

This post may contain affiliate links which won’t change your price but will share a commission.
One of the secret projects I have in progress is actually not entirely secret. It’s for the Schnitzel and Boo Mini Quilt swap. I suppose I can share all of my progress photos, I just can’t say for whom the quilt is being made! We’ve had a long string of uncharacteristically dark days here in midcoast Maine (it usually snows every few days with lots of sun in between), so I’m sharing photos taken with my iphone. Instagram has a wonderful array of filters and adjustments that help bring out the light and color in an otherwise dark space. Many (all?) of these are repeats from my Instagram feed, so I apologize to those of you who also follow me on IG. Just think of it as an inspiration flash-back de ja vu color explosion!
After I finished making English Paper Pieced (EPP) hexies out of the Anna Maria Horner True Colors fabric line, the foundation and inspiration for this Modern Hexies mini quilt, I decided I needed some supplementation.
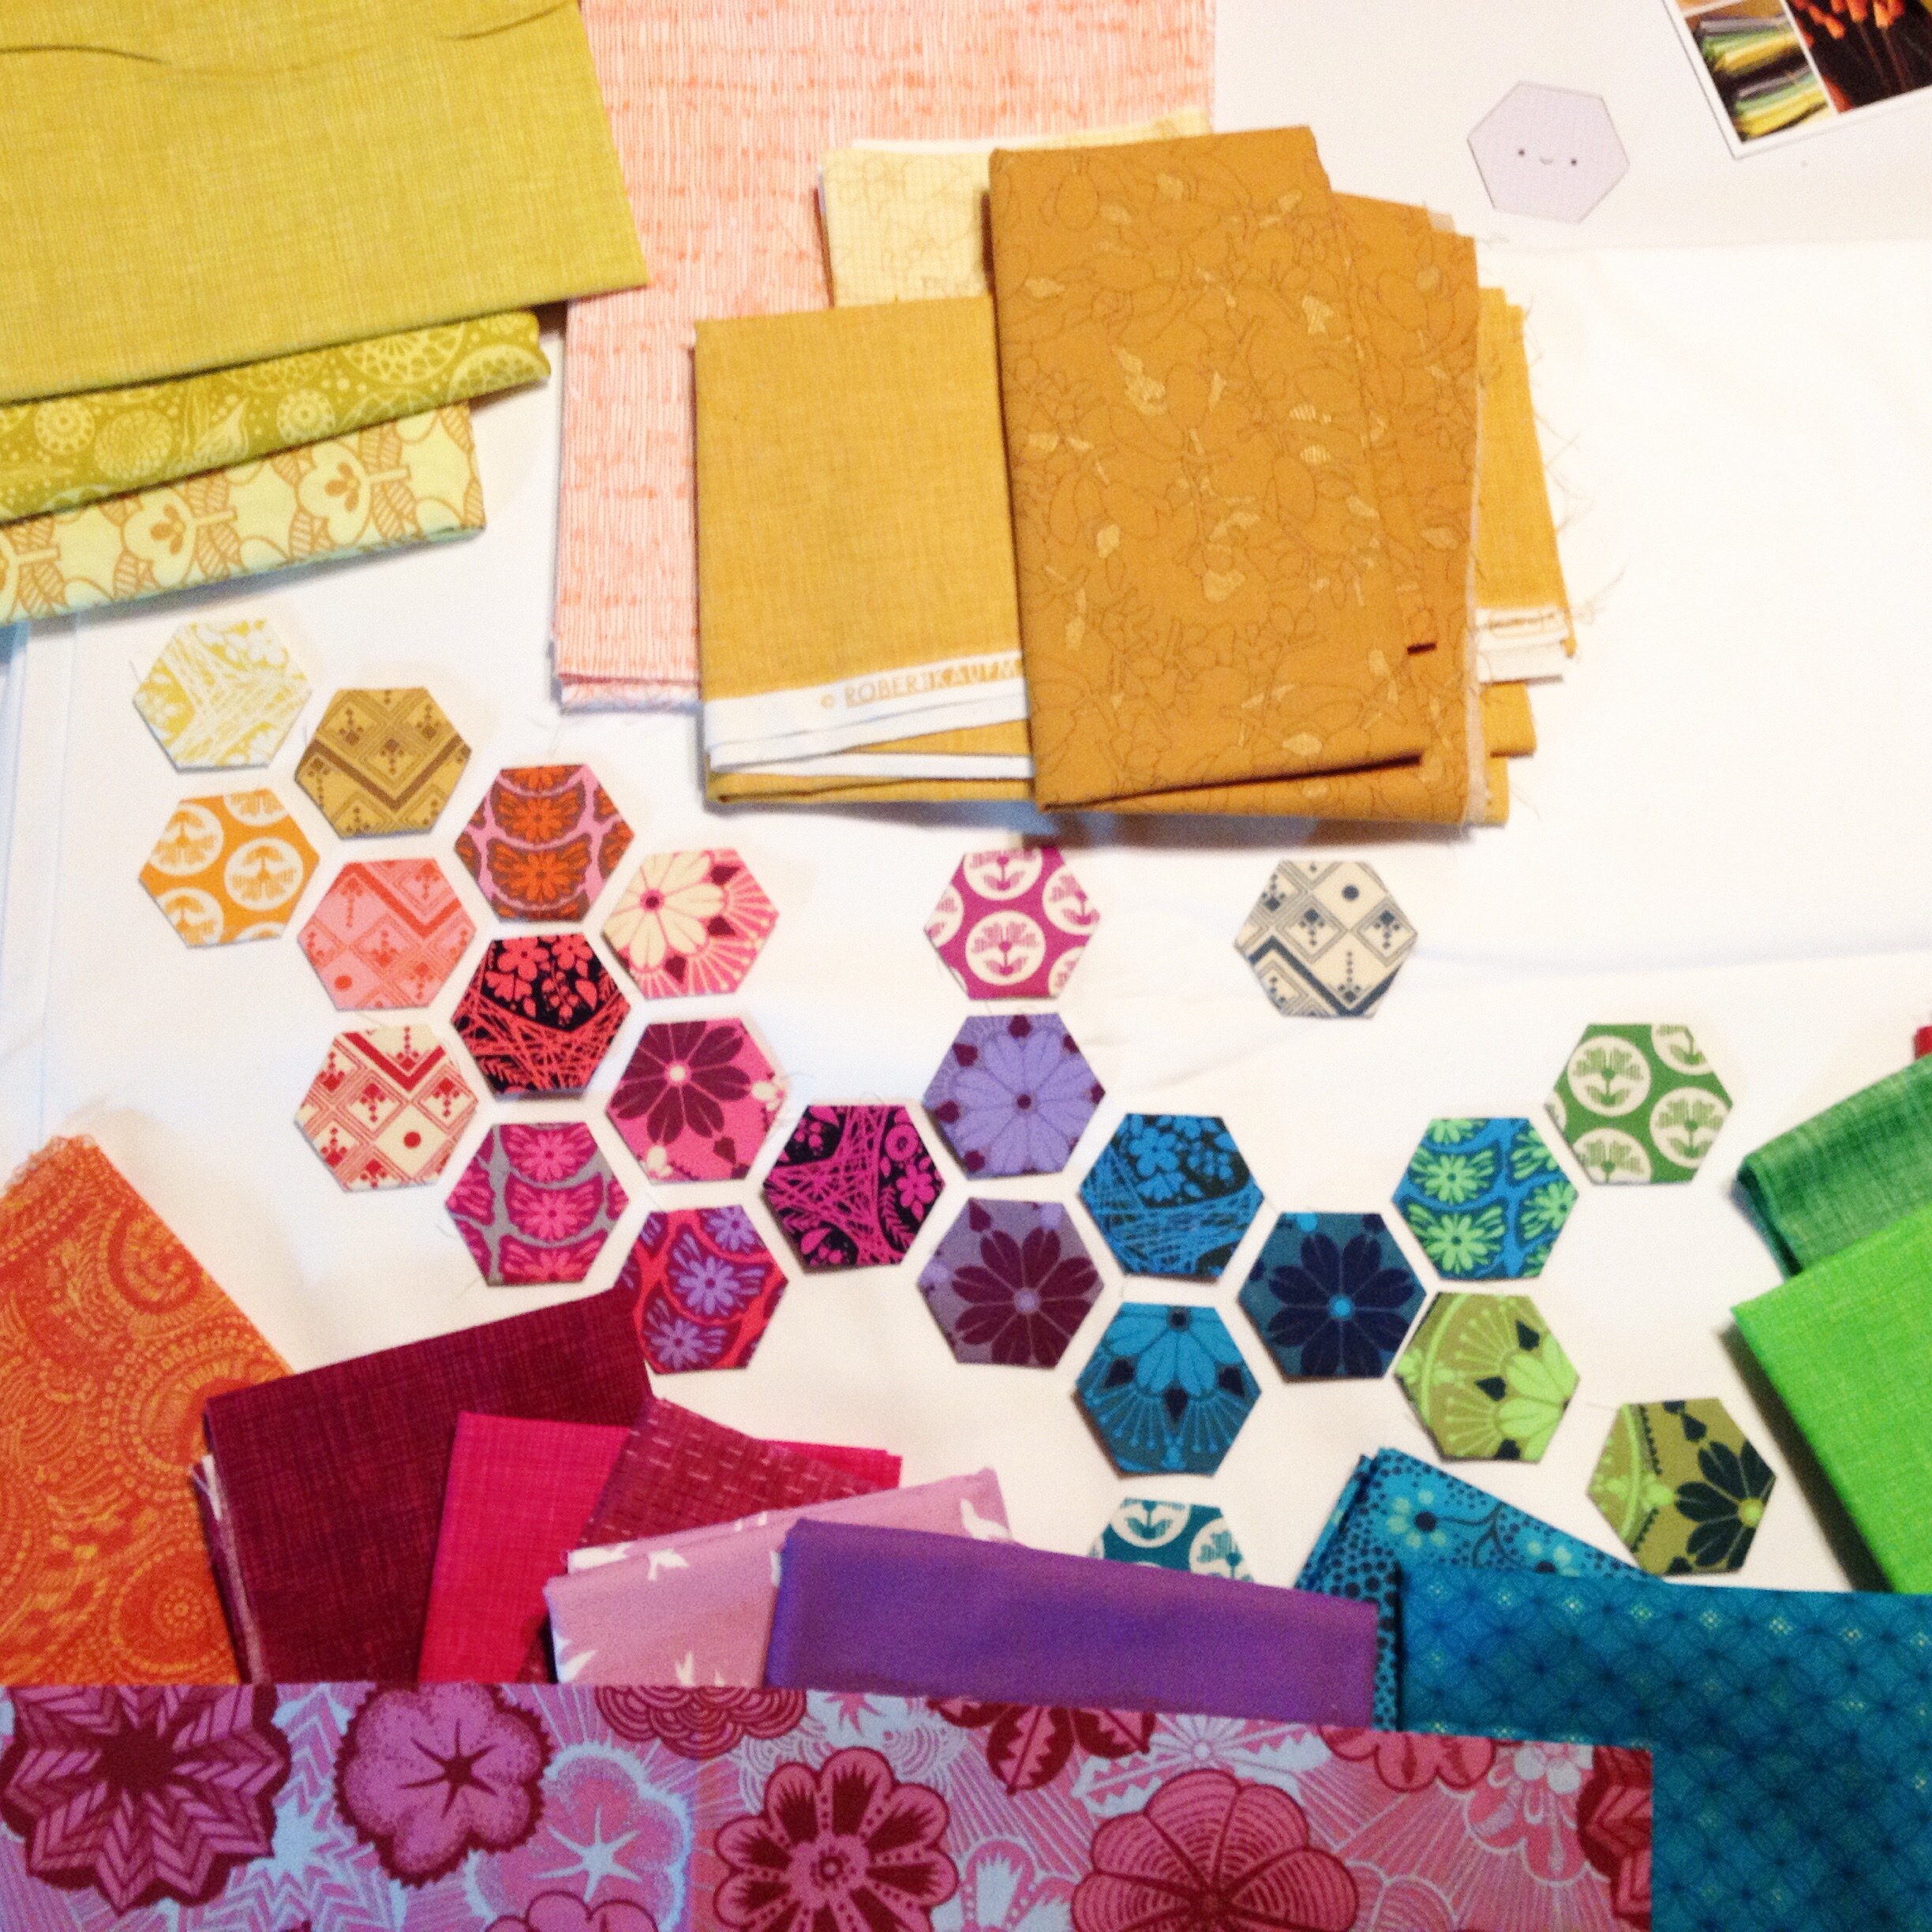
I cut out my chosen ones, and was all ready to EPP some more gorgeous hexies.

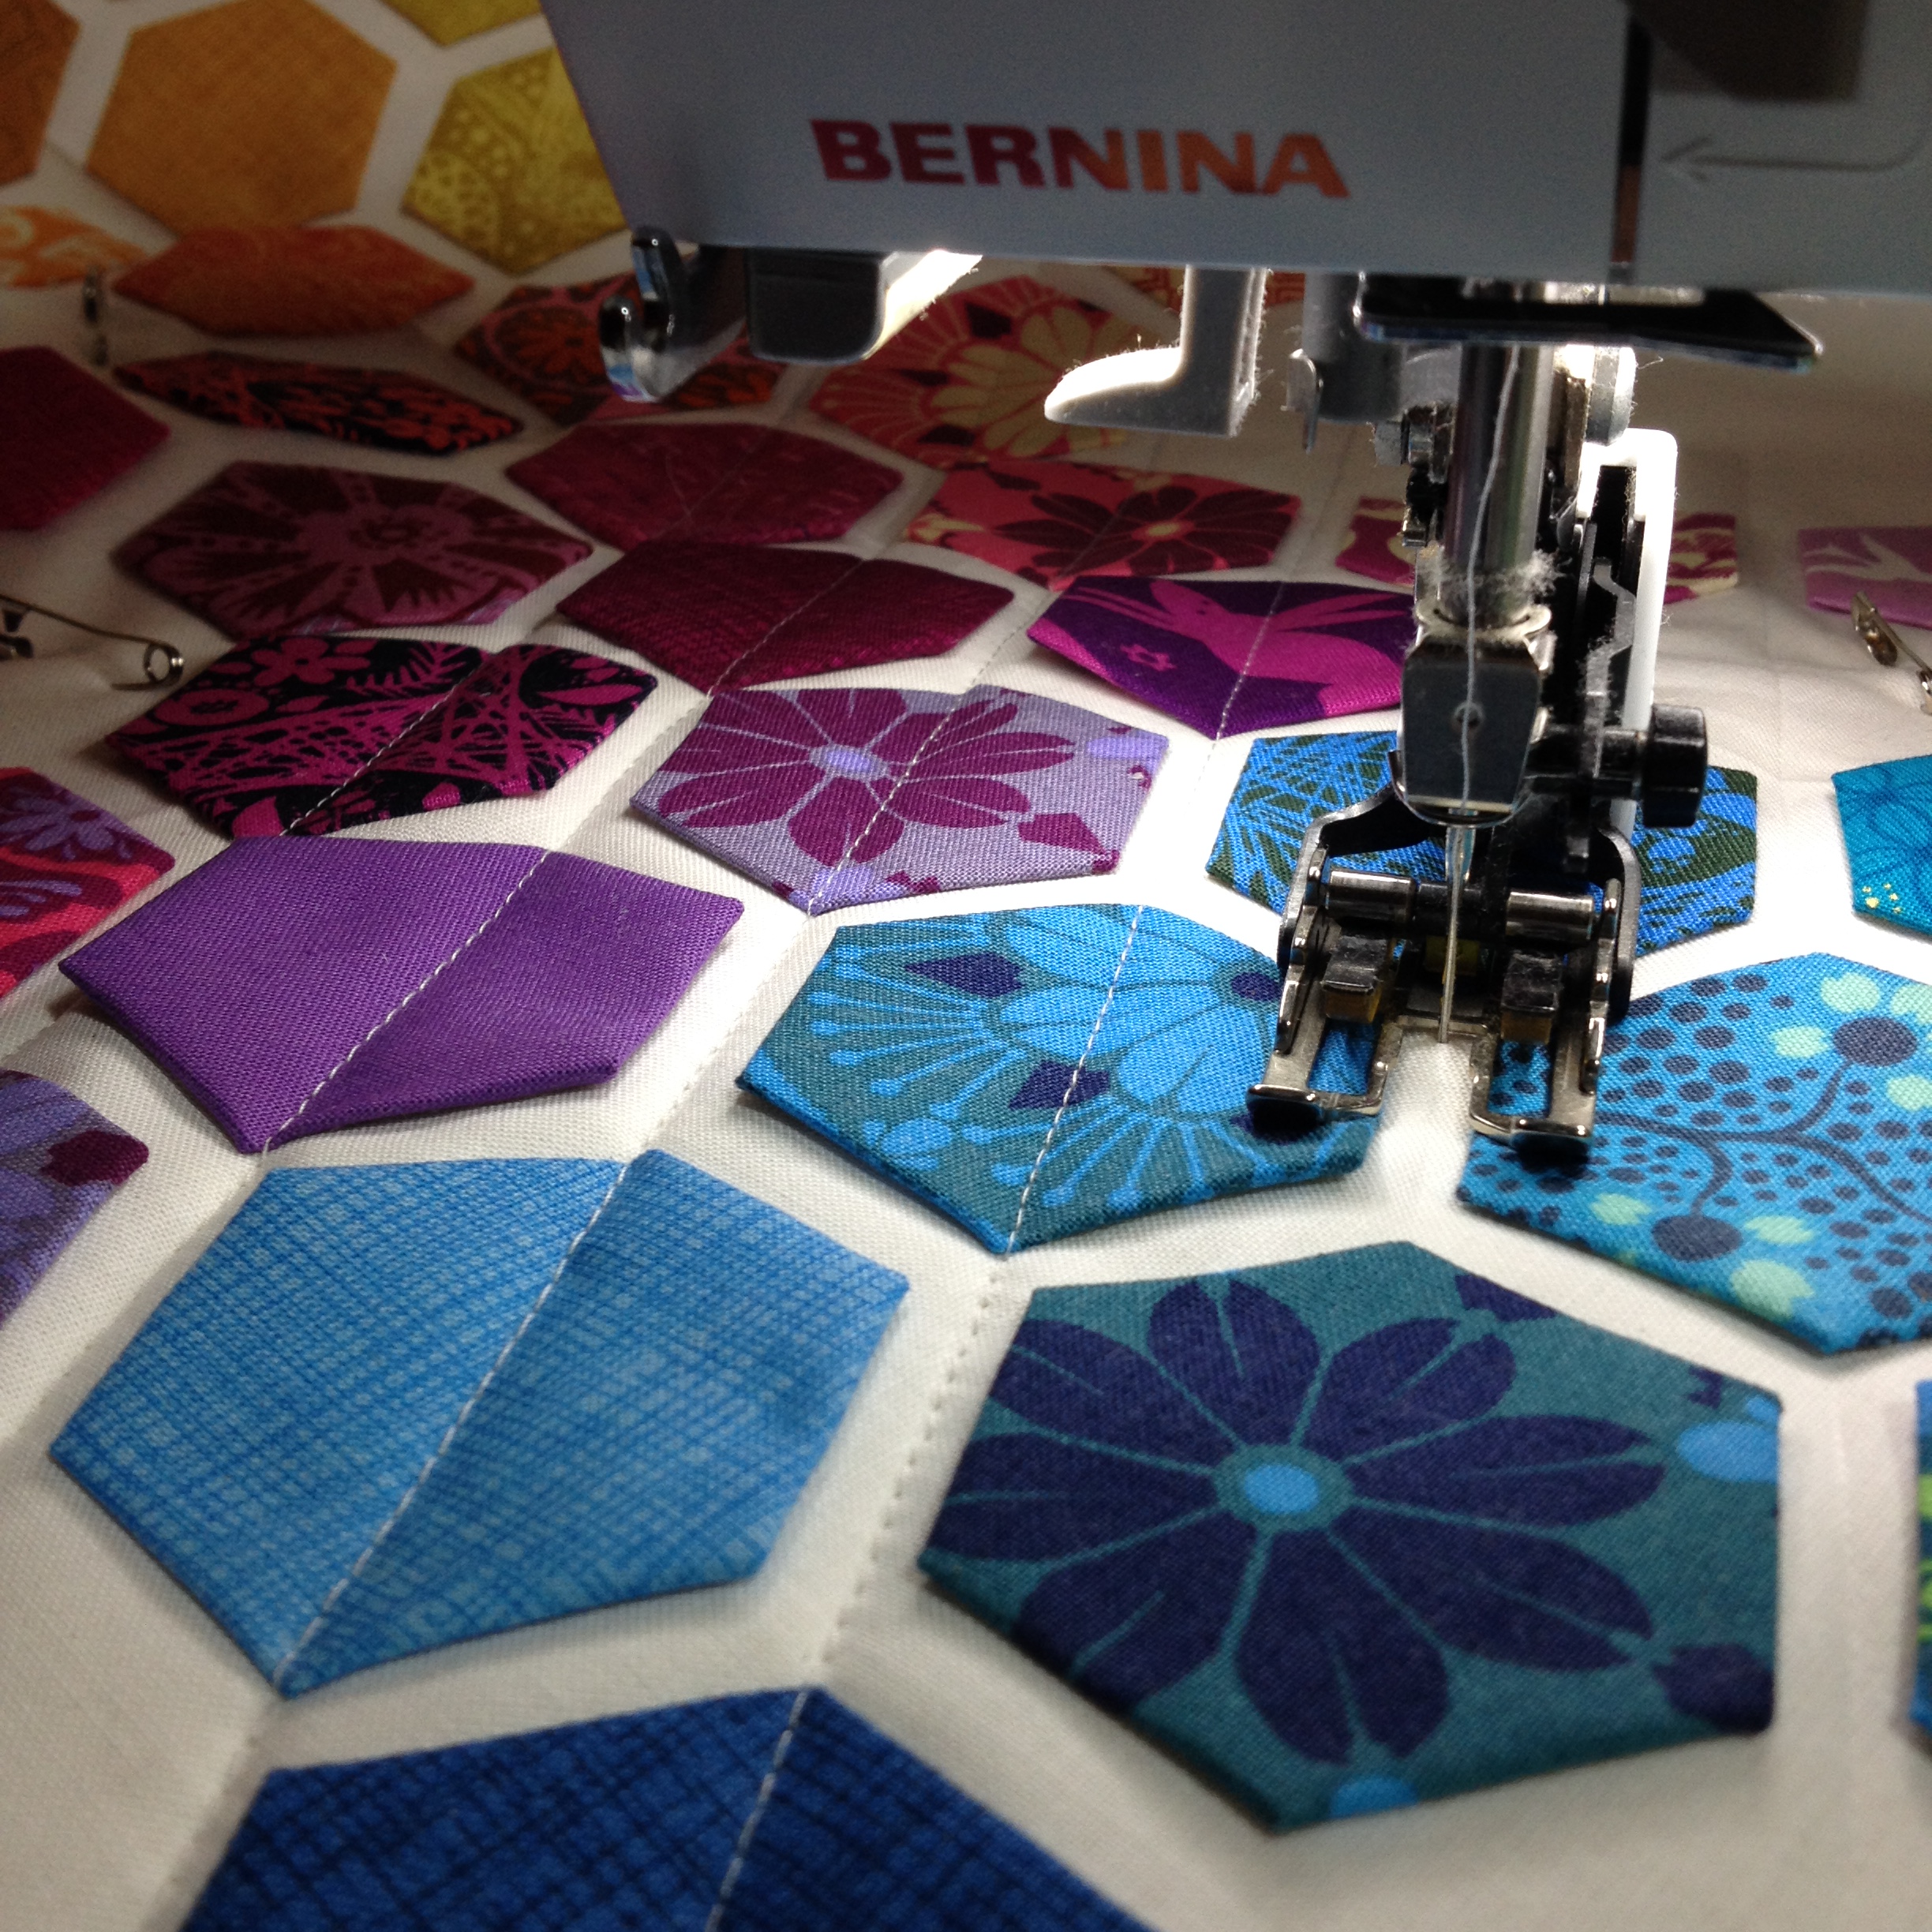
Next, I played around with layout and decided upon an Instagram-approved arrangement. It was decided that the bottom right dark blue-white hexagon would be best removed. I had been struggling with it already, upset that I didn’t have the perfect transition fabric to make it “work” in the flow, but hearing other IG friends and quilters suggest removing it helped me make the final decision. Out it went.

Next, it was time to start actually gluing! Yipes!

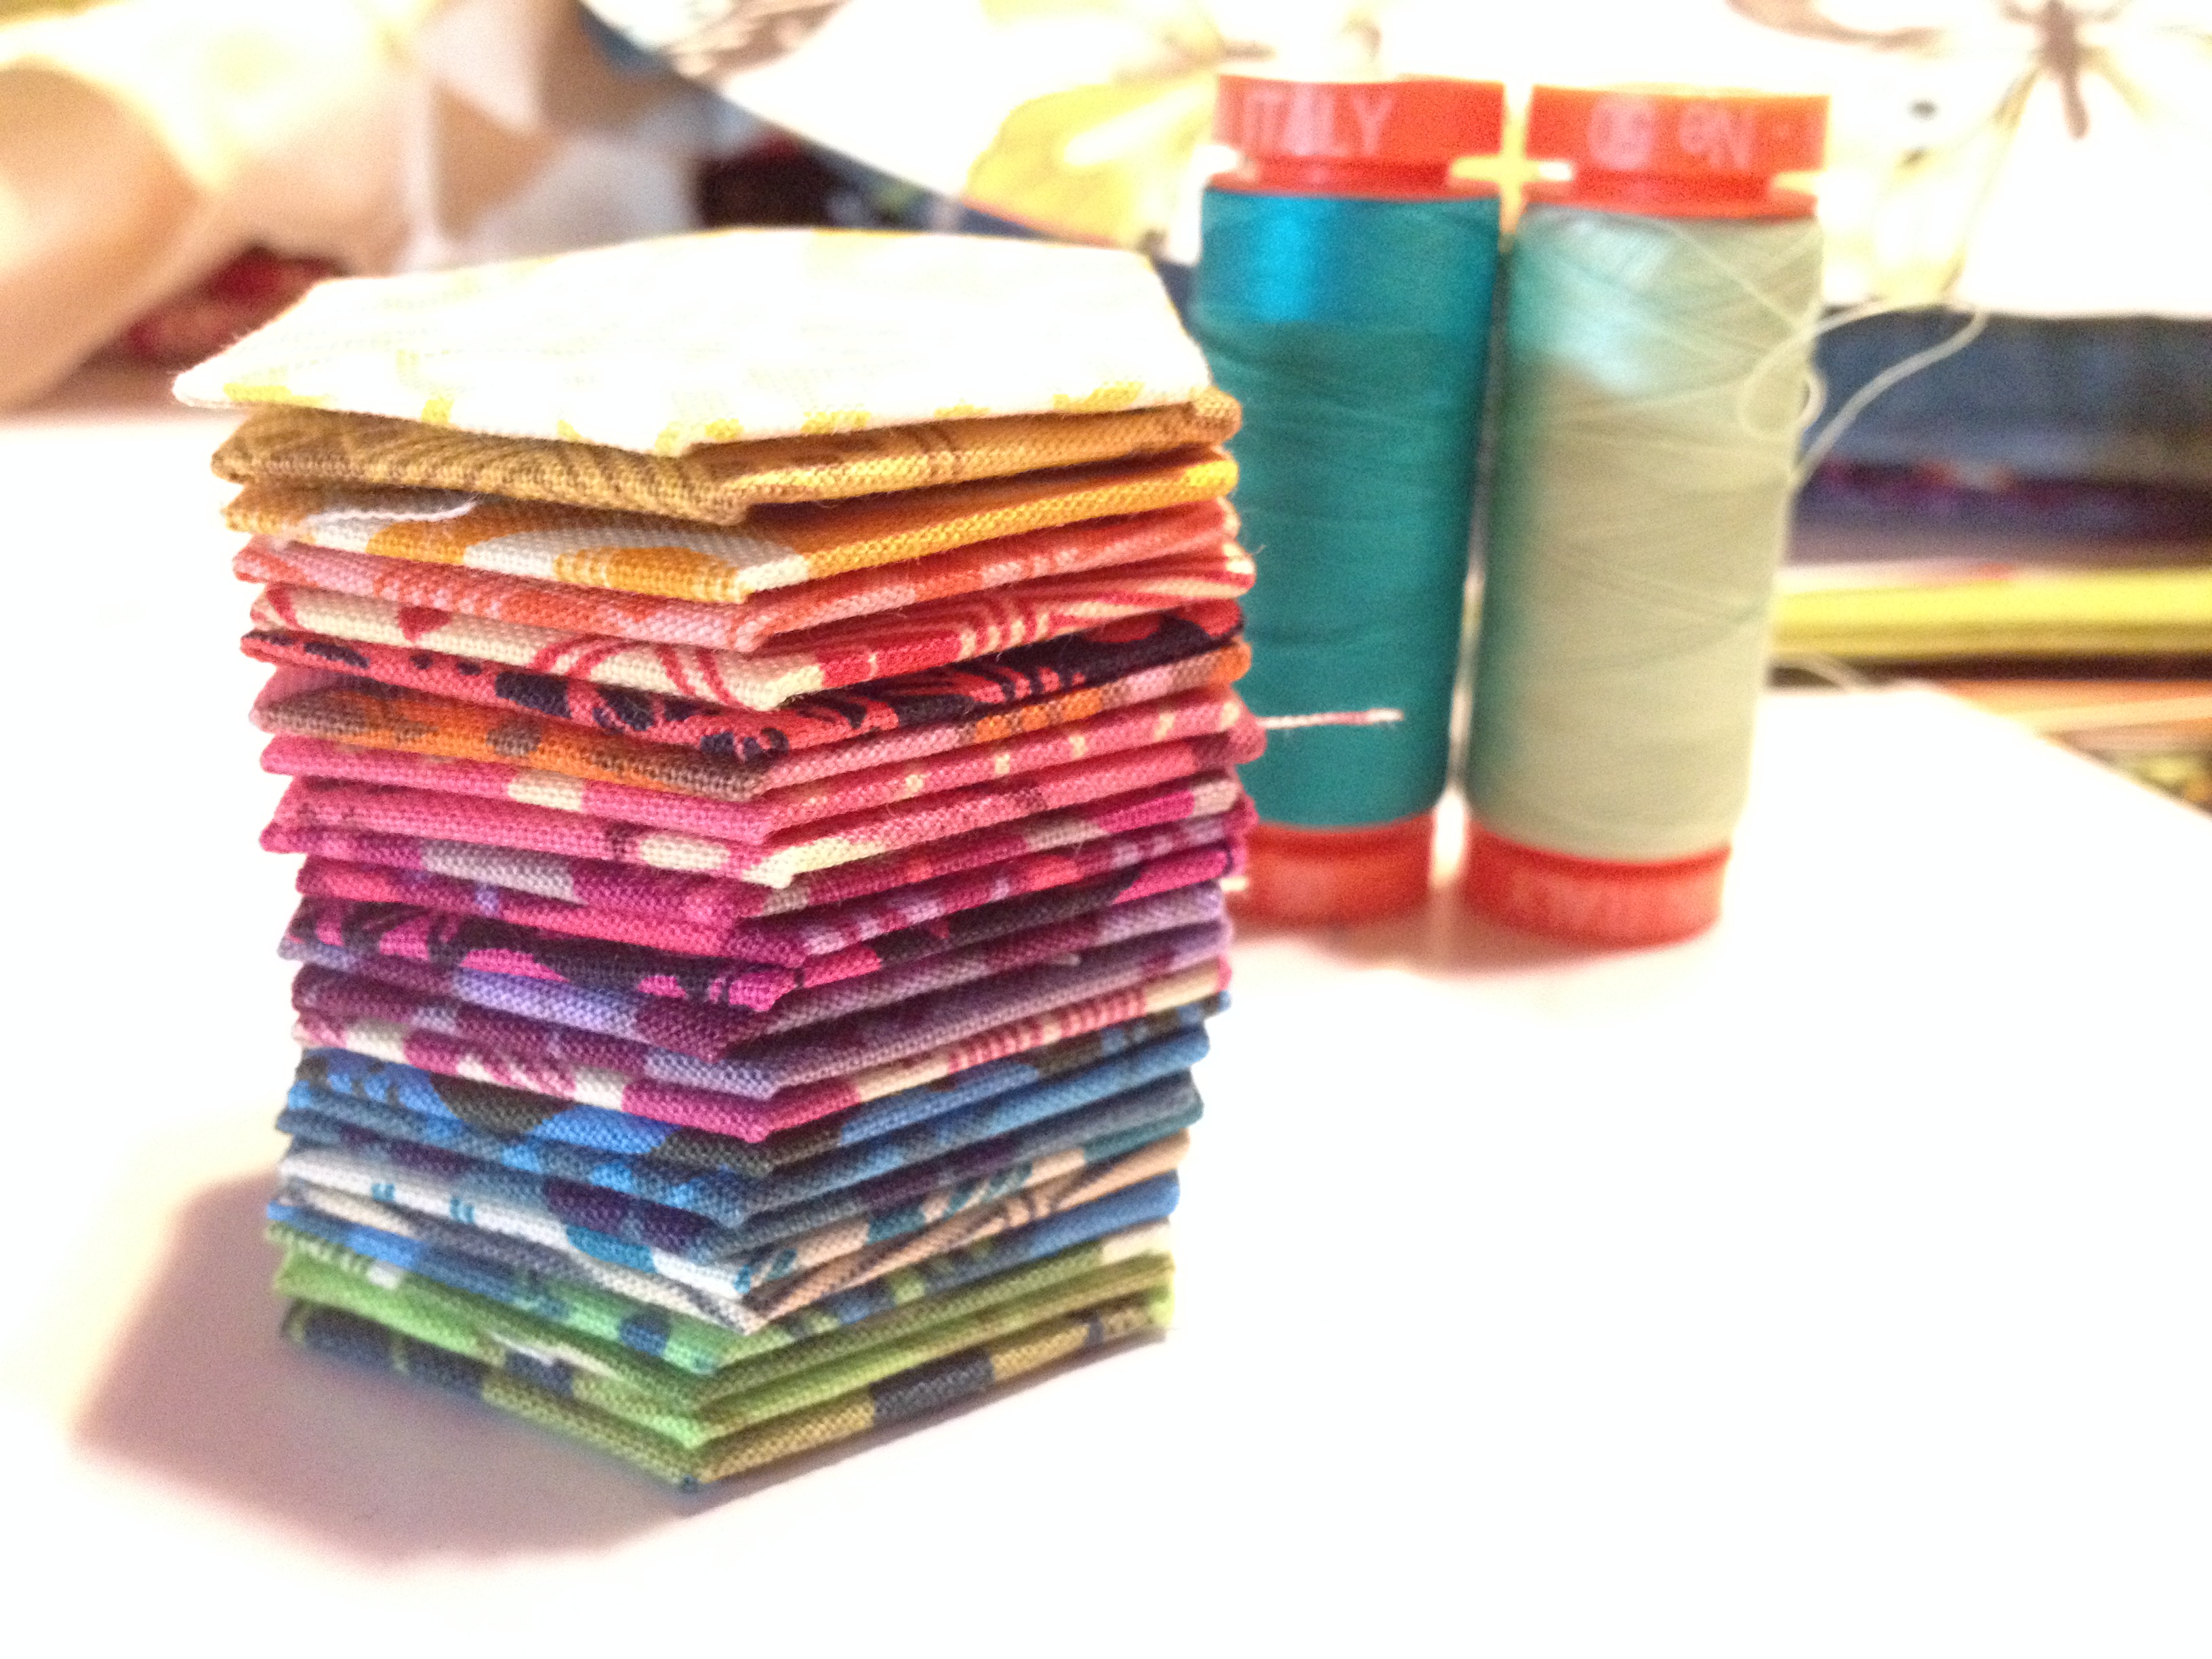
Nicole at Modern Handcraft’s pattern is fantastic. This is such a simple and “easy” method, yet the outcome is so fabulously gorgeous. I love the aesthetic of the borders between each hexagon, and the range of possibilities is endless. I didn’t have the suggested Aleene’s Fabric Fusion glue (Get yours here–affiliate link), so I used Fabri-Tac, which I had already. Boy was it a stinky and stringy experience! The glue would bubble up on the tip of the bottle by the time I got the next hexagon trimmed and de-papered, so it was quite a sticky process. Next time, I will definitely try Aleene’s, since I love the all-purpose glue for just about any other craft project. Sticky stink aside, I finally got all 44 hexies glued down, in a little over two hours.

I layered, basted, and was all ready for quilting! I only got a few passes done with the quilting before my sewing window ended for the day, but I’m very happy with my progress. I can’t wait to see this quilt completed, and I definitely will be making another one (or ten) in the future!
Update: I have finished the quilting and I’m getting ready to bind! I will show the quilt in its full completion after the recipient has received it (most likely… maybe sooner if I just can’t wait!).
Question for those of you who have participated in mini quilt swaps before: Do you stitch on a hanging sleeve, or leave it as is in case the recipient would prefer to clip it or hang it in a different way?
I’m linking up with Lee at Freshly Pieced’s WiP Wednesday!

Yikes it is stunning! I’m feeling inspired, I think I might need to make a list of all the quilts to make next year!
LikeLike
Almost all of the minis I’ve received have been without hanging mechanism. Not sure if this was a conscious decision or just a lack of time decision though…. 😀
LikeLike
I think that if you have time to add a hanging sleeve or the corner triangle dog ears that it would be really appreciated. This mini is so gorgeous, and I hope it goes to a very loving home!
LikeLiked by 1 person
I’ve been oooing and awwing over your pictures on instagram but I love seeing the full story. Your partner is one lucky person!!!
LikeLike
I haven’t been in a swap but when I gift a mini that is intended to hang, I do put a sleeve on the back. Lovely mini. I really like all the brightly colored hexagons for this dreary time of year!
LikeLike
I use fast triangles stitched into the binding on the back so that it can be hung with a dowel or still lay flat. Just take two squares (or three, if the quilt can hang horizontally or vertically) and fold them in half wrong sides together. Line up the corners of the (now triangular) square with the corner of the quilt and stitch it down before you finish your binding down. Use a very light weight dowel from the hardware store and cut it to length using scissors to hang.
clear as mud?!
LikeLike
This is so on my list…one day…after the holidays! Love the Anna Maria Horner fabric! Beautiful!
LikeLike
I have a bunch of random hexies sitting around. I should make something like this.
LikeLike
Love it! I’m sucker for rainbow, hexagons and all that. Fabulous project!
LikeLike
So so pretty!
LikeLike
Love this! And you are way ahead of me on that swap!
LikeLike
Rainbow hexies – love!! I’m so inspired to try epp now. 🙂
LikeLike
It’s looking great! I have this one on my hit list too … it’s a great way to use up scraps. I’m looking forward to seeing how you get on 🙂
LikeLike
I love these hexies, and the true colors – I just bought this bundle for myself a few weeks ago, and I have been trying to decide what to do with it! I have also been wondering about hanging sleeves in mini swaps…I just tack mine to the wall, but the corners seem like a good idea.
LikeLike
May I ask if you have left the papers in or removed them?
LikeLike
Hi Tracey, I remove them before attaching to the background fabric. Nicole at Modern Handcraft has a great explanation in her Modern Hexi Pillow pattern–I highly recommend buying that and following Nicole to get allll of the details!
LikeLike
Hello,
Love your hexie quilt/ pillow.
Feeling very inspired, but how do you get even spaces and such straight sewing lines ???
LikeLike