

Since the wonky triangle quilting I did in the narrow 1″ sashing of my Dr. Seuss Diamonds quilt was one I didn’t find elsewhere, I thought it would be helpful to create a quick tutorial on how to quilt them.
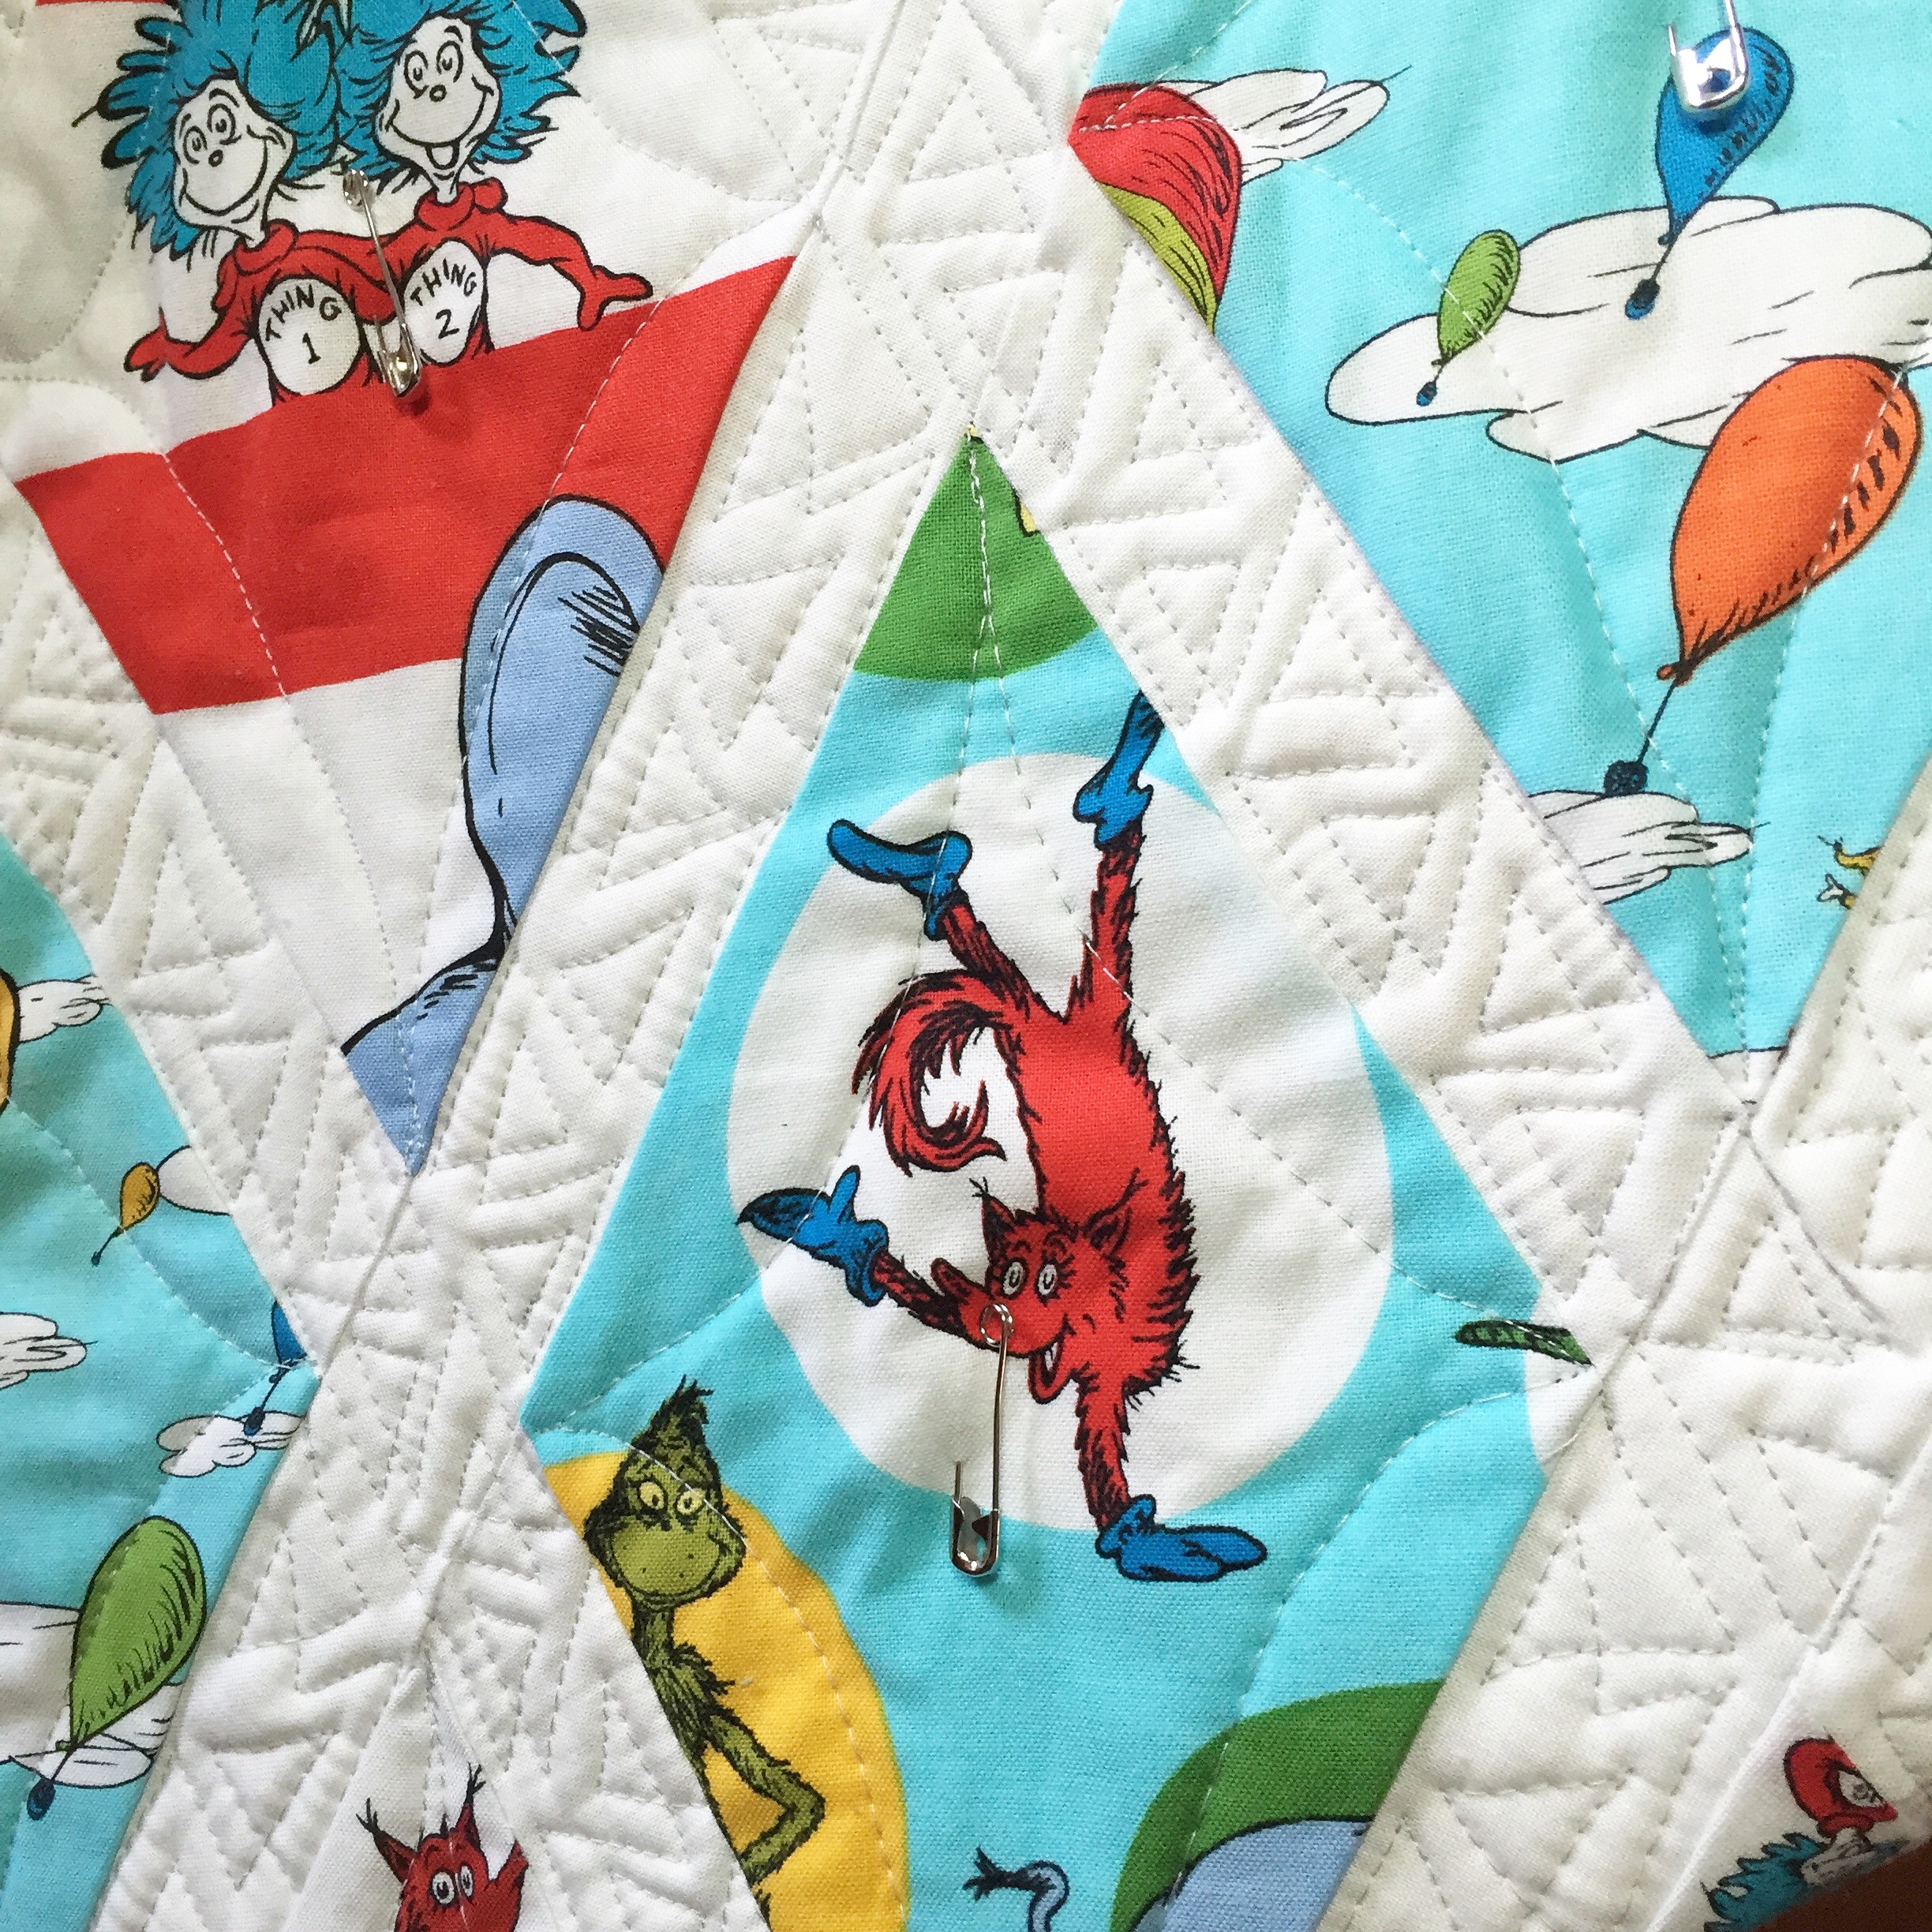 Being “wonky” certainly helps, since it means they don’t have to be–and in fact, shouldn’t be–perfect. For a beginner free motion quilter (FMQ) like me, this is the perfect pattern to play with when there’s a quilt full of narrow sashing to quilt!
The wonky triangles are great because:
-they can be used on very narrow sashing
-being wonky, perfection is not the goal
-they cross fairly smoothly for intersecting sashings
-triangles can be sized as needed, so it’s easy to fill even smaller spaces
-it’s a simple repetitive pattern that is perfect for beginners quilting on a domestic machine (or pros on a long-arm!)
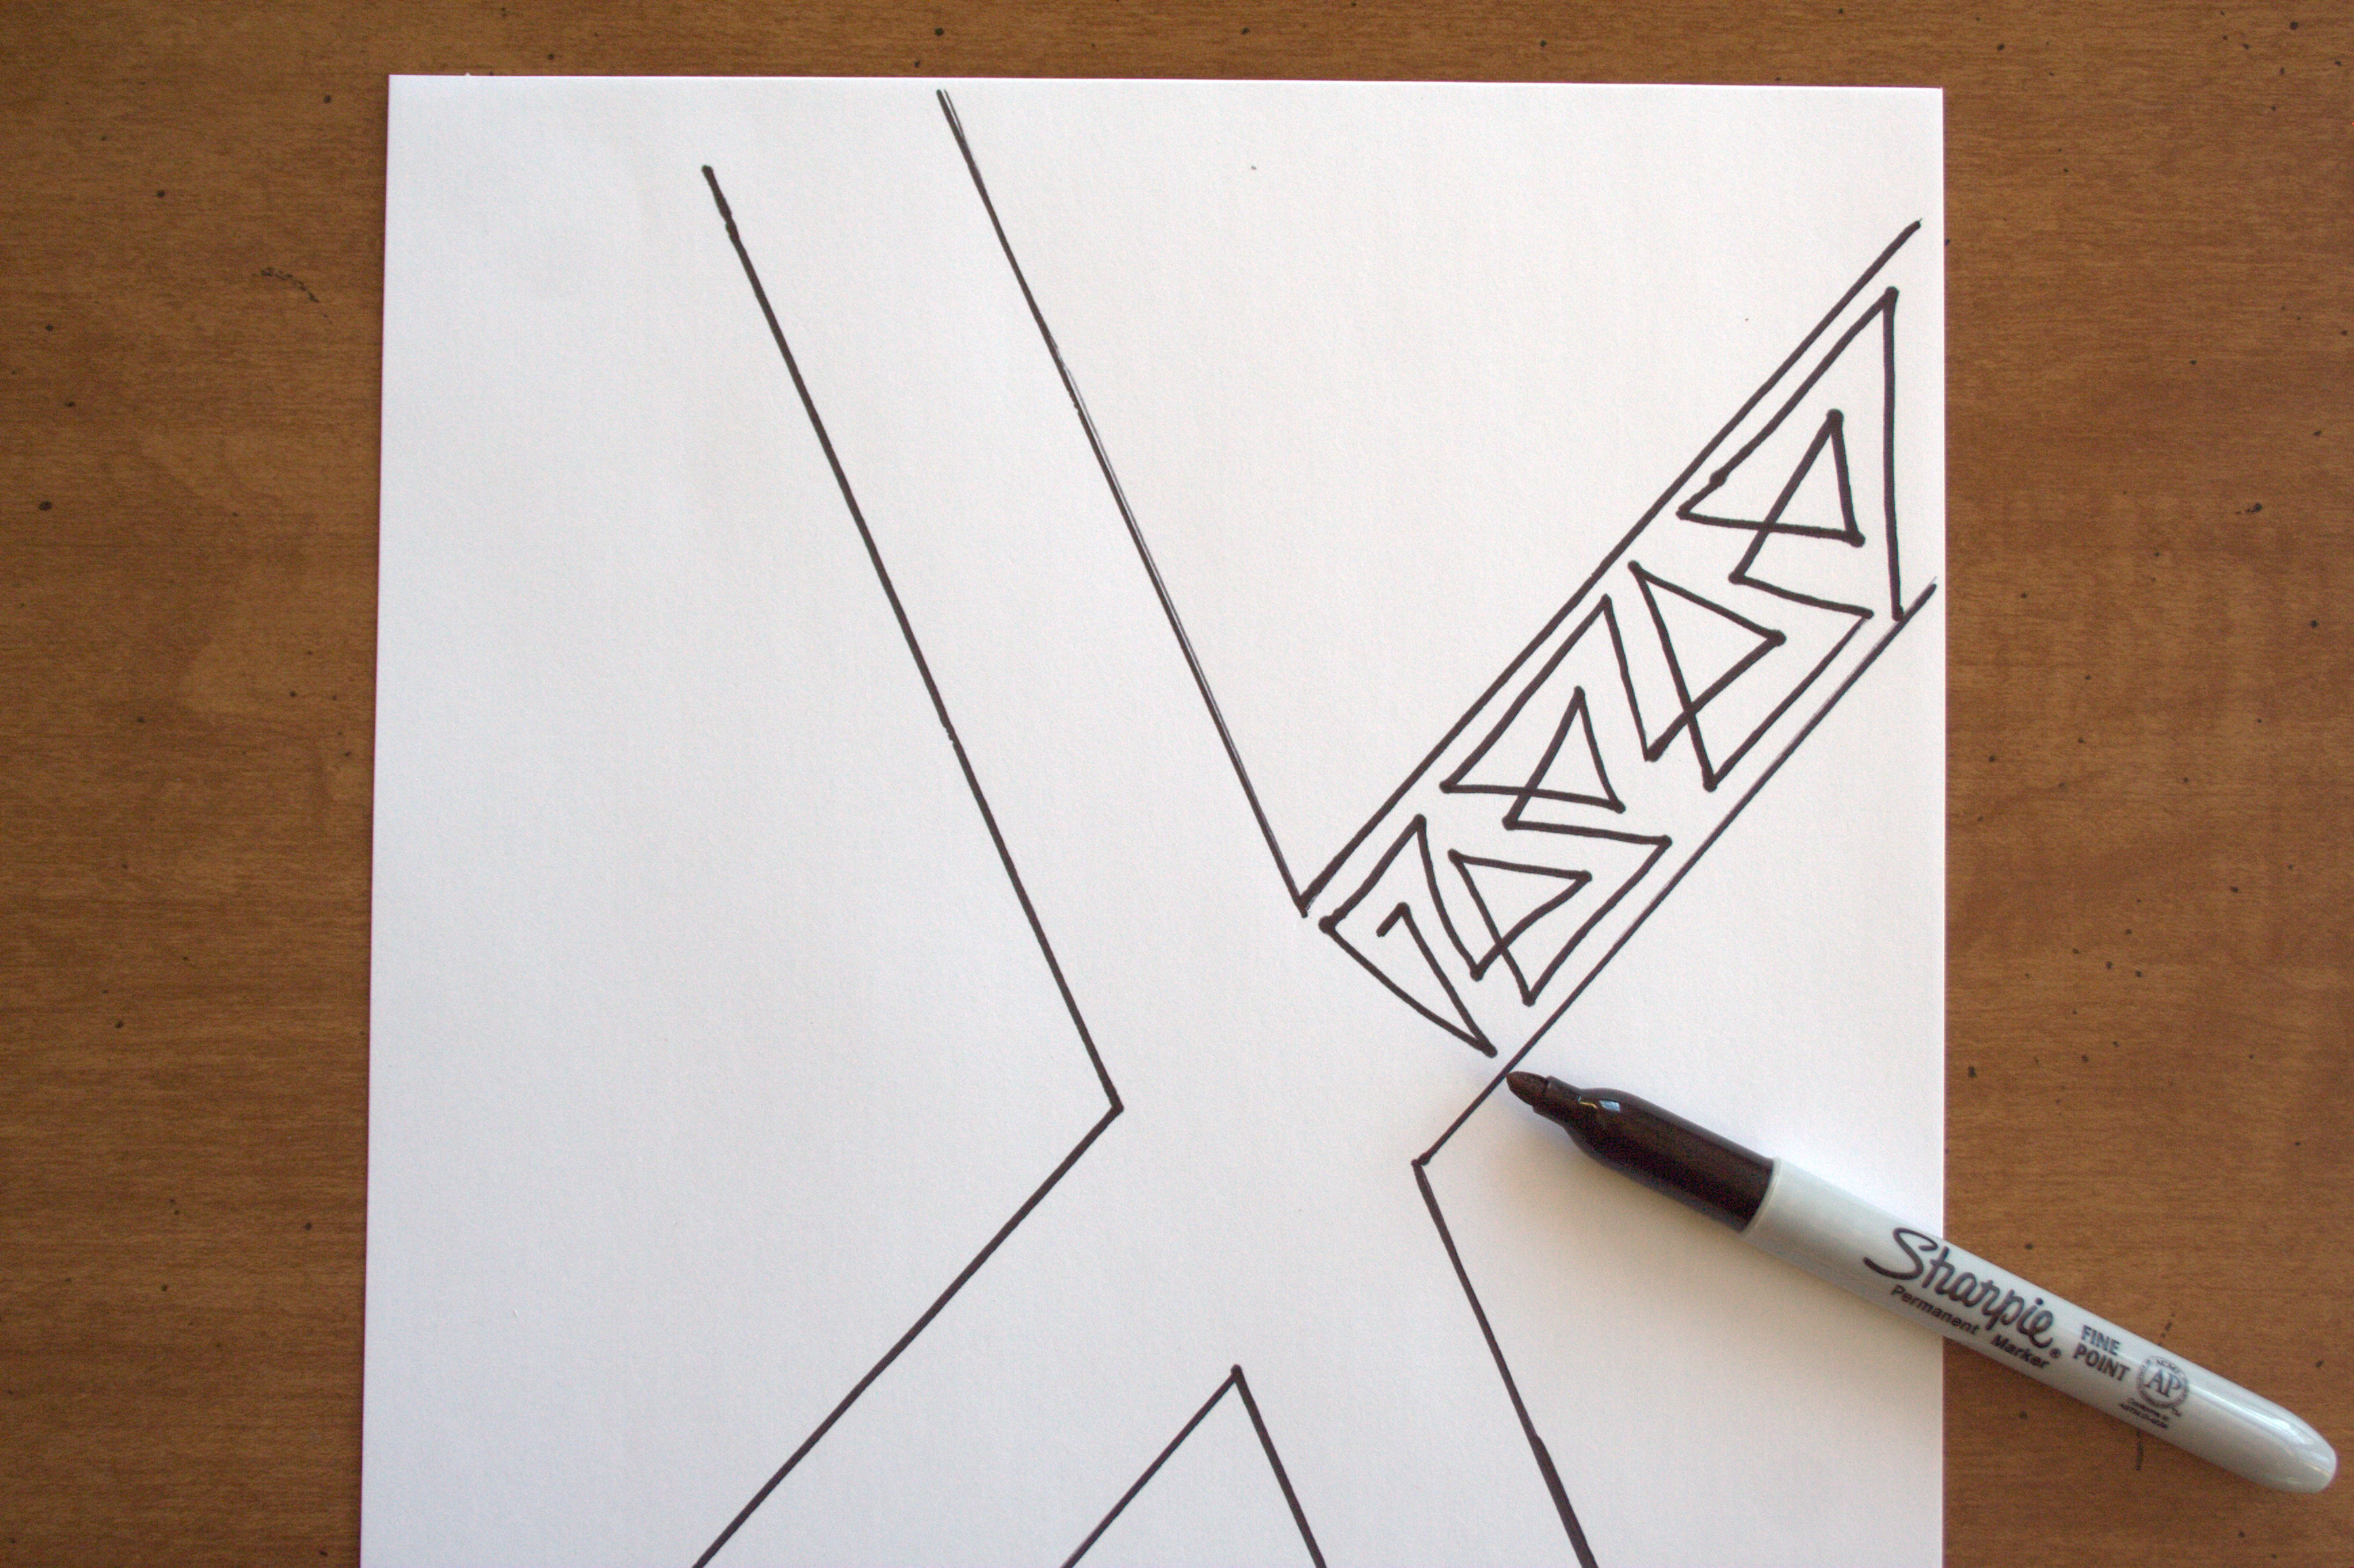
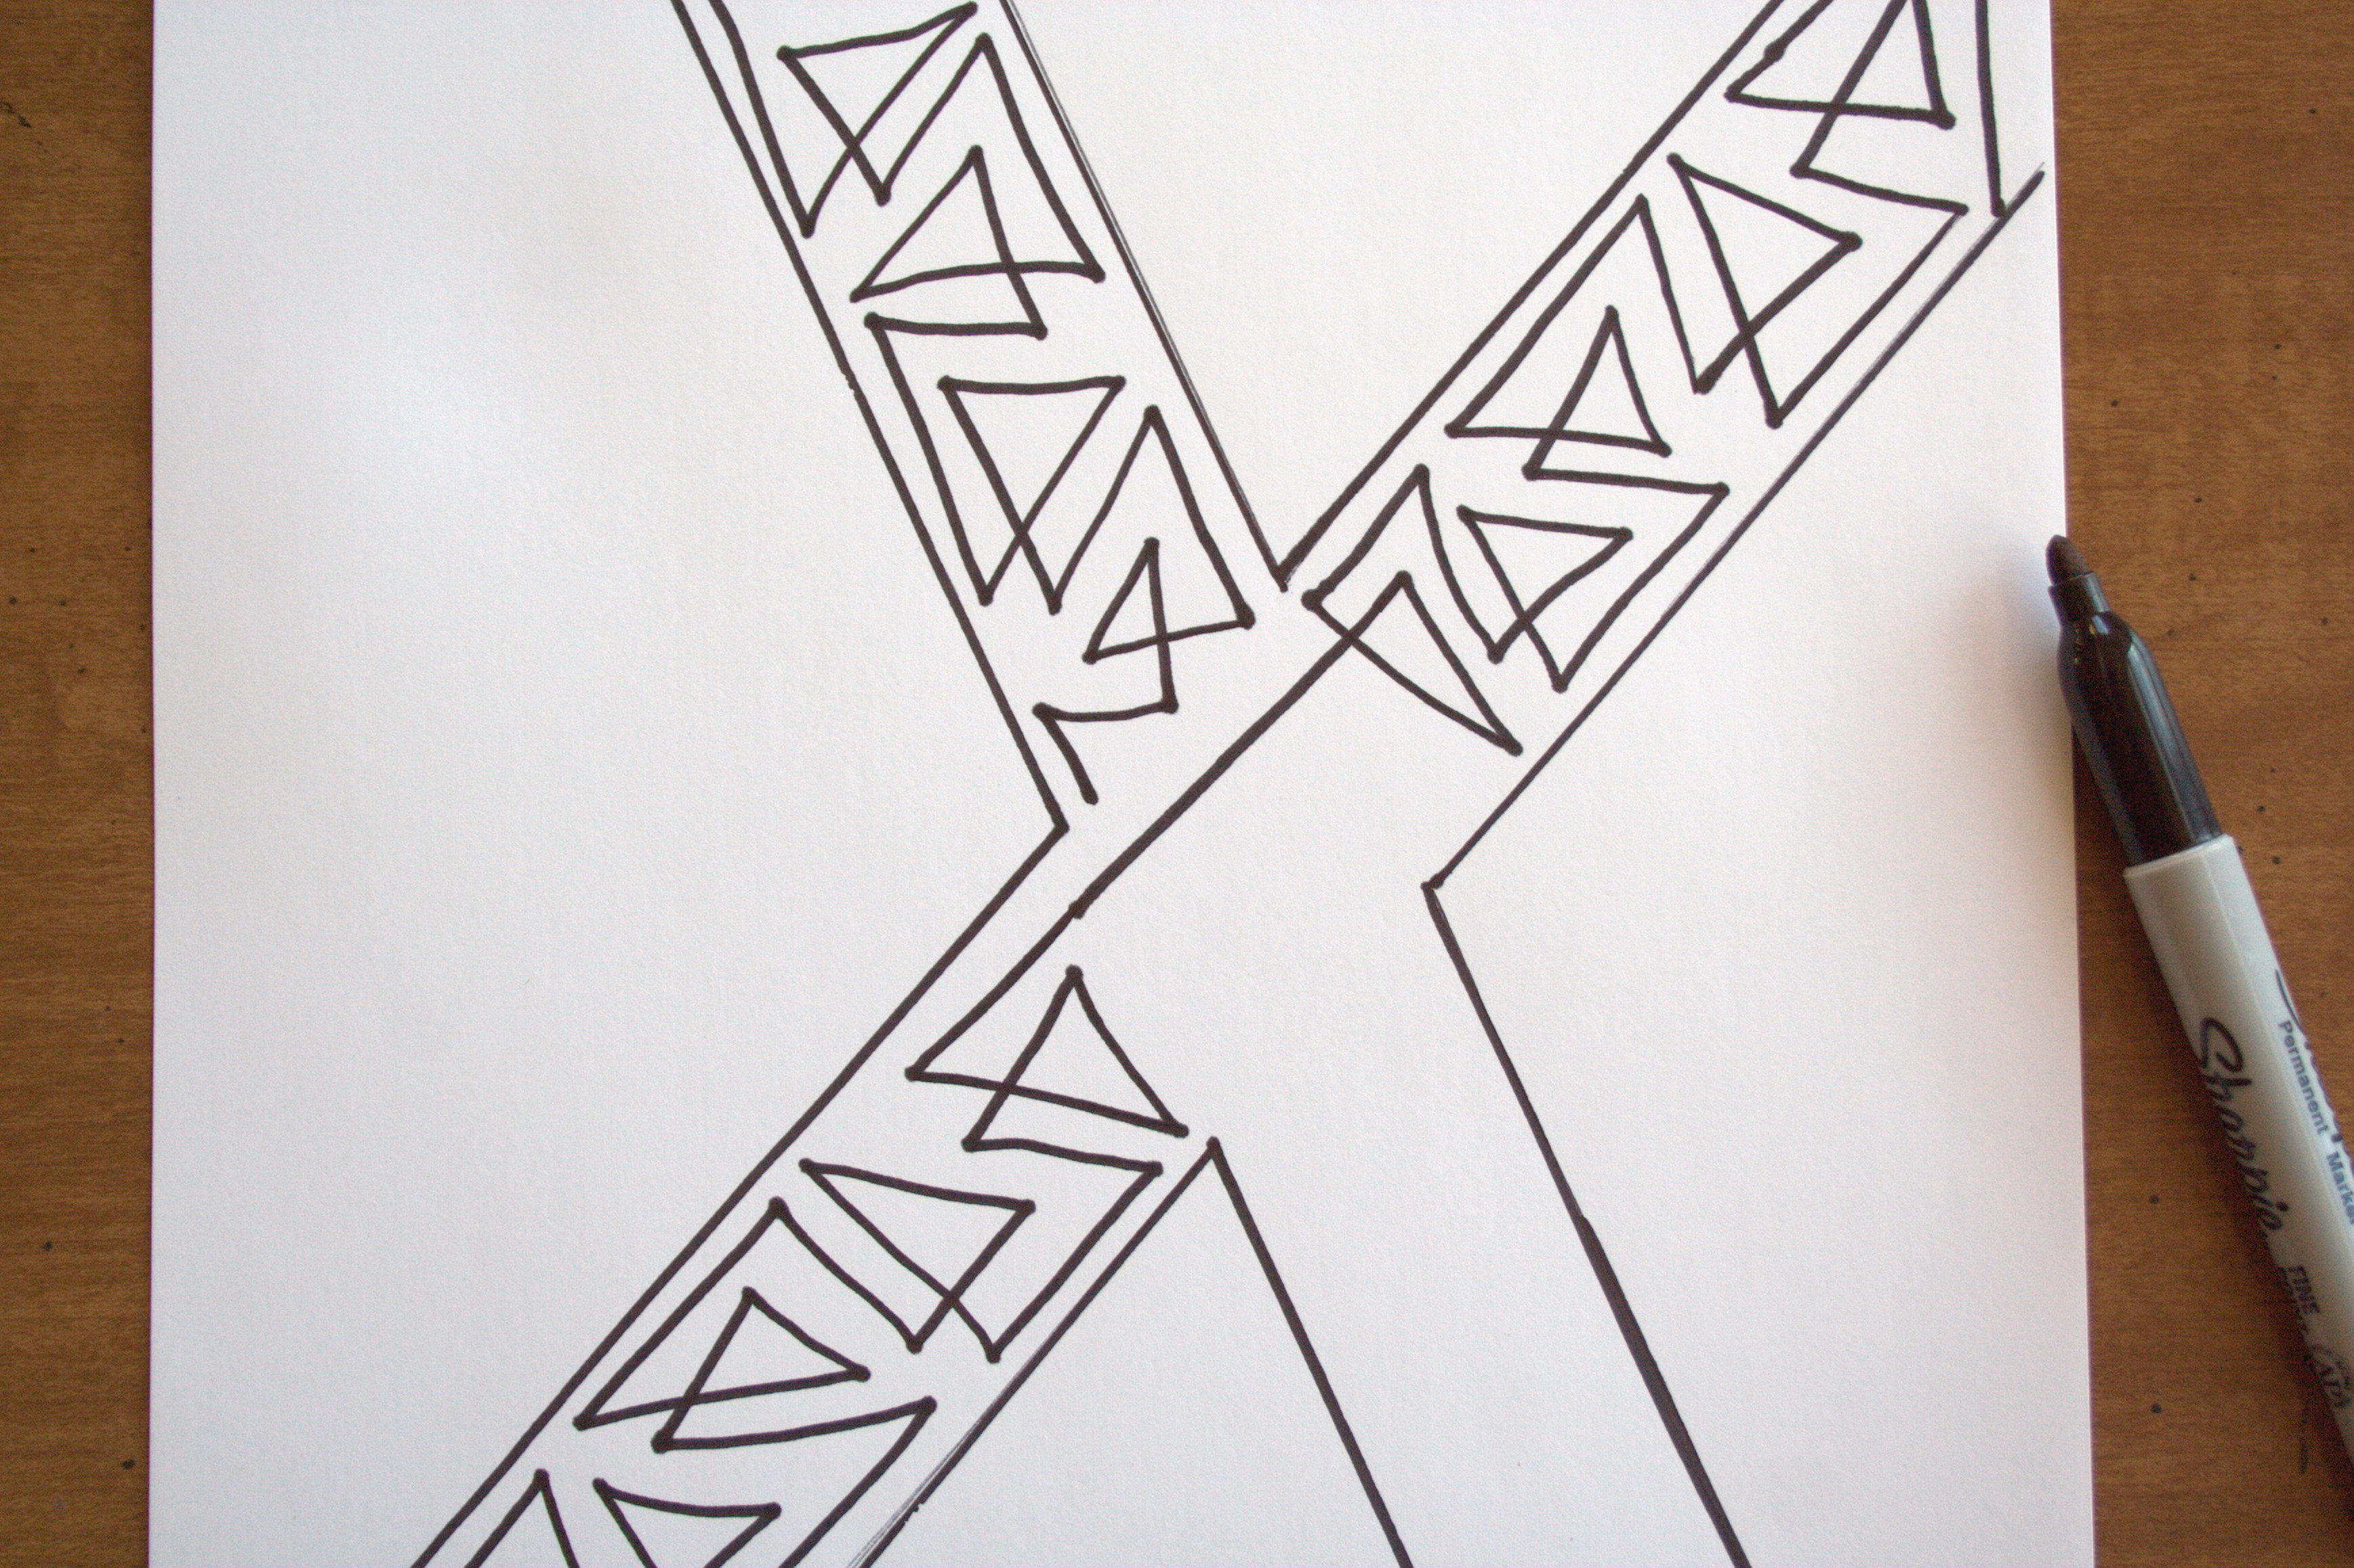
Inspired by Amy Garro of 13 Spools, I’m going to use a pen and paper to show you how to create the wonky triangle pattern. When you are quilting narrow sashing, you can use your piecing as your boundary lines. I drew black parallel lines to represent the boundaries.
Step 1
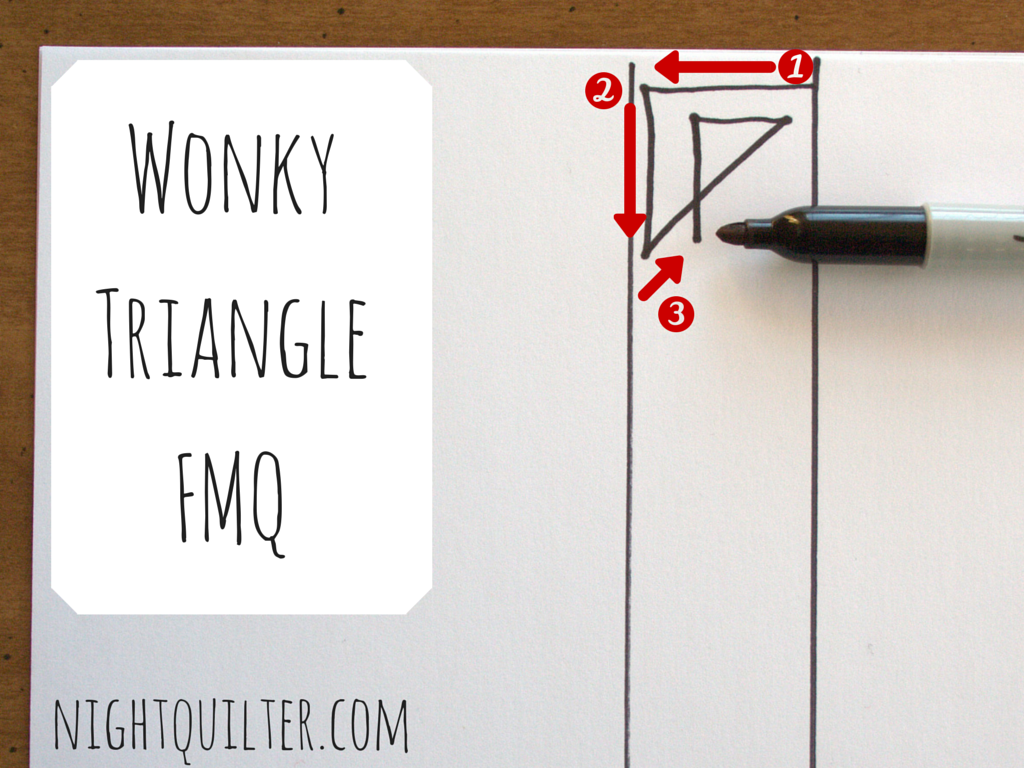
Begin at the top edge of one of your sashes. Quilt parallel to that edge (1 in diagram above), then turn along the sash boundary and quilt the second side of the triangle, approximately the same length as the width of your sashing (2 in diagram above). Since these are wonky triangles, nothing needs to be measured or perfect. Next, head back toward your starting point, creating the third side of the triangle but stopping before you actually get to the starting point (3 in diagram above). Next, quilt a little triangle inside your big one, following the same general shape. Once both nested triangles are quilted, continue your quilting line through the bigger triangle and extend a short distance.
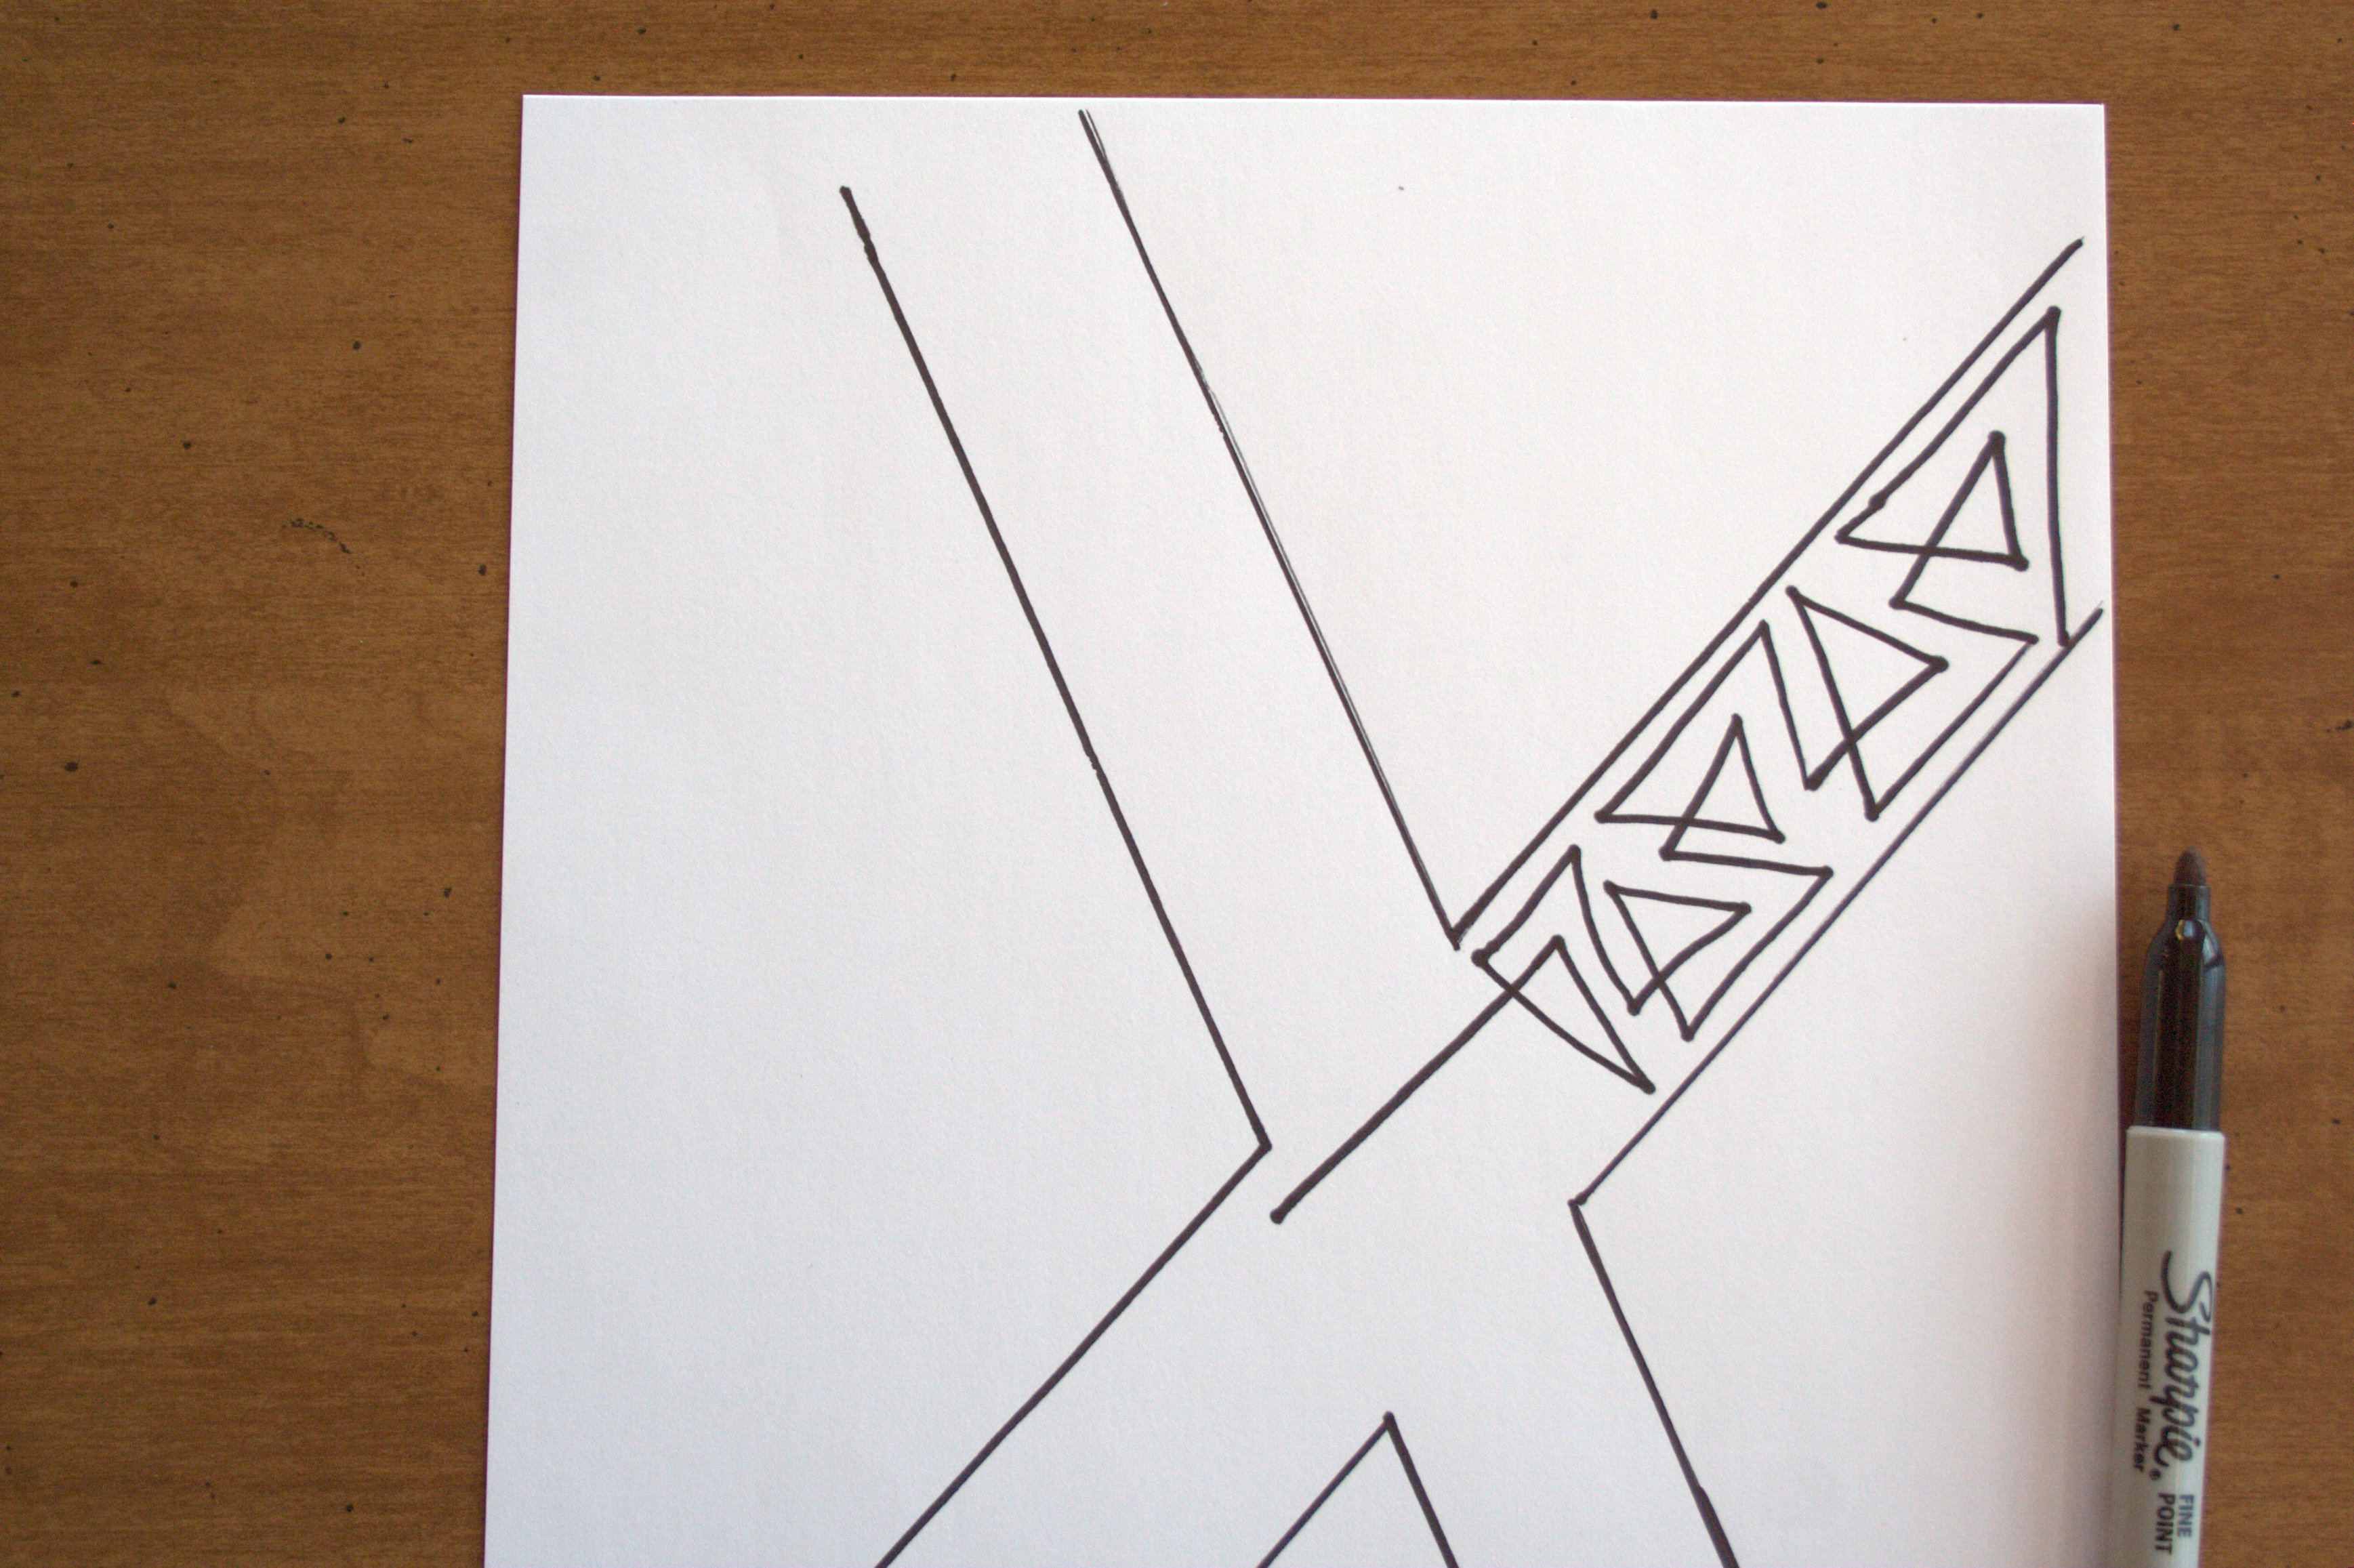
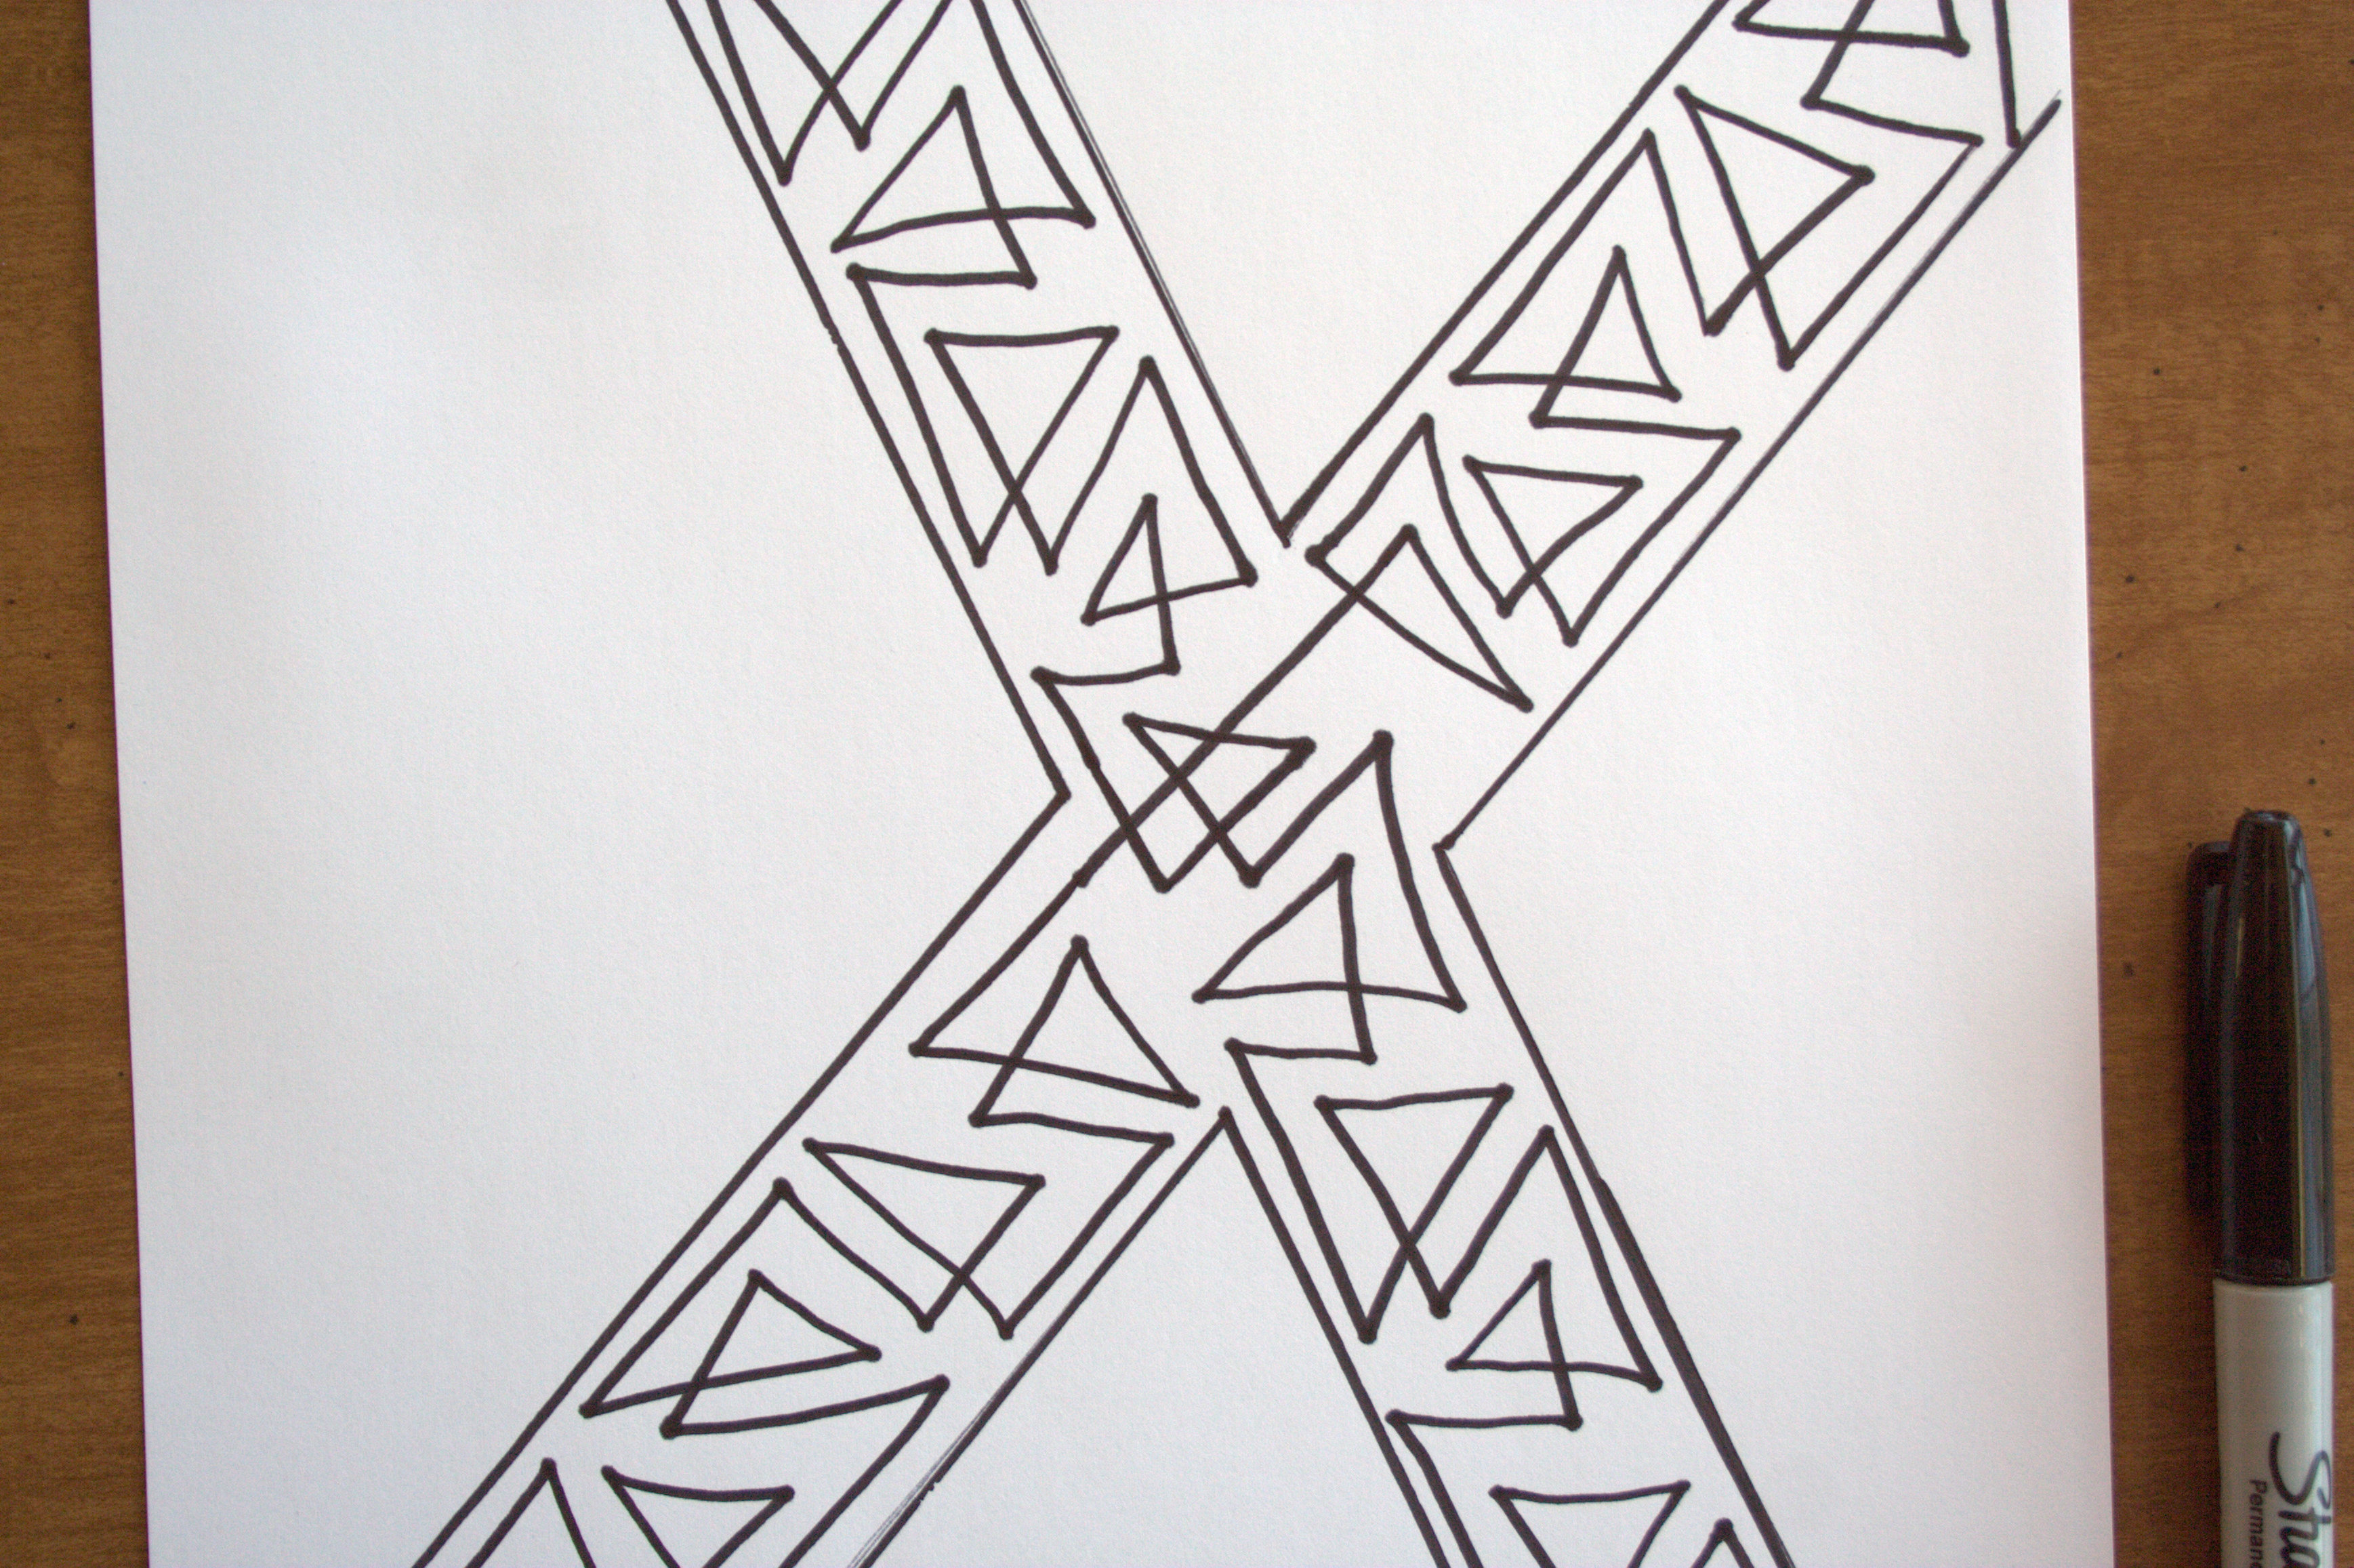
Step 2
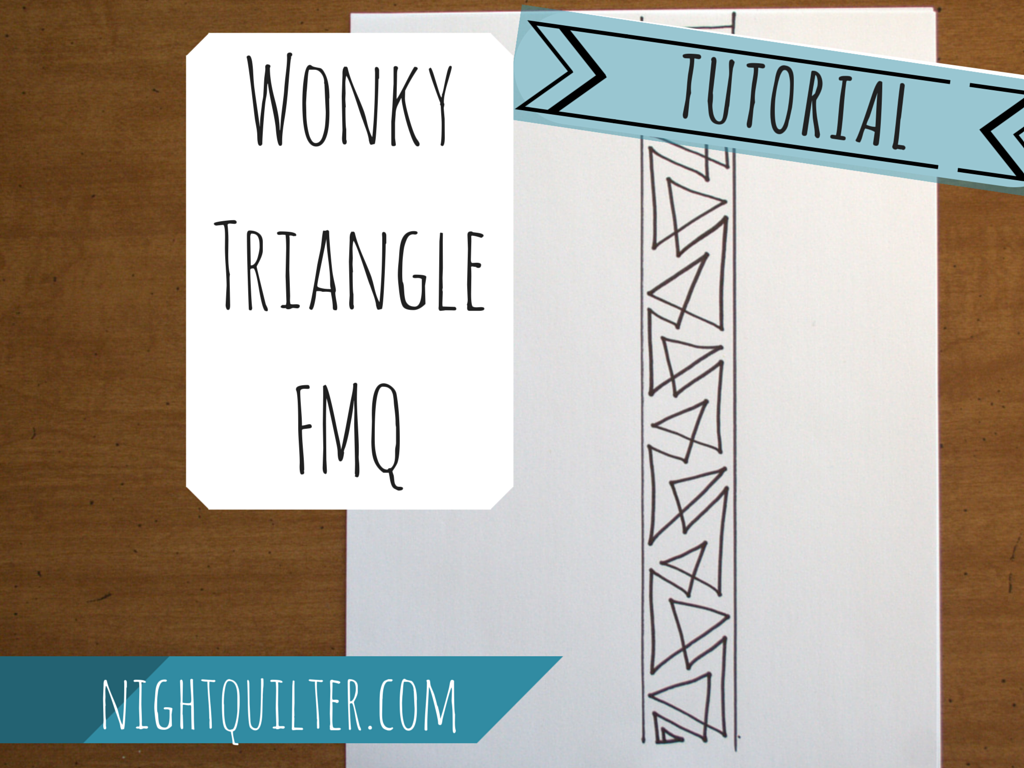
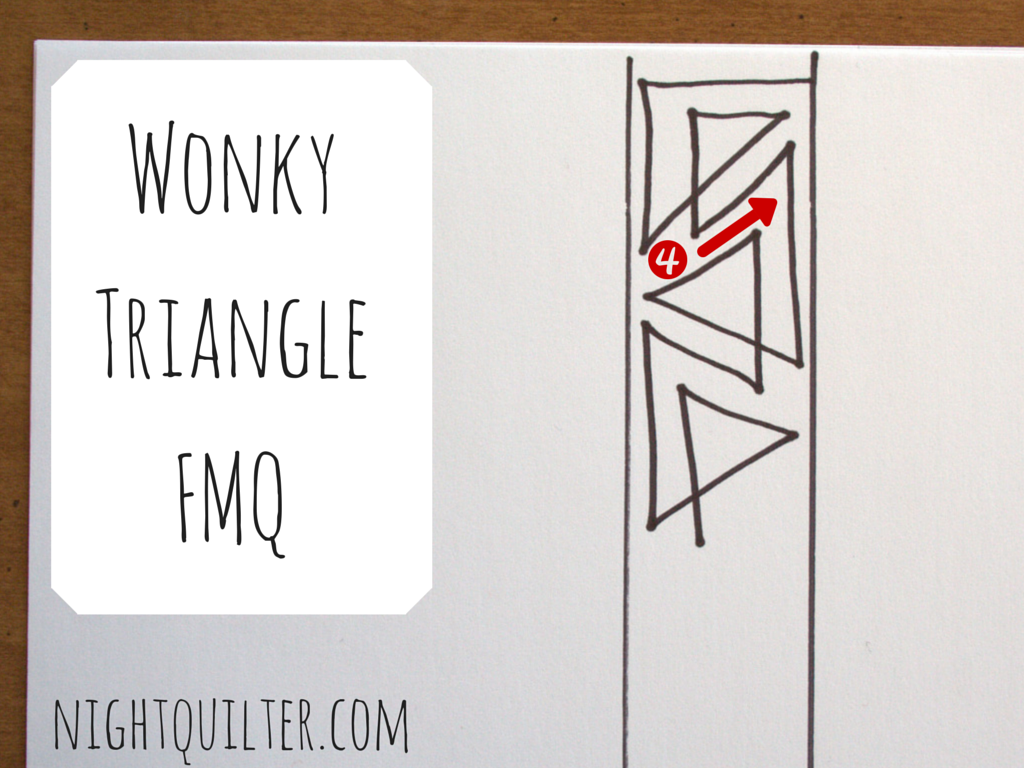 Quilt back toward your starting point again, keeping your quilting lines evenly spaced, to begin the next triangle (4 in diagram above). This first quilting line back toward your start is the first side of your second triangle. Continue quilting the wonky nested triangles along your entire length of sashing! Just be sure to always head back along your existing quilting after emerging from a triangle and it should smoothly progress to the end.
Quilting Intersections
If you are quilting sashing that intersects, here is how I crossed over. Begin quilting your first sashing line as described above.
When you begin to near the intersection, adjust your triangle size and spacing a bit (if necessary) to exit a complete triangle right at the edge of the intersection.
 Quilt straight across the intersection, creating a long straight line parallel to the sashing you are quilting. (Don’t worry, we will fill in when we do the crossing).
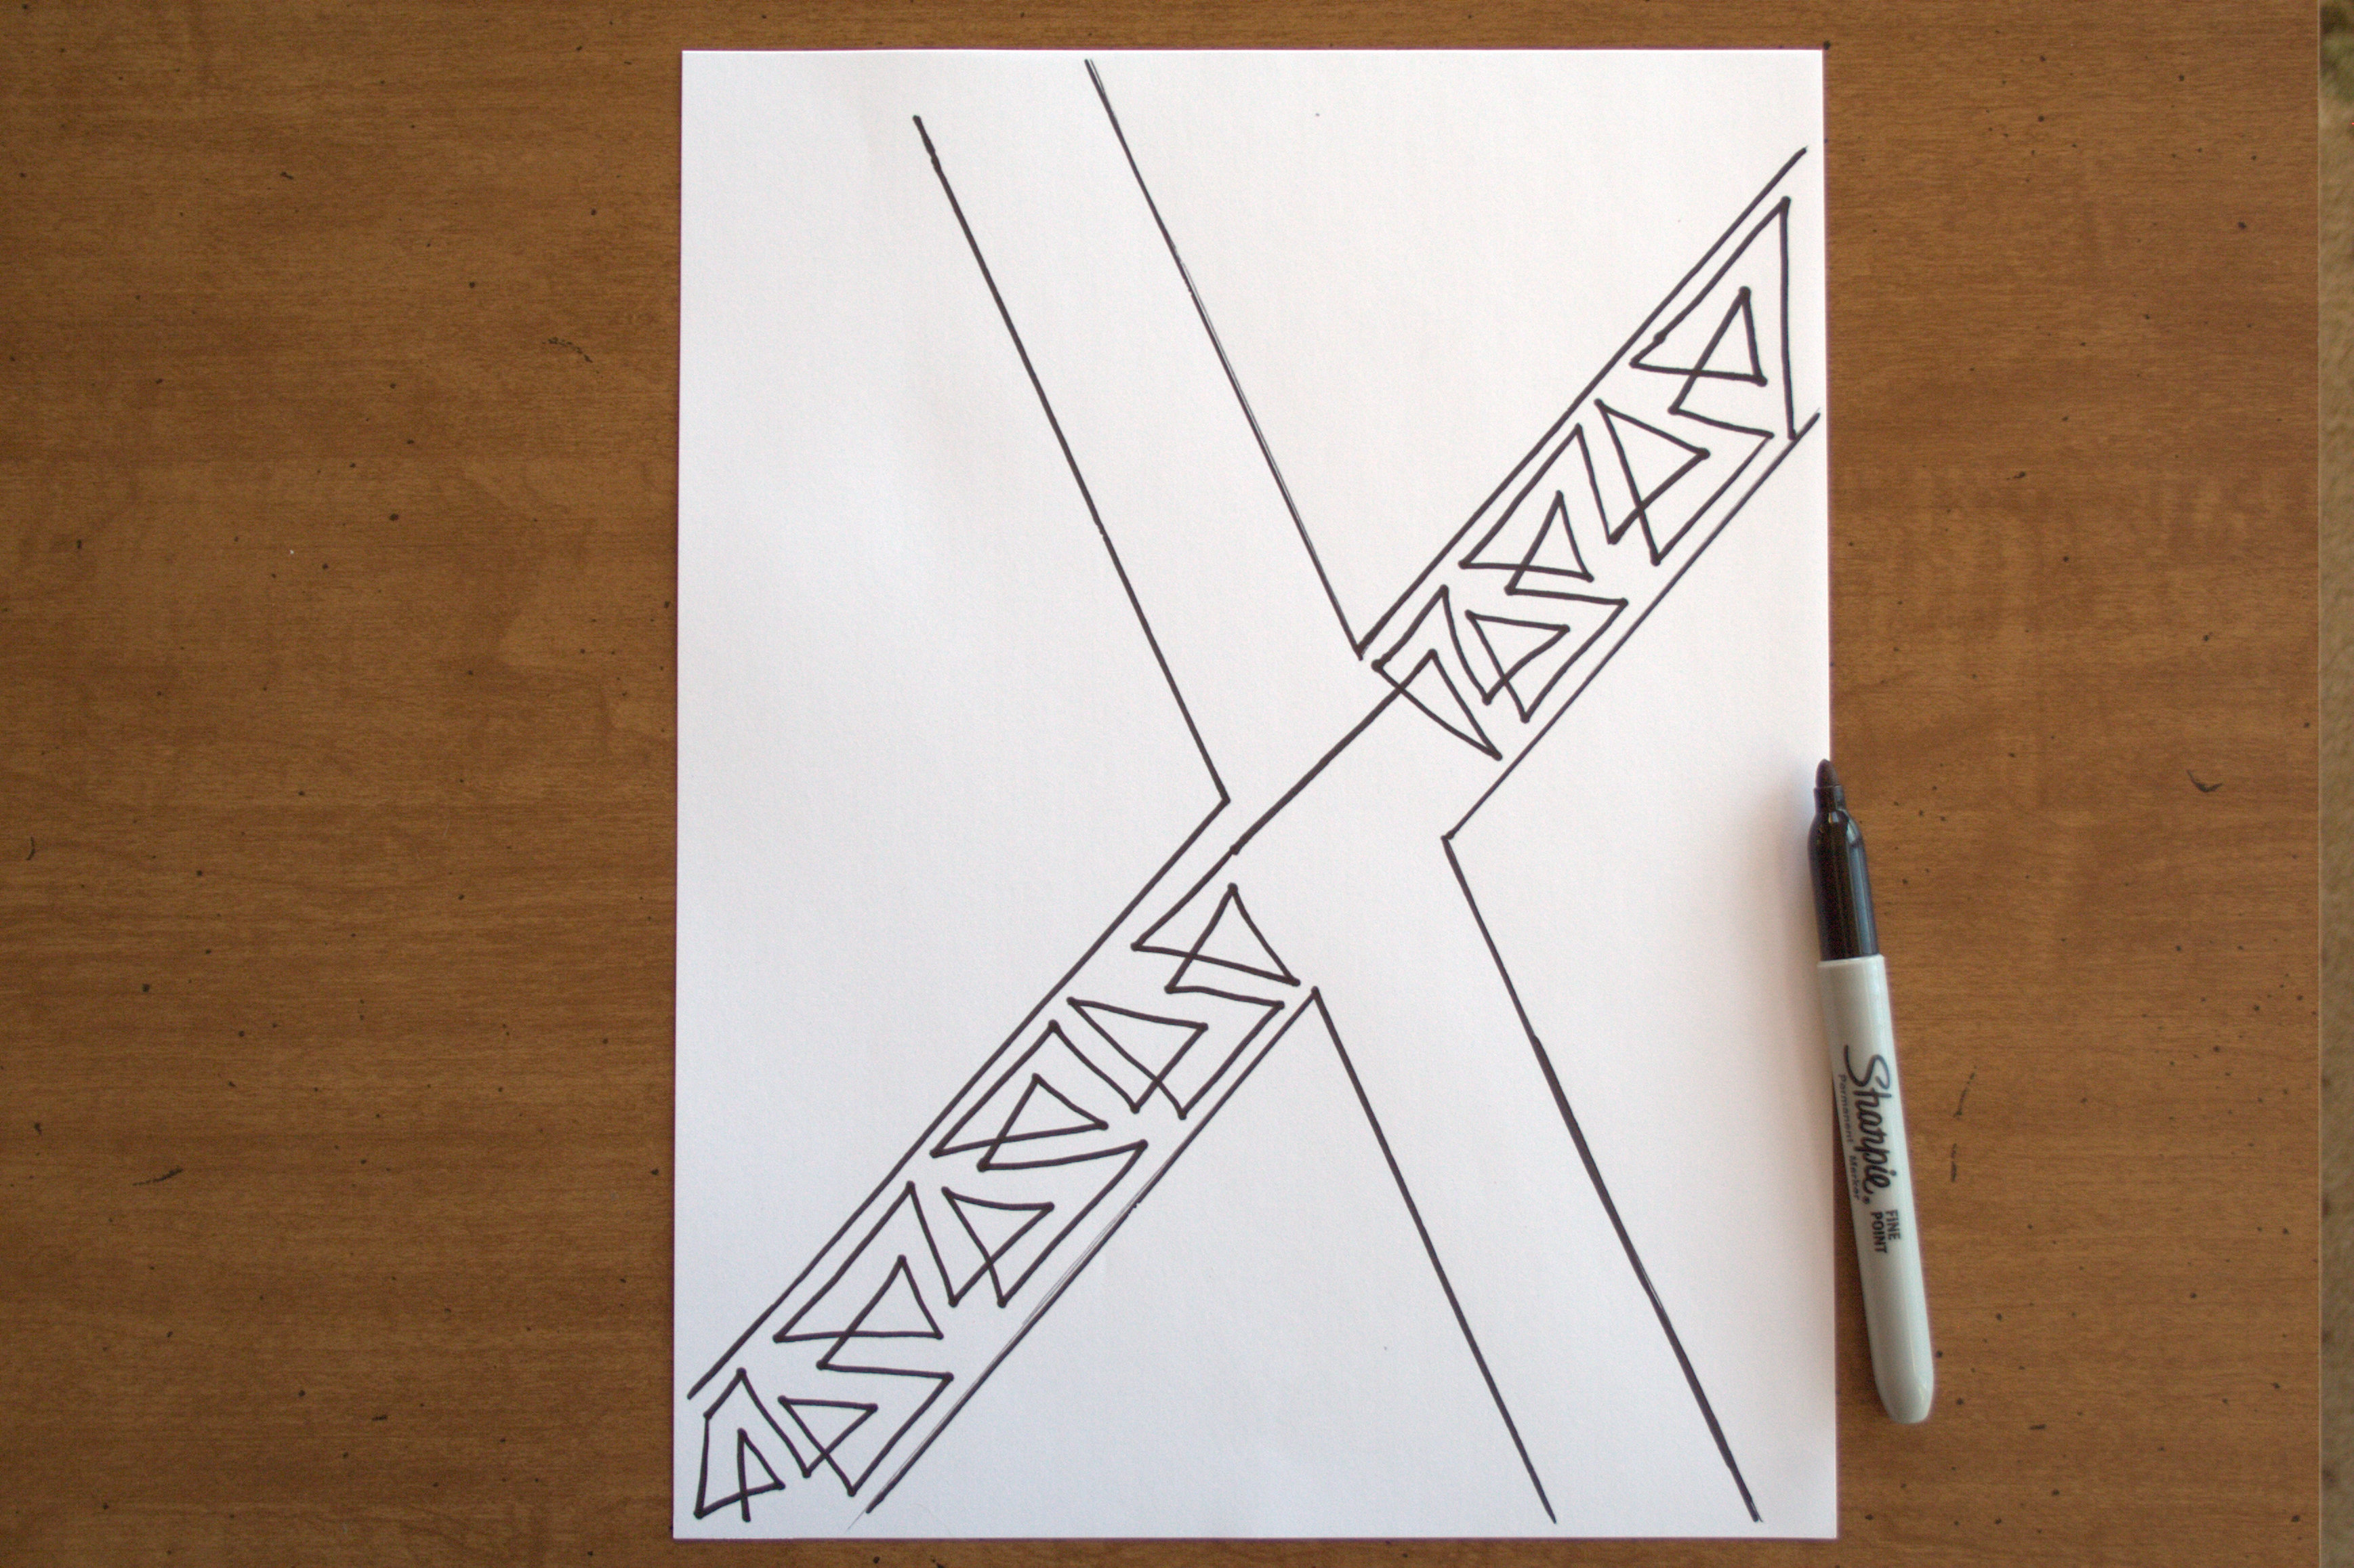 Continue your triangle quilting, crossing intersections in the same way. Quilt wonky triangles all the way to the end of the sashing.
Note: Depending on whether you are approaching the intersection crossing from the top or bottom, you will need to begin your triangles a bit differently.
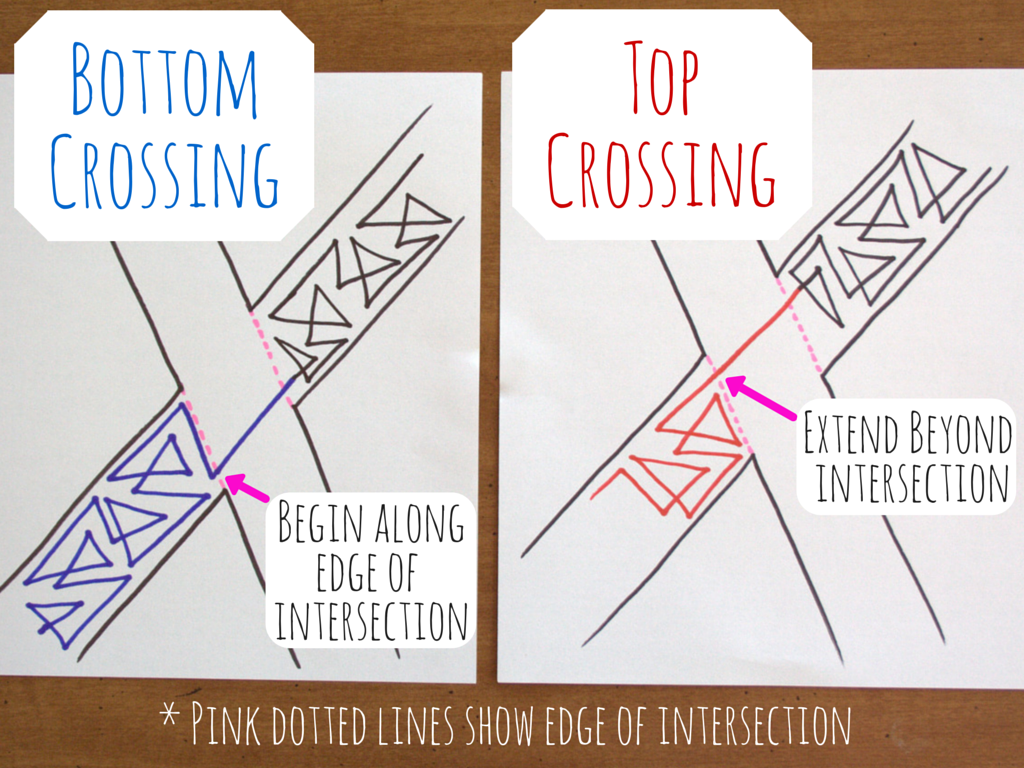
After you cross the intersection, if you are on a bottom angle of the sashing, begin your first triangle line perpendicular to the crossing, along the intersection (in blue above). If you cross on the top angle of the sashing, extend beyond the intersection so that your line forms the second side of the triangle (in red above). See the diagram with step 1 above for clarification on what I mean by “the second side of the triangle”.
After quilting wonky triangles all the way to the end of the first sashing, begin quilting the intersecting sashing. As you approach the intersection, be aware of how much space you have and try to allow for a triangle to be quilted to completion right at the edge of the intersection. In my example, I cut it a bit tight, so my last triangle is on the small side.
Here’s where you have a choice, depending on both your level of skill and your desired look. If you are really good at tracing existing quilting discretely, you can use the line across the intersection as the edge of one of your crossing triangles. In that case, just trace the line as part of an outer larger triangle and continue quilting as normal.
If, like me, you are not a pro at tracing existing quilting, you can pass right through the line across the intersection as if it is another triangle edge and quilt your crossing triangles right through it. As long as you keep the distance between your quilted lines consistent, it does not change the aesthetic of the design all that much, in my opinion.
Continue your wonky triangles until all of the sashes are quilted. Easy, right!?
As with all free motion quilting, the more you practice this design, the more natural it will become to get your triangles consistent and your intersections smooth. During the learning process, don’t fret over little hiccups or half-triangles. After all, they are wonky, right? Triangles are pretty forgiving since you can make them as big or small as you need to fit in your space. As long as it has three sides and three angles, it’s a triangle!
I’m linking up with Late Night Quilter’s Tips & Tutorials Tuesday. I hope you find this helpful, and please let me know if you try it! Tag me @nightquilter on Instagram, or link a picture here. I’d love to see!

I like that design–sounds doable. Timely. I have a 2-inch border about to be quilted and can try it out.
LikeLike
Oh wow, that’s the first FMQ tutorial I’ve ever been able to follow! Now I want to find a quilt to practice this one. 😀 Maybe…my triangles quilt. That I still haven’t finished the top of. Hah!
LikeLike
Great tutorial! I have to admit I looked at your previous post very closely to be able to understand how the triangles worked 🙂 Great timing 🙂
LikeLike
Going to try this, for sure! Thank you!
LikeLike
Yay for drawing it out first! That is definitely how I prefer to practice, and I think it is a magical way to gain confidence. 🙂
LikeLike
This is such a great motif for sashing, though of course it could be used in other areas. I am imagining it in larger sections of a quilt with varying triangle sizes as well. Thanks for sharing!
LikeLike
Awesome tutorial Kitty! You’re right – no existing tutorials for it. I’m about to do a version of this design as an all over pattern for a mid century modern quilt. The biggest difference is that for a mid century modern look, the corners of the triangles are rounded. I’ll send you a pic of it later.
LikeLike
I love how it looks on your quilt. Thanks for doing this.
LikeLike
Love love love. Thanks you so much for sharing this Kitty!!
LikeLike
Great tip on the crossing – I wouldn’t have thought of that on first seeing the design
LikeLike
Thanks for sharing the tutorial. I am going to try this.
LikeLike
This is a fantastic tutorial, Kitty! I absolutely love how clear it is! And I never would have thought of handling the intersections like that – very clever 🙂
LikeLike
That looks completely possible. Thanks!
LikeLike