
Welcome to Tips and Tutorials Tuesday! I’m hosting today while my dear friend Stephanie over at Late Night Quilter is traveling with her family.
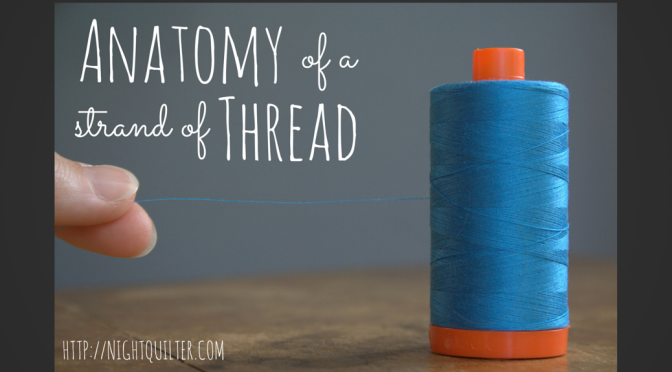
One of the perks of quilting retreats and other social sewing is that little tips are tossed around. Today I’m going to share a very simple yet important tip about using the thread you cut from a spool during hand stitching. As a self-taught sewist, these are the bits of knowledge that I miss, since rarely are there blog posts about the bare basics of sewing. While basting our needle-turn applique projects around the table at the Slow Stitching Retreat, I caught this important tip:
 Use the thread in the same direction it comes off the spool. The tail end that you pull to unravel your length of thread should be the side you thread through your needle. The end that you cut should be the knot end. This way, you are pulling the thread through the fabric in the intended direction, which works with the ply of the thread instead of against. Using the thread in the proper direction significantly decreases tangles and twists while stitching. Simple, right?!
I never knew that it mattered which end was which, so I didn’t pay attention while cutting my thread lengths. Now, when I’m pre-threading a bunch of needles for a good binding or hand stitching session, I thread each needle as the thread is cut instead of accumulating a nice pile of threads and then grabbing any which end to thread through the needle.
Stephanie’s Tips and Tutorials link ups from previous weeks are filled to the brim with great time savers, tricks, and how-to’s. I’d definitely recommend browsing them with your Pinning finger ready. 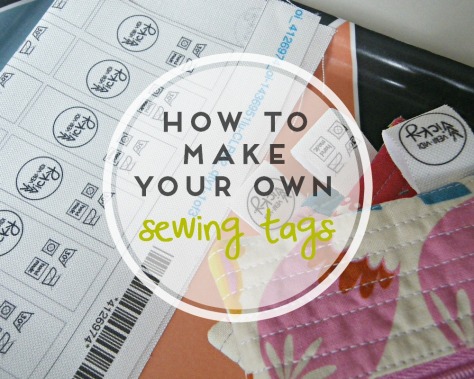 One of my favorites from last week was this tutorial by Veni Vidi Vicky on how to make your own sewing tags (which could easily be adapted to making your own quilt labels!). She gives great step by step instructions on how to use Spoonflower, which is something I’ve been tempted to do but have yet to try.
Now it’s your turn! Do you have any little tips or great tutorials to share this week? If you do, please link up below!
Powered by Linky Tools
Click here to enter your link and view this Linky Tools list…

Thanks for hosting Tips and Tutorials Tuesday, Kitty! I love your anatomy lesson, and the picture of the blue thread is just so pretty…xoxoxox
LikeLike
So simple, it’s gonna save me a lot of frustration over twisted/knotted thread.
Best tip I’ve heard, like you I’m a self taught sewist.
Indeed that Aurifil thread is a beauty:)
LikeLike
Interesting. Though by that logic, bobbins are always wrong and should twist and knot more… Maybe its just more noticeable with hand sewing, or with Aurifil?
LikeLike
Hmmm interesting point! I wonder if with machine sewing the ply doesn’t matter as much since it’s a controlled tension and feed? I might need to call Myth Busters, although it seemed like a commonly known fact among the experienced sewists at the retreat. For now, I’ll take their word for it. I’ll update you if I find out more!
LikeLike
Thanks for the great tip! I’m a machine quilter, but a lot of us hand sew our bindings down,or do hand-turned applique’ I will definitely pay attention next time I hand sew!
LikeLike
I had never thought of Spoonflower to make your own quilt tags… what a great idea! I just tested them out this summer and printed a few Heather Ross prints. I picked to print on Kona cotton because I know exactly the kind of quality to expect. So far so good… would love to see your version of this!
LikeLike
I never would have guessed. Thanks for the helpful insight! I’m planning to do a lot of EPP on vacation, and will make sure to use the thread the right way round =)
LikeLike
I don’t think I’ve ever paid attention to which end I’ve used before. Will keep this in mind next time I’m sewing down binding!
LikeLike
Thanks for the tip. Never knew that. But it does make sense.
LikeLike
I do find that aurufil snaps all the time in my machine , all the time . Maybe I’m threading it wrong or something
LikeLike
I am an old sewer, but my mama taught me that maybe 55 yrs ago! Guess she was smarter than I thought!
LikeLike