
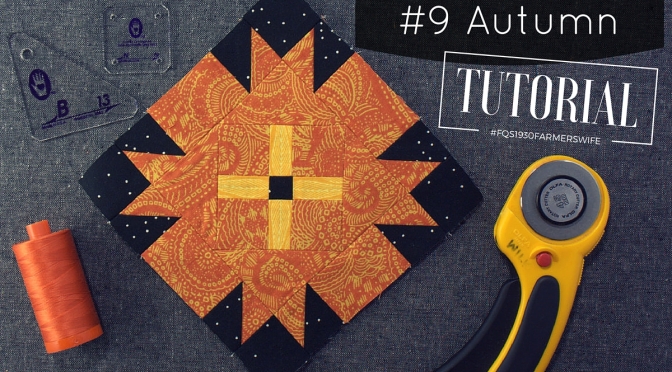
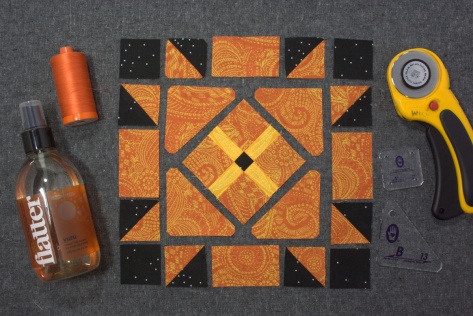
Today is my day to share the Block 9 Autumn tutorial for the 1930 Farmer’s Wife Sew Along, hosted by Angie at Gnome Angel and sponsored by Fat Quarter Shop and Marti Michell.
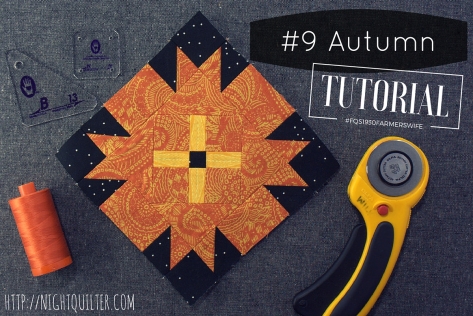 With a block like Autumn, it’s easy to get daunted before you even begin: 37 pieces in one 6″ block!? Ack! But wait! This is a perfect time to practice looking at each block’s construction creatively. If there’s one thing this sew along has taught me, it’s that there is nearly always a faster and easier way to approach block construction than purely cutting out all of the pieces and sewing them together. With a few shortcuts and piecing tricks, Autumn comes together quite smoothly. In this tutorial, I’ll show you how to make half square triangles (HST) 8 at a time (Yes, 8! We make all of the HST needed in this block at once), use strip piecing to save a bit of time, and fill in the gaps using Marti Michell templates (Set B and Set N are helpful with this block) or rotary cutting to help make putting Autumn together as easy as watching falling leaves.
As you may have noticed, I used different locations for the orange and black fabrics in the center square than those used in the book. I’d like to say it was intentional, but lo… it was not. I did not even realize my error until this entire tutorial was finished, photographed, and scheduled to post, as I was proudly admiring my block. When I realized my error, at first horror swept over me. Then, after Angie’s reassurance and another look at my block, I decided that Autumn was a good place for a design change. After all, it’s my quilt! I encourage you to remember that during this sew along, and don’t be afraid to make your quilt your own, with a hefty dose of gentleness toward yourself if when you discover an error after fully completing a block. Call it an unexpected design element. AND take this as an extra reminder to double check your fabric placement and choices BEFORE sewing your block together!
Note: Exact measurements for the pieces needed to construct this block will not be provided in this tutorial in order to protect copy write. It is a prerequisite of making this block that you have a copy of the book, The Farmer’s Wife 1930s Sampler Quilt: Inspiring Letters from Farm Women of the Great Depression and 99 Quilt Blocks That Honor Them. All measurements can be found in this book and its associated media. That said, even if you aren’t sewing along with us, I think you will find some really helpful tips in this tutorial that will help you look at all block construction more creatively!
Reflection on the Letter – A Precious Half-Hour
For those of you reading this who are not sewing along, one of my favorite aspects of this sew along is that each block in the book is inspired and accompanied by a letter written by an actual 1930 farmer’s wife. It has been inspiring to see how similar these farmer’s wives’ dreams, desires, troubles, and day-to-day struggles were to mine, and to hear their often uplifting takes on life. I can’t tell you how many times I’ve read the letter with tears in my eyes, nodding a resounding “yes!” as I relate my own life to the words on the page.
I know Angie said that blocks were allocated completely randomly, but this letter was meant for me. This woman is me! It was both surreal and somehow encouraging to read that even those hard working, ever-positive farmer’s wives embraced the NEED to make time for themselves. A few months ago, I created a hashtag (#sewtake20) in an attempt to encourage other busy moms (and myself!) to make time for themselves 20 minutes a day, no matter how crazy the day, how high the stack of dishes, and how all-engulfing the mountain of laundry. Wise L.O.L. from Iowa recognized the need to nourish body and soul back in 1939, despite her full plate. While she took a precious half hour and I’m striving for only 20 minutes, it still helps me to not feel so guilty doing the same here in 2015.
Tutorial
For this block, I specifically chose fabrics with small or nondirectional prints, so that I could quickly piece the components without worrying about fussy cutting or directionality. The #9C pieces are a small exception, since I gave a tiny bit of focus to fabric alignment. Note that I am arranging my final layout on-point, but for the purposes of being consistent with the diagram in the book, this tutorial pieces the block squared. If you plan to set your blocks on-point, be sure to account for that with any directional fabric placement.
 This block is composed of 8 HSTs, 8 rectangles, 9 squares, and 4 triangles. I first cranked out the bits I could make quickly and efficiently, namely the HSTs and the center square. Let’s break it down.
Making 8 HSTs at Once
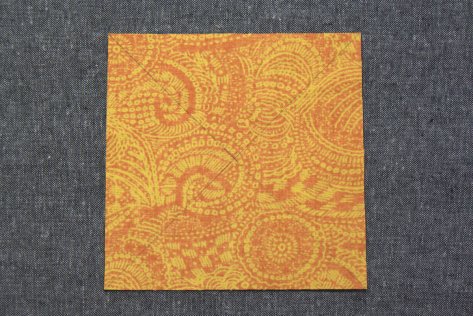
In the book, the print and coral fabrics were used to make the #9F HSTs. Choose your coordinating fabrics (I used black and orange).
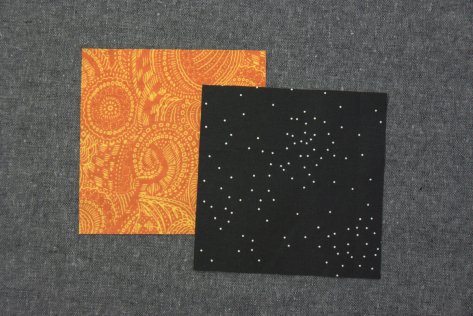 Cut one (1) 5″ square from each. Note: If your HST-making skills are on point and you want to conserve fabric, you can use 4 3/4″ squares. I prefer to play it safe and trim a bit more to ensure my HSTs are perfect.
 Right sides together, draw diagonal lines from corner to corner, making an X. You only need to mark the wrong side of one of the squares.
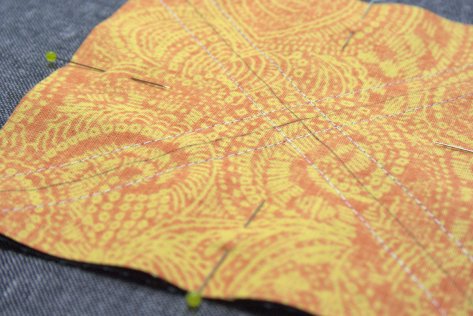 Pin your squares together to keep them from shifting, and sew 1/4″ from the right and left of both lines. This is a good time to confirm the accuracy of your 1/4″ seams.
 Carefully draw a line down the middle of the blocks in both directions. I used the 2 1/2″ line on my ruler to help make sure my line was square. You should now see a plus and an X.
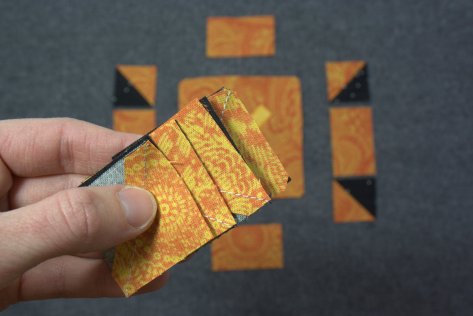
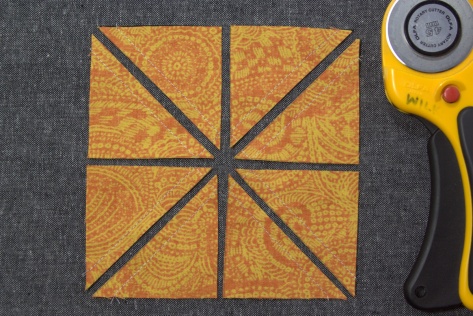 Cut along the marked lines. Press open.
 You now have 8 HSTs! I typically press all seams open, but with HSTs I press to the darker fabric since I use my Bloc Loc rulers to trim them to size. If you don’t have Bloc Loc rulers, feel free to press seams open, and align the 45 degree line on your ruler to help trim to the size indicated on the #9F template in the book.
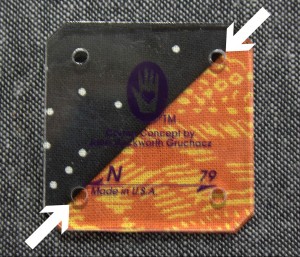 You can also use Marti Michell template N79 to trim to square, too. Be sure to center your diagonal seam in the centers of the two holes in the template to trim evenly.
Do a little dance and set those 8 HSTs aside.
Strip Piecing the Center Square
Because the center square is symmetrical, two of the outer edges can be strip pieced, saving you a bit of time and thread.
In the book, the coral (#9D) and yellow (#9G) fabrics with a tiny center square of print (#9E) were used. I should have used black, yellow-orange, and a tiny center square of orange, but as I noted above, I made an inadvertent design change and went with orange, yellow-orange, and a tiny center square of black. Wrap your brain around which of your fabrics belong where for your block, and here we go. **Really, take a moment and make doubly sure you have the right fabrics. Got it? Great! We will be strip piecing the two rectangles composed of #9G and #9D.
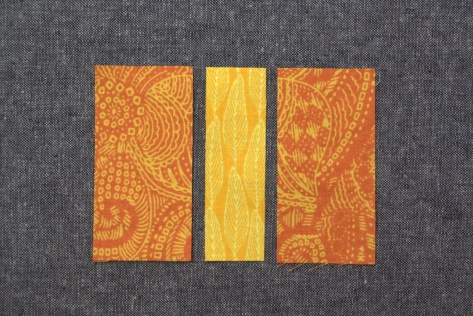 Cut two (2) 1 5/8″x 3 1/4″ rectangles of your #9D fabric and one (1) 1″ x 3 1/4″ rectangle of your #9G fabric. (Math aside: The 5/8ths” mark is the little line right after–aka a bit larger than–the 1/2″ mark on your ruler.)
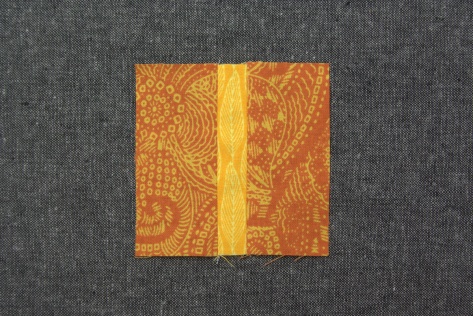 Right sides facing, sew the #9D rectangles to the center #9G along each long side.
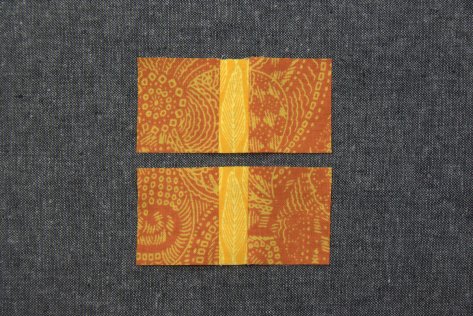 Cut in half as shown to create two (2) 1 5/8″ x 3 1/4″ rectangles. We will call these your #9DG units.
 Using the rotary cutting measurements provided in the book’s cd, cut two (2) #9Gs and one (1) #9E.
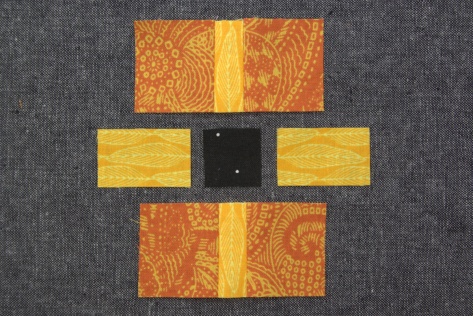
 Assemble as shown. Note that I rotated the bottom row 180 degrees so that the direction of the yellow-orange fabric radiates outward from the center.
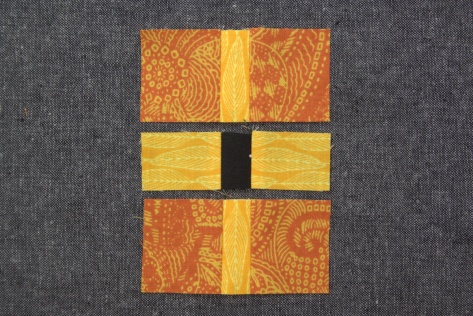
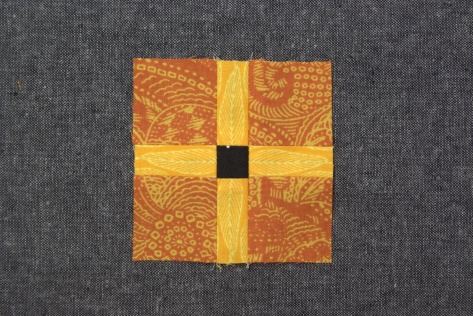 Sew your strip pieced #9GD units to the top and bottom of your center piece to create the center square.
Sewing Tip: When matching seams, pin directly after the seam join to prevent slipping. Also, take a moment to match up the seam lines on the opposite raw edges, too. While it is not a sewn edge, it will help keep the sewn edge level.
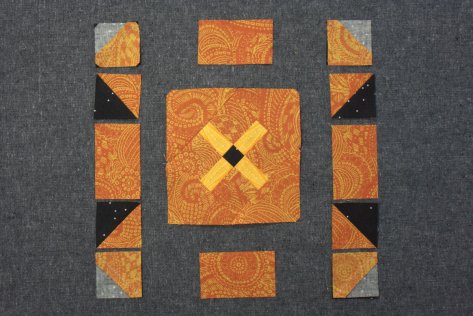
Cutting the Remaining Pieces
Now we need four (4) #9D squares, four (4) #9C rectangles, and four (4) #9A triangles. These remaining pieces can be cut in a very straightforward way, by using the rotary cutting instructions or paper templates included, or using Marti Michell templates. I’ve found that using the Marti Michell templates really help me line up different units accurately, so I opted to use those for the triangles and rotary cut the squares and rectangles. Here’s how:
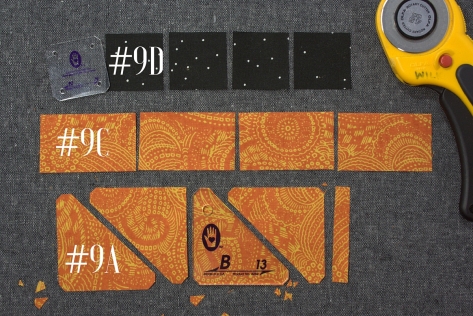 Cut a 1 1/2″ x 6″ strip of your coral-equivalent fabric (I used black). Subcut the four #9D squares, per the measurements provided in the rotary cutting instructions or with Marti Michell template N79.
Cut a 1 1/2″ x 10″ strip of your print-equivalent fabric (I used orange). Subcut the four #9C rectangles, per the measurements provided in the rotary cutting instructions.
Cut a 2 1/2″ x 7″ strip of your print-equivalent fabric (I used orange). Using Marti Michell template B13, subcut four (4) #9A triangles. If you don’t have the Marti Michell templates, you can use the rotary cutting dimensions or paper templates provided on the book’s accompanying CD.
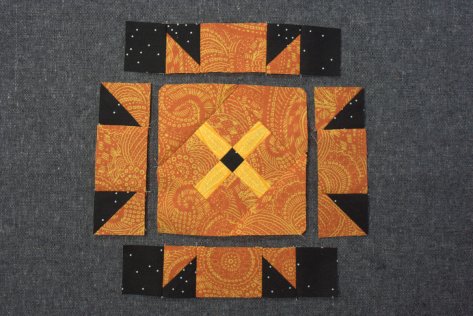
Assembling the Block
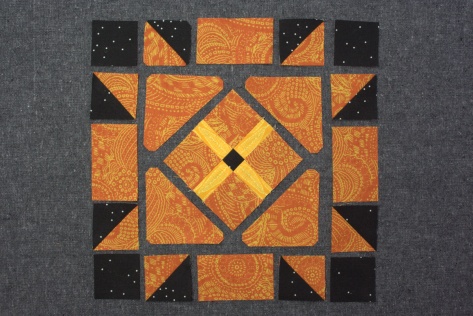
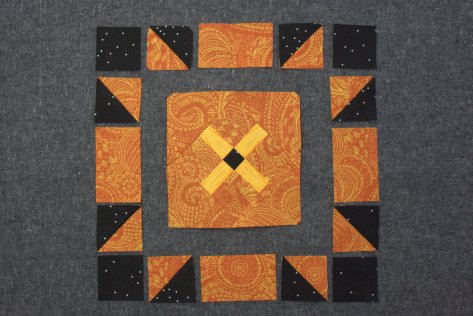
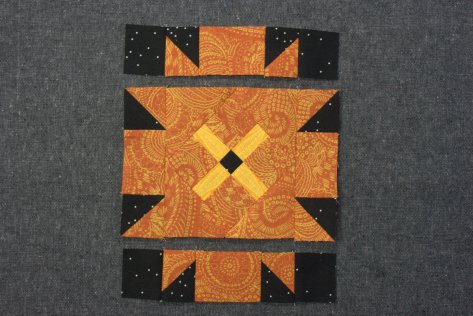
Now that you have all of the necessary components, lay them out to make sure you have all of the pieces aligned properly (pay particular attention to those sneaky HSTs). Tip: Take the time here to focus and be sure that all of the pieces are arranged properly, heavily referencing the picture in the book. The HSTs are particularly sneaky. Once your block is perfect, take a picture with your phone and reference it heavily throughout the piecing process. It takes less time to stop and lay out your pieces to check the arrangement than it does to seam rip once you’re finished!
 First, sew the #9A triangles to the center square as shown. Begin with two opposite sides. Press seams open.
 Sew on the remaining two triangles. Press seams open. Your center square should now measure 4 1/2″ including seam allowances.
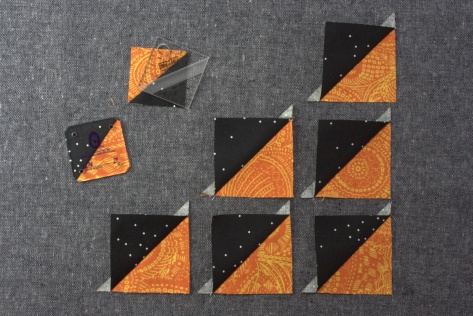
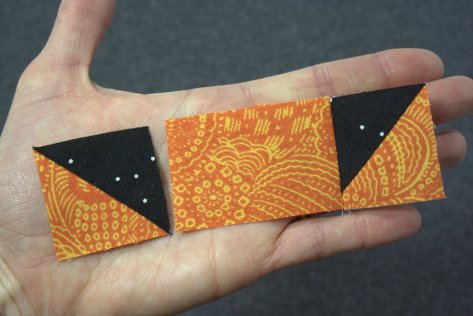
 Pair corner #9B squares with their neighboring HSTs and sew as shown.
 I like to chain piece steps like this, and as I pick up my pairs of squares to sew, I align all of the to-be-sewn edges so that I don’t get mixed up between my cutting/arranging table and the sewing machine.
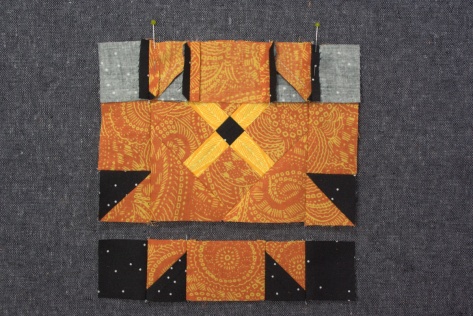
 Sew HST-corner square units to center #9C rectangles to create the top and bottom rows.
 Next we will sew the middle row together. Sew the HSTs to the side #9C rectangles as shown.
 Again, pay close attention to the alignment of those HSTs! They like to do somersaults on the trip to the sewing machine if you’re not super careful!
 Sew side HST-rectangle units to center square.
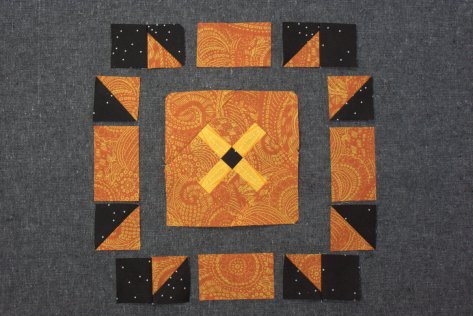
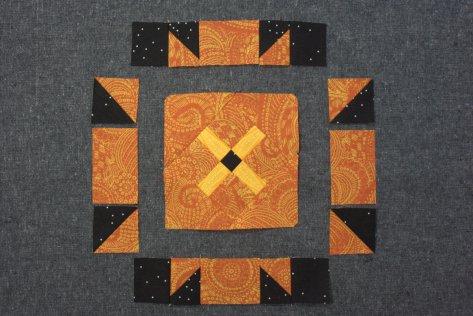
 Sew top and bottom rows to the center row. Tip: This is another great place to match bottom seam lines as well as those right at the sewn raw edge. There are only two seams to match! I love this block! Press all seams open.
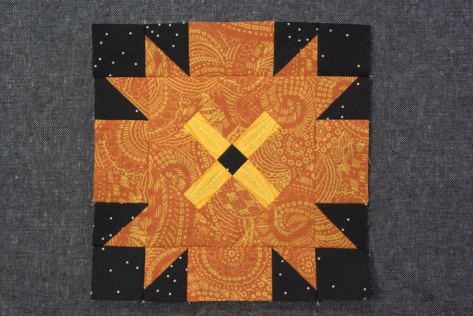 Gaze lovingly upon your Autumn block and think, “Gee, that wasn’t so bad! But it sure took me longer than a precious half-hour!” (and if you’re me, about 45 minutes later realize in horror that you botched the center square’s fabric placement, then decide that your Farmer’s Wife quilt deserved some individuality anyway, and let it go.)
Thank you so much for joining me today and I hope you found this tutorial helpful! This is the last tutorial before the Christmas break, which begins tomorrow and lasts through the first week in January. I know I am hoping to do some serious Farmer’s Wife catch-up amongst all of the festivities. Merry Christmas, happy holidays, and a very happy New Year to you all!
Important Links
- All the block tutorials by Angie and bloggers.
- FAQs for the sew along.
 The Farmer’s Wife 1930s Sampler Quilt: Inspiring Letters from Farm Women of the Great Depression and 99 Quilt Blocks That Honor Them by Laurie Aaron Hird for Fons & Porter/F+W; RRP $28.99 – Click here to purchase.
Here are links to all of December’s tutorials:
09/29/2015: Angie @ GnomeAngel.com & Marti @ Marti Michell
12/02/2015: Debbie @ Happy Little Cottage & Sedef @ Down Grapevine Lane
12/04/2015: Janice @ Better Off Thread
12/09/2015: Kerry @ Kid Giddy
12/11/2015: Lisa @ Sweet Little Pretties
12/15/2015: Kirsty @ Bonjour Quilts
12/18/2015: Kitty @ Night Quilter <— YOU ARE HERE
CHRISTMAS BREAK – 12/19/2015 to 01/04/2016
01/05/2016: Angie @ GnomeAngel.com & Marti @ Marti Michell

Fantastic tutorial, Kitty! I love your little changes – a lot. Thanks for a great block to take us into the holidays!
LikeLike
Once again, Kitty, your talent at choosing fabrics and quilt designs amazes me. I love this quilt block and all the details that are in it….
LikeLike
Kitty, I love the colors you used in your block! Thanks so much for the tutorial–that HST trick is a real keeper. Have a wonderful Christmas with your kiddos and husband–and Happy First Christmas to Finn 🙂
LikeLike
Fabulous tutorial! Really clear and jam packed with great lessons. Love this version of Autumn (and I’m really crushing on your quilt as it’s revealed!).
LikeLike
thank you
LikeLike
Great tutorial! Great photos and I love the colors you used in the block.
LikeLike
Thank you for the really clear tutorial. I really like your design and think I’m going to make an additional block using your setting.
LikeLike
Thankfully, quilters and quilts have a long history of design choices. I think having an element like this in the quilt top will keep your brain interested in the story behind the quilt for as long as the quilt holds up, and that is what heirlooms are made of. 🙂
LikeLike
Never feel guilty taking time for yourself, Kitty. Never!
I like it when people add their own touches to blocks and quilts. It makes it far more interesting.
LikeLike
That is a beautiful block. I was born in the fall and love those colors. I just got this book recently and am trying to decide which block to do first. Thank you for the tutorial.
LikeLike