

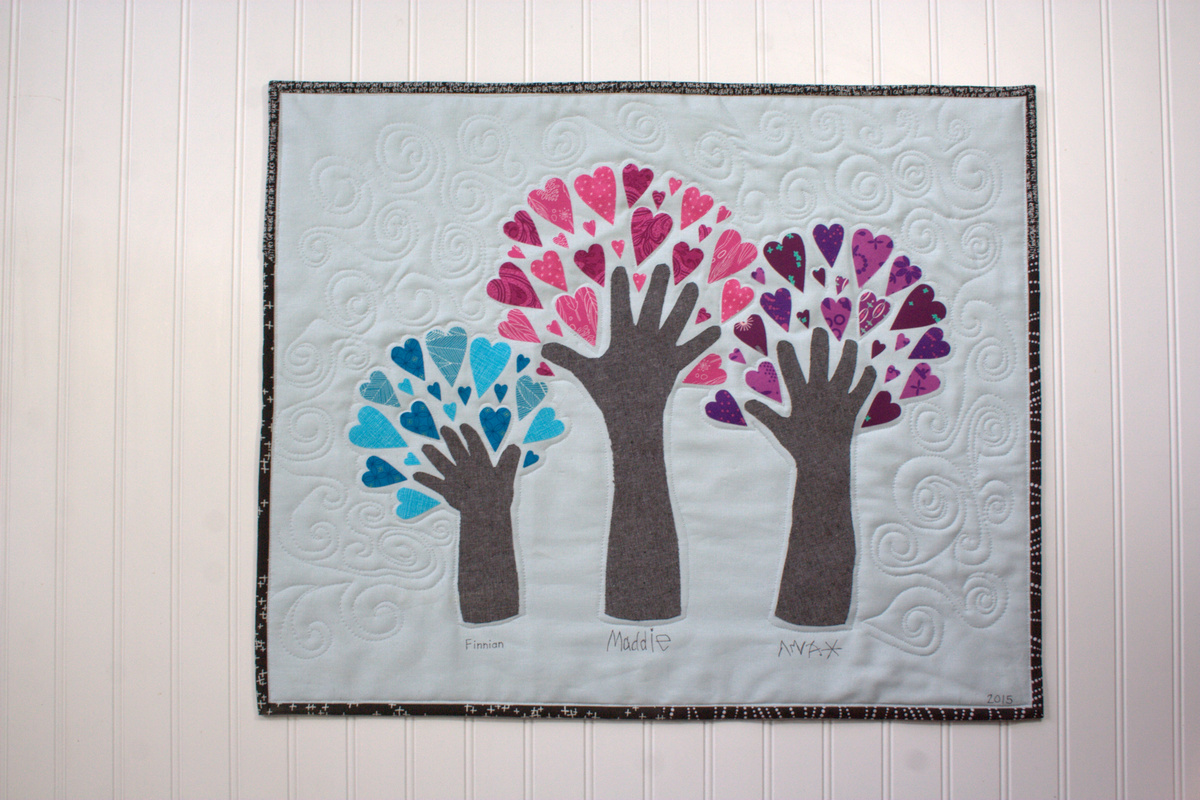
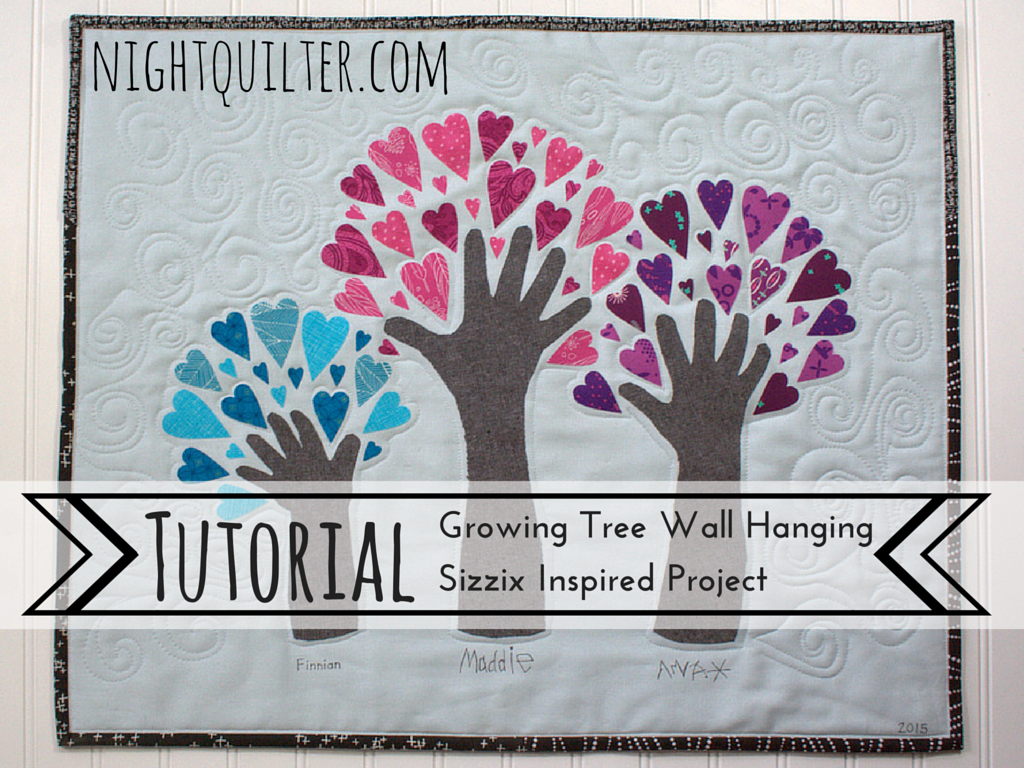
Today I’d like to share a tutorial for a great project that documents the growth of little ones while showing love in a beautiful way: the growing tree. In my case, it will be a growing grove of three trees, so feel free to adapt to fit your kiddos. I initially hoped to make four of these, one for each set of grandparents (we are blessed to have three sets!) and one for us to keep. Now that I’ve finally finished the first one, I’m accepting the fact that I may just stop at one, since I would like to cherish my little babies’ hands, too, and Christmas is less than three (3!?) days away. Since it involves hearts, this project would also be a fabulous Valentine’s Day gift for those doting grandparents.
 From the moment I gave birth to my first child, my holiday gift giving style changed completely. Instead of trying to think of the “thing” each family member would like or need most and focusing all of my time on making handmade gifts of love for every family member possible, I acknowledge that presence is the best present if at all possible, and as a busy mom (of three lovely children, now), gift making time is much more rare. I am blessed to have a large family, and to have married into an even larger family, so potential gift recipients abound. But especially in recent years, my parents and in-laws–the grandparents–are usually the sole recipients of Christmas gifts, and such gifts nearly always involve their cherished grandchildren (our kids). This year, grandparents will get a whole lot of love, since time wasn’t on my side with this project. When I had the idea to make heart-filled trees out of my children’s hands, I did my typical google search to see if it had been done before. I found this post, about a creation inspired by another creation, and I knew that that inspiration would need to take one more step into the quilting world to become a quilted gift. Here’s how to make your own Growing Tree.
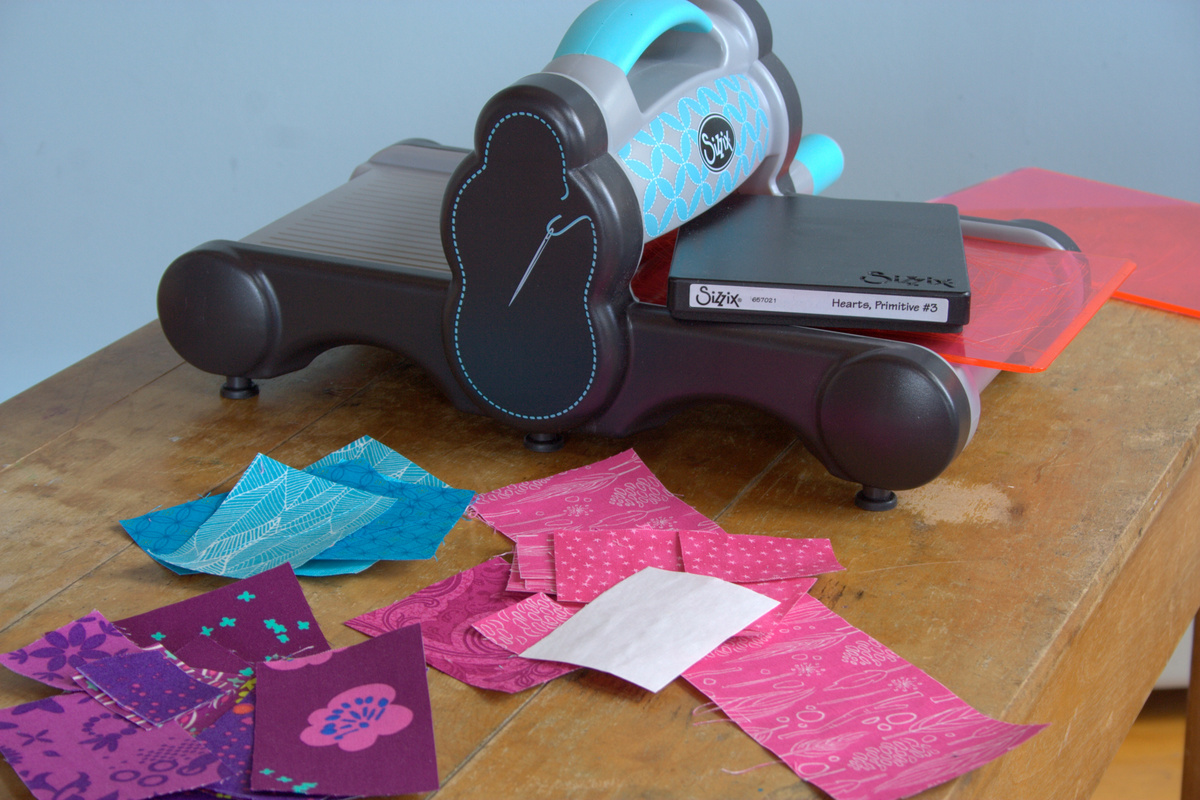
 First, gather your materials. Note that material amounts will vary depending on the number of children you have and the size of the child. I’ve tried to include amounts for a single tree, but feel free to adjust as needed. I’ve also included affiliate links to products that I use and love. If you click through and purchase with these links, I will receive a small commission that will go toward funding all that goes into creating these tutorials and keeping my blog up and running.
Materials
- 1/2 yard background fabric – you may be able to use less if your child is small. A fat quarter should be sufficient for a baby’s growing tree. A half yard is playing it safe if your children are older. (I used Essex yarn dyed linen in light blue)
- *18″x20″ piece of batting (I used Warm & Natural 100% Cotton Batting
)
- *18″x20″ backing fabric (I used muslin since it’s the back!)
- *1/4 yard binding fabric
- 1/4 yard or fat eighth of fabric for tree trunk (I used Essex yarn dyed linen in charcoal)
- Scraps of fabric for hearts
- Sizzix fabi die cutting machine
- Hearts, Primitive #3 Sizzix die
-OR- you can cut hearts by hand using scissors - Thermoweb Heat’n Bond Ultra Hold Iron-On Adhesive
- Coordinating thread (I used Aurifil 50wt 2600-Dove
)
- Iron and ironing surface
- Sewing machine (I use a Bernina 560)
- Children! and a pencil for tracing their forearms and hands!
*These items are not needed if you opt to frame your growing tree instead of quilting it, but you will also need a suitably sized picture frame, stiff acid-free cardboard if the frame doesn’t come with it, and a form of adhesive (glue or tape) to tightly wrap the fabric around the cardboard before insertion into the frame.
Let’s get started!
 Gather your children! Have them spread fingers wide and put forearms down onto the Heat’n Bond. With their excited help, trace each child’s forearm and hand onto the non-textured side of the Heat’n Bond. You want to trace from just below the elbow, up around each finger, and then down the other side. If you are making more than one version of this Growing Tree, trace as many forearm-hand tree trunks as you will need. (Because I initially aimed to make four versions of my Growing Grove of Trees–oh my boundless ambition!– I traced each patient child’s arm four times, except Finn’s. With squirmy 6 month old Finn, I struggled and wiggled and waggled until I got a somewhat accurate tracing of his arm and hand, cut it out, and traced THAT three more times. He was not interested in sitting still!)
Carefully cut out each tree trunk, either enlisting the help of your children if they are older and proficient at cutting, or sending them off to play for the next few steps.
Fuse your tree trunks to the wrong side of the tree trunk fabric, following the manufacturer’s directions. Always be extra cautious if using a hot iron with small children around. Toddlers are inherently curious and can not yet physiologically control their curious explorations, despite fervent warnings from mommy–as I’m sure you know! I do my ironing upstairs without any kids underfoot to be safe.
Set the tree trunks aside to cool. Once cool, carefully cut around each forearm tree trunk and set aside.
Fuse Heat’n Bond to the wrong sides of all of the fabric scraps that will become hearts. Remember to have the paper side of the Heat’n Bond facing up, and put a pressing cloth down to protect your ironing surface. Let cool completely.
 Once the fused heart-intended fabric has cooled completely, with paper-friendly scissors or rotary cutter (NOT your fabric scissors!), cut your fabric into 2 1/4″ x 3 1/4″ rectangles for ease of quick cutting.. Note that I am using the three smallest heart sizes for my trees, and am not worrying about directionality of the fabric. If you have smaller scraps or want the directionality of the fabric to be level, you can cut 3/4″ x 3/4″ for the smallest heart, 1 1/4″ x 1 3/4″ rectangles for the medium heart or 1 1/2″ x 2 1/4″ rectangles for the large. (I did not use the extra large heart). I mostly cut the medium and large hearts from 2 1/4″ x 3 1/4″ rectangles and then used the scraps from those to cut small hearts.
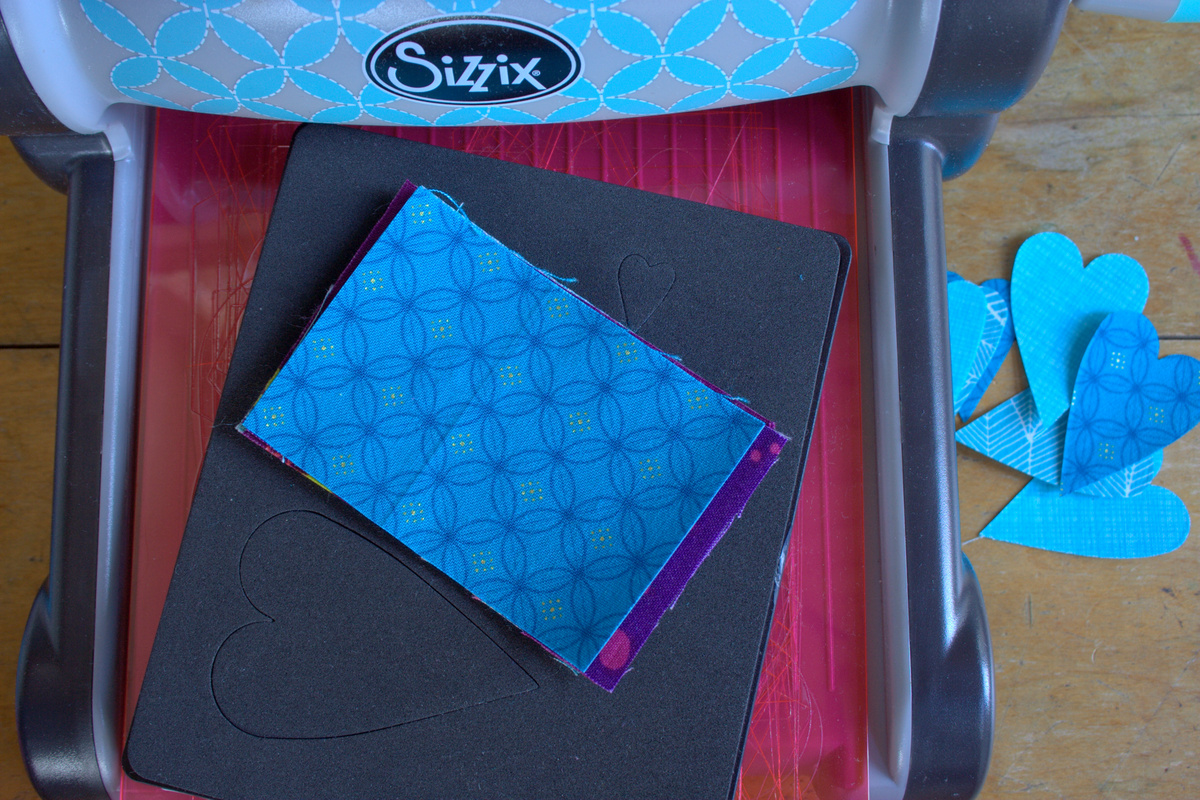
 Next, pull out your Sizzix fabi die cutting machine and Primitive hearts #3 die. Call those children back! Layer the pre-fused fabric rectangles over the desired sized hearts on the Primitive Hearts die, four (4) at a time. The Sizzix can cut up to nine (9) layers of fabric at once, but since the fusible is pre-fused, each rectangle counts as two layers. Make your Sizzix sandwich: bottom cutting pad, die with the blades facing up, fabric centered over the heart blades, and top cutting pad.

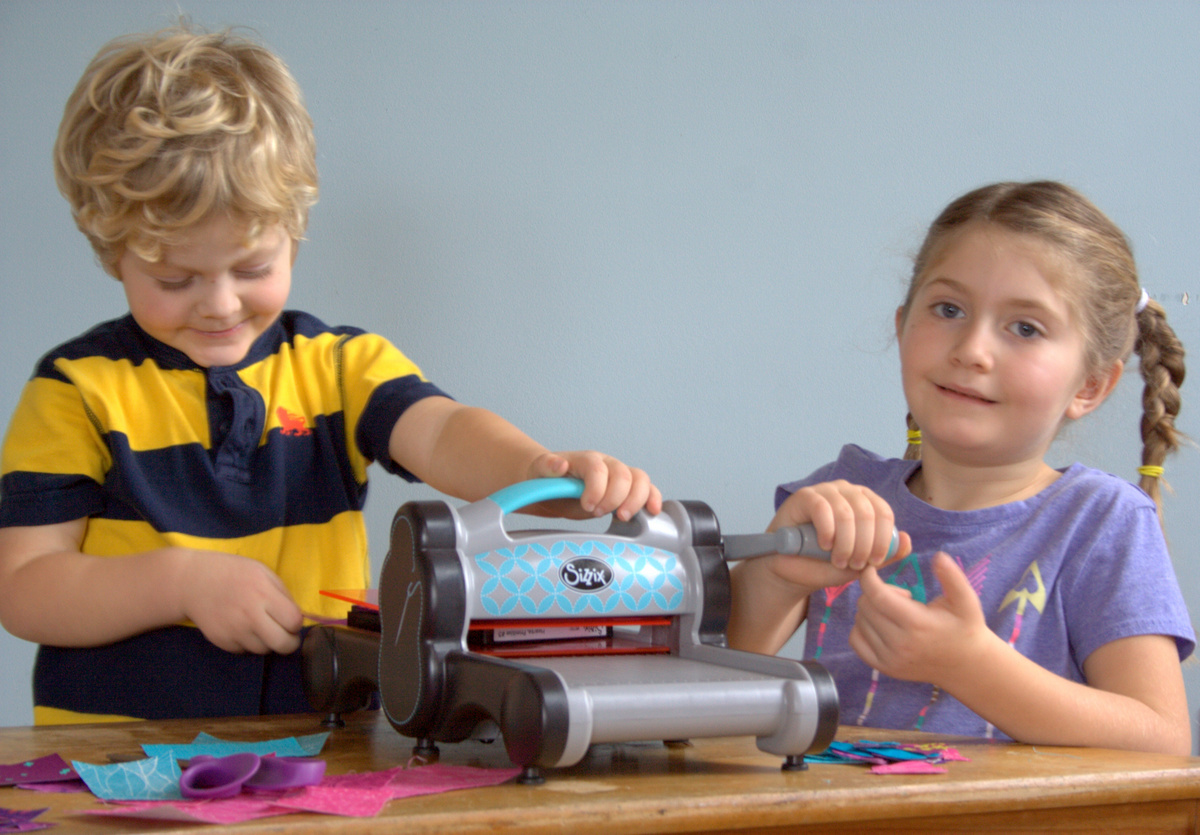 Let your kiddos carefully crank them through! If you don’t have a Sizzix, get the kids’ help and start cutting out hearts of different sizes, ranging from 1/2″ to 2″ in size. Depending on the ages of your children, you can either enlist their help or set them up with a different activity while you lay out the wall hanging once all of the hearts and trunks are cut.
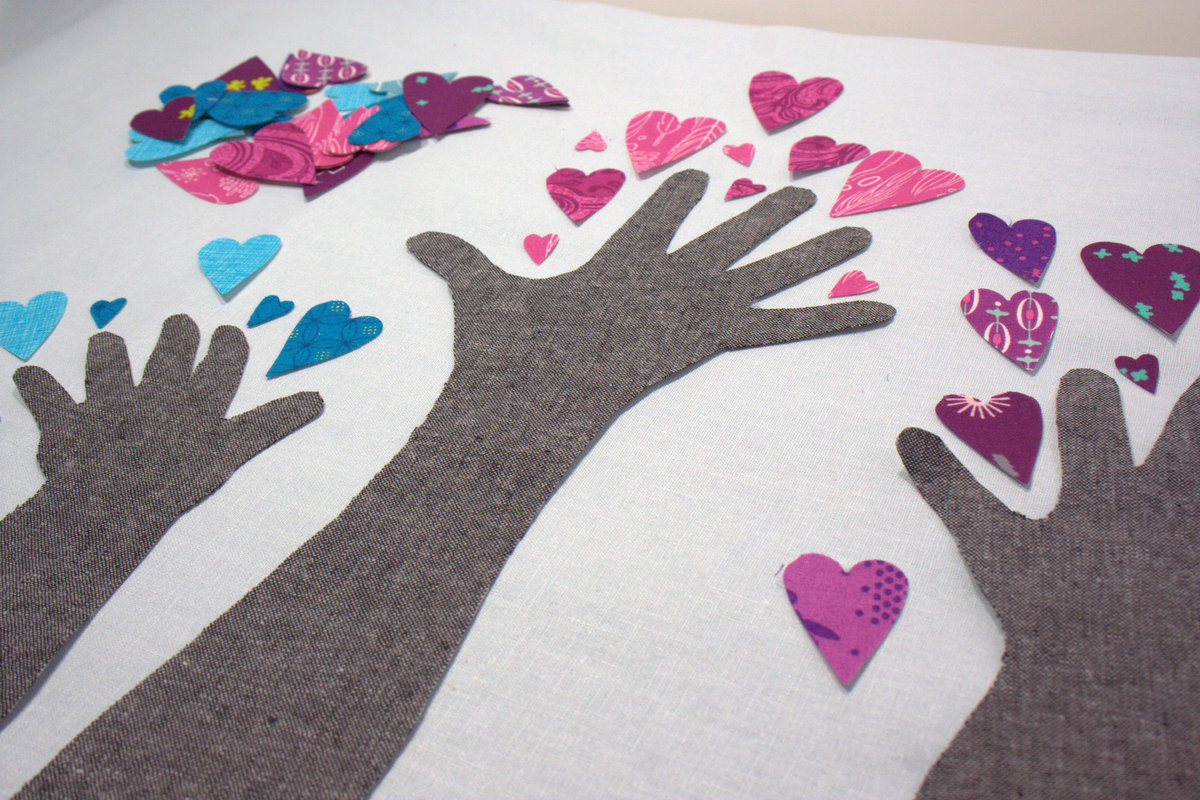 Lay out a large piece of your background fabric. I suggest arranging your tree or grove of trees BEFORE cutting the background fabric to size, since every child’s arm is different. Layout your tree trunk(s), arranging the hearts around the top like the leaves of a tree.
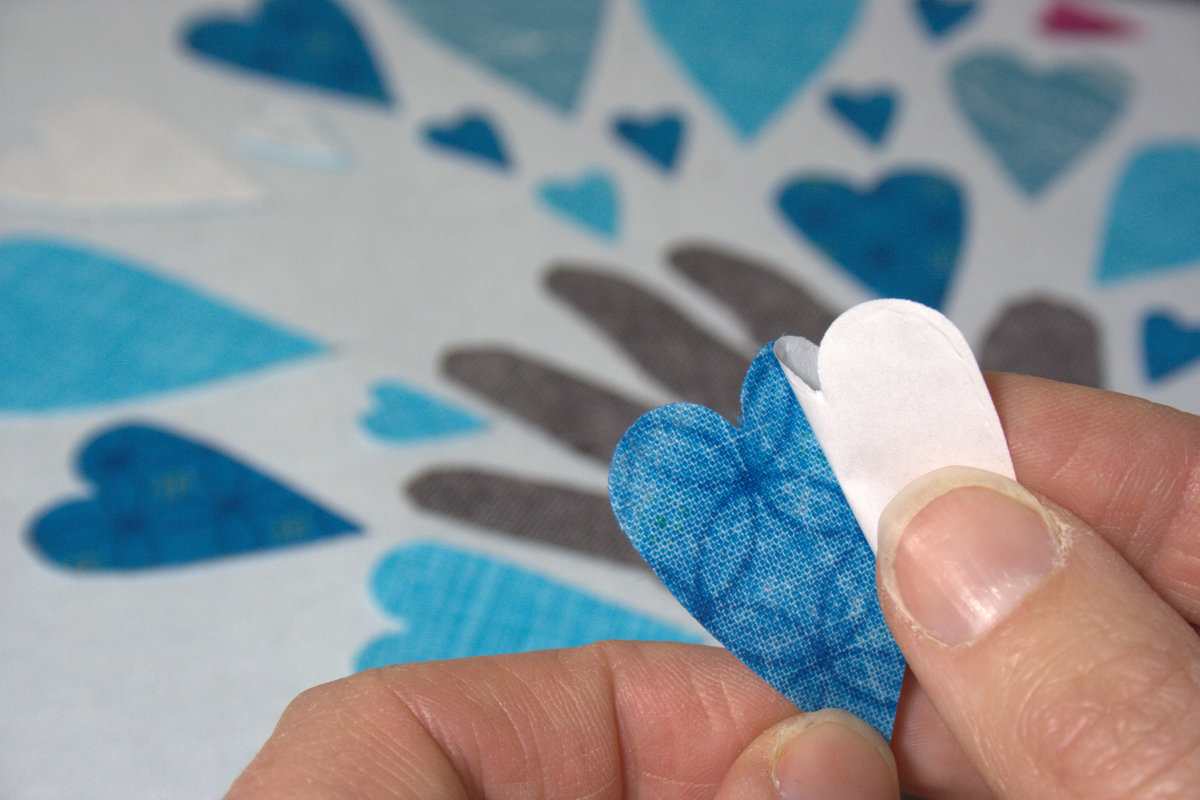
 Once they are arranged the way you want them, carefully remove the adhesive paper from each component, placing it back in its proper place as you go.
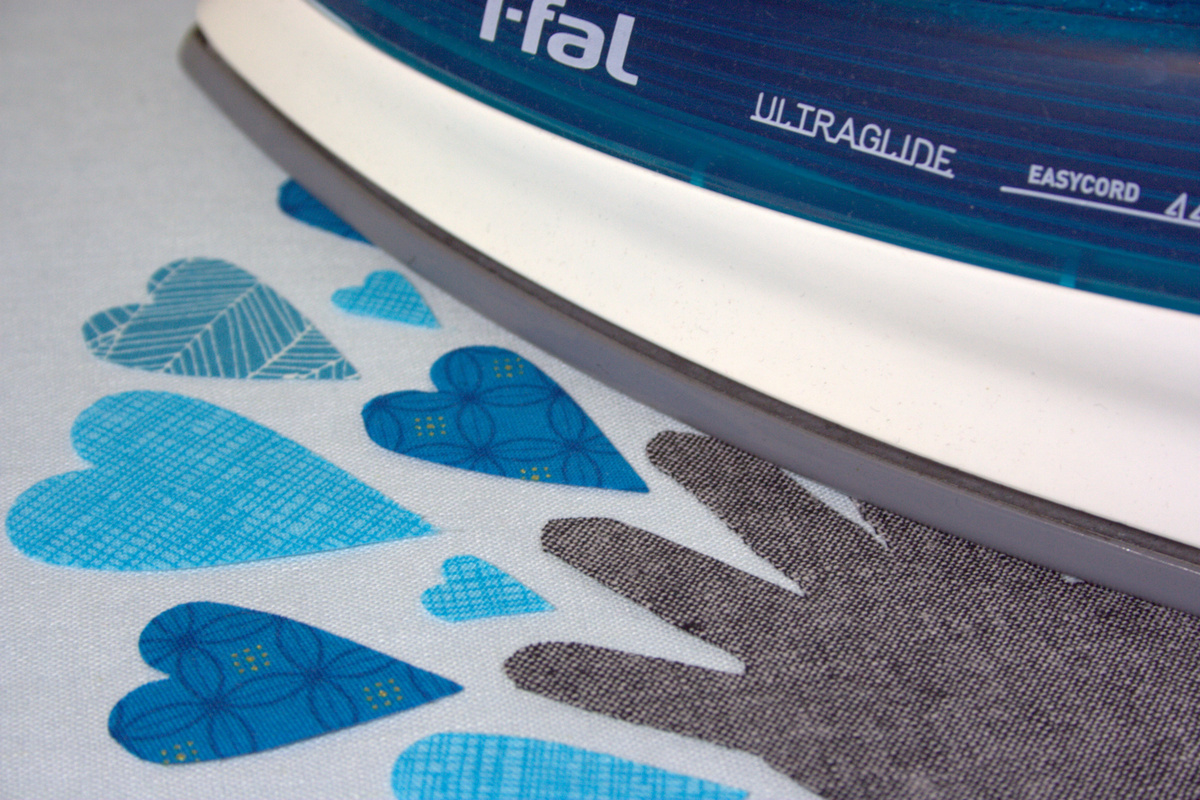 Once you have an iron-surface-sized batch with the paper backings removed, fuse them down. *Note: If possible, lay out your arrangement on your ironing surface so that once all of the papers are removed and pieces stuck, you can simply fuse them down. I used a large foam board beneath mine, and actually pressed onto the foam board since my ironing surface is tiny. Always follow the manufacturer’s instructions when using Heat’n Bond!
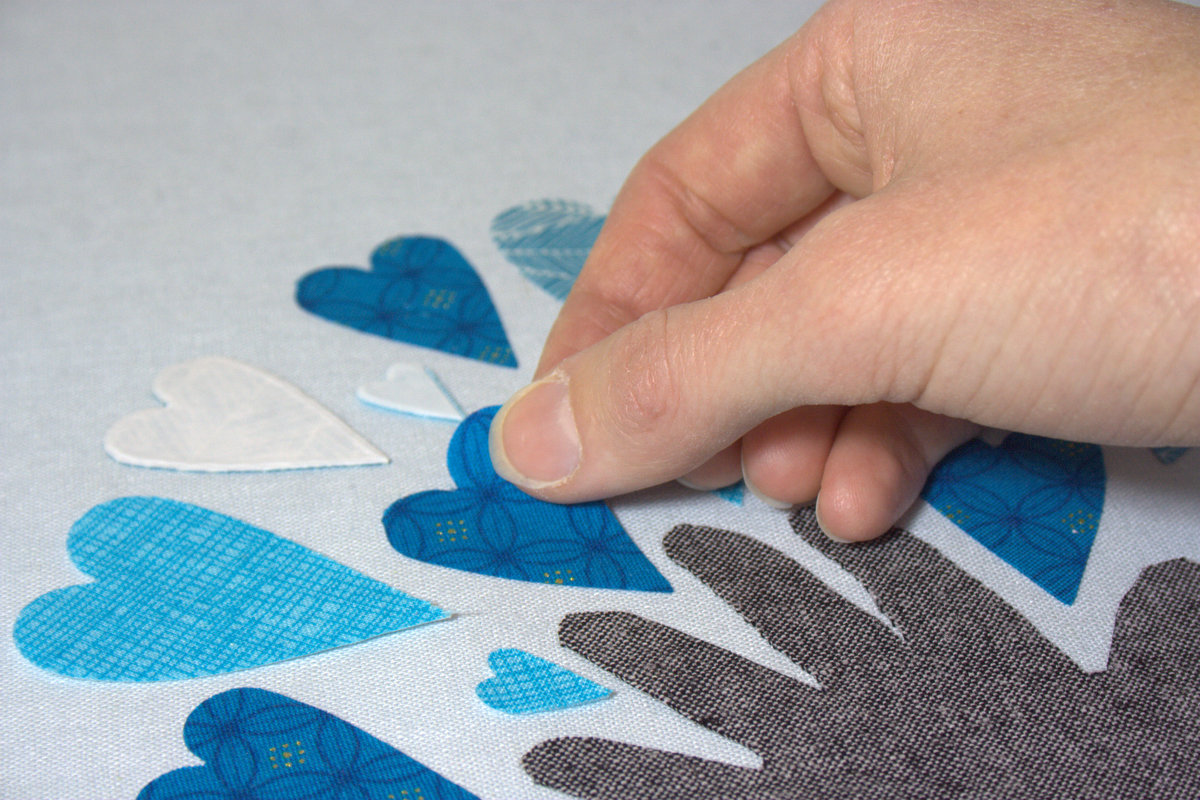
 If you’re like me and are interrupted during this process, simply flip a row of hearts that haven’t been fused yet, so that you know where you are when you return.
Trim the background fabric approximately 3″ from each edge of your Growing Tree if you plan on quilting. Be sure to use the lines on your cutting mat to ensure your quilt is square as you cut.
Alternate ending
Alternatively, after fusing the hearts and tree trunks, you could wrap the fabric tightly around a thick acid free piece of cardboard and frame it in a picture frame. If you opt to frame yours, be sure to give yourself at least 2″ of overhang on all four sides, and plan your tree arrangement to fit into your desired frame.
Back to the quilting option…
Cut batting and backing fabric to extend about 1″ from each edge of your Growing Tree quilt top (For example, if your Growing Tree top measures 27″ x 22″ like mine does, cut your batting and backing 29″ x 24″)
 Baste your quilt layers using your desired method (I used pins).
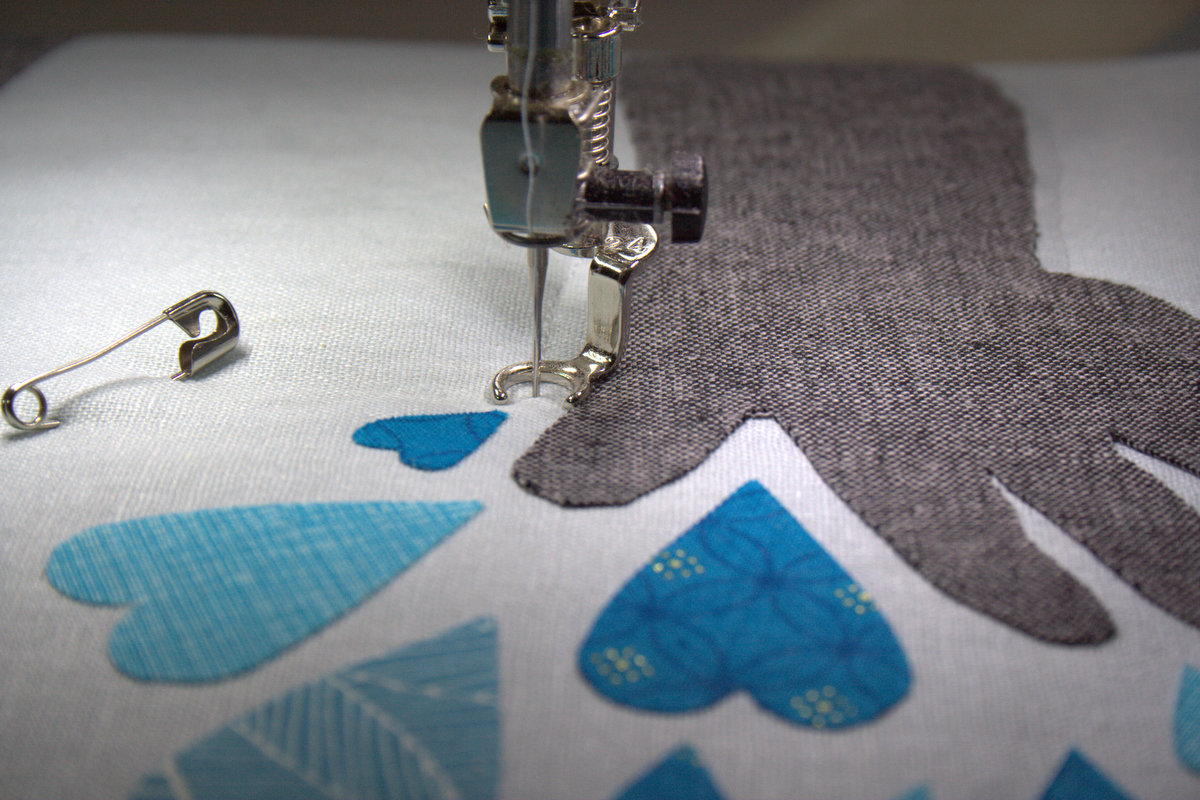
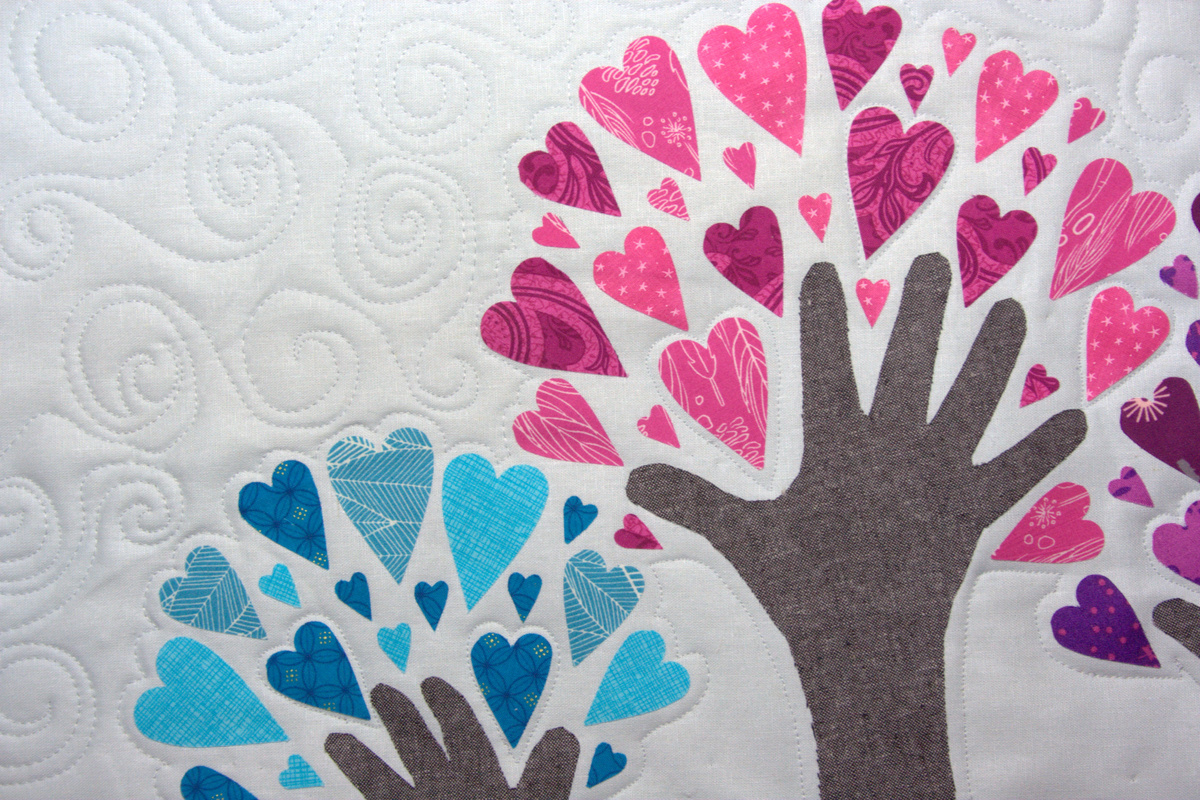 With a thread that coordinates with your background fabric, free motion quilt AROUND the edges of your tree trunk(s) and hearts. I also stitched around a few single hearts (you don’t need to sew around all of them) within the tree. Remember that the Heat’n Bond is NO SEW, so be sure not to sew on top of the fused pieces. Feel free to free motion quilt the background to help hold everything in place. I used a windy spiral design and was reminded at how much fun free motion quilting is! I need to do it more often!
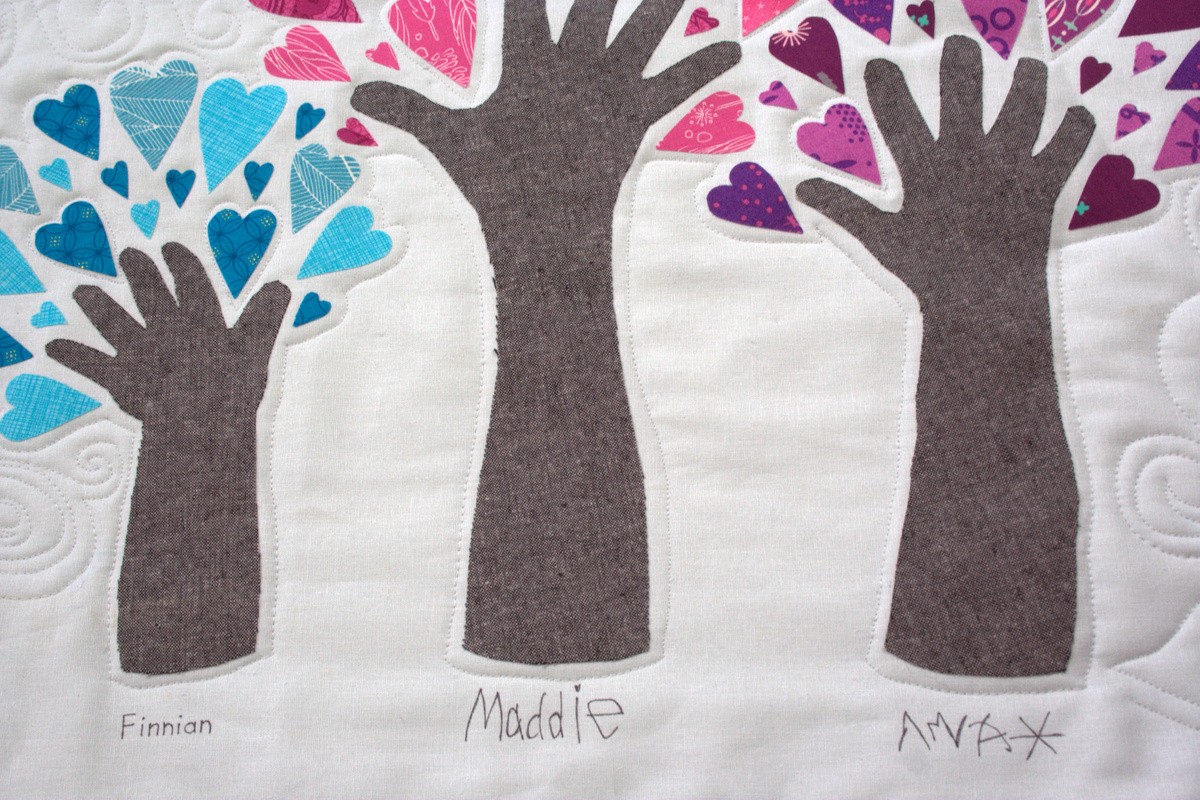 Add each child’s name beneath each tree, either with embroidery or permanent fabric marker. I used fabric marker so that Maddie and Max could include their signatures. Don’t forget the date! (Confession: I copied Max’s signature from a recent art project since I didn’t dare let him and a permanent fabric marker near this finished project. Perhaps a 3 year old with a less impish nature might be able to sign right on the project, but use your judgement.)
 Trim the batting and backing flush with the quilt top, square up, and bind as desired. I included corner hang tabs on the back of my Growing Tree Grove using THIS method, and bound the quilt using THIS great tutorial by Cluck Cluck Sew.
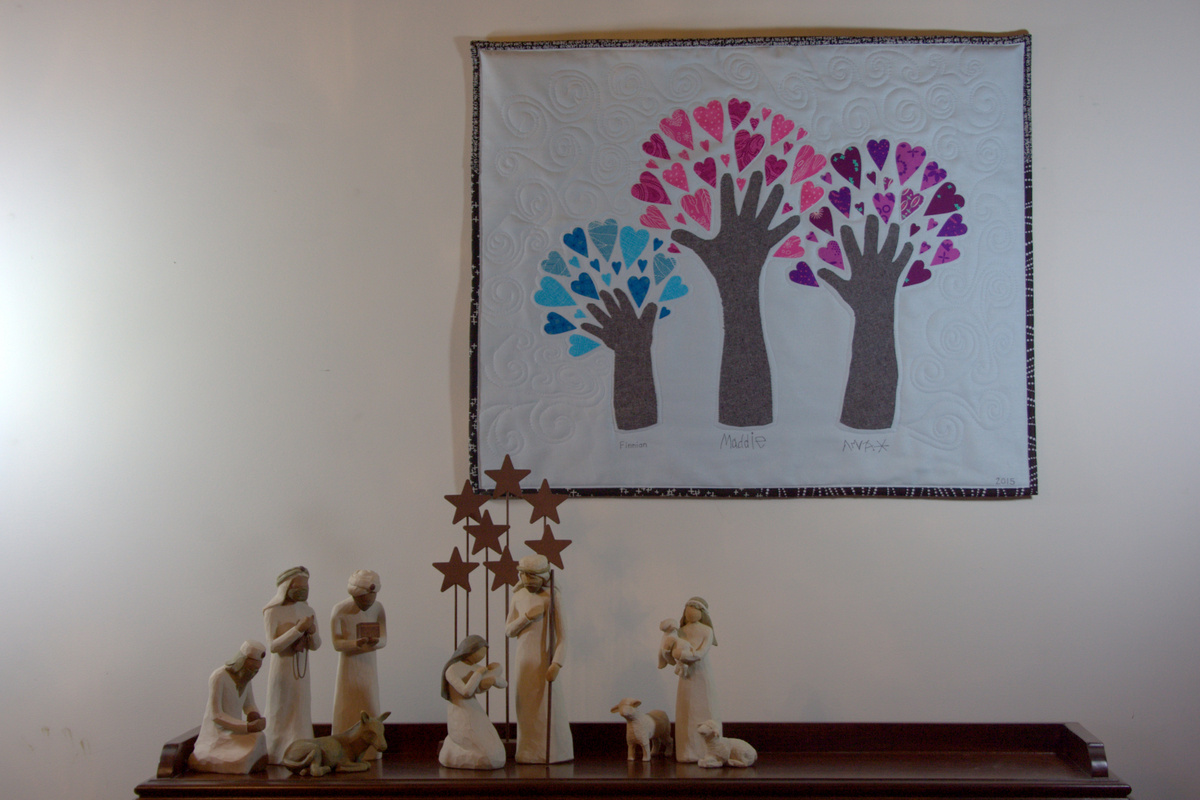 Hang this Growing Grove on your wall so that you can immortalize those precious little hands, or wrap & gift to those doting grandparents if you’re superwoman, or if you are already planning ahead for Valentine’s Day!
Enjoy, and happy holidays!
Outtakes
Just for fun, here’s what the vast majority of the photographs of my kiddos using the Sizzix looked like:
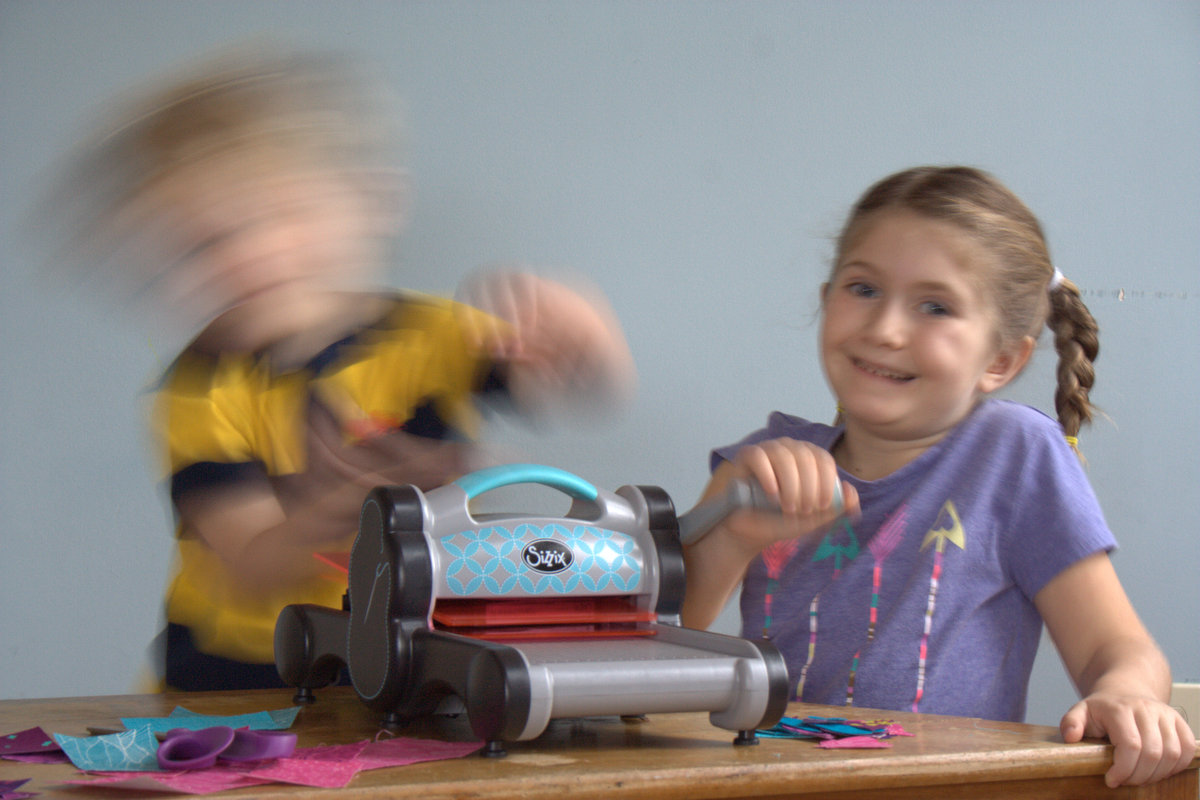 Max does not. stop. moving! Enjoy the blurry laugh, and enjoy your holidays!

Beautiful wall hanging!
LikeLike
That is just beautiful Kitty!
LikeLike
I recently learned an awesome trick for removing the paper on the back side of fusible web: score the paper in the center of the object with a straight pin. Using the pin, then work the pin under the scored line and pull the paper off. This keeps the shape of the object very true and keeps edges from fraying. I don’t know about you, but I tended to struggle to get my nail under the edge of the fabric an could sometimes really distort the shapes just trying to remove the backing paper. Beautiful project, Kitty.
LikeLiked by 1 person
Great tip, Yvonne!! I will try that! And yes, removing the backing papers and fusing took far longer than I anticipated! Perhaps the scoring trick will help speed the process. Thank you!!
LikeLike
What darling little love bugs! And thanks for the tutorial Kitty. It’s such a great idea. I think I’ll have Jake make one too!
LikeLike
Absolutely adorable and so very, very special. I am very tempted to wake DT and trace their hands. Just kidding. But I am definitely filing this one away!
LikeLike
Kitty, so adorable! What a treasure! I heard you talk about it on periscope, turned out fabulous! Merry Christmas!
LikeLike
What an awesome idea. You did a beautiful job. Now I want to trace my own hand and make one. LOL Merry Christmas.
LikeLike
I don’t have kids, but I love this idea! I’m saving it for the far off day when one of my children has hands instead of paws! 😉
LikeLike
Very creative, Kitty. As a grandmother, I know that this would be one of my most treasured pieces.
LikeLike
Great project Kitty! I made a similar version after hearing your idea on Periscope. I already had a bag of applique leaves I used instead of hearts and I also I zigzagged around all the pieces, which was a lot of work! I like your way better. Thanks for sharing, I enjoyed reading the tutorial, super idea! After I gift my, I will share and tag you in a picture.
LikeLike
That’s a great gift idea! Great tutorial too. Thanks for sharing – I’ll be filing this away for another day 🙂
LikeLike
Such an adorable project. Thanks for sharing. Makes me wish we had more than one kiddo for our grove.
LikeLike
What a clever and creative way to celebrate your kids! I will have to make a note of it for when my stepdaughter starts a family.
LikeLike
And then I remembered that I had made a very different sort of growing tree wall-hanging for a friend a couple of years ago.
LikeLike
This tutorial and the finished quilt are just precious! What a fun memento and way to involve kids!! Gonna file this one away for the future!!
LikeLike