
Today I’m excited to be a part of the Oakshott Lipari blog hop, your final stop for those of you who have been following along. So many fabulous projects have been made with the fat eighths bundle of the new Lipari line, so I encourage you to also check out the others along the hop, linked at the bottom of this post. Many thanks to Lynne and Michael at Oakshott for including me in the hop!
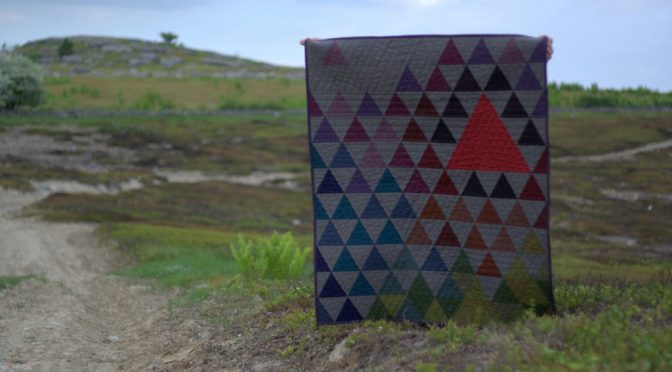
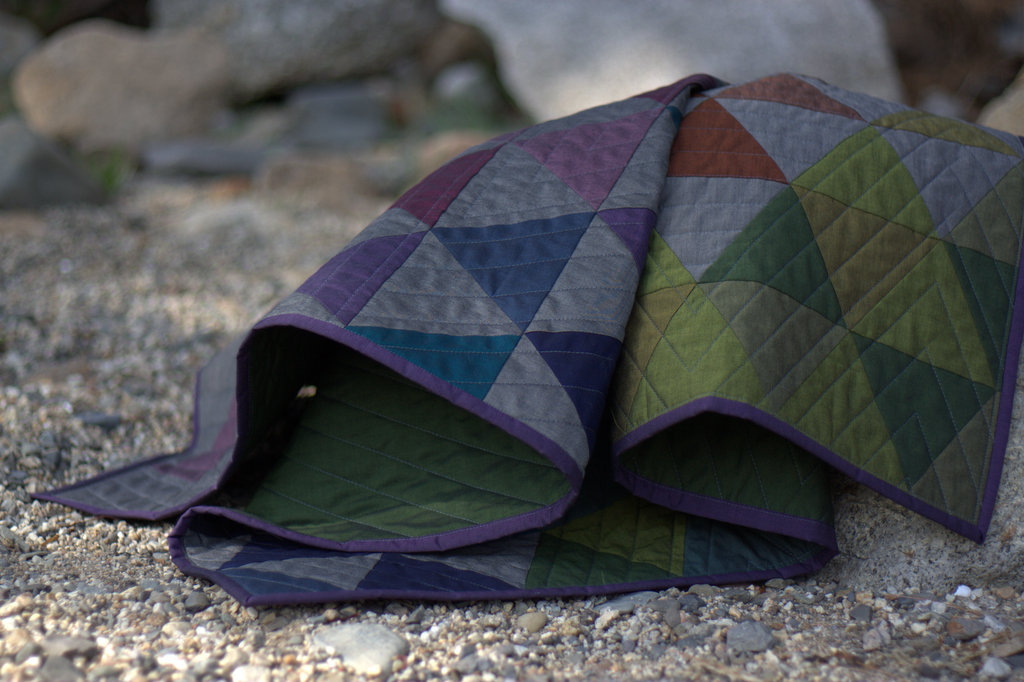
This was my first time working with Oakshott fabrics, and they are so luxurious! They are a woven fabric and feel almost silky to the touch. They feel more substantial than other shot cottons I’ve used, and the Lipari line looks iridescent since the warp is black and the weft is a bright jewel tone. These fabrics come to life when you see them in person–photos truly don’t do them justice. The Lipari line was inspired by volcanoes and the description from Oakshott says it best: “Lipari perfectly captures the primordial beauty of the Aeolian islands. Its luminous colours mirror cobalt seas, lush greenery, pink bougainvillea and shimmering sun; a beauty shot through with dark, fine-grained volcanic rock and black sand.” As soon as I read this description, I knew my quilt had to be a reflection of this volcanic inspiration. Thus, my Vesuvius quilt was born.
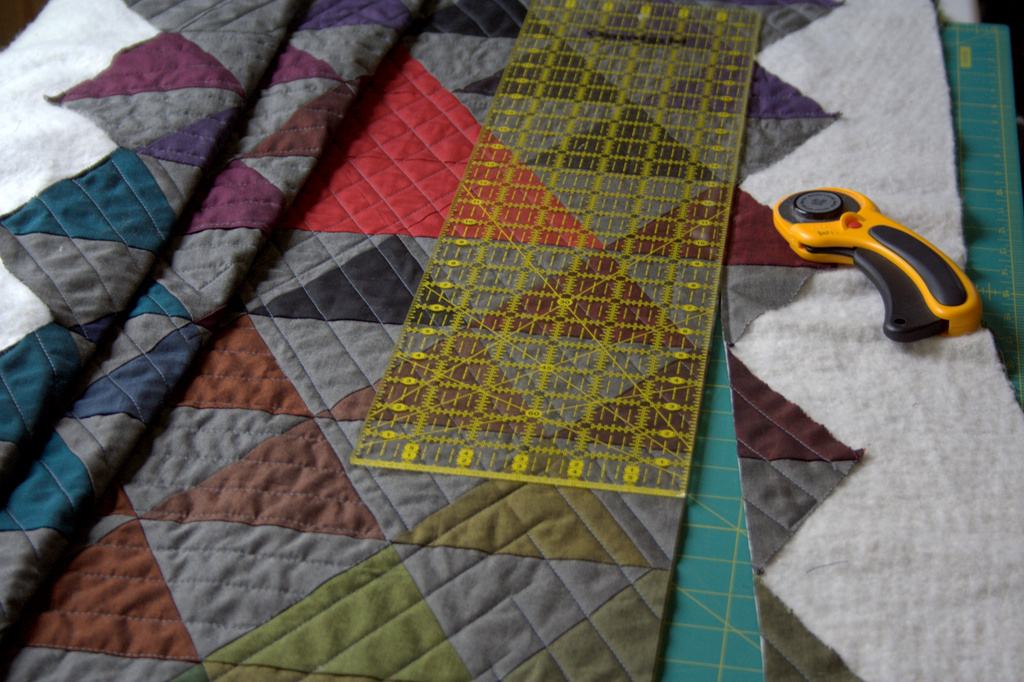
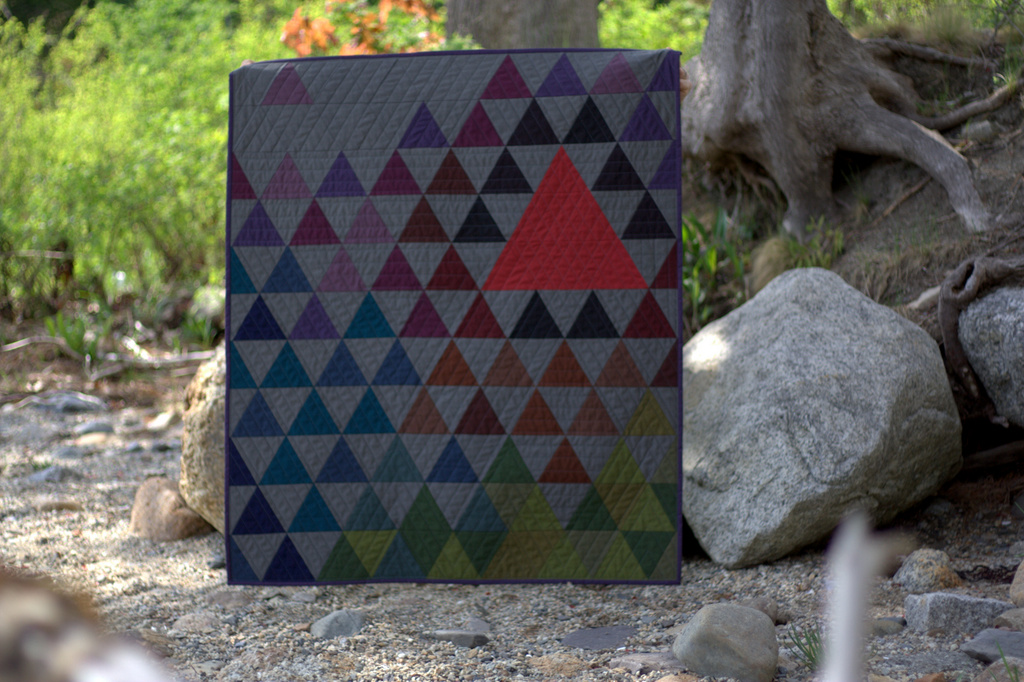
 I made my Vesuvius quilt with 60 degree triangles, to elicit the sharp peaks of the mountainous volcanoes. I pulled in some Ruby Red – Toledo for the molten focal triangle, and let the Lipari steal the show. I used my Sizzix die cutting machine to speed up the cutting process. I really wanted to photograph this quilt next to a volcano, but I had to settle for some blueberry barrens and a Maine coast beach.
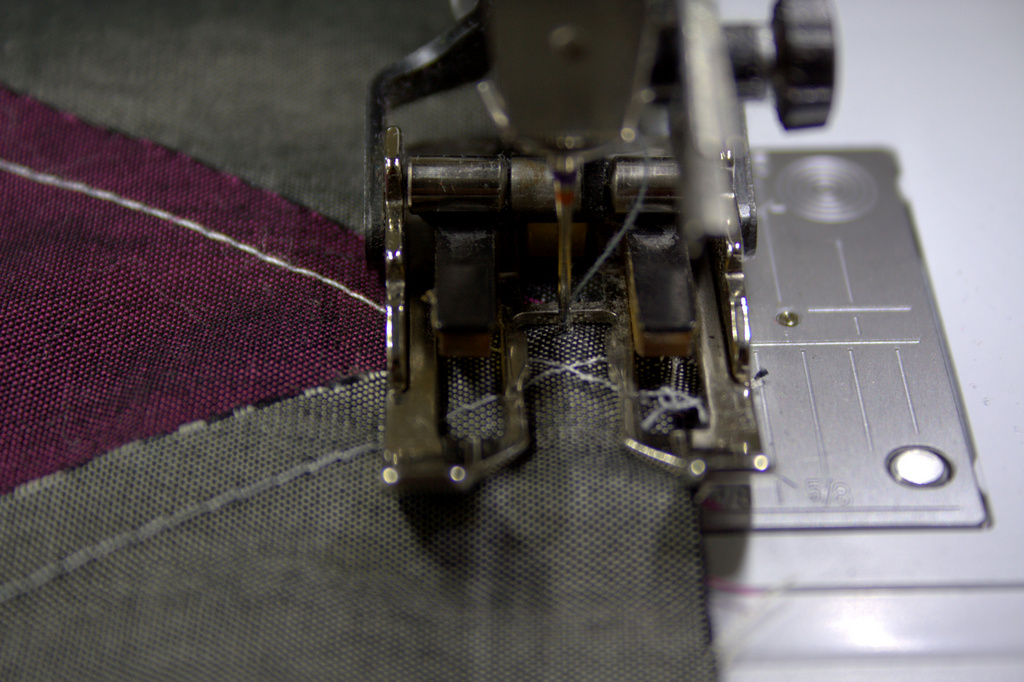
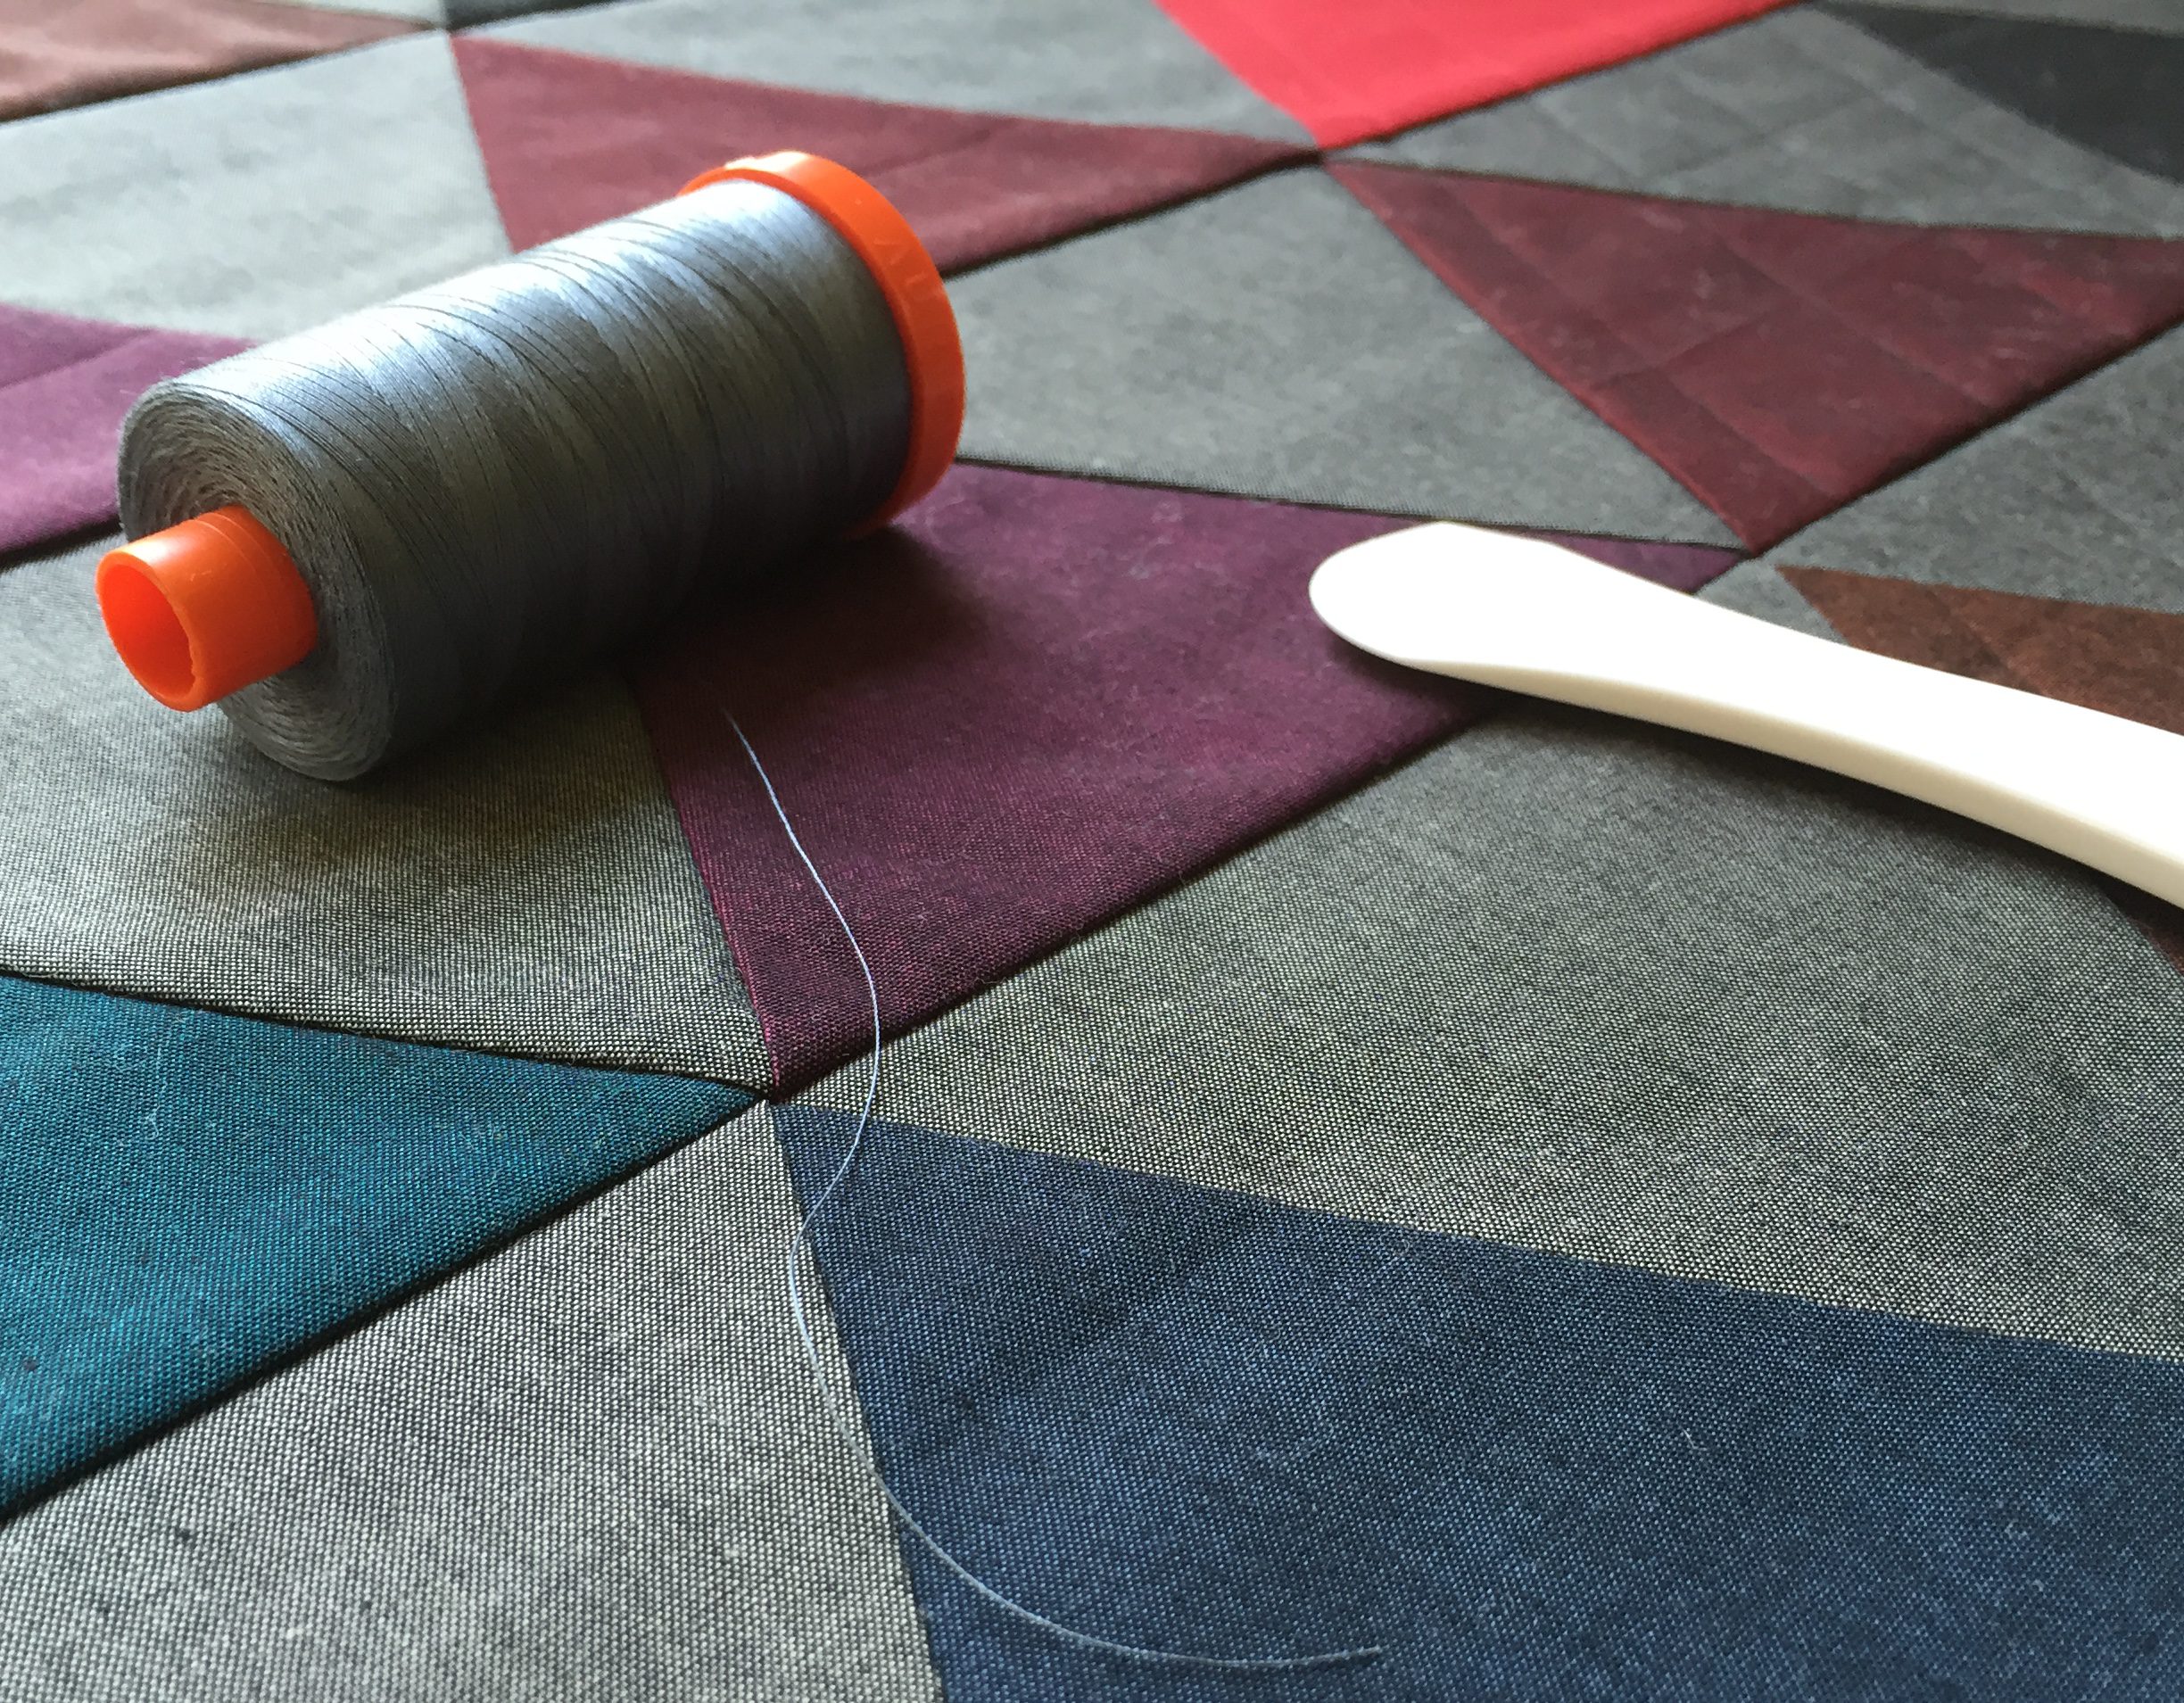
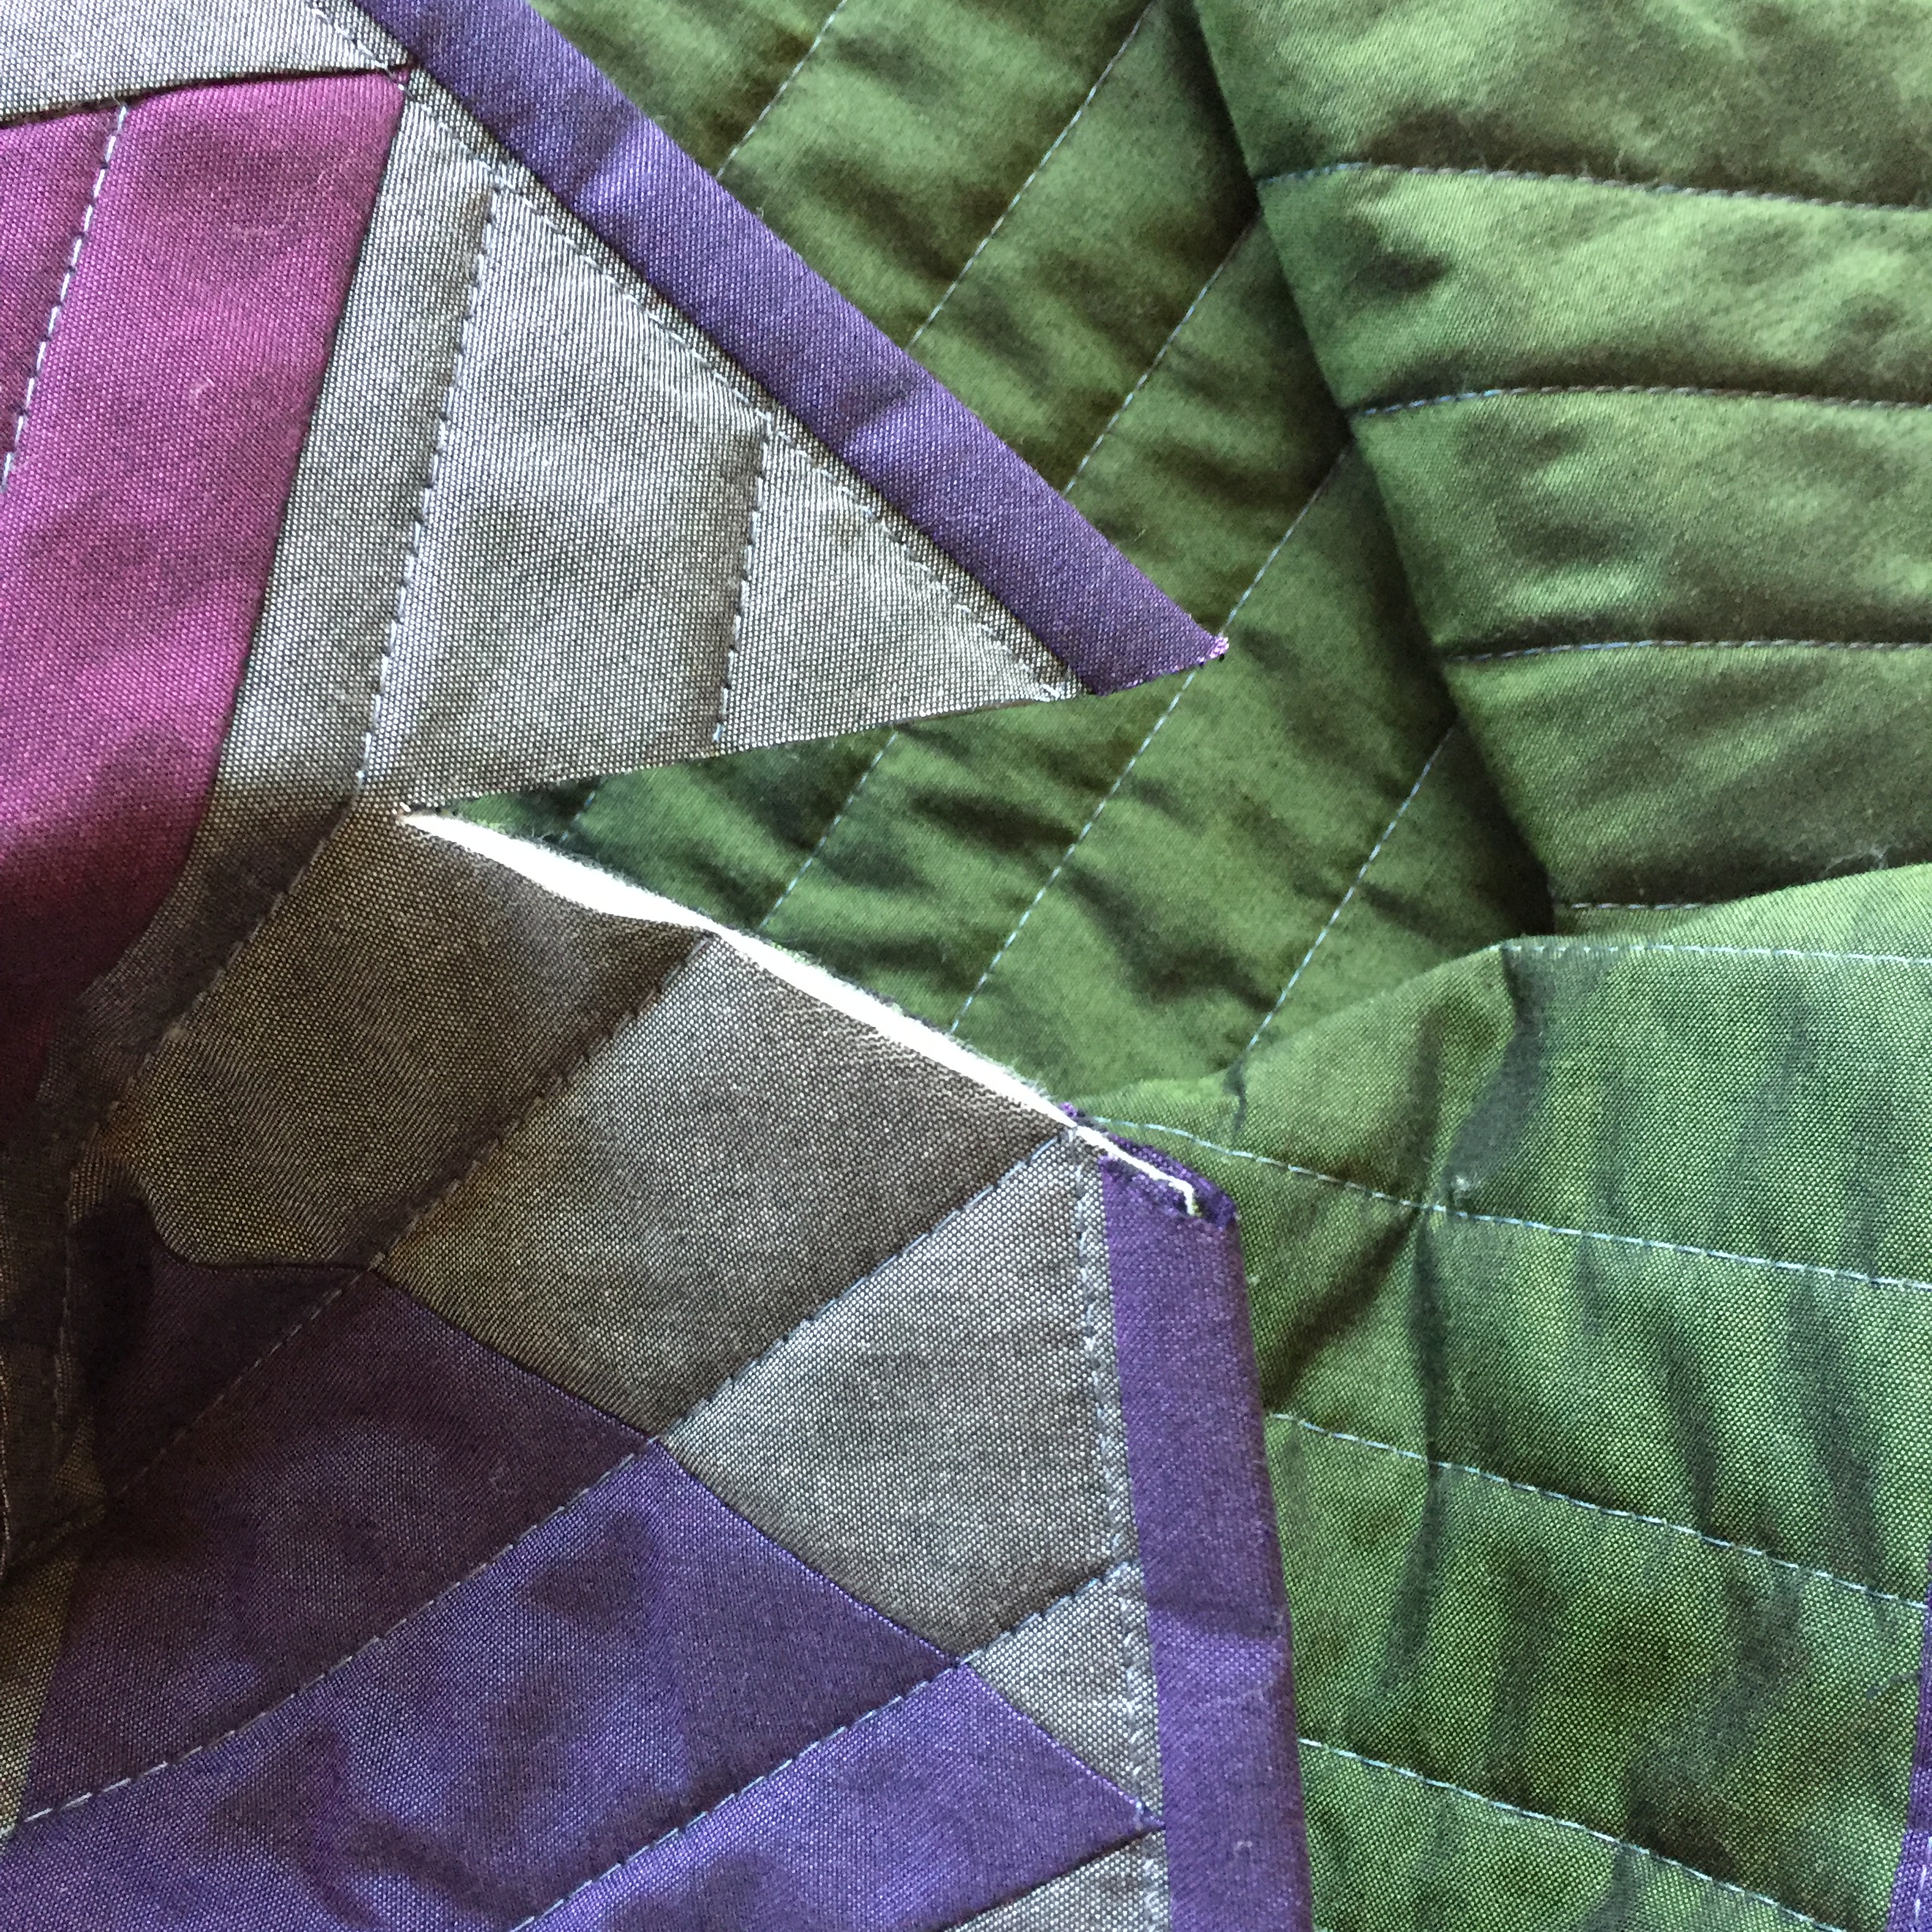
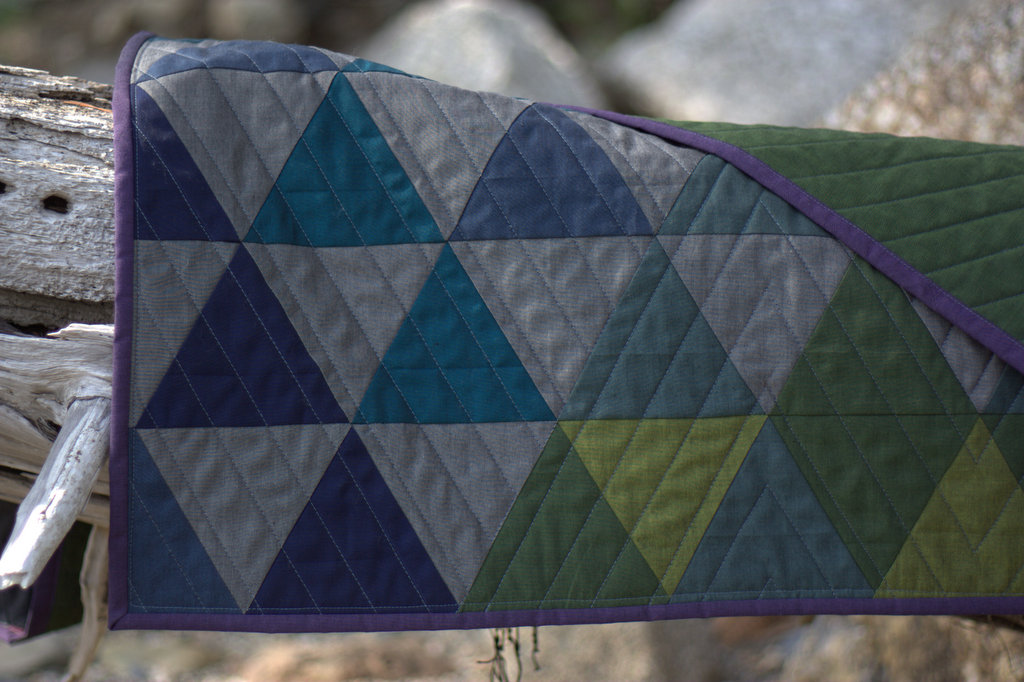 I quilted Vesuvius with 50 wt Aurifil thread 1246-Grey, which blended wonderfully with the Lipari Pollara (grey) I used as a background color. I used the walking foot on my domestic Bernina 560 to quilt straight lines 1″ apart, switching up directions in various sections of the quilt to provide movement and added interest. I LOVE how it turned out!
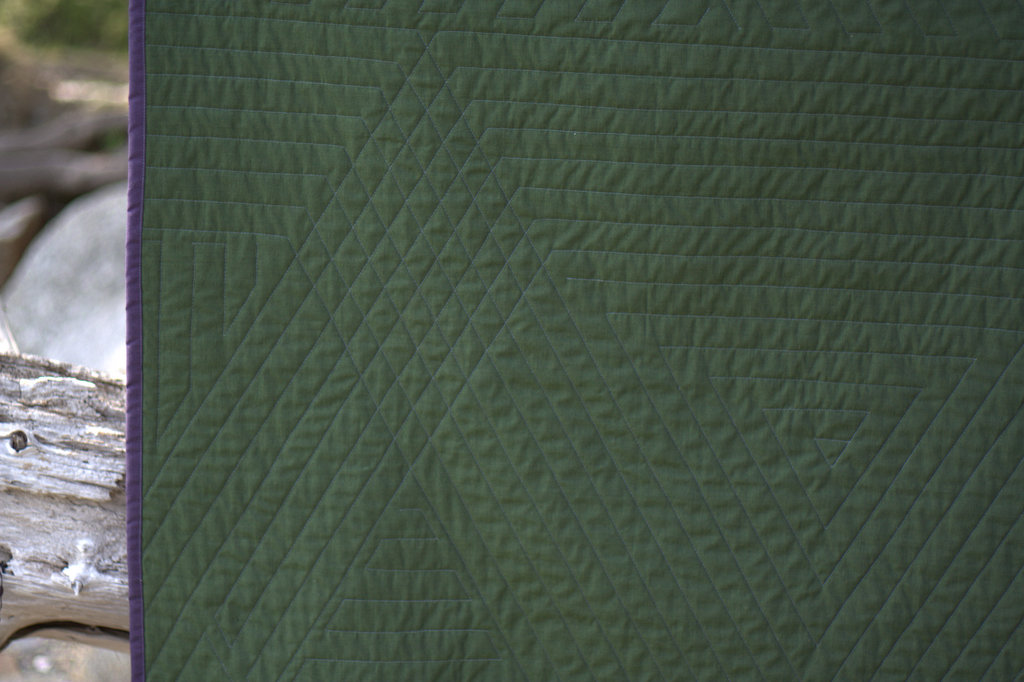 The Lipari Porticello (dark green) backing shows the quilting wonderfully, although it’s tough to get the full effect through photos!
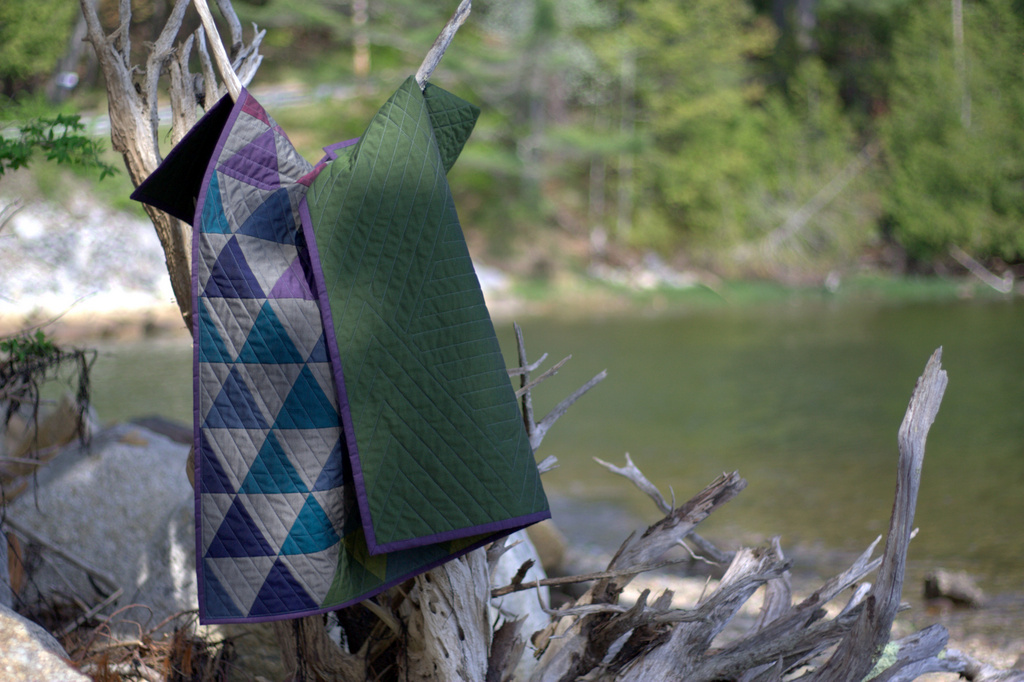
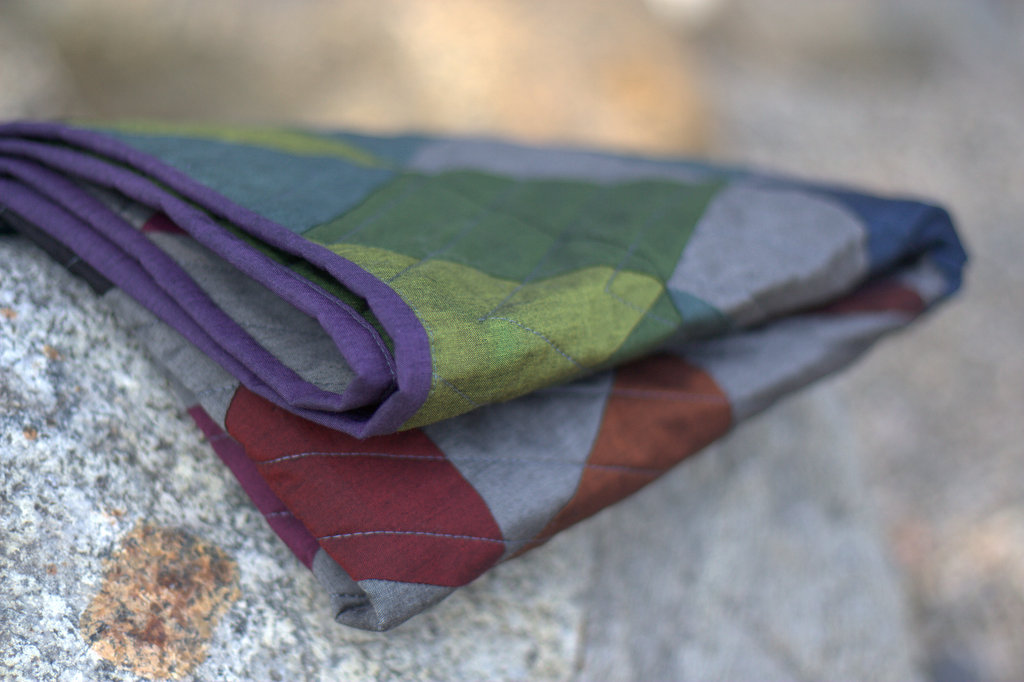
 I was torn on what color to use as the binding, but decided that Lipari Gallina (purple) frames it nicely.
 This quilt finishes at 36″x43″ so would make a wonderful wall hanging or sophisticated baby quilt. You could also add borders to make it larger.
Tutorial
Here’s how to make your very own Vesuvius quilt! (Note that Oakshott Lipari fabric is 54″ wide. Typical quilting cotton is approximately 42″ wide, so plan accordingly)
Materials
A fat eighths bundle of Oakshott Lipari
1/8 yard of Oakshott Ruby Red Toledo
3/4 yard additional Lipari Pollara (grey)-negative space
1 1/4 yards Lipari Porticello (dark green)-backing
1/3 yard Lipari Gallina (purple)-binding
42″ x 50″ piece of batting
Sizzix die cutting machine
Sizzix XL Triangle, Equilateral 4 3/4″ x 5 1/2″ unfinished die
–OR–
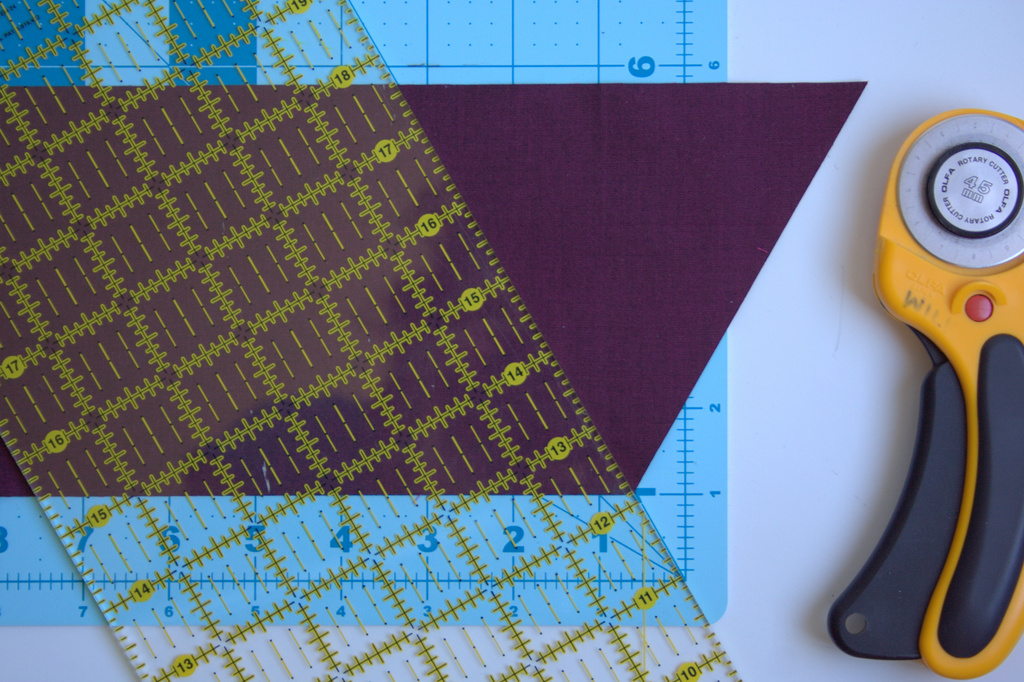
Rotary cutter, cutting mat with 60 degree lines, and ruler
Thread (I used Aurifil 50wt 1246-Grey for both piecing and quilting)
Sewing machine with a walking foot (I use a Bernina 560)
Rotary cutter
Hera marker
Pins
Small thread snip scissors
Cutting
Using your method of choice (see below for instructions for each method), cut the following number of triangles from each fabric:
88 grey (Lipari Pollaro)
9 red (Ruby Red Toledo)
From fat eighth Lipari bundle:
20 purples
27 greens/yellows
12 browns
19 blues
4 black-red
8 black
Using a Sizzix die cutting machine
I used my Sizzix Fabi and BigZ Triangle, Equilateral 4 3/4″ x 5 1/2″ unfinished die to speed up the cutting process.
 When using your sizzix, cut 5″ x width of fat eighth strips of fabric of each color, fold them over the die blade in the Sizzix cutting sandwich (bottom cutting pad, die with the blade face up, fabric, top cutting pad), and cut 9 triangles at a time. Note that the Oakshott fat eighths are 10″ x 27″, which are larger than a typical quilting cotton 9″ x 21″ fat eighth.
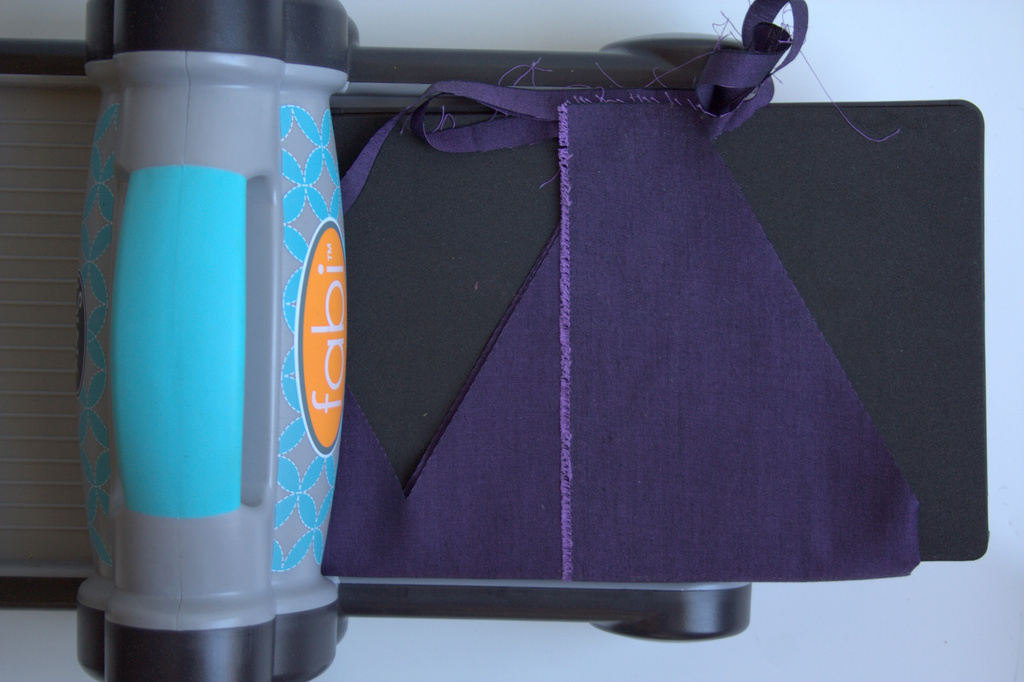 After passing each strip of fabric through the Fabi die cutting machine, you can reposition the remaining fabric and cut triangles from the “scraps”.
If you don’t have a Sizzix, read on to find out how to cut 60 degree triangles with your rotary cutter, using the lines on your cutting mat.
Using a rotary cutter and the lines on your cutting mat
First, cut strips 4 3/4″ by width of fabric. *Note: You can leave the fabric strip folded in half or doubled up if you’re using the width of fat eighth strips, allowing you to cut two triangles at a time!
 Find the 30 degree line on your cutting mat. Yes, we are making 60 degree triangles by cutting along the 30 degree line (You have a 90 degree square to begin, trim off 30 degrees, then you’re left with 60 degrees!)
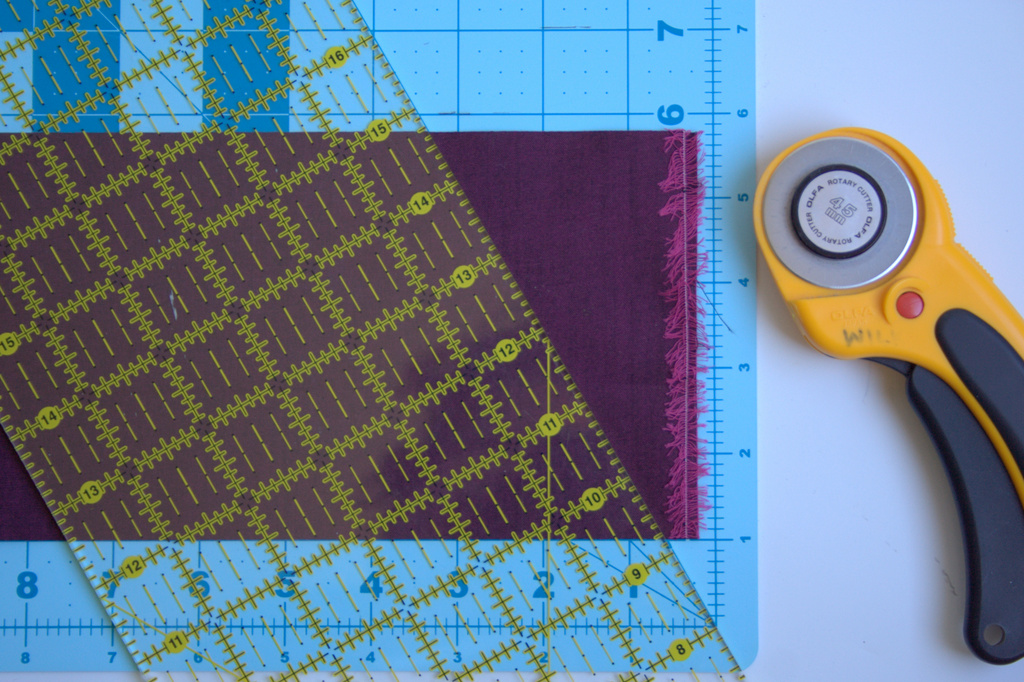 Align the bottom of your fabric strip along the 1-inch line. I use the 1-inch line so that you can see where the 30 degree line extends above and below the fabric. Place the edge of your ruler along the 30 degree line.
 Using your rotary cutter, cut your fabric on the ruler angle.
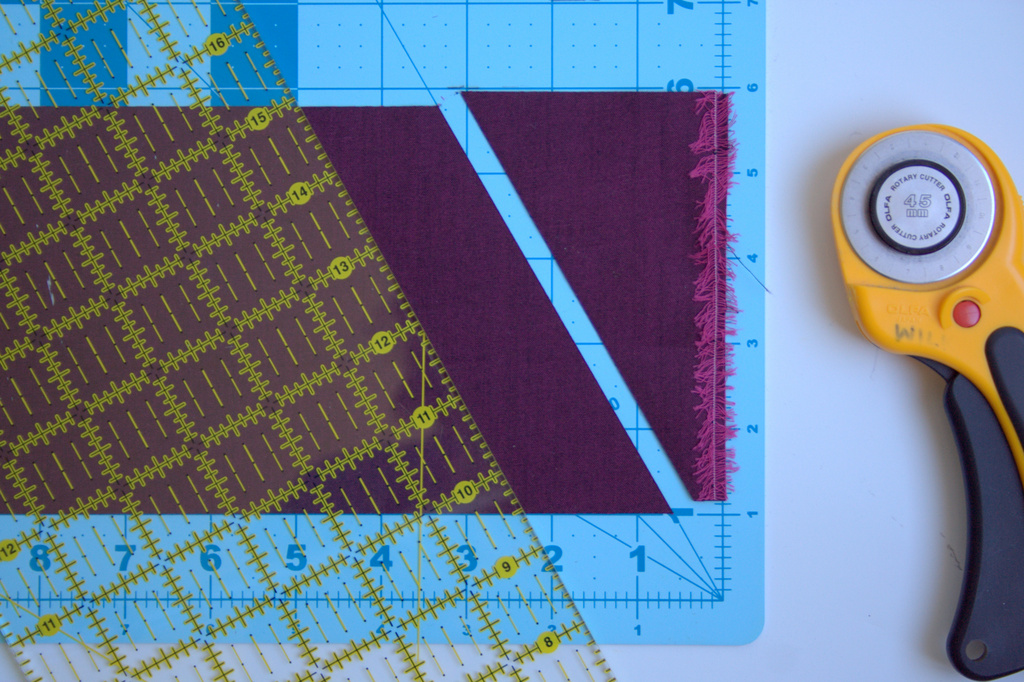
 Flip your fabric strip over, then align the bottom edge with the 1-inch line on your mat, so that the bottom point of your cut is on the 30 degree line.
 Again, place the edge of your ruler along the 30 degree line. Using your rotary cutter, cut your fabric on the ruler angle. You now have your 60 degree triangle, or two (2) if you kept your fabric strip folded in half. Cut as many as you need.
Piecing the Quilt Top
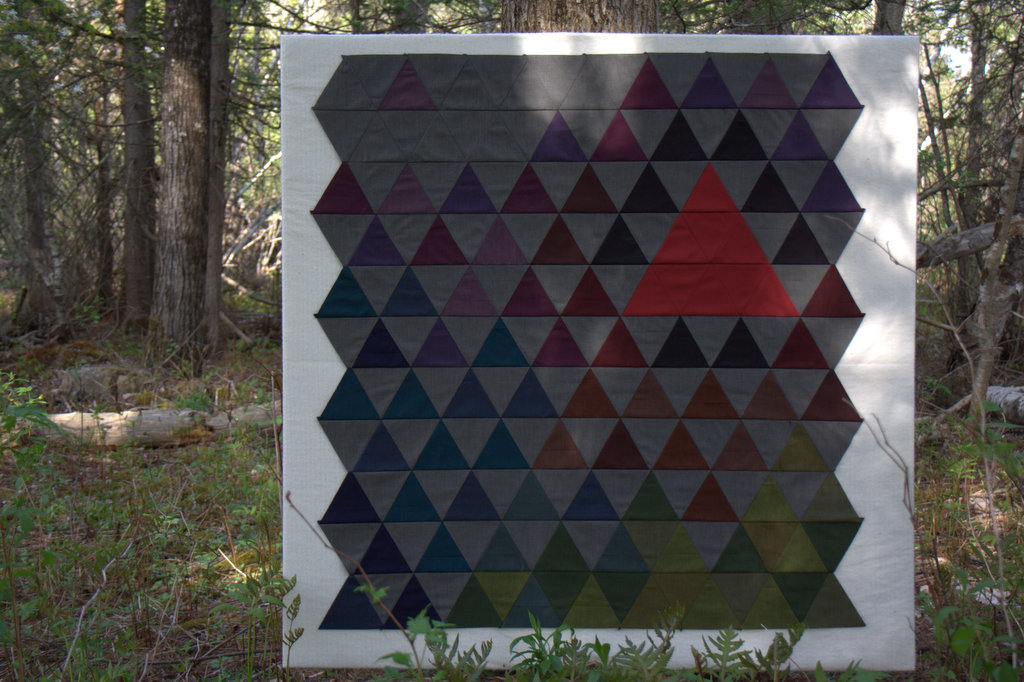 Once your pieces are cut, lay them out as shown. A piece of batting wrapped around a large wall board works well, but I have been often known to use my design floor to help with layout, too! (Sizing Note: if you want a larger quilt, you could add a row of grey (Lipari Pollara) triangles to the right and left sides before sewing the rows together to maintain the outer triangle points when adding borders. Then, trim square and add rectangular borders to the desired size.)
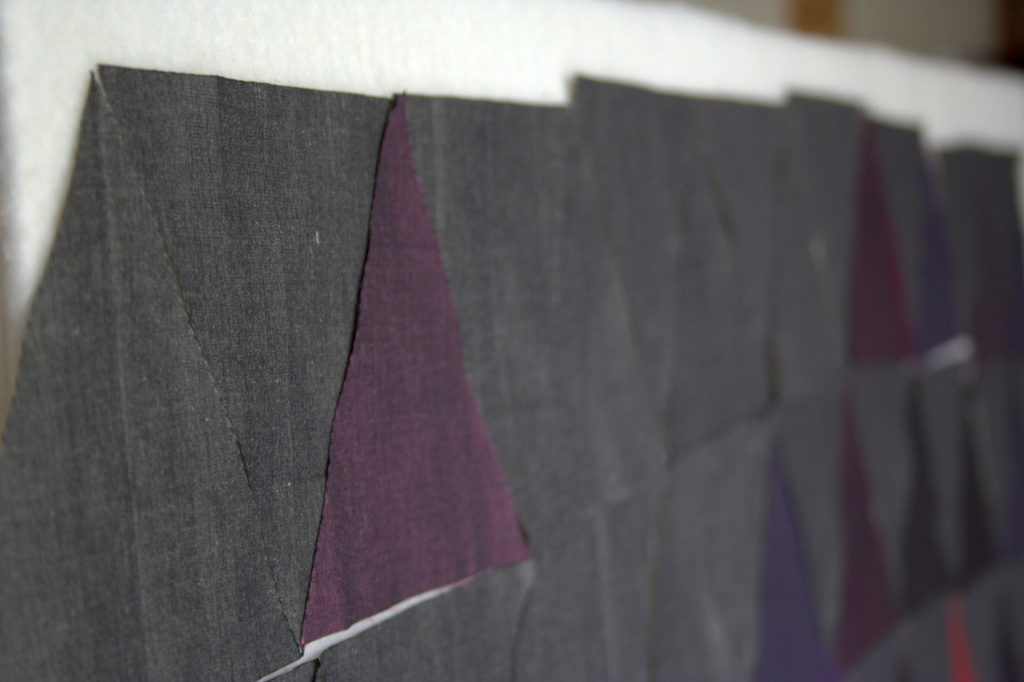
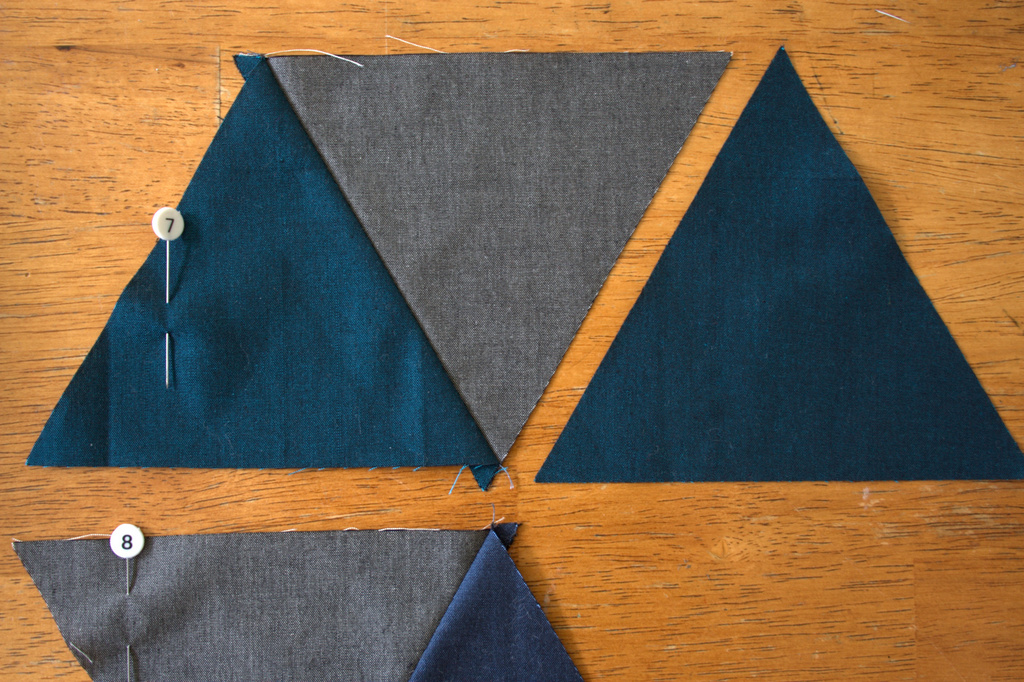
Be sure to keep the grain of fabric running top to bottom (the woven texture of the Oakshott Lipari makes this easy to do since the grain is clearly visible when the fabric is held up to the light). Once your pieces are laid out as desired, it’s time to sew them together! Chain piecing helps the process go quickly and smoothly. Here’s how to set it up.
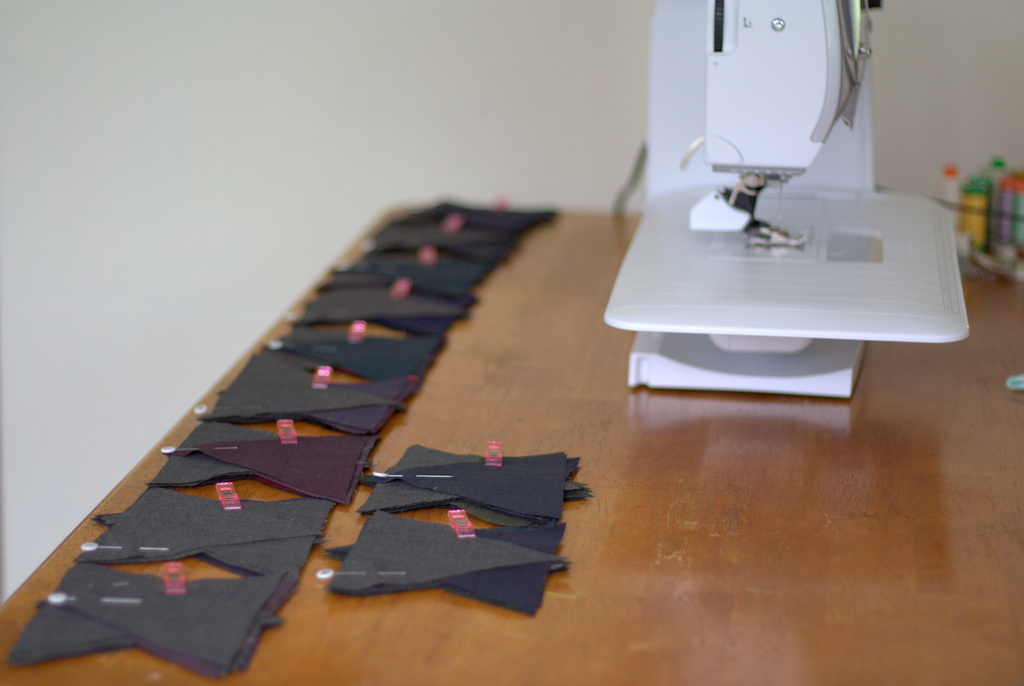
 Label each horizontal row. I began with 1 on the top and ended with 11 on the bottom and used pins to label the first piece in each row (Note that I labeled each row after stacking, so the pins aren’t visible in these photos).
 Carefully stack the triangles from each row, with the far left piece on top, and keeping the triangles facing the proper direction (this will help you keep them straight while piecing). For example, for row one, you will have the labeled first triangle piece from the far left on top, and carefully pick up each triangle across the row, adding it to the bottom of the stack.
 Once you have your row stacked, use a clover clip or similar device to hold the stack together.
 Gather all of your rows in this manner.
 Lay them out in order, making a clear mental note of what row is located where. You could label a sticker on the table next to each stack to help, although simply keeping them in chronological order works well for me. Let’s sew! (Note that a table next to you works better than having the stacks this close to the sewing machine. As you add pieces, your strips will drag your stacks around if you keep them here as shown!)
To speed up the process, we will be chain piecing (sewing without stopping) the first piece to the second piece from every row.
Note: Be sure to keep the pin labeling each row in the first block at all times!!
 Once you have all of your first pieces sewn to your second pieces, trim the threads to separate, and press. All these bias edges means this is a great time to practice pressing, and NOT ironing. Press: up, down, up. Great!
Alternate which side you press your seam for each row. I pressed odd rows (1, 3, 5, etc.) to the left and even rows (2, 4, 6, etc.) to the right. Pressing open also works well!
 Next, add the next triangle to each row, chain sewing again. You’ll be sewing the third triangle (which is now on top of each stack) to each row. Double check the number pin on the sewn row before adding the next triangle, since you want to be sure to keep your gorgeous layout intact.
 Continue chain piecing, trimming, pressing, and chain piecing again until all of your rows are assembled. As you add each triangle, stack those corners and everything will be right in line!
 Sew all of the rows together, pressing seams up toward the grey triangles. I like to pin about 1/8″ after each point where the triangle points will be matching up, and aim to sew *right* through the center of the seam-cross to make sure you don’t cut off any points when sewing the rows together.
Quilting & Finishing
Once your quilt top is pieced, baste as desired. I decided to quilt my quilt before squaring it up because of all of the bias edges. I used 505 basting spray and spray basted for the first time! I used Christa Watson’s design wall spray basting tutorial and can see why people love it.
 I decided to quilt my quilt with straight lines 1″ apart using the walking foot on my Bernina 560. I used a hera marker and a long quilting ruler to mark lines 1/2″ from some seams, and then 1″ apart from there. I sectioned the quilting in a few different sections, using straight lines 1″ apart but changing directions in each section. Lines intersect in the Ruby Red triangle, “exploding” out to the sides (like a volcanic eruption!?). The quilting lines don’t intersect anywhere else in the quilt. I really love the finished effect.
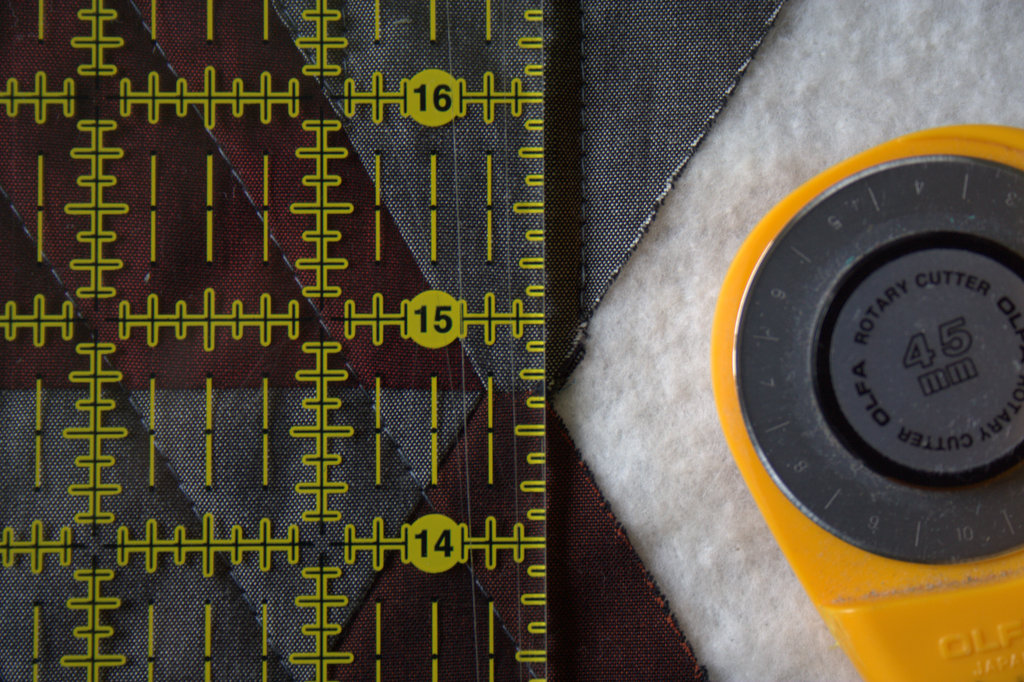 After quilting, it’s time to square up the quilt. Using a long, straight edge, trim 1/4″ away from the outer points so that you don’t lose any points when you sew on the binding. Use at least two sets of points to make sure your ruler is straight before cutting.
 Square up your quilt, trimming off the excess, then bind!
 Viola! Enjoy your Vesuvius Quilt, and please use #vesuviusquilt and tag me @nightquilter if you decide to make one.
Many thanks, again, to Oakshott for providing the fabrics for this project, and for including me in the hop. Make sure to check out the rest of the amazing Lipari projects:
5 May Allison Dutton allison-sews.blogspot.com
10 May Nicholas Ball quiltsfromtheattic.wordpress.com
12 May Helen Purvis archiethewonderdog.blogspot.com
17 May Lynn Harris thelittleredhen.typepad.com
24 May Jessica Skultety www.quiltyhabit.com
26 May Karin Jordan www.leighlaurelstudios.com
31 May Elisabeth Vaughan sharksdinner.com
2 June Kitty Wilkin nightquilter.com <— YOU ARE HERE
Thank you for following along the hop!
*BREAKING NEWS* Volcanic action alert
For those of you who follow me on Instagram, you may have seen the heart-wrenching fate of this quilt, that I so unknowingly aptly named “Vesuvius”: my nearly-four year old son cut into it in three places (along with a trail of destruction that included my Machinger quilting gloves cut into pieces and cuts into a big chunk of fusible fleece). With the great outpouring of support, commiseration, and suggestions offered by the fantastic community on IG, I’ve decided to make the cuts an added design element, another chapter in the story of the quilt, and sew either black or red patches over the cuts, making them into “fault lines”.
For now, though, I will put the quilt aside until I can dive into the repair with chuckles and reminiscence instead of lingering tears and frustration. I know that my son did not cut into my quilt maliciously, but it still is a difficult experience. I have made it known that if he ever wants to cut fabric again, he can tell me and I will help him make a quilt. We’ll see where it goes. For now, my Vesuvius Quilt (aka Max’s Fault Lines) is smoking and being buried by ash for a bit. It will rise again some day in the future.

So pretty! And a great way to show off the fabric. 😀
LikeLike
Oh, Kitty! It’s a beautiful quilt, and will remain so in spite of Max’s ‘fault lines’. I’m glad you’re able to set it aside for a while and work on it when you’re more emotionally ready!
LikeLike
What a gorgeous quilt. My heart clenches just a bit when I see the cuts into it, but you are wise to let it be until you can chuckle about it. Look forward to seeing Max’s fault lines. Every quilt has a story!
LikeLike
That is beautiful. I would have cried and screamed if one of my grandchildren had cut into a finished quilt. Your piecing is perfect. I’m impressed.
LikeLike
Beautiful quilt! I’m sure it will still be beautiful when you patch up those fault lines 🙂
LikeLike
It’s still a beautiful quilt
LikeLike
What a beautiful quilt – a great way to showcase the fabric, and you are very generous in showing us how to make our own. So sorry about the mishap. One day, a long time from now this will be an interesting story you can tell to your son’s future bride. I can see how you would want to put it away for now until you are ready.
LikeLike
Great quilt. I’m sure you’ll find a creative way to fix the fault lines.
LikeLike
A gorgeous quilt, Kitty! And it still is and will continue to be–and one you will never forget, too. (Maybe orange lava flow mending from an “off screen” volcano? It could be loaned to your daughter’s school to demonstrate the inside of a volcano, just by peeling back the cuts? . .) So did he use a pair of scissors (I hope!) or did he go for the gold with a rotary cutter and no ruler? I can see your hands flying with ASL as you responded to his misadventure. Deep breaths, glass of wine, lots of sleep are in order 🙂
LikeLike
Very very nice very amish looking…ty for sharing your idea… happyness04431@yahoo.com
LikeLike
What an excellent, thorough tutorial Kitty. Oh Max, you stinker! You know I’m down with the volcanic references, but fault lines? Not so much. Good luck with the repair! I guess the good news is that he didn’t hurt himself on the process…
LikeLike
I want to make this one! So beautiful! It almost shimmers. Sorry about the scissors incident. It is a bummer.
LikeLike
Ack, it’s wonderful that he is interested in what you do and wants to participate. Obviously some more judgment of what a completed Quilt looks like is needed.
LikeLike
oh no Kitty! my son did something like that when he was that age as well 😦 It is a beautiful quilt and Thank you for the tutorial and for including regular rotary cutting instructions.
LikeLike
Lovely quilt and I love the idea of fault lines – someday it will be a wonderful family story! I love your tutorial and photos – excellent! I once had my fav dog do her business on a qullt top while I was laying it out….I turned the air abit blue for a few minutes….got it cleaned up and got her done….but Sandy the Shitty Zui was banned from the sewing room for quite some time after that!!!
LikeLike
Gorgeous! I have heard a lot of lovely things about oakshott cottons, they really look lovely. And oh my, the fault lines!! I’m sure you will patch them wonderfully when the time I right. 😊
LikeLike
Amazing quilt and incredible tutorial – thank you so much
LikeLike
What a great quilt you and Maxwell have created together! Love it and its’ story 🙂
LikeLike
Wow, such a beautiful quilt! I love your organization with the assembly line for sewing the rows together. Thanks for such a detailed tutorial.
LikeLike