Foundation Paper Piecing is one of those things that when first encountered, may seem daunting enough to send you running for the hills. But once the general concept is grasped, paper piecing opens the door to a whole new world of quilting and fabric-play. Trust me, it’s worth giving it another go. As with anything, the best way to get more comfortable with foundation paper piecing is to practice, practice, practice, and then practice some more. Today I thought I’d share my process with tips along the way, in the hopes that it helps clarify the foundation paper piecing process.
For me, once I wrapped my brain around the fact that I was sewing something backwards while looking through a mirror, it all clicked. I’m a very spatial person, so once I could visualize that the picture was being created on the BACK, I was fine. Yes, the lines along which you sew will be on the back, or wrong-side of your sewn design. Think about that for a minute, and then let’s begin. Take your time, and have FUN!
Basic Foundation Paper Piecing Tutorial
First of all, why paper piecing? The ability to create life-like pictures with fabric is what first got me hooked on foundation paper piecing. Once I got the hang of it, I realized many more benefits to paper piecing:
- No other method results in such precision and accuracy when sewing. You can make two blocks that are EXACTLY the same without too much muss or fuss about seams.
- It is a great way to use up scraps.
- My favorite perk of paper piecing is that it gives me a way to create gorgeous gifts for family and friends without the time invested in sewing an entire quilt. Paper piecing patterns are perfect for wall hangings, table runners, tea cozies, mug rugs, pillows, bags, and even as framed art.
Convinced? Let’s get started!
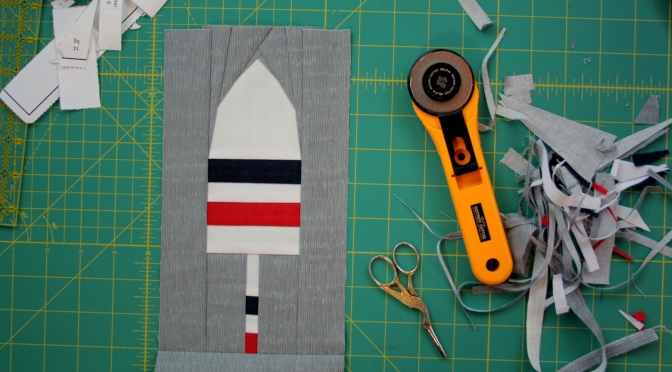
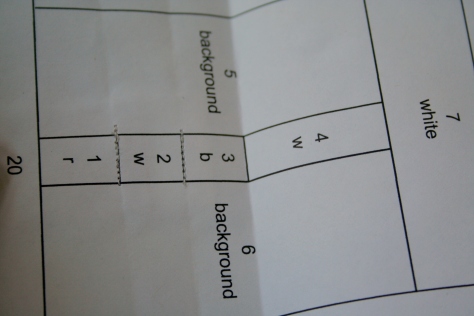
1. Choose a pattern. I am using my Buoy 1 pattern for this tutorial, since it’s fairly straightforward and consists of only one foundation piece. Summertime is calling my name, so this nautical pattern will soon become a pillow perfect for a beach house or someone’s nautical nursery. Buoy 1 used to be on Craftsy but is now no longer available, so you will need use another beginner pattern of your choosing. My available foundation paper piecing patterns are located on Payhip.
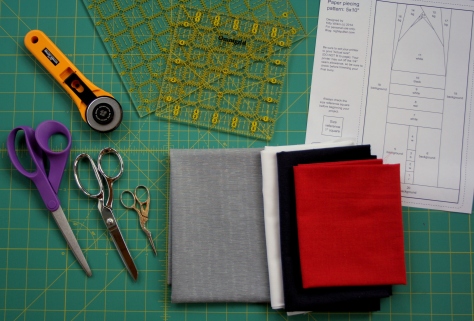
2. Assemble your tools. You will need:
– pattern & paper (I use regular printer paper. Some prefer velum or tracing paper)
– fabric & thread (I love Aurifil)
– rotary cutter and mat
– scissors (be sure to use non-fabric scissors to cut out your pattern. I suggest having fabric scissors, craft scissors, and small scissors for trimming threads)
– ruler (add a quarter rulers work well, but so do any quilting rulers with a 1/4″ measure)
– iron and pressing surface
– sewing machine
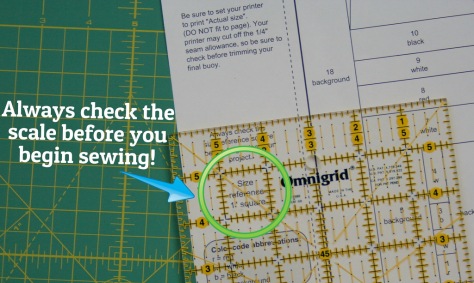
3. Print the pattern with your printer set on “Actual Size” and check the scale. ALWAYS check to make sure the pattern is printed to the correct scale before beginning to sew.
Cut out pattern using craft scissors. Many patterns have a dotted line showing a 1/4″ seam allowance on the pattern. Be sure to check that the seam allowance is included, and if it isn’t, add it on before you cut.
*Here, some people like to color their pattern with colored pencils to help with accurate fabric piecing. I only do this for complicated patterns or when I am using different fabric colors than indicated on the pattern, but you are welcome to get out the colored pencils and do some coloring here if you want!*
4. You’re ready to begin! Cut fabric pieces (or find scraps) to fit spaces 1 and 2 on the pattern. Be sure to include a 1/4″ seam allowance on all sides. Paper piecing is kind of like paint by number, but with sewing, and always in order. You start with piece 1, sew on piece 2, then piece 3, etc.
*When cutting fabric for paper piecing, I am generous in my cutting. I cut pieces that are amply large enough to cover the space and seam allowance and then some–lots of wiggle room. Yes, it may waste a bit more fabric, but it makes the process a lot smoother. To me, smooth (no seam ripper required) sewing is worth more than a few tiny scraps of fabric. Also, when you trim your seam allowances, any large pieces of excess fabric can be used for other pieces of the pattern. Go big!*
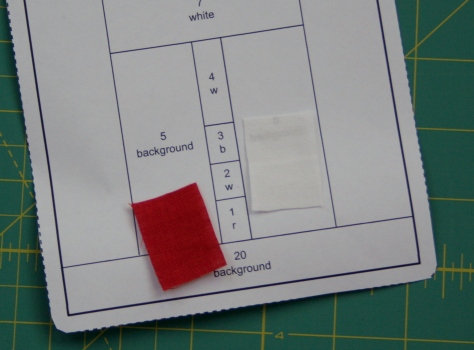 5. Here’s where the spatial part comes in, so get ready. Remember, you are using the paper foundation to help you make the pattern on the back, as if you are looking through a mirror. Ready?
Place the fabric for piece 1 on the back of the paper, wrong side of the fabric facing you (against the paper). Hold it up to a window or a light-box to ensure the fabric fully covers the #1 space, plus seam allowances.
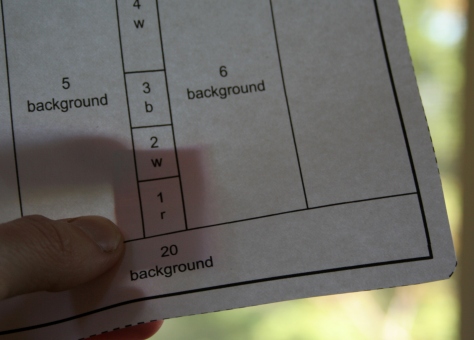 6. Holding fabric 1 in place, position the paper so that the printed side is away from you. Take the fabric scrap for space #2 and place it right side down, on top of fabric 1. Be sure the seam line between 1 and 2 is covered by both fabrics, holding up to the light if needed. The fabrics should now be right sides facing each other, and when you sew along the seam line and fold fabric 2 up, it should cover the #2 space plus seam allowances.
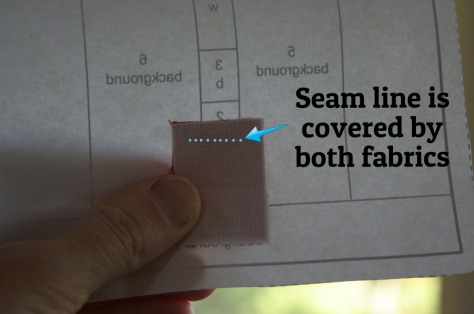 *Before you sew, shorten the stitch length on your sewing machine. I set mine to anywhere between 1.4 and 1.5. That way the paper is very easy to remove at the end.*
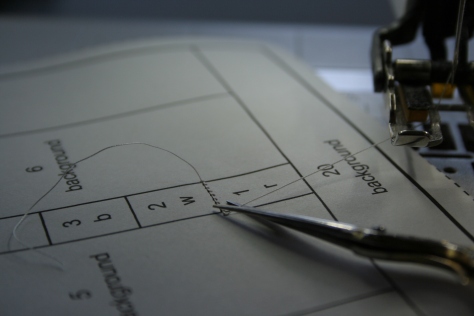
7. Holding both pieces of fabric in place, sew along the line between spaces 1 and 2, with the paper on top. Some people like to pin or even glue their pieces in place before sewing, since the fabric is underneath the paper. I personally just carefully hold them in place with my finger. I haven’t had a problem yet, and it’s one less step if that works for you.
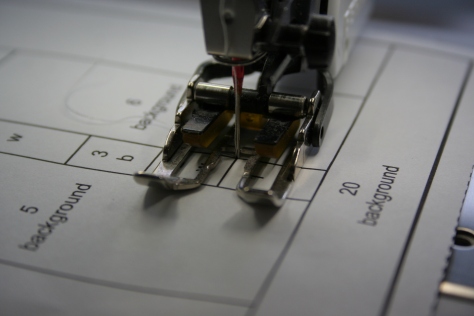 Accuracy tip: Lower the needle by hand for the first stitch, ensuring that your sewing will be straight along the line. Back-stitch for one stitch at the end to secure your threads.
8. Trim thread ends. (If you want to make yourself a cute little thread catch, I have a free tutorial HERE!)
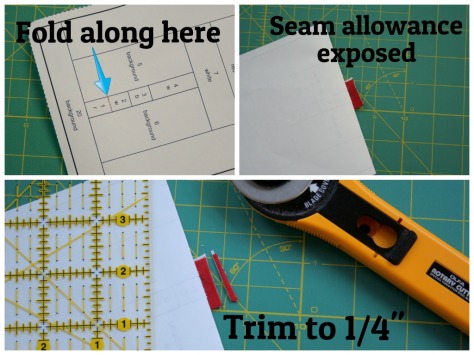
9. Fold the paper down along the seam you just sewed, and trim the fabric to 1/4″.
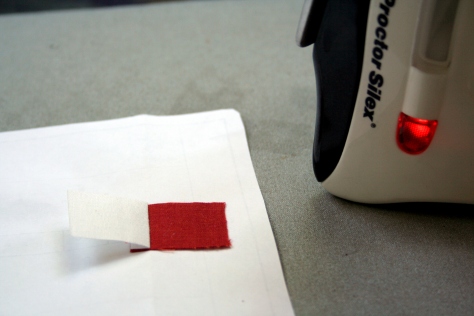
10. With the foundation paper flat and unfolded, press and set the seam with a hot iron (no steam). Finger press fabric 2 up to cover its space and press again.
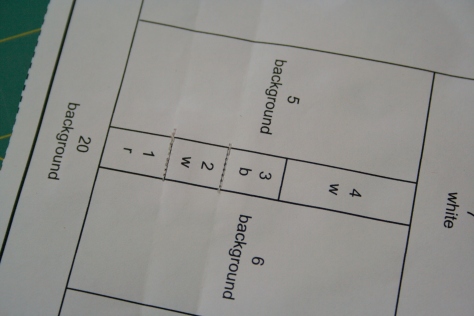
When you hold the paper up to the light, you should see that fabric 1 covers the #1 space and fabric 2 covers the #2 space, with seam allowances.
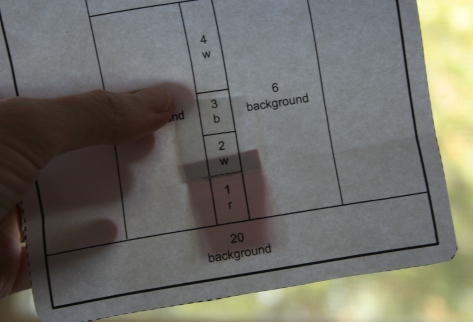 11. Continue this method for the rest of the pattern pieces. Cut, line up, sew, fold & trim, press. Cut, line up, sew, fold & trim, press. Repeat.
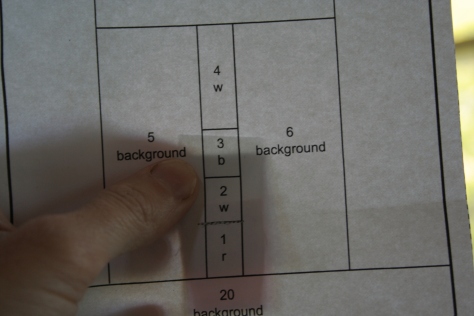
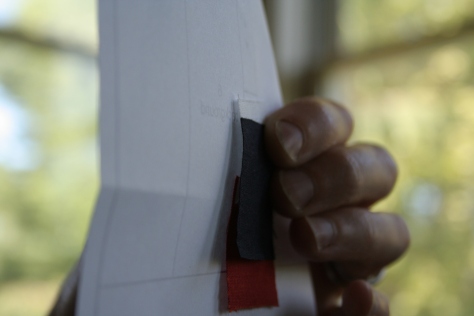
If you’ve got the hang of it, you can skip the next few parts and just scroll down to the finishing steps. For those of you who run into tricky spots along the way, here are some additional tips to help smooth the process.
Tips for Lining Up Seams:
If you are truly generous in your fabric cutting, this tip is not as necessary since you’re bound to have enough fabric even if your seams end up being larger than 1/4″. However, if the frugal part of you just can’t cut those fabric bits ginormously, here’s a tip to get accurate 1/4″ seams to conserve fabric. Note that this works best for straight-forward seams, and not nearly as well for long, skinny, tricky angles (I’ll address those in a bit).
For this example, I have just sewn on piece 3, and I’m getting ready to sew piece 4.
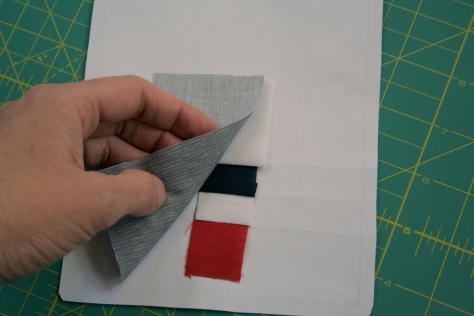
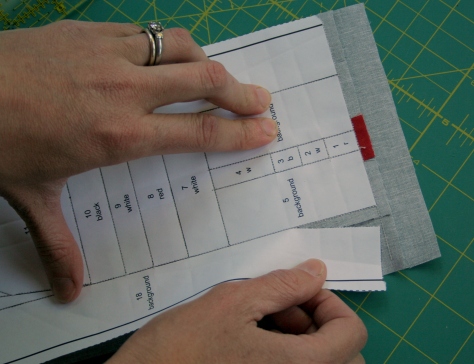
First, fold the paper along the seam line between pieces 3 and 4.
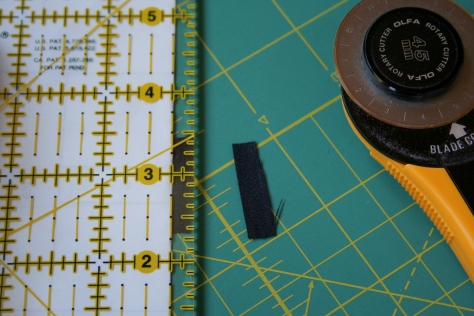
With paper folded over, trim the excess of piece 3 to 1/4″ beyond the fold. This will give you an accurate edge with which to line up the edge of piece 4.
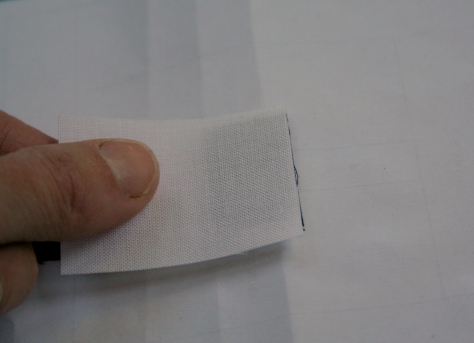
When lining up piece 4 (white) with the edge of piece 3 (black), if you match the edges, the seam will be exactly 1/4″. Note that the right side of fabric 4 is facing the right side of fabric 3. Hold in place, sew, and you’ve got as close to a perfect seam as you’re going to get!
Tips for Using Directional Fabrics:
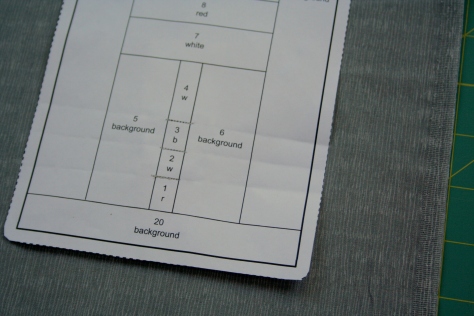
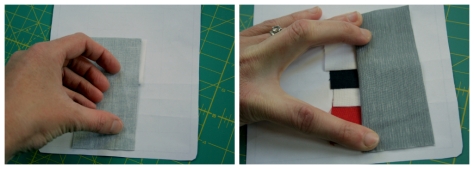
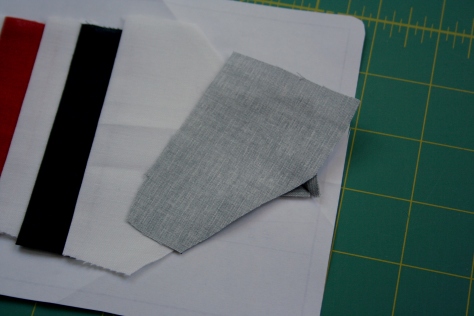
Using fabrics without a directional flow is fairly straight-forward, but if you are using a fabric with a directional pattern that you’d like to keep consistent, it takes a bit more forethought when you cut. First, line up your pattern and your fabric to decide in what direction the fabric should go. To cut the fabric, position the pattern with the printed lines up, and the fabric wrong side facing up. This way, since you are creating your pattern on the back, the shape of the fabric piece will be accurate (note that the above photo shows the fabric right side up, before pieces were cut).
Once your piece is cut, proceed as usual, paying close attention to the direction of the fabric. Remember, right side of fabric piece is placed facing the right side of the emerging picture, on the wrong side of the foundation paper.
Until you get the hang of aligning the fabric correctly, it’s a good idea to check the direction of the fabric before sewing. Unpicking paper pieced (tiny stitches!) seams is less than desirable (trust me, I know!). To check the fabric direction, simply place the fabric wrong side down, hold along seam line, and fold back. Once you are sure the direction of the fabric is the way you want it, fold it back and sew.
Tips for Tricky Angles:
Many angles in basic paper piecing patterns are fairly straight forward. Sometimes, though, you have an angle that really makes you crunch your brain to properly line up the fabric before sewing so that it fully covers the necessary space with seam allowances. Rather than sew, unpick, sew, unpick, sew, unpick, here are some tips to help get it right the first try.
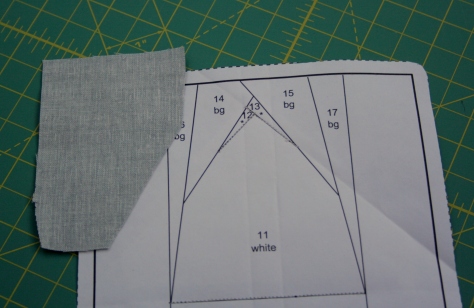
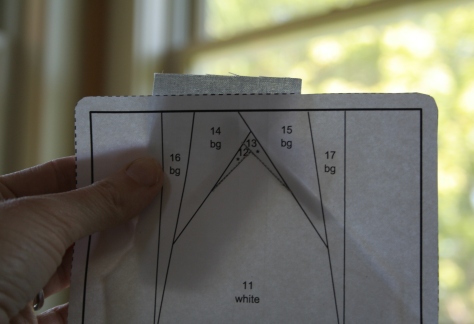
Here I’m trying to piece section 14. When cutting my fabric piece, I’ve been generous with size, and included the angle of the seam I’m about to sew. Note that the fabric is wrong side up, with my foundation paper right side up.
The fabric piece generously covers the space needed, with lots of wiggle room. The angle cut into the piece is key, since that will help align the seam correctly. If just eyeing the angle while cutting doesn’t work for you, you can put your pattern paper on top of your fabric, and using a Herra marker, deeply mark the seam line. Add 1/4-1/2″ to all sides and cut your fabric piece.
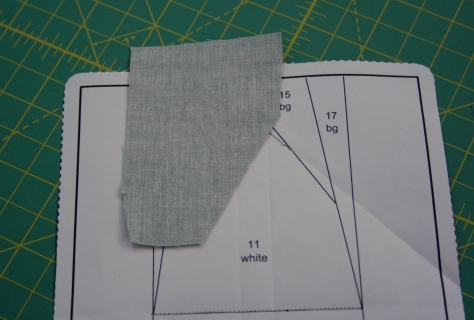
Holding it up to the light, I can see that my fabric piece covers the space, extends amply beyond the seam allowance, and that the general angle of the seam line is consistent with the angle of the fabric piece.
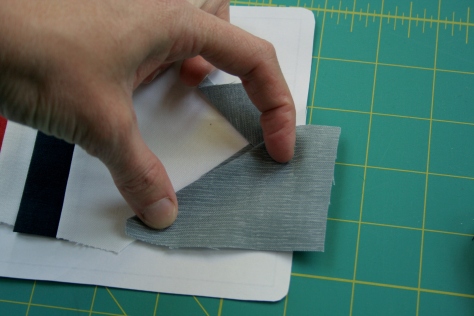
Here’s the tricky part. Placing your fabric right side facing the wrong side of the foundation paper, line your angled seam edge with the seam line on your block. It will look wonky, and may seem like it is headed in the wrong direction.
Fold along the seam line to ensure the fabric will cover the correct area. Once satisfied that it’s all lined up properly, fold back and sew the seam. With particularly wonky angles, I sometimes pin along the seam line, both to ensure I’m accurately checking the fold, and to hold the fabric in the proper place before sewing.
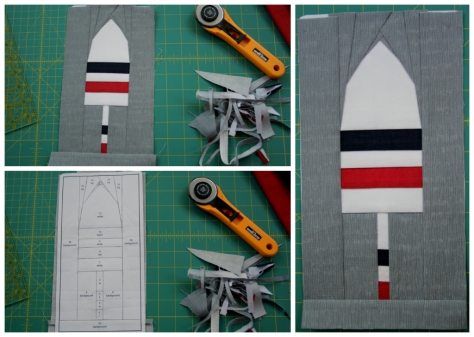
So now you’ve got the basics of foundation paper piecing! Once your entire block is pieced, square up the edges being mindful to keep the 1/4″ seam allowance around the block if you plan to sew it into a quilt, pillow, or just about anything else.
I often will leave the paper on if I plan to sew the block to another paper pieced block, since the 1/4″ seam allowance line helps me with accurate sewing. If you are already a pro at 1/4″ seams or are planning on using a single block for your project, now comes the fun part–removing the paper!
To remove the paper, gently tear away, holding the main block in place and pulling gently away and to the side, similar to how you would tear any perforated piece of paper. With your narrow stitch length, the paper should come away easily.
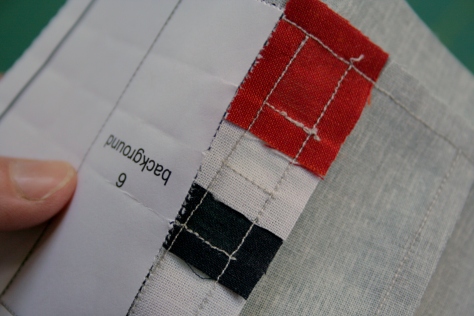 Once one side of the paper is off, the other side often will just pop out. Go slowly and tear gently to ensure your seams stay tight. If you end up with bits of paper stuck in the seams, carefully use blunt tweezers to remove the final bits. Alternately, I’ve heard that spraying the paper with water helps with removal. I haven’t had to try it yet, though, so can’t vouch for the method.
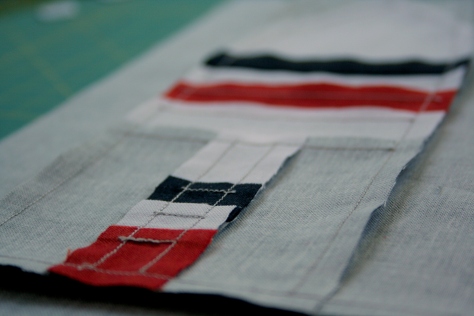 I just love the backs of paper pieced blocks. The precision and accuracy, all the little seams that are proof of my cut, line up, sew, fold & trim, press marathon… they make me happy. Take a good, long, admiring look at the back of your block, and then flip it over and admire your finished block. Gorgeous!
I hope this tutorial was helpful, and that you enjoy paper piecing as much as I do. Coming soon on my blog, I’ll talk about what’s next; now that you’ve made your paper pieced block, what can you do with it!?
Do you have any other tips for beginner paper piecers?

What an awesome tutorial! I’ve made a few paper pieced quilts but this makes me want to go back to it. I’m pinning this for inspiration!
LikeLike
Wonderfully detailed tutorial. It covers everything I know about paper piecing (which is admittedly a *very* new technique for me). The biggest thing for me is to remember to set my stitch length to be small… and then to increase it again when I go back to regular piecing!
LikeLike
Oh great!! I’m glad you found the tutorial helpful!! The stitch length change is SO key, and I think is what helps me to enjoy the paper removal part so much. Many people dread that last step, but with an itty bitty stitch length, it’s a walk in the park! Since you mention it, too, if/when you do a more complicated paper piecing pattern that includes multiple foundation papers that need to be seamed together, lengthen your stitch length a bit before joining. This way, especially when there are crucial points to match, if/when you need to use your best friend seam ripper to re-align parts, it’s a MUCH more reasonable task than ripping stitches with a 1.2 length!
LikeLike
This is soooo helpful. Thank you for such thorough explanations and tips along the way. I took a paper piecing workshop at a retreat this spring, but I think I had forgotten much of what I learned, so your tutorial is perfect to jog my memory.
LikeLike
This is AWESOME! I’ve never paper pieced before. I’m going to do it with your great directions. Thanks!
LikeLike
I’ve just finished a 5″ FPP Butterfly mug rug. The pieces were tiny and I made the mistake of using a good printer paper (90 gsm). Next time I’ll be using a cheap 80gsm weight as it’s easier to tear.
ps. I managed to rip the paper out after a struggle!
LikeLike
Great explanation!
I have a few tips:
• Avoid steam on your iron! The paper goes soggy or curls.
• I sometimes make freezer paper templates plus generous wiggle room margins to help me cut bits with tricky angles.
• I like inexpensive bank notepaper for piecing. It is just a lightweight notepad I can easily buy from the local newsagent for a few dollars. As you say, there’s no need for specialty paper.
I’ll also reinforce what you said about the importance of very small machine stitches to make your paper easier to tear away. (Unpicking is a pain, but the smaller stitches are still a good idea.)
LikeLike
Great tips! I will have to try the freezer paper method. I don’t think I would use it for the entire block, but for tricky angles, it’s a good idea! Our printer paper is the 100% post consumer waste paper, so it’s pretty thin. And yes, thank you! I thought I included to use a DRY iron, but good point. No steam!
LikeLike
I bought a paper piece pattern that came in three separate units. How do you join paper pieced units? Do I leave the paper on?
LikeLike
Hi Liz!
I keep the paper on when joining pattern sections, but be sure to trim each section to the outer seam allowance beforehand to help you align them accurately. Then, if there are seams that will be nested when sewing the next section on, I remove the paper from those so that the paper isn’t stuck inside. Does that help?
LikeLike
Que maravilla de tutorías y que excelente trabajo, felicidades
LikeLike