Eye Spy Something New

My recent experimentation with improv curves has got me excitedly skipping down the path of curved sewing, eagerly trying every rendition of curves I can find. Mastering curves is one of my big goals for the year, so I’m happily nurturing this skill with every try.

eye spy quilt beginnings
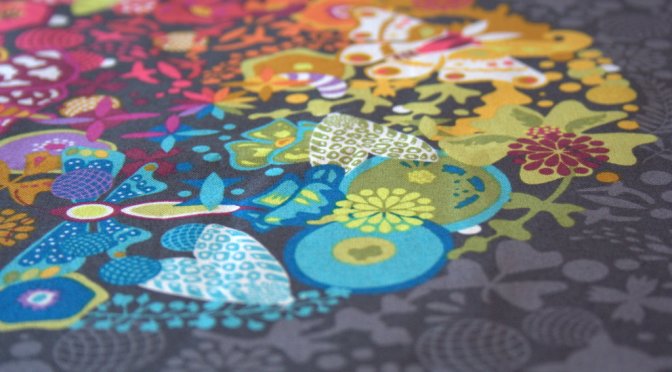
I have collected quite a sweet stack of fabric scraps featuring colorful creatures and items (many thanks to my most generous fellow quilters who sent scraps!), and with Allison from Campbell Soup Diary constantly prodding encouraging me to try freezer paper appliqué, I figured it was finally time. Thus begins another new project–an eye spy quilt for my kids involving inset circles, drunkards path blocks, and any other curves I can find.

inset circles with sizzix and freezer paper eye spySince I don’t have an actual mathematical compass in my house (gasp–appalling, I know!), I decided to use my Sizzix die cutting machine to help with cutting circles, since of course the eye spy quilt will need to consist of curves of all kinds. I only have the Sizzix BigZ L die that includes 2″, 3″, and 4″ circles together, so I could use it to cut the freezer paper but not the fabric. You can be sure the solo 2 1/2″ and 3 1/2″ circle dies will be in my next order! I grabbed some freezer paper, my washable school glue with Fineline tip, some appliqué scissors, my Sizzix fabi and circles and drunkards path dies and some fun fabrics.

inset circles with sizzix and freezer paper eye spyI used a combination of Allison’s fabulous tutorial for a mini drunkards path block and the techniques used in the six-minute circle and other improv sewing I’ve been trying. I basically followed Allison’s tutorial, using the Sizzix to cut the circle in the freezer paper, and ironing the freezer paper to the wrong side of my background square to get started.

inset circles with sizzix and freezer paper eye spy
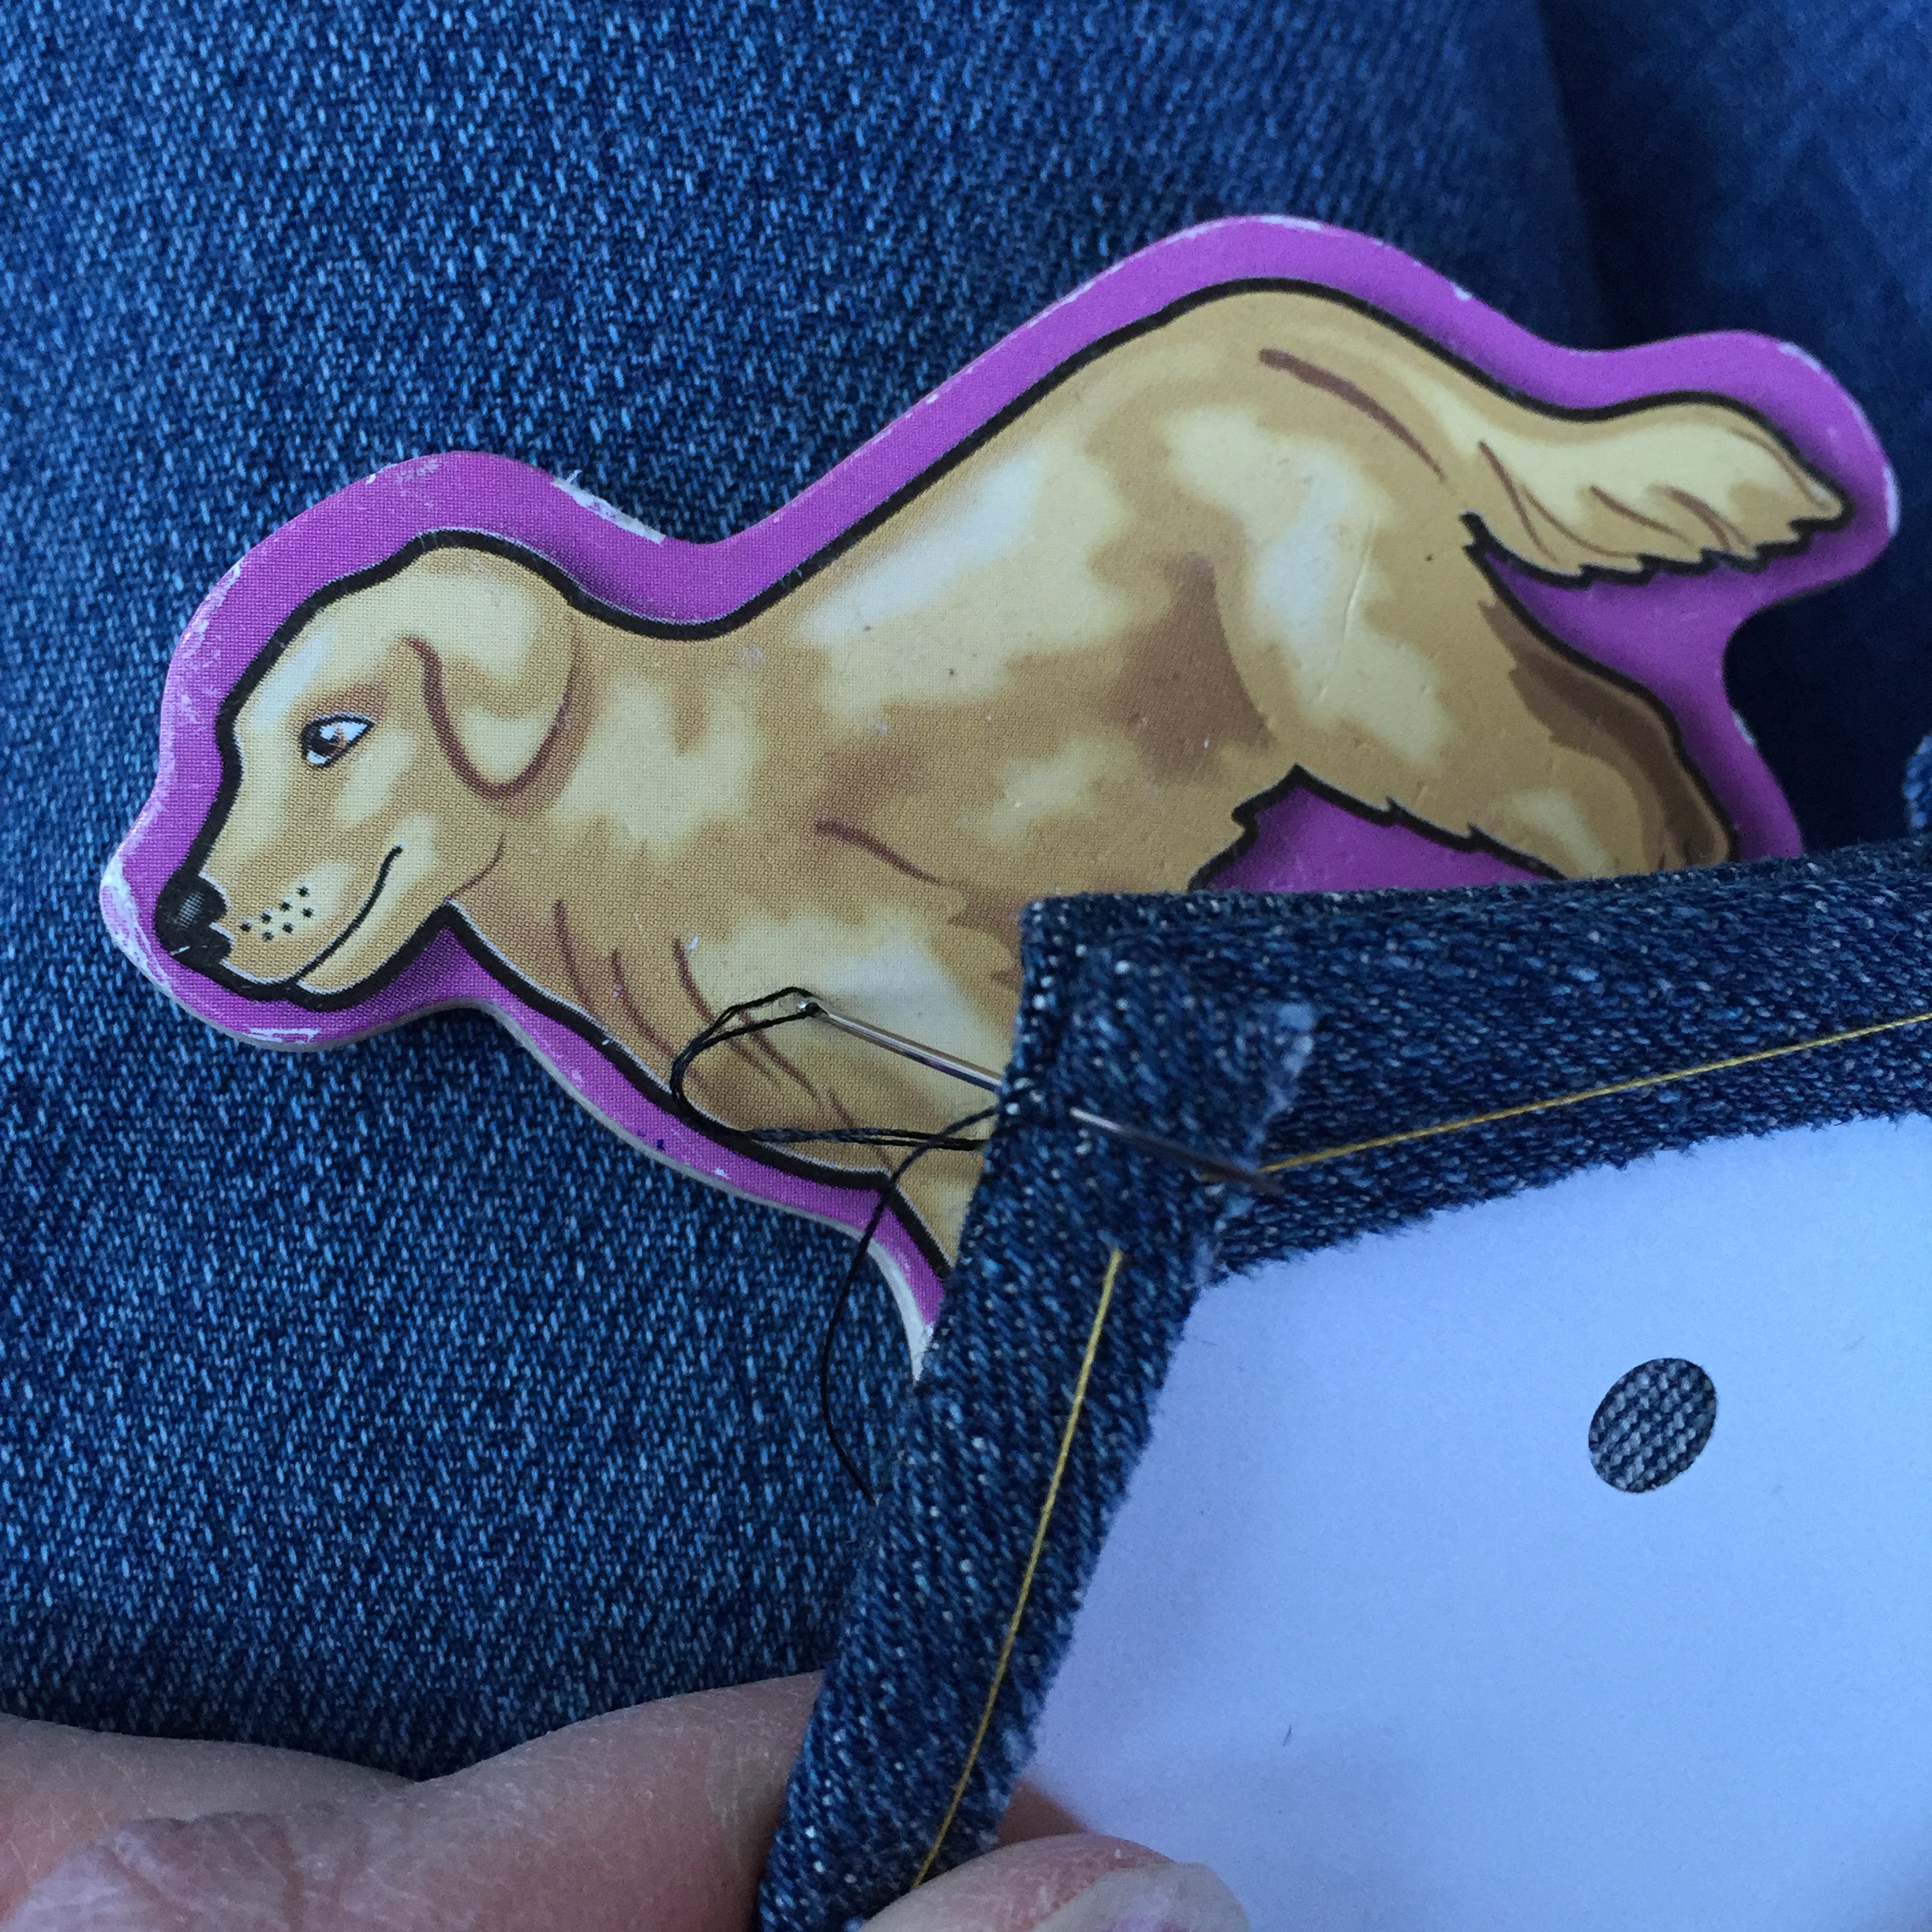
I clipped the curves and pressed them out around the freezer paper, actually gluing them a bit to the paper so that they would stay pressed back better (brilliant tip, Allison!). Then I diverted from Allison’s tutorial and switched into “six-minute circle mode”, running a bead of glue around the tabs.

inset circles with sizzix and freezer paper eye spyI then positioned the circle over the strawberry piece, pressing it with an iron to heat set the glue.

inset circles with sizzix and freezer paper eye spyOnce the tabs were heat set and secure, I gently pulled the background fabric up and slowly stitched around the inside edge of that freezer paper circle using a zipper foot. That way, these inset circles are sewn and secure, but the stitches are still hidden like with actual curved piecing.

inset circles with sizzix and freezer paper eye spyThen I trimmed the excess fabric from around the strawberry, creating a 1/4″ seam allowance. I LOVE the outcome! I also think this took even less than six minutes, which is kind of amazing in my book. Only a couple hundred more squares to go!

inset circles with sizzix and freezer paper eye spy
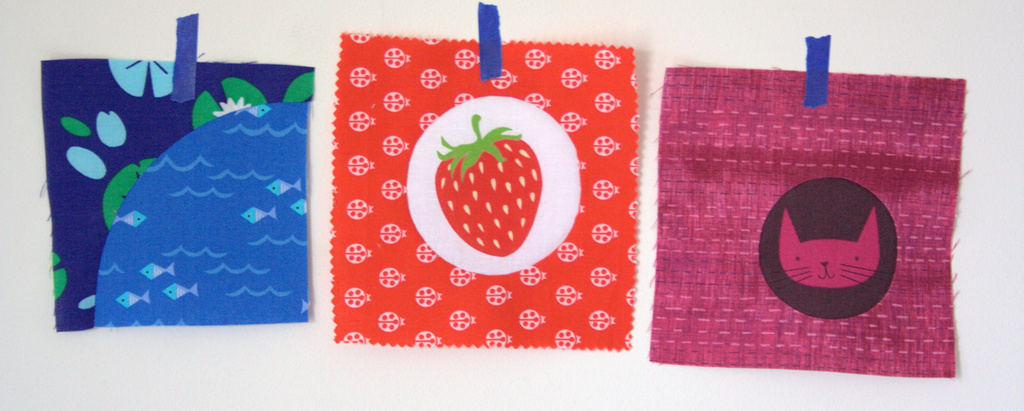
I don’t have a real firm plan for this quilt yet, other than I’m aiming to use 4″ and 8″ and possibly some 2″ blocks and aim for a smooth rainbow gradient as well as the eye spy fun within the blocks. I have not yet decided whether I will include squares as well as circles, or if I will keep this a purely curvy quilt. What would you do?

drunkards path block beginnings sizzixAs you can see, I did give one drunkards path block a go since I have a drunkards path die that finishes at 4″, but I clearly need more practice with actual curved piecing. It ended up a bit wonky and smaller than 4 1/2″ (for visual reference, the strawberry and cat blocks are about 5 or 5 1/2″ square since I plan to trim them down at the end and I wanted some wiggle room). Next time, I’ll try glue basting for the drunkards path block, too, I think. It’s worth a try!

I’m linking up with Lorna at Let’s Be Social, since I’ve added yet another project to my works in progress pile. After this one, I’m going to focus on finishing what I’ve started for a while!

Nurturing One Layer at a Time

This year I’ve dedicated myself to focusing on nurture–nurture of my children, my family, myself, and well… my sewing know-how! With a big project finally wrapped up (I’ll share more about that a bit later), I allowed myself to stretch WAY out of my comfort zone a bit and begin to work on fine-tuning two big aspects of quilting into which I haven’t yet delved too deeply: improv and curves.

back of improv curves block inspired by beesewcial
Isn’t the back fun!?

For the past week or so, I’ve been playing and experimenting with improv in response to the Bee Sewcial theme for March, which was suggested by Hillary from Entropy Always Wins. For those of you who are not yet familiar with Bee Sewcial, it’s a sewing bee with a bunch of super talented improv quilters, where each member suggests a general theme/prompt and color scheme each month and the bee members have free reign to sew their interpretations of the prompt. I’ve been blown away and inspired by the blocks these uber talented women create, and I’ve been meaning to play along using their prompts as inspiration.

Layers screen-shot-2016-02-29-at-6-48-14-pmThis month, Hillary invited her Bee Mates (and others playing along with #inspiredbybeesewcial) to “explor[e] the idea of layers (components that appear to be in the foreground and components that appear to be in the background) in your block design using the colors of this peeling paint image by Richman as a guide.” She asked that we bring at least two “layers” to our designs but said that we may add more.  She requested specific Kona colors consistent with the Richman image. I encourage you to read her post for more details, here. I was immediately smitten.

layers color palette
Suggested Kona color palette (left to right) Robin Egg, Capri, Breakers, Cyan, School Bus, Persimmon, Carrot, and Orange

I ordered the suggested colored fabrics, reviewed an impromptu lesson on the six-minute circle style form of improv curve sewing that Stephanie from Spontaneous Threads was kind enough to walk me through a month or so ago on Instagram, and began plotting.

layers improv curvesI added two already-stashed Kona oranges (orange and persimmon) to add a bit more depth to the foreground and got started. I began with the lightest robin egg blue and built out from there.

improv curve glue basting processA really fun aspect of being active on Instagram is the immediate feedback and visible spread of inspiration. While I was working on this creation, I posted updates along the way, as is my style, and a number of people expressed interest in trying it themselves (a couple have even sewn up a block already!). Since this is my very first time trying this method in earnest, I gave the best basic directions I could and directed them to the “six minute circle” technique. I applied the six minute circle basics of cutting the shape plus seam allowance, clipping curves, pressing the seam allowance with an iron, glue basting down, and then sewing along that pressed seam (from underneath the top fabric, so the stitches are hidden).

Note that in the photo above, I pressed the seam allowance on the orange piece and sewed it that way. In hindsight, because of the sharp curve of that mountain on the right, I should have done the reverse and cut and pressed the seam allowance on the layered piece and sewn down to the orange. This may seem clear as mud, but I’m hoping that as I practice this method and get more well versed in what consistently works, I will be better able to show you how to do it!

hand stitching tight curvesTo solve my steep mountain, tight sewing space problem, I decided to hand-stitch the steep part of the mountain down. The sewing machine foot (I used the zipper foot since it’s skinny!) didn’t want to fit up in that curve without sewing over bunches of fabric, so rather than make a mountain out of a molehill, I just hand stitched. Granted it’s wonky as anything, but it’s sewn down! No rules, right?!

improv curves layers inspired by beesewcialI’ve finished my base, but plan to build one more layer with needle-turn appliqué. I think I did a fairly good job of eliciting “layers” with this block, so I technically could stop here and call it a win. But, as is often the case, my initial vision included one more layer. Hillary mentioned depth of field in photos as a potential inspiration source, and so an image of looking through a field with a sun glare behind came to mind. This block looks a bit like a martian landscape at the moment, but with a little needle-turn appliqué that will soon change.

next step in improv layers inspired by beesewcialI want to try to play once more with a more modern take on layers, since as hard as I try, the natural gorgeousness of real life works its way into my quilting more often than not. Don’t get me wrong–there is nothing wrong with realism in quilting; but if I’m wanting to stretch into a different world of quilting for a bit, I may need to leave the tangible objects behind and play purely with geometry, color, and shape.

I’m really happy and excited with the outcome of this block so far, and feel like it opens up a whole new world of textile creation. I’m already plotting projects that incorporate this technique, and I’m thinking I’m getting really close to being ready to finally finish my Dropcloth Sampler Rainbow Color Wheel project.

What new techniques are you itching to try? What’s holding you back? This week, I encourage you to jump in and try it! No fears, no worries, no expectations. Just play. You just might be pleasantly surprised!

I’m linking up with Let’s Bee Social at Sew Fresh Quilts.


Color Inspiration Thursday {67}

Last weekend, we took advantage of the gorgeous spring weather and headed down to hike Mt. Battie in Camden, Maine. Flowers have not yet made their way out, but I found lots of color along the trail. It was also really nice to actually hike, probably for the first time in nearly six years. My oldest was at a playdate, so my husband carried Max and I carried Finn, meaning we could travel the path at an adult’s pace instead of a 3-6 year old’s pace. I love hiking with kids, but it was a nice change of pace to get to work a bit. It was a lovely day! This week’s color inspiration comes from some photos I took along the trail. Color palettes are made using Play Crafts’ Palette Builder 2.1 and my photographs.

moss color inspiration paletteCorresponding solids from left to right:
Bella Lead, Bella Soft Finish Black, Kona Sweet Pea, Kona Palm, Bella Grass, Bella Zen Grey

Corresponding Aurifil thread from left to right:
1246 – Grey
4241 – V Dk Grey
2900 – Lt Khaki Green
5021 – Light Grey
2908 – Spearmint
2600 – Dove

I was excited to see quite a bit of green along the path, even if none of it was new growth. The moss, lichens, and wintergreen ferns growing on the rocks on the forest floor gave me a much needed dose of green goodness.

lichen bark color paletteCorresponding solids from left to right:
Bella Etchings Slate, Bella Wisteria, Bella Indigo, Kona Ash, Bella Betty’s Brown, Bella Peacoat

Corresponding Aurifil thread from left to right:
2900 – Lt Kakhy Green
2524 – Grey Violet
2568 – Mulberry
2600 – Dove
5013 – Asphalt
2785 – V Dk Navy

Again, these lichens caught my eye from their textured perch on the trees. I love the purples that are pulled from this photo.

orange blue lichen stone color paletteCorresponding solids from left to right:
Bella Paper Bag, Kona Herb, Bella Night Sky, Bella American Blue, Bella Betty’s Blue, Kona Surf

Corresponding Aurifil thread from left to right:
2335 – Lt Cinnamon
5010 – Beige
1248 – Grey Blue
1158 – Med Grey
4140 – Wedgewood
2735 – Med Blue

I couldn’t resist including this third palette, featuring some gorgeous orange lichen on a large stone. The shadowed lighting helped the blue to shine, but I wish the brightness of that orange came through better. Imagine that left-most color cranked up a notch or two. Such a gorgeous partnership of colors! I am wishing my geological knowledge was stronger, but lo I’m more a botanist. I want to say this is granite since it’s wasn’t layered like slate, but I can’t be sure.

And now, just for fun, a few more photos from our hike.

mt battie family hike
My handsome husband, all suited up with our 3-year old, ready to hike!

mt battie family hike

mt battie family hike
This kid was telling everyone along the trail “shhhh! the Tick-Tock Crock is here!”, but I think he took his imaginative play to heart a bit. He was pretty serious during the hike.
mt battie family hike
It’s always fun when my husband takes some turns with the camera. Look, I was there, too!
mt battie family hike
Fishing for the Tick-Tock Crock.

mt battie family hike

Back on the Wagon with the Farmer’s Wife

It has been a long while since I last shared an update on my 1930’s Farmer’s Wife quilt progress. I wish I could say it’s been because I’ve been too busy stitching them up to post photos, but…. you know the truth. I haven’t made much progress. You know what, though? That’s ok! I have been creating all sorts of everything, and the whole idea behind this sew-along is to have fun. I’m still excited about my color scheme and warm-cool layout plan, and I plan to get back on the wagon with making slow progress on the blocks.

Since my last post, I’ve made two whole 6″ blocks. Yay, progress! Both blocks are in cool-on-white colors, since in looking at my blocks thus far, I decided I needed to build my cool collection.

farmers wife #46 jewel Jewel is the first block I foundation paper pieced, and you know me–I LOVE foundation paper piecing! As straightforward as she looks, I think I struggled with Jewel the most out of any of the blocks I’ve made thus far. Between the mirror image fabric placements and the tough angles, this block is a bit ragged around the edges. I’m living with it though, and I think it should be hidden within the seam allowances eventually.

This block also will act as a bit of a tie between the true blue blocks and more turquoise blocks. I am still on the fence as to how I will ultimately arrange the blocks within the cool-warm areas, but I think as I make more blocks, a cohesive plan will arise. It nearly always does, right?

farmers wife #67 mrs brownMrs. Brown was very fun to make. I used some precious scraps and had some fun with meticulous cutting to get those parent birds to gather around the nesting babes. I know these blocks measure a measly 6″ square when finished, but they sure do pack a lot of punch!

I’m currently finishing up a big project and a few small ones, and then I plan on setting the month of April aside for selfish sewing since it’s my birthday month. Part of my selfish sewing will include cranking out a few more of these 1930s Farmer’s Wife blocks (I hope!) An exciting update about the Farmer’s Wife Sew Along was recently announced, and should help my catch-up goal tremendously. The amazing Angie from Gnome Angel, who has been hosting this epic world-wide sew along with over 7,000 members (!!!), has decided to switch to releasing one block per week instead of two. It turns out she’s only human, too! It is reassuring to hear that I’m not the only one feeling like these sweet little 6″ blocks are not something to be taken lightly (nor something to be sewn up in any kind of record time).

I’m extending my promise from last time one more post–next time I post an update about my Farmer’s Wife progress, I’ll show you all of the blocks! Hold me to it!

I’m linking up with Let’s Bee Social over at Sew Fresh Quilts.

Lucky Love St. Patrick’s Day Reversible Table Runner {Sizzix Tutorial}

Today I’m excited to be sharing another tutorial on the Sizzix blog, this time for a really sharp-looking table runner (if I do say so myself)! I’m typically not one to make seasonal decor, since the seasons come and go so quickly, but this one is reversible so I can use it all year long. Ever since I first cut wool felt with the Sizzix, I’ve been wanting to do a wool felt applique project, and once I realized I could make four-leaf clovers using my Primitive hearts die, it was game on. I backed the table runner in one of my all time favorite Alison Glass neutrals, Botany in Taupe from Ex Libris, which I certainly won’t mind looking at for the non-St. Patrick’s Day part of the year!

sizzix st patricks day reversible table runner tutorial Since I love to make the most of the tools I have, this project is also exciting since it’s the third unique project I’ve made using the Primitive hearts #3 die from Sizzix. You may remember my Growing Tree Wall hanging and Valentine’s Day Garland tutorials, the first two projects I made using this die. You know it’s a winner when there seems to be an endless stream of projects that can be made out of a certain tool.

TUTORIAL- St Patrick's Day Table Runner sizzixI try to make my tutorials helpful to the entire sewing and quilting world, even if you don’t yet have a Sizzix or other die cutting machine, and this one is no different.

sizzix st patricks day reversible table runner tutorial blanket stitch appliqueIn this tutorial, I share:

  • a neat trick for making four leaf clovers out a heart die (you could use it with a heart hole-punch, too, if you have that);
  • tips on accurate straight-line quilting without having to physically mark your quilt; and,
  • how to blanket stitch.

Head on over to the Sizzix blog to read the full tutorial, and I hope you enjoy!

Do you make seasonal projects? How and where do you store them when they are off season? I may need to take some notes if this keeps up!

I’m linking up with Tips & Tutorials Tuesday with Stephanie at Late Night Quilter.

Color Inspiration Thursday {66}

I have been on the hunt for signs of spring, but the frozen ground is not yet giving us much ease. It was a fairly sunny day early this week and looked quite warm, so the kids and I headed outdoors to do a serious search for real signs of spring. Instead, what do we get? Snow! Within 20 minutes the sun dipped behind a cloud, the temperature dropped, and it began snowing! So much for spring! This week’s color inspiration palettes are from photos I took during that snowy search. It’s as close as we can get to spring just yet. Color palettes are made using Play Crafts’ Palette Builder 2.1 and my photographs, and of course the matching solids and Aurifil threads are an added bonus!

snowy lichen color paletteCorresponding solids from left to right:
Bella Lead, Kona Coffee, Kona Moss, Bella Etchings Slate, Kona Pewter, Kona White

Corresponding Aurifil thread from left to right:
1246 – Grey
1130 – V Dk Bark
2905 – Army Green
2900 – Lt Khaki Green
2606 – Mist
2800 – Mint Ice

There may not be much bright color out in nature these days, but there’s always texture. I love the texture of this lichen-laden tree branch! The mix of bark, lichen, moss, and snow creates a great variety of visual texture. The earth tones ring out strongly in this one, too.

daffodil sprouts color paletteCorresponding solids from left to right:
Bella Platinum, Kona Pewter, Bella Chocolate, Kona Espresso, Kona Avocado, Bella Avocado

Corresponding Aurifil thread from left to right:
2612 – Arctic Sky
5004 – Grey Smoke

1140 – Bark
1285 – Med Bark
4173 – Dk Olive
2910 – Med Olive

This is as close as we’re getting to spring colors so far here in Maine. These little daffodil sprouts are trying their hardest to push up through the frozen ground, standing strong despite snow and ice, and waiting patiently. I know that it won’t be long before these little sprouts reach with earnest and the flowers begin to appear. Once spring hits, I know it will begin a cascade of flowers that will snowball quickly (how about that for punny irony—snowballing spring flower blooms!). I can’t wait!

finn snow baby
Finn on Monday

Update: Maine spring weather is as fickle as ever. Yesterday it was nearly 60 degrees and we all played outside without coats!

Maddie and Finn Spring
(L) Maddie, Finn, and Abadee Abadoo, one of our chickens, yesterday (Wednesday). (R) Our first taste of bare feet weather!

Spring is upon us (at least at the moment)!

Favorite Finishing Techniques and Tools

With so many fabulous tutorials out there in this vast internet world, I try to avoid reinventing the wheel whenever possible. So far, when it comes to finishing my quilts and other stitched projects, I’ve had great luck in finding clear, well-written tutorials that help clarify exactly how to best finish a project. Today I thought it might be helpful for me to create a reference list of my top go-to finishing tutorials and tools to share with you.

finishing tips and toolsHere is a visual map I drew to help keep track of my favorite methods during an #Honestcraftroomies Periscope hop about this topic a few weeks ago, along with my top favorite finishing tools. (If you click the photo it should open in another tab a bit larger so that it’s easier to read. All of the information is in the blog post, too, though!)

I’ll begin by linking to each of my favorite finishing tutorials below with a brief explanation as to why it is a favorite (Each heading and photo link to the tutorial. Click and it will open in another tab. Peruse at leisure. Bookmark. Revel in sweet knowledge!)

Making Straight-Grain Quilt Bindings
by Bijou LovelyBijou Lovely making-quilt-binding

Holly DeGroot at Bijou Lovely was one of the first quilters I started following regularly, and for good reason. Her photos are superb and eye candy abounds! This tutorial is super straight-forward and has clear photos for every step. It also shows you how to get the end of your binding ready for the next step: attaching it to the quilt, which is very helpful. When binding any large, rectangular quilt, either entirely by machine or hand-stitched to the back, this is how I make my binding.

Attaching Binding to a Quilt
by Bijou Lovely 

Bijou Lovely binding attachingThis gets you set up for hand stitching your binding to the back of your quilt. The brilliance is in the overlap join where the beginning and end of your binding meet. For someone who initially struggled with getting that final binding seam sewn straight and in the proper place (hi, that’s me!), this tutorial was a lifesaver!

Machine Binding a Quilt
by Cluck Cluck Sew

Cluck Cluck Sew Machine-Binding-TutorialWhile I love hand stitching bindings to the backs of quilts, some quilts just warrant machine binding, either for durability or for the sake of saving yourself a bit of time.  This tutorial is fabulous! I now machine bind all baby quilts and kid quilts, and I use this tutorial to help machine bind things like mug rugs and table runners, too!

Binding Tiny Things
by Crazy Mom Quilts

crazy mom quilts binding tiny things mini tree and binding stripThis tutorial makes binding tiny things a breeze. Seriously! One tip I have to emphasize is the step where you press the binding away from the front of the quilt after sewing it on. This step makes all the difference in the accuracy of your final stitches and the overall perfection of your finished (finished! yay!) mini. If you are at all infected by the mini mini quilt bug, this tutorial is a must!

My Top 3 Finishing Tools

Finishing a quilt includes more than binding. To me, quilting and burying threads count within the ranks of “finishing steps”, too. I have three top tools that I couldn’t live without when it comes to actually quilting a quilt and burying all those threads. (Each tool name is linked to where you can buy it, but they are not affiliate links; they are just there for your convenience. I’ve heard rumors that Maine does not allow affiliate link payout, and I’m thinking they may be true. You probably will see a lot less affiliate links, but I will always link to products because I think it’s helpful to you!!)

Hera Marker

hera marker in useWhen I first heard of a Hera marker, I envisioned a special pen. The name is misleading a bit until you realize that it “marks” the quilt with creases, NOT with actual physical marks like a pen, pencil, or chalk would. (The white thing in the photo above is the Hera marker for those of you who have not yet heard of them). Hera markers are my go-to quilt marking tool, and I use one for marking straight lines for small quilting projects, marking increments before free motion quilting, marking seam lines when joining binding or sewing HSTs, and just about any other time I need to mark the fabric somehow.

Painter’s tape

painters tape marking quilt linesPainter’s tape is another fantastic tool for those of us who shudder at the thought of actually writing on a quilt top. I use painter’s tape to help keep straight line quilting evenly spaced and as a visual guide when sectioning off areas of free motion quilting. It is easily repositionable, and paired with a ruler, can be placed exactly straight. You NEED some of this in your quilting arsenal. (I also use it to tape up quilt blocks for photos!)

Self-threading needles

self threading needlesThese needles sound magical, and trust me–they are! When you have a gabillion threads to bury after epically quilting your quilt baby, the self-threading (also called easy-threading) needles are your bff (that stands for ‘best friend forever’, for those of you who aren’t savvy to teenage acronyms). The drawing I did of the self-threading needles shows how they work best (in my humble opinion) so I’ve included that above. Basically, they have an open top so that you can just pop your thread end right down into the eye of the needle, easily burying threads like a champ, again, and again, and again, and again…

I hope this collection of resources is helpful to you. There’s nothing like finishing a quilt, and these tutorials have helped those final steps be as smooth as possible for me. You know me; I love to share the love!

I’m sure there are more great tips and techniques that haven’t yet crossed my quilting path, and I’d love to learn about them. What are some of your favorite finishing techniques or tutorials that I haven’t included here? Thank you in advance for sharing!

I’m linking up with Tips & Tutorials Tuesday and Quilting Mod’s Lessons Learned Linky #3.

Stash Building: Art Theory Panels in a Panic

My recent scour of the internet in search of Carolyn Friedlander’s old Architextures fabrics for THIS project has given me a new appreciation for stashing your favorites before they disappear. Once a fabric line is out of print, especially if it’s been out of print for a while, those fabrics are GONE. Legit, no stores have them, not even Etsy, gone.

art theory panels ex libris alison glassThis realization gave me a little bit of a panic, so I quickly contacted my local quilt shop Fiddlehead Artisan Supply and had them set aside three yards of the Alison Glass Art Theory panels from Ex Libris (Andover Fabrics) in charcoal and one yard in white. Better safe than sorry, right? If I could afford to buy a bolt of each and every Sun Print fabric, too, I totally would. But the line has to be drawn somewhere!!

art theory panels ex libris alison glassIt’s no secret that I love Alison Glass fabrics, and these panels are just SO gorgeous. I have a few projects in mind already for these, and I don’t think I will ever tire of the colors and design. Having a bit of “extra” in the stash never hurt anyone.

art theory panels ex libris alison glassMaybe I’ll even get brave and cut into a few to use bits and pieces in a project beyond the full intact round panel. Maybe.

art theory panels ex libris alison glassIf you want to stock up before it’s too late, Fiddlehead does still have some yardage of these panels available, I think. They are not listed online, but if you call the store you can order some. No, I’m not *trying* to be an enabler. No, I don’t work for Alison Glass (to answer your question, Nancy! lol But wouldn’t that be a dream!?), but I really do honest-to-goodness love the vivid designs in her fabric. I’m trying to help. Really. Or if you are on a fabric diet, go ahead and let me know your birthday and I’ll set a panel aside for you.

art theory panels ex libris alison glassI mean, look at those details!

I’m linking up with Molli Sparkles’ Sunday Stash traveling edition, which is hosted by Irene from Patchwork and Pastry today.


Tipping Point: 9 Months

Finn has officially been growing on the outside as long as he grew on the inside. (Well, if you want to get really technical, he has another two weeks since he was born at 42 weeks gestation, but I’m just going with generalities a bit). This feels like the tipping point, for some reason. It’s amazing to think about the amount of growth that has happened over the past 18 months. Mind boggling, really. 18 months ago he was simply cells, and now…. wow! Life is miraculous, there’s no doubt. With month nine, I’m now working on the final row of his Milestone Quilt. Only three more blocks until it will be finished and ready to assemble. That means only three more months until my little baby will be a year old.

finn 9 month milestone quilt photo shootWhen I was thinking about what monthly milestones he’s been working on and meeting, and therefore which ones I wanted to document here, I immediately thought of his experiments with standing. He is getting steadier on his feet and will sometimes *briefly* let go of whatever it is he’s holding and stand on his own. Up until the photo shoot yesterday, though, these standing bouts lasted only a second or two.

finn 9 month milestone quilt photo shootYou can imagine my surprise when Finn stood on his own for a few minutes, albeit propped against the wall! There’s my 9-month old boy!

finn 9 month milestone quilt photo shootAs you can see, he’s still putting just about everything in his mouth, chomping at the bit as his teeth work their way in. He still has only those bottom two, but his top teeth look like they are getting close to breaking through. The drool faucet is often turned on.

finn 9 month milestone quilt photo shootI’m really loving seeing his quilt come to life. It does take some restraint to make such a simple quilt in such a long, drawn out time, but I think it is so worth it. I’m seeing my quilt-making mature as I watch my son grow, and I’m keeping the project completely manageable. This month I’m proud to say I made his block a few days in advance, and did the photoshoot yesterday. I won’t try to count how many months saw a last-minute day-of rushed shoot and late night sewing sessions. This month, I’m winning.

finn 9 month milestone quilt photo shootfinn 9 month milestone quilt photo shootfinn 9 month milestone quilt photo shootOne of Finn’s new favorite positions is on his knees. He “stands on his knees” as Maddie likes to say, and bops up and down, chewing on a toy, or dancing along to music or just about any repetitive sound. He LOVES to dance. He still loves to smile, too.

Finn 9 month milestone quilt photo shootWith his increasingly steady stance, he is exploring the world with earnest. Those little hands reach and grab, trying to figure out every little thing. I’ve had to reevaluate the “safe zone” height in our house, since there have been a few large items pulled to the ground due to his exploring reach. No worries–all furniture and large items are securely fastened to the wall. Fortunately, Max made that a necessity so we are well prepared for our next active boy.

Finn 9 month milestone quilt photo shootFinn still loves watching the chickens, and has begun to “talk” to them, as well as to the phone when it rings. He’s working on waving “hello” and loves to interact with others, especially his siblings.

Finn 9 month milestone quilt photo shoot
Finn “talking” to one of the friends who was here during the photoshoot. An epic 6-kid playdate was underway yesterday, but actually made the day more harmonious since everyone had a playmate. 

As a year draws near, I’ve begun to think about how I want to preserve these milestone posts. While his baby book has been sorely neglected, I do have these updates each month and I’d like them to be in a preserved form. I’m thinking I will turn at least the highlights of each post (the photos and milestone accomplishments) into a book via Shutterfly. That way, Finn will have his quilt and his First Year book to look back on. I love this project more every month!

For those of you new to this project, you can see the full quilt layout plan, HERE in the 3 month post. You can see the full progression of Finn and his quilt’s growth so far HERE or by clicking the “Milestone Quilt” tab at the top of my blog. Thank you for joining me on this journey!

Denim Play, Literally

I’ve been really itching to finish something–anything, so when I saw Leanne at Devoted Quilter’s blog post a few weeks ago with her blue jean English paper pieced (EPP) ball project, I knew I had to give it a try. With Finn just learning how to throw, plus two other kids who love to throw stuff around, and a large stack of jeans worn beyond the point of no return, paired with my desire to reuse and recycle as much as possible, this project was perfect.

jeans ballIt took me a bit longer to finish that I anticipated, as is typical, but today I finally finished this blue jeans ball! As Leanne suggested, I used the EPP templates provided by Abby at While She Naps. I glue basted most of the hexagons of old jeans to help make it a quick project, and I began stitching away!

jeans ballAt first I used 50wt Aurifil thread, but soon switched to 12wt. It was the perfect thickness to make the ball feel substantial and secure. I know this ball will be thrown and pummeled and beat on with the love only kids can exude with a well-loved toy, so I wanted to be sure it lasted the test of time.

kid magnet as a thimbleOne thing I learned during stitching this ball is that I need a thimble! I have old metal ones, but am so awkward in using them, I opted to just use coasters or, in some cases, wooden kid magnets to help ease the needle through the thick denim. This has been my down time and kid-napping-in-the-car project for the past two weeks, created through a series of #sewtake20s.

jeans ball
Ready for stuffing!

With the help of Finn and Max this morning, I stuffed the ball with 100% local wool I bought at Clementine Fabrics, a quasi-local but gorgeous fabric shop.

jeans ball stuffing helperMax helped a bit but soon was distracted with the task of cooking up some sheep soup for us to share with his own big ball of wool.

jeans ballFinn began roaming the rest of the playroom so that I could ladder-stitch the opening closed.

jeans ballIt’s a bit rougher than it could be, but I’m not well versed in 3D sewing. All three kids and a neighborhood friend have already had a blast playing with it within ten minutes of completion, so that’s what matters. Plus, I’ve begun the task of using old jeans for repurposed projects. Yay!

I’m linking up with Crazy Mom Quilts Finish it up Friday!