This year I celebrated a big milestone birthday, and I thought it was high time I made a quilt for myself to document it. I’ve discovered how powerful positive feedback loops with quilting and adventurous living can be, through our Summer Adventure Quilt back in 2017 and my 2020 Miles quilt that kept me running despite the pandemic. My 40th birthday felt like a perfect occasion for my next foray into quilting my life. I pulled out my Quilt Your Life project organizers and dove into planning.

During the weeks leading up to my birthday, I reflected a lot on age and what it means to get older, the power a measly number somehow has on my psyche, and how to break free from that feeling of impending mortality. I fully know that 40 isn’t “old” and that there is much grace and wisdom found through aging, but the whole “over the hill” thing got to me. In embracing the wonderful things that come with age, I decided to play on the “over the hill” bologna and instead, focus on climbing mountains. For my first year as 40, I hope to climb to 40 mountain peaks, celebrating my 40 year old body, mind, and soul from the highest points. Of course I’ll be making a quilt block to document each peak reached. I’m calling it my 40 Peaks Quilt, and I’ll be documenting it on IG under #40PeaksQuilt and hopefully blogging about it here.

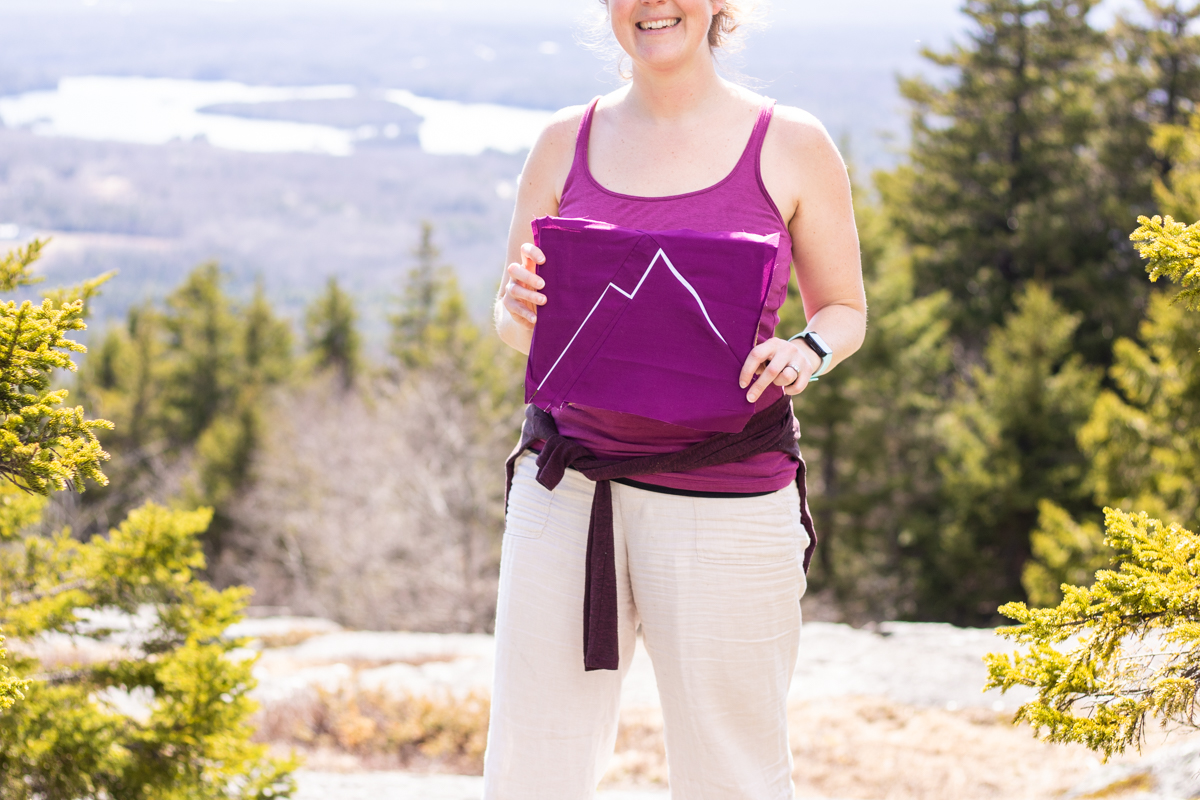
This past weekend, my 40th birthday and associated quilt project kicked off with a bang–I have 3 peaks under my belt already!! The first hike was a birthday hike, celebrated with my kids and a few hiking friends and their kids. We headed up a favorite local-ish mountain on a gloriously warm and sunny spring day, and it was perfect.
The day began in an unexpected way: I woke up to an overflowing drain line in the basement, so instead of birthday breakfast in bed, I spent the morning helping Gare carry everything outside into the sun to dry. It was so apropo!! A friend came over to help, we got the drainlines all snaked, and Gare graciously offered to stay home and do the mopping, cleaning, and drying while I headed out on my planned birthday hike.
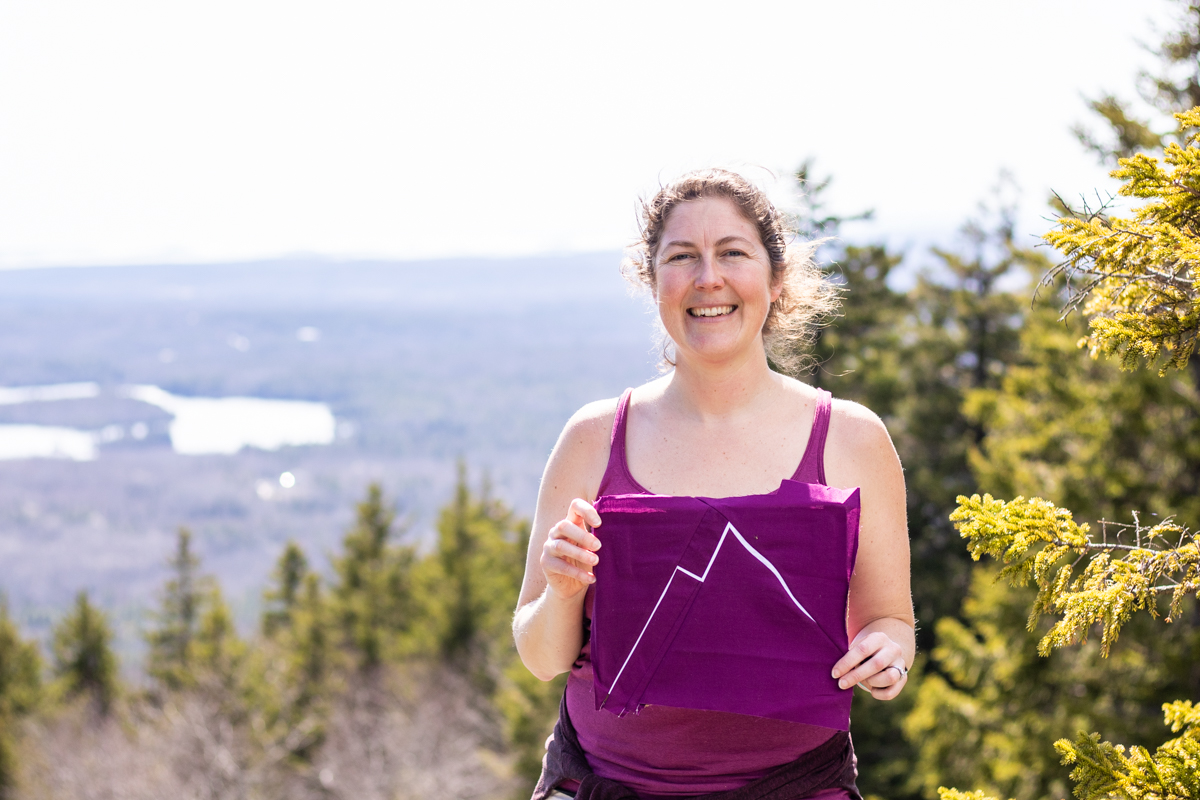
It was an absolutely stunning Maine spring day, and our hike up Blue Hill Mountain was delightful. I discovered that my sweet Finn, who during my last adventure-tracking quilt was my enthusiastic block holder, is very much like his mama and prefers to be behind the camera rather than in front. The photos of me shared here were taken by Finn.
So was this one, but this was his first official photography gig, so it’s all good. Hah!

Here’s the one photo he let me take of him as block holder, but I do think he will much prefer to be the one taking the photos during this project. Time to train the next generation of memory capturers!
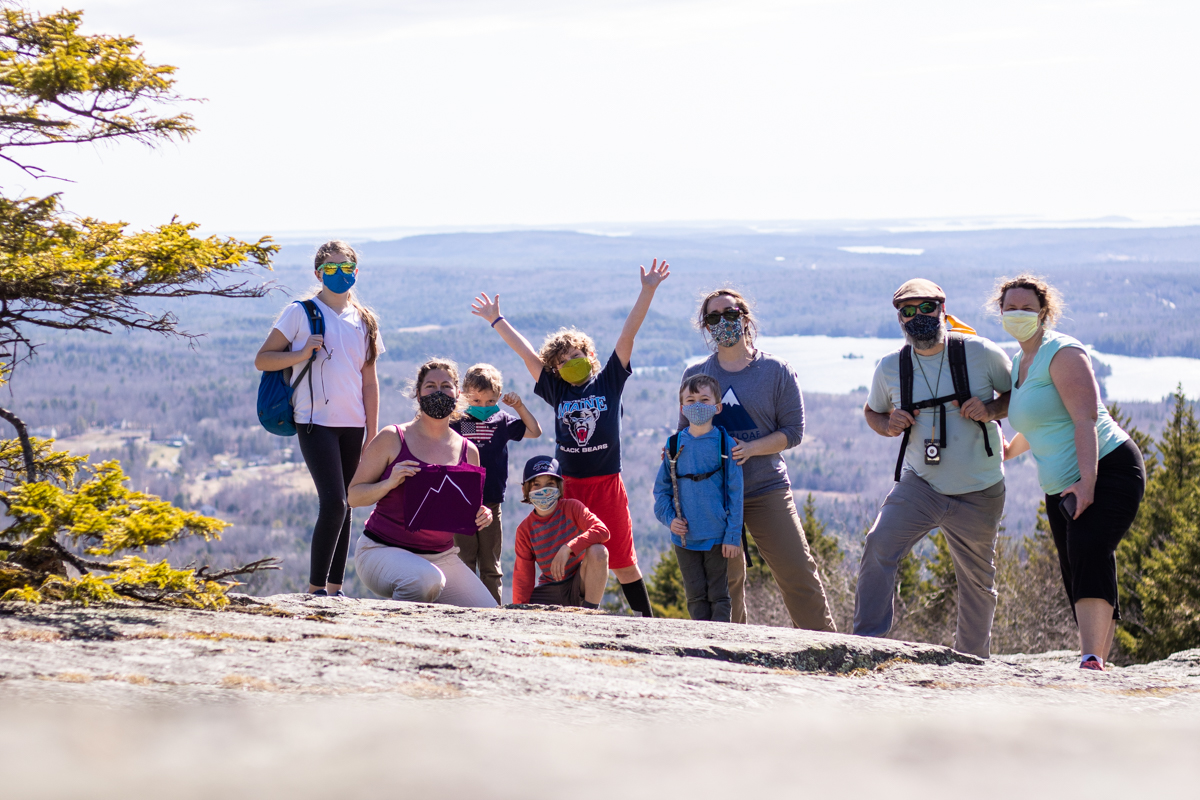
The fresh air and sunshine was amazing, some dear friends joined the kids and me–including one of my fellow Mountain Mamas from our #SummerAdventureQuilt days, who I hadn’t seen in over 13 months. Then the day was capped off with our first gathering of any size–a bonfire outside, with everyone masked and distanced, but oh so happy to see each other. Many of the adults were fully vaccinated, we all wore masks and stayed outside, but just being together for the first time in over a year was the most amazing birthday gift. And we made plans for a regular weekly hike day all summer, so our Mountain Mamas Lugging Babies & Towing Trekking Toddlers will be reunited, now that our babies are five+ and we’re the ones being towed by our speedster youngsters as they race up the mountains.
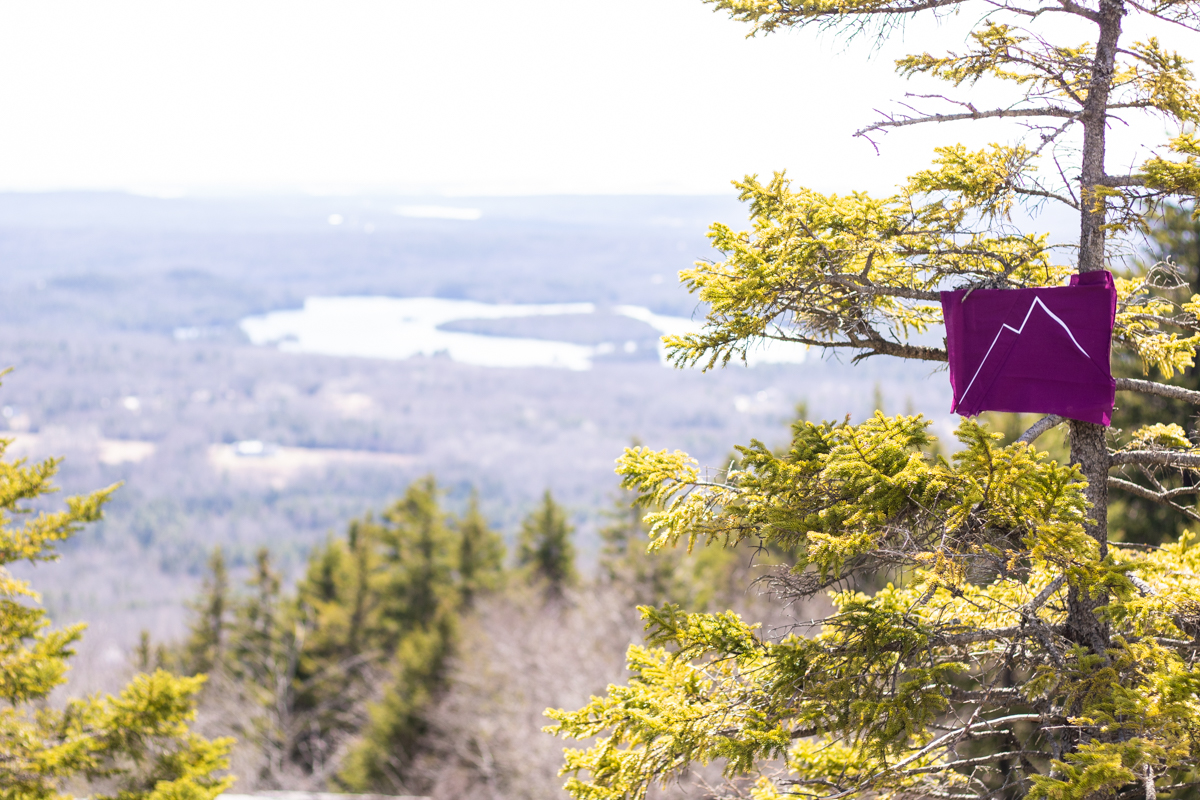
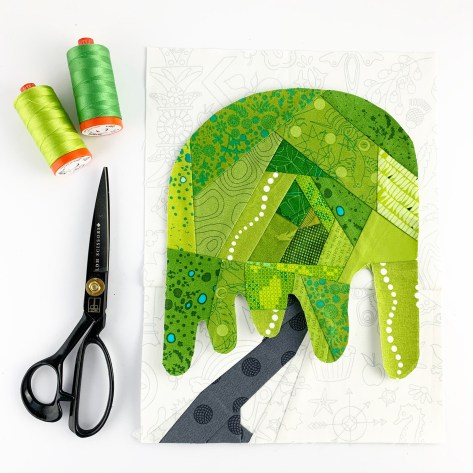
Block one for my 40 Peaks Quilt, done! I am planning to stitch some embroidered details on each block to track the people who accompany me on each hike, but I’ll share more of those details in the next post.

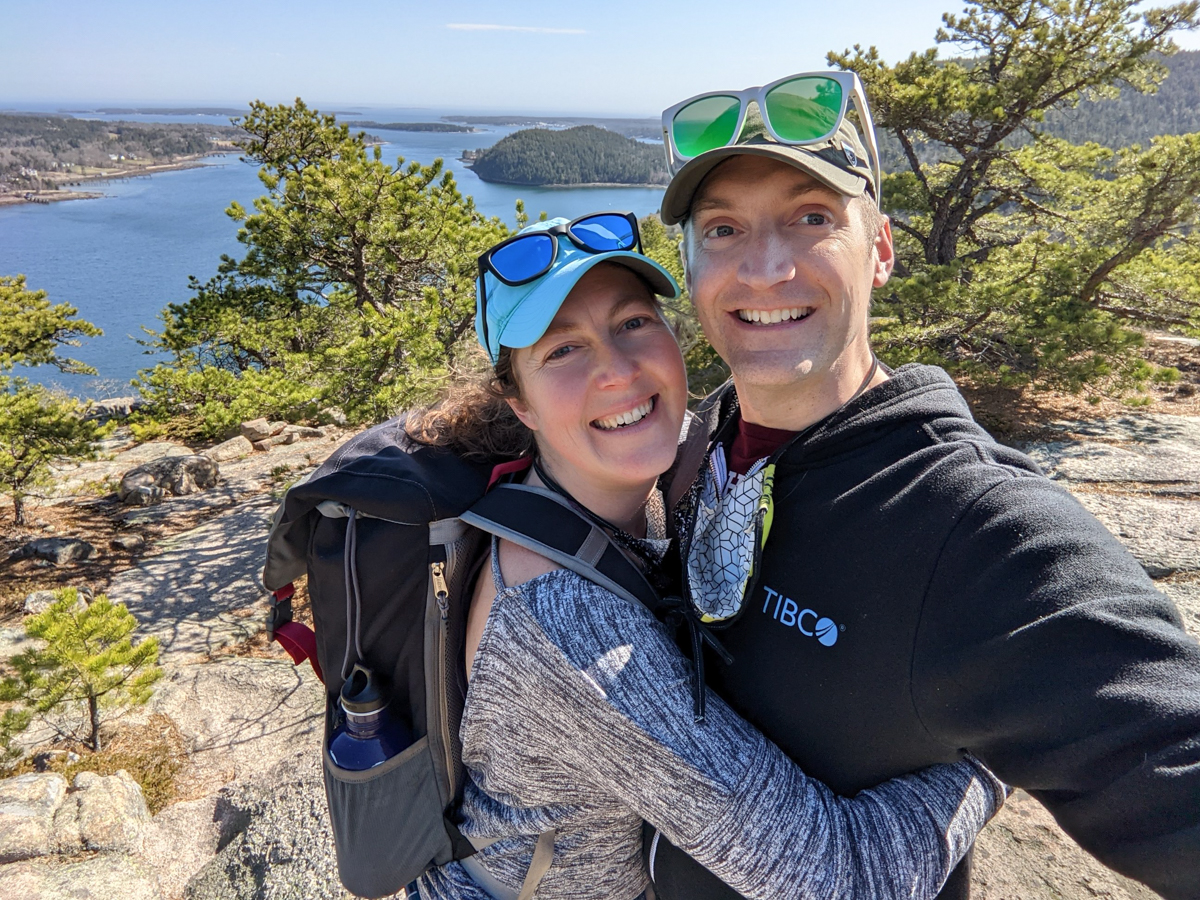
The next day, we dropped our three kids off at my fully vaccinated in-laws’ house and Garrett and I headed to Acadia National Park for a date hike, our very first time away from our kids in over 13 months. It was another gorgeous sunny day, and it was amazing. I love our kids dearly, but we all were very much ready for a day apart!


Gare and I hiked the Acadia Mountain & St Sauveur Mountain Loop, hitting two more peaks and getting in a serious workout! Those trails were STEEP!! Halfway up the second mountain, I commented, “When I thought of this project, I wasn’t thinking about this part! I was thinking about the epic views at the top!” But lo, you have to take the whole journey, not just the peaks, right? If that’s not a metaphor for life, I don’t know what is!

The hike ended up at 4.6 miles total, with an elevation change of 1,176 feet according to Strava. Because we hit two peaks, I am going to use two mountain blocks for this hike, and I haven’t yet fully decided how I will be marking the mileage. The block I brought with me, and which is in the photos for Acadia Mt and St Sauveur Mt has the color arrangement for a 3.5 mile hike. I made a 4.5 mile hike mountain for the second peak, and might just plan to do something similar for future multi-peak hikes: I’ll bring a block to designate part of the hike, and plan to make a new block after the hike to document the full mileage.

This is one part of this project I am still uncertain about: I love documenting memories through photos on each hike, but realize that without knowing the final mileage until the end, I won’t always guess correctly if I bring a guess block with me. Initially, I was thinking that maybe I would bring the previous hike’s block on each hike, since then we’d have a block for photos with us, but then the blocks would be documented on a different mountain than the one they represent. I might opt to relax the mile documentation aspect a bit and take a guess on hike mileage so that I can bring blocks with me on hikes, making notes so that the end quilt still accurately represents the mileage. I feel like for this project, the data tracking doesn’t rank as high as the memory making and adventuring, so this feels like a potential solution. I’m not fully decided yet, so if you have any ideas, please leave them in the comments!


Either way, my positive feedback loop is in place and underway. I’m getting out in nature, climbing to new mountain peaks (I’d never been up St. Sauveur Mountain before), and enjoying the best views in Maine. I can’t wait to see where this project brings me, how my health and well-being improves through doing it, and to what gorgeous heights I climb over the next year. Bring it on, 40!

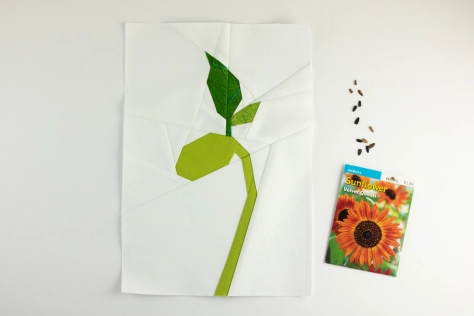 With a focus on hope and new beginnings, I thought today would be the perfect day to re-release my updated Bean Sprout block pattern, since there’s nothing like a freshly sprouted plant to celebrate spring, new life, and the wonder of discovery. As many of you likely know, I’ve been working with the amazing
  With a bit more pattern details, more professional layout, and an added block size (welcome, dear 4″x6″ block!), the newest Bean Sprout block pattern includes all of the great things from the original 2016 design, but in a clearer, crisper presentation. You can buy it now from my
 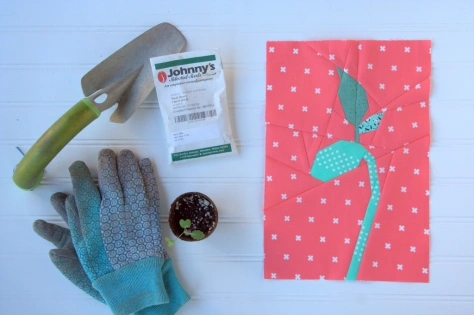 You can see a few other versions of this block I’ve sewn up in the past in its
  I particularly love the idea of a pillow, and very well might be making another one of these someday soon. I’d love to see what YOU make with the pattern, so please use #beansproutblock and tag me
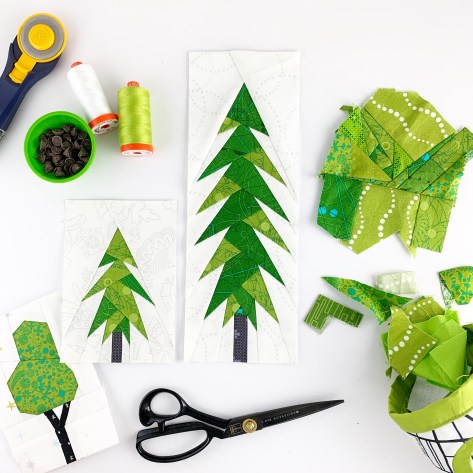 Since our self-isolation has begun, I’ve found myself sewing trees. They are a brief respite from the realities of life these days. As I’ve sewn more, I realize that I’m just trying to grow some hope, grow some patience, grow some resilience. I’ve started using the hashtag
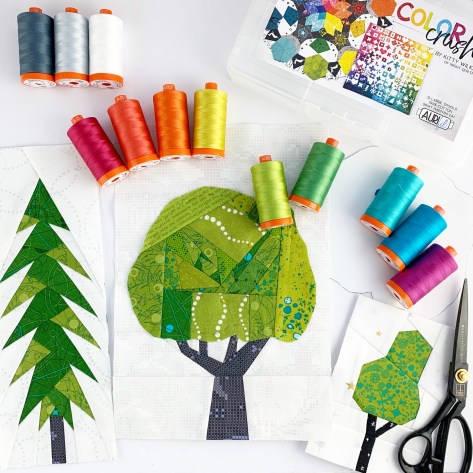
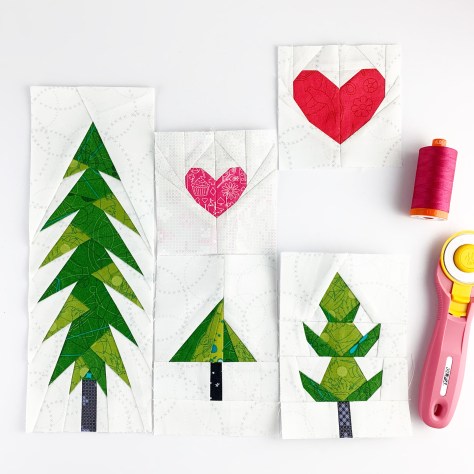 I once again plan to be gentle with myself, with soft guidelines of “growing hope”, which I imagine will mostly be in the form of sewing and designing trees, working on putting my Plant Worry, Grow Hope quilt together, and maybe spending sunny days in the garden, literally growing hope in the form of vegetable and flower seeds. I have not yet decided whether I will include weekend days or not, and will feel it out as I go.
 I last participated in the 100 day project back in 2018 when I embarked upon
 Amanda
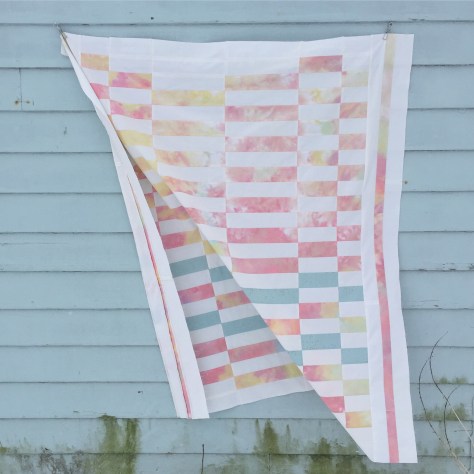
 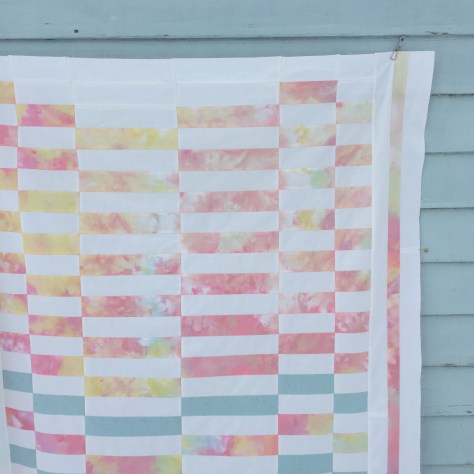 Note that Amanda chose to add her own personal touch by sewing vertical stripes into the side borders; that bit is not included in the Staggered pattern.
 Anja of
 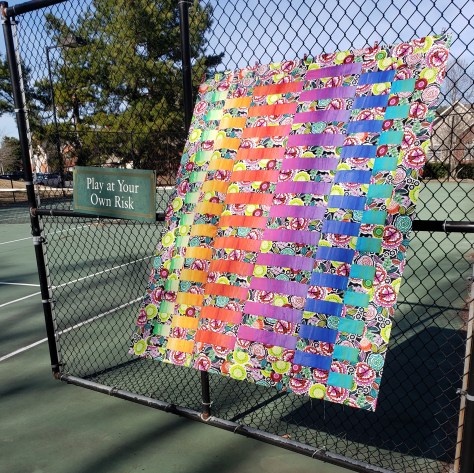 Darlene
  For this quilt, she used Giucy Giuce’s Spectrastic fabrics paired with Libs Eliott’s Venom fabric for the background, both by Andover fabrics, and it’s so much fun. I love how adding a non-solid background fabric changes the aesthetic of Staggered. You can find Darlene on Instagram
 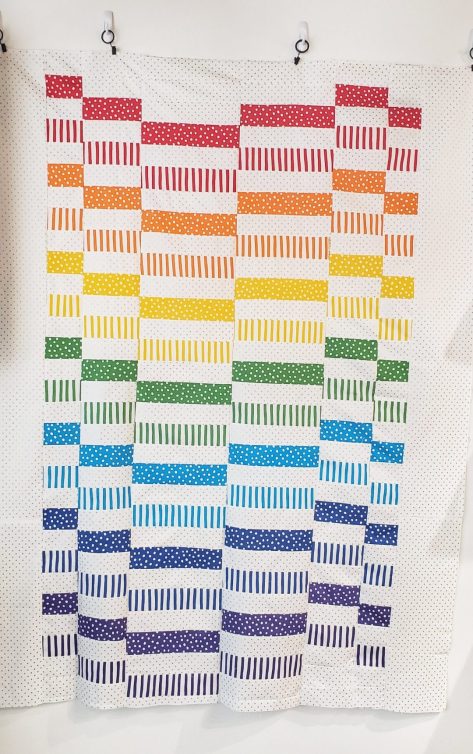 Natasha
 Shannon Spicer
 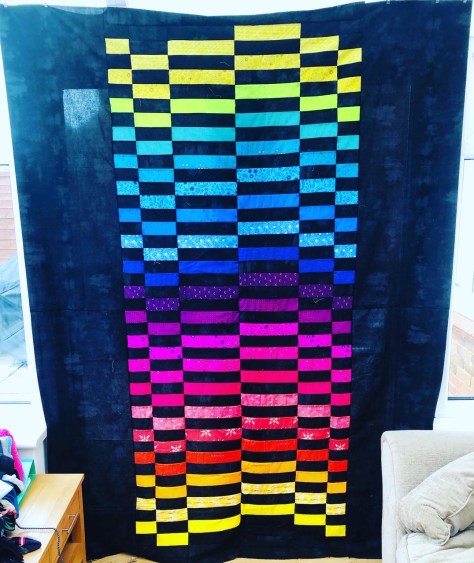 Kerry of
 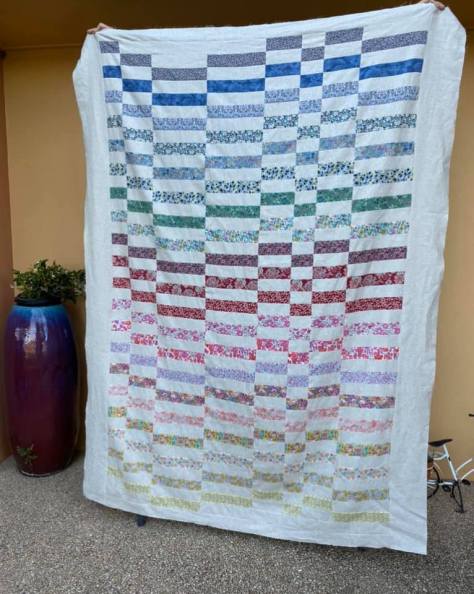 Ultimately I decided to widen the center of the Twin size so that the overall aesthetic and assembly for each size was more similar, so the Twin version included in the Staggered pattern is this one, with two additional columns. Debbie Griffiths
 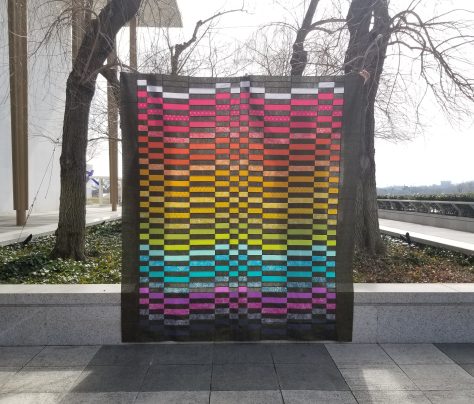 She used an Alison Glass Sun Print 2016 jelly roll plus the “Path” (text) prints from the Sun Print 2019 with Robert Kaufman Manchester Metallic in Licorice (black with gold sparkle) as the background, and holy smokes does it shimmer and shine!!! Alyson had a pretty epic photo shoot for this quilt, too, complete with video to show how much the gold metallic shines in the sun when the wind blows.
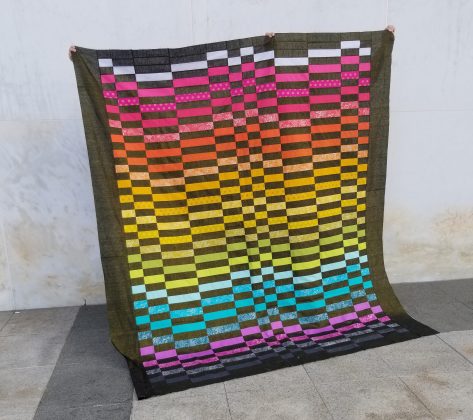 You can start to see the gold glimmer in this photo, but be sure to head over to her Instagram feed at
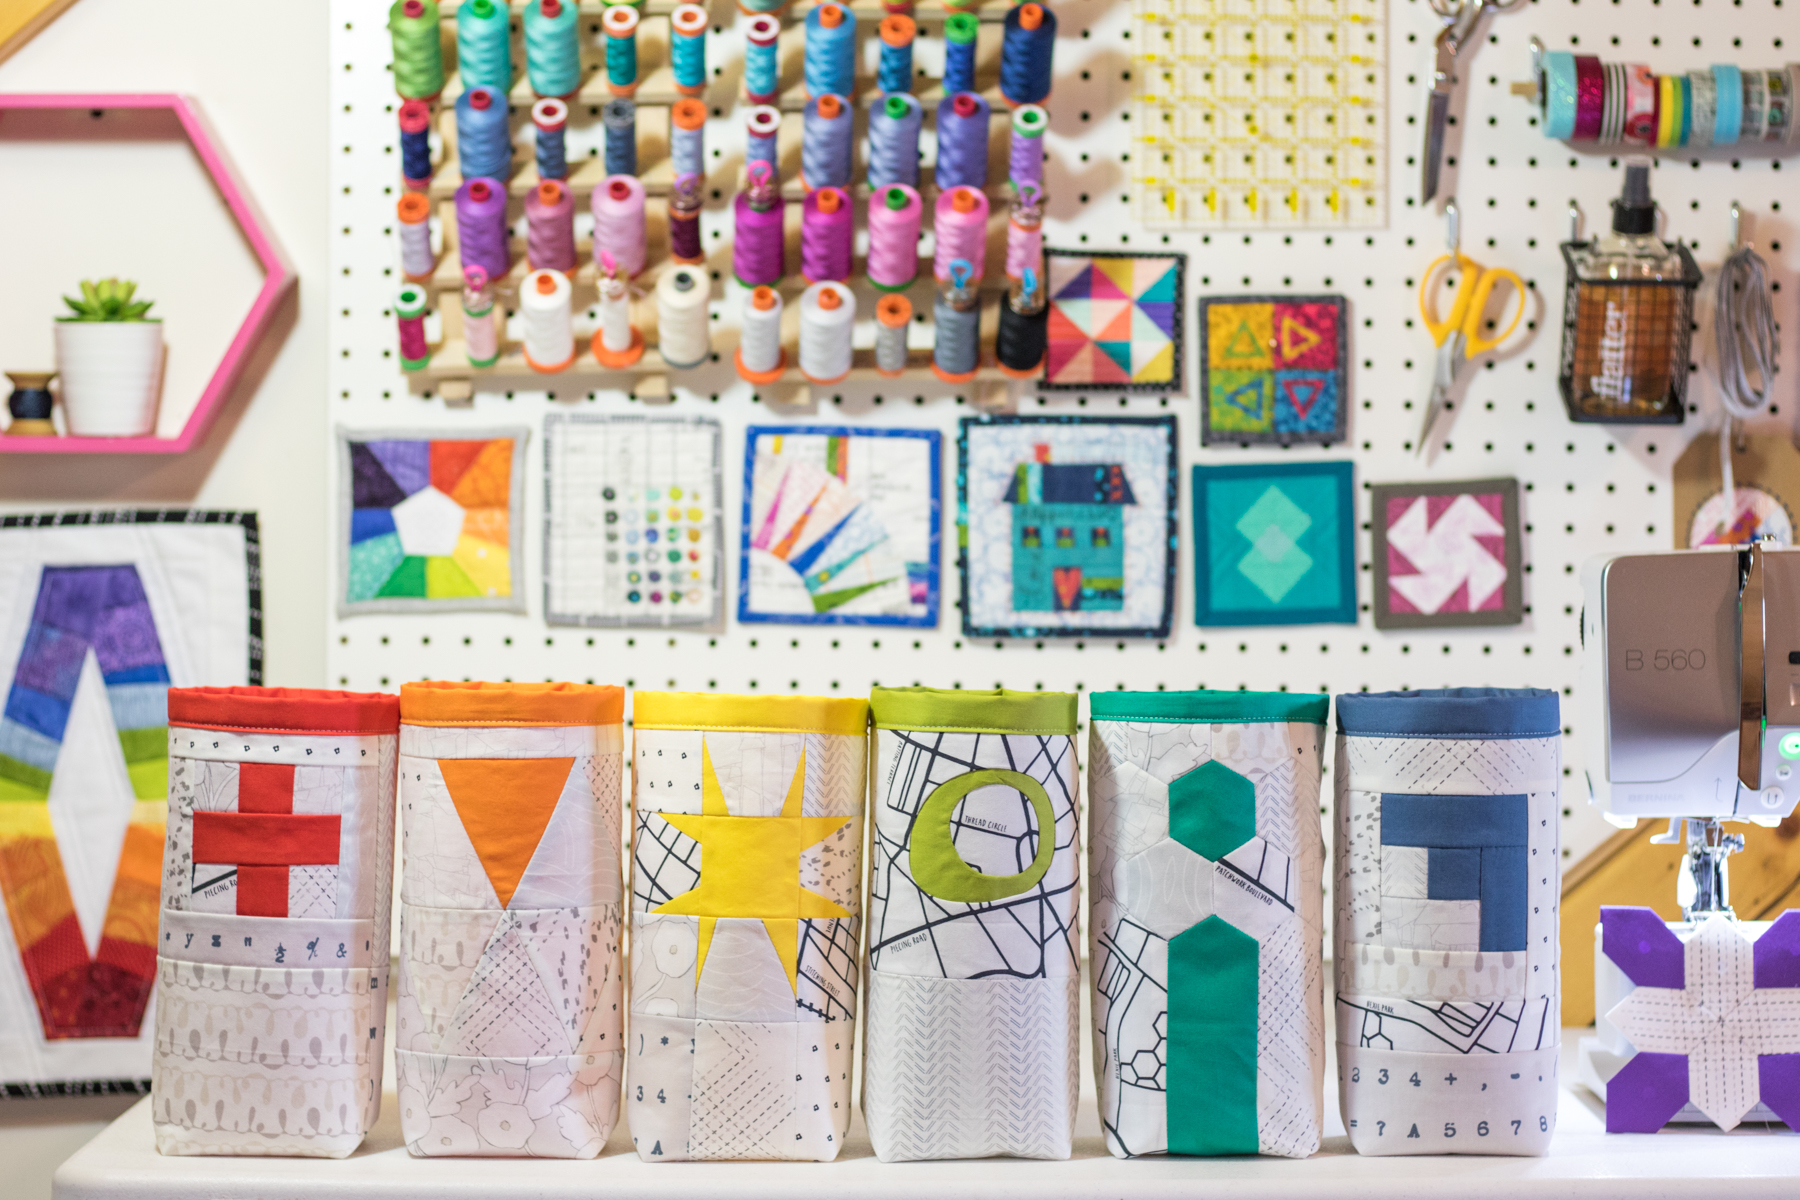
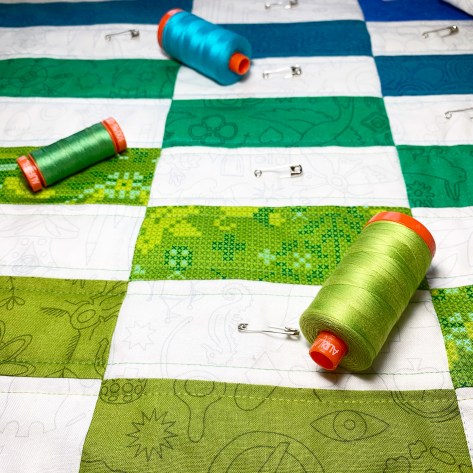
 I have been using Aurifil thread since early in my quilting days, and once I tried my first spool, I was immediately sold on how silky smooth and strong it is. It leaves hardly any lint in my machine, especially compared to the older hand-me-down threads I had been using before switching entirely to Aurifil. Not only that, the range of available colors has my rainbow-loving heart swooning. Paired with Aurifil’s commitment to seeking the most sustainable options: using 100% cotton thread, putting their most recent thread addition on a wooden spool, going plastic neutral in 2019, and a continuing focus on
 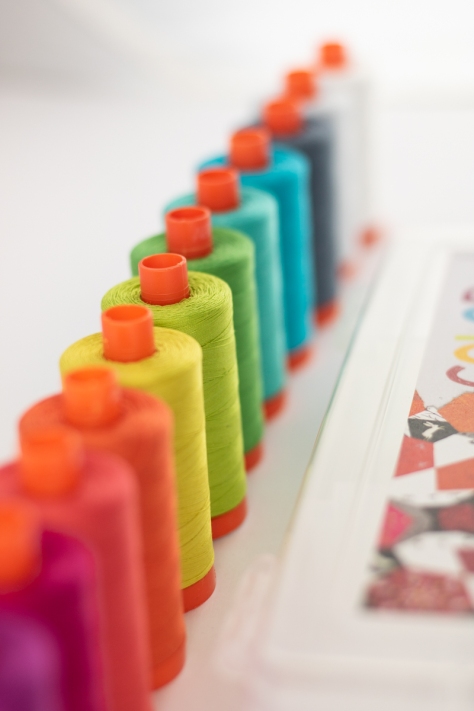 Over the past few years, I’ve found myself grabbing the same set colors of thread for most of my projects, and so finally I decided to reach out to Aurifil to see if they would still be interested in my curating a thread collection, since they had mentioned it a while back. I was excited to receive a resounding yes, and then the fun began!
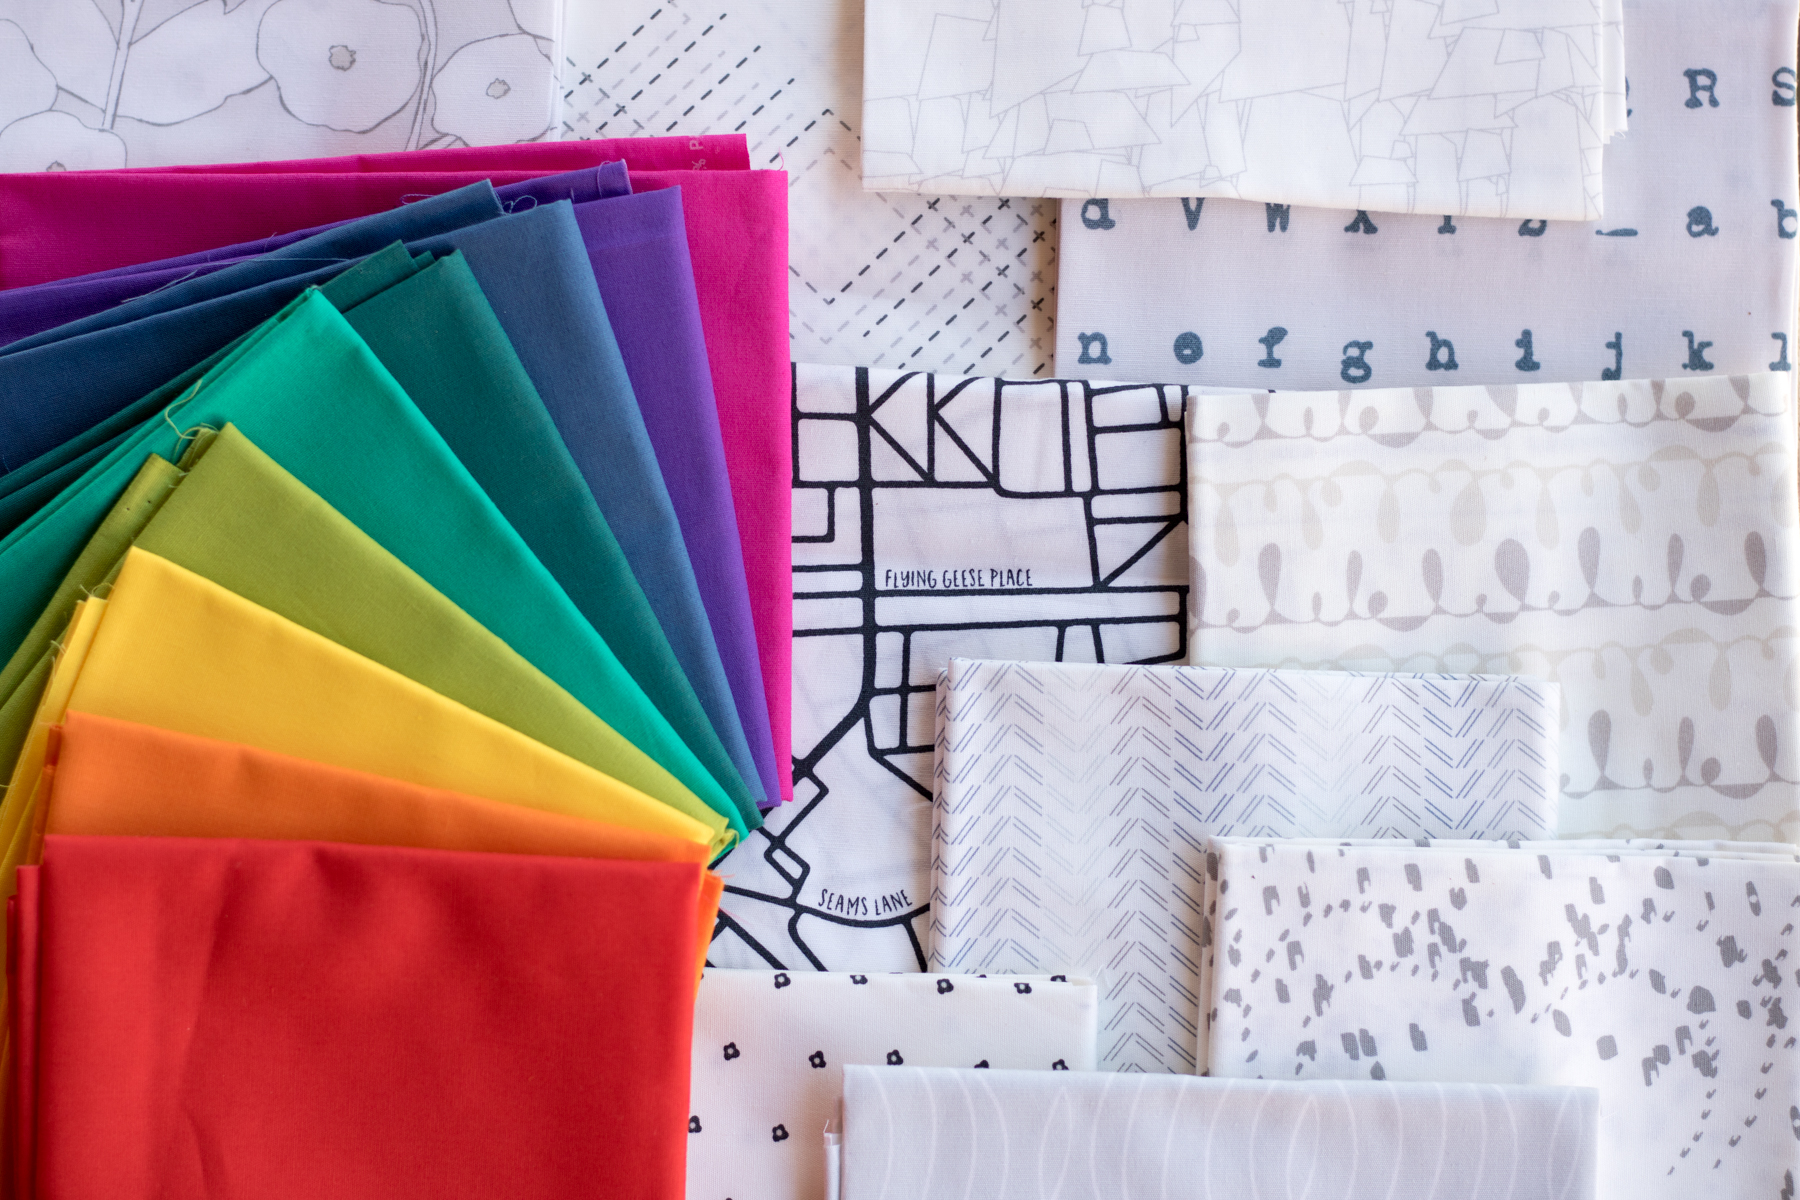
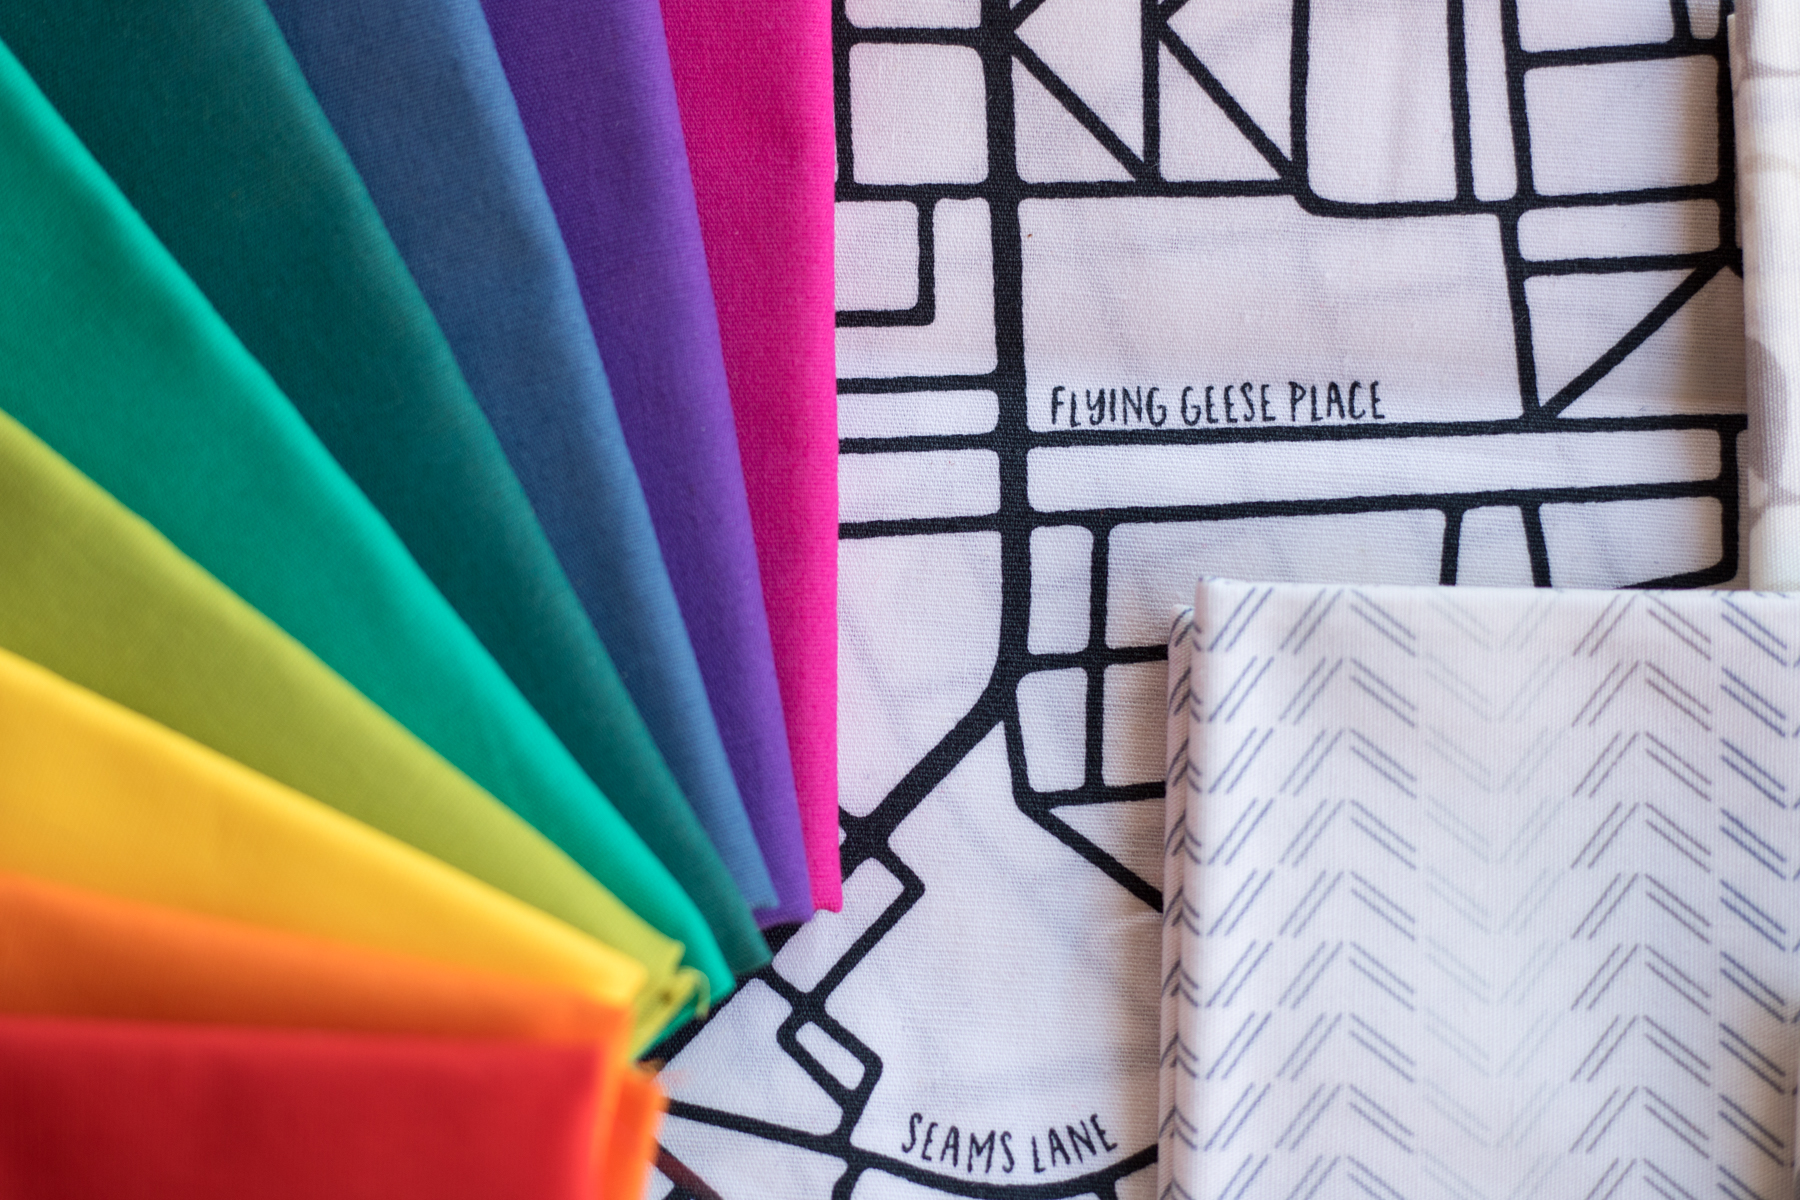
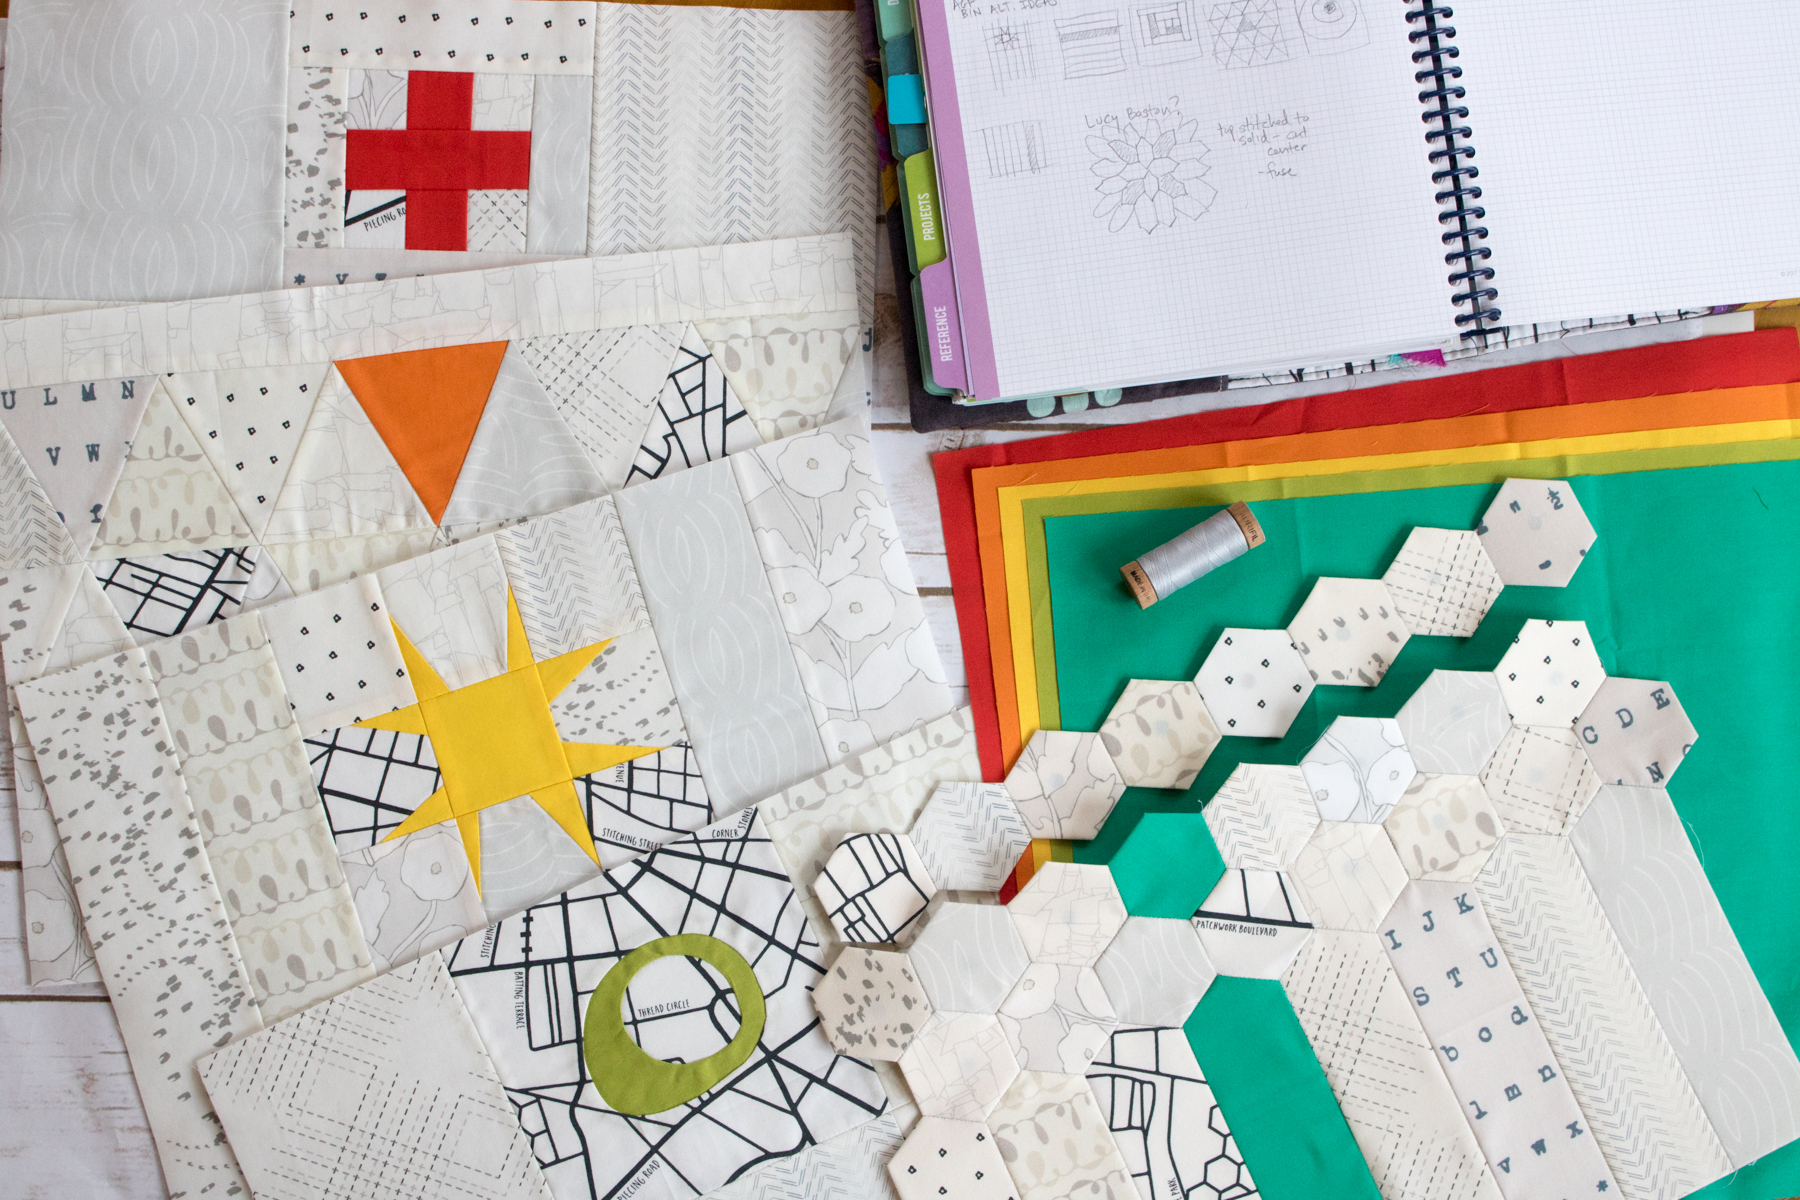
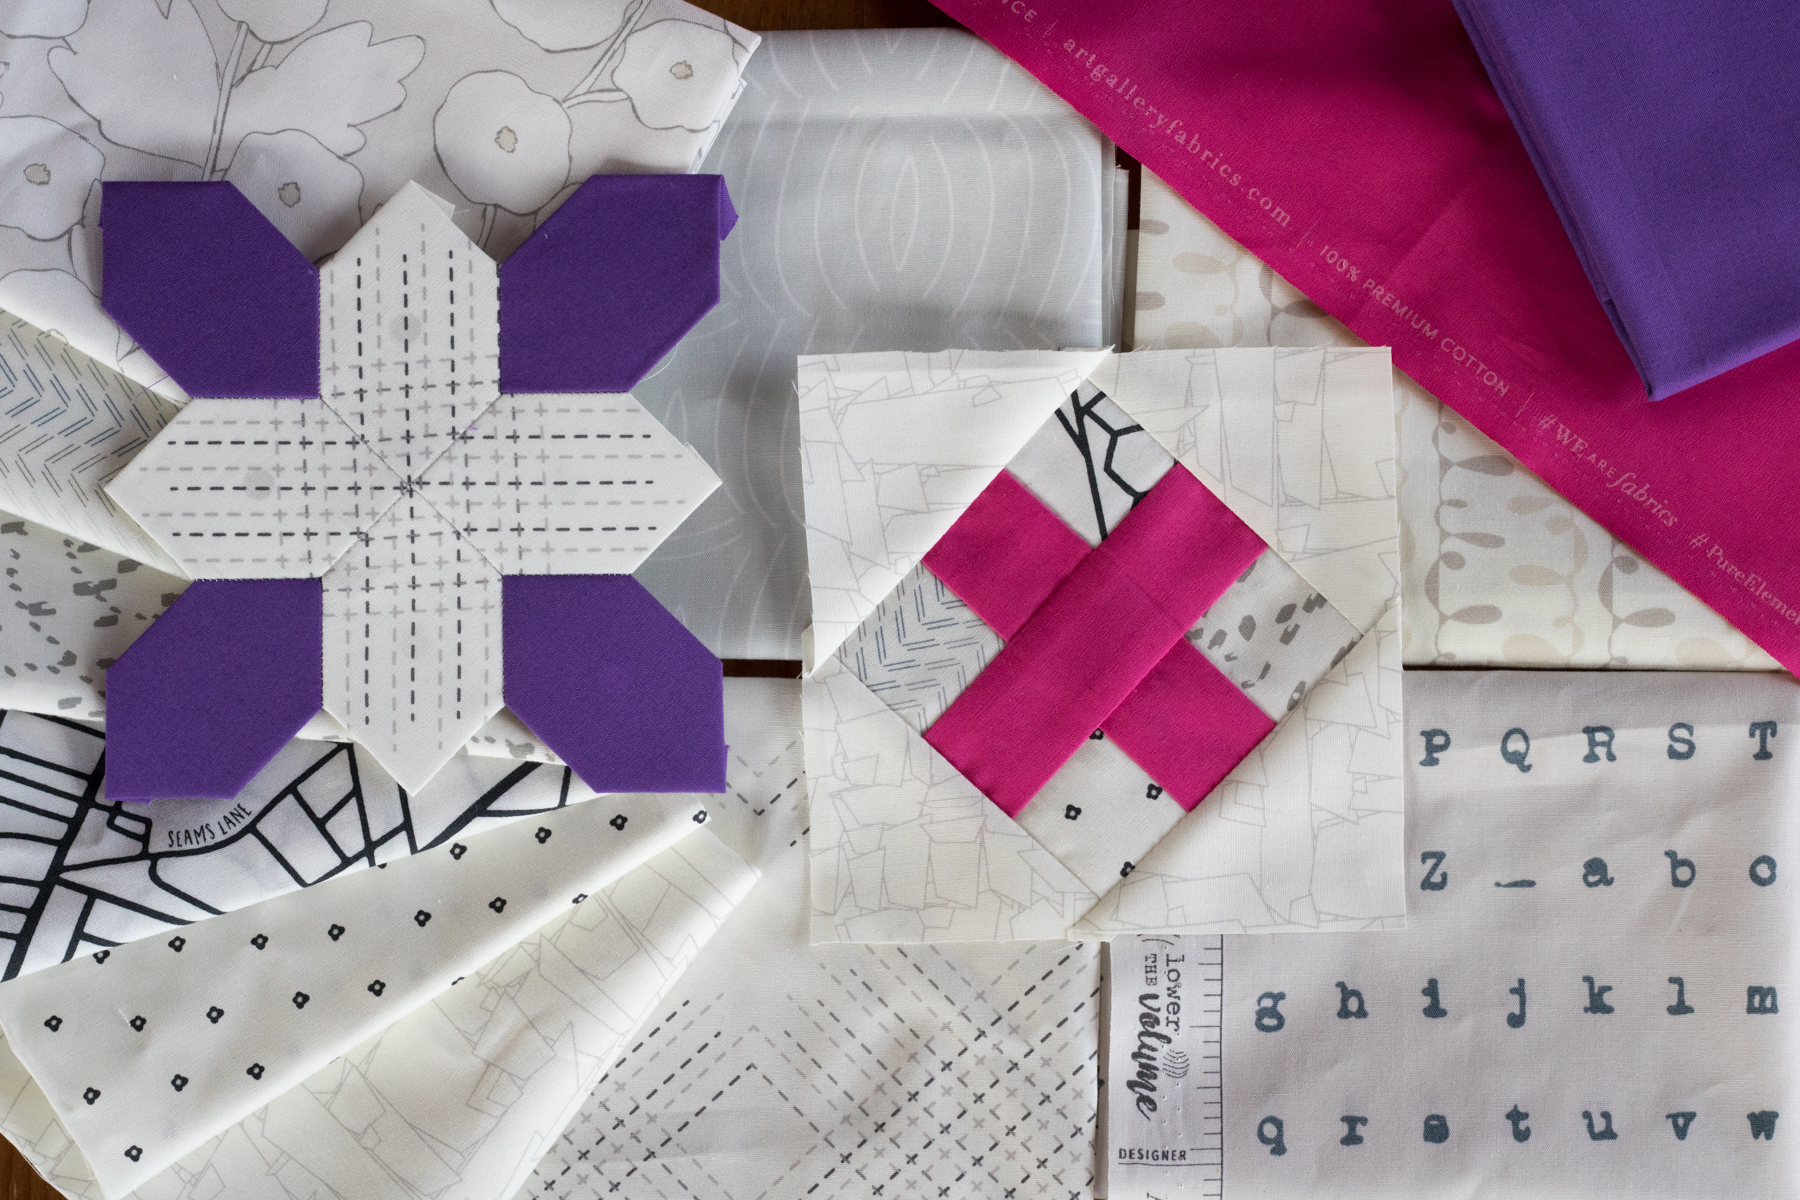
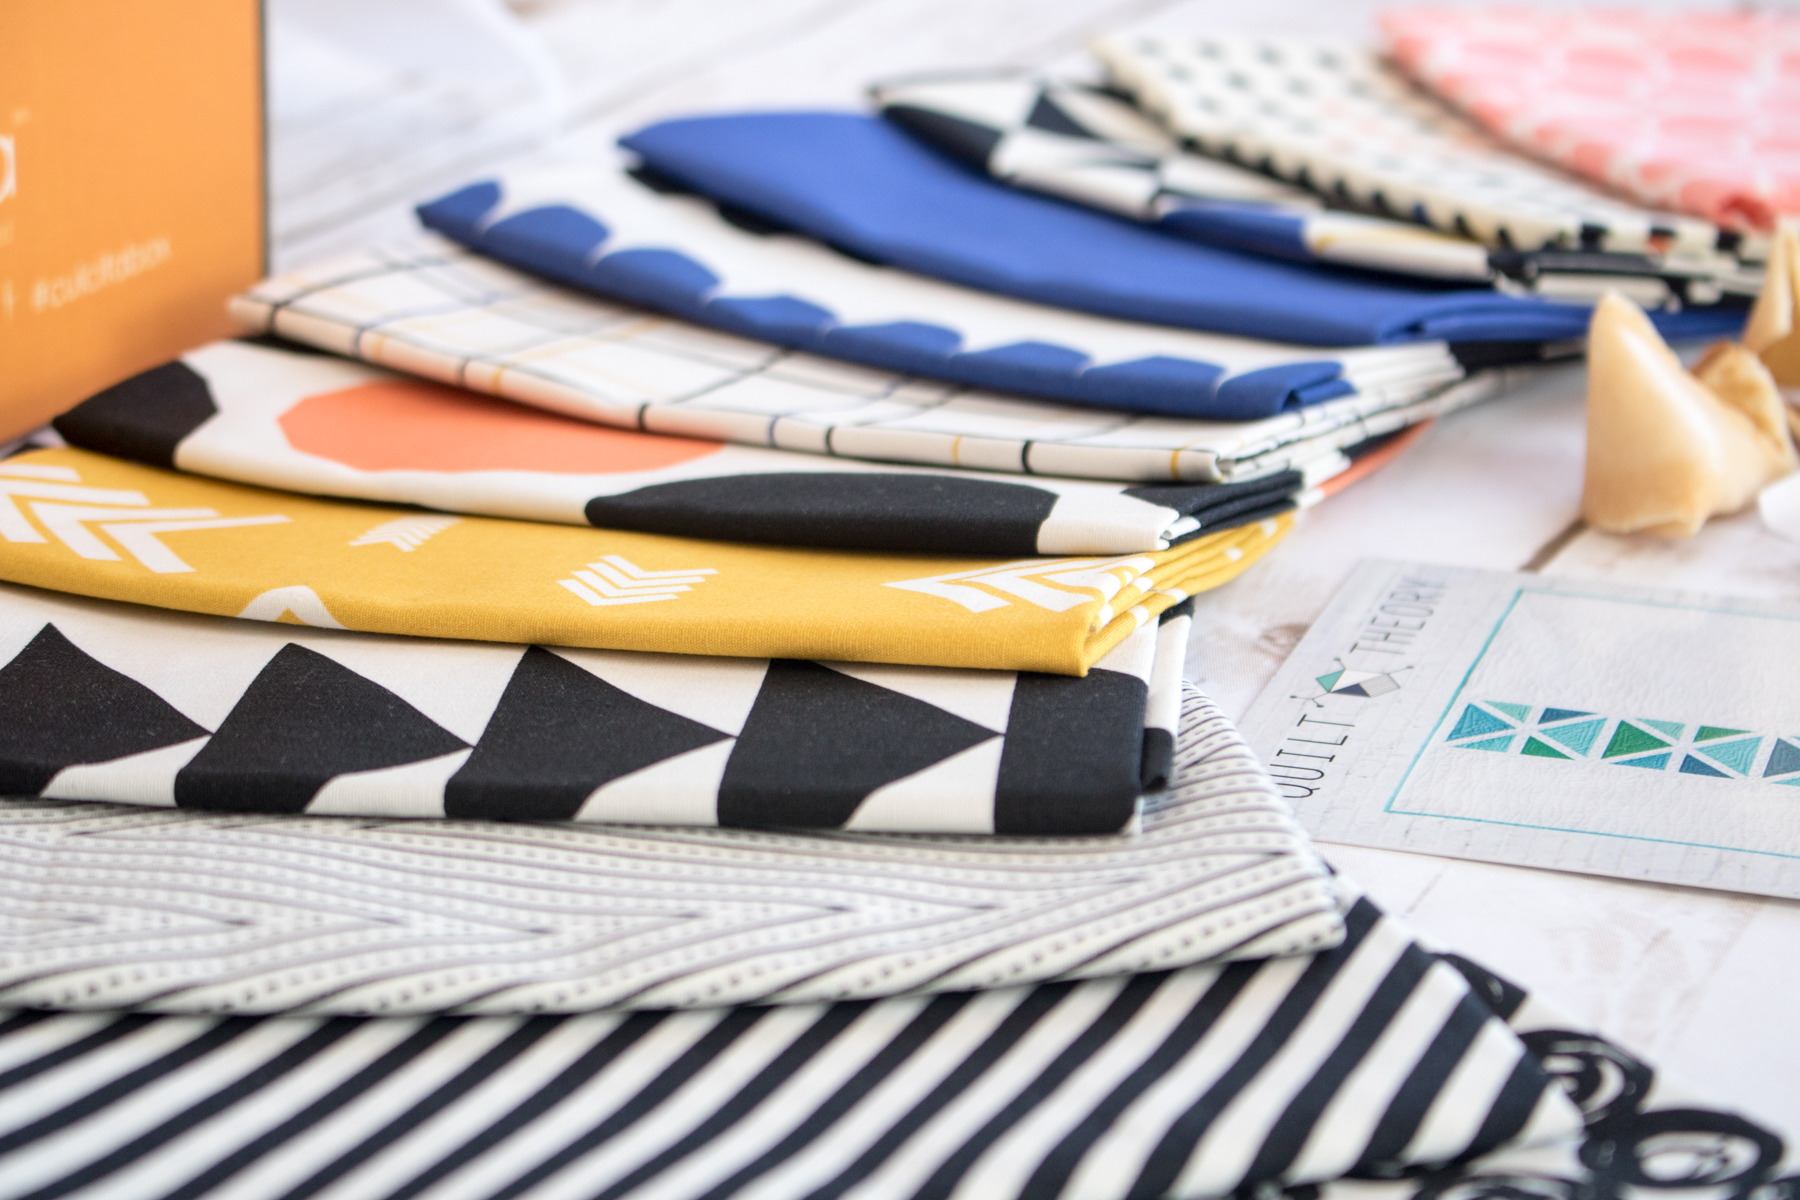
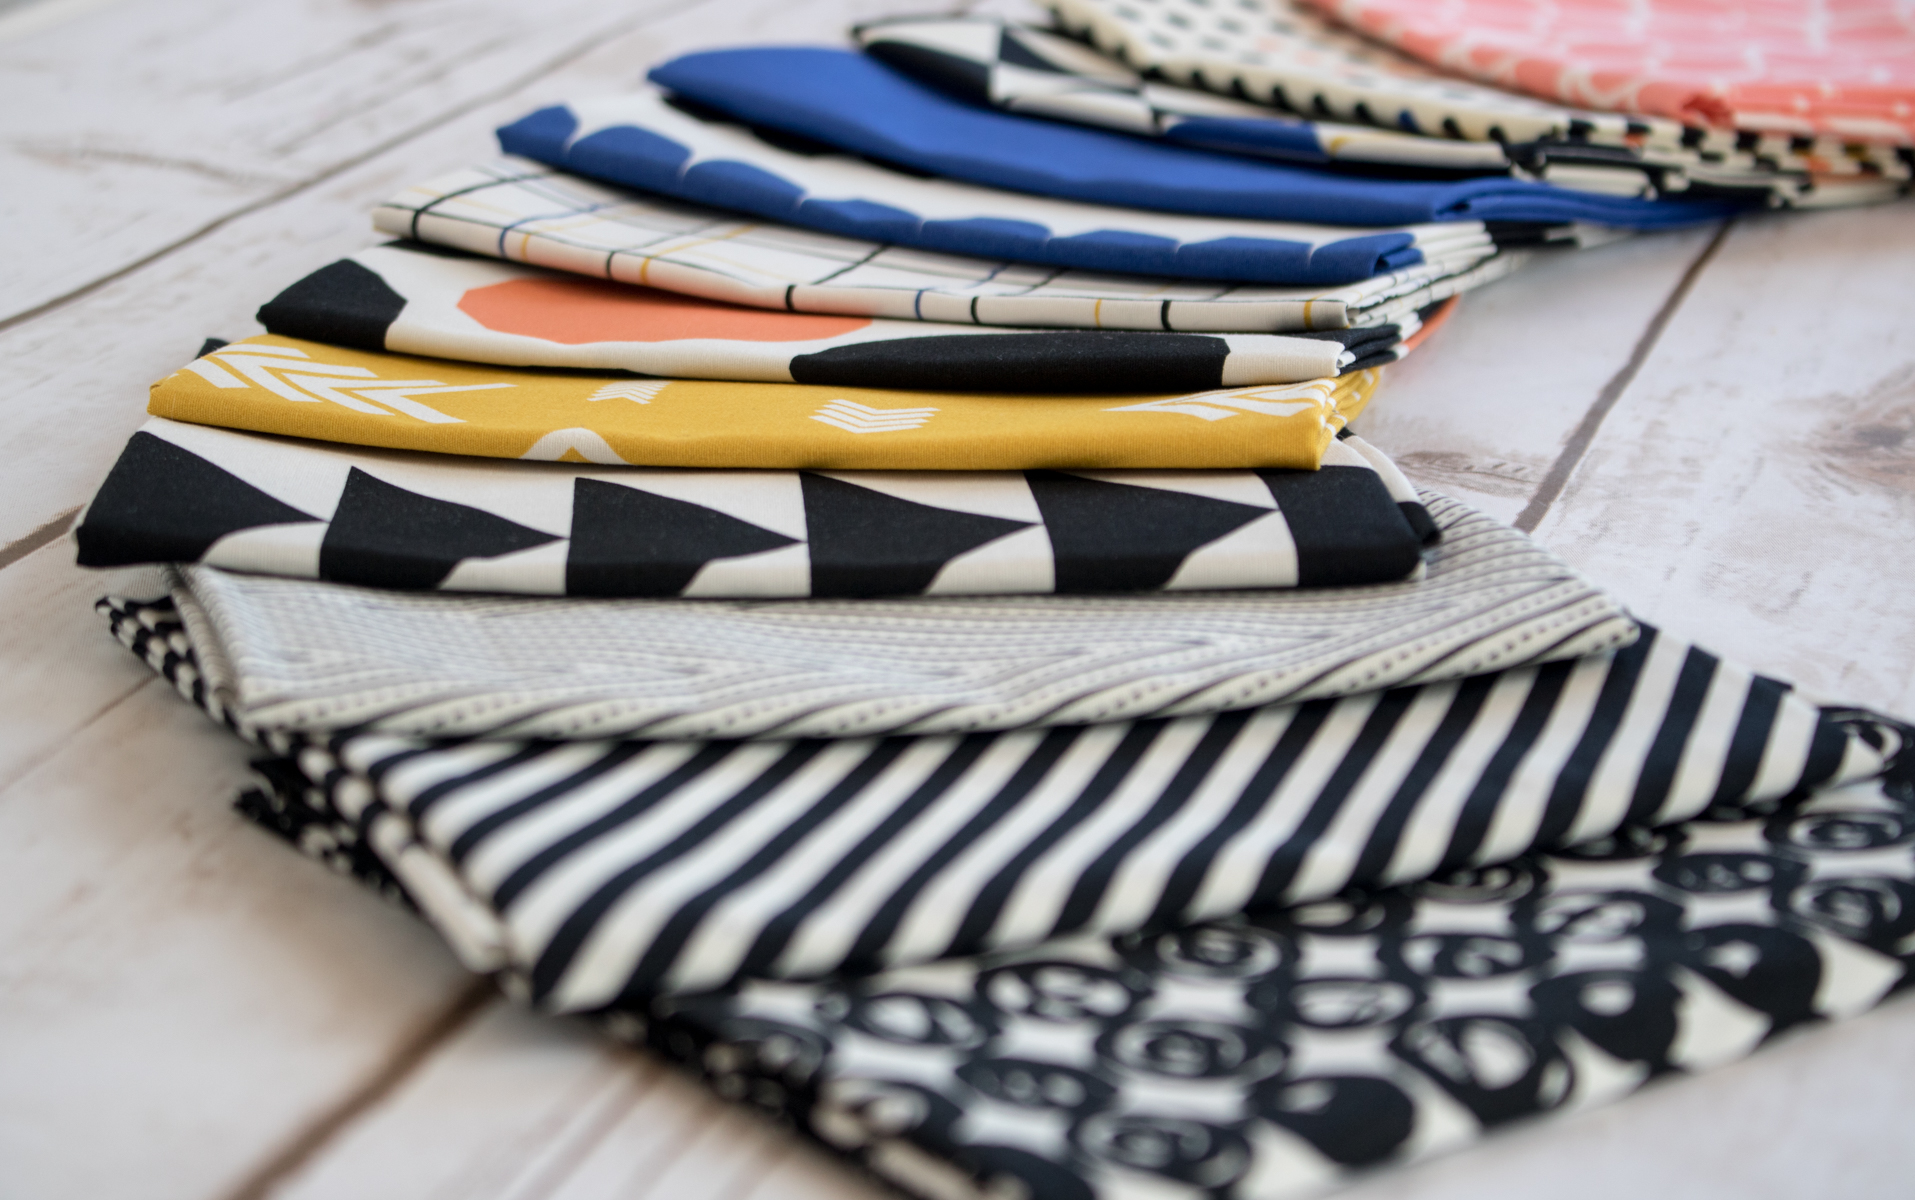
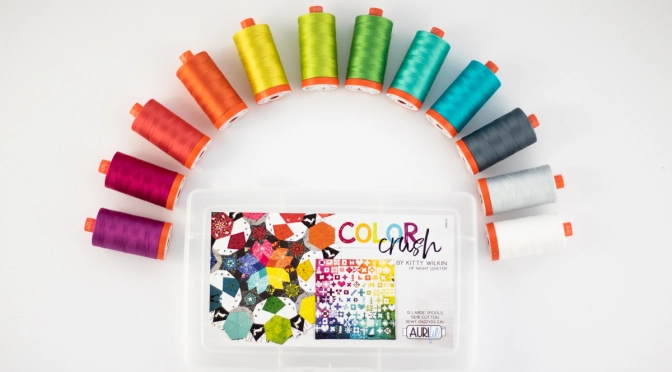
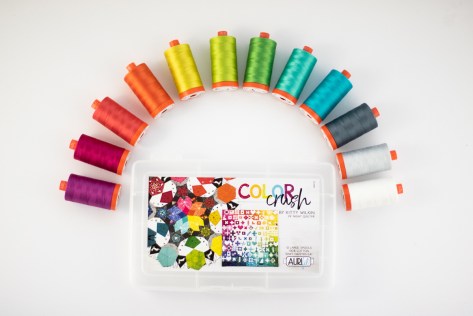
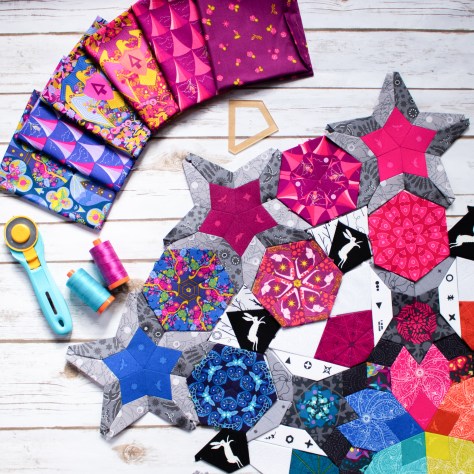
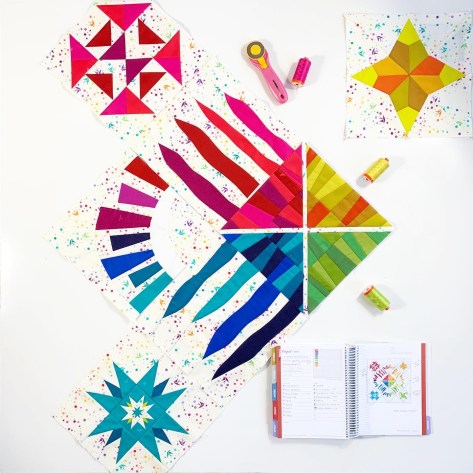
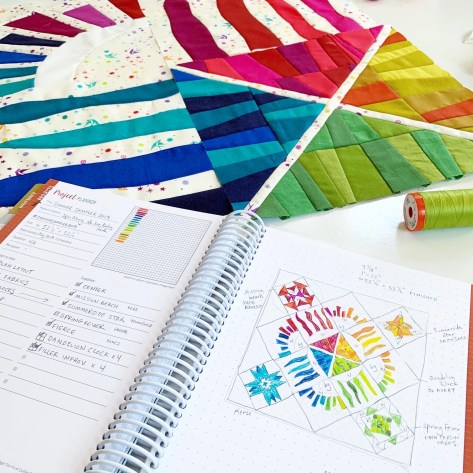
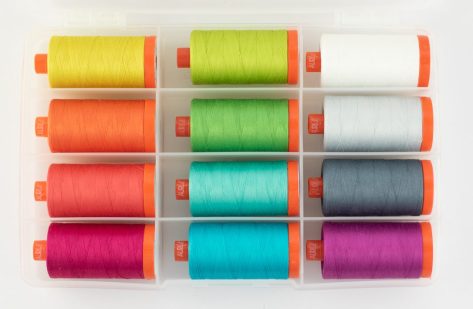 I carefully considered each of the colors of thread *I* always use, trying to decide if it would be a universally helpful color to have, and have very intentionally decided upon this spectrum of luscious, vibrant, tertiary-heavy threads. Here are just a couple of the projects on which I’ve personally used these threads recently:

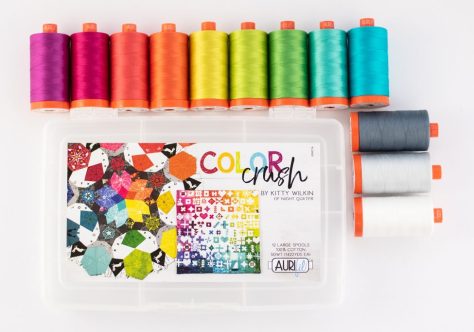 If you want to purchase Color Crush and your local quilt shop doesn’t currently stock it, please ask them to special order. Any shop can grab it from a distributor of course, but ANY shop can purchase directly from
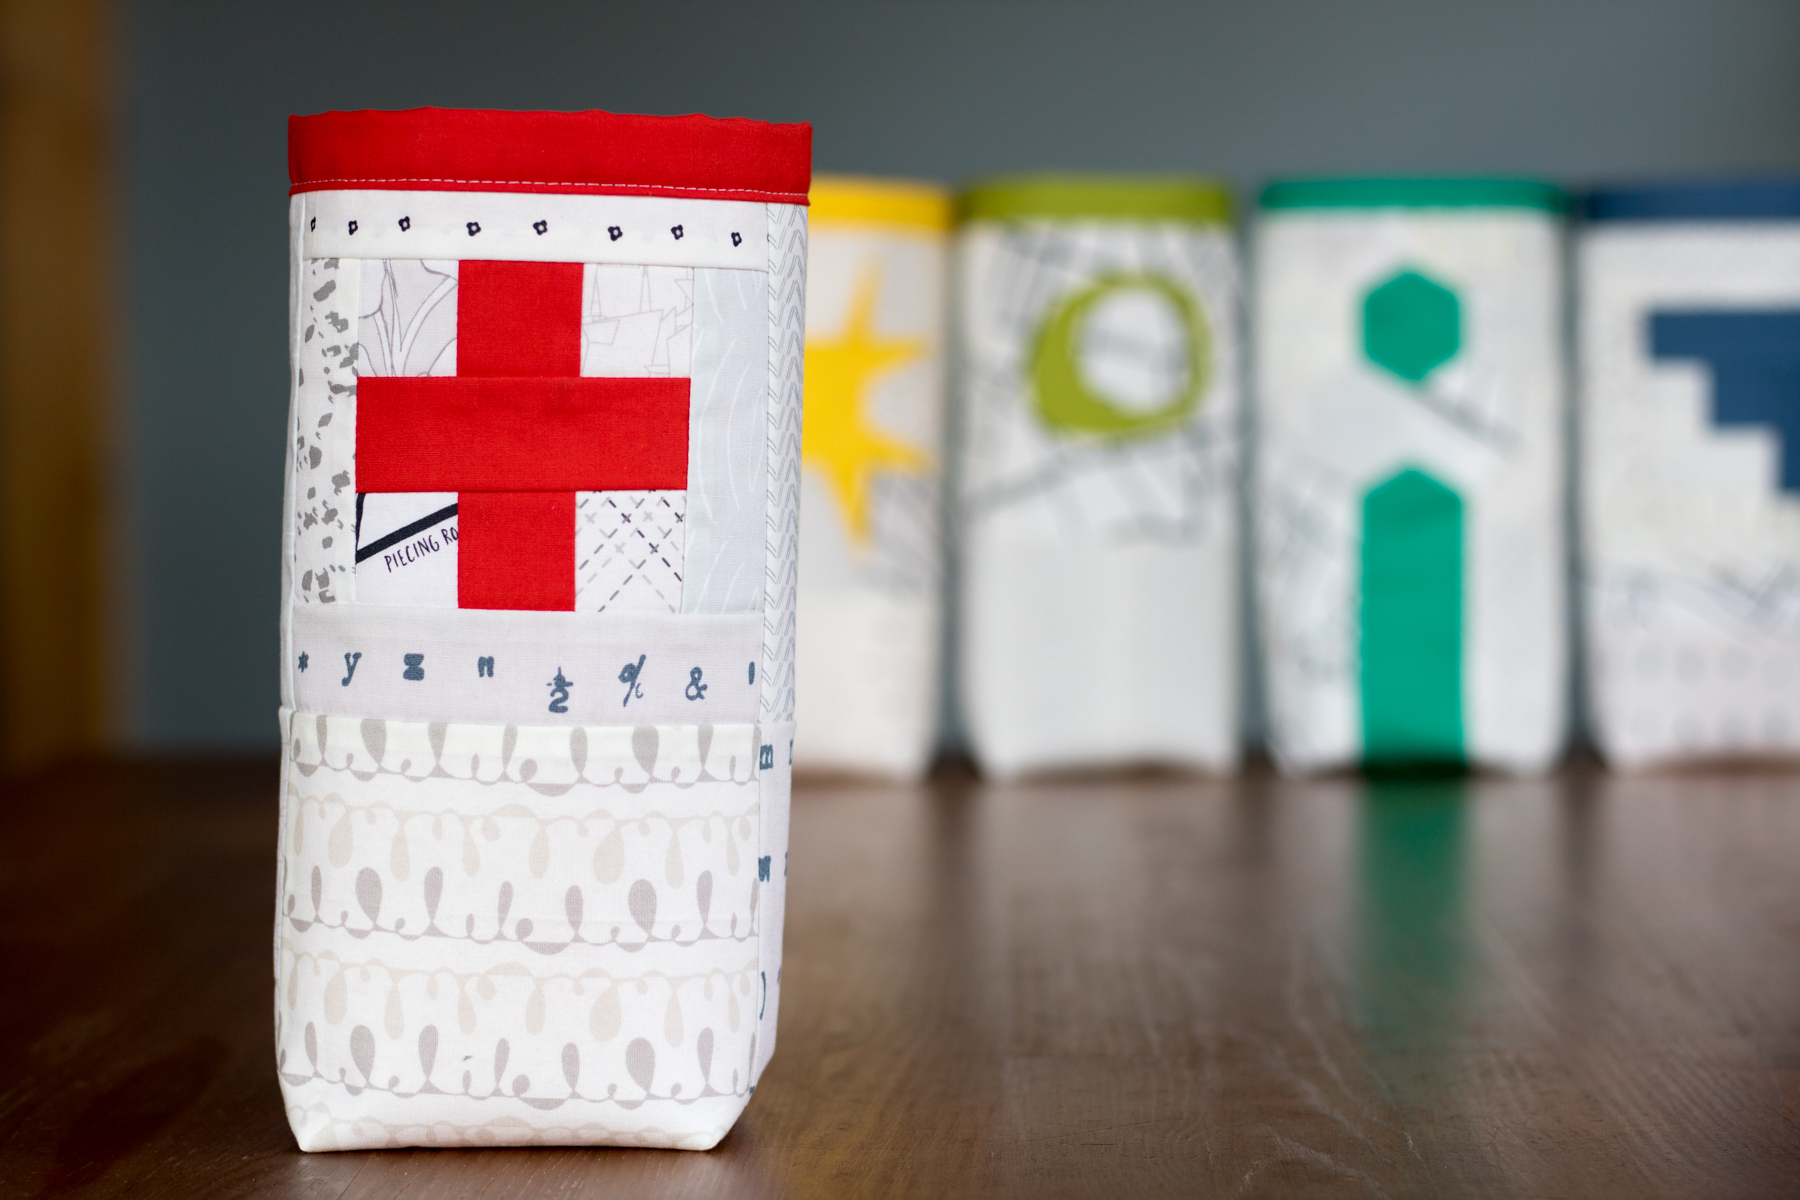
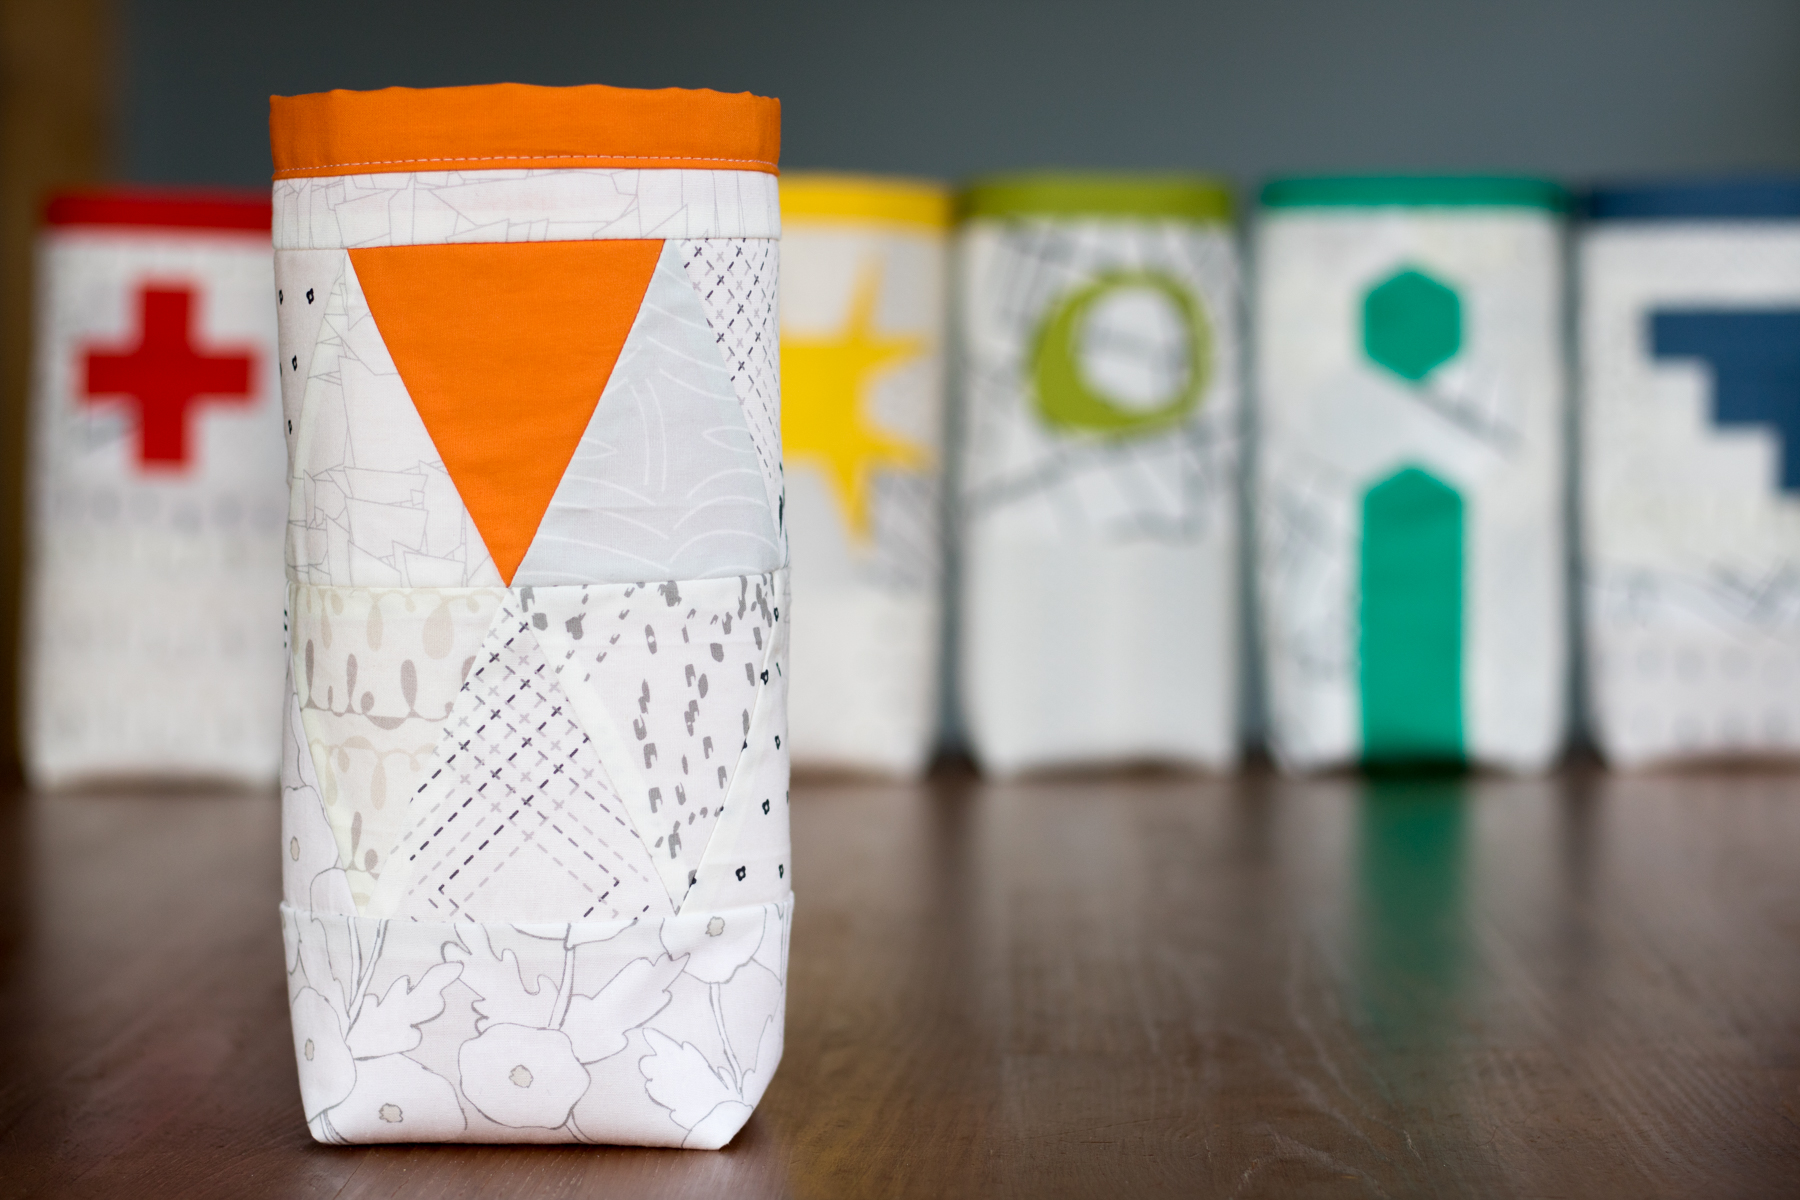
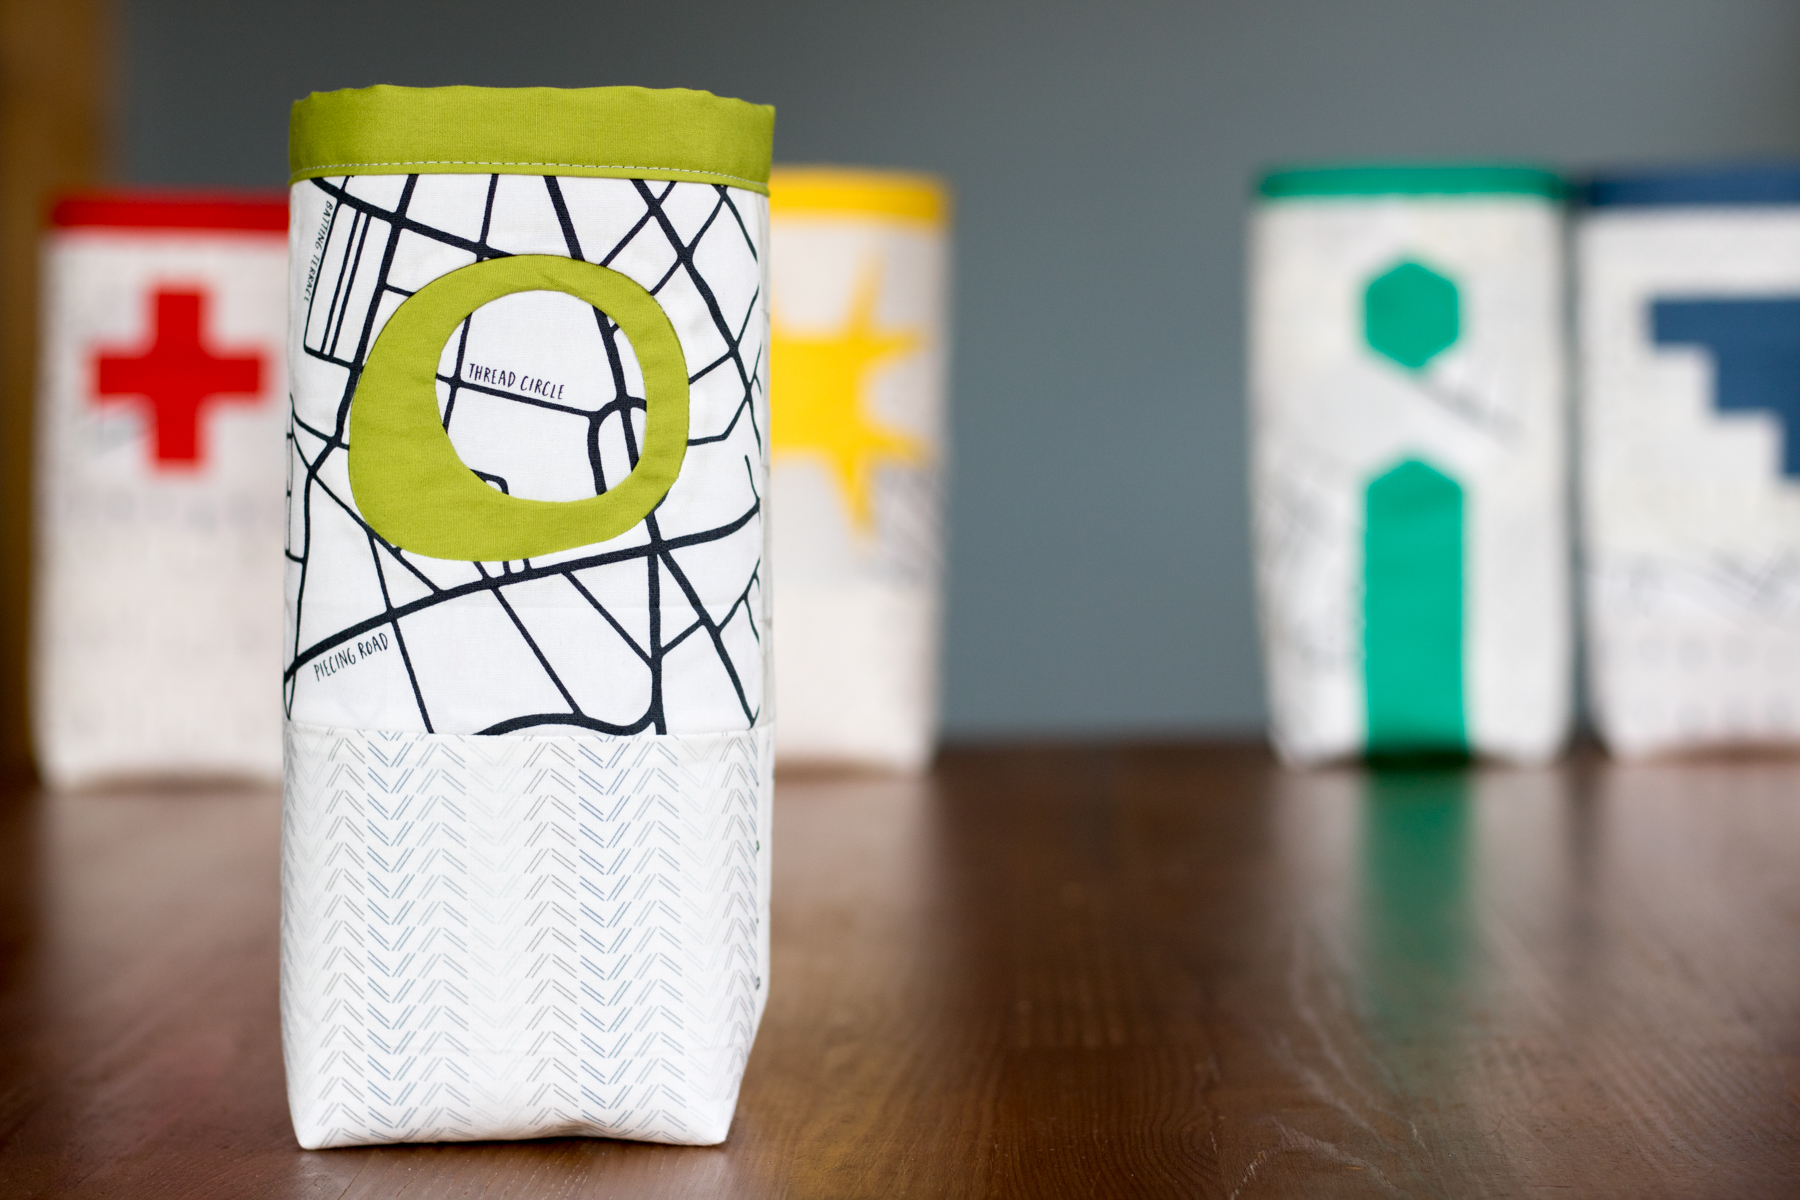
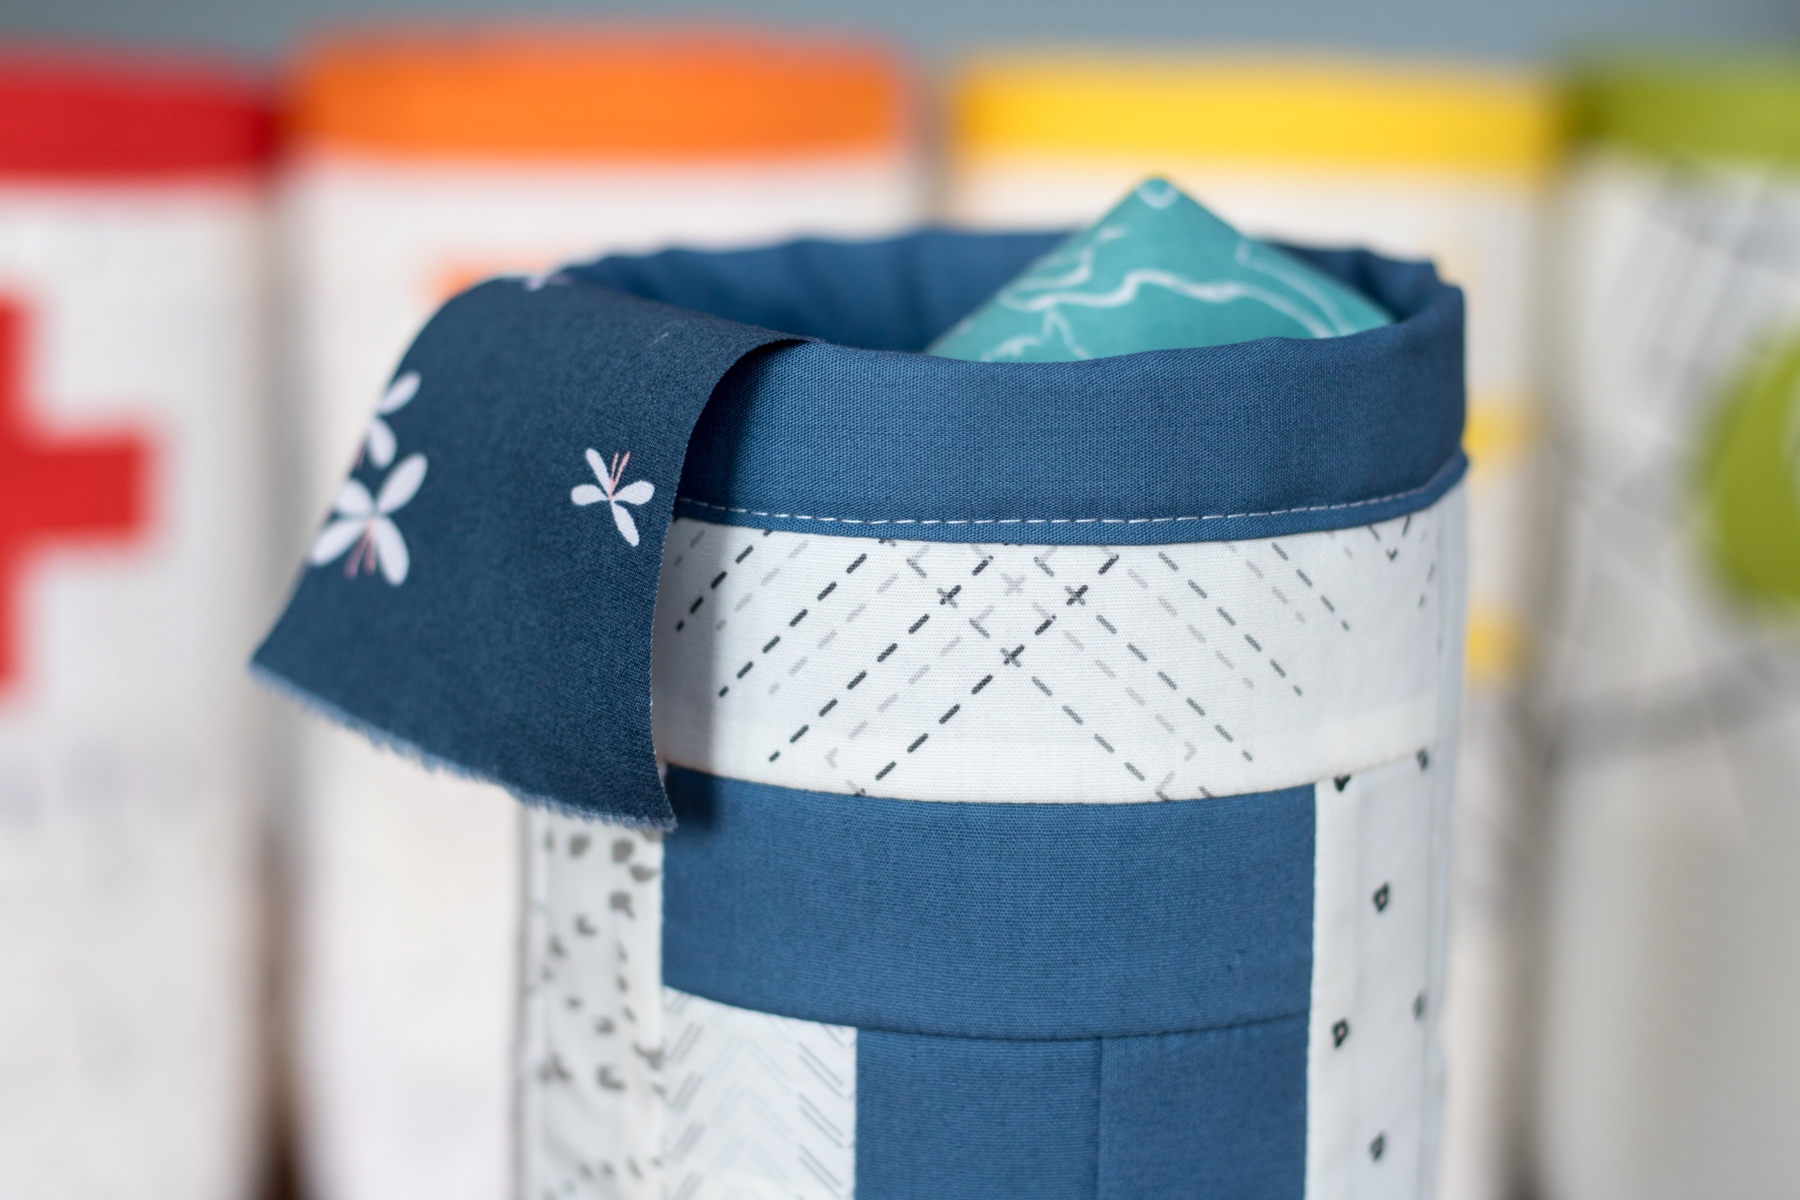
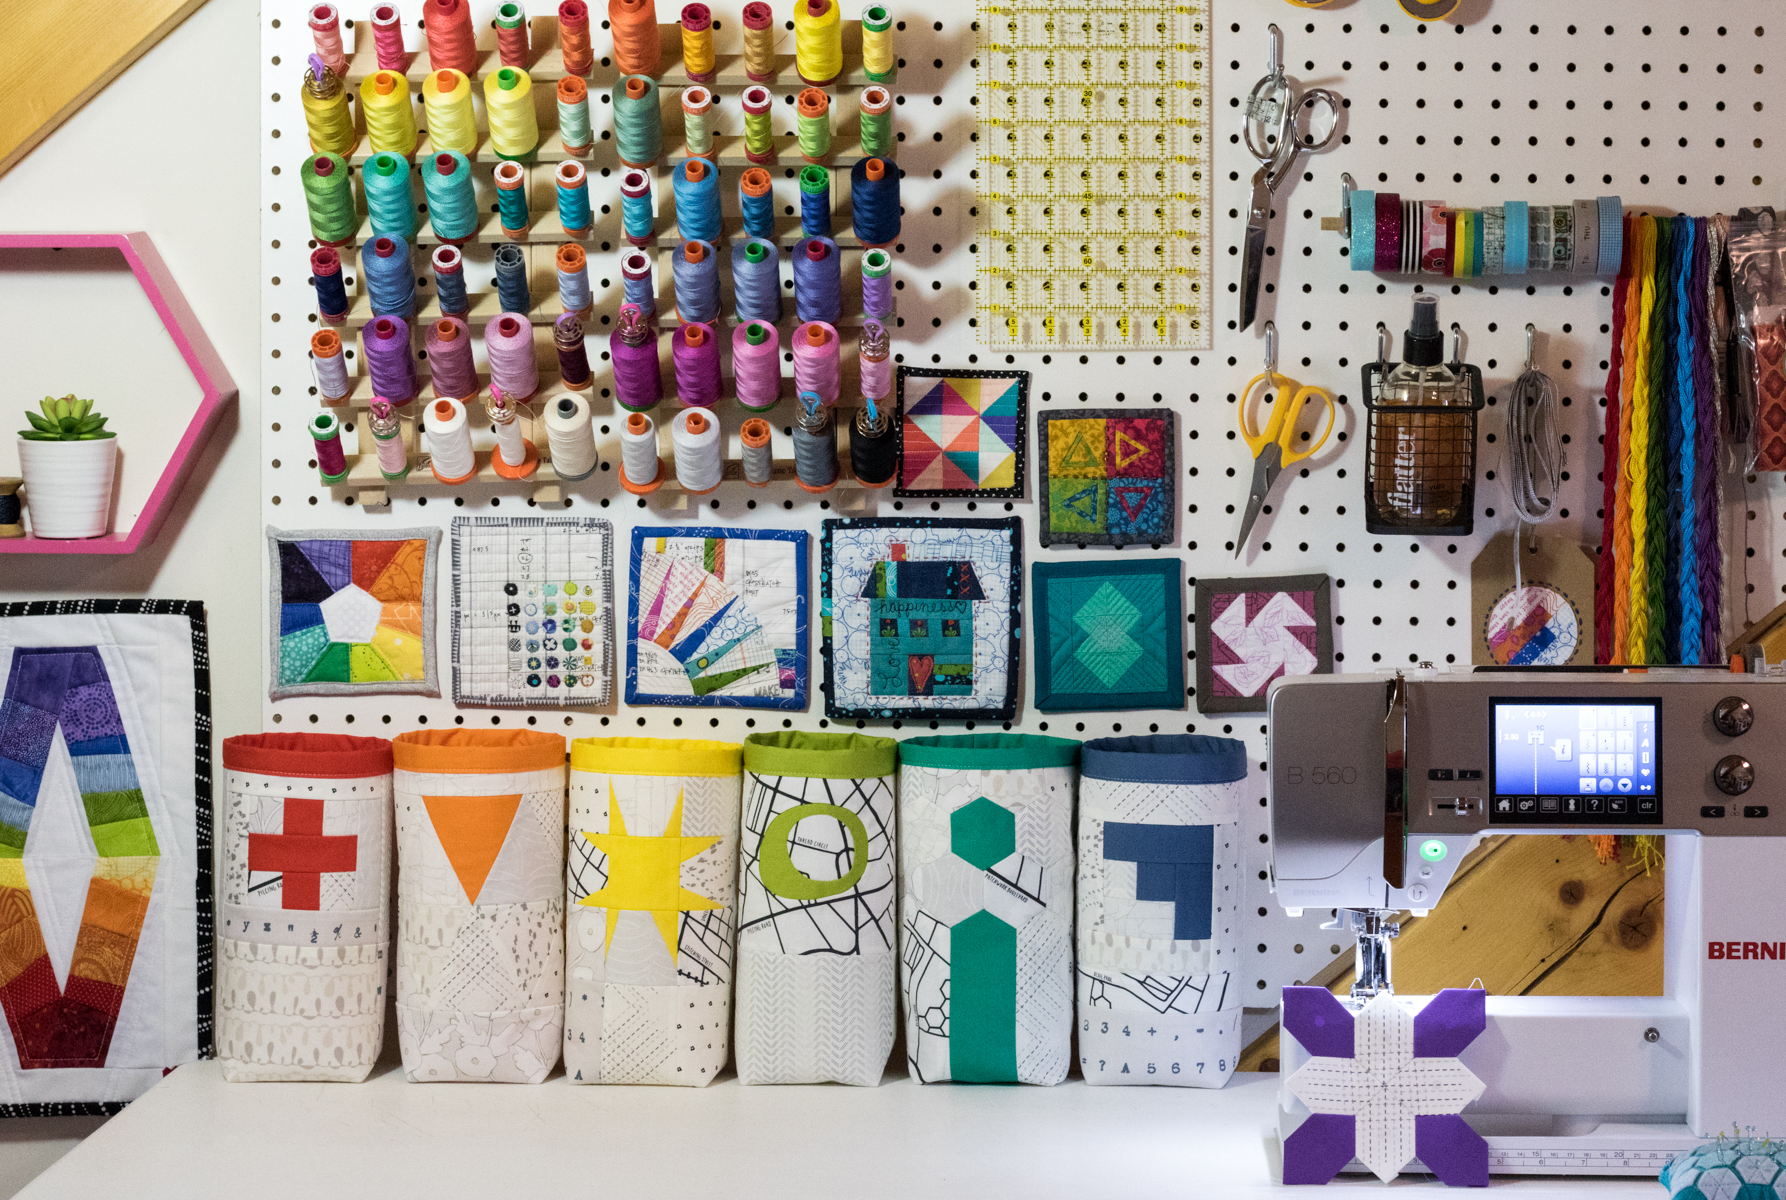
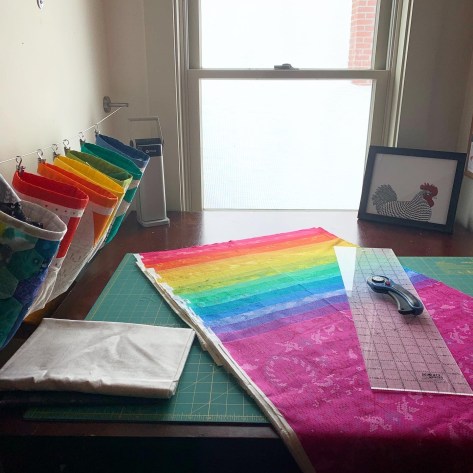 I recently faced the demon that was my chaotic sewing space and have been organizing with the help of my dear friend Alessandra. Yesterday when I shared the above photo of my newly cleared cutting table on Instagram, there were many questions about my rainbow of skinny bins hanging along the side of it. My skinny bins were made using a tutorial I wrote for Quilt Theory years ago, for a fabulous fabric party hosted by
  A few weeks ago, many fabric and thread companies were kind enough to send color cards to the Quilt Theory team to help with our planning. While brainstorming different ways to store and use these color cards, I realized that
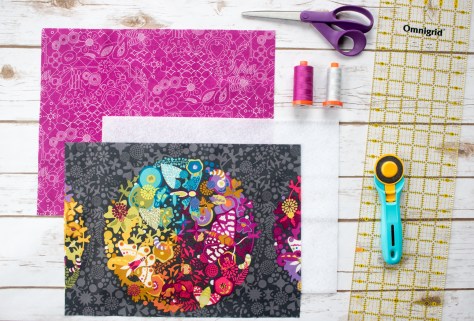
 Sew the short ends right sides together using a ⅜” seam allowance. You will have a tube with both ends open. Press seam open.
 Centering your pressed seam (3 ½” of fabric should be on either side of the seam), press the tube flat, creating clear side creases.
 Measure and mark 1 ⅞” (1 ½” from the bottom seam stitch line) up and 1 ½” in from the side on each bottom corner, as illustrated above.
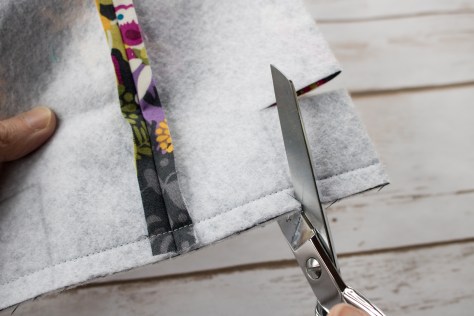 Carefully cut out the marked squares and discard.
 Opening the bin, fold the recently cut opening so that the bottom seam and side pressed seam match, right sides facing.
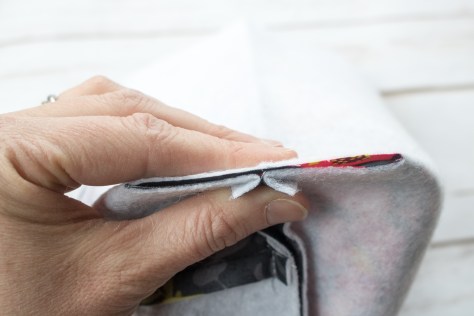 Carefully pin or hold in place, and sew along the opening with a ¼” seam. Be sure to backstitch at the beginning and end. Repeat for the other bottom corner.
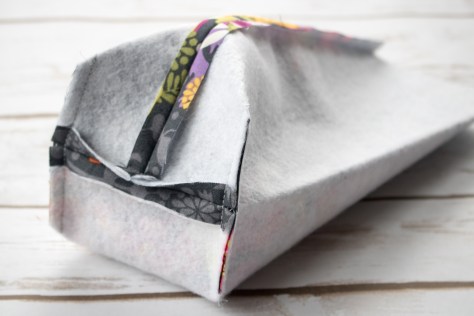 Your bin exterior should look like the photo above.
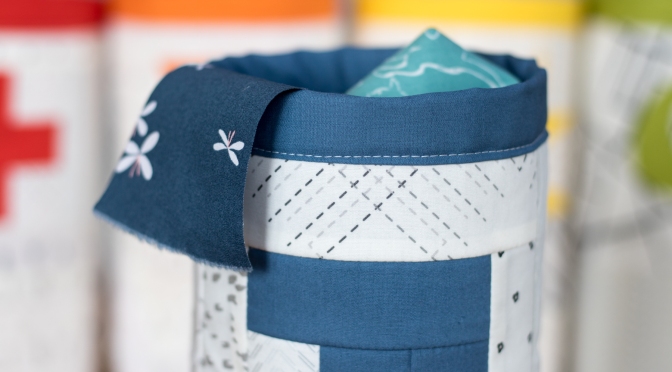
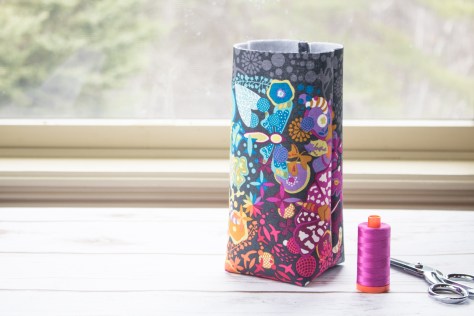 Turn bin right side out, press out the bottom corners, admire, and set aside the exterior of your bin.
 Repeat Steps 2 through 7 with the lining fabric to create the lining of the bin.
 With right sides out, carefully slide the lining fabric into the exterior of the bin, aligning the back seams and pressing the bottom corners into each other so that it fits snuggly. The exterior and lining should be wrong sides facing each other and the lining should extend about 1” above the top of the exterior.
 Fold the lining down toward the outside of the bin so that the raw edge of the lining meets the raw edge of the exterior (approx ½”).
 Fold again, so that the lining folds down over the exterior, with all raw edges contained inside the folds. Press carefully around the top edge of the bin so that your fold stays in place. You can pin or clip, or live on the wild side and simple feed carefully by hand as you stitch it down.
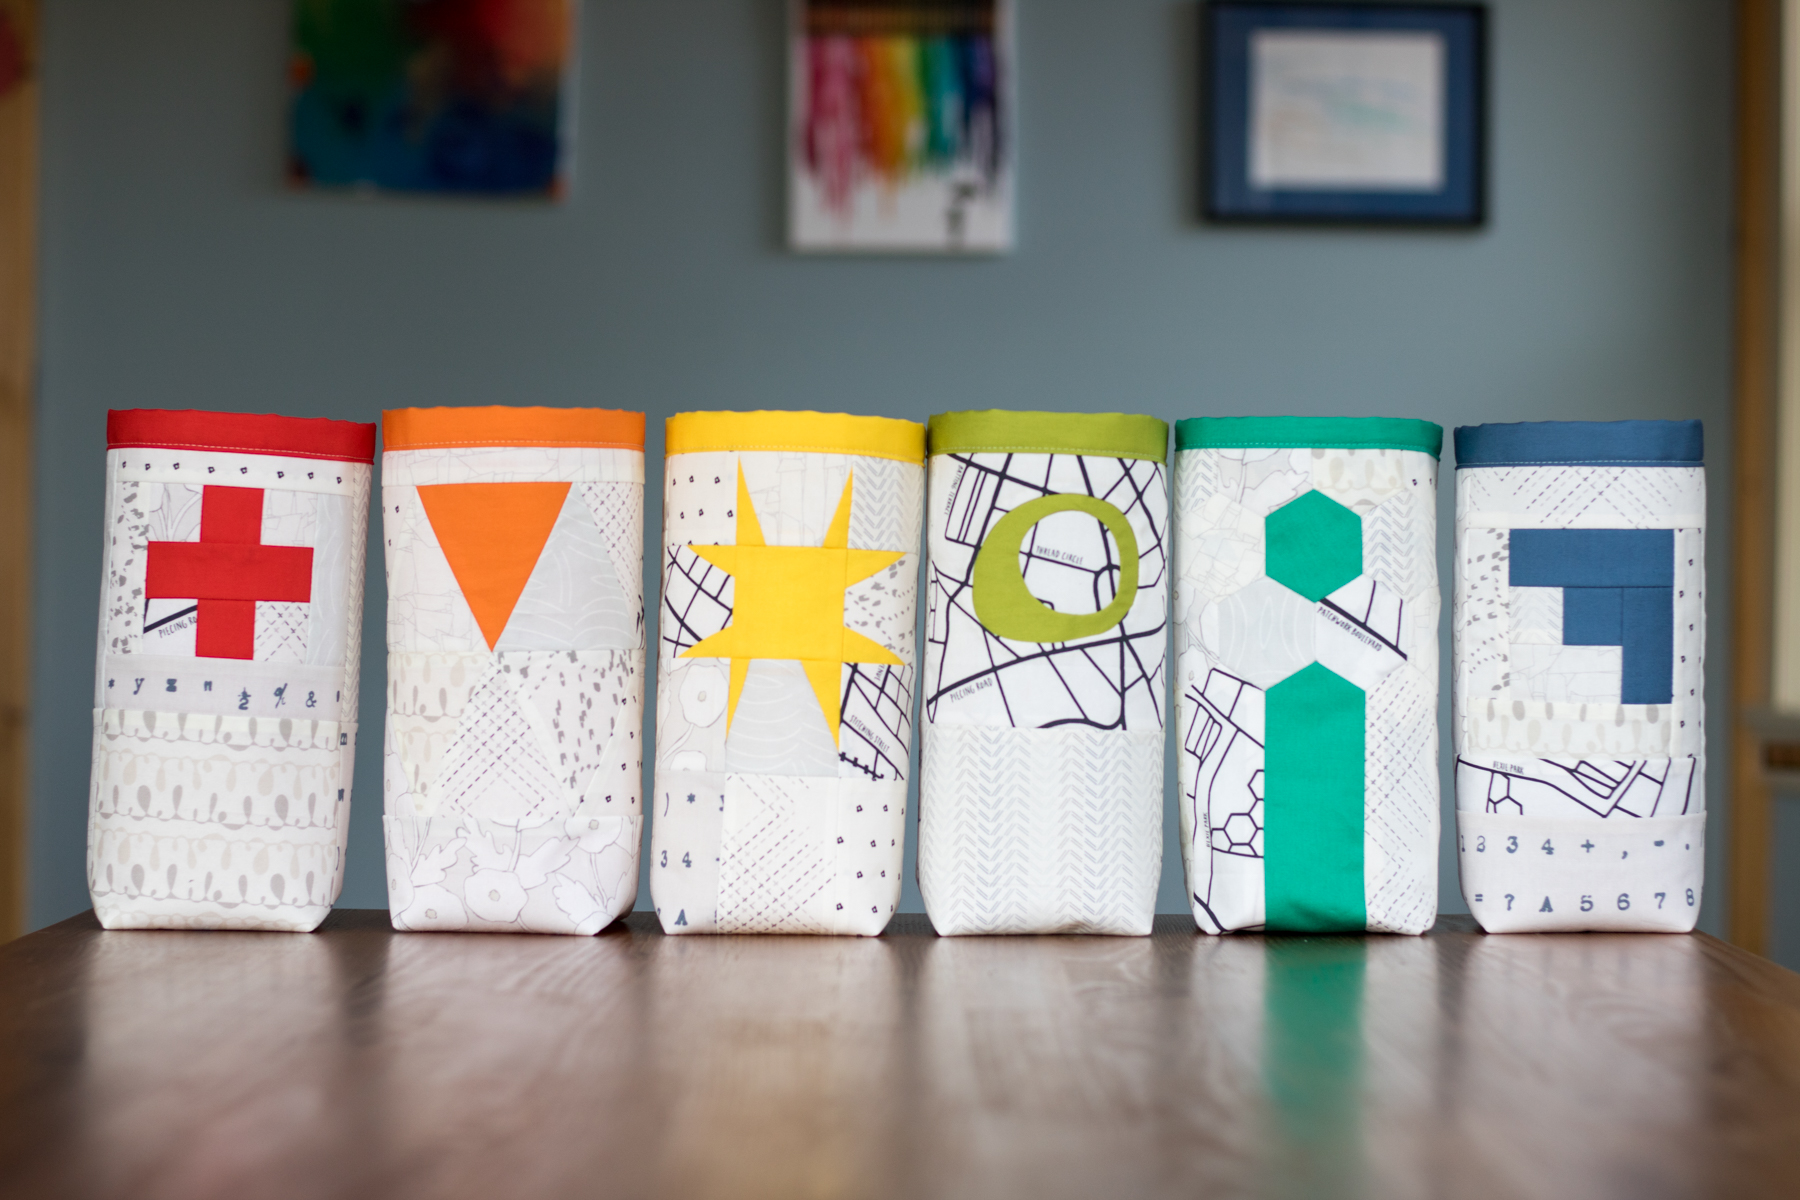
 I used my Aurifil 50wt 2600-Dove and a 3.0 stitch length so that it provided a bit of interest matching the pattern on the Alison Glass Sun Print Grow in Pansy I used for the lining.
 Feel free to personalize the outer panel, too! Add-on exterior patterns may be available one day if the desire is high. Please use
  If you don’t yet have an Aurifil thread color card, ask your local quilt shop or order from
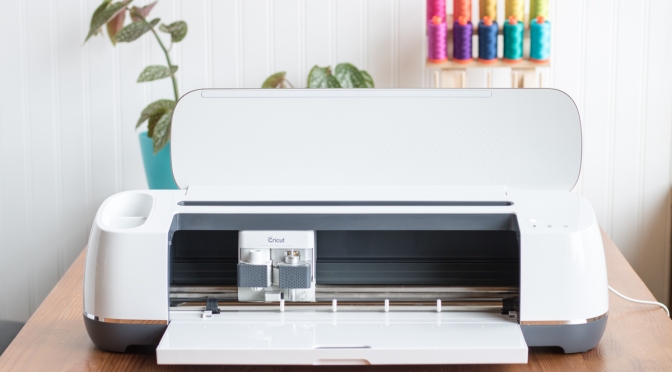
 This post is a sponsored conversation written by me on behalf of Cricut. All opinions are my own and I only share products that I think are awesome. Note that there are no affiliate links included since I live in Maine where affiliate programs aren’t permitted, but I have linked to referenced products for your ease. Business aside, shall we get on with the fun? Let’s!
 I set aside a day where I would have a window of a few hours without any of the kids home to first unbox my Cricut Maker, since I knew that I would need to not only figure out how it works, but also figure out how to use Design Space, where your projects and designs are created. I was pleasantly surprised at how extremely easy and user friendly the entire set up was! I probably could have figured it out with all three kids hanging on me–it was that intuitive!
 To set up the Cricut Maker, I just went to the Cricut website and found the
  I went into my Cricut Maker exploration day with full intention of diving into its capabilities for the world of quilting, but in exploring the Cricut Design Space, I accidentally–OOPs!–ended up bedazzling one of my daughter’s tank tops with a glittery iron-on unicorn! The
  It didn’t take me long at all to have the unicorn cut since it was a free image already in the Design Space, and the
 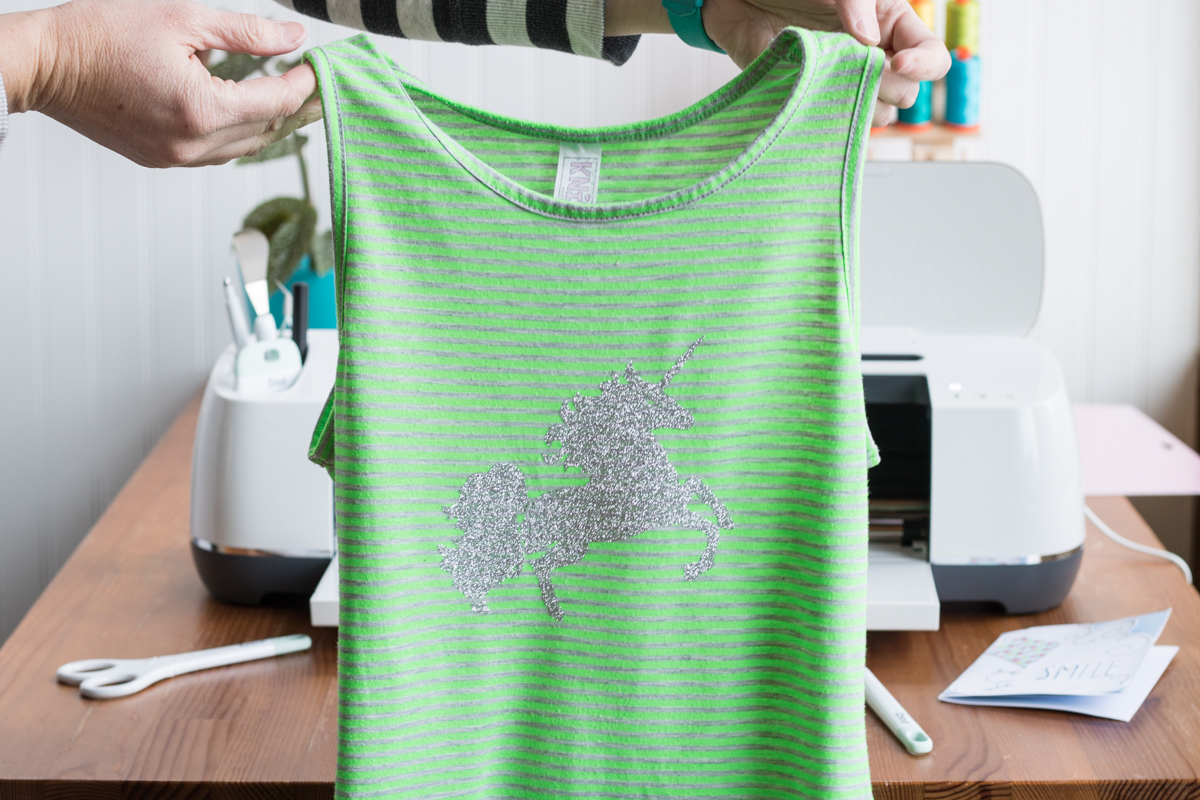 Within a half an hour, I had a fully bedazzled unicorn tank, which fortunately my daughter LOVED when she got home from school.
 The Cricut Maker comes with a fine point pen, but there are also a
 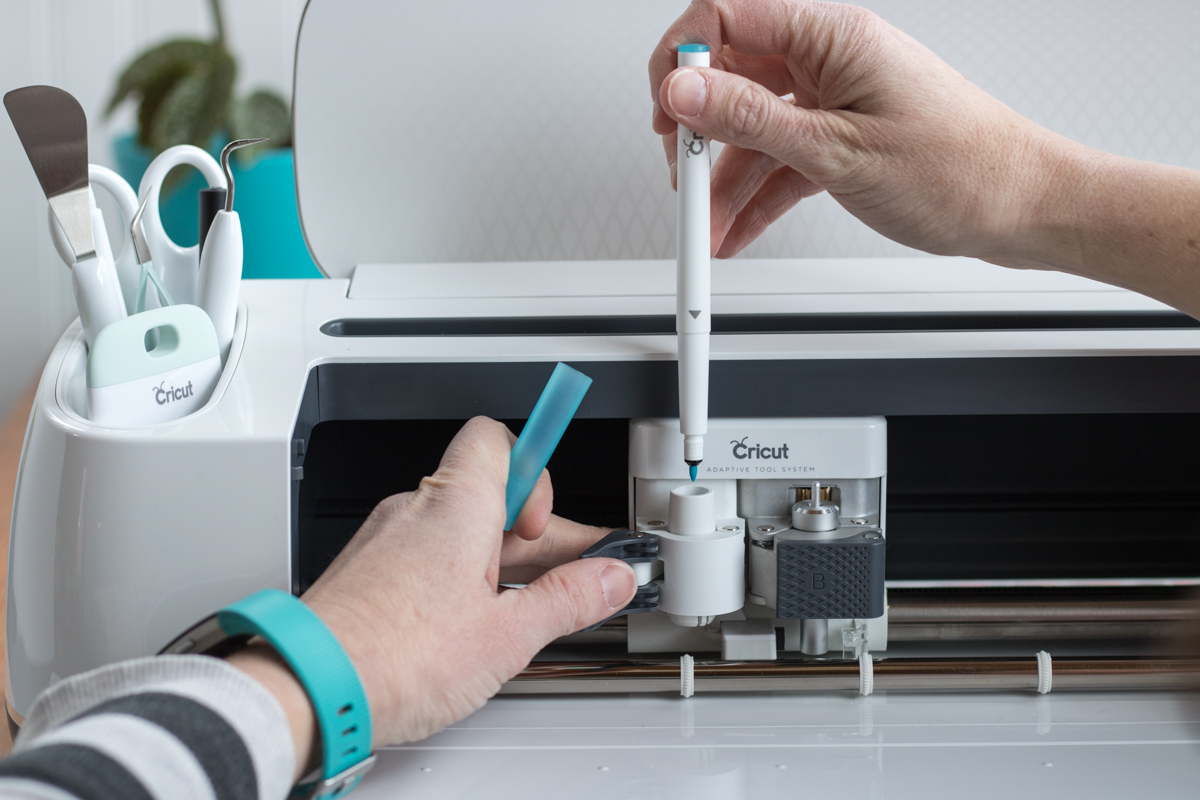 The pens and blade tools are *really* easy to install and switch, since they are held in with an easy snap clamp, and the Cricut Design Space prompts you on what pen or blade to insert before each project so that you’re sure to use the correct blade for your project.
 Using the
 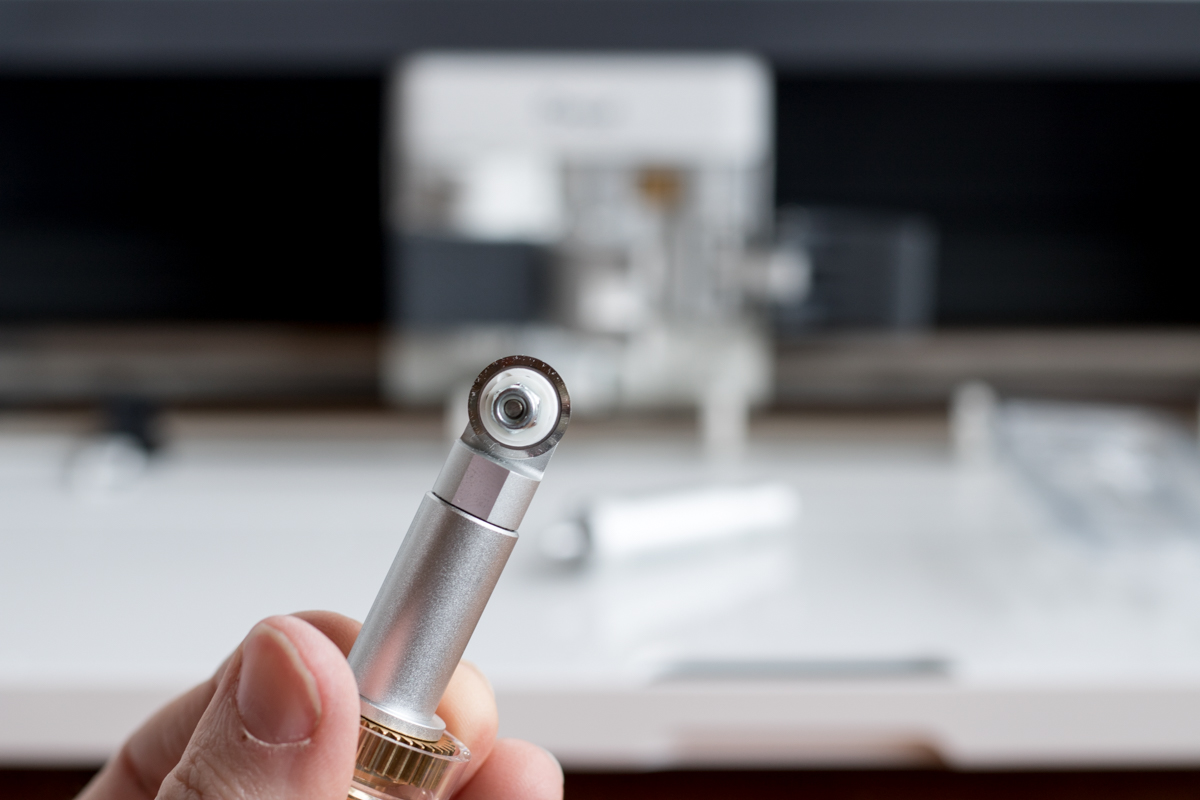 Now that you’ve seen the rotary blade from every angle, wouldn’t you agree that that’s the cutest little rotary blade you ever did see?
 The blades snap into the little B compartment to the right of the A pen holder, and it’s incredible easy to switch blades when needed. The Cricut Maker also has ample space for storage of unused blades, pens, and tools, which is really handy for someone like me who doesn’t have a whole lot of extra storage space.
 For example, when I do something he really loves, he says, “You just got 10,000 hearts in your heart tank!” and if we tell him he can’t have a second cookie, he says, “Your heart tank is almost empty!” in a warning voice, finger wagging for emphasis. How perfect is this little robot for him? I’m thinking I’ll make it a layered card stock creation to frame for his room. This was easy to make, since the robot is a free image in the Design Space, and adding the heart, customizing colors, and adding the text was very straightforward.
 Now for the nitty gritty: how much does the Cricut Maker cost? The
  Here’s a sneak peek at a project tutorial I’ll be sharing for the Cricut Maker next week that pairs quilting and embroidery, so stay tuned!
 As I mentioned in my post a few week ago, the list of use ideas for this tall and skinny fabric bin just keeps growing. From sorting tiny fabric scraps to housing your favorite adult beverage bottle, the sky’s the limit.
 Today I’m also sharing one such use over on
  Head on over to the