Ahh, remember the Farmer’s Wife Sew Along!? Today is my day to share the Block 95 Sylvia tutorial for the 1930 Farmer’s Wife Sew Along, hosted by Angie at Gnome Angel and sponsored by Fat Quarter Shop and Marti Michell. Sure, I’m wildly behind on this sew along, but that’s totally ok! With my final deadlines being met within the next couple of weeks, I will have time to catch up a bit, chipping away at the missing blocks here and there. It’s all good! That’s part of what I love about Angie’s Sew Along–there’s no pressure. I’m making this quilt for me and I can take as long as I want to finish it!
 Each of these Farmer’s Wife blocks manage to pack quite a punch in the little 6 1/2″ space. My method of attack when deciding how to piece each block has been consistent: how can I piece this with as little muss and fuss as possible? With Sylvia, at first I was thinking chain piecing would be the way to go, since it would help minimize the teeny tiny pieces in the inner borders I’d need to cut and sew. Looking at it more closely, I decided that with this block, even chain piecing would require piecing TINY bits, cutting, and then piecing again. Plus, sixteenths of an inch!? No thank you! Finally, I decided that foundation paper piecing was the way to go, since:
- there aren’t any tricky joins,
- the pieces are teeny enough that the foundation paper will be helpful in reducing wonkiness,
- the block breaks into pretty manageable pieces, AND
- all of the border pieces can be cut using a rotary cutter and ruler to decrease the paper removal at the end.
Those who know me know that I LOVE foundation paper piecing (FPP), and it’s true–I do! The precision one can get using FPP is unrivaled, and once the technique is mastered, it makes sewing teeny tiny pieces MUCH more manageable. I am not going to take you step by step through how to foundation paper piece, since I have written two very clear tutorials already (why reinvent the wheel, right!?), but I will share some block-specific tips and tricks to help you piece Sylvia smoothly.
For those of you who do not know how to foundation paper piece, visit my Basic Foundation Paper Piecing tutorial here, as well as the Foundation Paper Piecing tutorial guest post I wrote for the Andover Fabrics blog here. Trust me, it is a technique worth practicing and mastering, since it opens a whole new world of sewing possibility!
Reflection on the Letter – In Spite of the Mortgage
Nearly every one of the letters in this book seems to talk to me in a very specific, seemingly personal way. After the first dozen times of reading a letter I shockingly thought was *meant for me*, I realized that all of the letters have a very widely applicable message and I was simply interpreting it in a way that worked for me at that moment. That said, I can completely relate to this letter!!
Sometimes it’s necessary to just head off on an adventure despite whatever chores, obligations, or need for frugality you have waiting for you at home. We did a lot of adventuring this summer, but like Mrs. A. M. from the letter, we were able to do it on a very tight budget, not paying for much more than gas money. Day trips to beaches, mountains, playgrounds, and forested hikes abounded, and I was always sure to pack a picnic lunch, extra snacks from home, and full changes of clothes for all three kids (and myself)… just in case. It was a much needed change from the stay home and do chores days we could have had!
Tutorial
 Ready to get sewing? Make sure you have a grasp on how to foundation paper piece, and let’s make Sylvia!
Choosing Fabrics
 As soon as I saw this block, I knew that I wanted to meticulously cut the center square. I’m arranging my blocks on point, so be mindful of your own plans before meticulously cutting your fabric! (I call “fussy cutting” meticulous cutting, and you can read why here). In looking for a fabric with a perfect color scheme and feature design, I stumbled across my precious Heather Ross Far Far Away unicorns (Windham Fabrics). I added some solid blue from an old project, and some Lizzy House Twinkle Twinkle from her Whisper Palette (Andover Fabrics). While the colors are a bit more muted than my other blocks, I think they will all work together. Plus, this fabric combination was a match made in heaven… once it was together, there was no separating it!
Here are some general tips for foundation paper piecing:
- Shorten your stitch length to 1.2 (if you are an absolute newbie at FPP, try 1.5 until you get the hang of it);
- Hand crank your needle down at the beginning of each line to make sure you start off exactly where you want to;
- Backstitch at the beginning and end of each line to secure your stitches (they will be much sturdier during paper removal this way); and,
- Foundation paper piecing results in many trimmed thread ends. What better time to make yourself a thread catcher? Here’s a free tutorial on how to make the one I use.
To help you while you stitch up Sylvia, here are some block-specific tips for you with photos from my process.
Tip #1: How to make a fussy cutting template for FPP
Fussy cutting while foundation paper piecing can seem daunting, but with one extra step, it can be super easy! Simply create a fussy cutting planning template for the piece(s) you want to focus on. I go through making such template in detail in my FPP post for Andover here, but here are the basics: Print an extra sheet of paper containing the FPP template with the piece you want to fussy cut (printing on card stock will make the planning template sturdier).
 Mark the specific piece you want to meticulously cut. I went a little overboard on marking mine for the sake of clarity here. I circled the number but also traced just outside the line of the particular piece, both with bright pink sharpie. Simply circling the number would probably suffice!
 Cut out the center of the piece, creating a window that is exactly the size of the piece you want.
 Draw a 3/8″ seam allowance around the window. I used a green micron pen for this example to ensure the line didn’t get confused with the printed lines on the paper.
 Cut along the line you drew.
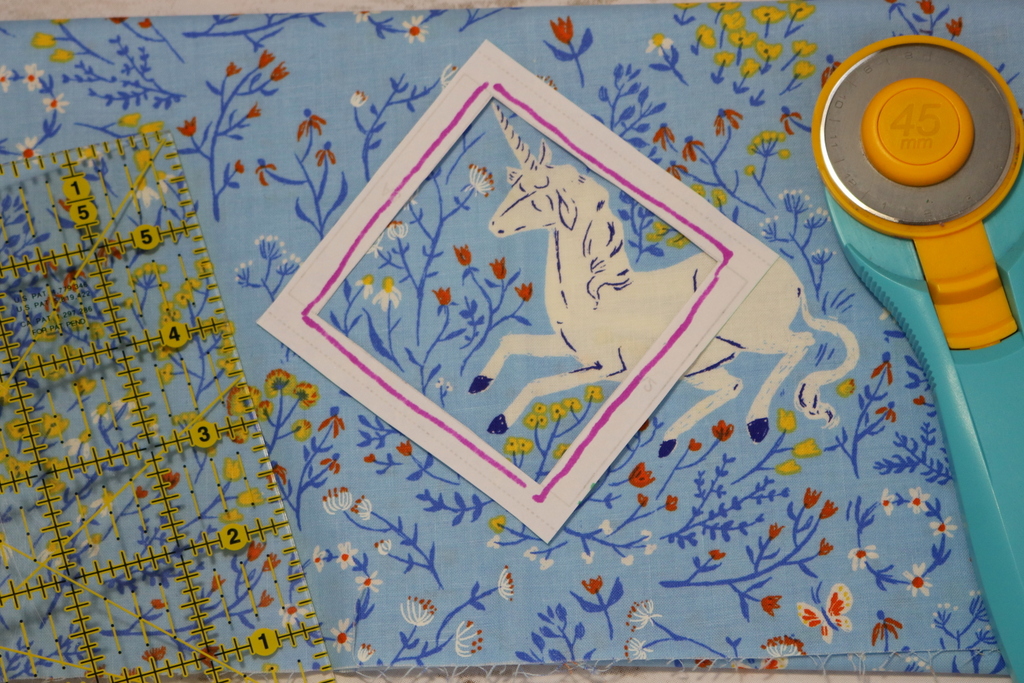 You should how have a planning template to help you cut your fabric for fussy cutting. Notice that I placed my planning template onto the fabric upside down. This is because in foundation paper piecing, we are sewing the block on the reverse side of the template. It did not matter too much for this particular piece, since it’s a square, but always be mindful of directionality of the fabric as well as wrong side-right side. If need be, mark your planning template with “right side up” or “wrong side up” so that your fabric is cut properly!
Tip # 2: Color code your foundation paper
 Between sewing the fabric on the reverse side of the paper, having the block broken into sometimes odd sections before sewing, and the many pieces involved in most foundation paper piecing patterns, it is in your best interest to color code your paper template before beginning to sew. This way, you can be sure you sew each fabric in the proper place.
Tip #3: Be generous with your fabric pieces
 Especially when first getting started with foundation paper piecing, one of the biggest tips I can offer is to be generous with your fabric pieces. It’s better to have to trim a bit more off than to be short and have to rip stitches! For my bright blue squares on Sylvia, I cut the fabric into 1 1/2″ squares, which as you can see includes ample overhang.
Tip #4: Use rotary cutter and ruler for rectangular shapes
 This tip goes for bag-making as well: just because there is a template created for a perfectly rectangular piece, it doesn’t mean you can’t use your rotary cutter and ruler! The outer pieces of Sylvia can be easily cut using a rotary cutter and ruler, which will save time with paper removal at the end. Since these pieces are not easily measured (let’s avoid using sixteenths of an inch if we can help it!) simply cut out the foundation paper piece templates and use them as a guide when rotary cutting. Use the foundation paper piecing method to piece the center portion, then add the D, E, H, and I rectangles using traditional piecing methods. Easy peasy!
 And there you have it. Sylvia, in all her glory.
Thank you so much for joining me today and I hope you found this tutorial helpful!
Important Links
 The Farmer’s Wife 1930s Sampler Quilt: Inspiring Letters from Farm Women of the Great Depression and 99 Quilt Blocks That Honor Them by Laurie Aaron Hird for Fons & Porter/F+W; RRP $28.99 – Click here to purchase.


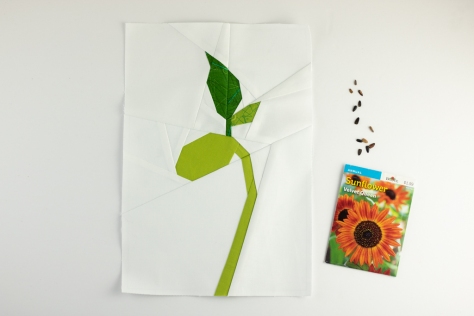 With a focus on hope and new beginnings, I thought today would be the perfect day to re-release my updated Bean Sprout block pattern, since there’s nothing like a freshly sprouted plant to celebrate spring, new life, and the wonder of discovery. As many of you likely know, I’ve been working with the amazing Lindsie Bergevin to convert some of my older patterns into fresher, more professional, and often more diverse versions and Bean Sprout is the latest to receive a make-over.
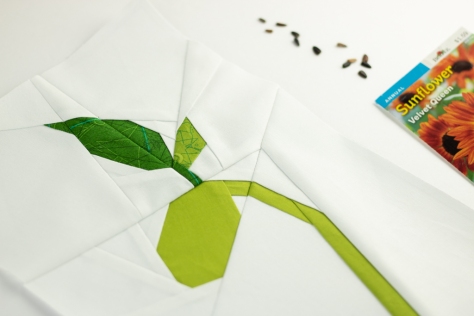 With a bit more pattern details, more professional layout, and an added block size (welcome, dear 4″x6″ block!), the newest Bean Sprout block pattern includes all of the great things from the original 2016 design, but in a clearer, crisper presentation. You can buy it now from my Payhip shop HERE. You can use code BIRTHDAY for 15% off it and all other patterns in my shop through the end of April, since I believe in celebrating birthdays all month long.
 You can see a few other versions of this block I’ve sewn up in the past in its original release post HERE. It’s always fun to look back into the blog archives, isn’t it!?
 I particularly love the idea of a pillow, and very well might be making another one of these someday soon. I’d love to see what YOU make with the pattern, so please use #beansproutblock and tag me @nightquilter on social media so that I can see your beautiful work.
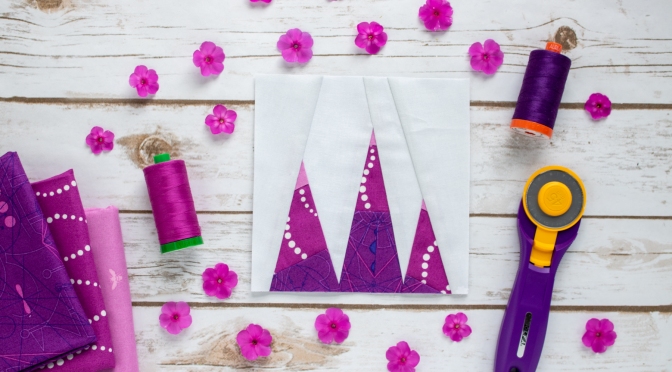
 Let’s start with this fun block! When OLFA invited me to design a block for a
  I decided to use the purple shade and chose a small gradient of fabric in the magenta-purple fade I love so much. I chose three Alison Glass prints, which most likely comes as no surprise! The darkest purple/magenta is SunPrint 2018 Compass in Jam, the middle tone is an old one from Alison Glass SunPrint 2014 called Bike Path (I believe it was also printed as part of her Lucky Penny fabric line, so googling or Etsy searches may find some left!), and the lightest is a fabric from her Insignia 2019 fabric line. I love the way the bike path dots add fun tracks of snow down these pinnacle points! Paired with a white solid background, this block is simple and graphic and provides lots of fun for experimentation.
 This block includes a fun twist to foundation paper piecing, since you premake a panel of fabric that is used to to fill each mountainous space. This means that every block you make will be slightly different, which to me equals fun! To find the instructions for this block, head over to the
  I also was honored to be asked to photograph the full OLFA 40th Anniversary quilt, where you can see how the finished Sew Along Quilt may look. Isn’t it fun!? Do you see my block?


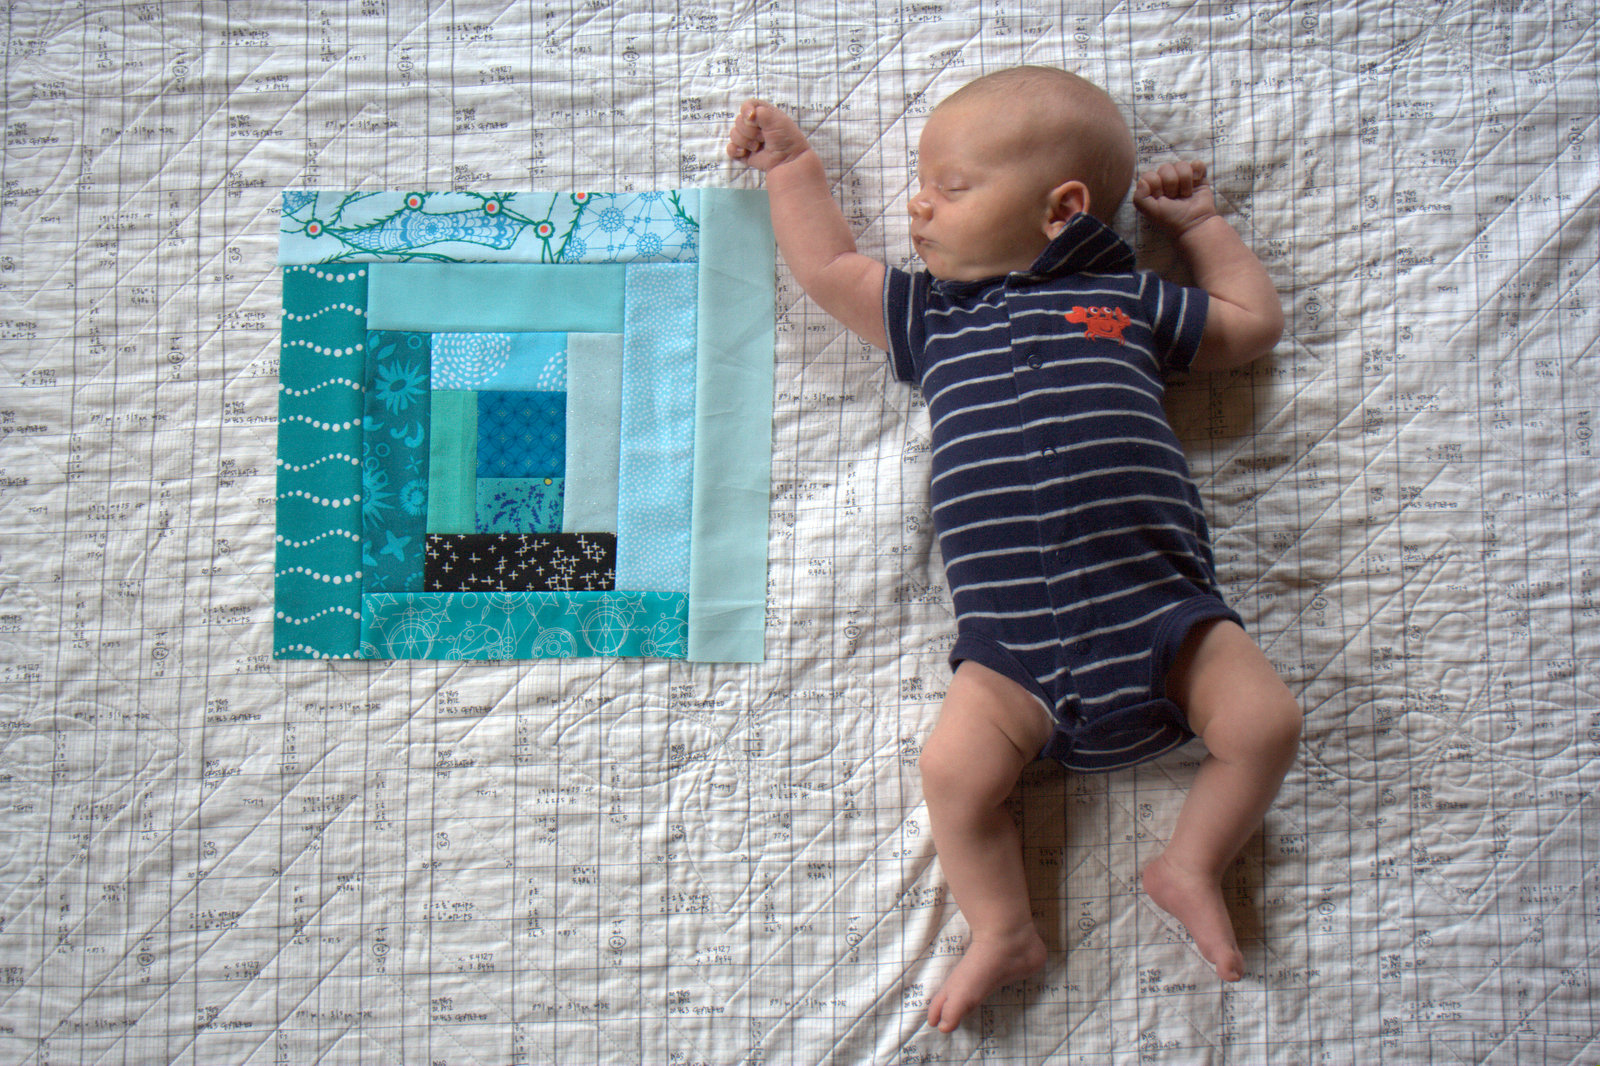
 Once my block was complete, I wandered the house in search of colorfully turquoise objects. As Angie suggests, I gathered a lot and generally laid them out around the block on a big white foam board.
 I arranged and rearranged, and rearranged some more. Without sharing all her secrets (
 I think I spent more time rearranging the items than making the block, and remembering where they all went when I was done was another interesting challenge. I honestly had such a fun time laying this out. I already have another idea I want to try, which almost ALWAYS happens when I divert from my project to-do list to play, but I have to get one deadlined tutorial finished before I play more with this idea. I have a feeling my kids will love helping me with these photo flat lays, too. I made this one while the big kids were away on their grand adventure with my parents, so they didn’t get to help this time around. Just one more reason to make the time to play juuuuuust one more time *wink* (we all know I’m not finished with these color block flat lays!)
 The challenge is being held on Instagram, so
  Zippers and frogs, and pencils, oh my!
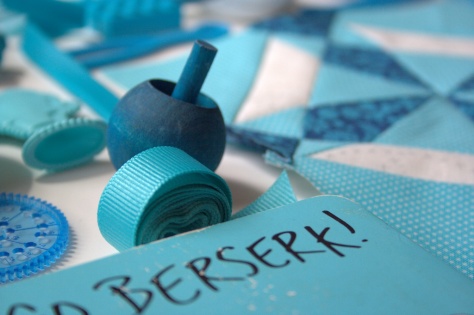 Checking the kids’ bookshelf was a great tip by Angie. Sandra Boyton’s Hippos Go Berserk is a must read, especially when you love turquoise, math, and silliness (like I do!).
 This smiley shark had as much fun as I did, I think! Legos are an immediate win, and the little bobbin minders that