Autumn Dusk Kaleidoscope Pillow Tutorial

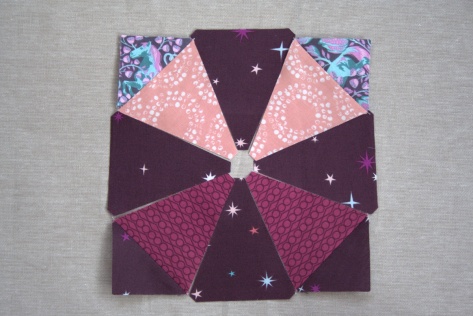
Today I’m going to share a quick tutorial on how to make your very own Kaleidoscope pillow using the Sizzix BigZ L Kaleidoscope die and six fat quarters (I used my Autumn Dusk blogger bundle from Fiddlehead Artisan Supply). For those of you who do not have a Sizzix die cutting machine, I will also include a printable foundation paper piecing option, so read on!

kaleidoscope pillow tutorialA month or so ago, I selected a blogger bundle for my local quilt shop Fiddlehead Artisan Supply, and called it Autumn Dusk. The colors made me think of the calm at dusk, and I thought it would be a perfect palette for a pillow. Our couch doesn’t have a single handmade pillow, and that needed to change. In thinking about pattern ideas, I came across my Kaleidoscope die from Sizzix and decided to play. Do you have ANY idea how many different patterns you can make with the Kaleidoscope pattern!? It boggles my mind. Peek at the results from a quick “kaleidoscope quilt” google search HERE to give you an idea of the potential.
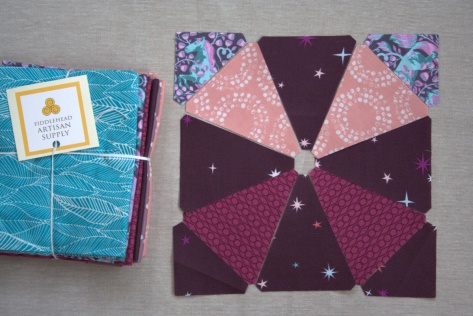
fiddlehead artisan supply autumn dusk kaleidoscope pillow sizzix tutorialTrust me when I say the most difficult part is deciding on fabrics and fabric placement.

autumn dusk kaleidoscope pillow tutorial sizzixThis tutorial will include cutting instructions for the same arrangement of nine (9) blocks made from six (6) fat quarters of fabric as I used, as well as assembly and finishing instructions for an envelope-backed 18″ square pillow. If you want to make an identical pillow, you can buy the Autumn Dusk bundle from Fiddlehead HERE, or enter to win a bundle by commenting on yesterday’s post HERE. I have included some affiliate links in this post so that if you click through, I will get a small commission. I only share products I love and use.

Let’s get started!

TUTORIAL- Kaleidoscope PillowMaterials Needed:

If you are creating your own kaleidoscope version, print out this printable provided by Debby at Quilter by Design and start playing with color combinations. Note that you can emphasize a windmill shape, a star shape, or a circular movement depending on where you position your colors and values of fabric. Once your design and fabric choices have been made, it’s time to cut!

Kaleidoscope fabric numbersFor this pillow, cut the following (refer to the photo above for fabric numbers):

Fabric 1: 36 wedges and 12 corners
Fabric 2: 8 wedges and 16 corners
Fabric 3: 8 wedges
Fabric 4: 8 wedges and 8 corners
Fabric 5: 4 wedges
Fabric 6: 8 wedges

sizzix kaleidoscope pillow tutorialFor quick and easy cutting with your Sizzix fabi, cut fabric strips 4″ wide for the wedges and 2 5/8″ wide for the corners.
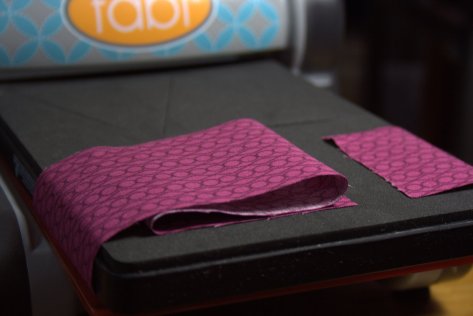
sizzix kaleidoscope tutorialThen you can accordion-fold the fabric over the die and cut 16 of each at a time, since the die has 2 corner and 2 wedge blades and you can layer fabric 8 layers thick. That’s 32 pieces cut per pass, if you plan your fabric cutting wisely! (Note that the image above is to demonstrate the accordion-fold, not the uber efficient cutting!)
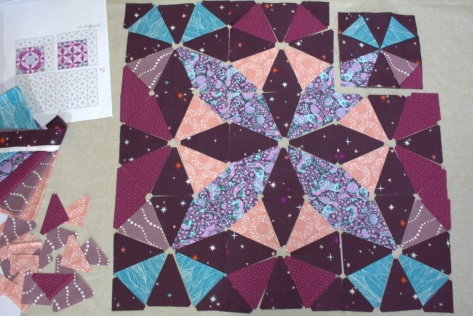
autumn dusk kaleidoscope pillow tutorial sizzixOnce your pieces are all cut, lay them out in your desired pattern. Tip: Take a photo with your phone or camera once you’ve decided on a layout. Having this photo handy during piecing will make getting everything in the proper place the first time so much easier!
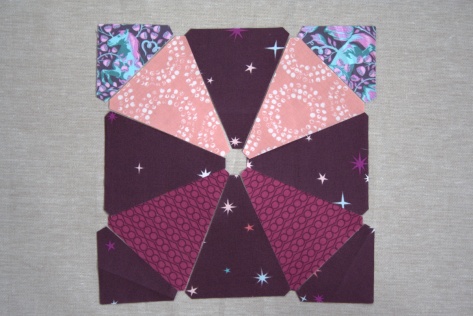
sizzix kaleidoscope tutorialNow let’s sew the blocks together!

sizzix kaleidoscope tutorialFirst, sew the corners onto the appropriate wedge blocks.
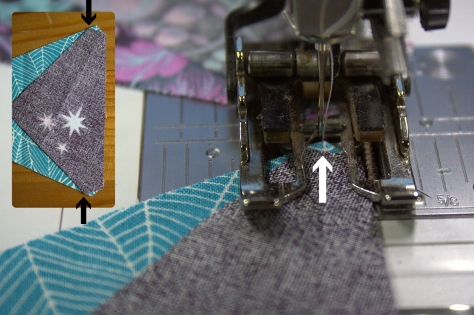
Kaleidoscope Lining up notches from sizzixThe notches cut by the Sizzix make accurate piecing easy. Center the corner piece right sides together with the bottom edge of the wedge piece as shown in the inset photo above. Then use the little corners sticking out from the bottom edges of the wedge as a sewing guide. Set seams and press open.
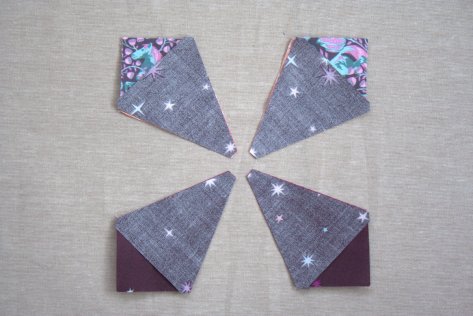
sizzix kaleidoscope tutorialYou will then have this.

sizzix kaleidoscope tutorialNext, pair each cornered wedge with a background wedge. Be sure to sew along the same side edge for each pair, and begin sewing from the corner edge and not the center point. Set seams, press open. **Note that assembling this block is a perfect time to practice pressing and NOT ironing. Even a little wiggle might stretch sections enough to result in a ripple when the final block is assembled. Press: up, down, up. NOT ironing. Got it!**

sizzix kaleidoscope tutorialDouble check your arrangement with the photo you took before sewing pairs together.
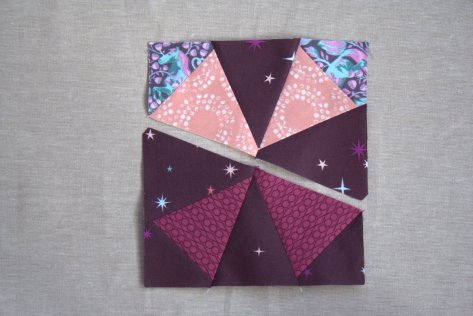
sizzix kaleidoscope tutorialYou will now have two halves. Aligning the notched corners and pinning just after the center seam match, sew the halves together. Set seams and press open.
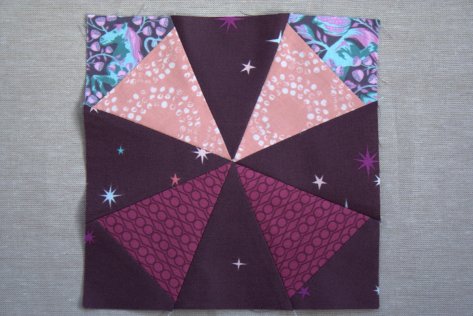
sizzix kaleidoscope tutorialTa-da! You have a kaleidoscope block. Make 9 total.
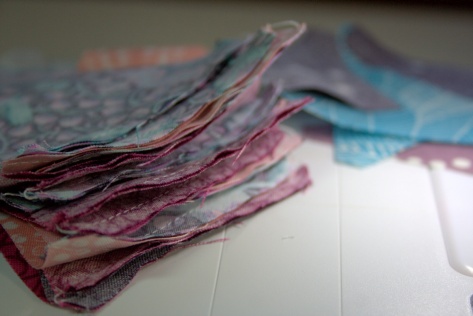
kaleidoscope block chain piecingFeel free to chain piece these blocks, but have your layout photo handy. Lay out your pieces and confirm arrangement before sewing each step.

joining rows of kaleidoscope blocks tutorialArrange your blocks as desired. Double check that all fabrics are in the proper place.
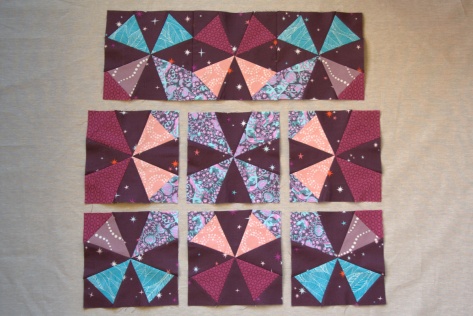
joining rows of kaleidoscope blocks tutorialThen sew the blocks in each row together. Finally, sew the three rows together to complete the pillow top.
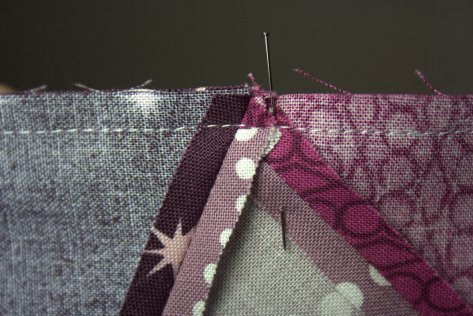
joining rows of kaleidoscope blocks tutorialI love how the notches cut by the Sizzix help with every step of the piecing process–from piecing to matching points in the final assembly. When joining your rows, you can use the seam line as a guide to make sure you don’t lose any points.
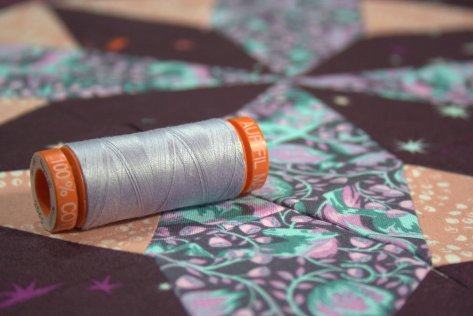
kaleidoscope tutorialOnce your kaleidoscope pillow top is complete, baste it to a 20″x20″ piece of batting (or fuse to fusible fleece), find some coordinating thread and quilt as desired. I used Aurifil 50wt 2560-Iris since it was a nice gentle purple and matched my light colors while providing great contrast with the dark background.

Once your pillow top is quilted, square it up with a rotary cutter, being sure to leave a 1/4″ seam allowance from the outermost points.

pillow envelope backing tutorialNext, we’ll make the pillow’s back panels. Cut two (2) pieces of 13 1/2″x19″ background fabric (my finished pillow top actually measured closer to 19″ than 18 1/2″ square. Adjust accordingly based on the measurement of your pillow) and two (2) pieces of 12 3/4″x19″ batting.
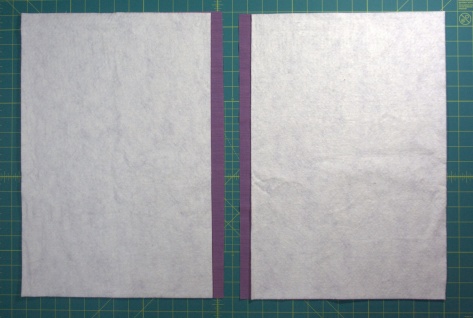
pillow envelope backing tutorialLayer the backing panels wrong sides facing the batting, and lining up three edges. The backing fabric should extend about 3/4″ on one side.
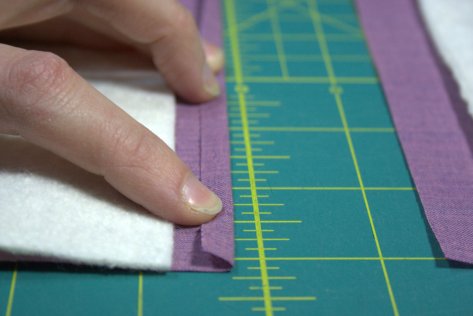
pillow envelope backing tutorialFold the extended edge in 1/4″. Press with a hot iron.
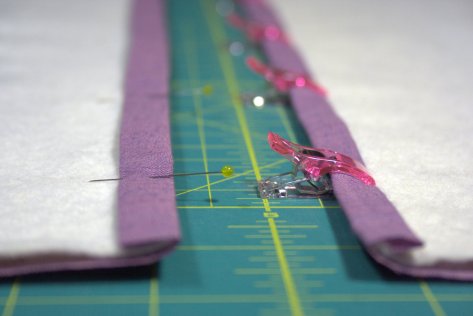
pillow envelope backing tutorialFold over again, flush with the edge of the batting (approx 1/2″) and press. Pin or clip in place.

pillow envelope backing tutorialPin along the edges of the backing fabric and batting to help keep them together if you want to, although I found that they stuck together just fine without any pins. Alternately, you could fuse on fusible fleece instead of batting, although this is a great project for using up batting scraps. With the backing fabric right side facing up, top stitch 1/4″ from the folded edge. Sew again 1/8″ from the first stitches. Repeat for the other panel.

pillow envelope backing tutorialNow it’s time to sew the pillow front to the back panels.  Lay the quilted pillow top right side facing up, and place the back panels right sides facing down, with the raw edges aligning with the raw edges of the pillow top and the sewn hem edges toward the center of the pillow.
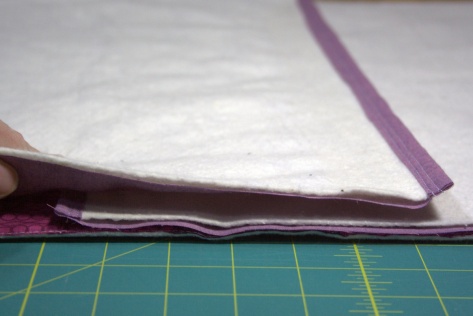
pillow envelope backing tutorialThere should be about 6″ of overlap.

Pin securely and sew around the entire edge of the pillow. Be sure to reinforce where the envelope edges meet, sewing back and forth multiple times, since they will receive the bulk of the wear and tear as the pillow form is put in and taken out.

Clip the corners, and turn right side out through the envelope opening, carefully pushing out corners with a blunt chopstick. Insert an 18″ pillow form, or one of your old couch cushions, and enjoy!
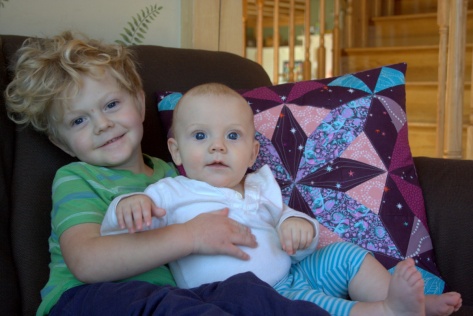
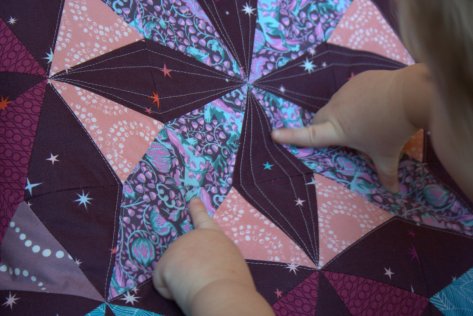
kaleidoscope pillow tutorialtula pink poniesMax quickly discovered that there were ponies on the pillow, so he had to run and get his best friend, aptly named Pony.
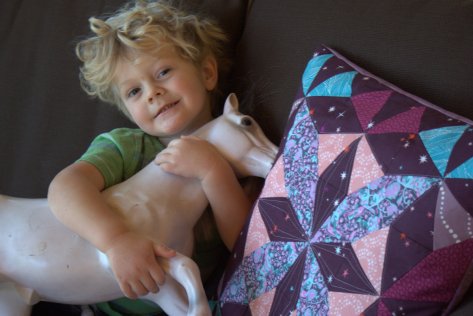
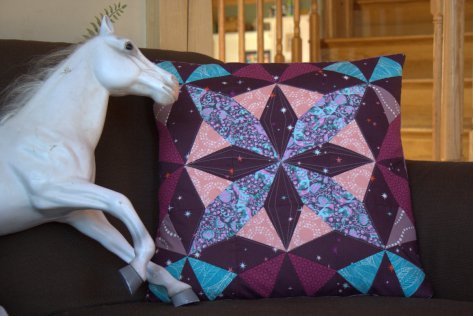
pony and kaleidoscope pillowpony and kaleidoscope pillowThis pillow apparently now belongs to Pony, since, well… ponies!


Stash Building: Autumn Dusk Blogger Bundle & Giveaway

I’ve been trying to stretch out of my comfort zone lately and create with color palettes other than rainbow order. With that goal in mind, I put together another blogger bundle for Fiddlehead Artisan Supply in Belfast, Maine, including some of my favorite autumnal colors. To play with the Summer Nights bundle I curated in August, this one is called Autumn Dusk. To double the fun, I have a bundle to give away, too!

autumn dusk fabric bundle fiddlehead artisan supplyThis color palette feels peaceful to me, with the soft purples, burgundy, magenta, mauvey peach, and a pop of turquoise. I’ve been working on a project using my bundle and I admit, it feels weird to be working with a non-rainbow color palette with no low volumes or black/charcoal neutrals…. but I like it!

Tomorrow I’ll be sharing a tutorial for the project I’m making with this bundle, so if you want to add these fabrics to your stash and immediately put them to use (fabric added to the stash doesn’t count if it’s immediately created into something beautiful, right?), you can with ease.

autumn dusk fabric bundle fiddlehead artisan supplyThese fabrics are all great stash additions, and help bolster my weak purple collection a bit. They are consistent with my love of tone on tones and blenders, which means my scraps will surely make their way into a rainbow somehow.

Autumn Dusk fabric bundle fiddlehead artisan supplyFiddlehead Artisan Supply is generously offering an Autumn Dusk fat quarter bundle to one of my readers. The bundle includes fat quarters of the following six fabrics (clockwise from Tula’s ponies):

  • Pony Play from Fox Field by Tula Pink (Free Spirit)
  • Leaves in Turquoise from In the Bloom by Valori Wells (Robert Kaufman)
  • Full Circle in Petal Pink from Shape of Spring by Eloise Renouf (Cloud 9)
  • Bike Paths in Lilac by Alison Glass (Andover)
  • Twinkle Twinkle in Burgundy from Natural History by Lizzy House (Andover)
  • Jewels in Purple from Hello Pilgrim by Lizzy House (Andover)

To enter the giveaway today, visit Fiddlehead’s online shop and tell me your favorite quilting print from their online offerings (click here for a direct link). Leave a comment and make sure I’m able to get ahold of you if you win.  If you’re a follower of Night Quilter, leave a second comment telling me how you follow for a second entry. ‘Like’ Fiddlehead Artisan Supply on Facebook or subscribe to their newsletter and tell me how you followed them in a third comment for a third entry. That’s three separate comments for three entries to win.

This giveaway is open to US and international participants.  The giveaway will be open until 8pm Sunday 12/6 when I’ll select the winner randomly with random.org. Good luck!  This giveaway has ended. Congratulations to Linda!

Fiddlehead is also having a big online sale through tomorrow (Monday 11/30) so you can get 15% off your entire online order with the code Thanks2015. That’s as good a reason as any to bolster your stash, don’t you think? *wink*

I’m linking up with Molli’s Sunday Stash. I’ve been quiet in the stash building department lately, but I have a few fun new stash additions I’ll be sharing in the coming weeks! I’m gathering fabric to last me through the snowy season; after all, winter is coming.

EPP Rose Star Mega Mug Rug: Finishing {Sizzix Tutorial}

Do you remember my post about getting started on this bright bunny English Paper pieced (EPP) mug rug, my Sizzix Design Team debut? I’m sure you have your stack of basted pieces all ready to go, sitting at the edge of your seat patiently awaiting my finishing directions, right? Great! Either way, I’m excited to finally share the finishing directions today on the Sizzix blog.

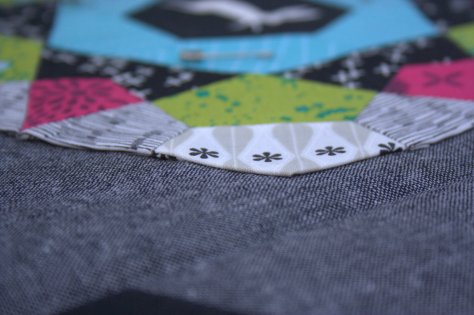
basting epp mug rugThis is a great project for those of you who want to do more hand stitching in the uber portable form of EPP, but who are not quite ready to hand baste and piece an entire quilt.

binding epp mug rugIn this tutorial, I take you through:

  • stitching the basted pieces together;
  • savvily removing the template papers;
  • attaching the completed EPP to the background fabric;
  • removing excess fabric to help reduce bulk; and,
  • using the backing to bind the mug rug.

These are all great techniques for any EPP project.

One little forewarning: making a bright and bold mug rug like this one may draw extra attention to the plate of treats you rest on it. This most likely will result in extra sneaky small hands swiping your snacks.

sizzix rose star mug rugNow you see it.

sizzix rose star mug rugNow you don’t!

Hop on over and check out the full tutorial on the Sizzix blog! Here’s a quick link to Part 1: Getting Started and Part 2: Finishing. Enjoy!

I’m linking up with Crazy Mom Quilts Finish it up Friday.

Farmer’s Wife Sew Along: Getting Organized

As this crazy month of November winds down (already!?), I’m trying to get a bit organized with my sewing projects. I truly enjoy having a lot of projects going, and I’m excited about all of the different quilting adventures I’ve joined lately (mini mini quilt swaps, Sizzix Design Team, a small private swap, my first commissioned quilt, and the Farmer’s Wife Sew Along as an official blogger, among others I’m surely missing). But life happens, and when it does, it can certainly throw a wrench into best laid plans. Yesterday I decided it was time to reevaluate, make some lists, and wrap my head around a plan for creating with little stress.

First up is the 1930 Farmer’s Wife Sew Along, hosted by Angie at Gnome Angel and sponsored by Fat Quarter Shop and Marti Michell.  As you may remember, in planning my quilt, I literally planned to be behind and to skip a few blocks so that I could sew along without stressing about being behind. After a crazy month of travel, visitors, and sickness all around, I may have taken that “it’s ok to be behind” a bit too far.

1930 farmers wife sew along organization
Time to get serious!

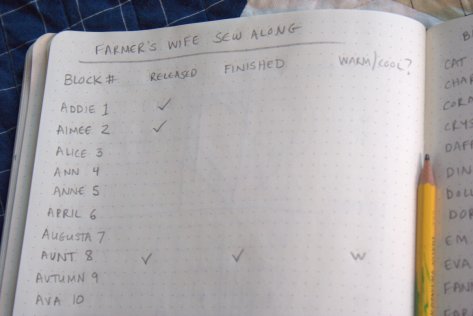
Yesterday I plopped down on a quilt on our living room floor, pulled out my notebook, my Farmer’s Wife book, and my laptop directed to Angie’s block tutorials page, and made a list. Per my calculations, 21 blocks have been released and I’ve made 6. Oops. I guess I’m just a BIT behind. (Update while writing this post–another block was just released! Make that 22 blocks!)

1930 farmers wife sew along organizationI made myself a comprehensive list complete with a space to check off when a block has been released or made. I LOVE checking things off a list, so I am hoping this is just what I need to catch up a bit.  I also put post-its on the pages of blocks that have been released so that when I have a free minute, I can easily flip to one, grab some fabric, and dive in. My mind is much more at rest knowing that everything is written down and ready to check off.

Now, for the fun update! Here are the blocks I’ve created so far.

1930 farmers wife #8 aunt1930 farmers wife #14 betty1930 farmers wife #16 bonnie1930 farmers wife #20 caroline1930 farmers wife #49 katherine1930 farmers wife #94 susannahI’ve decided on a photographing style, organized my notes, made a checklist of released vs finished blocks, bookmarked pages with blocks I need to make, and am reenergized and ready to do some catching up!

I’m linking up with Lee’s Works in Progress Wednesday at Freshly Pieced. These “easy 6-inch blocks” (insert maniacal laugh) will be works in progress all year!

**Sponsor News**
Online Sale – This is their big online sale for the holidays!
Take 15% off online starting Thanksgiving Day through Monday, November 30th. Please use the code “Thanks2015” to receive a 15% discount on your entire order (before shipping) anytime over those five days.
In-Store Sale – For those of you in the Belfast, Maine area, Fiddlehead Artisan Supply is also having in-store sales during this long holiday weekend, AND an early bird special sale day on Saturday December 5th. Check them out!


Surprise Success and Stitching on the Road

I began writing this post this past Sunday, but then caught the cold/fever/cough my kids have been kicking.  So instead of finishing this post, sewing, or blogging, I’ve been sleeping. Lots and lots of sleeping. And of course, making the most of the days with as much energy as I can muster. So pretend it is four days ago, and read on! The best laid plans, right?

Over the past two days, I’ve been driving from Maine to New Jersey with my three kiddos to surprise my mom (Grandma) for her birthday. I’m happy to report that the surprise was a complete success! My sister and brother who live in the area were planning on going to my parents’ house to cook dinner for her birthday, so the kids and I arrived at my sister’s house earlier in the day, then we all met up at the far end of the street before dinner, where I parked. My sister and brother walked in and Lucy said, “I invited a few more people over for your birthday; I hope that’s ok” and then Maddie and Max followed by Finn and I walked in. My mom says it was the best birthday surprise ever. Yay!

grandma's birthday surprise
Who doesn’t love little helpers when it comes to blowing out birthday candles?

Since we will be visiting here for five days before beginning the trek back up to Maine, I packed a good number of hand sewing projects so that my hands (and sewing mind) can be kept busy during the week. I contemplated bringing my sewing machine, but since the entire point of this trip is to spend family time together, I didn’t want to feel at all tempted to duck off to sew in a separate room while here. Hand stitching projects are a solution since they can be pulled out anytime, anywhere, and still ensure that I won’t be left with any thumb twiddling with all of the extra eager playmates for my kids.

I thought it would be fun give you a peek at the variety of projects I brought to satiate my need to create daily.

English Paper Piecing (EPP) at various stages of completion
EPP on the go
Basting. I still haven’t decided whether I like glue basting or thread basting best, so I’m doing both.
EPP on the go
Glue basted and ready to be stitched down.
Needle-turn applique
needle turn applique project ready to go
A new needle-turn applique project ready to go.
Embroidery & Hand Quilting
embroidery
Embroidery on a mini mini quilt
aurifil 12 wt thread for embroidery
I brought a collection of Aurifil 12wt thread for embroidery and a range of 12wt, 40wt, and 50wt for eventual hand-quilting.
Visible mending supplies.. just in case
visible mending supplies
Old cut-up jeans and perle cotton just in case my mom actually wants me to patch her jeans for her.

I’m linking up with Freshly Pieced’s WiP Wednesday, since it’s already Wednesday and these are still very much works in progress. C’est la vie! Good night!

Into the Woods with Wanderlust Quilts {Book Review & Giveaway}

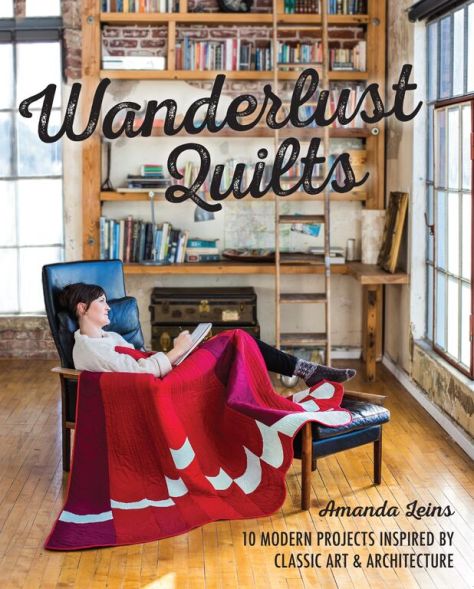
Welcome to my stop on the Wanderlust Quilts blog hop! Here I’ll tell you a bit about Amanda Leins (Mandy’s) new book Wanderlust Quilts, invite you to venture into the woods with me after drawing inspiration from the book, and then tell you how you can win your very own copy of this invaluable book.

Wanderlust Quilts cover
Courtesy of Stash Books. Photo by Nissa Brehmer.

When I was first sent a review copy of Wanderlust Quilts, my initial reaction was Wow! I love how her quilt designs break all the rules! When I mentioned this to Mandy, she replied, “It’s good to know all of the rules so that you know which ones you can break”.  I love how Mandy truly draws inspiration from the world around her, specifically classic art and architecture, unbridled by labels or quilt police. She doesn’t confine her quilts to the limits of a rectangle while still employing skillfully precise quilting techniques, and she spells it out so that we can utilize the techniques, too.

Wanderlust Quilts Going Places
Going Places. Courtesy of Stash Books. Photo by Nissa Brehmer.

One of my favorite aspects of Wanderlust Quilts is that Mandy includes photos of her sources of inspiration, so that we can see how each inspiration photo is translated into a quilt. A cobblestone path in Europe becomes a baby quilt, “the beginning of the road for some little person.”

Wanderlust Quilts Fishbourne
Lovely Fishbourne. Courtesy of Stash Books. Photo by Nissa Brehmer.

In Wanderlust Quilts, Mandy not only invites us to travel to our favorite places, stretch our imaginations, squint our eyes a bit, and see the world as a quilt, but she also gives us the technical tools and skills necessary to fine tune our visions and make them a reality. Included in the book are clear instructions and tips on turning your photos or sketches into a quilt, both improv and precision piecing, sewing Y-seams, sewing curves, and more. Wanderlust Quilts is a great resource for inspiration and technique, which makes it one book that I would happily add to my library.

C&T Publishing is generously offering a copy of Wanderlust Quilts to a reader at every stop along the blog tour.  Keep reading to find out how you can enter to win your very own hard copy. If you can’t wait, Mandy is selling autographed copies in her store here.

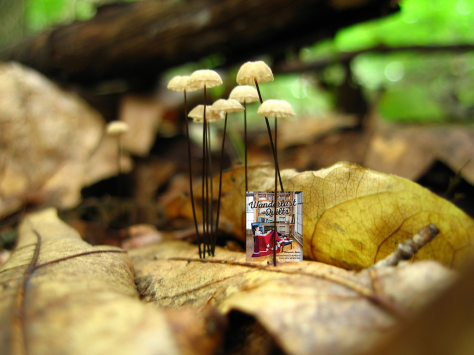
But first, travel into the woods with me for a moment. When Mandy invited me to be a part of her Wanderlust Quilts blog hop, she suggested that I choose a place or thing that is inspiring to me and talk about what techniques I might employ to make a quilt based on that spot. With a background of environmental science and an innate love of nature, I immediately knew that I had to shrink the book to smaller than a dime and take it down to the forest floor.

mandalei-mushroom wanderlust quiltsAs I’m sure you’ve noticed in my weekly color inspiration posts, I love to get really close to nature, since changing your perspective can open up an entirely new world of beauty. I took this photo over a decade ago, in gorgeous Sussex County, New Jersey. To this day, it inspires me.

mushroom quilt inspired by wanderlust quiltsThinking about the process I would take to turn this photo into a quilt was not enough; I had to jump right in, newly inspired by Mandy’s ten unique and fabulous patterns in her book. Wanderlust Quilts not only inspired me to give improv a go, but it also inspired me to sew with brown fabric (what!?). Above is my first attempt at creating a quilt inspired by the minuscule mushrooms that unfurl from the leafy loam during particularly wet mornings.

mushroom quilt inspired by wanderlust quiltsAs is my style, I let excitement drive me and I dove into piecing improv half circles without consulting Mandy’s book. After seeing that my first try was less than perfect, I realized that this book full of techniques and tips was available right at my fingertips. Slow down, inspiration; sometimes reading and studying a technique before jumping in is key.

mushroom quilt inspired by wanderlust quiltsAfter flipping through the many techniques offered in Wanderlust Quilts, I decided to put my wonky mushroom tops aside and try the freezer paper method clearly outlined by Mandy. I didn’t have time to complete the experimental quilt before the hop, but I’m excited to put the masterful techniques Mandy includes in her book to good use in making this favorite photograph into a quilt. I’ll be sure to show you my finished work of art upon completion.

Wanderlust Quilts Giveaway

As I mentioned above, C&T Publishing is generously offering a hard copy of Wanderlust Quilts to a lucky reader at every stop along the blog tour. You can enter by leaving two comments:

  1. What location most inspires you?
  2. If you follow me, Night Quilter, let me know how–or visit my right sidebar to follow me if you don’t already, then tell me how! (e-mail, WordPress, Bloglovin’, Instagram, Twitter, Craftsy)

The giveaway will be open until Sunday, November 15th, 12noon EST. I will select one winner randomly from the comments below. Good luck! Note: This giveaway is now closed! Congratulations, Sandra!

Once you enter, be sure to check out the other great stops along the tour to see where else in the world has been visited by Wanderlust Quilts:

November 5: Gen Q
November 6: Casey York Designs
November 7: Bill Volckening
November 8: Angela Walters
November 9: Kitty Wilkin, Night Quilter <—YOU ARE HERE
November 12: Rose Hughes
November 16: Mandy herself, with a final wrap-up and additional giveaway!


Inching Along: 5 Months

Five months; five blocks. Finn very nearly grew faster than his quilt this month, but I managed to sew up his five month block during his nap yesterday, and we had a fun photo shoot as soon as he awoke. Thank goodness for #sewtake20! For those of you new here, I’m making a milestone quilt for my infant son, one 12 1/2″ block per month for one year of his life. You can see the layout I’ve decided upon here, and I’ve created a separate page collecting the photos and posts from each month here (or you can click the tab at the top of this page that says “Milestone Quilt”).

5 months milestone quilt progressFinn and his quilt are quickly outgrowing the background I’ve been using for photographs, so I may need to get creative in the coming months! For now, we had a typically smiley photo shoot.

finn 5 month milestone quilt Finn 5 months milestone quiltIn the past week, Finn has discovered that he can actually move across the ground by running his legs like mad and inching like an inchworm. Boy does he put his heart into it, too! It’s so fun to see his intent face and his one leg kicking up like a donkey. He still is a happy, easy going, smiley boy and talks up a storm to anyone who will maintain eye contact with him.

finn 5 month milestone quilt
“Oooh…. what are these? Feet! Toesies!”

Finn has also discovered his hands and feet, so he’s slowly working on his yoga poses, starting of course with “happy baby”. He’s mastering the reach and grab, and everything goes straight to his mouth.

finn 5 month milestone quiltfinn 5 month milestone quiltfinn 5 month milestone quiltfinn 5 month milestone quiltThis month was the first month where Finn noticed the quilt blocks next to him, so he’s already begun to break in his quilt with baby drool and tough love. Reach. Grab. Mouth. Mmmm!

finn 5 month milestone quiltNext month I vow to make his block before the 5th, but in the meantime I’ll continue to love on this boy every single day. I am enjoying these immobile days as much as I can, since it won’t be long before this guy is cruising around the house!

Color Inspiration Thursday {62}

Yesterday was one of those gorgeously warm days that pop up amidst the weeks of solid autumn chill. The kids and I took advantage and spent as much time outside as we could. It was a much needed reminder of how rejuvenating time outside is for everyone; I think the entire afternoon and evening went by without a single bicker, request for a movie, or beg for Halloween candy. That’s the way I like it. Today’s color inspiration comes from some photos taken during our outside play. These are colors of the season, muted and earthy. Color palettes are created using Play Crafts’ Palette Builder 2.1 and my photos.

earth tones color palette autumnCorresponding solids from left to right:
Bella Graphite, Kona Ash, Kona Celadon, Bella Chocolate, Kona Hibiscus, Bella Paper Bag

Corresponding Aurifil thread from left to right:
2625 – Arctic Ice
2600 – Dove

2850 – Med Juniper
1140 – Bark
2465 – V Dk Brown
2335 – Lt Cinnamon

Remember those vibrant and colorful zinnias that brightened our yard not so long ago and made cheery color palettes here? Well here they are now, in all of their back to the earth autumnal glory. This palette embraces the earth tones that I enjoy so much while out in the world, but very rarely include in my quilts.

milkweed seedsCorresponding solids from left to right:
Bella Grape, Bella Etchings Slate, Bella Baby Blue, Kona Blue, Kona White, Kona Titanium

Corresponding Aurifil thread from left to right:
1158 – Med Grey
2625 – Arctic Ice
5008 – Sugar Paper
2710 – Lt Robins Egg
2024 – White
2612 – Arctic Sky

Ahhh, the season of seed dispersal! The way different plants attempt to champion the continuation and widespread of their species never ceases to amaze me. From burdock seed pods that stick your clothes and refuse to be removed, to the delicate and beautiful milkweed seeds that blow gently in the wind. Want to have a fun afternoon with your kids? Set them free in a field of milkweed that has gone to seed. Here are some more glimpses into our afternoon of exploration and seed dispersal.

exploring milkweed seeds

finding the perfect seed pod

finding the perfect seed pod

on our way to apple picking after spreading milkweed seeds far and wide
On our way to apple picking after spreading milkweed seeds far and wide

Heart + Community = The Quilter’s Planner 2016

Do you ever meet someone and know immediately that you will be fast friends? Stephanie from Late Night Quilter is one such person; I truly feel like we are sewing soul sisters despite our proximity across the country. She’s the mom of 4 little ones; I’m the mom of 3. We both love quilting and designing and try to juggle our busy lives to find balance with family, other obligations, and of course, creating. We both began blogging mere months apart, and named our blogs essentially the same name! While we’ve only spent time together in person once, we talk daily thanks to the convenience of Facebook messenger and texting. I’m not exaggerating when I say she’s my rock.

night quilter and late night quilter
Me and Stephanie in Austin after QuiltCon, right before parting ways. *tear*

A few months ago, my daily conversation with Stephanie began the way so many do: “Hey! So I have this idea…” Since that paramount conversation, I have been privileged to be part of Stephanie’s sounding board along her path as she researched, designed, redesigned, adjusted, and tweaked a true labor of love, all in the name of helping busy quilters like us find a bit more order, organization, and help in planning a balanced life. Today I’m excited to tell you all about this labor of love, which has now been released into the wild in the hopes that it flies.

Quilters PlannerThe Quilter’s Planner is 8″ x 11″, made in the USA, and includes everything you need to organize your life, plan and track your sewing projects and be inspired to create something beautiful every day! Here are some more peeks at some of what’s included in the planner, but you can see so much more HERE. I also suggest you watch the video Stephanie made about it. (Get your tissues handy–I totally cried!–then again, maybe I’m just sappy)

weekly calendar
Weekly Calendar with larger to-do list areas, and a new block pattern for every week.
Project planner to help keep on top of UFOs.
graph paper
Graph paper for sketching ideas and visualizing quilty math.
quilt references
Quilt References
MakeRoomArtPiece low res (1)
Inspiring pull out art prints by Kelsey Boes of Lovely and Enough.

Not only is the Quilter’s Planner a labor of love created by Stephanie while supported by her BQF (best quilty friends) and family, but it’s also a melding of the quilting community unlike any other. Stephanie has been working with the quilting community throughout the entire process; everything from asking what features should be included in the planner to actually including 52 original quilt block designs from awesome quilt bloggers AND 8 full quilt patterns from amazing designers (Cheryl Brickey (Meadowmist Designs), Yvonne Fuchs (Quilting Jetgirl), Amy Garro (13 Spools), Lee Heinrich (Freshly Pieced), Mandy Leins (Mandalei Quilts), Pat Sloan (Pat Sloan), me! (Night Quilter) and Stephanie herself (Late Night Quilter).  She also worked with another quilt blogger friend, talented artist and designer Kelsey Boes from Lovely and Enough, to include gorgeous and inspiring artwork pullouts. Yes, you read that correctly–the planner also includes a whole bunch of patterns to help inspire you to create something beautiful every. single. day. It is a real passion project of Stephanie’s and she feels strongly about making it a community-based project including lots of people’s work who want to share their creativity with others. What’s not to love?

I invite you to visit the Indigogo Campaign to read more about this planner and all it has to offer. If you’re like me and can’t wait to have a one-stop-spot for all of your day to day appointments, obligations, AND quilty project goals and to-do lists (not to mention ample space to sketch new ideas and record inspiration), you can preorder yours now, too. There’s even a 95% guarantee that you’ll get it before Christmas. (hello, Santa!)

I do want to note that this post is purely my desire to share a heart-filled, community-based project that I’ve been honored enough to see grow from infancy into near-adulthood. I have already ordered my own planner and would not let Stephanie gift one to me. I share this project because I believe in it, and I honestly think that many of you probably will love it, too! I am very much looking forward to getting organized in 2016! So much love for Stephanie and all of her hard work that has gone into making this planner a reality, all for the sake of helping her fellow busy quilters find a bit more balance and organization in life.

Blogger’s Quilt Festival Voting Open

Voting is now open for the Blogger’s Quilt Festival!  Through November 5th, head on over to Amy’s Creative Side to vote for your favorite quilts in each of the categories: Mini, Small, Large, Applique, Art, Hand Quilted, Home Machine Quilted, Modern, Original Design, ROYGBIV, Scrappy, Viewer’s Choice.

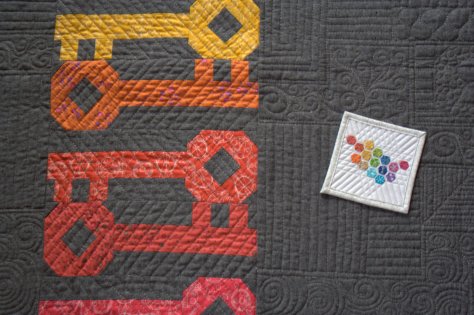
Bloggers Quilt Festival Entries: Large and mini miniYou can see my quilts in both the Large Quilts and ROYGBIV categories. I had a bit of silly fun trying to get a photo of my large quilt entry, Unlocked, next to the mini mini Modern Hexies quilt, my ROYGBIV entry. My son Max was excited to help out like Daddy, but is also a super silly three year old.

Bloggers Quilt Festival Entries: Large and mini miniBloggers Quilt Festival Entries: Large and mini miniI managed to get a few photos before he ran off flapping the mini mini like a wing, flying over the muddy driveway, as I panicked and thought, “What was I thinking!?”.  Fortunately, no quilts were harmed or dirtied during this photo shoot, and calm was somehow maintained.

Bloggers Quilt Festival Entries: Large and mini miniYou can read more about each of these quilts in my entry posts:

Large Quilts – Unlocked
ROYBGIV Quilts – Mini Mini Modern Hexies

Have fun perusing the many gorgeous quilts submitted this year! You can vote for three quilts in each category each day, and I think you can vote every day until the voting closes.