Category Archives: Sponsored Post

Flying Geese Table Runner with the Cricut Maker

Today I’m happy to share a simple and fun Flying Geese Table Runner project I made using the Cricut Maker. With Easter approaching and my table bare, I wanted to put together a quick project that could brighten the room for Easter, and really all year long. This table runner was also one of the first things I designed in the Cricut Design Space, so I wanted to keep it fairly simple while also using as many Cricut Maker features as I could! You can read a full review of my new Cricut Maker here.

flying geese table runner cricut maker easterThis post is a sponsored conversation written by me on behalf of Cricut. All opinions and text are my own. This Flying Geese Table Runner includes both traditional piecing and embroidery or hand quilting. If you don’t have a Cricut Maker, I’ve included cutting instructions and a pdf as well, so anyone can make it!

Let’s get started, shall we!? First, gather your materials.

Materials (My fabric details are in parenthesis)
  • Cricut Maker
  • Cricut Washable Fabric Pen
  • Cricut FabricGrip Mat 12″x24″
  • 3/4 yard background fabric (Kona cotton in Snow)
  • fat quarter focal fabric (Twinklestar in Berry from Garden Dreamer, by Maureen Cracknell for Art Gallery Fabric–from the blogger bundle I put together for Needle & Foot, here)
  • 1/2 yard fabric for backing and binding (Painted Desert Morning from Sage, by Bari J Ackerman for Art Gallery Fabric)
  • approximately 18″x44″ piece of batting
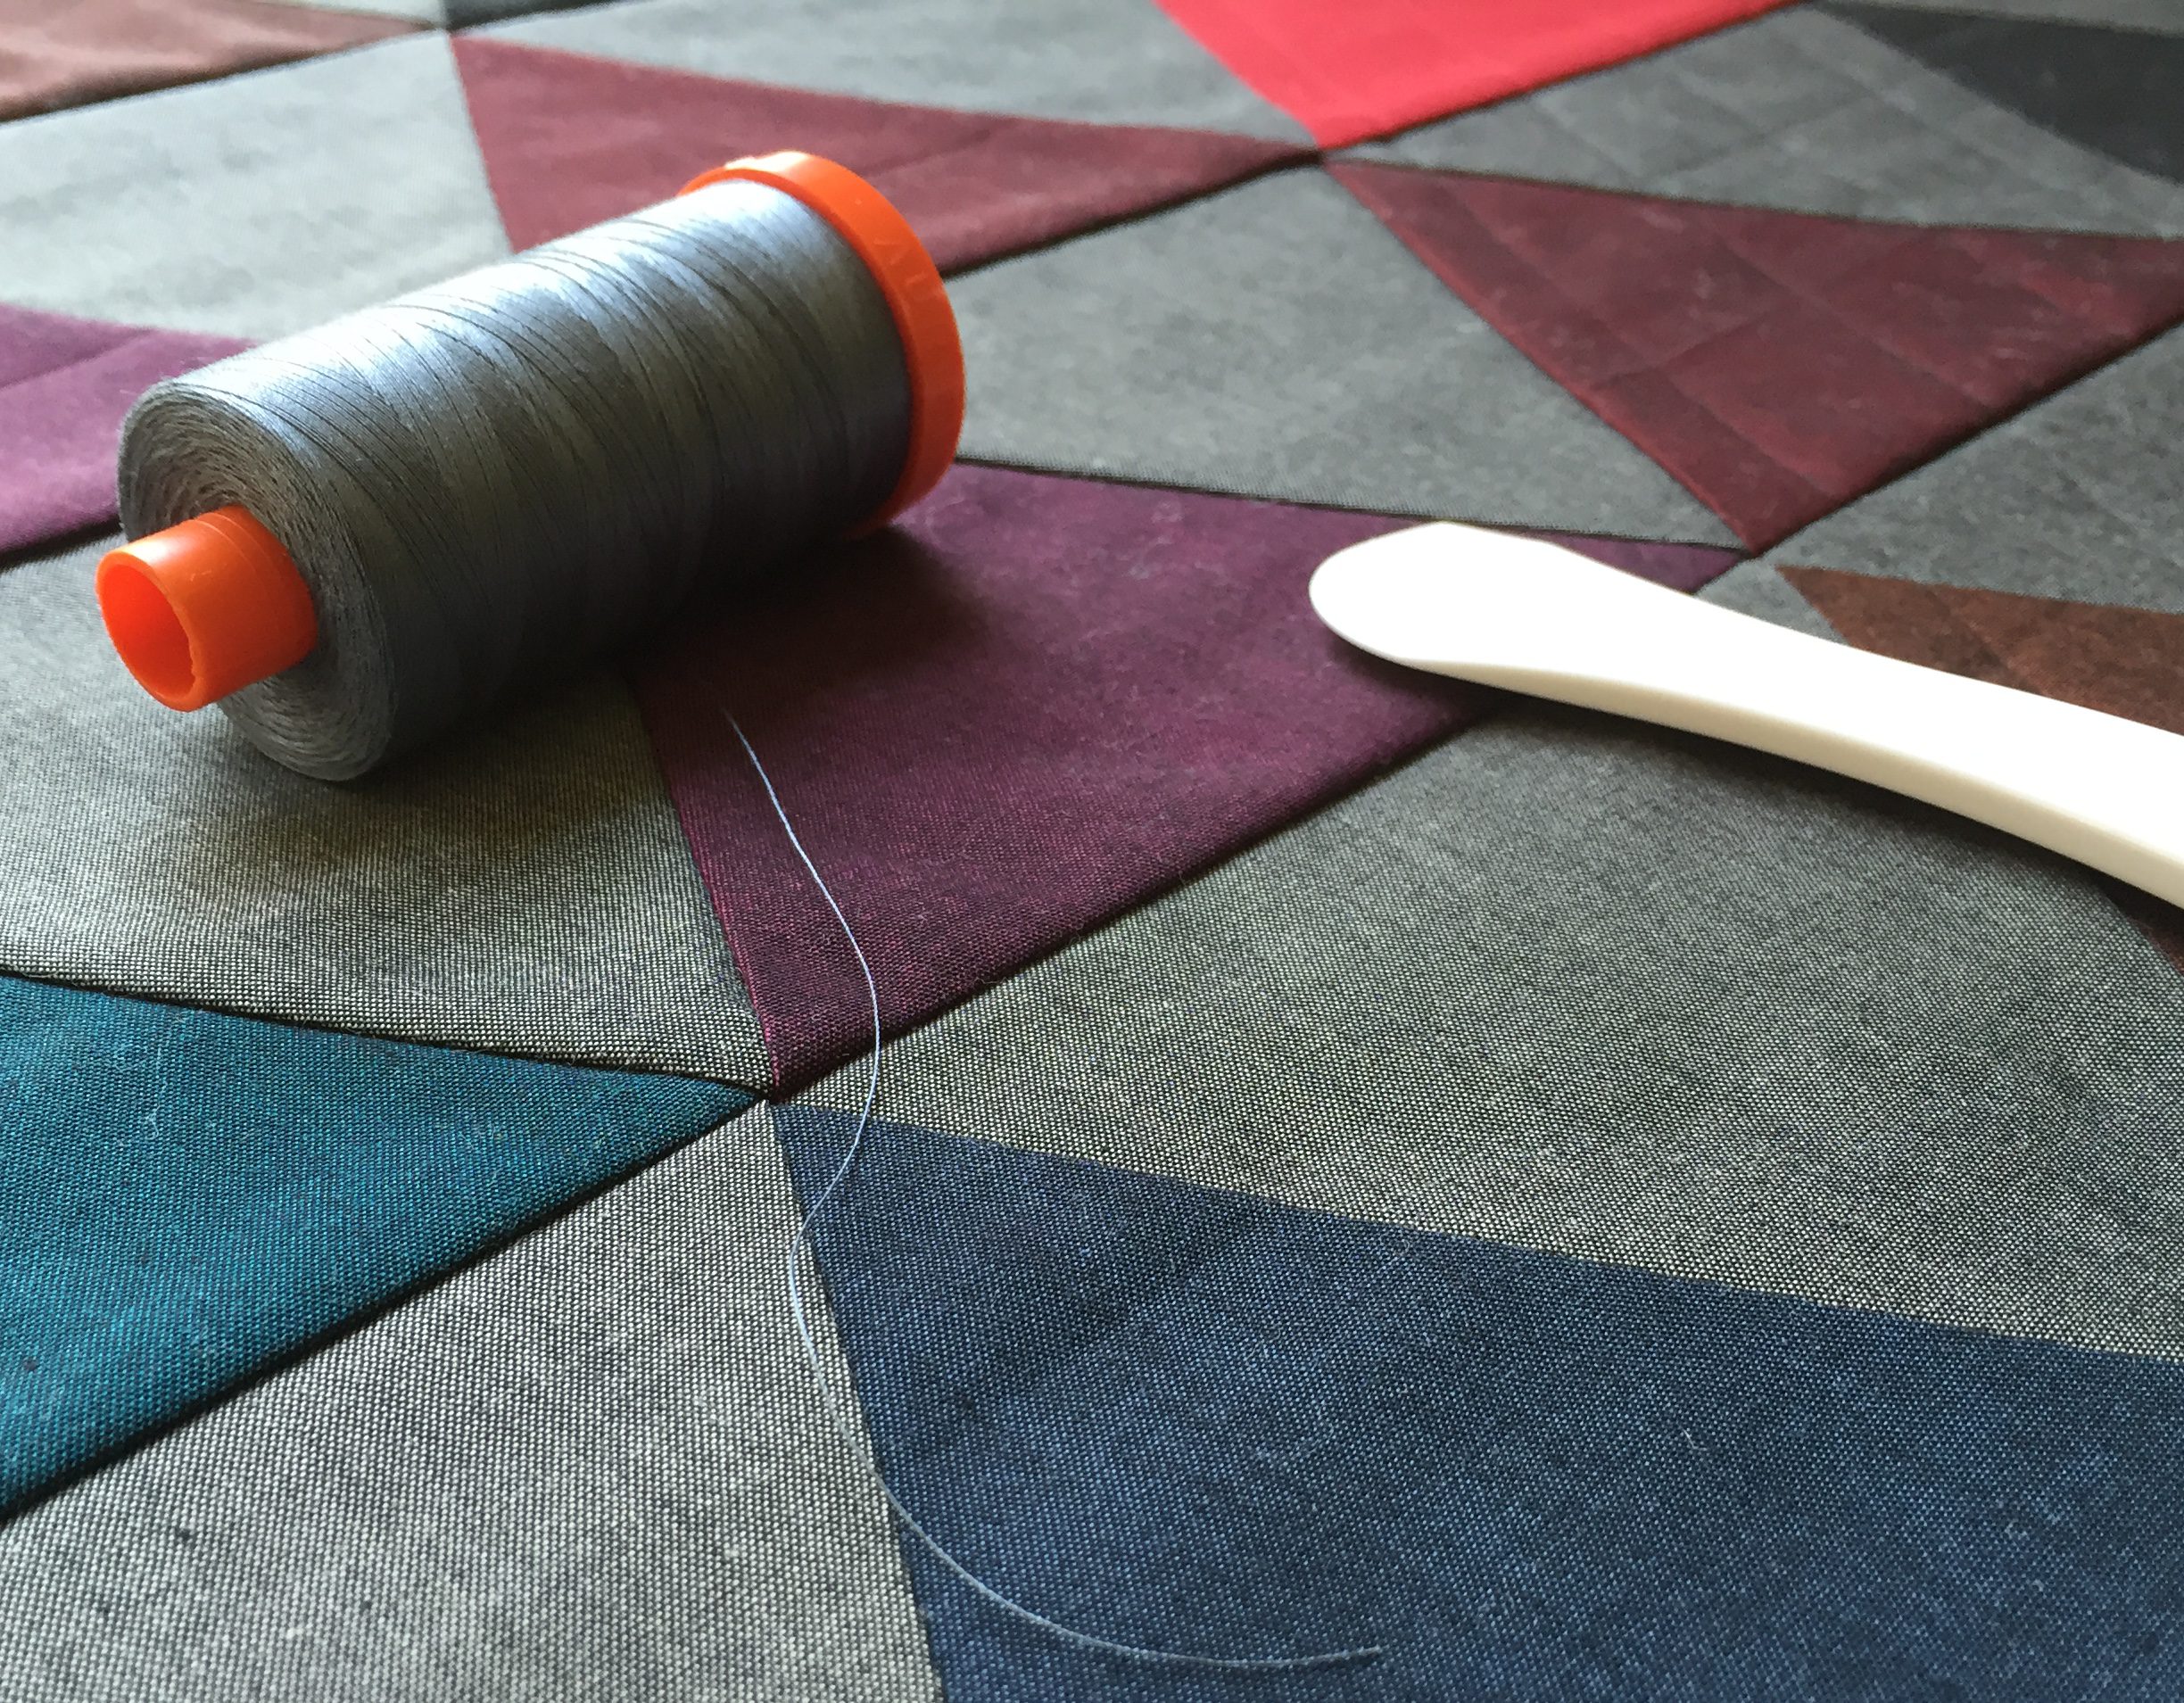
  • 50wt thread for piecing & quilting (I used Aurifil 50wt 2600-Dove for piecing and 50wt 2479- Medium Orchid and 2021-Natural White for quilting)
  • 12wt thread, embroidery floss, or perle cotton for embroidery (I used 12wt Aurifil 2435-Peachy Pink)
  • sewing machine
  • small embroidery hoop (6″ or smaller)
  • embroidery needle
  • rotary cutter and mat
  • iron and pressing surface

Note that if you do not have a Cricut Maker, you will also need a washable fabric marking tool, printer to print the embroidery template, and light box or other bright surface to facilitate tracing the embroidery template onto your fabric.

Now for the fun!

Using the Cricut Maker

Log into Cricut Design Space and get my Flying Geese Table Runner with Embroidery project here, and click “Make it!”

Prepare your mats as instructed, smoothly spreading your fabric onto your 12″x24″ FabricGrip mat. The Cricut Maker will lead you through the entire process, so simply follow the screen instructions and let the Cricut Maker work its magic!

Cricut Maker in action drawing and cutting The Cricut Maker will both draw the washable embroidery guide lines AND cut the larger rectangle for you!

Attaching elements in Cricut Design SpaceWhen I designed the drawn geese section, I designated the geese shapes as draw lines rather than cut lines and ATTACHED them to a larger cut background rectangle, about 11 1/2″ x 13 1/2″ in size so that they would be easier to embroider. For those of you designing for your Cricut Maker, this is key to remember when you want to combine both cut lines and drawn lines! Also, many thanks to Julie at Intrepid Thread for teaching me how to do this! If you’re a quilter getting to know your Cricut Maker, I highly recommend checking out Julie’s how-to resources both on her blog and YouTube channel!

Cricut Maker in action cuttingThe Cricut Maker will also prompt you to cut squares of your focal fabric, small squares of background fabric, and some background rectangles. Once the fabric is cut, carefully remove the excess fabric, revealing your perfectly cut shapes. Carefully remove the fabric from the mats, and then get ready to sew!

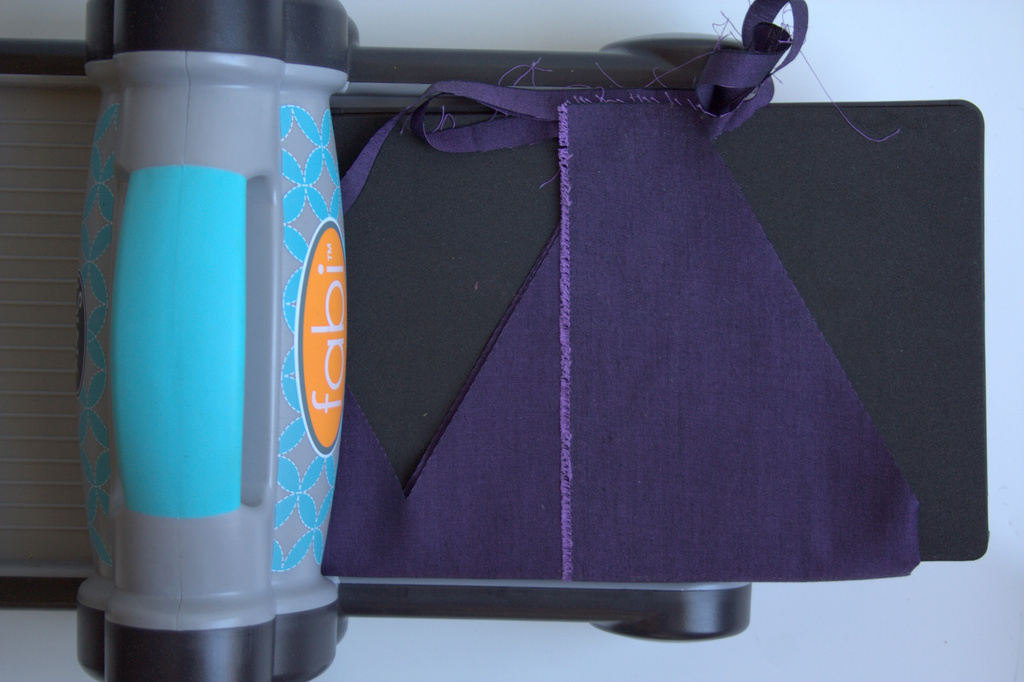
You will also need to cut a 19 1/2″ x 13 1/2″ rectangle of background fabric with your rotary cutter and mat for the center portion of the table runner. You can easily shorten or lengthen your table runner by adjusting the dimensions of this center panel accordingly. It should always be 13 1/2″ wide, but can be as long or short as needed to fit your table.

Preparation Instructions if you don’t have a Cricut Maker

If you don’t have a Cricut Maker, here’s how you can cut and prepare your fabric using a rotary cutter, mat, washable fabric pen, and lightbox or other light source.

First, do your cutting. From your background fabric, cut:

  • (1) 11″ x 13 1/2″ rectangle (onto which you will trace your embroidery templates
  • (12) 2 7/8″ squares
  • (2) 2 1/2″ x 13 1/2″ rectangles
  • (4) 1 1/4″ x 4″ rectangles
  • (1) 19 1/2″ x 13 1/2″ rectangle (as noted above)

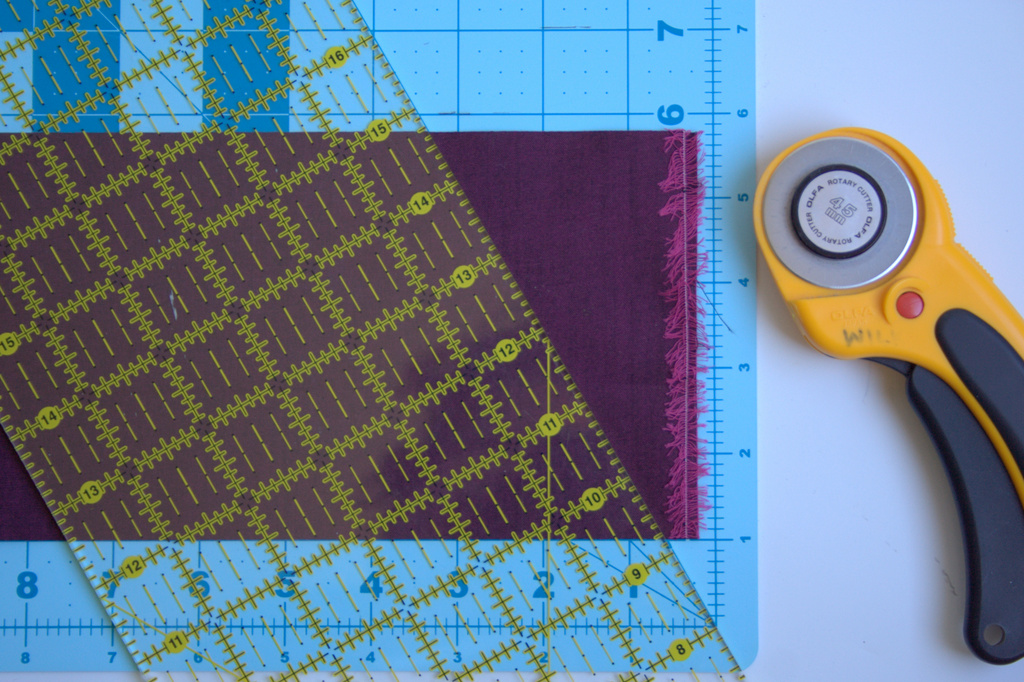
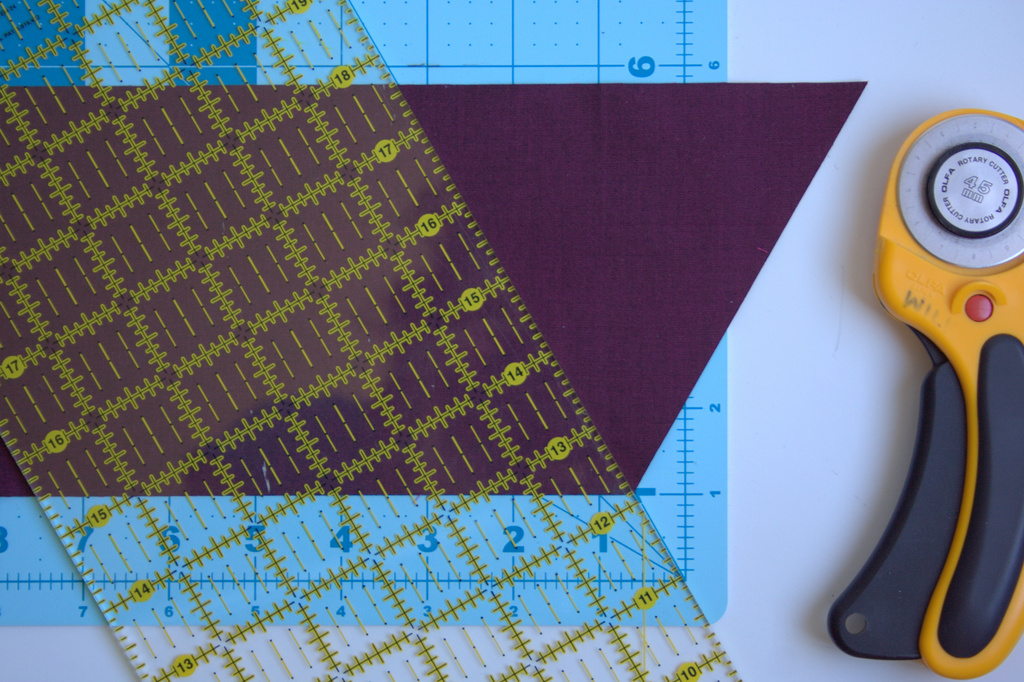
From your focal fabric, cut:

  • (3) 5 1/4″ squares

We will use the backing of the table runner as the binding, so will keep the backing fabric as a whole 1/2 yard cut until after quilting.

Download the Flying Geese Table Runner Embroidery Template-Night Quilter Printable, print on your computer at 100% scale, tape the two pages together along the match line, and trace onto your 11″ x 13 1/2″ rectangle of background fabric using a washable fabric pen. Be sure to center the template so that there is at least 1/2″ of fabric on both sides of the geese and 1″ above and below the geese.

Once all of your cutting and prepping is complete, it’s time to get stitching!

Embroidering the Accent Geese

embroidering the accent flying geeseThe embroidered accent geese are meant to add some subtle accent interest to your table runner, since hand stitching of any kind (in my mind) adds a special touch. Especially with a project that will be seen often, those hand stitches can echo the sharp aesthetic of the pieced flying geese.

aurifil 12 wt thread for embroideryGather your embroidery hoop, background fabric with your flying geese drawn on, and a thick 12wt thread, embroidery floss, or perle cotton in a coordinating color. I chose to use Aurifil 12wt thread in 2435-Peachy Pink since it’s a subtle echo of the geese that pulls the beautiful coral color from the Twinklestar in Berry fabric.

aurifil 12 wt thread for embroidery running stitchYou can use the drawn embroidery guides to do any type of embroidery you want. I chose to do a simple running stitch around each flying goose, but feel free to get creative! Chain stitch would me another fun stitch to use to outline each goose, you could echo the stitching inside each goose as well, or even fill the geese with french knots!

Note that if you choose to use a more dense embroidery design, you may want to layer another piece of white fabric or use an interfacing stabilizer behind your panel.  Yet another creative option would be to wait on the stitching, assemble your table runner, and then use the drawn guide lines to hand quilt around each goose, stitching through all three layers of the table runner. If I make another one of these table runners, I will go this route, since I think the stitches would work really well as hand quilting, too.

trim embroidered geese panels
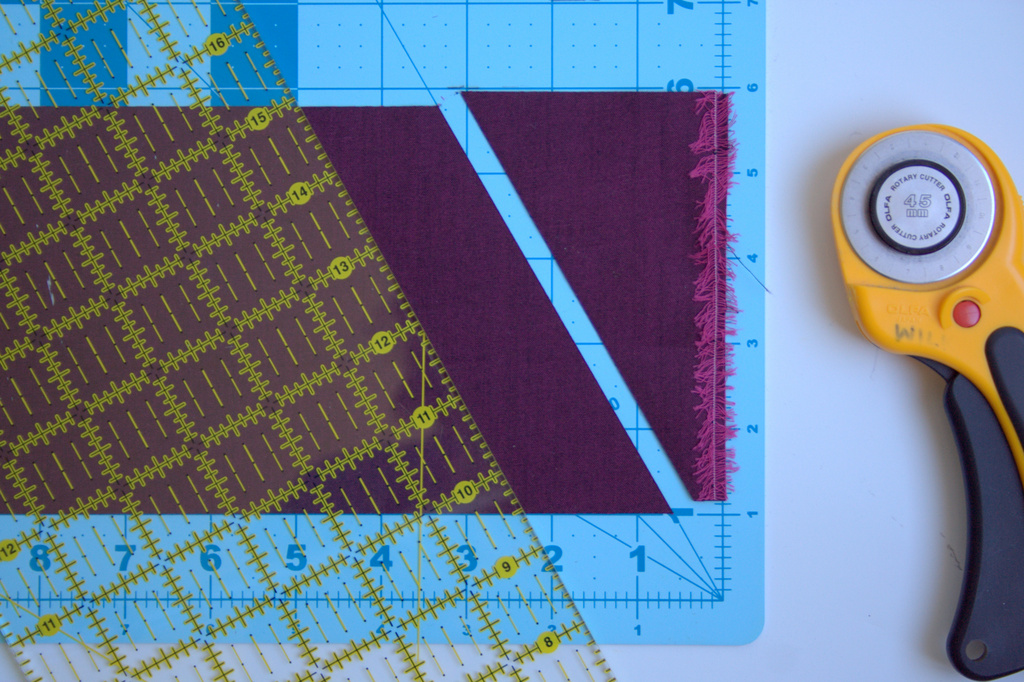
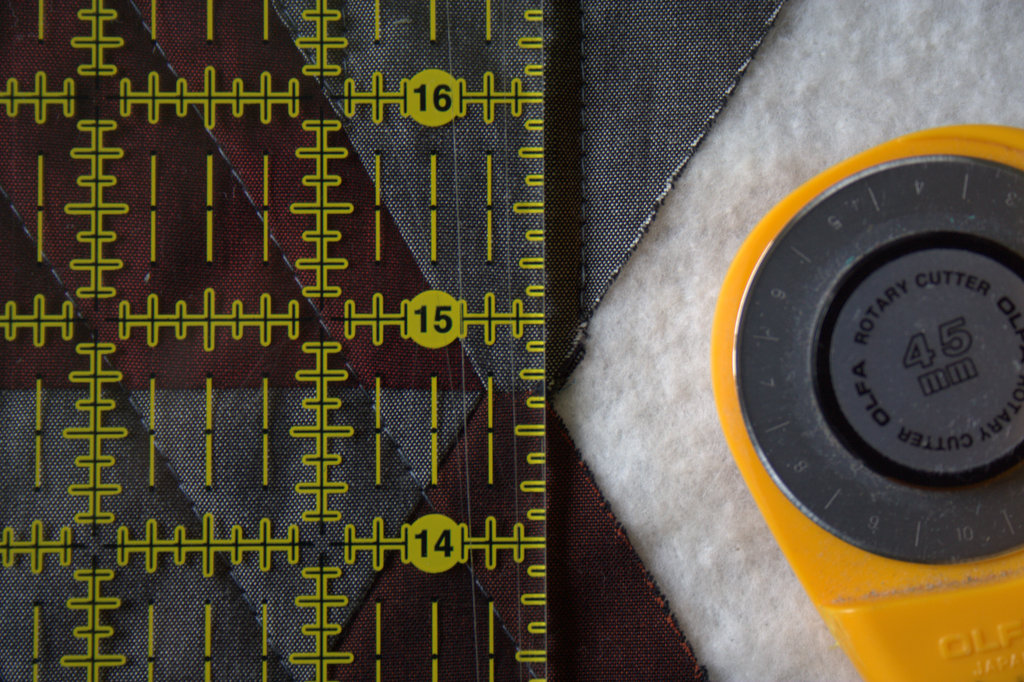
Once you’ve finished embroidering your geese, carefully trim the panel into two rows of geese, cutting 1/2″ away from the side points of each row. Do not cut the top or bottom of each row of flying geese. You should now have two embroidered geese panels measuring 5″ x 13 1/2″.

Piecing Flying Geese Four at a Time

piecing flying geese four at a timeWith your fabric pieces cut perfectly by the Cricut Maker, or as specified above, piece your flying geese using the four at a time method. I used the Reference section of my Quilter’s Planner to piece mine, and you can also find a download of the page HERE as a little taste of the awesome that is contained in the Quilter’s Planner. (If you don’t have one already, go ahead and buy a Quilter’s Planner 2018 while they are still available!) Note that we are making flying geese that finish at 2″x4″.

flying geese strips for table runnerMake twelve geese total and sew them into two strips of six as shown above. See how they are mirrored by the embroidered strips? Note that your embroidered strips should be cut apart by this step.
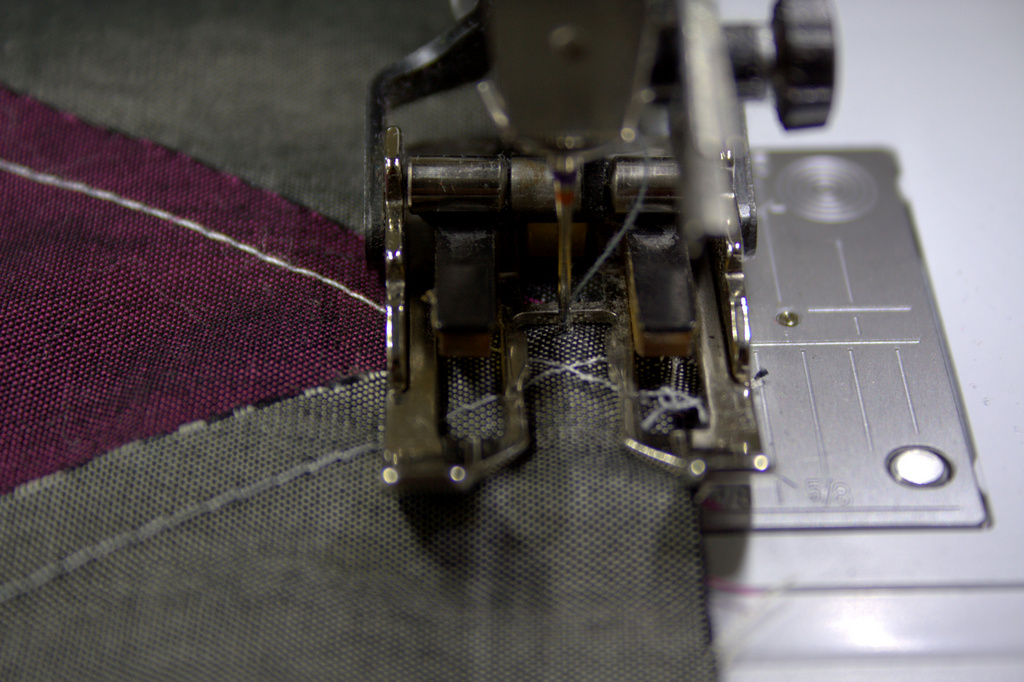

Sewing Tip:

Perfect Points for Flying GeeseWhen sewing two geese together, position the point of the goose on top and make sure your stitch line passes exactly through the stitched point of your goose.

perfect points with flying geeseThis way, you will be sure to never chop off the point of a flying goose ever again!


sewing top and bottom sectionsOnce your flying geese rows of six are assembled, sew a 1 1/4″x 4″ piece of background fabric to the top and bottom of each strip. Align with your 13 1/2″ embroidered geese strips, and trim the pieced flying geese strips to 13 1/2″ if needed, being sure that your embroidered geese align with your sewn geese before trimming. There is a little bit of wiggle room included in the top and bottom background rectangles to allow for those who sew scant or generous 1/4″ seams, so trim as needed.

Assembling the Table Runner

flying geese panel of table runnerFirst sew together the flying geese panels of the table runner. I’ve arranged mine on top of my backing fabric so that you can clearly see the different pieces being sewn together. With geese facing the same direction, sew the embroidered flying geese section to the pieced flying geese section. Then sew to the 2 1/2″ x 13 1/2″ background rectangle. Make two.

assembling table runnerAssemble the table runner top by sewing the sections together as shown above: Note that the embroidered flying geese panels should be sewn to the center background piece on both ends.

choosing threadOnce your table runner top is pieced, position the runner top and batting in the center of your chosen backing fabric, right sides facing away from each other. In other words, layer and baste your table runner and prepare for quilting!

quiltingI chose to use Aurifil 50wt 2479- Medium Orchid to quilt my Flying Geese Table Runner with a dense free motion quilting pattern in the center, simple outlines of the pieced flying geese, and dense free motion quilted switchbacks in Aurifil 2021-Natural White between both the pieced and embroidered geese. I wanted the texture but not the visual distraction from my hand stitching.

detail of quilting on flying geese table runner cricut maker aurifil threadI’m certainly not a free motion quilting pro, but I am pretty happy with my over-all heart-flower free motion quilting motif! Plus, how fabulously do those tulips go with the BariJ Sage fabric backing!?

As you quilt your table runner, be sure to stay 1/4″ away from all edges with your quilting! This will help your binding look great from both the top and the bottom, since we will be using the backing fabric folded over the edges as binding.

fold back backing fabric
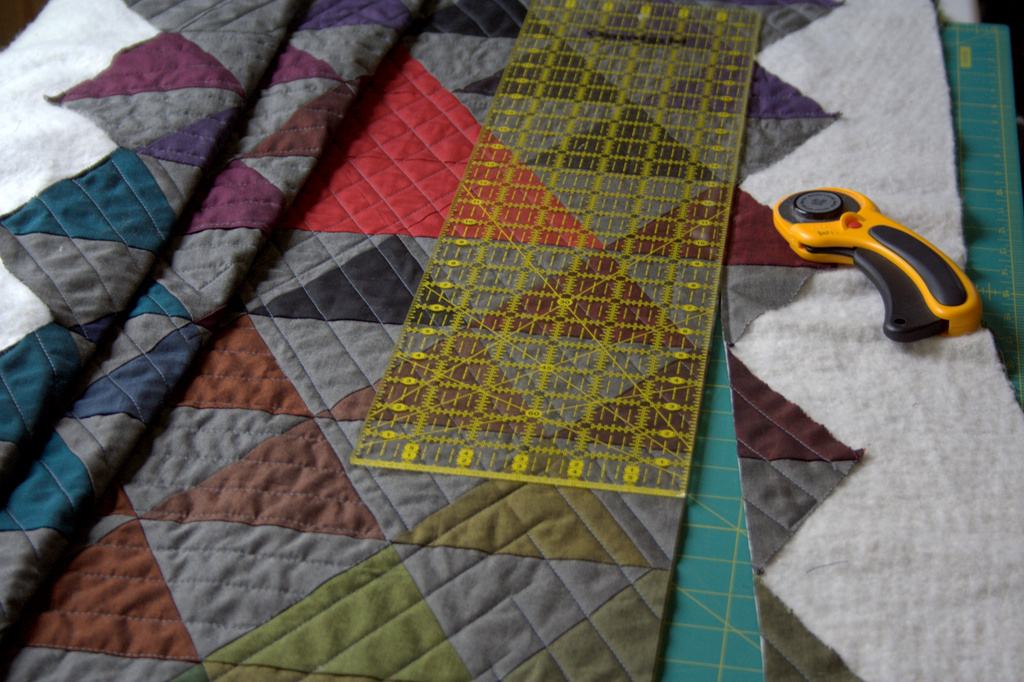
Once your table runner is quilted as desired, carefully fold back the backing fabric and trim the batting *just* outside the top of your table runner top. I gave myself a little less than 1/8″ around the edge of my table runner.

cutting batting square Be extra careful not to cut your backing fabric during this step!

Next, trim your backing fabric between 3/4″ and 1″ from the outer edge of your table runner quilt top. Fold the backing so that its raw edge meets the edge of your trimmed quilt top and batting and press. Fold again and top stitch in place, securing your binding to the front of the quilt.

binding close up flying geese table runnerA full tutorial for how to bind your quilt with the backing fabric can be found HERE on Cluck Cluck Sew’s blog.

binding close up flying geese table runnerI wanted my binding to be slightly slimmer, so I cut mine 3/4″ from the edge of the table runner top instead of 1″, but choose whichever you prefer.

flying geese table runner tutorial cricut makerTa da! Your table runner is nearly finished! All that remains is to wash out the washable fabric marker lines. I’ve found that the Cricut Washable Fabric Pen easily washes out with a bit of soap and cold water. Note that if you prewash your fabrics, you can wash out the fabric pen before trimming and piecing the embroidery panels into your table runner. I don’t prewash my fabrics, so I opted to wash it all at once after it was completely finished.

flying geese table runner cricut maker easter
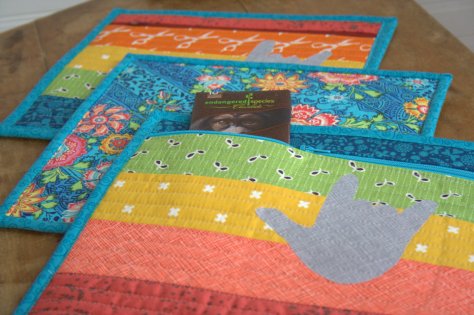
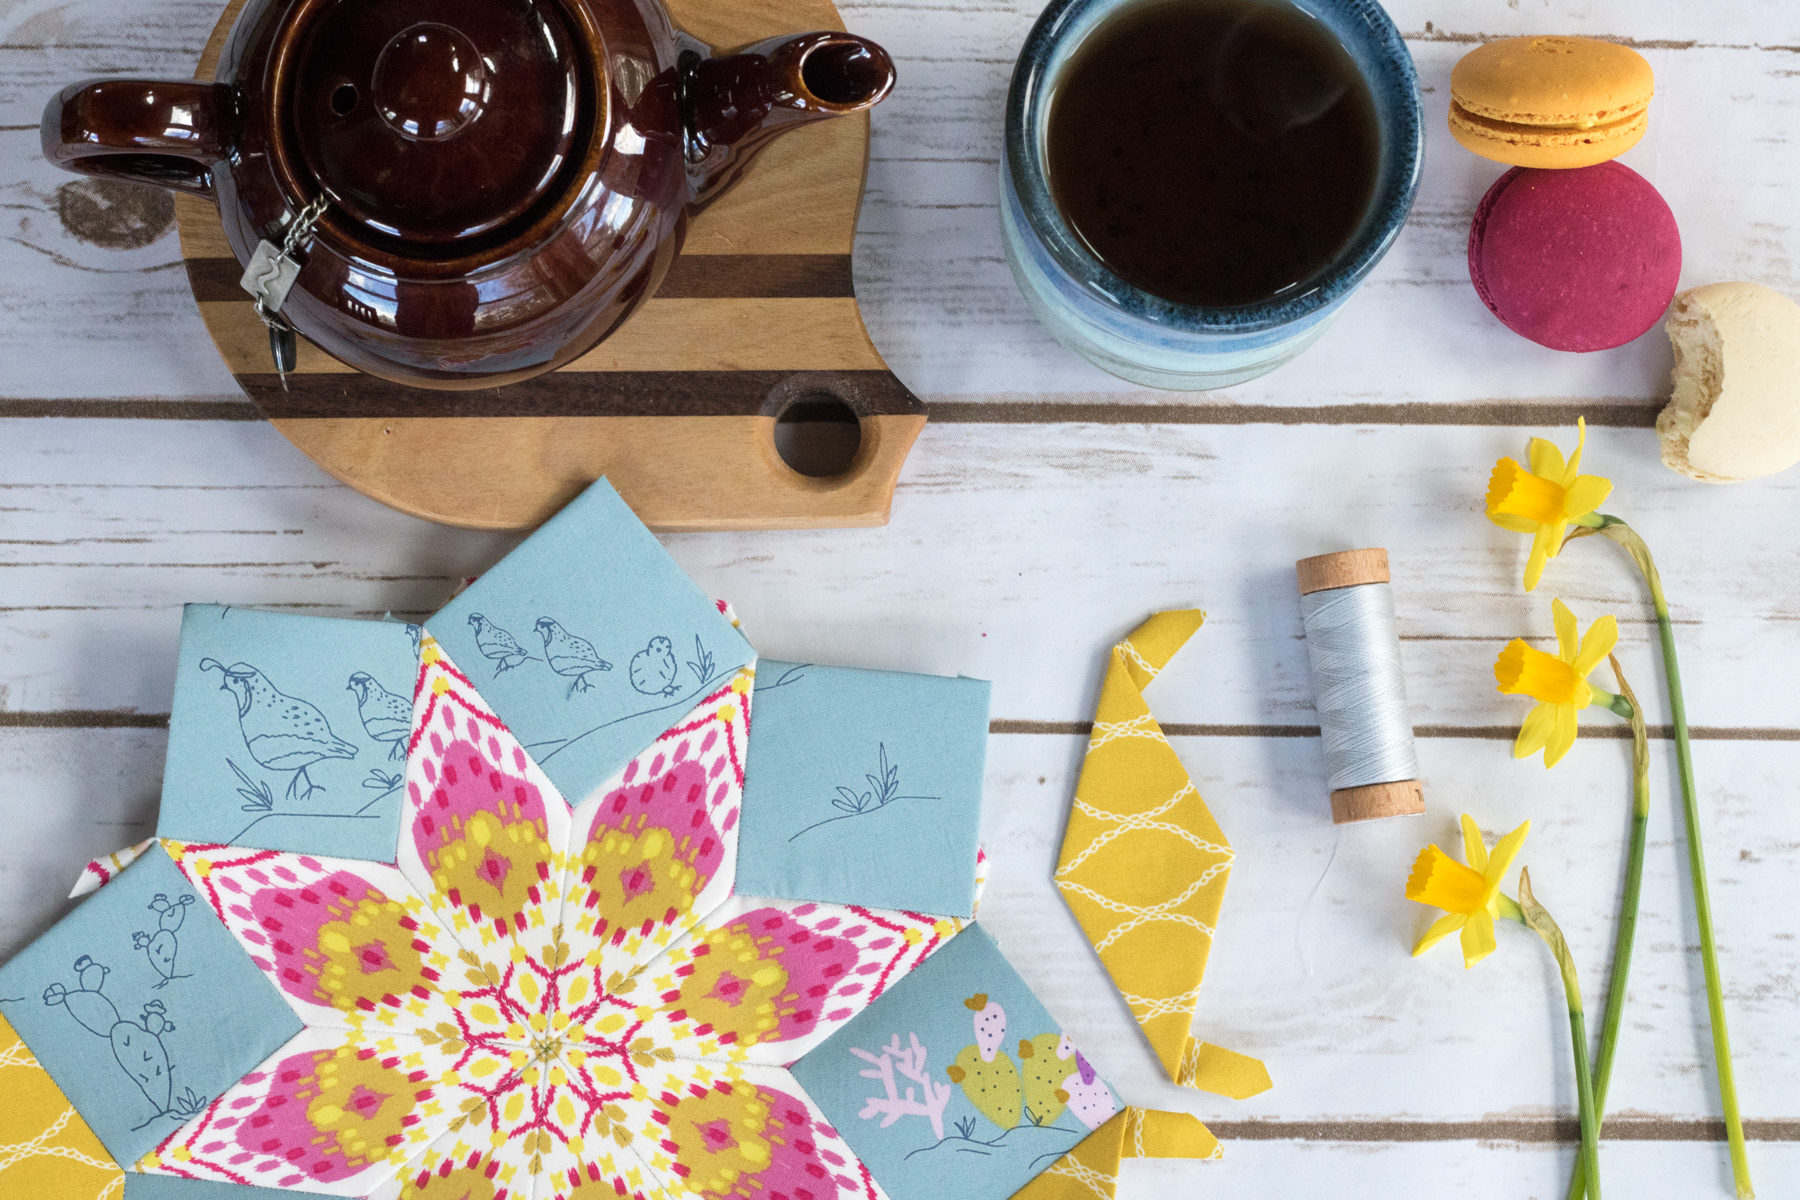
Set your Easter table and enjoy! I always love a good bundle of fresh flowers on a table, especially during these early days of spring when the snow is still thick on the ground outside.

flying geese table runner cricut maker easter

flying geese table runner cricut maker easterAfter giving my table runner its first wash, and in looking at these photos, I think I will go back and hand quilt within those embroidered flying geese to give them a bit more texture.flying geese table runner tutorial cricut makerEnjoy, and I hope you’ll share a photo of your Flying Geese Table Runner if you make one! You can tag me on social media @nightquilter or share a link here in the comments.

Happy stitching!


Cricut Maker and a World of Possibility

Today I’m excited to introduce a new tool I’ve been playing with over the past few weeks: the Cricut Maker. A few months ago, the folks at Cricut asked if they could send a Cricut Maker and starter kit to me in exchange for an honest review. I hesitated at first, since do I really need another cutting machine? But once I began reading up on the Cricut Maker and all of its digital cutting capabilities, including cutting any of your own designs and ability to cut literally hundreds of materials, I decided to say yes. I’m glad I did since this machine can do anything!

cricut maker digital cutting machine introductionThis post is a sponsored conversation written by me on behalf of Cricut. All opinions are my own and I only share products that I think are awesome. Note that there are no affiliate links included since I live in Maine where affiliate programs aren’t permitted, but I have linked to referenced products for your ease. Business aside, shall we get on with the fun? Let’s!

I’ve played with die cutting machines before, so the concept of a machine to help with the cutting step of quilting is not new to me. Some pros to cutting machines are that they cut perfectly accurately since human error is removed, they are safe since the blade is in the machine and not your hand, and they are versatile. The Cricut Maker is all of these things, but takes versatility to the next level since you can cut all of your own patterns and designs in Cricut Design Space.

cricut maker digital cutting machine introduction
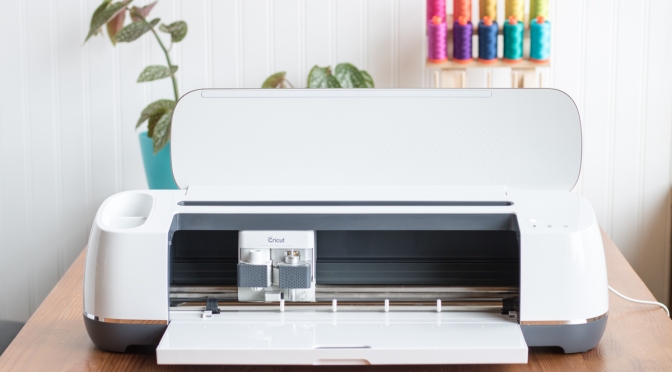
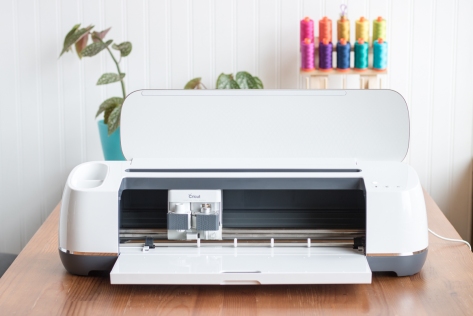
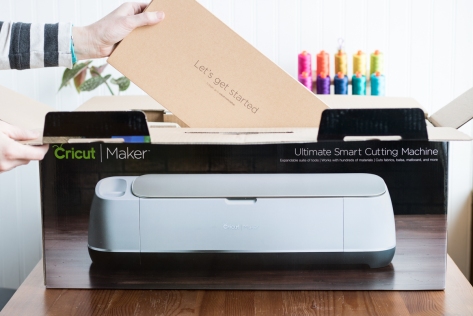
I set aside a day where I would have a window of a few hours without any of the kids home to first unbox my Cricut Maker, since I knew that I would need to not only figure out how it works, but also figure out how to use Design Space, where your projects and designs are created. I was pleasantly surprised at how extremely easy and user friendly the entire set up was! I probably could have figured it out with all three kids hanging on me–it was that intuitive!

Intro for Cricut MakerTo set up the Cricut Maker, I just went to the Cricut website and found the set up page. From there, I clicked the green “Get Started” button at the bottom and it walked me through the entire Cricut Maker set up, as well as an introductory greeting card project to help me learn the ropes. All materials for the greeting card project are included with the Maker machine, and because the project uses multiple settings and pens, after creating the quick greeting card, I felt confident enough to dive into making and designing myself! My “new technology” worry was all for naught!

cricut maker iron on glitter
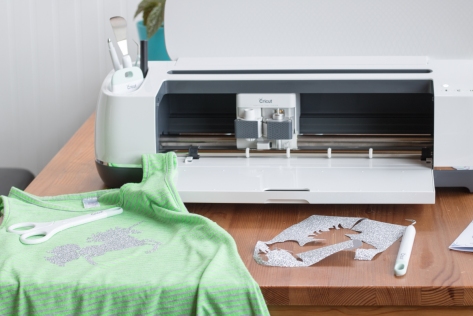
I went into my Cricut Maker exploration day with full intention of diving into its capabilities for the world of quilting, but in exploring the Cricut Design Space, I accidentally–OOPs!–ended up bedazzling one of my daughter’s tank tops with a glittery iron-on unicorn! The Cricut Maker Design Space has a large library of free graphics, templates, and projects and as soon as I saw this unicorn, I knew it just had to make its way into our world.

Cricut sent me a box full of supplies along with the Cricut Maker, and a roll of silver Glitter Iron-on was included. Even though the entire process was new to me, I couldn’t resist figuring out something new. Besides, glitter + unicorns = magical! Another big perk to the Cricut Maker is the huge library of available videos and tutorials available. A simple search found me a huge selection of tutorials, from the actual Learn page on Cricut, to a multitude of YouTube tutorials by craft bloggers.

cricut weeder tool at workIt didn’t take me long at all to have the unicorn cut since it was a free image already in the Design Space, and the Cricut Weeder tool was the perfect tool to help get the background away from the iron on transfer, all while making me feel like a glittery unicorn-loving dentist. The weeder tool comes in the Cricut Tools Basic Set, which is definitely worth getting if you have a Maker.

cricut maker iron on glitter vinyl 
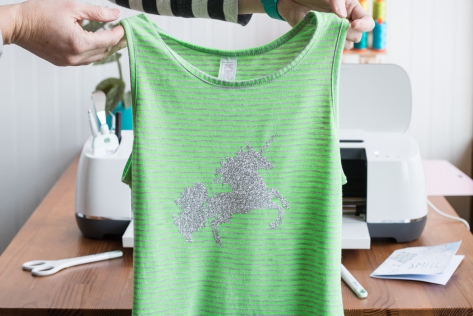
Within a half an hour, I had a fully bedazzled unicorn tank, which fortunately my daughter LOVED when she got home from school.

After that brief interruption, I continued to explore the possibilities of the Cricut Maker. Here are a few highlights:

washable fabric pen for cricut makerThe Cricut Maker comes with a fine point pen, but there are also a wide variety of other pens available for diversified projects. The pen I will likely use most in my quilting is the washable fabric pen. This is great for drawing on cut lines, seam allowances, embroidery guidelines, and more. It’s quite easy to designate lines in Design Space as a drawn line rather than a cut line, too, so you can have the Cricut Maker both draw and cut on the same fabric.

inserting the washable fabric pen for cricut maker
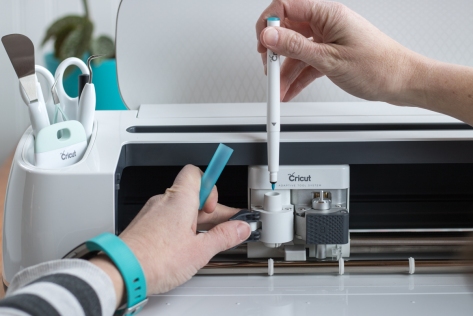
The pens and blade tools are *really* easy to install and switch, since they are held in with an easy snap clamp, and the Cricut Design Space prompts you on what pen or blade to insert before each project so that you’re sure to use the correct blade for your project.
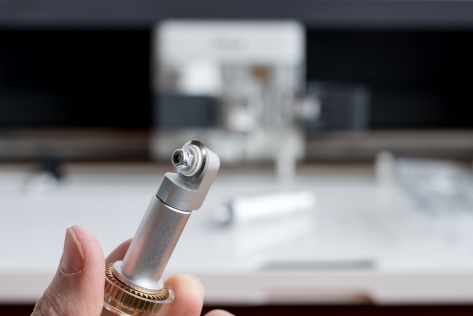
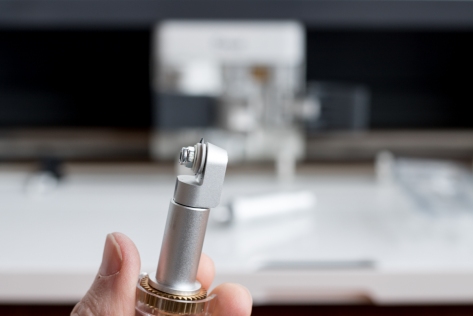
cricut maker rotary blade
Cricut Maker rotary blade

The Cricut Maker comes with a premium fine point blade, which is used for cutting paper, card stock, vinyl, leather, and other light-weight to medium-weight materials. What makes it really useful for quilters, though, is that it also comes with a rotary blade for cutting fabric.

cricut maker rotary bladeUsing the sticky pink FabricGrip mat and the rotary blade tool, the Cricut Maker can cut standard quilting cotton and other fabrics without needing to stabilize them first. Watching this little rotary cutter at work is super fun, too, since its little robotic lift, turn, press, cut, repeat is like taking a trip to the future.

cricut maker rotary bladeNow that you’ve seen the rotary blade from every angle, wouldn’t you agree that that’s the cutest little rotary blade you ever did see?

tools for the cricut maker
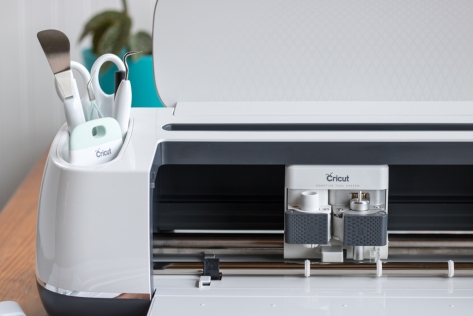
The blades snap into the little B compartment to the right of the A pen holder, and it’s incredible easy to switch blades when needed. The Cricut Maker also has ample space for storage of unused blades, pens, and tools, which is really handy for someone like me who doesn’t have a whole lot of extra storage space.

My hands down favorite features of the Cricut Maker are its design versatility and ease of use. You are not limited by the shape of a specific die, or even by a set library of designs. Because the Cricut Design Space is so user friendly and easy to figure out, and because there are so many fabulous tutorials available to help walk you through the details, I know that the sky’s the limit with design. For a pattern designer like me, that aspect is KEY.

I can see myself using the Cricut Maker for anything from:

  • fabric cutting for simple and quick sews
  • designing and making logo vinyl stickers
  • cutting fabric for my own foundation paper piecing patterns
  • cutting cardstock papers for English Paper Piecing
  • cutting templates for meticulous cutting using a thicker material like template plastic
  • drawing embroidery designs on fabric
  • cutting clothing patterns using the Simplicity patterns available in Cricut Design Space
  • quick projects from the Ready-to-Make Projects library in Cricut Design Space
  • helping my kids create cards for Thank Yous, holidays, etc.
  • other family and school projects not even related to quilting
  • and so, so, so much more!

I’ve already designed a little robot for my son, who loves robots and goes around telling people that they are either in or falling out of favor in his eyes because of the number of hearts in their heart tanks.

maxwell's heart tank robot cricut makerFor example, when I do something he really loves, he says, “You just got 10,000 hearts in your heart tank!” and if we tell him he can’t have a second cookie, he says, “Your heart tank is almost empty!” in a warning voice, finger wagging for emphasis. How perfect is this little robot for him? I’m thinking I’ll make it a layered card stock creation to frame for his room. This was easy to make, since the robot is a free image in the Design Space, and adding the heart, customizing colors, and adding the text was very straightforward.

As you can see, one little afternoon with the Cricut Maker, and my to-make list has already grown quite a bit! Can you blame me?

cricut maker world of possibility
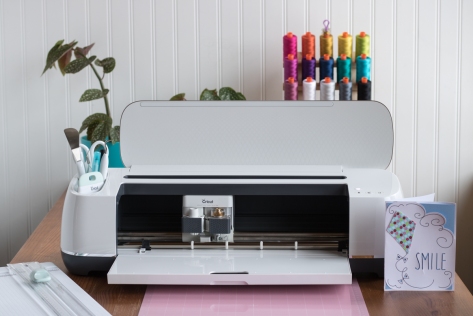
Now for the nitty gritty: how much does the Cricut Maker cost? The Cricut Maker machine retails for about $399.99.  When you buy a Cricut Maker, in the box you get: a Cricut Maker™ machine, Rotary Blade + Drive Housing, Premium Fine Point Blade + Housing, Fine Point Pen, FabricGrip™ Mat 12″ x 12″, LightGrip™ Mat 12″ x 12″, welcome book, USB cable, power adapter, Cricut Access™ free trial membership, 50 free ready-to-make projects, including 25 sewing patterns, materials for a first project.

If you plan to use the Cricut Maker for primarily quilting and fabric-related projects, you might want to get the Cricut Maker + Essentials Collection ($459.99), which comes with two larger 12″x24″ FabricGrip Mats and washable fabric pen, among other sewing-related tools. As I said earlier in the post, I don’t have any affiliation with Cricut, so I don’t get anything if you buy one. I’m simply sharing what I know and my experience with the Cricut Maker to help you decide if it’s a tool that would work well in your life.

I’m excited about the world of possibilities that exists with the Cricut Maker, and I’ll be sure to share my projects and experience as they happen. I’m excited about a new knife blade that will be coming out soon that will allow for cutting thicker, tougher materials like balsa wood and chipboard. The Cricut Maker’s Adaptive Tools System™ is perfect for the makers among us who don’t want to be limited to just one craft!

sneak peek project cricut maker quilting embroidery
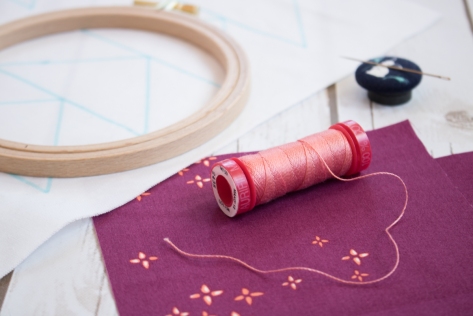
Here’s a sneak peek at a project tutorial I’ll be sharing for the Cricut Maker next week that pairs quilting and embroidery, so stay tuned!

What would you make with a Cricut Maker?

Blogger Bundle with Needle & Foot Fabrics {Giveaway}

needle and foot blogger bundle
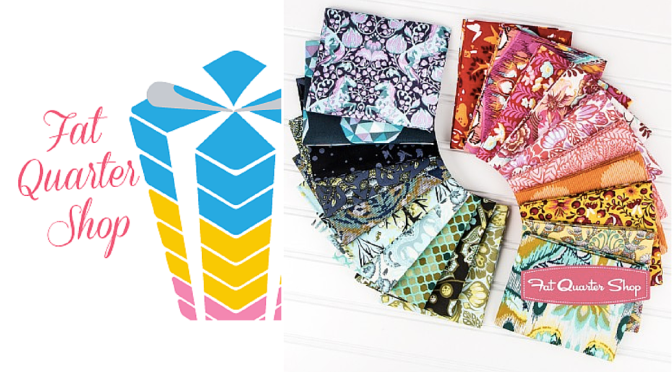
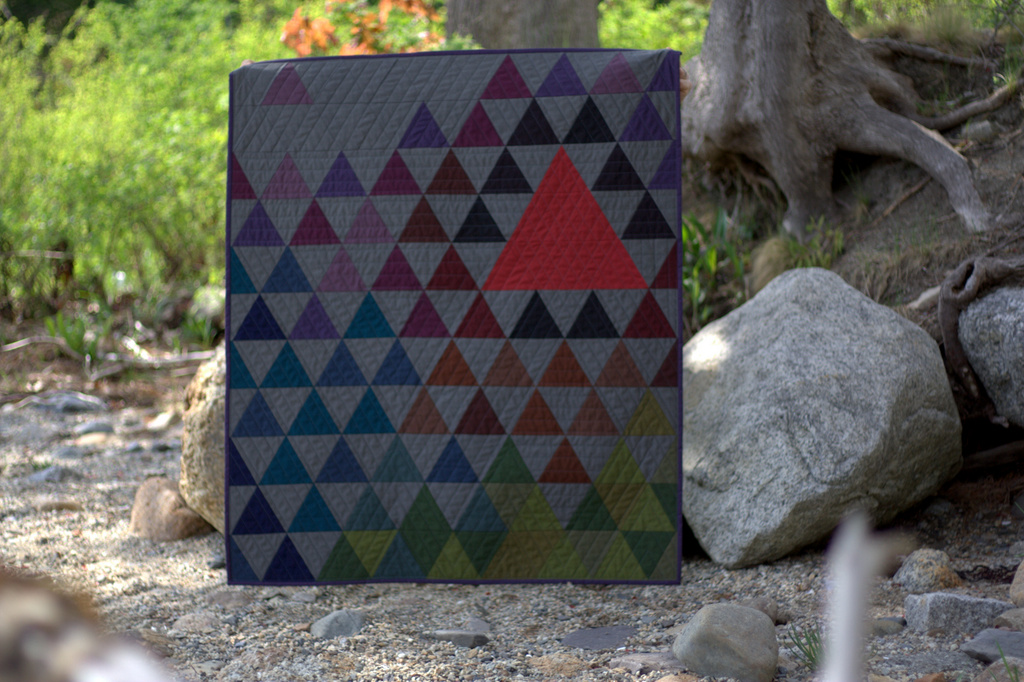
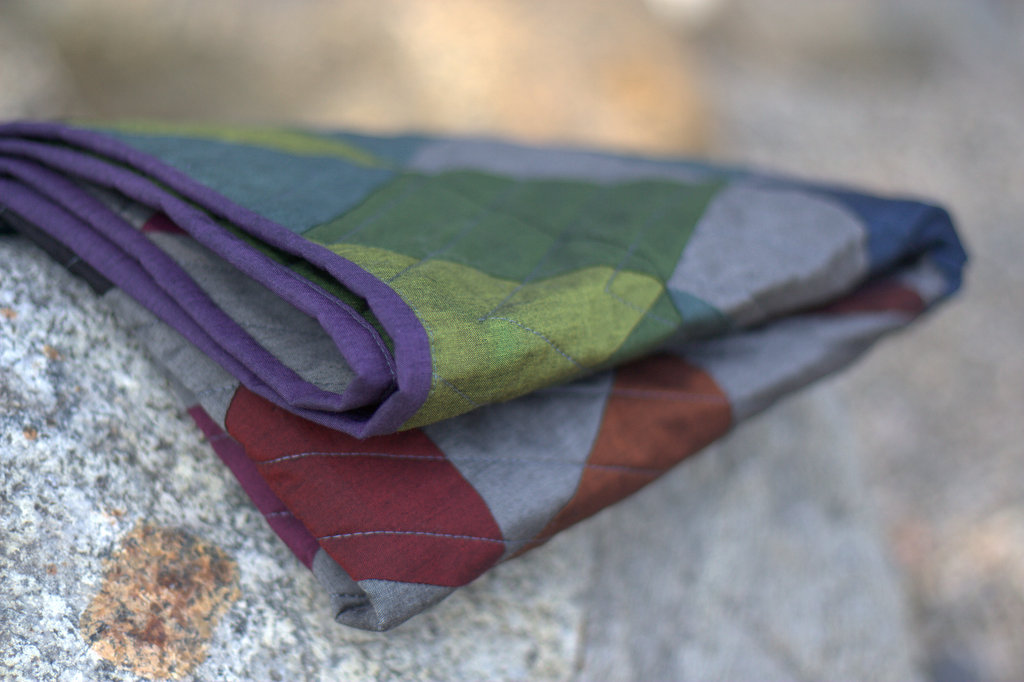
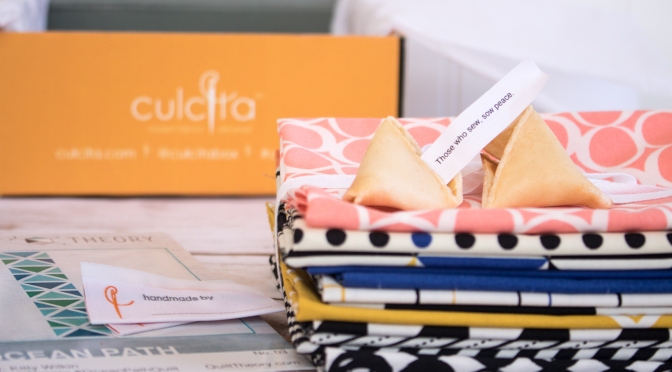
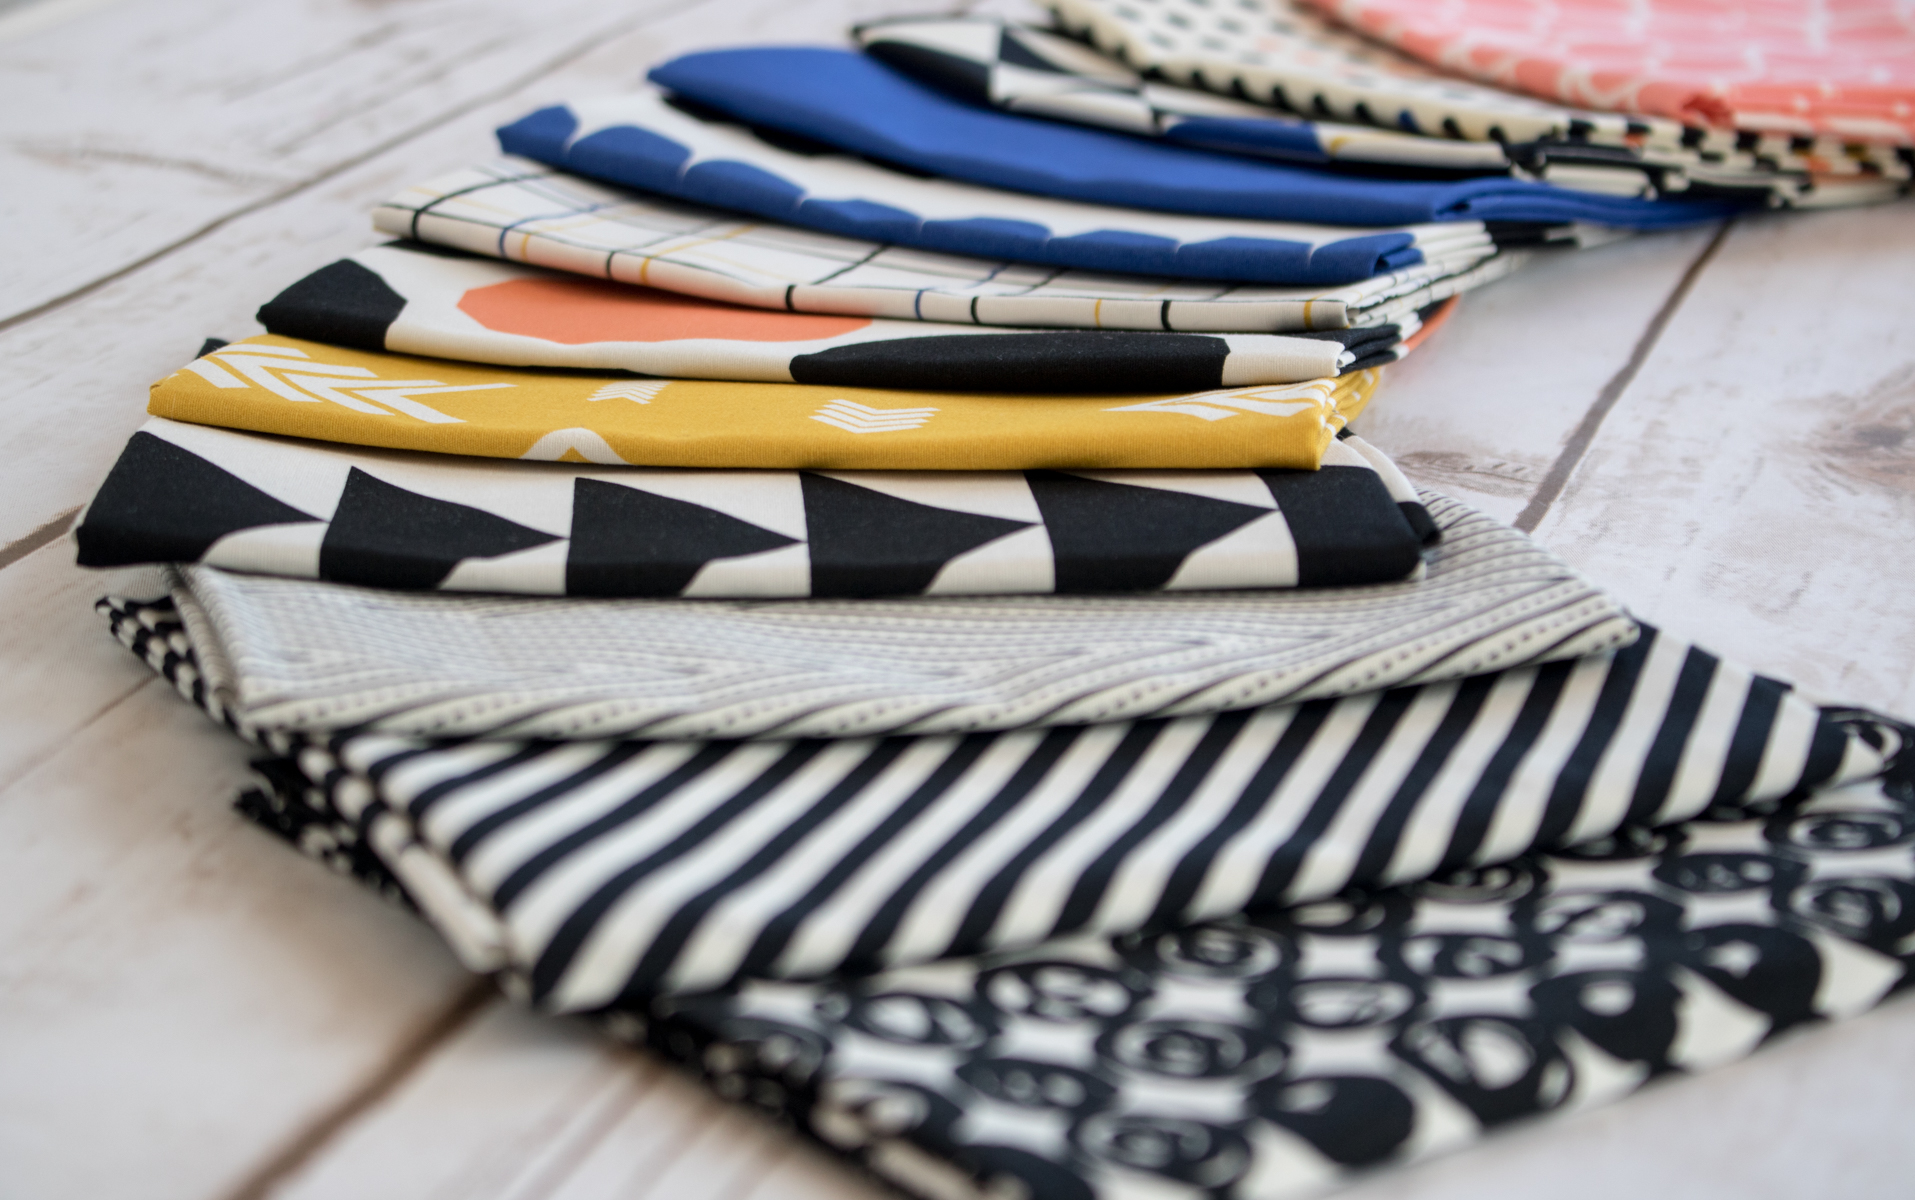
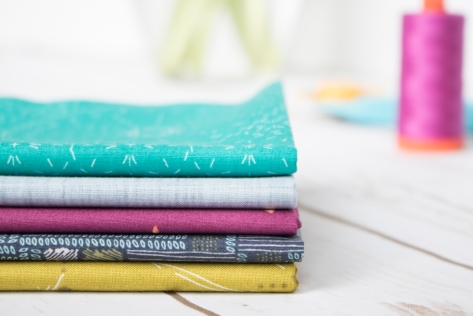
Selecting fabric combinations and color arrangements is one of my favorite stages in the quilting process. So a few months ago, when my friend Bernie asked if I would be interested in putting together a Blogger Bundle of fabric for her Etsy store Needle & Foot, of course I said yes! Today I’m excited to introduce you to the bundle I put together.

needle and foot blogger bundleWhile this bundle is versatile enough that any one of the fabrics could shine, there is definitely a star of the show in my mind, and that’s the Tartan Field in Midnight print from Bountiful, designed by Sharon Holland for Art Gallery Fabric (top left in the photo above). I selected this entire bundle based up on that one print. I’ve had my eye on it ever since Sharon first revealed her Bountiful fabric line peeks, and there’s just something about the grid work paired with the subtle colors, a touch of geometry and a good dose of nature (it’s the top down view of a garden, right?) that really makes my quilty heart sing.

needle and foot blogger bundle
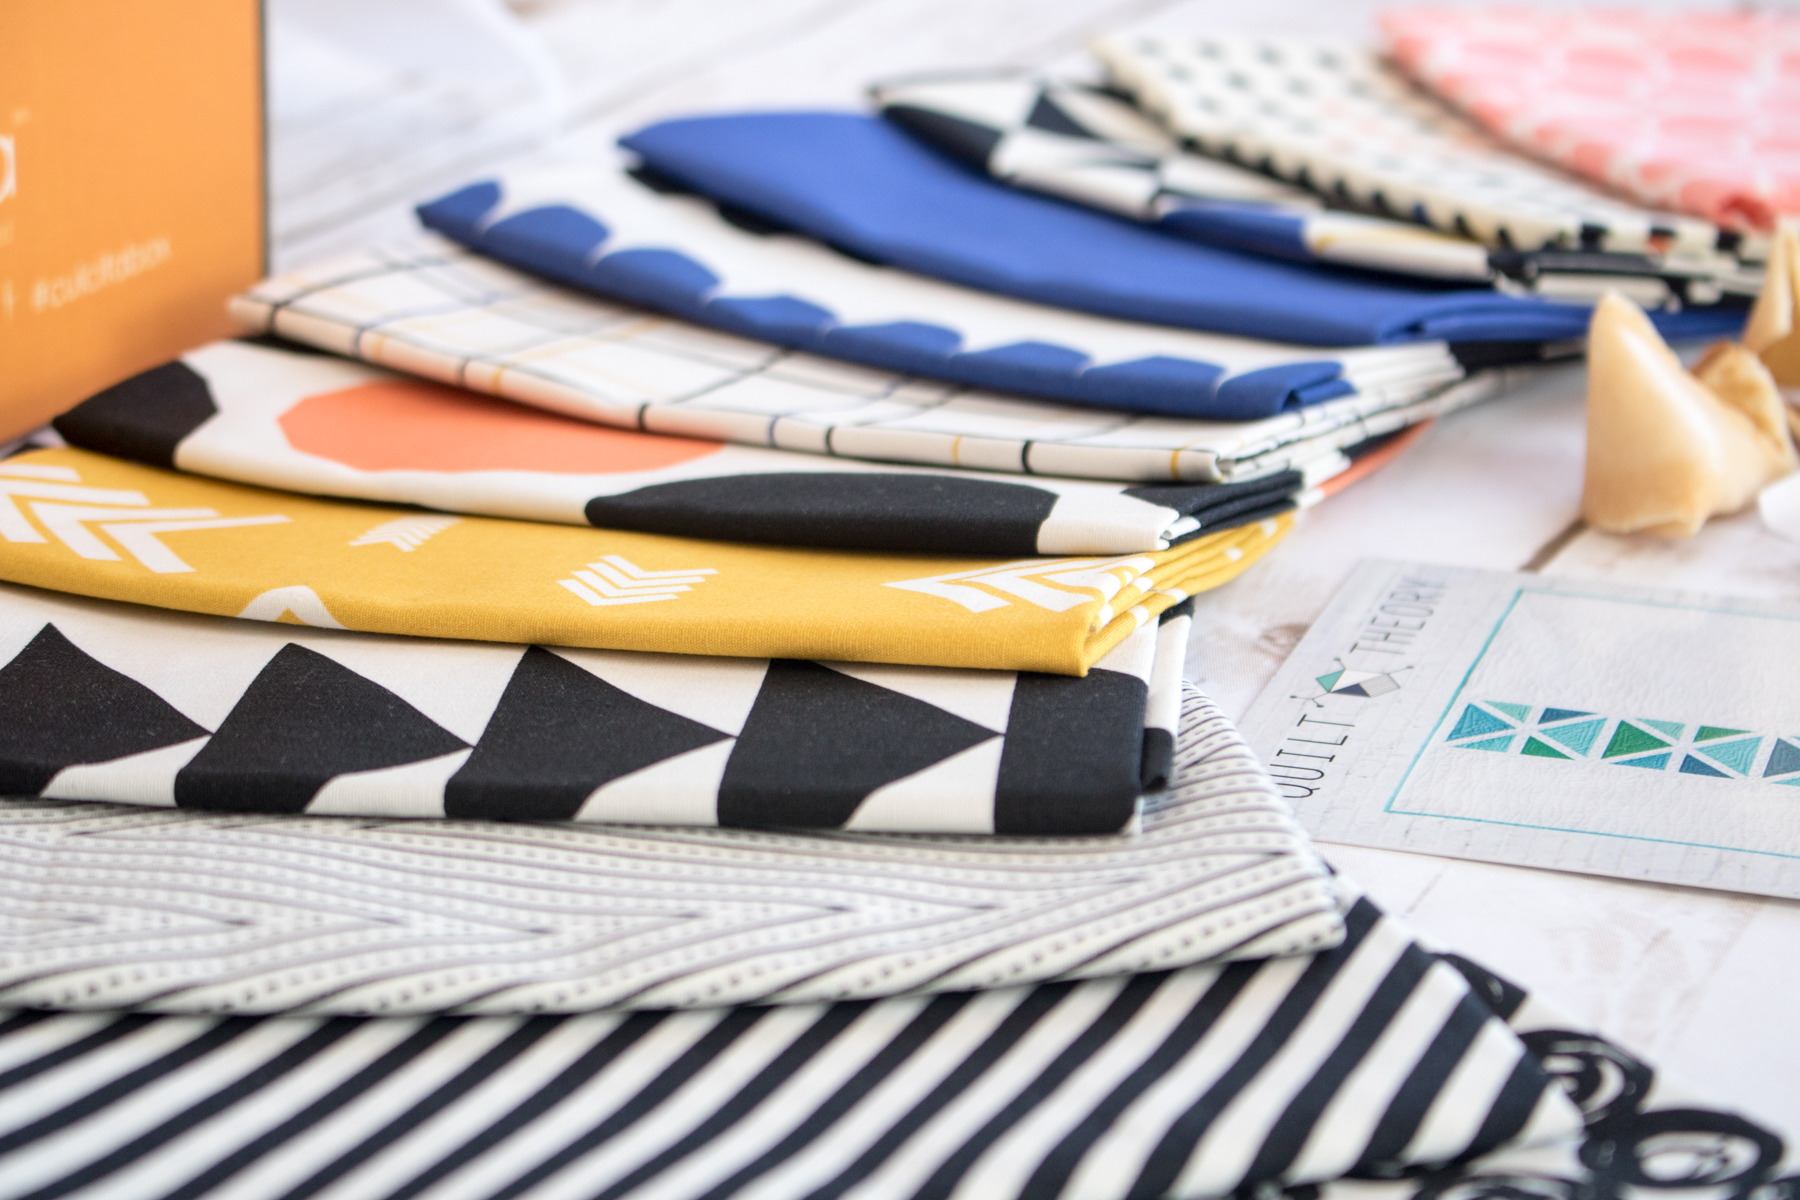
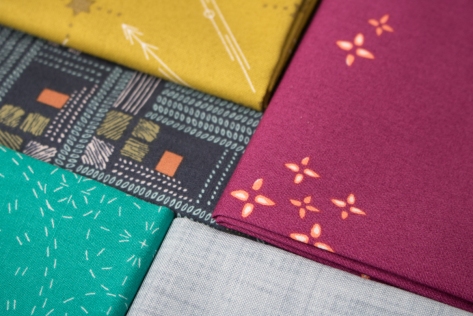
The other fabrics have all been carefully selected from Bernie’s shop to coordinate and complement Sharon’s print, and I love how the colors of all of the other fabrics mesh so well with it.

needle and foot blogger bundleThe bundle includes (from top down in the photo above):

You didn’t think I would put together a bundle of fabric without a single Alison Glass print, did you?! hah!

needle and foot blogger bundle tulipsJust for fun, these tulips had to join the fun since spring is not even close to appearing here in midcoast Maine yet, and I was in dire need of some cheer. Aren’t they luscious?!

Giveaway

february blogger bundle needle and foot
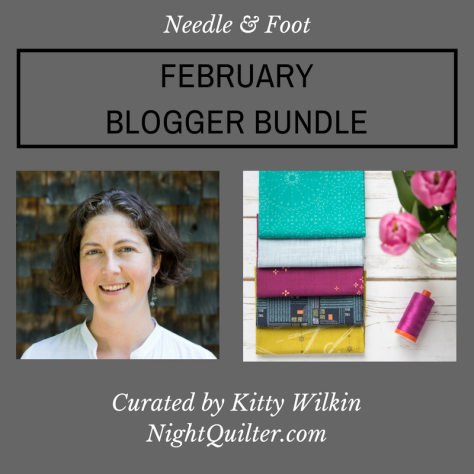
Now, for the giveaway! Today I’m flying across the country to Pasadena for QuiltCon, but I thought it would be fun to kick off my QuiltCon adventures with a blog giveaway. Bernie has generously offered this bundle of five (5) fat quarters to one of my lucky readers.

To enter the giveaway today, tell me your favorite fabric from Needle & Foot’s shop (linked here for ease). Leave a comment and make sure I’m able to get ahold of you if you win. For an additional entry, follow Needle & Foot on Instagram. For a third entry, follow Needle & Foot on Facebook. Leave a separate comment once you complete each entry.

This giveaway is open to US only. The giveaway will be open for one week, until my return home to Maine Wednesday, February 28th, when I’ll select the winner randomly with random.org. The winner will have 48 hours to reply or I will select a new winner. Good luck! This giveaway is now closed! Congratulations to Wendy!!

*Please note that comment moderation is on, so if you do not see your comment right after posting, do not be alarmed! I try to respond to each and every comment I get on my blog, but with giveaway posts the numbers are usually too great to do this. Plus, I’m at QuiltCon!! Follow me on IG @nightquilter or my Night Quilter Facebook page to see some live updates.

needle and foot blogger bundle
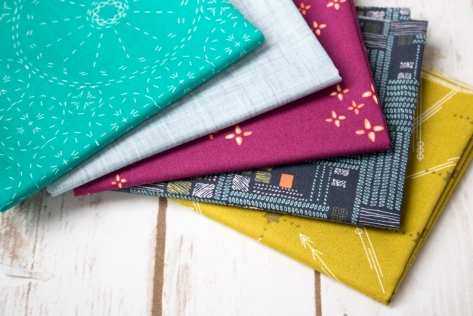
Love this bundle and don’t want to wait? You can get yours here! I would love to see what you make!

3 Self Care Tips for (Mommy) Quilters

The number one greatest challenge I’ve faced in my journey into motherhood is taking time for self care. Even the words self care sound like the antithesis of motherhood. To me, being a mother means your job is to give. Not only do you give life to amazing human beings, literally birthing them into this wild world, but you also then provide the nurturing, sustenance, protection, guidance, direction, support that they need to grow and develop into independent creatures. You’re needed literally 24 hours a day, 7 days a week for years without any breaks, vacation time, or even sick days. Unless you make a point to create, make, steal, demand–whatever it takes!–some time for yourself, it is so easy for self care to fall completely by the wayside. (Ask me how I know!)

My self care of choice these days is taking time to sew. It took me about 5 years and 2 1/2 kids before I realized that I absolutely needed to make time to sew and create, and that making time to do something I love wasn’t selfish; it was a necessary part of this beautiful dance called life, and without it, my dance steps were more of a heavy trod than a light leap. When we’re all lightly skipping and twirling, everyone is much happier than when mommy is stomping and dragging her exhausted, grumpy self around.

tea epp self care for quilters plum deluxeEven since coming to this realization, I still struggle some weeks to set aside time for me time and self care, especially when there are deadlines looming. A while back, I was in the thick of a few looming deadlines when I received an email from Andy at Plum Organics Tea Company asking if I’d like to try some of their tea and review it on my blog. In perusing their site to see if it seemed like something I would enjoy, and more importantly, something relevant to this space, I discovered their Self Care blend. I also found myself immersed in a world of inspirational quotes, encouraging mantras, and soothing encouragements to take time for oneself.  Relevant? I think yes. Full disclosure: Plum Organics provided two packets of tea in exchange for my honest review on my blog. All opinions are always my own. My gratitude for Andy’s timely email and the resulting realization that I needed more focus on self care is also fully my own, and huge.

As a result, I’ve created this short list of three tips (or ideas) for self care for (mommy) quilters. I include “mommy” in parentheses since the tips apply to any busy quilter, mother or otherwise. I hope it will inspire you to take a moment for yourself amidst your busy day:

1 – Create just for the fun of it. No purpose. No end goal. Just make.

Especially with an endless stream of quilty requests, whether for the next baby quilt for a family member or friend, a graduation quilt for a cousin, teacher gifts for your children’s teachers, or business related quilting, the list of quilting “needs” rarely, if ever, ends. Despite this–or because of this!–it is so important to create for the sake of creating.

epp girt by sea center medallionI’ve recently joined in with the Girt by Sea sew along led by the Modern Makers Retreat and have been hand stitching the center medallion with some fabrics I won from Bari J a month or so ago (Sage fabrics for Art Gallery Fabrics). They are outside of my usual style and color scheme, it is a project with no end purpose or need, and it’s fun! Meticulous cutting, hand stitching, no stress or deadlines. That’s chicken soup for the quilter’s soul.

2 – Slow down and take time to sit. Drink tea. Hand stitch. Read.

When it feels like there’s no way you’ll ever accomplish everything on your daily to-do list day after day, it seems like leisure is impossible. Yet, truly, what’s 10-20 minutes? Take the time to sit, relax, drink some tea, hand stitch, read… whatever helps you fully relax.

tea and epp relaxTea and EPP, anyone?

I’m a huge fan of English Paper Piecing (EPP) and the tiny meticulous hand stitching is meditative for me. Sitting down with a mini pot of the Self Care tea from Plum Deluxe with a sweet snack and my hand stitching, even if only for a few moments, can help rejuvenate and reset my patience level so that I’m better able to tackle the rest of the day. Try it!

3 – Take time for yoga, or simply stretch, move, and breathe mindfully for a few moments each day.

Breathing is something that you do all day and night, but mostly likely rarely think about. Yet taking a few moments to be more mindful of your breath, notice the way you are sitting, and then sit a little bit taller, relax your shoulders, and take a few deep easy breaths can make such a difference in mood and how you feel physically. Especially when quilting or sewing, remember to take a break every so often, sit tall, breathe deeply, and gently stretch your arms, shoulders and back. Your mind and body will feel so much better!

Even on the busiest day, I hope that this list will inspire you to take a bit more time for self care. Your mind, body, and family and friends will thank you! Now I just need to help myself take my own advice more often!

More about Plum Deluxe Tea

plum deluxe organic teaThe first thing I noticed about Plum Deluxe when I visited their site was that their tea is organic, non-GMO, hand-blended, and fair-trade, all by a small independently run company out of Oregon. The focus of the company is community and inspiring people to live their best lives. Even their motto is: Making moments matter. I encourage you to read their About page; they are not your everyday tea company! Everything associated with the tea is packed full of positivity–even the ingredients list on the tea states that the tea includes love and gratitude. That’s my kind of tea!

self care blend plum deluxe teaThe Self Care tea is fruity and delicious, and smells divine as soon as you open the package. I love loose tea, since seeing the actual components makes me feel like I’m enjoying tea straight from nature.

plum deluxe tea package ingredients Andy was kind enough to send me a package of the Self Care blend and a bonus package of Oregon Breakfast Black Tea, since I’ve been wanting to decrease the amount of coffee I drink and the Oregon Breakfast flavor is rich and robust. Not only does it have hazelnut essence, it includes love and gratitude. Mmmm.

I mentioned that a big focus of Plum Deluxe is community; they also have a fabulous tea of the month club – for only $10/month subscribers receive 1 oz of a custom seasonally-perfect artisan loose leaf tea made just for the club. Subscribers also enjoy access to a robust and supportive private tea lover’s community, tea-inspired recipes, discounts on extra teas and supplies, and other surprises. They even host member meet-ups throughout the year, and several of their members host self-organized group events year-round. Andy was kind enough to offer my readers a free tea of your choice in your first month when you join the Plum Deluxe tea community. Be sure to tell him Kitty from Night Quilter sent you, and enjoy!

plum deluxe tea meaningful momentI enjoy how drinking loose leaf tea forces me to slow the daily rush. The practice of getting out the loose tea and boiling the water allows me to slow down a bit, so that I can remind myself to breathe a bit more deeply, stand a bit taller, and chill out. With three kids under 8, I have to tell myself, insist to myself–chill out–quite often. In the grand scheme of things, this mess and chaos doesn’t matter. Everyone will be better off if I take a moment to breathe. Sip some tea. Have a snack. Stitch in a sunbeam. You know, that rare rainbow unicorn called self-care for (Mommy) quilters. I’m going to *try* to work the practice into my life a bit more often. I think we’ll all be better off for it.


Stash Building: Culcita Box

Living out in the country, if I can order something online and have it delivered literally to my door (rural mail delivery is awesome!), I do it! Don’t get me wrong–I’m all about shop local and I support local businesses as much as I can. But with three little ones to wrangle into and out of carseats for every errand, some things like toothpaste, shampoo, kid sneakers, and … fabric!? Those can be delivered right to my door, thank you!

culcita box march fq boxSo when Jamie, co-founder of Culcita Box, emailed me a while back and asked if I would be interested in checking out their new fabric subscription service, I only needed a little nudge to say yes. That nudge was in the form of a quick perusal of their website and what their boxes included to make sure it was my style, and instead of a little nudge it was an “absolutely yes!” Full disclosure: Culcita Box provided compensation in the form of product, a subscription box with fabric. All opinions expressed are my own. My excitement and heart eyes are also my own. 

culcita box march fq boxThere are many things I really love about what Culcita Box is offering. They include modern fabric lines in their boxes, and you can basically customize your subscription, choosing the yardage and frequency that best fits your sewing style (1/4 yard or 1/2 yard, delivered monthly, bi-monthly, or quarterly). Not only that, Culcita Box also offers specific kit subscriptions including everything you need to make a quilt or a bag/accessory, or kits to help you improve your skills. I think those options are super cool and unique, and I could definitely see gifting someone the improve your skills kit subscription if they wanted to get more into sewing.

culcita box march fq boxJamie was kind enough to send me the March fat quarter bundle box, so let’s take a look at what was in it!

culcita box march fq boxFirst the deets: the March Culcita box included a bundle of 12 fat quarters of luscious Art Gallery Fabrics–from the Take Shape Capsule, two (2) sew-in labels, a Quilt Theory pattern card for Ocean Path (my pattern!), and perhaps my favorite part–a quilty fortune cookie. I love the attention that clearly went into every detail of this subscription box–from the fun text all over the box, the wrapping, the hand-written note, and even a sewing-related message in the fortune cookie!! It’s like unwrapping a present, and honestly, who doesn’t like unwrapping presents?

culcita box march fq box labelsI love that the box included two labels, since I think labeling is one of the most important parts of making, yet it’s something that so many people omit from the process. I bet having labels ready to go would help at least get a name and date added to the quilty goodness stitched with love daily. I’m excited to put these to use!

culcita box march fq box fortune cookieThe fortune cookie was such a fun addition. With a sewing-related inspiring message/fortune inside, and a delicious cookie to boot, how can you not love this little detail? Those who sew, sow peace. Yes!

culcita box march fq box fabricThe fabric is luxuriously soft, as we’ve all come to love about all Art Gallery fabrics, and included fabric from one of the new fabric capsules, namely Take Shape. I love the bold geometric shapes and gorgeous color palette. I also really love that these fabrics are a palette and style somewhat different than my usual saturated rainbow tone on tones. With the inclusion of my Quilt Theory Ocean Path quilt pattern card, I’m really wanting to make an Ocean Path pillow version with 2 offset blocks in these geometric beauties. Will my to-do list allow? Time will tell! Either way, I’m excited to add these fabrics to my stash… or projects list!

Many thanks to Culcita Box for letting me try out their subscription box! I would definitely recommend this box for the modern quilter looking to build a stash of beautiful fabrics, or as a gift for those who prefer making bags, working from quilt kits, or building their skills.

I’ll be linking up with Molli Sparkles’ Sunday Stash since gosh, it’s been a while since I’ve built my stash!


Monday Giveaway & Off to Slow Stitching

Ahhh Mondays! Mondays often have that heavy feel, transitioning from a relaxing or adventuresome weekend of family fun back into the daily grind of work and household duties. Not this week! I’m home on a quick packing layover, gathering my supplies for the Slow Stitching Retreat at Medomak Retreat Center in Washington, Maine!! I dropped in on this retreat for one blissful day last year, but this year I’m attending the entire week! I’m so excited to relax with Sam from A Gathering of Stitches (the mastermind behind these retreats), Alison Glass, Chawne Kimber, my friend Karin Jordan from Leigh Laurel Studios who is also attending the retreat, and all of the other slow stitchers!

slow stitching retreat a gathering of stitches maine alison glass chawne kimberMy parents have graciously come up from New Jersey and rented a house on a lake only 15 minutes away from the retreat center, so during the day they will be playing with all three kids, and every evening someone will drive Finn to me where he will join me for sleep, to be (hopefully) joyfully picked up each morning. He’s still a nursing babe at 14 months, so I’m looking forward to the nightly mama reconnection time, too.

medomak retreat center maine
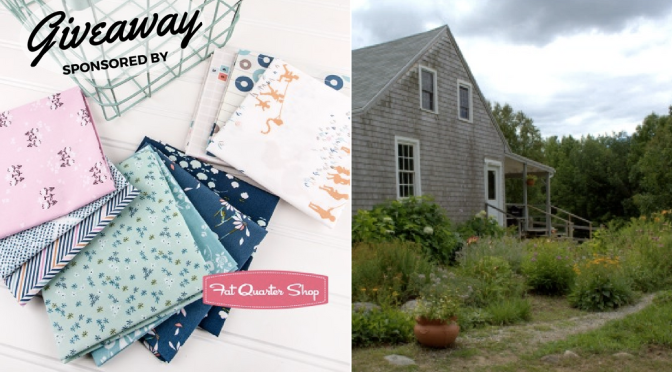
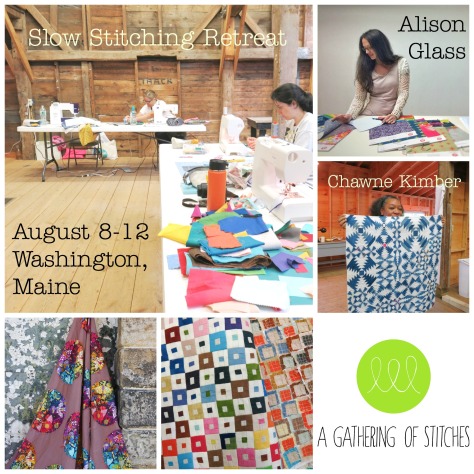
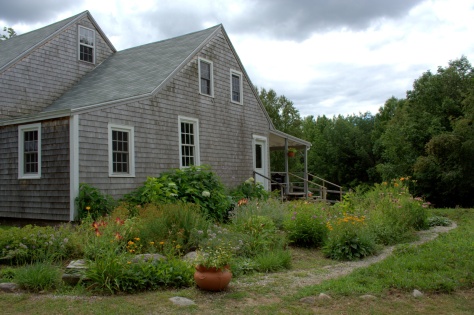
I originally aimed to schedule some blog posts for while I was away, but life has been very full these days, so this week will be quiet. I will be stitching away in this big, beautiful building and its neighboring barn, and will join you upon my return. Keep your eye on Instagram, since I will post a few updates to help share the blissful relaxation of the week! I have a fun color inspiration post pretty much ready for the week I return, and will get back into the swing of sharing my creative process and projects with you next week. And of course, of course, I will share a reflection of my time slow stitching.

fresh adventures amy sinibaldi art gallery fabric fat quarter shop
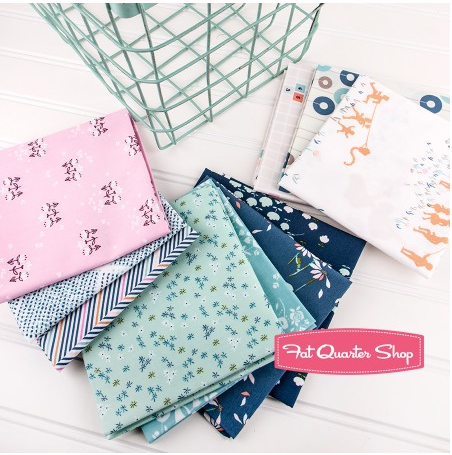
To hold you over for the week, I do have a fun giveaway sponsored by the
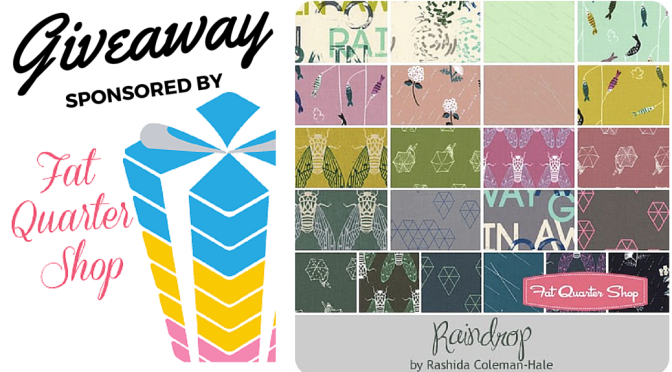
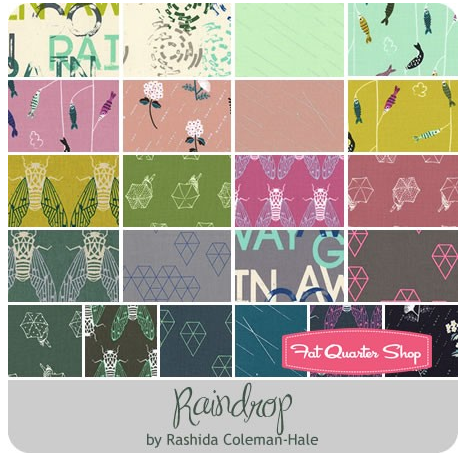
 Fat Quarter Shop! One lucky reader will win this Fresh Adventures Playground Fat Quarter Bundle by Amy Sinibaldi for Art Gallery Fabrics, which includes 10 fat quarters.

To enter the giveaway today, tell me what type of adventures you like to go on. I’m a big fan of exploring new places, so my ideal day consists of traveling to a new ocean beach, walking along the coast line, hiking through the neighboring woods, and picnicking on the beach. I’d love to hear about what you do for an adventure! Leave a comment and make sure I’m able to get ahold of you if you win.  For an additional entry, click HERE and sign up for my Night Quilter email list (or let me know you’re signed up). Tell me how you follow Fat Quarter Shop (facebook,twitter, Instagramtheir blog Jolly Jabber, etc.) in a third comment for a third entry.

fresh adventures amy sinibaldi art gallery fabric fat quarter shopThis giveaway is open to US and international participants.  The giveaway will be open until Sunday August 14th at 8pm EST when I’ll select the winner randomly with random.org. Good luck, and enjoy your week! This giveaway is now closed! Congratulations One Creative Family!

*Please note that comment moderation is on, so if you do not see your comment right after posting, do not be alarmed! I will be disconnecting from social media for most of each day on the retreat, but will be checking in each evening to approve new comments. xoxo

Friday Giveaway: Raindrop Bundle by Rashida Coleman-Hale

There’s nothing like beginning a month with a holiday to help it feel like it’s flying by like a firecracker. Pair that with a week long trip down to celebrate with family, and July has truly snuck up on me!

As I get back into the swing of things on the homestead, unpack, and hopefully dive productively into a few big sewing projects, I thought I’d host a giveaway to help get the second weekend of July (how did that happen!?) off to a fun start.

raindrop fat quarter bundle giveaway cotton + steelThanks to the Fat Quarter Shop, one of my lucky readers can enter to win this newly released Raindrop fat quarter bundle by Rashida Coleman-Hale for Cotton + Steel Fabrics. The bundle includes 20 fat quarters and two (2) 24″ x 44″ canvas prints, and seems most fitting to kick off this rainy weekend here in Maine. There are so many great prints in this collection–from the geometric play stash builders to the fabulous cicadas, all inspired by the rainy season in Japan. True to my naturalist heart, I love cicadas. I used to love to collect their exoskeletons from trees when I was a kid, and hook them all over my clothes to surprise the less-bug-loving kids on the block. Ahh, memories!

raindrop fat quarter bundle giveaway cotton + steel
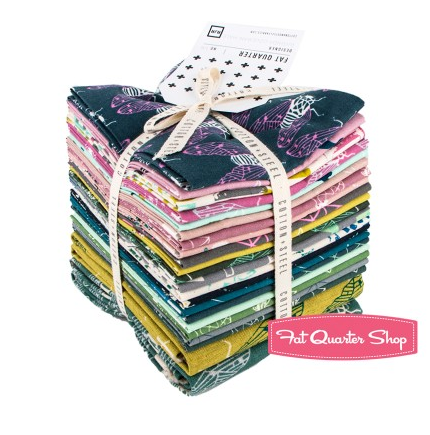
To enter the giveaway today, tell me what you like to do on rainy days. Leave a comment and make sure I’m able to get ahold of you if you win.  For an additional entry, click HERE and sign up for my new Night Quilter email list. You will get occasional emails with highlights, pattern announcements, and special offers. Leave a second comment to let me know you’re signed up!  Tell me how you follow Fat Quarter Shop (facebook,twitter, Instagramtheir blog Jolly Jabber, etc.) in a third comment for a third entry.

This giveaway is open to US and international participants.  The giveaway will be open until Thursday July 14th at 8pm EST when I’ll select the winner randomly with random.org. Good luck, and enjoy your rainy (or sunny if you’re lucky) weekend!  This giveaway is now closed! Congratulations, Kendra!

Geese Crossing Mini Quilt {Sizzix Tutorial} & Color Inspiration Thursday {72}

I recently had some fun playing with a new Sizzix die and a color/value gradient from dark purple to light pink. Today I’m sharing a tutorial over on the Sizzix blog so that you can make your own Geese Crossing mini quilt. Since the colors and the peonies from my garden are serendipitously paired, I created a color inspiration palette to share, too!

sizzix geese crossing tutorial value gradient
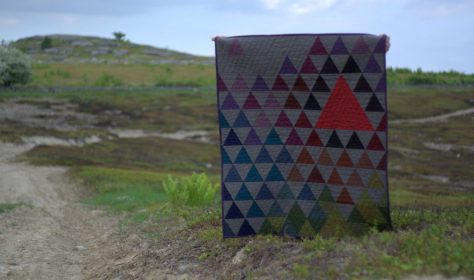
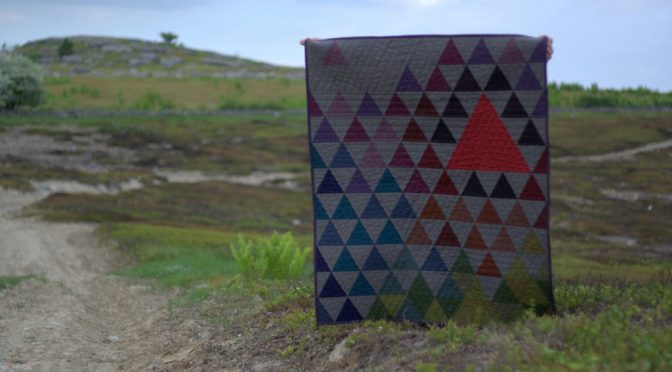
This mini quilt finishes at 24″ square, and its creation coincided with the fabulous bloom of peonies in our garden. It features a new die called Geese Crossing, designed by Victoria Findlay Wolfe and released at Quilt Market last month. It’s a very versatile die and allows for lots of design, color, and value play.

-How to get perfect points when sewing geese
Tips for getting perfect points!

In my tutorial, I share information that will be helpful for all quilting projects, including:
– Tips for creating a successful value gradient in a fabric pull;
– How to get perfect points when sewing geese or other triangles; and,
– Tips to prevent bunching when sewing on an angle.

You can read the full tutorial and see more photos of my project process on the Sizzix blog, here.

sizzix geese crossing tutorial value gradient peoniesThe colors of the peonies and the colors in the quilt meld so beautifully together! I really could not help but take a million photos of this quilt with the gorgeous color gradient of peonies from my garden, but since it’s Thursday, I figured a combination of Color Inspiration Thursday and a heads-up about my Sizzix tutorial would be perfectly acceptable.

sizzix geese crossing tutorial value gradient peoniesAhhh peonies! Such an inspiration!

peony geese crossing color paletteCorresponding solids from left to right:
Kona Dusty Blue, Bella Pewter, Bella Petal Pink, Kona Plum, Kona Cerise, Kona Eggplant

Corresponding Aurifil thread from left to right:
2560 – Iris
2564  – Pale Lilac
2425 – Bright Pink
2479 – Med Orchid
4030 – Plum
2582 – Dk Violet

This color palette was created using Play Crafts’ Palette Builder 2.1 as per usual, and the matching Aurifil threads and Kona & Moda Bella solids are particularly useful! I will certainly be getting a few of those threads for quilting! We actually had dark magenta peonies that would have matched the darkest purple fabric, but they are the early variety that met their end during a thunderstorm a few weeks ago. Still, our garden provided a lovely fade from the palest pink to a bright magenta with the peonies blooming now.

sizzix geese crossing tutorial peonies value playI love the natural ombres and vibrant colors found in nature and thoroughly enjoy combining natural inspiration with quilty projects. It is so fun to try to stitch the beauty around me into the quilts in my hands!

Where in nature do you find the most inspiration? Flowers? Colors in general? Textures? or simply through the endless variety of growth and new life that appears before our eyes daily?

Psst… stop and smell the flowers today!

I’m linking up with Crazy Mom Quilts Finish it up Friday with this finished flimsy!


Friday Finishes & Tula Giveaway

Ahh, Friday! We love Fridays in this house, since not only is it the last day before the weekend, but it also means family movie night. I make homemade pizzas, we set out picnic quilts in the living room, and we have a pizza picnic while watching a movie. After pizza, there’s a short intermission for popcorn making and we enjoy the rest of the movie with huge bowls of popcorn and buttery fingers. My husband has a bit of a thing for popcorn, so he makes enough to feed a small army, which I suppose we are becoming as the kids get older! While this week had its share of frustration, I also finally finished and shared two projects. A week with one finish is great; a week with two finishes is worth celebrating!!

I love linking up with Crazy Mom Quilts’ Finish it Up Friday to share in the celebration of finished projects in the quilting community, so I figured I’d write a summary post this week so that I could link up with just one post instead of two. I also have a great giveaway sponsored by Fat Quarter Shop to share to help kick off the weekend!

So here we go–my finishes for the week!

fqs simple zipper pouch teacher giftI finished three cute Amy Butler-inspired rainbow zipper bags as end of the year teacher gifts for my son’s preschool teachers and communication facilitator. There is a great video tutorial posted by the Fat Quarter Shop so that you can make your own. You can see and read more about my zipper bags HERE.

oakshott lipari vesuvius quilt sizzixI also finished a volcano-inspired quilt with Oakshott’s new Lipari fabric line. This was a much longer term project, taking about 18 hours of work to make, start from finish. I share a tutorial so that you can make your very own Vesuvius quilt if you want! Check it out HERE.

Giveaway!

Tula Throwback bundle FQS giveawayAnd now, for the giveaway! Thanks to the Fat Quarter Shop, one of my lucky readers can enter to win a Tula Pink Throwback fat quarter bundle of 20 fat quarters! The bundle includes some of the most popular prints from Tula’s collections over the past four (4) years, and would be a great stash builder for any modern fabric lover, whether you’re a Tula troops die hard who would pay a premium for these prints on ebay or not. There are also many fabulous opportunities for meticulous cutting with these beauties!

To enter the giveaway today, tell me–are you a fabric designer fanatic, willing to pay top dollar for rare out of print fabrics? or are you happy using whatever gorgeous fabric is available now, regardless of designer? I’m curious, since while I consider myself to be in the latter category, I could definitely see myself paying more than market value for *some* rare and beloved out of print fabrics. Leave a comment and make sure I’m able to get ahold of you if you win.  If you’re a follower of Night Quilter, leave a second comment telling me how you follow for a second entry. Tell me how you follow Fat Quarter Shop (facebook,twitter, Instagramtheir blog Jolly Jabber, etc.) for a third entry.

This giveaway is open to US and international participants.  The giveaway will be open until Thursday June 9th at 8pm EST when I’ll select the winner randomly with random.org. Good luck! This giveaway is now closed. Congratulations, Tessa! 

Thanks again to the Fat Quarter Shop! Blog sponsors help me to keep this blog going by helping cover the costs of hosting, photography equipment, supplies, and of course time. Sweet, precious time. Many many thanks to all who support me!

Oakshott Lipari Blog Hop: Vesuvius Quilt

Today I’m excited to be a part of the Oakshott Lipari blog hop, your final stop for those of you who have been following along. So many fabulous projects have been made with the fat eighths bundle of the new Lipari line, so I encourage you to also check out the others along the hop, linked at the bottom of this post. Many thanks to Lynne and Michael at Oakshott for including me in the hop!

This was my first time working with Oakshott fabrics, and they are so luxurious! They are a woven fabric and feel almost silky to the touch. They feel more substantial than other shot cottons I’ve used, and the Lipari line looks iridescent since the warp is black and the weft is a bright jewel tone. These fabrics come to life when you see them in person–photos truly don’t do them justice. The Lipari line was inspired by volcanoes and the description from Oakshott says it best: “Lipari perfectly captures the primordial beauty of the Aeolian islands. Its luminous colours mirror cobalt seas, lush greenery, pink bougainvillea and shimmering sun; a beauty shot through with dark, fine-grained volcanic rock and black sand.” As soon as I read this description, I knew my quilt had to be a reflection of this volcanic inspiration. Thus, my Vesuvius quilt was born.

oakshott lipari vesuvius quilt sizzix I made my Vesuvius quilt with 60 degree triangles, to elicit the sharp peaks of the mountainous volcanoes. I pulled in some Ruby Red – Toledo for the molten focal triangle, and let the Lipari steal the show. I used my Sizzix die cutting machine to speed up the cutting process. I really wanted to photograph this quilt next to a volcano, but I had to settle for some blueberry barrens and a Maine coast beach.

oakshott lipari blog tour vesuvius quilt sizzixI quilted Vesuvius with 50 wt Aurifil thread 1246-Grey, which blended wonderfully with the Lipari Pollara (grey) I used as a background color. I used the walking foot on my domestic Bernina 560 to quilt straight lines 1″ apart, switching up directions in various sections of the quilt to provide movement and added interest. I LOVE how it turned out!

oakshott lipari blog tour vesuvius quilt sizzixThe Lipari Porticello (dark green) backing shows the quilting wonderfully, although it’s tough to get the full effect through photos!

oakshott lipari blog tour vesuvius quilt sizzixoakshott lipari blog tour vesuvius quilt sizzixI was torn on what color to use as the binding, but decided that Lipari Gallina (purple) frames it nicely.

oakshott lipari blog tour vesuvius quilt sizzixThis quilt finishes at 36″x43″ so would make a wonderful wall hanging or sophisticated baby quilt. You could also add borders to make it larger.

Tutorial

Here’s how to make your very own Vesuvius quilt! (Note that Oakshott Lipari fabric is 54″ wide. Typical quilting cotton is approximately 42″ wide, so plan accordingly)

Materials

A fat eighths bundle of Oakshott Lipari
1/8 yard of Oakshott Ruby Red Toledo
3/4 yard additional Lipari Pollara (grey)-negative space
1 1/4 yards Lipari Porticello (dark green)-backing
1/3 yard Lipari Gallina (purple)-binding
42″ x 50″ piece of batting
Sizzix die cutting machine
Sizzix XL Triangle, Equilateral 4 3/4″ x 5 1/2″ unfinished die
–OR–
Rotary cutter, cutting mat with 60 degree lines, and ruler
Thread (I used Aurifil 50wt 1246-Grey for both piecing and quilting)
Sewing machine with a walking foot (I use a Bernina 560)
Rotary cutter
Hera marker
Pins
Small thread snip scissors

Cutting

Using your method of choice (see below for instructions for each method), cut the following number of triangles from each fabric:

88 grey (Lipari Pollaro)
9 red (Ruby Red Toledo)
From fat eighth Lipari bundle:
20 purples
27 greens/yellows
12 browns
19 blues
4 black-red
8 black

Using a Sizzix die cutting machine

I used my Sizzix Fabi and BigZ Triangle, Equilateral 4 3/4″ x 5 1/2″ unfinished die to speed up the cutting process.

sizzix fabi equilateral triangle oakshott vesuvius quilt tutorialWhen using your sizzix, cut 5″ x width of fat eighth strips of fabric of each color, fold them over the die blade in the Sizzix cutting sandwich (bottom cutting pad, die with the blade face up, fabric, top cutting pad), and cut 9 triangles at a time. Note that the Oakshott fat eighths are 10″ x 27″, which are larger than a typical quilting cotton 9″ x 21″ fat eighth.

sizzix fabi equilateral triangle oakshott vesuvius quilt tutorialAfter passing each strip of fabric through the Fabi die cutting machine, you can reposition the remaining fabric and cut triangles from the “scraps”.

If you don’t have a Sizzix, read on to find out how to cut 60 degree triangles with your rotary cutter, using the lines on your cutting mat.

Using a rotary cutter and the lines on your cutting mat

First, cut strips 4 3/4″ by width of fabric. *Note: You can leave the fabric strip folded in half or doubled up if you’re using the width of fat eighth strips, allowing you to cut two triangles at a time!

sizzix fabi equilateral triangle oakshott vesuvius quilt tutorialFind the 30 degree line on your cutting mat. Yes, we are making 60 degree triangles by cutting along the 30 degree line (You have a 90 degree square to begin, trim off 30 degrees, then you’re left with 60 degrees!)

equilateral triangle cutting with mat vesuvius quilt tutorialAlign the bottom of your fabric strip along the 1-inch line. I use the 1-inch line so that you can see where the 30 degree line extends above and below the fabric. Place the edge of your ruler along the 30 degree line.

equilateral triangle cutting with mat vesuvius quilt tutorialUsing your rotary cutter, cut your fabric on the ruler angle.

equilateral triangle cutting with mat vesuvius quilt tutorialFlip your fabric strip over, then align the bottom edge with the 1-inch line on your mat, so that the bottom point of your cut is on the 30 degree line.

equilateral triangle cutting with mat vesuvius quilt tutorialAgain, place the edge of your ruler along the 30 degree line. Using your rotary cutter, cut your fabric on the ruler angle. You now have your 60 degree triangle, or two (2) if you kept your fabric strip folded in half. Cut as many as you need.

Piecing the Quilt Top

oakshott lipari blog tour vesuvius quilt sizzixOnce your pieces are cut, lay them out as shown. A piece of batting wrapped around a large wall board works well, but I have been often known to use my design floor to help with layout, too! (Sizing Note: if you want a larger quilt, you could add a row of grey (Lipari Pollara) triangles to the right and left sides before sewing the rows together to maintain the outer triangle points when adding borders. Then, trim square and add rectangular borders to the desired size.)

Be sure to keep the grain of fabric running top to bottom (the woven texture of the Oakshott Lipari makes this easy to do since the grain is clearly visible when the fabric is held up to the light). Once your pieces are laid out as desired, it’s time to sew them together! Chain piecing helps the process go quickly and smoothly. Here’s how to set it up.

oakshott lipari vesuvius quilt tutorialLabel each horizontal row. I began with 1 on the top and ended with 11 on the bottom and used pins to label the first piece in each row (Note that I labeled each row after stacking, so the pins aren’t visible in these photos).

oakshott lipari vesuvius quilt tutorialCarefully stack the triangles from each row, with the far left piece on top, and keeping the triangles facing the proper direction (this will help you keep them straight while piecing). For example, for row one, you will have the labeled first triangle piece from the far left on top, and carefully pick up each triangle across the row, adding it to the bottom of the stack.

oakshott lipari vesuvius quilt tutorialOnce you have your row stacked, use a clover clip or similar device to hold the stack together.

oakshott lipari vesuvius quilt tutorialGather all of your rows in this manner.

oakshott lipari vesuvius quilt tutorialLay them out in order, making a clear mental note of what row is located where. You could label a sticker on the table next to each stack to help, although simply keeping them in chronological order works well for me. Let’s sew! (Note that a table next to you works better than having the stacks this close to the sewing machine. As you add pieces, your strips will drag your stacks around if you keep them here as shown!)

To speed up the process, we will be chain piecing (sewing without stopping) the first piece to the second piece from every row.
Note: Be sure to keep the pin labeling each row in the first block at all times!!

oakshott lipari vesuvius quilt tutorialOnce you have all of your first pieces sewn to your second pieces, trim the threads to separate, and press. All these bias edges means this is a great time to practice pressing, and NOT ironing. Press: up, down, up. Great!

Alternate which side you press your seam for each row. I pressed odd rows (1, 3, 5, etc.) to the left and even rows (2, 4, 6, etc.) to the right. Pressing open also works well!

oakshott lipari vesuvius quilt tutorialNext, add the next triangle to each row, chain sewing again. You’ll be sewing the third triangle (which is now on top of each stack) to each row. Double check the number pin on the sewn row before adding the next triangle, since you want to be sure to keep your gorgeous layout intact.

oakshott lipari vesuvius quilt tutorialContinue chain piecing, trimming, pressing, and chain piecing again until all of your rows are assembled. As you add each triangle, stack those corners and everything will be right in line!

oakshott lipari vesuvius quilt tutorialSew all of the rows together, pressing seams up toward the grey triangles. I like to pin about 1/8″ after each point where the triangle points will be matching up, and aim to sew *right* through the center of the seam-cross to make sure you don’t cut off any points when sewing the rows together.

Quilting & Finishing

Once your quilt top is pieced, baste as desired. I decided to quilt my quilt before squaring it up because of all of the bias edges. I used 505 basting spray and spray basted for the first time! I used Christa Watson’s design wall spray basting tutorial and can see why people love it.

oakshott lipari vesuvius quilt tutorialI decided to quilt my quilt with straight lines 1″ apart using the walking foot on my Bernina 560. I used a hera marker and a long quilting ruler to mark lines 1/2″ from some seams, and then 1″ apart from there. I sectioned the quilting in a few different sections, using straight lines 1″ apart but changing directions in each section. Lines intersect in the Ruby Red triangle, “exploding” out to the sides (like a volcanic eruption!?). The quilting lines don’t intersect anywhere else in the quilt. I really love the finished effect.

oakshott lipari vesuvius quilt tutorialAfter quilting, it’s time to square up the quilt. Using a long, straight edge, trim 1/4″ away from the outer points so that you don’t lose any points when you sew on the binding. Use at least two sets of points to make sure your ruler is straight before cutting.

oakshott lipari vesuvius quilt tutorialSquare up your quilt, trimming off the excess, then bind!

oakshott lipari vesuvius quilt tutorialoakshott lipari vesuvius quilt tutorialViola! Enjoy your Vesuvius Quilt, and please use #vesuviusquilt and tag me @nightquilter if you decide to make one.

Many thanks, again, to Oakshott for providing the fabrics for this project, and for including me in the hop. Make sure to check out the rest of the amazing Lipari projects:

5 May     Allison Dutton       allison-sews.blogspot.com
10 May   Nicholas Ball         quiltsfromtheattic.wordpress.com 
12 May   Helen Purvis          archiethewonderdog.blogspot.com
17 May   Lynn Harris            thelittleredhen.typepad.com
24 May   Jessica Skultety      www.quiltyhabit.com 
26 May   Karin Jordan           www.leighlaurelstudios.com
31 May   Elisabeth Vaughan  sharksdinner.com
2 June     Kitty Wilkin           nightquilter.com <— YOU ARE HERE

Thank you for following along the hop!

*BREAKING NEWS* Volcanic action alert
For those of you who follow me on Instagram, you may have seen the heart-wrenching fate of this quilt, that I so unknowingly aptly named “Vesuvius”: my nearly-four year old son cut into it in three places (along with a trail of destruction that included my Machinger quilting gloves cut into pieces and cuts into a big chunk of fusible fleece).  With the great outpouring of support, commiseration, and suggestions offered by the fantastic community on IG, I’ve decided to make the cuts an added design element, another chapter in the story of the quilt, and sew either black or red patches over the cuts, making them into “fault lines”.

quilt tragedy
One of three cuts, now called “fault lines”, made into the edge of this quilt by my nearly-four year old son.

For now, though, I will put the quilt aside until I can dive into the repair with chuckles and reminiscence instead of lingering tears and frustration. I know that my son did not cut into my quilt maliciously, but it still is a difficult experience. I have made it known that if he ever wants to cut fabric again, he can tell me and I will help him make a quilt. We’ll see where it goes. For now, my Vesuvius Quilt (aka Max’s Fault Lines) is smoking and being buried by ash for a bit. It will rise again some day in the future.