

Halloween is a fun time of year around our house, since my kiddos love to dress up in costumes from years past all year ’round, and the end of October means NEW costumes and candy! While I’m not really big into decorating the house for holidays (with the exception of Christmas and Easter–how can you resist those?), I do like making holiday crafts with the kids to help build excitement.
Today I’m going to share a quick tutorial for some spooktacularly sturdy beanbags, a perfect addition to a Halloween party but also a great addition to any child’s toybox. I should note, too, that beanbags are my go-to gift for two year old birthday parties. When a child turns two, I’ve found it’s really fabulous to have something you’re SUPPOSED to throw. Beanbags are such a versatile gift since they can be personalized in any way; you can change the shape, change the fabric, or personalize with applique letters or pictures. I’ve included affiliate links in this post so that if you decide to buy any of the tools I’m using, I will receive a small commission, too. I only share tools and products I love, so you can be sure they are tried, tested, and loved!
 Materials needed (to make 4 beanbags):

- 8 charm squares of fabric
- Die cutting machine & 5″ circle die (such as Sizzix cutting machines, AccuQuilt, Cricut, etc)
- 8 x 5″ diameter circles of fabric
- Sewing machine (zipper foot suggested but not required) – I use a Bernina 560
- Iron and ironing surface
- Thread (I used Aurifil 50wt 2600-Dove)
- Dried beans or other filler (approx 3 cups)
- Pins and/or Clover clips
I made my beanbags using my Sizzix fabi die cutting machine and the BigZ L Circle 5″ die. You can also use any palm-sized circle item in your kitchen to trace circles on fabric for the beanbags if you don’t have a die cutting machine.
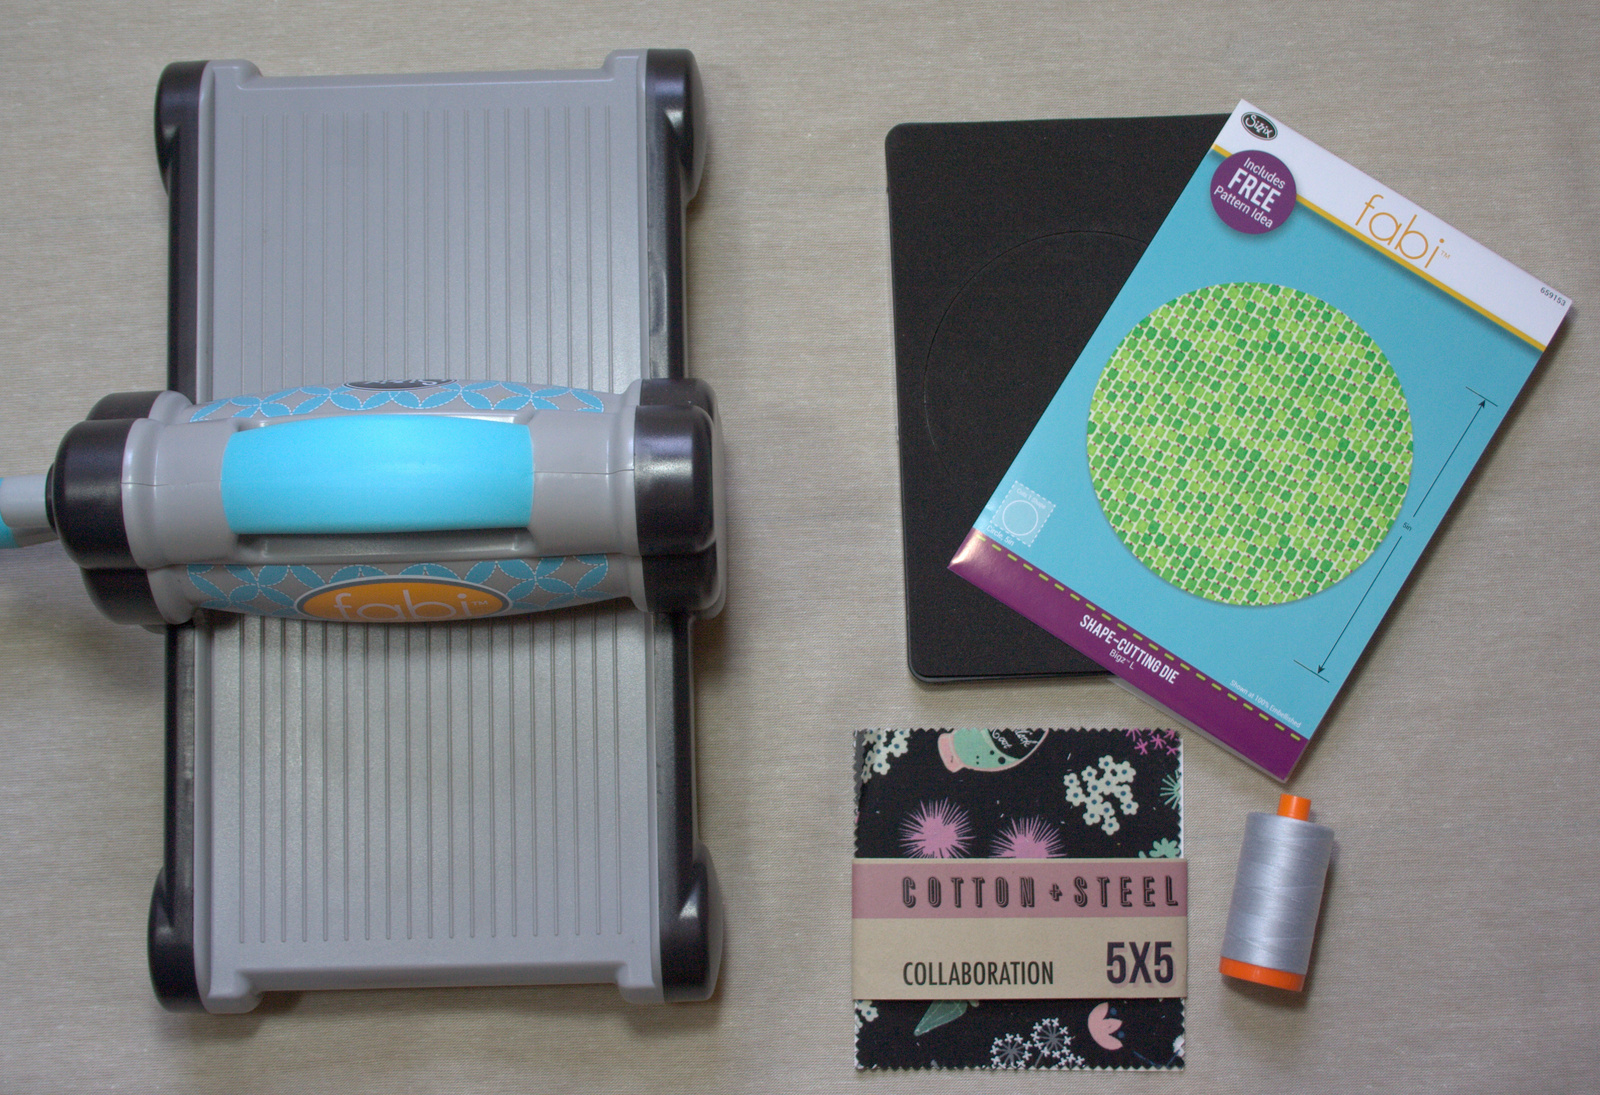 I figured since it’s nearly Halloween, it was the perfect time to use my Cotton + Steel Spellbound Collaboration charm pack. The 5″ circle die worked perfectly with the charm squares, which made my job even easier! I used my go-to thread, 50wt Aurifil 2600-Dove for all sewing.
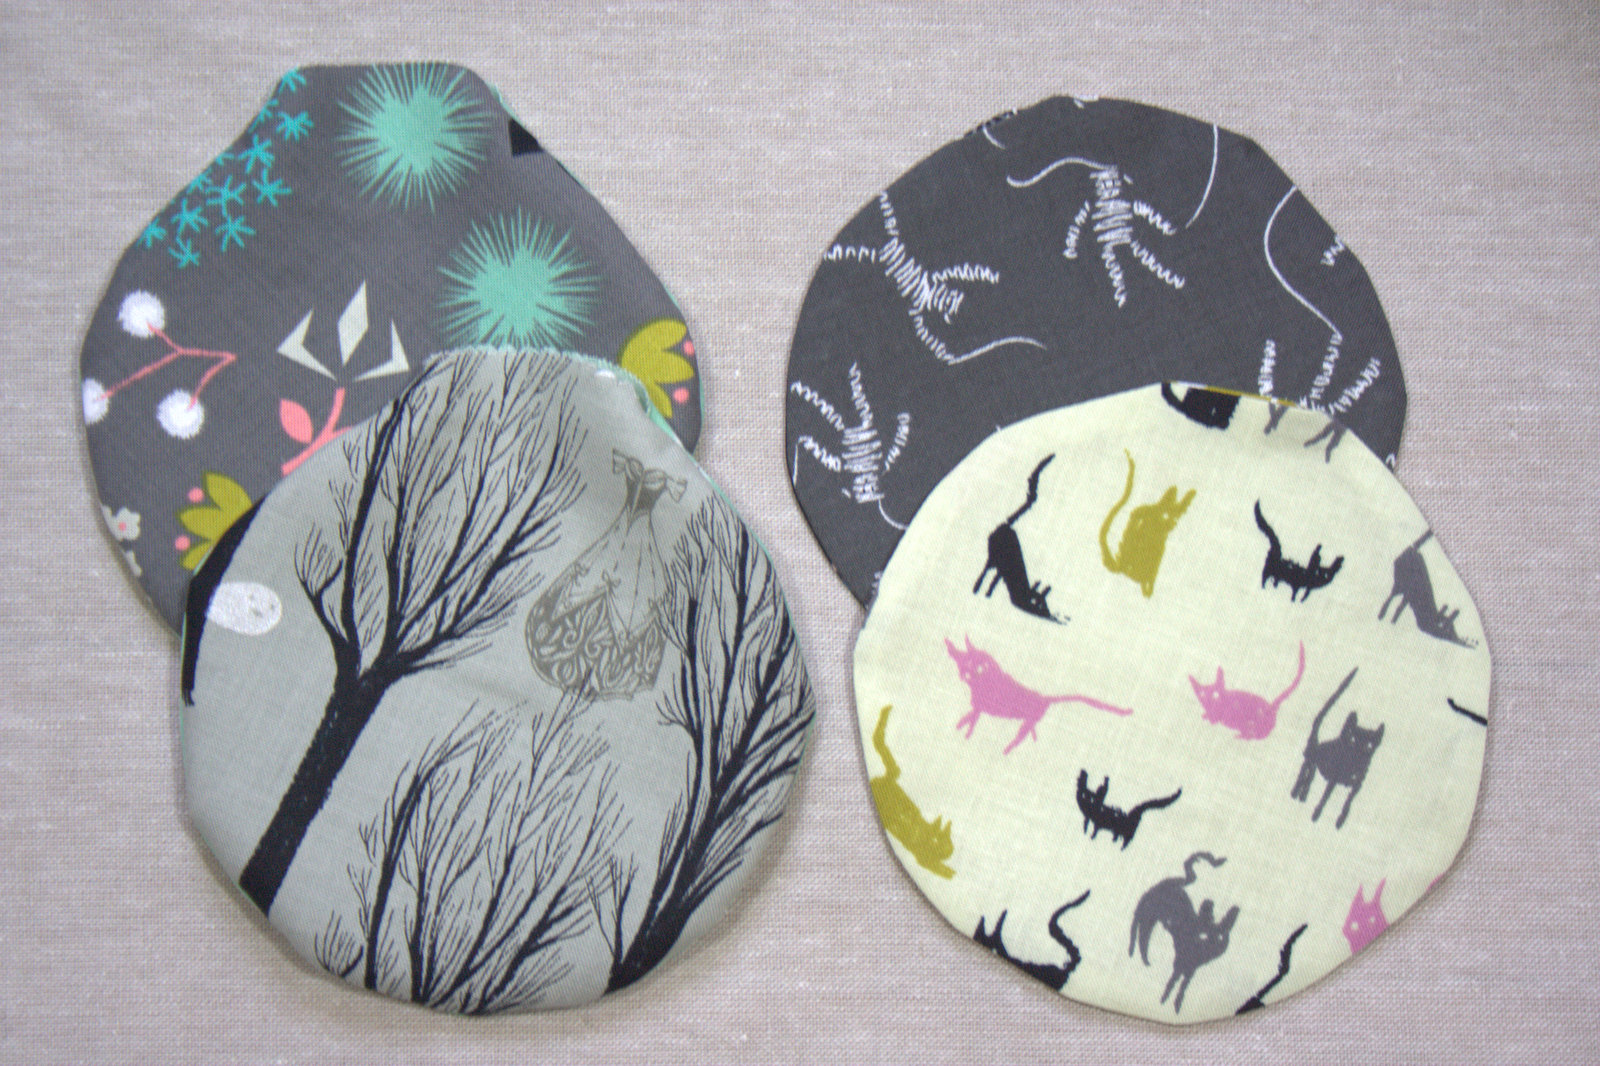
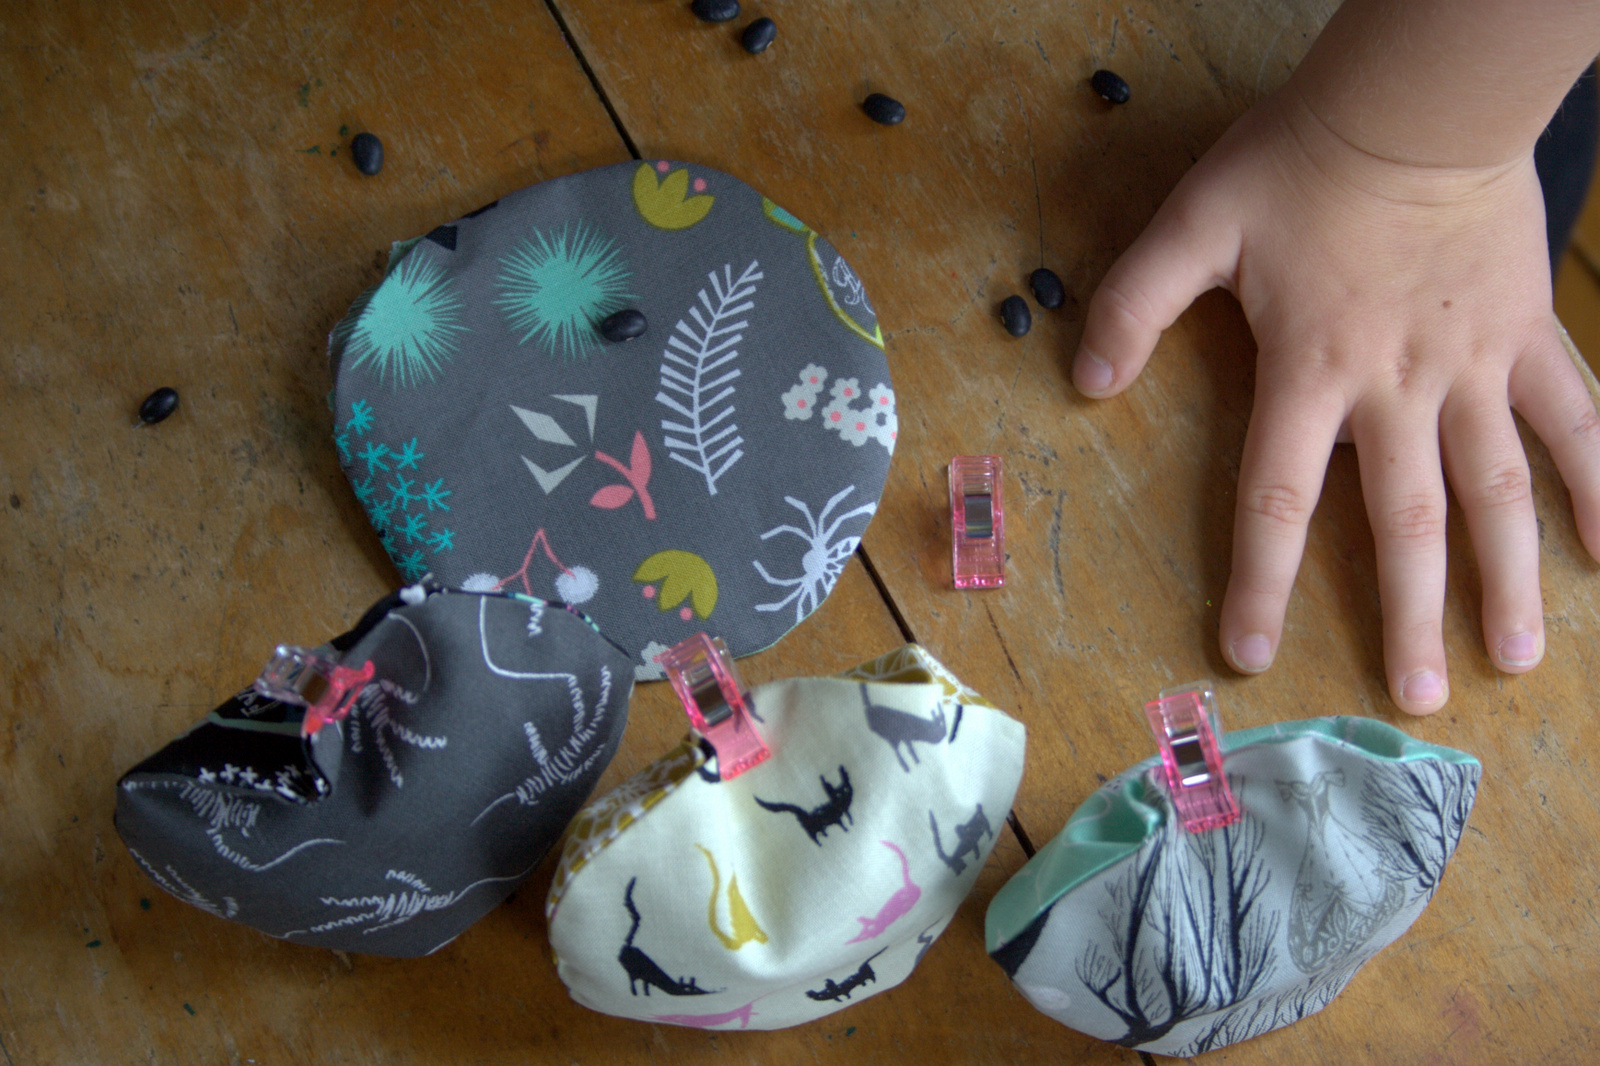
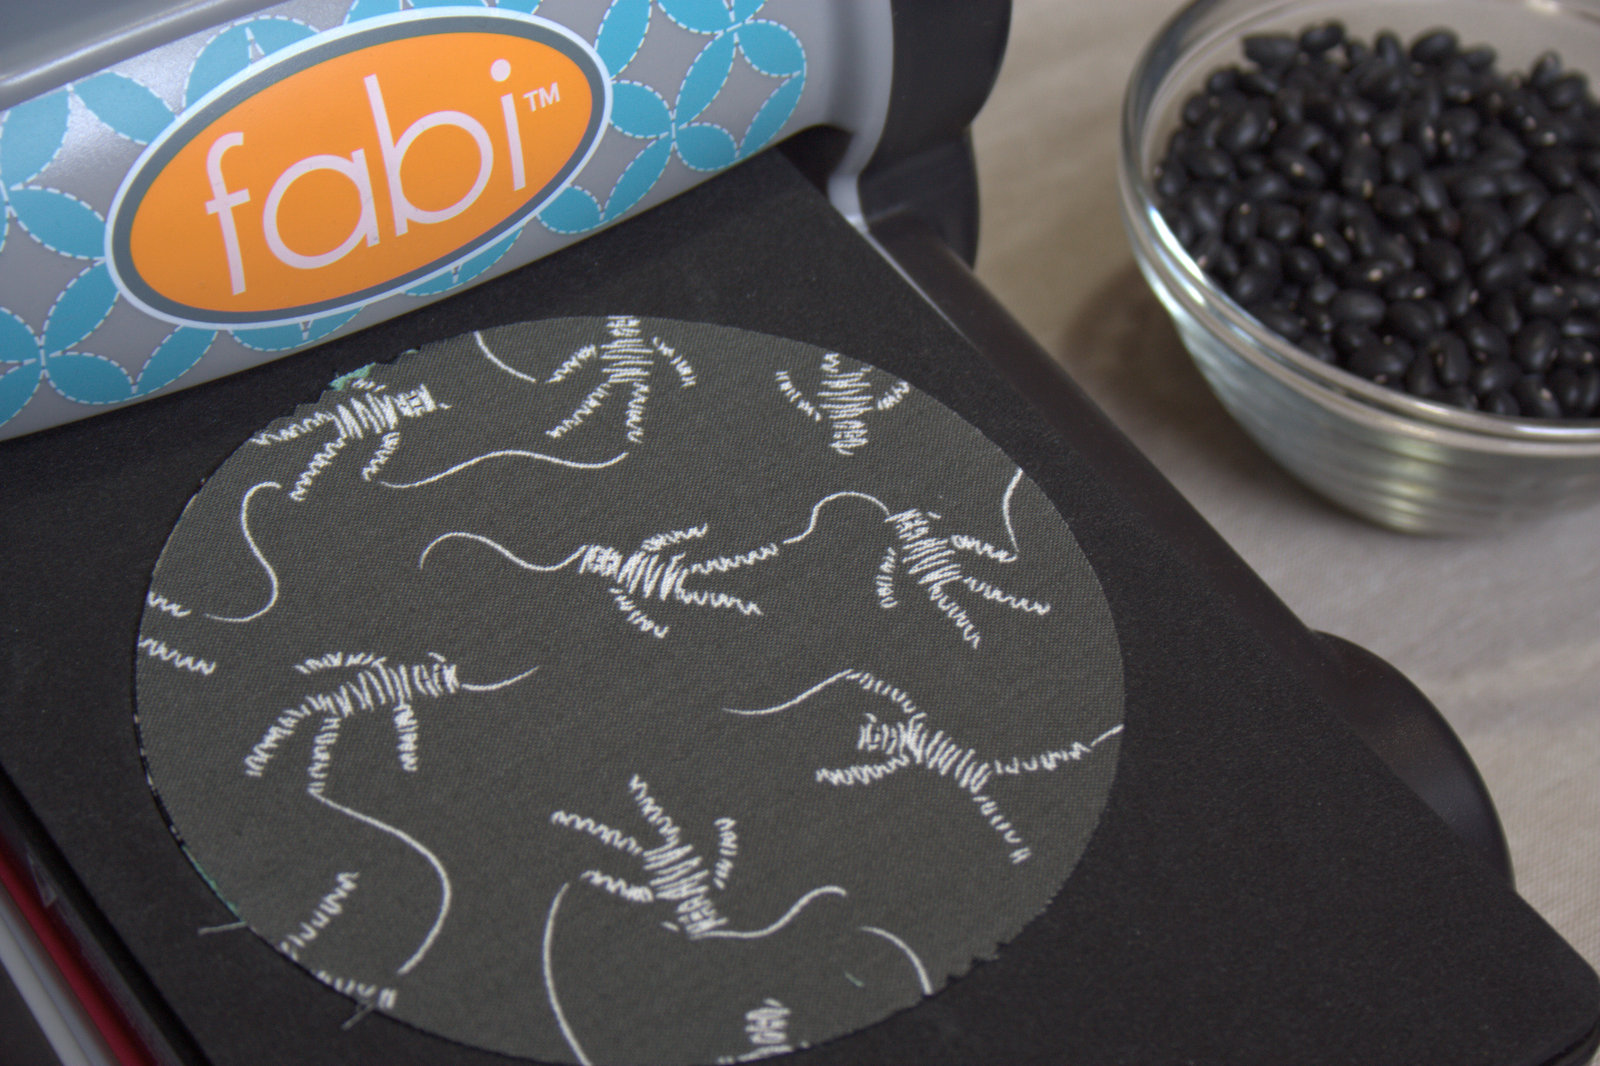 Choosing four pairs of coordinating charm squares, cut eight (8) 5″ circles, layering your Sizzix sandwich: bottom cutting pad, die with the blades facing up, fabric centered over the circle blade, and top cutting pad. All necessary circles for this project can be cut with one pass through the die cutting machine, which made this a really quick project to make with my kids.
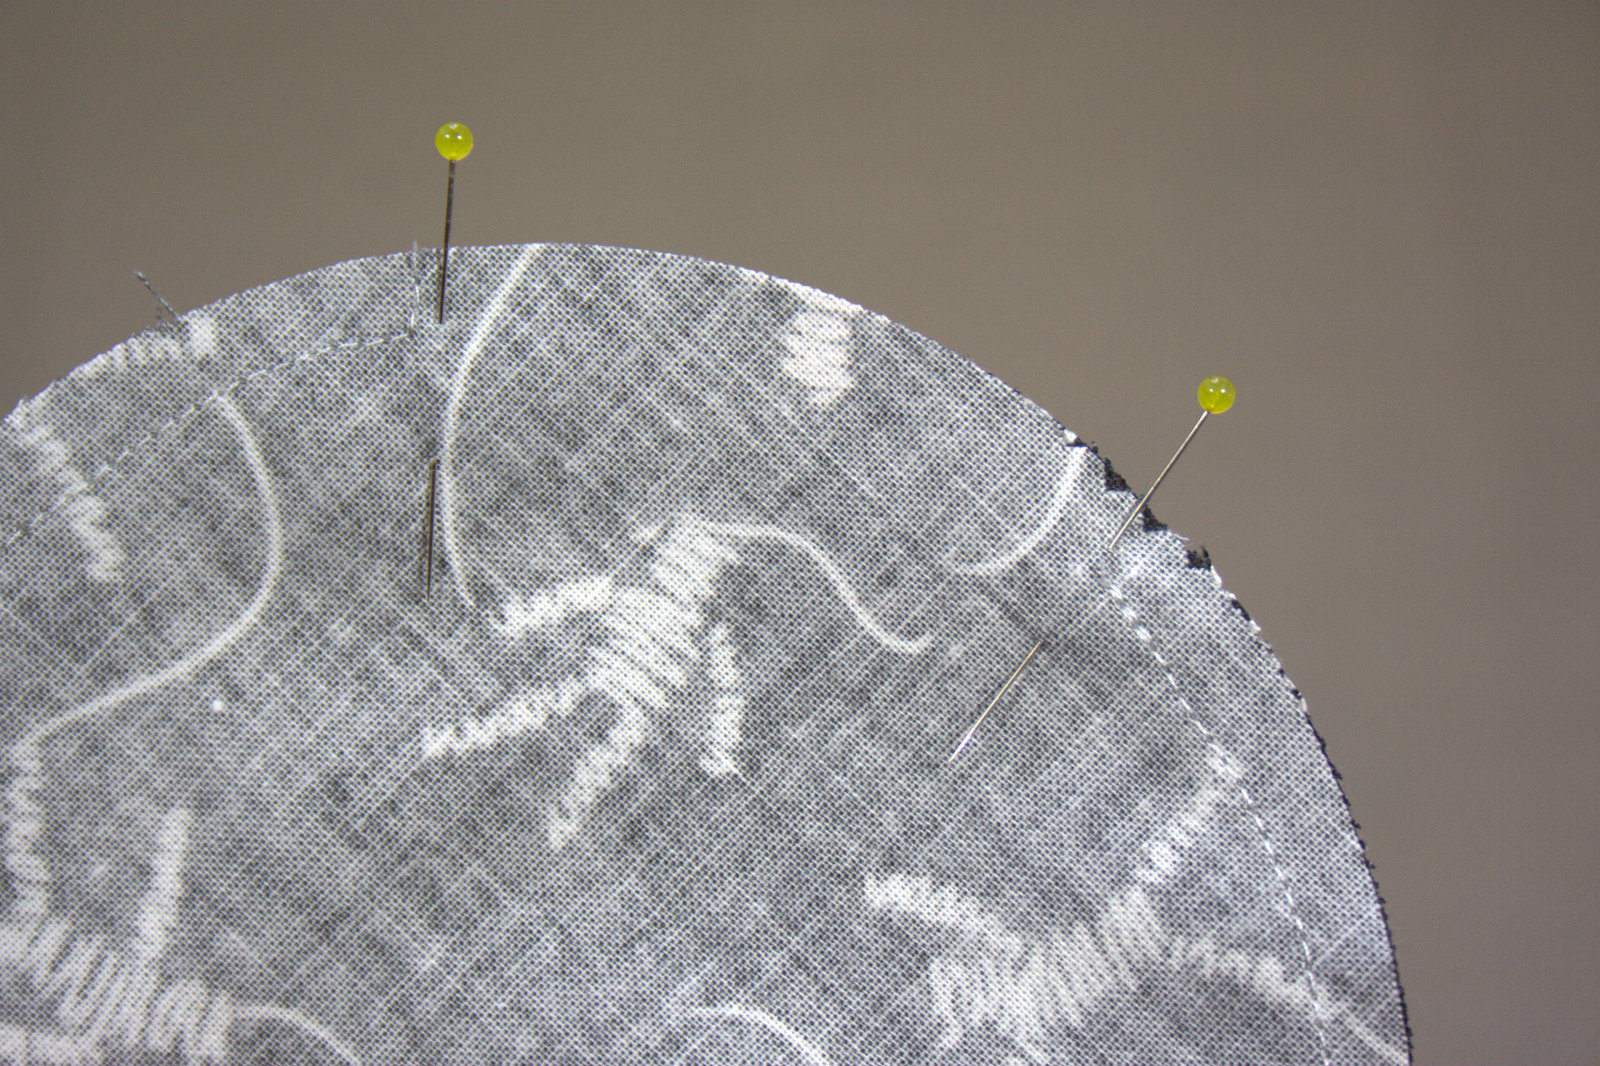 Next, pin your pairs of fabric right sides facing. I used only four pins, two of which marked a 2″ opening. With a 1/4″ seam allowance, sew the circles together, leaving 2″ open for turning and filling. Remember to backstitch at the beginning and end of each seam.
Turn beanbags right side out through the 2″ opening. Gently slide your finger along the seam from the inside to make sure the circle is fully turned. Press with a hot iron. Turn in the seam allowance around the opening and press, too, since that will make sewing the beanbags together much smoother once they are filled with dried beans. Since it’s a curve, this step is a little tricky (or at least it was a little tricky for me). Just remember what you’re making: these are going to be tossed and thrown and loved, and perfection is overrated!
Now comes the fun part! Grab some small dried beans (I used dried black beans), a funnel and/or spoon, and a couple of eager helpers.
 Fill the beanbags with dried beans, leaving at least an inch of empty space at the top. Trust me here; the beanbags will seem too empty, but while you are sewing them shut and top-stitching, you will want that extra wiggle room.
 We found that a combination of funnel, spoon, and simple “use your hands to put the beans in” worked well for us.
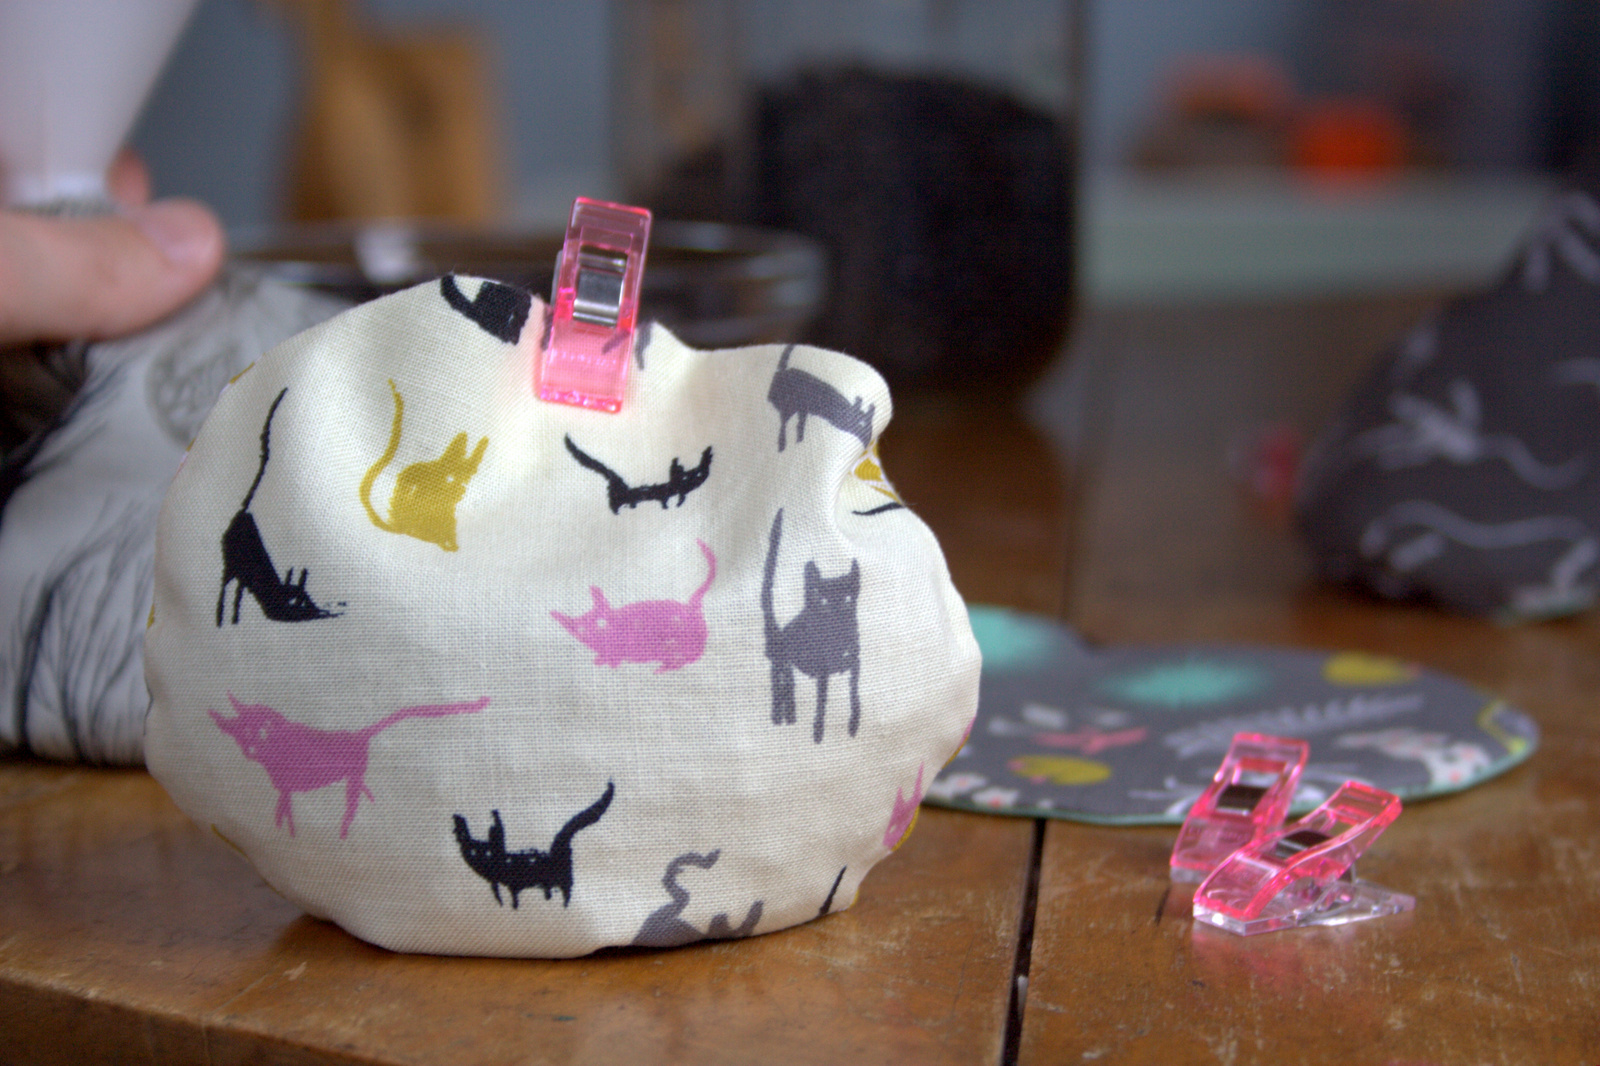 Either pin or clip the tops once the beanbags are filled (remember to leave that good inch or inch and a half of empty space in the top). This will both remind you that the beanbag is “finished filling”, and remind your kiddos not to cram any more beans into it. (We definitely took as many beans out of the beanbags as we put it. All part of the fun, right!?)
 Depending on the size of your helpers, this may be a messy activity. Plan accordingly, or embrace the chaos.

Once all of your beanbags are sufficiently filled, head back to the sewing machine and topstitch about 1/8″ inch from the edge of the beanbag, beginning by sewing the opening closed. This extra round of sewing will securely close the opening, and will also provide extra durability for the entire beanbag. I made some beanbags for my nearly-six year old when she turned two, and they are still going strong in our playroom.
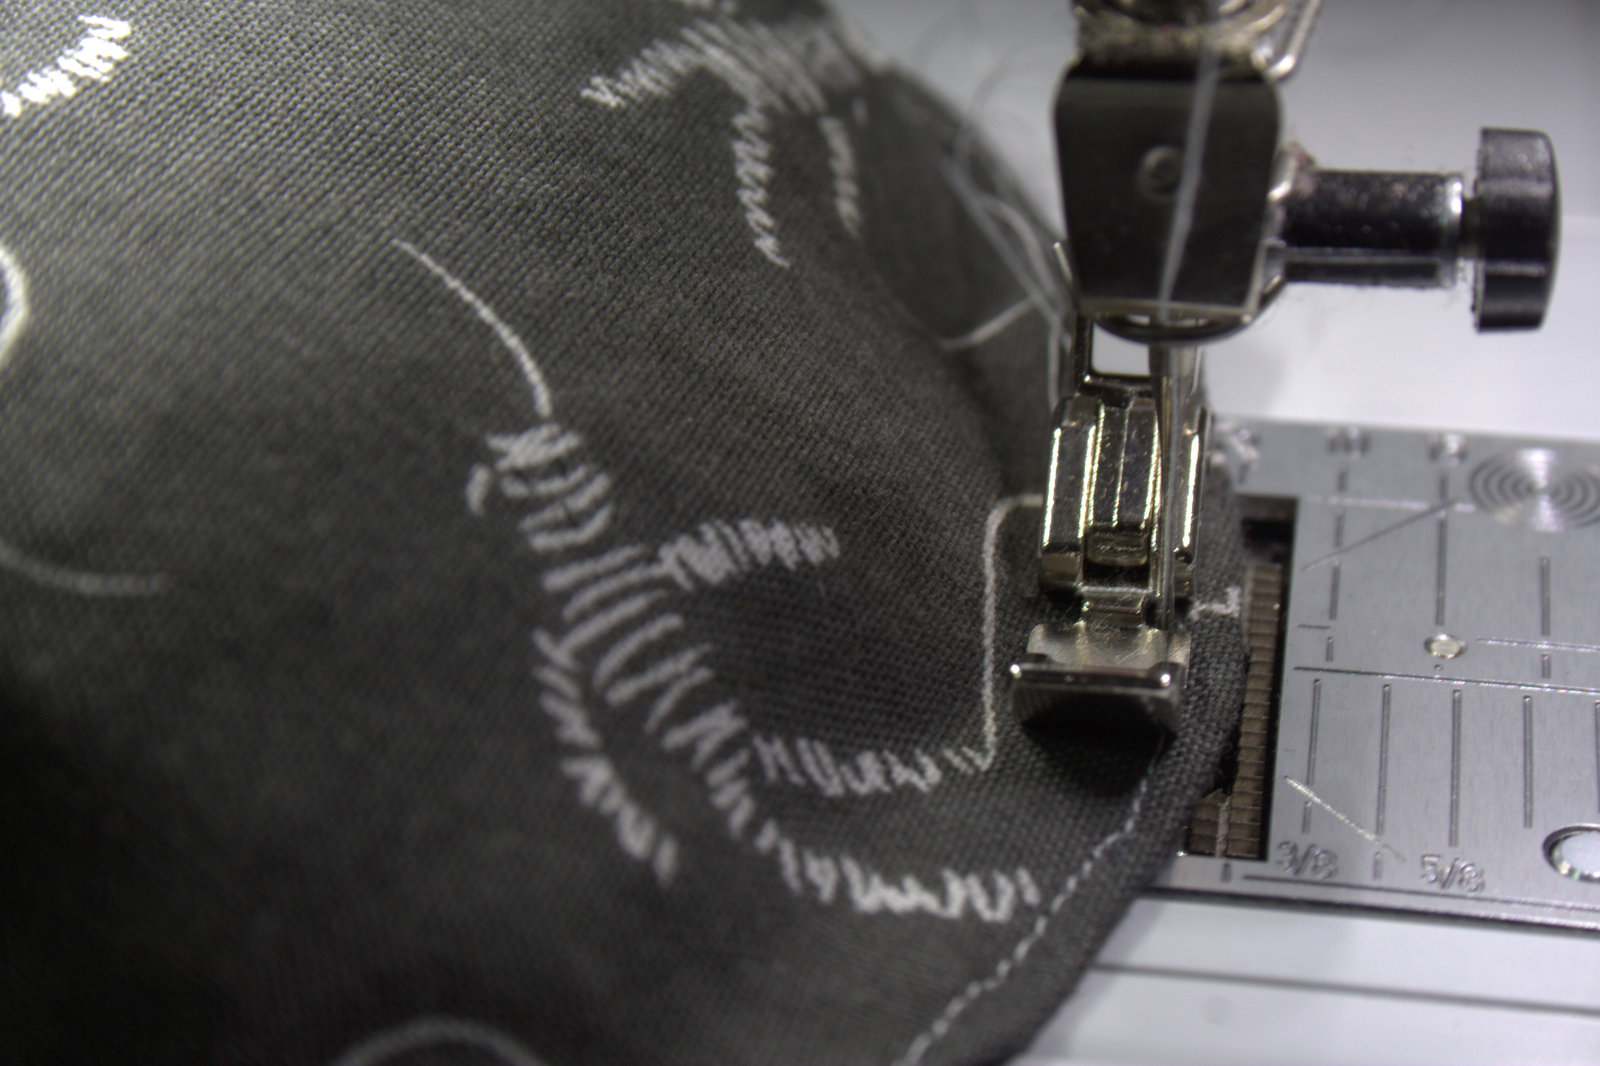
I used my zipper foot to sew these beanbags closed, and sewed most of them with the needle between the foot and the beanbag (shown in the top photo above). It proved more finicky than I remembered, so with the final beanbag, I moved the needle so that the foot was between the needle and the beanbag (shown in the photo above). This worked much more smoothly for me. As you sew around the edges of the beanbag, stop every couple inches with the needle down to reposition the beans, pushing them away from the part of the beanbag you are about to sew. Sew all the way around each beanbag.

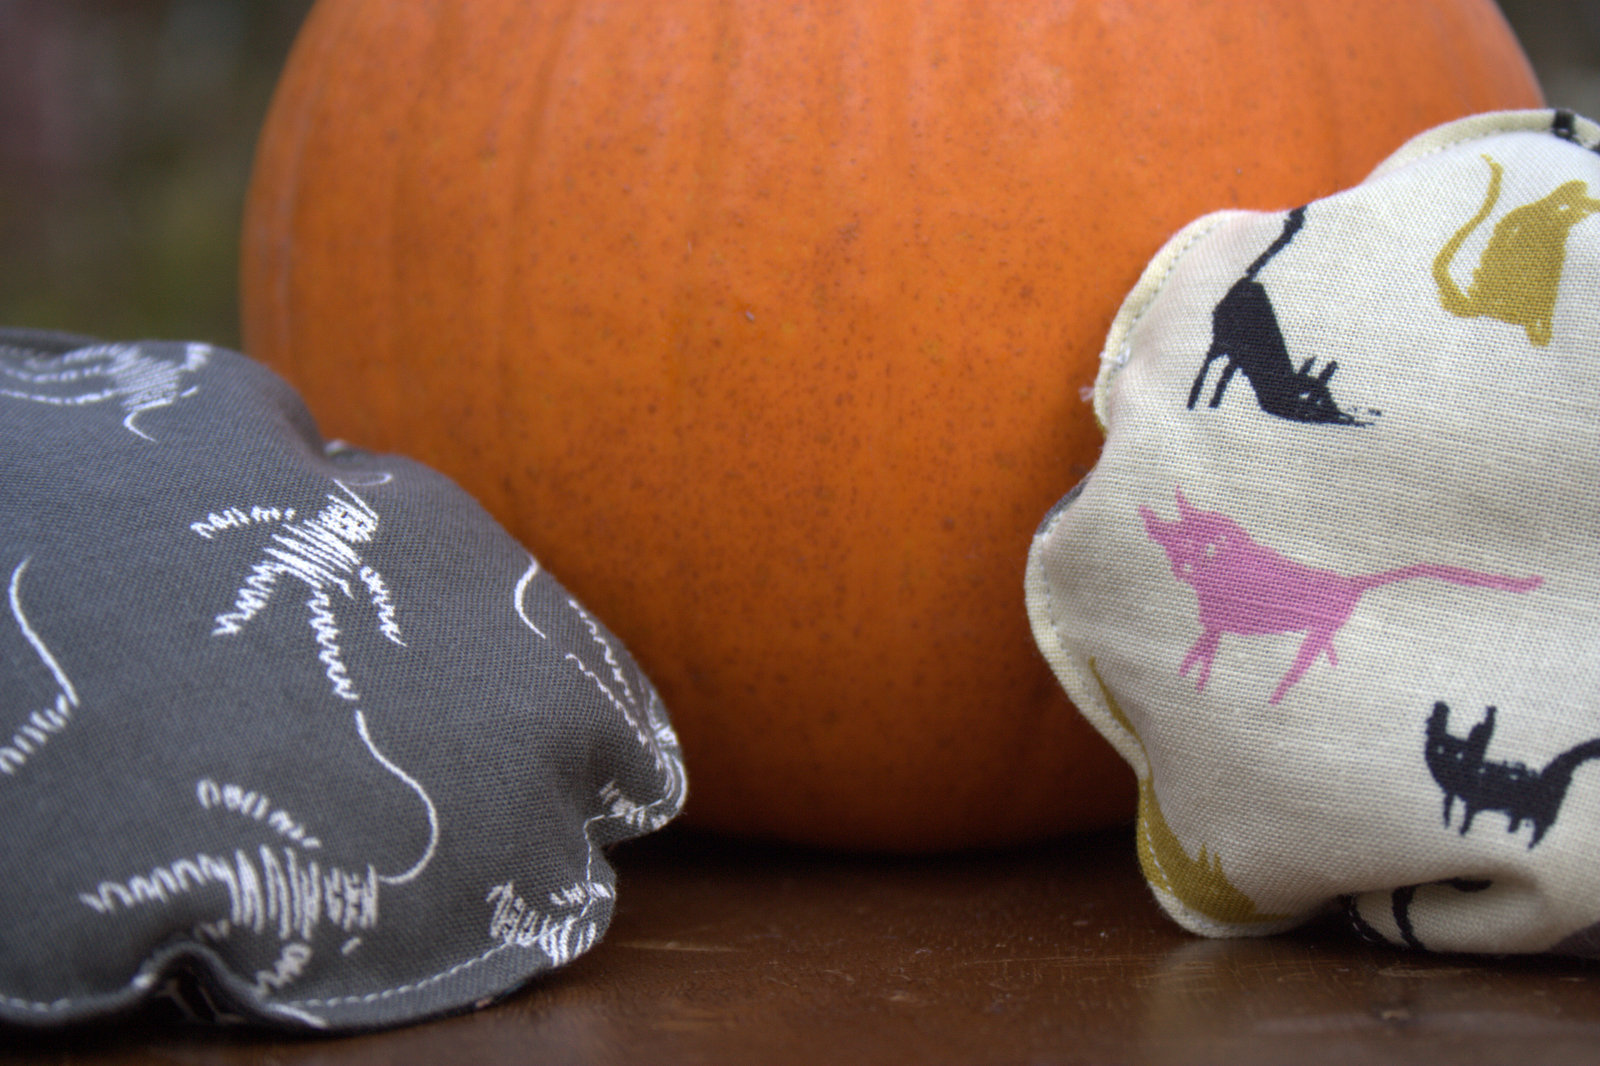 Now you have a handful of spooktacular sturdy beanbags and you’re ready for fun! Toss them at pumpkins, into trick-or-treat buckets, or at each other (avoid faces!). Have fun!

Yeah for beanbags. We take our Girl Guides to Sherbrooke Village which is set up like a village in the 1800’s, and making beanbags is one of the activities. I think I’ll go find my beanbags and play around. LOL
LikeLike
What a clever project, and so easy too! I never would have thought to make bean bags for my kiddo and you’re right – have something that you’re allowed to throw around is perfect! I also like the idea that he can help me make them.
LikeLike
Oh how fun! What kid (or kid at heart) doesn’t love something you’re supposed to throw? There would be a lot of games of war between my brother and I with these! Thanks for the tutorial! 🙂
LikeLike
What a fun family project, Kitty! I can just picture an indoor skating event taking place right after a good number of beans end up on the floor 🙂
LikeLike
I am in awe of your expert parenting tips. Gifts that two-year-olds are ‘supposed to throw’ and ’embrace the chaos’ are such wonderfully sensible parenting advice. 🙂
LikeLike
Aww thank you, Carla!! I’ve studied the developmental stages and abilities of infants and children for years, both through reading and experiential observation (and being in the thick of it), and knowing what a child’s neurological capabilities are at each age honestly helps me be a better parent. Knowing that toddlers don’t continually “break the rules” just to be bad, and that they physiologically cannot yet control their actions and do not have cognitive judgement enough to help them make good decisions really helps me stay calm during days of endless chaos. I am FAR from perfect, and don’t always embrace the chaos—in fact, I think I angrily sent my 3 year old on an epic house-vacuuming journey after these beanbags, since he took all of the extra beans and spread them all over the living room floor while I was helping Maddie clean up the spilled beans in the play room—but I hope that by saying it out loud, it may help other moms. Redirection being as valuable of a peacekeeper as just about any other strategy as a parent of a 2 year old, the bean bags are KEY. Then when a matchbox car goes flying toward your face, you can quickly and excitedly say, “Oh, cars are for driving on the floor. They are HARD. Let’s go throw a beanbag!!” and let your child pelt the walls repeatedly with harmless beanbags. It works wonders, as long as you are patient enough to redirect in this way many times per day, for weeks and months on end 🙂
LikeLike