Tag Archives: crazy mom quilts

AG Challenge Finish: Noodlehead Diaper Pouch

Sometimes you just need a quick finish. Something small and beautiful that you made with your own hands, but that takes only hours (instead of days) to create. When Yvonne announced her Quilting Jetgirl Alison Glass Challenge as an incentive for the rest of us to get one of our Alison Glass fabric makes into the finished pile, I had a few different ideas of which of my many Alison Glass-influenced projects I should finish first. At first I thought I’d focus on the table runner I started late last year using the Insignia and Seventy-Six fabric lines, but then thought it might be the perfect boost to finally finish Max’s Eye Spy quilt that has a dominance of bright Alison Glass prints from across the years. Then I gave myself a reality check and decided to select something small. I have two big deadline projects to finish within the next month, so to be real I decided to pull a diaper pouch project off of my WIPs shelves and finish it up. I’m so glad I did!!

noodlehead diaper pouch alison glass art theory panelI made this Diaper Pouch using a free tutorial by Anna Graham of Noodlehead, found here. It took me about two (2) hours to make, start to finish, which is pretty awesome as far as projects go.

noodlehead diaper pouch alison glass art theory panel
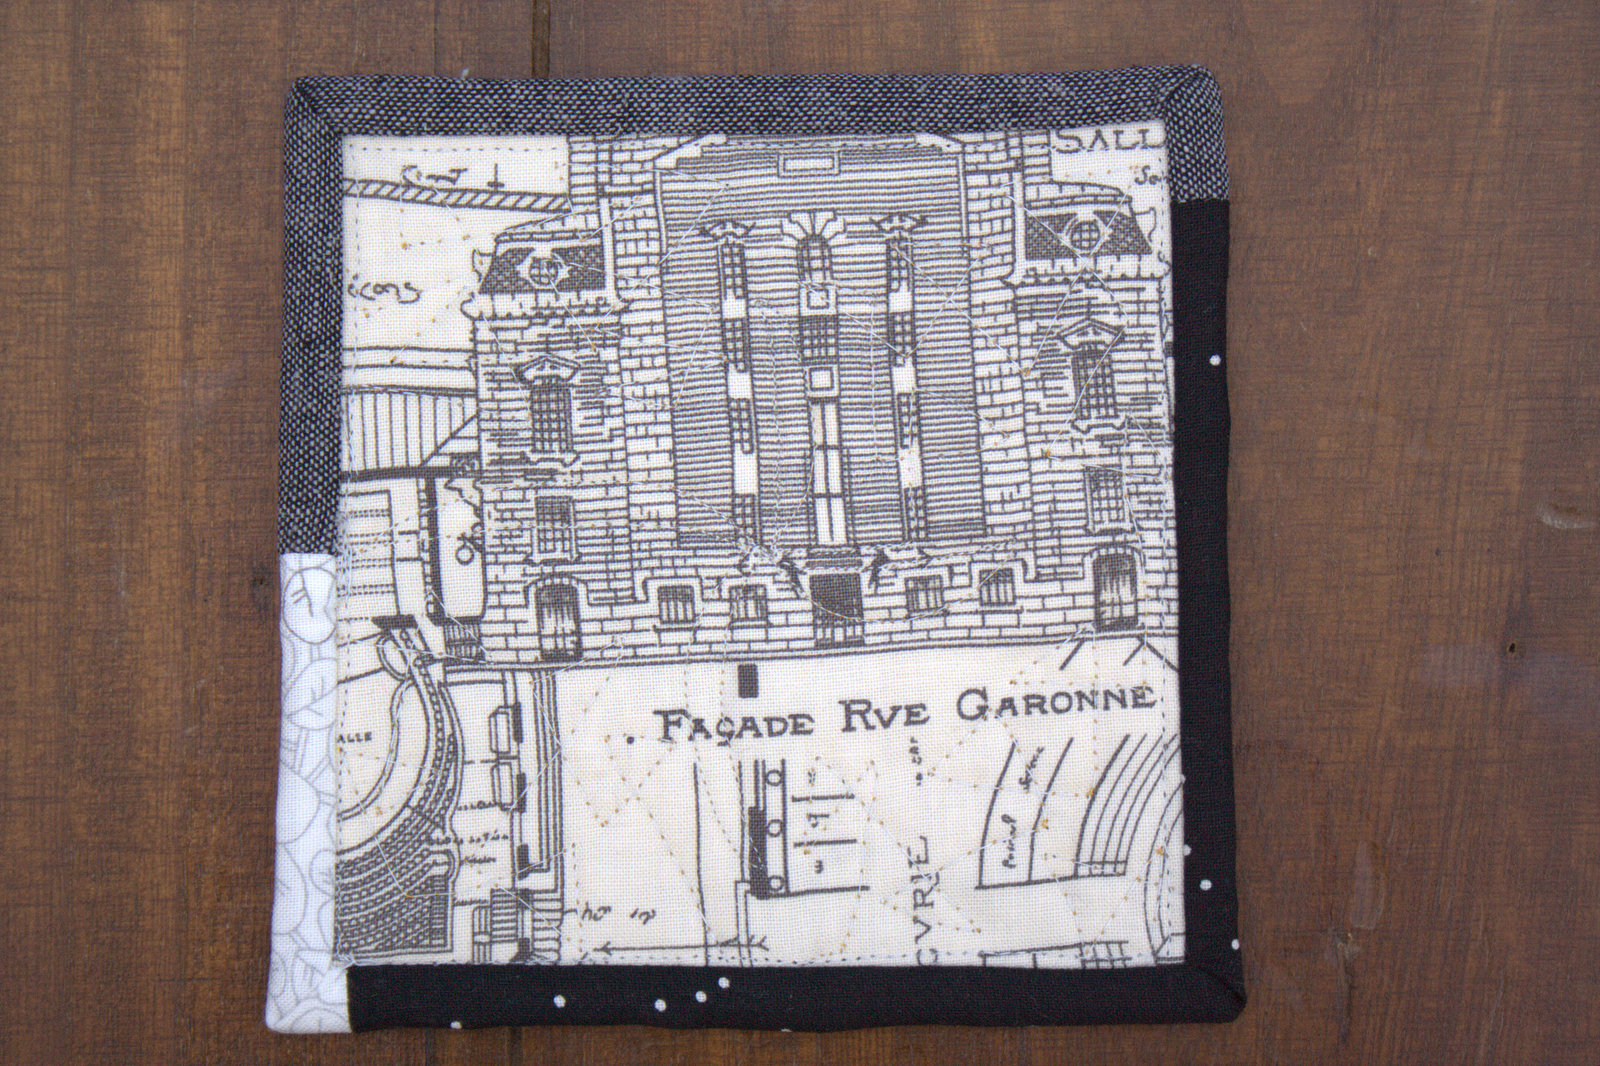
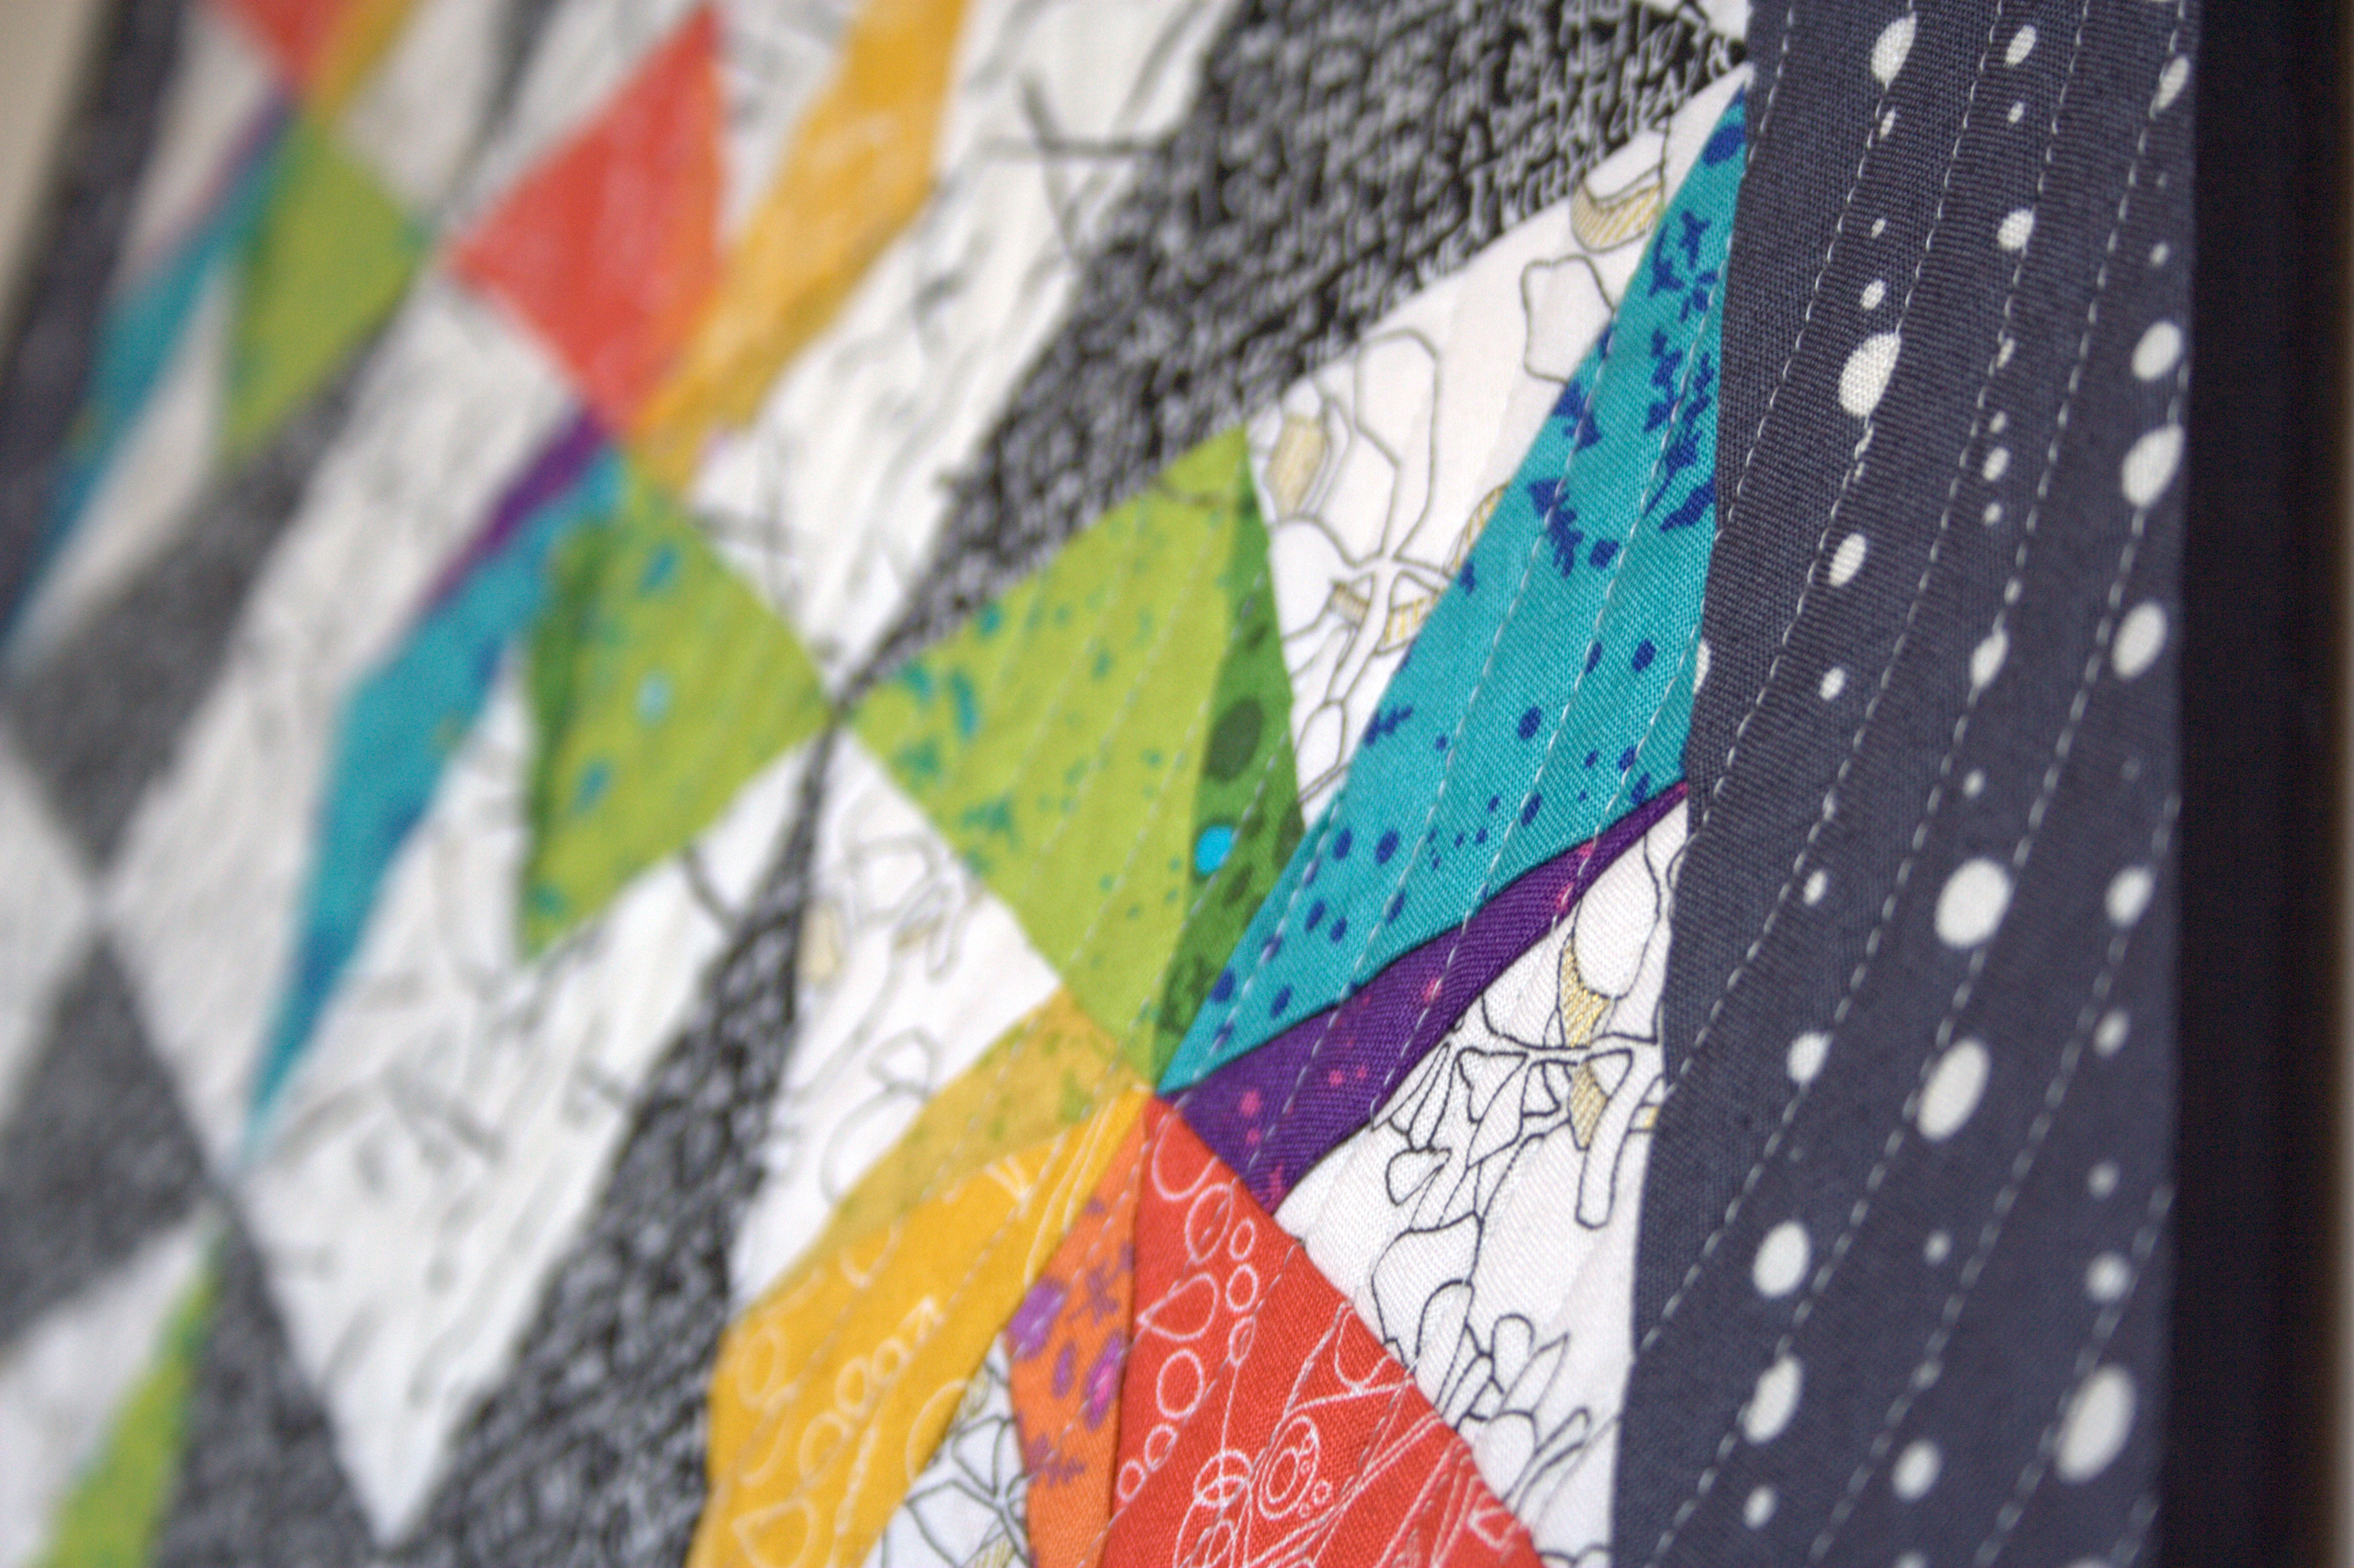
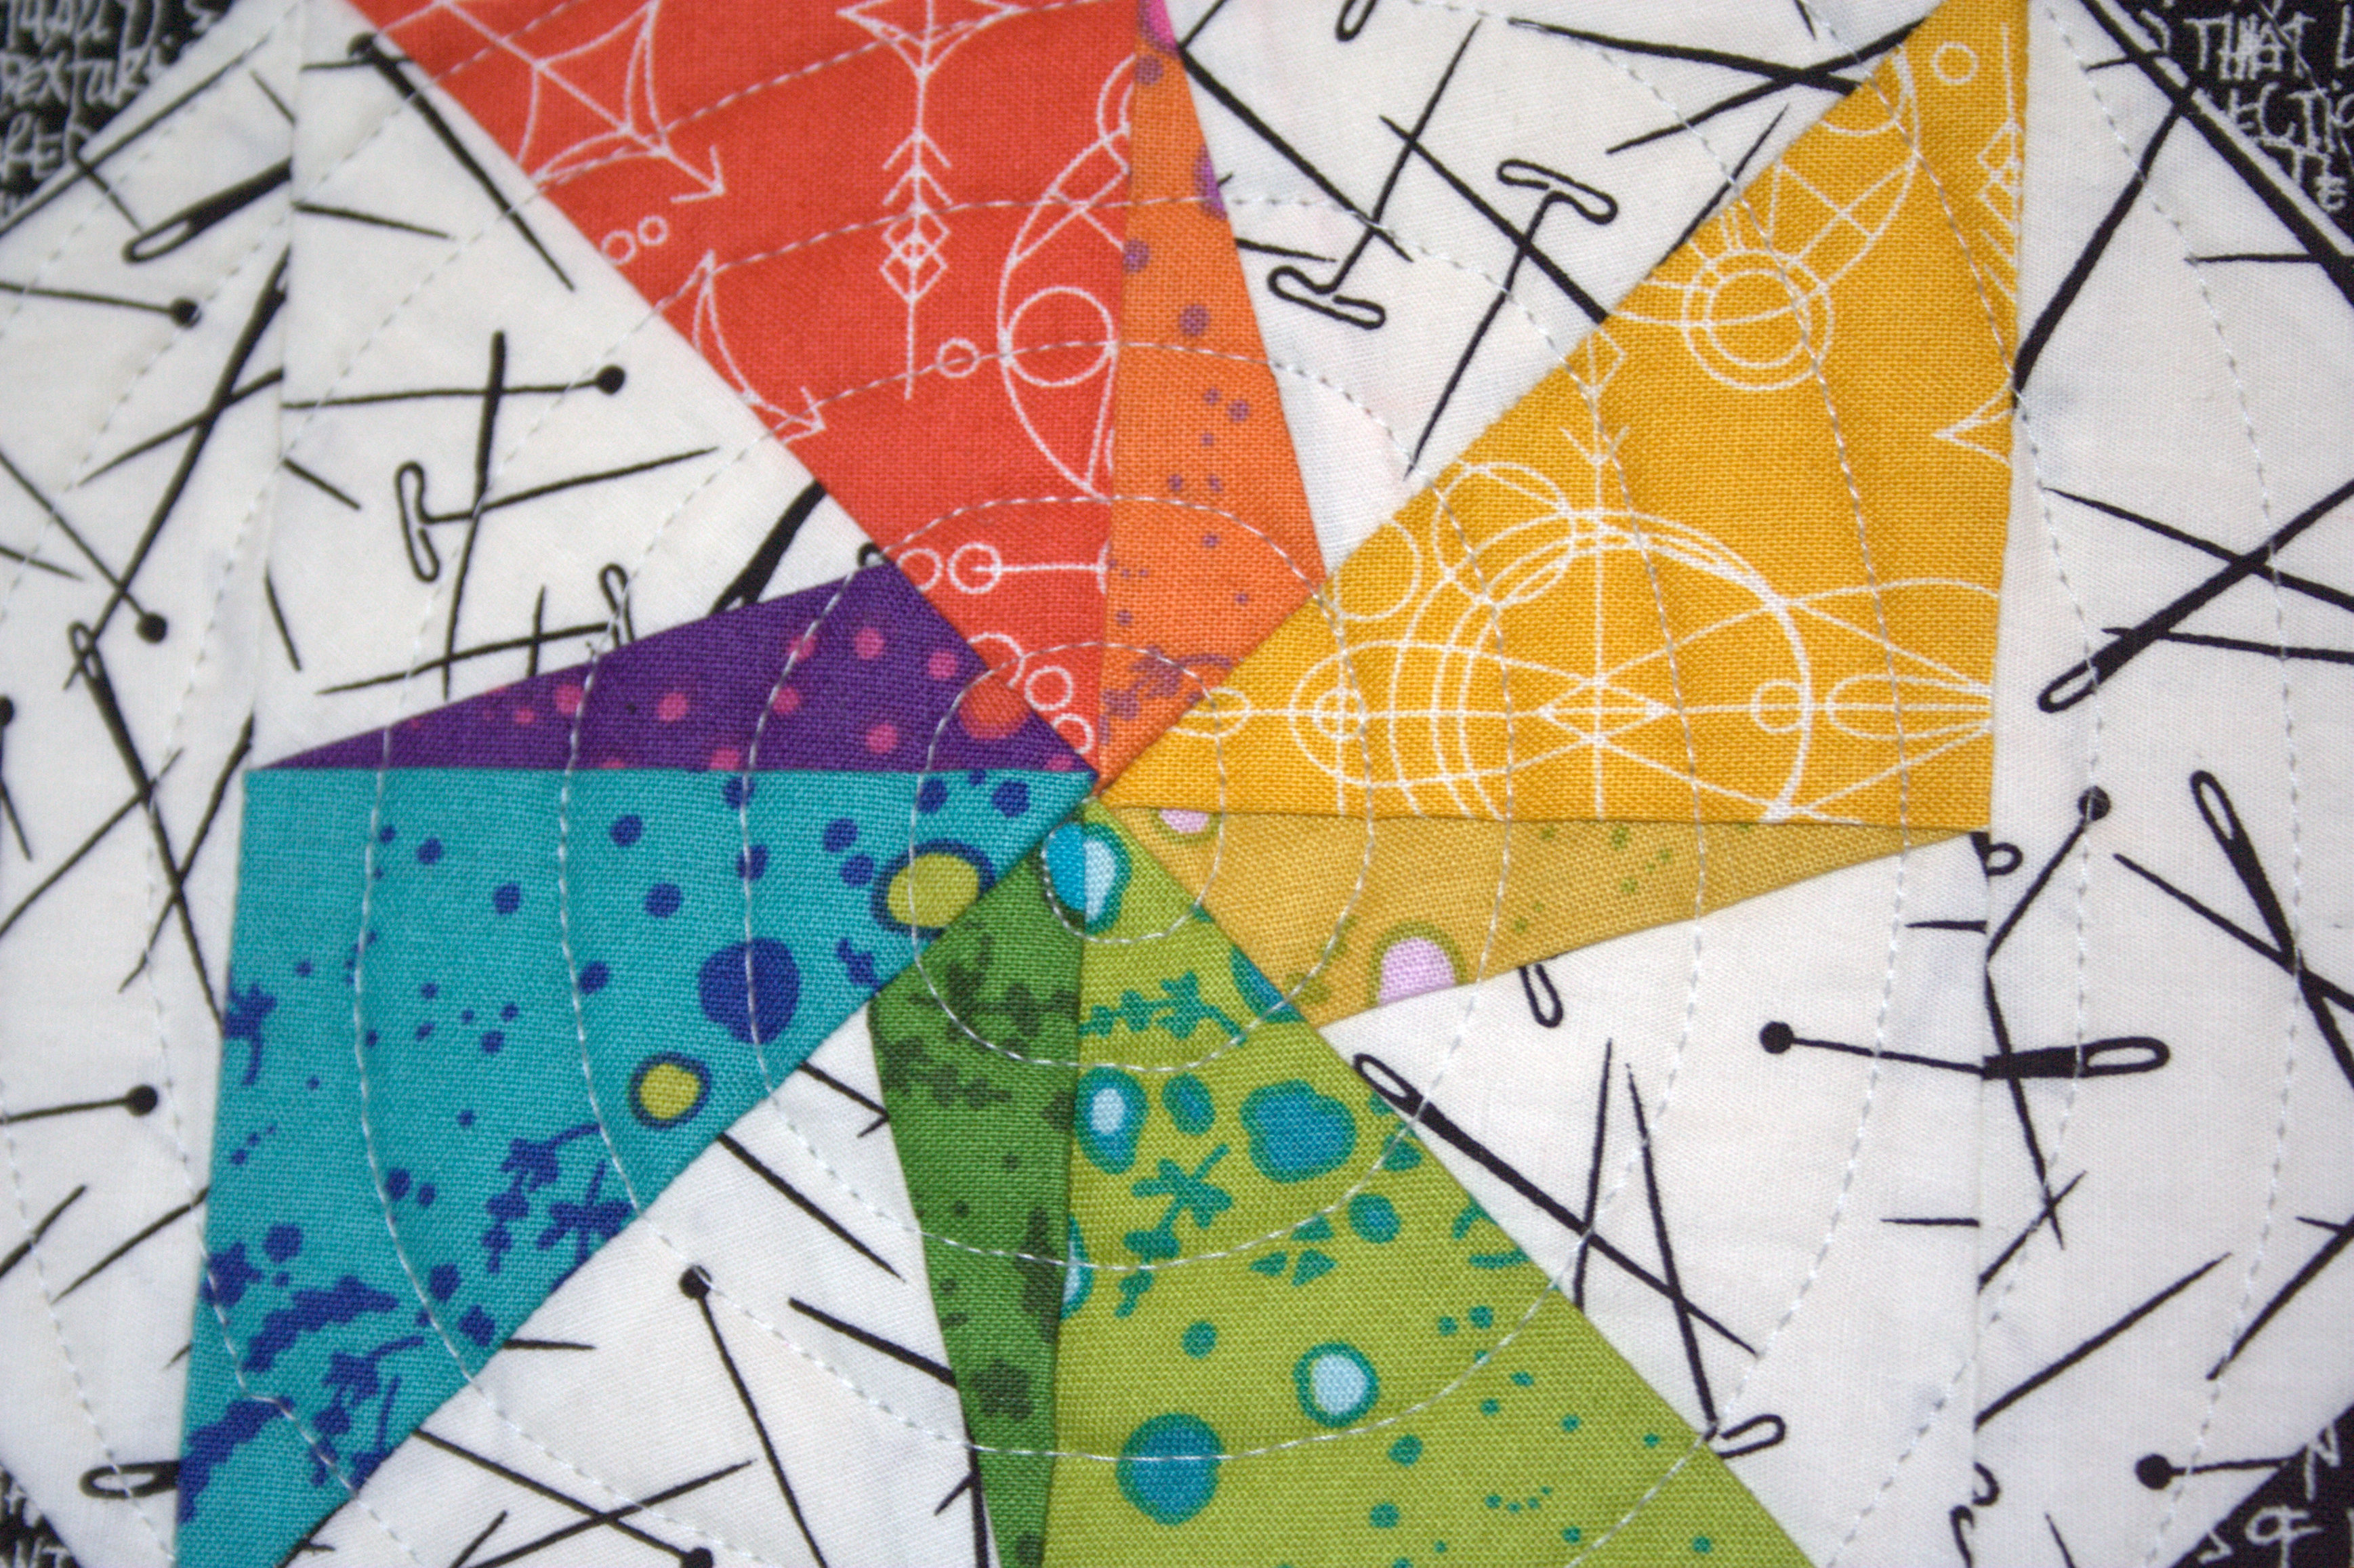
I used my all time favorite Alison Glass Print, the Art Theory Panel from her Ex Libris line as the outer panel, and lined it with Artifact in Charcoal from her Abacus line (Andover Fabrics). I was lucky enough to buy all of these fabrics, AND the cotton webbing strap from my local quilt shop Fiddlehead Artisan Supply.

I used my go-to 50wt Aurifil thread 2600-Dove for all the piecing and 50wt 2692-Black for sewing on the velcro so that the stitches would not stand out. I love that Fiddlehead also carries a good selection of Aurifil threads! One stop shopping for the win!

noodlehead diaper pouch alison glass art theory panel
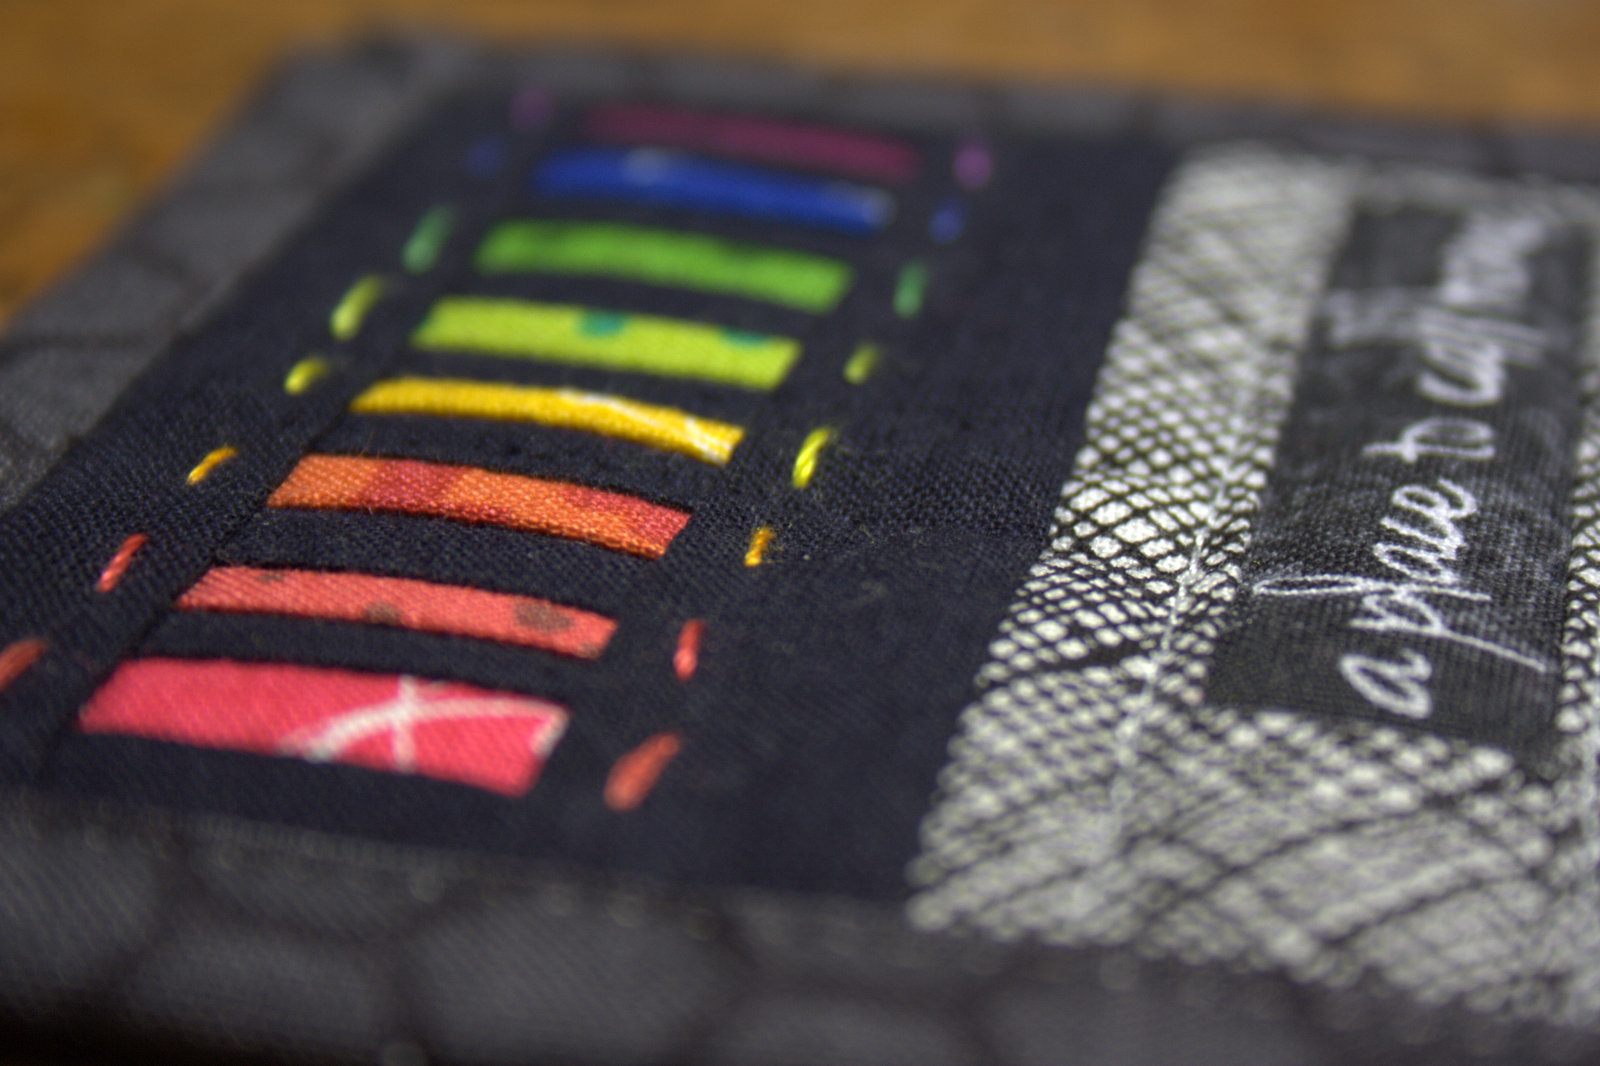
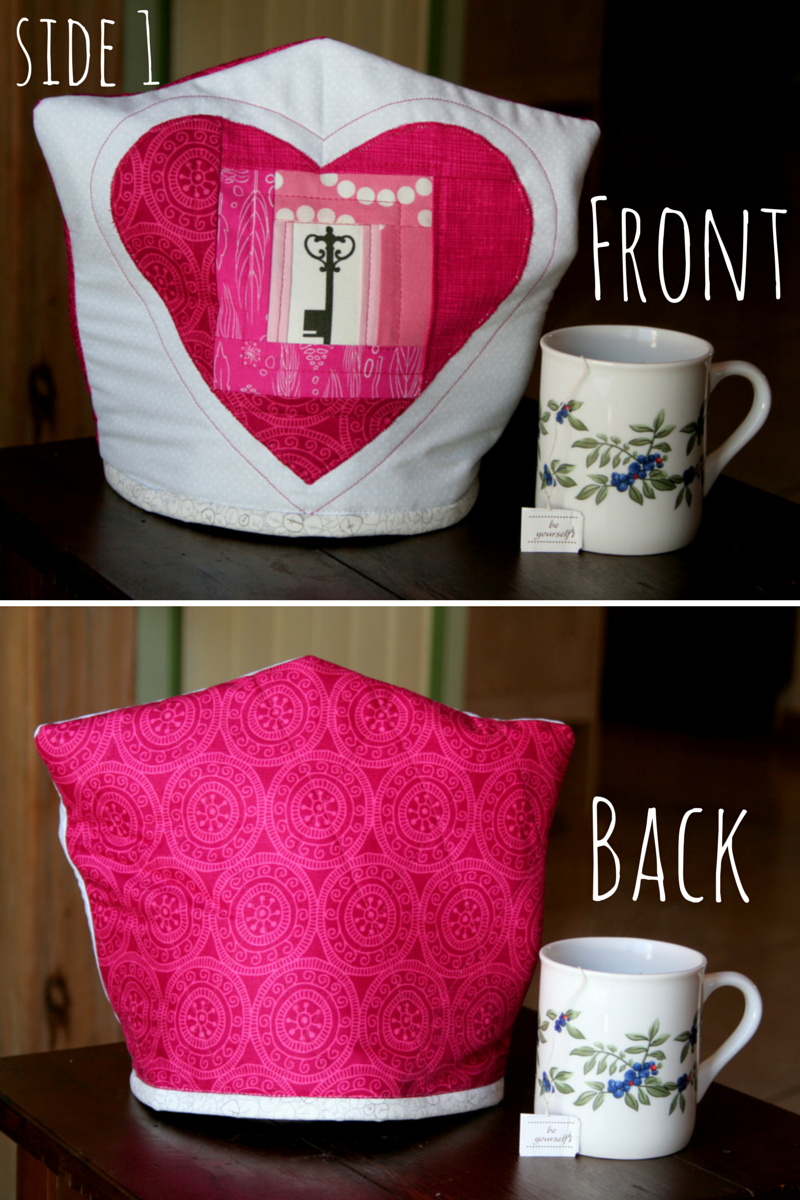
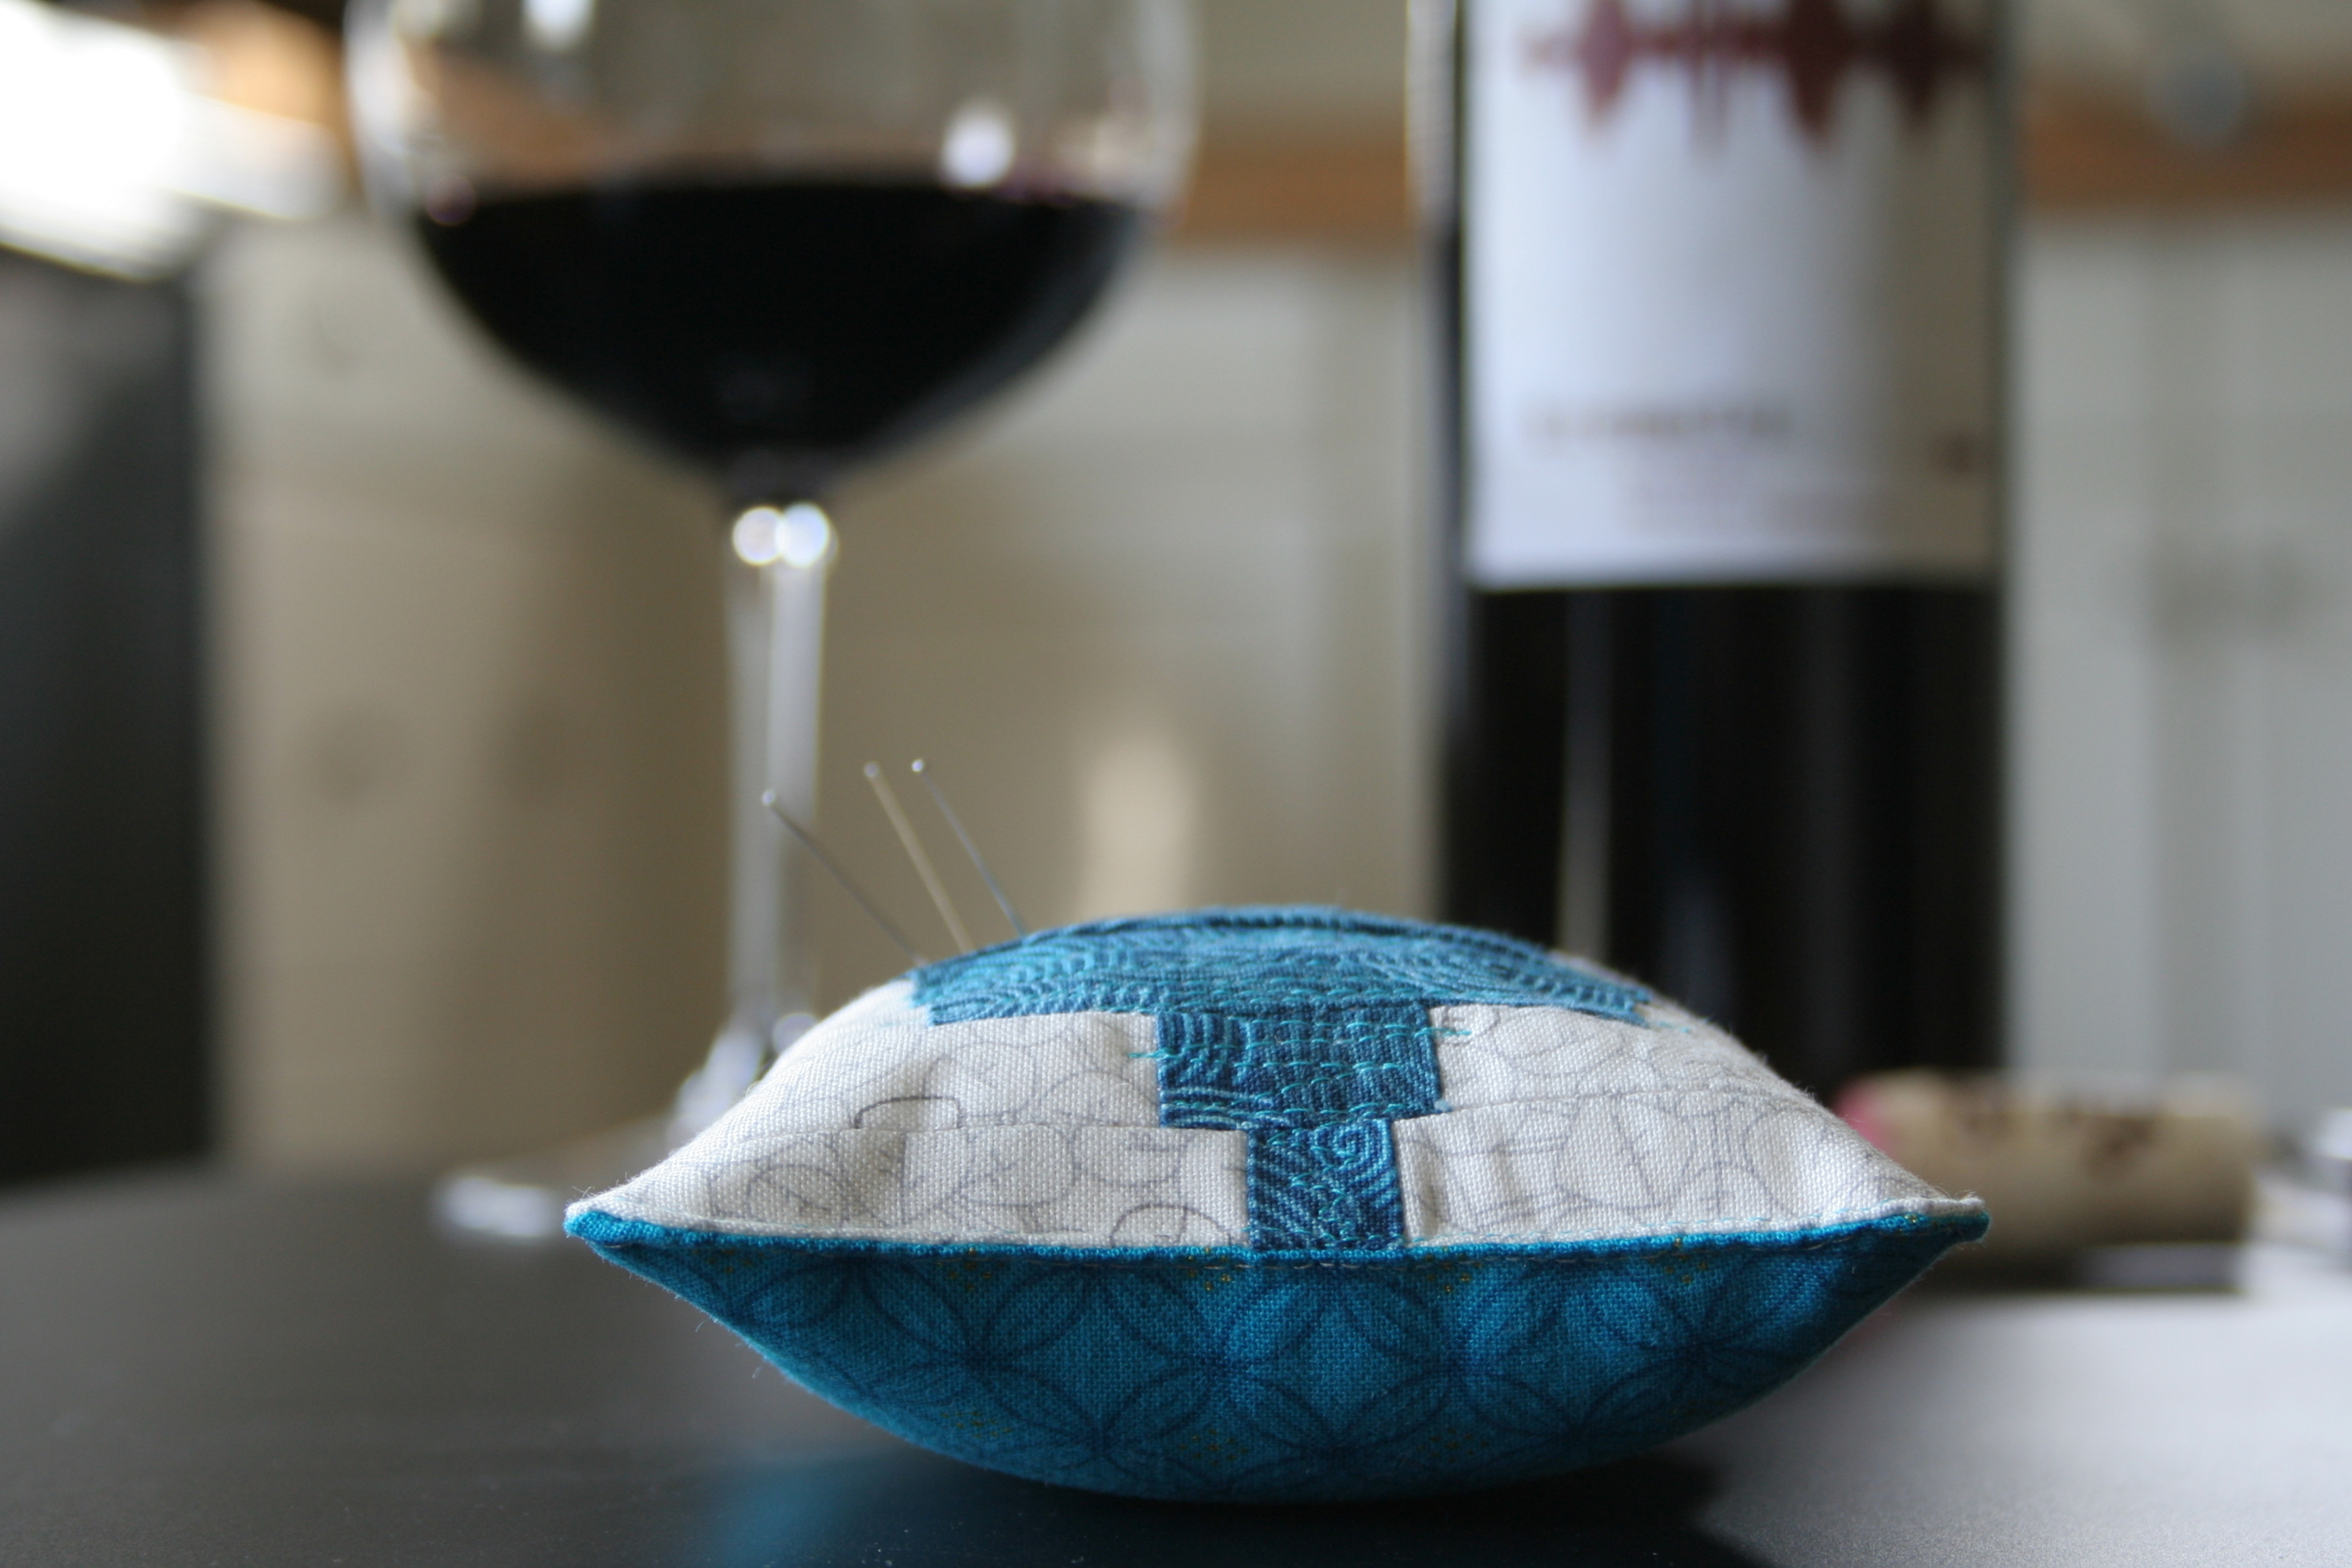
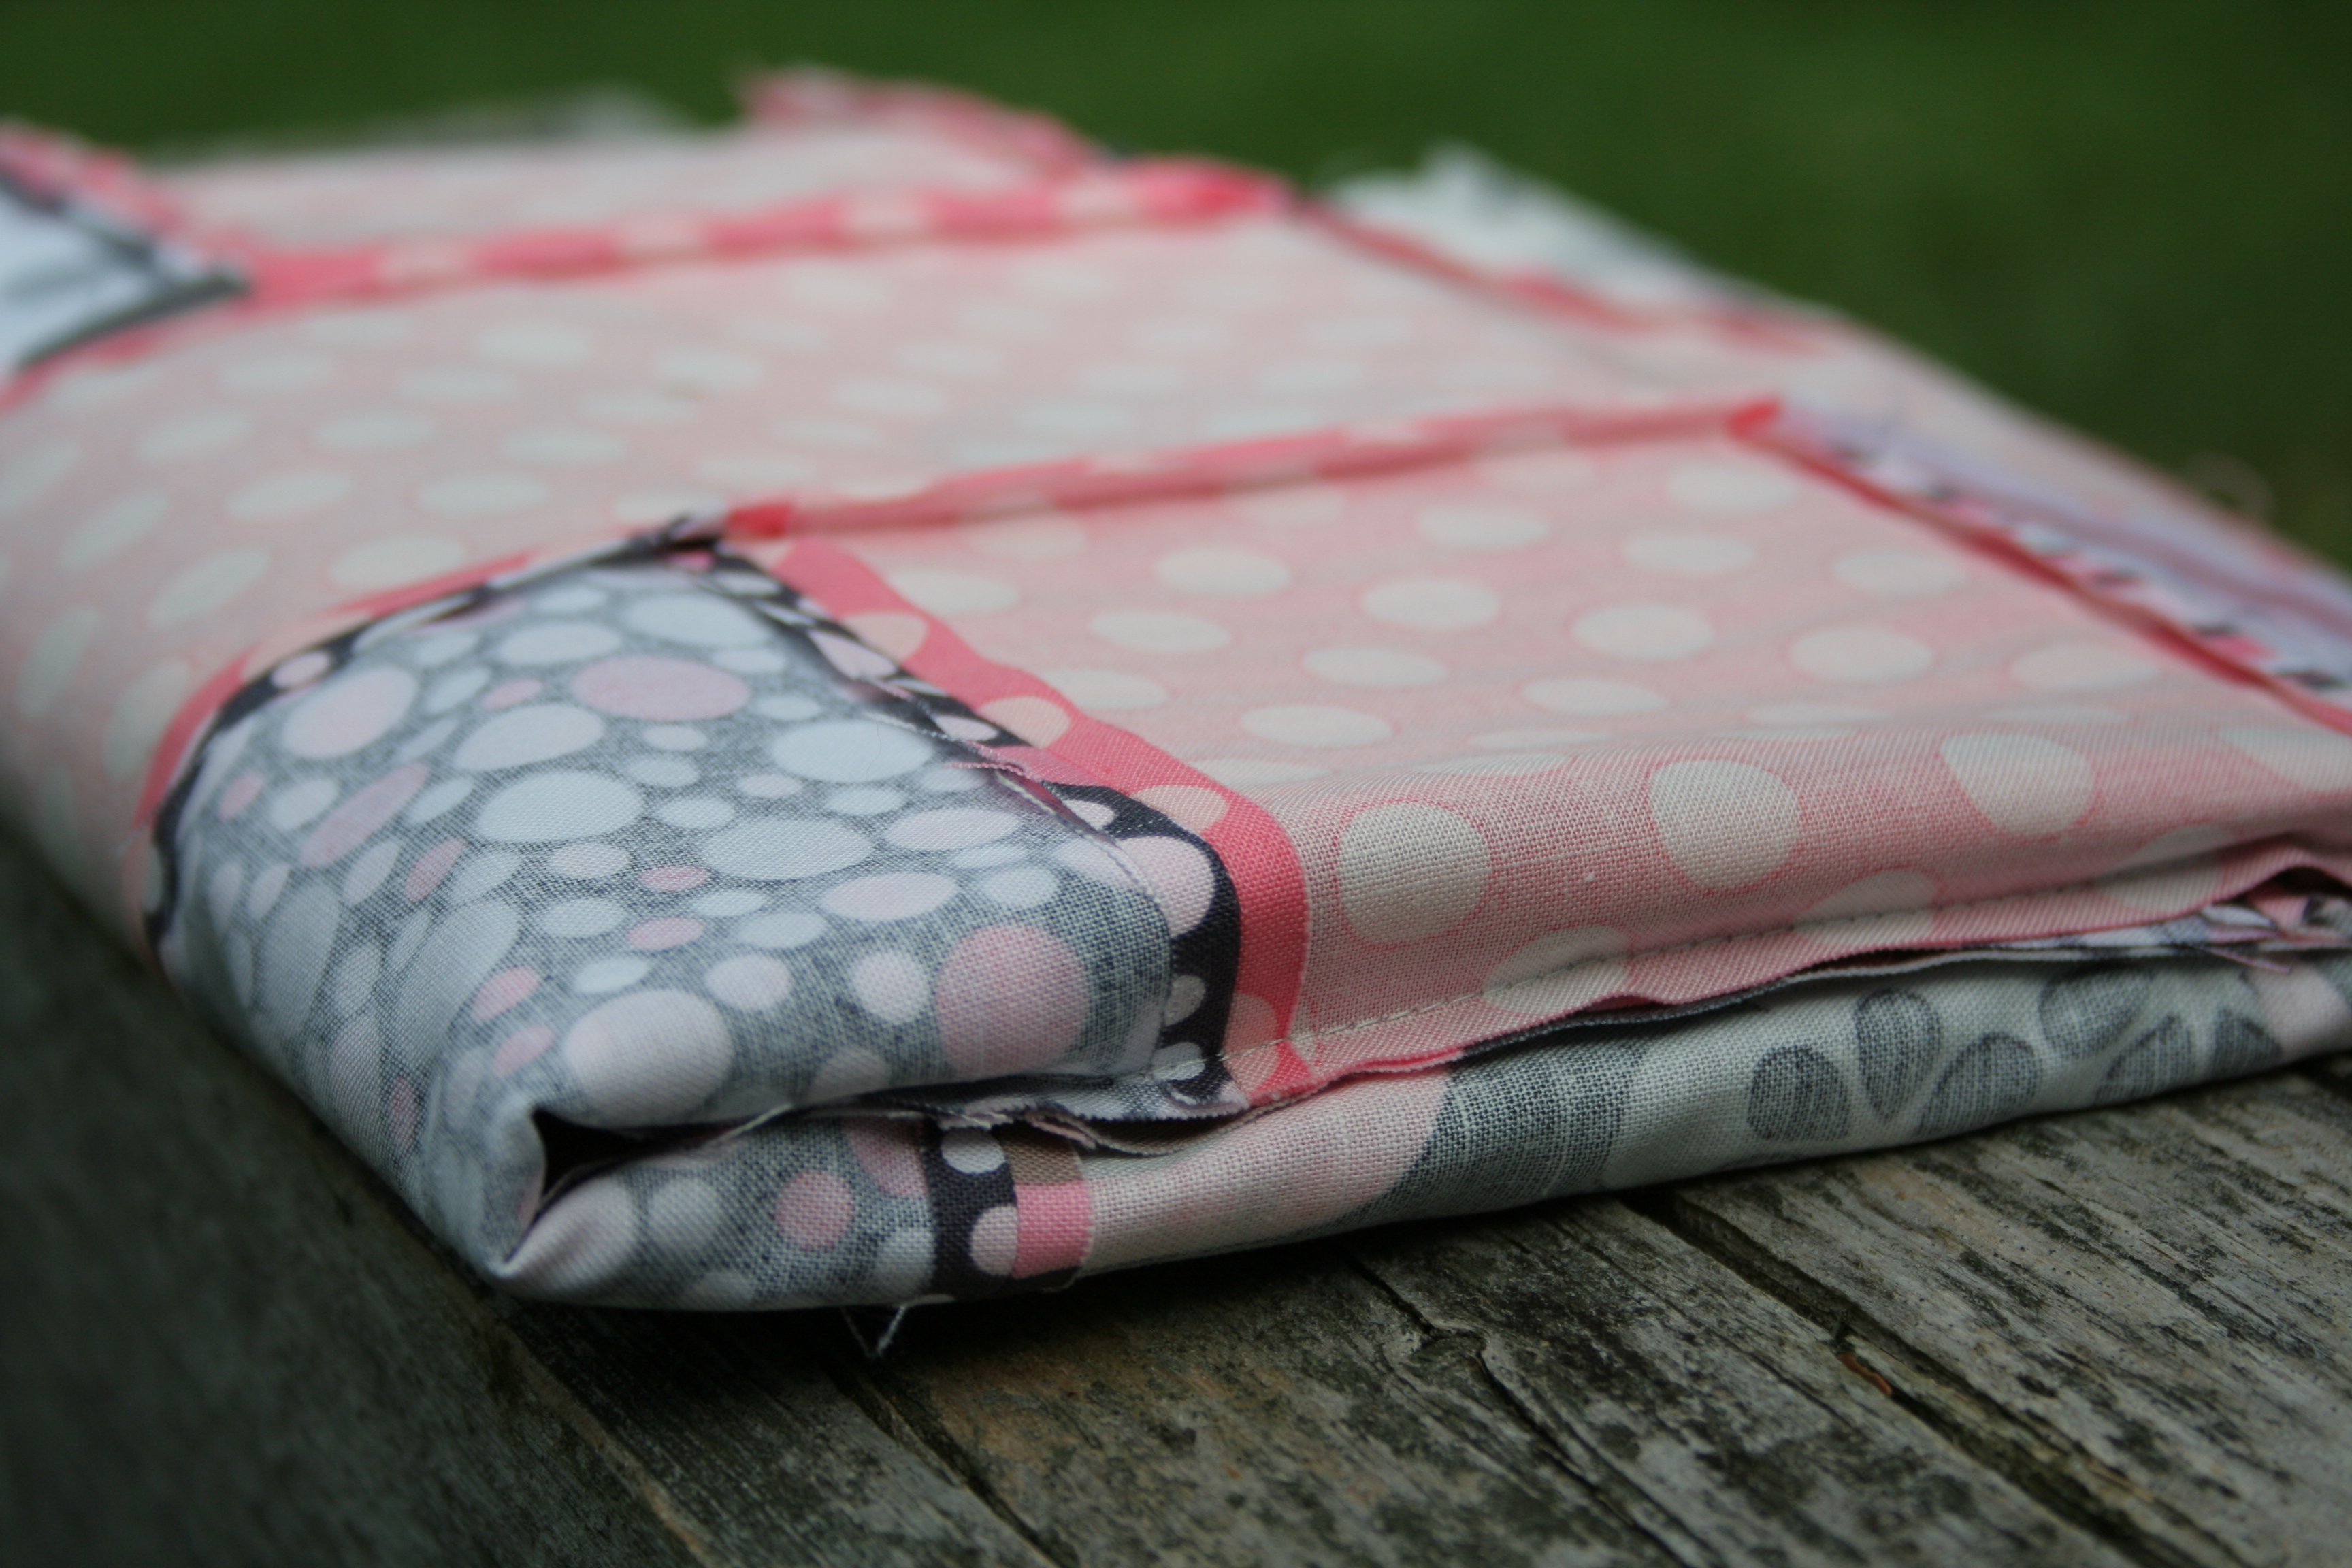
Of course I had to plan it so that the rainbow star from Artifact was visible right on the top. I should have given myself a tiny bit more space in that seam, but I’m not losing sleep over it. It’s gorgeous anyway!

noodlehead diaper pouch alison glass art theory panel
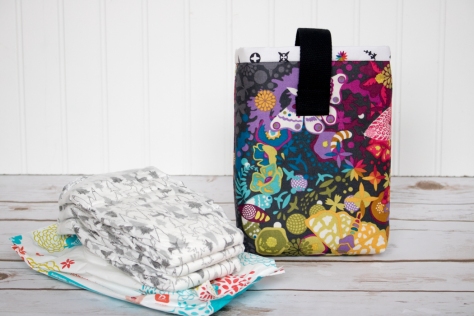
Now instead of having a purse filled with diapers and wipes floating every which way, I can have a beautiful and function space to store them compactly, not only making the inside of my purse a bit more organized, but also making it easy for me to visually check that I have a diaper for my little one before I head out!

noodlehead diaper pouch alison glass art theory panel
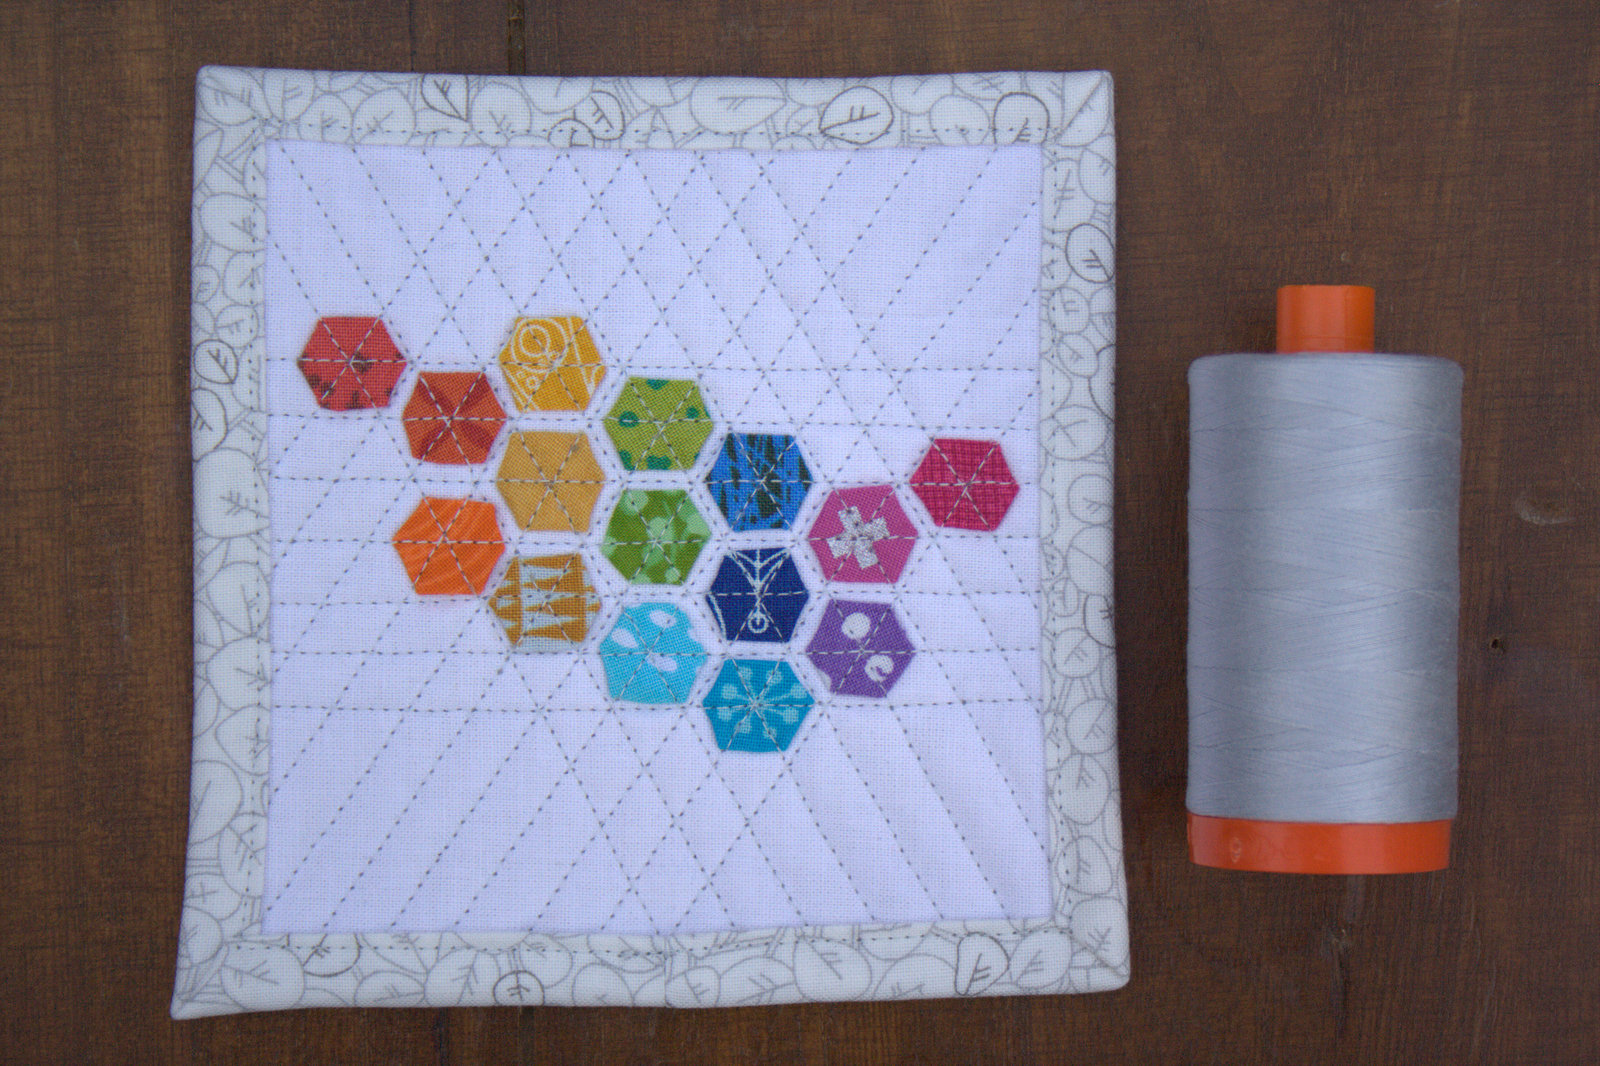
Since pens are another item I’m often digging for in the chaos within my gorgeous bag, I decided to store two of my favorite micron pens tucked in the corner of the diaper pouch, so that they are easily found when I think of something to add to my Quilter’s Planner Mini–my traveling to-do list, grocery list, and inspiration keeper. Pst… you can now order the Quilter’s Planner Minis individually, here. Just a PSA for the day!

noodlehead diaper pouch alison glass art theory panel
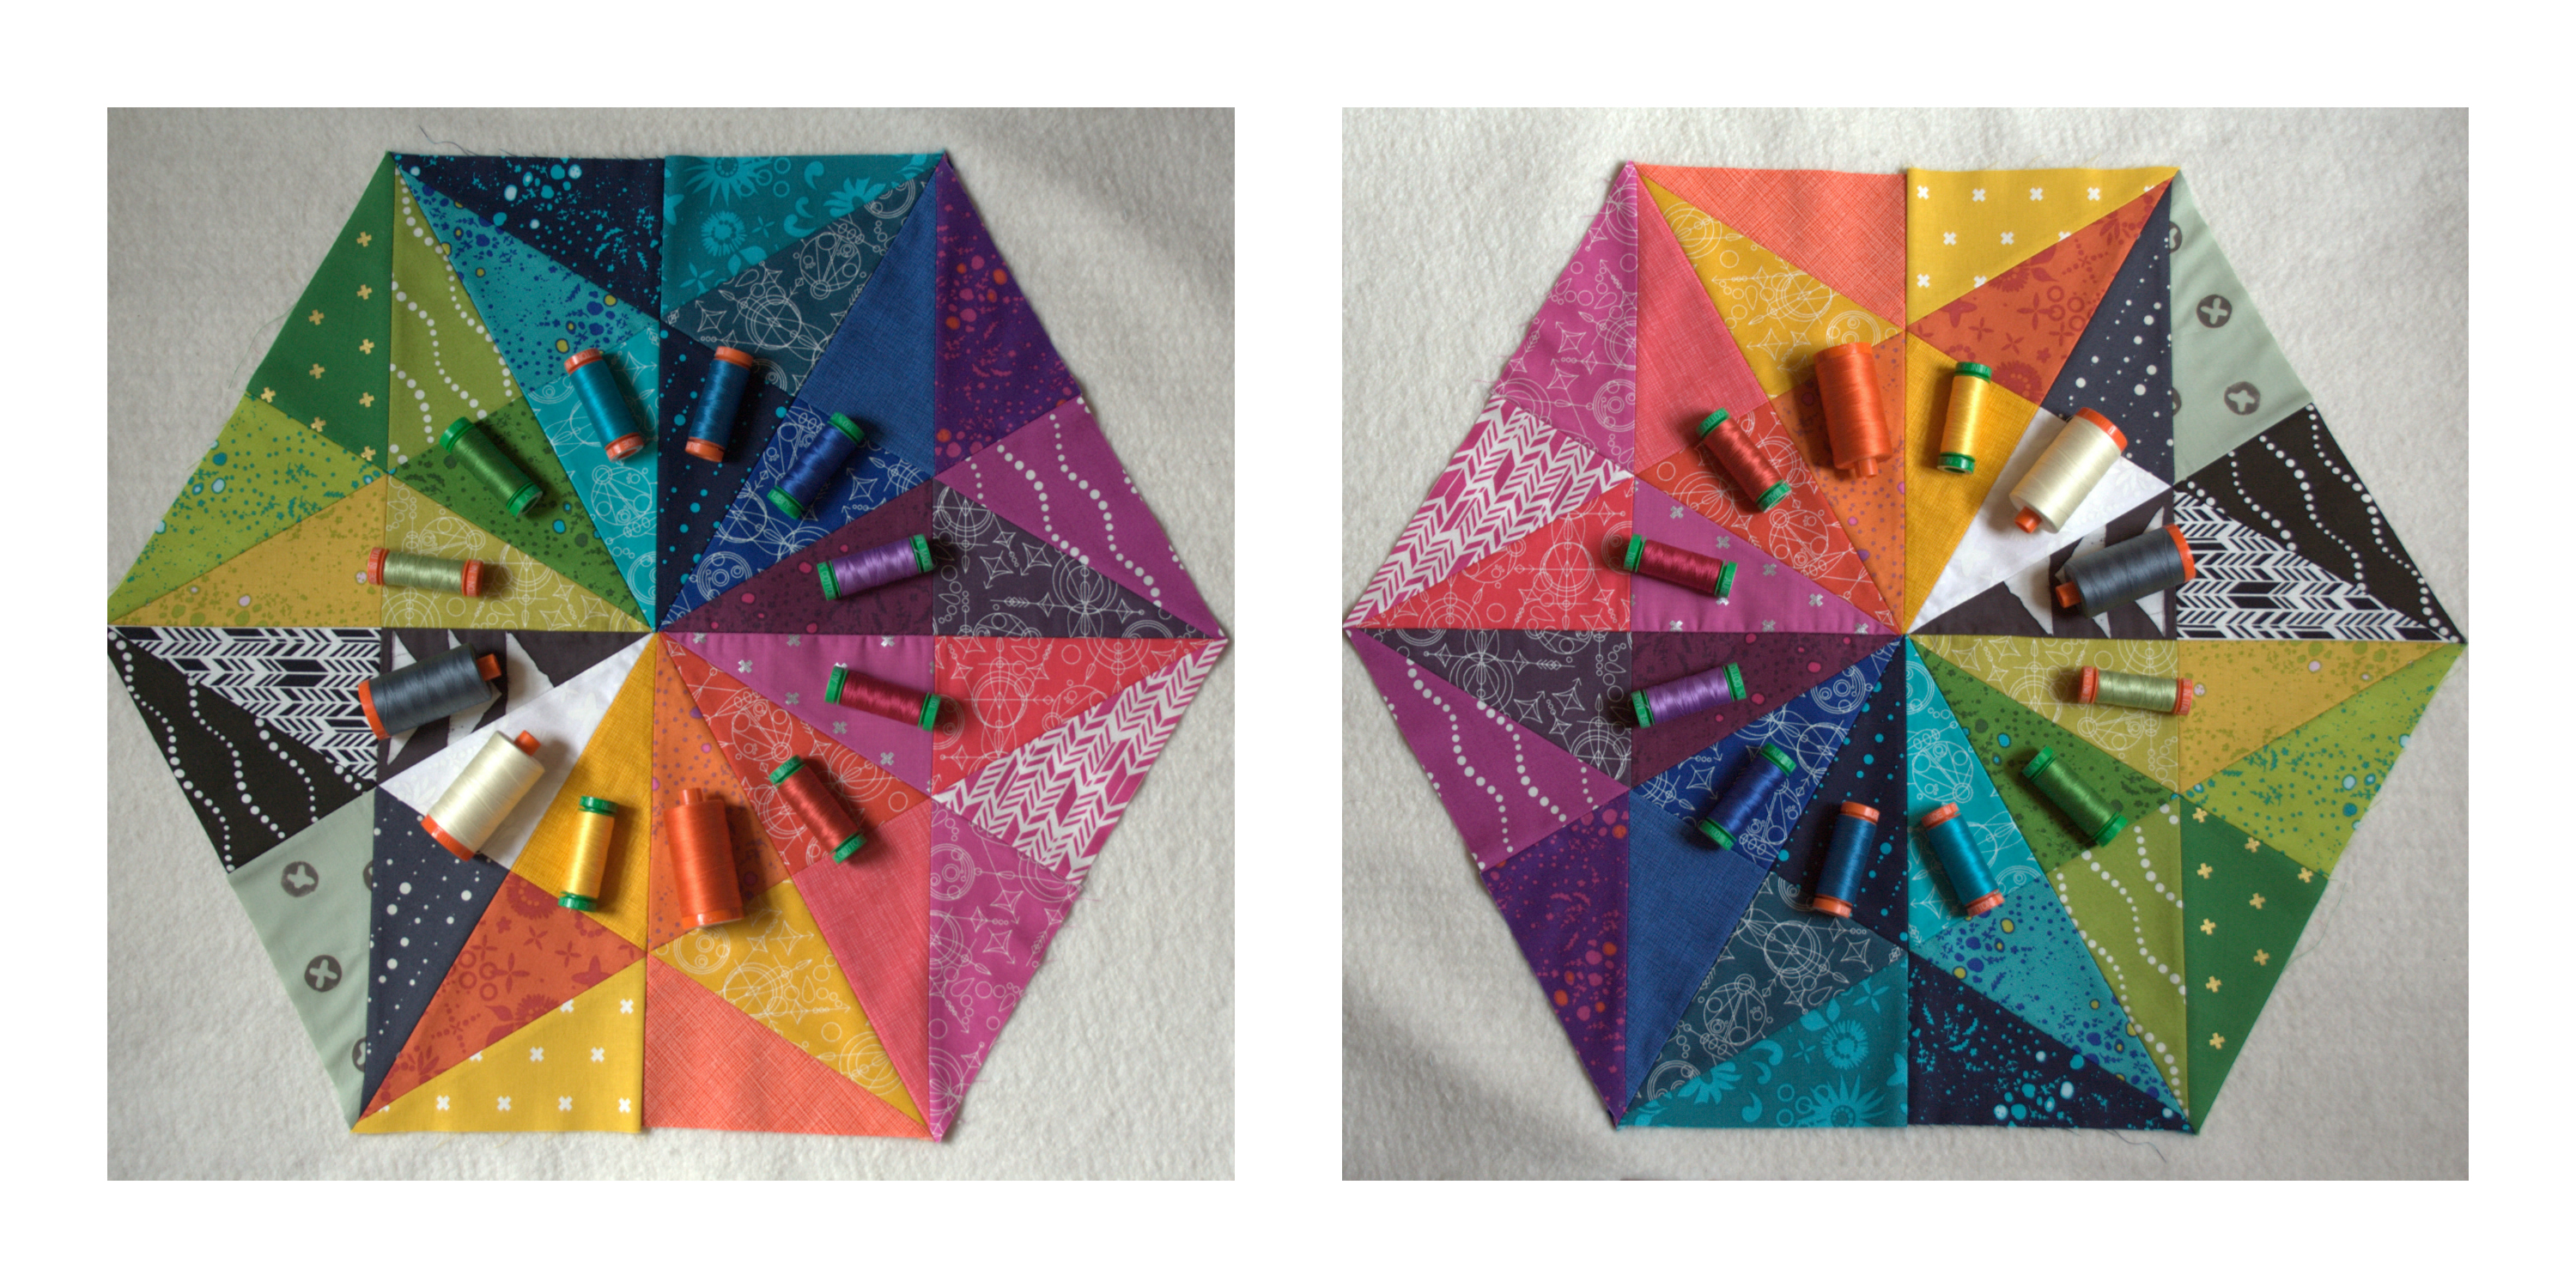
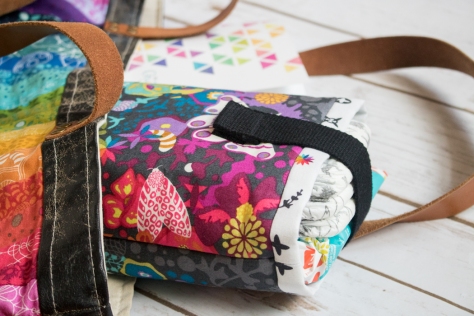
This pouch also perfectly coordinates with the amazing Alison Glass fabric bag my husband bought me for my birthday last year, made by the ever talented Kristy at Rock Baby Scissors. There’s no such thing as too much Alison Glass fabric, right?! No way!! What next?…. I’m thinking a few zip pouches to help organize the other contents of my purse. What’s your favorite simple zip pouch pattern? (Noodlehead’s Open-Wide Zippered Pouch is a fab one, but should I know about others?)

I’m linking up with Amanda Jean at Crazy Mom Quilts Finish it up Friday, and of course Yvonne’s Alison Glass Challenge. Yippee for gorgeous and functional finishes!

Favorite Finishing Techniques and Tools

With so many fabulous tutorials out there in this vast internet world, I try to avoid reinventing the wheel whenever possible. So far, when it comes to finishing my quilts and other stitched projects, I’ve had great luck in finding clear, well-written tutorials that help clarify exactly how to best finish a project. Today I thought it might be helpful for me to create a reference list of my top go-to finishing tutorials and tools to share with you.

finishing tips and toolsHere is a visual map I drew to help keep track of my favorite methods during an #Honestcraftroomies Periscope hop about this topic a few weeks ago, along with my top favorite finishing tools. (If you click the photo it should open in another tab a bit larger so that it’s easier to read. All of the information is in the blog post, too, though!)

I’ll begin by linking to each of my favorite finishing tutorials below with a brief explanation as to why it is a favorite (Each heading and photo link to the tutorial. Click and it will open in another tab. Peruse at leisure. Bookmark. Revel in sweet knowledge!)

Making Straight-Grain Quilt Bindings
by Bijou LovelyBijou Lovely making-quilt-binding

Holly DeGroot at Bijou Lovely was one of the first quilters I started following regularly, and for good reason. Her photos are superb and eye candy abounds! This tutorial is super straight-forward and has clear photos for every step. It also shows you how to get the end of your binding ready for the next step: attaching it to the quilt, which is very helpful. When binding any large, rectangular quilt, either entirely by machine or hand-stitched to the back, this is how I make my binding.

Attaching Binding to a Quilt
by Bijou Lovely 

Bijou Lovely binding attachingThis gets you set up for hand stitching your binding to the back of your quilt. The brilliance is in the overlap join where the beginning and end of your binding meet. For someone who initially struggled with getting that final binding seam sewn straight and in the proper place (hi, that’s me!), this tutorial was a lifesaver!

Machine Binding a Quilt
by Cluck Cluck Sew

Cluck Cluck Sew Machine-Binding-TutorialWhile I love hand stitching bindings to the backs of quilts, some quilts just warrant machine binding, either for durability or for the sake of saving yourself a bit of time.  This tutorial is fabulous! I now machine bind all baby quilts and kid quilts, and I use this tutorial to help machine bind things like mug rugs and table runners, too!

Binding Tiny Things
by Crazy Mom Quilts

crazy mom quilts binding tiny things mini tree and binding stripThis tutorial makes binding tiny things a breeze. Seriously! One tip I have to emphasize is the step where you press the binding away from the front of the quilt after sewing it on. This step makes all the difference in the accuracy of your final stitches and the overall perfection of your finished (finished! yay!) mini. If you are at all infected by the mini mini quilt bug, this tutorial is a must!

My Top 3 Finishing Tools

Finishing a quilt includes more than binding. To me, quilting and burying threads count within the ranks of “finishing steps”, too. I have three top tools that I couldn’t live without when it comes to actually quilting a quilt and burying all those threads. (Each tool name is linked to where you can buy it, but they are not affiliate links; they are just there for your convenience. I’ve heard rumors that Maine does not allow affiliate link payout, and I’m thinking they may be true. You probably will see a lot less affiliate links, but I will always link to products because I think it’s helpful to you!!)

Hera Marker

hera marker in useWhen I first heard of a Hera marker, I envisioned a special pen. The name is misleading a bit until you realize that it “marks” the quilt with creases, NOT with actual physical marks like a pen, pencil, or chalk would. (The white thing in the photo above is the Hera marker for those of you who have not yet heard of them). Hera markers are my go-to quilt marking tool, and I use one for marking straight lines for small quilting projects, marking increments before free motion quilting, marking seam lines when joining binding or sewing HSTs, and just about any other time I need to mark the fabric somehow.

Painter’s tape

painters tape marking quilt linesPainter’s tape is another fantastic tool for those of us who shudder at the thought of actually writing on a quilt top. I use painter’s tape to help keep straight line quilting evenly spaced and as a visual guide when sectioning off areas of free motion quilting. It is easily repositionable, and paired with a ruler, can be placed exactly straight. You NEED some of this in your quilting arsenal. (I also use it to tape up quilt blocks for photos!)

Self-threading needles

self threading needlesThese needles sound magical, and trust me–they are! When you have a gabillion threads to bury after epically quilting your quilt baby, the self-threading (also called easy-threading) needles are your bff (that stands for ‘best friend forever’, for those of you who aren’t savvy to teenage acronyms). The drawing I did of the self-threading needles shows how they work best (in my humble opinion) so I’ve included that above. Basically, they have an open top so that you can just pop your thread end right down into the eye of the needle, easily burying threads like a champ, again, and again, and again, and again…

I hope this collection of resources is helpful to you. There’s nothing like finishing a quilt, and these tutorials have helped those final steps be as smooth as possible for me. You know me; I love to share the love!

I’m sure there are more great tips and techniques that haven’t yet crossed my quilting path, and I’d love to learn about them. What are some of your favorite finishing techniques or tutorials that I haven’t included here? Thank you in advance for sharing!

I’m linking up with Tips & Tutorials Tuesday and Quilting Mod’s Lessons Learned Linky #3.

A Finish is a Finish, No Matter How Small (x4)

Lately, I’ve been sucked into the world of mini mini quilts, sparked by an Instagram post by my quilty blogger friend Michelle Bartholomew. The Mini Mini Quilt Swap, as far as I can tell, is an open swap of teeny tiny quilts (finishing usually between 3 – 5 inches square). It’s entirely independent, and up to you or a partner to send the invitation to swap, on you and your swap partner’s own set timeline, and open to as much fun and interpretation as you want. As Yvonne from Quilting Jetgirl said, it’s the perfect “Squirrel!” activity for quilters.

I have a big project to fini…. Squirrel! Off to the world of mini mini quilts.

mini mini quilt
The first two mini mini quilts I made.

I’ve finished four mini mini quilts so far and have at least two (more like three or four) in progress. You can see my mini minis in progress HERE. I have promised mini mini quilts to 9 people and have received 4 (5, technically, since Allison sent me two!) so far. They are a perfect little brain-rest in between bouts of completion on larger projects.

mini mini quiltThe first mini mini quilt I finished was inspired by Chawne Kimber’s Roberta quilts and her idea to sew SMALLER (check #sewSMALLER on Instagram to find her amazingly tiny and detailed quilting @cauchycomplete). I had played around with the idea after meeting Chawne and seeing her amazing work in person at the Slow Stitching Retreat hosted by Sam of A Gathering of Stitches this summer, and this mini mini was originally one of my play pieces. Michelle claimed it, I quilted it with a spiral and bound it with as much skill as an elephant threading a needle.

mini mini horrible bindingAs my first mini mini quilt bound, I was silly and tried a normal binding method, except thought it would be a good idea to join the binding at a corner (like a miter, right!?). Trust me, don’t do that. I’m seriously strongly considering ripping off the binding and giving it another go. In fact, I think I will. Sorry, Michelle, it will be a bit longer before your mini is in the mail.

mini mini quiltThe second mini mini I finished is for Yvonne, who said she liked rainbows and that I could have free reign. I first made the rainbow strips 1/4″ wide, but it ended up far too large.

mini mini quilt rainbowSo I channeled Chawne and sewed smaller… these finished rainbow bars finish at about 3/16ths of an inch. In my typical style, this mini is rainbow with a black/grey contrast (it’s either that or low volume, right!?).

mini mini quilt rainbow place to call homeI added a little meticulously cut bit of Medrona Road that says “a place to call home”. Without going into too much detail, one of the projects Yvonne is undertaking in an ongoing manner is her Reclamation Project, where she creates quilts with a personal statement. As she says, she “decided to take seeds of inspiration I found in song lyrics to create my own unique poetry in the form of a simple haiku. Once I had derived my own original work, my goal was to use my poetry as design inspiration for a mini quilt.” (from her Reclamation Project intro) From these projects, and through knowing Yvonne for nearly 2 years (really!?), I know that Yvonne has moved quite a bit in her life. I mean this mini mini quilt as a positive reminder that now that she’s found quilting, she will always have a place to call home. Home is where your sewing machine is, right?!

I quilted this mini mini with 50wt Aurifil 2600 – Dove around the text, and then used 12wt Aurifil in coordinating colors to hand quilt a single stitch above and below each rainbow bar. I think it’s the perfect amount of quilting to bring out the colors without detracting from the overall clean aesthetic of the quilt. I hope Yvonne loves it!

improv mini mini quiltNext, I attempted my first improv and resulted in this mini mini. I love the scrappy binding and the gold 50wt Aurifil works great to bring out the pops of gold in the quilt. This mini mini is not yet claimed, but I figure I will make a few more and then email the folks with whom I agreed to swap and let them choose a mini mini of their liking.

improv mini mini quiltI like the backing, too, which is a scrap of a fun low volume print called Passport Charcoal Etchings by 3 Sisters for Moda included in the low volume fat quarter bundle I put together for Fiddlehead Artisan Supply early in the summer.

mini mini modern hexiesFinally, I made what is perhaps my favorite mini mini to date: my ultra tiny modern hexies mini mini, with 1/4″ EPP hexagons glued and sewn according to Nicole at Modern Handcraft‘ awesome Modern Hexies tutorial, and finishing at 4 1/2″ square.

teeny tiny modern hexies mini mini quiltI wasn’t sure if these tiny hexies would work, but with forgoing actual basting (I just used a hot iron and Flatter to press the fabric around each tiny cardstock template), and using a toothpick for fine-tuning placement, it all worked quite smoothly! I quilted with 50wt Aurifil 2600 – Dove and bound in one of my favorite Carolyn Friedlander prints from her Botanics collection.

teeny tiny modern hexies mini mini quiltNow that I’ve bound four of these mini minis, I think I’m beginning to get the hang of a method that works. A single fold binding, joined before it’s attached to the quilt, and sewn to the back before top stitching to the front seems to work the best for me. As you can see, the bottom left corner of the modern hexies mini is a *bit* mis-calculated, but the rest of it is spot on. I’m planning to send this one to Jennifer at Little Black Cat quilting, since it’s somewhat inspired by the gorgeous mini mini she made for me!

I’m linking up with Crazy Mom Quilts Finish it up Friday for the first time in a LONG time. But, hey! A finish is a finish, no matter how small.

Alison Glass Prismatic Medallion Flimsy Finish

Choosing fabrics for the Prismatic Medallion mini quilt pattern has been hands down the most difficult part of the entire process. As you read in my last progress post for this project, I have been humming and hawing over fabric choice and placement for the last few sections of the quilt for about a month. Finally, this past week, I bit the bullet, made the decision, and finished sewing together the quilt top. Verdict: I LOVE it!

prismatic medallion flimsy finish and matching aurifil threadI realized that I didn’t take a single photo of the flimsy without the matching Aurifil thread on top, so I apologize! Then again, I don’t really apologize, since how gorgeous is that thread circle paired with the quilt top!?

Ultimately, I opted to add some Carolyn Friedlander Architextures Crosshatch in Tangerine to balance out the yellow-orange section, and swapped out some of the more saturated magenta/red Alison Glass Sun Prints for her Feathers in Dahlia, and added in a pinky-orange Sketch section to finalize the magenta-red section. I’m really happy with the outcome.

While photographing this mini, I realized that when viewed from different perspectives, the entire look of the quilt changes. Here is the exact same photo from above, just taken upside-down (or right-side-up?):

prismatic medallion flimsy finish and matching aurifil threadHere they are side by side, with a wide white border so that you can view each individually.

AG Prismatic Medallion compare

Is it just me, or do they look completely different depending on what side you call the top? For this reason, I think I will hold off on attaching a hanging sleeve to this mini before mailing it off to my Alison Glass Mini Quilt Swap partner. That way, while it means they will need to handle hanging “hardware”, they can decide what aesthetic view they prefer.

AG Prismatic Medallion compare

AG Prismatic Medallion compare
Aurifil fairy circle

As you can see, I had a lot of fun going through my Aurifil thread stash to find matching thread. My penchant for rainbows paid off, since I had an exact match for most of the colors, and a reasonable match for the remaining one or two.

I decided on a prismatic-style quilting pattern, in lieu of the basic “echo quilting the seams” and I’m silly excited about it. I actually finished quilting this yesterday (shhh don’t tell), but haven’t buried any of the threads or tackled binding yet. The full finish will have to wait, but I’m getting close!

It feels good to have finally made the fabric choice decision and have this mini quilt on the fast track to “finished”. I’m also doubly excited now that I have enough fabric half-rectangle-triangles to make a duplicate of this mini. That’s a definite plus to the Prismatic Medallion pattern–two quilts with one cutting bout!

I’m linking up with Crazy Mom Quilts Finish it up Friday and TGIFF.


Twirling Star Mini Quilt Finish {Pattern Testing for Devoted Quilter}

Visitors entering our home will now be greeted by a bright and colorful quilt (of course we will also greet any visitors in person… but, you know what I mean!). I’ve finished the Twirling Star mini quilt I was testing for Leanne at Devoted Quilter, and I’m loving it in its new home.

twirling star mini quilt finish

It was really fun to make Leanne’s pattern with a modern aesthetic. Here’s Leanne’s version:

Twirling Star Mini Leanne's VersionI love how different choices of fabric and colors can completely change the look of a quilt. The mini quilt finishes at 19 1/2″ x 19 1/2″ and features both traditional piecing (the hourglass blocks) and paper piecing (the pinwheel blocks). The pattern also includes a coloring page, where you can test out different color arrangements before starting. I tried out a lot of different color possibilities before deciding on this one, and the coloring page is KEY (and so much fun). Leanne’s pattern is now available in her Etsy and Payhip shops, so if this looks like a mini you’d like hanging in your home, too, head on over and buy the pattern!

twirling star mini quilt finishI decided to quilt this mini with one big radiating spiral, and I’m quite happy with how it turned out. I followed the tutorial on Crazy Mom Quilts and began the spiral with free motion quilting (FMQ) in the center and then switched to my walking foot for the outer spirals. Since I have yet to find an actual pen/chalk/pencil that I trust for writing ON my quilts, so I decided to just wing it and do it by eye. I’m quite happy with how it turned out, and it was a lot easier than I anticipated.

center of spiral quilt patternOnce I quilted past the center, I switched to my walking foot, which proved to be a lot more difficult than I anticipated. Keeping a steady curve with the walking foot was tough, although I can see that I did improve as I moved outward, either the result of more practice or the less severe angle. As with any quilting, I found that I was more consistent with spacing and more accurate with the curve when I went slowly.

quilting "jump"
A little quilting “jump” as a result of less-than-smooth maneuvering with the walking foot.

There were quite a few “jumps” where I had stopped sewing to reposition the quilt under my machine and must have restarted sewing with too much torque on the quilt. Either that, or perhaps I tried to turn the curve while my machine was stopped. (You can see one of the “jumps” in the bottom of the blue triangle. Just a little wiggle.) If I were planning to submit this quilt to shows or give it to someone who would noticed the imperfections (are there such gift-quilt recipients?), I might have ripped out the quilting and tried again. But for this, a quilt meant to hang in our own entryway, I opted to just let them be. When you step back and view the quilt as a whole, the imperfections are lost.

twirling star mini quilt finish

I didn’t keep track of the time I spent making this quilt, but here are the other quilt finish stats:

Twirling Star Mini Quilt

Completed April 2015
Pattern: Twirling Star Mini Quilt pattern by Leanne at Devoted Quilter
Size: 19.5″x19.5″
Fabric: Pinwheels are pieced using rainbow fabric from Alison Glass’s 2015 Sun Prints, Mercury and Grove (Andover Fabrics), with a background of Modern Floral in Charcoal from the Botanics fabric line by Carolyn Friedlander (Robert Kaufman Fabrics).
Hourglass blocks are pieced using Scribble Notes in Black from the Architextures fabric line by Carolyn Friedlander (Robert Kaufman Fabrics) and Make and Pin fabric from the Makers fabric line (Art Gallery Fabrics).
Border is Ink in Charcoal from Alison Glass’s 2015 Sun Prints (Andover Fabrics).
Binding is Black Kona cotton (Robert Kaufman Fabrics).
Quilting: Spiral quilting using free motion quilting in the center and a walking foot for the outer spirals
Thread: Aurifil 50wt 2600 – Dove for piecing and quilting
Related blog posts: Embrace the Rainbow, Twirling Star Flimsy Finish

I’m linking up with Crazy Mom Quilts Finish it up Friday.


A Tea Cozy for Every Season: Valentine’s and Spring

“A tea cozy for every season,” requested my mom when we were talking about making quilts for family members. My mom loves tea and drinks a pot of tea every afternoon–no, she’s not even English!–so it really is a perfect gift.  For Christmas, I gave her the first seasonal tea cozy for the winter holidays, which you can see in my post Finishes New and Old. Today I sewed on the bottom binding, finishing the next seasonal tea cozy, which should take her into summer. I used Yvonne’s (Quilting Jetgirl) tea cozy tutorial, so the tea cozy is completely reversible and is suitable for two seasons in one!

One side is perfect for Valentine’s Day, since I used my Key to my Heart pattern:

tea cozy valentine's day

The reverse side features a bicycle inside the heart, which I think will be perfect for spring. My mom also loves bicycling, and she and my dad are known to plan vacations that include cycling from bed and breakfast to bed and breakfast in awesome European countries, where they surely enjoy actual tea time.

bicycling tea cozy

I thought about putting both hearts on one side of the tea cozy, but decided make one the “inside” and one the “outside”, with a coordinating solid backing. This way, one side of the tea cozy can be perfect for Valentine’s Day…

tea cozy valentines dayThen after February passes, you can just flip the tea cozy inside out and the other side is perfect for spring.

spring tea cozy bicycle

I technically made the Valentine’s Day side on the “inside” since I figure the bicycle will probably be shown more often. When turned to the Valentine’s Day side, the tea cozy is a little bit snug on my teapot (as you can see in the photo above), but I’m not too worried. I know my mom has a few different tea pots and I’m sure it will fit on one of them!

Now all I have to do is encourage my kids to finish their cards for Grandma (my mom) & PopPop (my dad) and get this all in the mail so it arrives in New Jersey before the 14th. I’m excited that I finished it in time, and hope my mom loves it as much as I do. This “tea cozy for every season” project is making me want a tea cozy of my own!

valentine's tea cozy

I’m linking up with Crazy Mom Quilts for Finish it Up Friday.

A Secret Finish {Still Secret}

I did it! I set my goal to finish this quilt in January for A Lovely Year of Finishes (ALYoF), thinking it would be quite an accomplishment if I met it by the end of the month. But lo, here we are on January 30th (with still one more day to finish burying those last threads and defluffing) and I have a finished quilt!

Doe Secret Quilt Peek
I can’t show you any more than this tease of a peek at the binding and folded back, but I promise the full reveal will be soon. Since my tardy goal-setting post on January 14th, I’ve pieced the quilt back–including my first ever needle-turn applique–, layered and basted, quilted on my domestic machine–both straight line quilting with a walking foot and free motion quilting–, and bound this quilt. For slow sewing me, that is quite an accomplishment. Enough of an accomplishment, in fact, that I felt the need to take the quilt out into the snow to take some sneak peek photos so that I could post them here as proof–it’s finished!

doe secret quilt peek
Everyone takes their newly finished quilts out into a snowstorm to take photos, right?

doe secret quilt peekI can’t wait to show you more of this quilt. But I will. I’m planning an epic whole-family quilt photo shoot this weekend, weather and toddler willing, so you will get to see every detail. Soon.

For now, I’m linking up with ALYoF to document my January success, and Crazy Mom Quilts Finish it up Friday.

Off I go to bury some more threads!


A Modern Hexies Mini Finish

I’m sneaking in one last post before I disappear for a few weeks on a much needed vacation & blogging break. I finished the mini quilt I’m making for my partner in the Schnitzel and  Boo Mini Quilt Swap, and I just have to share! I have loved working on this quilt, and I’m pretty certain my partner will love it, too! Nicole at Modern Handcraft has a wonderful tutorial on this short-cut hexagon quilting method. I’ve done some blogging (and a lot of Instagramming) about my progress on the quilt, which you can read here and here.

Are you ready for a total photograph color explosion? Okay, good. I took a LOT of photos of this baby, and in my usual style I can’t choose just one.

modern hexies mini quilt finish
I took the quilt to the city (Bangor, ME) to find a good brick wall on which to photograph it. I wanted to mix it up a bit from my usual shed/barn side backdrop. I love the effect!

modern hexies mini quilt finish

modern hexies mini quilt finish

modern hexies mini quilt finish
A little angle from the left…
modern hexies mini quilt finish
A little angle from the right…

modern hexies mini quilt finish

modern hexies mini quilt finish
I decided to bind the quilt in one of my favorite low volume prints from Carolyn Friedlander’s Botanics collection. I used light grey aurifil to quilt it, and the grey on this print ties it together nicely without distracting the eye from the colorful hexies.
modern hexies mini quilt finish
Oh how I love depth of field!
Finished quilt stats:

Name: Modern Hexies Mini Quilt (for Schnitzel and Boo, Round 3)
Size: 24″ x 18″
Fabric: Hexies are primarily Anna Maria Horner’s True Colors collection, with supplements from my stash (including but not limited to Carolyn Friedlander’s Botanics, Timeless Treasures Sketch, other Anna Maria Horner fabrics); backing Kona Snow; binding is Carolyn Friedlander’s Leaves in Charcoal from Botanics.
Quilting: Straight-line quilted through each hexagon, lines 1″ apart
Thread: Aurifil 50wt 2615 – Aluminum (light grey) and 28wt 2000 – Light Sand in the bobbin
Finished: December 2014
Related blog posts: Schnitzel and Boo Mini Quilt Swap: I’m in!, A Mini Sneak Peek, Modern Hexies Mini Progress

I’m linking up to Crazy Mom Quilts’ Finish it up Friday!

A Perfect Pair: Wine and Fabric {Tremolo}

It’s been a while since my last wine and fabric pairing post, and there’s a good reason for it: I’m expecting baby #3 and therefore haven’t been drinking any wine! Now that the cat’s out of the bag, you will understand my relative blogging silence the past few months. The first trimester is exhausting, meaning my late night quilting was replaced by sleeping!

This past week, though, my parents came to visit, and when I saw one of the bottles of wine my dad brought along, I immediately was inspired to make a quilt. Or, in this case, a small pincushion for starters.

Tremolo wine  inspired pincushion quilting

Tremolo wine  inspired pincushion quilting

My first thought when I saw the 2013 Tremolo Malbec from Mendoza, Argentina (other than “Man, I wish I could have some wine”) was how the sound waves would make a cool quilt.

Tremolo definition from google

I did a bit of googling to see if I could find any existing sound wave quilts, and then decided to make my own practice version in the form of a pincushion. At first I was going to make it longer with gradating colors from dark to light, but due to time and resulting size I limited myself to just one sound wave.

tremolo sound wave quilt pincushion

I used almost entirely scraps, but needed to cut one more 3/4″ strip of Carolyn Friedlander’s beloved botanics fabric for background. I’m mostly happy with how this turned out, but I feel like the strips should could be skinnier. Perhaps on a larger scale (think: pillow or quilt), the strips could be wider and still have the right sound wave generating effect. As it was, 3/4″ strips (finishing at 1/4″) were pretty tiny, and still look too wide for my taste.

tremolo sound wave quilt pincushion

I do love the quilting, though!! I jumped right into free motion quilting a sound wave zig-zag right on top. I intentionally bumped out into the background a bit, mimicking the fluctuations of an actual sound wave. I used Aurifil 2810 – Turquoise 50 wt thread, which coordinated with the sound wave, but contrasted enough so that the stitches are very visible (and audible?)

tremolo wine inspired quilted pincushion

My dad reported that the Tremolo wine is very good, and nice and smooth. The label description says: French-born winemaker Didier DeBono crafted this 100% Malbec from grapes grown on two special, high-elevation vineyard sites in Mendoza. A Tremolo is an aurally pleasing musical effect we were reminded of upon tasting this harmonious, balanced wine. It sounds like my dad agrees, and that the inspiration can be extended visually, to music-inspired quilting!

tremolo wine inspired quilted pincushion

There you have it: another perfect wine and fabric pairing. Drink Tremolo while you work on your musically-inspired quilt, whether it be a tiny pincushion or a king sized quilt!

The perfect pair:

Fabric
Any music or sound wave-inspired sewing
My mini tremolo pincushion included:

Front (Collection/Designer/Manufacturer):
Scraps of:
*  Botanics/Carolyn Friedlander/Robert Kaufman Fabrics – background
*  Plum Rose/Blank Quilting – sound wave

Back (Collection/Designer/Manufacturer):
*  Tree of Life/Chong-a Hwang/Timeless Treasures Fabrics

Wine
Varietal: Malebec
Producer: Tremolo
Vintage: 2013
Location: Mendoza, Argentina

Tasting notes from website: Rustic, earthy and even a bit restrained at first, after some air this wine will reveal excellent fruit concentration with notes of dark cherry and blackberry, plus a hint of vanilla and a meaty, earthy finish. It finishes dry and will leave you thirsting for more – especially if you’re having it with grilled meat.

Or if you’re in the middle of an aurally and visually pleasing quilting project. A perfect pair, indeed.

Here are two of my favorite sound wave-esque quilts I found during my google search:

Piano Keys quilt by Avis Collins Robinson
Piano Keys by Avis Collins Robinson

This beauty was found on the November 1, 2009 tumblr post on http://allfortheloveofgooddesign.tumblr.com/.  It’s a photo taken at the African American Quilts exhibit at the Nelson Gallery, of a quilt called Piano Keys by Avis Collins Robinson.

tuning forks quilt by heather preggers
Tuning Forks #11 by Heather Preggers

I absolutely love this quilt by Heather Preggers. Visit her blog to read more about her thought process and creation of this quilt. She also has many other variations of this tuning forks quilt, since she’s admitted she is somewhat obsessed with them! They are all gorgeous and resonate with sound and movement.

I’m linking up with Crazy Mom Quilts Finish it up Friday, since I finished my pincushion and paired a nice wine!

Friday Finish: Pink & Grey Baby Plus Quilt

It’s been a productive sewing week, and with another chunk of uninterrupted sewing time today, I was able to complete the Pink & Grey Baby Plus Quilt I’ve been wanting to finish! I definitely will incorporate more solids into the mix the next time I make a plus quilt, but I am very happy with how this quilt turned out.

pink and grey baby plus quilt top finish

My adventures photographing the quilt top were a reminder as to why I really need to buy some washi tape! Blue painters tape does the trick, but doesn’t really add to the aesthetic. Blue bits aside, here are some photographs of my finished flimsy:

pink and grey baby plus quilt top finish

I was inspired by Michelle Bartholomew’s quilt photography, especially for her Barn Door Quilt, for this photo shoot locale. My quilt is hanging on the side of our shed, which is not exactly a barn, but the “X” door complements the plus quilt so well, the math geek in me just couldn’t resist. I think the grey in the shed also brings out the grey in the quilt. It was a match that was just waiting to happen.

pink and grey baby plus quilt top finish
I love when seams match perfectly!

pink and grey baby plus quilt top finishNow that the quilt top is complete, it’s all set to go to Stephanie & Michelle in Austin for some longarm quilting. Once Stephanie is finished working her magic, this quilt will be posted for sale in our Late Night Baby Etsy shop. It will be my first contribution, so I’m excited to finally get it finished.

pink and grey baby plus quilt top finish

I’m linking up with Crazy Mom Quilts Finish it up Friday & TGIFF.

tgiff-button-blog