Tag Archives: pattern testing

Twirling Star Mini Quilt Finish {Pattern Testing for Devoted Quilter}

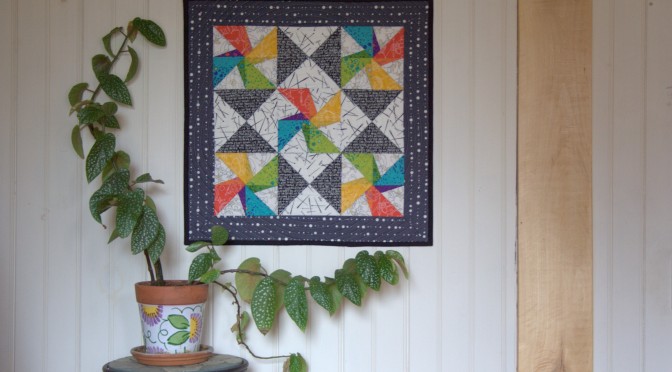
Visitors entering our home will now be greeted by a bright and colorful quilt (of course we will also greet any visitors in person… but, you know what I mean!). I’ve finished the Twirling Star mini quilt I was testing for Leanne at Devoted Quilter, and I’m loving it in its new home.

twirling star mini quilt finish

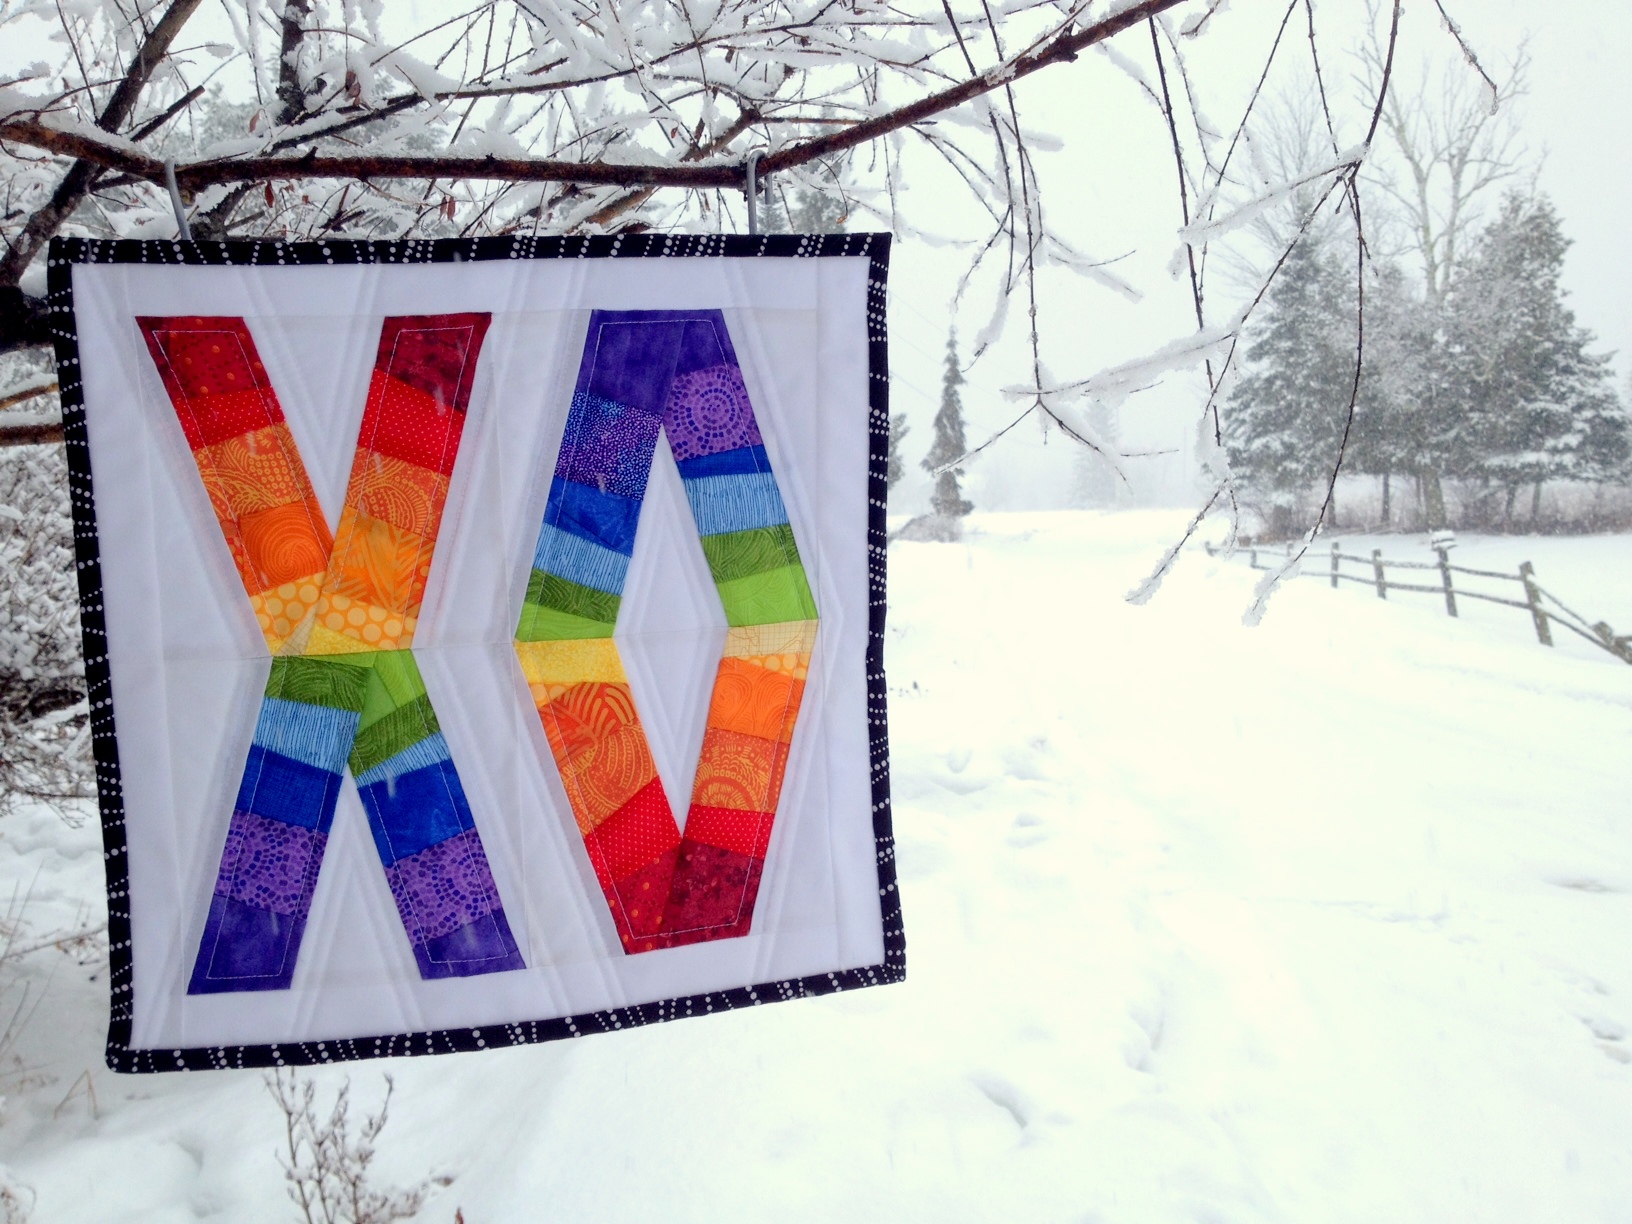
It was really fun to make Leanne’s pattern with a modern aesthetic. Here’s Leanne’s version:

Twirling Star Mini Leanne's Version
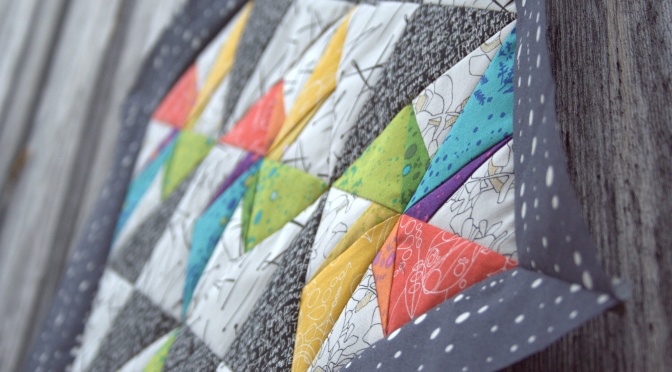
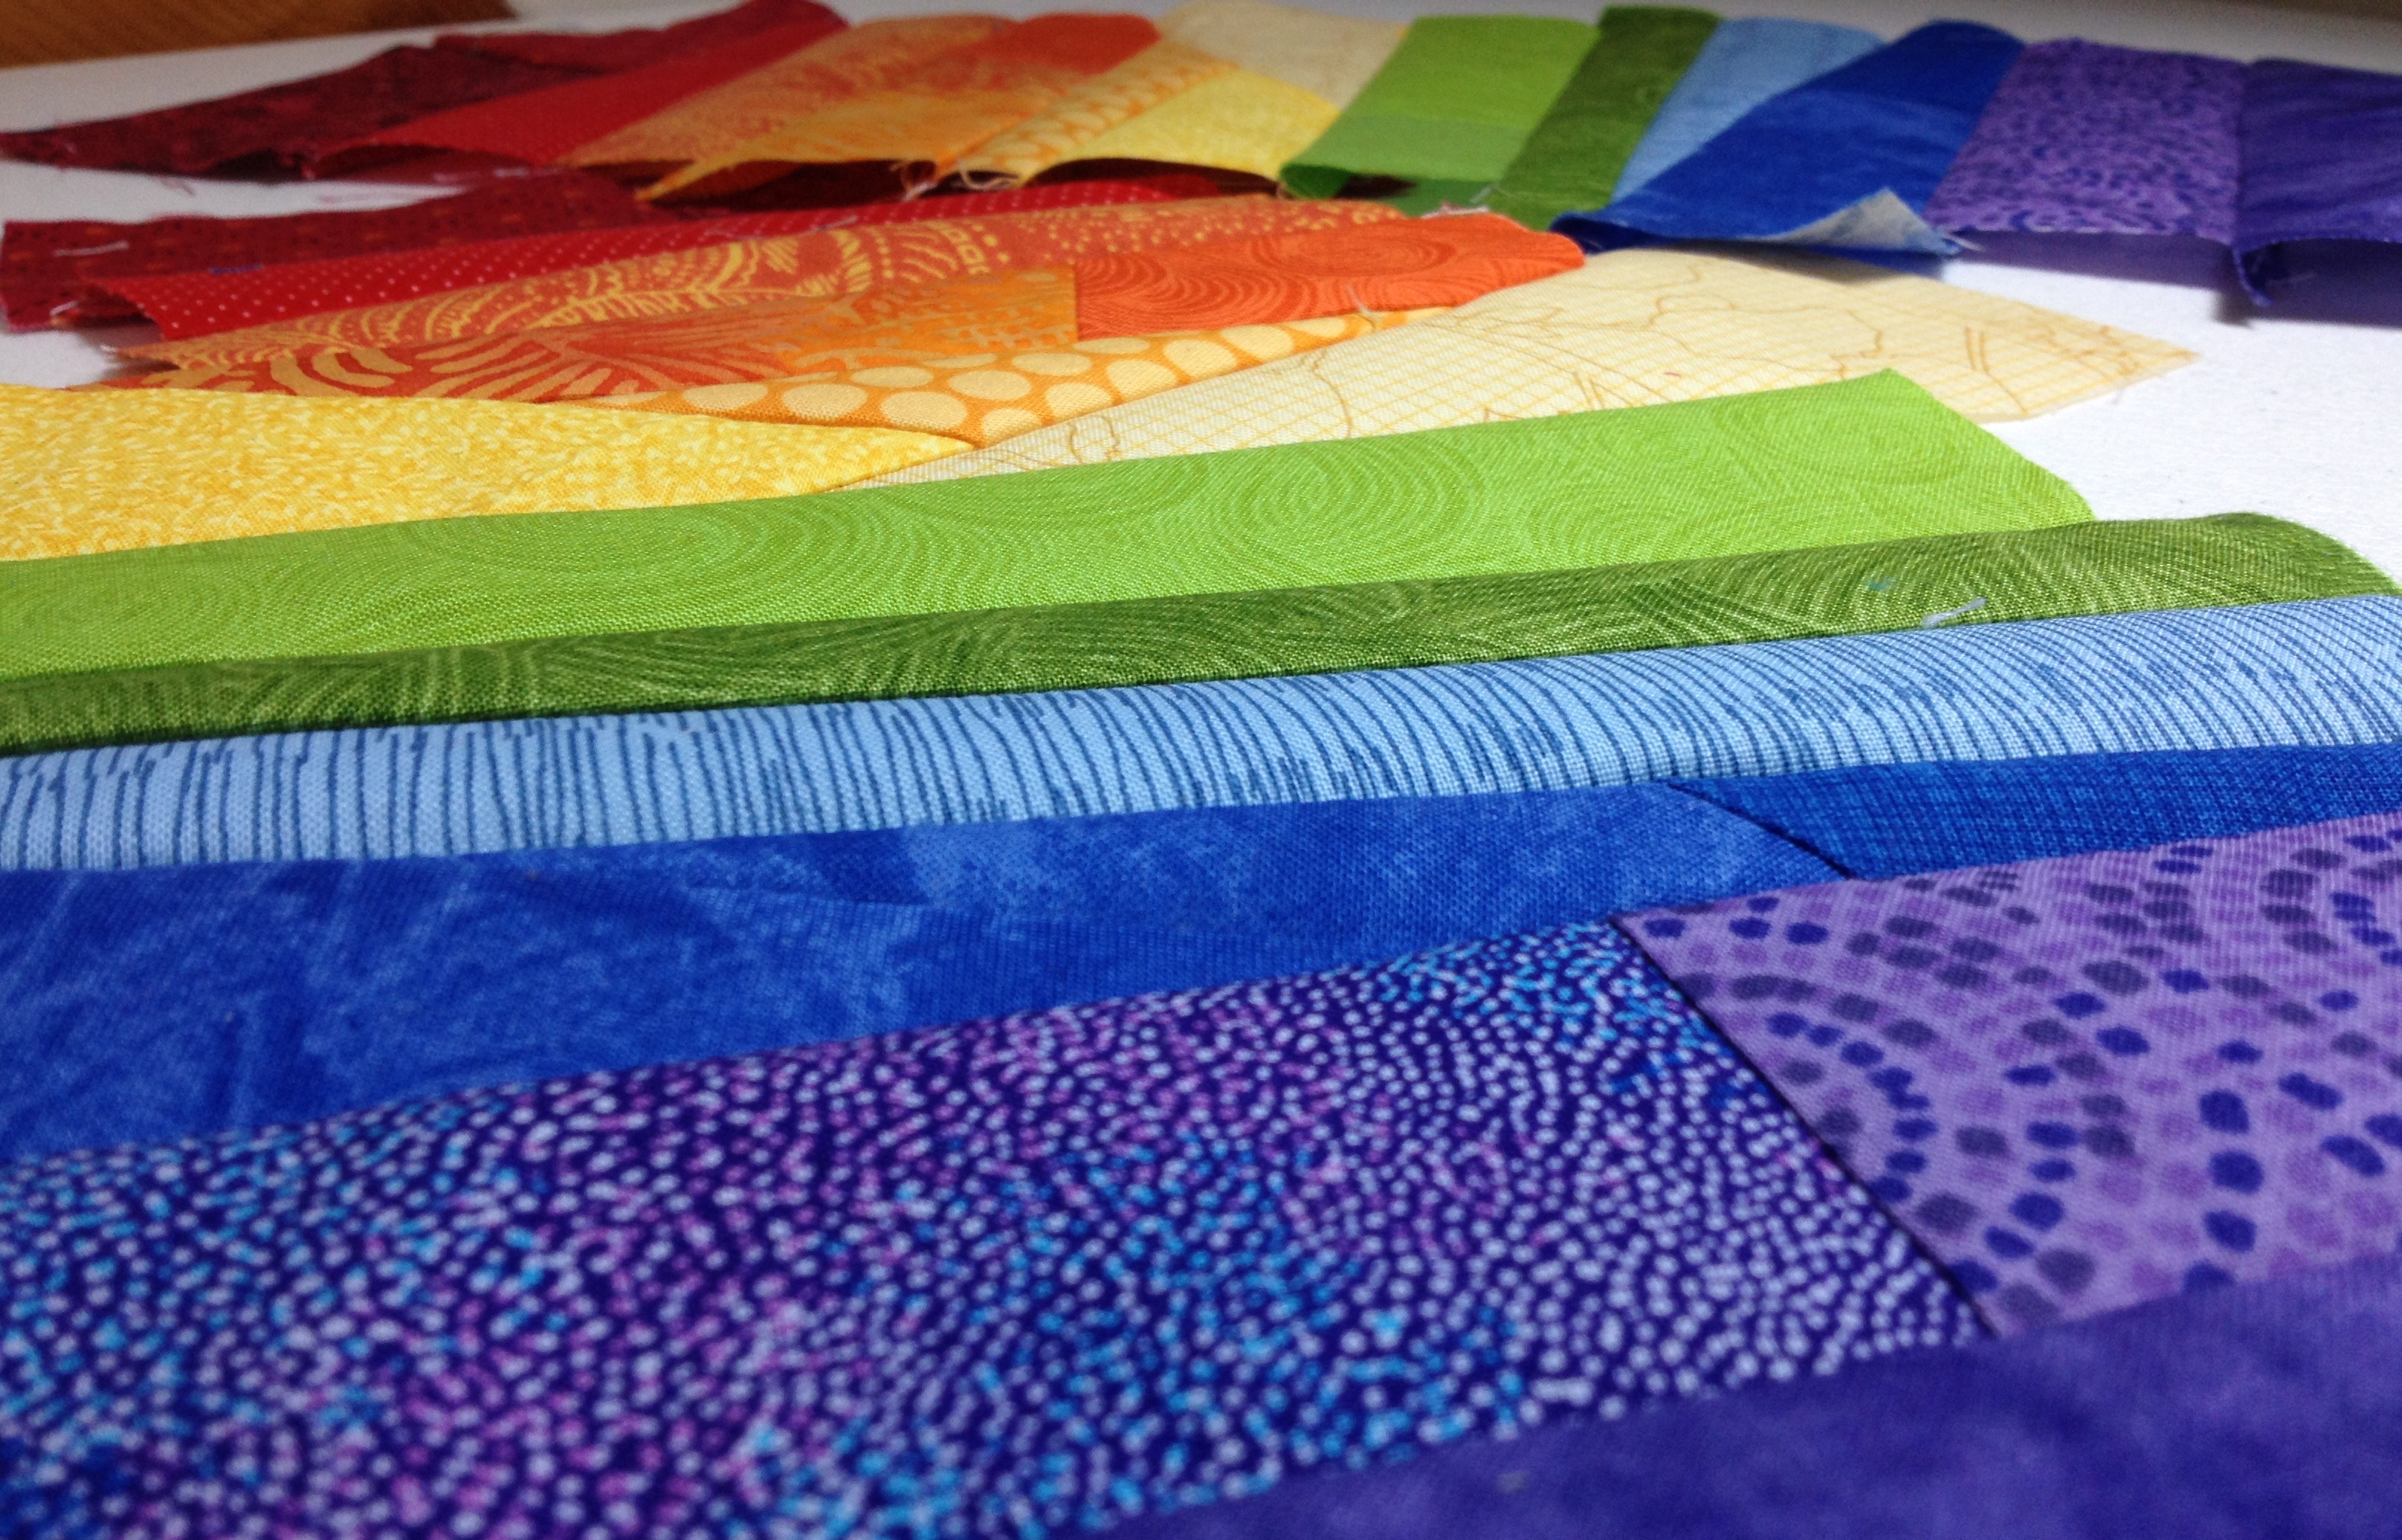
I love how different choices of fabric and colors can completely change the look of a quilt. The mini quilt finishes at 19 1/2″ x 19 1/2″ and features both traditional piecing (the hourglass blocks) and paper piecing (the pinwheel blocks). The pattern also includes a coloring page, where you can test out different color arrangements before starting. I tried out a lot of different color possibilities before deciding on this one, and the coloring page is KEY (and so much fun). Leanne’s pattern is now available in her Etsy and Payhip shops, so if this looks like a mini you’d like hanging in your home, too, head on over and buy the pattern!

twirling star mini quilt finishI decided to quilt this mini with one big radiating spiral, and I’m quite happy with how it turned out. I followed the tutorial on Crazy Mom Quilts and began the spiral with free motion quilting (FMQ) in the center and then switched to my walking foot for the outer spirals. Since I have yet to find an actual pen/chalk/pencil that I trust for writing ON my quilts, so I decided to just wing it and do it by eye. I’m quite happy with how it turned out, and it was a lot easier than I anticipated.

center of spiral quilt patternOnce I quilted past the center, I switched to my walking foot, which proved to be a lot more difficult than I anticipated. Keeping a steady curve with the walking foot was tough, although I can see that I did improve as I moved outward, either the result of more practice or the less severe angle. As with any quilting, I found that I was more consistent with spacing and more accurate with the curve when I went slowly.

quilting "jump"
A little quilting “jump” as a result of less-than-smooth maneuvering with the walking foot.

There were quite a few “jumps” where I had stopped sewing to reposition the quilt under my machine and must have restarted sewing with too much torque on the quilt. Either that, or perhaps I tried to turn the curve while my machine was stopped. (You can see one of the “jumps” in the bottom of the blue triangle. Just a little wiggle.) If I were planning to submit this quilt to shows or give it to someone who would noticed the imperfections (are there such gift-quilt recipients?), I might have ripped out the quilting and tried again. But for this, a quilt meant to hang in our own entryway, I opted to just let them be. When you step back and view the quilt as a whole, the imperfections are lost.

twirling star mini quilt finish

I didn’t keep track of the time I spent making this quilt, but here are the other quilt finish stats:

Twirling Star Mini Quilt

Completed April 2015
Pattern: Twirling Star Mini Quilt pattern by Leanne at Devoted Quilter
Size: 19.5″x19.5″
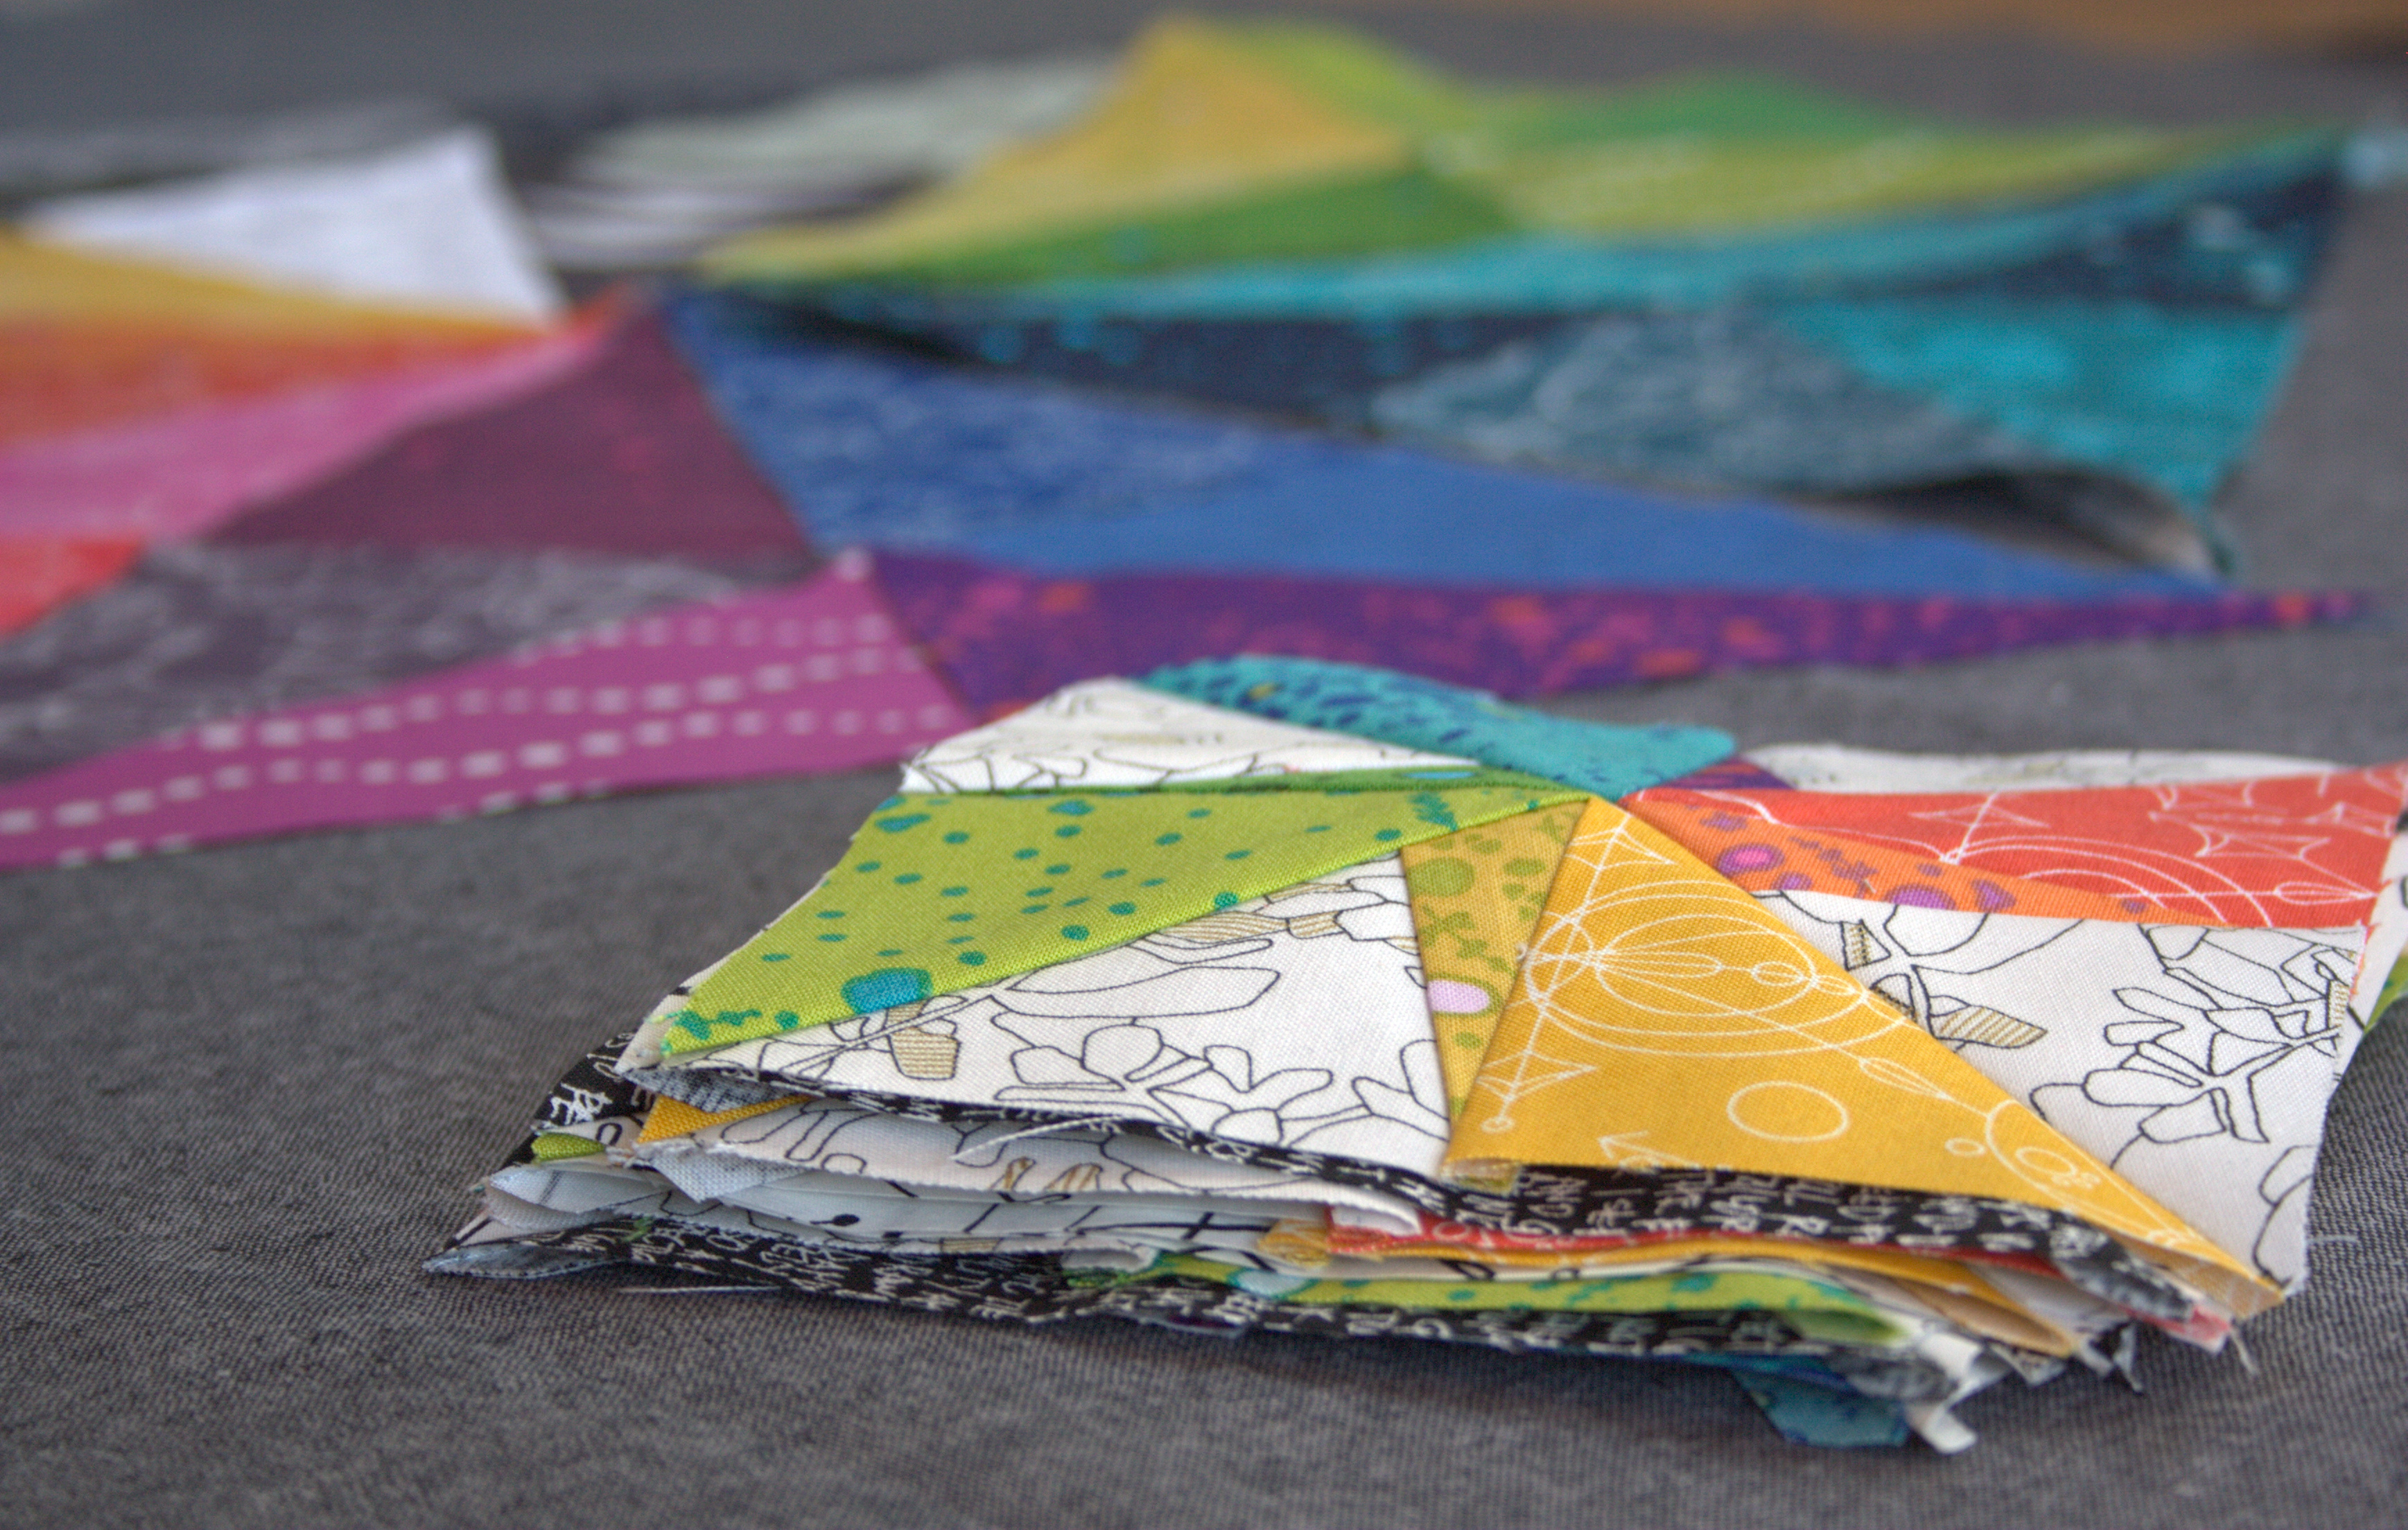
Fabric: Pinwheels are pieced using rainbow fabric from Alison Glass’s 2015 Sun Prints, Mercury and Grove (Andover Fabrics), with a background of Modern Floral in Charcoal from the Botanics fabric line by Carolyn Friedlander (Robert Kaufman Fabrics).
Hourglass blocks are pieced using Scribble Notes in Black from the Architextures fabric line by Carolyn Friedlander (Robert Kaufman Fabrics) and Make and Pin fabric from the Makers fabric line (Art Gallery Fabrics).
Border is Ink in Charcoal from Alison Glass’s 2015 Sun Prints (Andover Fabrics).
Binding is Black Kona cotton (Robert Kaufman Fabrics).
Quilting: Spiral quilting using free motion quilting in the center and a walking foot for the outer spirals
Thread: Aurifil 50wt 2600 – Dove for piecing and quilting
Related blog posts: Embrace the Rainbow, Twirling Star Flimsy Finish

I’m linking up with Crazy Mom Quilts Finish it up Friday.


Twirling Star Flimsy Finish

I have had such a fun time testing the Twirling Star pattern for Leanne at Devoted Quilter. The pattern is a combination of traditionally pieced and paper pieced blocks, which allows each technique to compliment the blocks perfectly.

Twirling Star Flimsy finishI did break one of my big rules of pattern testing, though, and did not follow the pattern exactly as written in one spot: I mitered the corners of the border. The pattern calls for a straight-edged border, but using this directional fabric, I feel like miter was necessary. Other than that little detail, I followed the pattern exactly. Go me!

twirling star quilt patternThis mini embodies some of my favorite aesthetic combinations these days. Low volume fabrics paired with black and whites with splashes of bright, rainbow colored fabrics. I love it!

twirling star quilt pattern

twirling star quilt patternI particularly like the rainbow pinwheels. Since they are paper pieced, the points fit together so well. The precision of paper piecing just can’t be beat!

rainbow pinwheel twirling star quilt patternI’m happy to check this flimsy finish off my list, and will post one more time when the pattern is ready to be released and I have this baby quilted and bound. I’m thinking I am going to go with a center spiral quilting pattern. I’ve never tried it before, and I think a mini quilt like this is the perfect place to start!

I’m linking up with Crazy Mom Quilts Finish it up Friday.

Embrace the Rainbow

Rainbows make me happy. As early as I can remember, I’ve enjoyed arranging things in rainbow order. In high school and college, I would always eat M&Ms in rainbow order. No exceptions. As a mom, putting colored pencils or crayons away in rainbow order fills me with a weird feeling of bliss. It’s no surprise, then, that rainbow order finds itself into so many of my quilts. For a while, I thought I would “grow out of” my penchant for rainbows. For some reason, in my mind, rainbow order isn’t as mature as, say… marsala, or gold. Then I had a little blog comment conversation via email with Jenn from A Quarter Inch from the Edge, where she pointed out, “Why does one need to get over a penchant for rainbows? We see them so rarely in real life… we’ve got to make a few of our own!” True that! And so, I have embraced my love of rainbows and I’m letting it shine! Here are two of my current works in progress as proof.

Twirling Star by Leanne at Devoted Quilter pattern testingI’m testing a pattern called Twirling Star by Leanne at Devoted Quilter. It has been fun getting feedback on Instagram about fabric choices along the way. I opted for an entirely low volume background, just switching up the background fabric for the outer pinwheels to help the center star stand out a bit more. Opinions were pretty evenly split between using this Botanics Foliage in Charcoal fabric versus using Ledger from Carolyn Friedlander’s Architextures line. As much as I LOVE Ledger (can you tell I love pretty much all things Carolyn Friedlander?), I was toying with the idea of spinning the outer rainbow pinwheels, but wanted the flexibility to make the decision after seeing the blocks. With Ledger, the directionality issue would have required that I make the decision before assembling the blocks. Foliage, it was!

twirling star rainbow pattern testing for leanne at devoted quilterNow I just need to sew these blocks together and add the borders and this mini quilt top will be finished!

prismatic medallion rainbow alison glass versionNext up is my progress on the Prismatic Medallion mini quilt I’m making for my partner in the Alison Glass Mini Quilt Swap. I definitely attribute my recent burst of rainbow to my purchase of the newest Alison Glass Sunprints. How could you resist making EVERYTHING with these fabulously bright and saturated fabrics!?

I’ve finally received all of the supplemental fabrics needed to fill out the black and white section, and all of the pieces are cut. Only the green and blue/turquoise triangles are sewn together so far. I’m really happy with the black and white triangle, and have come to accept the blue/purple triangle. I’m still debating the yellow/orange and the red/orange/magenta sections.

prismatic medallion alison glass version
Alison Glass handcrafted added in. I think it’s too brown for this palette.

In the yellow/orange triangle (beneath the black and white one), I originally bought a fabric from Alison Glass’ s Handcrafted line to vary the colors a bit. Now I’m thinking it may be too brown for this palette. I’m leaning toward the brighter Cotton & Steel basics yellow instead.

prismatic medallion alison glass version
Magenta-purple spread out a bit in the bottom triangle.

In the red/orange/magenta triangle (bottom center), I’m thinking I will spread out the purply magenta triangles a bit more. I’m thinking this bottom layout will be the final layout, with the C&S yellow and the spread out magenta. I need to decide soon and get this sewn together! What would you do?

embrace the rainbow

I’m linking up with Lee at Freshly Pieced for Work in Progress Wednesday.


Pattern Testing for ShannonMac Designs

I recently had the opportunity to test a new pattern by a fellow designer. Shannon of ShannonMac Designs created a new beginner paper piecing pattern called “Oops… I Scrapped My Pants”. I’m not typically a big scrappy quilt fan, but I was drawn to her various layout suggestions and so I offered to test it out.

The layout on the bottom right called to me. I love it!

Note that her pattern includes an easy to follow tutorial for paper piecing using the freezer paper method. I tested the pattern before the tutorial was finished, so I used my favorite paper piecing method instead–printer paper piecing, where you stitch along the lines on the paper and then remove the paper after the block is pieced. I’m tempted to give the freezer paper method a try after reading Shannon’s tutorial, though!

With my test quilt, I knew I wanted to incorporate a rainbow gradient since I’ve been ALL about color these days. Perhaps it’s the stark white environment outside: snow, snow, and more snow!  I debated creating a large quilt with color gradient pants, I toyed with shrinking down the pattern to make each block 2″ or 3″ instead of 6″ so that I could have a full color gradient in a smaller quilt, and then I finally settled on stitching together some wonky, scrappy rainbow fabric panels and using them to get the full gradient in four pairs of pants.

2014-02-28 21.07.53

I’m also all about love, so it seemed only right that I make those rainbow pants into a nice big X and O. Hugs and kisses!

I love the complexity of the backs of paper pieced quilt blocks.
All laid out and stitched together!

I’m finding myself drawn toward modern quilting more and more, so I went for a modern look with this mini quilt. I opted for some echo straight-line quilting to emphasize the X and O.  My Clover Hera Marker was the perfect tool for marking out the quilting lines! Being new to quilting, I am still too nervous to use any kind of “disappearing” fabric pen or other marking tool to actually write on my quilt before quilting. A hera marker is great, since it simply indents the fabric, creating a clear yet mark-free line. You can see how clear the marks from the hera marker are, and they certainly helped me find those perfect intersection points!

Herra markers are the best for marking quilts for straight line quilting.

I used the walking foot for my borrowed sewing machine for the first time while quilting this, and boy was it fun! I can see why quilters swear by them! I’m really looking forward to quilting a larger quilt with the walking foot to really see its even-feed skills in action.

I used my go-to tutorials on bindings–on the Bijou Lovely blog–both to make a straight-grain binding and to attach it to the quilt.

Using my favorite straight-grain binding tutorial.

2014-03-02 16.23.02

I love how this quilt turned out! The pattern is a very basic, beginner-friendly paper piecing pattern, and is extremely versatile. What can’t you do with scrapped pants?!

The day after I finished stitching the binding to the back of this quilt, we got another massive snowstorm, which dropped another 18″ of snow–yes, in March! It provided the perfect backdrop for a rainbow quilt photo shoot.

photo 1 (7)


photo 2 (5)

Now this bright mini quilt lives happily on my craft loft pegboard, brightening up my sewing space.

photo (12)


I definitely would recommend this pattern, for both beginner and seasoned paper piecers. If you’ve been wanting to try paper piecing, this is your chance to learn the freezer paper method. Shannon is offering this pattern and tutorial for free in her Craftsy store, so hop on over and check it out!


Wonky Rainbow

2014-02-28 21.08.41

I’m attempting my first wonky anything in quilting. “Wonky” is a word I rarely heard before getting into the modern quilting world. The first quilting blog I ever followed is Bijou Lovely, and it’s still one of my favorite blogs!  The photography is always stellar with lots of bokeh (narrow focal length resulting in that gorgeous blur around the point of focus), the projects are gorgeous, her tutorials are the best I’ve found, and I’m always on top of the newest fabric lines by following. Holly, the creator of Bijou Lovely, creates a lot of “wonky” quilts.

bijou lovely wonky-mini gift
The “wonky star” in this awesome wall hanging was the first wonky that really caught my eye. It’s actually a gift quilt made by Holly’s friend Jen at http://mjandco-quilting.blogspot.com/. Click the picture to go to the Bijou Lovely blog post to see more of the little details. Trust me, it’s worth the side trip!

Quilting is traditionally very exact and symmetrical. With “wonky” quilting, elements of the quilt are all a kilter, asymmetrical, or otherwise skewed. There’s a lot of wonky in the modern quilting world. Come to think of it, the project I’m working on may not even be categorized as wonky; it might be more scrappy. I’m still learning this quilting lingo! Whether scrappy or wonky, it’s a bit uncomfortable for me. I like exact. I like precise. I really like symmetrical.

2014-02-28 21.08.11

So far, despite this new-to-me wonk (something with wonk is wonky, right? :)), I like the way this is turning out. I can’t show you more, since I’m testing a pattern for a fellow designer, and the pattern isn’t out yet! Once the pattern is published and I’m cleared to show you, I’ll be sure to show you the finished work. Maybe you’ll be able to tell me whether it’s wonky or scrappy!

2014-02-28 21.07.53