Tag Archives: gift

Let Your Heart Shine True: A Mini Quilt Finish

let your heart shine true mini quilt giftI recently finished and gifted this mini quilt to a fellow quilting friend as part of a small private swap, and now that it has been received, I can tell you all about it! I entitled it, “Let Your Heart Shine True”, and it’s meant to be a visual representation of the fact that the goodness in your heart shines through, despite any missteps, mistakes, wrong words, or other things we personally may feel will tarnish or cloud our good intentions. It was made for Yvonne of Quilting Jetgirl, who often reflects on her introverted personality and how it influences her day to day, both quilting and non. The design inception came after Yvonne posted a number of articles about the struggles of attempting social interaction as an introverted person. The articles mentioned a desire to have people understand your good intentions, even if the words or actions that emerged as a result of an uncomfortable social interaction as an introvert may have been less than smooth. I think we are all familiar with foot in mouth syndrome; at least I am!

let your heart shine true gifted mini quilt finishThis is my first attempt at a “statement quilt”, per se. My thought was that the quilt would show the large pieces on top as representing “people”, and the rippled reflection below being the public perception of the person. When mistakes are made, things are said in a not so clear way, or even just general awkward social interactions happen, those are the ripples that cause the reflection to be jarred and shaken. Yet despite the ripples and the jolted reflection, the heart remains intact and unbroken. If you lead with the heart, your good intentions ultimately must become known, no matter how many times you need to back pedal or rephrase things to clarify your meaning. I thought creating a statement quilt for Yvonne was fitting, since she has created a number of quilts as part of her Reclamation Project, which she describes as “a project series to explore discomfort in [her] life with the hope that [she] can reclaim and redefine.” I primarily create quilts as things of beauty, but I thought it would be fun to try to create one that is both beautiful and meaningful.

let your heart shine true detailThe construction of this mini quilt was a fun multi-step process. I began by needle-turn appliquéing the rounded pieces onto panels of background fabric. I cut the bottom pieces with an identical free-style rounded top, but with much longer length since I planned to cut and resew it many times. Once they were appliquéd onto the background fabric, I cut random, varied width strips from the bottom ones, off-set it enough to wobble but not extend beyond the width of the finished panel, and resewed it. Each one was cut and re-sewn six or seven times to create the rippled effect. Let me tell you–that first cut into the needle-turned mound was a bit nerve-wracking! It was another one of those times I just had to trust that the vision in my head would translate well to reality.

let your heart shine true mini quiltAfter rippling all three reflections, I squared each panel and sewed them together creating a horizon with a very narrow, approximately 1/8″ strip of solid orange fabric (Kona Persimmon, I think!). Yvonne’s favorite colors are blue and orange, which clearly influenced my fabric selection. I used some of our mutual favorite oranges from Carolyn Friedlander, and added some sketch by Timeless Treasures and an unknown solid from my early quilting days stash. I bound it in blue Mercury by Alison Glass, including a bit of framing while adding a bit from another mutually adored fabric designer.

For quilting, I knew I wanted to matchstick quilt the background, but have the lines become gradually further apart in the bottom half, similar to ripples becoming less dense the further from the source they extend. I matchstick quilted the background of the top portion with 50wt Aurifil 1320-Medium Teal. To keep my rows evenly spaced, I used a stitch length of 3.0 on my Bernina 560, and I carefully moved two stitches (with a three-stitch gap thrown in here and there for interest) between rows. For the bottom portion, I first matchstick quilted with the same 1320-Medium Teal 50wt Aurifil, but instead of making the rows two stitches apart like I did for the top portion, I increased the number of stitches by one between each row. I moved one stitch between the first and second rows, two stitches between the second and third rows, three stitches between the third and fourth rows, etc., all the way to the bottom of the mini quilt. I think at the bottom, each row was 19 or 20 stitches away from the previous row. Yes, it got a bit trickier to keep my quilting lines straight, but I eyeballed it and it turned out well. Organic lines were my goal, after all.

let your heart shine true matchstick quilting detailAfter that, the quilt begged for some more quilting, so I added random rows in yellow, gold, and orange for interest (40 wt 1135-Pale Yellow, 50 wt 5022-Mustard, and 50 wt 1154-Dusty Orange respectively). Both the top and bottom ended up pretty thoroughly matchstick quilted, but I really like the addition of the yellow, gold, and orange thread in the bottom, as well as the added interest of using a slightly heavier weight thread as the yellow. It reminds me of light reflecting off the ripples in a pond, which is perfect given the intention of the quilt.

After matchstick quilting this mini, I can certainly see why people are so drawn to dense quilting. It creates a whole new textural element to the quilt!

let your heart shine true mini quilt gift
One of my dedicated helpers. He really wanted his picture taken with this mini!
let your heart shine true mini quilt gift
My other dedicated helper, who helped by not crawling *too* far into the lake while we were photographing this quilt.

I’m really happy with the final result of this mini quilt–it pretty much looks exactly like I imagined. Yvonne is also happy with it, even though it took months for me to finally finish each part and mail it, so that makes for one happy exchange! The true joy in quilting is in the giving, and it feels really great to have been able to create a little daily visual reminder for Yvonne that as long as you lead with your heart, joy will be found.

I’m linking up with Crazy Mom Quilts Finish it up Friday, Needle and Thread Thursday, and TGIFF. I hope you have a joyful day!

Inviting Ancestors to Tea: A Mug Rug Gift

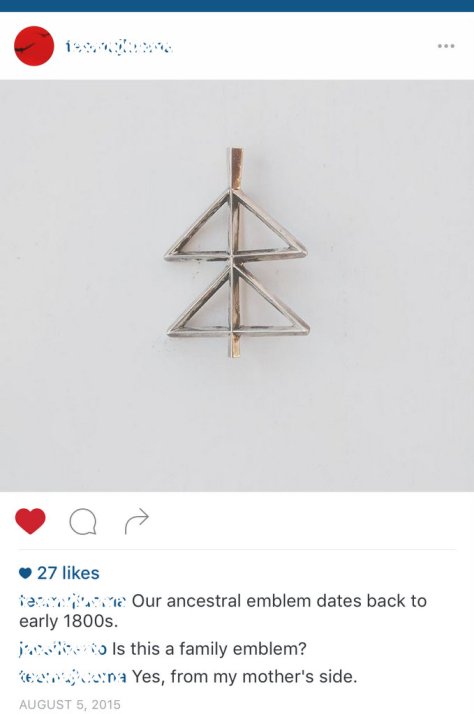
A few months ago, my brother-in-law posted the coolest picture on Instagram of what appeared to be a little metal pin or charm. My first thought (of course) was, “That would make a cool paper pieced pattern!” His caption read: “Our ancestral emblem dates back to the 1800s.”  That sealed the deal. This HAD to be made into fiber art of some sort. How awesome is it to have an ancestral emblem!? I’ve been prodding my artist brother to design one for our family, since you’ve gotta start somewhere, right?!

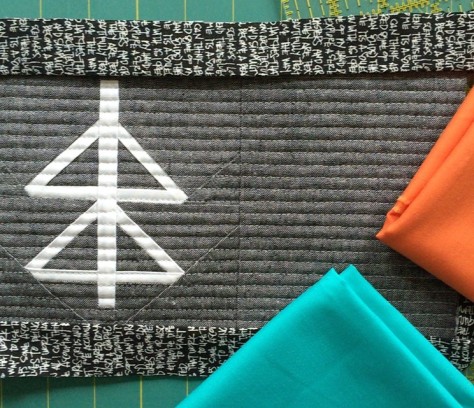
ancestral emblem IG postWhen I got the reminder from my mom that his birthday was in early March, I decided it was time for this ancestral emblem creation to become a reality. I drafted a foundation paper pieced pattern, decided a mug rug would be the perfect doable yet useful gift, and set to work.

finnish ancestral emblem mug rugI’m very happy with the result!

This gift was a surprise for my brother-in-law, so I had to do some secretive research into favorites. He and my brother both have a very distinct style and I wanted to be sure to make a gift he’ll sincerely love (for more than just the fact that I made it for him). First up was to do some research to figure out a favorable color scheme. Word back from my brother was that colors were tough, and the safest bet was to go with grey, black, or white. Since Robert Kaufman’s Essex yarn dyed linen in charcoal is one of my all-time favorite fabrics, this color scheme sounded perfect to me!

finnish ancestral emblem progressWith Kona white and Essex yarn dyed in charcoal, I pieced the top using my newly created foundation paper pieced pattern. I made some binding with my go-to Carolyn Friedlander text on black from Architextures and decided the whole thing needed an accent–just a pop of color in the binding to round it out. I sent my brother the photo above for his opinion, and I’m glad I did! The texty print was vetoed and orange and black apparently are a favorite color combination (you know me–I was leaning heavily toward turquoise).

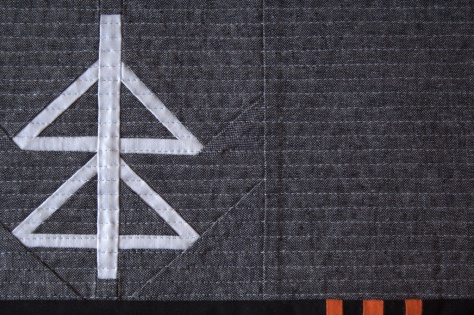
hand stitching binding relaxationI easily switched in Kona black instead of the Architextures (I’ll save that for another project!) with three narrow bits of Kona Persimmon and before I knew it, I was relaxingly hand stitching the binding to the back to finish it up.

finnish ancestral emblem mug rugI am really happy with this mug rug, and I hope that my brother-in-law loves it and better yet–uses it ALL the time! He can now invite his ancestors to tea whenever he wants.

architextures ledger perfect backing fabric straight quiltingThose of you who follow me on Instagram most likely already saw my secret trick to perfectly straight quilting lines, but I’ll share it here for those who missed it. I used Ledger from Carolyn Friedlander’s Architextures line for the backing and quilted straight lines with the backing facing up. This project was small enough that I could easily line up the backing with the front, so the lines were perfectly straight, evenly spaced, and horizontal on the front. I used 50wt Aurifil 2600-Dove thread for piecing, quilting, and binding (of course).

finnish ancestral emblem mug rugThis was mailed off yesterday (better late than never!), so it should be arriving soon.

Project Stats – Mug Rug

Pattern: Finnish Ancestral Emblem foundation paper pieced pattern designed by me, inspired by a photo of a metal pin.

Size: 6.5″x11″

Fabric:
Front: Kona White (Robert Kaufman), Essex Yarn Dyed Linen in Charcoal (Robert Kaufman)
Back: Ledger in Ivory from Architextures by Carolyn Friedlander (Robert Kaufman)
Binding: Kona Black with three accents of Kona Persimmon (Robert Kaufman)

Batting: 100% cotton Soft n’ Crafty batting

Thread: Aurifil 50wt in 2600 – Dove for both piecing and quilting

Quilting: Straight line quilting using the lines in Ledger as a guide, with my Bernina 560 and a walking foot

*******

I’m linking up with Crazy Mom Quilts Finish it Up Friday. I have a lot of finishes to share in the coming weeks, which explains my relative quiet here on the blog. Time to show you what I’ve been making!


Babies on Quilts and a Big Thank You

I’m thinking I should rename my blog “Babies on Quilts” these days. Babies abound in these parts (seriously, don’t drink the water if you don’t want to join in the new baby snuggles), so many quilts are being created for these new little members of our world. I’ve written about how wonderful it feels to give a quilt to a brand new baby, with wishes that the quilt will accompany the child on his/her grand journey through life. Today I get to write about the immense joy of receiving such a quilt from some dear friends.

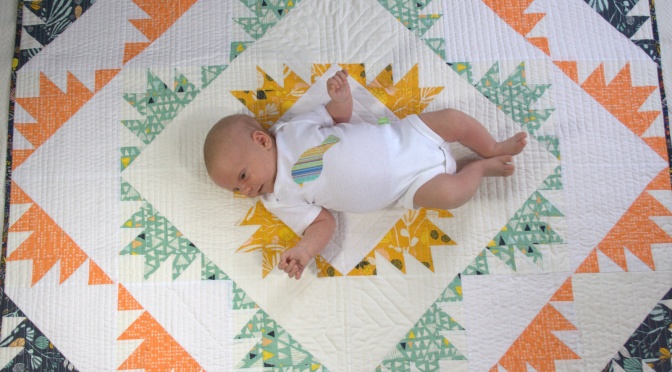
gift package from stephanie and michelleI received the sweetest package from my dear quilty friends Stephanie and Michelle (from Late Night Quilter–we are sewing soul sisters half a country apart). They made a gorgeous Delectable Mountain quilt for Finn and included some sweet additions for mommy–a teething necklace and magnetic hexie puff, both in my favorite color!–as well an adorable applique bird onesie for Finn. Finnian loves the quilt already, and clearly the sleepy magic is in it. The first three times I put him on the quilt, he settled right down to sleep!

Finn on his Delectable Mountain quilt
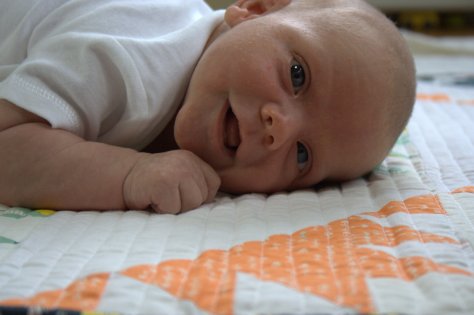
Some big baby laughs before settling down to sleep.
sweet sleeping babe on quiltBabies on quilts–I just can’t get enough!

baby on quilt

baby on quilt

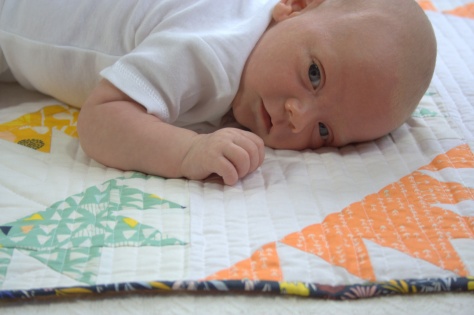
baby on quiltThis quilt is the perfect size to take with us everywhere. It fits right in my bag, and will be making memories with us daily, even if that means mostly diaper changes and spit up-filled tummy time in the beginning. Thank you so very much, Stephanie & Michelle. Your love is clearly in this quilt, and it makes me so happy to see it be a part of our daily lives.

This gift is just one example of the wonderful community of quilters of which I’m blessed to be a part. I have been overwhelmed by the generosity and kindness of my quilting blogging community, and I not only enjoy conversing with many of you via blog comments and resulting email conversations, but I find myself calling many of you friends. I want to extend a special thanks to Nancy–your care package with such well thought gifts for the entire family is cherished and still appreciate daily in our home. Just yesterday, Maddie made a very special spirograph flower for me to hang on our bedroom door. ❤

Yvonne at Quilting Jetgirl, another dear friend in our blogging community, wrote a wonderful reflective post about community and what it takes to cultivate relationships with people you know purely through blogging. It’s all about authentic connection. I love that her final tip on how to cultivate community is to be you. That’s part of what I love about blogging–I’m free to be me, and share the parts of life and my creative process that inspire me. Amazingly, by doing that, I in turn inspire you, or at least inspire the spark of conversation that begins a relationship. It was just such a spark that began my conversation with Stephanie and Michelle over a year ago, and since then we’ve not only become friends, but we’ve also roomed together at Quilt Con, worked together on many projects, and provided daily support and encouragement to each other from a far.

folded quilt

Thank you, Stephanie and Michelle. Thank you, Nancy. Thank you, Yvonne. And many, many thanks to all of you readers, many of whom I’m now blessed to call friends.


The Gift of Love {Why I Quilt}

We’ve all heard it many times: it is better to give than to receive. Especially with handmade gifts of love, I fully agree with this sentiment. That doesn’t mean I don’t love to receive handmade gifts–don’t get me wrong, I absolutely love handmade gifts! But seeing someone using and loving and enjoying a quilt that I stitched full of love especially for them, warms my heart and reminds me of yet another reason I quilt. Quilting allows me to give the gift of love in a warm snuggly form that can literally wrap around the recipient, and that will hopefully last a lifetime.

reagan on her hazel hedgehog quilt
I realized recently that I had yet to share photos of baby Reagan on her Pinkalicious Hazel Hedgehog quilt and thought it was high time I rectified that!

Take, for instance, a baby quilt. I know a few grown adults who still have–or even sleep with–a handmade blanket or quilt that was given to them at birth. There’s just something about a baby blanket that is especially comforting.

gift of love quiltQuilts are also infinitely useful to babies and their doting, toting mamas. Babies spend a lot of time on the floor (quilt!), need diaper changes (quilt!), need to stay warm (quilt!), need tummy time (quilt!),… the list of uses goes on and on, and evolves as the child grows (think superhero capes, club forts, and picnics galore).

dreaming of love on baby quilt

baby reagan on her quiltI absolutely love seeing babies on the quilts I’ve made for them. It reaffirms all of the time, effort, money, and LOVE that I’ve put into the creation of the quilt and inspires me to create even more. I’m looking forward to seeing Reagan grow with her quilt, and her cousin Finn is sure to join her on it whenever the opportunity arises!

cousins on hazel hedgehog quilt
Cousins Reagan and Finn, born one day apart (Reagan is older!), sharing some time on Reagan’s Pinkalicious Hazel Hedgehog quilt at less than a week old.

Sponsor Introduction {& Giveaway}: Fiddlehead Artisan Supply

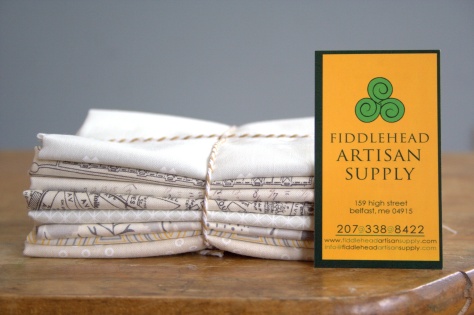
I’m thrilled to introduce you to my very first sponsor, my local quilt shop located in Belfast, Maine–Fiddlehead Artisan Supply. Fiddlehead Artisan Supply is a family-owned sewing, quilting, and craft-supply shop in beautiful midcoast Maine. In addition to a great selection of modern quilting cottons, patterns, thread, and notions, Fiddlehead offers a wide range of other craft supplies all within one of the most aesthetically pleasing shops I’ve visited. It’s a haven for makers. Just for my readers, Fiddlehead is offering 15% off anything in their online shop with the code nightquilter15%.

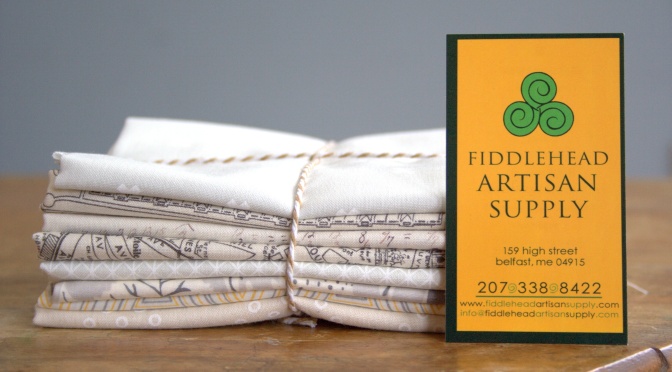
fiddlehead sponsor introduction and giveaway low volume bundle fabric

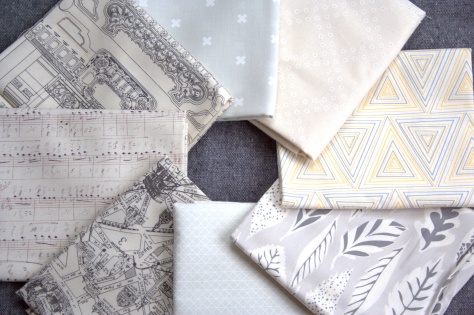
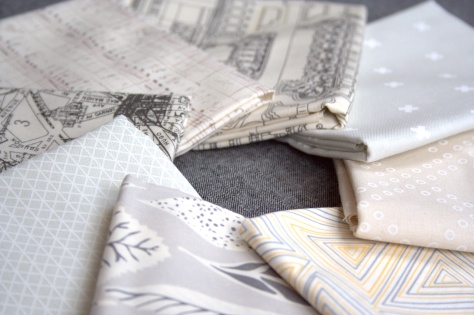
To kick-off our partnership, Abby at Fiddlehead invited me to curate a bundle of low volume fabrics, AND is offering a bundle as a giveaway to one of my readers. I love low volume fabrics, since they are so versatile in quilting and just about anything. There’s nothing like a scrappy low volume background to help colors pop.

fiddlehead sponsorship introduction and low volume bundle giveaway fabric

This bundle of eight (8) fat quarters includes (clockwise from top):

– XOXO Cotton + Steel basics by Rashida Coleman Hale
– Dotti’s Cousin in Natural, Mochi by Rashida Coleman Hale for Cotton + Steel
– Prisma in Honeycomb, Minimalista by Art Gallery Fabrics
– Hello Bear by Bonnie Christine for Art Gallery Fabrics
– Cotton + Steel basics by Alexia Marcelle Abegg
– Passport Parchment Paris Map by 3 Sisters for Moda
– Music in Neutral by Tim Holtz Eclectic Elements
– Passport Charcoal Etchings by 3 Sisters for Moda


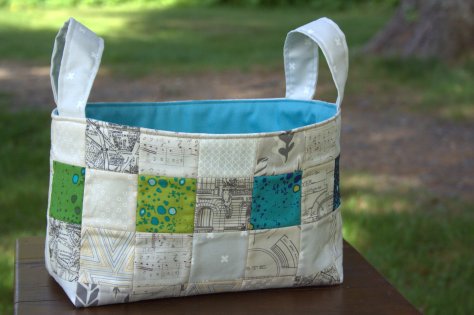
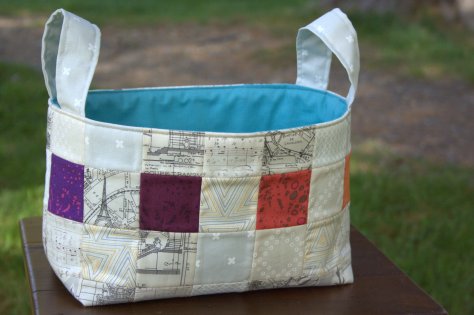
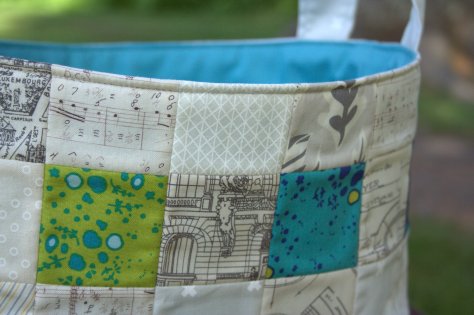
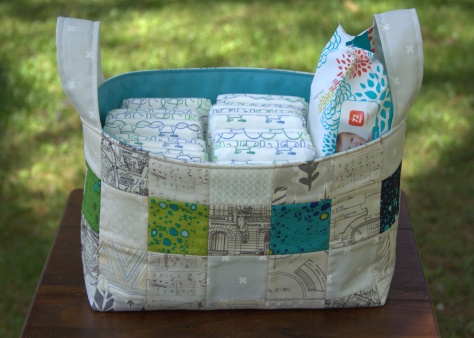
Just for fun, and since I have a baby shower to attend this weekend, I decided to whip up a quick project using this bundle. I made a one hour basket (free pattern by Kelby Sews) using the fabrics from this bundle and some scraps of Alison Glass’s Sun Prints Grove.

low volume one hour basket
Side 1
low volume one hour basket
Side 2
low volume one hour basket detail
I love these low volumes!

The recipient of this basket hasn’t found out the gender of her baby, so I thought the sleek low volumes and pops of color were the perfect combination.

low volume one hour basketThe basket is the perfect size to hold diapers and wipes, or just about any other newborn essentials.

To enter the giveaway today, simply share what you love about your local quilt shop. If you don’t have a local quilt shop that fits your style, tell me what you look for in a fabric shop. Leave a comment and make sure I’m able to get ahold of you if you win.  If you’re a follower of Night Quilter, leave a second comment telling me how you follow for a second entry. Like Fiddlehead Artisan Supply on Facebook or subscribe to their newsletter and tell me how you followed them for a third entry.

This giveaway is open to US and international participants.  The giveaway will be open until 8pm Wednesday 5/27 when I’ll select the winner randomly with random.org. Good luck! Note: This giveaway is now closed! Congratulations to Mary!
low volume bundle from fiddlehead artisan supply

If you just can’t wait to get your hands on this low volume bundle, it can be purchased HERE. And, if you’re like me and like to support family run small businesses, feel free to take a virtual vacation to midcoast Maine and visit Fiddlehead Artisan Supply’s online shop: Fiddlehead is offering 15% off for all of my readers through June 21st–use code nightquilter15%.  Of course a vacation in person is preferred–if you do that, let me know and I’ll meet you for coffee and fabric shopping in Belfast!
I’m linking up with Crazy Mom Quilts Finish it up Friday, since I’ve got this adorable one hour basket finish ready for the baby shower this weekend. Many thanks to Fiddlehead Artisan Supply!

A Tea Cozy for Every Season: Valentine’s and Spring

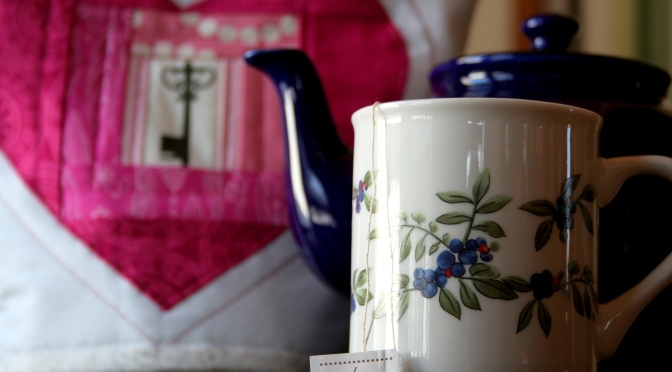
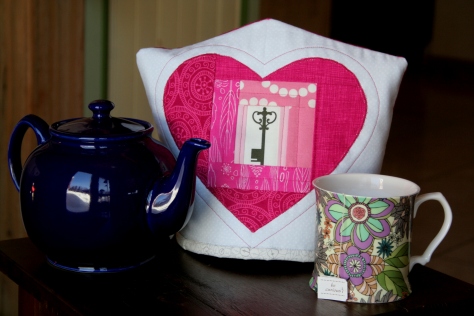
“A tea cozy for every season,” requested my mom when we were talking about making quilts for family members. My mom loves tea and drinks a pot of tea every afternoon–no, she’s not even English!–so it really is a perfect gift.  For Christmas, I gave her the first seasonal tea cozy for the winter holidays, which you can see in my post Finishes New and Old. Today I sewed on the bottom binding, finishing the next seasonal tea cozy, which should take her into summer. I used Yvonne’s (Quilting Jetgirl) tea cozy tutorial, so the tea cozy is completely reversible and is suitable for two seasons in one!

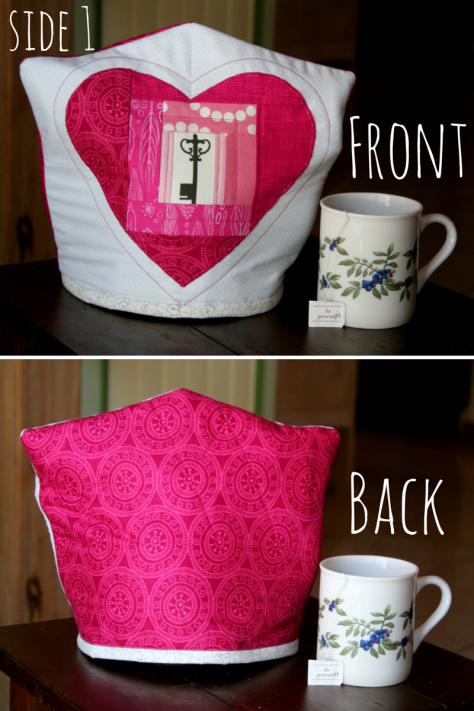
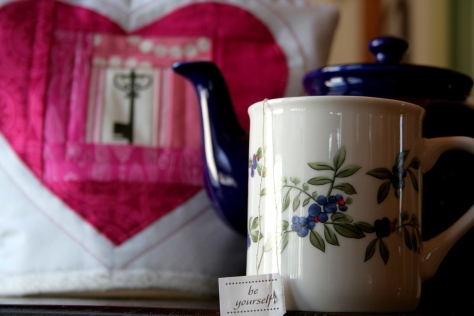
One side is perfect for Valentine’s Day, since I used my Key to my Heart pattern:

tea cozy valentine's day

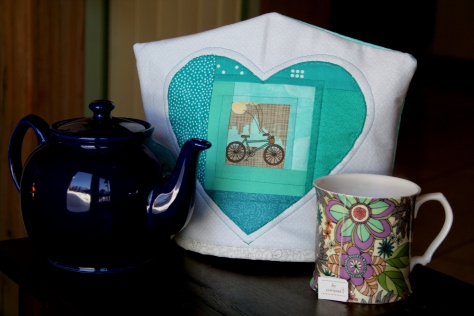
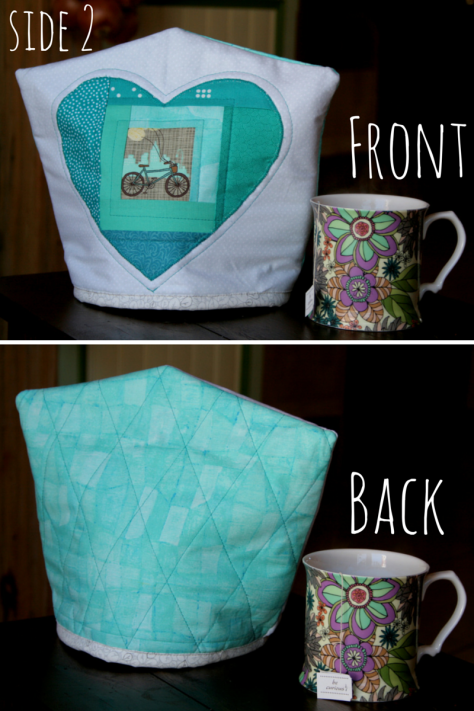
The reverse side features a bicycle inside the heart, which I think will be perfect for spring. My mom also loves bicycling, and she and my dad are known to plan vacations that include cycling from bed and breakfast to bed and breakfast in awesome European countries, where they surely enjoy actual tea time.

bicycling tea cozy

I thought about putting both hearts on one side of the tea cozy, but decided make one the “inside” and one the “outside”, with a coordinating solid backing. This way, one side of the tea cozy can be perfect for Valentine’s Day…

tea cozy valentines dayThen after February passes, you can just flip the tea cozy inside out and the other side is perfect for spring.

spring tea cozy bicycle

I technically made the Valentine’s Day side on the “inside” since I figure the bicycle will probably be shown more often. When turned to the Valentine’s Day side, the tea cozy is a little bit snug on my teapot (as you can see in the photo above), but I’m not too worried. I know my mom has a few different tea pots and I’m sure it will fit on one of them!

Now all I have to do is encourage my kids to finish their cards for Grandma (my mom) & PopPop (my dad) and get this all in the mail so it arrives in New Jersey before the 14th. I’m excited that I finished it in time, and hope my mom loves it as much as I do. This “tea cozy for every season” project is making me want a tea cozy of my own!

valentine's tea cozy

I’m linking up with Crazy Mom Quilts for Finish it Up Friday.

Secret Garden Quilt: Attalie’s June Garden

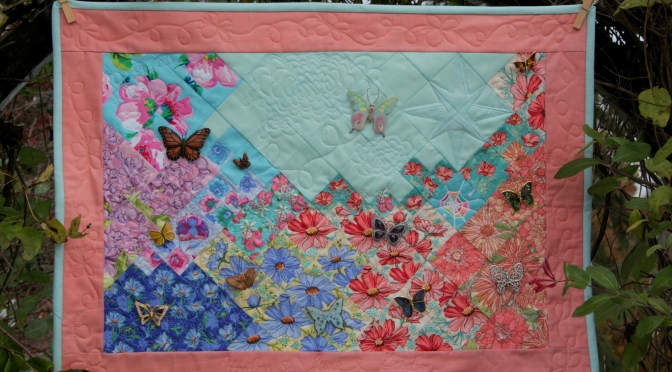
Finally, here is the reveal of my secret garden quilt: Attalie’s June Garden.

garden quilt finish butterfly flower
Attalie’s June Garden: A finished quilt, without all of the butterfly pins.

Last weekend, I was doing some hurried slow stitching, trying to get the binding sewn down on this quilt before the baby shower at which it was to be gifted. I finished sewing the binding just in time for the shower to be postponed due to the swiftly blowing and accumulating snow, and shortly thereafter we lost power. For over three days. But I finished the quilt!

free motion quilted words garden quilt
“Attalie’s June Garden”, free motion quilted into the bottom of the quilt’s border.

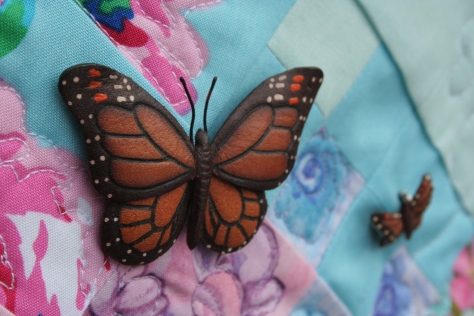
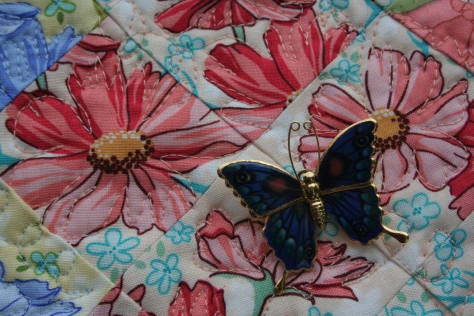
This quilt has a definite story behind it. First, to decipher the name for you. Attalie is the in utero baby for whom I made the quilt. June is the name of my husband’s Grammy, the quilter of the family, and the collector of all of the butterfly pins that live in this garden quilt. Grammy June died less than a year ago. When she died, all of the family had the emotional task of going through her things before the estate sale. In looking at her jewelry, I discovered a large number of butterfly pins. “I didn’t know Grammy collected butterflies!” I said. As it turns out, neither did any one else in the family. Either way, I immediately envisioned them living forever in a quilted garden wall-hanging, so I asked if I could take them. Everyone, of course, said yes.

paper pieced star butterfly quilt garden
One of Grammy June’s butterfly pins, flitting peacefully by the glittering sunburst I paper pieced especially for this quilt.

Flash forward a few months. Our cousin Molly, who was the one who took care of Grammy June during her last days, and who now lives in Grammy June’s old house, announced that she was pregnant. Flash forward a few more months: Molly shared that they were having a girl, naming her Attalie, and that the nursery theme would be “Garden”. The butterfly garden quilt was asking to be created, finally. With a little over two weeks before the baby shower, I got started. I designed, pieced, and free motion quilted the entire quilt, which finishes at 27″ x 20″, and stitched on the binding just in the nick of time. The quilt is mostly comprised of fussy-cut 1- and 2-inch squares (1 1/2″ and 2 1/2″ before sewn together).The process was a lot tougher than I imagined, and there were definitely some face-palm, seam ripping moments (which I will go into in a later post), but I am very happy with how this quilt turned out. Here are some detail photos:

flower free motion quilting
I used a wild, make it up as I go free motion quilting pattern, sometimes mirroring the flowers, and sometimes adding features. I love how this particular FMQ turned out!
butterfly garden quilt
The finished quilt, complete with flitting butterflies. The butterfly pins were all collected by Grammy June, who would have been (and always will be, in heaven) baby Attalie’s Great Grammy.

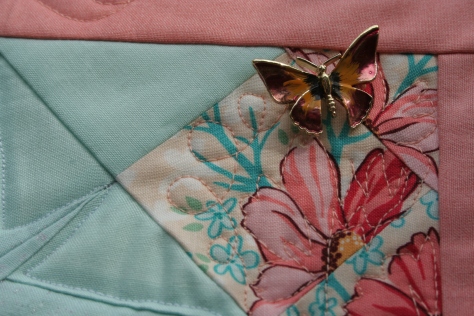
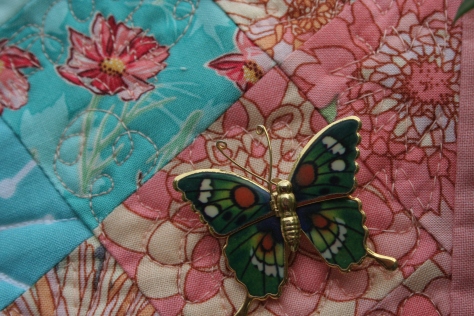
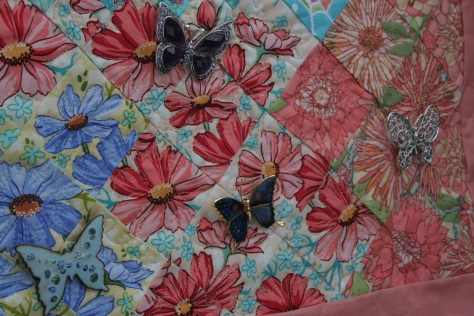
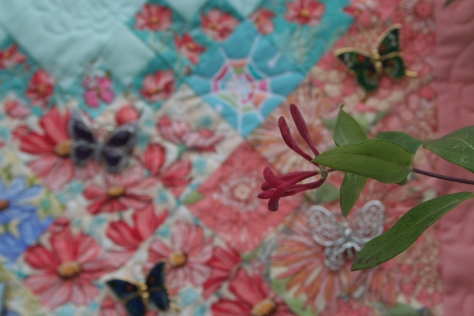
Here are some detail shots of the beautiful butterfly pins on different parts of the quilt. I tried to balance the overall color flow by putting the blue/green pins on the pink flowers, and the other pins in and around the blue and purple flowers. I think the butterflies look quite happy on this quilt!

butterfly pins garden quilt

Attalie's June Garden

butterfly pins on garden quilt
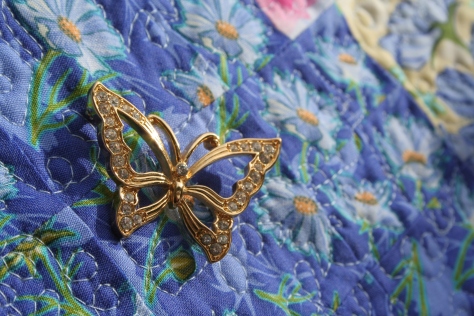
I think this little copper butterfly is my favorite.

butterfly pins on garden quilt

butterfly pins on garden quilt

butterfly pins on garden quilt
As I photographed this quilt after the storm had subsided and during our first somewhat bright day, the sun began to shine with earnest.
flower garden quilt
Even after a blizzard, there were still a few flowers in the garden. This one came out to play with Attalie’s June Garden quilt.
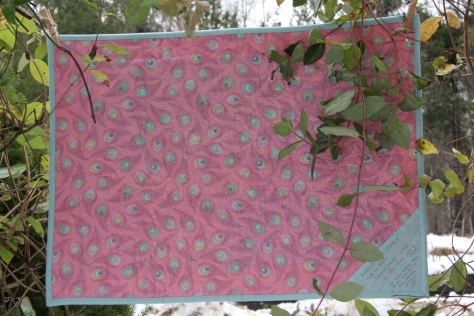
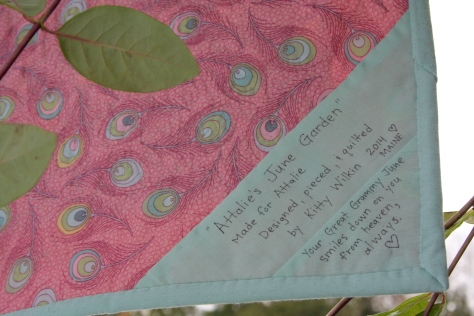
Quilt back with corner label.
quilt corner label
My first corner label. I will fill in Attalie’s middle & last names once her middle name has been chosen!


Finished quilt stats:

Name: Attalie’s June Garden
Size: 27″ x 20″
Fabric: Assorted flowers from RJR Fabrics, Andover, and Studio E
Quilting: Free motion quilted with mostly Aurifil and some other hand-me-down threads
Finished: November 2014
Related blog posts: A Garden {Quilt} Full of Florals

I’m linking up with Crazy Mom Quilts Finish it up Friday.

A Garden {Quilt} Full of Florals

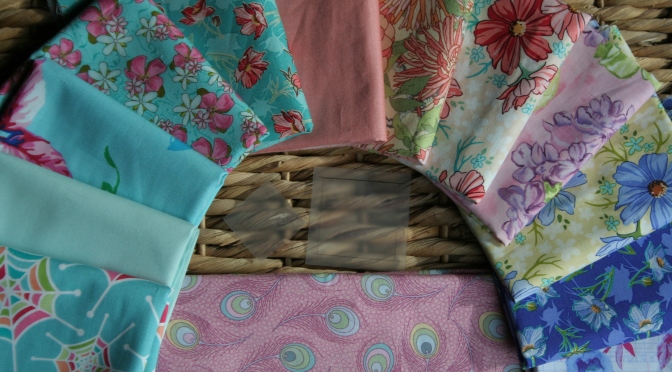
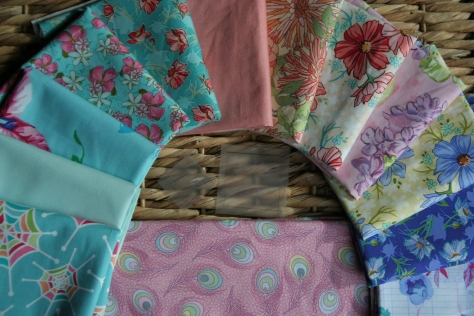
For as much as I photograph and swoon over flowers, florals are foreign to my fabric stash. Last week, I built my stash with this fabric it rarely sees: florals. I bought in 1/4 yard cuts since it was the smallest possible cut at the local fabric store I visited, and I don’t typically use florals in my projects. I must say, though, I am happy with the floral fabrics I did find, and they are perfect for the project gift I have in mind.

stash building for a new projectThis project is a surprise gift with a short deadline. I KNOW the recipient will love it, and I’m exciting to share details with you. But for now, I’ll just show off these fabrics.

Grace fabric rjr fabrics flowers

Grace fabrics rjr fabrics flowers

I don’t know the full information for all of the fabrics, since I didn’t have a chance to write them all down, and I bought small enough cuts that the selvedges don’t all have the manufacturer/designer information present. Many of the fabrics are from the Grace fabric line by Mary McGuire for RJR Fabrics, which I love. I had to buy some of the Snug as a Bug (spiderwebs) fabric  by Melly & Me for Riley Blake Designs, since how could I resist sneaking a spider web into the garden?! I also bought a couple of fabrics by Andover and Studio E, with two coordinating Cotton Couture (I think?) solids, one for sky and one for border.

big fabric flower fussy cut

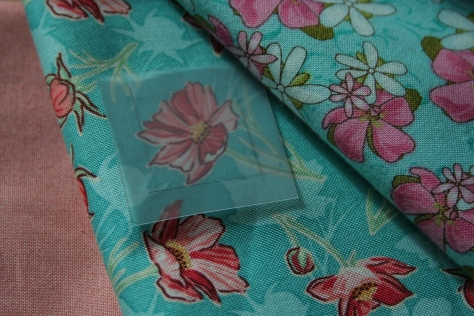
fussy cutting plan
Planning my 2″ square assiduous cutting (okay… fussy cutting!), with the help of the 2.5″ square template I made.

As you may have guessed with the little hidden templates, I plan to fussy cut most of these to make a garden quilt wall hanging. Some of it will consist of 2″ squares on point (2.5″ unfinished), and some will consist of 1″ squares on point (1.5″ unfinished).

small flowers fussy cutting planning

Some small 1" flowers to be assiduously cut.
Some small 1″ flowers to be assiduously cut.

More than that, I cannot yet tell you. I have my work cut out for me, though (pun intended!). Stay tuned to see this secret garden bloom!

Friday Finish: Lillian’s Baby Quilt

Finally! Over the past few weeks especially, I’ve hinted at this project and have shown little peeks at quilting and piecing details, but now I can finally show you the whole finished quilt!

2014-04-02 18.17.06

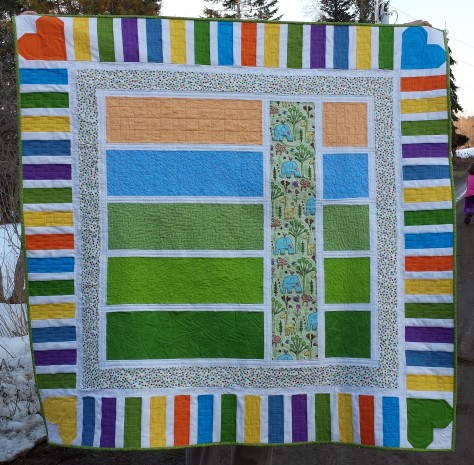
I began this quilt before little Lillian was born, and my friends didn’t find out the gender in advance, so I worked to choose gender neutral fabrics in creating this quilt. The center square is from a pattern I found in an old quilting magazine (I will link to it when I return to Maine; I don’t have the magazine with me and don’t remember specifics), but I really didn’t like the border suggested in the pattern and after much internal debate decided to design my own. I created the heart cornerstones, and I’m really happy with the mosaic-style cobblestone outer border and how well it frames the quilt.

For the back, I used a flannel fabric similar to the jungle focal panel in the front center square, with a single row of the color cobblestones mirroring the focal panel on the front.

2014-04-02 18.16.35

We are down in New Jersey visiting my family, and last weekend my dear friends and recipients of this quilt came down from NY for a visit. We haven’t seen them in nearly–or over–a year! I have been working hard to complete this quilt so that I could gift it in person, and while I came down to the wire, I did it, hand stitching the label the night before their visit.

20140409-000844.jpg

I’m really happy with the way this quilt turned out, and it is a showcase of many firsts and newly practiced skills, primarily the free motion quilting (FMQ). You can see more about my process in making the quilt, as well as more FMQ detail in my posts Baby FMQ for the Win, Free Motion Quilt-a-thon, A Sensory Adventure with FMQ, and An Unexpected Element. Seriously, the other posts are worth checking out! I’ve only been hinting at it a little, right? hah!

Since it’s a baby quilt and hopefully will see a lot of use and tough love, I opted to machine sew the binding. I also was pressed for time and really wanted to be sure to finish the quilt before departing on our trip. I used the method suggested in Cluck Cluck Sew’s Machine Binding Tutorial. With this method, the binding is sewn to the front of the quilt first, and THEN the back. The final stitching, when done correctly, traces the edge of the quilt right inside the binding, so it looks like part of the quilting. Just like the tutorial promises, most of the time it turned out perfectly:

Stitches trace the edge of the quilt just inside the binding: perfect!

and some of the time, I hiccuped and the stitches ended up on top of the binding:

Oops!
Oops!

All in all, I’m very happy with this quilt, and I’m eager to see many baby, toddler, child photos with this quilt getting grayer and grayer in the background! Enough about the quilt; here are some photos from the day, gifting and of course adorable Lillian!

Gifting the quilt and discussing the little details.
I love babies! Lillian was adoring her view of her momma, otherwise I would have been snuggling that girl up close!

2014-04-05 12.20.55

My son Max wanted Lillian on his lap, always. He was so very gentle!

Since it’s Friday and this is an epic finish for me, I’m linking up! Click the links below to see many other awesome finishes.

Crazy Mom Quilts Finish it up Friday
TGIFF