Tag Archives: ex libris

Moonstone Madness (in the Best Way)

I was bitten by the EPP bug years ago, but this summer I came down with a serious case of Moonstone Madness, and in the best possible way! In June, my talented friend Giuseppe Ribaudo aka @giucy_giuce released his first English Paper Pieced pattern in partnership with Karen of @karenthediyaddict, called Moonstone. He was kind enough to send me a kit and boy has it kept me busy and grinning pretty much all summer! I love EPP and hand stitching is the perfect solution for busily adventuring makers in the summer months, and this pattern didn’t disappoint.

moonstone quilt progress giucy giuce pattern alison glass fabricIn the spirit of setting myself up for success, I opted to make four (4) blocks to make a pillow rather than a full sized quilt, and I dove into my bright Alison Glass stash to put together a fully saturated, smooth rainbow gradient. You know how I feel about rainbows. Alison Glass fabric rainbow + Giucy Giuce EPP project = heaven on a summer’s day!

alison glass rainbow moonstone giucy giuce epp pattern aurifil threadI used mostly 50wt Aurifil thread, with a few 80wts thrown in, using coordinating colors so that the stitches blend right in with the blocks. The threads shown here are (from top left clockwise): 2535-Magenta, 1154-Dusty Orange, 5015-Gold Yellow, 5017-Shining Green, and 1125-Medium Teal, all 50wt. There’s nothing quite as satisfying as matching the perfect thread to your fabric!

alison glass ex libris art theory panel rainbow epp moonstone quilt
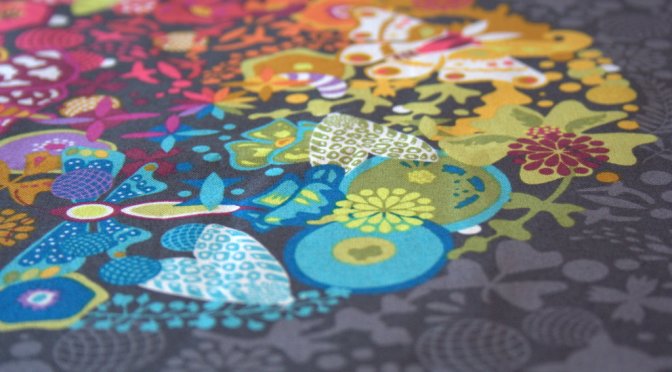
Alison’s Art Theory print from her Ex Libris line (still my ultimate favorite fabric ever) was my color inspiration, so I planned my 4-block panel around the color flow in the center octagon. Throughout the course of the summer, I finished the four blocks and completely stitched them together!

alison glass rainbow moonstone quilt giucy giuce epp patternNow I am at the point in the game where this could lounge in the works in progress pile for a while, but instead, I am going to use my excitement to forge ahead and aim to finish this beauty, which is sure to be my most favorite pillow of all time.

choosing a background fabric alison glassMy next step is to choose background fabric, press the pieced panel thoroughly, remove the template papers (so that I can use them again!!), and then hand stitch the panel down onto the background fabric. Just last week, I visited my local quilt shop Fiddlehead Artisan Supply in Belfast, ME, in the hopes of buying some yardage of Insignia in charcoal by Alison Glass, which is a nearly-solid. While Fiddlehead did not have the Insignia, they did have two other options that I bought to try out: Flying Geese in Dark Charcoal from Handcrafted, and Ink in Charcoal from Sun Print 2016 (all for Andover Fabrics).

alison glass rainbow moonstone giucy giuce epp patternAfter looking at those options, I still felt like I needed to see the Insignia before deciding, and with the encouragement of a few friends on Instagram, especially Erin who said, “I’m a strong believer in first instinct=best instinct!”, I ordered a yard of Insignia in Charcoal from Alison Glass’s shop. (Thank you Erin!). Clearly, my first gut choice is the winning choice!

alison glass rainbow moonstone quilt giucy giuce pattern aurifil monofilament threadNext I will hand stitch this epic panel to the perfect Insignia background using Aurifil’s monofilament thread in Smoke. I plan to quilt this with the Smoke monofilament thread, too, and I’m so excited just thinking about how amazing this pillow will be. This will be my first time sewing with monofilament thread, either by hand or machine, so I’ll be sure to share how it goes.

If you’d like to get a Moonstone kit for yourself, you can order one HERE on Karen the DIY Addict’s site. The kit is pretty amazing, with acrylic templates for every piece, as well as enough pre-cut foundation papers to make a full 72″x72″ quilt (or lots of pillows!), a booklet with Giuseppe’s reflections, thoughts, tips, and four (4) different layout suggestions, and of course coloring pages for all four layouts.

moonstone quilt ocean theme tula pink giucy giuce pattern aurifilAs for me, I’m nearly finished piecing my next rendition of a Moonstone block, going with the Gems layout and a more nautical theme. I plan to make only one block and top stitch it to a large zippered pouch for a friend to whom I owe a quilt. I’m hoping the consolation diaper pouch/zipped pouch will hold her (and her nearly 1 year old baby) over until I manage to make the quilt!

moonstone madness giucy giuce epp kit patternAs you can see, I’ve been absolutely struck with Moonstone Madness and it doesn’t appear to be tapering off just yet. I’ve had a wonderful time piecing together these blocks, and the portable nature of English Paper Piecing ensures that it is still very much on the top of my “summer stitching” projects list!

What did you stitch this summer? 

I’m linking up with Let’s Bee Social, since it’s about time I was social in blogland again!

Pin Cushion Sew Along with Fat Quarter Shop

Today I’m taking part in yet another fun, quick sew along hosted by Fat Quarter Shop. Kimberly from FQS teamed up with Sherri McConnell once again to bring you a video tutorial for a really simple and cute pin cushion, which is being released today. I definitely will be making more of these!

fat quarter shop pin cushion sew alongI really love clear video tutorials since I am very much a visual learner. Seeing each step helps make the process smooth and easy to complete without hang up or confusion. That, to me, is a big win!

fat quarter shop pin cushion sew alongI decided to make my pin cushion with a range of warm Alison Glass Sun Prints 2015 and 2016, and once it was finished, it begged to be photographed out in the garden with the peonies. Such vibrant colors need to be in colorful company.

fat quarter shop pin cushion sew alongI used a Tula Pink ribbon I won in a giveaway from Renaissance Ribbons a year or so ago as the ribbon detail, top stitched with Aurifil 40wt 2230-Medium Peony (so fitting!). I topped the pin cushion with Robert Kaufman Quilter’s Linen, which is a fabulous all-purpose blender fabric that happened to coordinate wonderfully. Aurifil 50wt 5022-Mustard was the perfect thread for hand stitching the opening in the Quilter’s Linen closed, too. I just love when perfectly coordinating fabrics and thread can be found in my stash.

fat quarter shop pin cushion sew alongI backed the pin cushion in Ex Libris Bookplate in Charcoal by Alison Glass (Andover Fabrics), and really would be tempted to use the pin cushion upside down every so often, it’s so pretty. This pin cushion is not for me, though, so the recipient can do with it as she pleases!

fat quarter shop pin cushion sew alongThis is the first pin cushion I’ve stuffed entirely with crushed walnut shell, at Sherri’s suggestion, and I really like the sturdiness and ease with which pins go into it. I bought the crushed walnut shell from a quasi-local, fabulous quilt shop, Clementine in Rockland, Maine months ago but had not yet had a chance to use it. Leah at Clementine suggested the crushed walnut shells since the oils from the nut shells help keep the pins and needles sharp and rust free. They also provide a nice, sturdy base for your pins and needles.

fat quarter shop pin cushion sew alongCheck out the video below and make your own pin cushion if you want! There’s no such thing as too many pin cushions, right?

Be sure to visit the other bloggers in the hop to help spark your inspiration and see what they did with this pin cushion:

Kitty from Night Quilter <–You’re here!

Amanda from Jedi Craft Girl

Nicole from Modern Handcraft

Jessica from Quilty Habit

Jessee from Art School Dropout

Tina from Emily Ann’s Kloset

Michele from Island Life Quilts

Angie from Gnome Angel

Sinta from Pink Pin Cushion

Melissa from Happy Quilting

Lucky Love St. Patrick’s Day Reversible Table Runner {Sizzix Tutorial}

Today I’m excited to be sharing another tutorial on the Sizzix blog, this time for a really sharp-looking table runner (if I do say so myself)! I’m typically not one to make seasonal decor, since the seasons come and go so quickly, but this one is reversible so I can use it all year long. Ever since I first cut wool felt with the Sizzix, I’ve been wanting to do a wool felt applique project, and once I realized I could make four-leaf clovers using my Primitive hearts die, it was game on. I backed the table runner in one of my all time favorite Alison Glass neutrals, Botany in Taupe from Ex Libris, which I certainly won’t mind looking at for the non-St. Patrick’s Day part of the year!

sizzix st patricks day reversible table runner tutorial Since I love to make the most of the tools I have, this project is also exciting since it’s the third unique project I’ve made using the Primitive hearts #3 die from Sizzix. You may remember my Growing Tree Wall hanging and Valentine’s Day Garland tutorials, the first two projects I made using this die. You know it’s a winner when there seems to be an endless stream of projects that can be made out of a certain tool.

TUTORIAL- St Patrick's Day Table Runner sizzixI try to make my tutorials helpful to the entire sewing and quilting world, even if you don’t yet have a Sizzix or other die cutting machine, and this one is no different.

sizzix st patricks day reversible table runner tutorial blanket stitch appliqueIn this tutorial, I share:

  • a neat trick for making four leaf clovers out a heart die (you could use it with a heart hole-punch, too, if you have that);
  • tips on accurate straight-line quilting without having to physically mark your quilt; and,
  • how to blanket stitch.

Head on over to the Sizzix blog to read the full tutorial, and I hope you enjoy!

Do you make seasonal projects? How and where do you store them when they are off season? I may need to take some notes if this keeps up!

I’m linking up with Tips & Tutorials Tuesday with Stephanie at Late Night Quilter.

Stash Building: Art Theory Panels in a Panic

My recent scour of the internet in search of Carolyn Friedlander’s old Architextures fabrics for THIS project has given me a new appreciation for stashing your favorites before they disappear. Once a fabric line is out of print, especially if it’s been out of print for a while, those fabrics are GONE. Legit, no stores have them, not even Etsy, gone.

art theory panels ex libris alison glassThis realization gave me a little bit of a panic, so I quickly contacted my local quilt shop Fiddlehead Artisan Supply and had them set aside three yards of the Alison Glass Art Theory panels from Ex Libris (Andover Fabrics) in charcoal and one yard in white. Better safe than sorry, right? If I could afford to buy a bolt of each and every Sun Print fabric, too, I totally would. But the line has to be drawn somewhere!!

art theory panels ex libris alison glassIt’s no secret that I love Alison Glass fabrics, and these panels are just SO gorgeous. I have a few projects in mind already for these, and I don’t think I will ever tire of the colors and design. Having a bit of “extra” in the stash never hurt anyone.

art theory panels ex libris alison glassMaybe I’ll even get brave and cut into a few to use bits and pieces in a project beyond the full intact round panel. Maybe.

art theory panels ex libris alison glassIf you want to stock up before it’s too late, Fiddlehead does still have some yardage of these panels available, I think. They are not listed online, but if you call the store you can order some. No, I’m not *trying* to be an enabler. No, I don’t work for Alison Glass (to answer your question, Nancy! lol But wouldn’t that be a dream!?), but I really do honest-to-goodness love the vivid designs in her fabric. I’m trying to help. Really. Or if you are on a fabric diet, go ahead and let me know your birthday and I’ll set a panel aside for you.

art theory panels ex libris alison glassI mean, look at those details!

I’m linking up with Molli Sparkles’ Sunday Stash traveling edition, which is hosted by Irene from Patchwork and Pastry today.


Riot of Color: Quilter’s Planner Cover Tutorial

Today I’m sharing the tutorial for how to make the outer panel of a Zippy Quilter’s Planner Cover like the one I made. I’m calling it Riot of Color and it’s a tribute to Alison Glass and her consistently bold and beautiful fabrics. A full color pdf of this tutorial is available on the Quilter’s Planner website, so head on over there to download it!

alison glass quilters planner coverThis tutorial is for creating the outer  panel for the Zippy Quilter’s Planner  Cover pattern customized by Stephanie (Late Night Quilter) and Amanda (What the Bobbin) for the Quilter’s Planner. This  tutorial will provide cutting and piecing instructions for the outer panel (11”x19 1/2”). From there, follow the instructions in the   Quilter’s Planner cover pattern found at http://quiltersplanner.com to make the full zippy planner cover, using this 11”x19 1/2” panel as the “exterior fabric”.

zippy quilters planner cover tutorialThe secret to this cover’s creation is the fabric choices. The dark grey of the Essex linen in Charcoal (Robert Kaufman Fabrics) lets the bright bold colors of Alison Glass’s Sun Prints 2016 and Art Theory panel in Charcoal (from Ex Libris – Andover Fabrics) shine. This could also be made using a favorite large scale print for the feature fabric and fussy cut bits for the squares, but be sure to use a contrasting solid or reads-as-solid background fabric so that the construction shines.

General Notes:  Seam allowances are 1/4” throughout unless indicated otherwise. I like to press seams open, but in some cases I pressed to the side for this project. I will note those places in this tutorial.

Cutting

zippy planners cover tutorial cutting instructionsFirst, cut all of your fabric pieces according to the Cutting Requirements chart and diagram above.

A Note About the E Pieces

Here’s where I’m going to be real with you. The DE strips have a lot of seams. This means that if your 1/4” seam allowance is off by even a little bit, your strip may be slightly the wrong size. In the cutting chart above, I’ve accounted for this human error. (You’re welcome!)

*IF* your seams are an absolute perfect 1/4” and your cutting is precise, the top and bottom E pieces on both strips (four E pieces total) only need to measure 1 1/2” x 3/4”.

This tutorial allows you to trim the excess at the end so that you don’t have to worry as much about the precision of your 1/4” seam. That said, focus on straight, consistent seams and we will adjust for scant or generous seams during the process!  If you feel like you want to be a Perfect Seams Superhero and save yourself some math and cutting, use 1 1/2” x 3/4” E pieces on the top and bottom of each strip. Go ahead and cut your pieces.

Ready? Lay it all out how you want it and then start assembling!

Assembly

Pair each D piece right sides together with an E piece and sew with a 1/4” seam allowance. 

chain piecingI like to get them all ready and then chain piece to save time.

Organization Tip
Be sure to take a photo of your layout before sewing so that you have a visual reference along the way!

Set seams and press open. Lay them out again and check your reference photo. There should be one E that has not yet been paired and sewn. Pair and sew components of the DE strips until they are completely assembled. Press seams open.

If you are being a Perfect Seams Superhero today and used 1 1/2” x 3/4” E pieces on the tops and bottoms of your strips, confirm that your fully assembled strip now measures 1 1/2” x 11”, pat yourself on the back and skip ahead to the full panel piecing.

If you are being merely human today, give your strips a good press and lay them on your cutting mat. It’s time to measure how much excess you have and take care of it.

Planner Cover StripsWe want the finished strips to measure 11” long, but we want to be sure our colorful bits  stay centered. To do this, take the following steps (the example shown is in parenthesis):

  1. Measure each strip to the nearest 1/8” being sure to press it flat so that it extends to its full length. (My strips shown measured 11 1/2” when I held them flat.)
  2. Take the difference of 11” from the length of your strip.   (11 1/2 – 11 = 1/2”)
  3. Divide the difference by 2.  (1/2” / 2 = 1/4”)
  4. That’s how much you should trim from each end of your strip. (I trimmed 1/4” from each end)

Now, measure your strips again. Each strip should measure 1 1/2” x 11”. Don’t worry about a little wobble or wonk at this point. Everything will be smoothed out during the final assembly!

Next, we will piece the rest of the panel.

zippy quilters planner tutorialLay out all of your pieces again as shown (left to right): C,  DE strip, B, A, B, DE strip, C.

Sew them together!

Here’s the order in which I assembled it, but do what works logically for you.

  1. Right sides together, sew B pieces to A. Press seams open. This is the BAB unit.
  2. Right sides together and double-checking the orientation of the DE strips, sew C outer pieces to DE strips. Press toward C. These are your DEC units.
  3. Sew DEC units to the BAB unit, pressing seams toward BAB.

Give your panel a good press, check that it measures 11” x 19 1/2” and trim if needed.

zippy quilters planner cover tutorialFrom here, head over to the Zippy Quilter’s Planner Cover tutorial by Amanda and Stephanie to complete your planner cover!  Use this Riot of Color panel as the “exterior fabric”.

alison glass quilters planner coverHave fun creating your own versions of this cover, and please tag me @nightquilter if you post pictures on social media. I always love to see what you create!

I’m linking up with Stephanie’s Tips and Tutorials Tuesday. I love collaborating with that girl! Can you tell?

Planning a Colorful Year {& Giveaway}

I have spent the past three months or more psyching myself up for the Quilter’s Planner designed by Stephanie at Late Night Quilter. I’ve dreamt of a year during which I’m organized, on time, and actually accomplishing my goals in a somewhat planned and consistent way. One month into using the Quilter’s Planner and I’m excited to report that it has helped me create a life that fits my vision! I also finally finished sewing the cover, which adds even more color and cheer to the year ahead. To celebrate, I’ll be giving away a Quilter’s Planner! Now is your chance to get one since they are sold out everywhere else! To be clear, the giveaway is for a planner and fabric only. The planner cover shown in this post is mine… BUT there will be instructions on how to make one just like this available soon, and I’m including the fabric needed to make the outer panel in the giveaway!

alison glass quilters planner coverEver since Stephanie announced that she would be teaming up with Amanda at What the Bobbin to provide a tutorial for sewing a personalized planner cover, I’ve been planning to finally cut into my cherished Art Theory panel from Ex Libris by Alison Glass. I am absolutely smitten with the result, and am planning to create a tutorial and piecing instructions for the outer panel in case you would like to make an Alison Glass-themed outer cover, too. (I’m hoping to have it to Stephanie some time next week and she will make it available on the Quilter’s Planner website.)

alison glass quilters planner coverThe cover has the Art Theory panel as the center focal print, with Essex linen in charcoal and coordinating Sun Prints 2016 on the sides. Sun Prints 2016 are arriving in stores now, but Alison was kind enough to send a bit my way in advance for this project. I love how all of her fabric lines coordinate and compliment each other so well!

alison glass quilters planner coverHere’s the full outer cover, without the planner in it. As you can see, I chose cool colors for the front and warm for the back, complete with the appropriate Sun Prints 2016. As I mentioned above, cutting and piecing instructions for recreating this outer panel will be available on the Quilter’s Planner website soon. I absolutely love it!

alison glass quilters planner coverHere is the inside without the planner so that you can see the Bookplate in Charcoal (Ex Libris) pockets paired with the Sticks and Twine in Charcoal (Abacus) lining. I added two ribbons; one marks the current weekly calendar page, and one marks the page on which I’m currently sketching new ideas.

alison glass quilters planner coverI used a bit of Artifact in Charcoal from Abacus as a pen/scissor holder, too. It fits perfectly! Realistically, I most likely will keep my pencil and micron pen in the zip pocket and my scissors in my sewing kit, but I know I have an option to carry them along if need be. Plus, BEAUTY!

alison glass quilters planner coverI found a perfectly coordinating zipper and some fun eggplant colored elastic at my local quilt shop Fiddlehead Artisan Supply. The elastic is designed for bra straps, so it’s sooooo silky smooth.

alison glass quilters planner cover
View of the back of the planner cover, with the gorgeous elastic holding it all together.

I love how the elastic holds the planner together when it’s closed. I have big plans to make a coordinating Super Tote (a Noodlehead pattern) and carrying my planner with me everywhere (scheduled for sometime in the future! LOL).

quilters planner cover alison glassAs you can see, I absolutely love my planner and am very excited to have this finished cover to show to you. I am a big list person, so making the decision to set goals and write out my lists at the beginning of each week and again every morning has been monumental. Not only am I improving at setting and staying on top of realistic sewing and blogging goals, I’m also keeping my house nearly completely clean for the first time ever. The change? A switch from “I should do…” to just doing it. Instead of looking at the dishes and saying “I need to do the dishes” I just put on my dish gloves and dig in. I also space out tasks so that laundry is done in manageable steps instead of left until it’s a mountain with no end in sight. Did the planner work some magic over me? Who knows. Either way, knowing that I have a paper planner with actual listed items I need to cross out each day has made me much more accountable for actually doing the things on my list.

Giveaway time!

Now, for the giveaway! Stephanie was nice enough to send me an extra planner and I want to share it with YOU! I’m also going to include a charm pack of Alison Glass’s Sun Prints 2016, one Art Theory panel in charcoal, and a bit of Robert Kaufman’s Essex linen in charcoal–in other words, all of the fabric needed to create the outside panel for a planner cover just like mine!

Giveaway Quilter's Planner and Fabric BLOGTo enter the giveaway today, tell me your favorite feature of the Quilter’s Planner, OR a feature you’d like to see next year. You can read all about this year’s Quilter’s Planner and can sign up for email updates here. Leave a comment and make sure I’m able to get ahold of you if you win.  If you’re a follower of Night Quilter, leave a second comment telling me how you follow for a second entry.

For those of you who want to be in the loop for next year regardless of whether you win this planner, I definitely recommend signing up for the mailing list at http://quiltersplanner.com/. When you sign up, you’ll also immediately receive a PDF of the Individual Project Planning Page. Stephanie will periodically email you new PDFs as she develops them to thank you for your support, and you will be the first to know when preorders open for next year’s planner.

This giveaway is open to US and international participants.  The giveaway will be open until 8pm Wednesday 2/10 when I’ll select the winner randomly with random.org. Good luck, and spread the word! This giveaway has ended. The winner will be announced shortly!

I’m linking up with Crazy Mom Quilts Finish it up Friday, and I’m so excited to have this gorgeous finished planner cover to brighten my days!

Please note that while I usually try to reply to every blog comment by email, due to the volume of comments during giveaways I will not be able to reply to all comments on this post. Know, though, that I read every one and appreciate all of your kind words!!

**Sponsor News**
All Night Quilter love-themed patterns are on sale through Valentine’s Day on Craftsy and Payhip. Sew up some hearts for your home!
Fiddlehead Artisan Supply is having a Cabin Fever Sale this weekend! Use code “CabinFever” on their site this Friday evening through Sunday night to receive 20% off of your total purchases (not including shipping).