
I am so excited to finally share this technique with you, since it makes sewing curves SO simple. I especially love that it can be used on both improv and exact curves, even circles. Mastering curves was on the top of my list this year in terms of quilting goals, and I’ve been working hard at it! While my traditional curve sewing still needs about 900 hours to hit the 10,000 hours that will result in mastery, I’ve found that this method results in perfect curves in five (that’s right–5!) easy steps.
 I first saw this method being used by Hillary from Entropy Always Wins, Stephanie from Spontaneous Threads, and the other #beesewcial-ites, and was intrigued by the way they created such flat-laying, wildly curving improv pieces again and again and again. With some extra guidance from Stephanie, I was able to figure out the technique and have been using it on most of my sewn curves since. You can see where I’ve used it here, here, and here. This technique is derived from the six-minute circle method, but can be applied to any curve. I love using the technique, and so I thought I would share it with you.
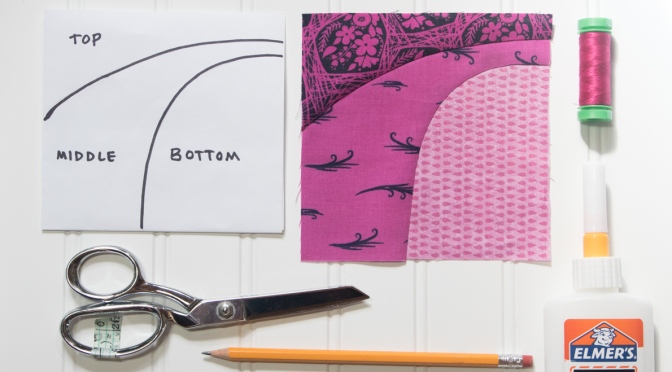
 So let’s get started! First, gather your supplies. You will need:
- your fabric pieces (I used three approx 5″ square pieces of fabric to help demonstrate the stacking of the layers, but you can use any scrap that fits the shape you’re trying to sew!)
- fabric scissors
- washable school glue – Elmer’s works great
- fine glue tip (optional but helpful!)
- zipper foot for your sewing machine (optional but makes sewing the curve much easier)
- iron and pressing surface
- pencil or other fabric marking tool for drawing your line
- paper on which to draw your desired curves (only needed if you are sewing an exact curve–you can free draw or cut improv curves, too)
 Before you begin, decide generally how you want your curves to look. I like to sketch mine out on paper more for a visual than for an exact plan. Think of your fabrics in terms of layers: the bottom is the inside of the curve, moving upward and outward. Keep in mind that if you want to have a convex curve next to a concave curve, simply switch the way you view your “top” and “bottom” layers. The inside of the curve is always the bottom, and work from the bottom up.
Once you have an idea of generally (or exactly) how you want your curves to look, it’s time to get started. Five easy steps, I promise! Ready?!
Step 1:
Draw desired curve on the wrong side of top fabric piece.
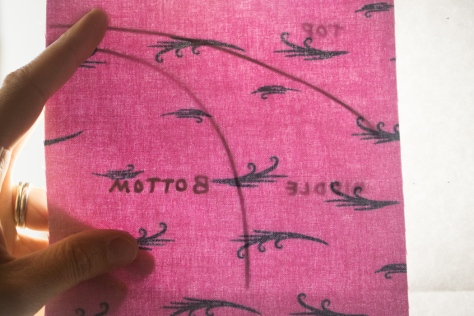 Draw your curve on the wrong side of your top (or in this case, middle) fabric with a pencil or other light fabric marking pen. If you want your curve to be exact, you can trace the line from your paper sketch by holding the fabric and paper up to a window or other light source. Be sure that the right sides of both the paper and fabric are facing away from you, since you want the line drawn on the wrong side of your fabric, but also want the curve to go in the proper direction.
Step 2:
Cut 1/4″ away from the inside edge of your drawn line.
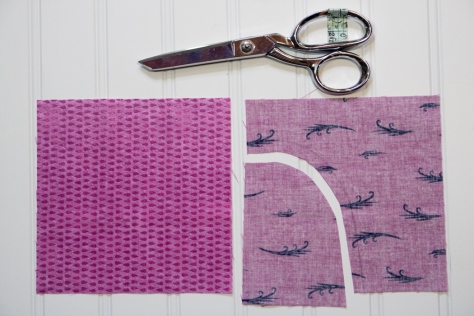 Next, cut between 1/4″ and 3/8″ away from the inside edge of your drawn line. This is your seam allowance.
 Clip your curves to help make your curve smooth. Be sure to cut only halfway to the drawn line, not all the way to the drawn line.
Step 3:
Press seam allowance.
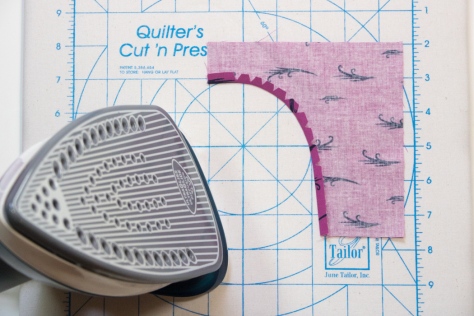 Next, carefully press the seam allowance along your drawn line. Take your time here to make sure your curve is pressed smoothly and exactly along your drawn curve.
Step 4:
Glue baste to bottom layer.
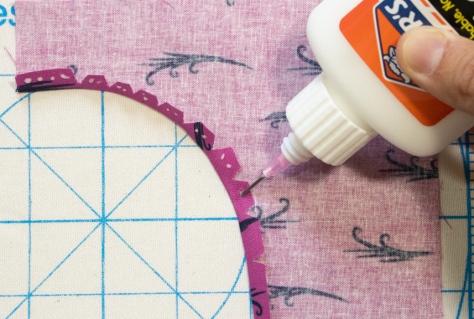 Now it’s time to glue baste this curve onto your bottom layer. Using a fine glue tip and washable school glue, create a small beaded line of glue along the seam allowance. Carefully lining up the outer corners of your squares, layer the middle fabric (with right side facing up and your cut, pressed, and glued seam allowance tucked under) on top of the bottom piece of fabric. This step is why I like to begin with three squares that are the same size. It makes positioning my curves as easy as pie!
 Press with your fingers, making sure the seam allowance is in the right spot and fully folded under. Press with a hot iron to set the glue. Admire your perfect curve… but it’s not sewn yet! Just one more step.
Step 5:
Sew along drawn line.
 Once the glue has been set and fabric cooled off, carefully lift up the top layer of fabric to expose the seam allowance. I use my zipper foot with my needle moved all the way to the left, since the narrow foot helps ease around tight turns. Carefully and slowly sew along your drawn line.
 As you sew around the curves, carefully move the top fabric out of the way, being sure not to allow folds or puckers to form under the needle. Backstitch a bit at the beginning and end of your sewn line to secure the stitches.
 Viola! Press again and you have a perfectly sewn curve!
 Trim away the bottom fabric that extends beyond the seam allowance, and save for your next scrappy project.
 Repeat those five easy steps for your other layers: Draw, Cut, Press, Glue Baste, Sew.
 There you have it. Smooth curves, either traced and perfect, or free cut and improv.
I hope you find this tutorial helpful! I know I can’t stop sewing crazy curves now that I know I can sew them like this. Next week I’ll be sharing a block tutorial for the Cloud9 New Block Hop, and *hint hint* part of it will use this method! Get your practice in now!
I’m linking up with Let’s Bee Social, and will link up with Tips & Tutorials Tuesday when Stephanie & Yvonne get it started again in a couple weeks!
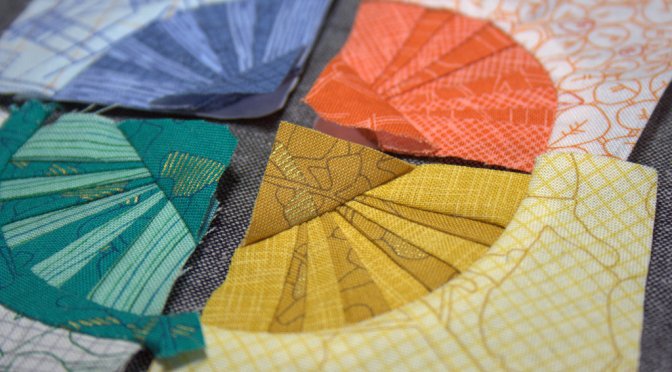
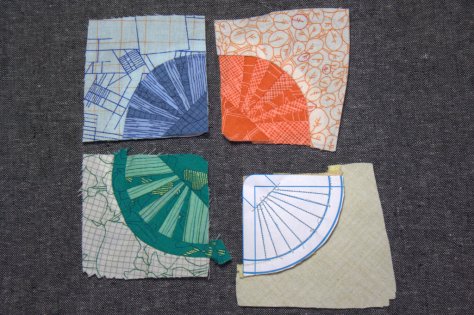 I’m nearing the finish line with this little one. It features some of my favorite Carolyn Friedlander fabrics, with a goal of playing with transparency in a cyclic way. I created a mini 2″ square foundation paper pieced pattern for each quarter of this mini mini, resulting in about a 4″ square. I used the template I designed for accurate piecing of the center spokes, and then have used different methods for sewing the outer curves.
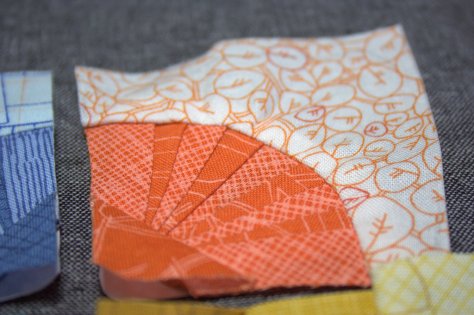 One of the fun perks of dragging projects out over obscene lengths of time (chuckle with me for a minute, here) is that it becomes a documentation of skill development. Two of the four curves were pieced using traditional curved sewing, and the wobbly, puckery wonk is indicative of my amateur curve abilities a few months ago. In fact, my original plan includes a needle-turn appliqué element over the curve, since I knew that it would most likely be something I would need to mask a bit (possibly a lot bit).
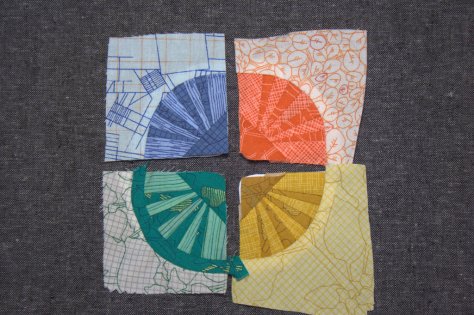 You can see on the green quadrant that there is another dark curved piece added on top of the curve. That is needle-turned and does a fabulous job of covering the little inconsistencies of my tiny curved stitching. Use the method that works best for you, right!?
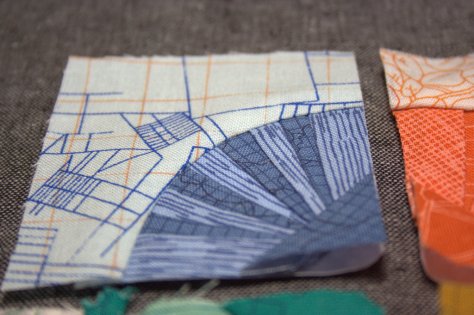 However, since completing the first two quadrants of this mini mini, I have learned and conquered the
 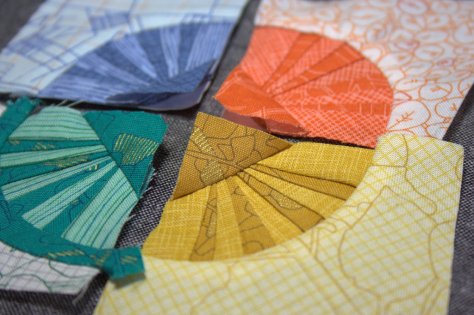 I am currently contemplating the quilting for this mini mini, and am leaning toward some simple, large, hand stitching to secure the layers and add just a bit of interest. I also have some travel plans coming up, so as long as I can get the top prepared and layered, hand stitching might be just the thing to take with me on my trip. I’m really happy with how this is progressing, though, and I’m grateful as always for the patience of my quilty friends as I slowly process, evolve and execute my plans for their personalized mini minis. I’ll be sure to share the finished mini mini once I finally complete it.