
I don’t travel often, and when I do, I usually have three kids in tow who demand quite a bit of my attention, so traveling solo to and from QuiltCon early last month was quite a treat. Even with layovers, long flights, and all-day travel days, it seemed like I was on vacation traveling solo. Well, okay, I WAS on vacation… but you know what I mean! All the free time meant that I made a lot of progress with my hand stitching, which I want to finally share with you today.
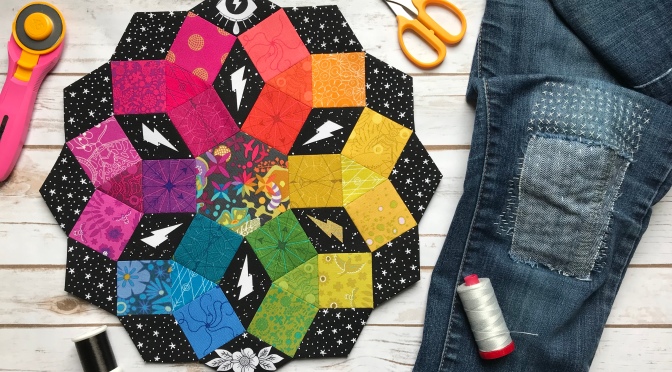
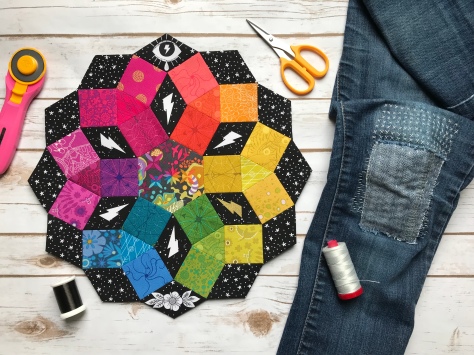
 I headed off to QuiltCon with an English Paper Piecing (EPP) project–the Mandolin Quilt Block by Jodi at Tales of Cloth. I had gotten a bit further than my last blog update on this project, but I still had the entire outer ring to baste and stitch on, as well as some of the inner colored segments to attach. EPP is my favorite travel stitching project at the moment, since it’s compact, fun, and easy to pick up and put down. I also don’t seem to be tiring of rainbows and high contrast, so hopefully you’re not getting bored, either!
As you can see, I was able to completely finish stitching my Mandolin Quilt block during my travels, which means this is next in line to become an awesome pillow right behind its Moonstone brother. I used Alison Glass fabric in that saturated stunning rainbow for which she’s so well known, and threw in some fun meticulously cut Libs Elliott fabrics from her True Love line for Andover Fabrics for contrast. I stitched it together using Aurifil monofilament thread in smoke, which meant I didn’t need a headlamp for precision on the poorly lit plane, yet you still can’t see any of the stitches. Bonus!
 While I was traveling, the mending on my most-worn jeans began to wear through, but fortunately I was able to pick up a mending kit from the Brooklyn Haberdashery booth at QuiltCon, and I stitched on a new patch during my travels home. I love the texture on this patch, and also am kind of loving the mending of mending layered play between the stitches on the original mending and the stitches on the new.
 I used the 12wt Aurifil thread I had with me to stitch on the new patch, whip stitching the full edge in place and then used simple vertical running stitches to secure the patch further. These jeans contain a bit of stretch, which is part of why they are wearing through so quickly, but also means that there’s a good clear Kitty-knee worked into them. That knee mountain makes me laugh, but gosh are these jeans comfortable!
 My long flight back to NJ after QuiltCon allowed me to finish both of these hand stitching projects, which felt pretty amazing since I typically make progress at a snail’s pace.
I’m still working on my QuiltCon Reflections post, but hope to be sharing that soon. Spoiler: Finishing these projects was the icing on the cake of a wonderful trip.

 Today I’m excited to be the first quilting stop on Patty’s Flit and Bloom Blog Tour, where I get to show you what I’ve been working on these past couple of months using her newest fabric line for
  I began with one of my favorite EPP patterns,
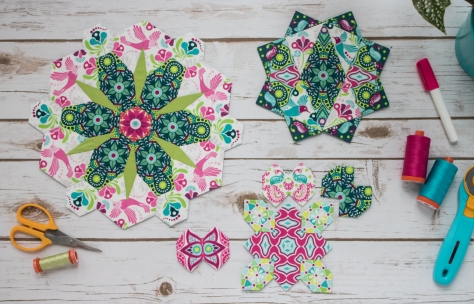
  Aren’t these peacocks fun as they dance in pairs around the block?
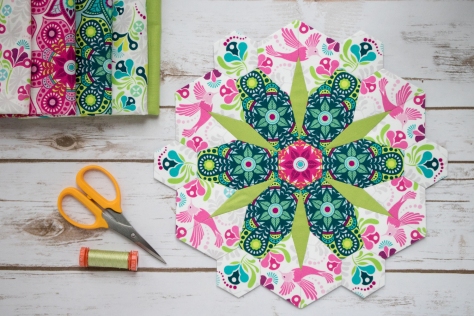 While I was stitching my Moonstone block, Mathew (aka
  I knew I wanted to incorporate the hummingbirds into this flower block, since hummingbirds and flowers go together like rock and roll, but couldn’t fit them onto any of the individual shapes. Then I realized that I could split the hummingbirds across two background fabrics and decided to go headfirst into meticulous cutting at its best.
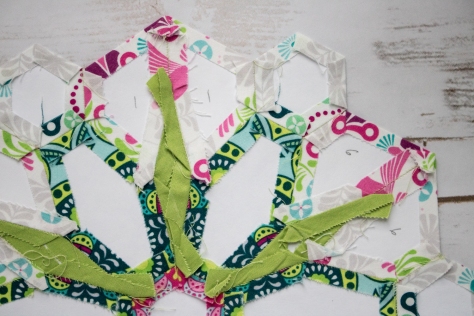 I labeled the humming bird front-back pairs since the Flowermania block is pieced in such a way that they are only joined right at the end as the segments are stitched together. This fussy cutting feat was no easy task, I might add. From the careful cutting to make sure the hummingbird halves would seamlessly meet when stitched together, to basting the pieces *just* so, to then stitching it all together and having it meet perfectly around the green diamonds, this was a challenge. They are not all perfectly matched up, and I learned a few tricks along the way that I’ll keep in mind next time, but overall I’m happy with the outcome.
 Some hummingbirds match perfectly, but even the imperfect ones are perfect in their own way. Hummingbirds are happily flitting around this Fowermania bloom, and it seems to me that it’s the perfect poster-child block for Flit and Bloom fabrics. Right!?
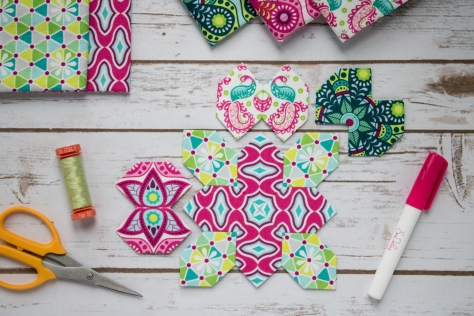 Finally, I started to dive into a Lucy Boston Patchwork of the Crosses block, since what is EPP without Lucy Boston? I love how rotating the fabrics creates even more meticulously cut geometric fun, and I look forward to seeing how this block shapes up.
 One of my favorite parts of planning with Lucy Boston blocks is in the outer pairs. I like to make a few “test pairs” with different fabrics and arrangements to see which ones I visually like best.
 I love that Flit and Bloom has plenty of opportunity for mirror image fussy cutting, since those are my favorites–can you see why?
 Which arrangement is your favorite?
 I used
 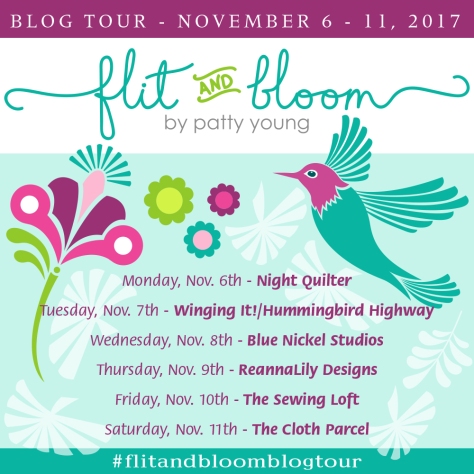 Be sure to visit the rest of the stops on the Flit and Bloom Blog tour to see what everyone has made with this fun fabric:
 In the spirit of setting myself up for success, I opted to make four (4) blocks to make a pillow rather than a full sized quilt, and I dove into my bright Alison Glass stash to put together a fully saturated, smooth rainbow gradient. You know how I feel about rainbows. Alison Glass fabric rainbow + Giucy Giuce EPP project = heaven on a summer’s day!
 I used mostly 50wt Aurifil thread, with a few 80wts thrown in, using coordinating colors so that the stitches blend right in with the blocks. The threads shown here are (from top left clockwise): 2535-Magenta, 1154-Dusty Orange, 5015-Gold Yellow, 5017-Shining Green, and 1125-Medium Teal, all 50wt. There’s nothing quite as satisfying as matching the perfect thread to your fabric!
 Alison’s Art Theory print from her Ex Libris line (still my ultimate favorite fabric ever) was my color inspiration, so I planned my 4-block panel around the color flow in the center octagon. Throughout the course of the summer, I finished the four blocks and completely stitched them together!
 Now I am at the point in the game where this could lounge in the works in progress pile for a while, but instead, I am going to use my excitement to forge ahead and aim to finish this beauty, which is sure to be my most favorite pillow of all time.
 My next step is to choose background fabric, press the pieced panel thoroughly, remove the template papers (so that I can use them again!!), and then hand stitch the panel down onto the background fabric. Just last week, I visited my local quilt shop
  After looking at those options, I still felt like I needed to see the Insignia before deciding, and with the encouragement of a few friends on Instagram, especially Erin who said, “I’m a strong believer in first instinct=best instinct!”, I ordered a yard of Insignia in Charcoal from Alison Glass’s shop. (Thank you Erin!). Clearly, my first gut choice is the winning choice!
 Next I will hand stitch this epic panel to the perfect Insignia background using Aurifil’s monofilament thread in Smoke. I plan to quilt this with the Smoke monofilament thread, too, and I’m so excited just thinking about how amazing this pillow will be. This will be my first time sewing with monofilament thread, either by hand or machine, so I’ll be sure to share how it goes.
 As for me, I’m nearly finished piecing my next rendition of a Moonstone block, going with the Gems layout and a more nautical theme. I plan to make only one block and top stitch it to a large zippered pouch for a friend to whom I owe a quilt. I’m hoping the consolation diaper pouch/zipped pouch will hold her (and her nearly 1 year old baby) over until I manage to make the quilt!
 As you can see, I’ve been absolutely struck with Moonstone Madness and it doesn’t appear to be tapering off just yet. I’ve had a wonderful time piecing together these blocks, and the portable nature of English Paper Piecing ensures that it is still very much on the top of my “summer stitching” projects list!
 …after January’s stitching…
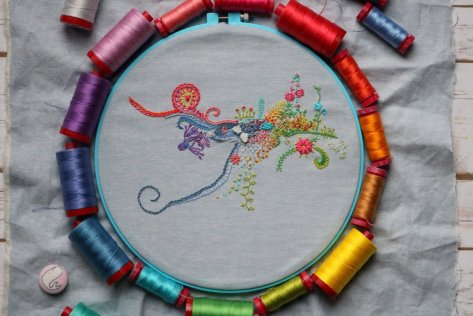 …after February’s stitching…
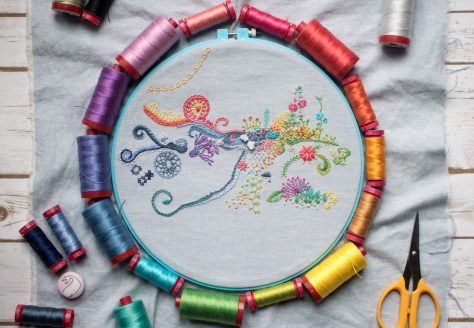 …after March’s stitching…
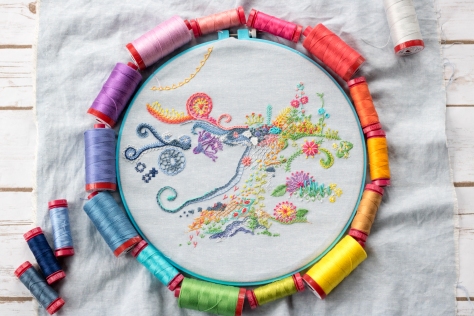 …after April’s stitching…
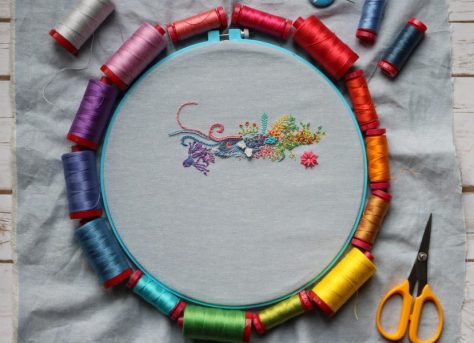
 …and here it is after May’s stitching!
 I added a whole sun burst super nova element in that warm sunny section of the hoop, as well as some added texture with different rows of yellow stitches. This little supernova was very fun to make, and grew day to day. Again, I began with not much of a plan at all, just wanting to add some more bright yellow to the top portion of the hoop. After a few days, it took on a life of its own and continued to grow and take shape until the flowery starbursts decided to cap the growth (for now).
 I also added some “background” plant like elements behind the patch that began this whole hoop back in January. My biggest challenge with this daily stitching challenge is figuring out how to create background behind stitches that have already been stitched. Some attempts are more effective than others, but I figure it’s all part of the learning experience.
 A few more flowers were also added, in the form of lavender roses and their associated greenery. The flower garden continues to grow and blossom.
 A month of progress wouldn’t be complete without adding some motion to the ocean! There wasn’t all that much growth here this month, but some running stitch and french knots helped begin to create some more flow.
 The hoop is beginning to fill out, but knowing that I’m just about halfway through the year, I do think I should be able to fit the entire year in this hoop without extending off the sides. There are lots of little spaces between elements, and while I hope to not fill every *single* one, there is a lot of room for depth and texture and who knows what else!
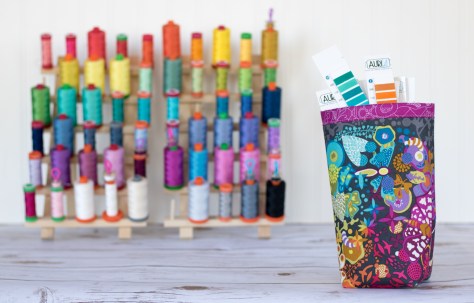 As I mentioned in my post a few week ago, the list of use ideas for this tall and skinny fabric bin just keeps growing. From sorting tiny fabric scraps to housing your favorite adult beverage bottle, the sky’s the limit.
 Today I’m also sharing one such use over on
  Head on over to the