Heading into the summer, I had too many irons on the fire, as the saying goes. I began writing this post back in June, and not only did it not get published, but I haven’t blogged since. This past summer was full of so many fun things, and between a summer of family adventures, big projects, and exciting opportunities, I just didn’t have the time to dedicate to blogging about them. I take pride in the quality of the posts that I share, which means that each blog post requires forethought, a photo shoot, photo editing, writing, formatting, and of course the sewing part! With all of the deadlines I had on top of an already full summer with all three kids home and ready to rumble, blogging needed to take a back seat. I needed to let it fall off my mental (and written) to-do list.
Fast forward through summer, then back-to-school, then how are we already past Thanksgiving?! I’ve been thinking about returning to this space and I figure now is as good a time as any! I will certainly need to reevaluate the frequency and depth at which I share, but I do hope to be sharing something here with more regularity.
I thought it might be fun to return with just a few peeks at what I accomplished over the summer, some complete and some still in progress. For those of you who want to be sure to stay in the loop, you can opt in for my emails, follow me on Instagram @nightquilter, follow my Night Quilter Facebook page (which is mostly another place to view my IG posts and fun announcements), or join my Pollinate EPP Garden Party Facebook group, where there’s a fun group of stitchy friends gleefully hand-stitching my Pollinate EPP quilt (there’s so much I haven’t shared here!).
Anyway, here are some highlights of my past few months:
Quilter’s Planner 2019 Photography
 Once again I was honored to have the task of doing the quilt photography for the 2019 Quilter’s Planner, and it was loads of fun this year! I’ve learned a lot each year as I have tackled the monumental task of photographing 12-15 projects out in the wilds of Maine with the help of my strong, tall, patient husband, usually in a fairly short timeframe.
 This year, we were definitely a lot more relaxed and peaceful during the photoshoots, which I’m sure Garrett appreciated!
 With projects photographed all through Maine, next year’s planner is sure to inspire, and if you haven’t ordered yours yet, I definitely recommend doing so! As an added bonus (and added irons on the fire) I also contributed a pattern to the Quilter’s Planner 2019 Companion Magazine (the Pollen Pillow, which is shown above and is a baby bite from my larger Pollinate EPP pattern, which I’ll talk about soon!), and I wrote an article with the basics for English Paper Piecing (EPP). There’s so much value to the package you get with the Quilter’s Planner, and I’m grateful to have been able to contribute so much to it this year. See more and order yours HERE.
Summer Adventure Quilt Pattern
In the beginning of the summer, I released my Summer Adventure Quilt Pattern, which was a project I realllllly wanted to get out before the summer months hit. It was actually my very last blog post on here before I began the summer juggle, so you can read more about it HERE. With everything else on my plate, I wasn’t able to do as much with the Summer Adventure Quilting with Kitty Wilkin group on Facebook, but there’s always next summer! The pattern is out and available in both my Craftsy and Payhip shops, which are linked in the blog post.
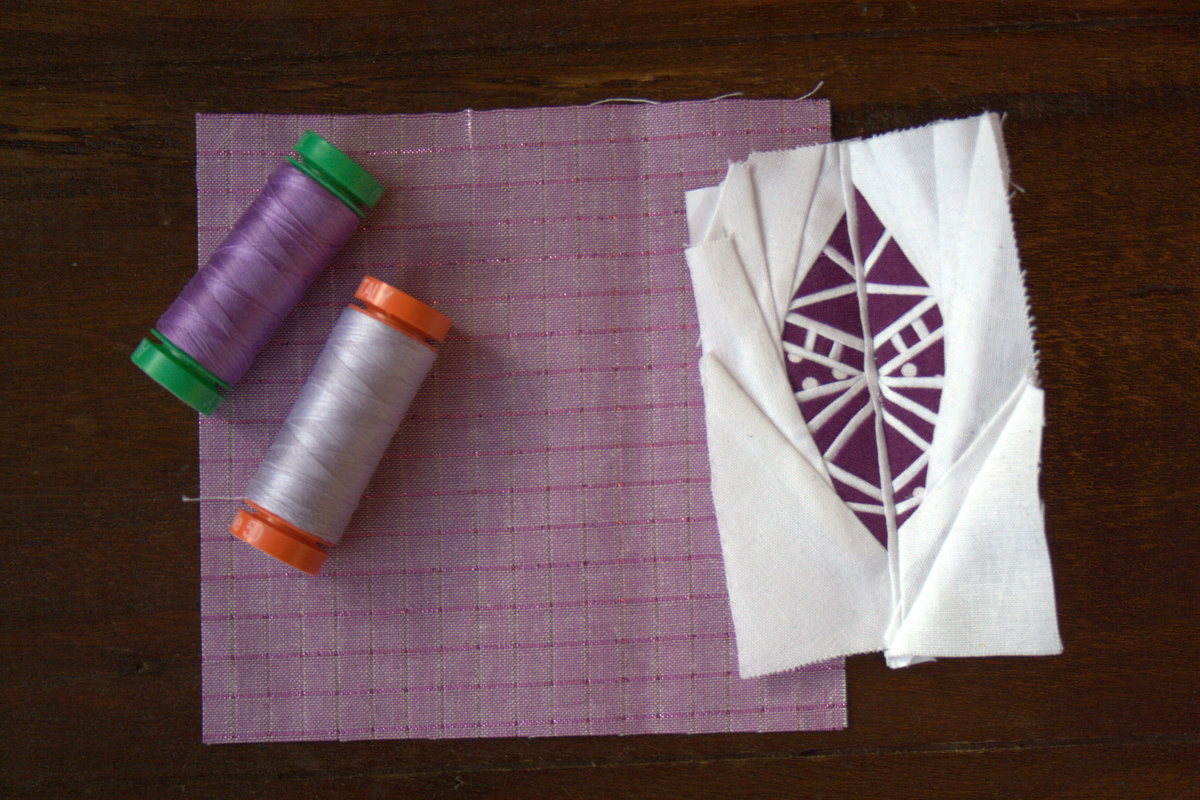
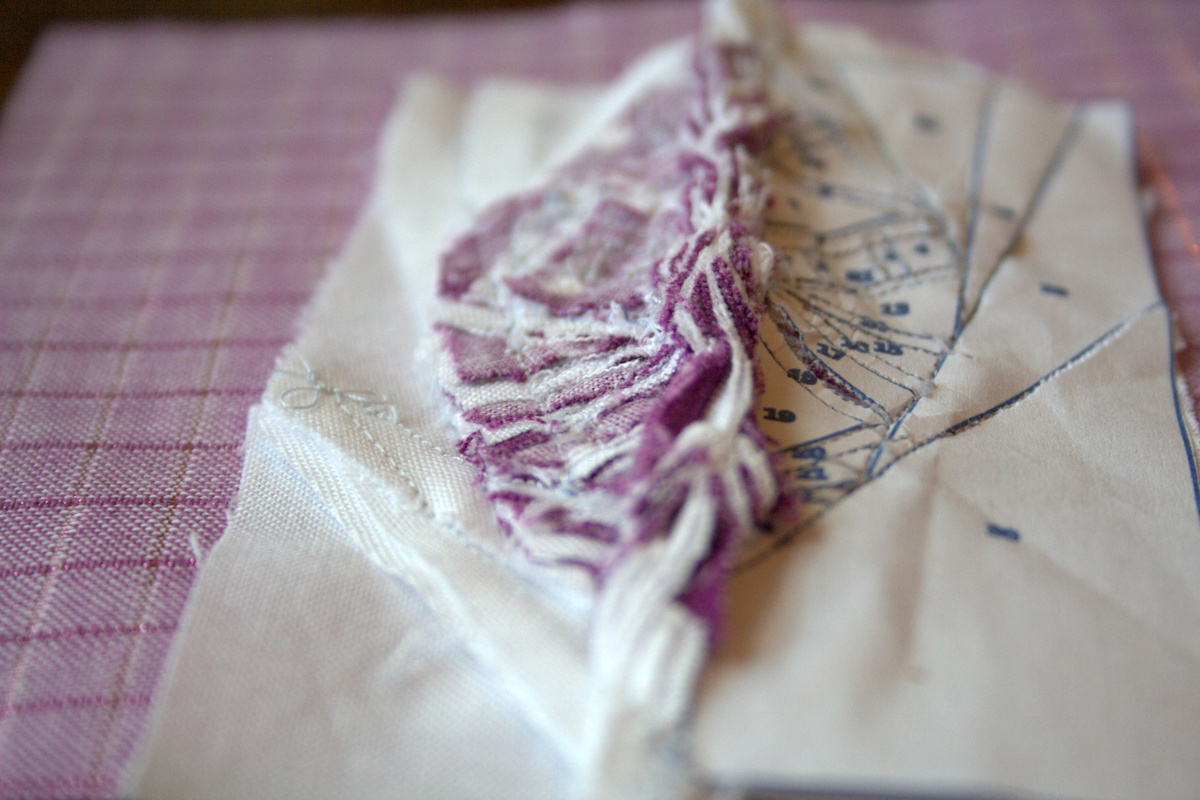
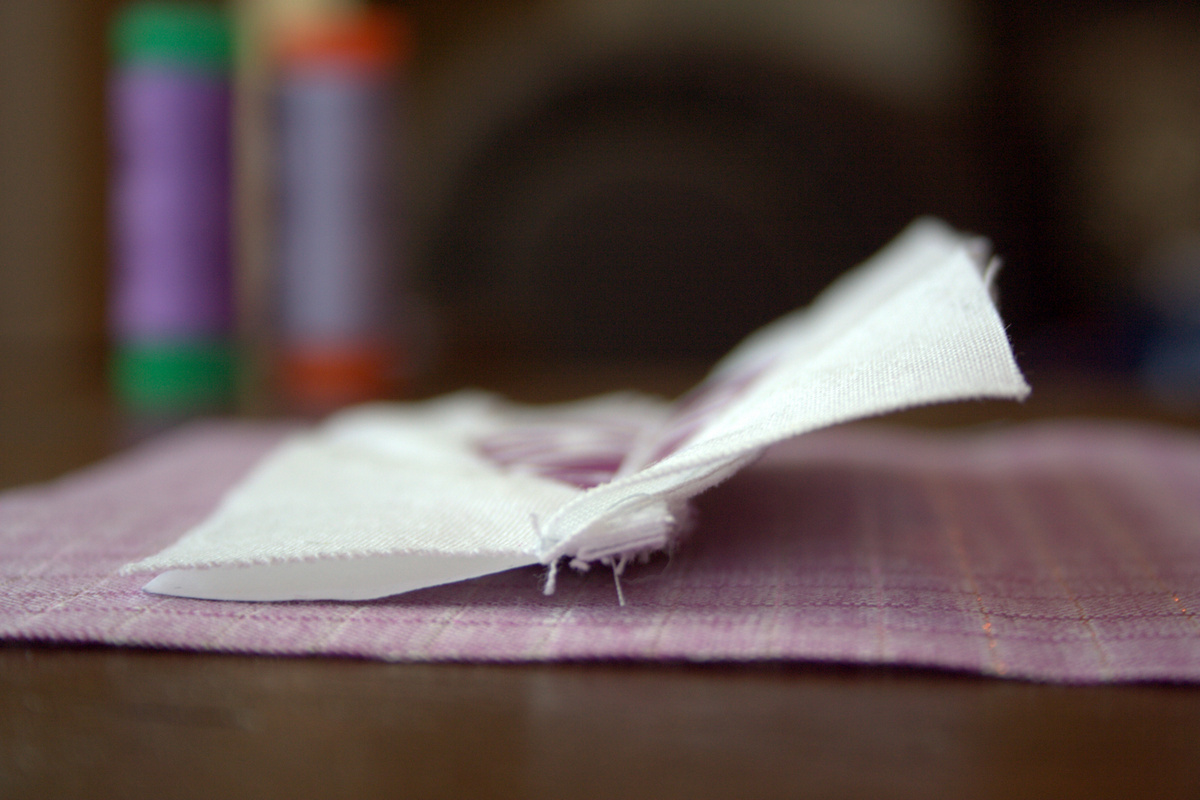
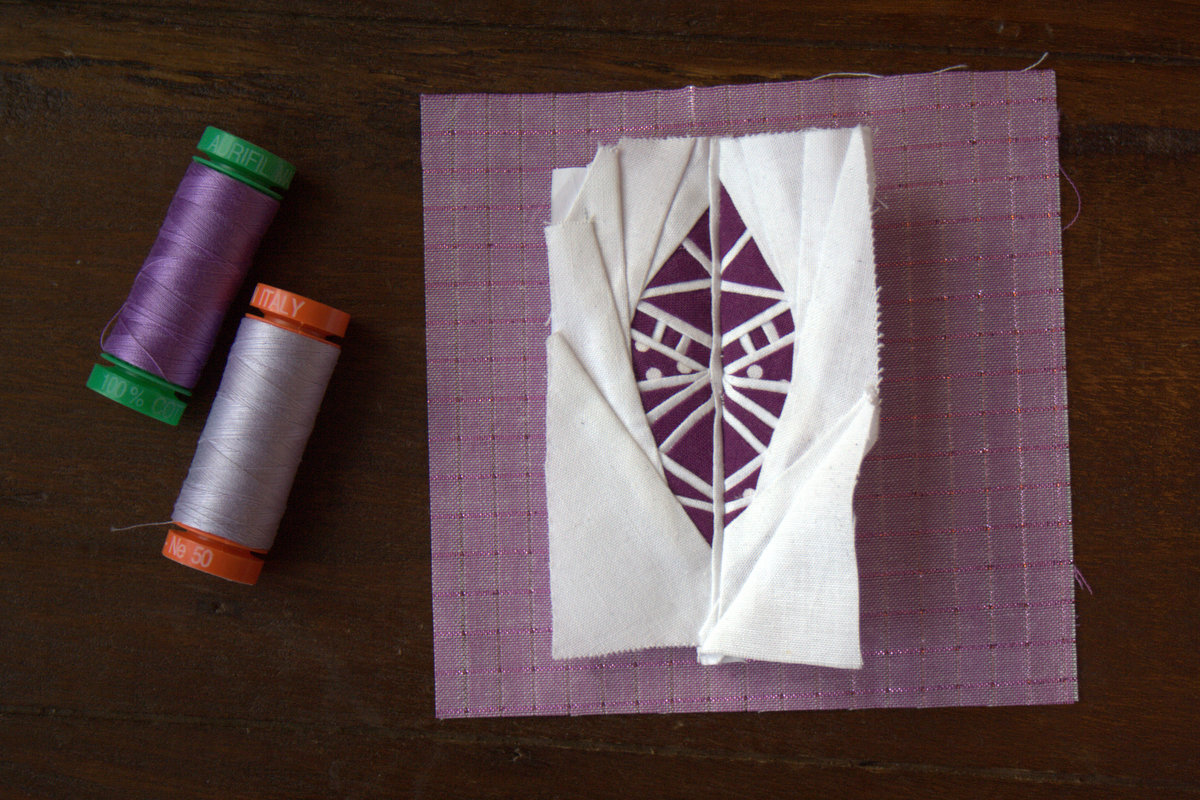
Pollinate EPP Pattern
 Perhaps the most exciting and monumental project I tackled over the course of the summer was the design of my very first English Paper Piecing pattern with Karen the DIY Addict! My pattern is called Pollinate and it’s absolutely wonderful (yes, that’s a proud mama’s take on it, but from what I’m hearing, a lot of others agree!).
 Perfect for both beginner and experienced EPPers alike, Pollinate is a diverse pattern that has endless possibilities for design and color play. Plus, the “filler” sections look like bees!! You can see the many different Pollinate quilts taking shape on Instagram by checking out the #pollinatequilt hashtag (you don’t have to have an Instagram account to see them, I don’t think). There are 3 finished quilt tops so far, and each completely different! I will definitely share more about that here soon. In the meantime, you can read more about the pattern and order yours (if you want to join in on the Garden Party fun) HERE. Join the Pollinate EPP Garden Party on Facebook for more inspiration, a joyful group of stitching cheerleaders, and a community of help! Or you can watch my totally amateur videos on YouTube. Yes, I have finally created a channel, and with my phone taped to a tripod, I’ll slowly add video tutorials all about EPP and anything else you want to know!
Aurifil Photography
 This summer I was honored to work with Aurifil to update the photographs on their website. As you all surely know, I love photography, and combined with my favorite quilty notion, I couldn’t turn down the opportunity.
 I photographed all 9 different weights of thread offered by Aurifil in a variety of stagings, and truly enjoyed the process. You can scroll through the photos on the top of the Aurifil Thread website to see a selection of my photos, and I’ve included a couple of my favorites here. There’s also a fun interview with me on the Auribuzz blog HERE.

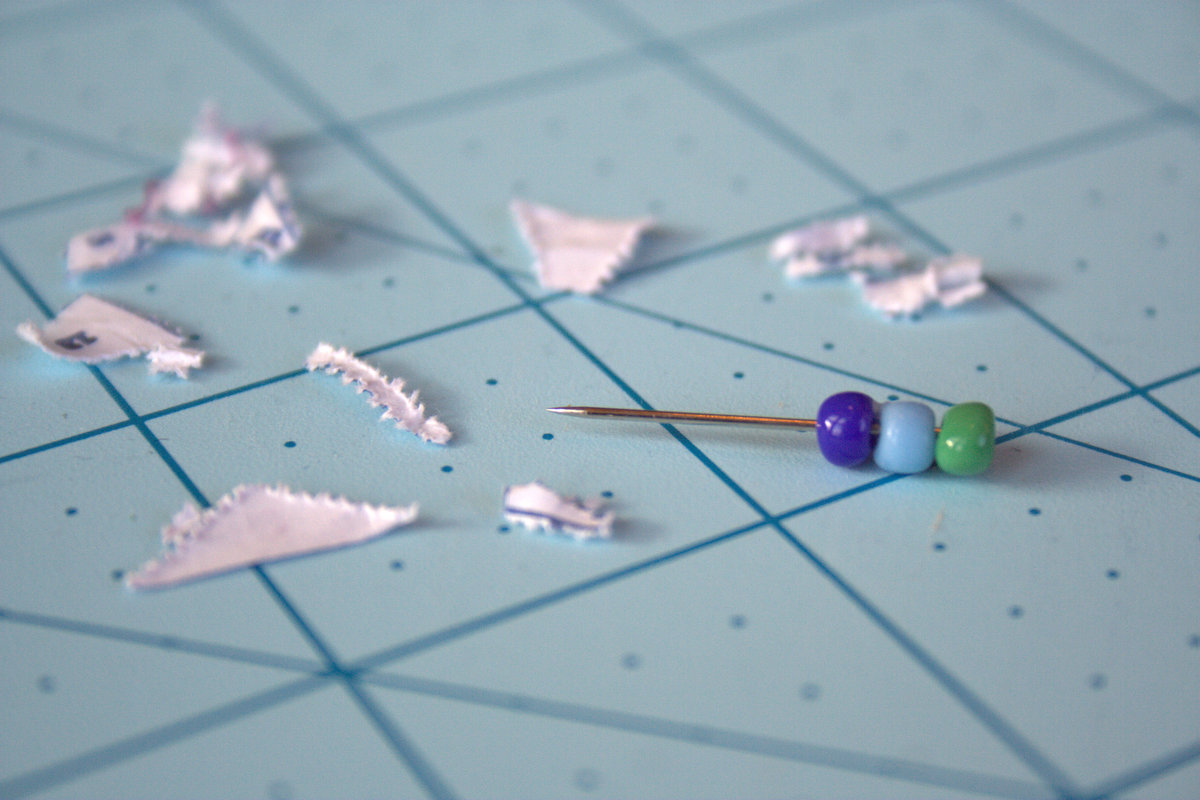
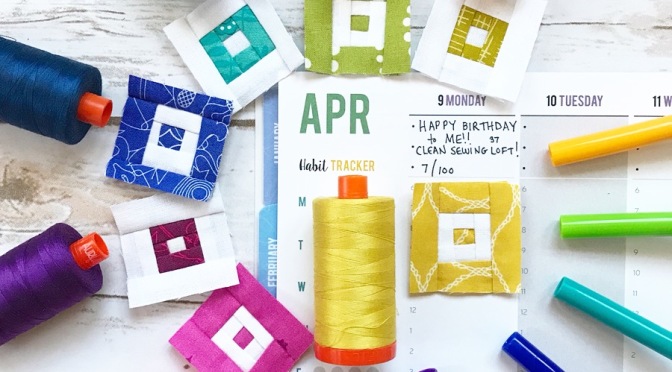
100 Days of Sew Smaller Challenge
 This summer I also tackled the 100 Day Project, and chose to go with 100 Days of Sew Smaller. My goal was to sew a teeny tiny quilt block that finishes at 1 1/4″ square each day for 100 days. I created foundation paper piecing templates as I went, stretched my comfort zones in both minuscule piecing and fussy cutting at a tiny scale, and really had a great time. AND I actually finished all 100 blocks!! The progress photos and finished mini quilt will be exhibited in the special exhibit at Quilt Con in Nashville in February of 2019, so be sure to check it out if you’re planning on attending QuiltCon!
The Splendid Sampler 2
 I’m excited to be one of the contributing designers to the Splendid Sampler 2 book by Pat Sloan and Jane Davidson, and have been sewing along as much as I could fit in. They released 20 free blocks to kick off the Sew Along beginning in June, and now we are diving into sewing the book! My block will appear somewhere along the course of the sew along, but you’ll just have to wait and see which one it is!
 Here is a screenshot showing some of the blocks I’ve made so far. You can see all of them on Instagram HERE, and I’ll aim to share updates here as I make more!
Phew! There’s surely so much more that I’ve forgotten to share, but this is a pretty decent start on catching up! What have you been up to this summer?
 I’m officially 11 days into
  1/100
1/100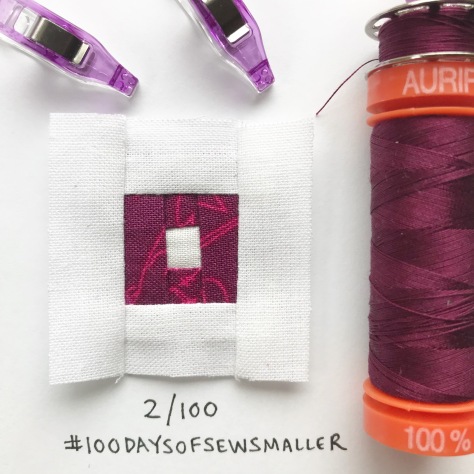 2/100
2/100 3/100
3/100 4/100 (which was also the day when I created a foundation paper pieced template for my day 11 block. I didn’t sew that one until today, but the idea was born on day 4!
 5/100
5/100 6 & 7/100 – Day 6 was the day of my daughter’s First Communion & Confirmation and my family was visiting all weekend, so I got a self-granted “bye” on posting. I caught up on my birthday, day 7!
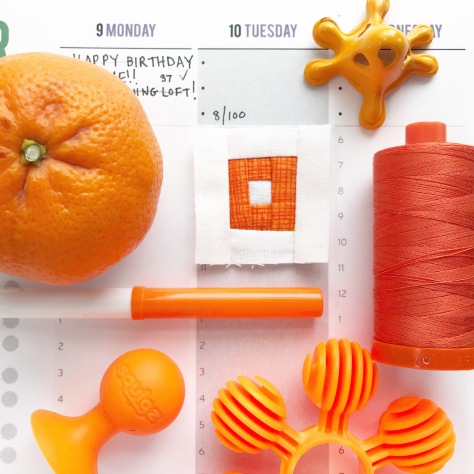 8/100
8/100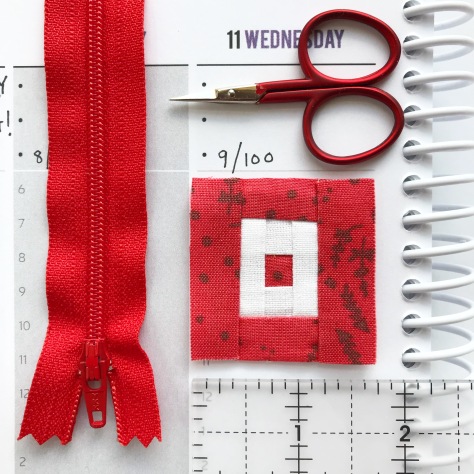 9/100
9/100 10/100
 11/100
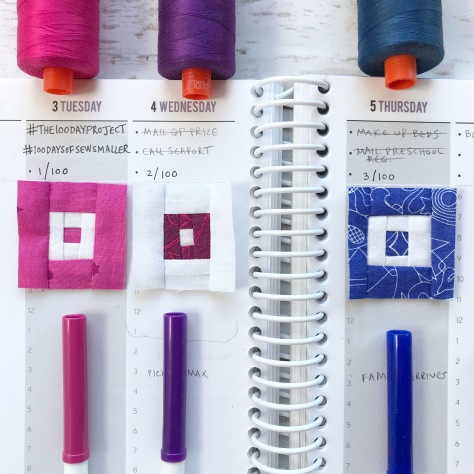 Days 1-3
 The first week of blocks
 The first 10 days
 I love how your challenge is going Kitty and how it relates to you as a quilter but also think you should let it be organic and use the 100 days to explore if needed and push yourself also if needed. Don’t get locked into a direction.
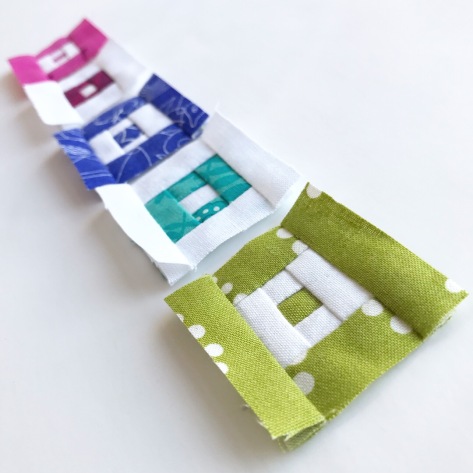 I’ve worked ahead twice (once when my entire family was visiting for the weekend for my daughter’s First Communion, and once today since I know weekends are often filled with family time and not necessarily sewing time), but have stuck with the block per day format.
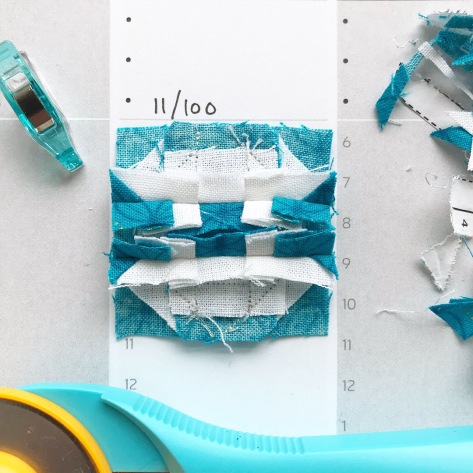 I’ll leave you with a cheeky peek at the backside of my latest block, since one of the big questions I’ve gotten so far over on Instagram is “How big is your seam allowance?”. My answer: 1/4″ seam allowance, just like always. Note that so far I’ve created blocks with mostly straight joins, and I might scale a few seam allowances down to 1/8″ to decrease bulk as I experiment further, but for the most part, the 1/4″ seam works just fine!
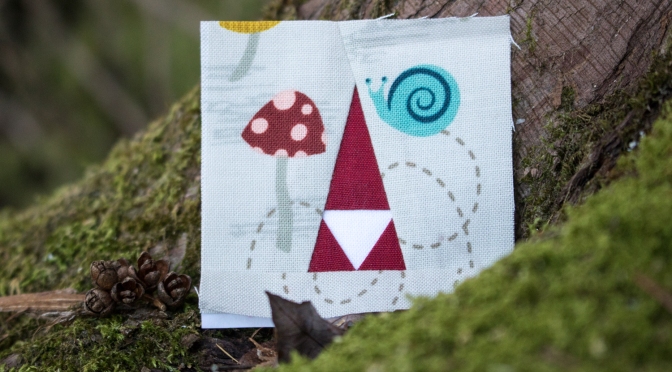
 Before stitching up a Peder or Halvor Tomte (my two favs at the moment), I had to sew one of the adorable Tiny Tomtes! This Tiny Tomte is a free addition when you buy the
 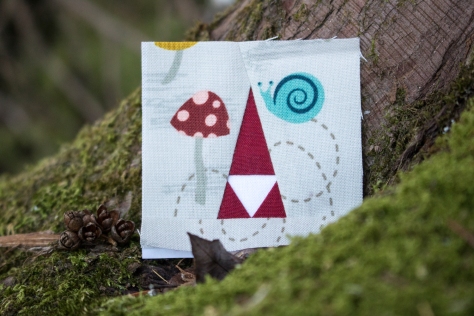 I used a Henry Glass print for the background, since the mushroom and snail seemed right at home with this Tiny Tomte. This print actually also happens to be the very first fabric I ever bought, years and years ago before I began quilting. The red fabric is from my scrap bin, some gorgeous Oakshott Lipari from my
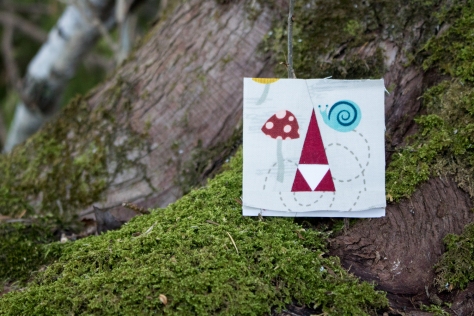
 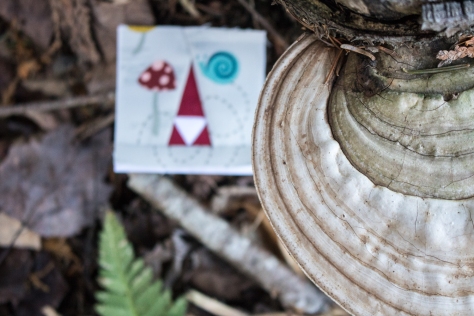 After sewing up this Tiny Tomte, I had to take him out on an adventure in the woods so that he would feel at home. During my youngest’s nap, I ventured out behind our house and Tiny Tomte had a fun photo shoot! We found a gorgeous shelf fungus on a tree stump, so Tiny Tomte played beneath it.
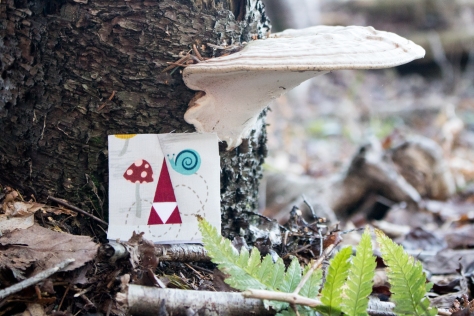
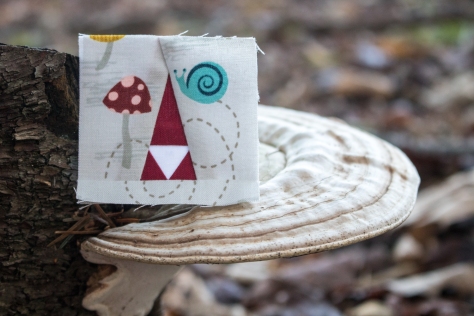 And on top of it!
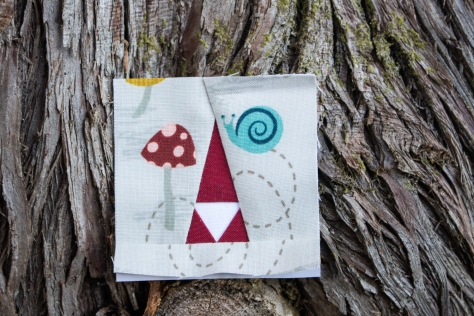 He climbed some trees and gathered some souvenirs.
 A pinecone three times his size and an evergreen bough will have to hold him over until we cut our Christmas tree this year. I think they will do just fine.