
It’s no secret I struggle to finish things. In fact, last year, I made it my yearly focus to finish what I started, but then got distracted by other fun ideas and didn’t actually succeed in finishing much of anything! Oops. Life happens and all is fair in love and creativity, right? This year I’m going to try something a bit different. I’m going to *try* to join in on the community link ups that focus on FINISHING projects completely, namely the 2018 Finish-A-Long hosted by a group of bloggers across the world, and One Monthly Goal hosted by Patty at Elm Street Quilts. In my style, I’ve already missed the link up for the January goal for One Monthly Goal, but perhaps I’ll get February’s posted in time! I’m sneaking in right under the wire for the Finish-A-Long Quarter 1 link up, but I made it!
![]()
There is a lot going on behind the scenes here, between preparing for my QuiltCon classes and lecture, working for the Quilter’s Planner manning the Instagram feed and leading a January daily photo challenge as well as helping guide the 2018 Block of the Month Sampler sew along (so many fun things happening over in the QP community!), working on the development of a couple of patterns I hope to release before summer hits, and of course being a full time mom and wife, so I don’t imagine my lists will be long. But any progress is progress, and one more way to help keep me motivated can’t be a bad thing.
As seen in December when I joined the 31 Day Blog Writing Challenge, committing to a public community goal helps motivate me to meet my goals. While I didn’t post a blog post every day in December (note that I went into it not expecting to post every day), I did write or work on blog posts nearly every day and I published 8 posts for the month when my monthly average for the 6 months prior was 2-3 posts. That’s a marked improvement and I consider my goal met.
 So here I go again, publicly announcing my goals so that maybe the thought that you or someone out there is eagerly anticipating my finish, cheering me on, and helping spark my fire even when I’m feeling heavily weighted with other responsibilities, will help me stay on track.
The first quarter of this year includes a good amount of travel and preparation for QuiltCon, which is in late February in Pasadena, California, so I know most of my time will be spent fine-tuning my classes, preparing handouts, and practicing my lecture so that I can share my knowledge, inspiration, and tips the best I possibly can (It’s not too late to sign up for the Advanced Quilt Photography classes I’m teaching with Michelle Bartholomew at QuiltCon, or to register for my Quilts to Mark Milestones lecture Sunday morning, so go register if you will be in Pasadena and haven’t already!). The Finish-A-Long guidelines clearly encourage us to set high goals, but I also know I need to set myself up for success so I don’t get too overwhelmed or discouraged, so I’m going to start with four projects I hope to have completely finished by early April when Q1 ends:
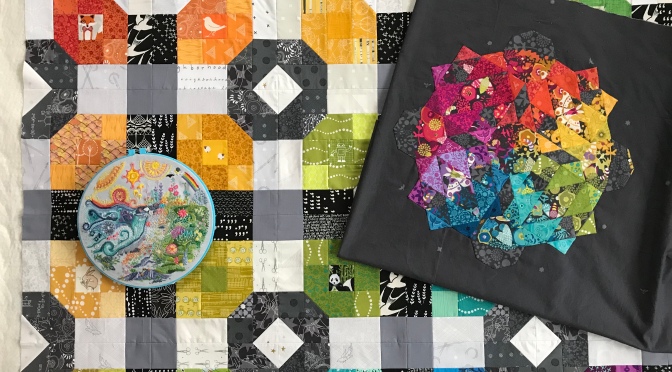
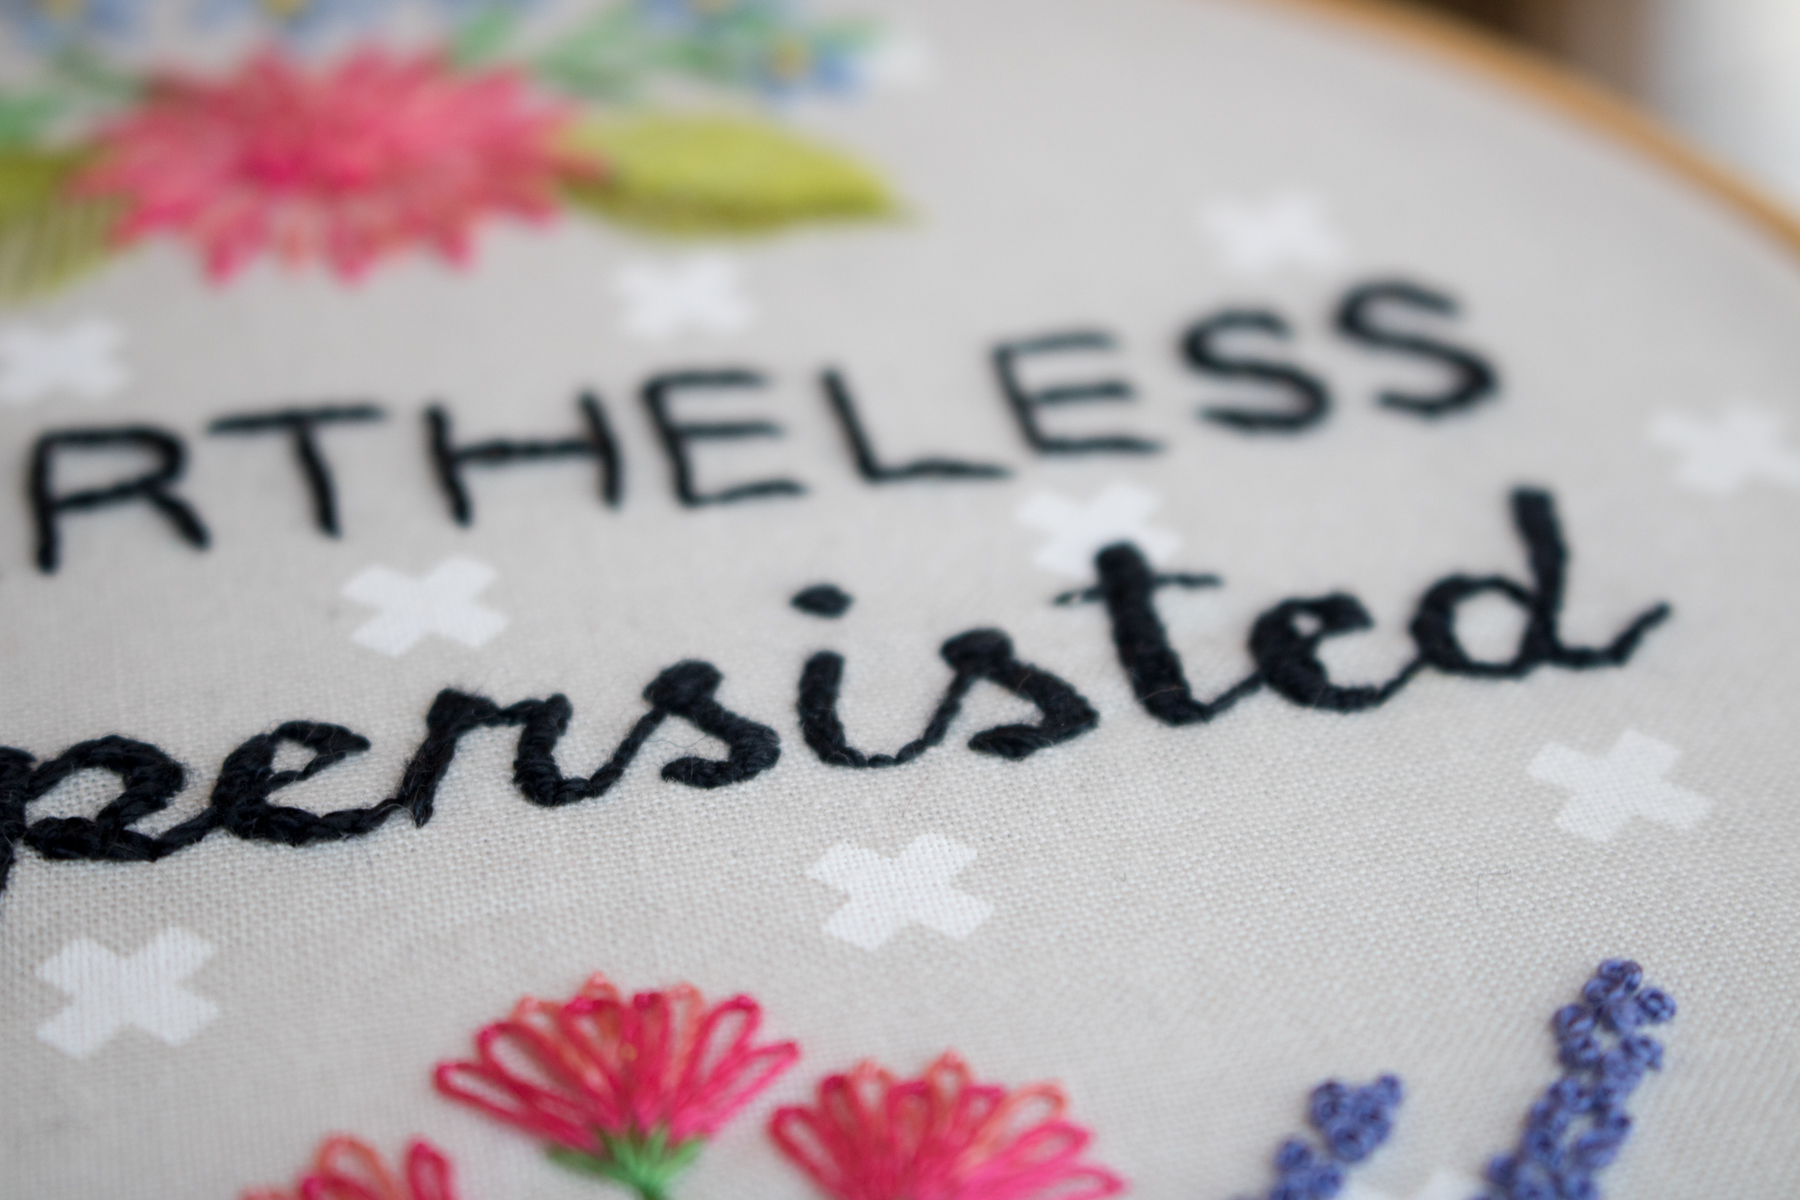
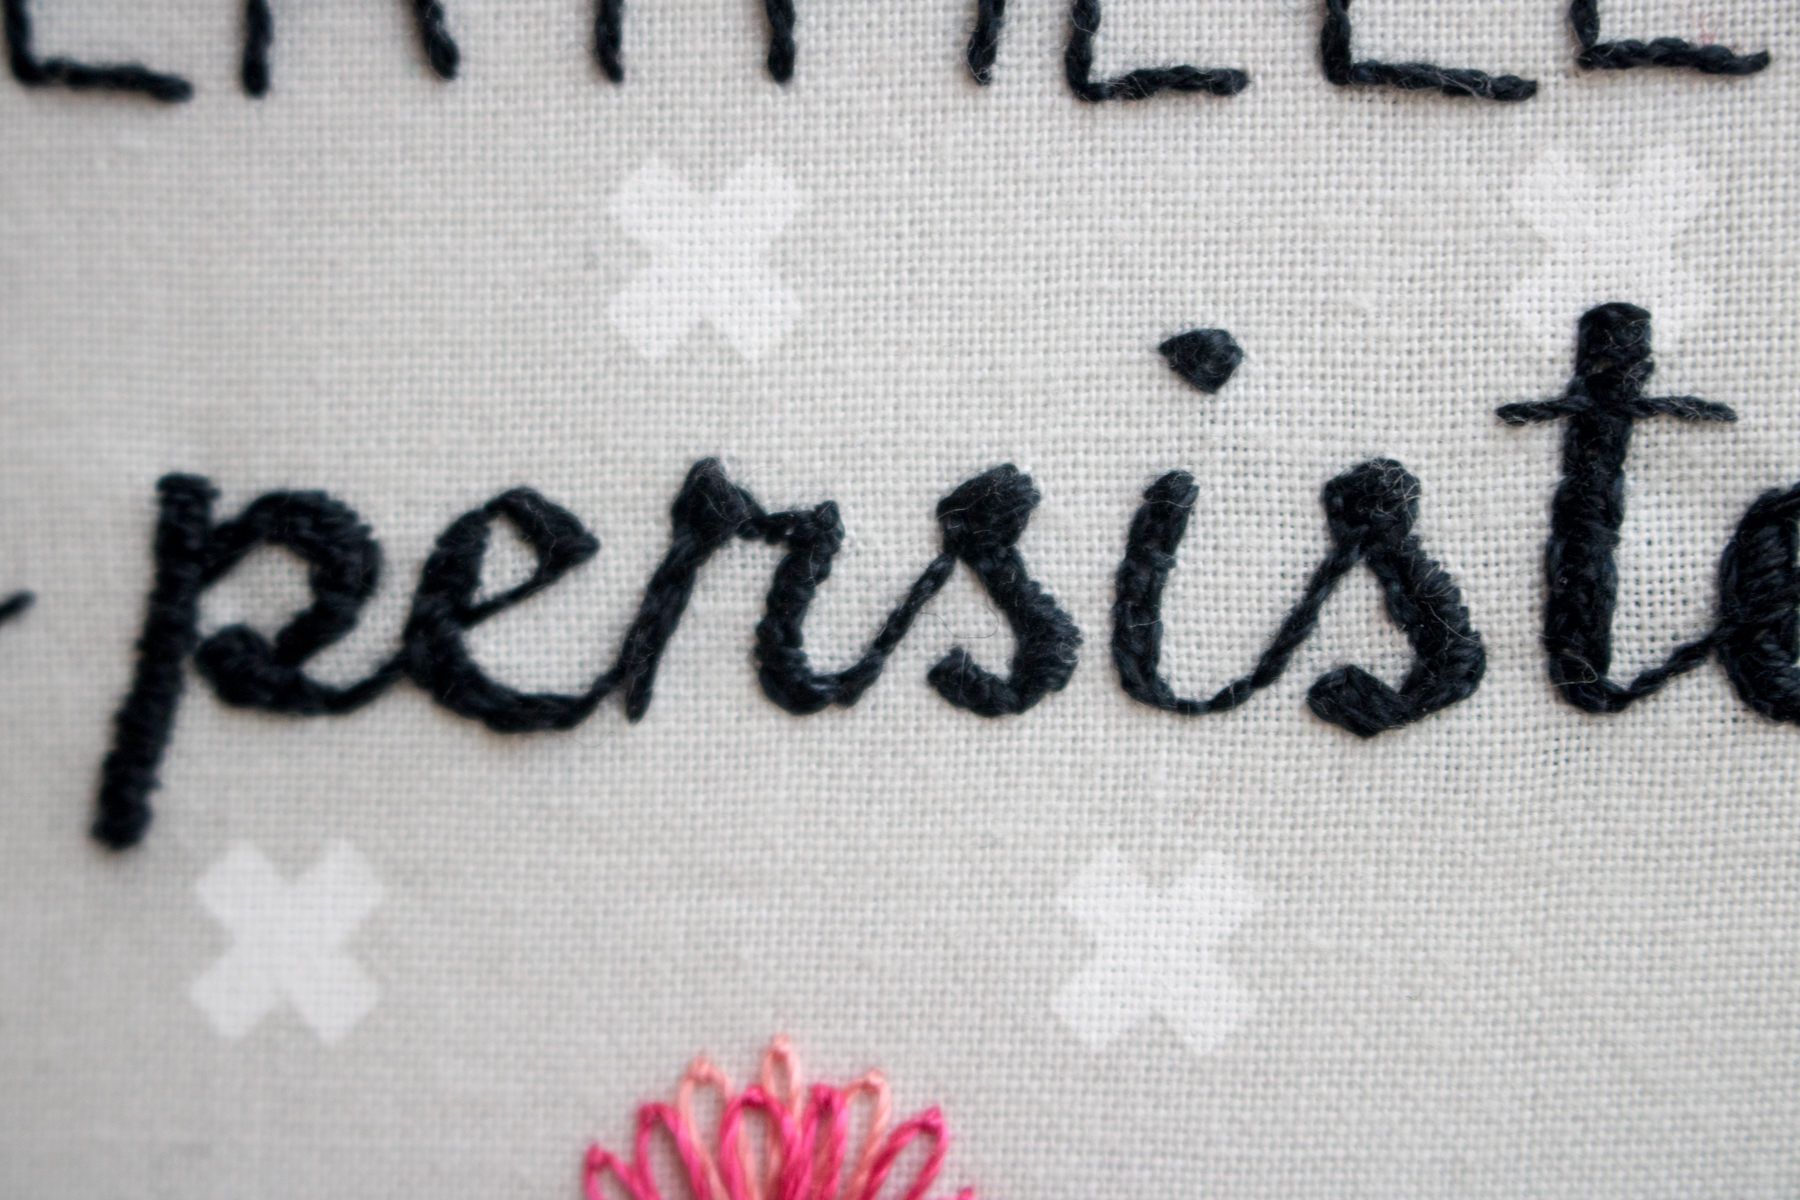
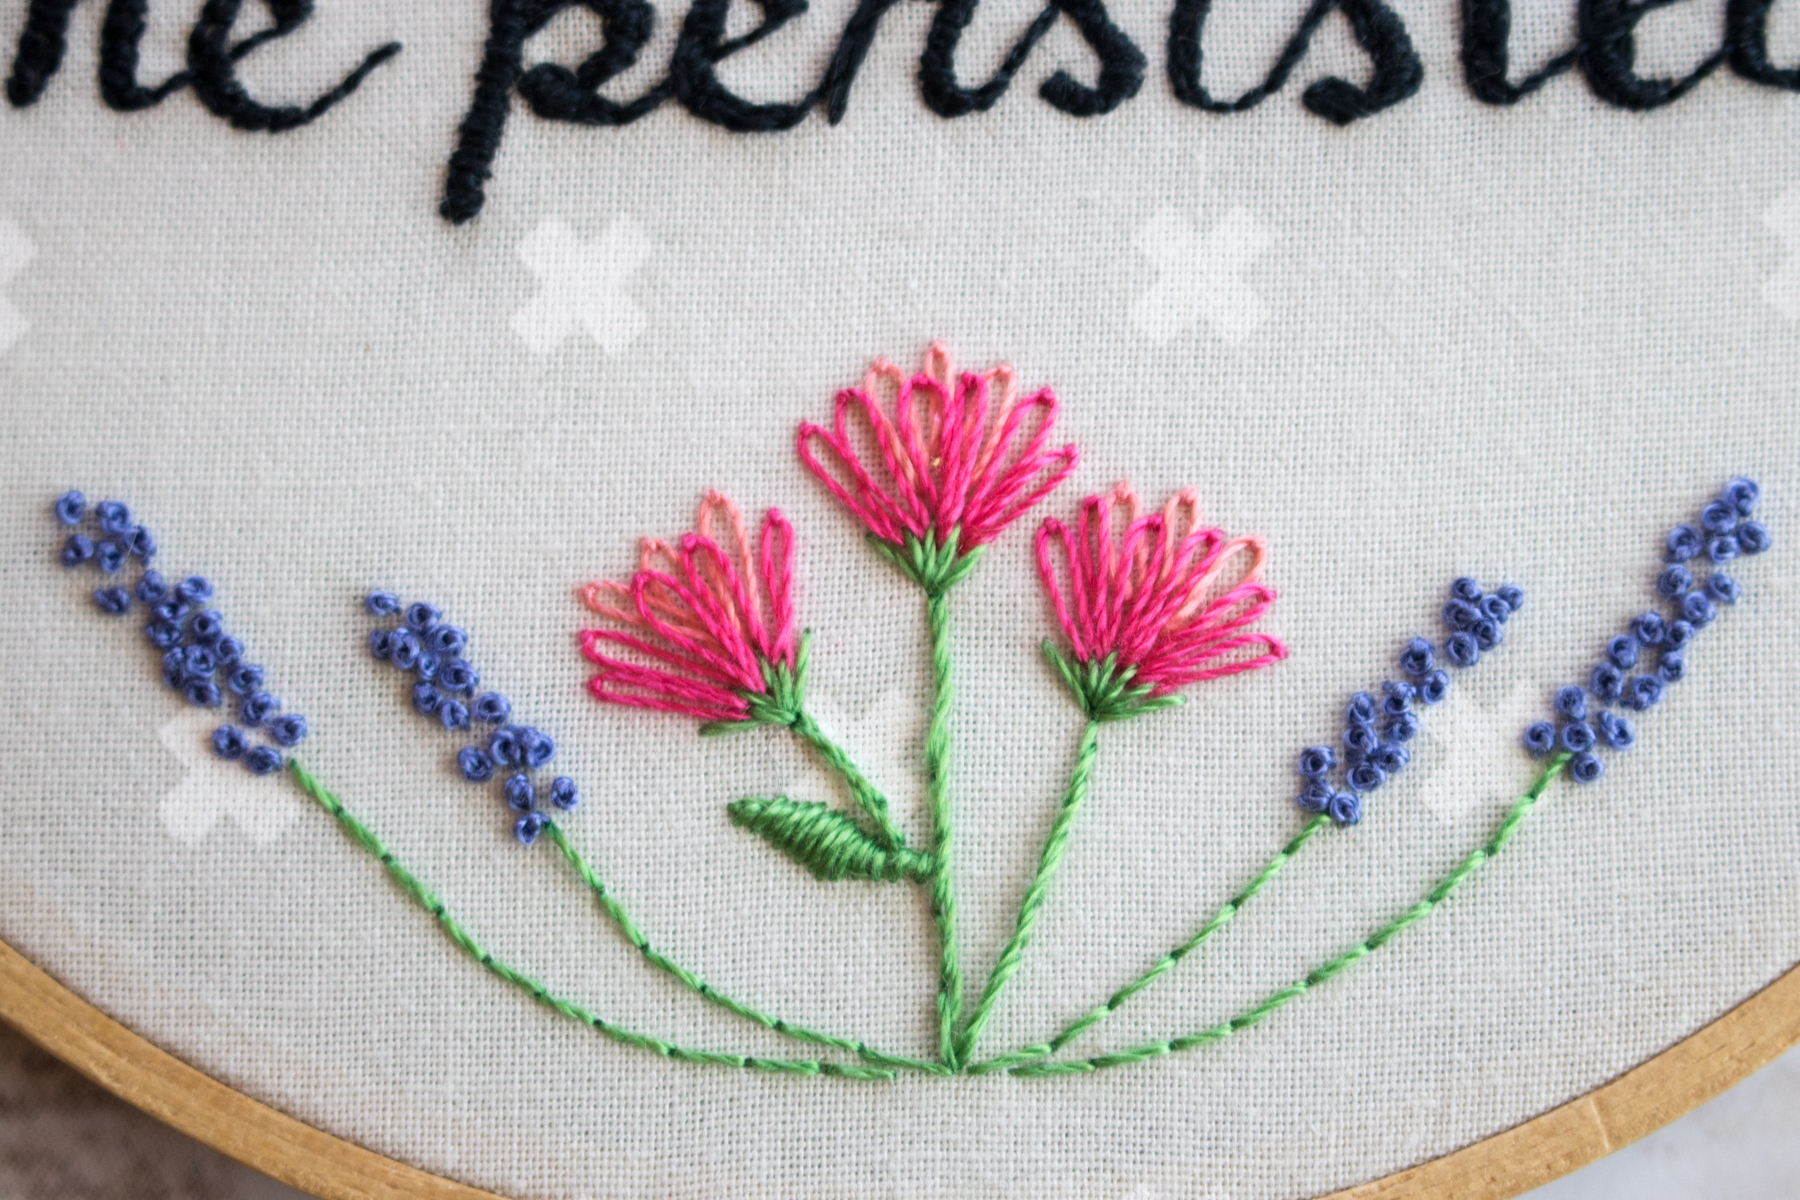
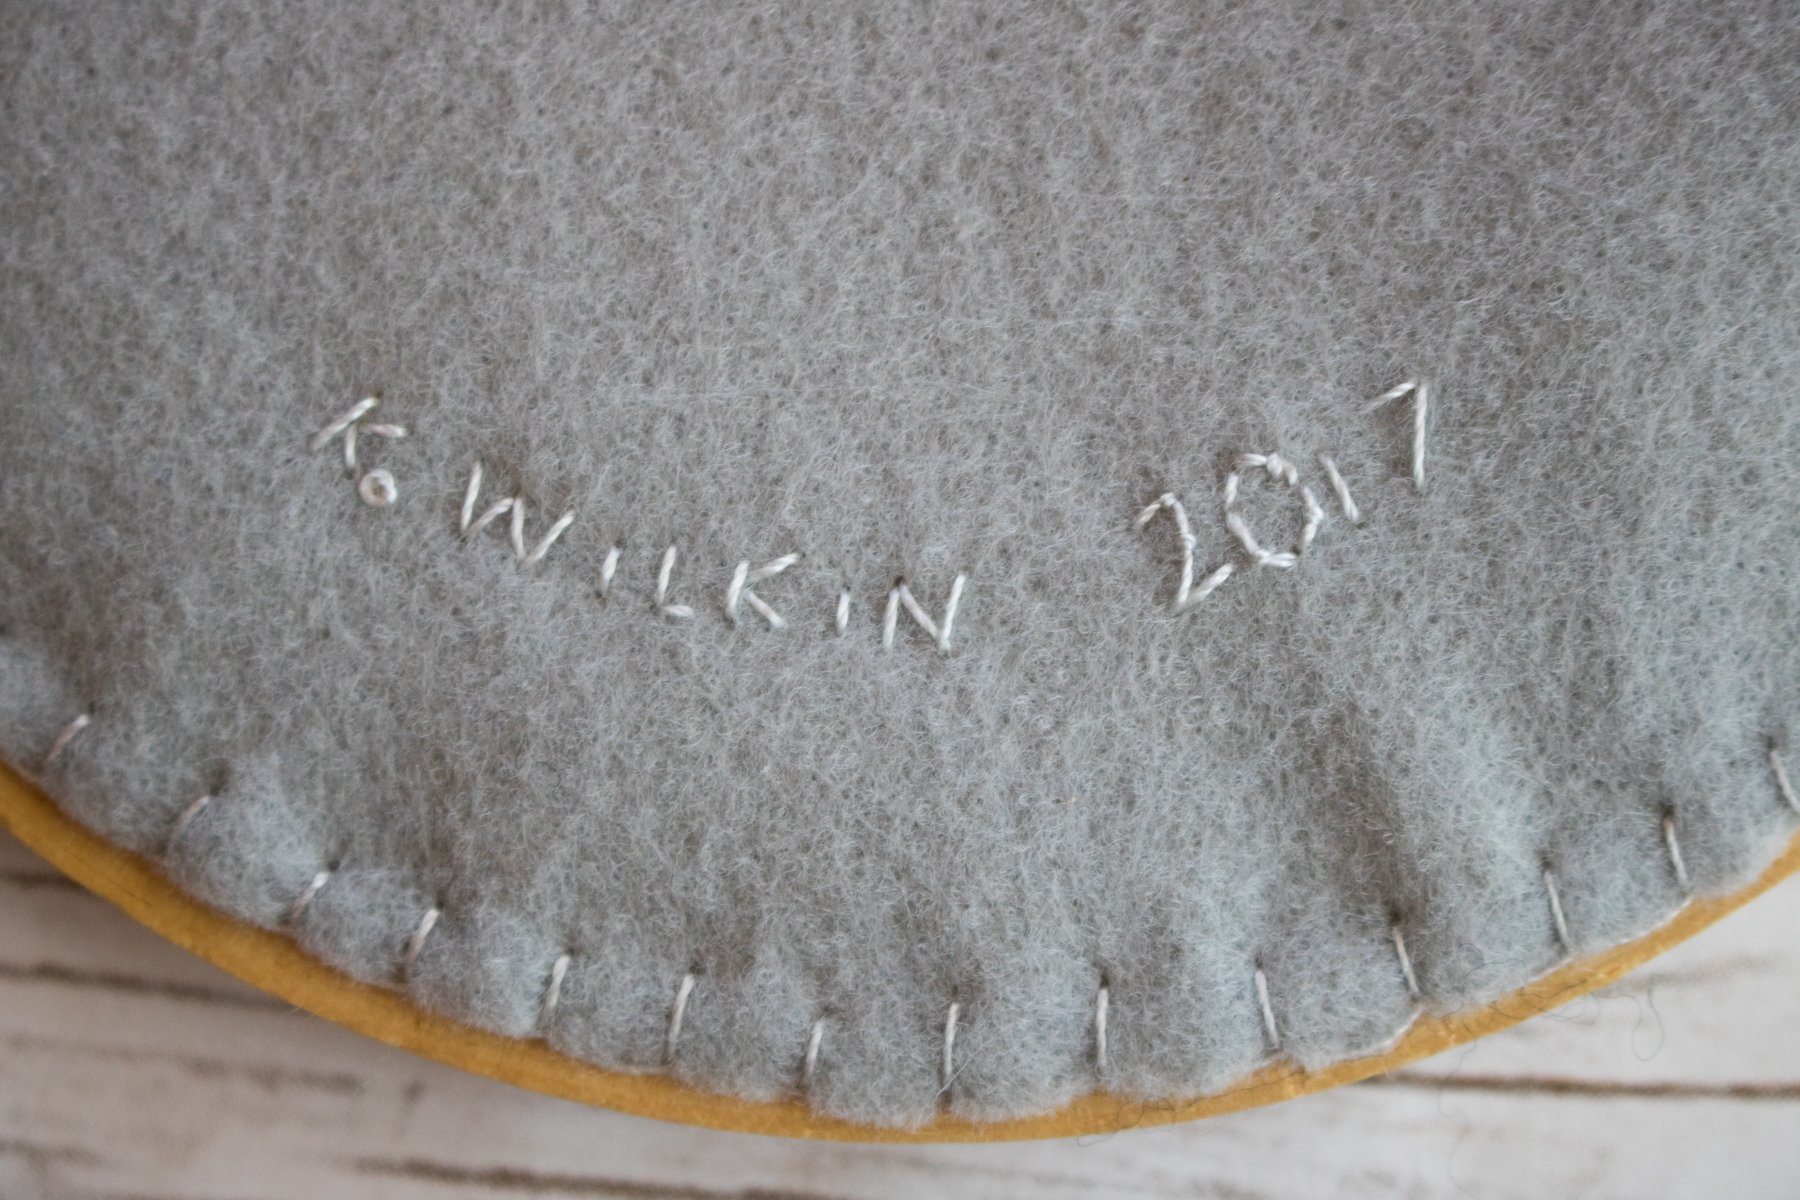
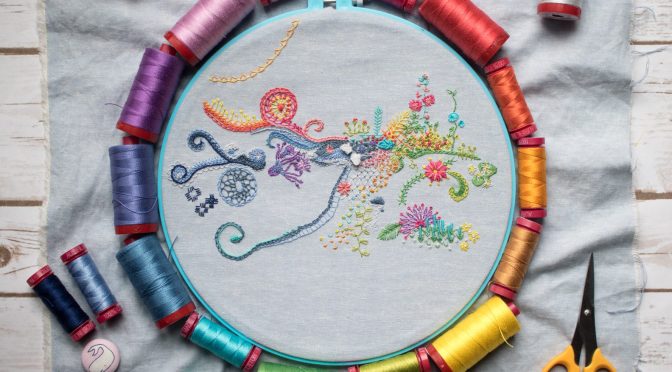
1 – One Year of Stitches Embroidery hoop from 2017
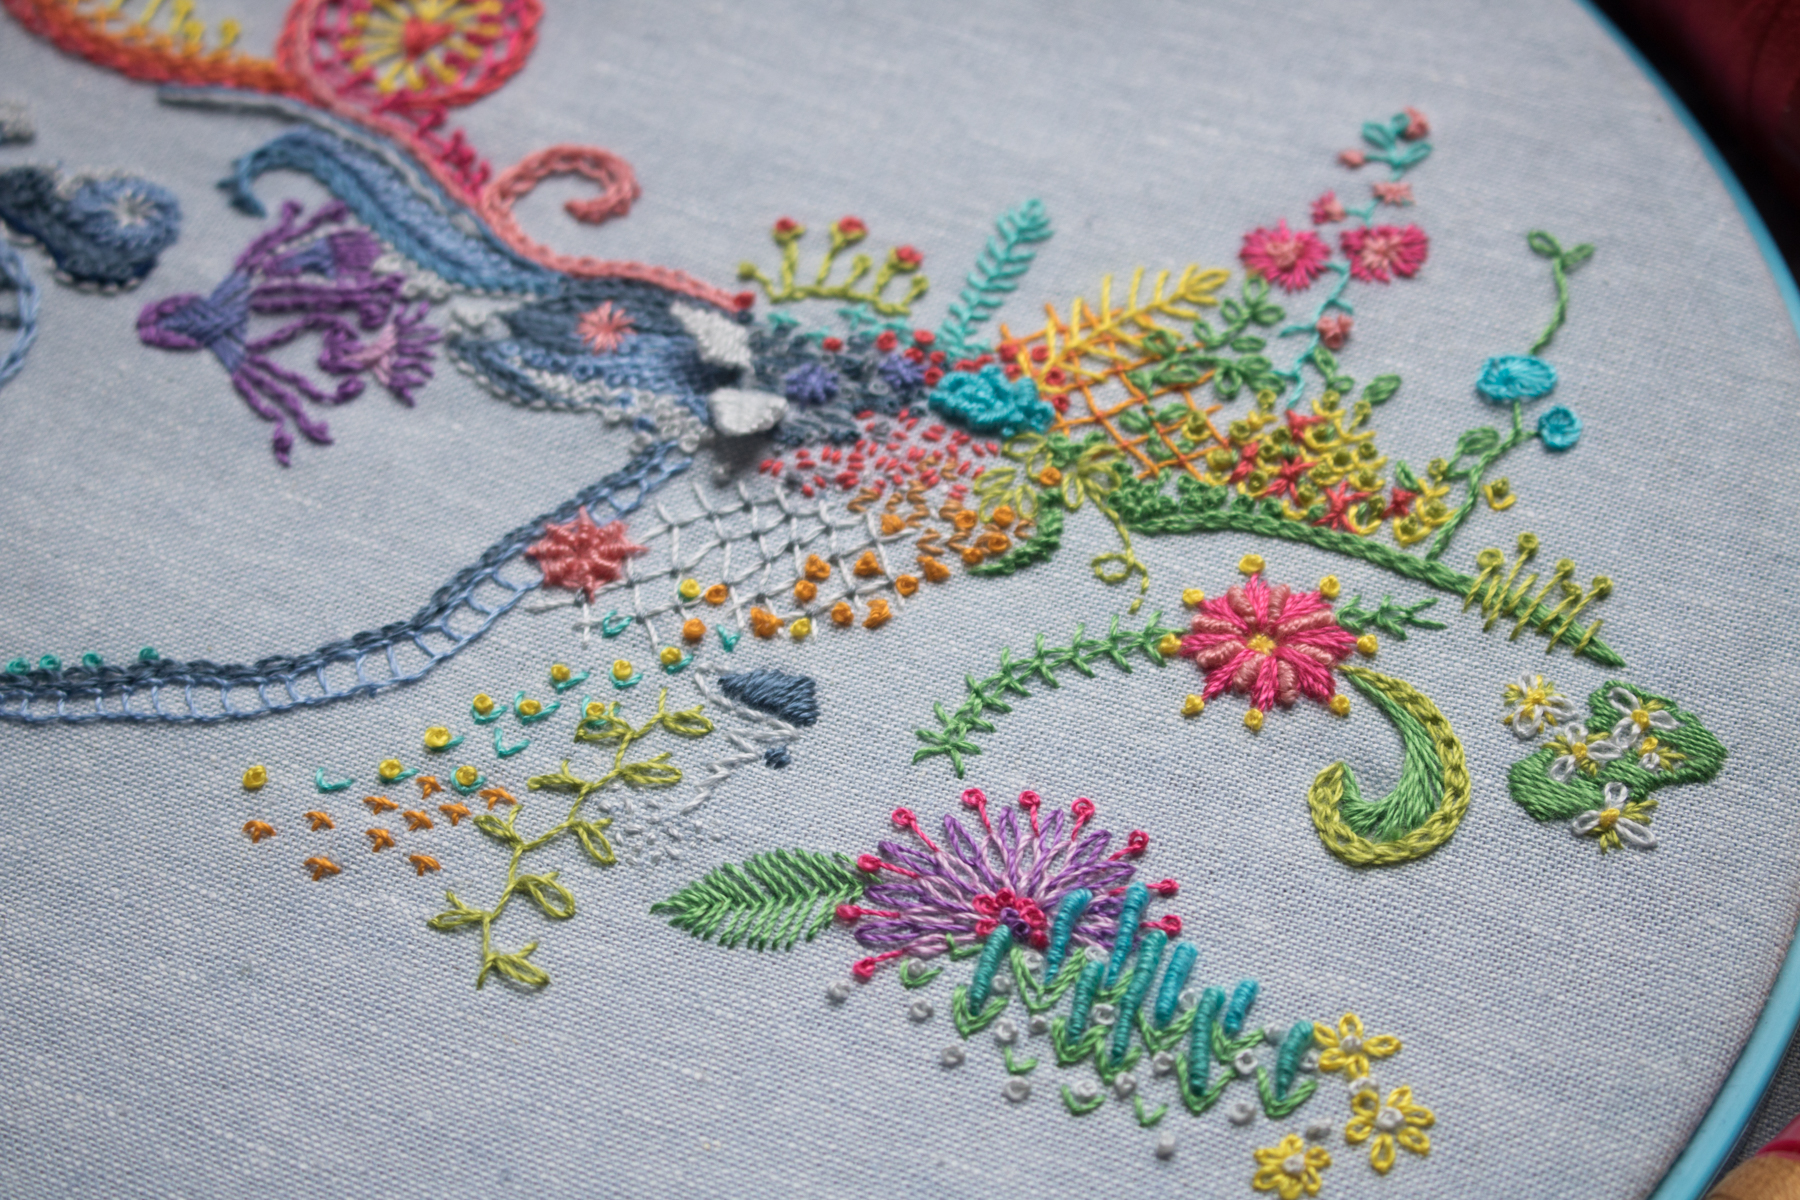
 I still have about 14 days worth of stitches to complete to have fully finished the stitching for my 364 days of stitching, 1 year of stitches freestyle embroidery project I took on in 2017. The photo included above is an old old old one from May 2017, so there is MUCH more stitched at this point (see the photo with the projects together to get a peek!)! I want to get the stitches finished and documented, post the fully updated post on IG at my @nq1yearofstitches account, publish a blog post with monthly updates that has been in draft form since May 2017, and fully finish the hoop so it’s ready to hang on my wall.
2 – Rainbow Moonstone Pillow
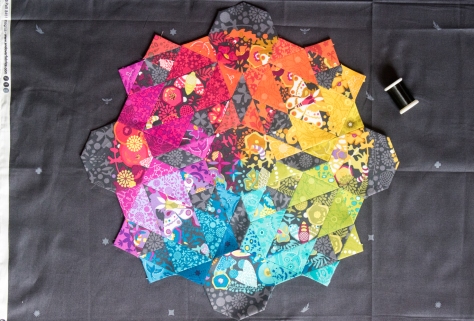 I want to completely finish my epically gorgeous (modest, aren’t I? haha) rainbow Moonstone pillow I made using Giuseppe @giucy_giuce’s Moonstone quilt EPP pattern and Alison Glass fabrics. Right now, it’s fully stitched together, stitched onto the backing, and most of the papers are removed. I still need to finish removing the papers, trim the seam allowance edges of the backing fabric, layer, baste and quilt the pillow front, make the pillow back (I want it to have a zipper closure–I haven’t yet decided whether it will be a side seam zipper or a zipper across the backing yet–and finish the pillow. I’m using Aurifil monofilament thread to stitch and quilt this, and it’s an exciting new look (it really is invisible!).
3 – Secret Sewing Project
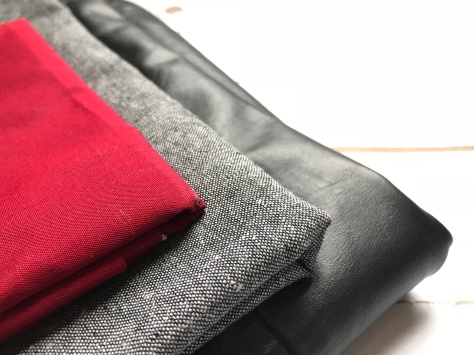 I’m doing some secret sewing for a book release blog tour in March, and unfortunately can’t tell you much more than that. I have my project chosen and fabrics pulled, but haven’t cut into it yet. I’m planning to use some thrifted leather and scraps of Oakshott Lipari red fabrics in this one, paired with Essex Linen in charcoal. It’s a small project, but I’m excited about this one! This project is my given, since the fact that I have a hard deadline means that I will finish this project no matter what. I don’t mind setting myself up for some success, though, so it’s included here.
4 – Max’s Eye Spy Picnic Plaid Quilt
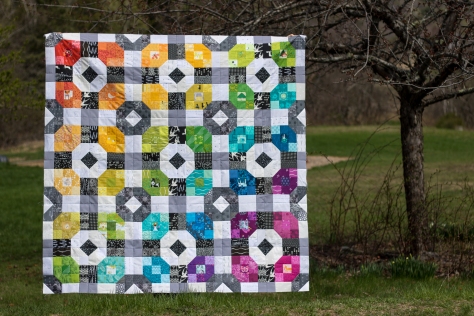 This one is a stretch only because of the limited time I have this quarter, but I want to put this quilt at the top of my list. I began it back in 2016 during the Quilter’s Planner Sew Along and have the full quilt top finished and the backing pieced. I need to layer and baste the quilt (my brick wall when it comes to finishes!), quilt it, bind it, finish it, and finally gift it. I’m thinking Max has most likely forgotten about it at this point, so it will be a fun surprise when (if?… no, WHEN) I finish it.
So there you have it. Think I can do it? I’m excited at the prospect of having a little extra motivation to finish these projects, and also hope this can get me back into the thick of the quilt blogging community. There’s so much inspiration to share! Here’s to fabulous finishes!
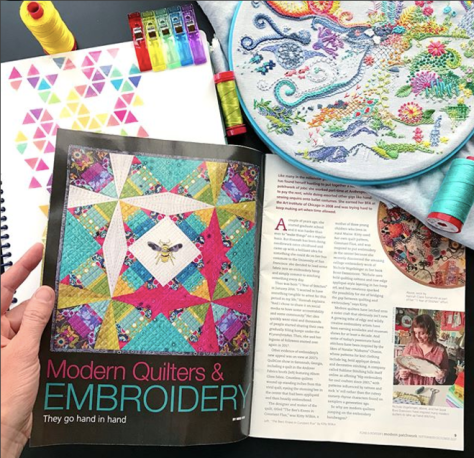 The article, written by
  I ordered my copy of the magazine through the
 …after January’s stitching…
 …after February’s stitching…
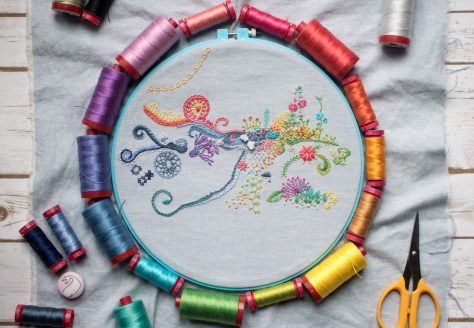 …after March’s stitching…
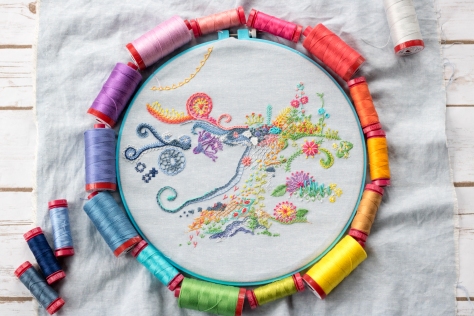 …after April’s stitching…
 …and here it is after May’s stitching!
 I added a whole sun burst super nova element in that warm sunny section of the hoop, as well as some added texture with different rows of yellow stitches. This little supernova was very fun to make, and grew day to day. Again, I began with not much of a plan at all, just wanting to add some more bright yellow to the top portion of the hoop. After a few days, it took on a life of its own and continued to grow and take shape until the flowery starbursts decided to cap the growth (for now).
 I also added some “background” plant like elements behind the patch that began this whole hoop back in January. My biggest challenge with this daily stitching challenge is figuring out how to create background behind stitches that have already been stitched. Some attempts are more effective than others, but I figure it’s all part of the learning experience.
 A few more flowers were also added, in the form of lavender roses and their associated greenery. The flower garden continues to grow and blossom.
 A month of progress wouldn’t be complete without adding some motion to the ocean! There wasn’t all that much growth here this month, but some running stitch and french knots helped begin to create some more flow.
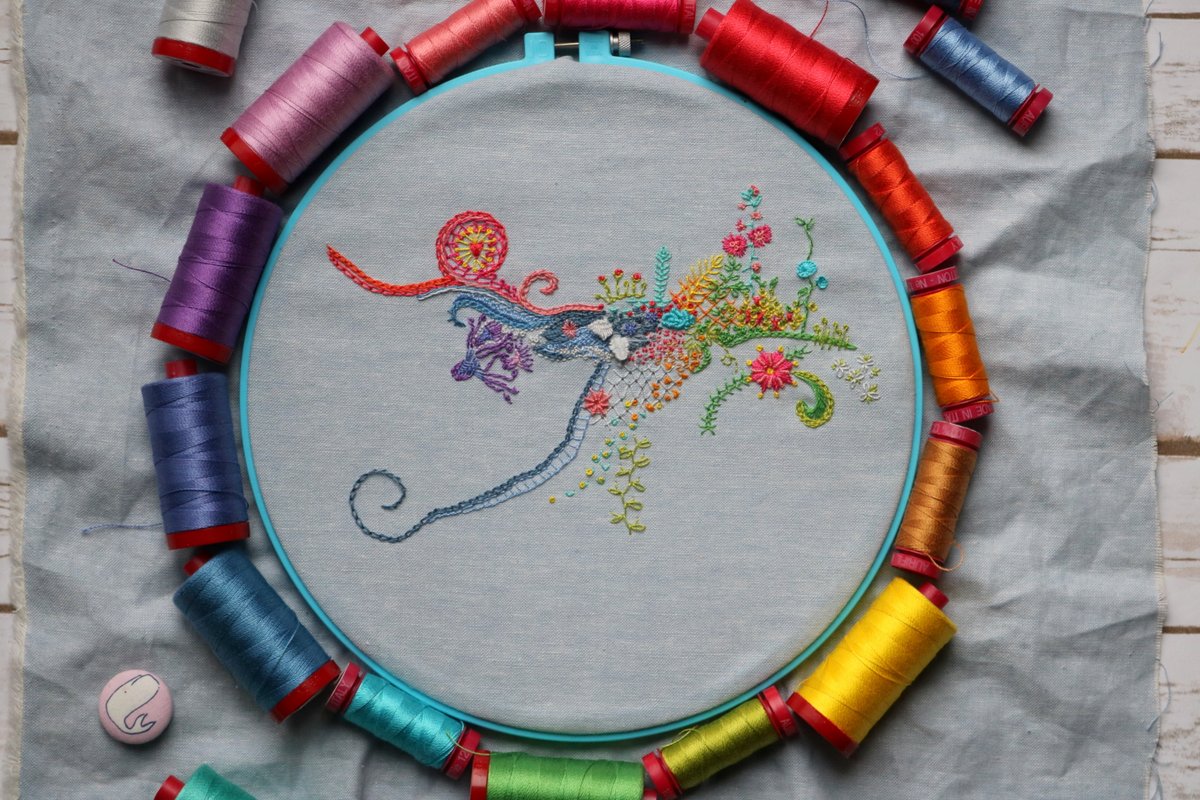
 The hoop is beginning to fill out, but knowing that I’m just about halfway through the year, I do think I should be able to fit the entire year in this hoop without extending off the sides. There are lots of little spaces between elements, and while I hope to not fill every *single* one, there is a lot of room for depth and texture and who knows what else!
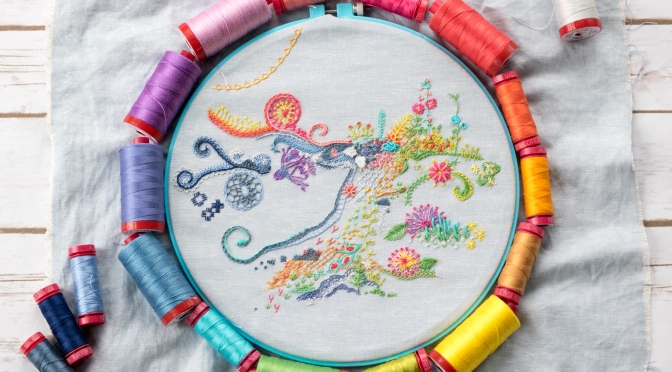
 …after January’s stitching…
 …after February’s stitching…
 …after March’s stitching…
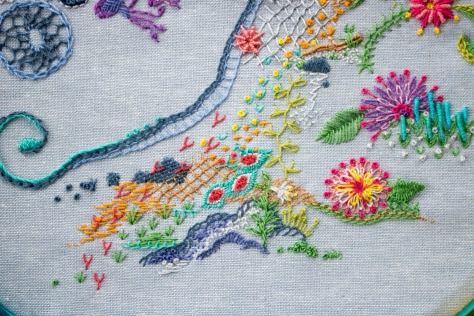 I think it all began with some rocks, and then some little critter footprints, and then took off from there.
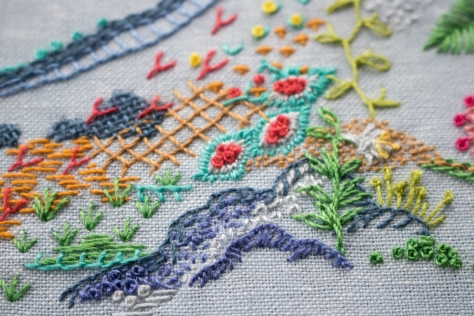 I mostly stitch whatever comes to mind each day, without much influence from my everyday happenings. A couple stitches this month had some subtle meaning, however. I stitched a large rock on Good Friday and a lily flower sprouting out of the rock on Easter. Sometimes it just sneaks in.
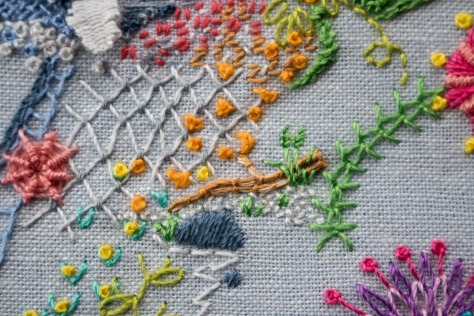 On one particularly uninspired day, I showed my hoop to my husband and prompted, “Where should I stitch? Tell me a color and point to a spot.” He pointed to a spot and said “A piece of driftwood here.” Thus originated the couched stitch driftwood, which was followed by some 12wt Aurifil 2600-Dove sand and a few tufts of beach grass. Some days inspiration strikes; some, not so much.
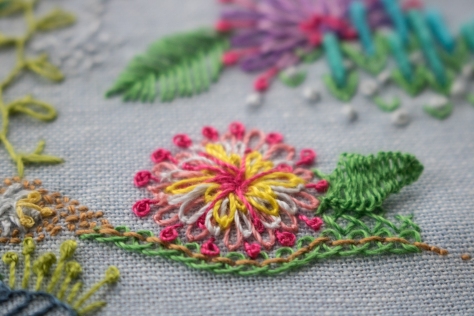 I also added another wild and crazy layered flower consisting of long tailed lazy daisy stitches, lazy daisy, and pistil stitch. There might be a few french knots in there, too.
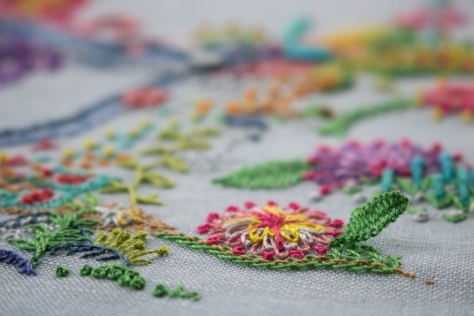 The boldness of the flower begged for some offsetting feature, so another woven picot appeared in the form of a big green leaf. I love the little 3-dimensional elements on this hoop!


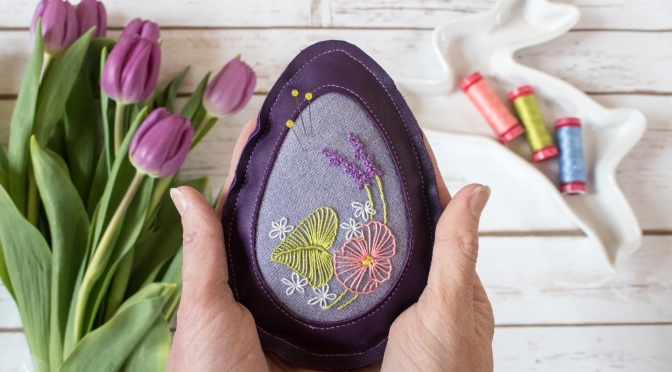

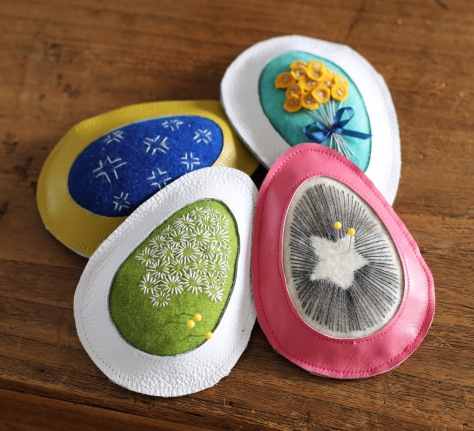 In this tutorial we give everyone some guidelines but the emphasis is on PLAY and MAKING THIS PROJECT YOUR OWN. Don’t celebrate Easter? No biggie, make a similar pincushion in another shape. We will be following on Instagram so please tag your makes
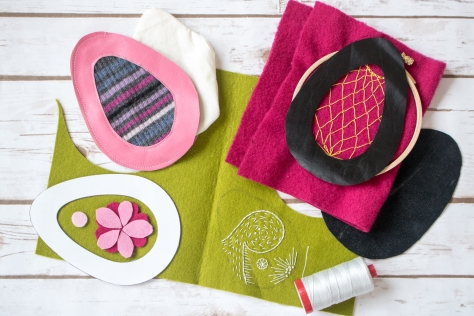
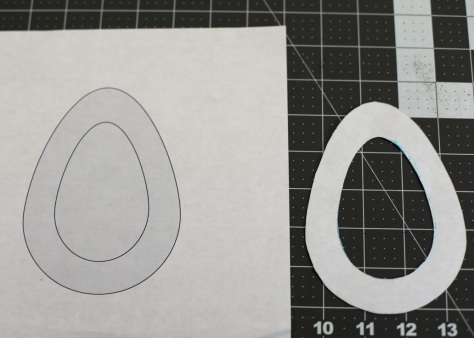 Print the
 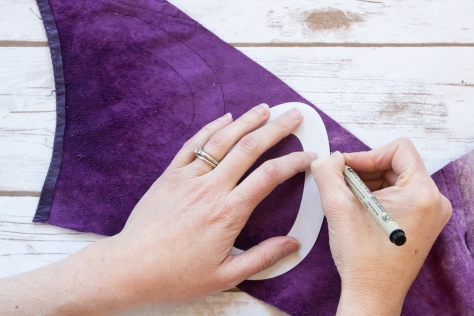 Trace the template onto the wrong side of the leather, marking out two eggs–one with only the outline and one with both the inner and outer lines drawn.
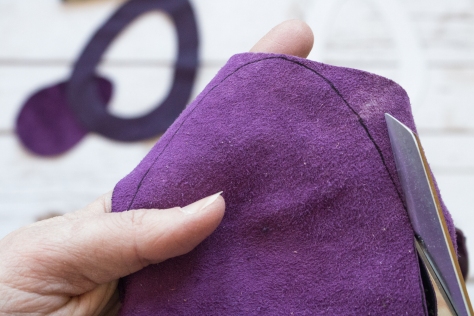 Carefully cut along the marked lines, remembering to cut one piece along only the outer egg outline and cut the other piece along both the inner and outer egg outlines.
 Set your leather pieces aside.
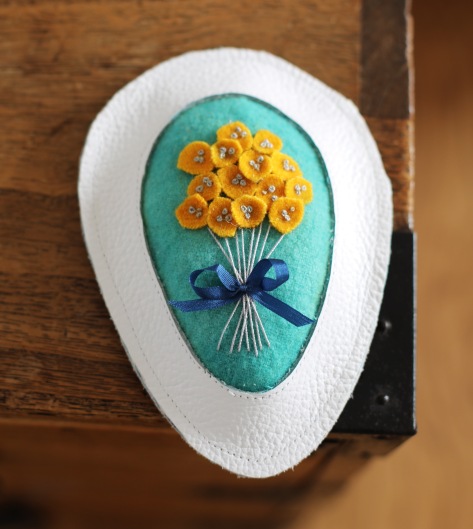
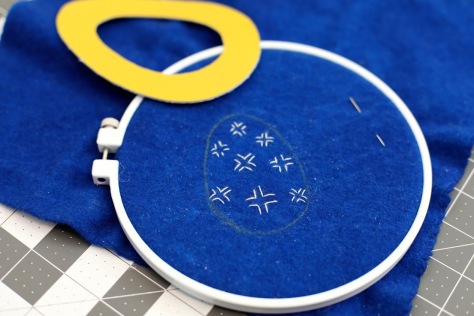 Using chalk or water soluble marker, trace the inner egg outline onto your embroidery surface (felt, velvet, jeans, etc) so you will know the limitations of your embroidery design.
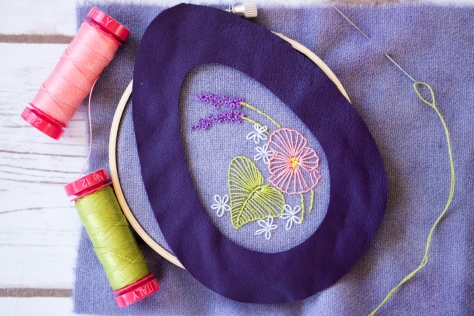 Adorn at your heart’s desire with embroidery, applique, etc. You are welcome to copy our experiments but please feel free to try your own ideas.
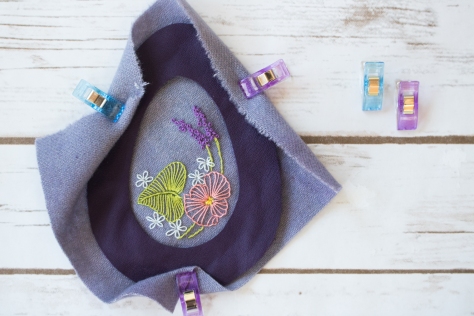 Align your embroidered material so that the embellishments fit within the window of your leather upper (the egg with the hole cut out of the middle).
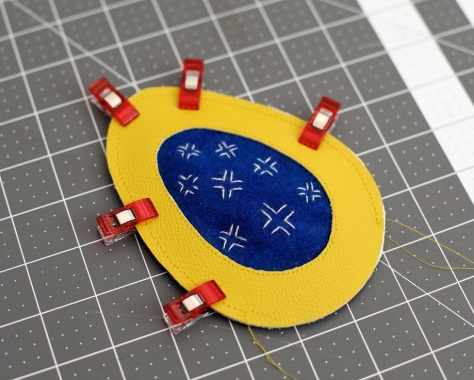
 Secure the right side of your embroidery to the wrong side of your leather upper with double sided tape, glue, clips, or other method.
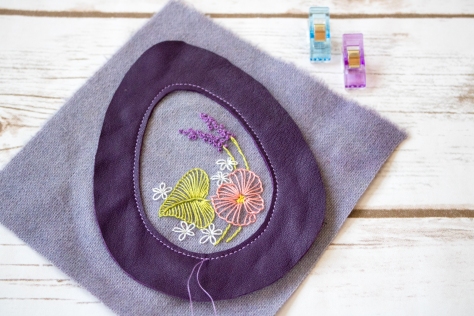
 Then, using a ¼ or ⅛ inch seam allowance, top stitch the two together along the inner egg as shown.
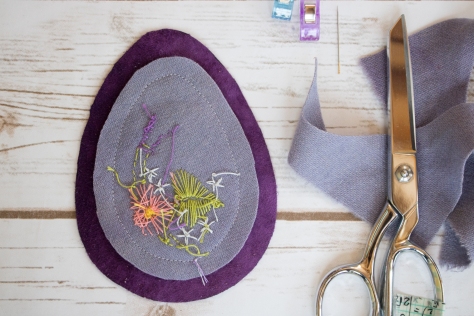
 Finally, if possible, trim the seam allowance of your embroidered material carefully about ½” away from the stitched line so that it remains easily inside the outer margins of the egg.
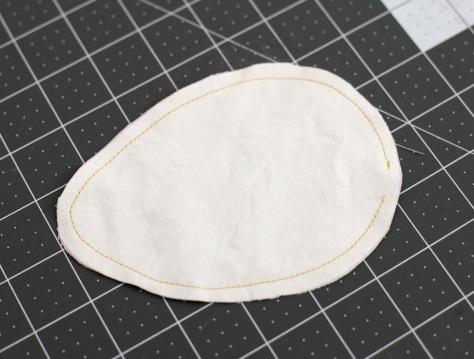 Using only the outer margin of your Egg Template, trace and cut two pieces of muslin. Sew the two pieces together using a ¼ inch seam allowance, leaving a small opening to use for filling.

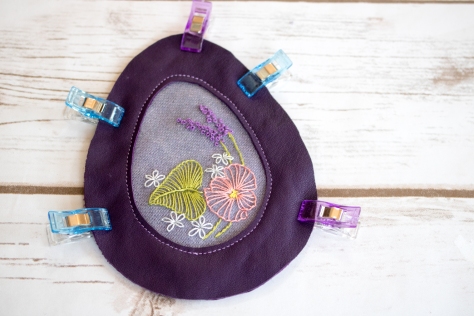
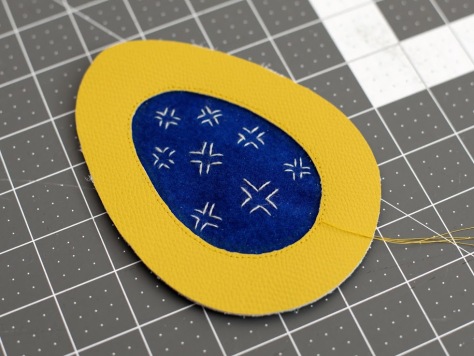
 Place the two leather egg pieces wrong sides together and secure with clips. (Note that pinning will create visible holes in the leather–use clips!) Sew around the outer margin of the egg using a ¼ seam allowance, leaving an opening at least 3 inches long unsewn.
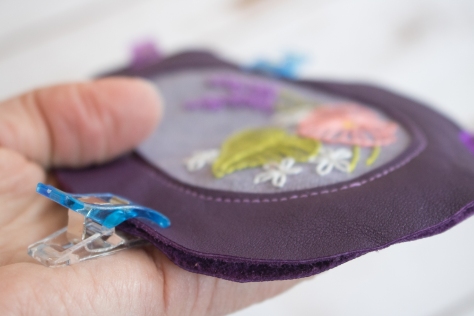
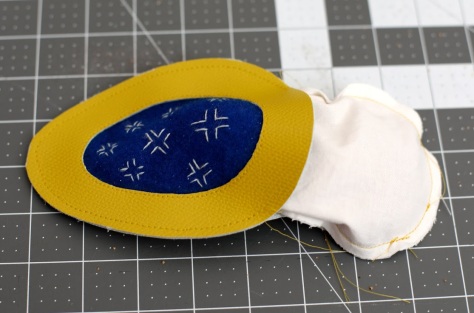 Stuff your filled and fully closed inner pincushion through this opening. Ensuring the inner pincushion remains entirely inside, top stitch the remaining way around the outer edge of the egg.
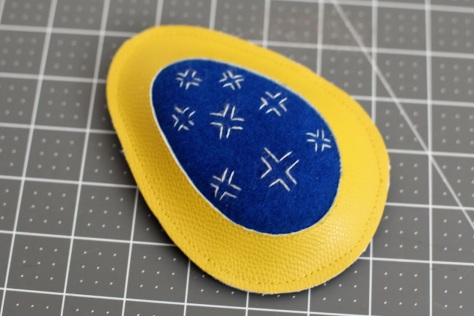 Thread the top threads to the back of the piece, tie all loose ends together and trim or bury.


 This quilt got its name after it was nearly completed, as I sat hand stitching the binding to the back. A mini quilt made at the request of
 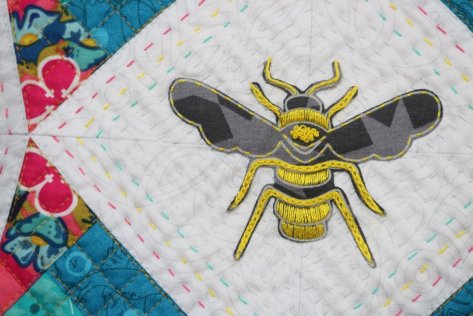 With freestyle embroidery fresh on my mind and
 I had a lot of fun with the
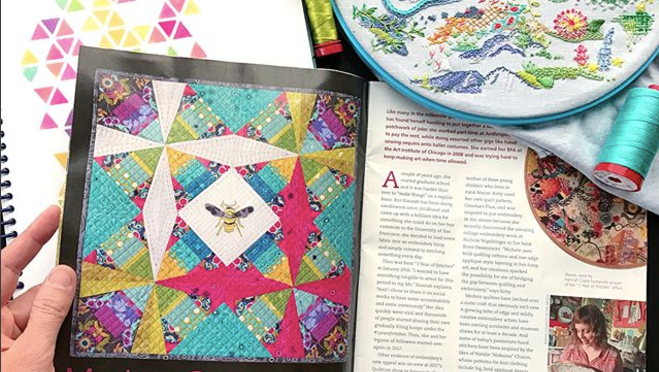
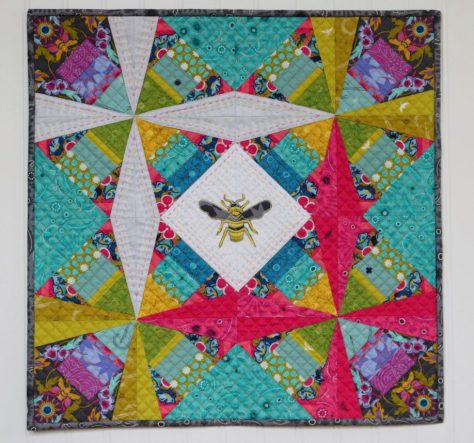
  I knew I wanted to incorporate both hand and machine quilting, and I knew that I wanted the machine quilting to be dense. It took me a while to decide between using 50wt Aurifil 2600-Dove or 5015-Gold Yellow for the quilting, and finally I opted for the Gold Yellow to pull out the gold of the centrally stitched bee. I quilted a diagonal grid approx 1/2″ apart on all of the colored sections of the quilt and I love the texture it created. I wanted the white star and central diamond to pop, so I let them be, patiently awaiting hand quilting.
 I used a rainbow of 12wt Aurifil thread to help pull the rainbow from the gorgeous fabrics into the white sections, and I love the outcome! I decided to switch to 12wt 2600-Dove for the center so that the bee would stand out.
 The back shows that my hand quilting still has plenty of room for improvement (especially when trying to maneuver around the bee), but it’s still fun to see the back, too!
 I used Seventy Six fabrics Rising in Graphite and Numbered in Duck Egg for the back, with an Insignia in Chartreuse label.
 Labeling is one of my favorite parts–maybe because it helps me know that my name is on my work, or maybe because it means I’m finished with a project!!
 This quilt is currently in Andover headquarters in NYC for photography and other fun fabric adventuring before it returns to me, but it was super fun to see it hanging in the booth at QuiltCon (see it, top right??). You can see a photo of me proudly standing next to it in my
 The highlight of the month was getting the chance to chat with Erin from Aurifil on Facebook live while attending QuiltCon in Savannah. You can see my low key chat
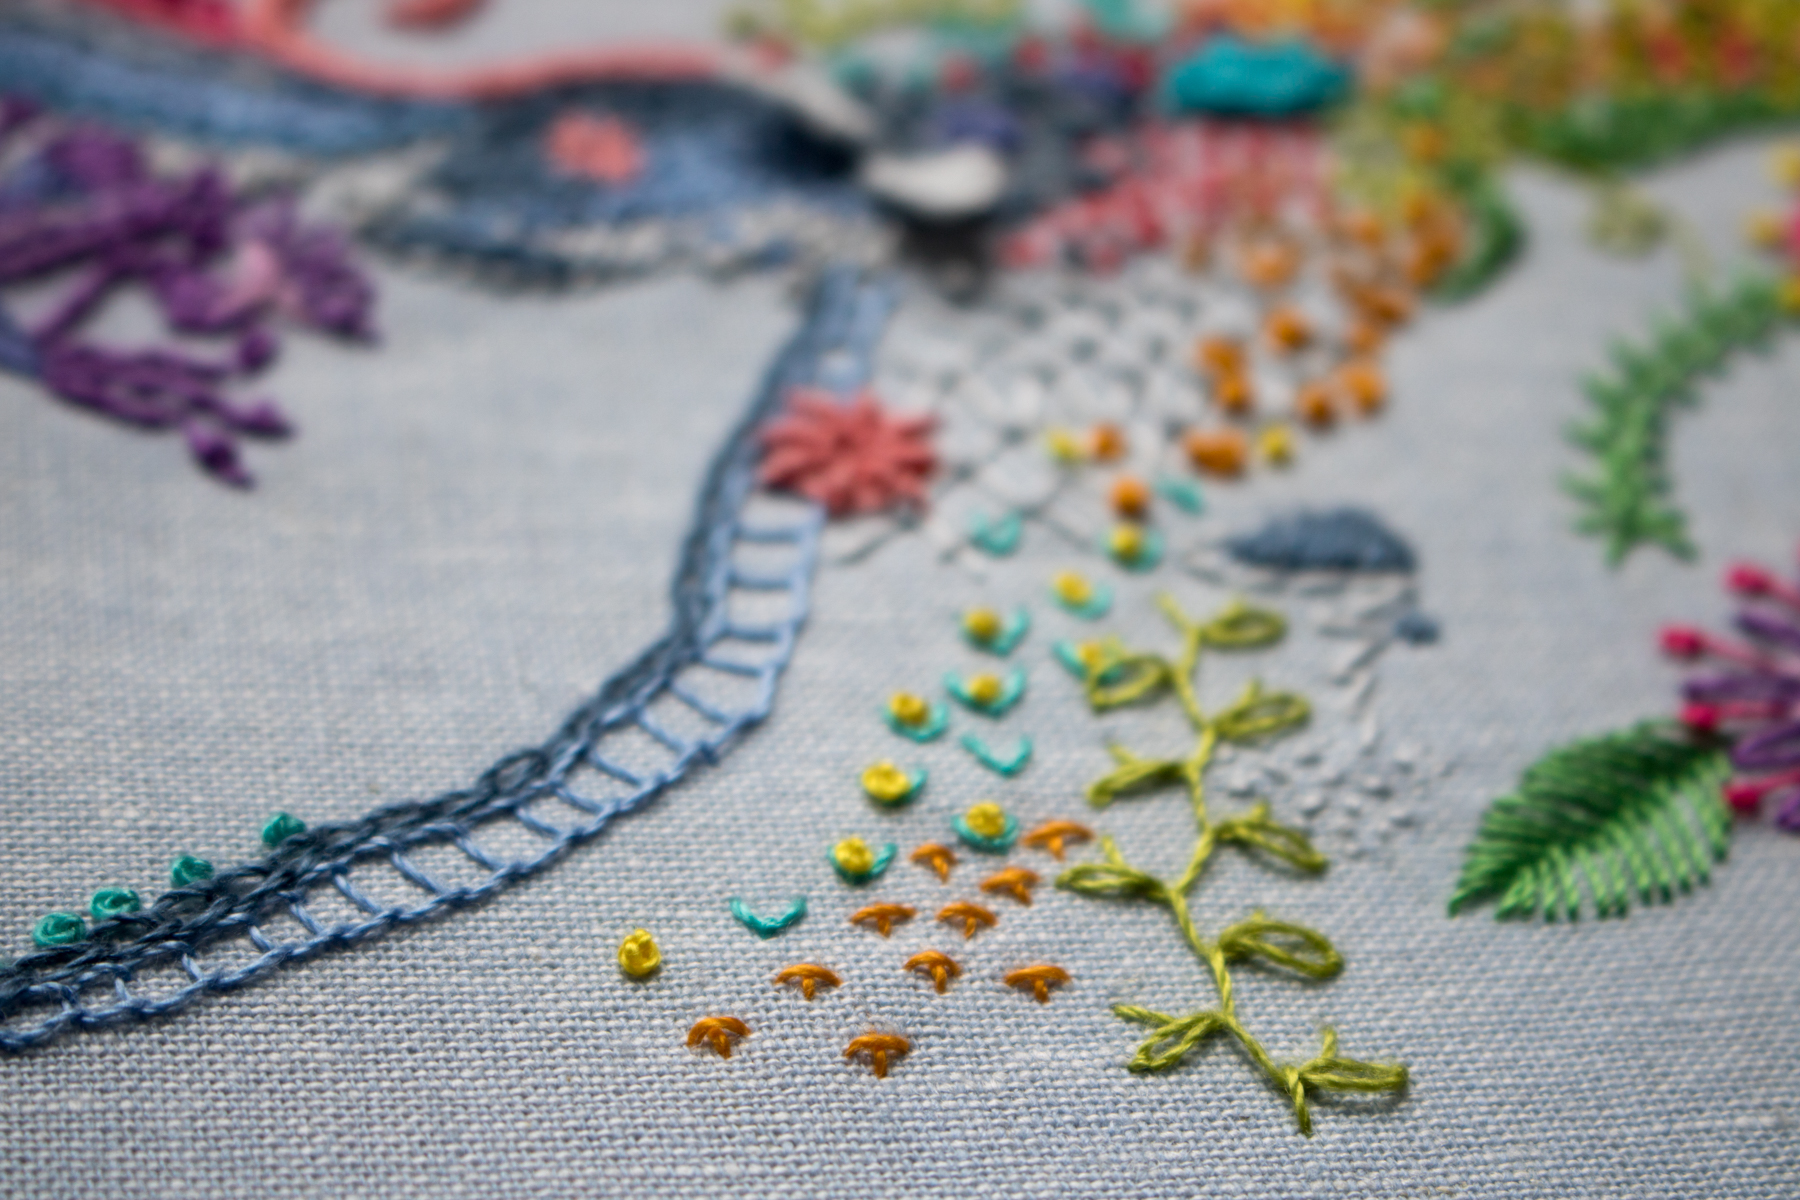
  Back to my embroidery progress! Here are some close up shots of the various sections of this freestyle hoop.
 I am still stitching without a plan, deciding each day’s stitches the morning–or sometimes night!–of the current day. I have tried a handful of new stitches and look forward to trying even more as the year progresses!

 Those little white three-petalled trillium flowers are the most recent addition. Time will tell where this will go from here!
 This month, I had a photography helper, so of course I can’t end the post without a few Finn cameos. I often use the photos on my phone as a reference, so I pulled up January’s photo to make sure I arranged the thread in a consistent way. Finn was please as punch that they matched.
 He also helped me put the thread back into the box, then arranged around the hoop, back into the box, then arranged around the hoop. What a helper!
 Late last year, I kind of got hooked on the quick mental fix that comes with freestyle embroidery while I was creating this
  I went into the year with a 10″ hoop of Robert Kaufman Essex linen in light blue, my stash of
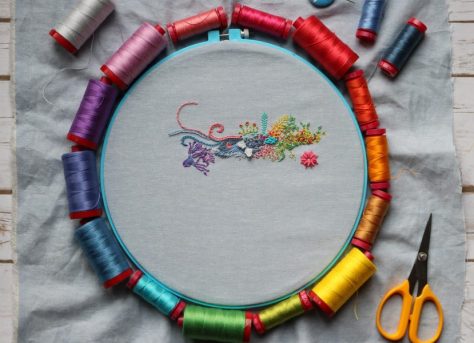
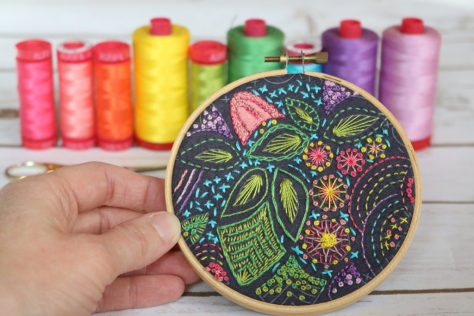
  Here is my hoop after 1 month of daily stitch-whereever-the-wind-blows stitching. Fun, right!? I created a separate account on Instagram
  My basic strategy began as a daily google of “
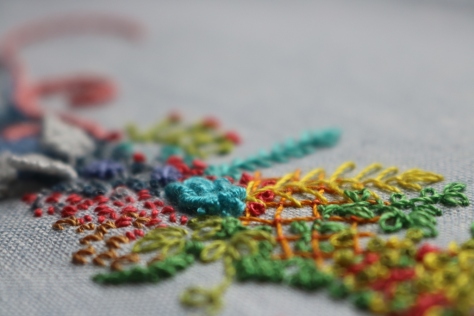 I began by learning bullion knots, so this whole project began with that little mass of turquoise squiggles and has grown organically from there.
 I love the texture that results when you stack embroidery stitches together. Those white floppy things are my first attempts at braided picot stitch, another fun one!
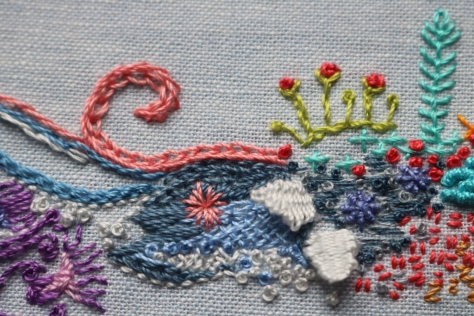 This has been really fun so far, and as of the writing of this post, I’m already over halfway through February, too! (You’ll have to wait until March, or check the IG account, to see those additions, though!) I’ll plan to share an update each month, so that you can see how this grows.
 My personal guidelines include stitching at least one stitch each day, trying to plan as little as possible and simply stitch whatever feels right each day, and not remove any stitches no matter how much I dislike the final outcome (cough, cough, that octopus family, cough). I figure this way, the stress of getting everything *just* right disappears, and instead the thought that it will all work out somehow in the end dominates. No stress!
 This is a really fun, exhilarating project since it is pure spur of the moment random creativity. If you have any cool, unusual embroidery stitches to recommend, I’d love to add some more to my arsenal. There’s something about learning something new that makes my day.