Category Archives: Patterns

Friday Finish: Leaf and Fishies Rainbow Row Patterns

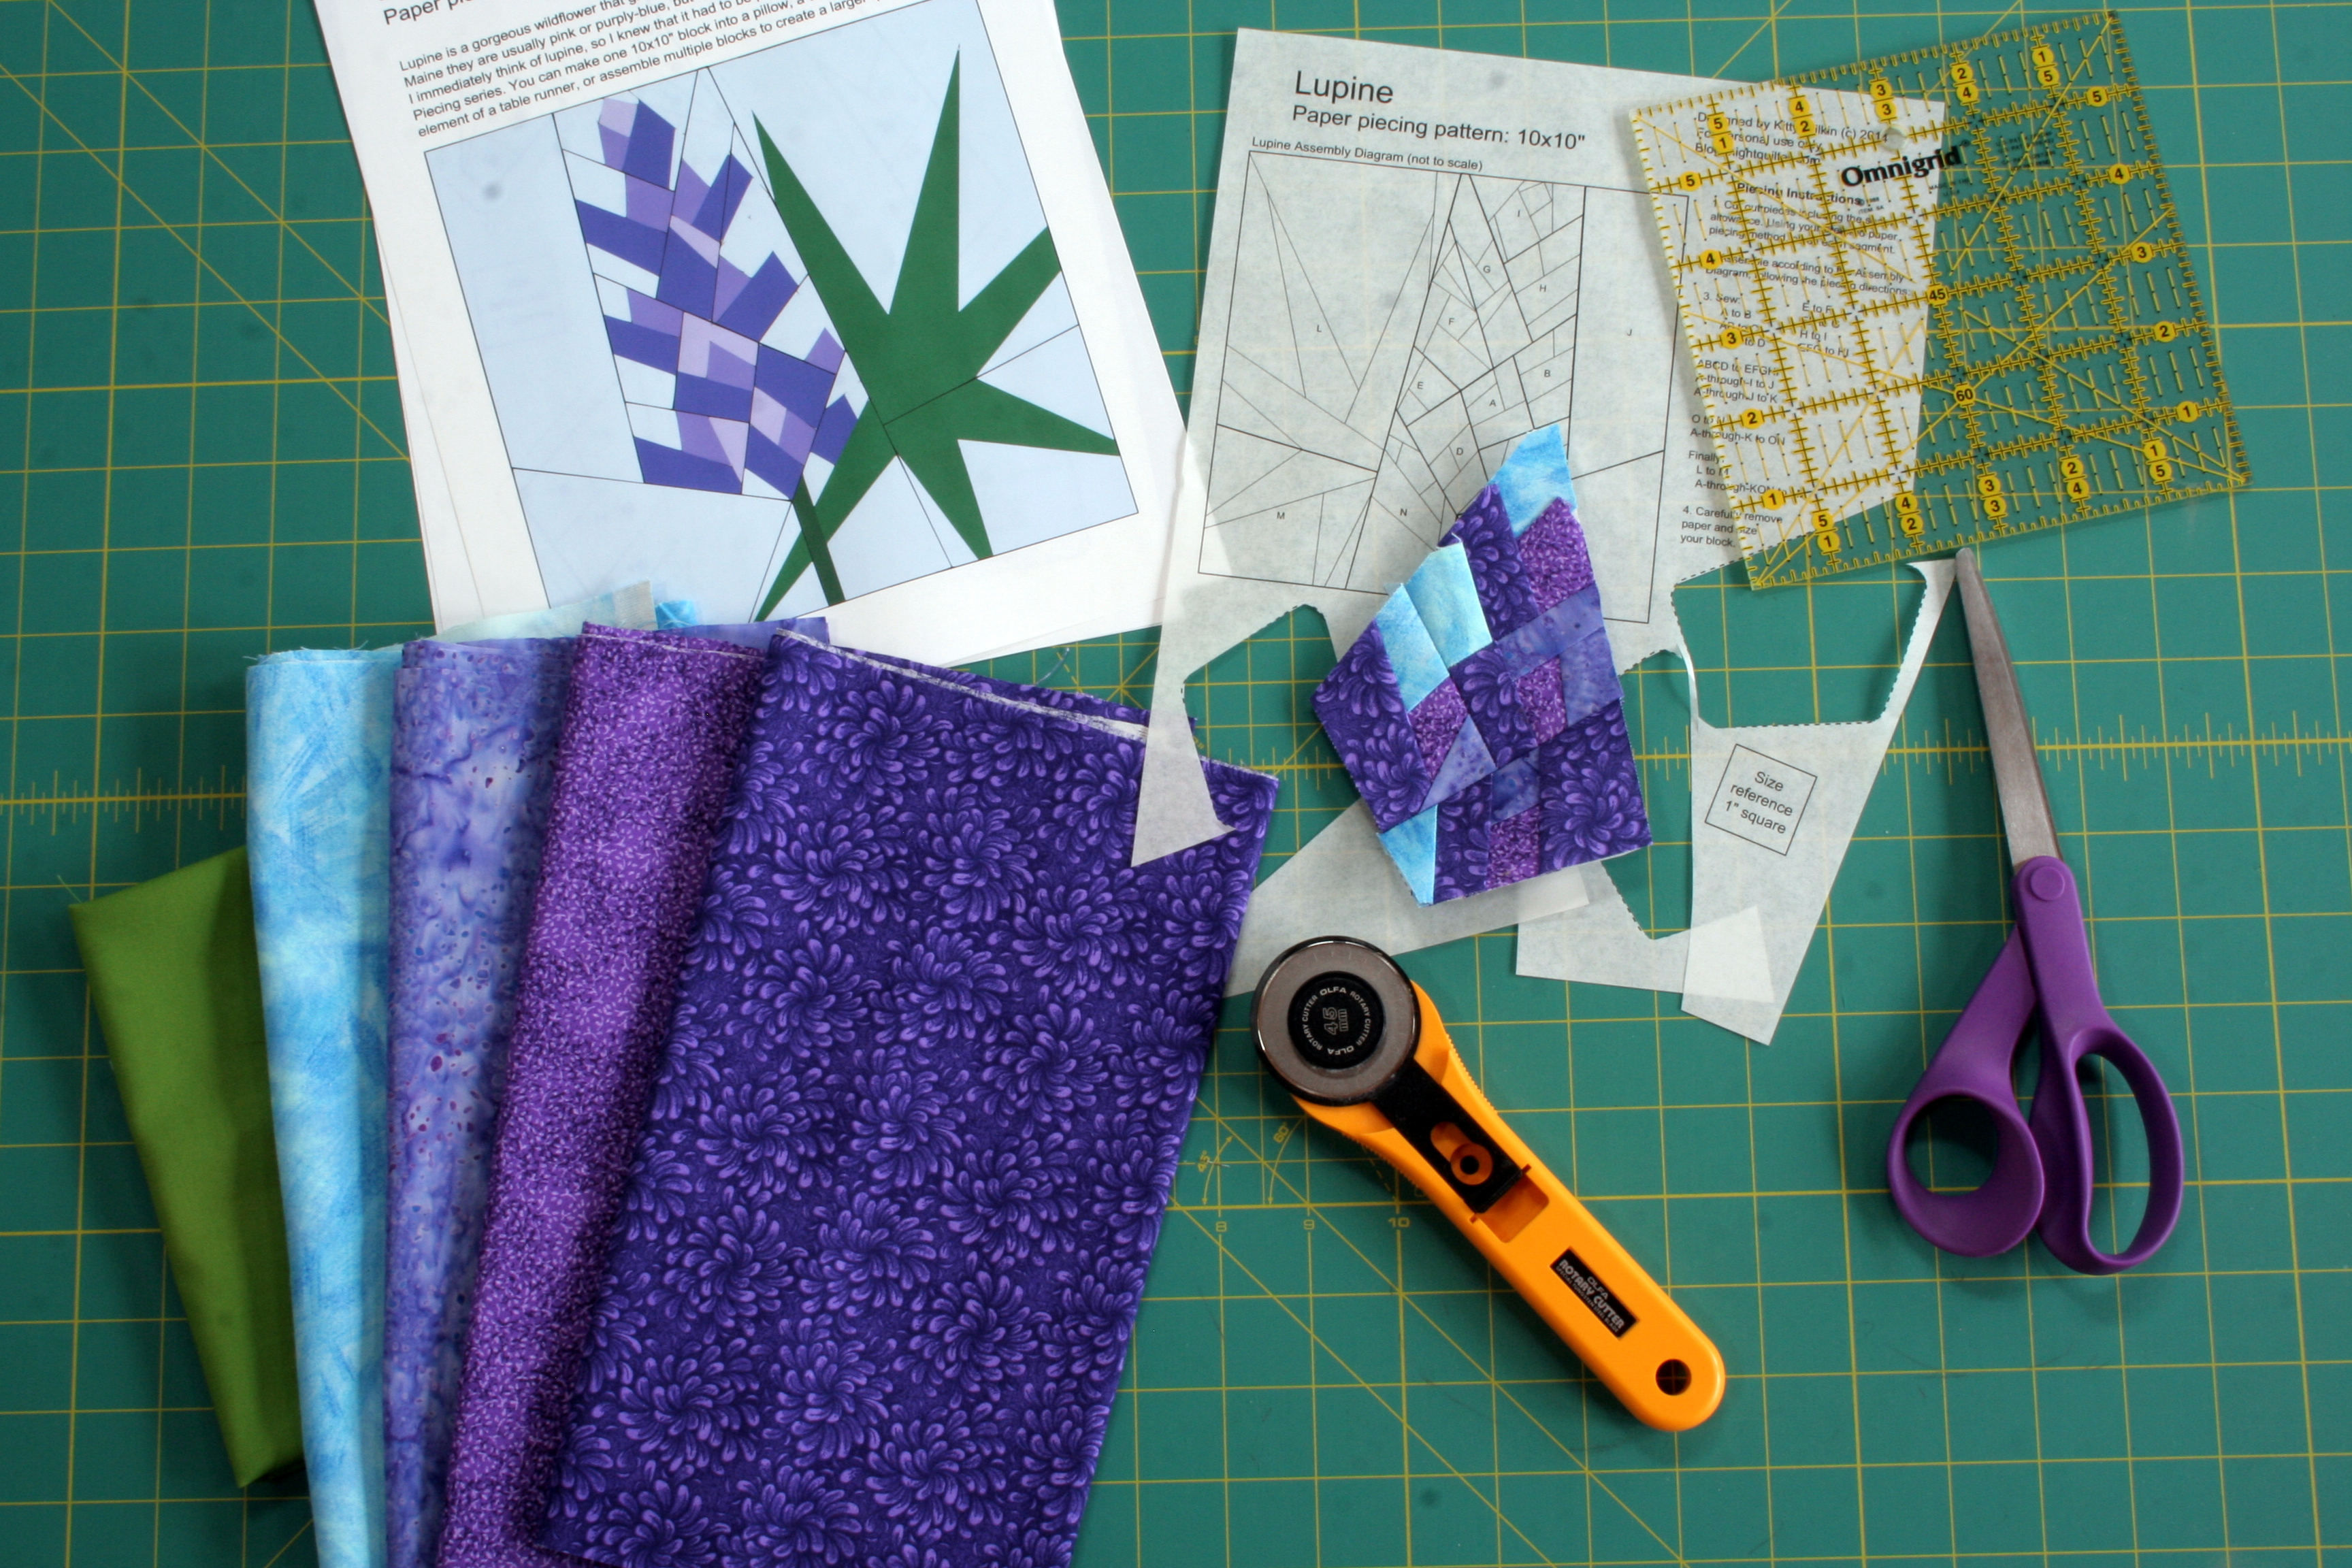
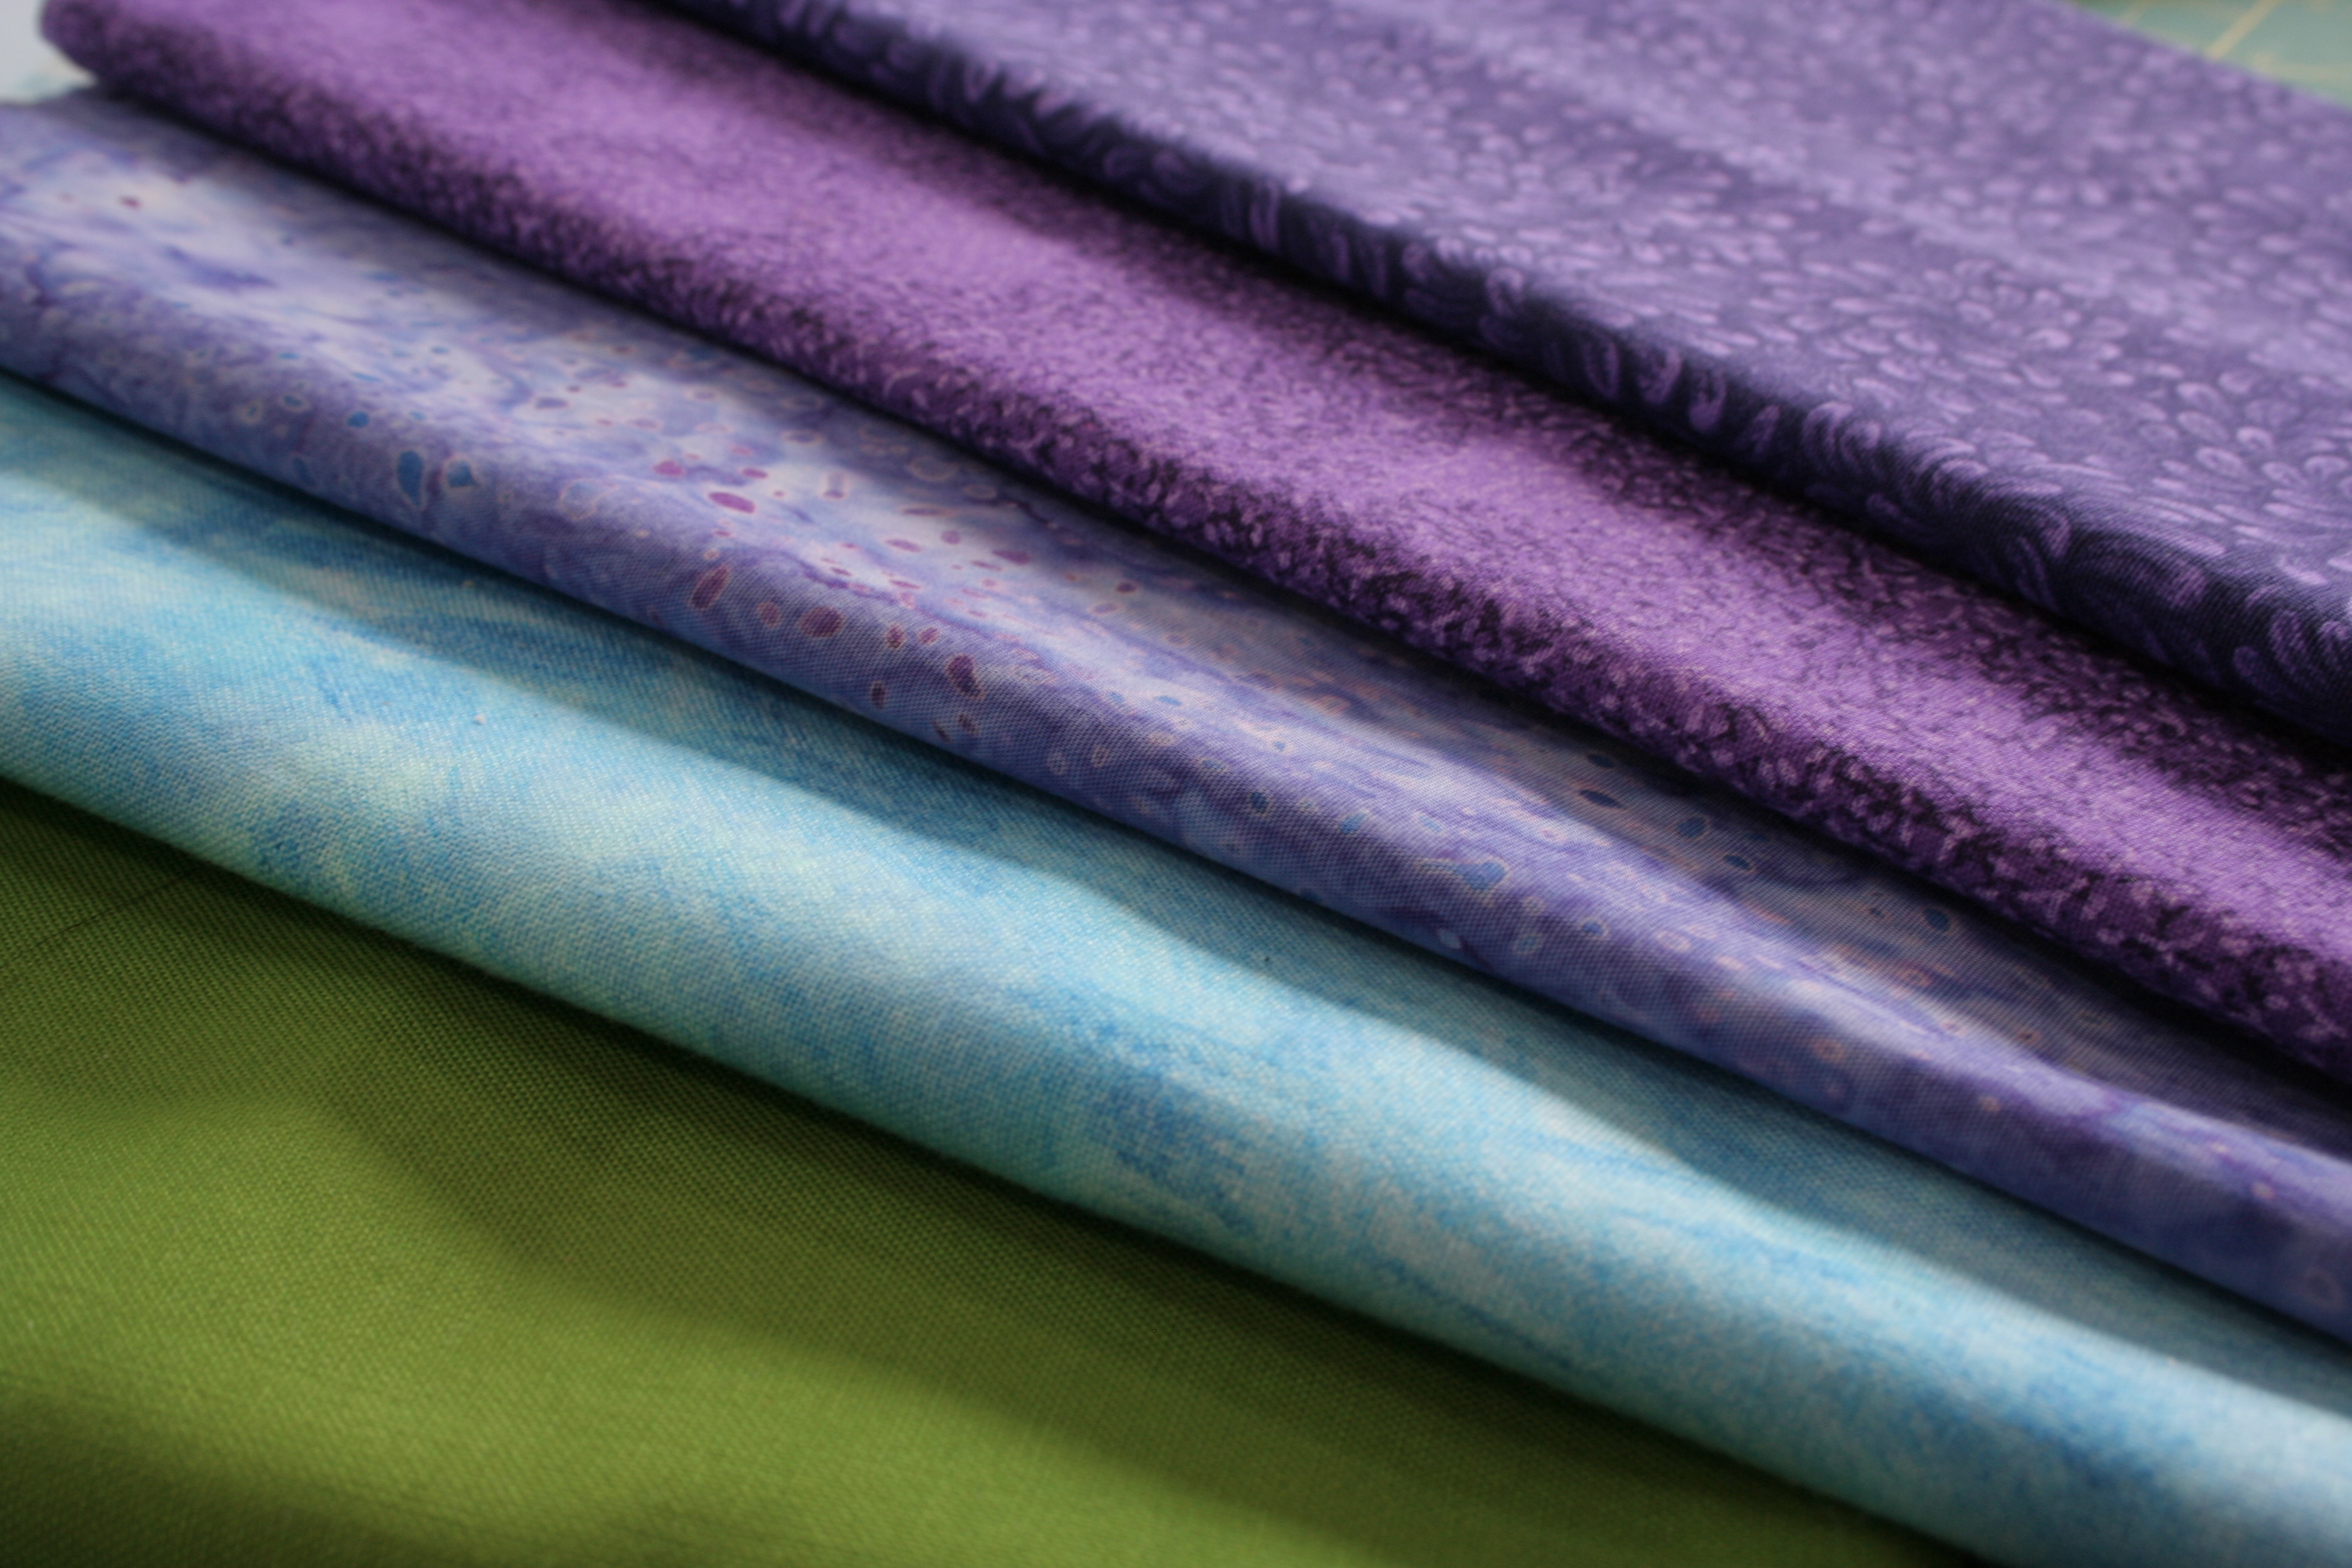
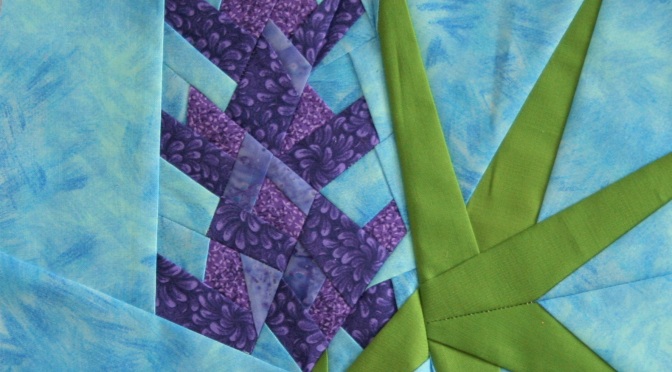
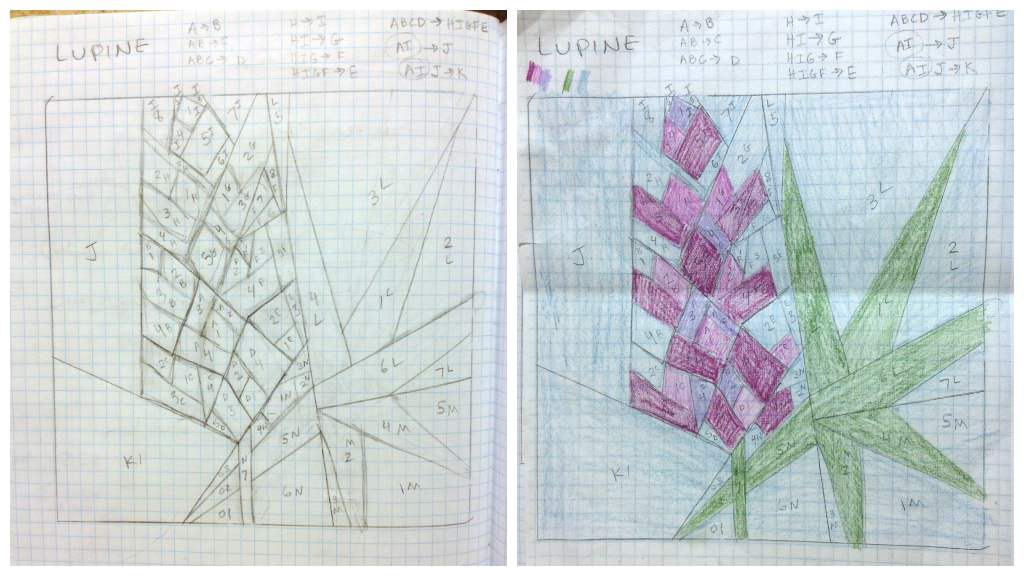
The hustle and bustle of the autumn harvest season has overflowed into my sewing habits. Over the past couple of weeks, I’ve been finalizing some new foundation paper piecing patterns with the help of some awesome pattern testers. I’m relatively new to the solicit-pattern-testers game, but I managed to find some great and enthusiastic testers through the Late Night Quilters Club facebook group. Here are my new patterns, and a sampling of the fabulous testing:
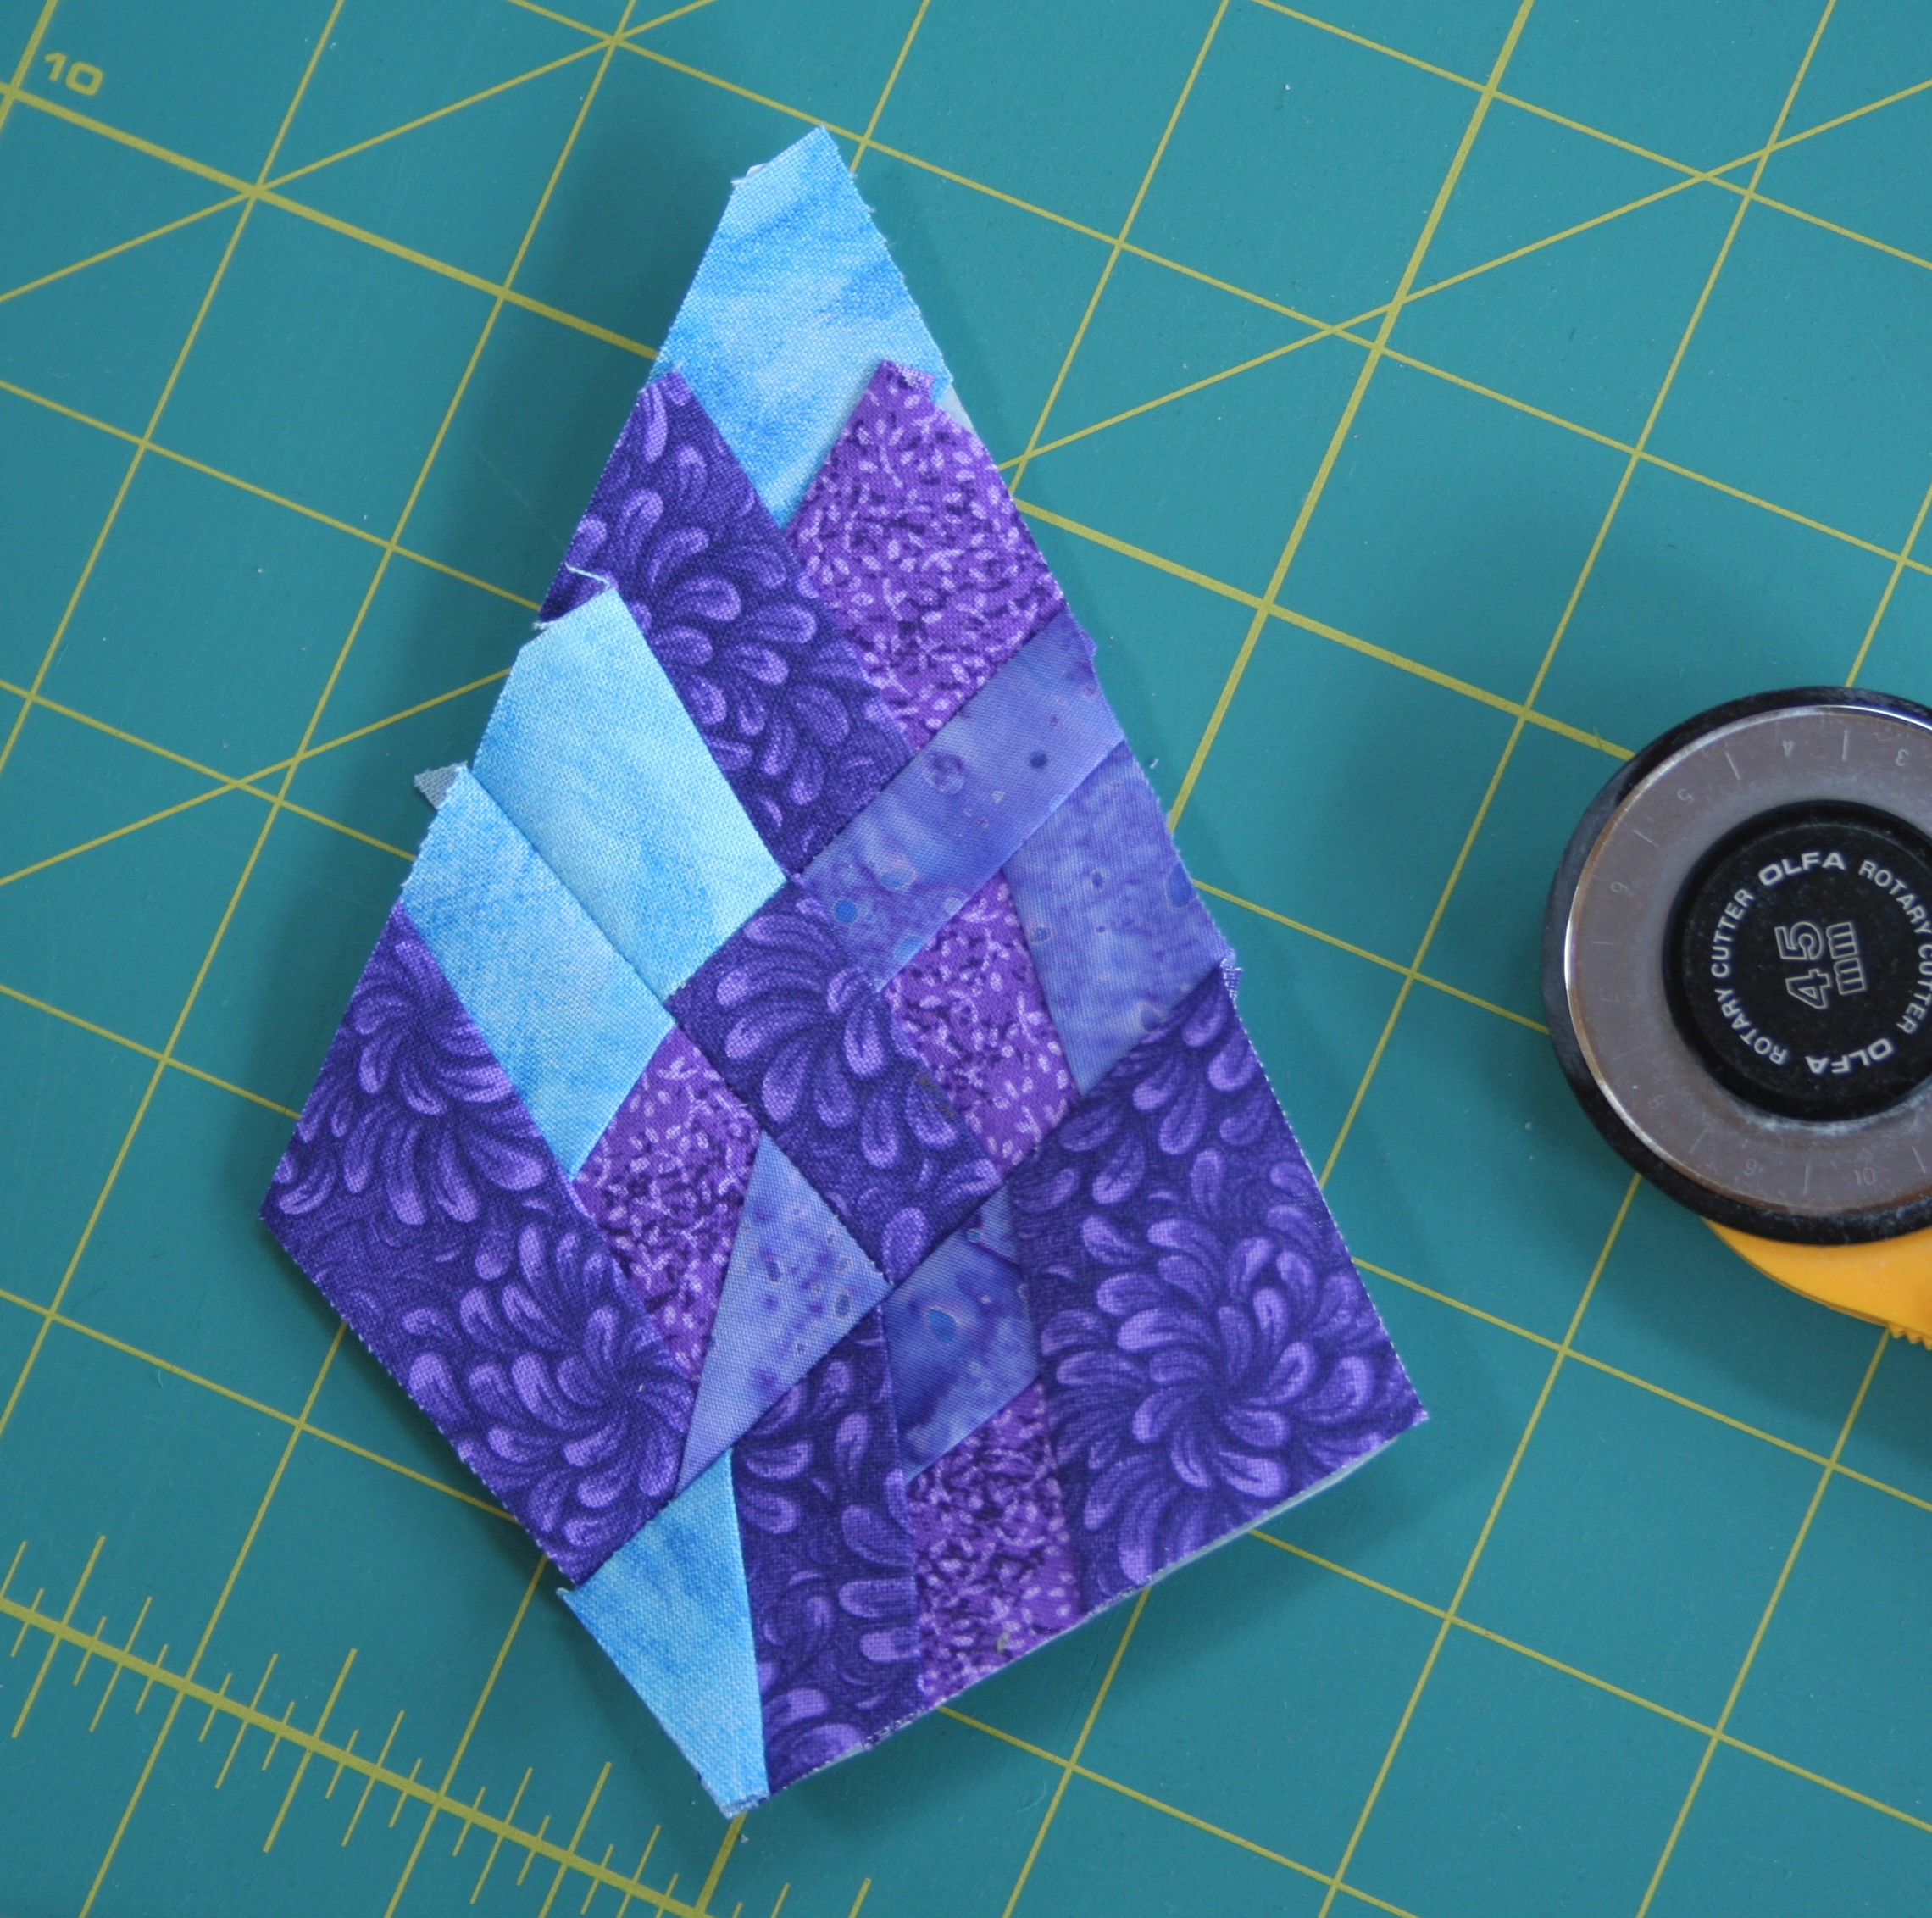
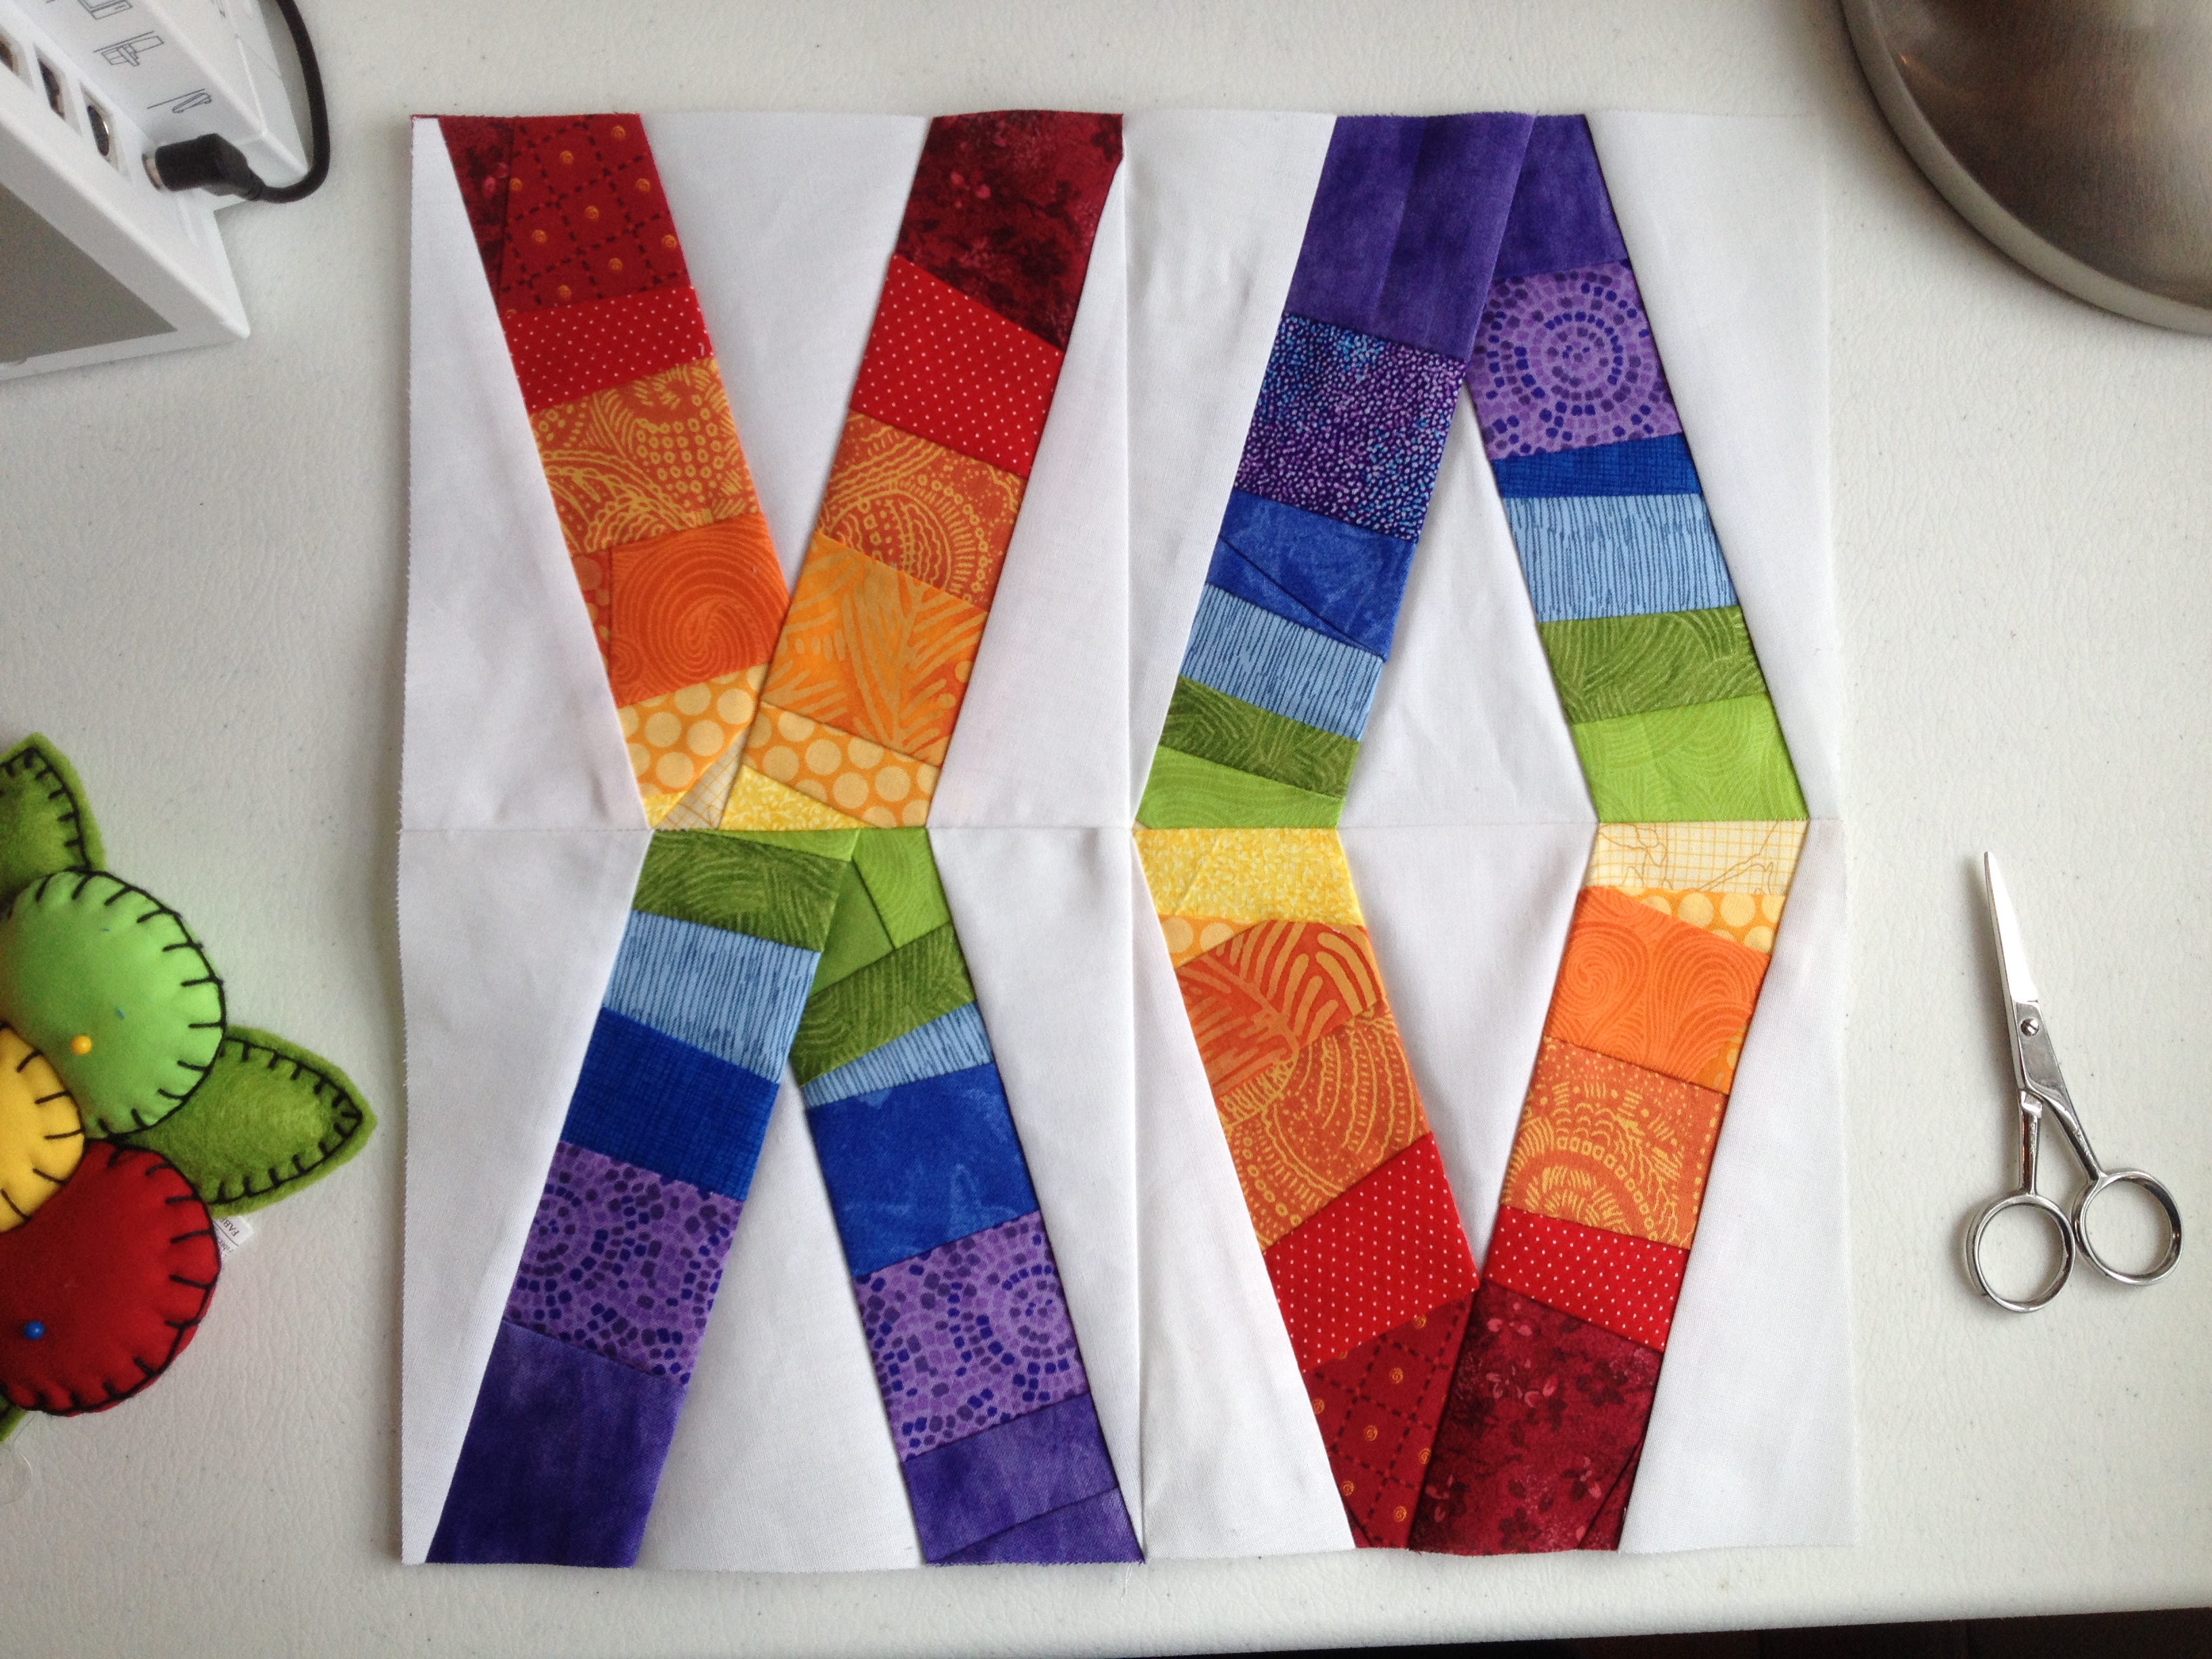
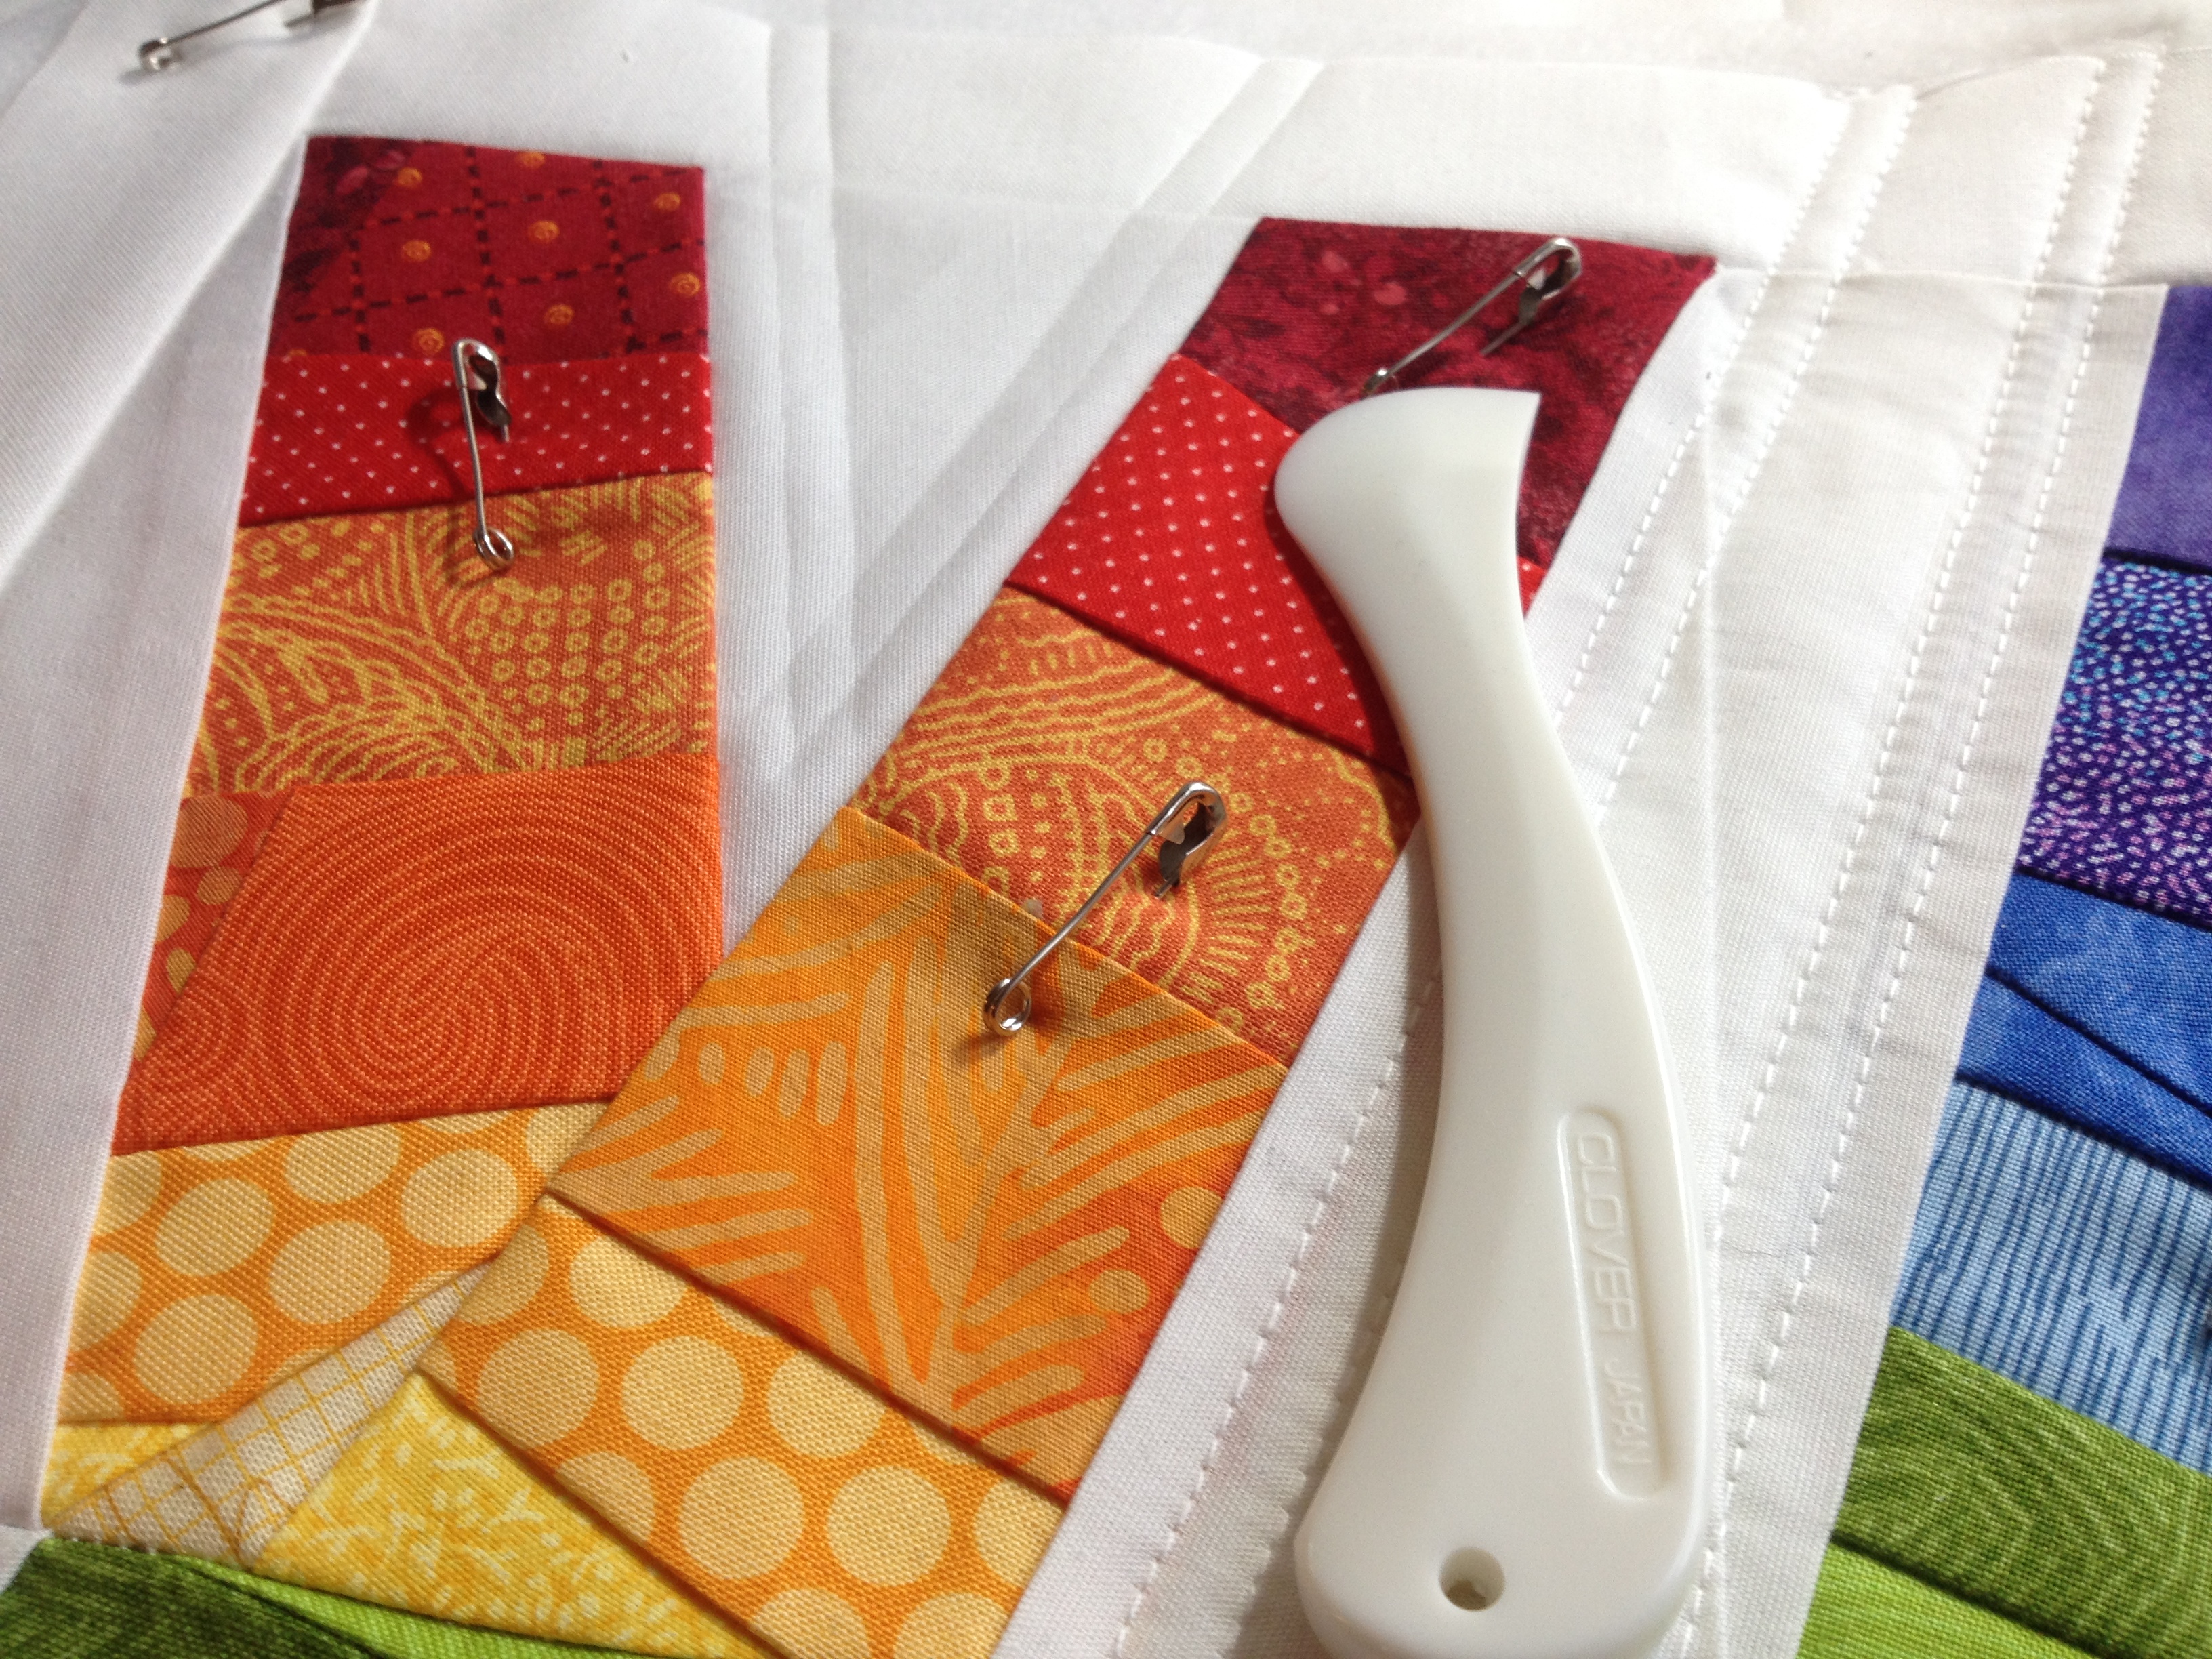
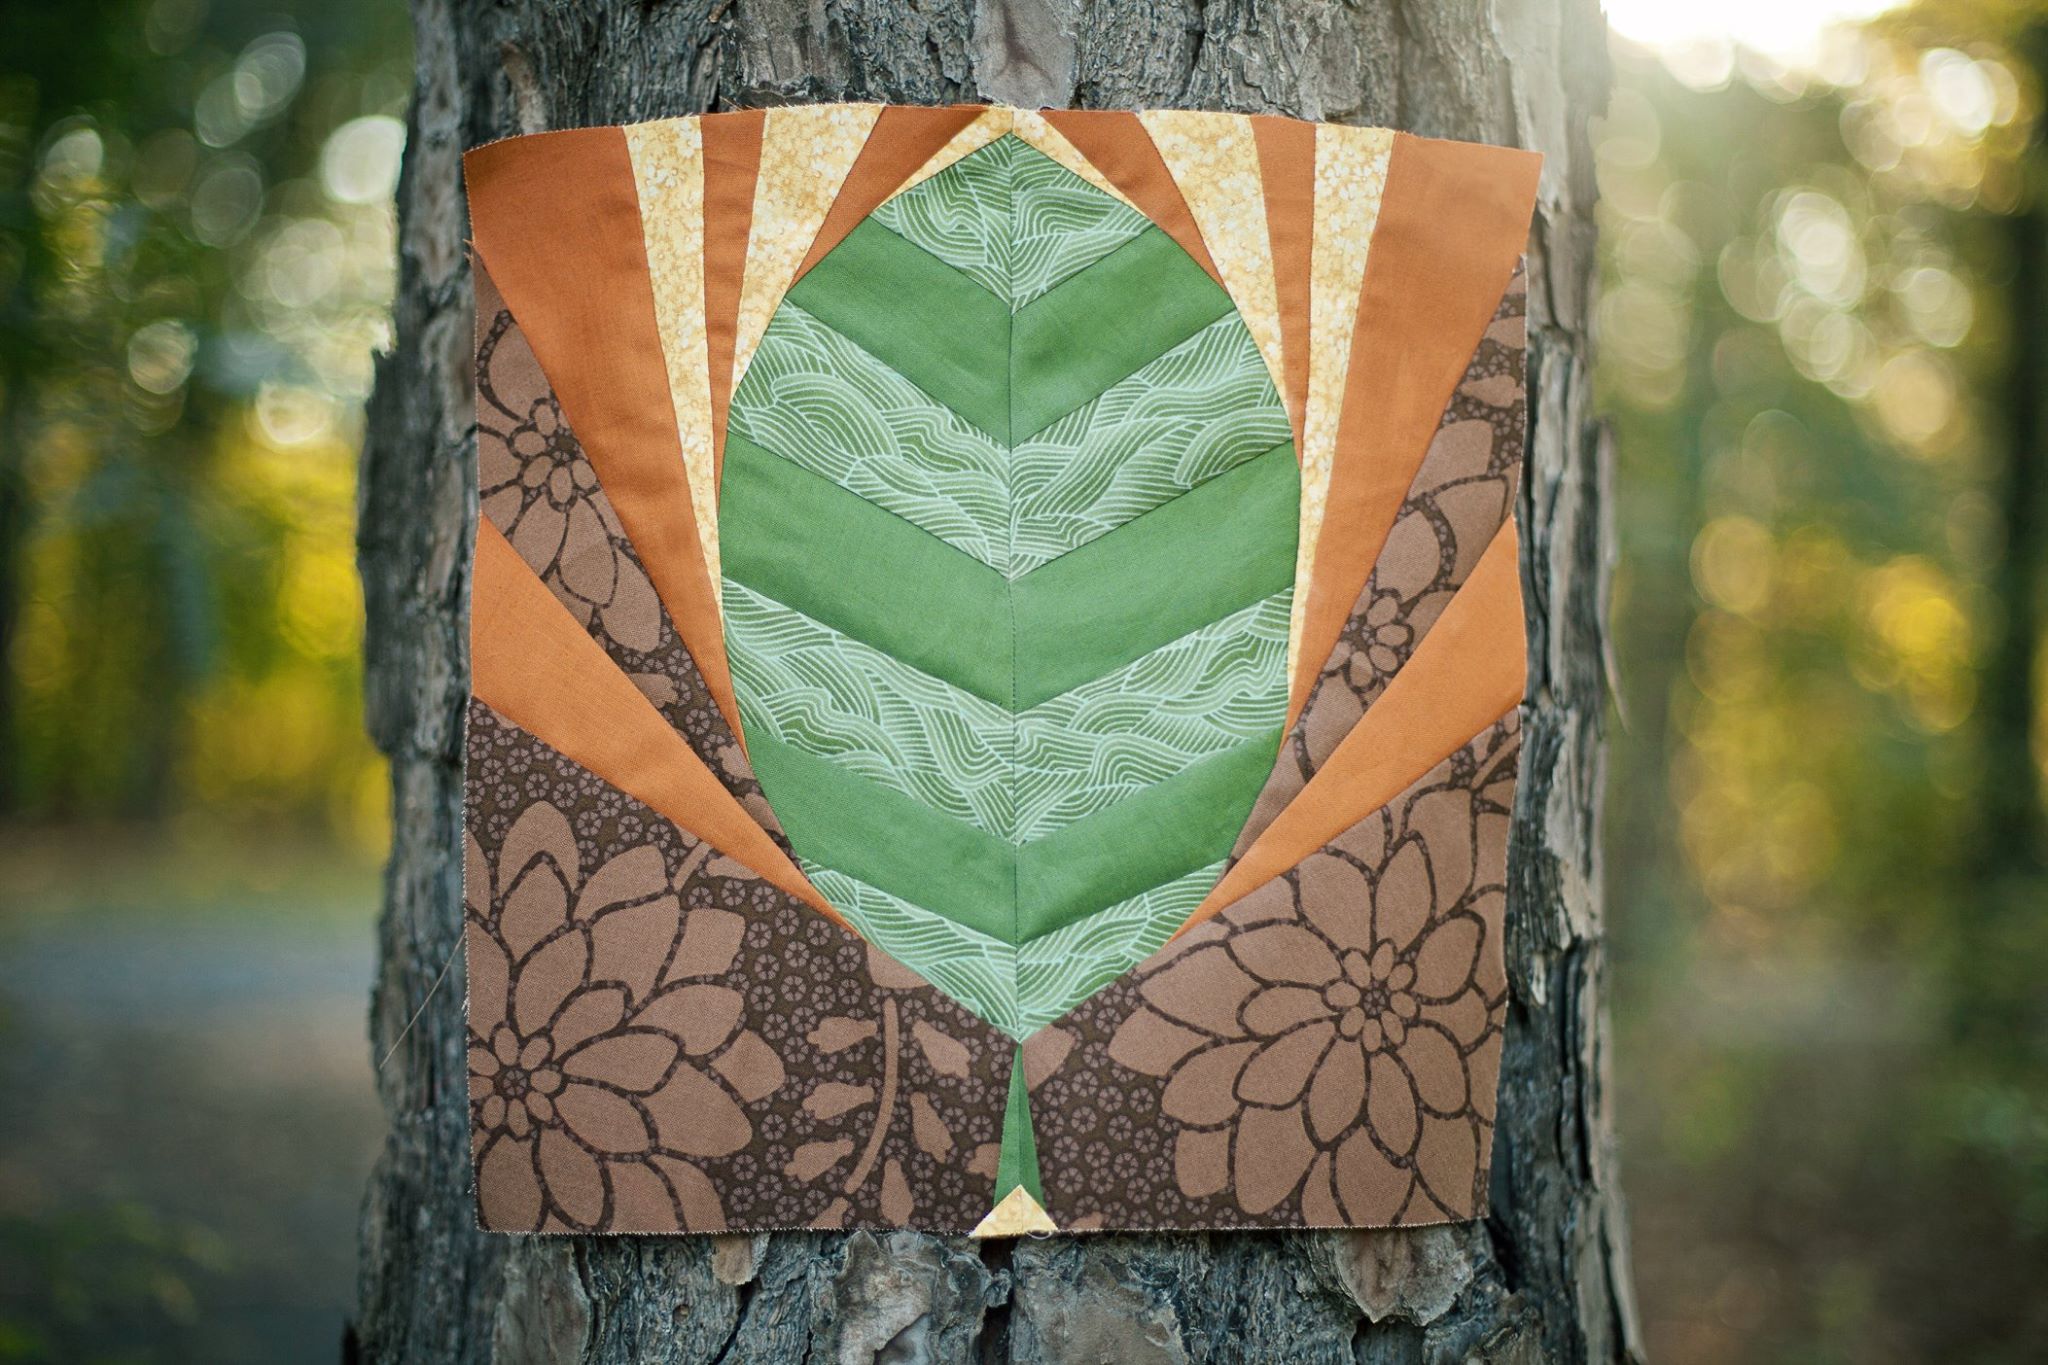
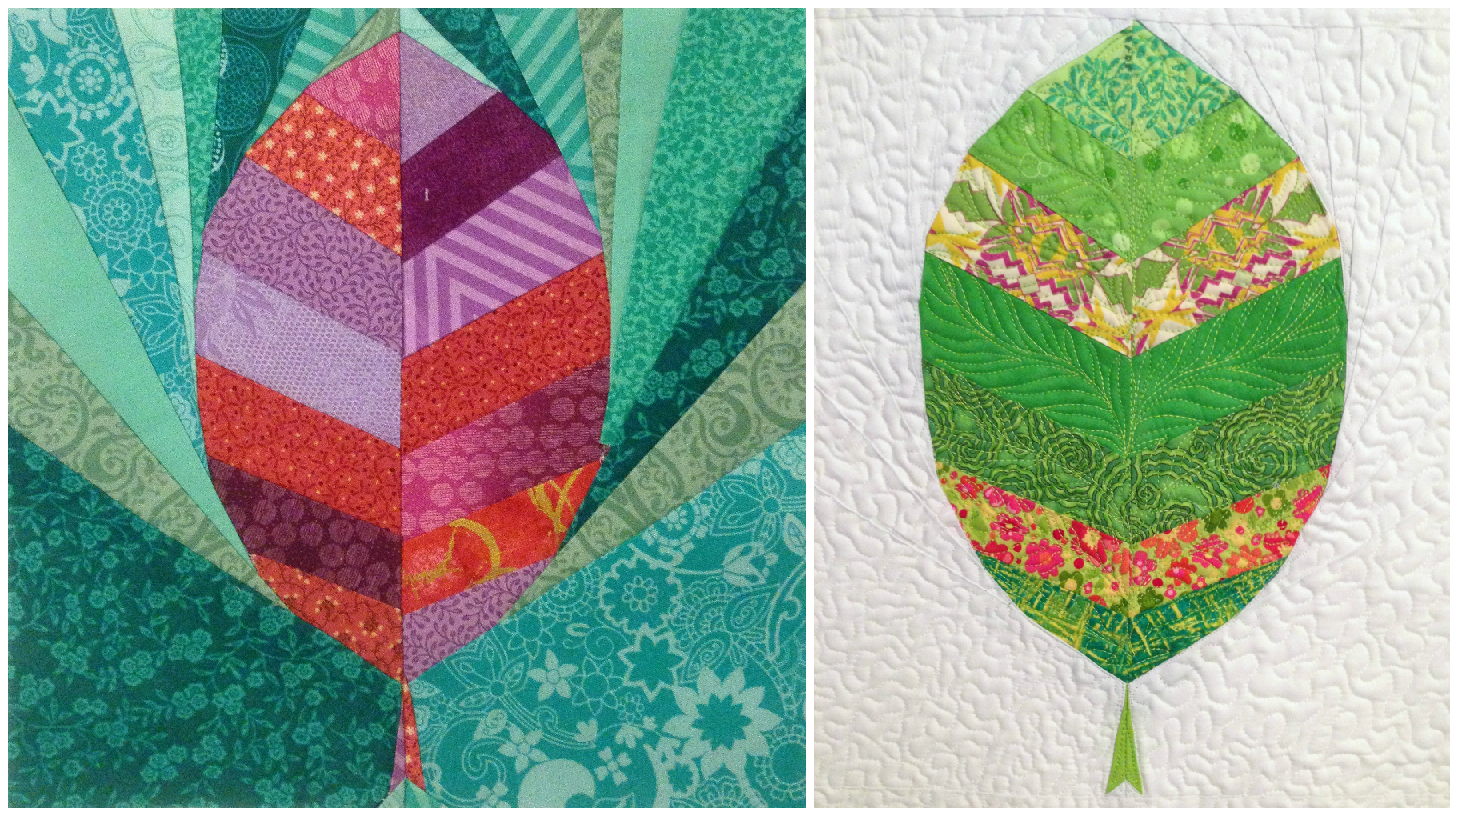
Leaf

Leaf paper piecing pattern

This pattern literally came to me as my family was driving home from church one Sunday. I have been really trying to simplify my patterns and focus on geometric symmetry. Perhaps the turning leaves speckling our drive home inspired me, but either way I quickly sketched out this pattern on a scrap of paper while my husband drove (don’t worry–I didn’t sketch it out while driving!). Here we are a few weeks later and it’s ready to go!

leaf piecing detail

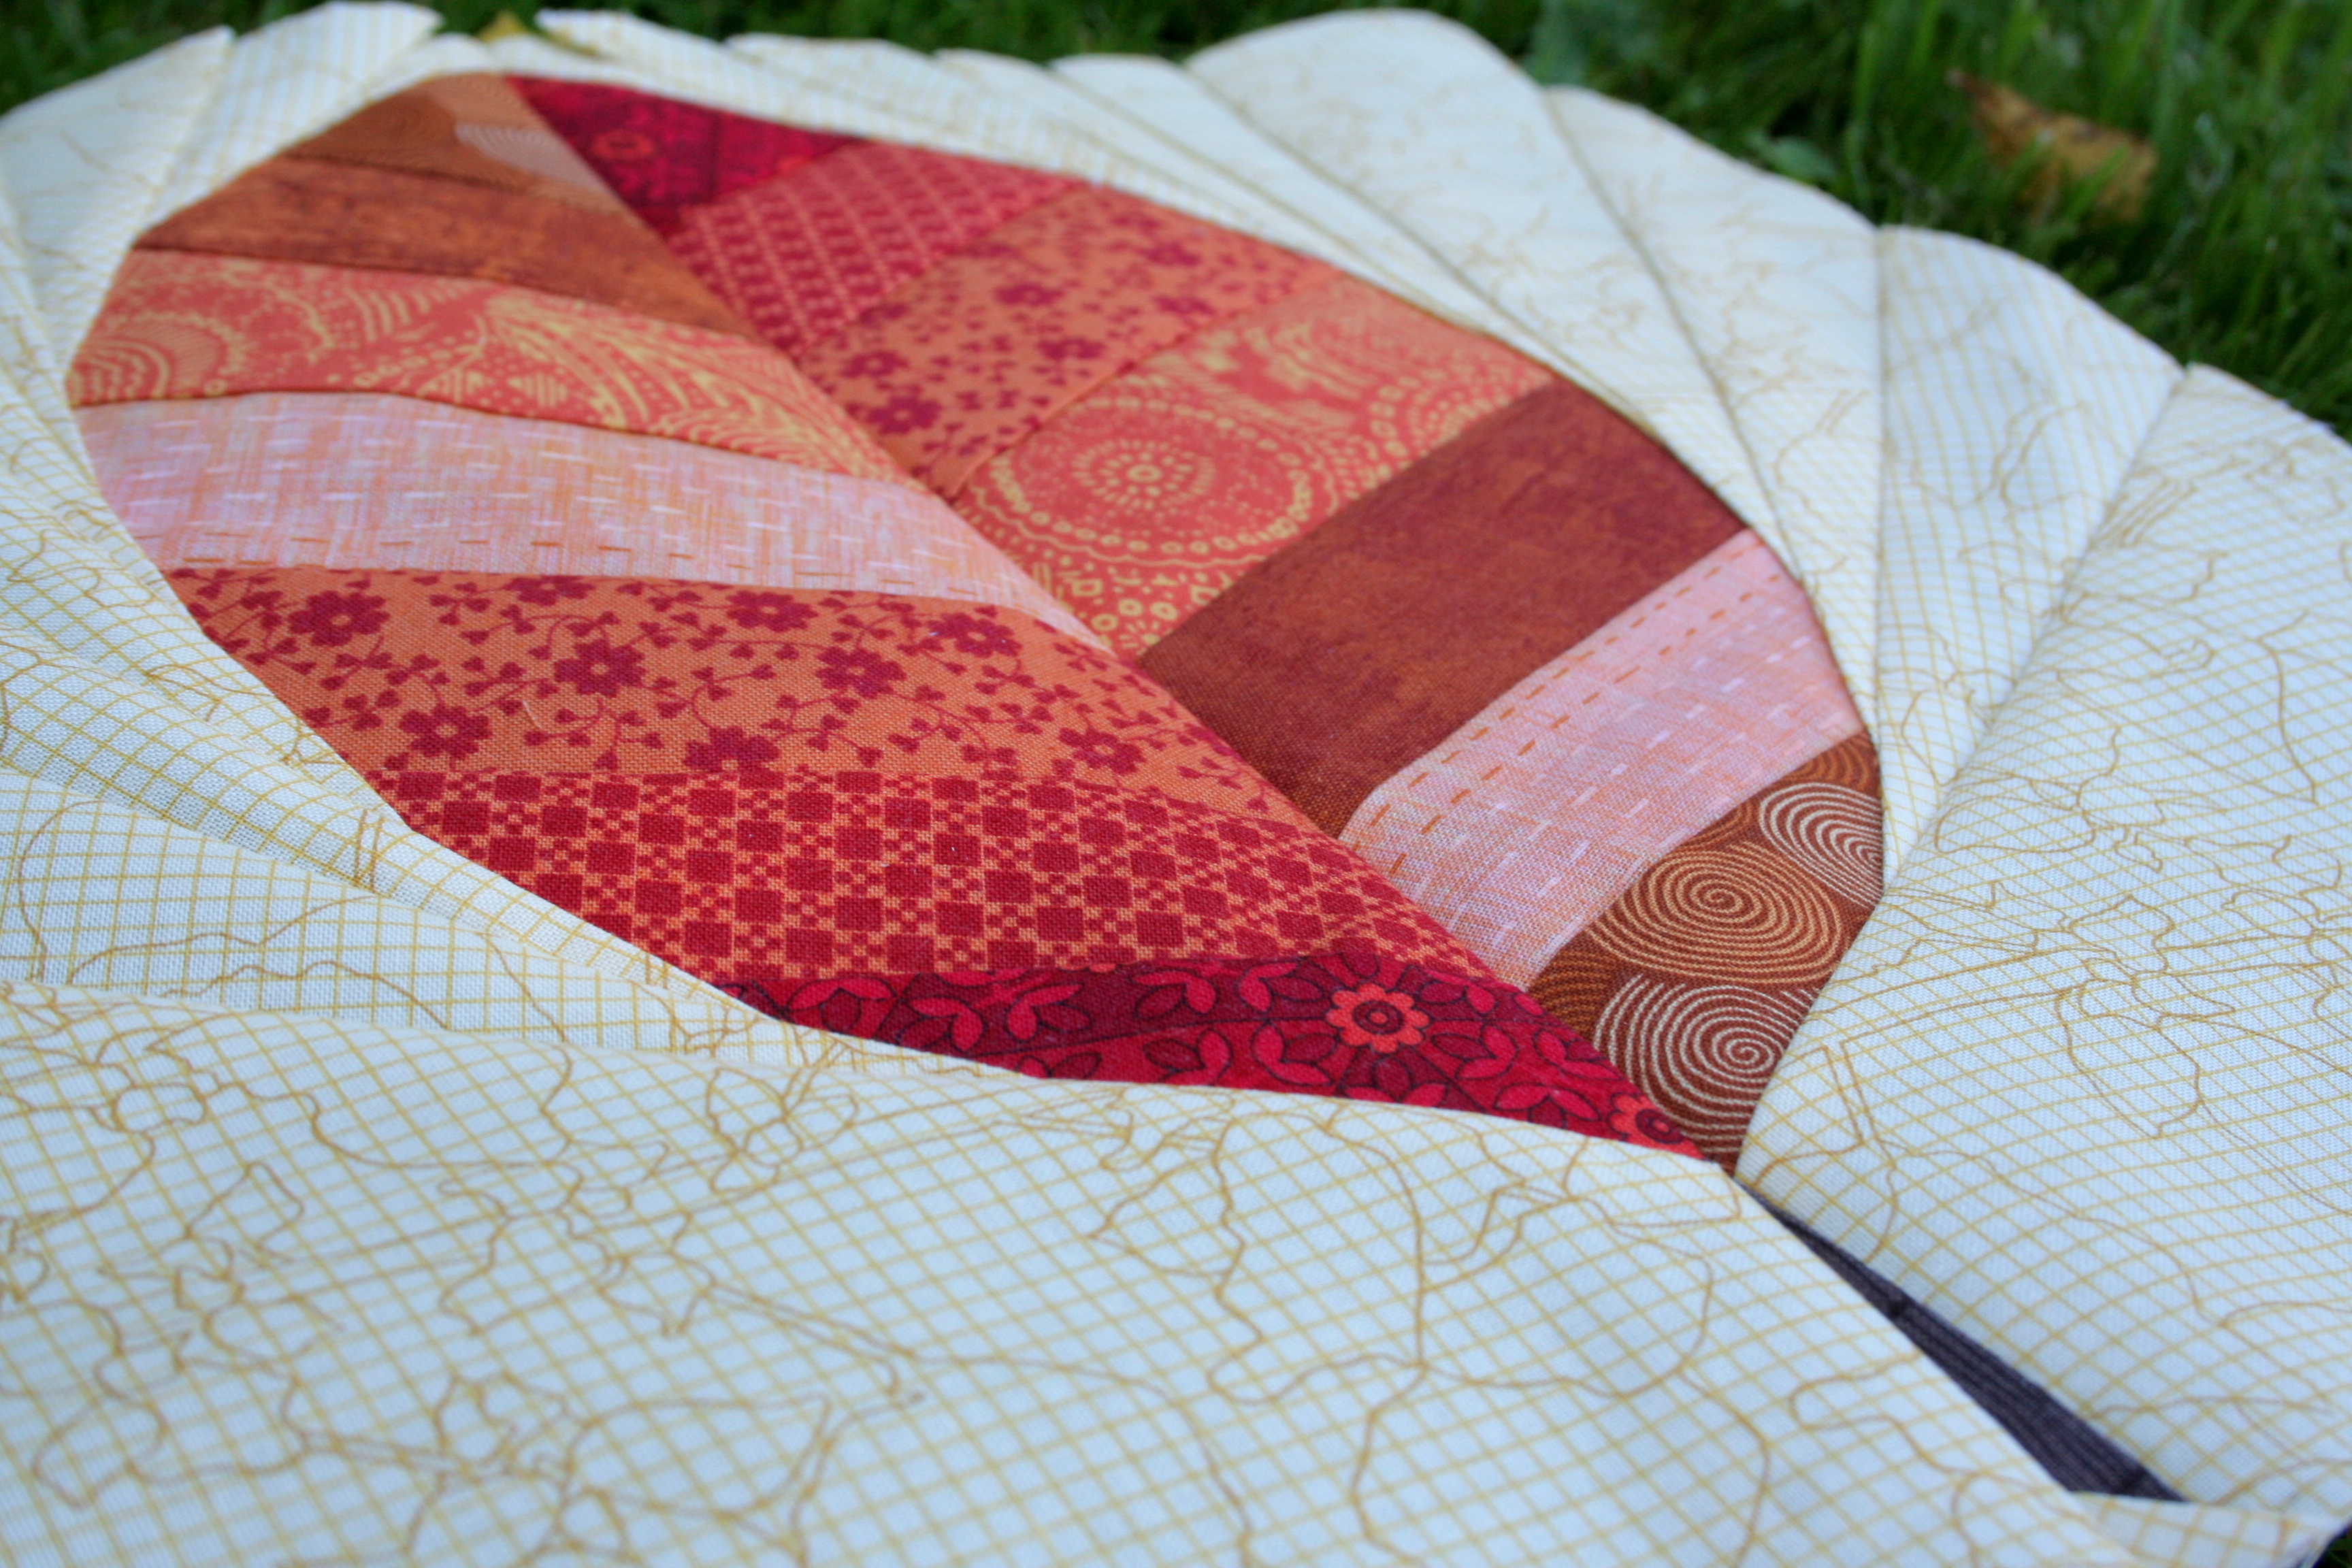
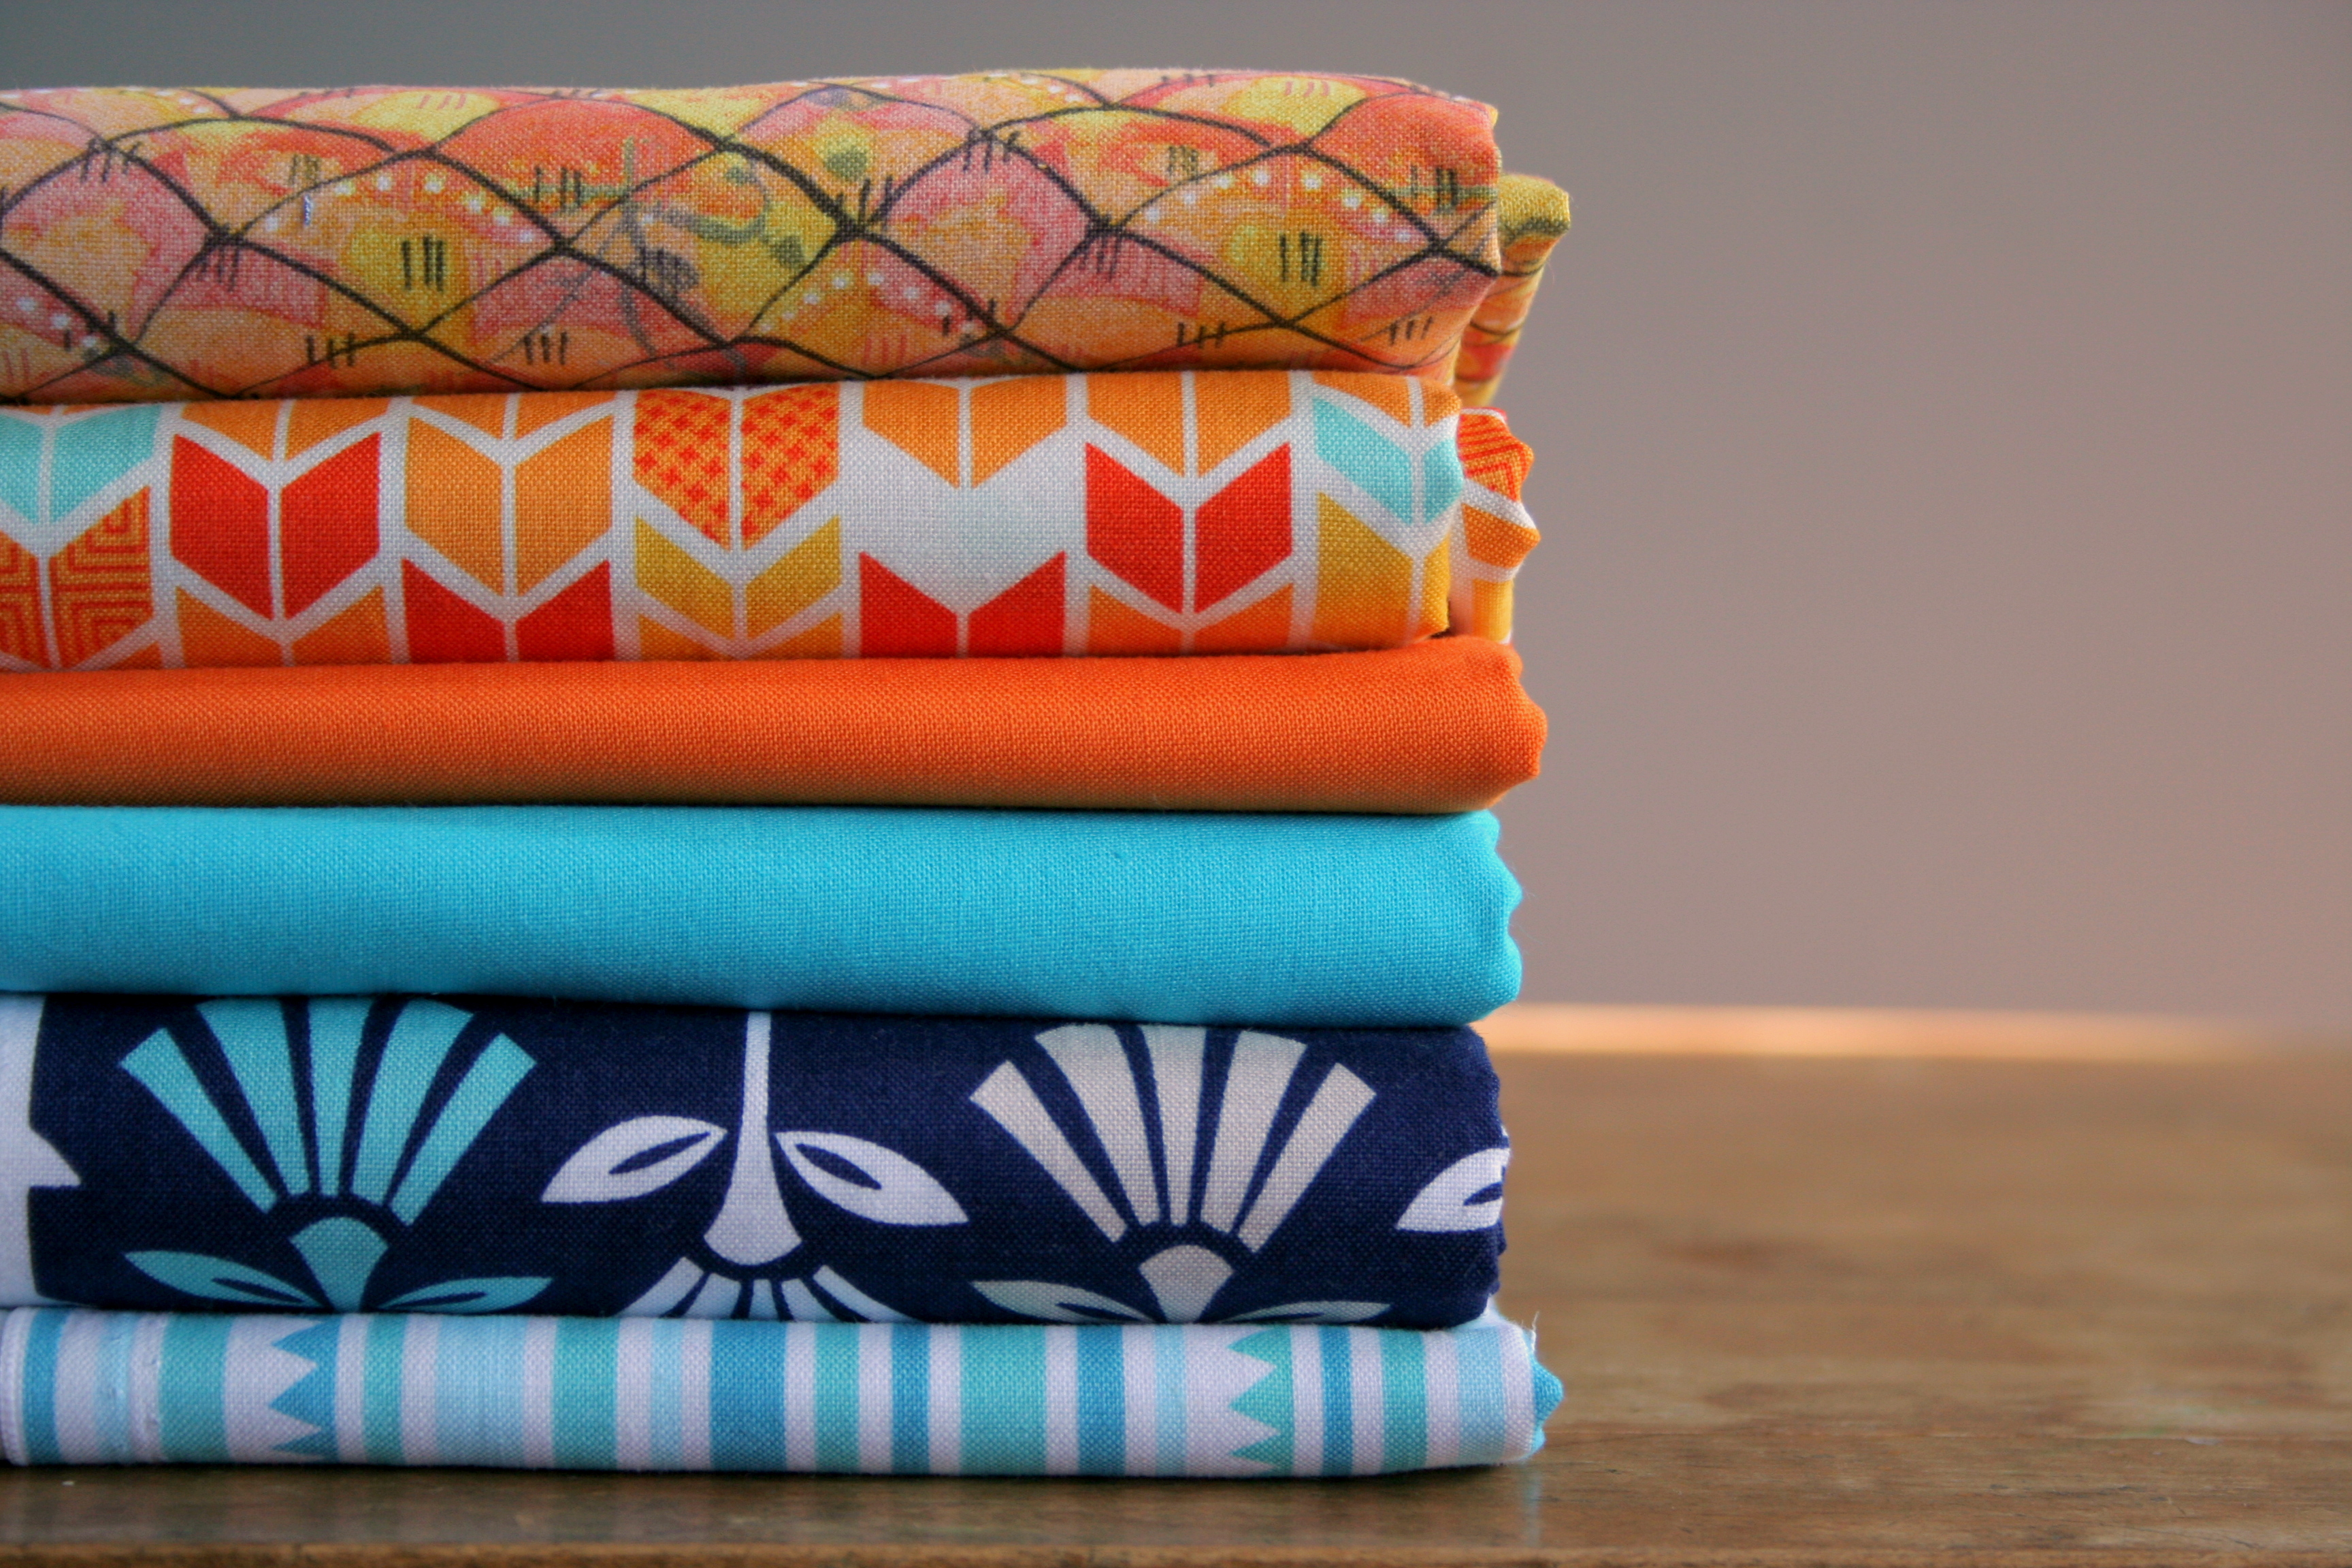
One of the most exciting things about sending your pattern to testers is the anticipation of what color scheme and design each tester will choose. My testers for this leaf didn’t disappoint! Check out these lovely tester versions; they are so incredibly varied and gorgeous!

Pattern tested by Shayna Shipley-001
Pattern tested by Shayna Shipley from http://wifemomcreator.com
Leaf Pattern Tested
Left: Pattern tested by Sarah Pitcher at http://pitcherfamilyadventures.blogspot.com Right: Pattern tested by Cheryl Schenck at http://myfeeddogsaredown.blogspot.com

Each of these three lovely ladies will be giving away a copy of my new pattern on her blog, so head on over to check them out and try your hand at winning this seasonal leaf pattern. The pattern is also listed for sale in my Craftsy store, and will be on sale for $3.50 for one week before it goes back to its usual price.
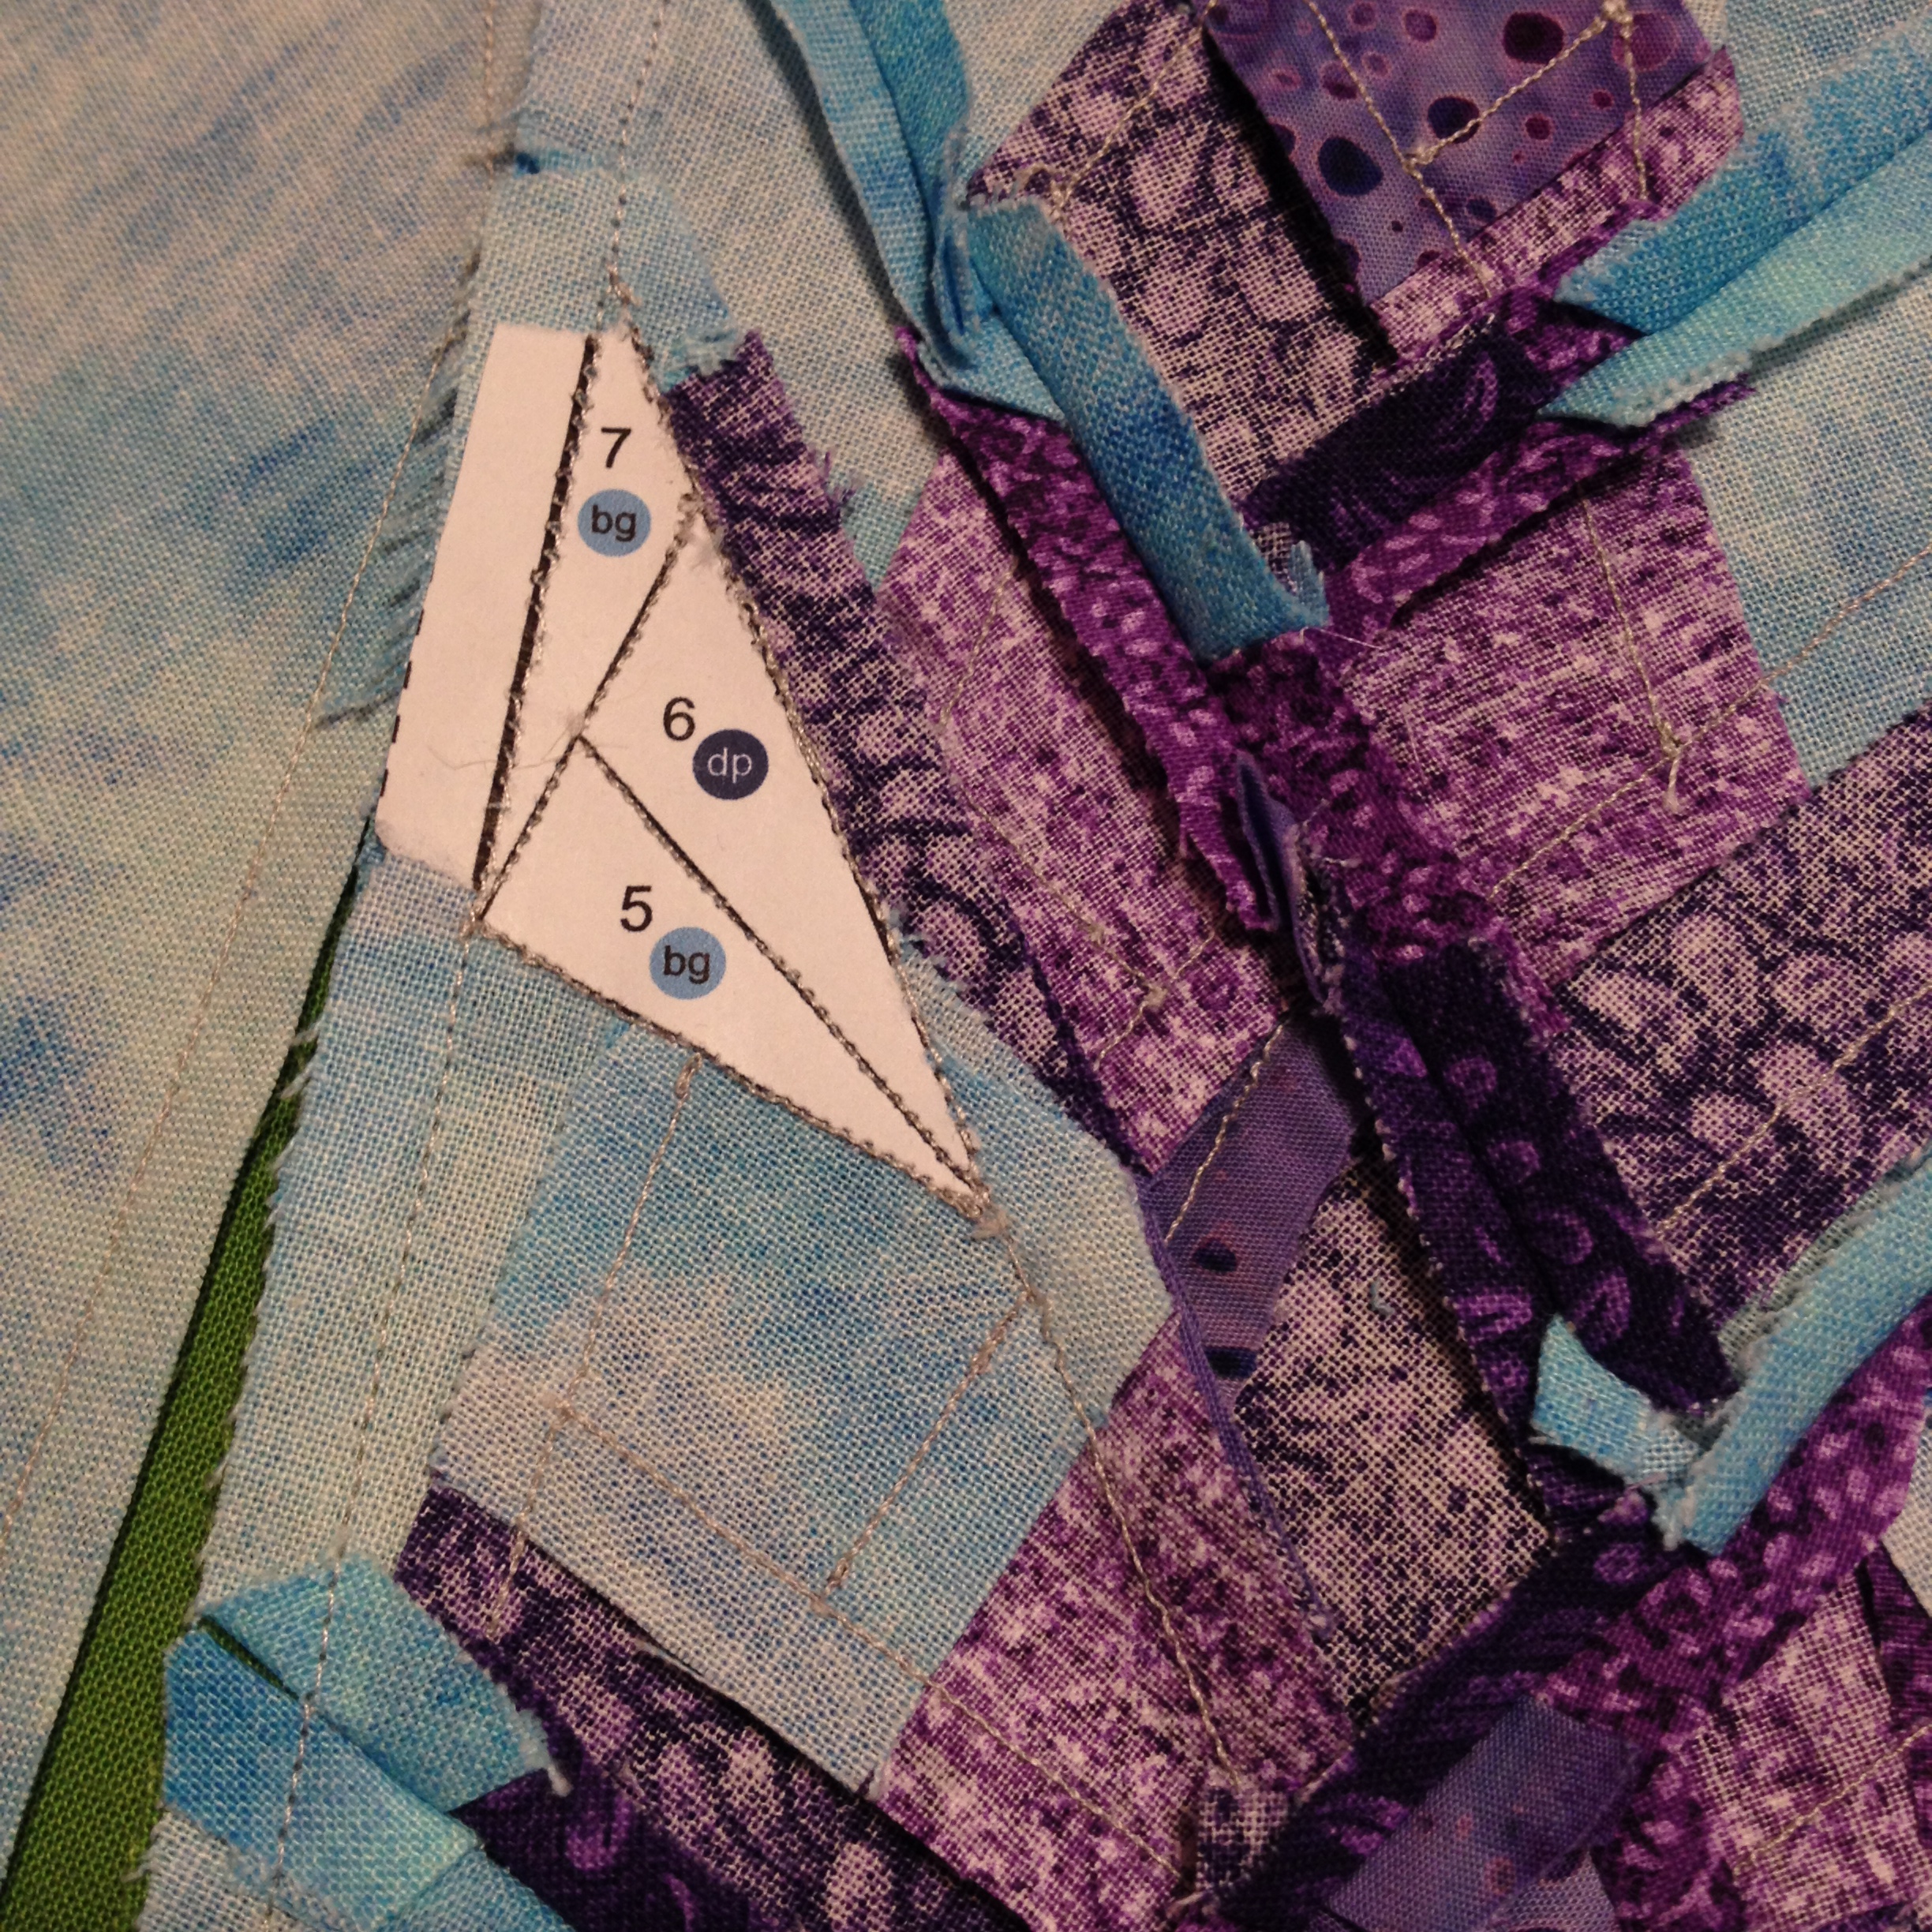
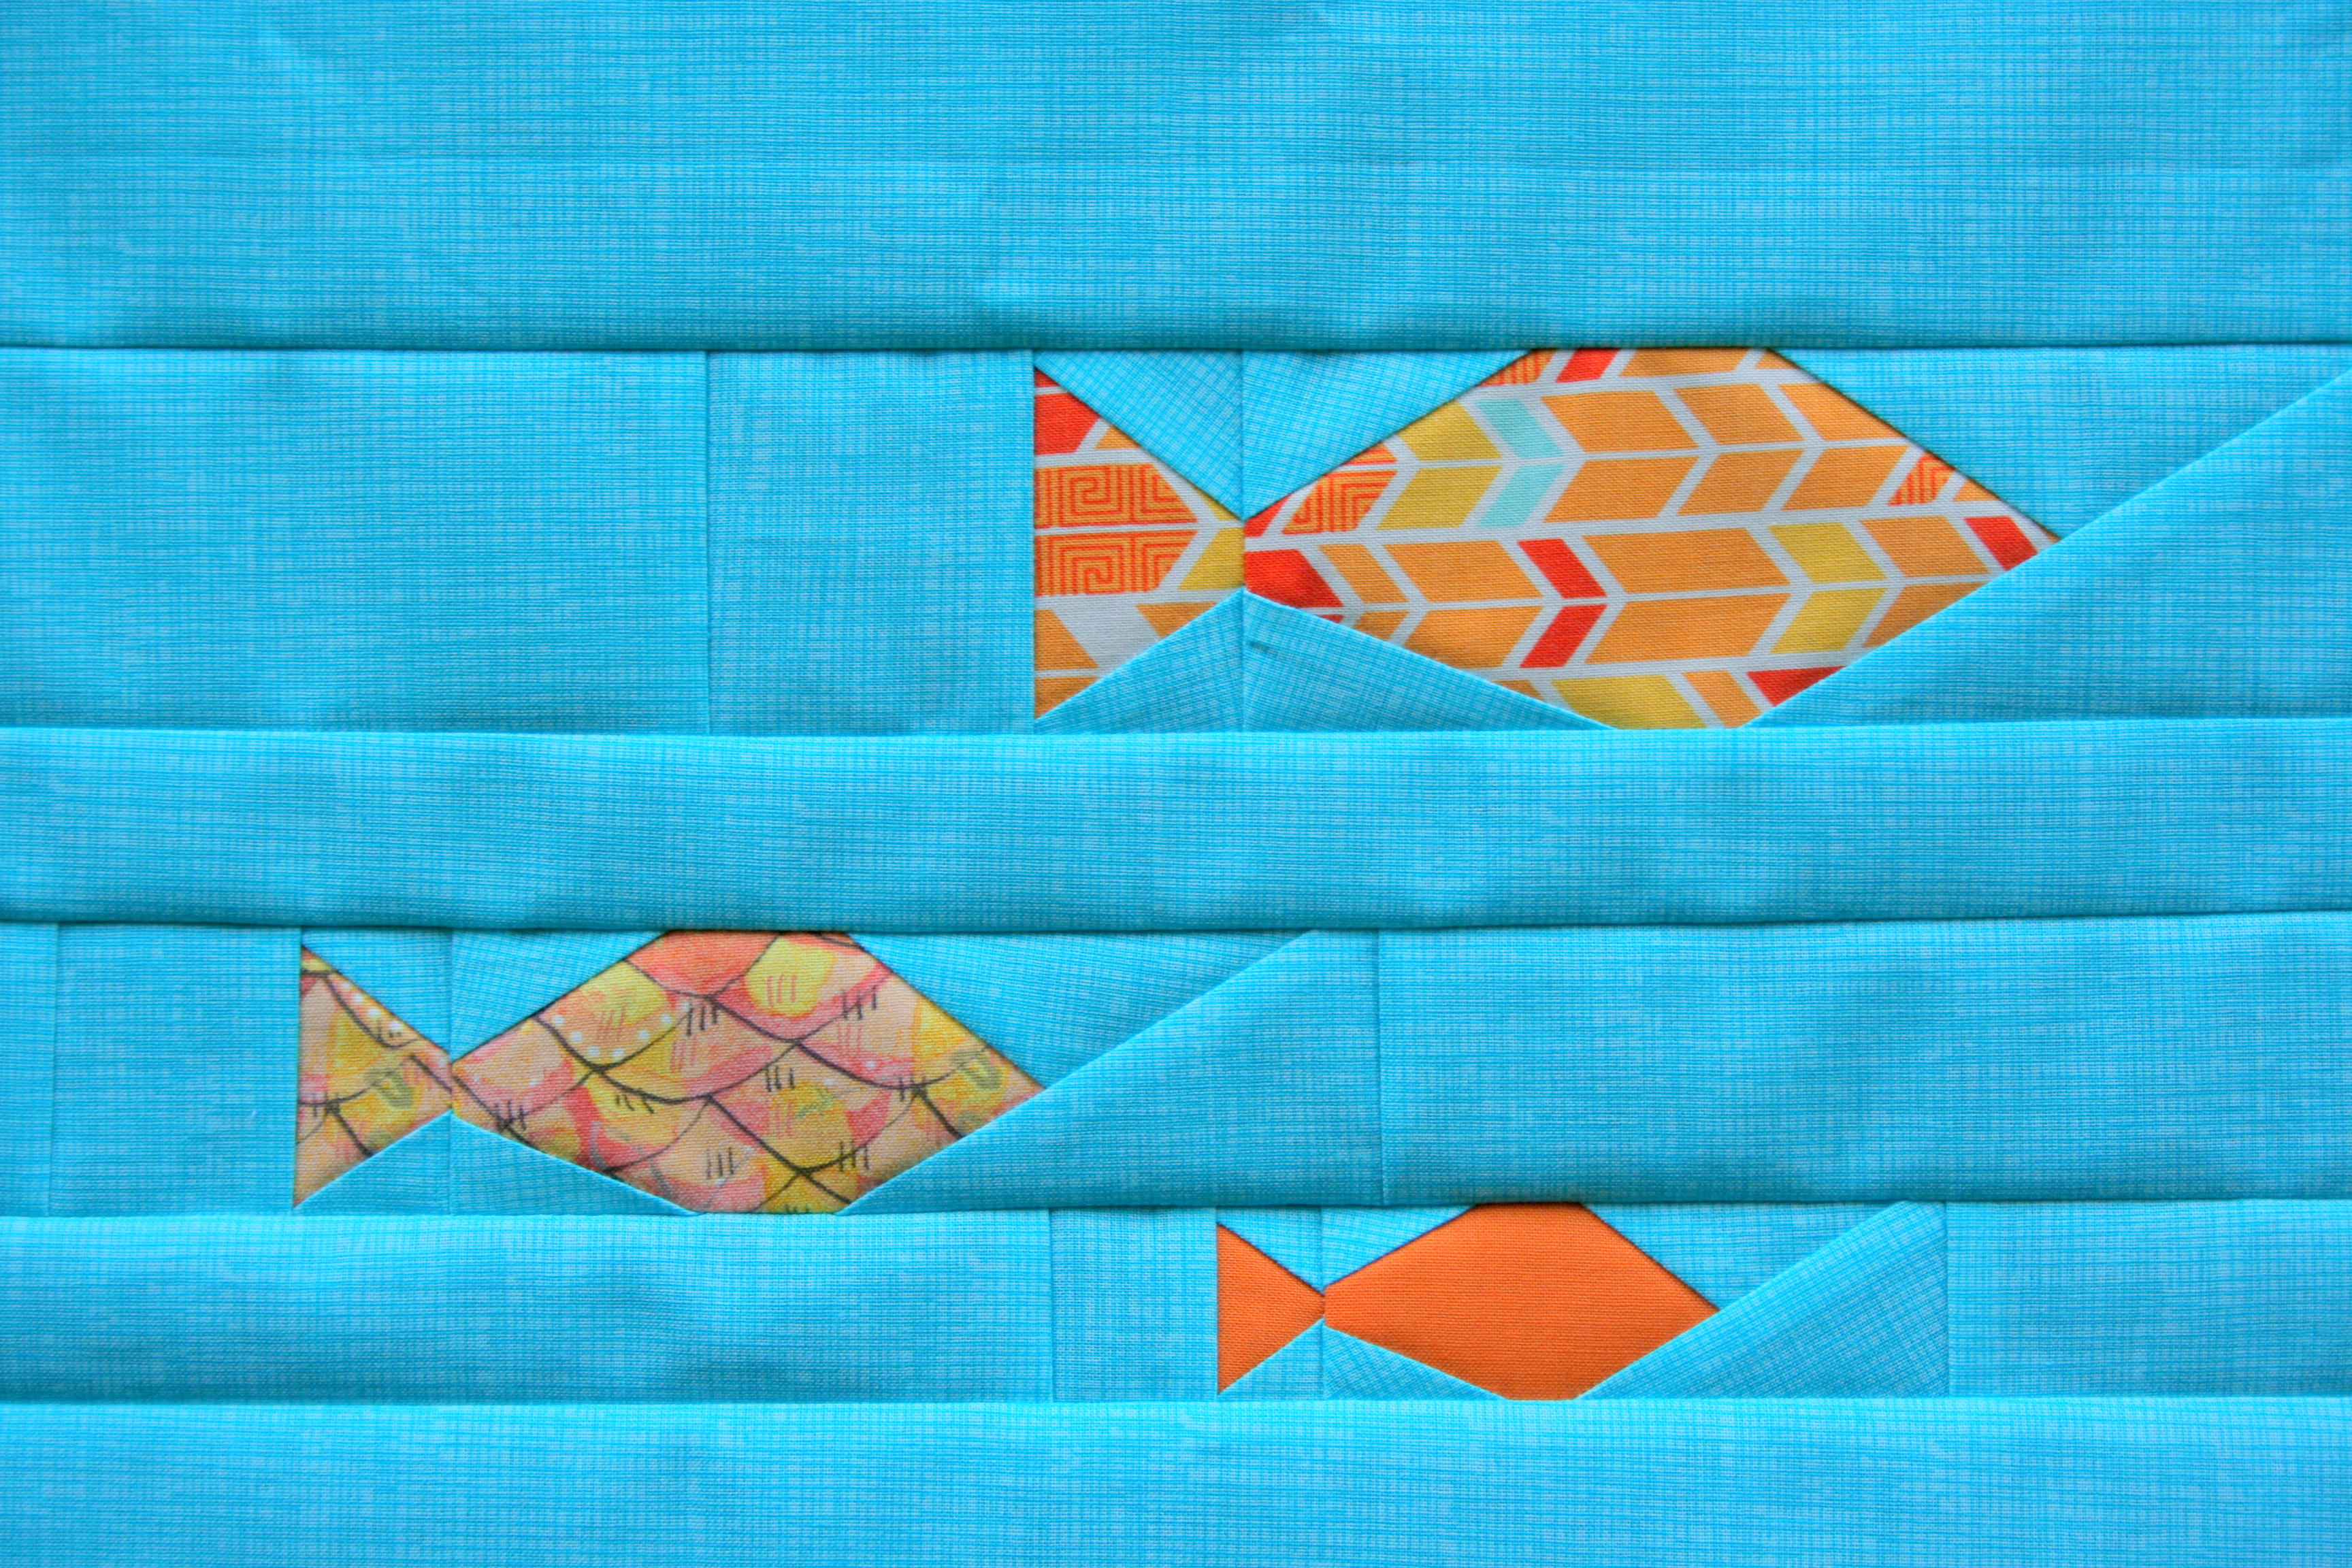
Fishies Rainbow Row

fishies foundation paper piecing quilt panel
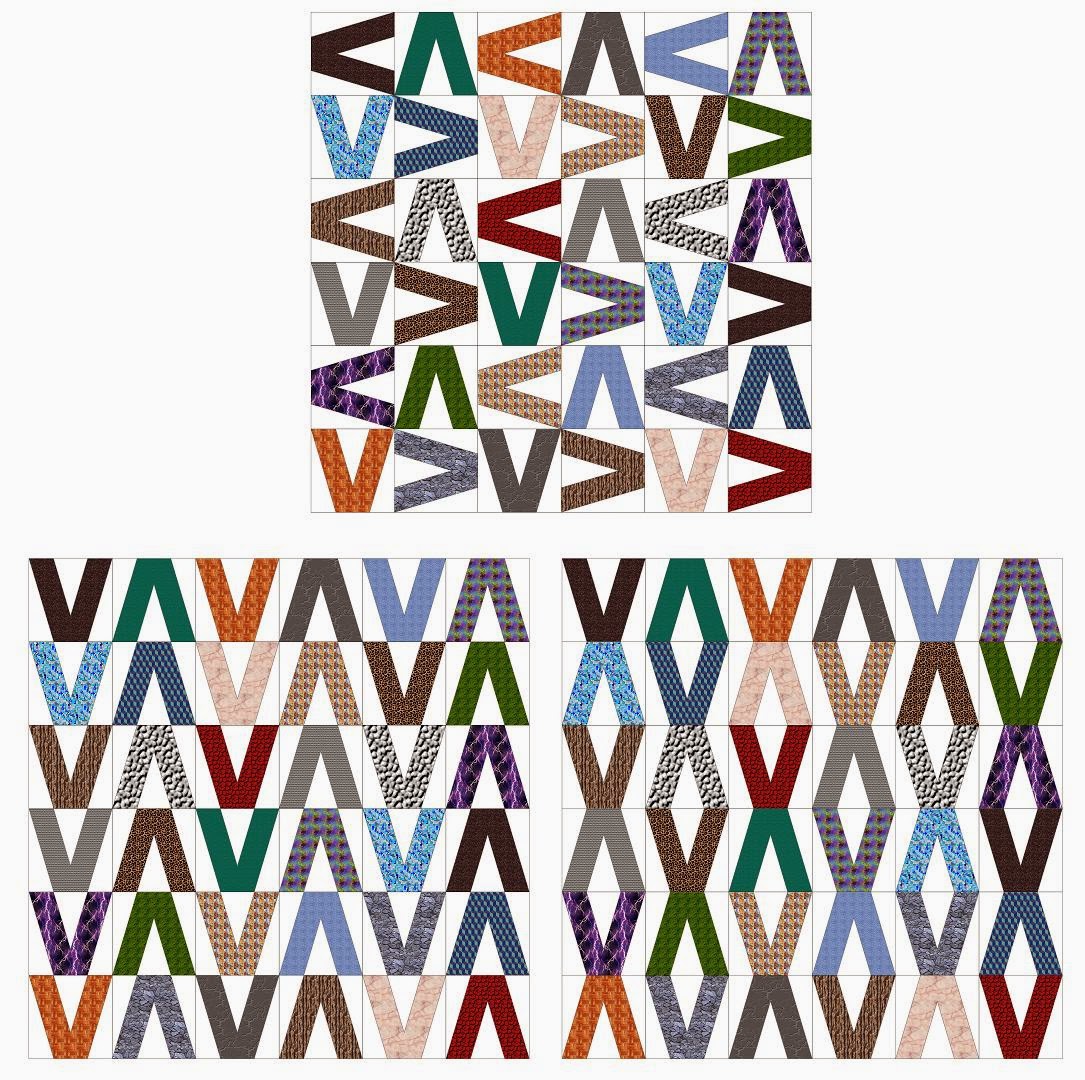
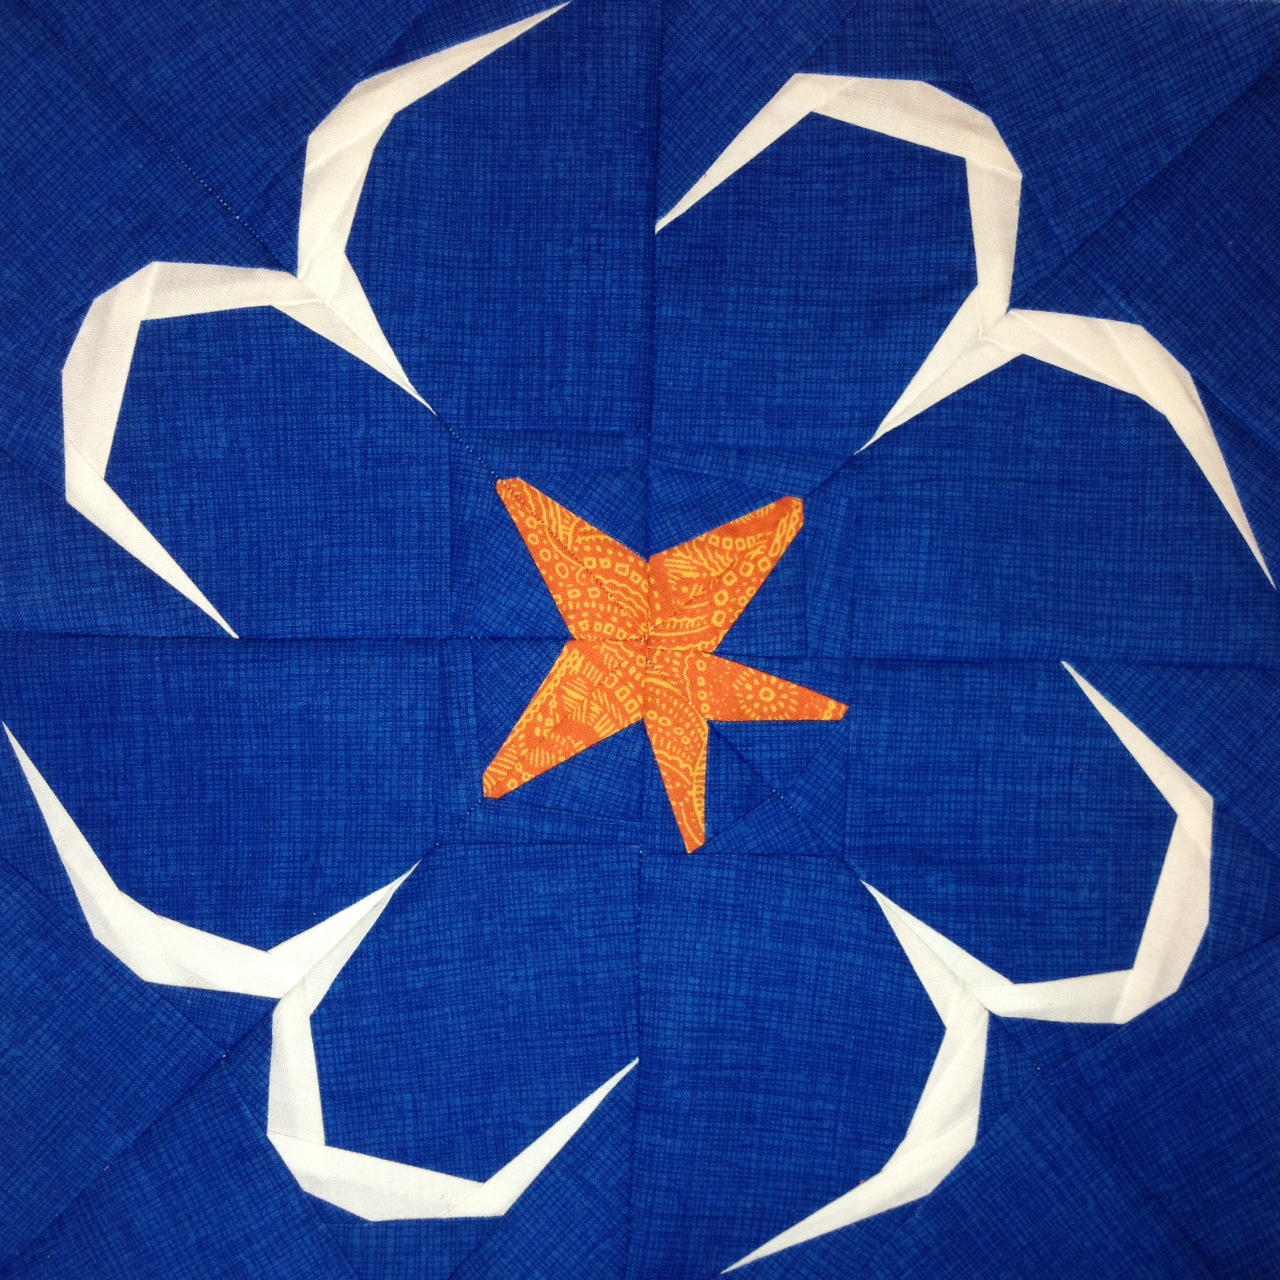
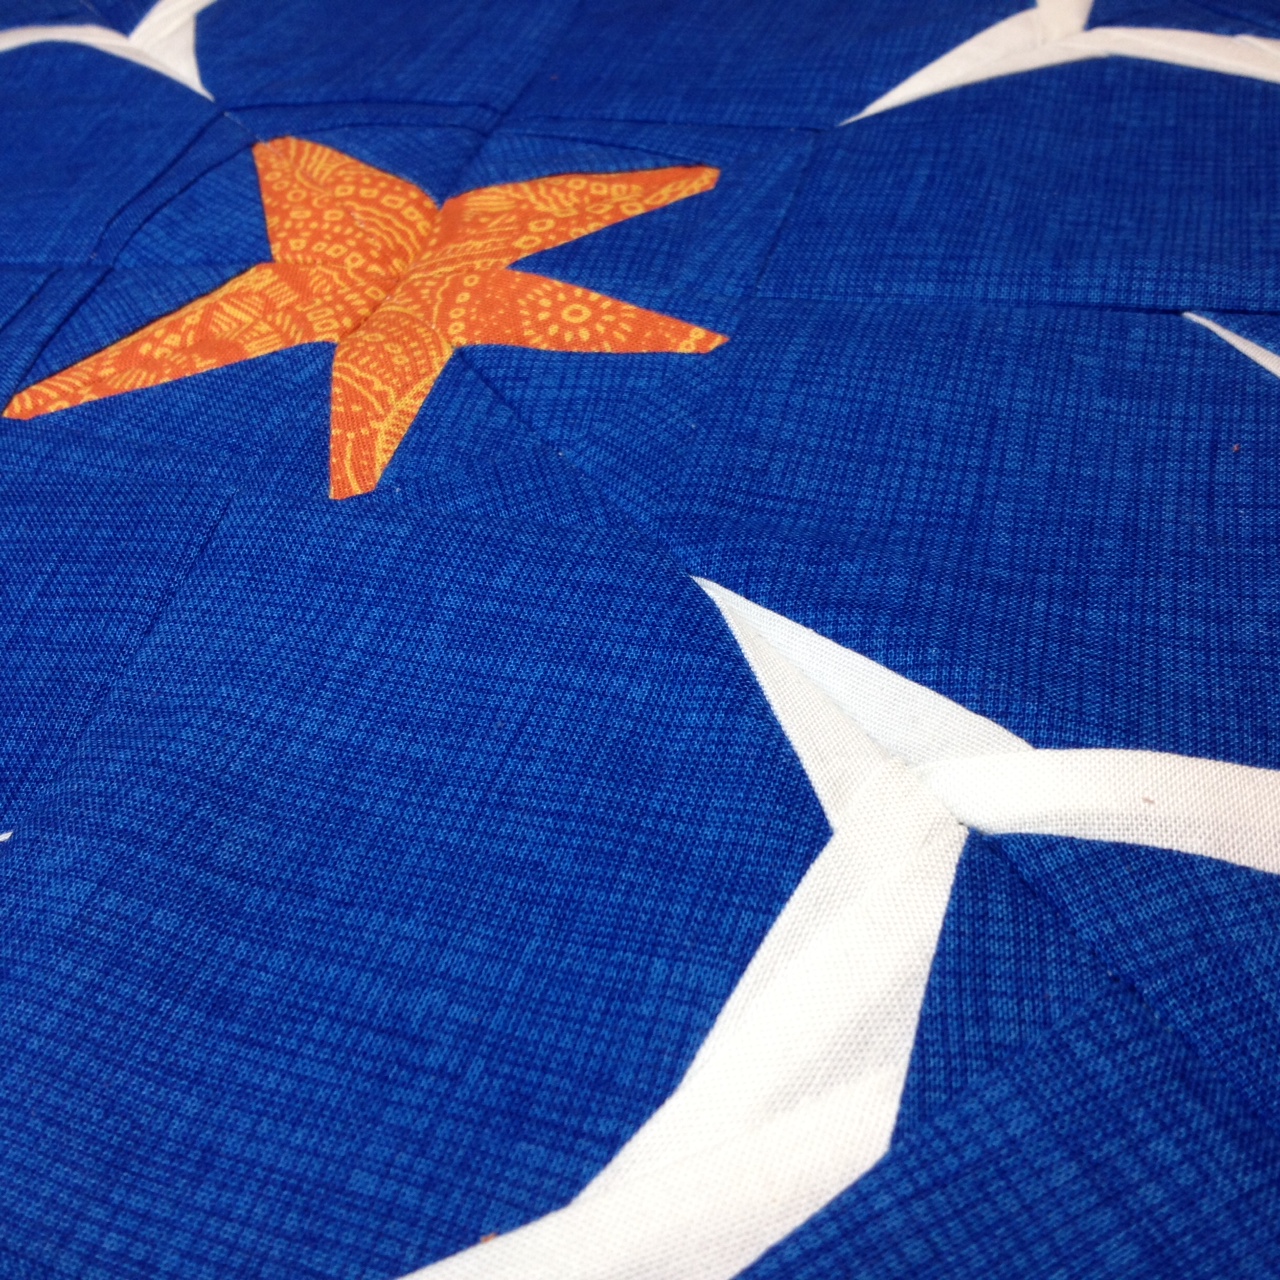
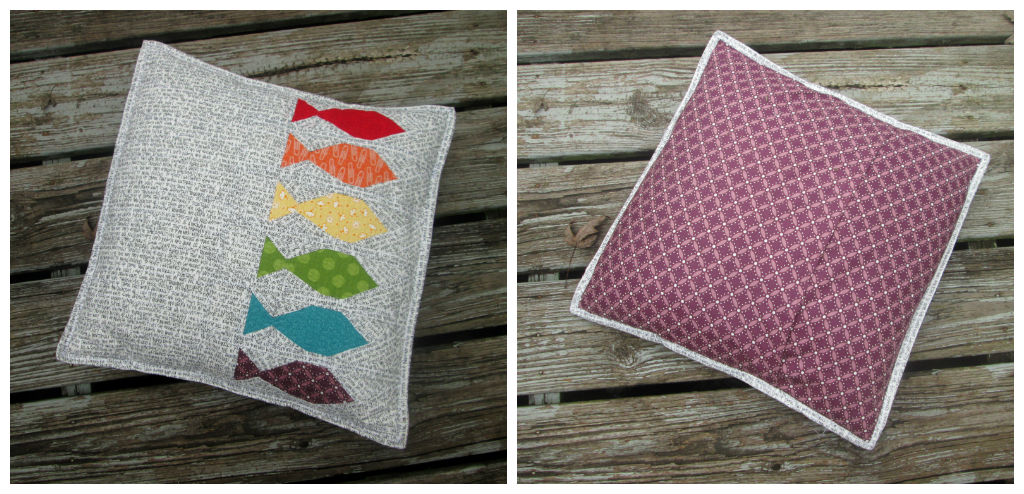
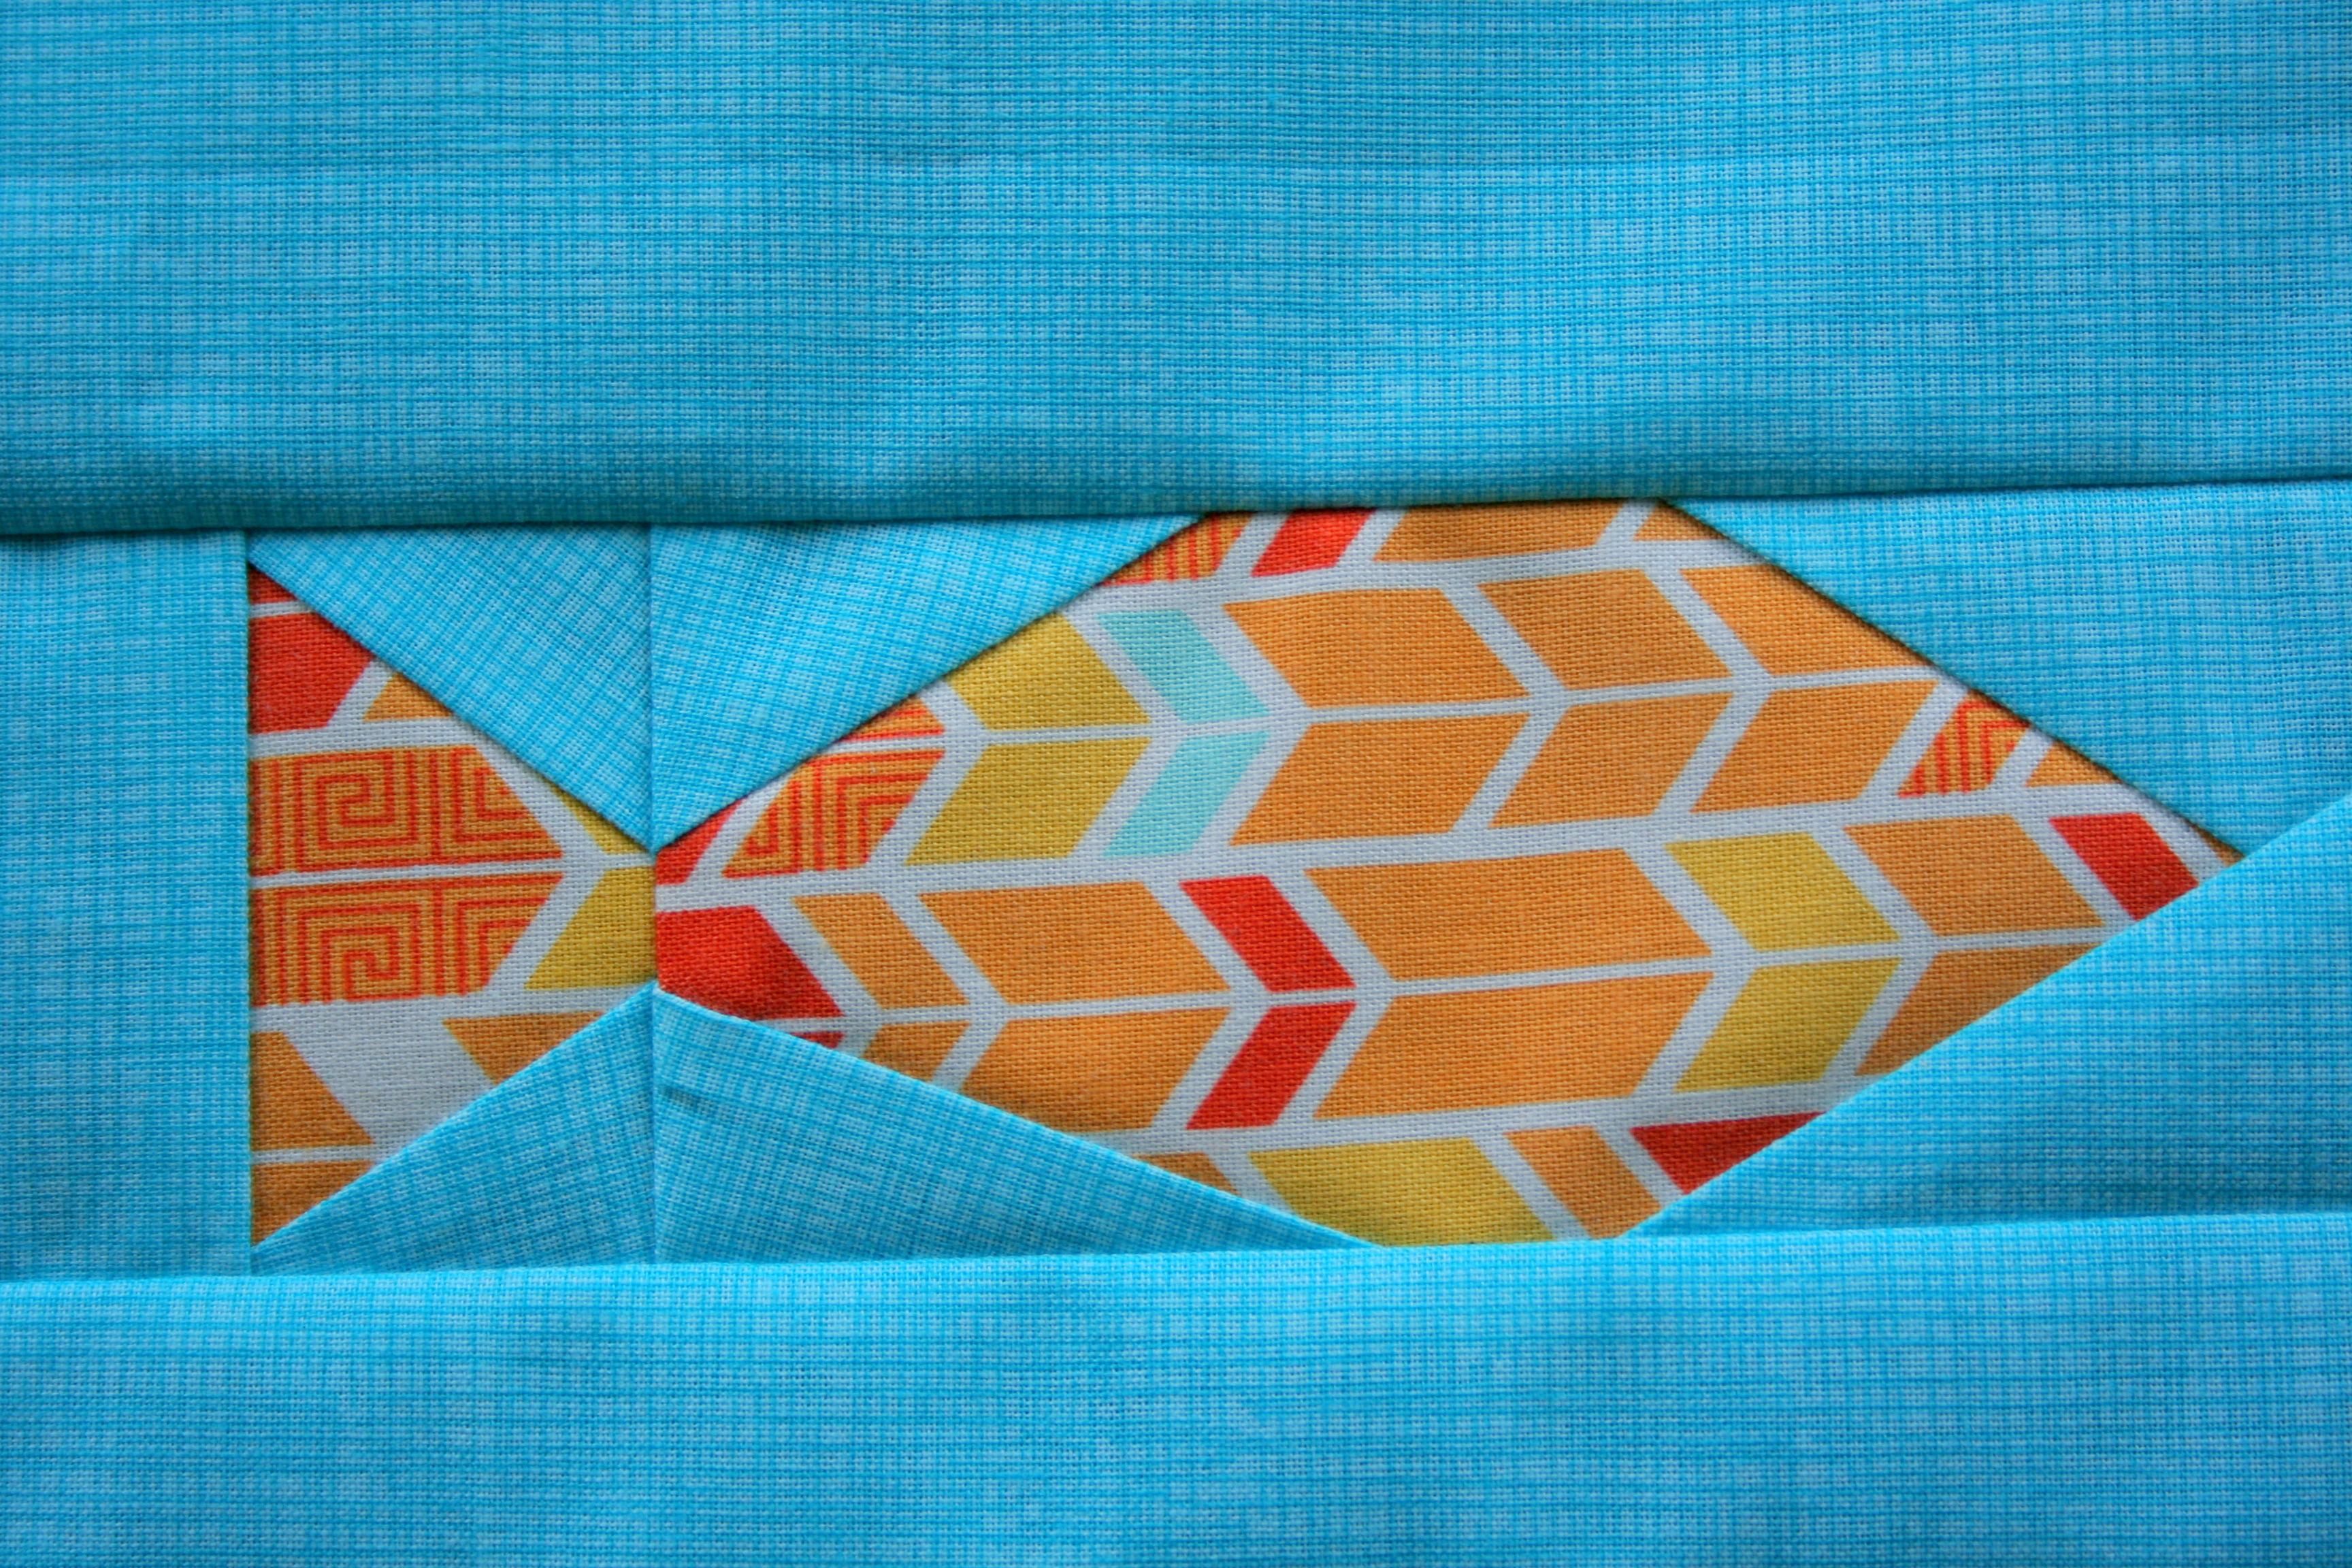
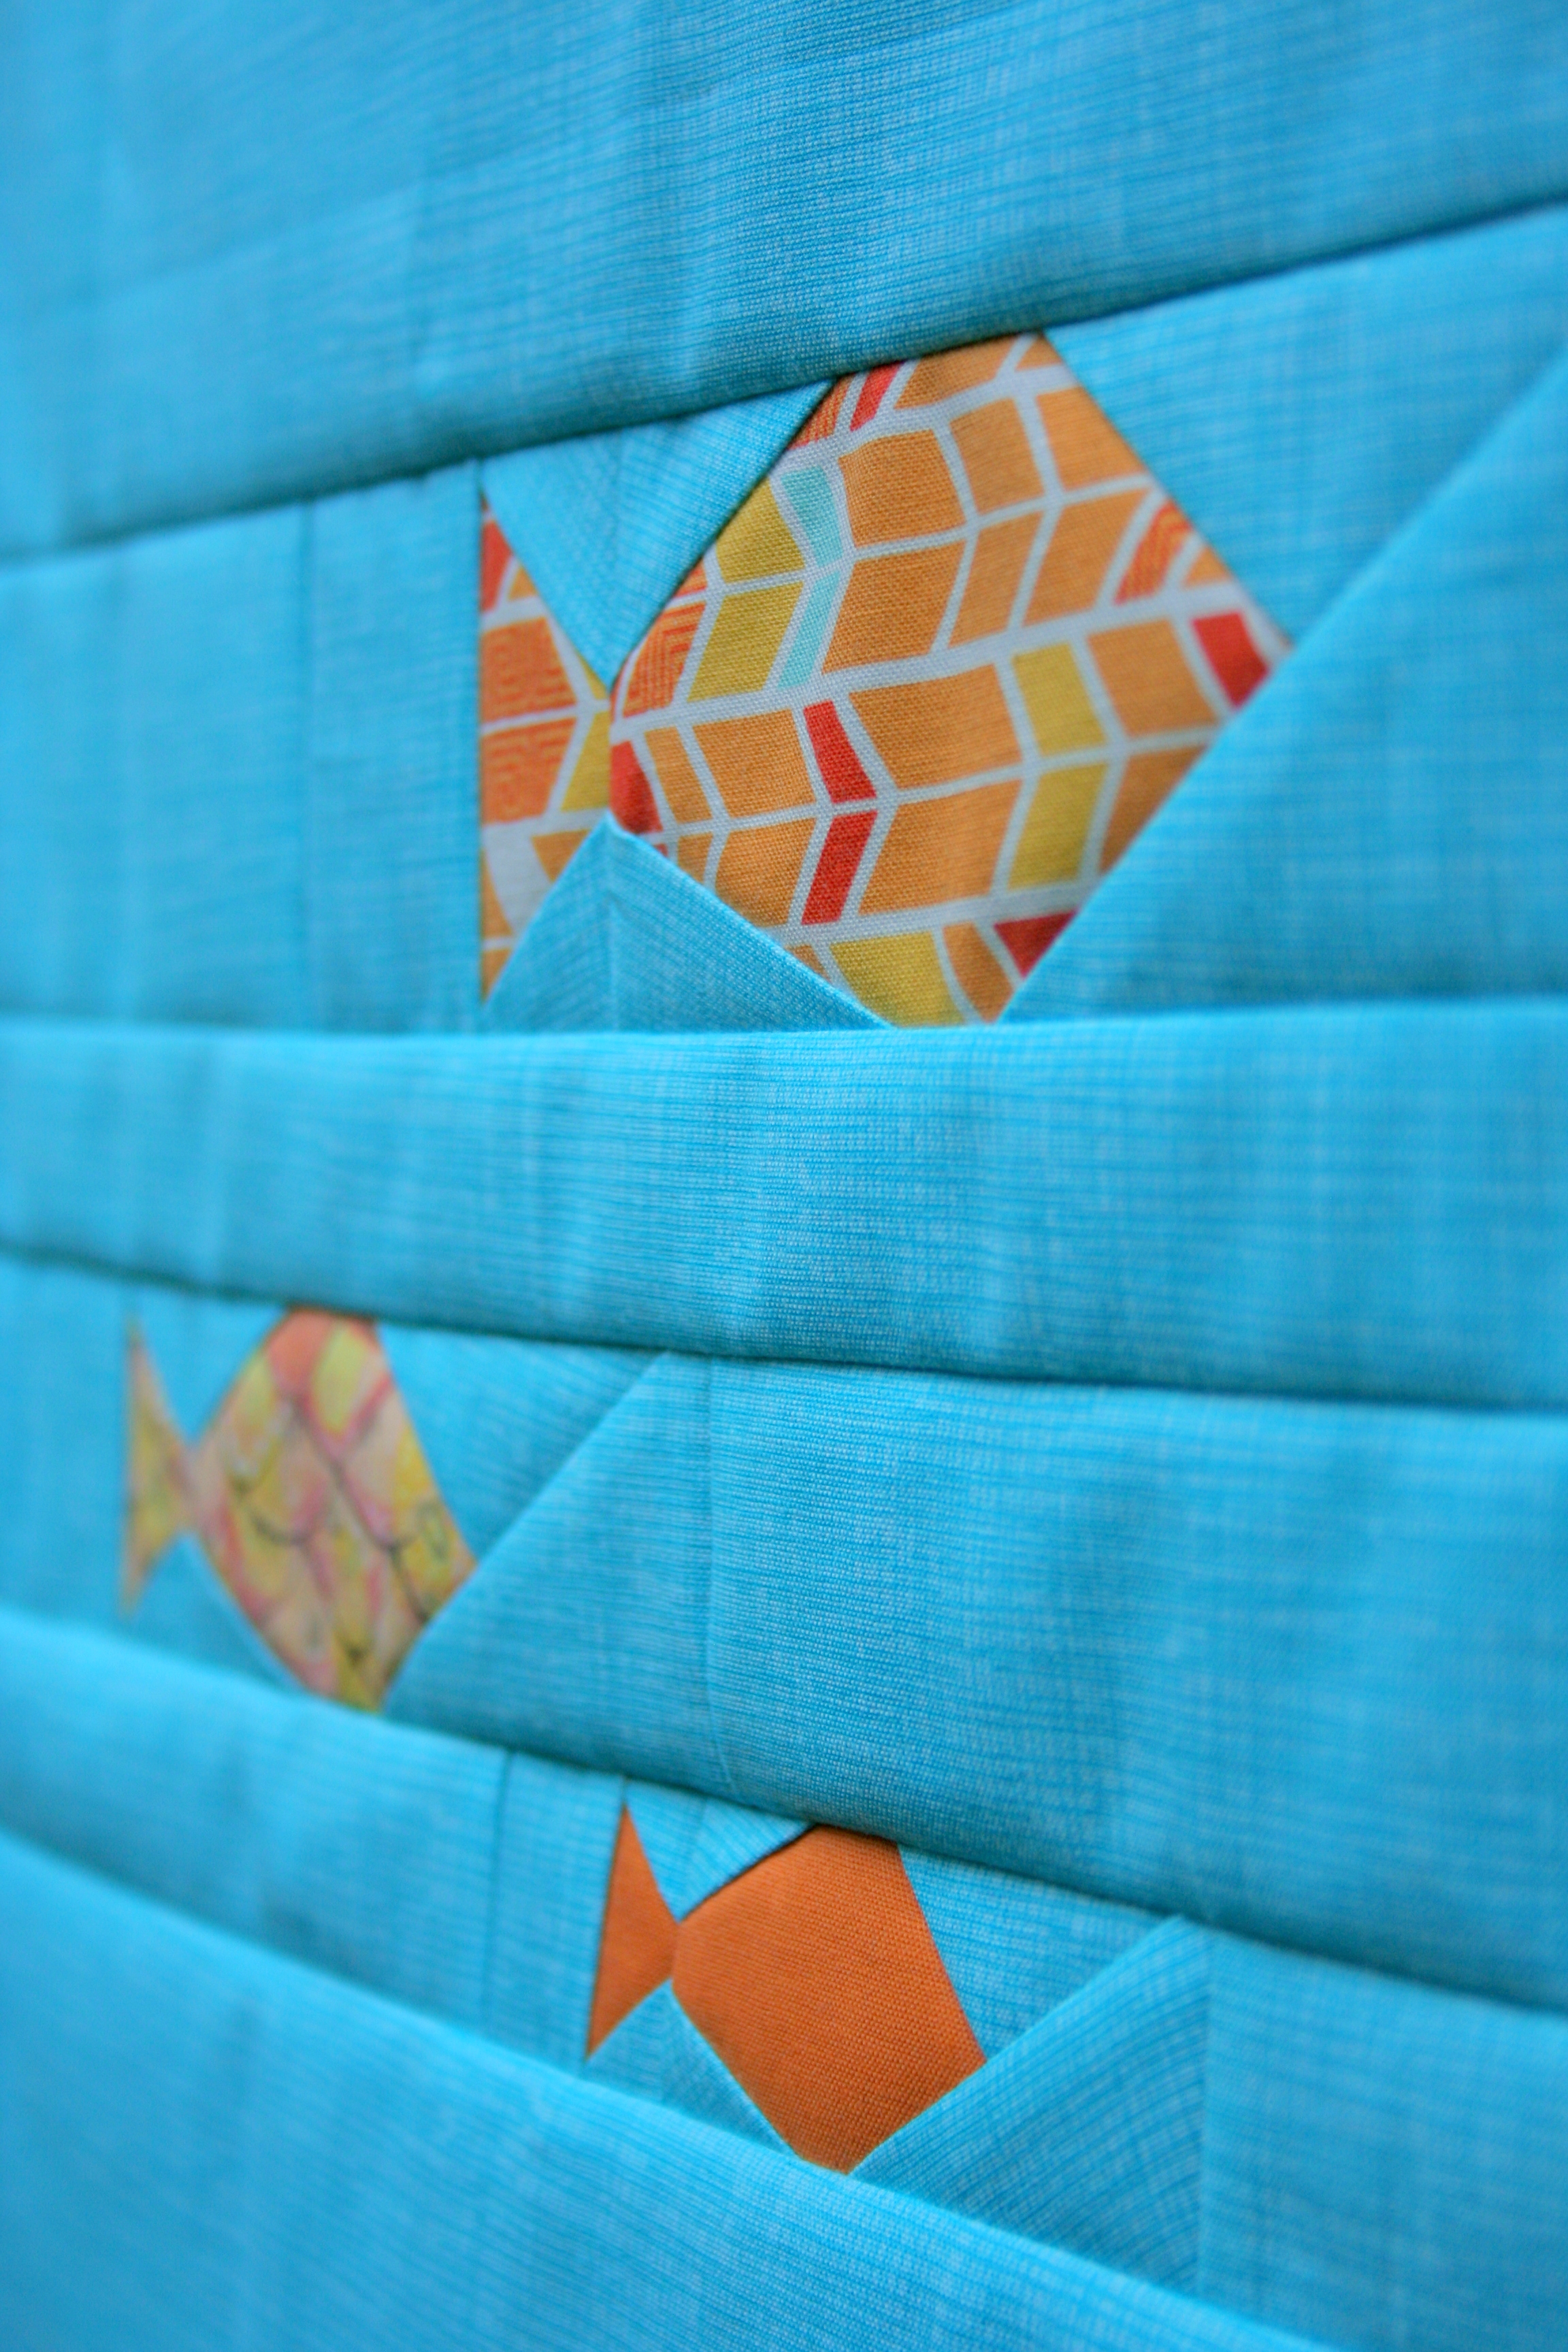
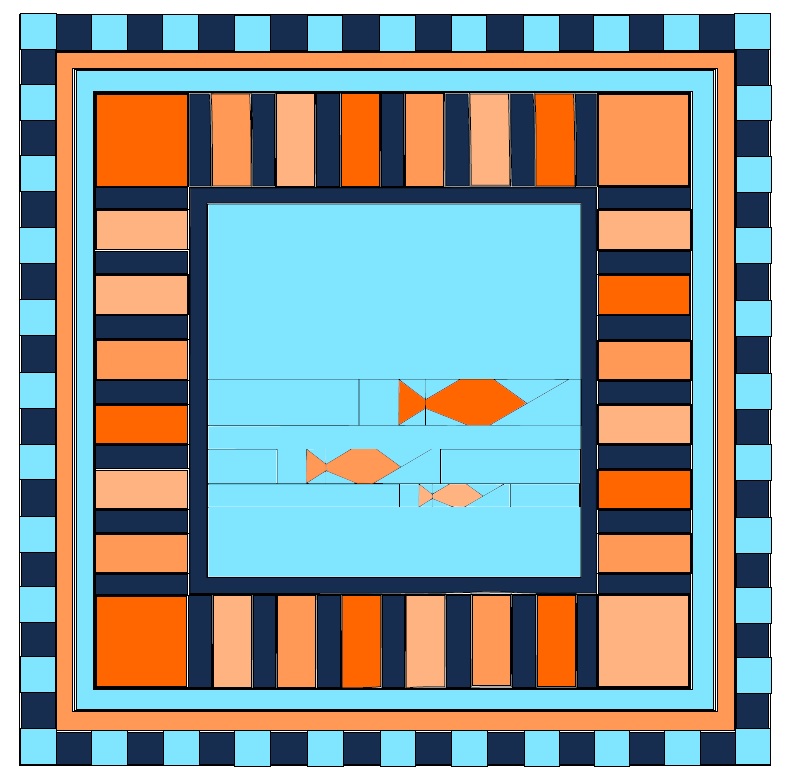
Just about immediately after sketching out my original Fishies panel, the idea for this alternate layout and color scheme came to mind. I sketched it out and wrote out rough piecing instructions and then put it on the back burner. When asking for pattern testers, Julie Schloemer from That’s Sew Julie offered to test my fishies panel pattern. After looking through her blog and seeing her style, I thought she might be interested in making my rough idea into a reality. Little did I know that she would literally make my exact vision into a reality! Here is the Fishies Rainbow Row pattern, exactly as I envisioned it, pieced and quilted by Julie.

Pattern tested by Julie Schloemer

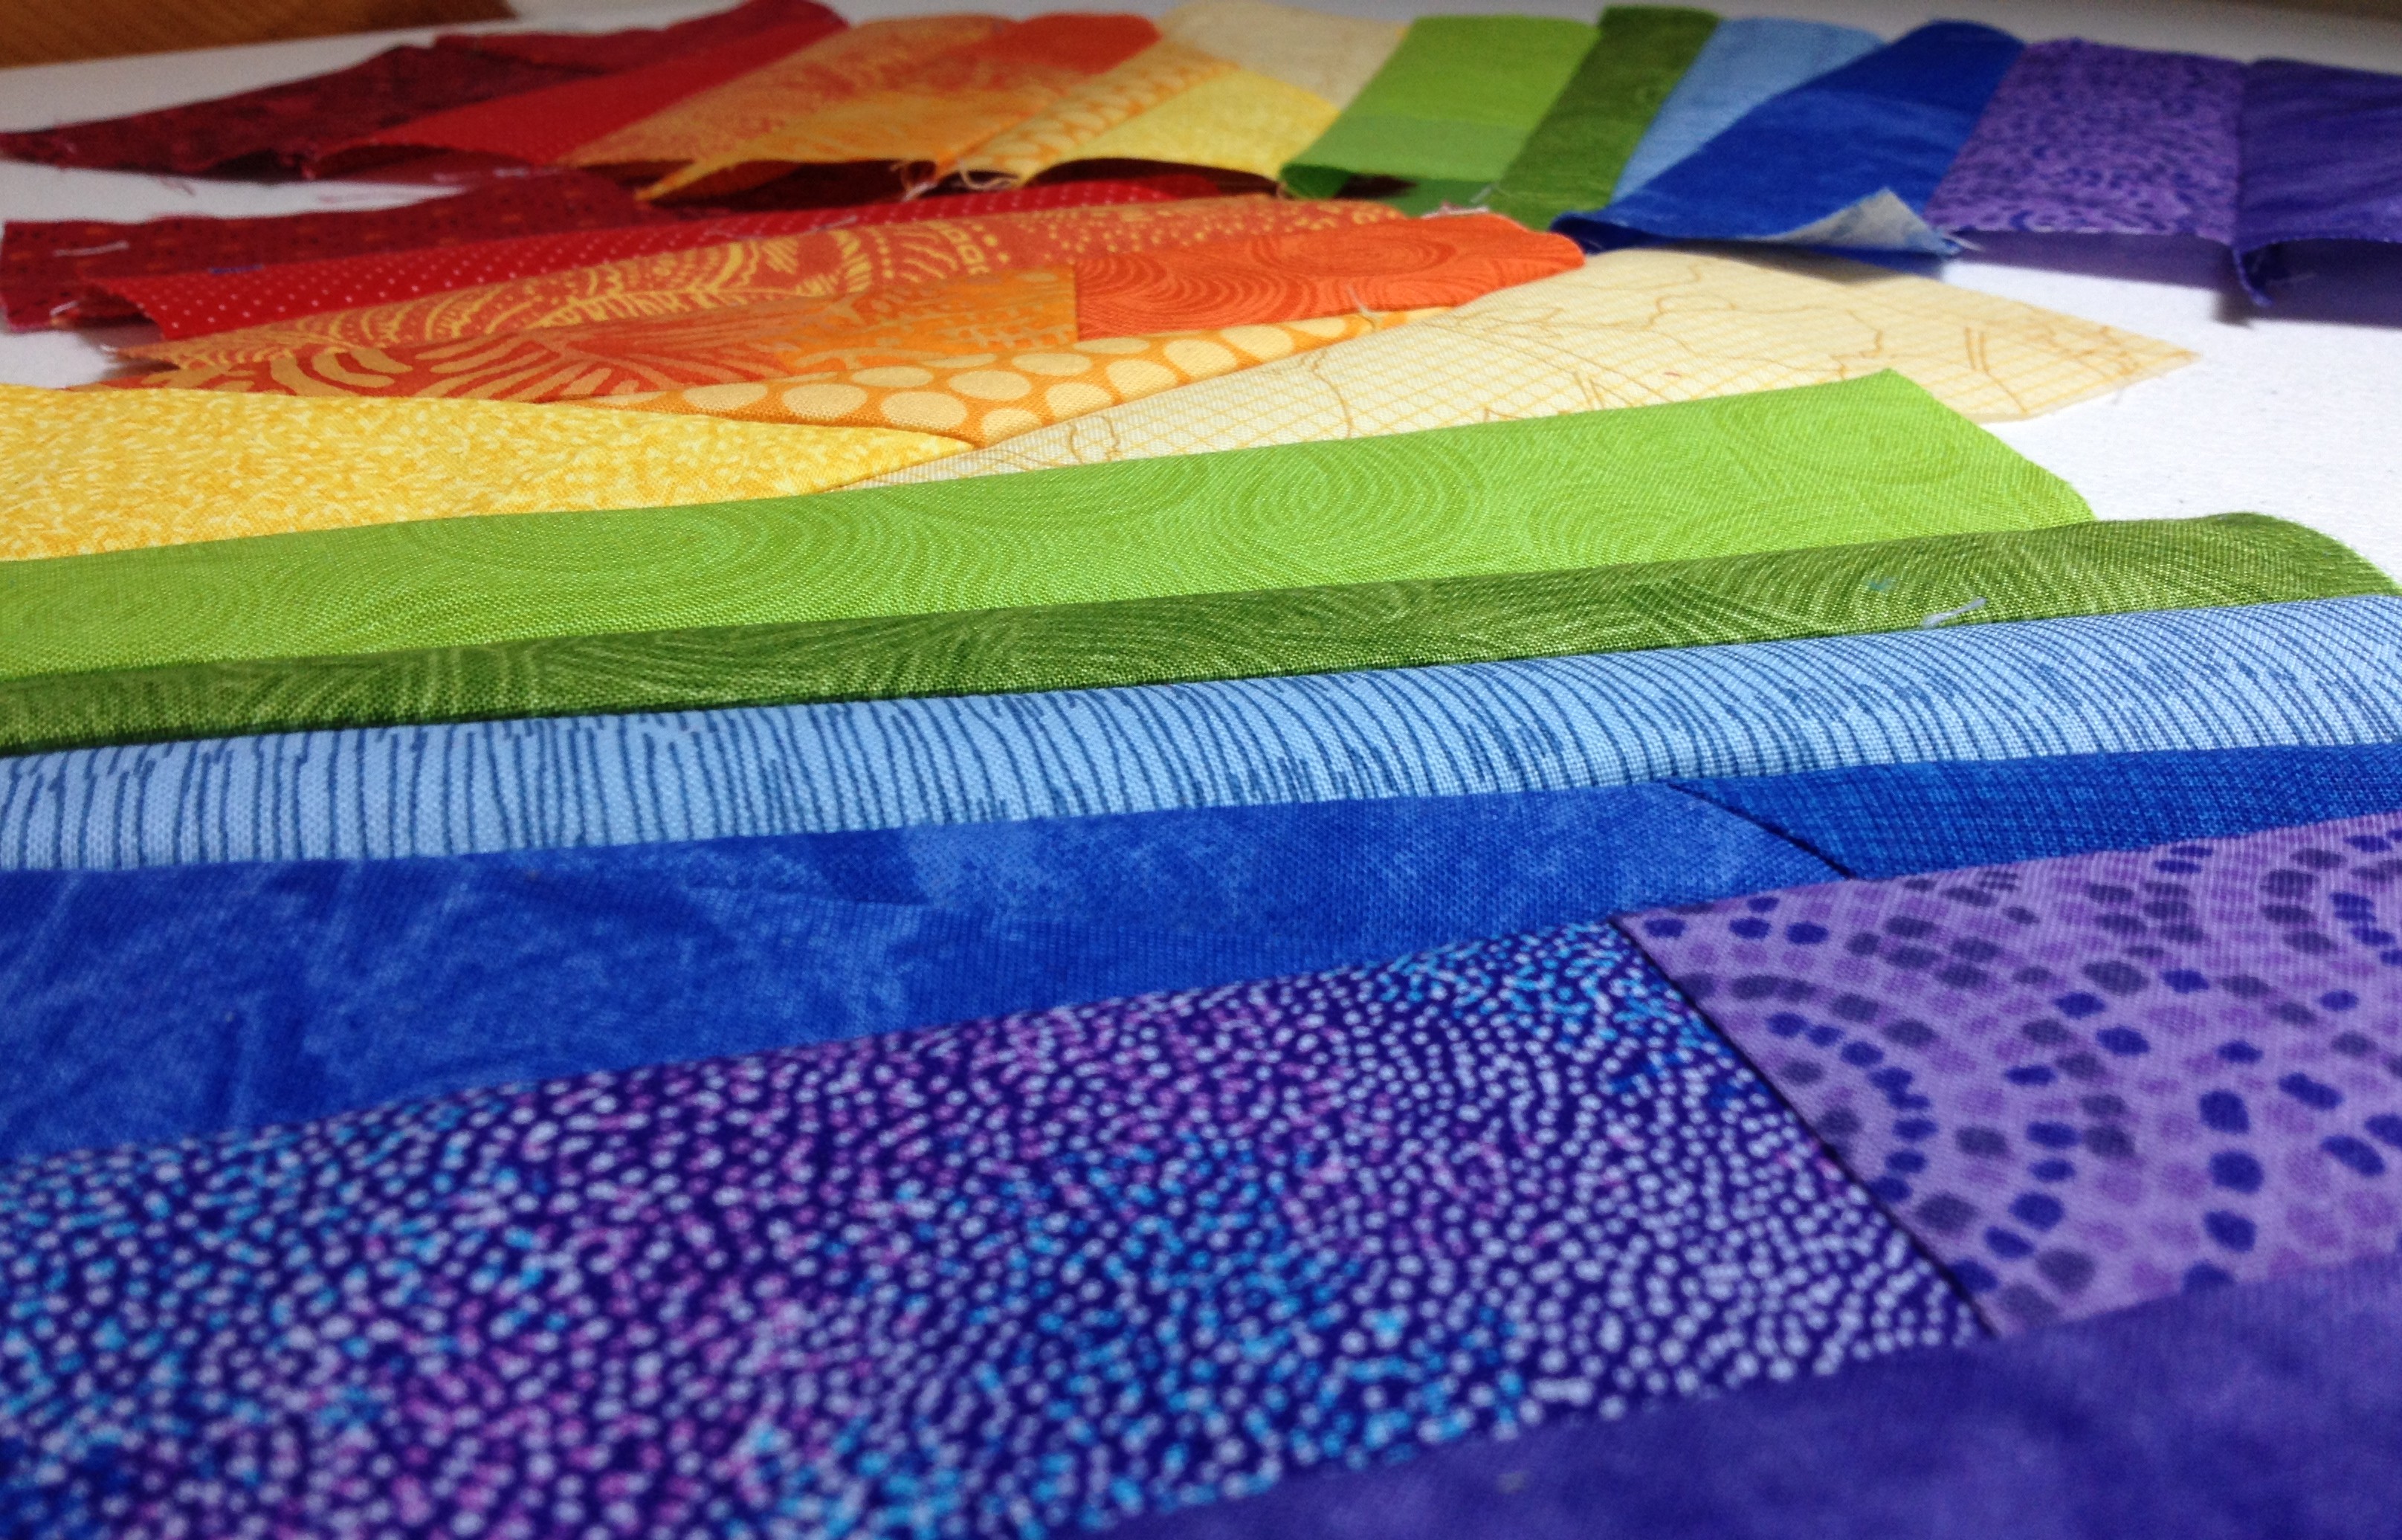
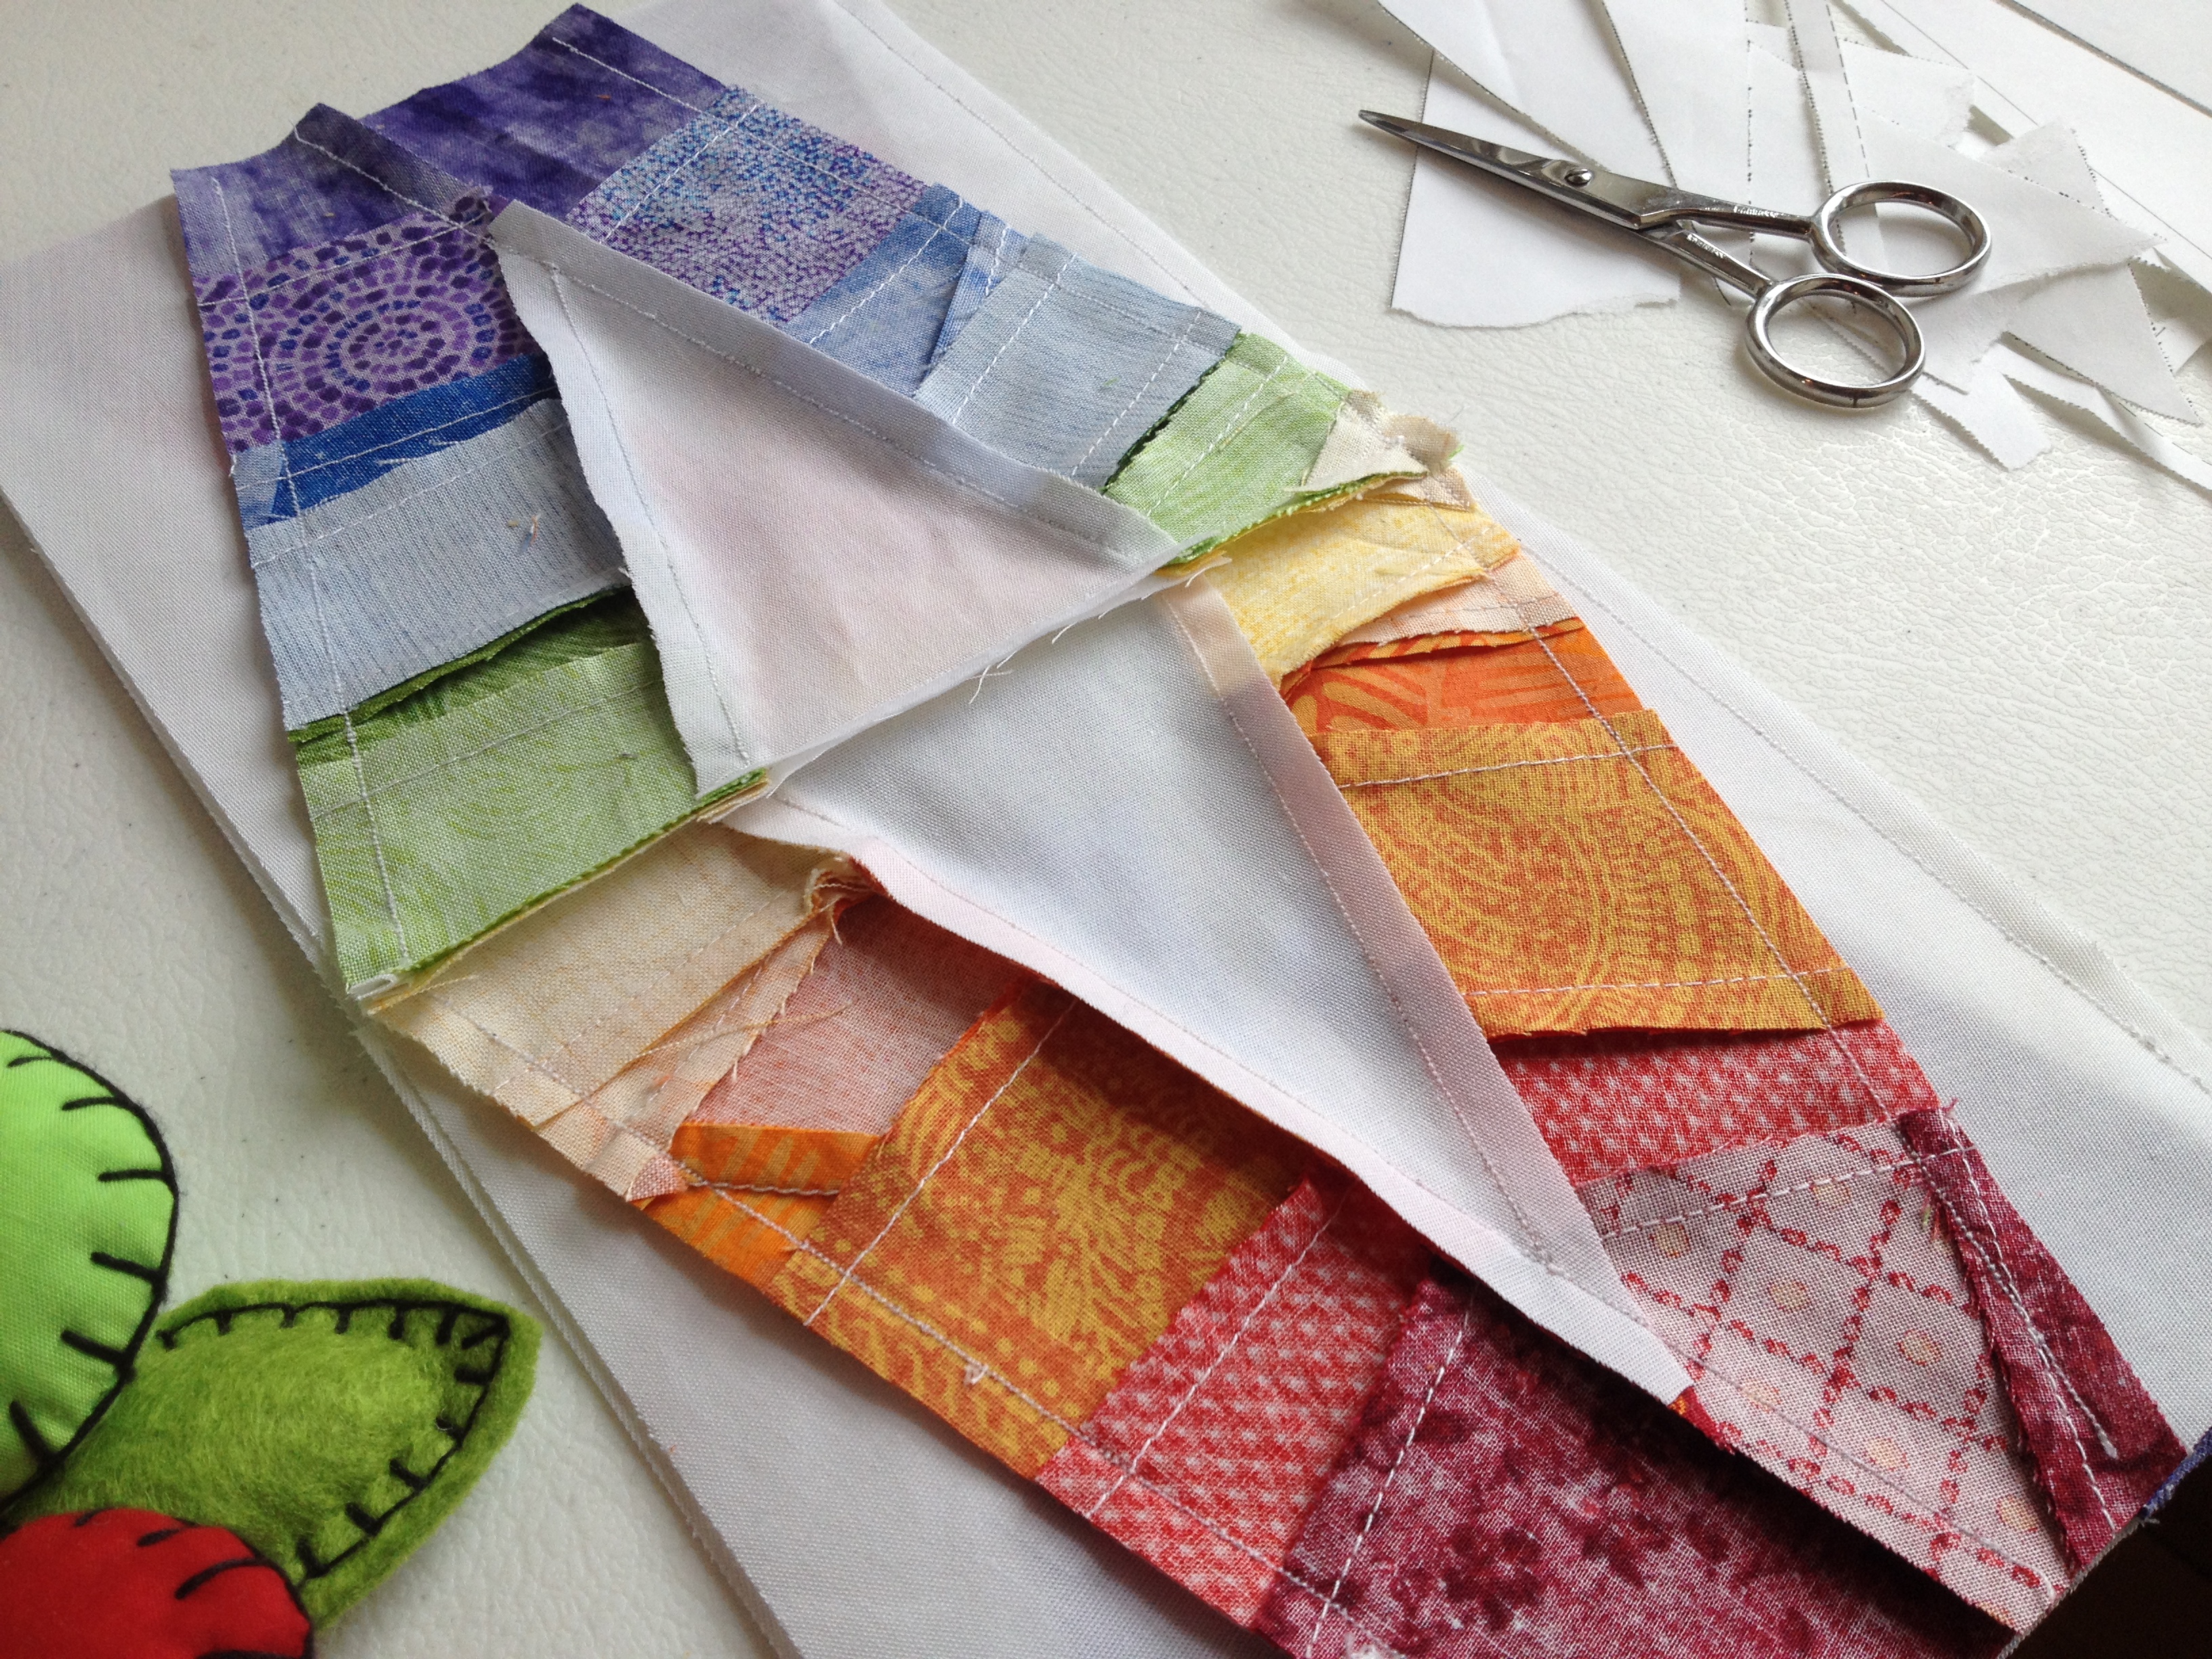
I loved watching Julie’s progress with this on Instagram, from the first pieced fish, to the matching of thread in preparation of quilting, all the way to finishing as a lovely pillow. Check out these great photos by Julie:

Rainbow Row Fishies Pillow made by Julie Schloemer

rainbow row fish pillow

Julie will also be hosting a giveaway on her blog, where you can enter for a chance to win a free copy of this pattern. The pattern is also listed for sale in my Craftsy store and will be on sale for $3.50 for one week until it returns to its usual price. Get it now!

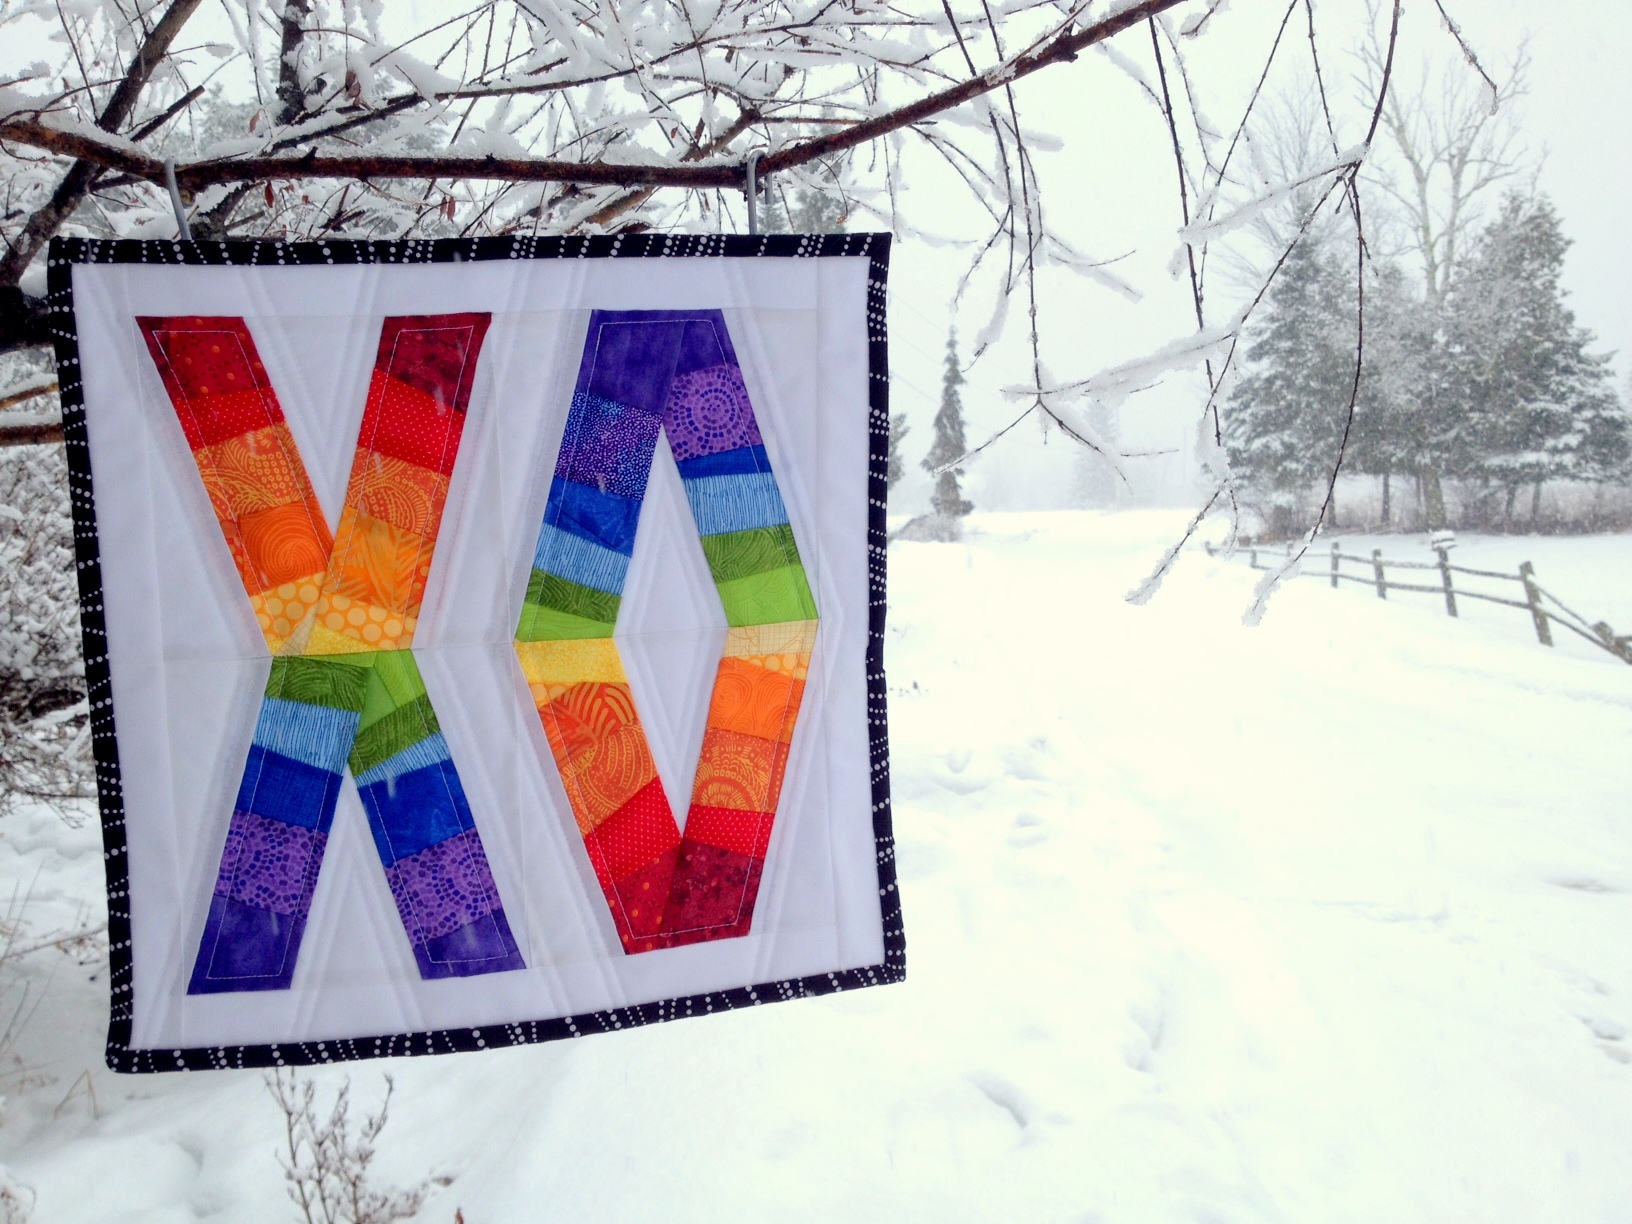
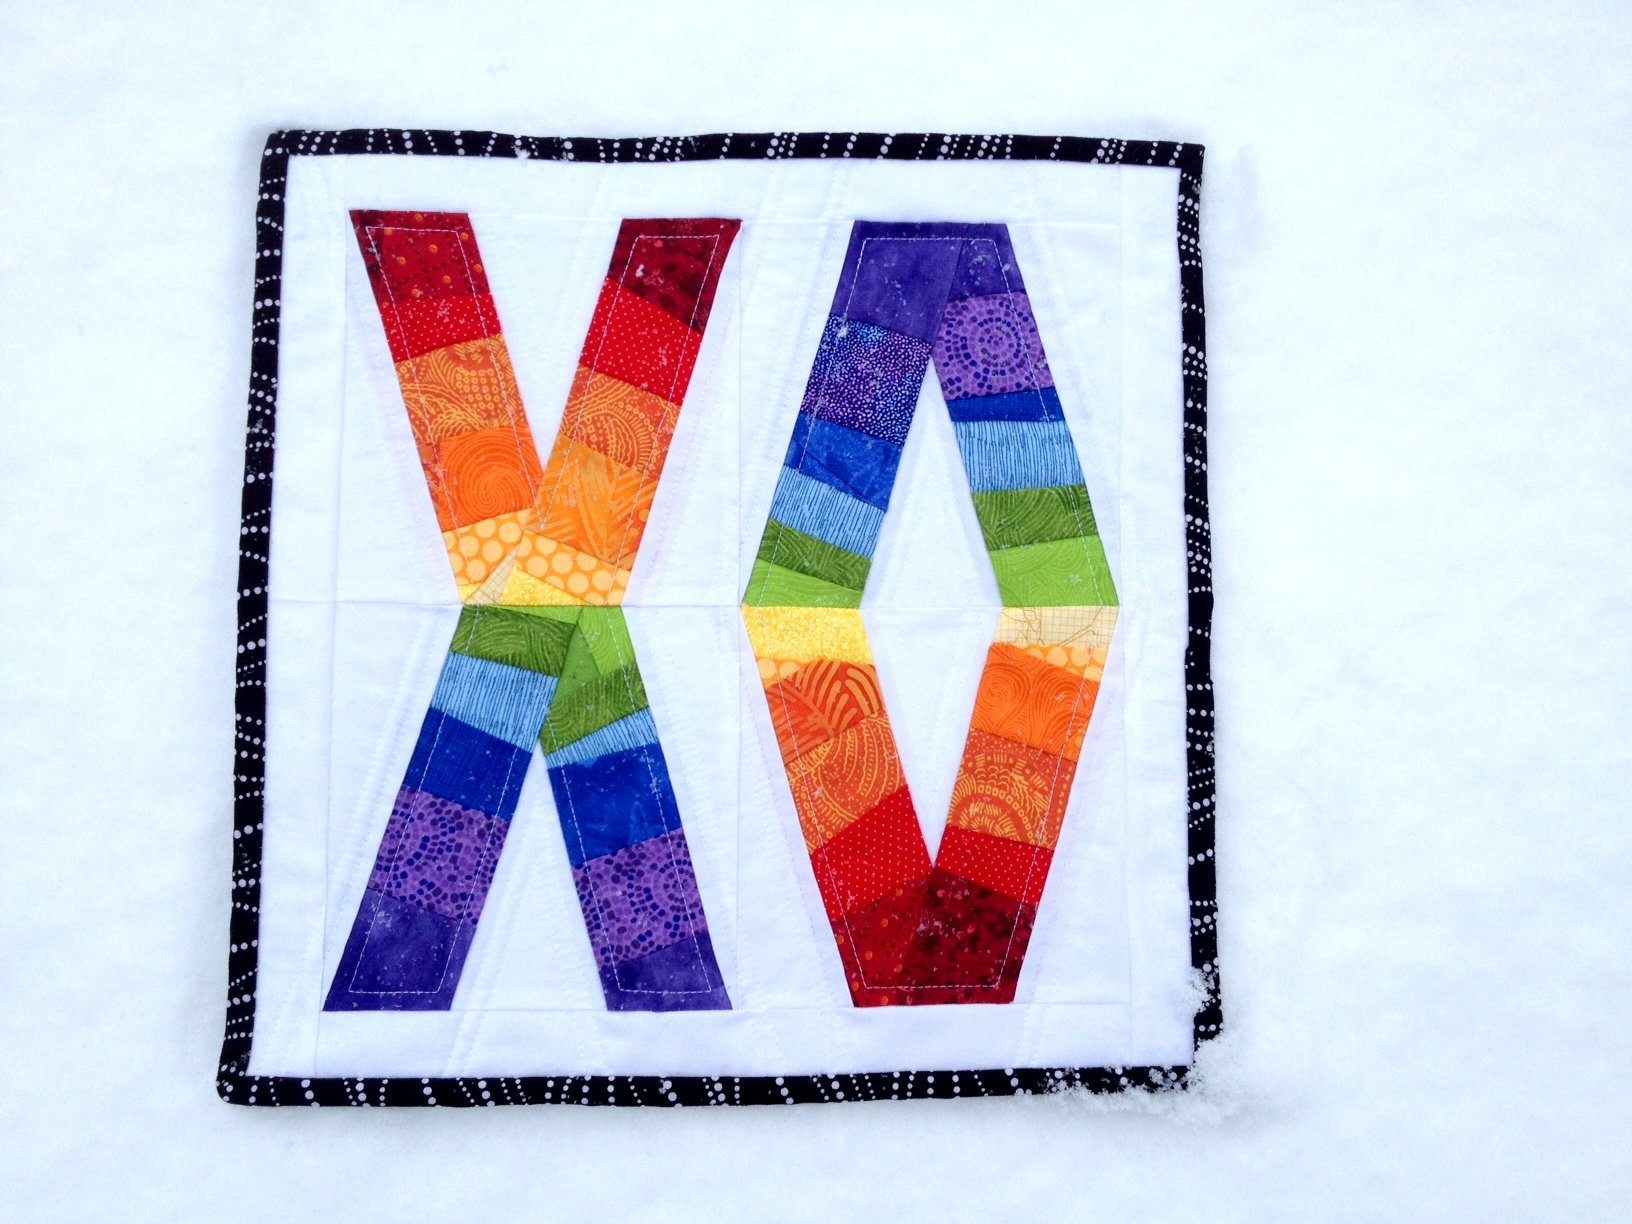
I also recently created a Flickr group called Night Quilter Creations, where you can post photos of projects you’ve made using my patterns. If you’re on Flickr, go check it out, join in, and post your photos! I’d love to see what you create!

I’m linking up with Crazy Mom Quilts Finish it Up Friday and TGIFF.
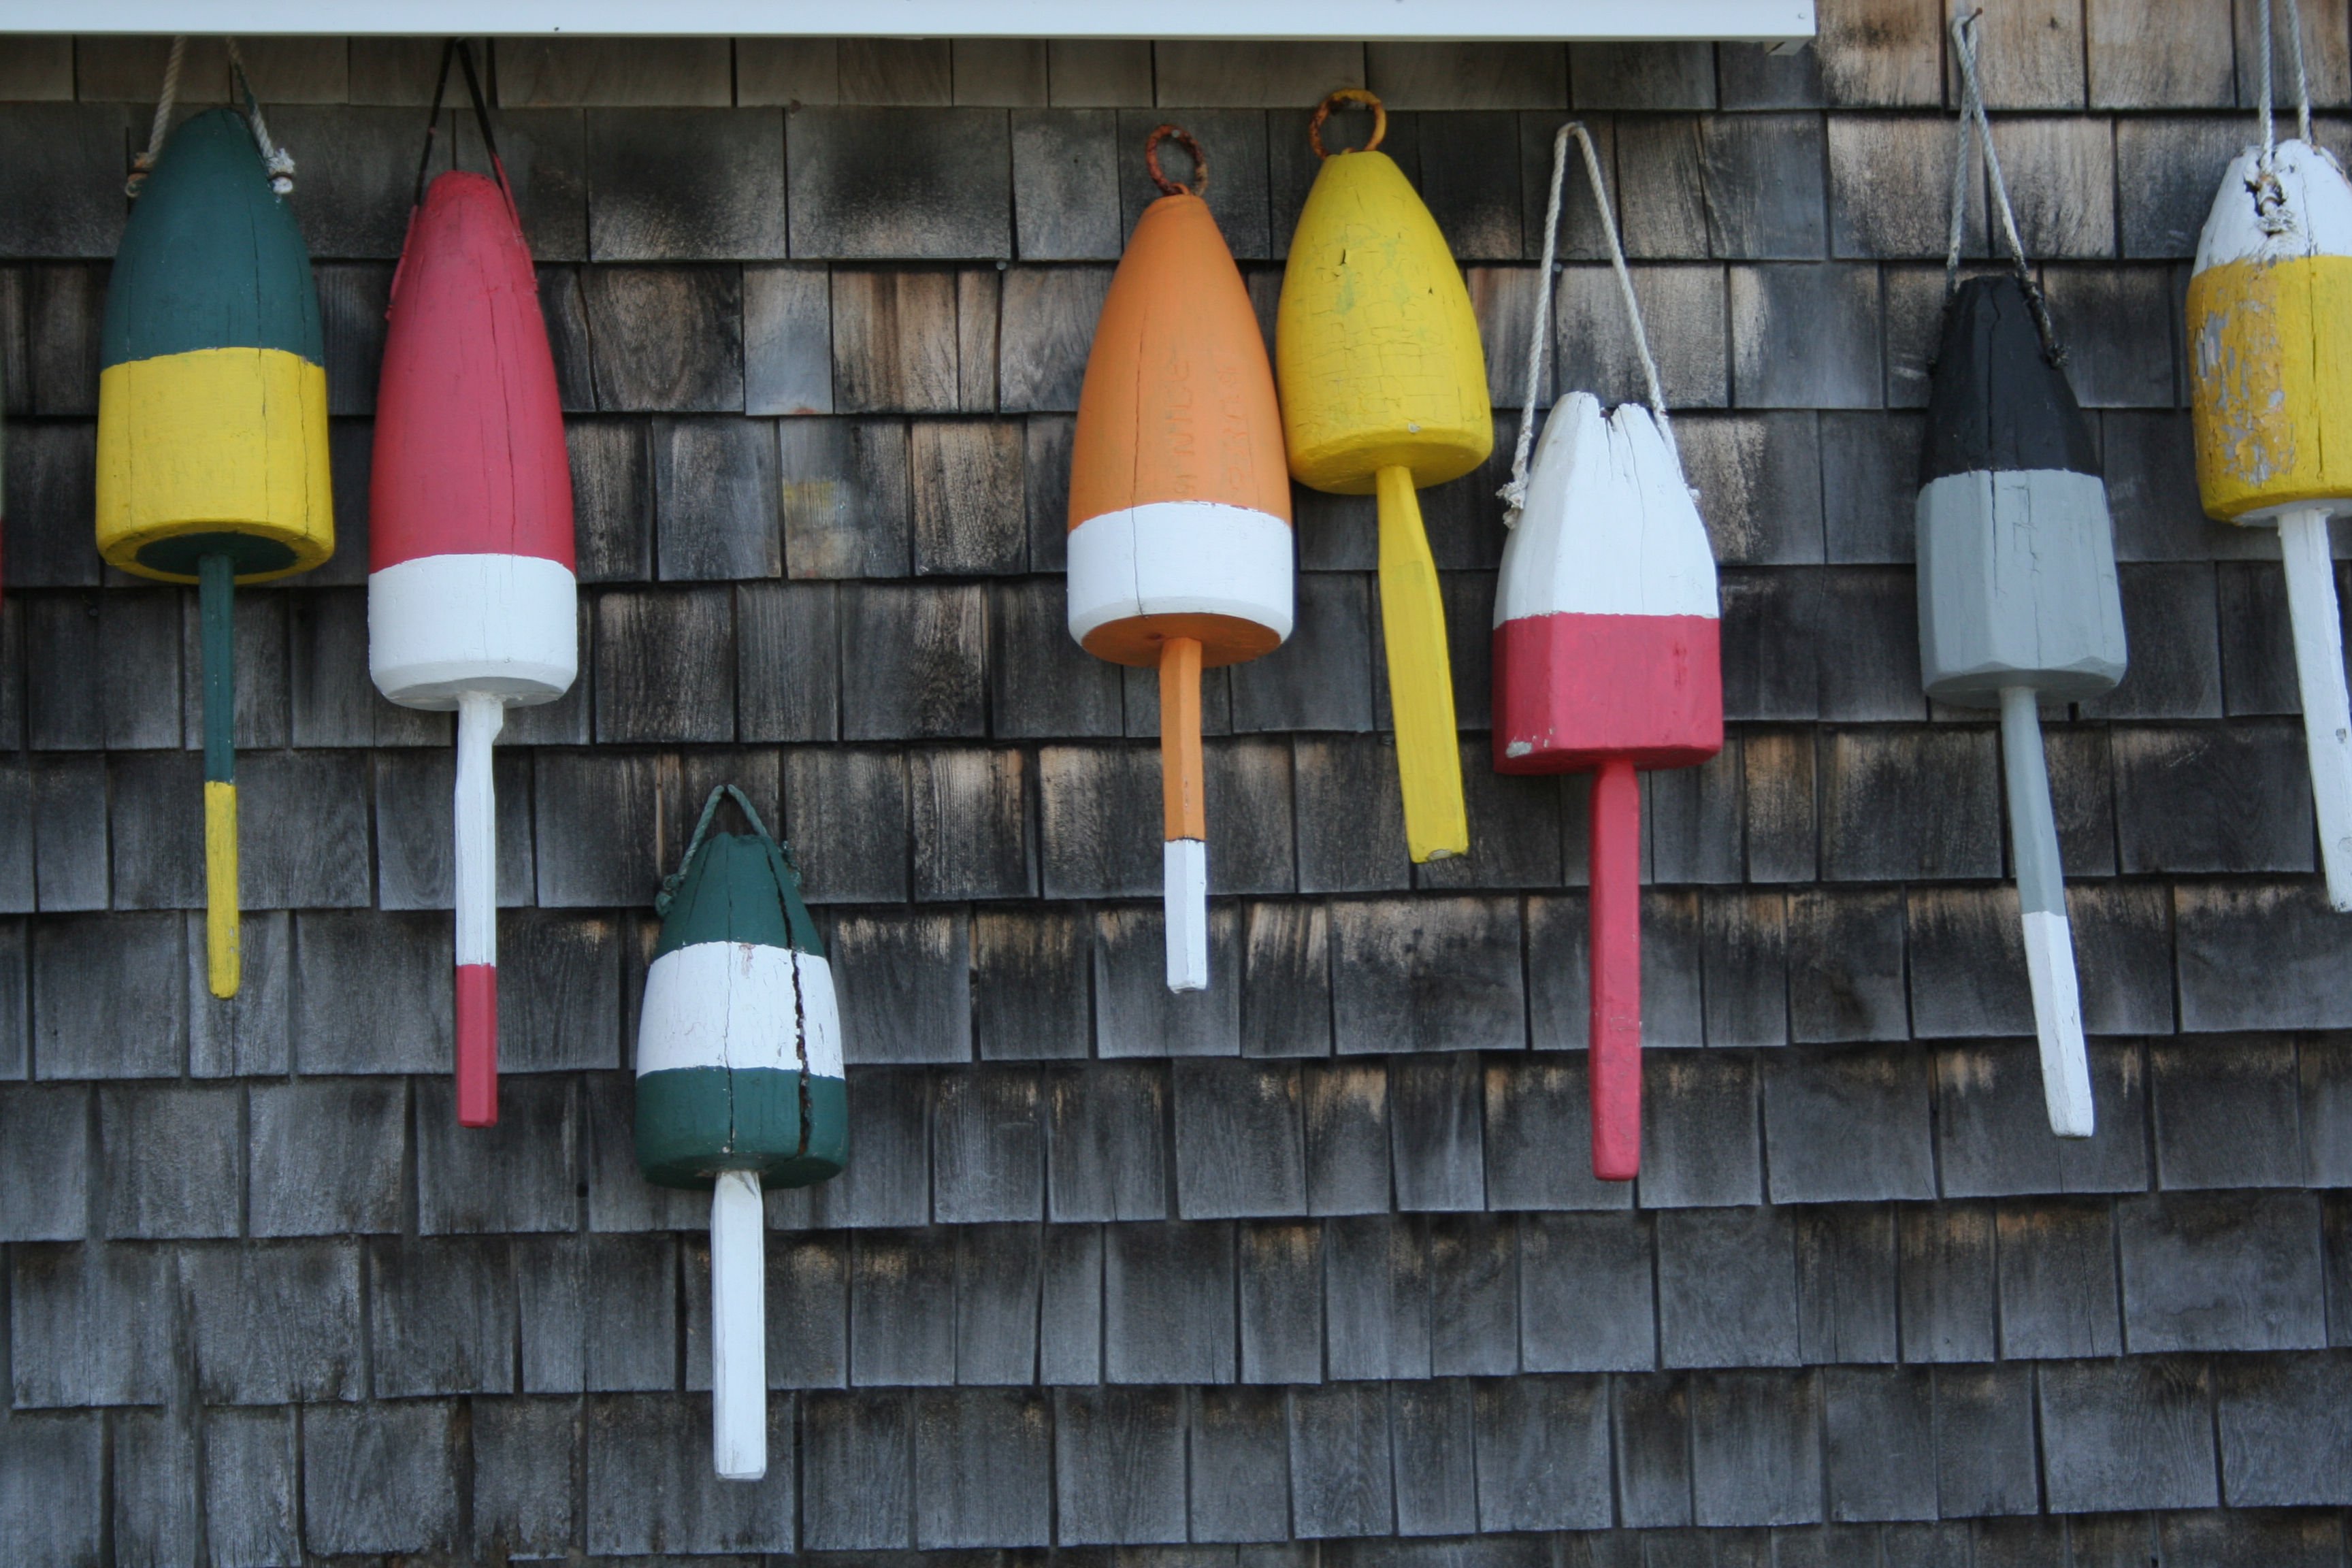
tgiff-button-blog


Mini Snail House: Free FPP Pattern

When Laura from Adventures of a Quilting Diva asked for volunteers to design itty bitty mini paper pieced houses for her Mini House-Along, I thought it would be fun. Little did I know exactly how much fun! I had such a blast sketching out and piecing this little Mini Snail House, and I’m a bit afraid I may be hooked on mini houses!

mini snail house foundation paper piecing pattern freeThis mini house block finishes at 5″x5″ (5.5″x5.5″ unfinished) and was super fun to piece. I think it was the smallest block I’ve ever made, and being comprised of five foundation pieces made the itty bitty fun even more extreme! Next time I think I will use a smaller print pink scrap, or maybe even sketch or solid for the snail, but overall I kind of love it! I honestly didn’t think I’d be all about the itty bitty paper piecing, but it was so fun. These mini house blocks are a fabulous way to use up those tiny scraps you know you’ve been saving.

This block is available for free in my Craftsy shop, as the October block for the Mini House-Along. While typically one might think of haunted houses being more fitting for October, I think this works perfectly: it’s a snail dressing up as a house. Or maybe a house dressing up as a snail? Either way, we’ve got Halloween covered.

You can download the previous blocks in Laura’s Mini House-Along here:

September: Download the free Dog House pattern.
August: Download the free Jessica’s Cabin pattern.

or visit Laura’s blog for more details about the inspiration and design of the previous blocks in the Mini House-Along.

Design Inspiration

This block was heavily inspired by Suzy Ultman‘s fabric collection Suzy’s Dollhouse for Robert Kaufman. Once I agreed to design a miniature house, I started looking for house styles, sizes, shapes, and features everywhere. I found my inspiration right in my very own fabric stash!

Suzy Ultman Suzy's Dollhouse inspiration for block
Suzy Ultman fabric line Suzy’s Dollhouse was my inspiration for this mini snail house block.


Friday Finish: Fishies FPP Panel Pattern

Wow, that’s a mouthful!! Friday Finish Fishies Foundation Paper Piecing Panel Pattern. If you can say that three times fast, you can have the pattern for free! Thank goodness for abbreviations. (FPP stands for Foundation Paper Piecing, for those who don’t have a full arsenal of quilting jargon).

Fabric pull for testing out my new paper pieced pillow pattern.
Fabric pull for testing out my new paper pieced pattern.

This pattern began as a pillow pattern (in the fabric pull above, the bottom fabric is intended as binding and the second-from-bottom is the backing fabric), but as I pieced it and envisioned it more, I realized it would make a great center panel for a baby quilt or underwater nursery wall hanging, too. I decided to offer the pattern simply as a panel pattern so that the end product can be left to your creative desires. The pattern includes foundation paper piecing patterns for three different sized fish, finishing at 2″x9.5″ (large), 1.5″x7″ (medium), and 1″x4.75″ (small), as well as cutting instructions and a piecing diagram for a full 16″x16″ finished panel (16.5″x16.5″ unfinished).

fishies foundation paper piecing quilt panel

I can see this pattern being created with any number of fabric color and pattern vs. solid combinations, as well as different layouts. For color, I’m itching to make a version with a scrappy low volume background and rainbow fish. I could also see using the fish individually for other smaller projects, maybe fabric bins for a playroom, kids’ place mats, or even at the bottom of a little girl’s dress.

paper pieced fish pattern

foundation paper pieced fish patternWhile the specific instructions for making this panel into a pillow or baby quilt are not included in this pattern, I included a “project inspiration page” with different color possibilities and a rough sketch of one way this panel would work in a baby quilt.

fishies baby quilt schematic

Yes, I said it was rough! It’s in creating patterns like this that I really wish I had EQ! It gets the idea across, though, which is what matters… right? On IG, @onceuponadonkey suggested cutting this finished panel into a fishbowl shape to be used on a baby quilt panel. How adorable would that be?!

foundation paper piecing fish panel pattern

This Fishies Foundation Paper Piecing Panel pattern is available in my Craftsy shop. I plan to list additional patterns with step-by-step instructions for making the panel into a pillow and perhaps for making the baby quilt shown above in the near future. What would you make with the pattern?

I’m linking up with Crazy Mom Quilts Finish it up Friday & TGIFF, and I’m joining the Paper Piecing Party for the first time!

tgiff-button-blog


Work in Progress: Buoys

On the coast of Maine, lobster buoys freckle the harbors and are often seen hanging on the sides of buildings, sheds, boat houses, and even near mailboxes further inland. Many of my patterns are inspired by the Maine coast, and my latest works in progress are certainly not exceptions.  I’ve finally completed and posted all three of my buoy foundation paper piecing patterns in my Craftsy store.

buoys on a building maine coast buoys on a building maine coastLobster buoys come in all shapes and sizes, and definitely many different colors. I tried to create patterns for at least the three most commonly seen shapes, and I am happy with how they turned out.

IMG_4886The patterns are super simple and extremely versatile. While testing these patterns, I accidentally sewed the 4″x8″ of the middle buoy, instead of the intended 5″x10″ version. I’m not quite sure what I will do with the little buoy yet, but the larger ones will be made into a pillow once I make a 5″x10″ of that pesky middle one.

I love the detail and precision of foundation paper piecing. There’s something about the exactness of seams and the ability to create anything with fabric that makes me happy.

Buoy 1 foundation paper piecing pattern detail.

lobster buoy foundation paper piecing patternSince I still need to remake a larger version of the Buoy 2 pattern and stitch these all together, I’m linking up with Freshly Pieced’s Work in Progress Wednesday. Stay tuned to see the completed pillow, and stop by my shop if you have an inkling of making some nautical lobster buoy creations!

WIP Wednesday

Friday Finish: Lupine, a Foundation Paper Piecing Pattern

I had never seen lupine before traveling to Maine, but now that I live here they are among my favorite flowers. There is a depth and richness to their color that force me to get really close and admire their intricacy. They are very advantageous growers, almost invasive, and the sheer numbers of lupine seen along roadsides, in fields, and in happy gardens make the color incredibly apparent.

Photo by Steffen Ramsaier, found on Flickr

Early in my sewing days, I was trying to think of a gift to make for my mother-in-law. I immediately thought of lupine, since they are her favorite flower. (If you have children, do you know the book Miss Rumphius? aka the Lupine Lady? Well that’s my mother-in-law–okay, it’s not really, but it certainly could be!) I had recently found paper piecing and wanted to make her a paper pieced lupine pillow.  The only problem was that all of my searches for paper pieced lupine patterns came up empty.

Flash forward a month or so, when I discovered that I could design paper piecing patterns.  A lupine flower was one of the first sketches I did. Talk about complex! I really wanted to get the heart-shaped petals into the pattern, but I knew it had to be fairly simple to be able to be pieced. I drew out a few sketches, chose my favorite, and began to try to break it down into logical pieces. My brain instantly scrambled.  I had to put the pattern aside, and work on a few different projects for a week or two.

paper piecing process
It all starts with the graph paper and sketch.

After that much needed breather, I picked up the lupine again one evening and smoothly worked it into numbered paper piecing sections. After a month or so of fine tuning and testing, the pattern is ready!

paper pieced lupine quilt block

Don’t you love it!? I wasn’t sure about my fabric choices at first, but now that the block is done, I think they were perfect! They blend together just enough to give the flower depth without detracting from the congruence of the bloom.

This is not a beginner paper piecing pattern in that there are many pieces and a few sharp angles.  There are only simple joining seams, though; no y-seams! If you have a good sense of paper piecing, this block shouldn’t be too tricky. It took me about 4 hours to complete and measures 10″ square (10.5″ with seam allowance).

paper piecing progressIf you follow me on Instagram, you’ve watched this lupine block’s progression. For those of you who don’t follow me yet, here’s a peek at the process from my Instagram feed (@nightquilter). Of course these are taken with my iPhone during my late night quilting foray, so pardon the blur!

Lupine paper piecing progress
Little by little, it comes together.

paper piecing detail

The back is my favorite! Stragglers hanging on after I’ve removed most of the paper.

The pattern will be available in my Payhip Pattern Store by the end of today, so now if you need to make your mother-in-law (or mom, sister, brother, cousin, friend, or yourself!) a lupine pillow, wall hanging, table runner, bag, etc. you can get right to it!

This particular block will soon become a long-awaited Lupine Pillow for my mother-in-law. I’d say it was worth the wait.

This is my exciting Friday Finish, so I’m linking up!

Crazy Mom Quilts
TGIFF

tgiff-button-blog


Work in Progress: Lupine Paper Piecing Pattern

Now that I’ve got my printer figured out, I’m back to testing my new Lupine Paper Piecing Pattern. It’s a 10″ block with lots of small bits, but no complicated joining points. I’m excited to test this out and finalize the pattern, since I really think it will be a beautiful block, truly representative of lupine. Lupine grows all over Maine, and during early June you can see it sprawling gorgeously alongside highways and roads, as well as in fields and gardens. I’m working on a Downeast Paper Piecing Series, and this lupine is an essential piece!

Gorgeous lupine
Gorgeous lupine

When designing paper piecing patterns, I always battle with the balance of visual accuracy and simplicity. I want the finished pattern to look unmistakably like lupine, but I also want it to be simple enough that people will want to create it. With the lupine design, I knew I definitely wanted to get the heart-like flower petals into the pattern.

Hearts in the heart of a lupine flower.

The recognizable radiating leaves also had to make an appearance, albeit simplified.

3756803010_aa15f06e49_b

I’m really happy with how my pattern turned out! I think it looks like lupine, leaves room for lots of color play in the flower, and is fairly simply pieced despite the many small bits. There are a few tricky angles, but using the printer paper foundation paper piecing method, I focus on being generous when cutting my fabric bits and haven’t had trouble yet.

IMG_0769

I’m not overly wild about my fabric choices this time around; they seemed like they melded and contrasted well when I looked at the stacks of fabric, but once paper pieced, I’m not sure it’s enough contrast for my liking.

IMG_0773

Mental note: when choosing fabrics for Lupine Paper Piecing Pattern, go bold!

IMG_0791

I’ve only completed one small section of the Lupine so far, but I will be sure to post my progress as it comes along. I’m hoping to have this pattern posted in my Craftsy Pattern Store within the next couple of weeks, just in time for lupine season here in Maine.

This pattern came about when a search for a paper pieced lupine pattern turned up nothing. There are many paper pieced flower patterns, but I could not find lupine! The only solution was to design it myself.

What’s your favorite flower? Would you take the time to paper piece it into a pillow, table runner, etc.?

Since it’s Wednesday, I’m linking up with
Work in Progress Wednesday at Freshly Pieced.

WIP Wednesday


Follow my blog with Bloglovin

Pattern Testing for ShannonMac Designs

I recently had the opportunity to test a new pattern by a fellow designer. Shannon of ShannonMac Designs created a new beginner paper piecing pattern called “Oops… I Scrapped My Pants”. I’m not typically a big scrappy quilt fan, but I was drawn to her various layout suggestions and so I offered to test it out.

The layout on the bottom right called to me. I love it!

Note that her pattern includes an easy to follow tutorial for paper piecing using the freezer paper method. I tested the pattern before the tutorial was finished, so I used my favorite paper piecing method instead–printer paper piecing, where you stitch along the lines on the paper and then remove the paper after the block is pieced. I’m tempted to give the freezer paper method a try after reading Shannon’s tutorial, though!

With my test quilt, I knew I wanted to incorporate a rainbow gradient since I’ve been ALL about color these days. Perhaps it’s the stark white environment outside: snow, snow, and more snow!  I debated creating a large quilt with color gradient pants, I toyed with shrinking down the pattern to make each block 2″ or 3″ instead of 6″ so that I could have a full color gradient in a smaller quilt, and then I finally settled on stitching together some wonky, scrappy rainbow fabric panels and using them to get the full gradient in four pairs of pants.

2014-02-28 21.07.53

I’m also all about love, so it seemed only right that I make those rainbow pants into a nice big X and O. Hugs and kisses!

I love the complexity of the backs of paper pieced quilt blocks.
All laid out and stitched together!

I’m finding myself drawn toward modern quilting more and more, so I went for a modern look with this mini quilt. I opted for some echo straight-line quilting to emphasize the X and O.  My Clover Hera Marker was the perfect tool for marking out the quilting lines! Being new to quilting, I am still too nervous to use any kind of “disappearing” fabric pen or other marking tool to actually write on my quilt before quilting. A hera marker is great, since it simply indents the fabric, creating a clear yet mark-free line. You can see how clear the marks from the hera marker are, and they certainly helped me find those perfect intersection points!

Herra markers are the best for marking quilts for straight line quilting.

I used the walking foot for my borrowed sewing machine for the first time while quilting this, and boy was it fun! I can see why quilters swear by them! I’m really looking forward to quilting a larger quilt with the walking foot to really see its even-feed skills in action.

I used my go-to tutorials on bindings–on the Bijou Lovely blog–both to make a straight-grain binding and to attach it to the quilt.

Using my favorite straight-grain binding tutorial.

2014-03-02 16.23.02

I love how this quilt turned out! The pattern is a very basic, beginner-friendly paper piecing pattern, and is extremely versatile. What can’t you do with scrapped pants?!

The day after I finished stitching the binding to the back of this quilt, we got another massive snowstorm, which dropped another 18″ of snow–yes, in March! It provided the perfect backdrop for a rainbow quilt photo shoot.

photo 1 (7)


photo 2 (5)

Now this bright mini quilt lives happily on my craft loft pegboard, brightening up my sewing space.

photo (12)


I definitely would recommend this pattern, for both beginner and seasoned paper piecers. If you’ve been wanting to try paper piecing, this is your chance to learn the freezer paper method. Shannon is offering this pattern and tutorial for free in her Craftsy store, so hop on over and check it out!


Circling Gulls Paper Piecing Pattern

2014-02-15 12.54.00

FINISHED! Remember this? I finally finished piecing it!

circling gulls completeFor one of my first designed paper piecing patterns, I’m very happy with it! I love how the gulls are pinwheeling in to fight over the starfish, and as a friend pointed out, the starfish has seen the gulls and is reaching out to flyyyyyyy!  Little does that poor little starfish know that he’s actually going to be lunch and not a flying companion. Then again, maybe it is the starfish’s turn to fly!

photo 2 (2)I’m excited that this pattern pretty much turned out how I had imagined it.  I’m debating the next step for this 12×12″ block.  Should I make it into a pillow? A quilted wall-hanging? Or perhaps tuck it away and aim to make 11+ more of the blocks using up blue, white and orange (or other colors?) scraps along the way. I do think this pattern would look awesome as a full quilt.

What would you do with this block?

This pattern is for sale in my Pattern Shop on Craftsy; go check it out!

Four-pointed Star Out in the Universe

I received the most exciting comment on my blog today–the gift chocolates have been received, AND the recipient has already made a gorgeous universe quilt using my pattern as an element… well, eight elements!

quilted delights universe quilt full
“My Who-niverse” created by Leah from Quilted Delights

This gorgeous quilt was created in response to Project Quilting’s week four theme of “Across the Universe”. I think this quilt is a perfect depiction of that theme!  You can visit the Quilted Delights blog to read more about Leah’s thought process and gradual creation of this quilt. I really enjoyed reading about how she combined various patterns and elements to create this well-balanced quilt.

tardis starLook at how cute that star looks next to the Tardis in flight! I’m so thrilled that my pattern is out there in the world… er, universe… and that it was used to create such an awesome quilt!

Four-pointed Star Pattern Published

I’m more than a little excited! I’ve officially published my first paper piecing pattern! I decided that the little four-pointed star I designed as an element for my Delight in the Little Things art quilt would be a great spot to start in my attempts to learn the ways of Inkscape.
cropped-2014-02-05-15-35-212.jpgYou can find the pattern in my Craftsy Pattern Store. Since my original pattern is for a scant 4″ square, I included larger options in the pattern. Those two dollars and fifty cents not only will get you the 4″ paper piecing pattern template, it will also get you a 6″ and 12″ version. Sweet deal!
What’s even slightly more exciting is that I’ve already had one buyer! Little does that buyer know, but she will be receiving a little “Congratulations! You’re my first buyer” gift in the mail.

Be Kind Chocolates

These are delicious chocolates made locally in the town of Belfast, Maine. I can vouch for their deliciousness! Yummm! Hopefully she enjoys the chocolates while creating some awesome starry project. I can’t wait to see what others create with my patterns!