
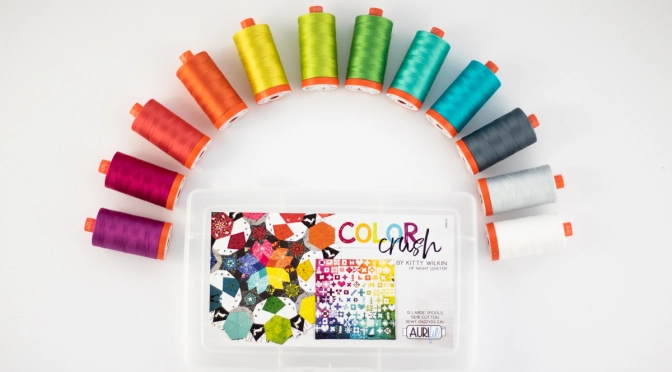
I have such exciting news to share today–I’m honored to introduce you to my first Aurifil thread collection: Color Crush! What’s extra special is that for those of you at QuiltCon right now, you can be one of the very first to purchase the thread set if you so desire, so that you can return home ready to stitch the rainbow and always have the perfect coordinating color in your thread stash. Read on to find out more, and then head over to Auribuzz for a really sweet interview.
 I have been using Aurifil thread since early in my quilting days, and once I tried my first spool, I was immediately sold on how silky smooth and strong it is. It leaves hardly any lint in my machine, especially compared to the older hand-me-down threads I had been using before switching entirely to Aurifil. Not only that, the range of available colors has my rainbow-loving heart swooning. Paired with Aurifil’s commitment to seeking the most sustainable options: using 100% cotton thread, putting their most recent thread addition on a wooden spool, going plastic neutral in 2019, and a continuing focus on environmentally sustainable practices, this company’s ideals resonate with me, which is really important.
 Over the past few years, I’ve found myself grabbing the same set colors of thread for most of my projects, and so finally I decided to reach out to Aurifil to see if they would still be interested in my curating a thread collection, since they had mentioned it a while back. I was excited to receive a resounding yes, and then the fun began!
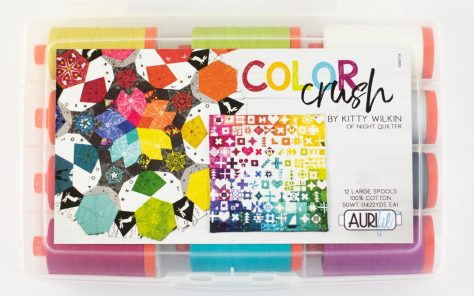
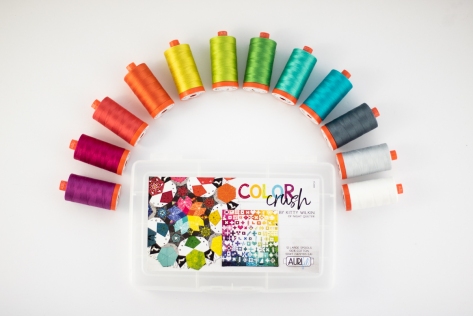
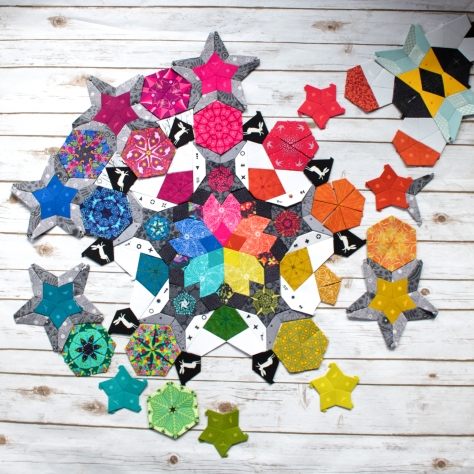
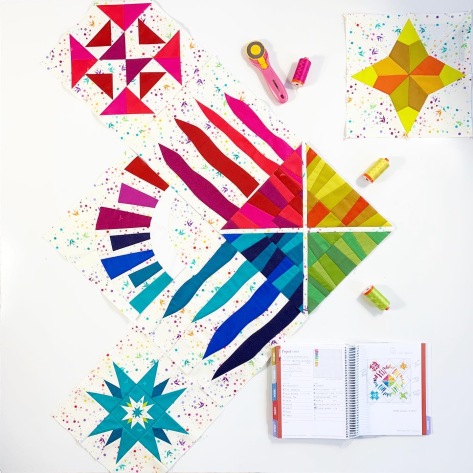
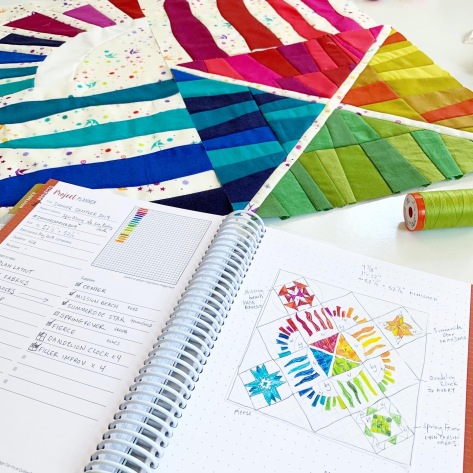
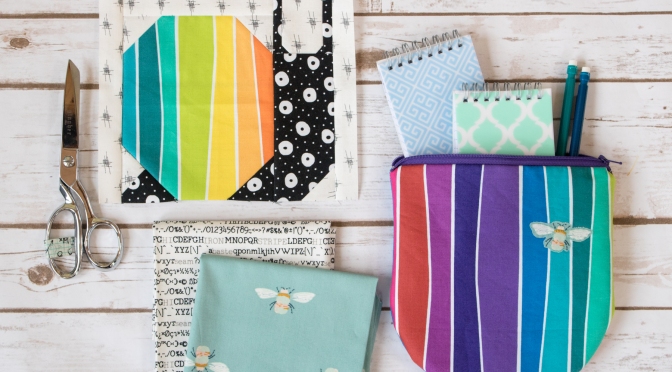
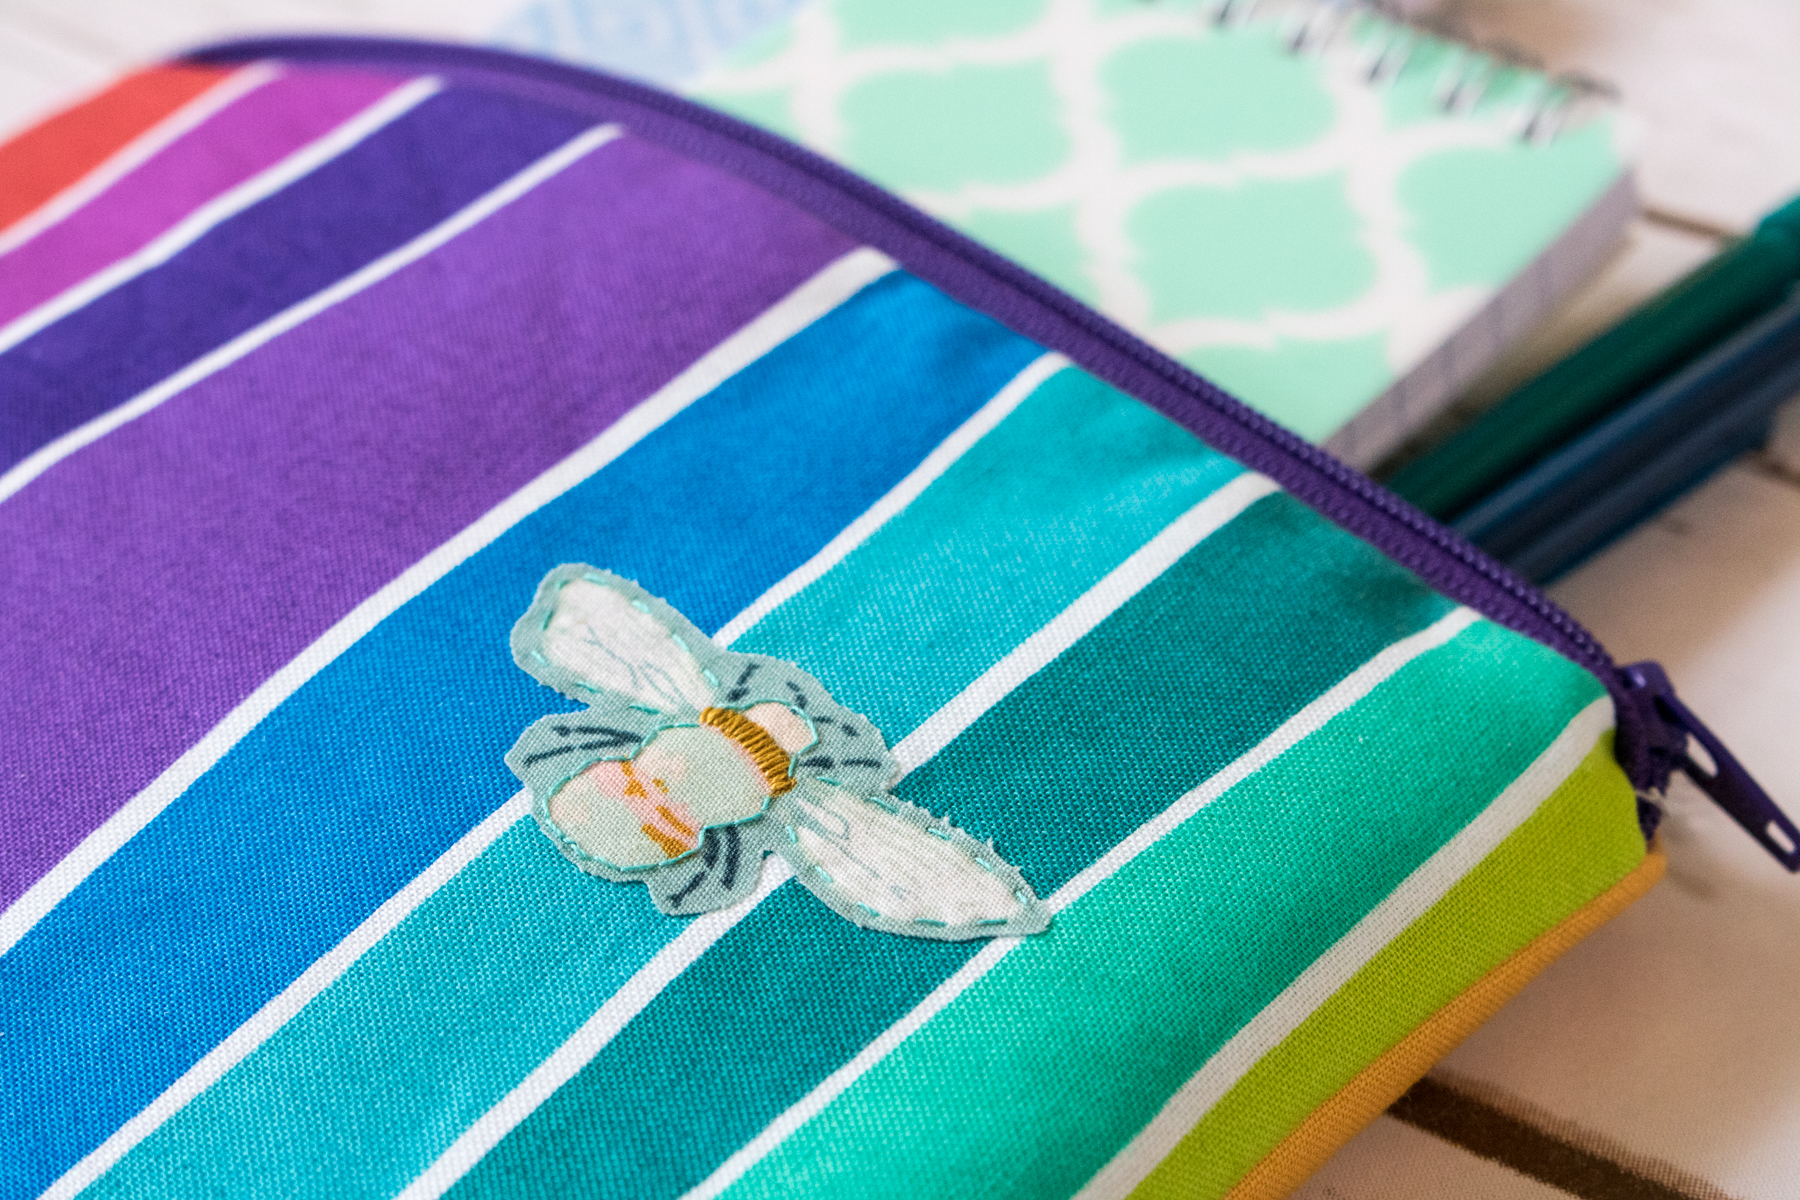
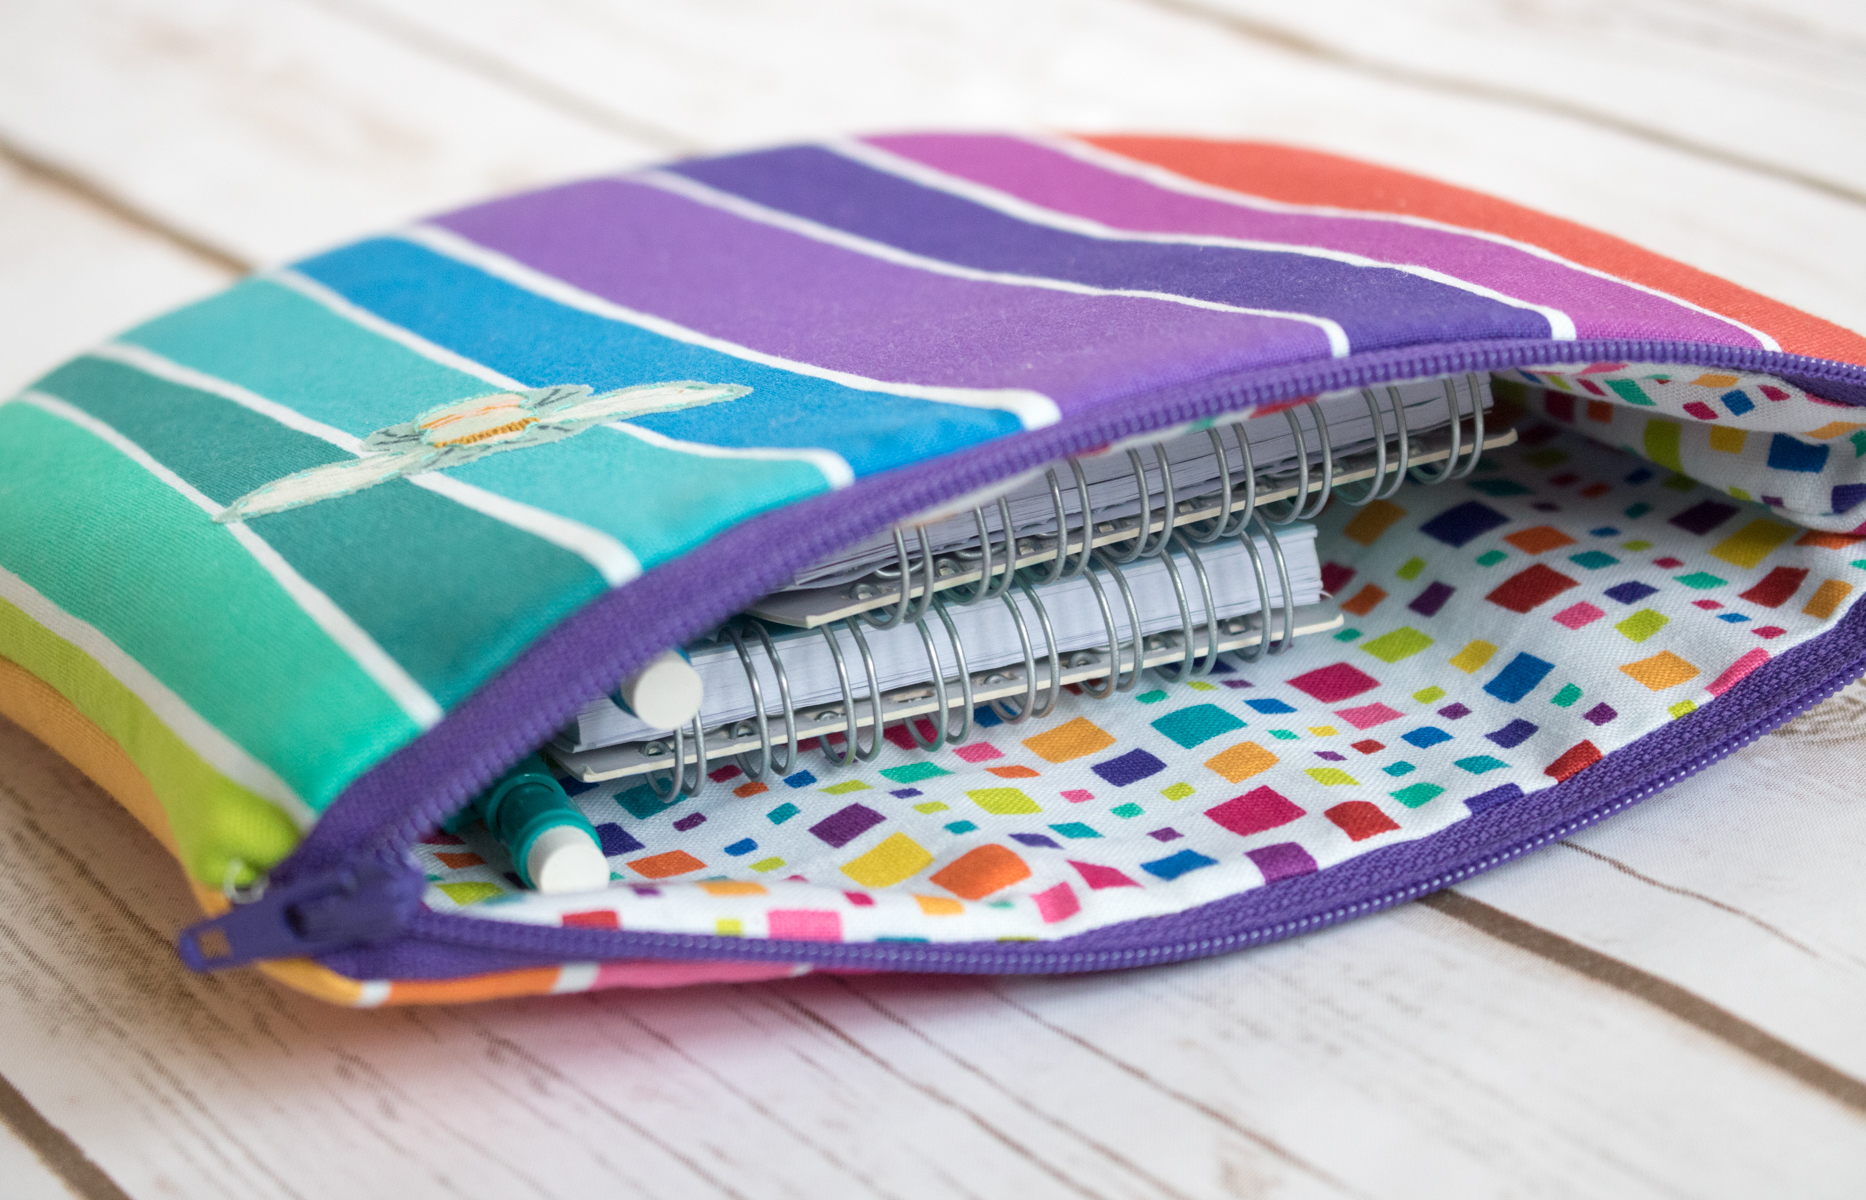
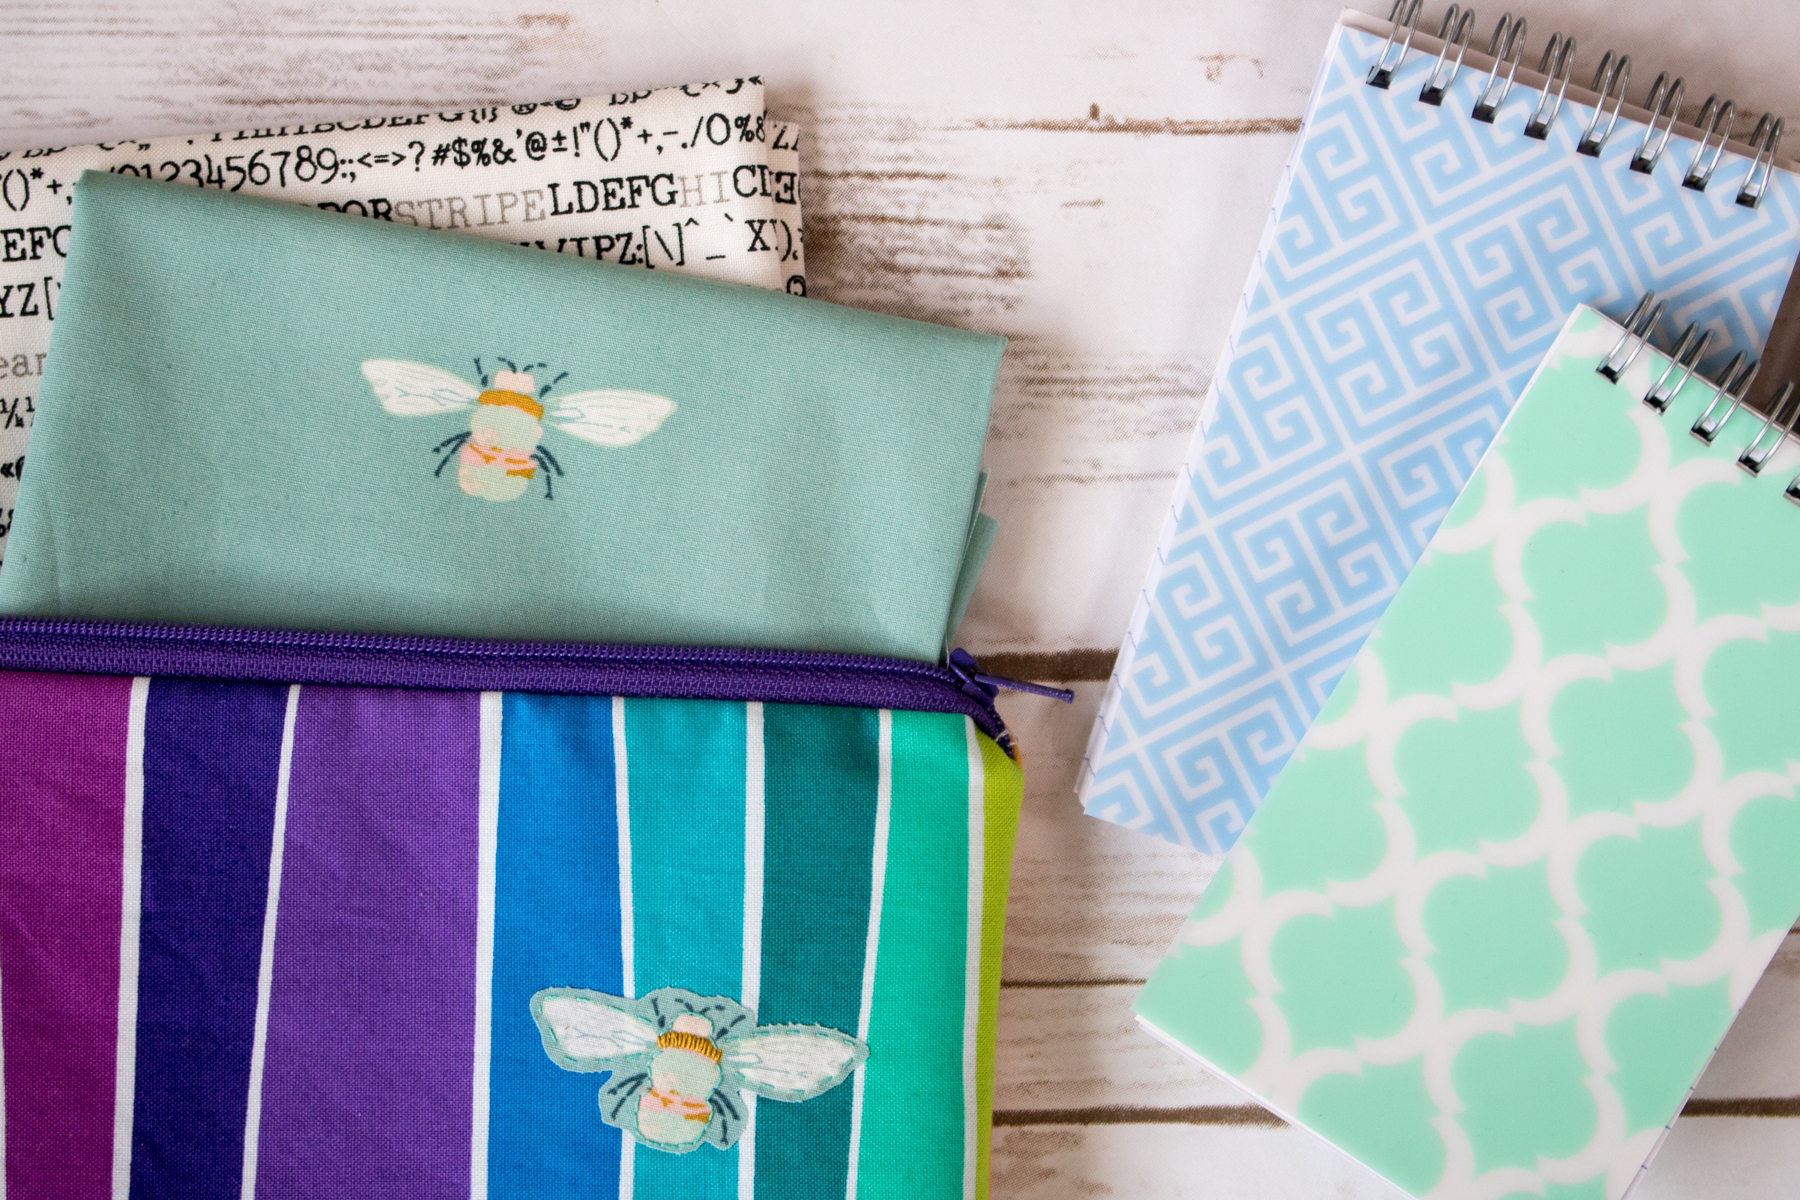
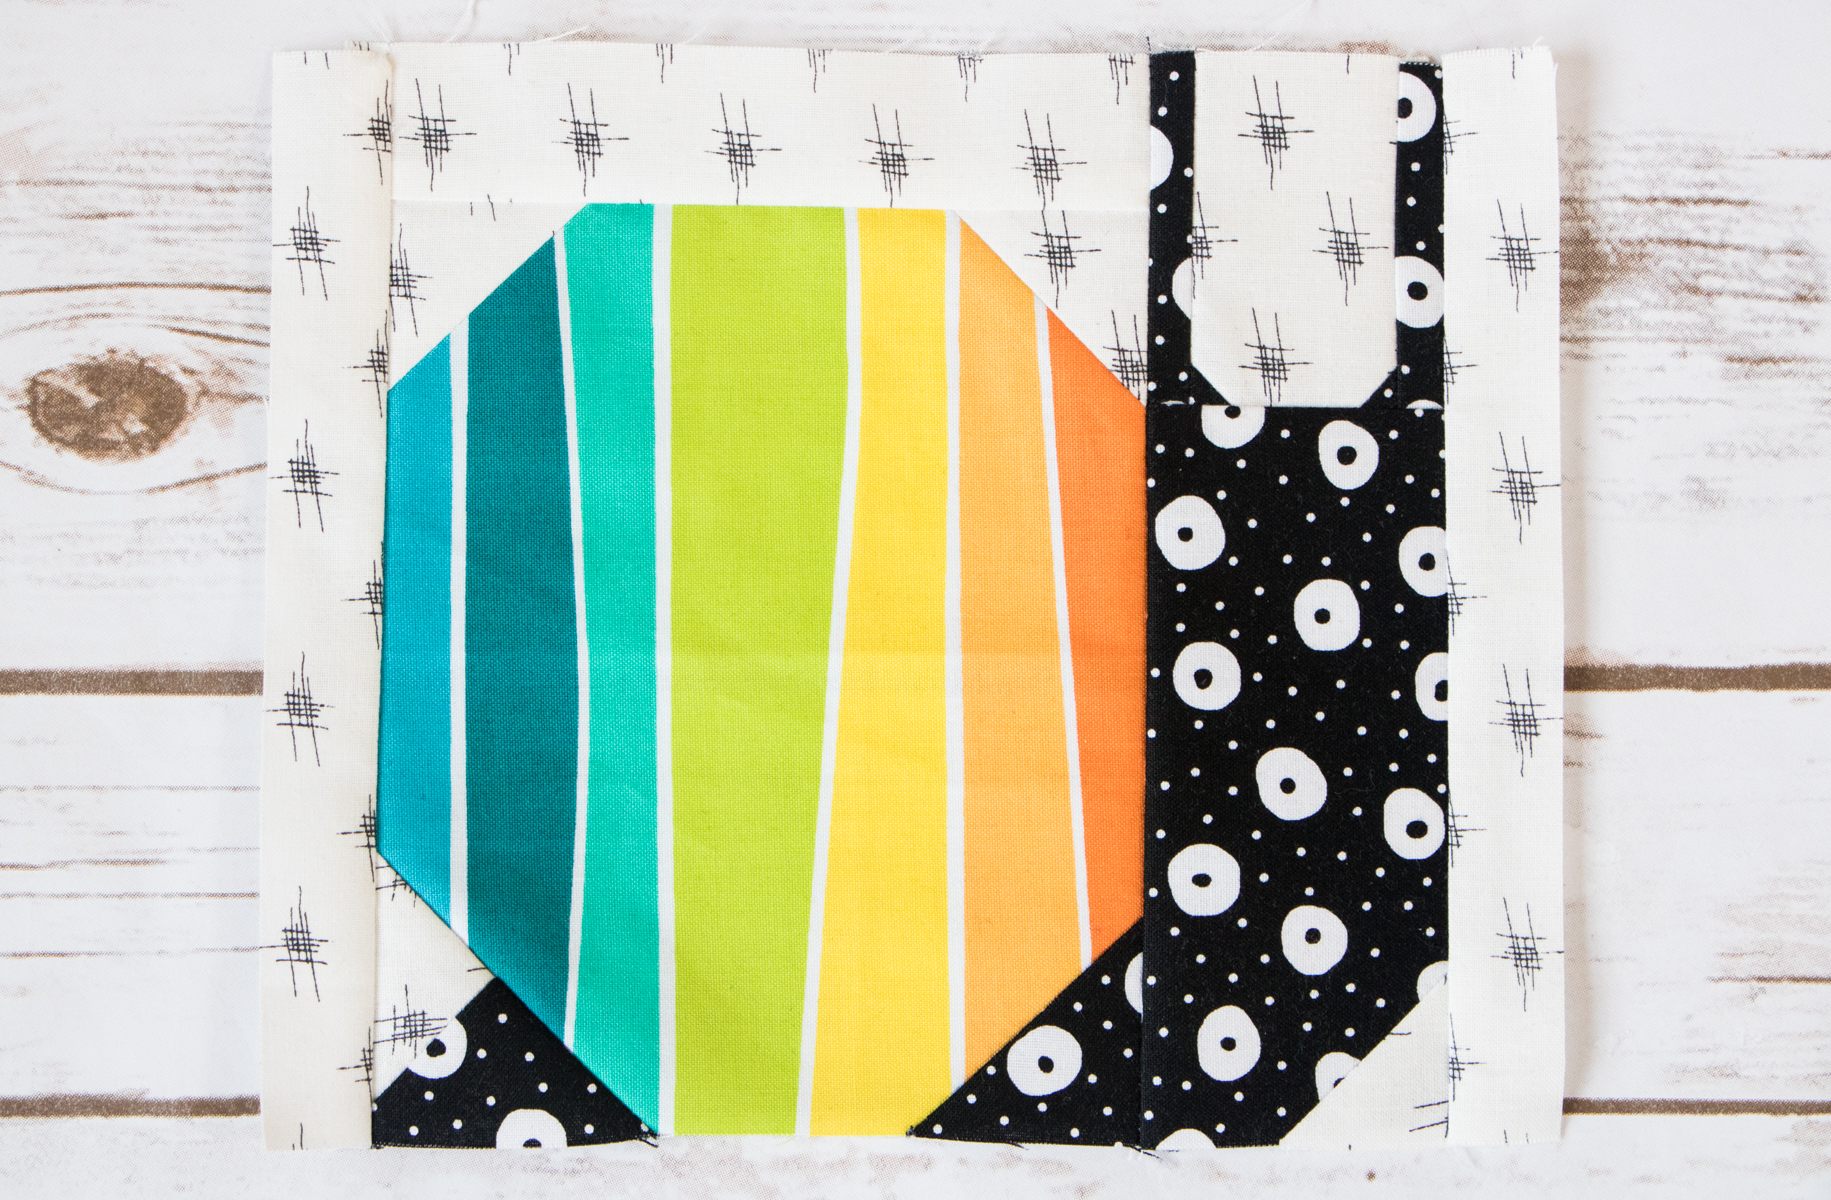
 I carefully considered each of the colors of thread *I* always use, trying to decide if it would be a universally helpful color to have, and have very intentionally decided upon this spectrum of luscious, vibrant, tertiary-heavy threads. Here are just a couple of the projects on which I’ve personally used these threads recently:
Pollinate EPP quilt
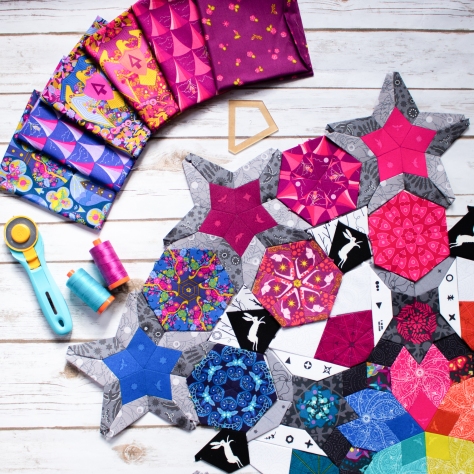
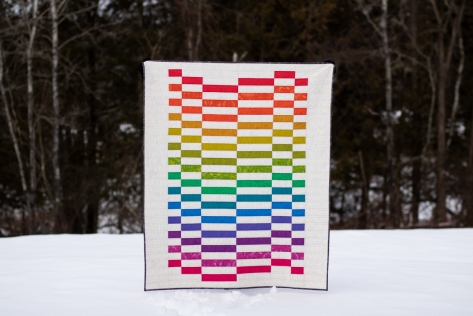
Staggered Quilt
Summer Sampler 2019 Alternate Layout, Planned out in my Quilter’s Planner 2020
This thread collection embodies my favorite design aesthetic, and as you can see, I put ALL the colors to good use! I plan to share much more about each individual thread and why it was selected in a later blog post, but for now, I encourage you to head over to the Aurifil blog Auribuzz, where they are sharing really fun interview in which I talk about all things quilting, color, QuiltCon, and more! Read it HERE.
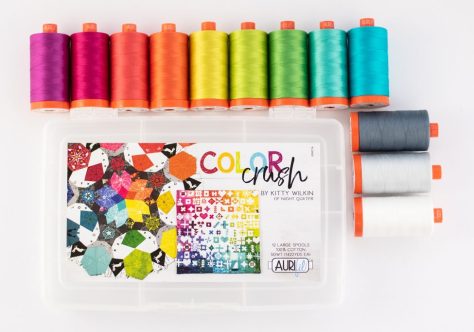 If you want to purchase Color Crush and your local quilt shop doesn’t currently stock it, please ask them to special order. Any shop can grab it from a distributor of course, but ANY shop can purchase directly from Aurifil, no minimum, flat rate shipping. Simply click the “Shop Now” button on the top right of the Aurifil webpage, choose “Designer Collection”, set up an account with them, and order until your Color Crushing heart’s content! Please let me know if you are a shop and plan to stock this collection, since I will be creating a landing page with a list of where Color Crush is available for sale, both online and in brick and mortar shops.
QuiltCon 2020 – Austin!
If you are in Austin for QuiltCon right now and love this collection of threads as much as I do, there’s good news! You can buy a signed collection AND say hi to me! (hugs, please) during two meet-and-greet events during the show:
Friday, February 21st, at 12:30pm at Aurifil’s booth, booth #910, facilitated by Private Source Quilting (PSQ), and,
Saturday, February 22nd, at 3pm at the Homestead Hearth/Designs by Sarah J booth, booth #404. The Homestead Hearth/Designs by Sarah J booth will also be selling some of my most popular quilt patterns, including the new Staggered quilt, Sew Tiny Sampler, Pollinate EPP quilt pattern, my Run Run Run block pattern, Pollen Pillow EPP, and a couple more. This is a rare chance to get one of my patterns in print, so I do hope to see you there!
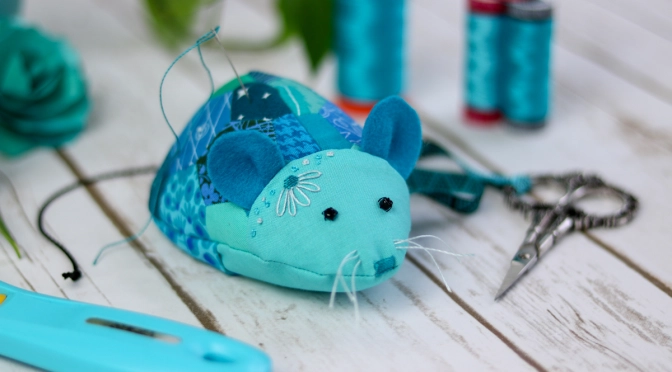
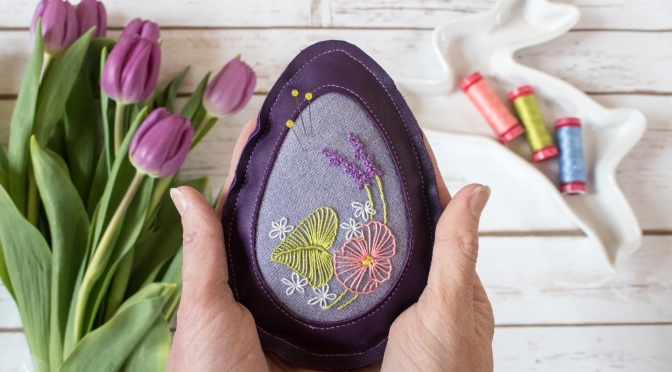
 A few months ago when Sharon asked me to be a part of her book tour, I didn’t hesitate to say yes. I had made Sharon’s block for the Splendid Sampler 2 and loved it, and English Paper Piecing (EPP) is quickly becoming my go-to style of quilting because of its portability and versatility. A Stitch in Time is a fun book including 18 small projects that combine EPP with vintage linens, embroidery, appliqué, patchwork and quilting. It’s a great resource for hand-stitched gifts that won’t require a year’s worth of stitching.
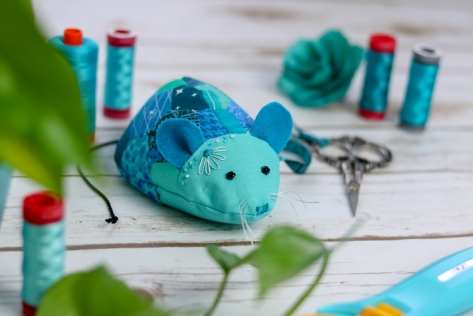 As I flipped through the beautiful book trying to decide what project to make, I fell in love with the mousie pincushions immediately. I opted to make the larger of the two, and thus my Mummy Rosie came to be.
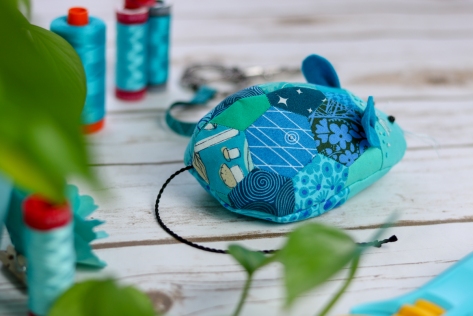 I used a bunch of turquoise/teal scraps to piece Rosie’s back, and realized that this project would make SUCH a great scrap buster. I might just start making 3/4″ hexies and throwing them in a jar to make mousies!
 Any project that involves cutting through a hand-stitched panel always is painful, but I forged ahead with gritted teeth and it was worth the pain of trimming. As you can see, I marked the template plastic with guides around some of the hexies so that when I cut each panel, they would be symmetrical. It worked well!
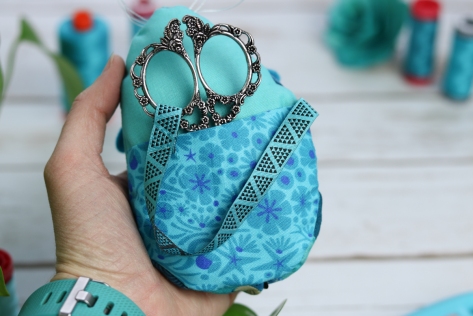 I love how so many of the projects in Sharon’s book include little embellishments with embroidery, cute ribbon, and vintage lace. Rosie not only has a scissor pocket on the bottom, which makes use of a pretty coordinating ribbon I bought from my local quilt shop
 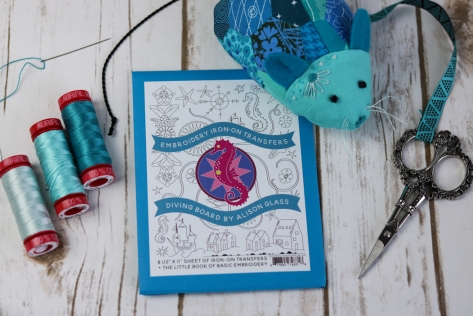 I decided to pull out the
  Here’s a peek at the process. You can see how well the lines transfer onto the fabric. It’s reallllly easy to use, too. I used a selection of
  I think it’s a good look, don’t you?
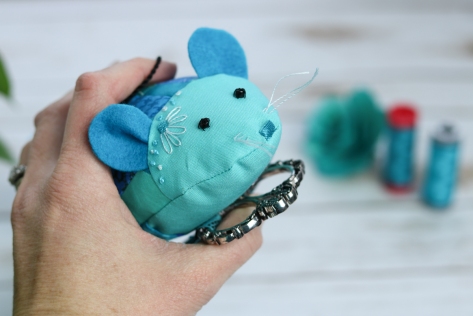 The pattern calls for attaching 2 1/2″ scissors, but I opted to attach my 4″
 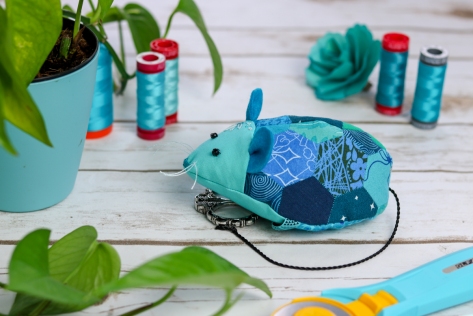 Rosie’s ready for action, don’t you think?
 With 16 diverse patterns including a variety of techniques including traditional piecing, applique, and foundation paper piecing, this book is a great resource for quilters of all levels of experience. For the next few weeks, be sure to follow along with the
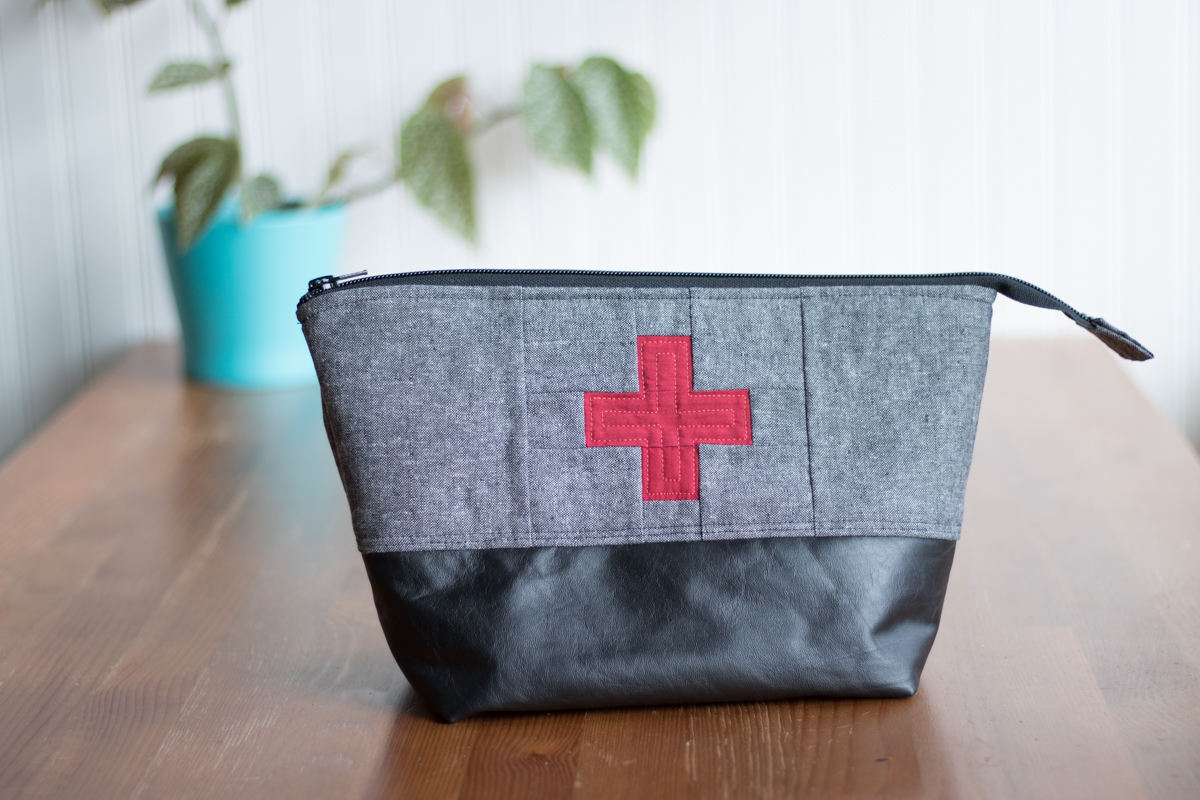
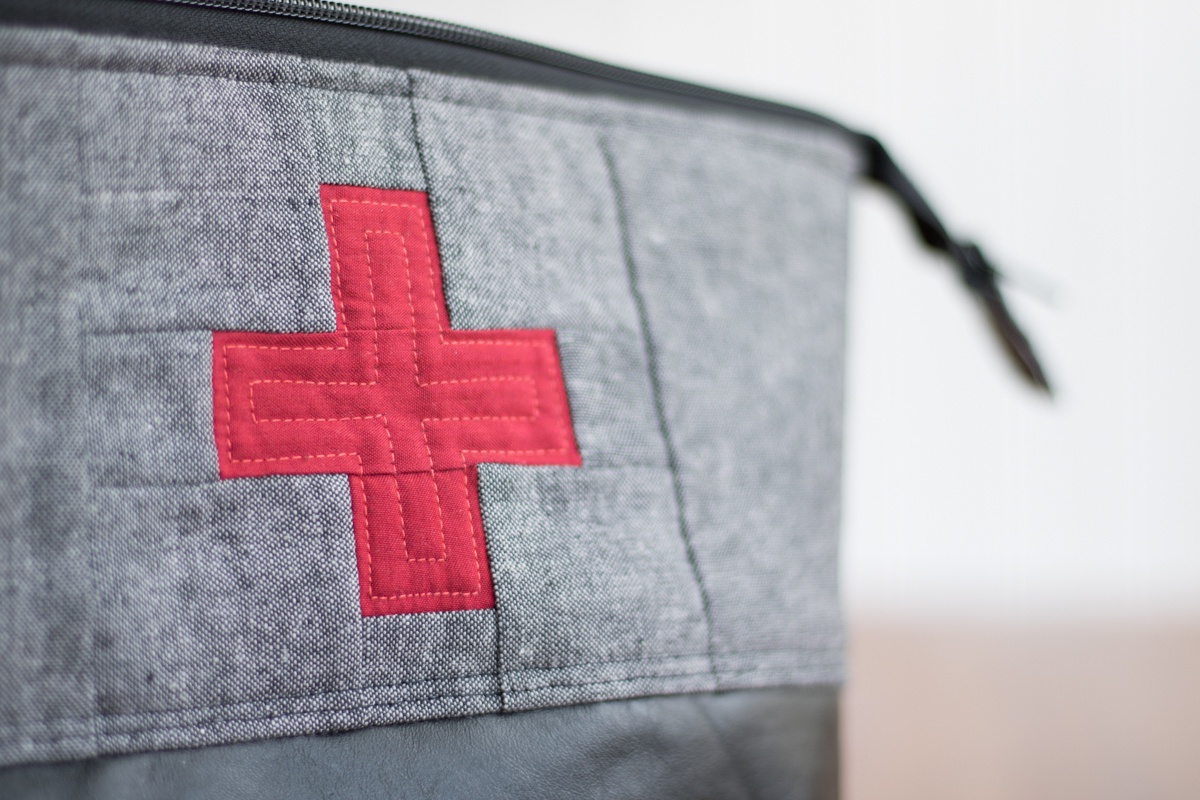
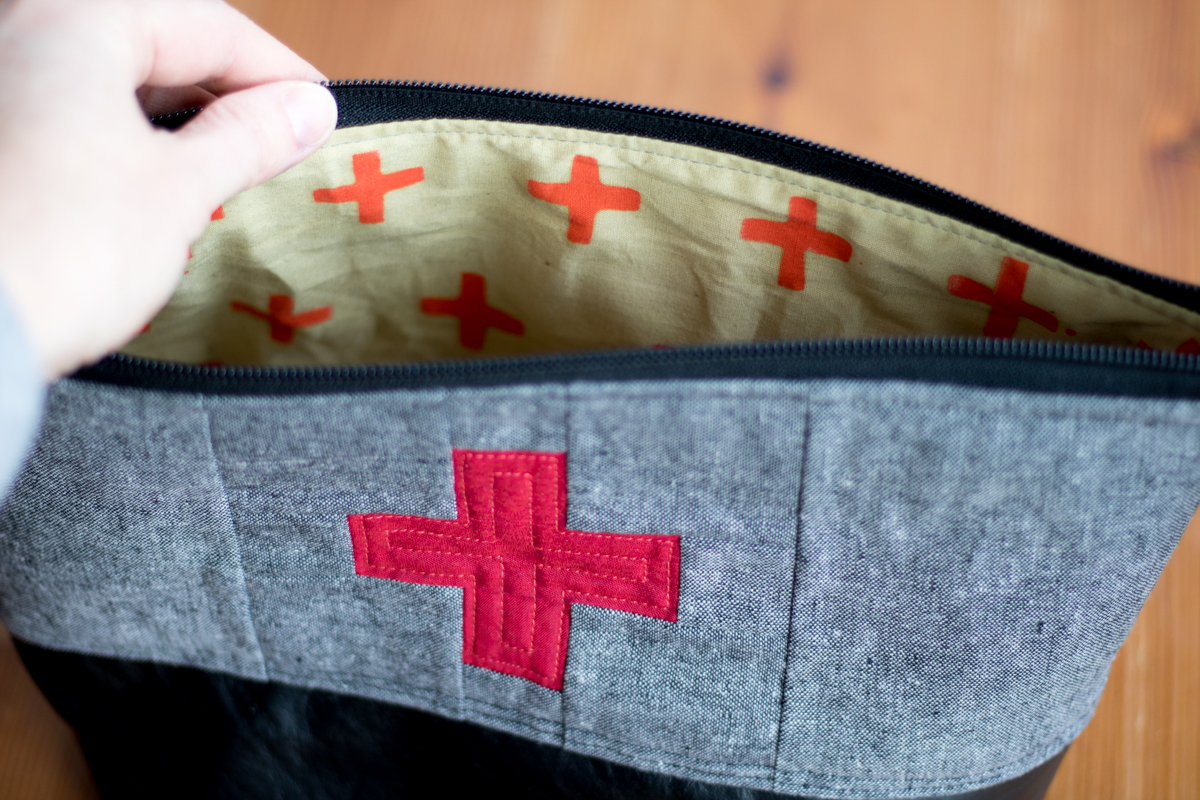
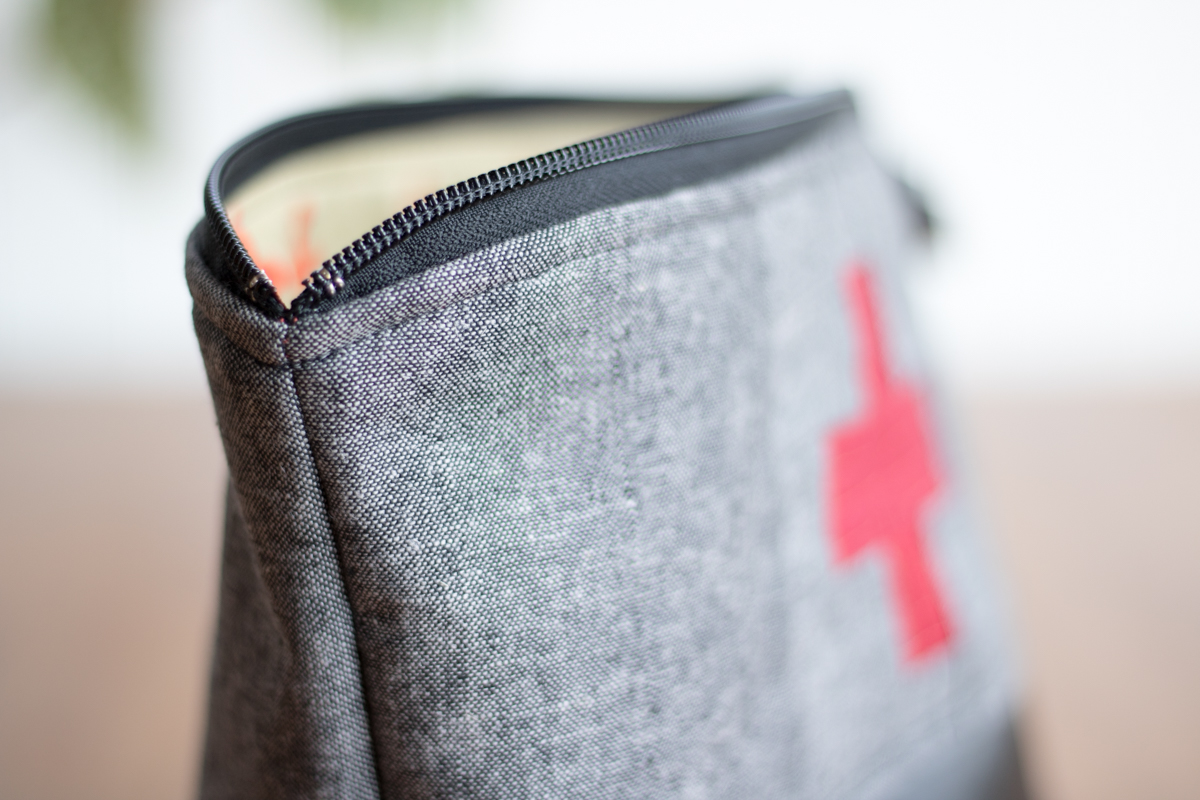
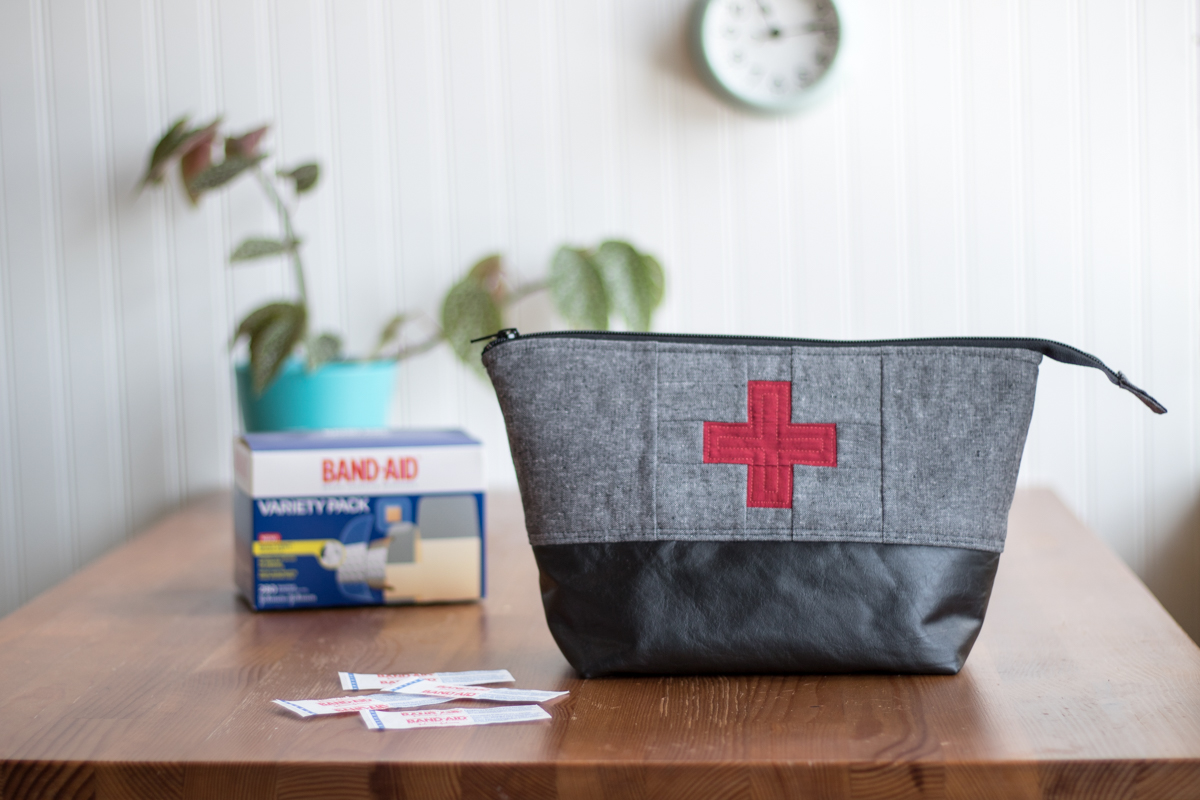
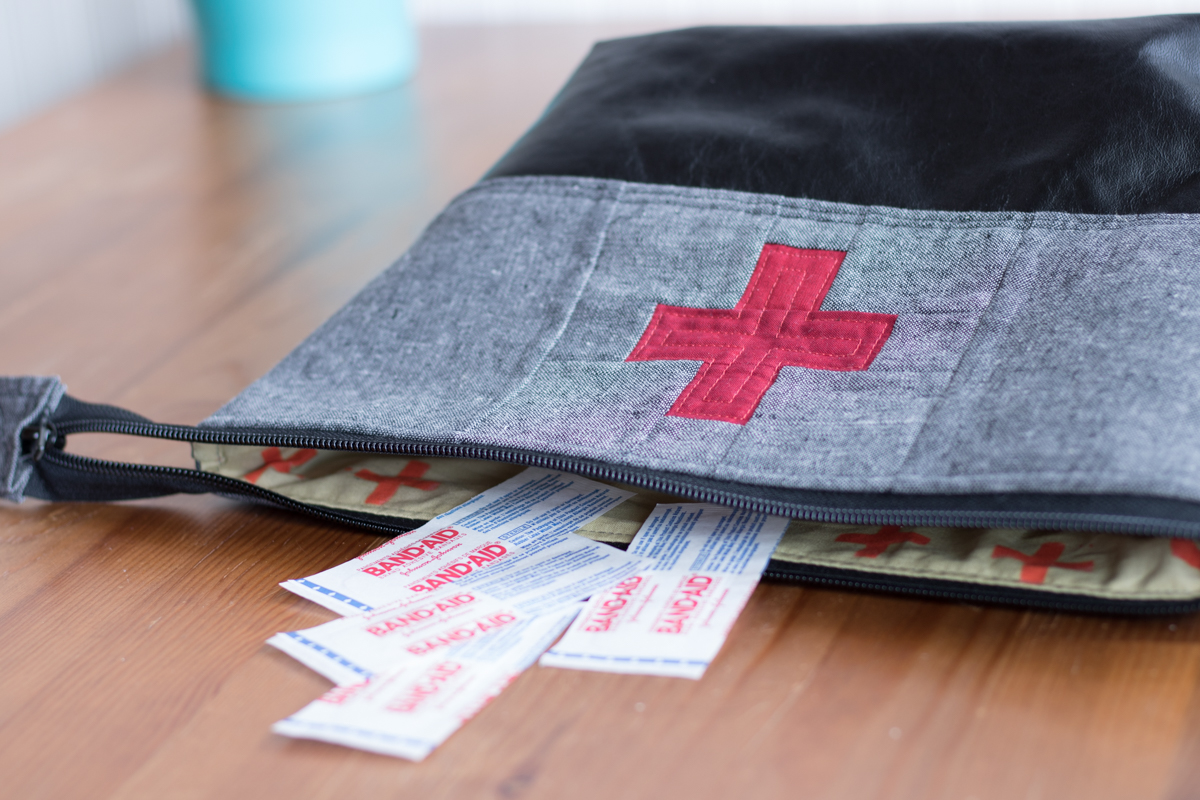
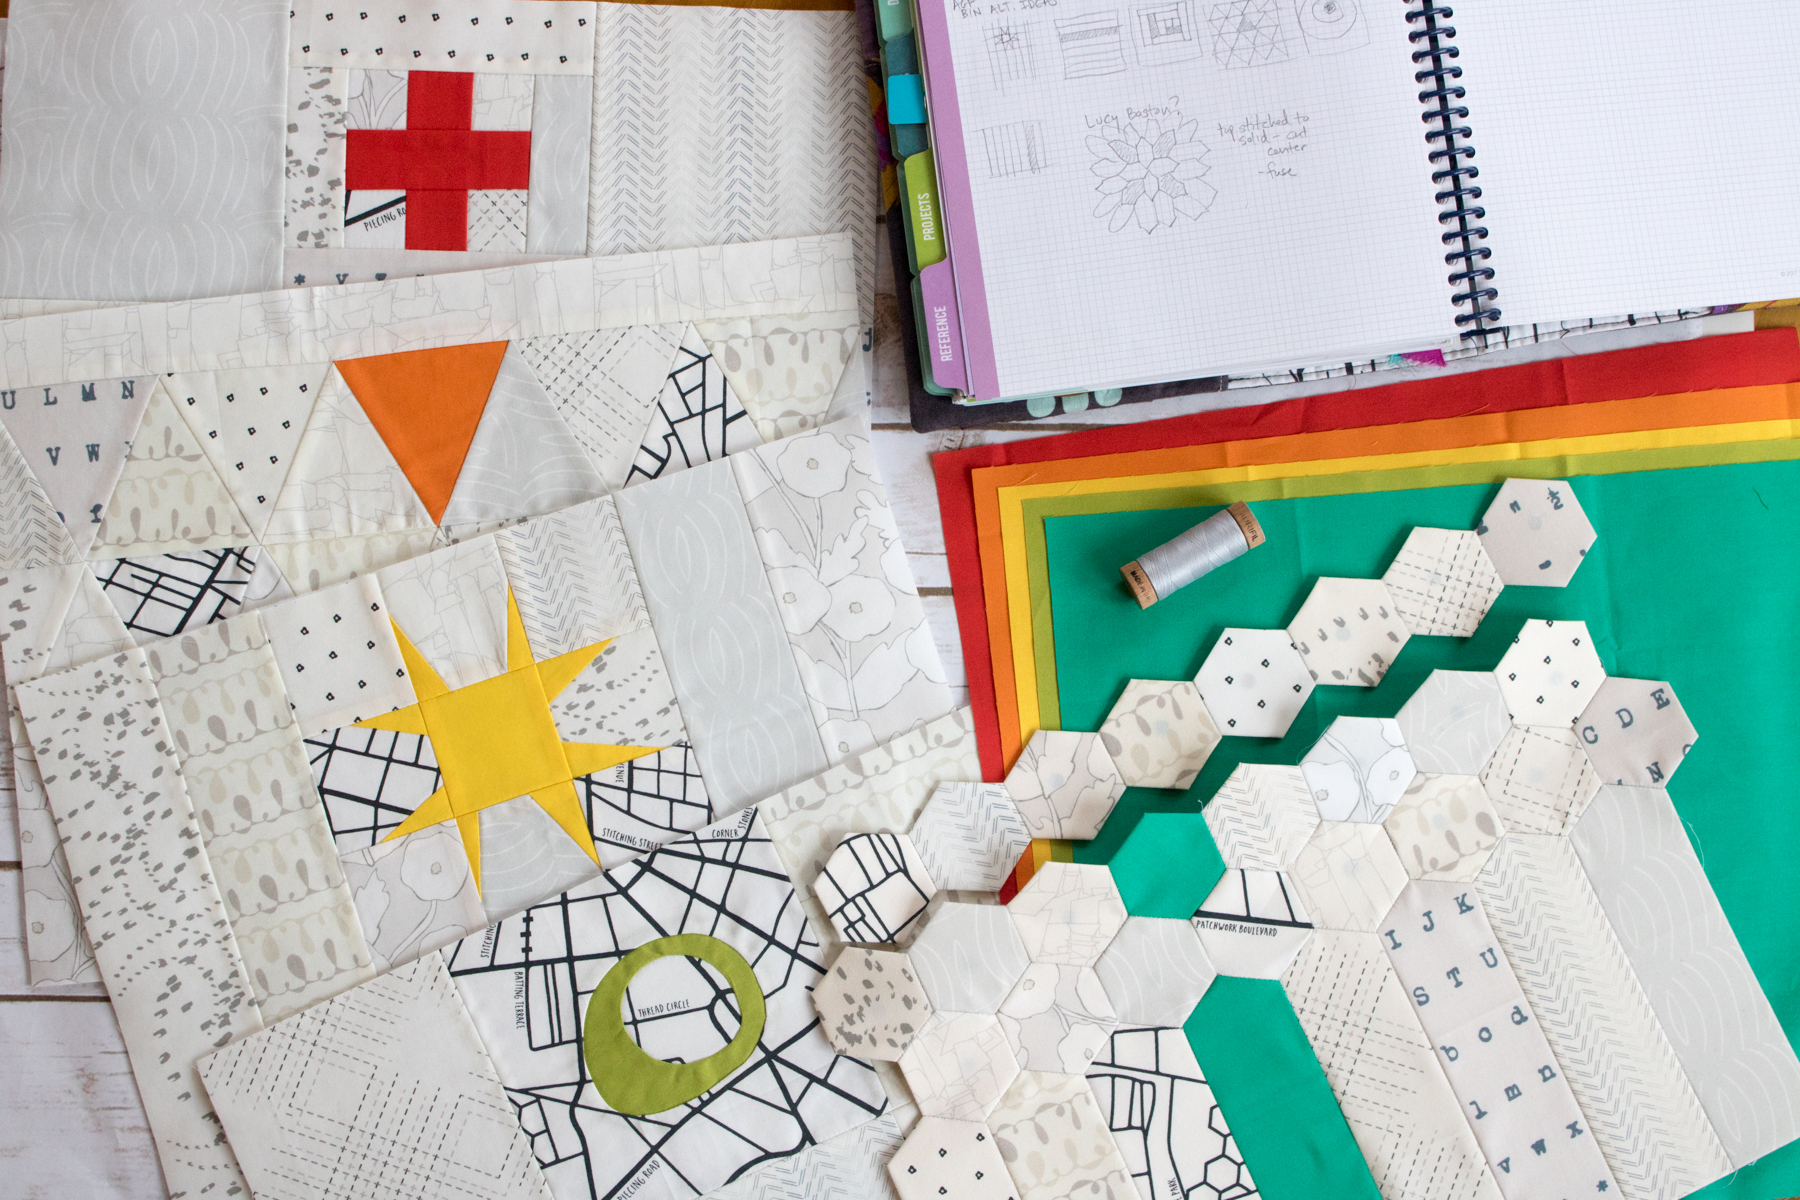
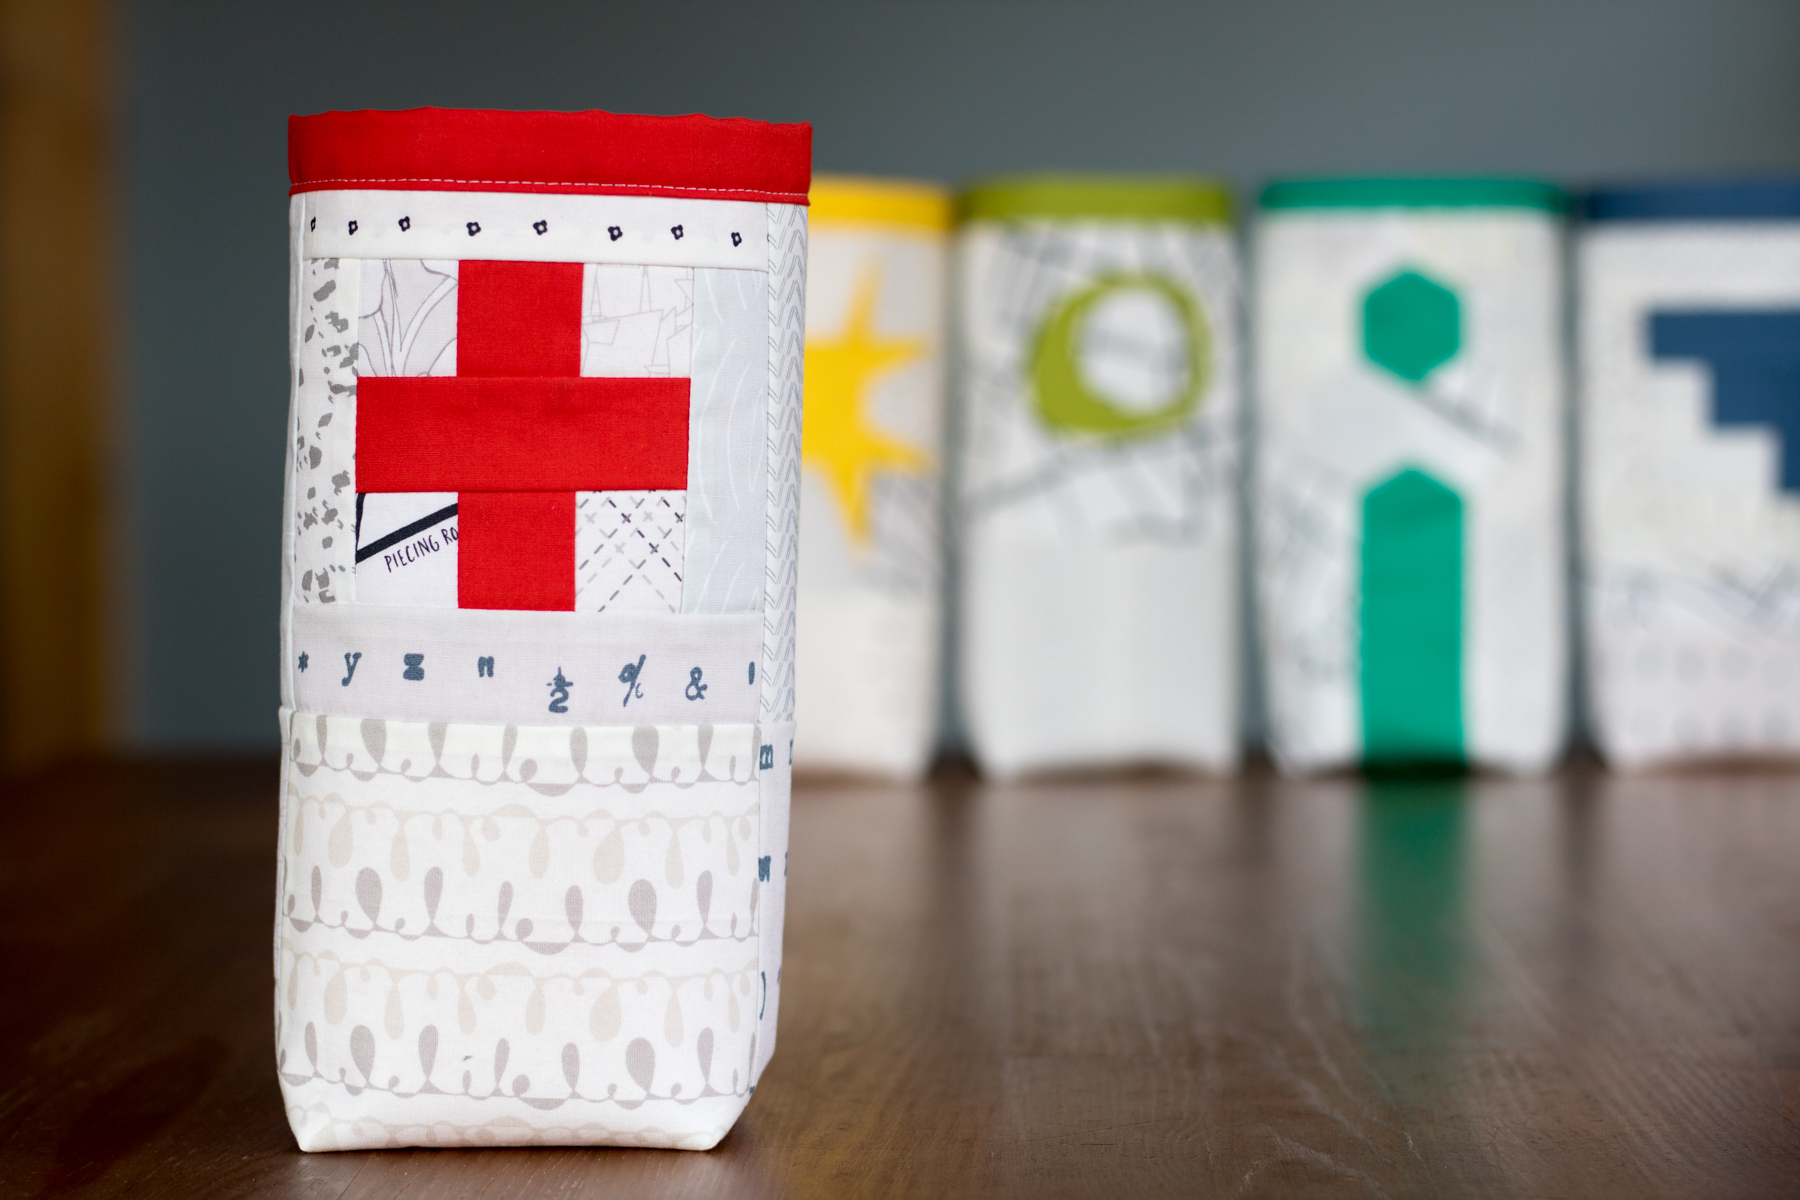
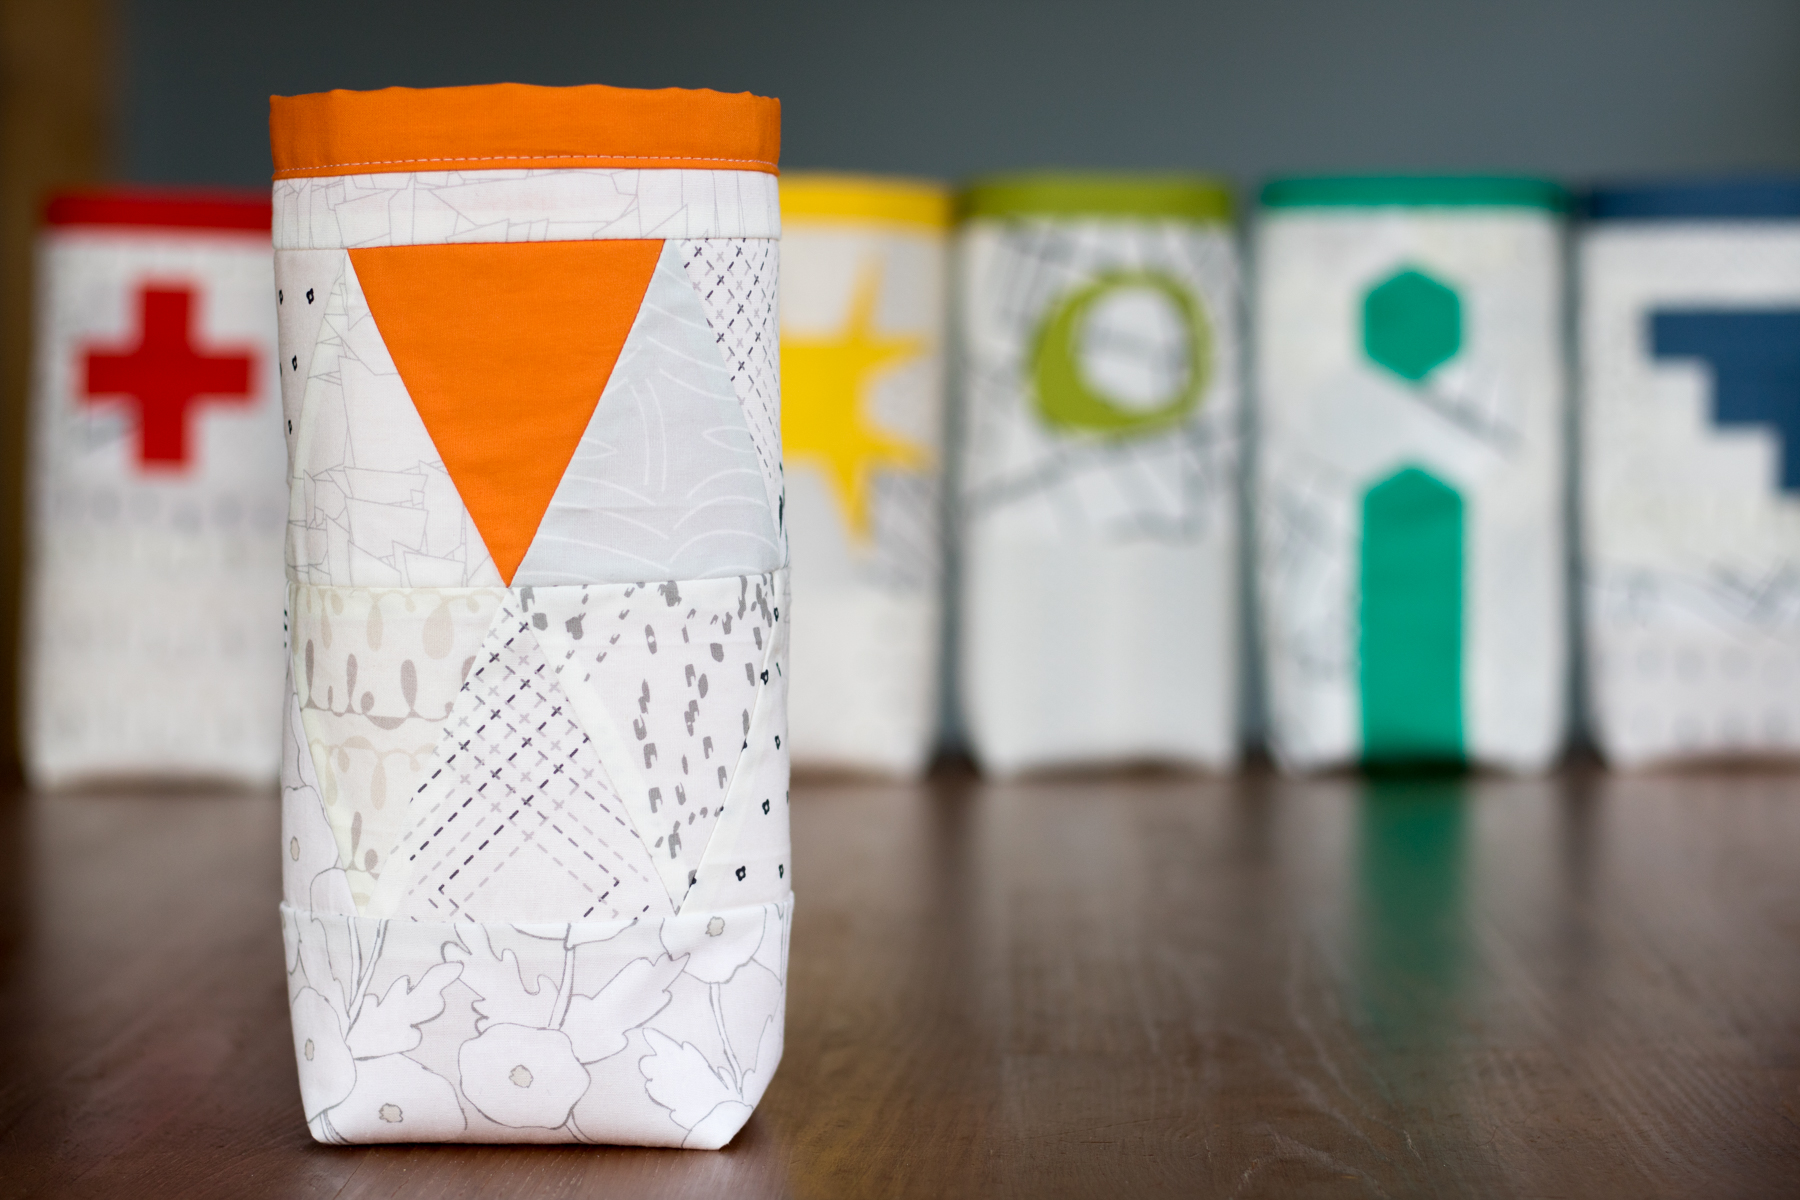
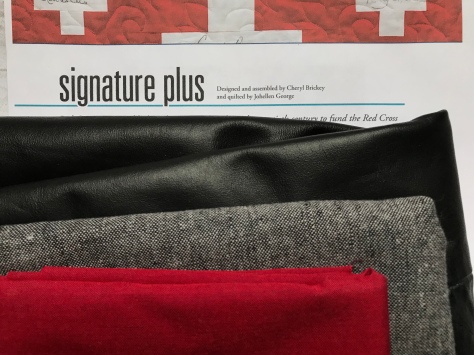 One thing I love about the Signature Plus pattern is that it’s designed as a pattern well suited to group quilts, inspired by Red Cross signature block quilts from the early twentieth century. You can read more about the history of Red Cross quilts


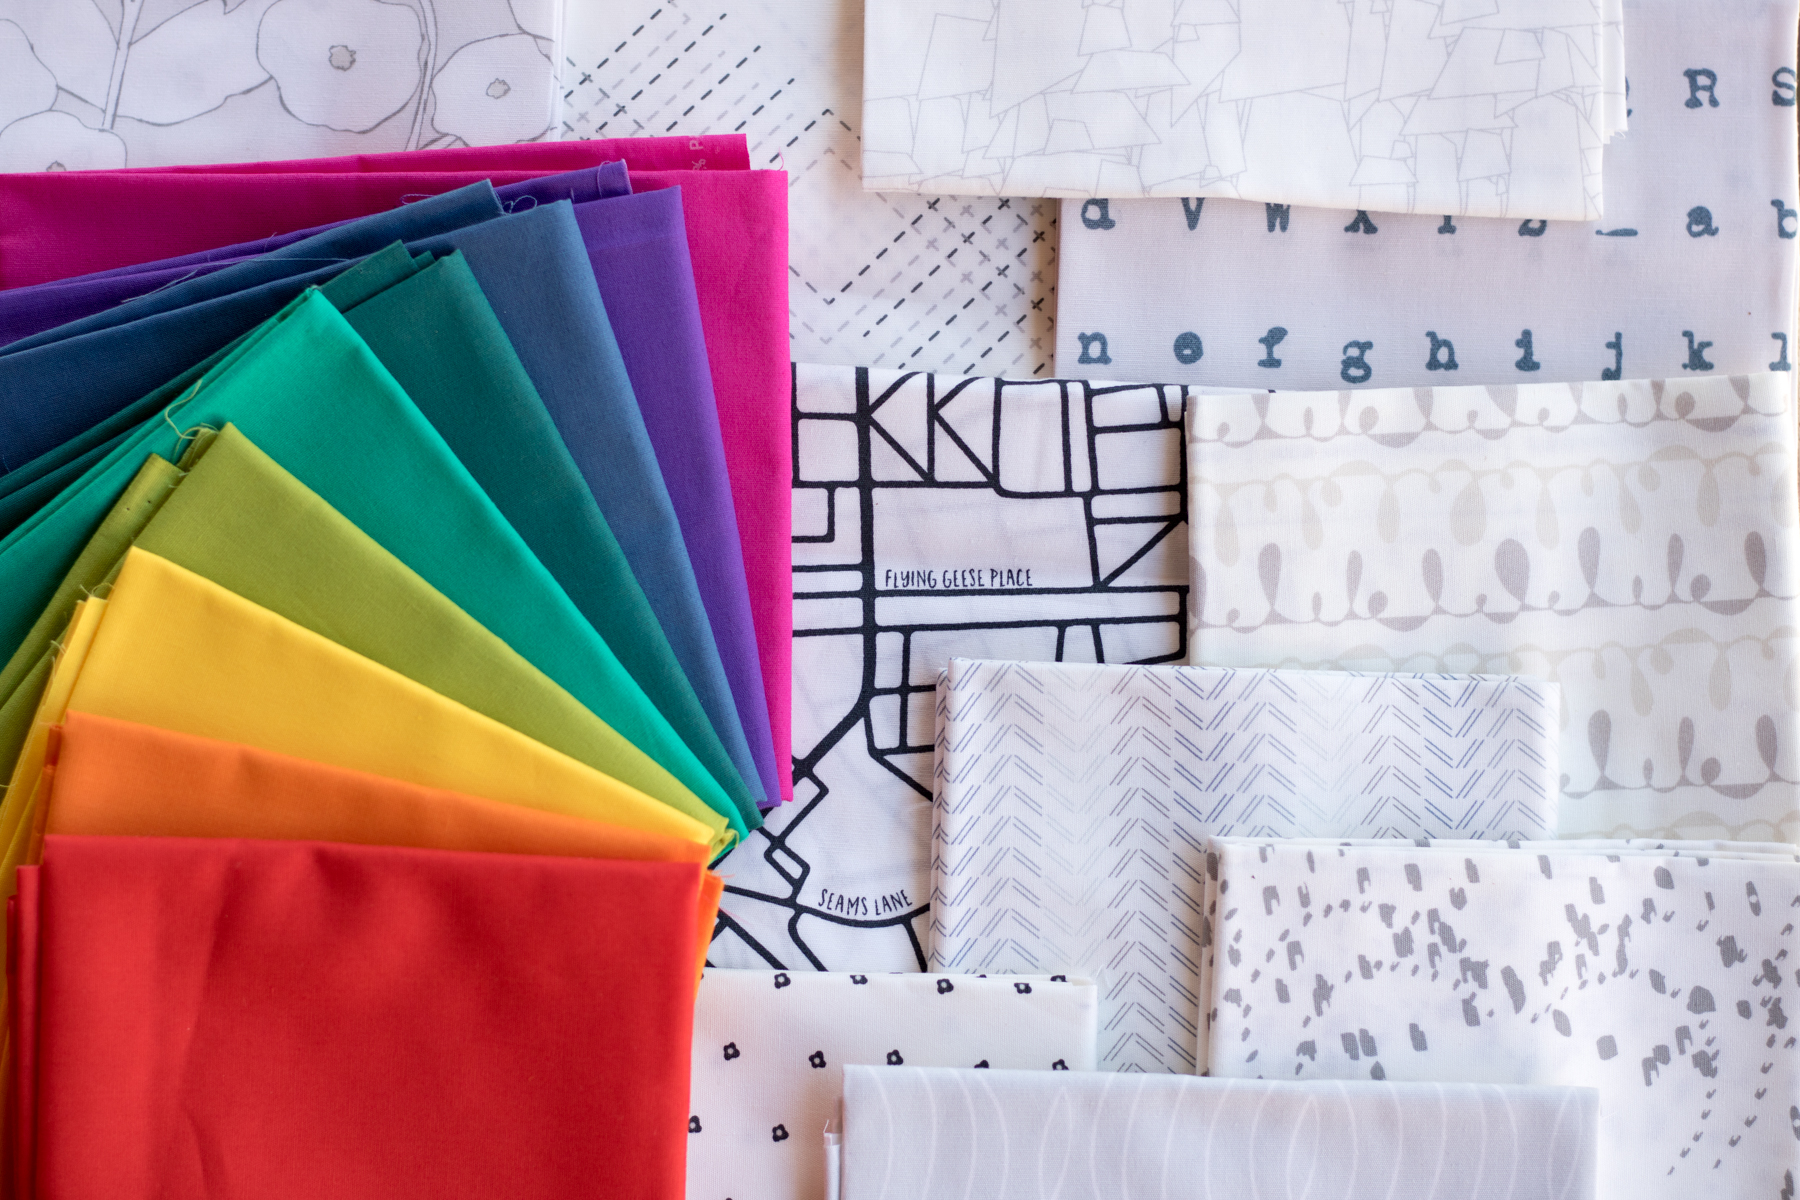
 Feast your eyes upon this! Can you blame me!? I mean, seriously…. is there anyone who doesn’t love a rainbow? Here’s a quick introduction to the line, with attention drawn to a few details I especially love, and far too many photos, as is my style.
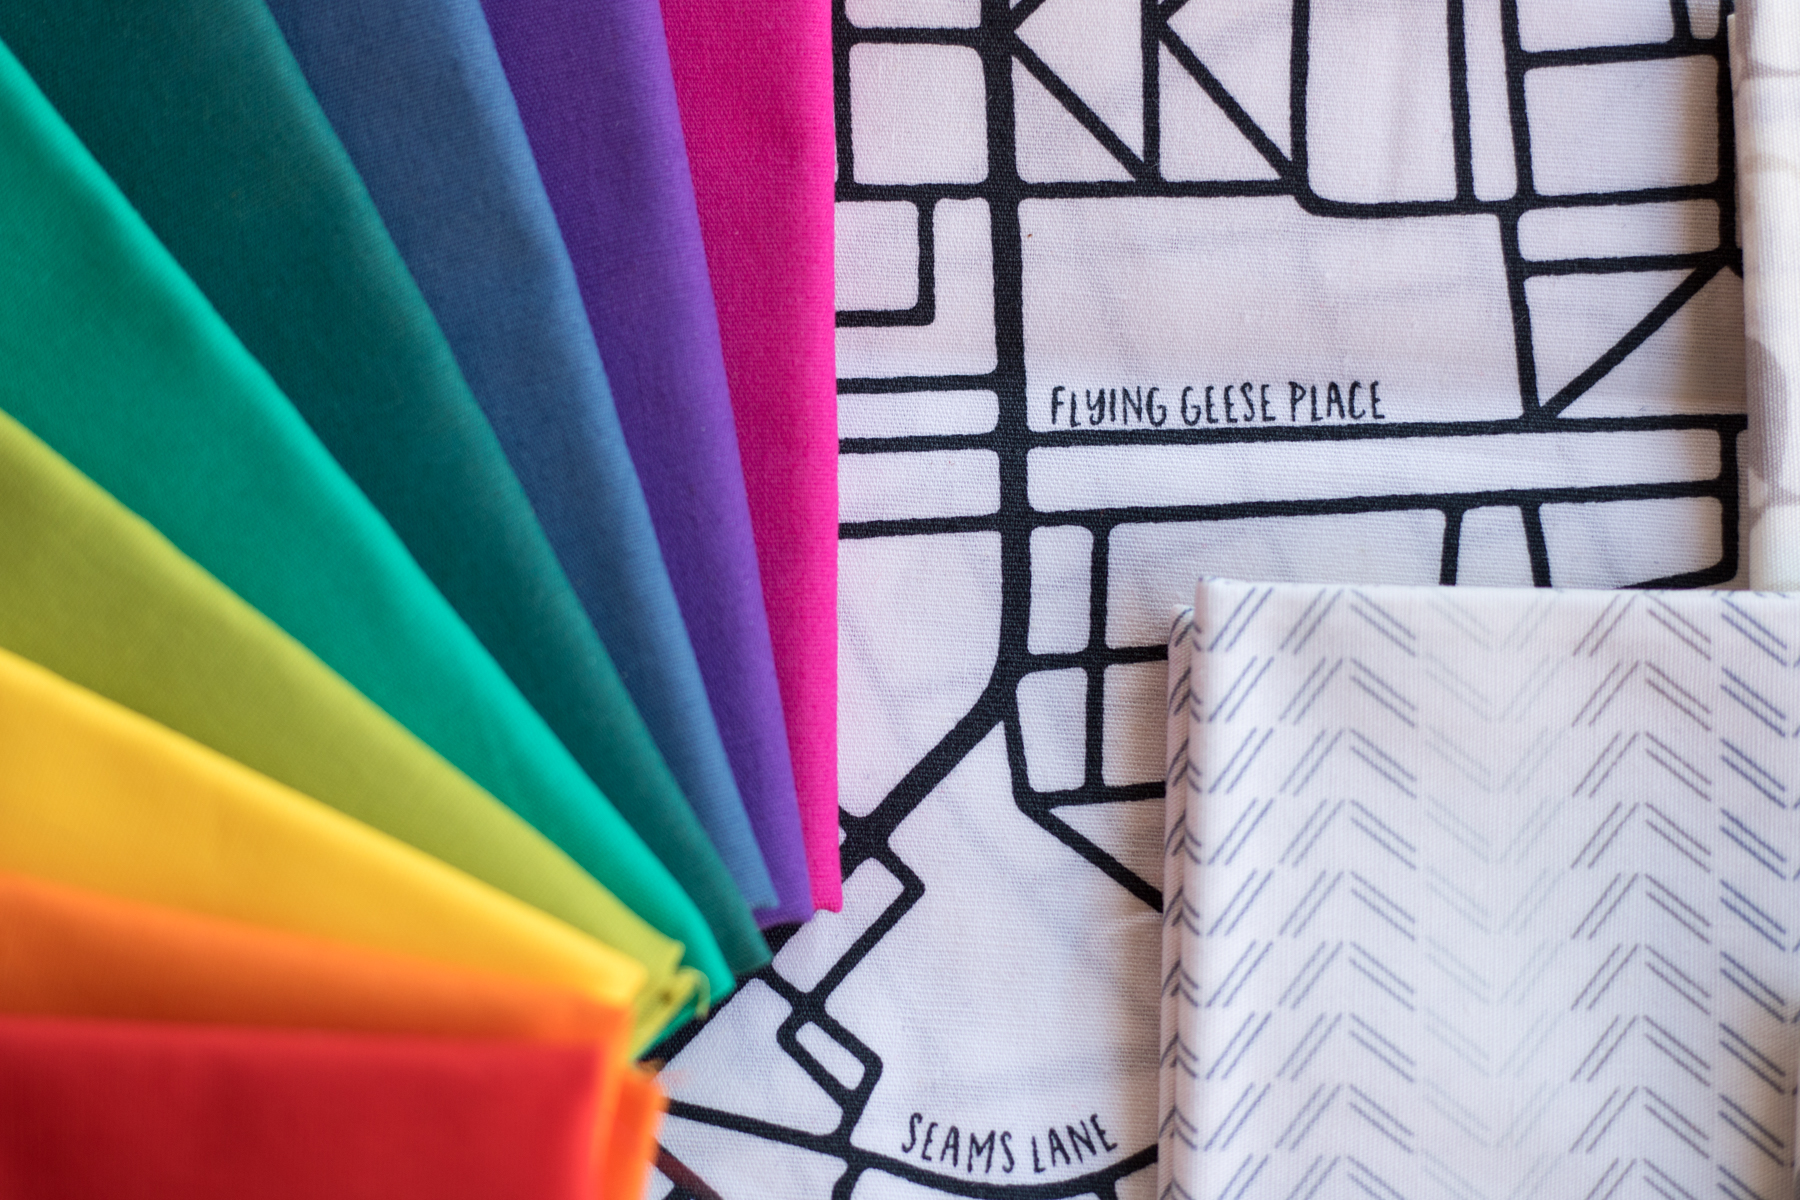
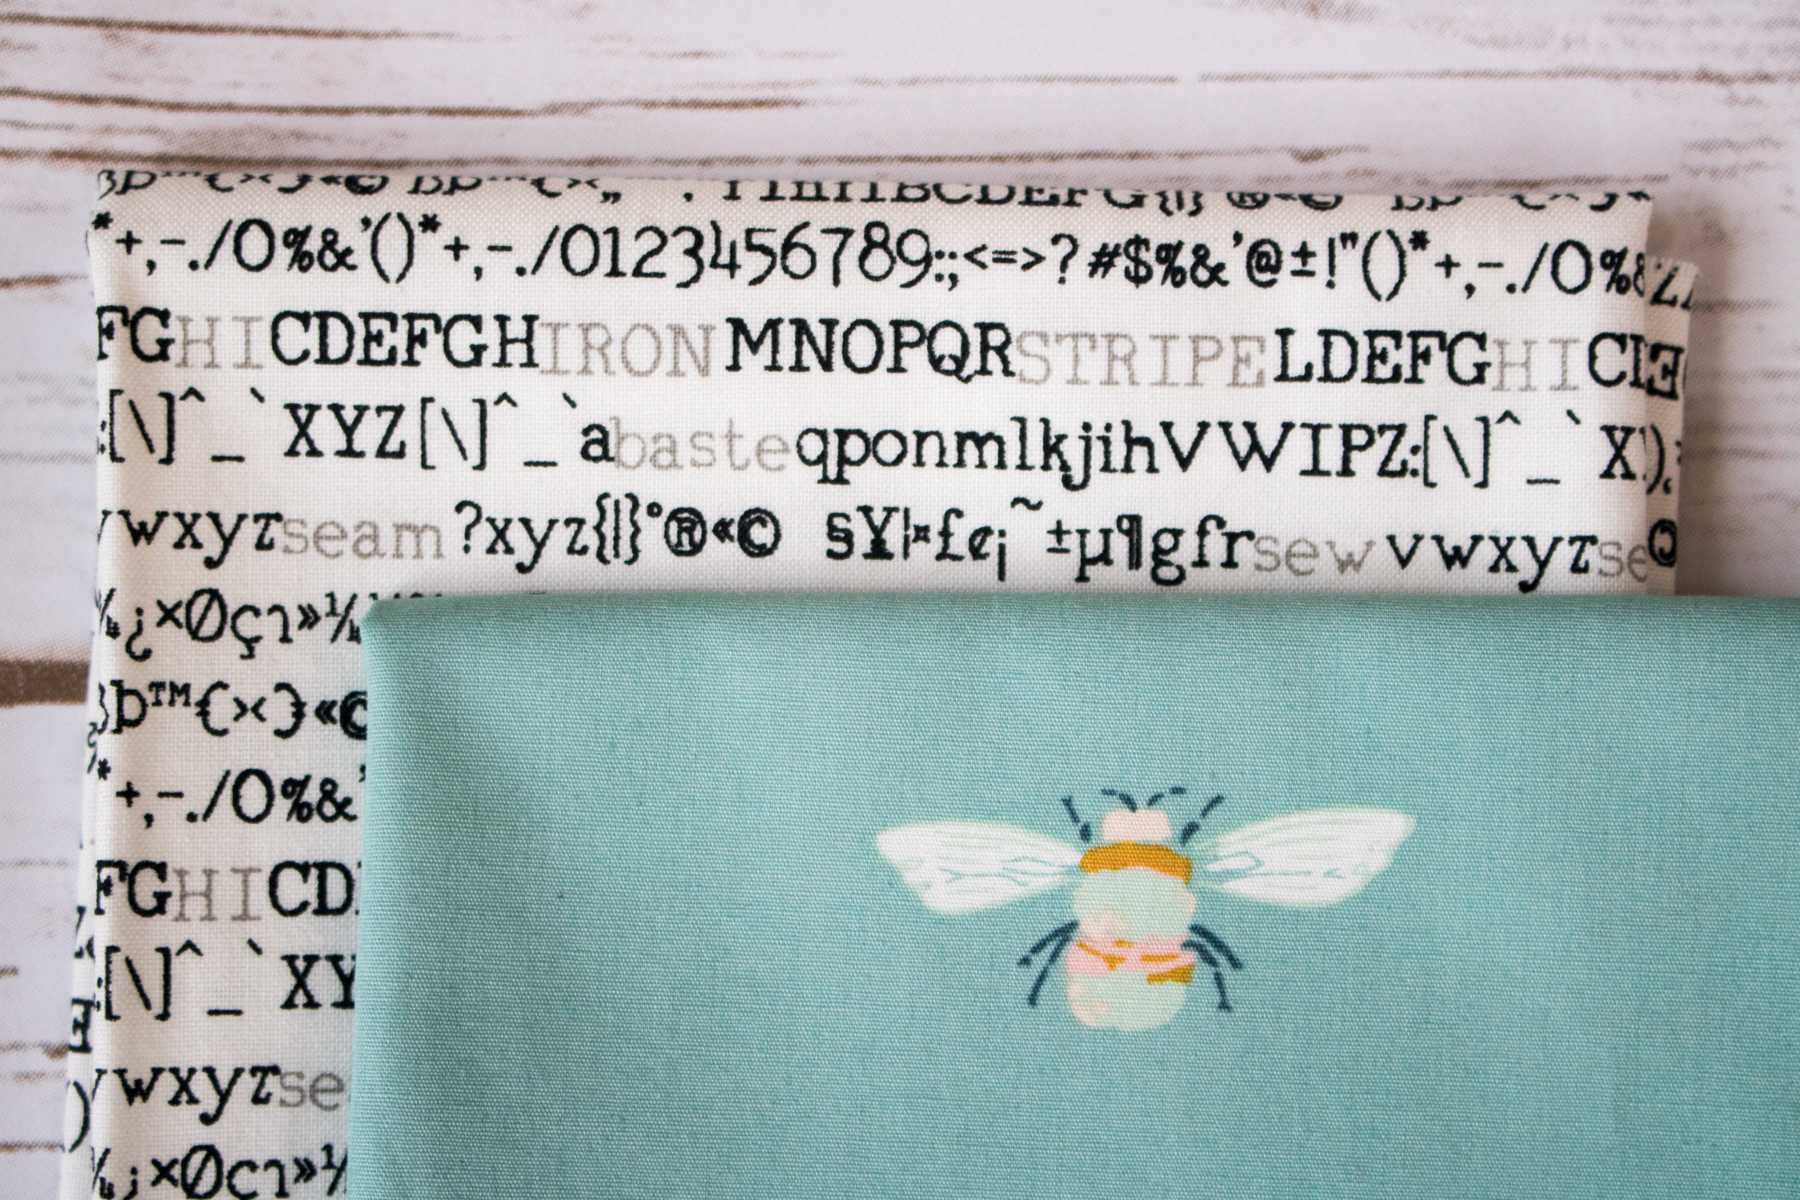
 Diatom reminds me a bit of Insignia, with its large solid portions, only a bit softer. I love how the colors play wonderfully together, yet you can get different value play within each color.
 Compass is definitely the boldest in color, and I love the addition of complementary colored details on some of the fabrics.
 With the dense white sketch-like pattern on Depths, it reads the lightest in color.
 The designs are reminiscent of Alison’s most recent fabric line
  Together, these fabrics make a rainbow that fits in wonderfully with the rest of my rainbowtized stash (let’s be honest, it’s probably 90% Alison Glass fabrics anyway), and I can’t wait to work them into my projects. I already have two new rainbow project ideas in the works, even though I really could do with some project finishing before I begin more new ones (shhh).
 I also love that Alison includes white and grey versions of each print, since both act as the perfect neutral to help the rainbow truly pop. She’s thought of everything.
 Soooooo so pretty! I’m thinking I’ll use these in an EPP project or two, and I’m planning on using mostly this line (with a few other Alison Glass fabrics of old) in my
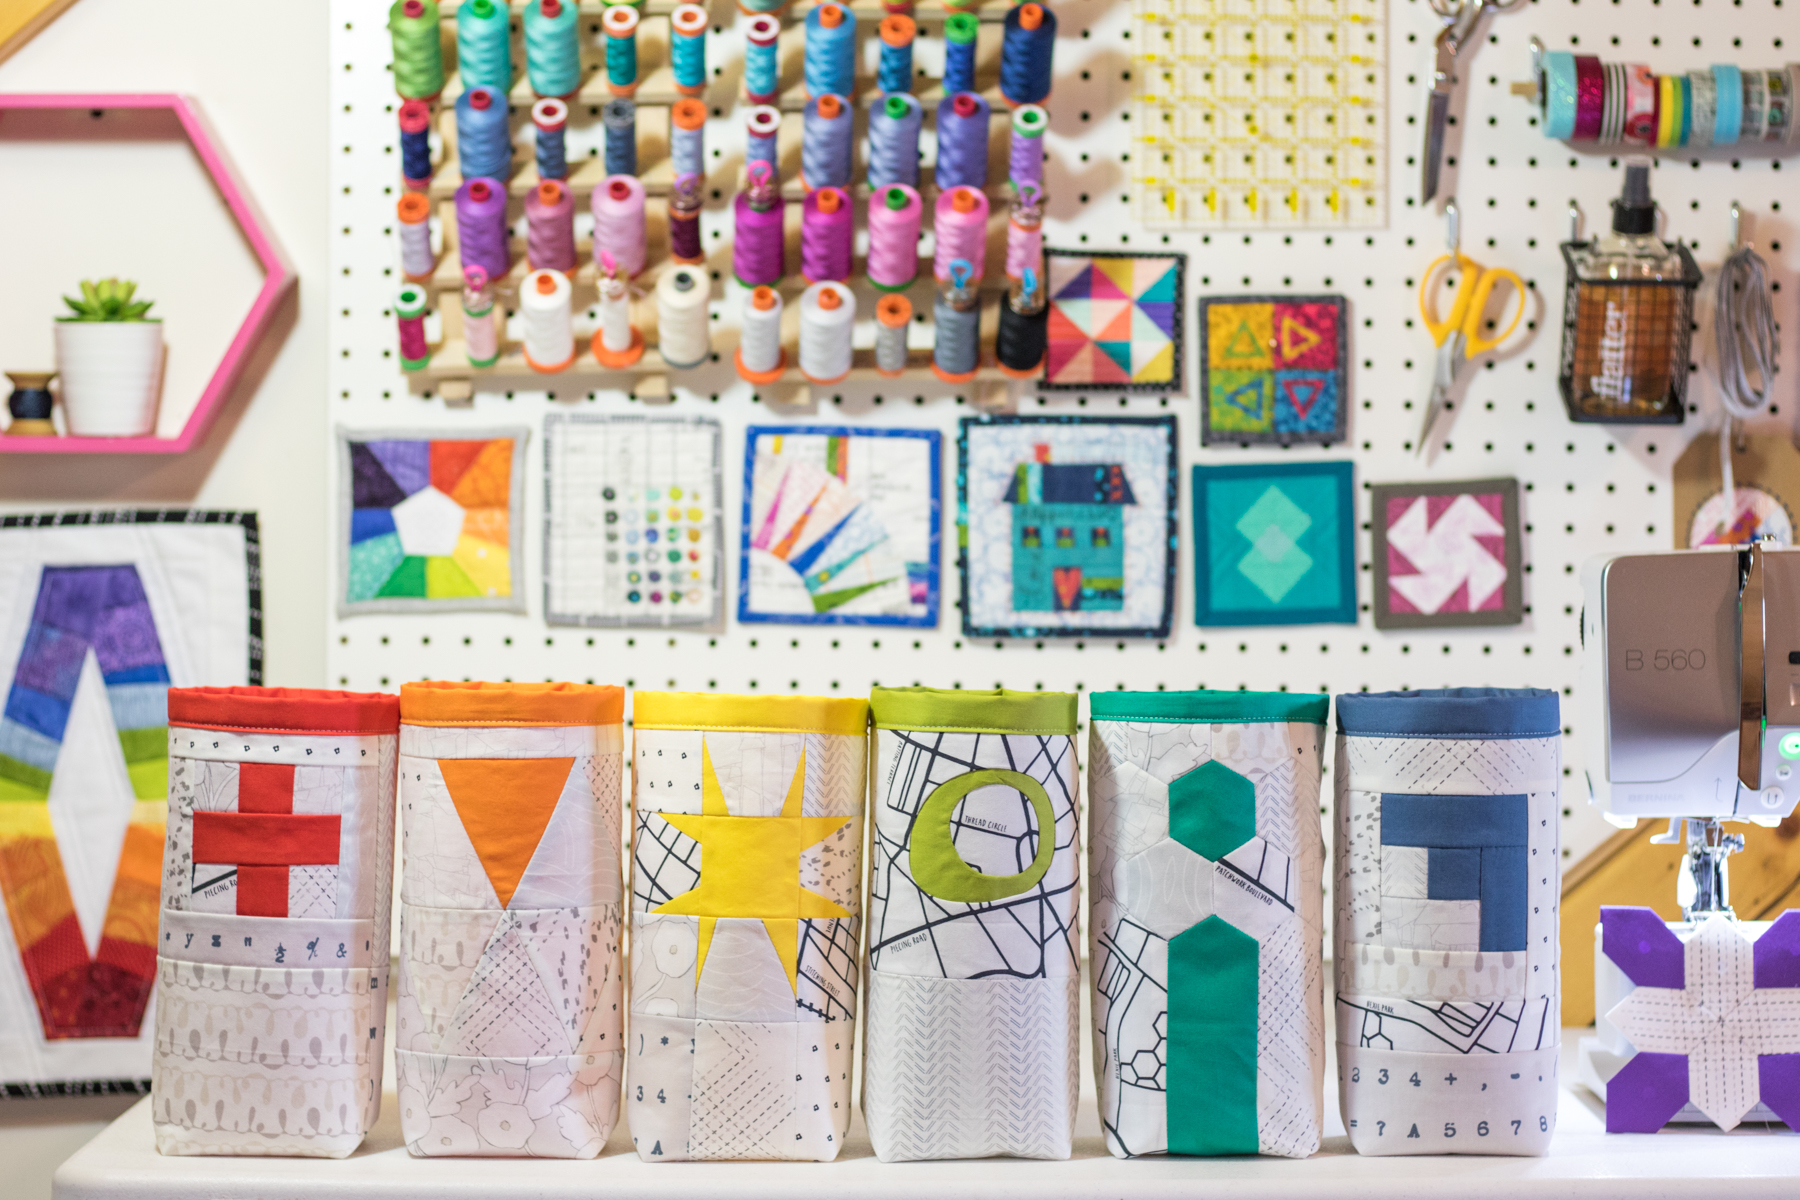
 My husband has been requesting a pillow made with
 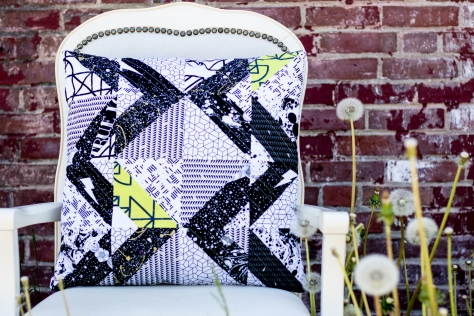 I made 16 quick blocks using the white heavy fabrics and black-heavy fabrics from
 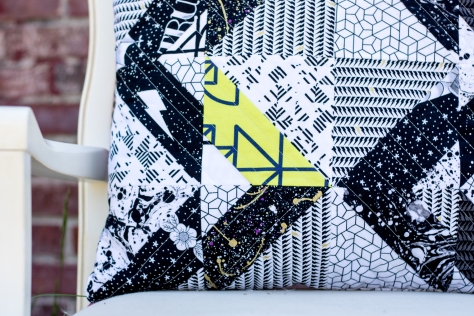 I quilted it with straight lines on my Bernina 560 using my walking foot and 50wt
 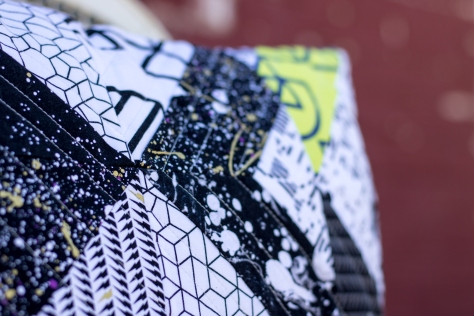 I threw in a few sharp angles to help keep the edge, and staggered the distances between lines for some fun.
 I used the large scale Wound Up in Bright for the pillow backing, and closed it with my first ever side-seam zipper.
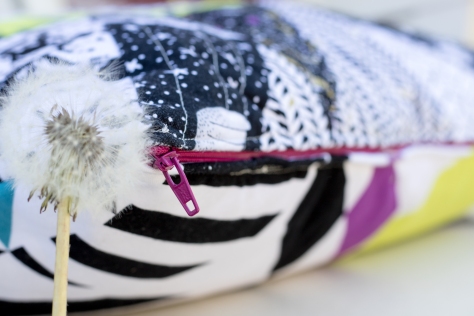 I love how this magenta zipper I had on hand coordinates with the pink from the Wound Up print. Perrrrfect. I do need quite a bit of practice with sewing zippers, but we won’t focus on the wobbles and such. The pillow was well received and lives happily on our couch. Now I just need to make about 5 more to cover the rest of our *cough-cough-ugly-cough* couch pillows, and then redo our living room decor to match our more modern design aesthetic. All in good time, right? (haha laugh with me here).
 I did enjoy making this pillow, though, and I’m happy I can finally say I’ve sewn something for my husband. Today is our 10th wedding anniversary, too, so it seems fitting that I share this true love pillow gift!
 The first spot that seemed like it could potentially work was the shaded side of a cafe. The dark blue-grey surface first attracted my attention, and the fact that it was in full shade was a big plus. However, it seemed flat. Above you can see try #1. I did a full photo shoot here, just in case I didn’t find anything better. Fortunately my nearly 5 year old son was asleep in the car, and my 2 year old was content to watch from his carseat. After the shoot, I drove around a bit more seeing if I could find a better spot.
 The second spot I tried was a rusted metal shed in a back parking lot, which I spied while turning around to get back to the main road after my first attempt. This was a bit more of the urban feel I was looking for, but still a bit flat. A bit of graffiti or added interest would have made this potentially a winner, but still, I felt there had to be a better spot. While running back and forth from the shed to the trunk of my car, I spotted the back of a red brick building. The big concrete slabs and tall seeded dandelions are what attracted my attention most. Rather than move my car again, I simply carried everything the extra 50 feet to this next, winning location and had at it!
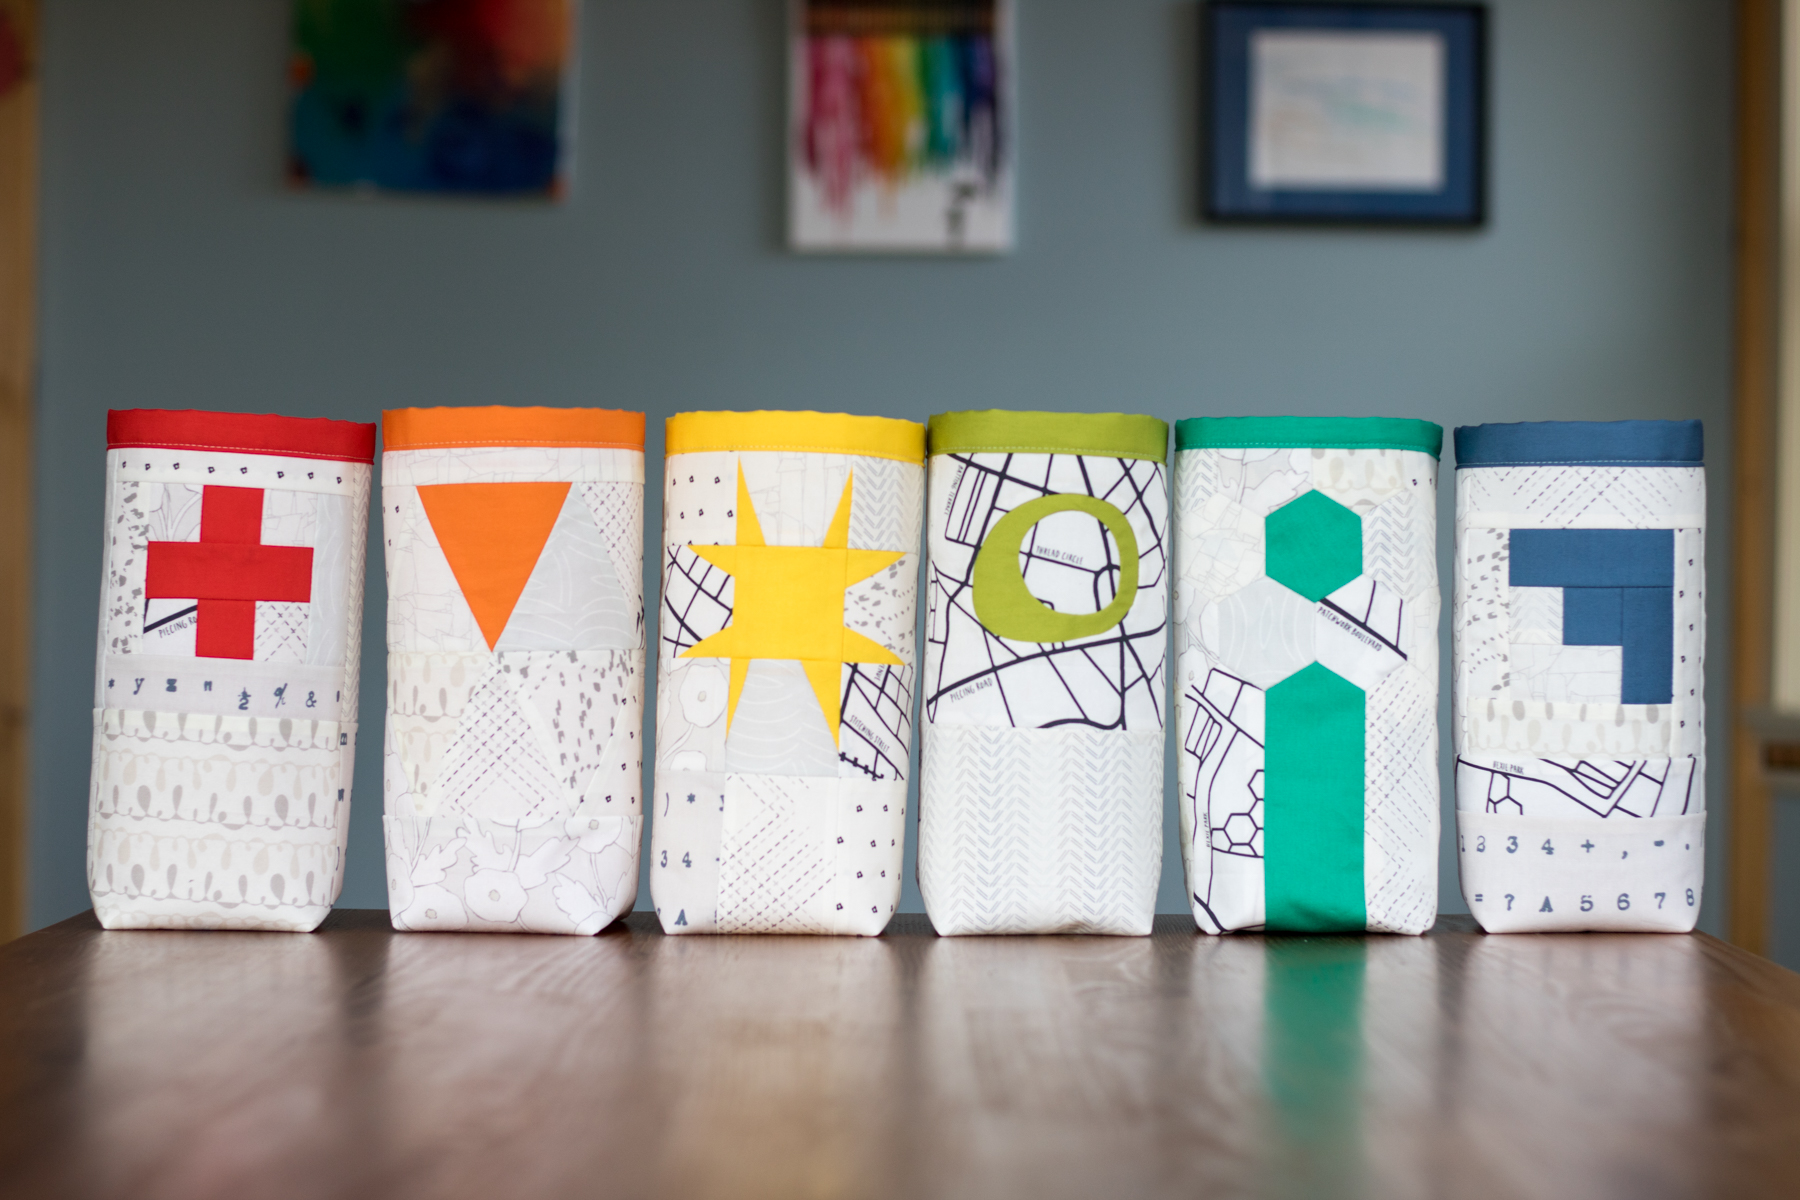
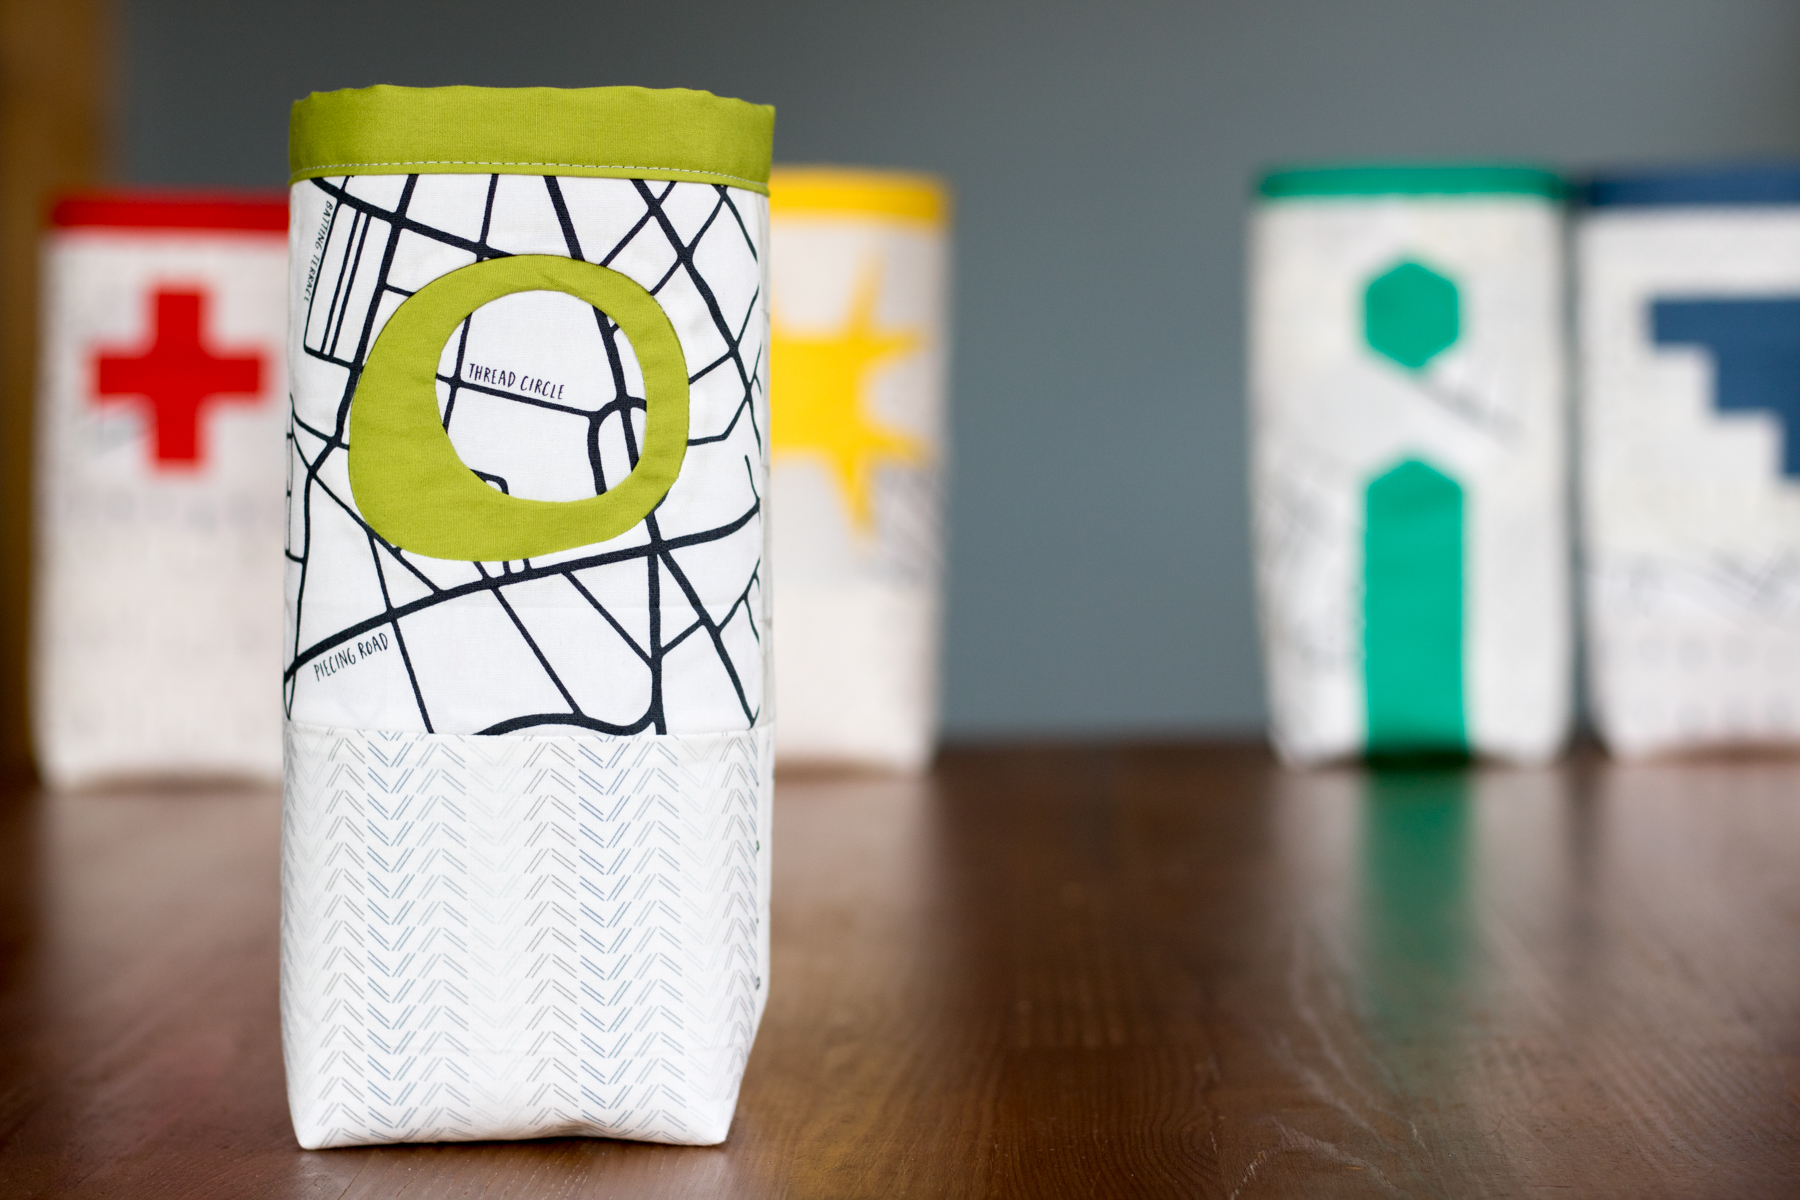
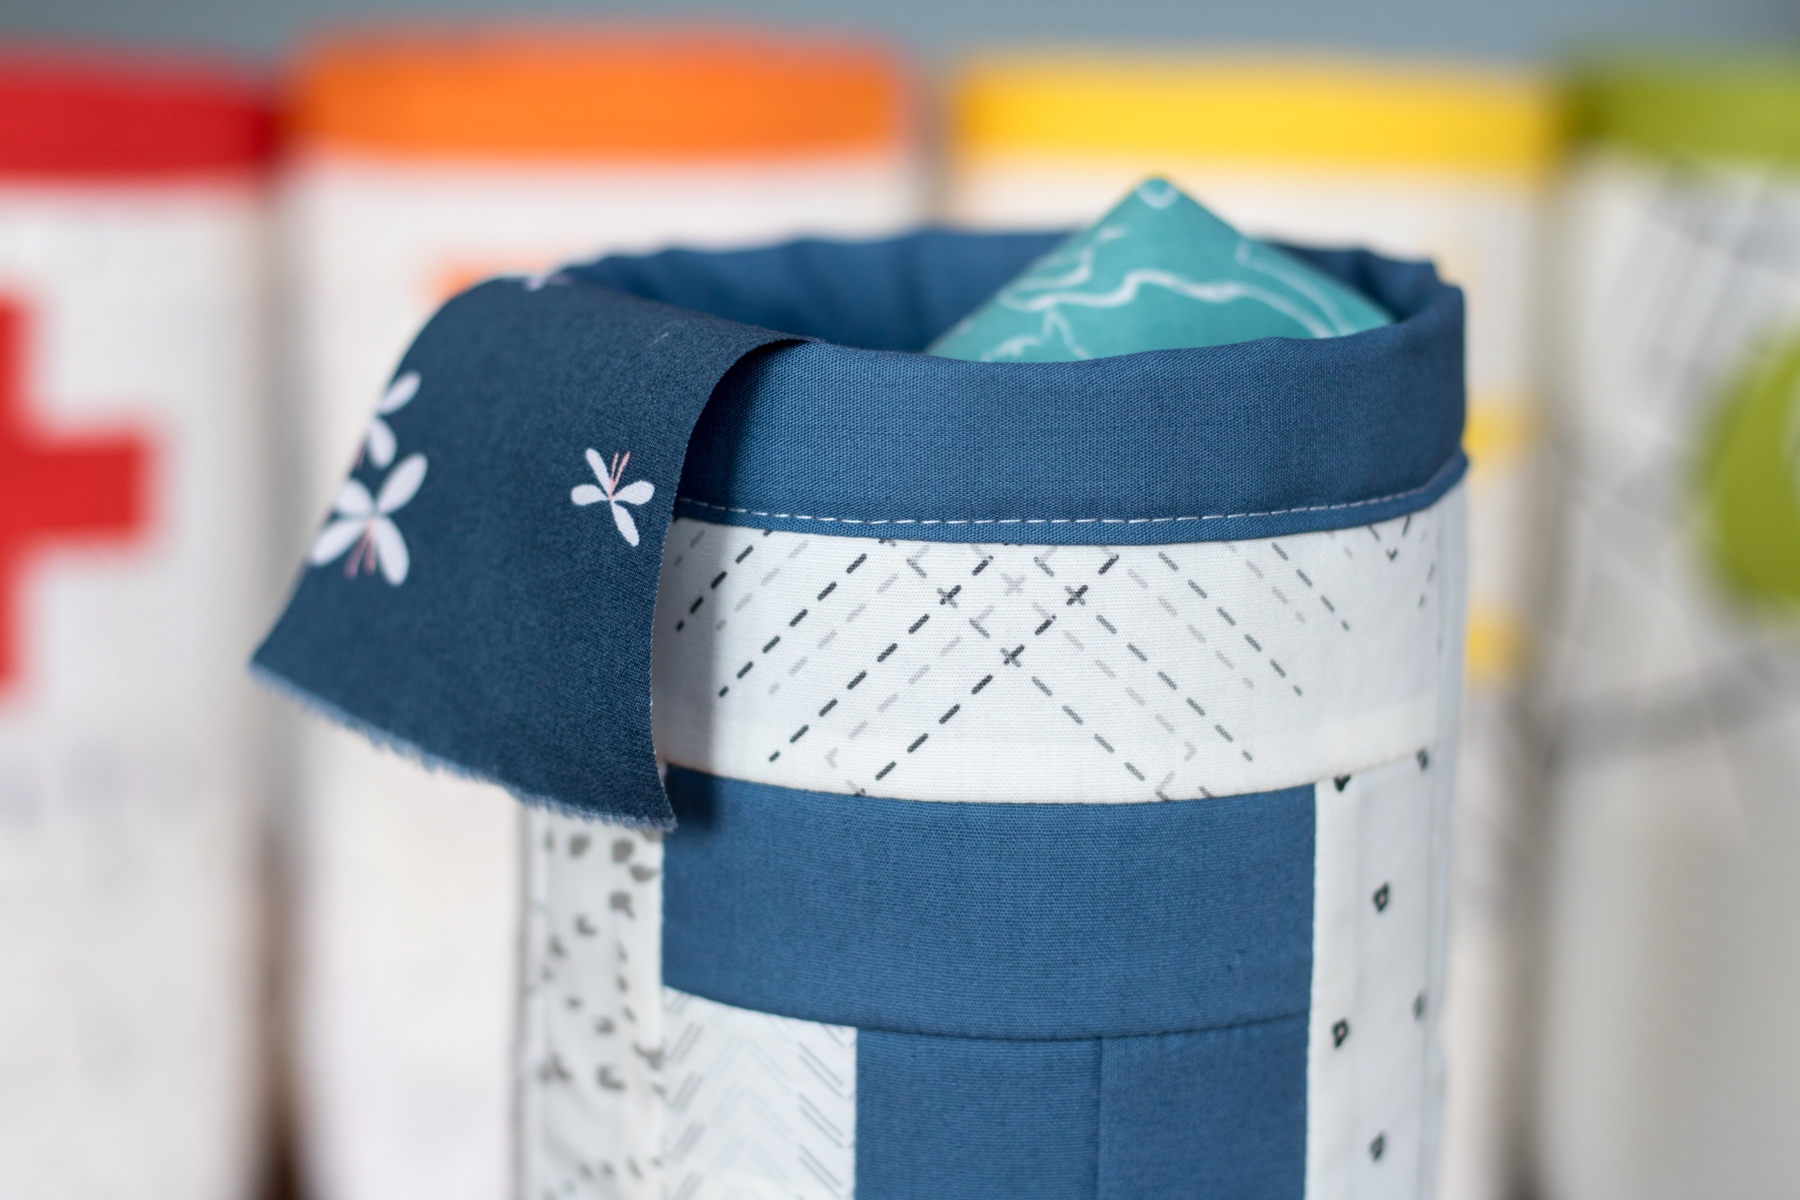
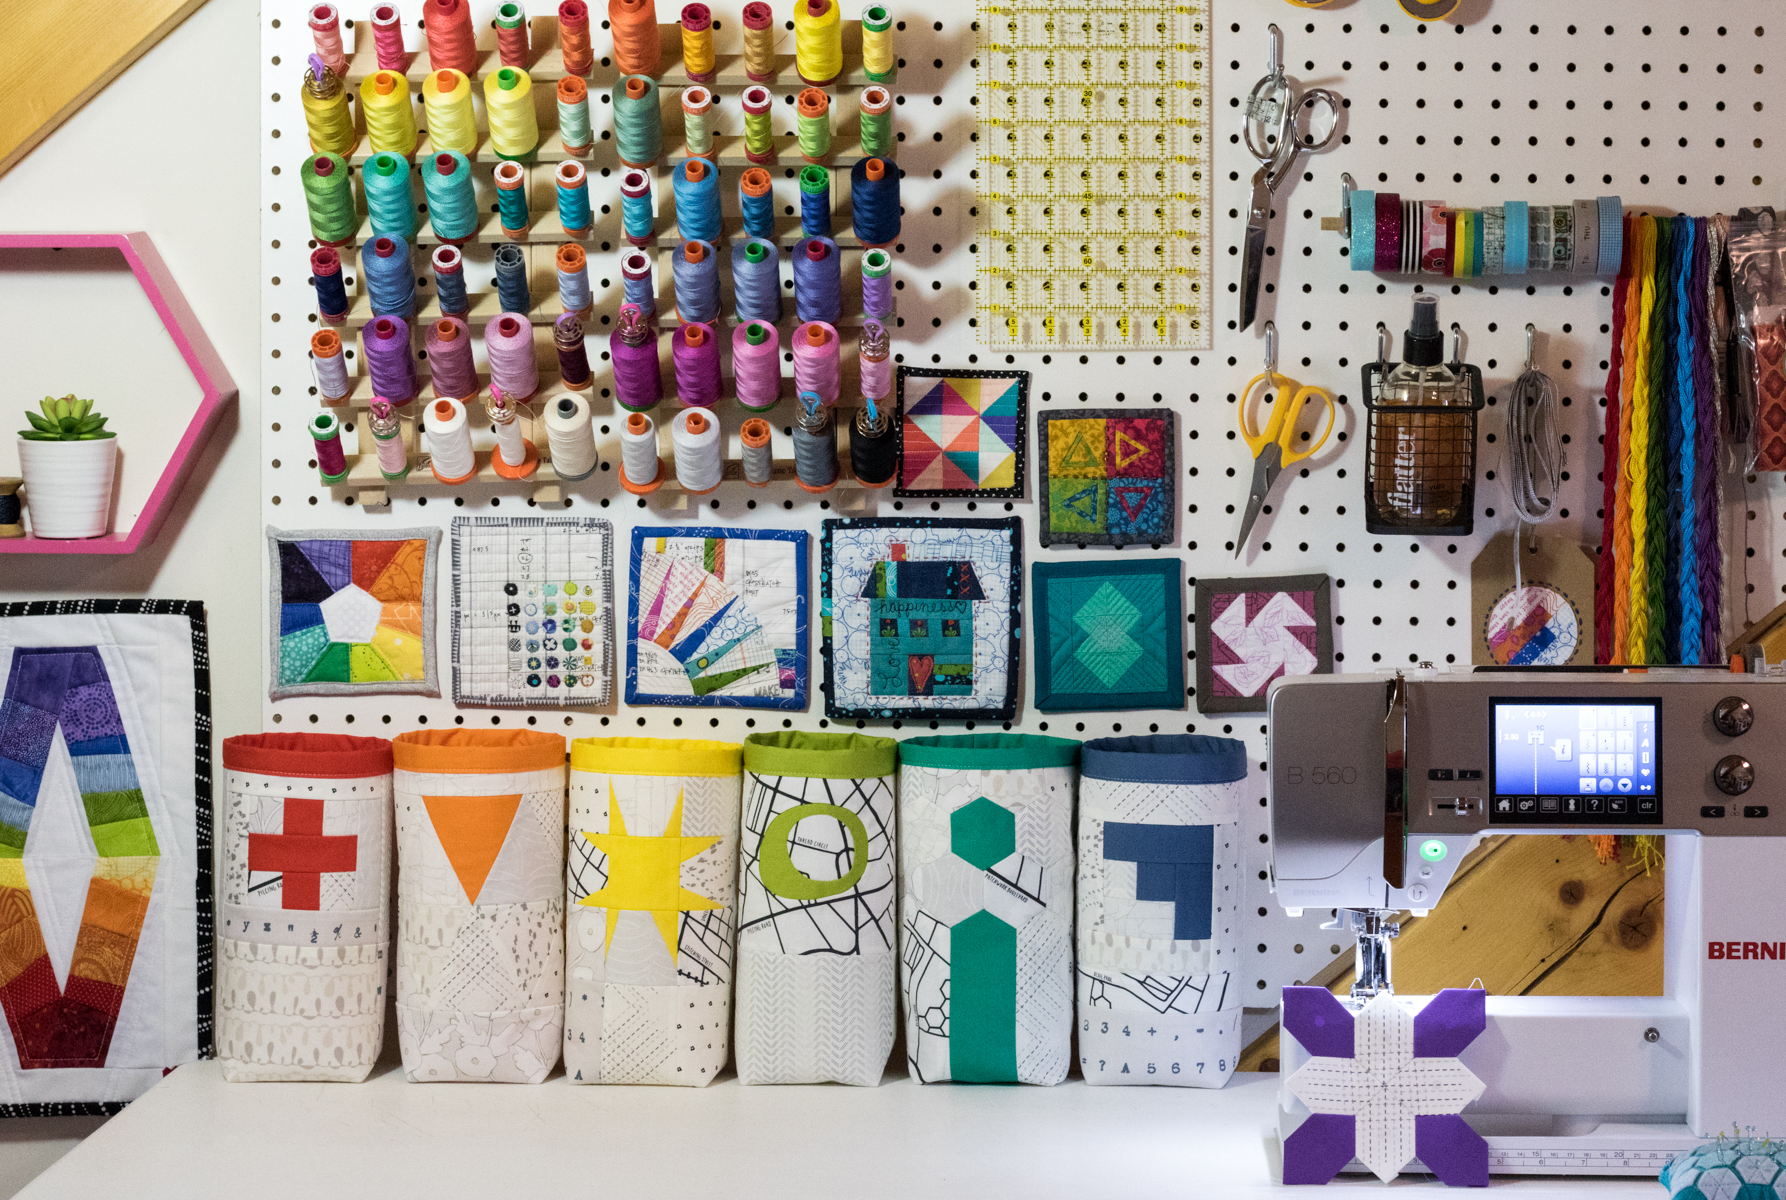
 As I mentioned in my post a few week ago, the list of use ideas for this tall and skinny fabric bin just keeps growing. From sorting tiny fabric scraps to housing your favorite adult beverage bottle, the sky’s the limit.
 Today I’m also sharing one such use over on
  Head on over to the


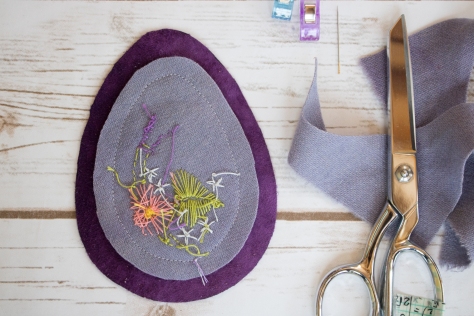
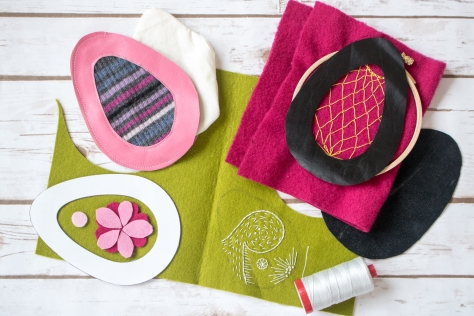
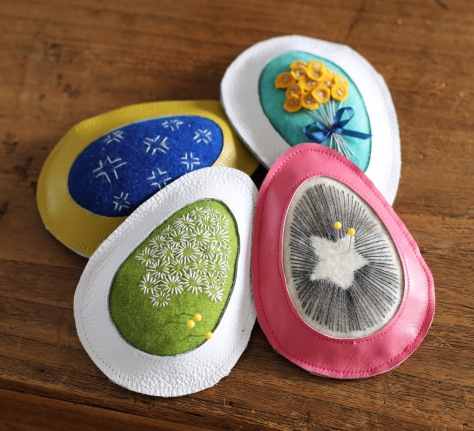 In this tutorial we give everyone some guidelines but the emphasis is on PLAY and MAKING THIS PROJECT YOUR OWN. Don’t celebrate Easter? No biggie, make a similar pincushion in another shape. We will be following on Instagram so please tag your makes
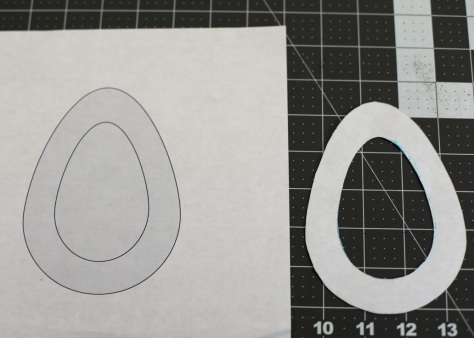 Print the
 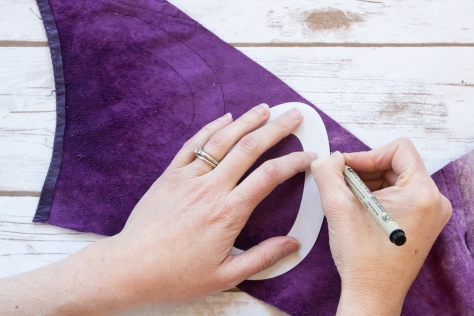 Trace the template onto the wrong side of the leather, marking out two eggs–one with only the outline and one with both the inner and outer lines drawn.
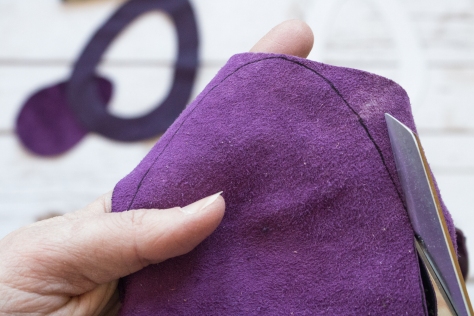 Carefully cut along the marked lines, remembering to cut one piece along only the outer egg outline and cut the other piece along both the inner and outer egg outlines.
 Set your leather pieces aside.
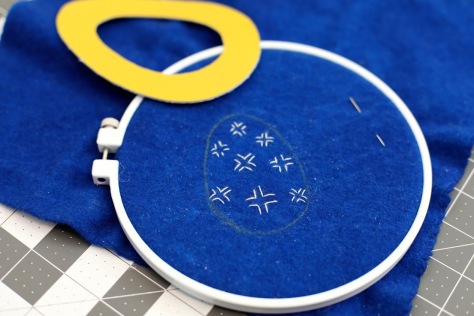 Using chalk or water soluble marker, trace the inner egg outline onto your embroidery surface (felt, velvet, jeans, etc) so you will know the limitations of your embroidery design.
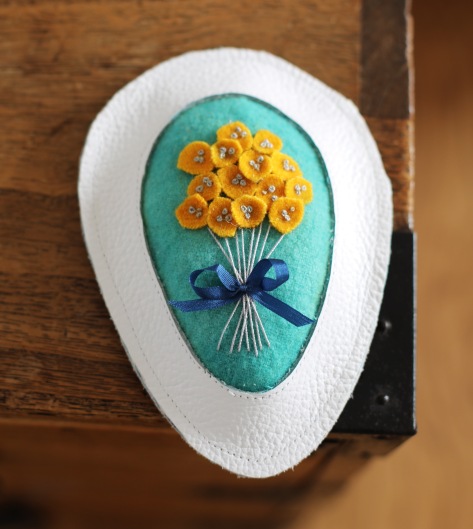
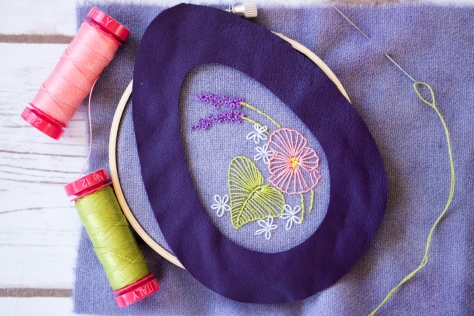 Adorn at your heart’s desire with embroidery, applique, etc. You are welcome to copy our experiments but please feel free to try your own ideas.
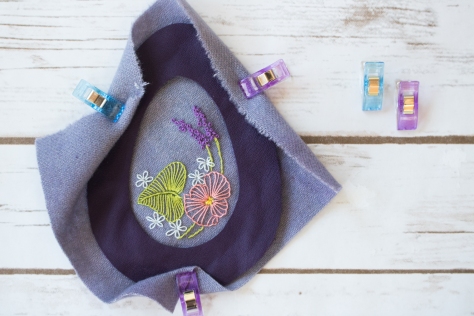 Align your embroidered material so that the embellishments fit within the window of your leather upper (the egg with the hole cut out of the middle).
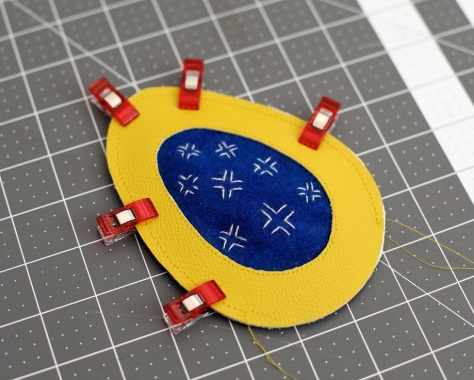
 Secure the right side of your embroidery to the wrong side of your leather upper with double sided tape, glue, clips, or other method.
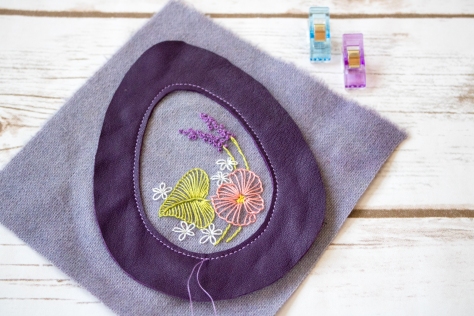
 Then, using a ¼ or ⅛ inch seam allowance, top stitch the two together along the inner egg as shown.
 Finally, if possible, trim the seam allowance of your embroidered material carefully about ½” away from the stitched line so that it remains easily inside the outer margins of the egg.
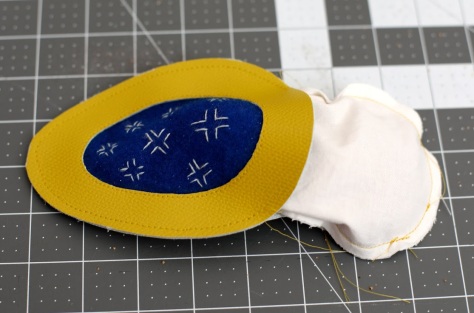
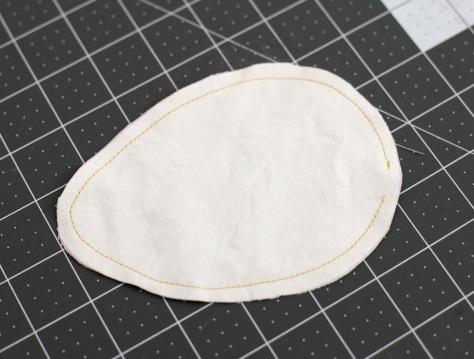 Using only the outer margin of your Egg Template, trace and cut two pieces of muslin. Sew the two pieces together using a ¼ inch seam allowance, leaving a small opening to use for filling.

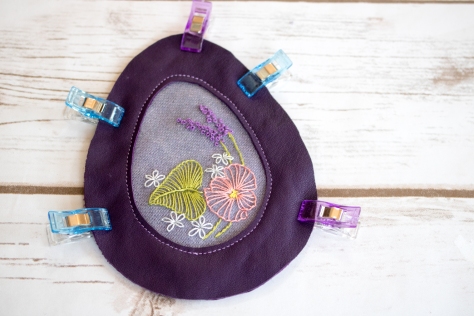
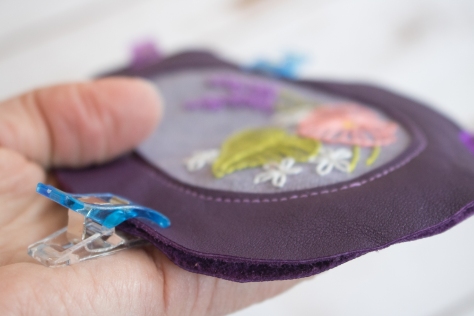
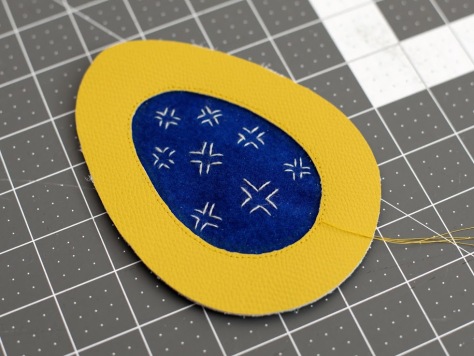
 Place the two leather egg pieces wrong sides together and secure with clips. (Note that pinning will create visible holes in the leather–use clips!) Sew around the outer margin of the egg using a ¼ seam allowance, leaving an opening at least 3 inches long unsewn.
 Stuff your filled and fully closed inner pincushion through this opening. Ensuring the inner pincushion remains entirely inside, top stitch the remaining way around the outer edge of the egg.
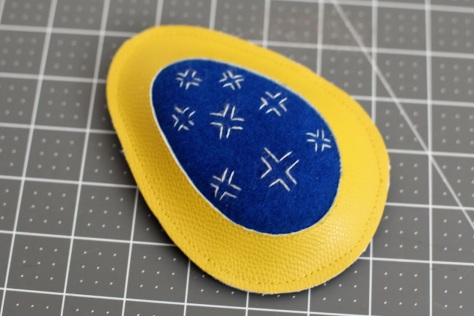 Thread the top threads to the back of the piece, tie all loose ends together and trim or bury.


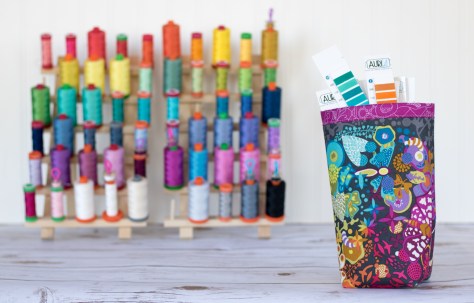
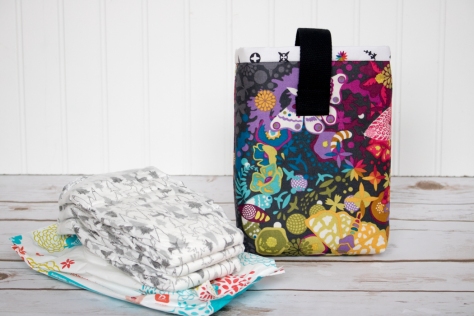 I made this
 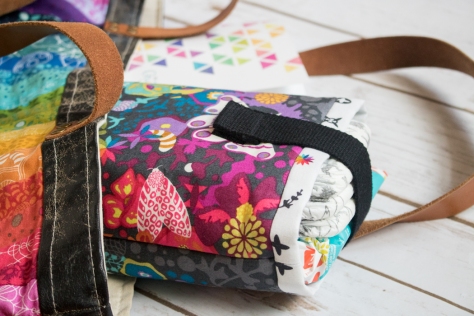 I used my all time favorite
  Of course I had to plan it so that the rainbow star from Artifact was visible right on the top. I should have given myself a tiny bit more space in that seam, but I’m not losing sleep over it. It’s gorgeous anyway!
 Now instead of having a purse filled with diapers and wipes floating every which way, I can have a beautiful and function space to store them compactly, not only making the inside of my purse a bit more organized, but also making it easy for me to visually check that I have a diaper for my little one before I head out!
 Since pens are another item I’m often digging for in the chaos within my gorgeous bag, I decided to store two of my favorite micron pens tucked in the corner of the diaper pouch, so that they are easily found when I think of something to add to my
  This pouch also perfectly coordinates with the amazing Alison Glass fabric bag my husband bought me for my birthday last year, made by the ever talented