Category Archives: Sponsored Post

Simple Zipper Bag Sew Along with Fat Quarter Shop

The school year is winding down, which means teachers’ gifts are at the forefront of my mind (along with excitement–and trepidation!–at the prospect of summer adventure day trips with all three kids). When Fat Quarter Shop invited me to join this Simper Zipper Bag Sew Along, I thought it would be a perfect teacher’s gift project. I stitched up three of the large zipper bags, added some chocolate and a personalized thank you note from my 3 year old son, and viola! Perfect heartfelt teachers’ gifts!

fqs simple zipper pouch teacher giftThese zipper bags are SO easy to make, and Fat Quarter Shop has a very clear instructional video tutorial that you can find here:

The construction of the bags is brilliant, since the lining and the outer panels are quilted together and then simply sewn together and bound–so easy! I definitely will be going back to this pattern for future gifts, and I’m thinking of making a few more to stash coloring supplies for my kids in my purse for when extra entertainment is needed.

simple zipper pouch fat quarter shop teacher gifts
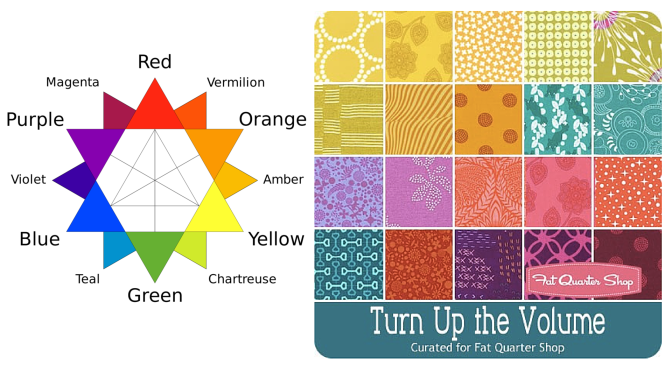
This is admittedly the first time I’ve made handmade teachers’ gifts, but my son’s preschool teachers have done such a fabulous job supporting and guiding him this year, that I felt I really wanted to express my gratitude. When I asked Max if he had any idea what colors might be his teachers’ favorites, he said, “Alllllll the colors!” That’s my boy. I figured I probably couldn’t go wrong with a rainbow-esque bag, especially for preschool teachers.

fqs simple zipper pouch teacher gift
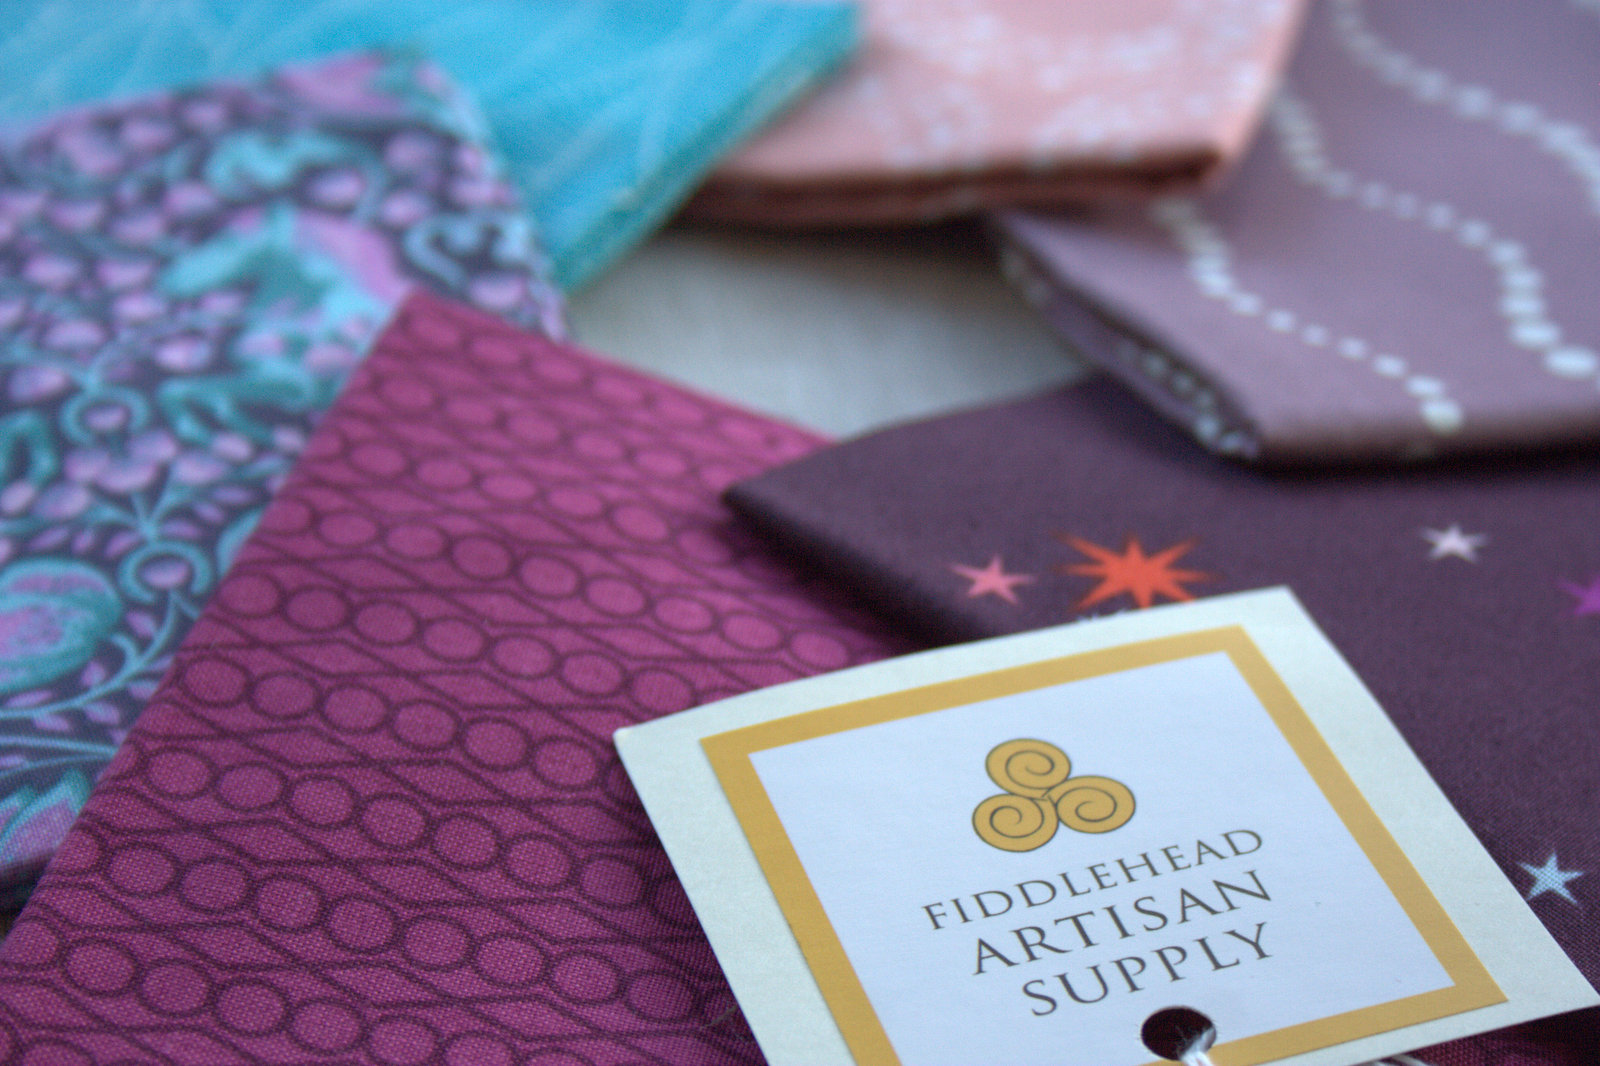
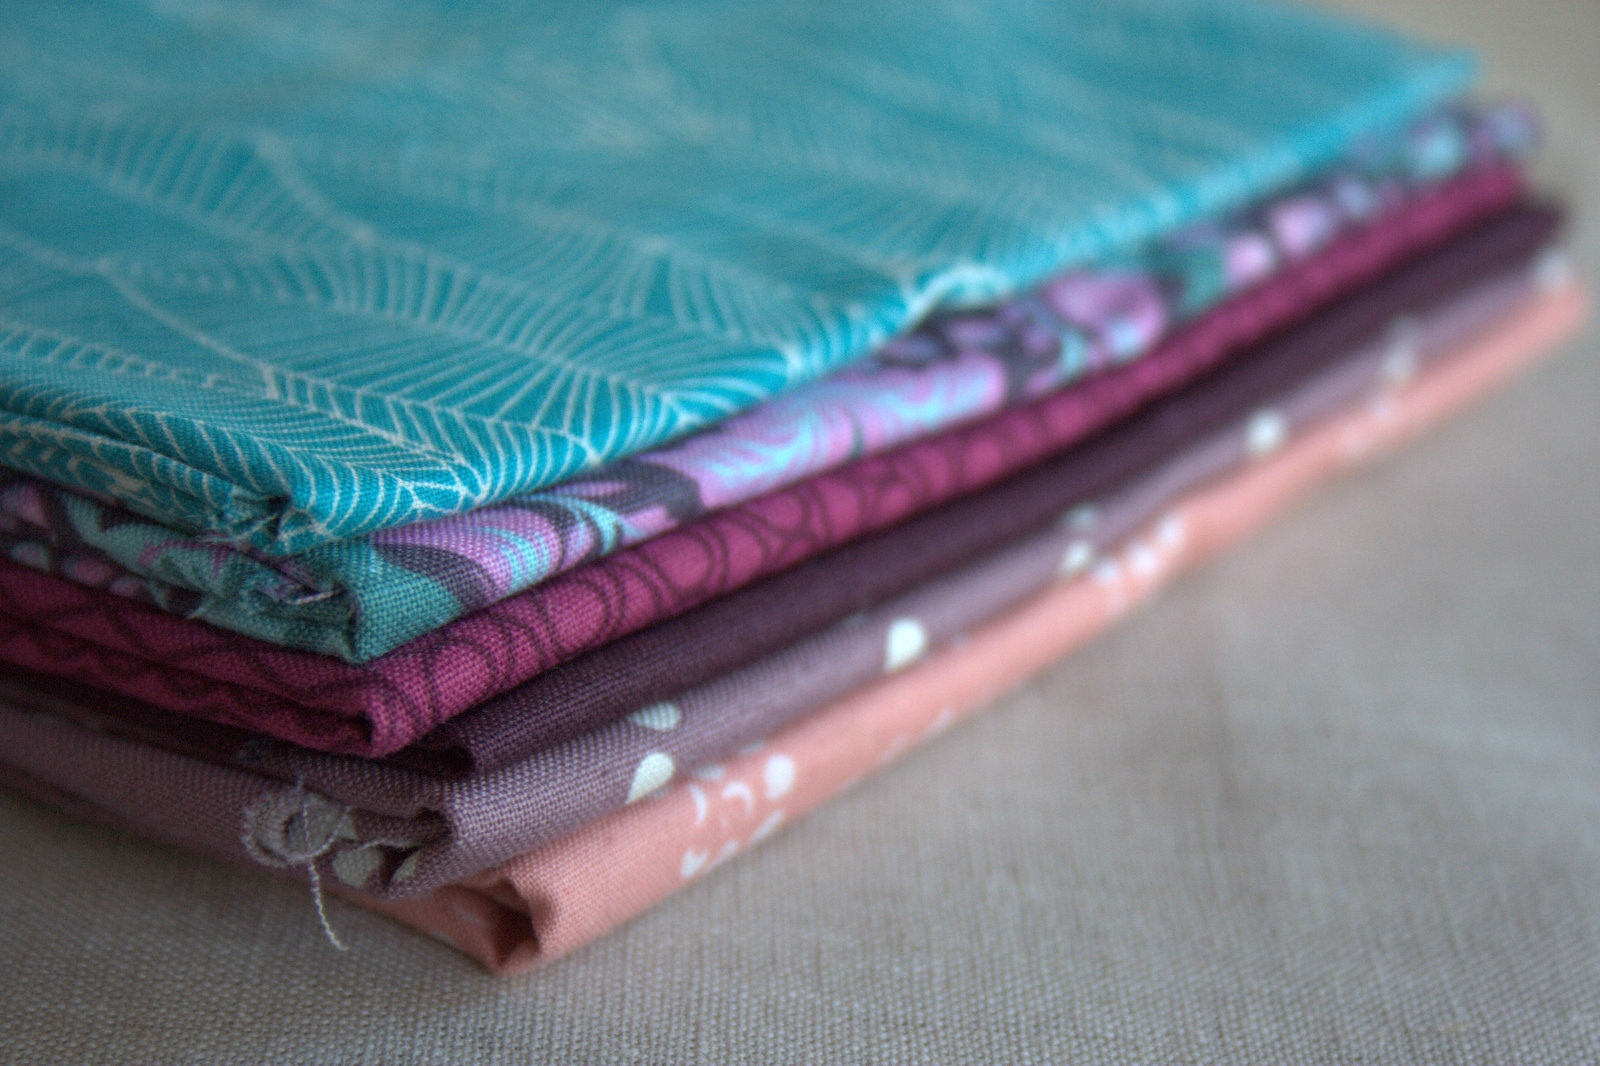
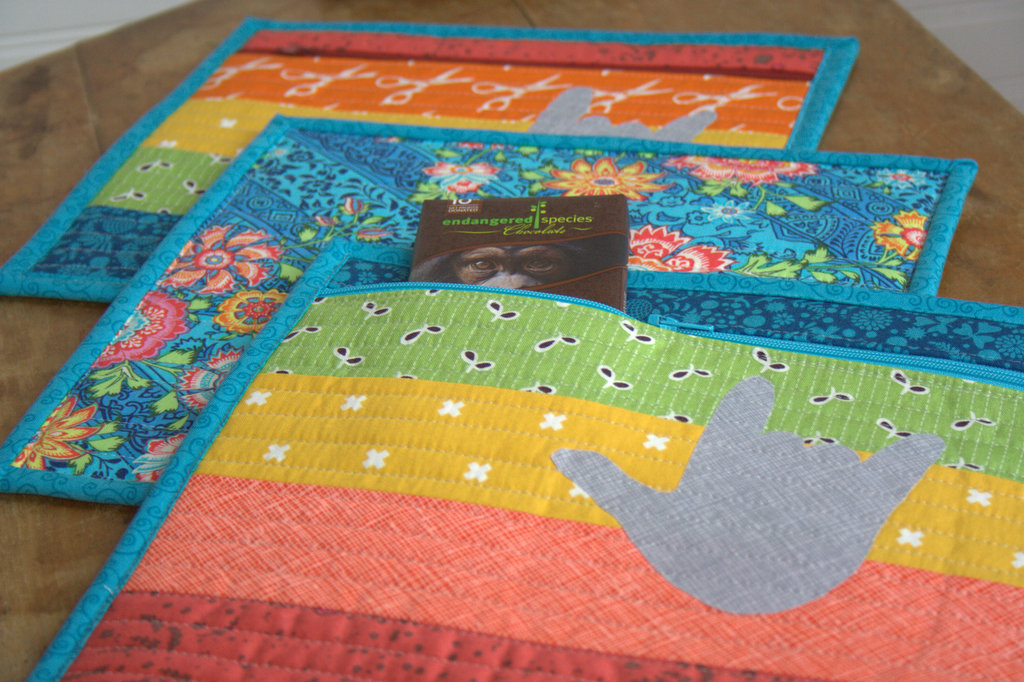
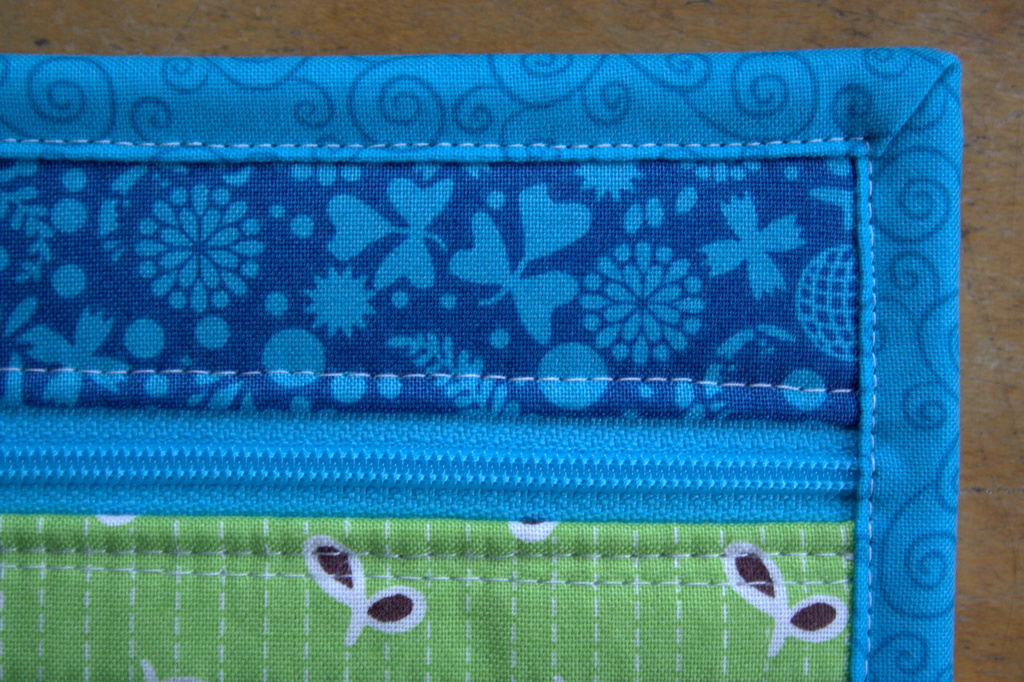
I decided on a gorgeous Amy Butler fabric from my stash for the backings and then used it to pull a coordinating rainbow of some of my favorite fabrics. You can see Alison Glass, Carolyn Friedlander, Cotton + Steel–they’re all there!

fqs simple zipper pouch teacher giftI chose to use strips of fabric instead of mini charm squares, and arranged the fabrics in a way that worked with the three zippers I had on hand, making each bag unique while still having the same general aesthetic. I used the edge of my walking foot to space horizontal straight line quilting on the front, using my go-to thread, 50wt Aurifil 2600-Dove. It blended perfectly with the “I love you” appliquéd hand while providing some subtle texture and interest to the rainbow fabrics.

fqs simple zipper pouch teacher gift
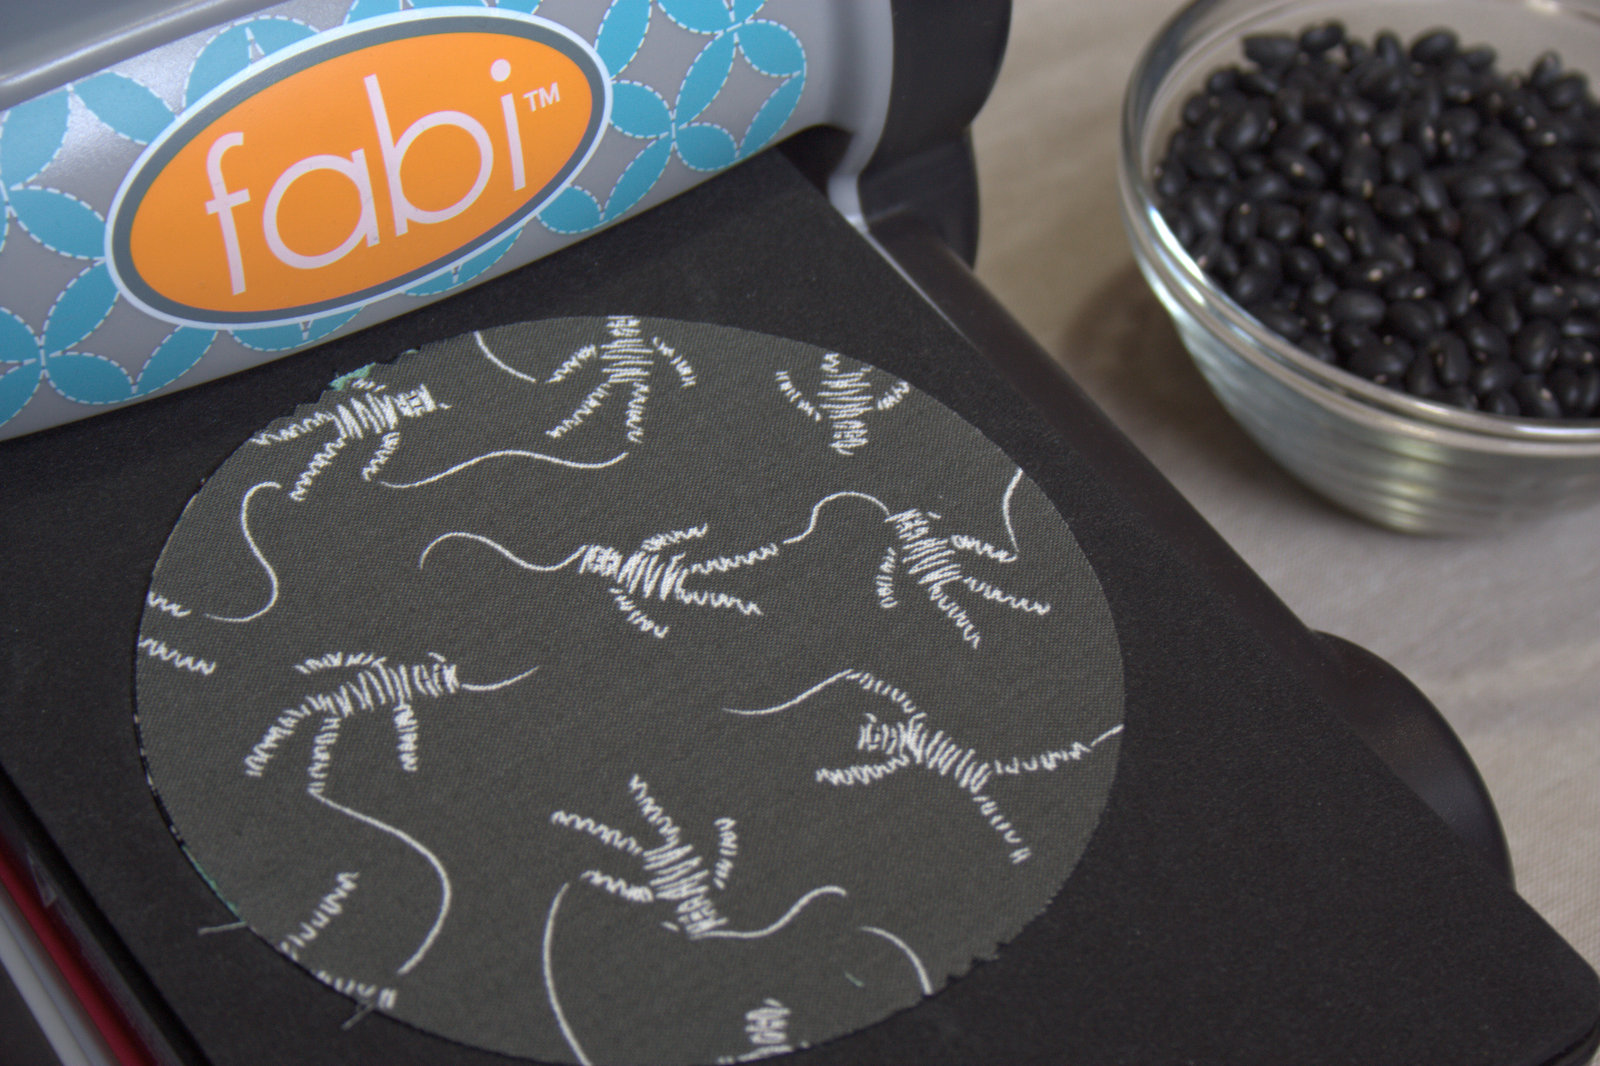
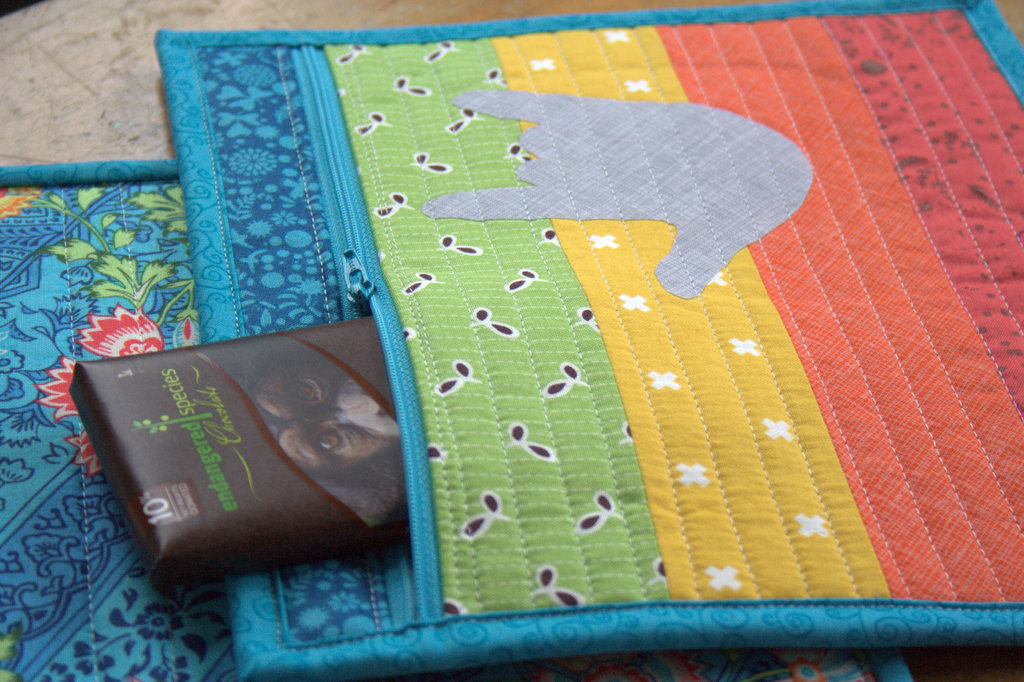
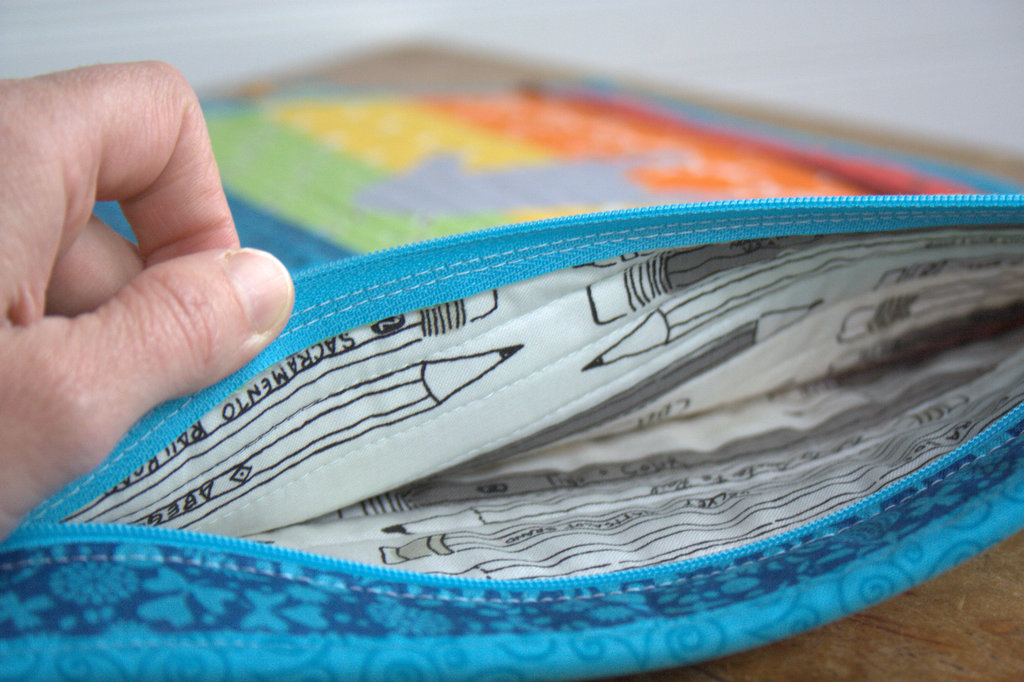
I lined my bag with an appropriate Cotton + Steel print, Study Hall in Black and White from their Black and White Collection.

fqs simple zipper bag teacher giftI love the neat detailing that results with the construction of this bag. Sewing in the zipper is made SO easy, and the top stitching frames it nicely.

fqs simple zipper pouch teacher gift

More about that “I love you”; I think the American Sign Language (ASL) sign for “I love you” is known pretty universally, but in case you’re not familiar with it, the appliqué on each pouch is a tracing of my son’s hand making the “I love you” sign. My son is hard of hearing and wears hearing aids (when we can convince him to keep them in), and so he has a communication facilitator in addition to his two amazing teachers. His communication facilitator was fantastic, signing to him all day to increase exposure and familiarity to sign, since we are all trying to learn ASL as a family, and ensuring he heard directions during the day. The entire preschool class learned some sign language throughout the year, and the three teachers worked so well together to help ALL of the children in class have the best experience possible. When Max gave the gifts to his teachers, the “I love you” appliqué of Max’s hand was met with “awww” and a few misty eyes. I think the zipper bags were a win!

How would you use one of these Simple Zipper Bags? Be sure to visit Fat Quarter Shop and the other bloggers’ posts to see their creative takes on the pattern:

Erin from Why Not Sew?
Kitty from Night Quilter <—That’s me!
Leanne from She Can Quilt
Vanessa from Lella Boutique
Amanda from Jedi Craft Girl
Sherri from A Quilting Life
Cristy from Love You Sew
Leslie from Seasoned Homemaker
Tiffany from Tiny Seamstress


Have fun making your zipper bags!

Color Realizations {& Giveaway!}

Many makers have a signature style, a color palette they visit again and again, or perhaps an aesthetic that just makes their heart sing and their makes shine. We all know how much I love a rainbow, but recently I’ve felt the need to dive into other color combinations and experiment elsewhere. I’ve tried color combinations that have felt way out of my comfort zone, played with more monochromatic palettes, and have experimented with predetermined colors (paired with improv, no less!). While I do love the makes I’ve created through these experiments, I’ve realized that I truly love a rainbow gradient, but more specifically, I’m drawn strongly to tertiary colors.

color star tertiary wikipediaAs a refresher, the tertiary colors are the ones that fall between the primary and secondary colors, namely: Vermillion (red-orange), Amber (orange-yellow), Chartreuse (yellow-green, or lime), Teal (green-blue), Violet (blue-purple), and Magenta (purple-red). Thank you, Wikipedia for the great graphic! Even when a project isn’t a full rainbow spectrum, if it consists of tertiary colors it still makes my heart sing. Primaries? Not so much. Secondaries? Meh. Tertiaries? Oh, yesssss! All the colors? Even better!

I’ve decided that once a few last non-rainbow projects are completed, I am going to let go of my hesitancy to creating rainbow-everything. I will embrace my rainbow-loving self and create a rainbow-filled world! I have some really fun projects on the horizon and I can’t wait to share them with you!  Do you have a specific color combination that makes your heart sing and your eyes turn into hearts? Tell me about it in the comments and enter to win a great bundle of some of MY favorites!

Giveaway Time!

turn up the volume bundle for fat quarter shopToday’s giveaway is generously sponsored by the Fat Quarter Shop. When it was time to select the giveaway bundle for the month, this lovely Turn Up the Volume bundle curated by Rebecca Mae Designs caught my eye. Can you tell why? Tertiary colors!! It’s jam packed with vibrant, stash building tertiary colors. Now you have a chance to build your tertiary color stash in a big way (20 fat quarters-big… that’s 5 yards of fabric!).

To enter the giveaway today, let me know what colors you find yourself using again and again. Leave a comment and make sure I’m able to get ahold of you if you win.  If you’re a follower of Night Quilter, leave a second comment telling me how you follow for a second entry. Tell me how you follow Fat Quarter Shop (facebook, twitter, Instagramtheir blog Jolly Jabber, etc.) for a third entry.

This giveaway is open to US and international participants.  The giveaway will be open until Tuesday 5/10 at 8pm EST when I’ll select the winner randomly with random.org. Good luck! This giveaway is now closed. Congratulations to Delaine!!

Thanks again to the Fat Quarter Shop! Blog sponsors help me to keep this blog going by helping cover the costs of hosting, photography equipment, supplies, and of course time. Sweet, precious time. Many many thanks to all who support me!

Stash Building: Cotton Crates Subscription Box

Subscription services are all the rage these days, and who doesn’t love to receive packages in the mail? You can get boxes of stylish clothing in just your size (StitchFix), food ready to prepare healthy meals (Hello Fresh), science experiments ready for parents and kids to build together (TinkerCrate), wine curated to your tastes (Club W), and now fabric and sewing supplies, all mailed to your doorstep each month (Note, I’m not affiliates of any of these subscription boxes, simply stating one of many examples in each case). In the recent months, I’ve seen more and more fabric and sewing notions subscription boxes arise, so when Cotton Crates contacted me asking if I was interested in trying out a box in exchange for writing an honest review on my blog, I was intrigued. When they mentioned that the month’s box would contain 15 fat quarters of bright Riley Blake solids, I was sold. Full disclosure: Cotton Crates provided compensation in the form of product, a subscription box with fabric. All opinions expressed are my own. My excitement and heart eyes are also my own.

cotton crates subscription box fabricLet me tell you about my Cotton Crates experience. There’s something that comes from having a mystery box arriving in the mail that has a different feel than when fabric you specifically selected and purchased is delivered. Yes, any online fabric purchases arrive in your mailbox, but the cotton crates box held a bit of mystery that made the whole experience more exciting. My kids take turns getting the mail, and on this particular day it was my son Max’s turn. As soon as he opened the mailbox and saw the package he excitedly said, “Is it for me!?” I had to contain my glee when I said, “No, this one is for Mommy.”

cotton crates fabric subscription boxDuring the walk back to the house along our driveway, I was excitedly anticipating what I might see inside the box. Sure, I knew pretty specifically what it would contain, but still that excitement was there–specifically what colors would be included? What would it look like? Cotton Crates gives clues on social media (Instagram | Facebook) during the month to give you an idea of what types of fabric are included each month, but once you order it, it’s easy to keep it a surprise. Solids are such a versatile stash builder, since projects using all solids shine, and solids can also be a great compliment to the right print. In my humble opinion, one can never have too many solids in a stash.

cotton crates fabric subscription boxOpening the box was like opening a present, tissue paper, sticker, candy, and all.

cotton crates fabric subscription boxI love that Cotton Crates includes a card with a schedule of inspiration blog posts with projects you can make using the month’s box. You essentially have fabric and projects all in one box, with some candies, too, unless your kids grab them first!

cotton crates fabric subscription boxI captured the beauty of the fabrics, and then, true to my style, immediately put them into rainbow order.

cotton crates fabric subscription boxSigh… ahh, much better!

cotton crates fabric subscription boxI do have a thing for rainbows.

Now, how about some details? You can head over the the Cotton Crates website to read all about the subscription process, see or order previous boxes, and visit the blog for project ideas. Basically, the longer the time you subscribe, the cheaper the price you pay per box. For example, if you subscribe for one month, you pay $38 for the 12 (or in this case 15 solids) fat quarters, but if you subscribe for a full year, you only pay $34, which is a bit over $2.80 per fat quarter. I can definitely see the fun in fabric subscription services, and it is a great option for building a stash.

cotton crates fabric subscription boxMany thanks to Cotton Crates for the opportunity to try out their subscription box!

I’m linking up with Molli’s Sunday Stash since my solids rainbow grew in a beautiful way this week.

Stash Building: Low Volume Loves & 3K IG Giveaway

I recently hit a pretty big milestone over on Instagram when I surpassed 3K followers, so to help celebrate that (and the fact that it was my birthday yesterday), I’m hosting a pretty epic giveaway over on Instagram. If you haven’t seen it yet, check out my feed @nightquilter and enter to win! The giveaway will close tomorrow (Monday) night at 9pm EST.

Giveaway nightquilter 3K IGI figured I couldn’t go wrong giving away some of my all-time favorite fabrics and threads, and I’m so very grateful to my sponsors for donating the prizes. The prize package contains (from left to right): a fat quarter bundle of Endpaper from Sun Prints 2016 by Alison Glass (Andover) donated by Fiddlehead Artisan Supply; a low volume bundle of 14 gorgeous quilting cottons curated my yours truly donated by Fat Quarter Shop, and the Simply Color by Vanessa Christensen large spool set of 50wt Aurifil thread donated by Alex Veronelli at Aurifil. Many, many thanks!!

fat quarter shop low volume bundleFat Quarter Shop also sent a low volume bundle for me to keep since I curated it, so I’m super excited to be restocking my low volumes! The low volume bundle is available here. Go check it out, and if you love low volumes as much as I do, I hereby give you permission to treat yourself!

low volume bundle fat quarter shop nightquilterI included a little bit of everything in this bundle, including Cotton + Steel basics, Modern Background Paper, Lizzy House mini pearl bracelets, prints from Anna Maria Horner’s newest line, a print from Wonderland by Katarina Rocella, those adorable scissors from Maker Make by Art Gallery fabrics, and more. You’ll have to visit the post on Fat Quarter Shop to see the full list of included fabrics, but I can tell you I’m loving every one and already plotting the next low volume + rainbow Alison Glass fabrics project (are you surprised?).

As always, I’ll be sure to show you once I start putting these fabrics to use. In the meantime, head over to Instagram to enter for a chance to win your very own stash building prize package! I apologize to those of you who don’t have Instagram, but there’s sure to be another great giveaway here on the blog, too. Surpassing 3 thousand followers needs some celebrating!

I’m linking up with Molli’s Sunday Stash, since my low volume stash grew in a fabulous way this week, and one lucky follower will be REALLY building his/her stash soon! Best of luck!

Eye Spy Something New

My recent experimentation with improv curves has got me excitedly skipping down the path of curved sewing, eagerly trying every rendition of curves I can find. Mastering curves is one of my big goals for the year, so I’m happily nurturing this skill with every try.

eye spy quilt beginningsI have collected quite a sweet stack of fabric scraps featuring colorful creatures and items (many thanks to my most generous fellow quilters who sent scraps!), and with Allison from Campbell Soup Diary constantly prodding encouraging me to try freezer paper appliqué, I figured it was finally time. Thus begins another new project–an eye spy quilt for my kids involving inset circles, drunkards path blocks, and any other curves I can find.

inset circles with sizzix and freezer paper eye spySince I don’t have an actual mathematical compass in my house (gasp–appalling, I know!), I decided to use my Sizzix die cutting machine to help with cutting circles, since of course the eye spy quilt will need to consist of curves of all kinds. I only have the Sizzix BigZ L die that includes 2″, 3″, and 4″ circles together, so I could use it to cut the freezer paper but not the fabric. You can be sure the solo 2 1/2″ and 3 1/2″ circle dies will be in my next order! I grabbed some freezer paper, my washable school glue with Fineline tip, some appliqué scissors, my Sizzix fabi and circles and drunkards path dies and some fun fabrics.

inset circles with sizzix and freezer paper eye spyI used a combination of Allison’s fabulous tutorial for a mini drunkards path block and the techniques used in the six-minute circle and other improv sewing I’ve been trying. I basically followed Allison’s tutorial, using the Sizzix to cut the circle in the freezer paper, and ironing the freezer paper to the wrong side of my background square to get started.

inset circles with sizzix and freezer paper eye spyI clipped the curves and pressed them out around the freezer paper, actually gluing them a bit to the paper so that they would stay pressed back better (brilliant tip, Allison!). Then I diverted from Allison’s tutorial and switched into “six-minute circle mode”, running a bead of glue around the tabs.

inset circles with sizzix and freezer paper eye spyI then positioned the circle over the strawberry piece, pressing it with an iron to heat set the glue.

inset circles with sizzix and freezer paper eye spyOnce the tabs were heat set and secure, I gently pulled the background fabric up and slowly stitched around the inside edge of that freezer paper circle using a zipper foot. That way, these inset circles are sewn and secure, but the stitches are still hidden like with actual curved piecing.

inset circles with sizzix and freezer paper eye spyThen I trimmed the excess fabric from around the strawberry, creating a 1/4″ seam allowance. I LOVE the outcome! I also think this took even less than six minutes, which is kind of amazing in my book. Only a couple hundred more squares to go!

inset circles with sizzix and freezer paper eye spyI don’t have a real firm plan for this quilt yet, other than I’m aiming to use 4″ and 8″ and possibly some 2″ blocks and aim for a smooth rainbow gradient as well as the eye spy fun within the blocks. I have not yet decided whether I will include squares as well as circles, or if I will keep this a purely curvy quilt. What would you do?

drunkards path block beginnings sizzixAs you can see, I did give one drunkards path block a go since I have a drunkards path die that finishes at 4″, but I clearly need more practice with actual curved piecing. It ended up a bit wonky and smaller than 4 1/2″ (for visual reference, the strawberry and cat blocks are about 5 or 5 1/2″ square since I plan to trim them down at the end and I wanted some wiggle room). Next time, I’ll try glue basting for the drunkards path block, too, I think. It’s worth a try!

I’m linking up with Lorna at Let’s Be Social, since I’ve added yet another project to my works in progress pile. After this one, I’m going to focus on finishing what I’ve started for a while!

Lucky Love St. Patrick’s Day Reversible Table Runner {Sizzix Tutorial}

Today I’m excited to be sharing another tutorial on the Sizzix blog, this time for a really sharp-looking table runner (if I do say so myself)! I’m typically not one to make seasonal decor, since the seasons come and go so quickly, but this one is reversible so I can use it all year long. Ever since I first cut wool felt with the Sizzix, I’ve been wanting to do a wool felt applique project, and once I realized I could make four-leaf clovers using my Primitive hearts die, it was game on. I backed the table runner in one of my all time favorite Alison Glass neutrals, Botany in Taupe from Ex Libris, which I certainly won’t mind looking at for the non-St. Patrick’s Day part of the year!

sizzix st patricks day reversible table runner tutorial Since I love to make the most of the tools I have, this project is also exciting since it’s the third unique project I’ve made using the Primitive hearts #3 die from Sizzix. You may remember my Growing Tree Wall hanging and Valentine’s Day Garland tutorials, the first two projects I made using this die. You know it’s a winner when there seems to be an endless stream of projects that can be made out of a certain tool.

TUTORIAL- St Patrick's Day Table Runner sizzixI try to make my tutorials helpful to the entire sewing and quilting world, even if you don’t yet have a Sizzix or other die cutting machine, and this one is no different.

sizzix st patricks day reversible table runner tutorial blanket stitch appliqueIn this tutorial, I share:

  • a neat trick for making four leaf clovers out a heart die (you could use it with a heart hole-punch, too, if you have that);
  • tips on accurate straight-line quilting without having to physically mark your quilt; and,
  • how to blanket stitch.

Head on over to the Sizzix blog to read the full tutorial, and I hope you enjoy!

Do you make seasonal projects? How and where do you store them when they are off season? I may need to take some notes if this keeps up!

I’m linking up with Tips & Tutorials Tuesday with Stephanie at Late Night Quilter.

Lucy Boston Patchwork of the Crosses EPP {Sizzix Tutorial}

Today I’m excited to be blogging over on the Sizzix blog, sharing a tutorial on how to piece the iconic Lucy Boston Patchwork of the Crosses (PoTC) block. Lucy Boston blocks allow for endless meticulous cutting fun, the most kickassiduously planned pattern meet-ups, and of course lots of color play. (Translation: You can fussy cut your heart out and the blocks will look even more amazing the more meticulous you get).  Since Lucy Boston blocks are English Paper Pieced (EPP), they are also great on-the-go projects. If you’re looking for a new EPP project but are getting a bit tired of hexies, I definitely would recommend Lucy Boston.

lucy boston patchwork of the crosses epp tutorial sizzixAs you can see, I really stretched out of my color combination comfort zone with this project. With the Tula Pink Moonshine print as my focal fabric, I went wild with the blue, mustardy-yellow, and a pop of red palette. With my favorite Essex yarn dyed linen in charcoal as the background fabric, I’m really liking the way this is headed!

lucy boston patchwork of the crosses epp tutorial sizzixIn my tutorial over on the Sizzix blog, I show how to:

  • make a fussy cutting planning template with the Sizzix Honeycombs and Squares die (so you don’t need to buy the acrylic template, too)
  • Find pattern repeats in fabric
  • Fussy cut using a Sizzix die cutting machine
  • Assemble the Lucy Boston PoTC block
  • I share tips on matching pattern meet-ups after fussy cutting, and more!

lucy boston patchwork of the crosses epp tutorial sizzixMany of these tips would be helpful to anyone wanting to create a Lucy Boston block, with or without a die cutting machine.

sizzix lucy boston tutorialSo head on over to the Sizzix blog and have a look at what I’ve been working on over the past few months!

I’m planning to turn my Lucy Boston blocks into a vertical wall hanging with three blocks and red accent squares. Stay tuned…

For other color combination inspiration, you can see another Lucy Boston PoTC project I did here, or peruse the Instagram feed of Rhea at Alewives Fabrics (one of my fav Maine quilt shops)–she’s a Lucy Boston fanatic!

I’m linking up with Design Wall Monday and tomorrow I’ll link to Stephanie’s Tips and Tutorials Tuesday. Check ’em out!

Also, just a reminder that today is the last day to enter the giveaway sponsored by Fat Quarter Shop! Comment on THIS post to enter!

Sponsor Introduction: Fat Quarter Shop {& a Giveaway}

I’m excited to kick off the week by announcing a new sponsor: Fat Quarter Shop. Many of you most likely know about this pinnacle online fabric shop that not only stocks a wide selection of fabrics, but also engages the community in a big way through free video tutorials and patterns, quilt alongs, block of the month clubs, and more. I’ve worked with Fat Quarter shop in the past during two separate quilt pattern blog hops: Layers of Charm and Welded, and they are also a big sponsor of the 1930s Farmer’s Wife Sew Along hosted by Angie at Gnome Angel, for which I’m an official blogger. Fat Quarter Shop has long been very supportive of independent bloggers. When they reached out to me wanting to sponsor my blog, I graciously accepted.

fat quarters shop quilt shop

Here are some of my favorite features about Fat Quarter Shop:

  • They have a *really* extensive selection of fabrics that span from traditional to more modern.
  • fat quarter shop stash bundleThey stock gorgeously curated bundles of solids, some of which have matching Aurifil threads!
  • The shop is searchable by color, which is always a good starting point in finding the perfect fabric for a project.
  • fox fabric searchThey seem to have an endless supply of novelty fabrics, which helps tremendously with eye spy or any other themed quilts.
  • They have many free tutorials and patterns that are great for both quick projects and skill building, not to mention learning short cuts that can help in all future quilt projects.
  • They have great sales including a 24 hour flash sale each day.
  • Their customer service is always stellar.
Giveaway Time!

contemporary splendid sampler fat quarter bundle fat quarter shopFat Quarter Shop is generously offering a Contemporary Splendid Sampler Fat Quarter Bundle, consisting of twenty (20) gorgeous fat quarters by Moda Fabrics, to one of my readers. This is a great stash-building bundle (look at those teals! swoon!), or perhaps a reason to jump in on the Splendid Sampler Sew Along by Pat Sloan and Jane Davidson.

To enter the giveaway today, let me know your favorite fat quarter bundle offered by Fat Quarter Shop. You can peruse the selection HERE. Leave a comment and make sure I’m able to get ahold of you if you win.  If you’re a follower of Night Quilter, leave a second comment telling me how you follow for a second entry. Tell me how you follow Fat Quarter Shop (facebook, twitter, Instagram, their blog Jolly Jabber, etc.) for a third entry.

This giveaway is open to US and international participants.  The giveaway will be open until 8pm Monday 2/29 when I’ll select the winner randomly with random.org. Good luck! Giveaway is now closed! Congratulations to Pam S.!

Thanks again to the Fat Quarter Shop! Blog sponsors help me to keep this blog going by helping cover the costs of hosting, photography equipment, supplies, and of course time. Sweet, precious time. Many many thanks to all who support me!


Stash Building: Autumn Dusk Blogger Bundle & Giveaway

I’ve been trying to stretch out of my comfort zone lately and create with color palettes other than rainbow order. With that goal in mind, I put together another blogger bundle for Fiddlehead Artisan Supply in Belfast, Maine, including some of my favorite autumnal colors. To play with the Summer Nights bundle I curated in August, this one is called Autumn Dusk. To double the fun, I have a bundle to give away, too!

autumn dusk fabric bundle fiddlehead artisan supplyThis color palette feels peaceful to me, with the soft purples, burgundy, magenta, mauvey peach, and a pop of turquoise. I’ve been working on a project using my bundle and I admit, it feels weird to be working with a non-rainbow color palette with no low volumes or black/charcoal neutrals…. but I like it!

Tomorrow I’ll be sharing a tutorial for the project I’m making with this bundle, so if you want to add these fabrics to your stash and immediately put them to use (fabric added to the stash doesn’t count if it’s immediately created into something beautiful, right?), you can with ease.

autumn dusk fabric bundle fiddlehead artisan supplyThese fabrics are all great stash additions, and help bolster my weak purple collection a bit. They are consistent with my love of tone on tones and blenders, which means my scraps will surely make their way into a rainbow somehow.

Autumn Dusk fabric bundle fiddlehead artisan supplyFiddlehead Artisan Supply is generously offering an Autumn Dusk fat quarter bundle to one of my readers. The bundle includes fat quarters of the following six fabrics (clockwise from Tula’s ponies):

  • Pony Play from Fox Field by Tula Pink (Free Spirit)
  • Leaves in Turquoise from In the Bloom by Valori Wells (Robert Kaufman)
  • Full Circle in Petal Pink from Shape of Spring by Eloise Renouf (Cloud 9)
  • Bike Paths in Lilac by Alison Glass (Andover)
  • Twinkle Twinkle in Burgundy from Natural History by Lizzy House (Andover)
  • Jewels in Purple from Hello Pilgrim by Lizzy House (Andover)

To enter the giveaway today, visit Fiddlehead’s online shop and tell me your favorite quilting print from their online offerings (click here for a direct link). Leave a comment and make sure I’m able to get ahold of you if you win.  If you’re a follower of Night Quilter, leave a second comment telling me how you follow for a second entry. ‘Like’ Fiddlehead Artisan Supply on Facebook or subscribe to their newsletter and tell me how you followed them in a third comment for a third entry. That’s three separate comments for three entries to win.

This giveaway is open to US and international participants.  The giveaway will be open until 8pm Sunday 12/6 when I’ll select the winner randomly with random.org. Good luck!  This giveaway has ended. Congratulations to Linda!

Fiddlehead is also having a big online sale through tomorrow (Monday 11/30) so you can get 15% off your entire online order with the code Thanks2015. That’s as good a reason as any to bolster your stash, don’t you think? *wink*

I’m linking up with Molli’s Sunday Stash. I’ve been quiet in the stash building department lately, but I have a few fun new stash additions I’ll be sharing in the coming weeks! I’m gathering fabric to last me through the snowy season; after all, winter is coming.

Spooktacular Beanbags Tutorial

Halloween is a fun time of year around our house, since my kiddos love to dress up in costumes from years past all year ’round, and the end of October means NEW costumes and candy! While I’m not really big into decorating the house for holidays (with the exception of Christmas and Easter–how can you resist those?), I do like making holiday crafts with the kids to help build excitement.

Today I’m going to share a quick tutorial for some spooktacularly sturdy beanbags, a perfect addition to a Halloween party but also a great addition to any child’s toybox. I should note, too, that beanbags are my go-to gift for two year old birthday parties. When a child turns two, I’ve found it’s really fabulous to have something you’re SUPPOSED to throw. Beanbags are such a versatile gift since they can be personalized in any way; you can change the shape, change the fabric, or personalize with applique letters or pictures. I’ve included affiliate links in this post so that if you decide to buy any of the tools I’m using, I will receive a small commission, too. I only share tools and products I love, so you can be sure they are tried, tested, and loved!

Spooktacular Beanbag Tutorial PinterestMaterials needed (to make 4 beanbags):
  • 8 charm squares of fabric
  • Die cutting machine & 5″ circle die (such as Sizzix cutting machines, AccuQuilt, Cricut, etc)
  • 8 x 5″ diameter circles of fabric
  • Sewing machine (zipper foot suggested but not required) – I use a Bernina 560
  • Iron and ironing surface
  • Thread (I used Aurifil 50wt 2600-Dove)
  • Dried beans or other filler (approx 3 cups)
  • Pins and/or Clover clips

I made my beanbags using my Sizzix fabi die cutting machine and the BigZ L Circle 5″ die. You can also use any palm-sized circle item in your kitchen to trace circles on fabric for the beanbags if you don’t have a die cutting machine.

bean bag sizzix prepI figured since it’s nearly Halloween, it was the perfect time to use my Cotton + Steel Spellbound Collaboration charm pack. The 5″ circle die worked perfectly with the charm squares, which made my job even easier! I used my go-to thread, 50wt Aurifil 2600-Dove for all sewing.

sizzix beanbag tutorialChoosing four pairs of coordinating charm squares, cut eight (8) 5″ circles, layering your Sizzix sandwich: bottom cutting pad, die with the blades facing up, fabric centered over the circle blade, and top cutting pad. All necessary circles for this project can be cut with one pass through the die cutting machine, which made this a really quick project to make with my kids.

sizzix beanbag tutorial 2" openingNext, pin your pairs of fabric right sides facing. I used only four pins, two of which marked a 2″ opening. With a 1/4″ seam allowance, sew the circles together, leaving 2″ open for turning and filling. Remember to backstitch at the beginning and end of each seam.

sizzix beanbag tutorial
Beanbags once they have been turned. On the left are beanbags before pressing; on the right are beanbags after pressing and turning in the opening.

Turn beanbags right side out through the 2″ opening. Gently slide your finger along the seam from the inside to make sure the circle is fully turned. Press with a hot iron. Turn in the seam allowance around the opening and press, too, since that will make sewing the beanbags together much smoother once they are filled with dried beans. Since it’s a curve, this step is a little tricky (or at least it was a little tricky for me). Just remember what you’re making: these are going to be tossed and thrown and loved, and perfection is overrated!

Now comes the fun part! Grab some small dried beans (I used dried black beans), a funnel and/or spoon, and a couple of eager helpers.

sizzix beanbag tutorial filling the beanbagsFill the beanbags with dried beans, leaving at least an inch of empty space at the top. Trust me here; the beanbags will seem too empty, but while you are sewing them shut and top-stitching, you will want that extra wiggle room.

sizzix beanbag tutorial fill the beanbagsWe found that a combination of funnel, spoon, and simple “use your hands to put the beans in” worked well for us.

sizzix beanbag tutorial fill the beanbagsEither pin or clip the tops once the beanbags are filled (remember to leave that good inch or inch and a half of empty space in the top). This will both remind you that the beanbag is “finished filling”, and remind your kiddos not to cram any more beans into it. (We definitely took as many beans out of the beanbags as we put it. All part of the fun, right!?)

sizzix beanbag tutorial fill the beanbagsDepending on the size of your helpers, this may be a messy activity. Plan accordingly, or embrace the chaos.

sizzix beanbag tutorial sew closed
Needle between foot and beanbag.

Once all of your beanbags are sufficiently filled, head back to the sewing machine and topstitch about 1/8″ inch from the edge of the beanbag, beginning by sewing the opening closed. This extra round of sewing will securely close the opening, and will also provide extra durability for the entire beanbag. I made some beanbags for my nearly-six year old when she turned two, and they are still going strong in our playroom.

sizzix beanbag tutorial sew closed
Foot between needle and beanbag = winning combination for me.

I used my zipper foot to sew these beanbags closed, and sewed most of them with the needle between the foot and the beanbag (shown in the top photo above). It proved more finicky than I remembered, so with the final beanbag, I moved the needle so that the foot was between the needle and the beanbag (shown in the photo above). This worked much more smoothly for me. As you sew around the edges of the beanbag, stop every couple inches with the needle down to reposition the beans, pushing them away from the part of the beanbag you are about to sew. Sew all the way around each beanbag.

sizzix beanbag tutorialsizzix beanbag tutorialNow you have a handful of spooktacular sturdy beanbags and you’re ready for fun! Toss them at pumpkins, into trick-or-treat buckets, or at each other (avoid faces!). Have fun!