

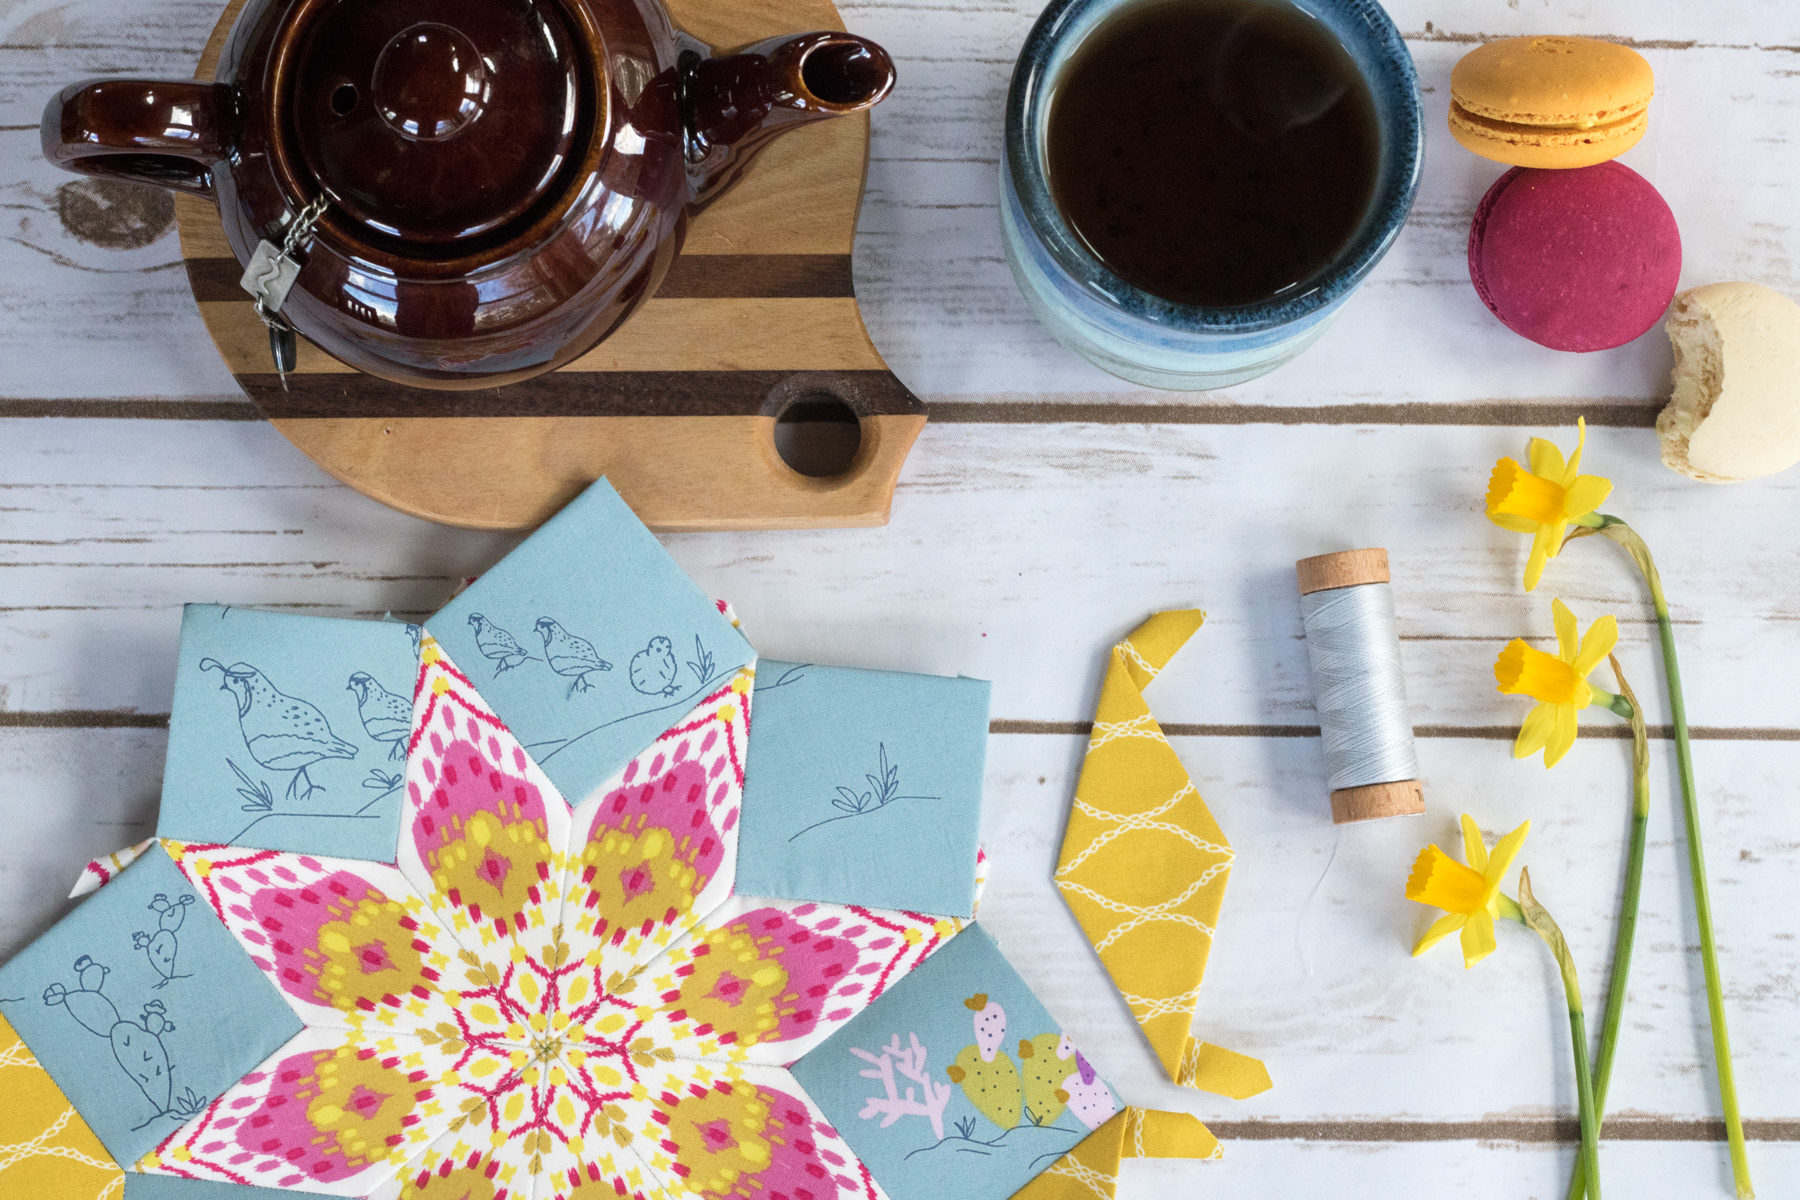
 Today I’m excited to be joining the My Typecast of Characters Blog Tour with Sheri at Whole Circle Studio with the ubiquitous yet uplifting, uniquely utilized U is for Unicorn! When Sheri asked if I would sew up an English Paper Pieced letter with curves and landed on U, I knew immediately that it was a perfect project to showcase Tula Pink’s Pinkerville fabrics and the fabulous U-nicorn.
 Though it’s subtle, I meticulously cut the background so that the unicorn is continuous and the fabrics all line up (mostly). The coordinating Tula Pink solid in Limeade made the perfect coordinating yet stand-out pop for the U. I used coordinating 50wt Aurifil thread to sew up my block, and between the 1231-Spring Green and 1148-Light Jade the stitches blended right in.
 To conserve fabric with the fussy cutting, I opted to keep a few of the paper shapes together, as you can see if you inspect the backside of my letter. Can you see where there are perforations but no fabric seam? That’s where I condensed my shapes. If you’re new to EPP, basting and stitching smaller shapes may be easier, so do what’s comfortable for you.
 One of the really cool aspects of these Typecast letter patterns designed by Sheri and produced by Paper Pieces is that they arrive completely assembled, with perforations where you’re to separate each piece, as you can see above. This means that not only is it easy to know exactly where each EPP pieces goes (especially if you label them before tearing the individual pieces apart–hint hint!), but it also gives you the option to condense pieces easily if you so desire and are fairly comfortable with EPP. I’m all for saving time and fabric! The Typecast Pattern Guide and paper packs are all now available, so be sure to check out details at Whole Circle Studio HERE so that you can stitch up your own EPP sentiment.
 I’m pretty happy with how my fussy cutting went, and was able to give the impression that the U was just set right down on top of the continuous unicorn fabric, Frolic Imaginarium from Pinkerville by Tula Pink.
 I could see this U framed in a shadowbox or stitched down onto a background fabric and wrapped around a canvas in a child’s room, or of course stitched into a pillow for a Unicorn-loving friend.
You can see the full Typecast of Characters Blog Tour schedule below, so be sure to check out all of the other letters that have been stitched up, and visit Sheri’s website to check out the weekly giveaways.
What would you spell with EPP?
TYPECAST OF CHARACTERS BLOG TOUR hosted by Whole Circle Studio:
• Wednesday, March 27: Tour Introduction by Whole Circle Studio
• Monday, April 1 — A: Kate Brennan of Aurifil
• Tuesday, April 2 — B: Mathew Bourdreaux of Mister Domestic
• Wednesday, April 3 — C: Tara Curtis of Wefty Needle
• Thursday, April 4— D: Leah Day of Free Motion Quilting Project
• Friday, April 5 — Week 1 Wrap Up featuring A-D and GIVEAWAY at Whole Circle Studio
• Monday, April 8 — E: Jess Finn of Paper Pieces
• Tuesday, April 9 — F: Sylvia Schaefer of Flying Parrot Quilts
• Wednesday, April 10 — G: Giuseppe Ribaudo of Giucy Giuce
• Thursday, April 11— H: Hilary Jordan of By Hilary Jordan
• Friday, April 12 — Week 2 Wrap Up featuring E-H and GIVEAWAY at Whole Circle Studio
• Monday, April 15 — I: Kim Soper of Leland Ave Studios
• Tuesday, April 16 — J: Yvonne Fuchs of Quilting Jetgirl
• Wednesday, April 17 — K: Karen O’Connor of Lady K Quilts
• Thursday, April 18 — L: Kristy Daum of St. Louis Folk Victorian
• Friday, April 19 — Week 3 Wrap Up featuring I-L and GIVEAWAY at Whole Circle Studio
• Monday, April 22 — M: Molli Sparkles of Molli Sparkles
• Tuesday, April 23 — N: Nicole Daksiewicz of Modern Handcraft
• Wednesday, April 24 — O: Scott Hansen of Blue Nickel Studios
• Thursday, April 25 — P: Pat Sloan of Pat Sloan
• Friday, April 26 — Week 4 Wrap Up featuring M-P and GIVEAWAY at Whole Circle Studio
• Monday, April 29 — Q: Joanna Marsh of Kustom Kwilts
• Monday, April 29 — Q: Lindsay Széchényi of Lindsay Széchényi (and Patchwork Threads)
• Tuesday, April 30 — R: Andrea Tsang Jackson of 3rd Story Workshop
• Wednesday, May 1 — S: Sarah Thomas of Sariditty
• Thursday, May 2 — T: Rachel Rossi of Rachel Rossi
• Friday, May 3— Week 4 Wrap Up featuring Q-T and GIVEAWAY at Whole Circle Studio
• Monday, May 6 — U: Kitty Wilkin of Night Quilter <–YOU ARE HERE
• Tuesday, May 7 — V: Jenn McMillan of Fabric, Ink
• Wednesday, May 8 — W: Jenny Meeker of Bobbin Roulette Studio
• Thursday, May 9 — X: Stephanie Kendron of Modern Sewciety
• Friday, May 10 — Week 5 Wrap Up featuring U-X and GIVEAWAY at Whole Circle Studio
• Monday, May 13 — Y: Debby Brown of Debby Brown Quilts
• Tuesday, May 14 — Z: Nisha Bouri and Kim Martucci of Brimfield Awakening
• Wednesday, May 15 — Week 6 Wrap Up featuring Y-Z, Tour closeout and GIVEAWAY at Whole Circle Studio

 Once again I was honored to have the task of doing the quilt photography for the
  This year, we were definitely a lot more relaxed and peaceful during the photoshoots, which I’m sure Garrett appreciated!
 With projects photographed all through Maine, next year’s planner is sure to inspire, and if you haven’t ordered yours yet, I definitely recommend doing so! As an added bonus (and added irons on the fire) I also contributed a pattern to the
  Perhaps the most exciting and monumental project I tackled over the course of the summer was the design of my very first English Paper Piecing pattern with
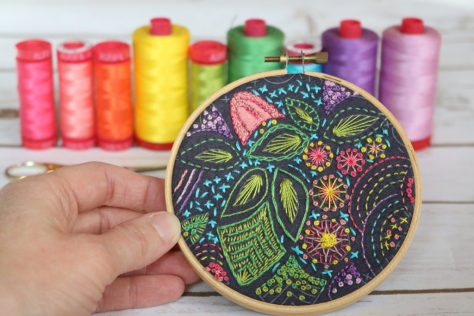
  Perfect for both beginner and experienced EPPers alike, Pollinate is a diverse pattern that has endless possibilities for design and color play. Plus, the “filler” sections look like bees!! You can see the many different Pollinate quilts taking shape on Instagram by checking out the
  This summer I was honored to work with
  I photographed all 9 different weights of thread offered by Aurifil in a variety of stagings, and truly enjoyed the process. You can scroll through the photos on the top of the Aurifil Thread website to see a selection of my photos, and I’ve included a couple of my favorites here. There’s also a fun interview with me on the
 This summer I also tackled the
  I’m excited to be one of the
  Here is a screenshot showing some of the blocks I’ve made so far. You can see all of them on
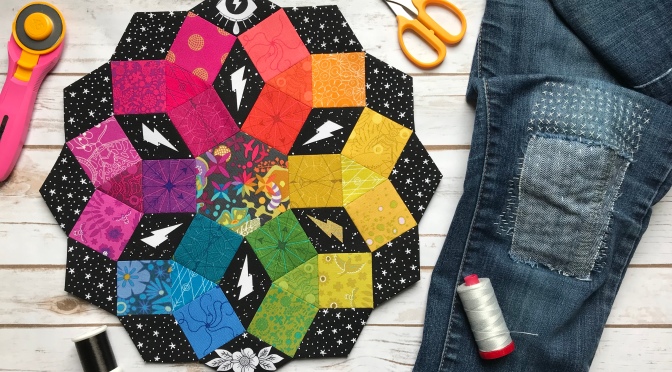
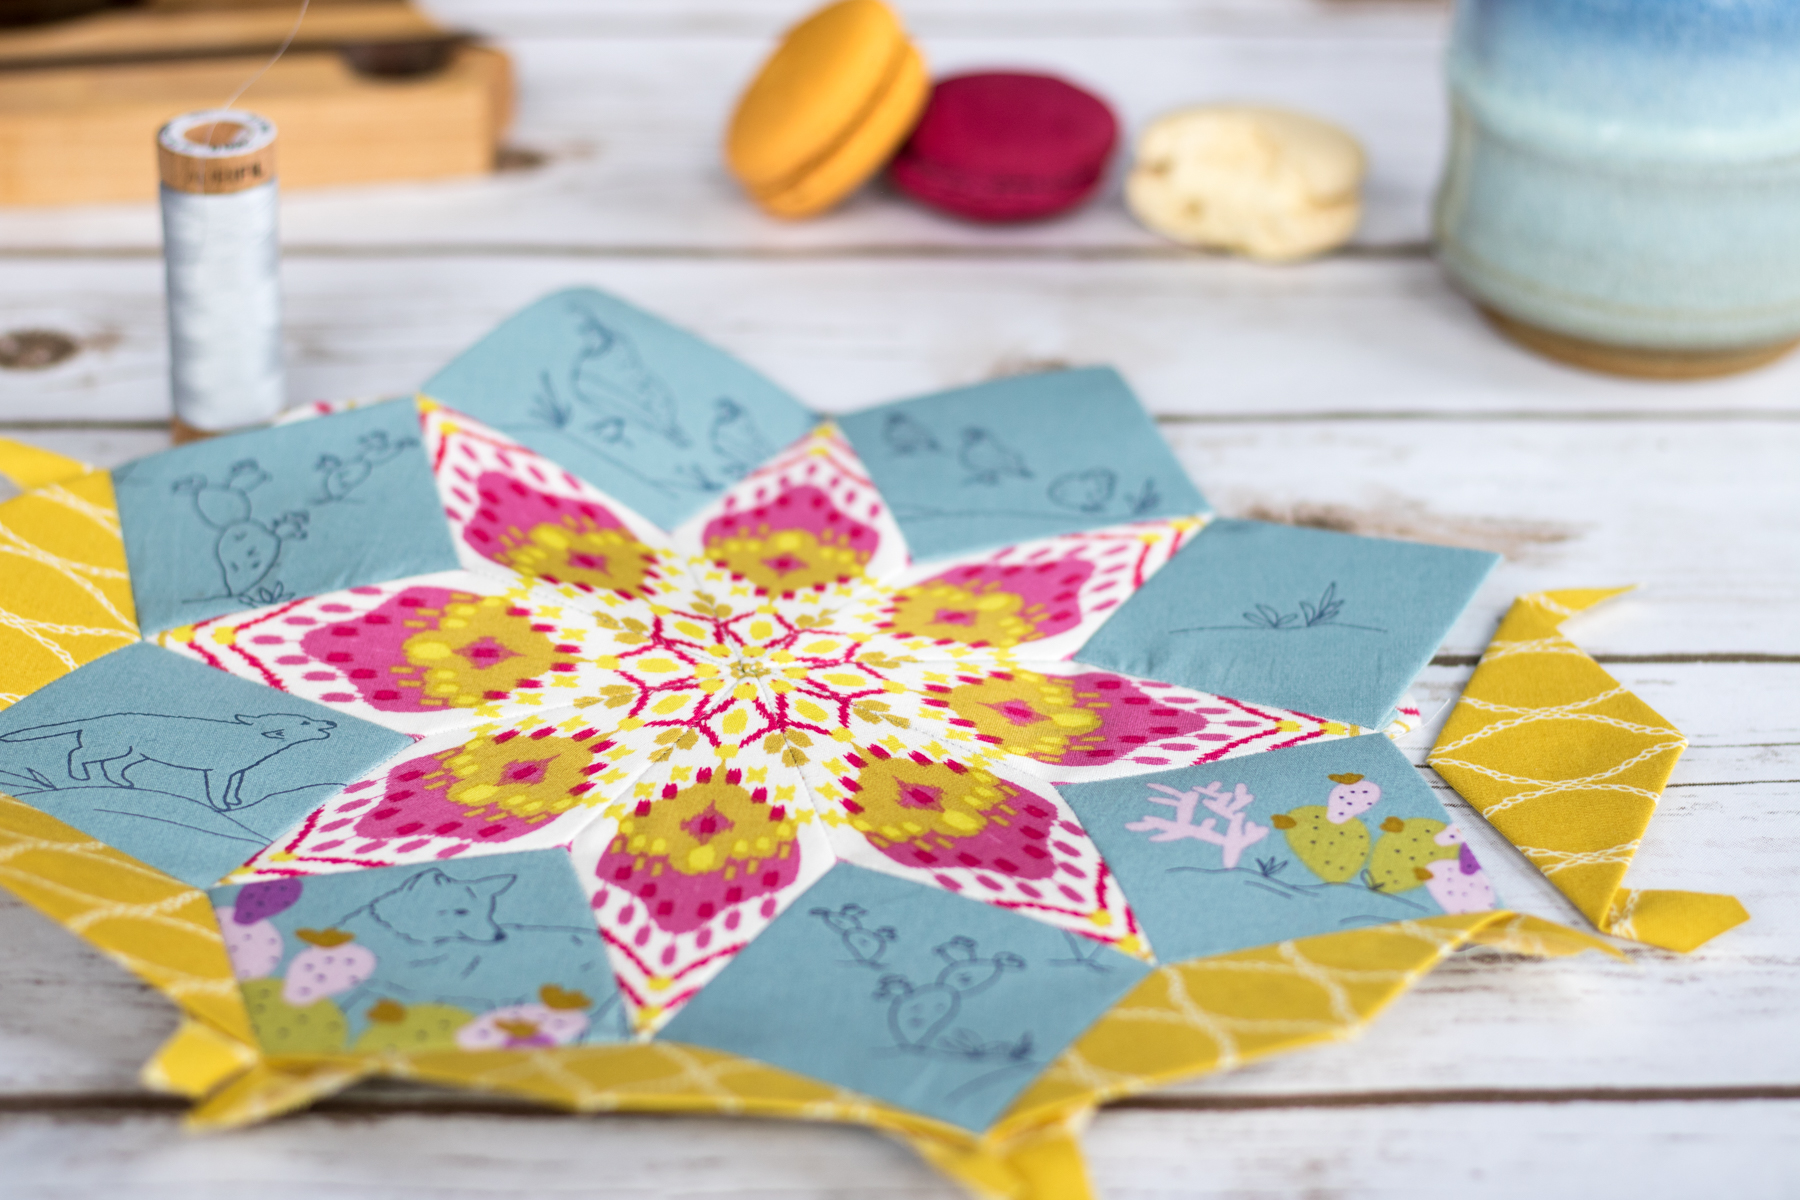
 I headed off to QuiltCon with an English Paper Piecing (EPP) project–the Mandolin Quilt Block by Jodi at Tales of Cloth. I had gotten a bit further than
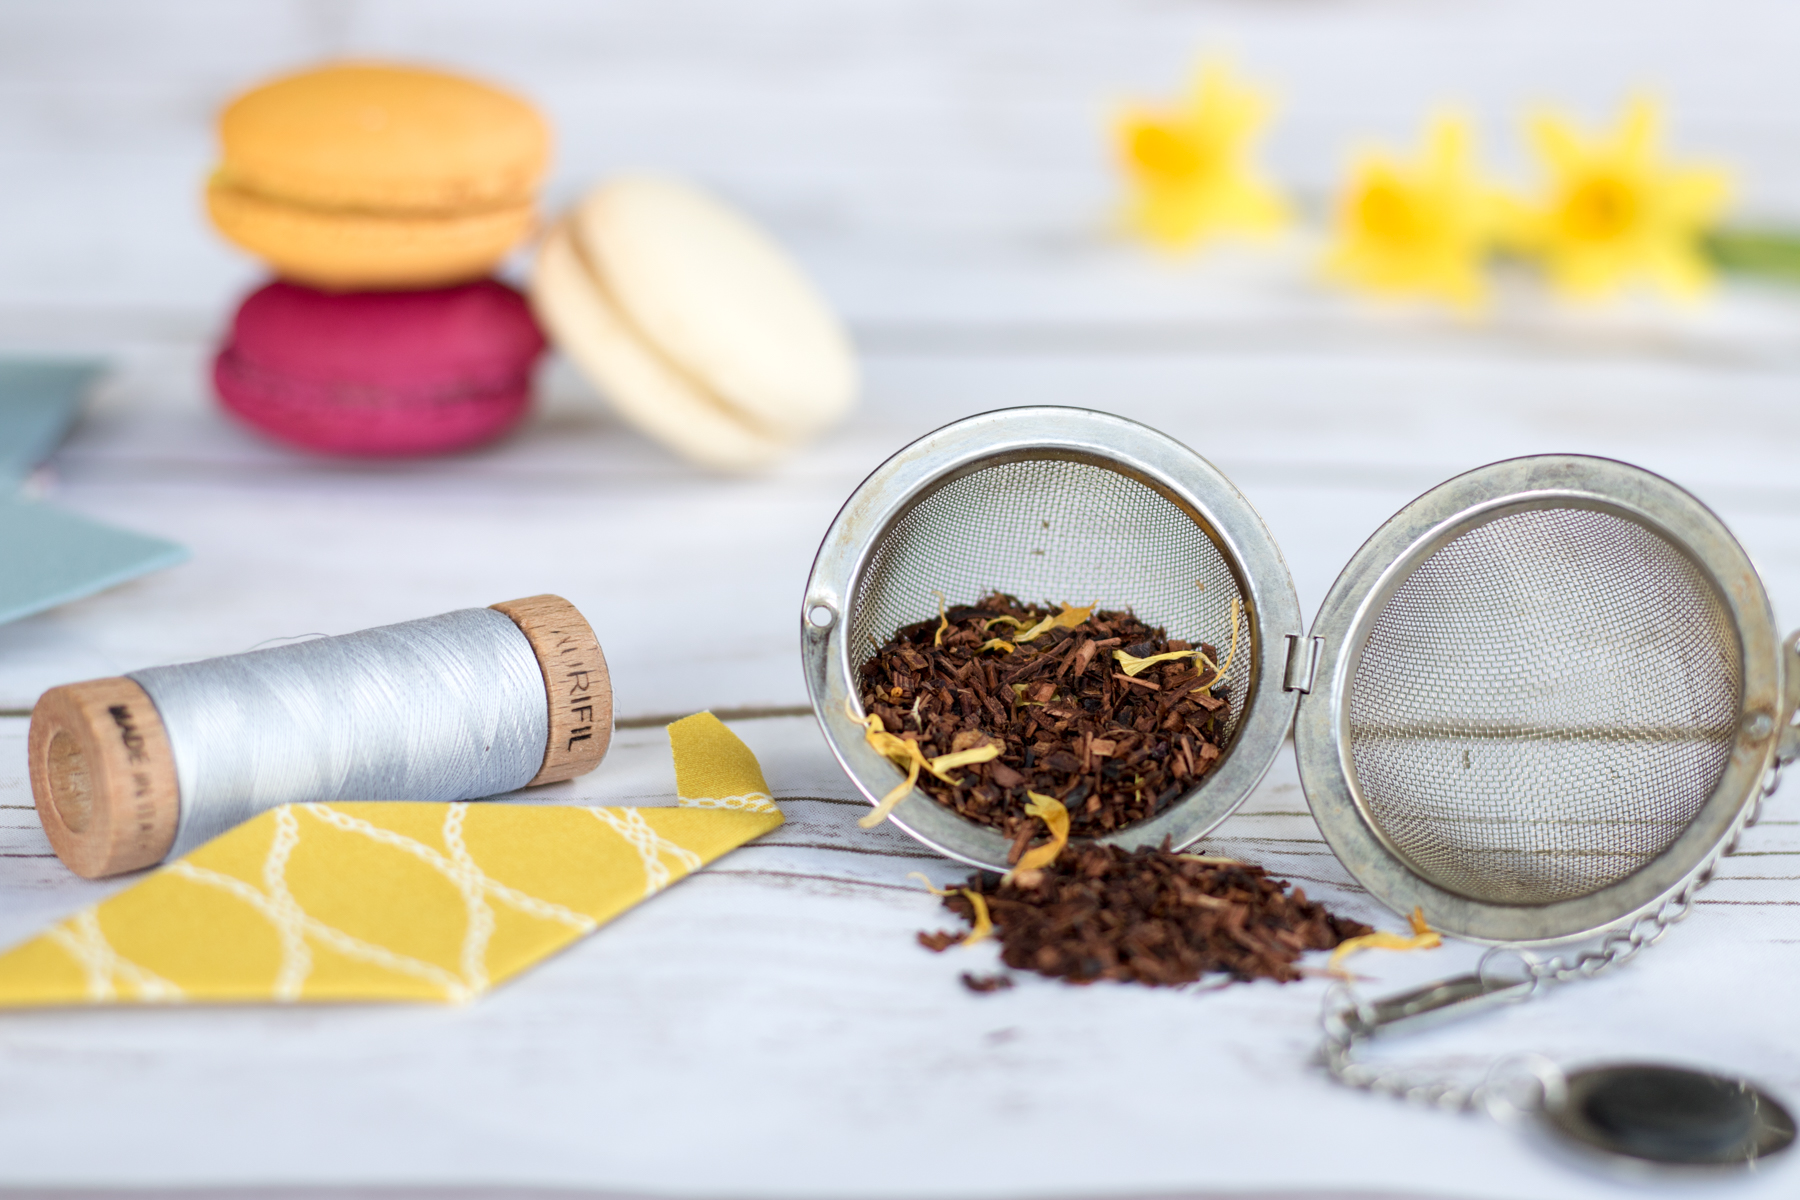
  While I was traveling, the mending on my most-worn jeans began to wear through, but fortunately I was able to pick up a mending kit from the
  I used the 12wt
 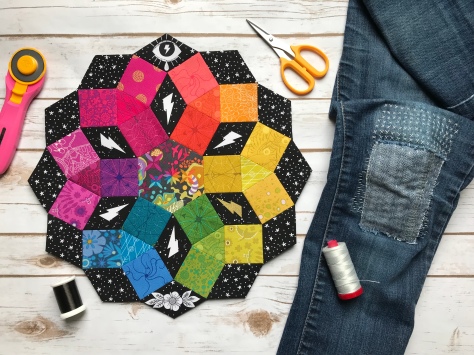 My long flight back to NJ after QuiltCon allowed me to finish both of these hand stitching projects, which felt pretty amazing since I typically make progress at a snail’s pace.
 In the spirit of setting myself up for success, I opted to make four (4) blocks to make a pillow rather than a full sized quilt, and I dove into my bright Alison Glass stash to put together a fully saturated, smooth rainbow gradient. You know how I feel about rainbows. Alison Glass fabric rainbow + Giucy Giuce EPP project = heaven on a summer’s day!
 I used mostly 50wt Aurifil thread, with a few 80wts thrown in, using coordinating colors so that the stitches blend right in with the blocks. The threads shown here are (from top left clockwise): 2535-Magenta, 1154-Dusty Orange, 5015-Gold Yellow, 5017-Shining Green, and 1125-Medium Teal, all 50wt. There’s nothing quite as satisfying as matching the perfect thread to your fabric!
 Alison’s Art Theory print from her Ex Libris line (still my ultimate favorite fabric ever) was my color inspiration, so I planned my 4-block panel around the color flow in the center octagon. Throughout the course of the summer, I finished the four blocks and completely stitched them together!
 Now I am at the point in the game where this could lounge in the works in progress pile for a while, but instead, I am going to use my excitement to forge ahead and aim to finish this beauty, which is sure to be my most favorite pillow of all time.
 My next step is to choose background fabric, press the pieced panel thoroughly, remove the template papers (so that I can use them again!!), and then hand stitch the panel down onto the background fabric. Just last week, I visited my local quilt shop
  After looking at those options, I still felt like I needed to see the Insignia before deciding, and with the encouragement of a few friends on Instagram, especially Erin who said, “I’m a strong believer in first instinct=best instinct!”, I ordered a yard of Insignia in Charcoal from Alison Glass’s shop. (Thank you Erin!). Clearly, my first gut choice is the winning choice!
 Next I will hand stitch this epic panel to the perfect Insignia background using Aurifil’s monofilament thread in Smoke. I plan to quilt this with the Smoke monofilament thread, too, and I’m so excited just thinking about how amazing this pillow will be. This will be my first time sewing with monofilament thread, either by hand or machine, so I’ll be sure to share how it goes.
 As for me, I’m nearly finished piecing my next rendition of a Moonstone block, going with the Gems layout and a more nautical theme. I plan to make only one block and top stitch it to a large zippered pouch for a friend to whom I owe a quilt. I’m hoping the consolation diaper pouch/zipped pouch will hold her (and her nearly 1 year old baby) over until I manage to make the quilt!
 As you can see, I’ve been absolutely struck with Moonstone Madness and it doesn’t appear to be tapering off just yet. I’ve had a wonderful time piecing together these blocks, and the portable nature of English Paper Piecing ensures that it is still very much on the top of my “summer stitching” projects list!
 …after January’s stitching…
 …after February’s stitching…
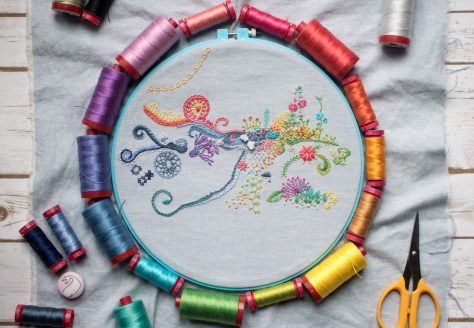 …after March’s stitching…
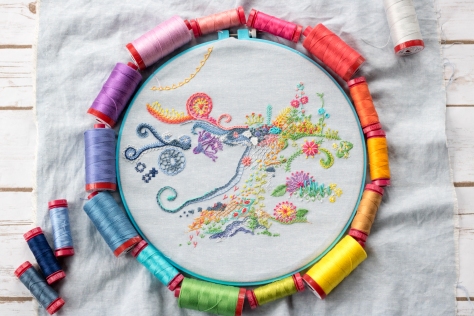 …after April’s stitching…
 …and here it is after May’s stitching!
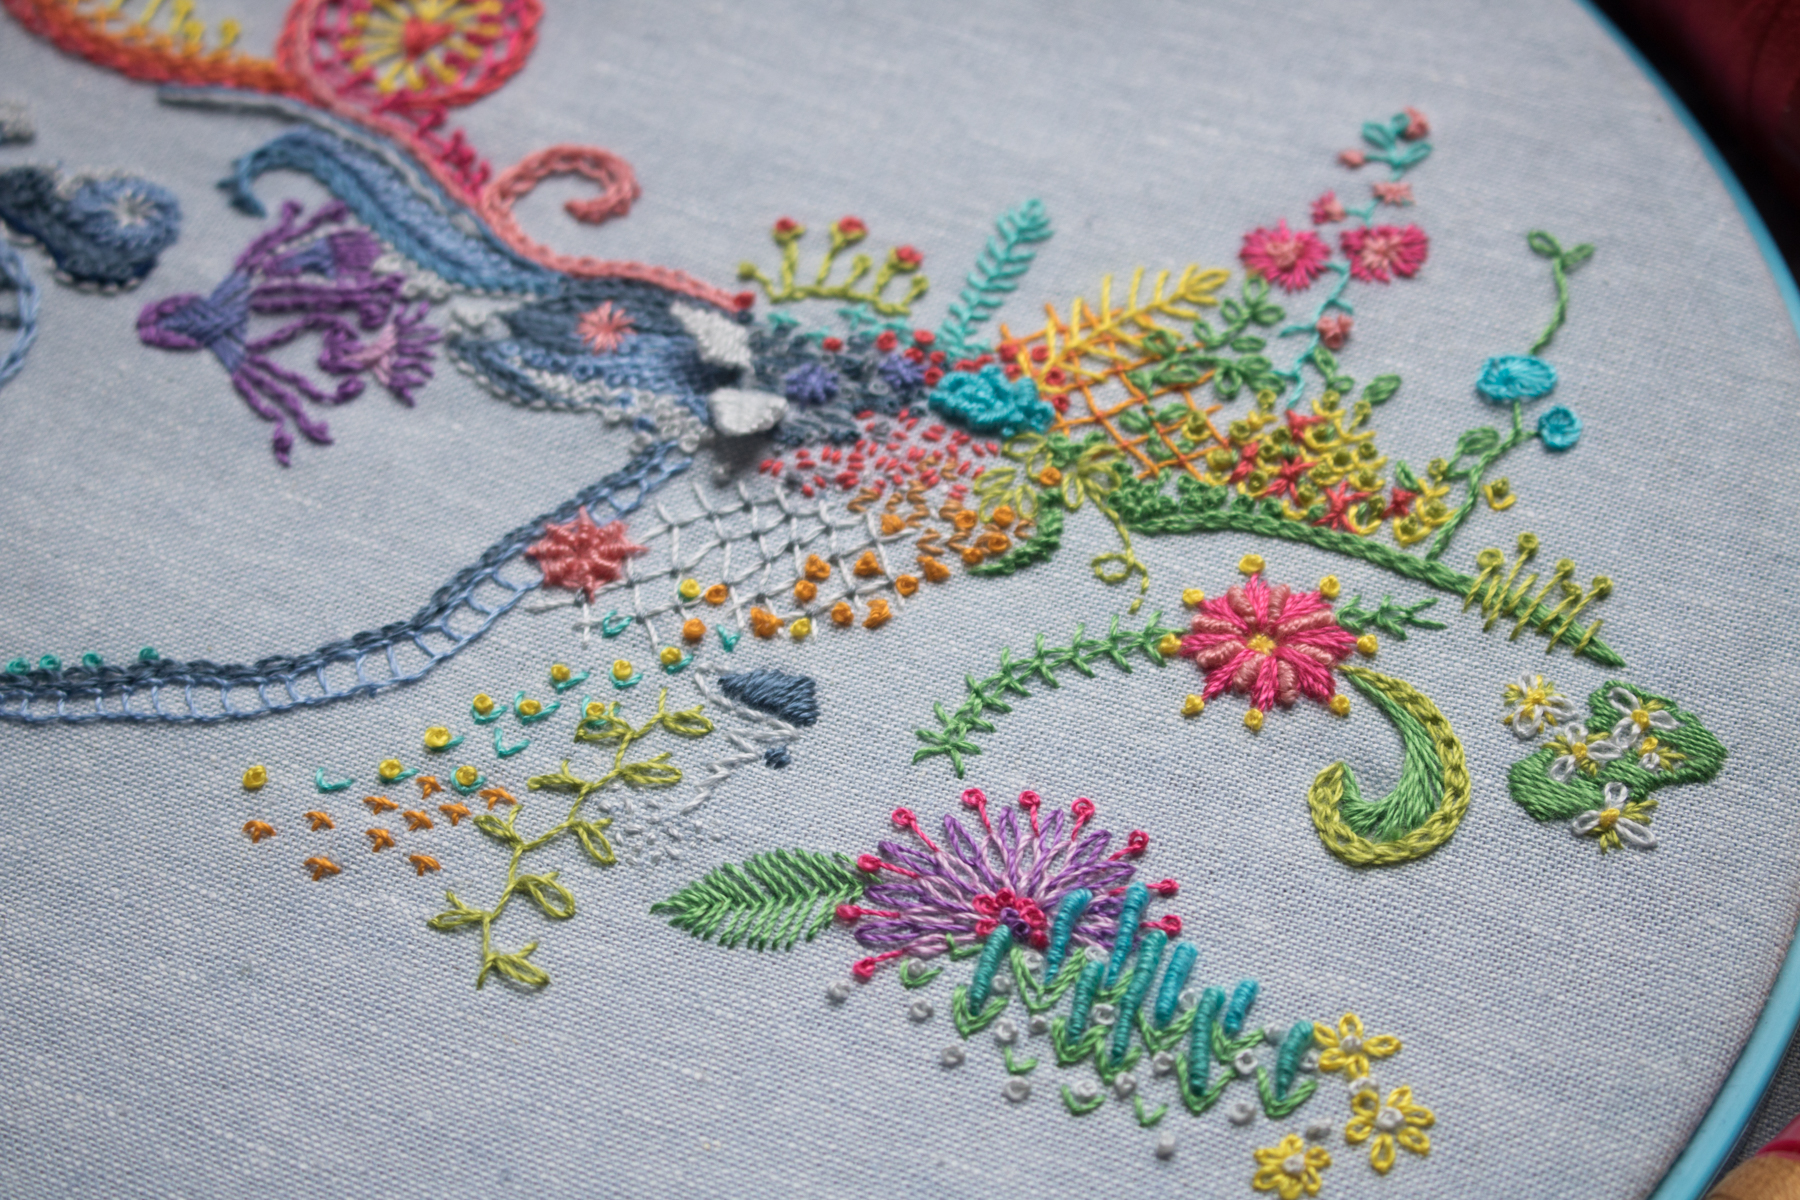
 I added a whole sun burst super nova element in that warm sunny section of the hoop, as well as some added texture with different rows of yellow stitches. This little supernova was very fun to make, and grew day to day. Again, I began with not much of a plan at all, just wanting to add some more bright yellow to the top portion of the hoop. After a few days, it took on a life of its own and continued to grow and take shape until the flowery starbursts decided to cap the growth (for now).
 I also added some “background” plant like elements behind the patch that began this whole hoop back in January. My biggest challenge with this daily stitching challenge is figuring out how to create background behind stitches that have already been stitched. Some attempts are more effective than others, but I figure it’s all part of the learning experience.
 A few more flowers were also added, in the form of lavender roses and their associated greenery. The flower garden continues to grow and blossom.
 A month of progress wouldn’t be complete without adding some motion to the ocean! There wasn’t all that much growth here this month, but some running stitch and french knots helped begin to create some more flow.
 The hoop is beginning to fill out, but knowing that I’m just about halfway through the year, I do think I should be able to fit the entire year in this hoop without extending off the sides. There are lots of little spaces between elements, and while I hope to not fill every *single* one, there is a lot of room for depth and texture and who knows what else!
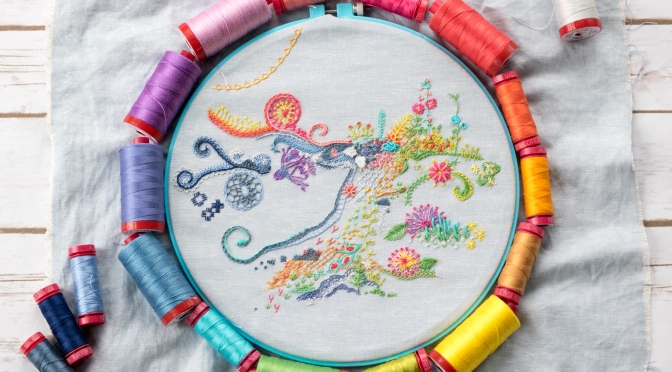
 …after January’s stitching…
 …after February’s stitching…
 …after March’s stitching…
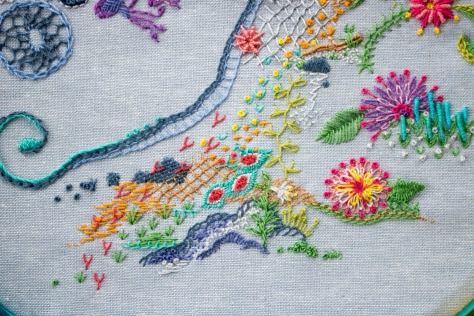 I think it all began with some rocks, and then some little critter footprints, and then took off from there.
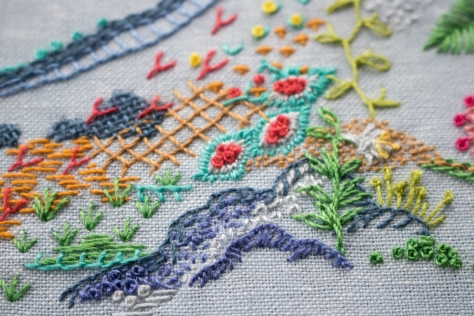 I mostly stitch whatever comes to mind each day, without much influence from my everyday happenings. A couple stitches this month had some subtle meaning, however. I stitched a large rock on Good Friday and a lily flower sprouting out of the rock on Easter. Sometimes it just sneaks in.
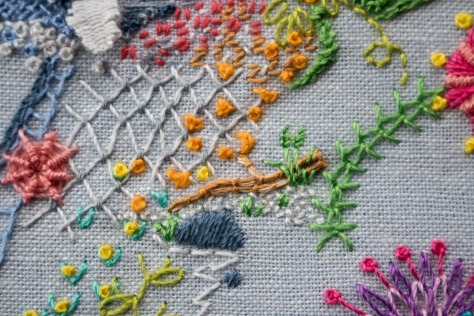 On one particularly uninspired day, I showed my hoop to my husband and prompted, “Where should I stitch? Tell me a color and point to a spot.” He pointed to a spot and said “A piece of driftwood here.” Thus originated the couched stitch driftwood, which was followed by some 12wt Aurifil 2600-Dove sand and a few tufts of beach grass. Some days inspiration strikes; some, not so much.
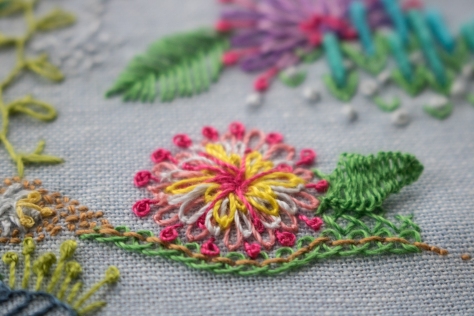 I also added another wild and crazy layered flower consisting of long tailed lazy daisy stitches, lazy daisy, and pistil stitch. There might be a few french knots in there, too.
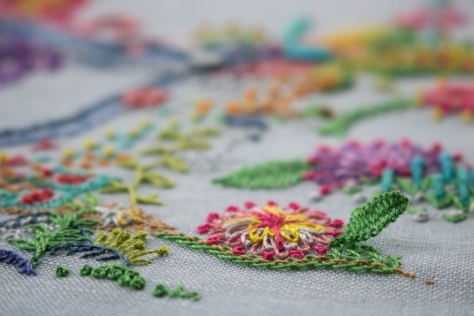 The boldness of the flower begged for some offsetting feature, so another woven picot appeared in the form of a big green leaf. I love the little 3-dimensional elements on this hoop!


 The highlight of the month was getting the chance to chat with Erin from Aurifil on Facebook live while attending QuiltCon in Savannah. You can see my low key chat
  Back to my embroidery progress! Here are some close up shots of the various sections of this freestyle hoop.
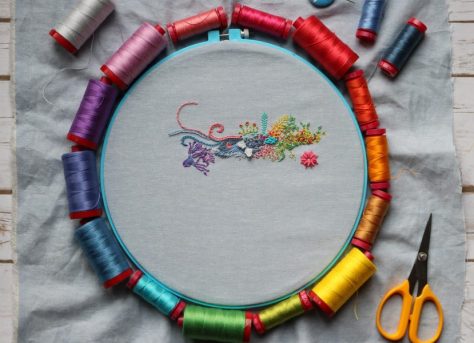
 I am still stitching without a plan, deciding each day’s stitches the morning–or sometimes night!–of the current day. I have tried a handful of new stitches and look forward to trying even more as the year progresses!

 Those little white three-petalled trillium flowers are the most recent addition. Time will tell where this will go from here!
 This month, I had a photography helper, so of course I can’t end the post without a few Finn cameos. I often use the photos on my phone as a reference, so I pulled up January’s photo to make sure I arranged the thread in a consistent way. Finn was please as punch that they matched.
 He also helped me put the thread back into the box, then arranged around the hoop, back into the box, then arranged around the hoop. What a helper!
 Late last year, I kind of got hooked on the quick mental fix that comes with freestyle embroidery while I was creating this
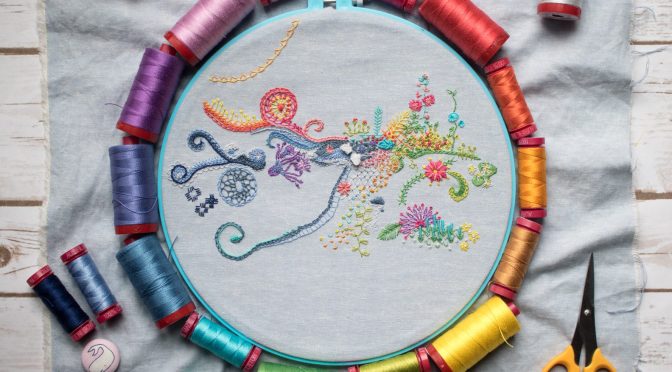
  I went into the year with a 10″ hoop of Robert Kaufman Essex linen in light blue, my stash of
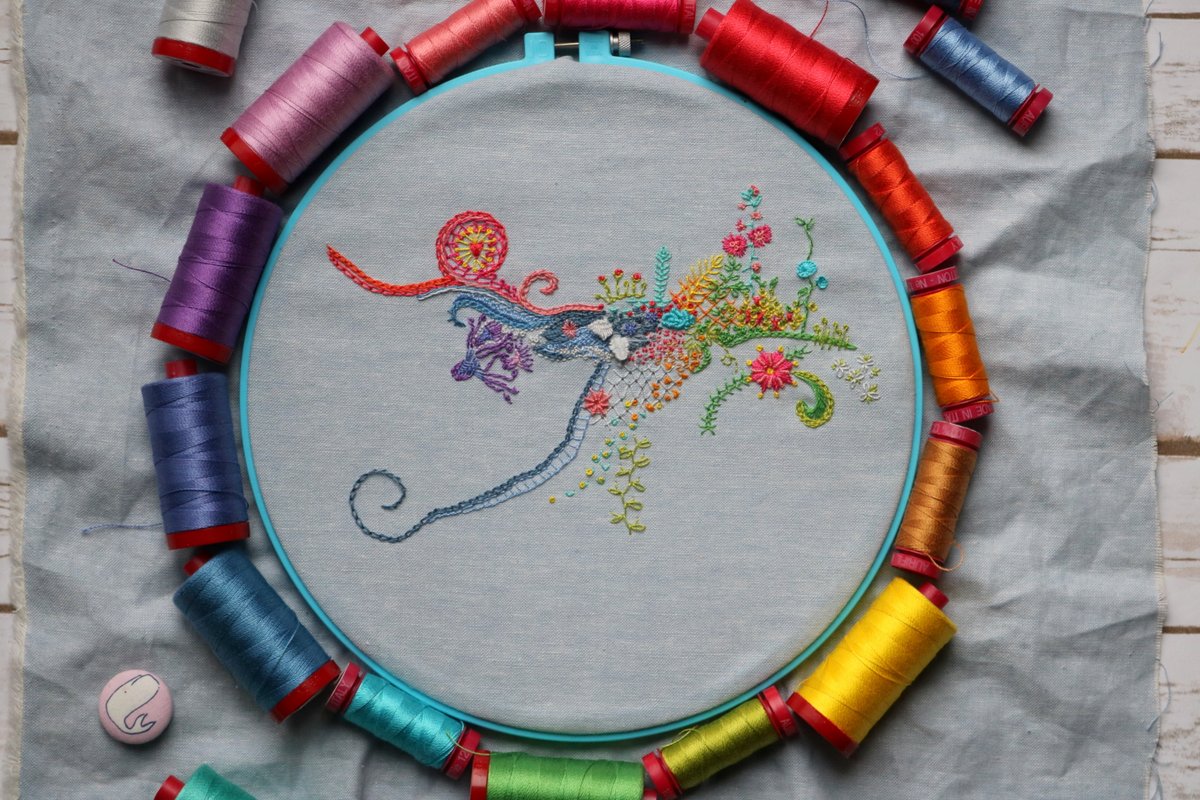
  Here is my hoop after 1 month of daily stitch-whereever-the-wind-blows stitching. Fun, right!? I created a separate account on Instagram
  My basic strategy began as a daily google of “
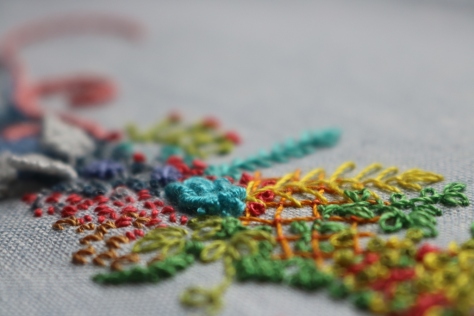 I began by learning bullion knots, so this whole project began with that little mass of turquoise squiggles and has grown organically from there.
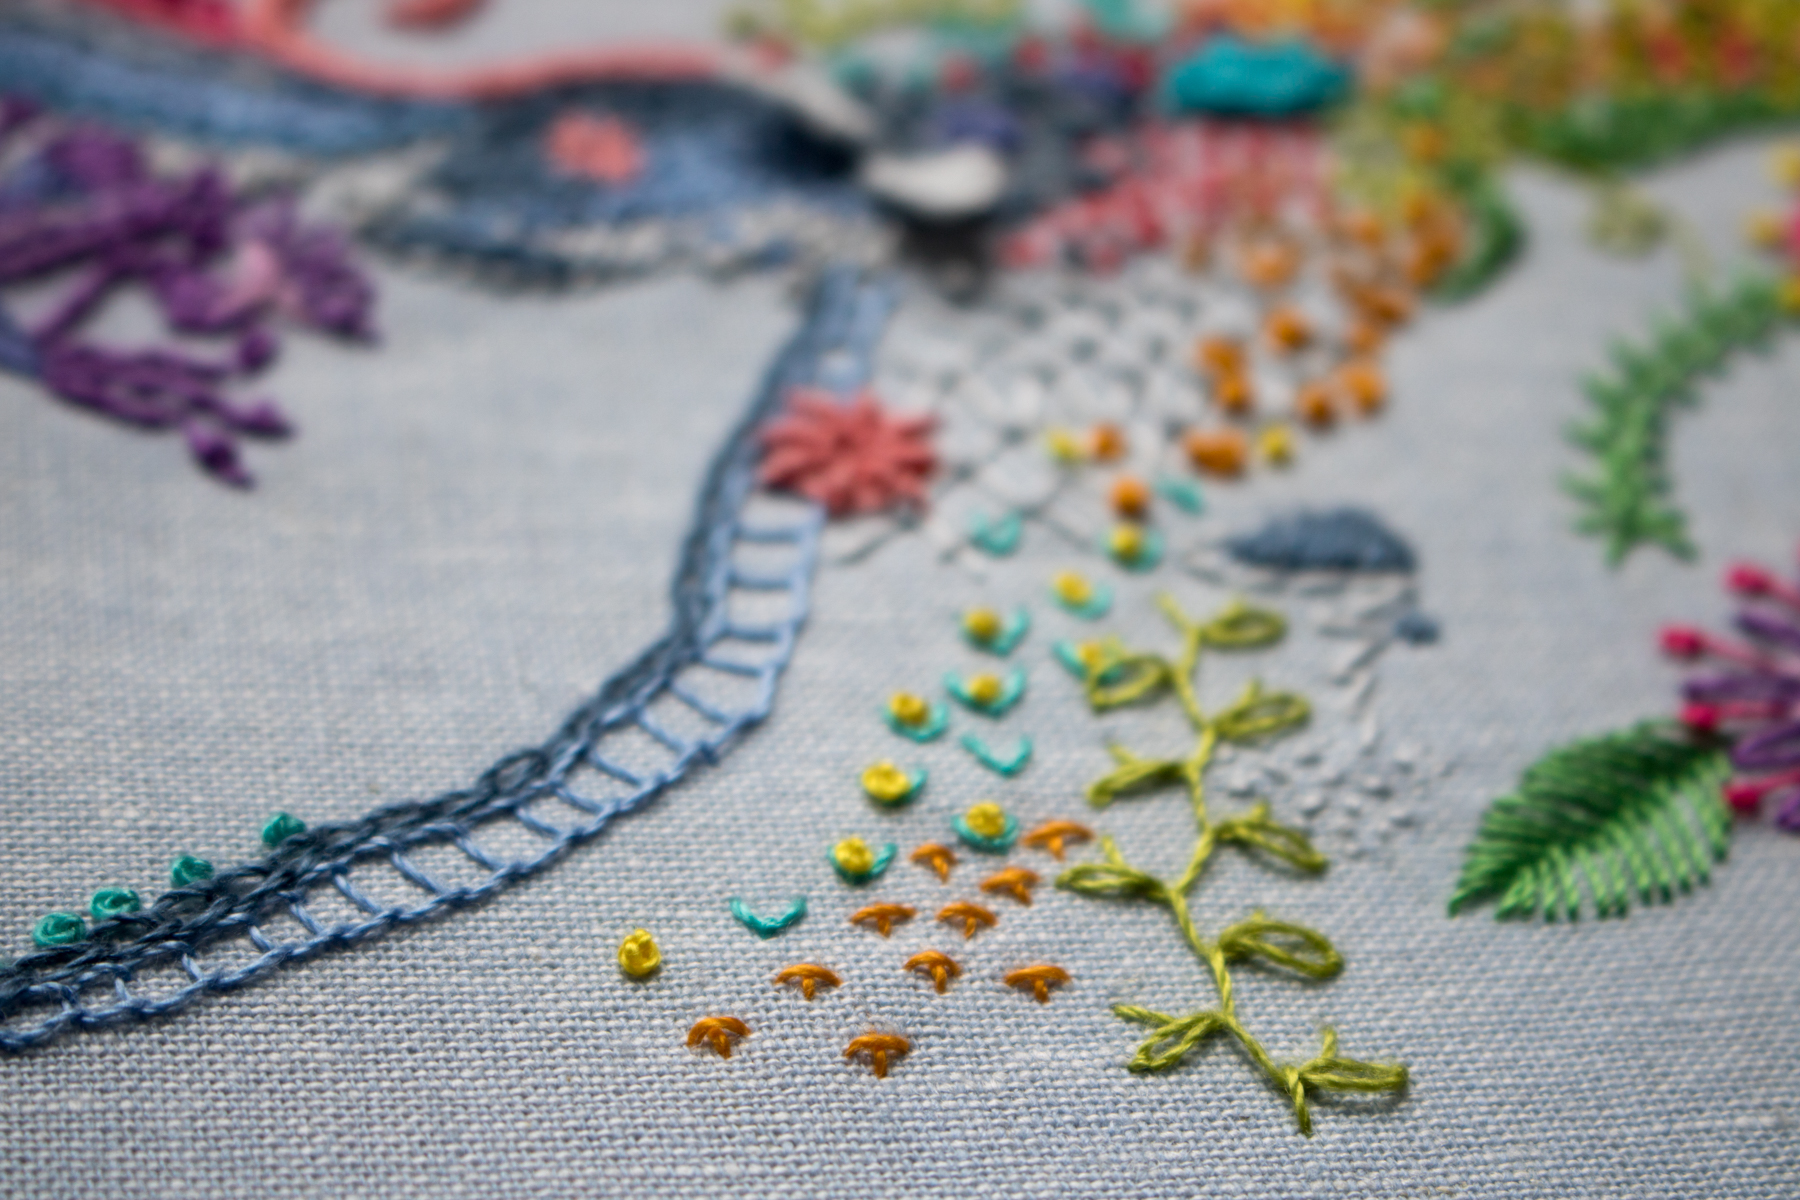
 I love the texture that results when you stack embroidery stitches together. Those white floppy things are my first attempts at braided picot stitch, another fun one!
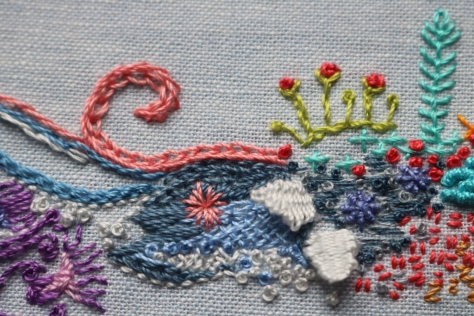 This has been really fun so far, and as of the writing of this post, I’m already over halfway through February, too! (You’ll have to wait until March, or check the IG account, to see those additions, though!) I’ll plan to share an update each month, so that you can see how this grows.
 My personal guidelines include stitching at least one stitch each day, trying to plan as little as possible and simply stitch whatever feels right each day, and not remove any stitches no matter how much I dislike the final outcome (cough, cough, that octopus family, cough). I figure this way, the stress of getting everything *just* right disappears, and instead the thought that it will all work out somehow in the end dominates. No stress!
 This is a really fun, exhilarating project since it is pure spur of the moment random creativity. If you have any cool, unusual embroidery stitches to recommend, I’d love to add some more to my arsenal. There’s something about learning something new that makes my day.