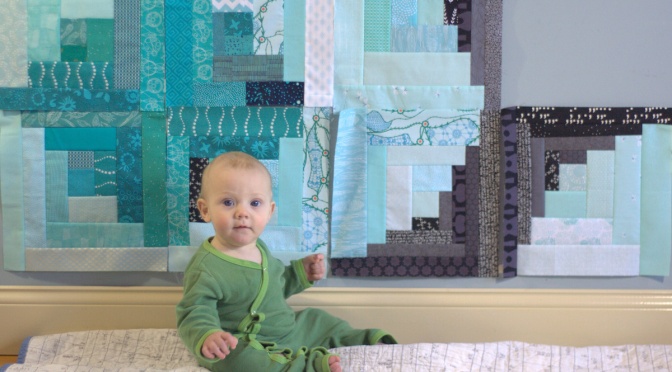
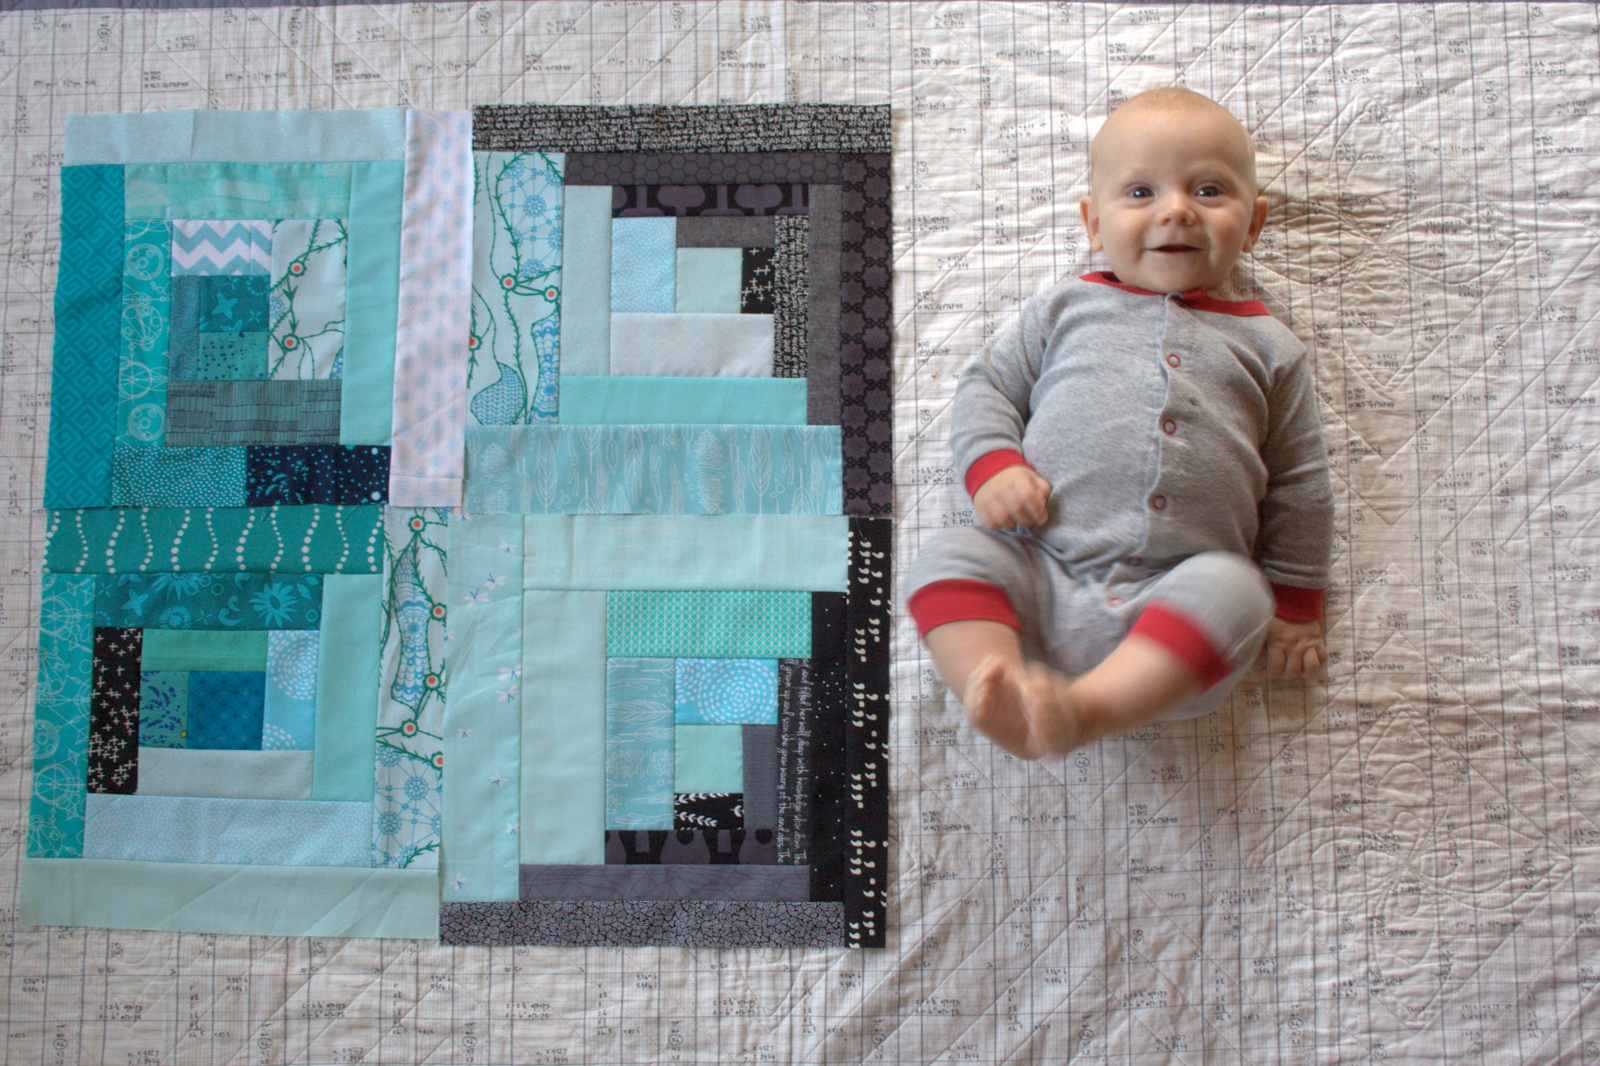
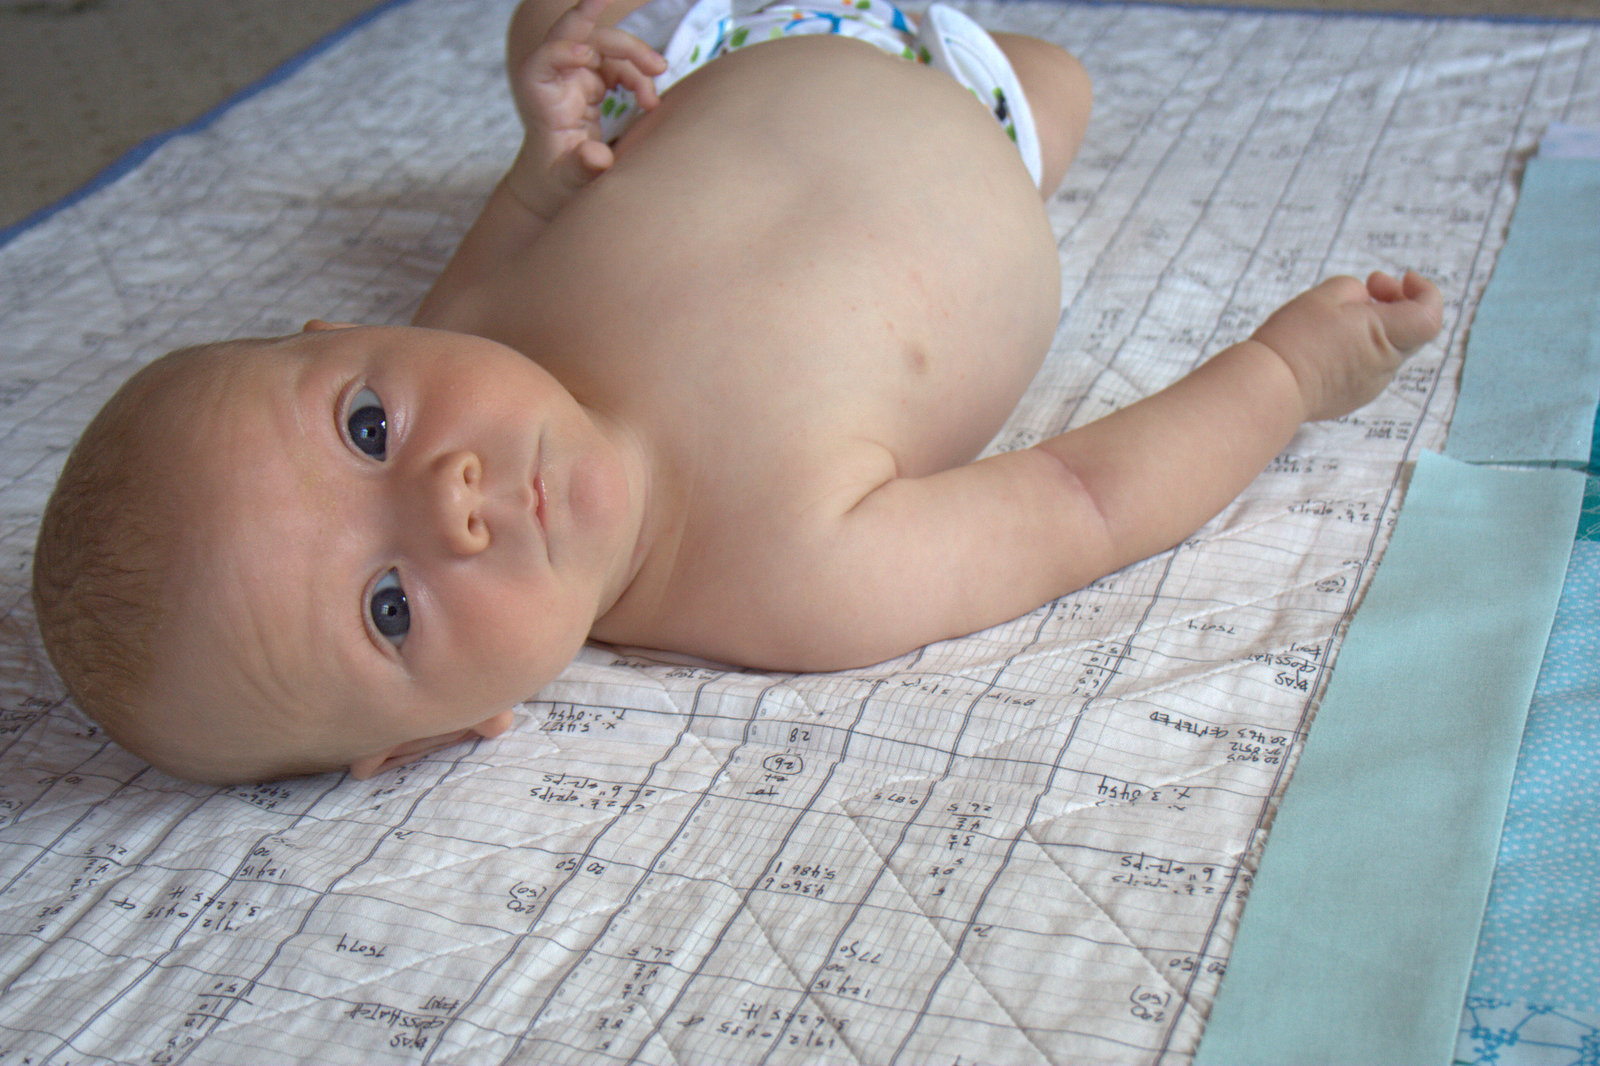
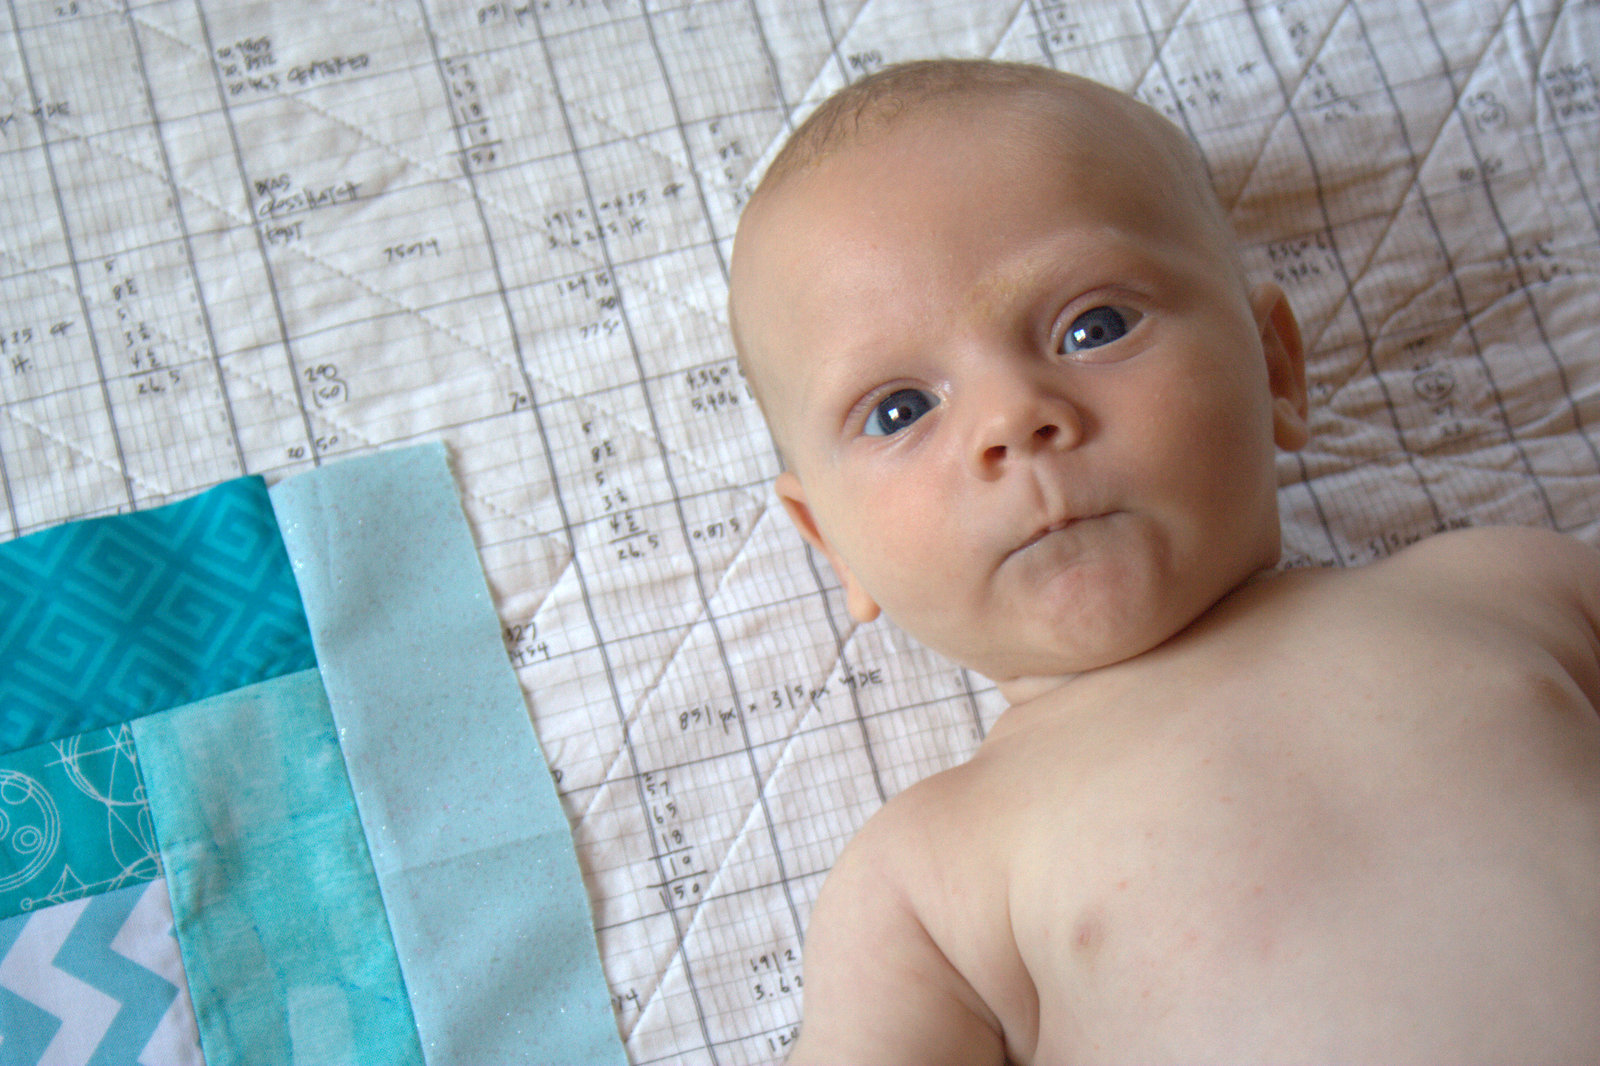
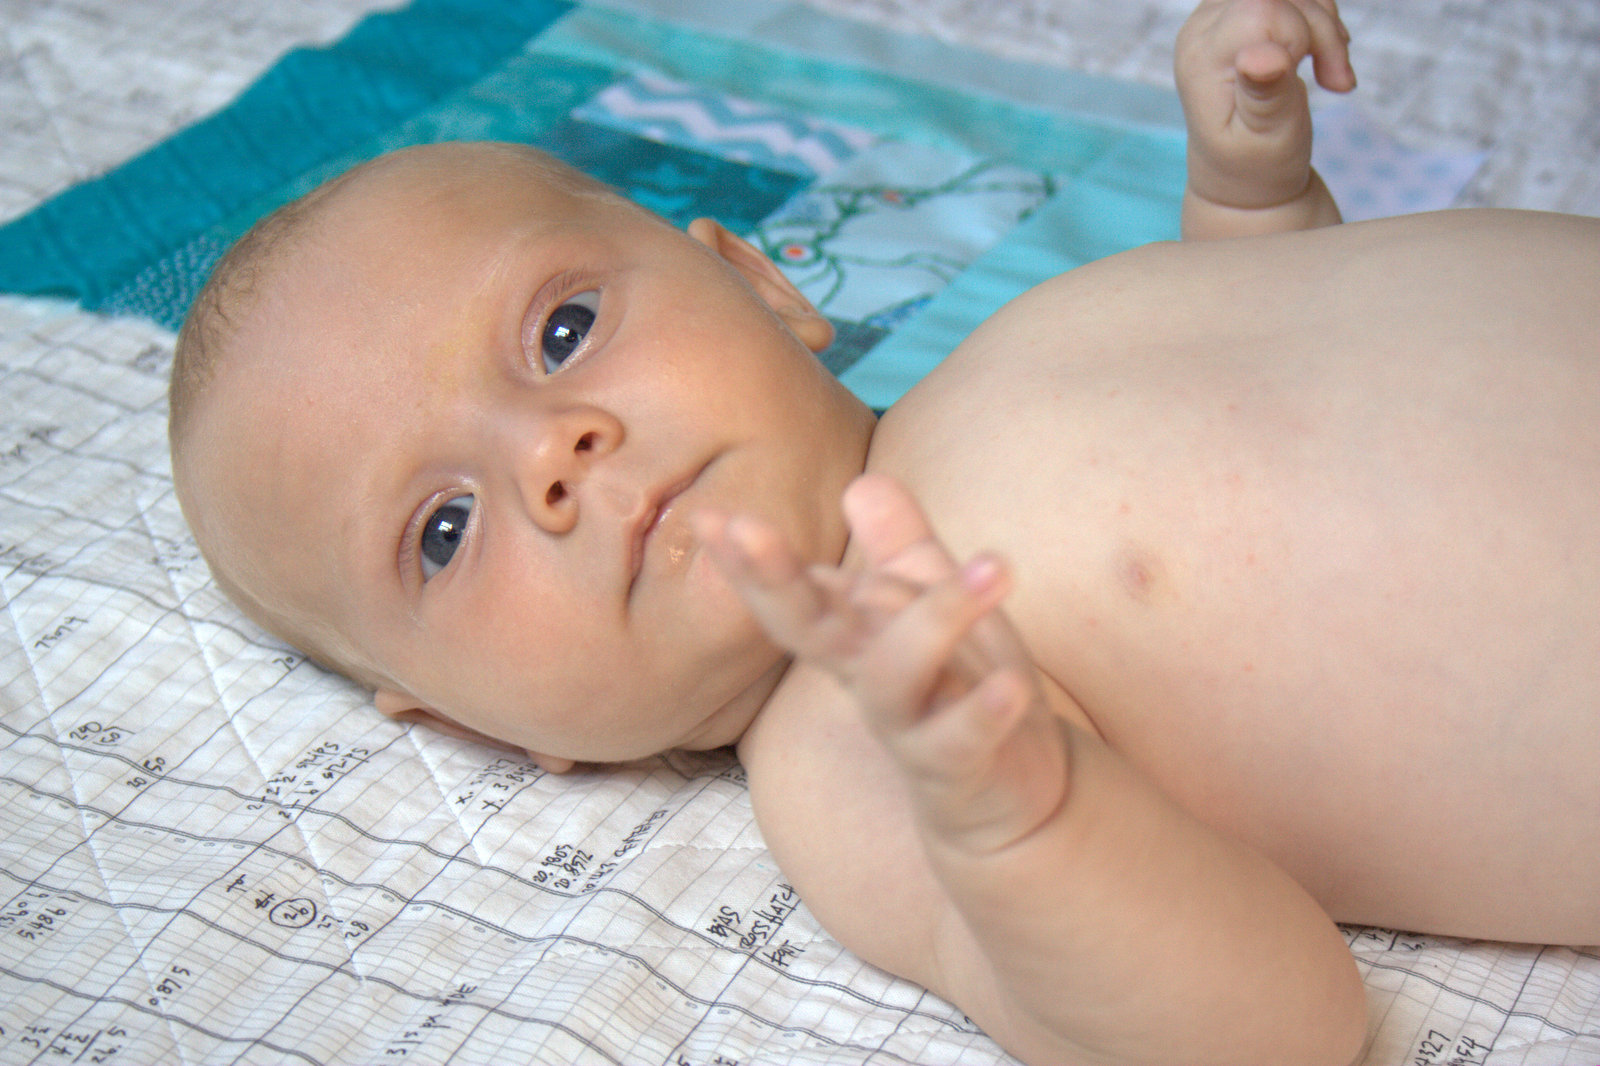
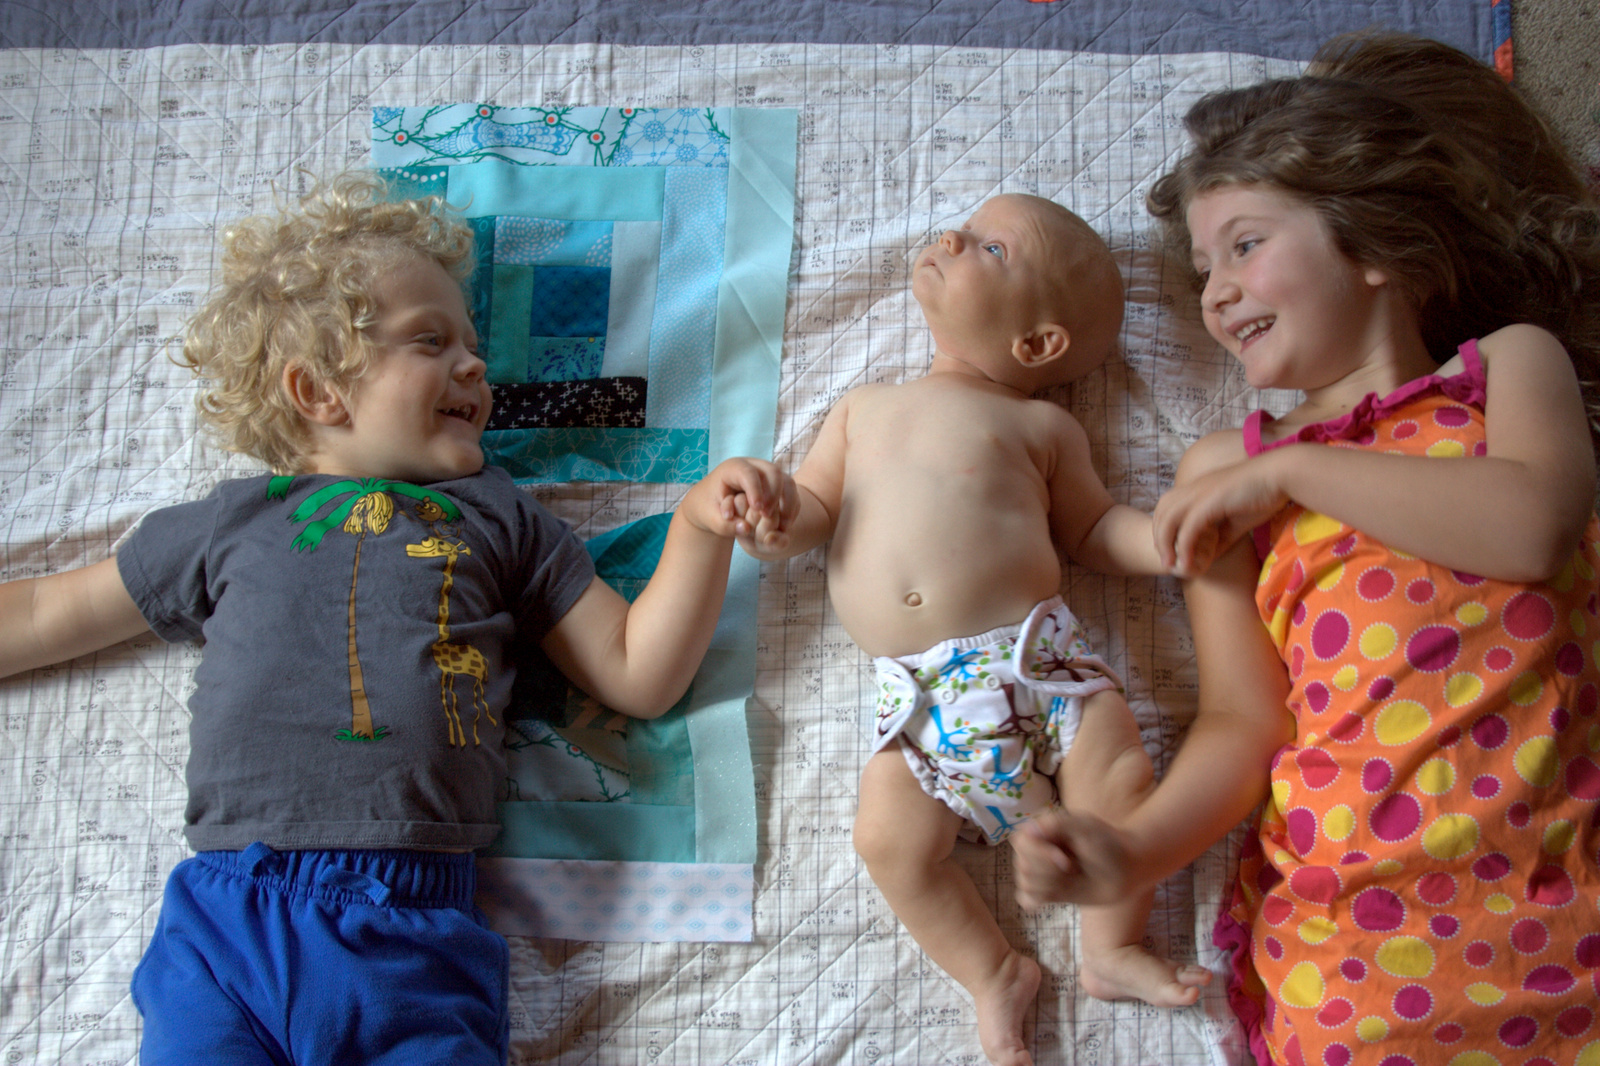
If I thought Finn was on the move last month, this month takes it literally to another level. A few days ago, I was helping Max get his socks on in the morning and casually glanced over to make sure Finn wasn’t eating anything he shouldn’t. I am so glad I did, since Finn was three steps up, headed gleefully up the stairs! He can crawl, pull up to stand, walk along with movable items, eat solid foods, and now climb stairs. I think he’s beginning to explore communication more, too, since he clearly understands the words and signs for “milk” and “food”, and anytime he sees his brother, he says, “bop!” I’m hoping he starts to sign back soon, since then the fun really begins! This kid is amazing!
As we know, as Finn grows, so does his quilt. With the eighth block finished, this is really beginning to look like a quilt!
Every month when I’m writing this post and looking at the quilt, I think perhaps I should up the ante and make two blocks per month to make it a bit larger when finished. But then, when the monthly milestone comes (and sometimes goes before a block is complete… ahem, this month), I remember that the reason I am keeping this project small is that it is meant to be attainable and fun, NOT stressful.
I’ll keep it to one block per month and will focus on the fun. At 36″x48″ finished dimensions, I think it will be the perfect drag-around size for Finn. Plus, this way if he feels like he outgrows his quilt, it can go right into the memory box (in tatters, hopefully) and I will make another one!
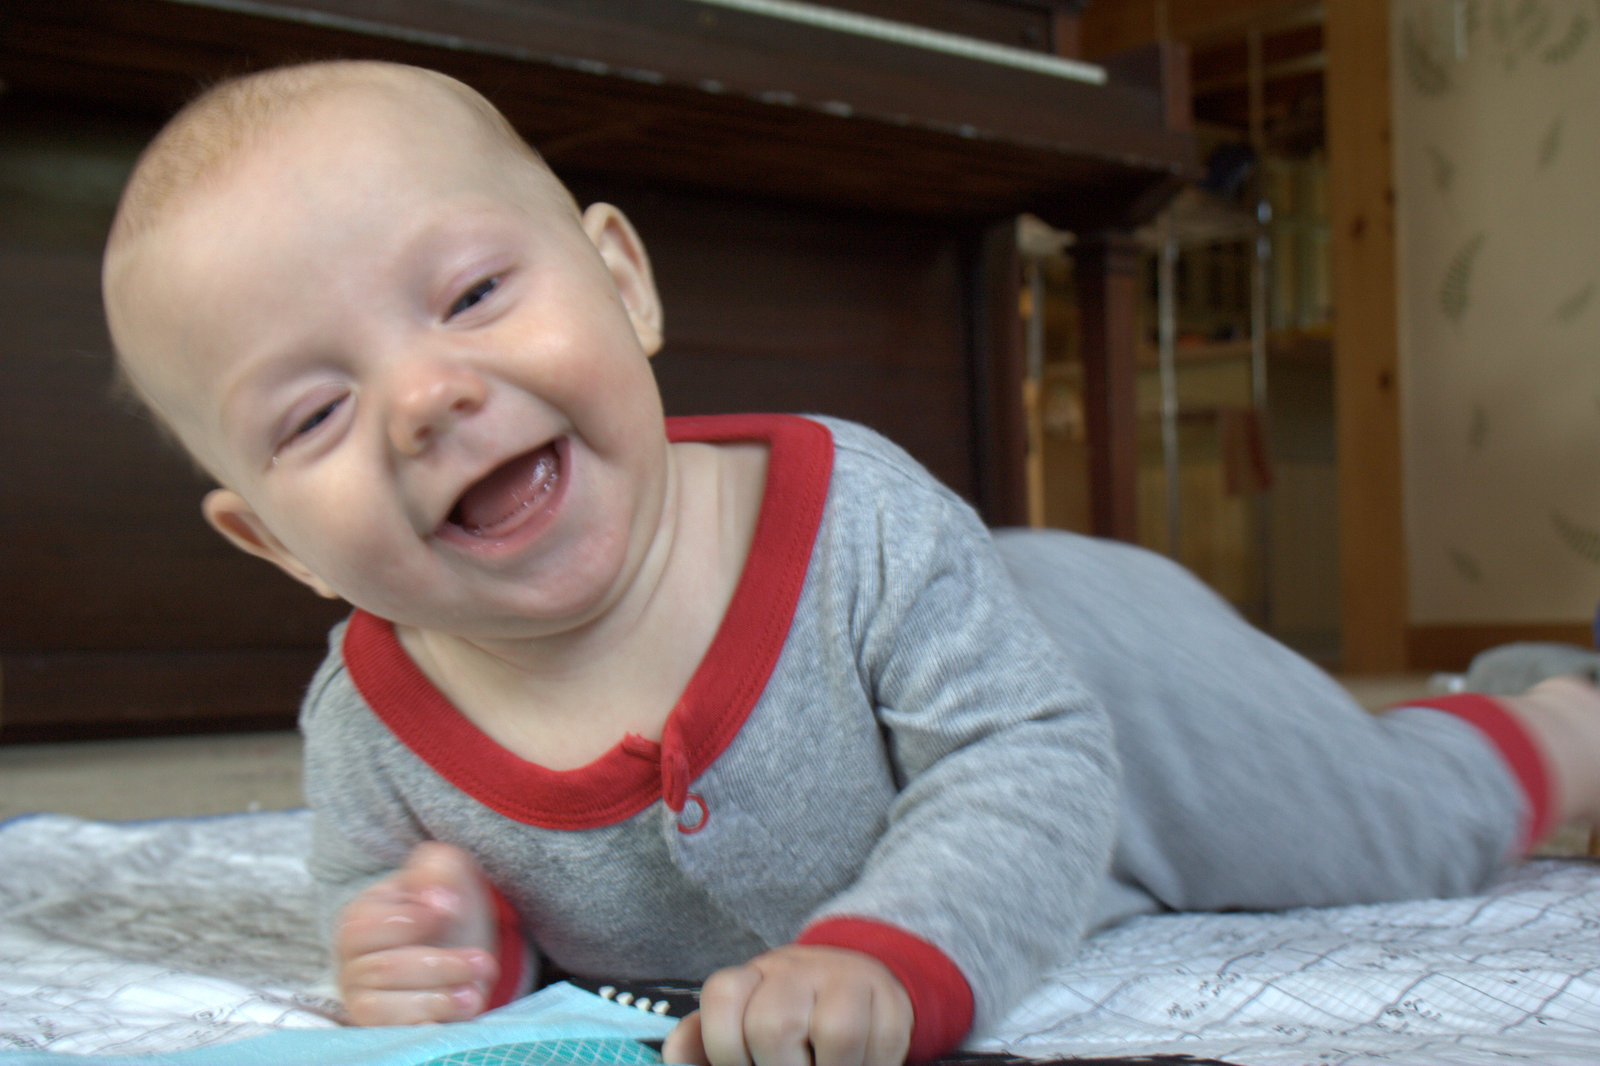
Such a helpful boy!
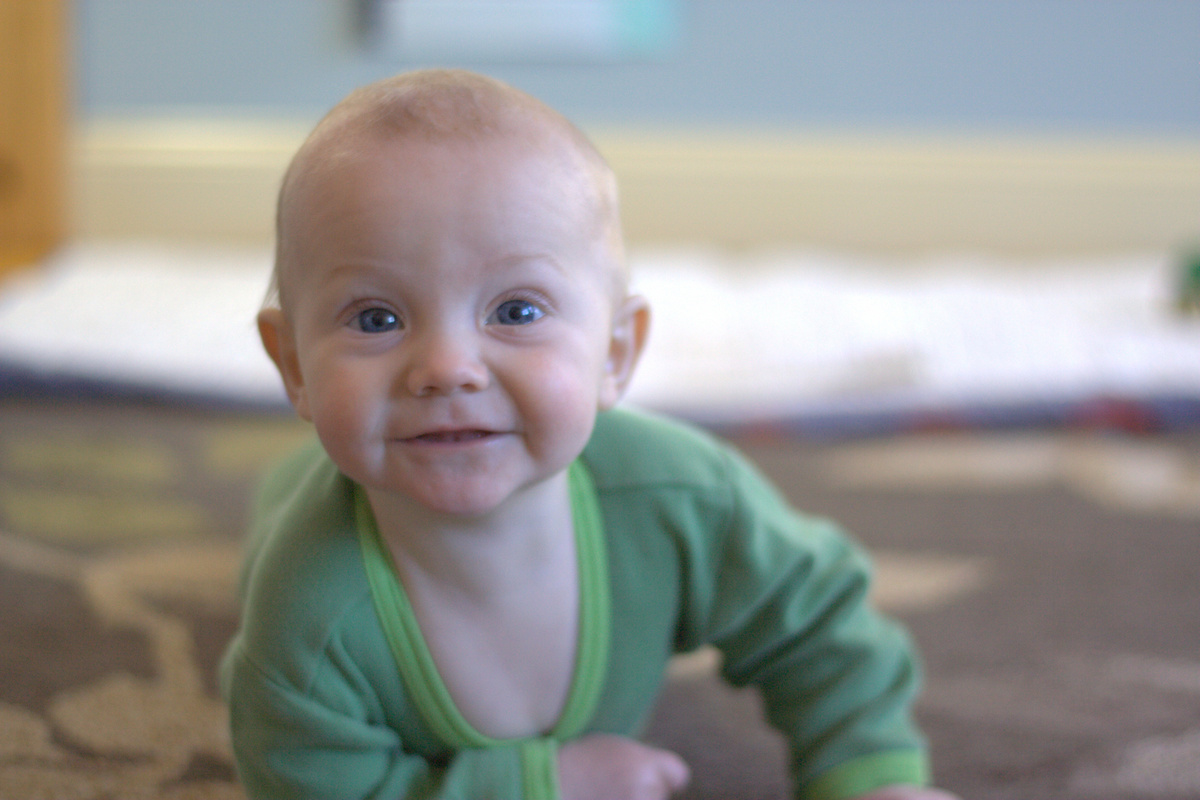
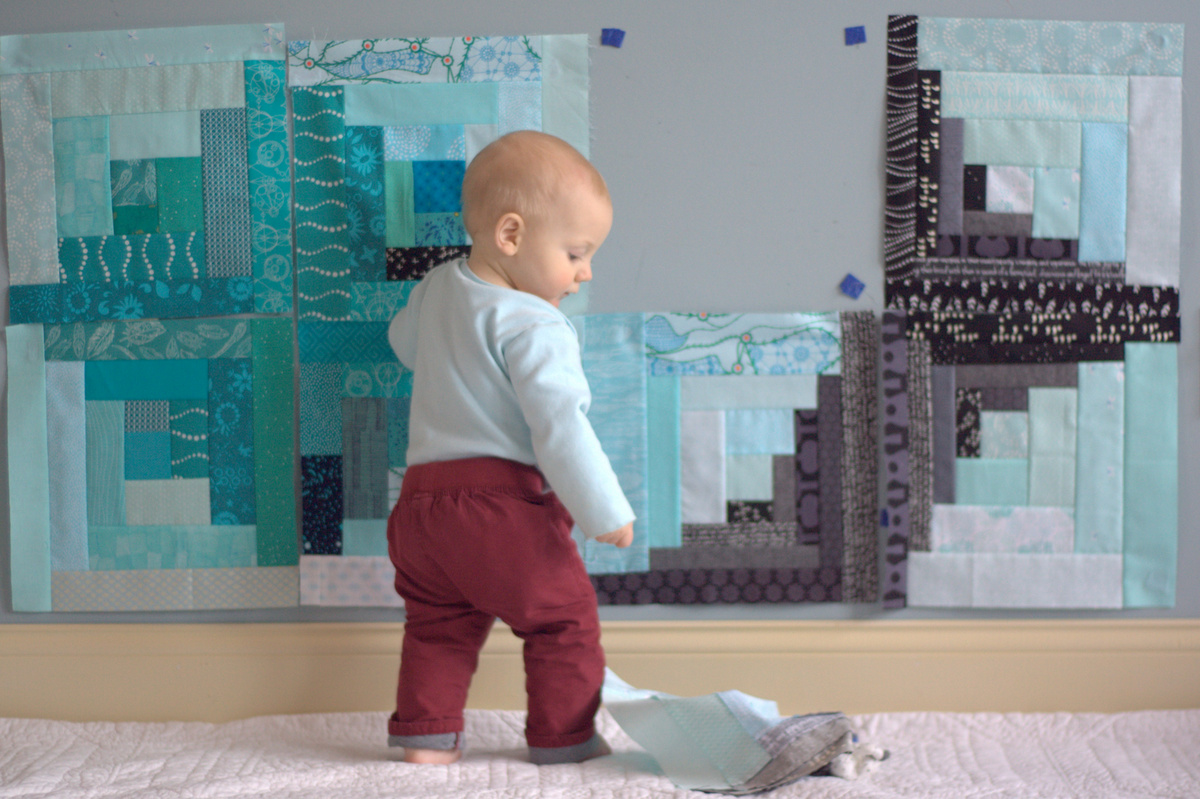
As you can see, Finn enjoyed helping with this month’s photo shoot. All predictions related to the complexity of successfully photographing a fully mobile infant were absolutely correct! All part of the fun!
Who knows what kind of new explorations he’ll be tackling next month! Maybe he will be able to help me tape the blocks UP onto the wall instead of just pulling them off?
If you want to see the full quilt layout plan, I showed it HERE in the 3 month post. You can see the full progression of Finn and his quilt’s growth so far HERE or by clicking the “Milestone Quilt” tab at the top of my blog. It’s wild to see how he’s grown in such a seemingly short time. Four more blocks to go! Thank you for joining me in creating Finn’s milestone quilt.
I’ve been quiet here, not for lack of sewing, but for lack of *shareable* sewing and computer time. I’ve been working on my first commissioned quilt, and I’ve been buckling down to try to get it finished. I’m having fun with it, but as is the case with just about every project, it’s taking me a bit longer to get together than I had hoped.
Perhaps one day I will learn that “I’ll just make a background of half square triangles (HSTs) and then I’ll just appliqué on top…” really is equal to cut, sew, press, trim, sew, cut, sew, press, trim, sew, on repeat for days, and while aesthetically “simple”, it is far from actually simple. The just is deceptively dismissive, but resides heavily in my planning process. I think part of my nurture goal for the year should include eliminating some “just” and being more realistic with my goals. In the meantime, I’ll continue making slow and steady progress, and enjoying the journey.
I can’t share much, since who knows if the recipient may be reading this, but here are a few peeks at my progress, and at the awesome project that has been filling most of my sewing time as of late.
I promise to show the final quilt once it is finished, gifted, and received. All I can say is that the half square triangles are “just” a canvas for something greater.
Time is not the only thing that has been flying by. Finn is already seven months old and is officially on the move! While he still moves primarily through his inching army crawl, he is getting a lot more adept at moving his body around from belly to sitting to up on all fours, *flop* to belly and across the floor!
While I didn’t finish it before Christmas, I did finish Finn’s 7 month milestone quilt block. I’m on course to have 12 blocks by his first birthday. The photography part is definitely getting fun, since as soon as I sit Finn down, he wants to move. That squirmy wormy desire to *move* just shows his growth and personality, so I’m embracing it. It’s one more opportunity for creativity!
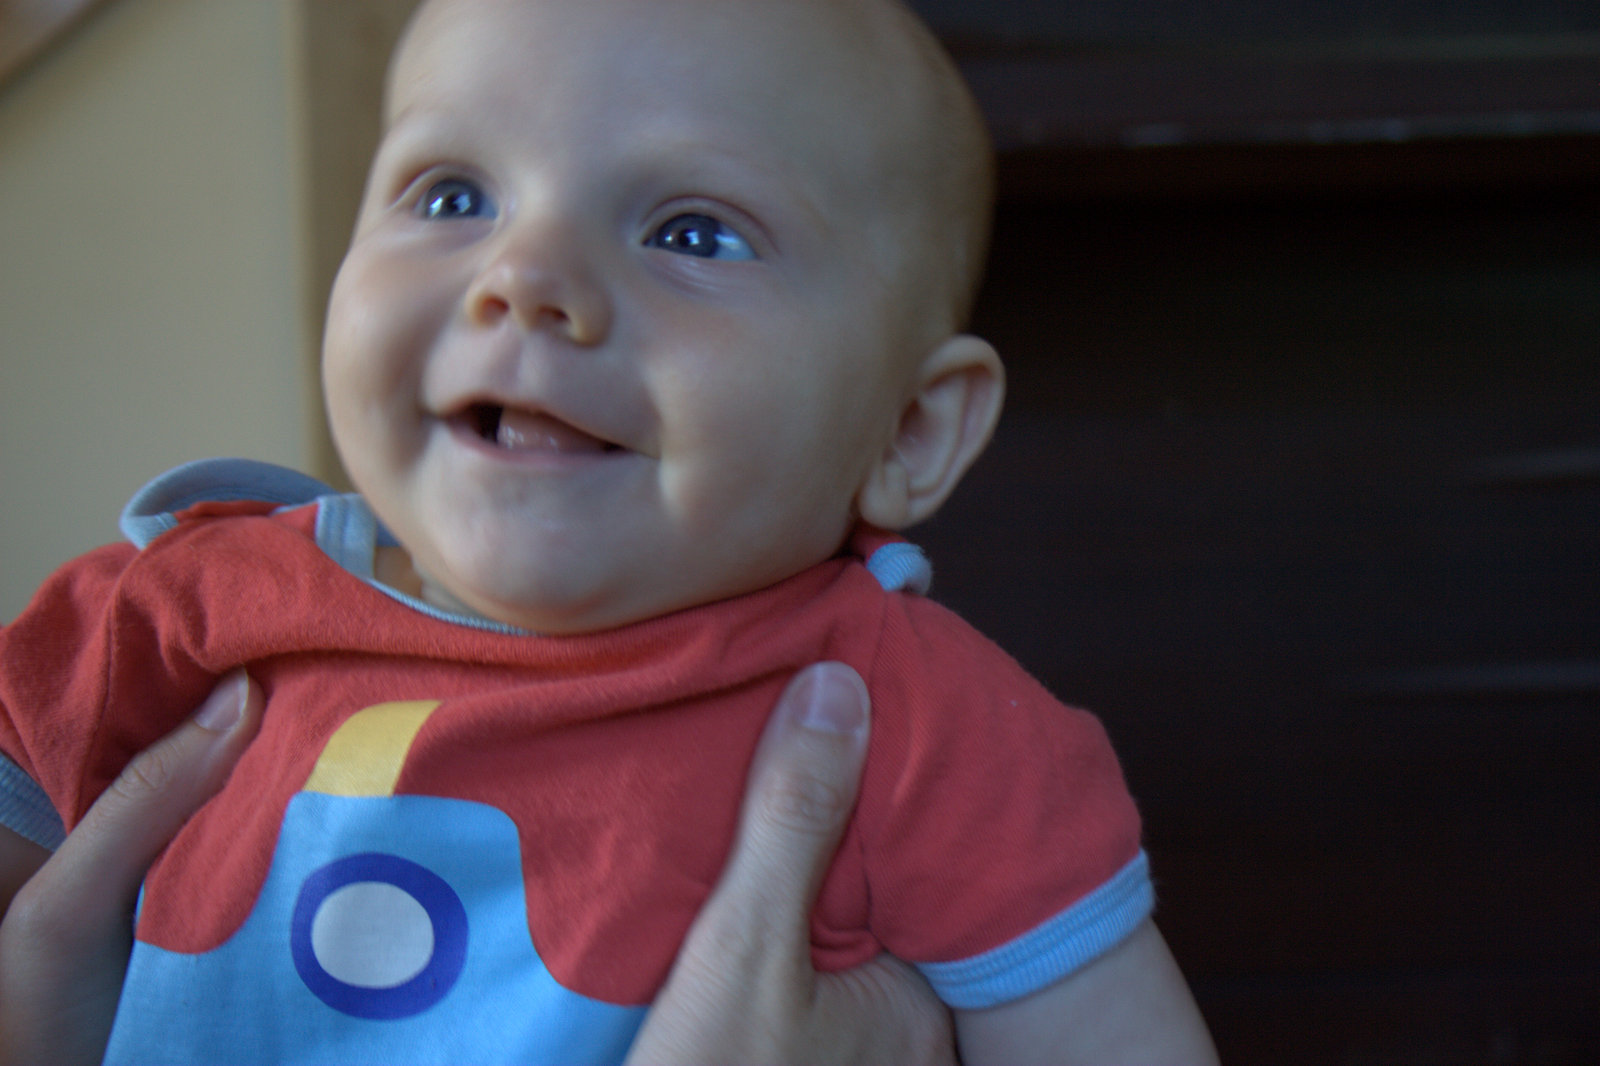
The biggest news this month is: teeth! Finn’s two bottom teeth are in and now big enough to see when he gives his gummy smile. Teething is never fun, but Finn (and mommy & daddy) have been handling it like champs. Between his big sister’s birthday, Christmas, and holiday travel, it has been a full and busy month!
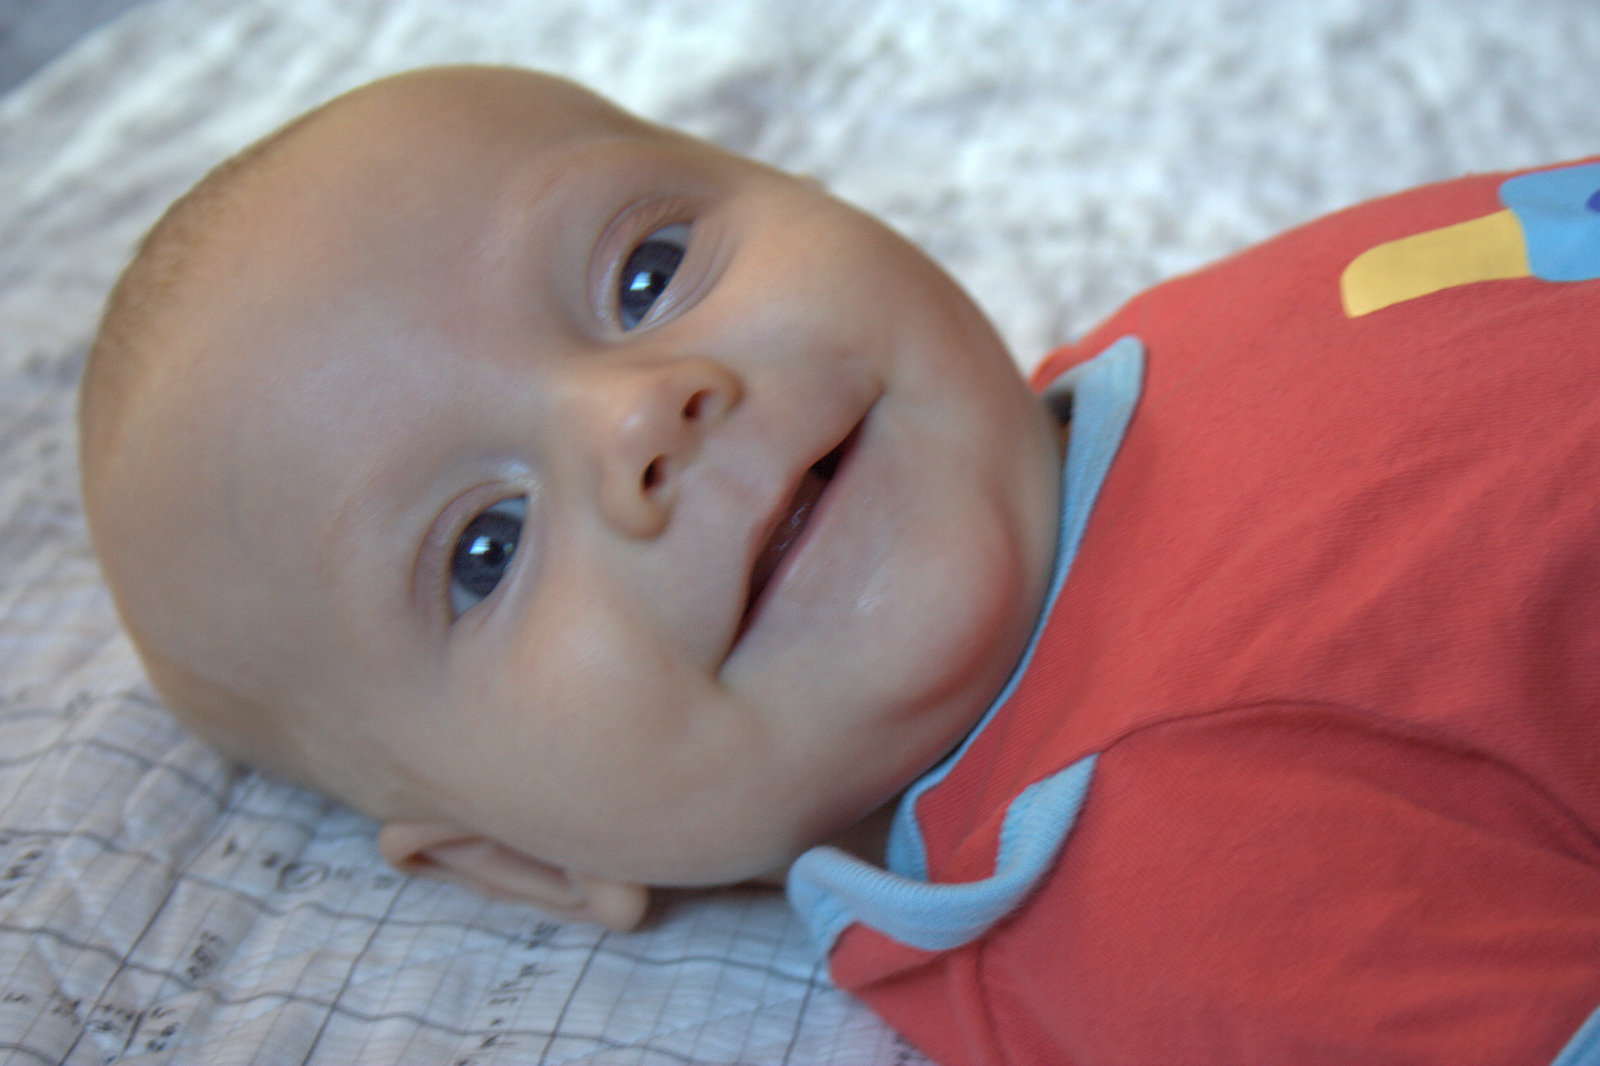
Not much stands in Finn’s way these days. Trying to get him to stay on the quilt near his quilt block was tricky, so most of the photos this week are movement or snuggle photos. I’m sure you don’t mind. This was what I saw less than a minute after putting him down right next to the wall. “I want to play, Mommy!”…
…until he got distracted by a design in the carpet. He is also really working on his fine motor skills, trying to grab tiny bits off the carpet and floors. I love watching his little mind at work. Babies are amazing; they learn so much so quickly!
“I like this one, Mommy!”
Finn’s quilt is really taking shape! You can see my full layout plan here in case you missed it a few months ago. I’m tempted to begin sewing blocks together but I think I will wait until the end to be consistent with photos. Here’s a quick photo burst since who doesn’t want to see babies in front of gorgeous quilt blur?
He loves to stand while holding onto my knees, and was trying to eat my colorful knees.
This project is so much fun, and I love that even if I procrastinate, sewing up a block takes less than an hour; sometimes it comes together as quickly as a half hour. For a busy mom with a million things on her plate (Hi, that’s me!), this project is a breath of fresh air and a chance to see and make progress without a huge time commitment. Plus, it’s such a fun way to document Finn’s growth and milestones.
Halloween is a fun time of year around our house, since my kiddos love to dress up in costumes from years past all year ’round, and the end of October means NEW costumes and candy! While I’m not really big into decorating the house for holidays (with the exception of Christmas and Easter–how can you resist those?), I do like making holiday crafts with the kids to help build excitement.
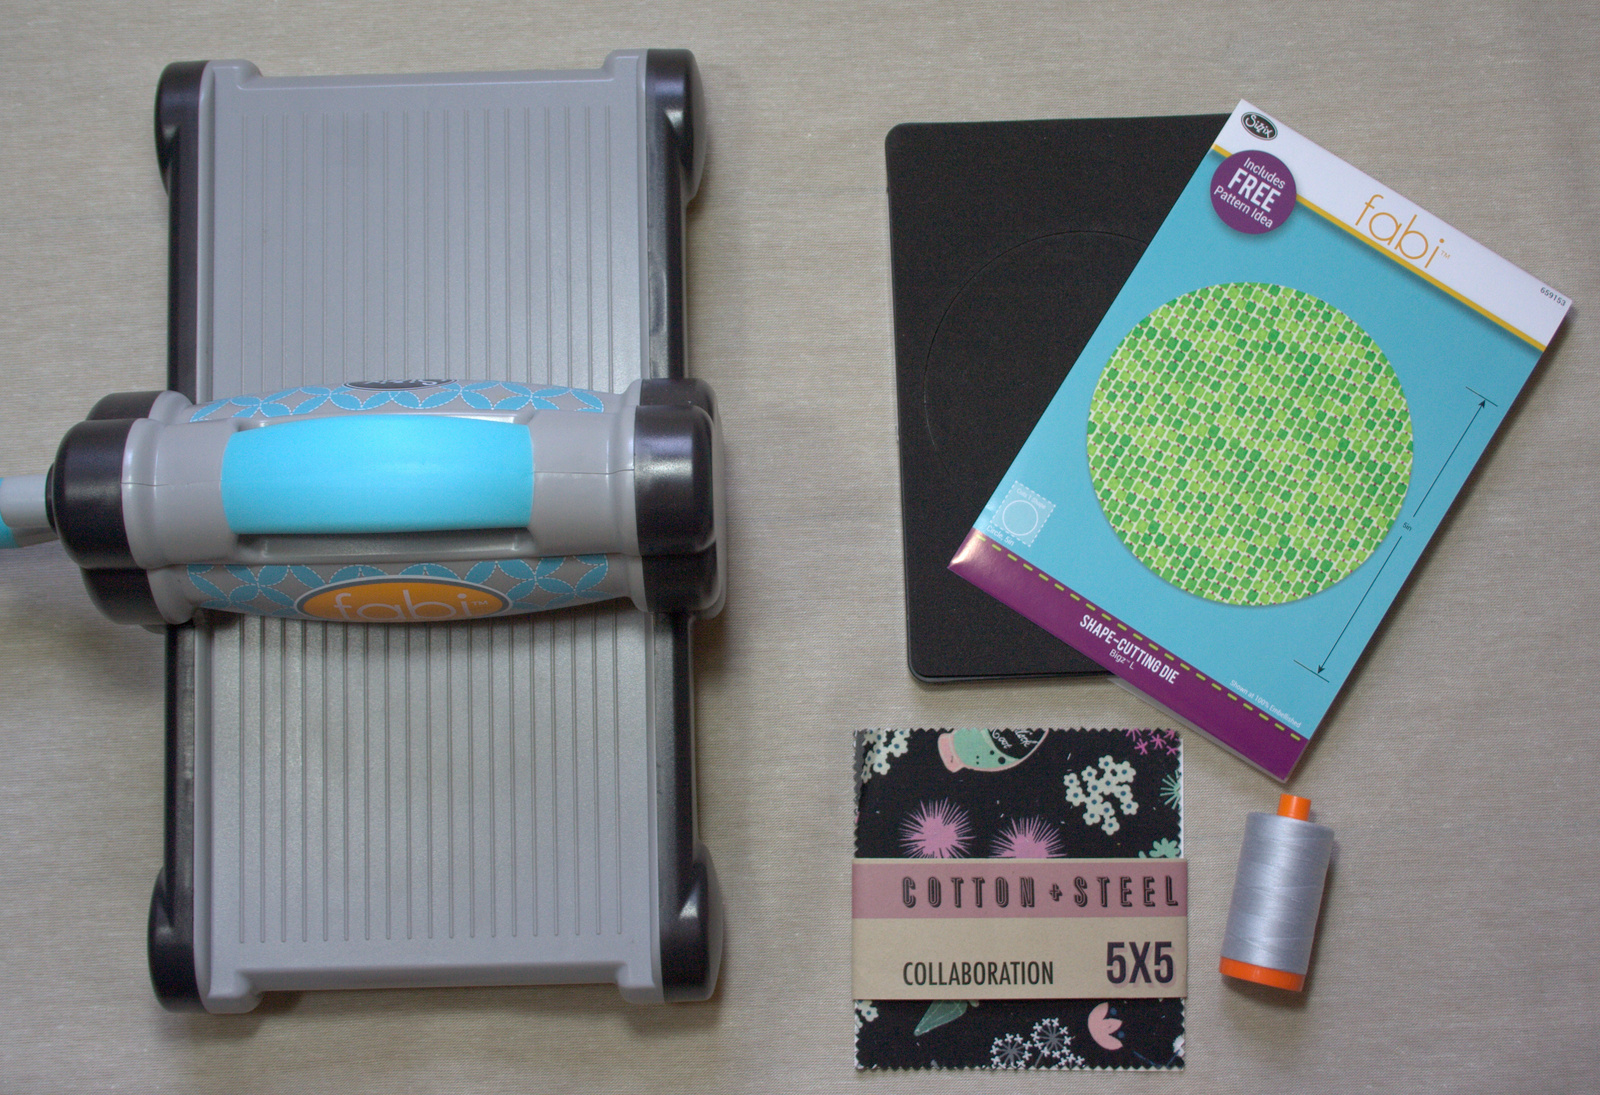
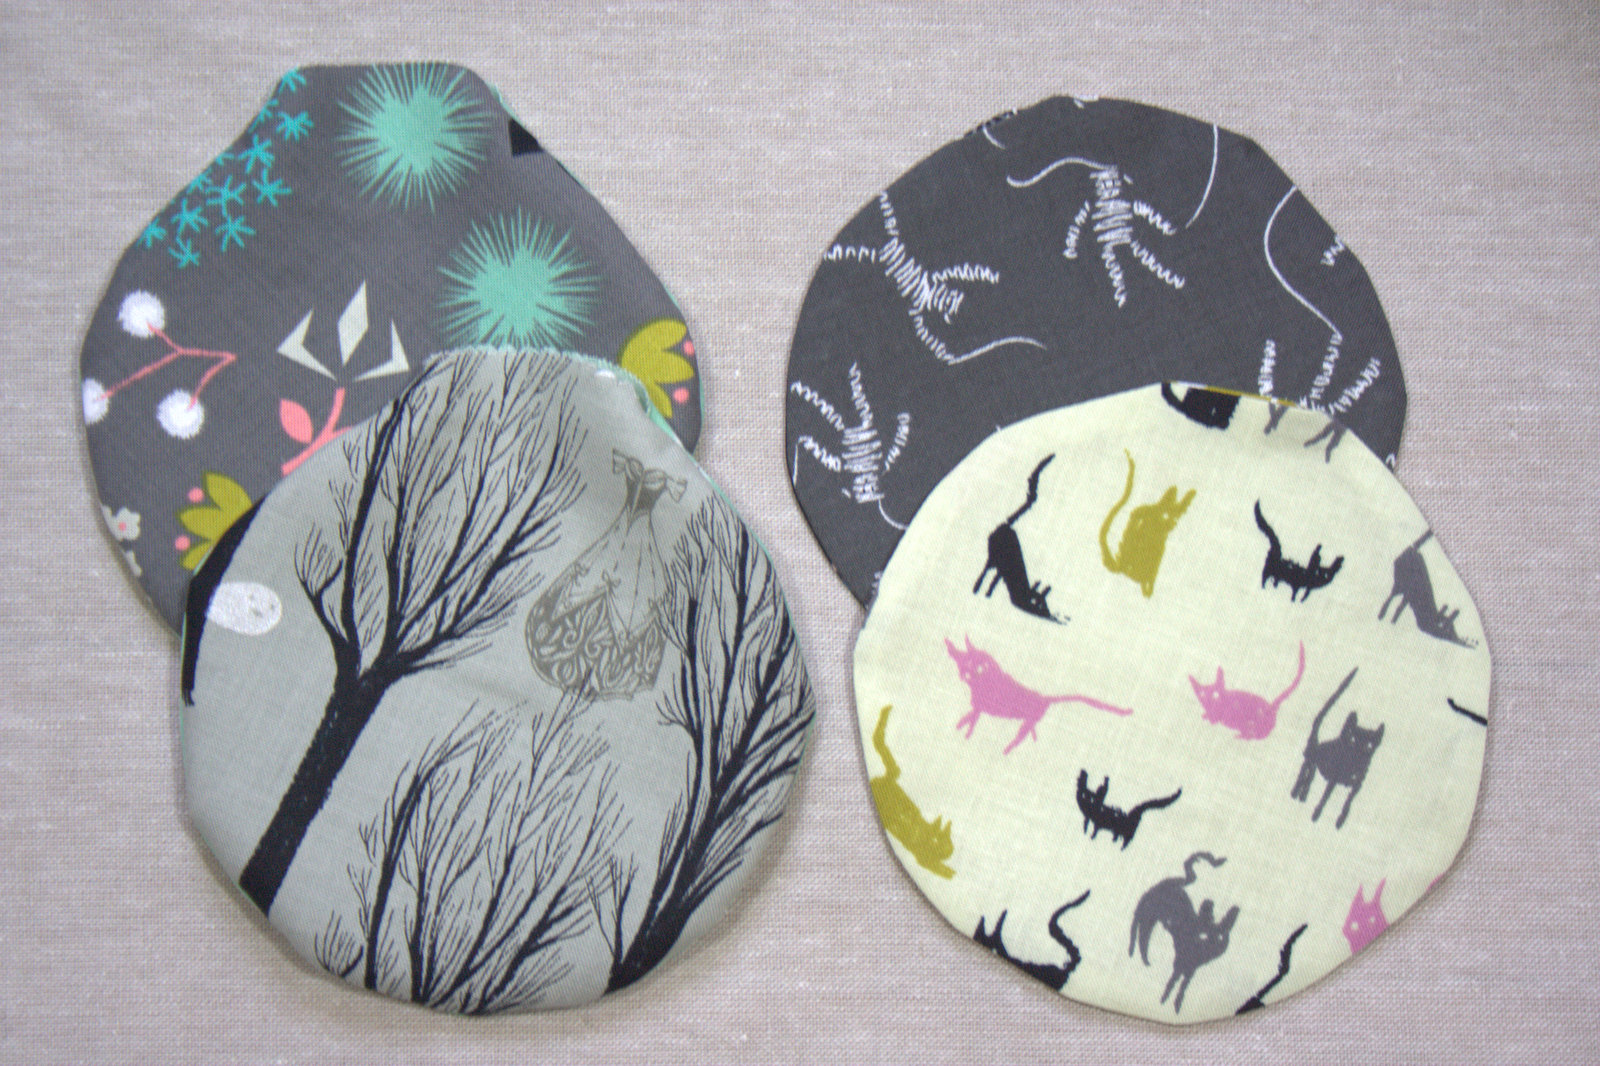
Today I’m going to share a quick tutorial for some spooktacularly sturdy beanbags, a perfect addition to a Halloween party but also a great addition to any child’s toybox. I should note, too, that beanbags are my go-to gift for two year old birthday parties. When a child turns two, I’ve found it’s really fabulous to have something you’re SUPPOSED to throw. Beanbags are such a versatile gift since they can be personalized in any way; you can change the shape, change the fabric, or personalize with applique letters or pictures. I’ve included affiliate links in this post so that if you decide to buy any of the tools I’m using, I will receive a small commission, too. I only share tools and products I love, so you can be sure they are tried, tested, and loved!
Materials needed (to make 4 beanbags):
8 charm squares of fabric
Die cutting machine & 5″ circle die (such as Sizzix cutting machines, AccuQuilt, Cricut, etc)
8 x 5″ diameter circles of fabric
Sewing machine (zipper foot suggested but not required) – I use a Bernina 560
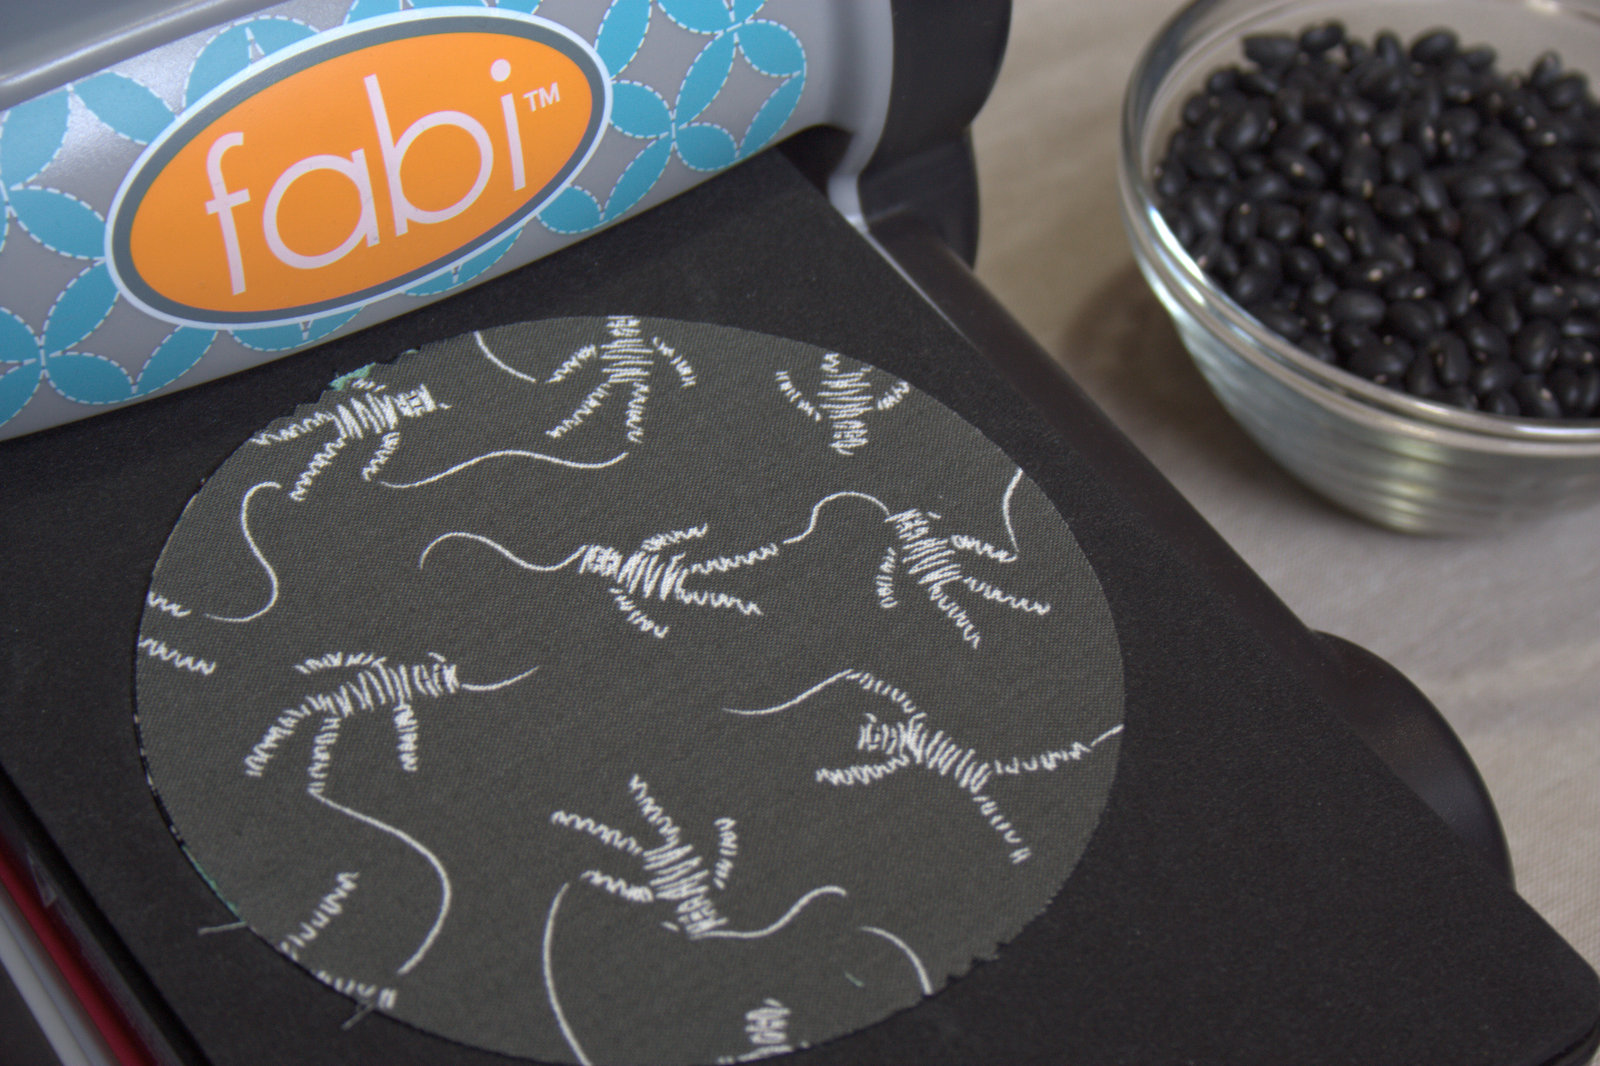
I made my beanbags using my Sizzix fabi die cutting machine and the BigZ L Circle 5″ die. You can also use any palm-sized circle item in your kitchen to trace circles on fabric for the beanbags if you don’t have a die cutting machine.
I figured since it’s nearly Halloween, it was the perfect time to use my Cotton + Steel Spellbound Collaboration charm pack. The 5″ circle die worked perfectly with the charm squares, which made my job even easier! I used my go-to thread, 50wt Aurifil 2600-Dove for all sewing.
Choosing four pairs of coordinating charm squares, cut eight (8) 5″ circles, layering your Sizzix sandwich: bottom cutting pad, die with the blades facing up, fabric centered over the circle blade, and top cutting pad. All necessary circles for this project can be cut with one pass through the die cutting machine, which made this a really quick project to make with my kids.
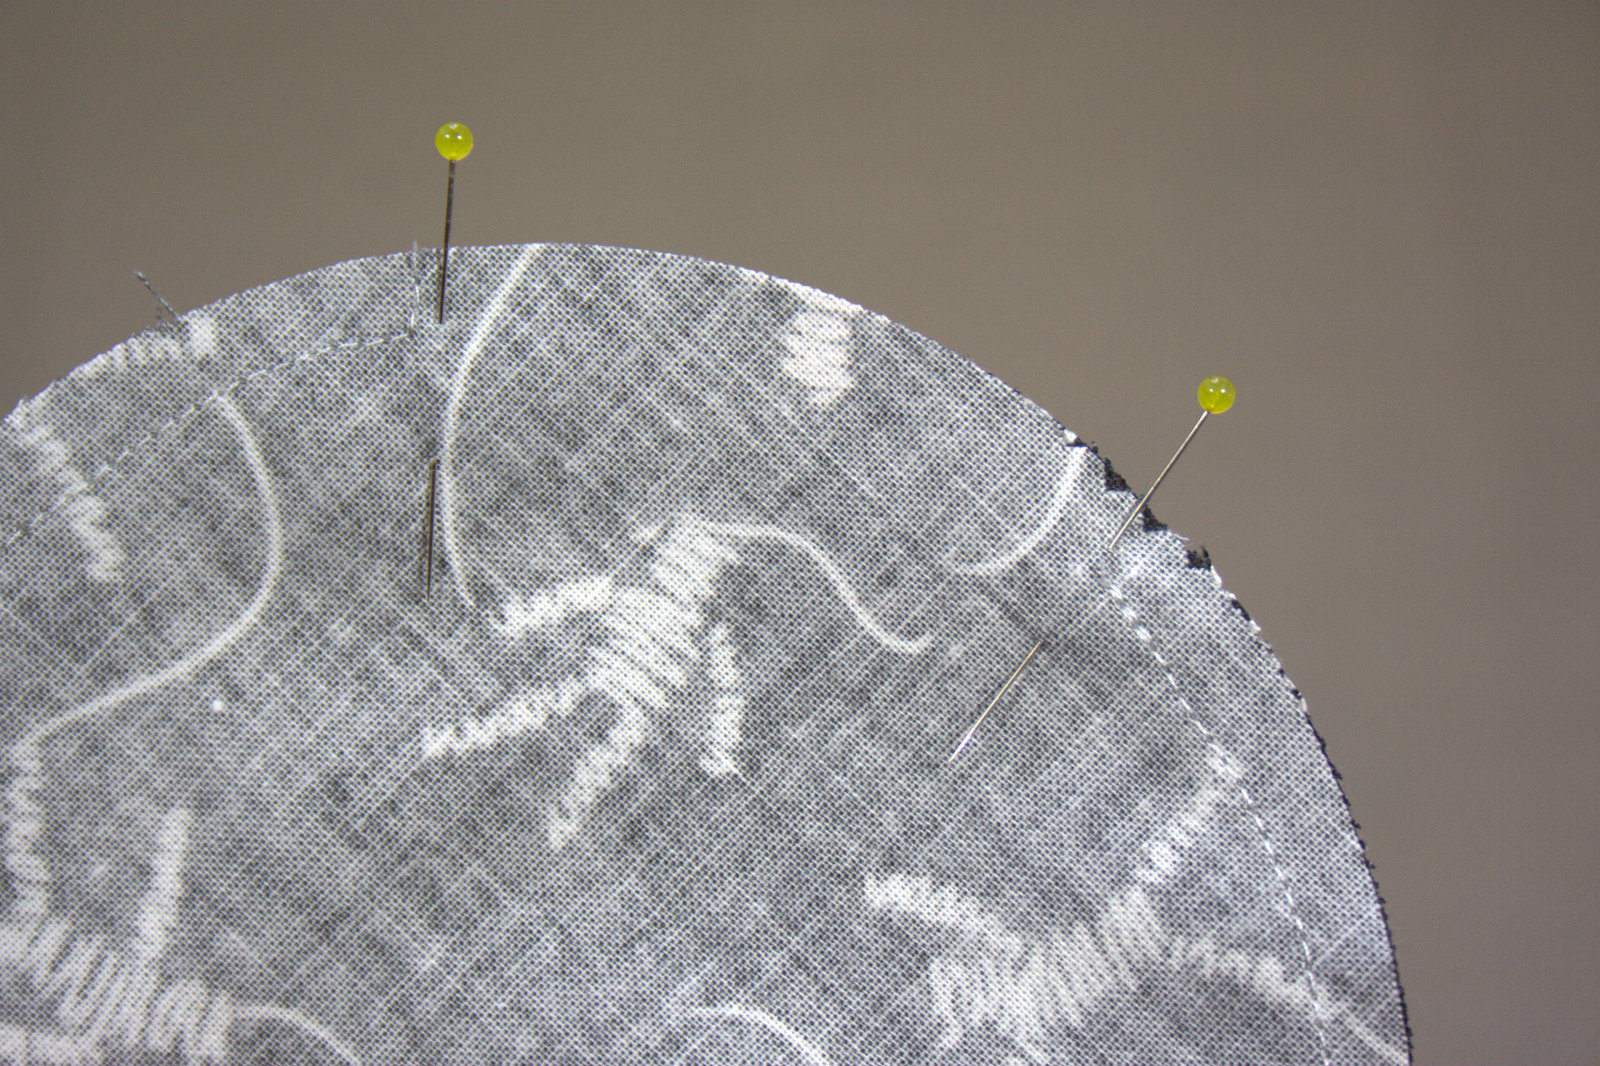
Next, pin your pairs of fabric right sides facing. I used only four pins, two of which marked a 2″ opening. With a 1/4″ seam allowance, sew the circles together, leaving 2″ open for turning and filling. Remember to backstitch at the beginning and end of each seam.
Beanbags once they have been turned. On the left are beanbags before pressing; on the right are beanbags after pressing and turning in the opening.
Turn beanbags right side out through the 2″ opening. Gently slide your finger along the seam from the inside to make sure the circle is fully turned. Press with a hot iron. Turn in the seam allowance around the opening and press, too, since that will make sewing the beanbags together much smoother once they are filled with dried beans. Since it’s a curve, this step is a little tricky (or at least it was a little tricky for me). Just remember what you’re making: these are going to be tossed and thrown and loved, and perfection is overrated!
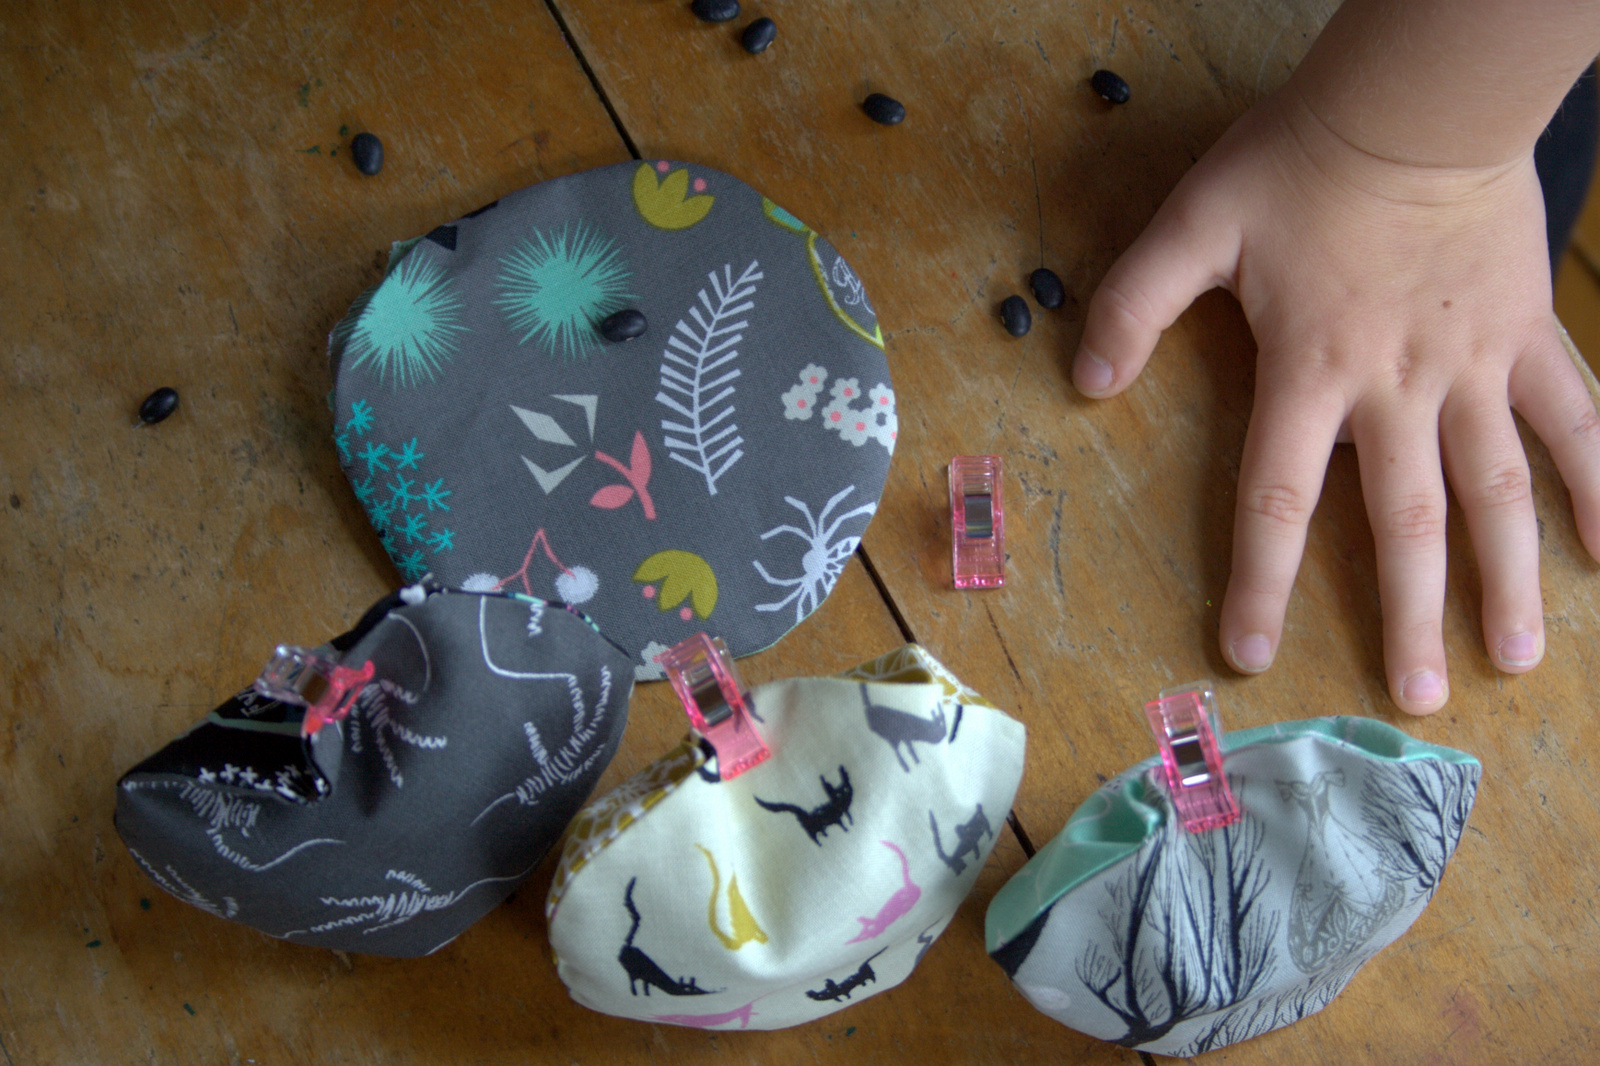
Now comes the fun part! Grab some small dried beans (I used dried black beans), a funnel and/or spoon, and a couple of eager helpers.
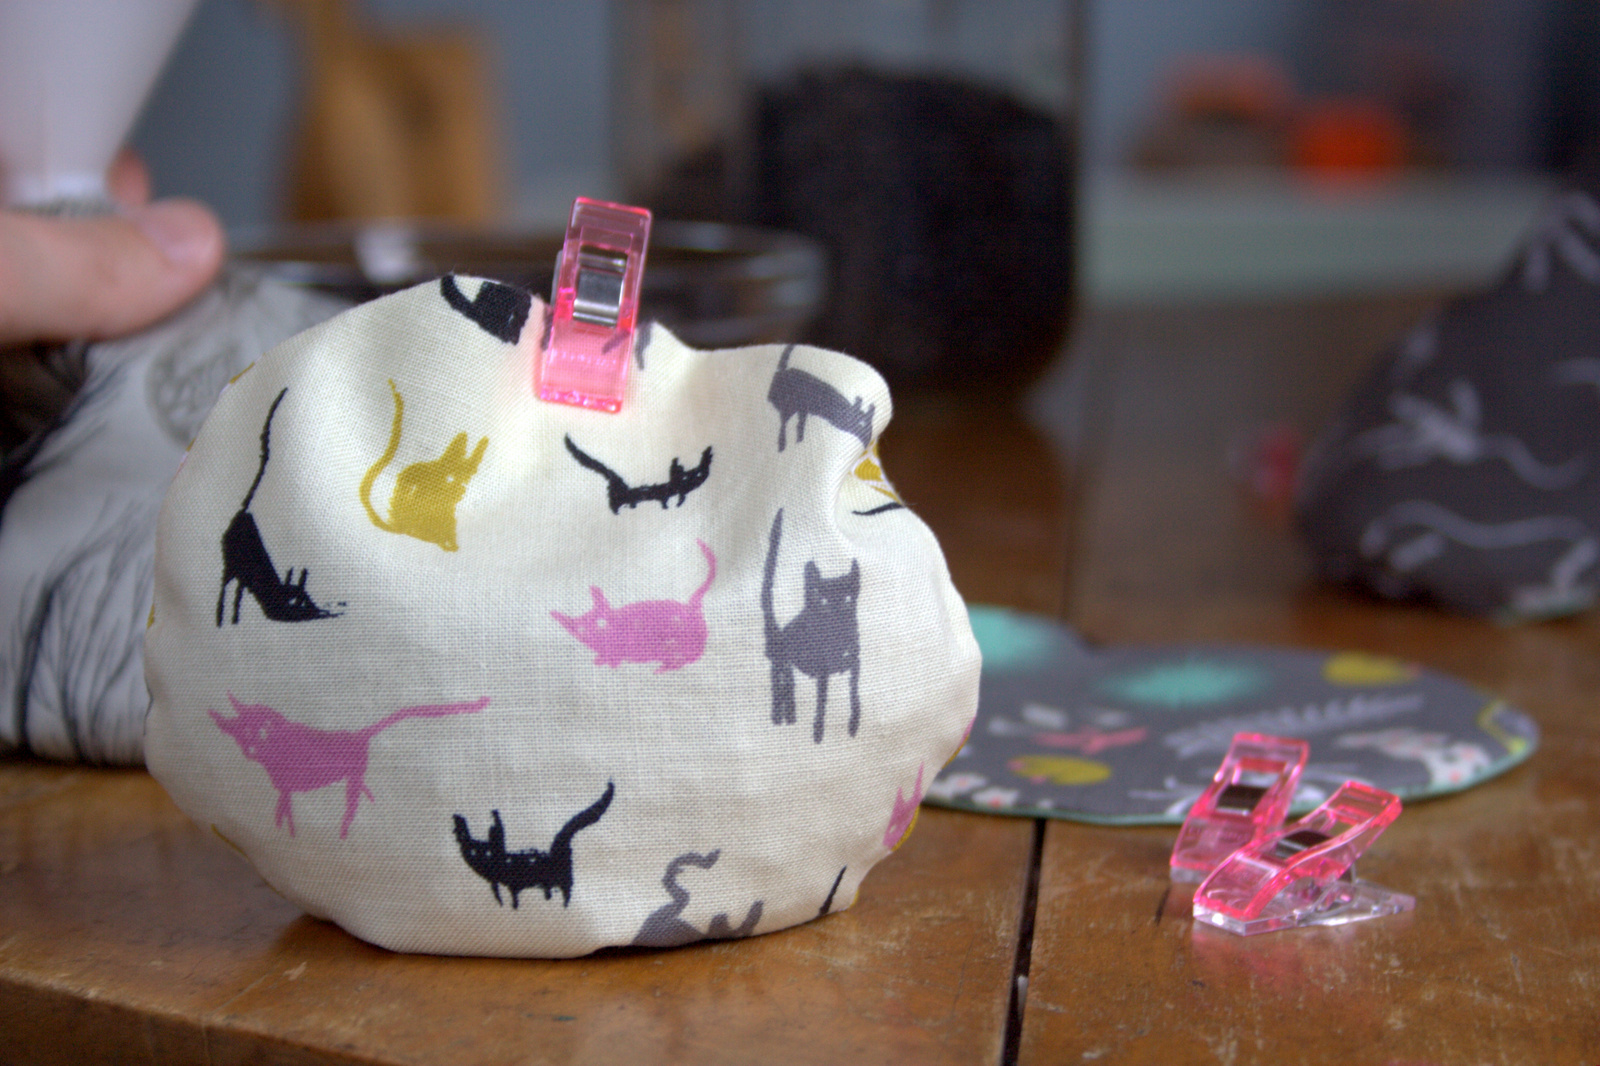
Fill the beanbags with dried beans, leaving at least an inch of empty space at the top. Trust me here; the beanbags will seem too empty, but while you are sewing them shut and top-stitching, you will want that extra wiggle room.
We found that a combination of funnel, spoon, and simple “use your hands to put the beans in” worked well for us.
Either pin or clip the tops once the beanbags are filled (remember to leave that good inch or inch and a half of empty space in the top). This will both remind you that the beanbag is “finished filling”, and remind your kiddos not to cram any more beans into it. (We definitely took as many beans out of the beanbags as we put it. All part of the fun, right!?)
Depending on the size of your helpers, this may be a messy activity. Plan accordingly, or embrace the chaos.
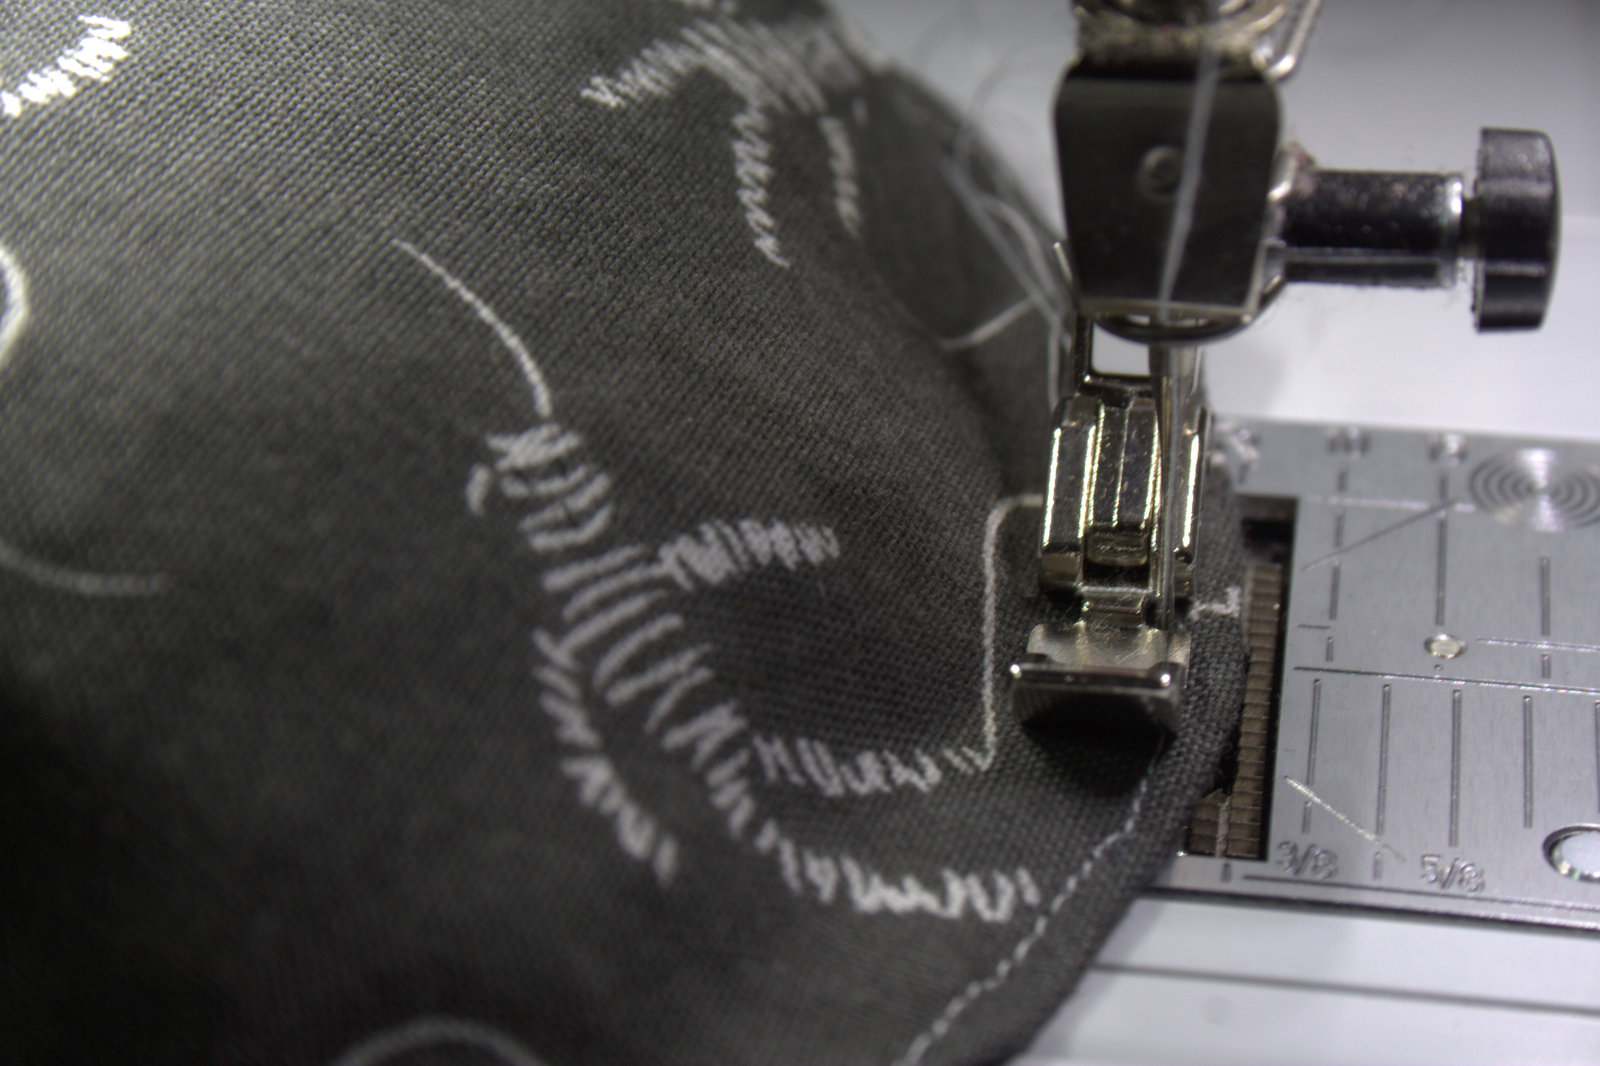
Needle between foot and beanbag.
Once all of your beanbags are sufficiently filled, head back to the sewing machine and topstitch about 1/8″ inch from the edge of the beanbag, beginning by sewing the opening closed. This extra round of sewing will securely close the opening, and will also provide extra durability for the entire beanbag. I made some beanbags for my nearly-six year old when she turned two, and they are still going strong in our playroom.
Foot between needle and beanbag = winning combination for me.
I used my zipper foot to sew these beanbags closed, and sewed most of them with the needle between the foot and the beanbag (shown in the top photo above). It proved more finicky than I remembered, so with the final beanbag, I moved the needle so that the foot was between the needle and the beanbag (shown in the photo above). This worked much more smoothly for me. As you sew around the edges of the beanbag, stop every couple inches with the needle down to reposition the beans, pushing them away from the part of the beanbag you are about to sew. Sew all the way around each beanbag.
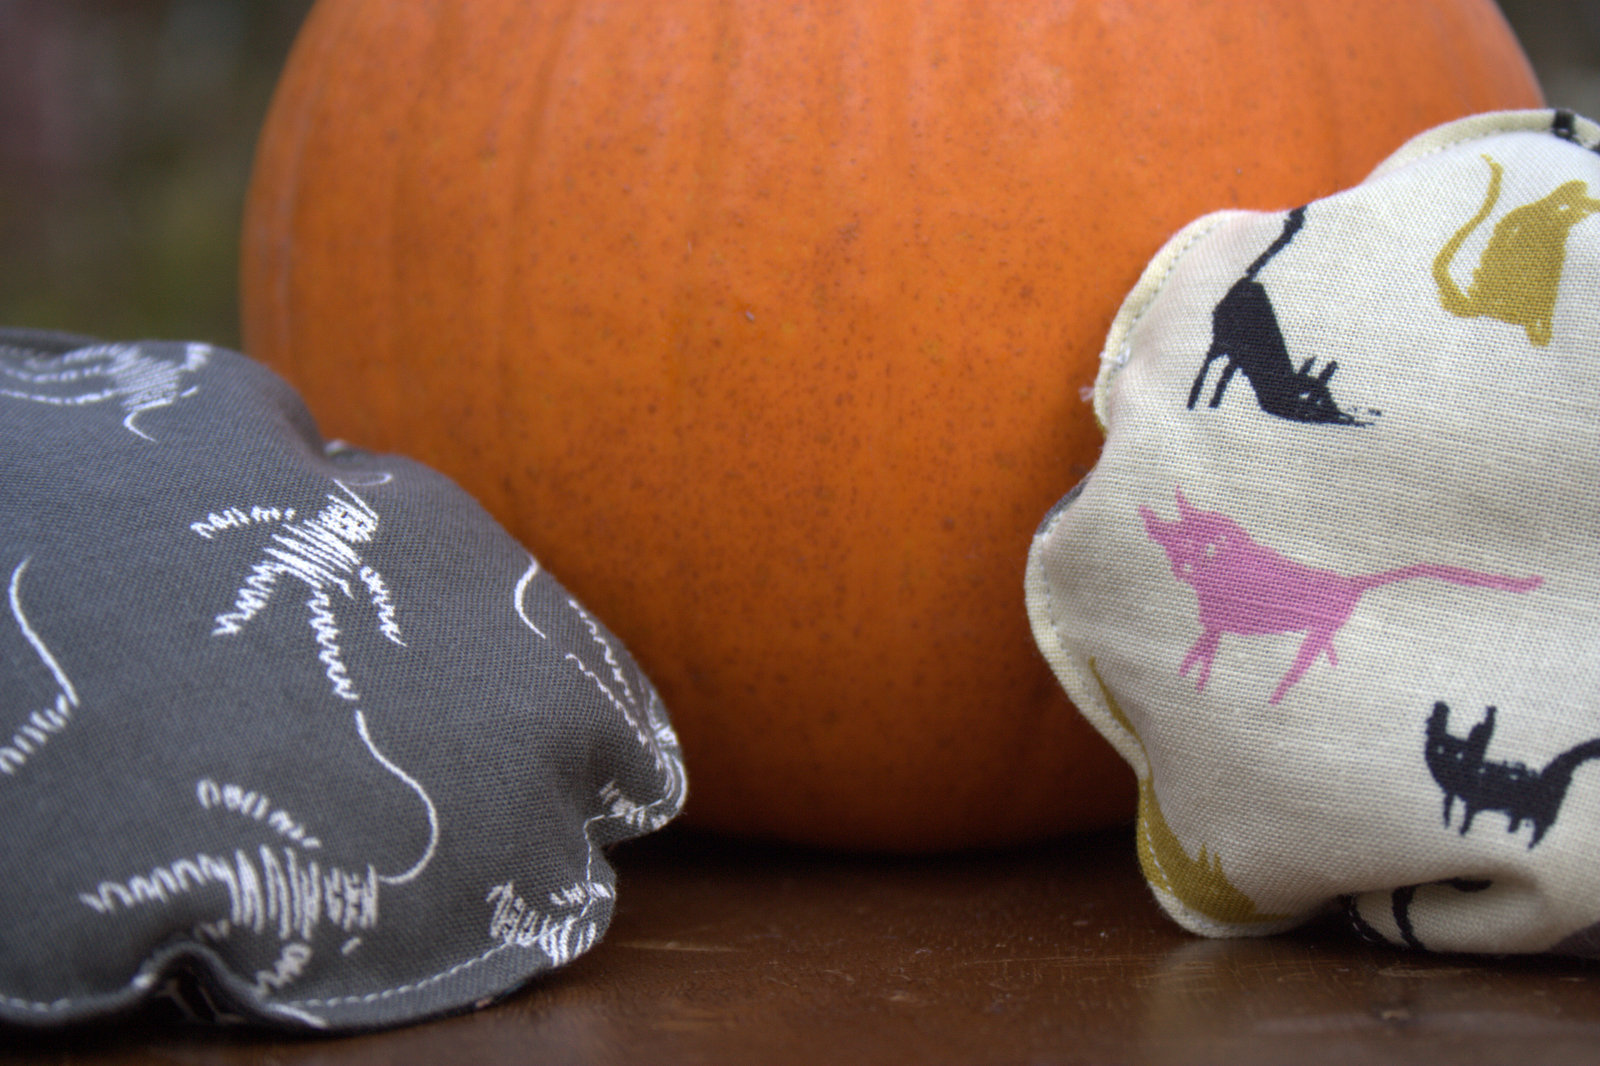
Now you have a handful of spooktacular sturdy beanbags and you’re ready for fun! Toss them at pumpkins, into trick-or-treat buckets, or at each other (avoid faces!). Have fun!
We are now two weeks into the year-long 1930s Farmer’s Wife Sew Along hosted by Angie at Gnome Angel and sponsored by Fat Quarter Shop and Marti Michell. I’m a block behind already, but it’s okay. No, seriously, I planned for this. At this point in my life, I have learned to actually PLAN for being behind schedule. (Is that weird or just really resourceful? I haven’t decided yet).
The final layout and block setting I chose/created includes background blocks between the farmer’s wife blocks, so my finished quilt only needs 72 blocks instead of the full 99. This gives me some much needed wiggle room and a whole lot less stress when I’m running “behind”. No worries. This is fun!
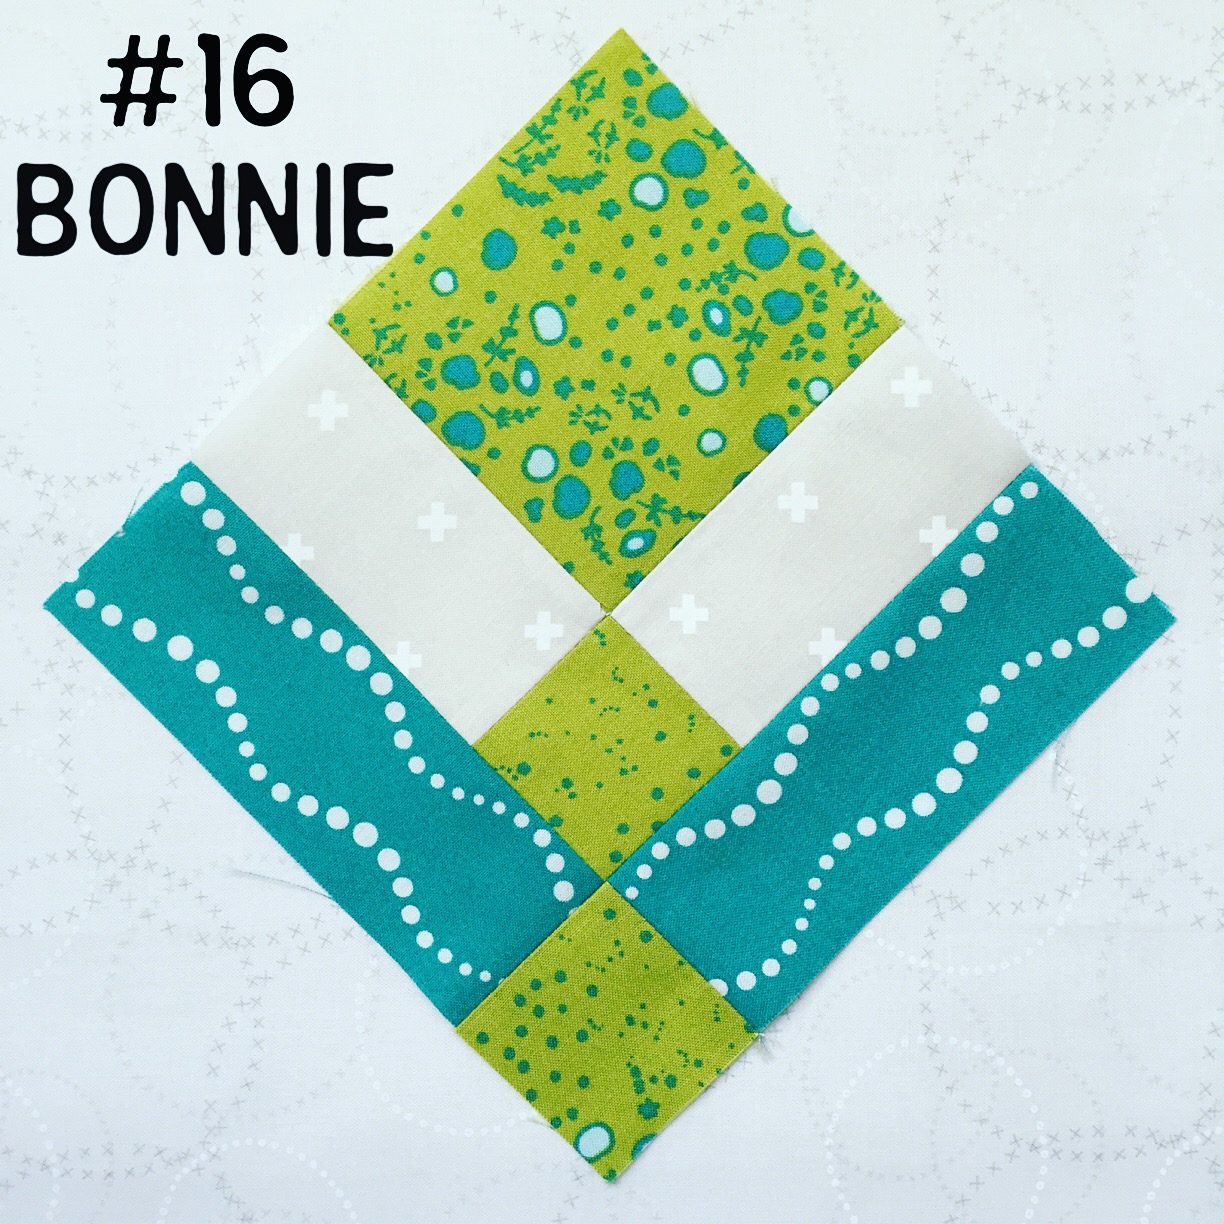
I’m having a great time so far experimenting with warm and cool color combinations as I put together the 6″ blocks. Here are the ones I have completed so far. For photos, I’m backing the warm colors with the black fabric in which they will be sashed, and the cool colors in a white/low volume print. I may swap a more grey-silver fabric in as sashing in the final quilt construction. Time will tell.
As you can see, I’ve been inspired by the gorgeous blocks being made by other quilters, especially the fun use of meticulous cutting. While I don’t have many “fussy cut”-able tone on tone fabrics, you can be sure you’ll be seeing more meticulous cutting in future blocks wherever I can make it work. It’s so much fun!
Reading the letters that correspond to each block has been my favorite part. The determined spirit of the farmer’s wives in the 1930s is inspiring and really puts things into perspective. While my block sewing has not been as reflective and relaxing as I imagined (shocker), I am enjoying this journey.
The Farmer’s Wife 1930s Sampler Quilt: Inspiring Letters from Farm Women of the Great Depression and 99 Quilt Blocks That Honor Them by Laurie Aaron Hird for Fons & Porter/F+W; RRP $28.99 – Click here to purchase.
The only requirement for this sew-along is that you have the book by Laurie Aaron Hird, since the block measurements, directions, and templates are all included only in the book. There is also now an ebook available, which makes it super easy to jump right in.
I’m linking up with Angie’s Farmer’s Wife 1930 Sew Along Link up, week 2. I encourage you to hop over and see all of the gorgeously diverse blocks that have been made so far. It’s amazing how each person’s personal style and tastes can be put into the very same block! You can also visit the extremely active and growing Facebook group, which is now over 4,000 strong! I’m looking forward to making more of these blocks, and reading more inspiring reflections by the farmer’s wives of the 1930s.
Four months old! Which means I’m now four blocks into my milestone quilt for Finn. For those of you new to this project, my husband had the brilliant idea (through jest) to make a quilt block every month with which to photograph my baby Finn as he grows, and sewing them into a quilt for him as a birthday present in celebration of his first year. I took the idea and ran, and haven’t looked back yet.
This project is still feeling very doable and I’m considering adding an additional four blocks to make it a big larger of a quilt at the end of the year. For now, though, I’m sticking with the one quilt block per month idea, and so far I’m four for four (great record!). You can see my planned layout in my 3 Month post here.
Finn is growing as only babies can. He’s a very stretched out baby, who loves to flex his legs and stand whenever he can, but he also has found the potential in rolling to the side, and has made it halfway over before getting stuck. He sucks and chews on his fingers, either for soothing or maybe he’s teething already (I sure hope not!). He is still so aware of everything around him and loves to “talk” with his baby babble and big bright eyes.
His newfound love of movement makes it quite difficult to get a good photo, but I managed to get a few. Even today, when he’s in the thick of a slimy, drippy, coughy cold, he is so full of bright eyed smiles and giggles. I caught myself almost defiantly asking him the other day, “How are you so happy ALL the time!?”, feeling like I was missing out on something. But then I realized since smiles are contagious, seeing him smile makes me happy no matter how stressed, tired, or otherwise cranky I might be. He’s a gift for sure.
Always on the move, with a smile in his heart.
I am really enjoying creating this quilt along with Finn’s growth. Setting small, attainable goals makes the entire quilt-making process not only doable, but it makes it part of my journey through his first year.
Now up I go to relieve my husband and take my shift holding our poor slimy guy upright so that he can get some sleep without coughing and spitting up slimy gunk. It may be a long night ahead, but hey… it’s all part of the journey and it’s a blessed one indeed.
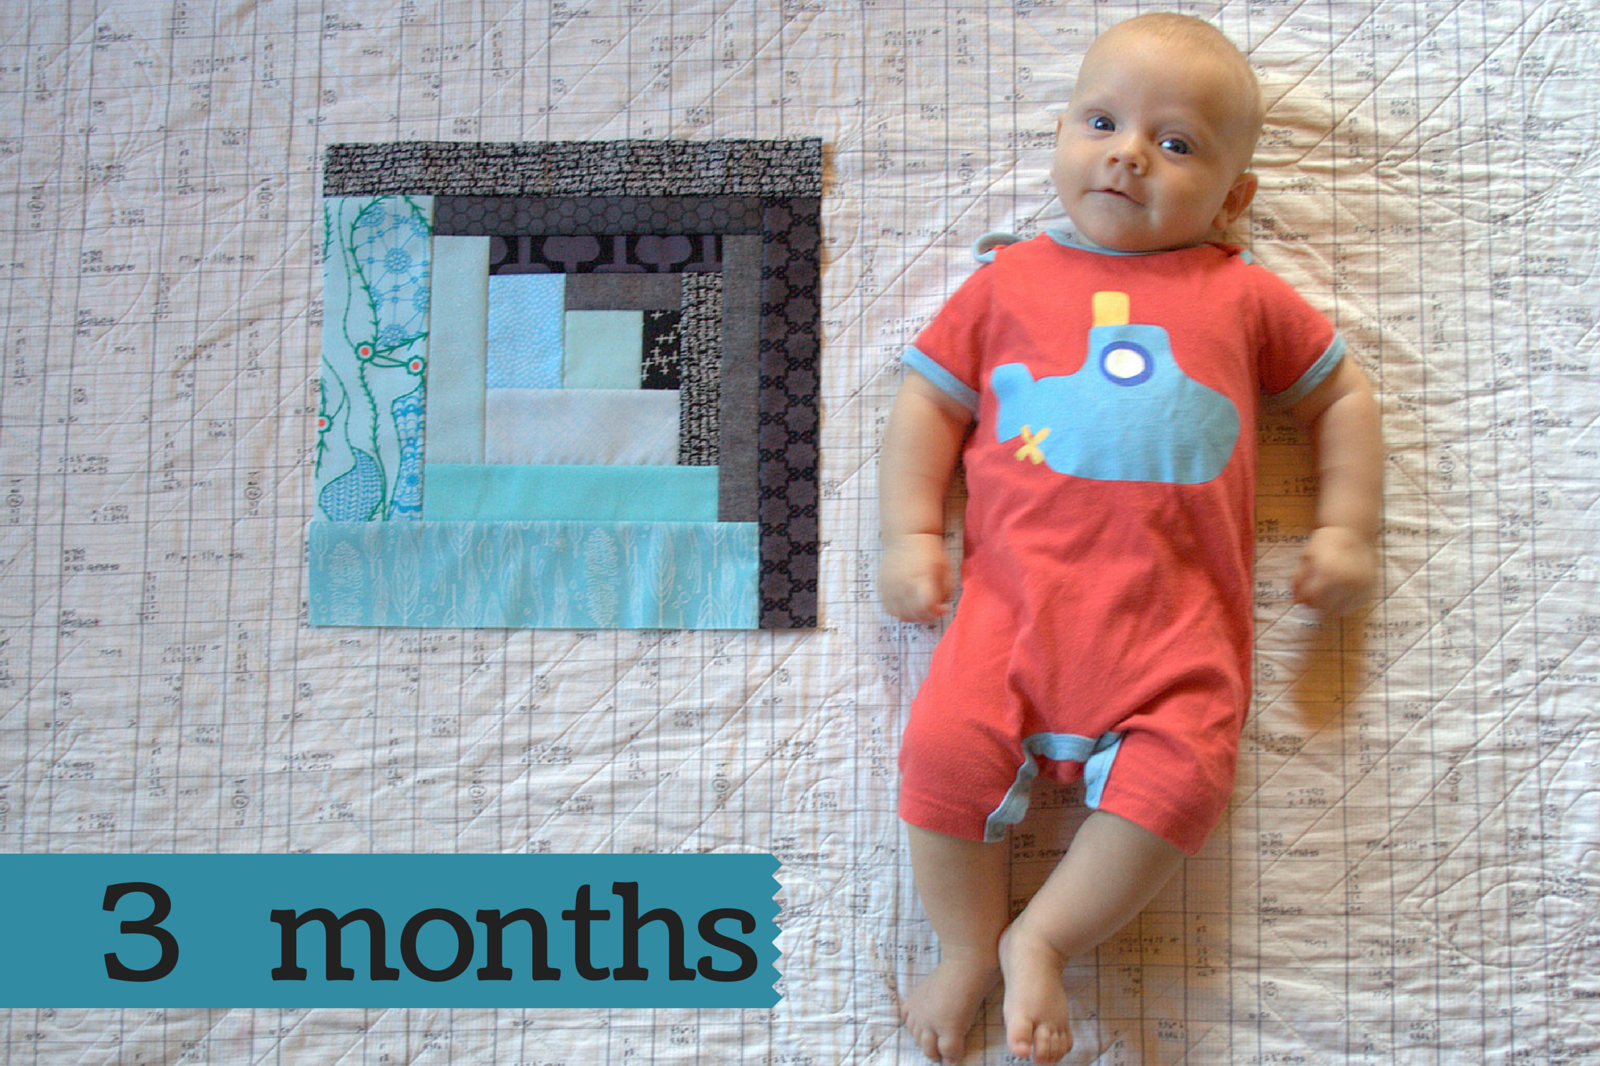
Time flies. Really, it does. It’s so cliche, but when it hits me how quickly hours become days, days become weeks, weeks become months, and then, surely, the months become years, it makes me slow down and remember how important it is to make the most of each moment. Three months have already passed since little Finn joined us on the outside. The first quarter of his first year is complete. I actually planned ahead this month, too, so that means a quarter of his monthly milestones baby quilt is complete.
“Wow, that’s growing!”
As promised, I finally settled on an overall layout and design for this quilt, and now I’m even more excited for the outcome.
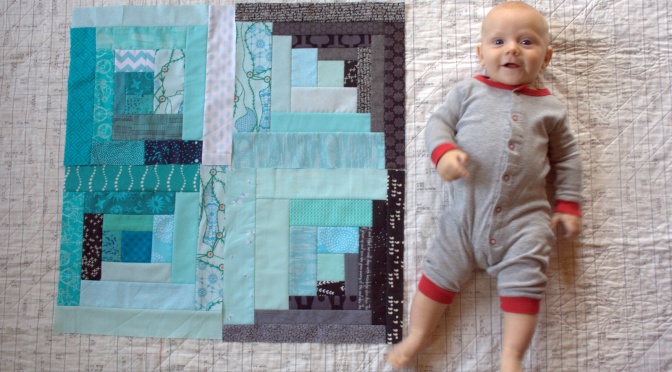
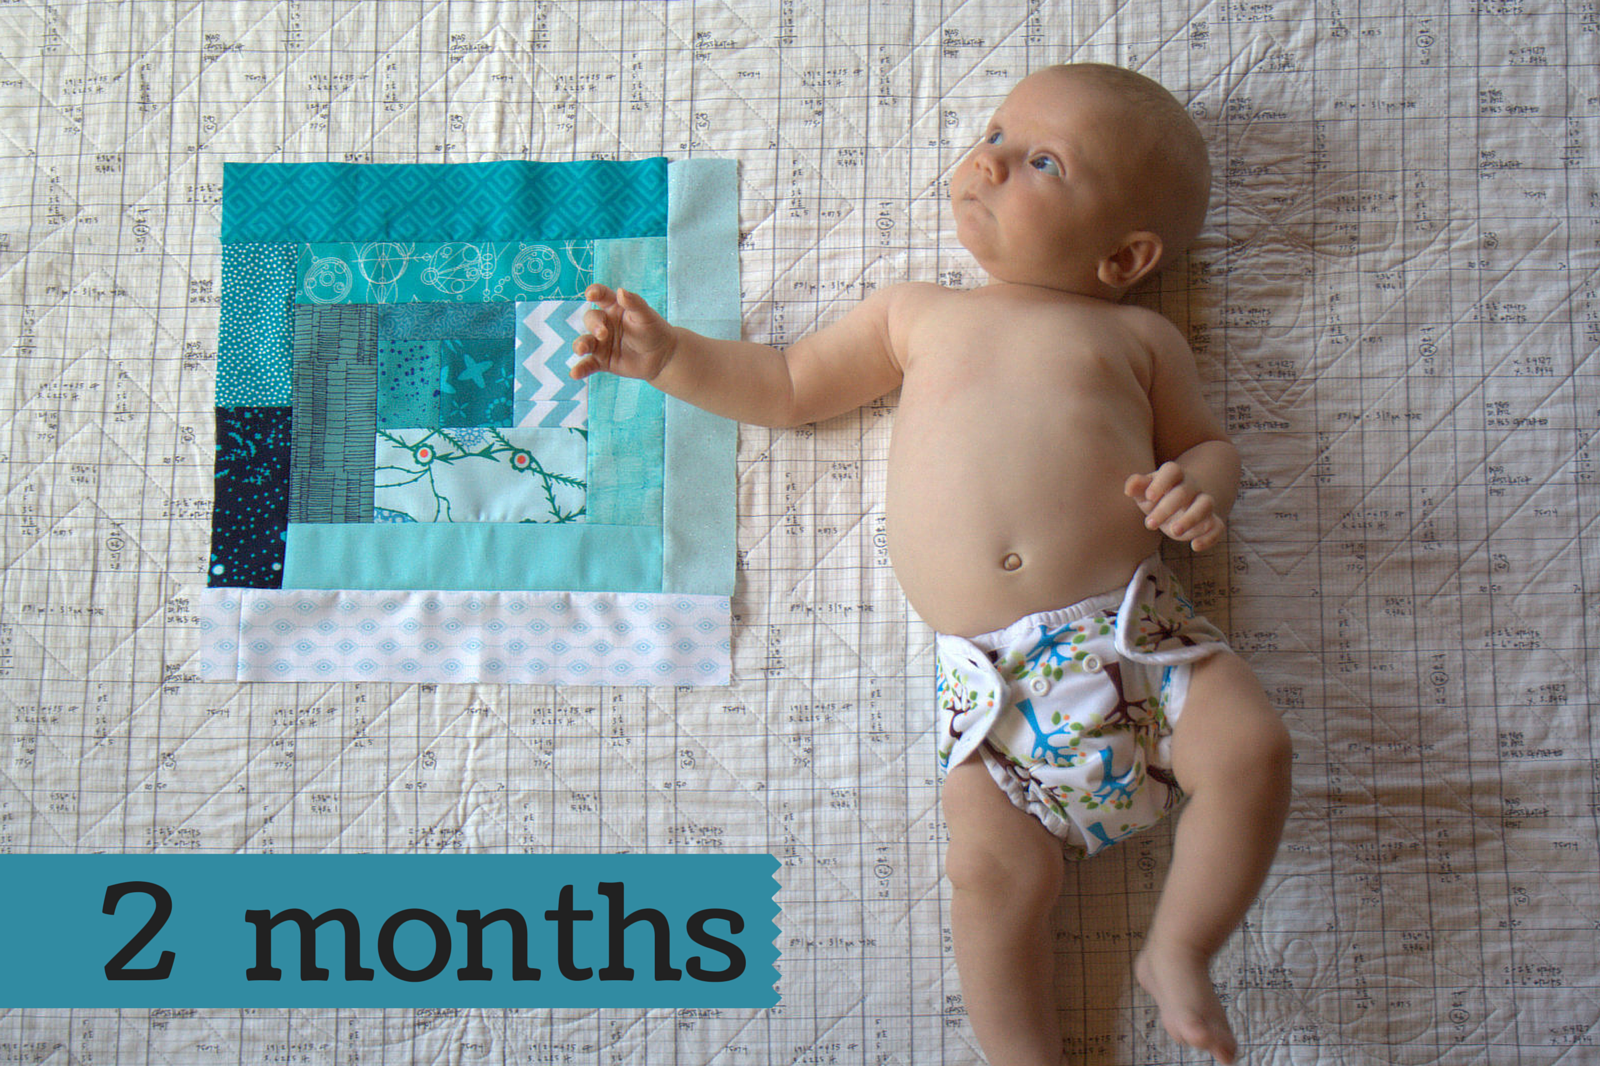
I settled on a color scheme of dark and light teal and blacks/greys, both because they are fabulous colors, but also because I have plenty of teal and black/grey fabric in my scraps pile and stash. I also added a slightly skewed log cabin block to help provide the appearance of some curves and to add some interest to the overall quilt.
Monthly Milestones quilt Block 2
This month I made a Block 2, with wide light teal and narrow black/grey pieces. Creating the illusion of a curve is really quite simple with log cabin blocks. I drafted this block from the outside in, with 1″ strips on two edges and 2″ strips on the opposite two edges, ending with a 2″ square in the off-set center.
The finished quilt will require five (5) block 1s and seven (7) block 2s. Block 1 is a more improv, scrappy log cabin with strips varying in widths, but generally around 2″ or 2.5″ in width. Both blocks are quick and easy to make.
Enough about the quilt, though; I know you really want to hear about Finn! He is truly a blessing. He still loves to “talk” back and lights up whenever anyone looks him in the eye. His favorite thing as far as I can tell is having conversations with anyone who will sit and look at him, replying to his baby babble and grunts. He is generous and unbiased with his smiles, but the looks of true adoration are directed toward his siblings.
Finn just recently started finding his hands, which is really fun to watch. I love seeing him deep in thought, examining his hands and clearly working hard at figuring out how to get them to do his bidding. He grabs my arm or hand when it’s within his reach, but he’s not quite reaching out to grab things yet.
Now that I have a clear plan for the quilt, I’m even more excited to see it come together as Finn grows. While I’m tempted to up the ante to two blocks per month (one every 2 weeks feels doable), I am going to be easy on myself and stick with the one block per month plan. A finished 36″x48″ will be a great drag-around size as he grows into toddlerhood.
Use the code LaborDay2015 at checkout to get 15% off anything on their website all weekend (today, Saturday, September 4th through Monday, September 6th). Fiddlehead now has international shipping available, too! Check out the details on their Shipping Page.
One of the perks of quilting retreats and other social sewing is that little tips are tossed around. Today I’m going to share a very simple yet important tip about using the thread you cut from a spool during hand stitching. As a self-taught sewist, these are the bits of knowledge that I miss, since rarely are there blog posts about the bare basics of sewing. While basting our needle-turn applique projects around the table at the Slow Stitching Retreat, I caught this important tip:
Use the thread in the same direction it comes off the spool. The tail end that you pull to unravel your length of thread should be the side you thread through your needle. The end that you cut should be the knot end. This way, you are pulling the thread through the fabric in the intended direction, which works with the ply of the thread instead of against. Using the thread in the proper direction significantly decreases tangles and twists while stitching. Simple, right?!
I never knew that it mattered which end was which, so I didn’t pay attention while cutting my thread lengths. Now, when I’m pre-threading a bunch of needles for a good binding or hand stitching session, I thread each needle as the thread is cut instead of accumulating a nice pile of threads and then grabbing any which end to thread through the needle.
Stephanie’s Tips and Tutorials link ups from previous weeks are filled to the brim with great time savers, tricks, and how-to’s. I’d definitely recommend browsing them with your Pinning finger ready. One of my favorites from last week was this tutorial by Veni Vidi Vicky on how to make your own sewing tags (which could easily be adapted to making your own quilt labels!). She gives great step by step instructions on how to use Spoonflower, which is something I’ve been tempted to do but have yet to try.
Now it’s your turn! Do you have any little tips or great tutorials to share this week? If you do, please link up below!
Powered by Linky Tools
Click here to enter your link and view this Linky Tools list…
While that first month seemed to last so long, with days and nights filled with slow baby snuggles, the second month flew by as we returned to our daily routine. My baby is two months old! With a bit over 20 minutes of sewing time (#sewtake20!) his second monthly quilt block is finished.
They are both growing!
I decided to make another teal block since I still have a lot of teal scraps. I think rather than my usual rainbow, I’m going to stick with a simple color scheme for this quilt: teal and black & white. I really need to sketch out a firm plan, so I’ll make that a goal for month three.
He is so alert and interested in the world around him.
I am blessed beyond belief with this boy. He has such a peaceful demeanor, and as soon as he hit one month old, he was all smiles. He is so very interested in the world around him, and I love having “conversations” with him. After three children, I have mastered the art of the one-sided conversation, and I truly love the baby babble and expressions I get in return.
He’s telling me all about it.
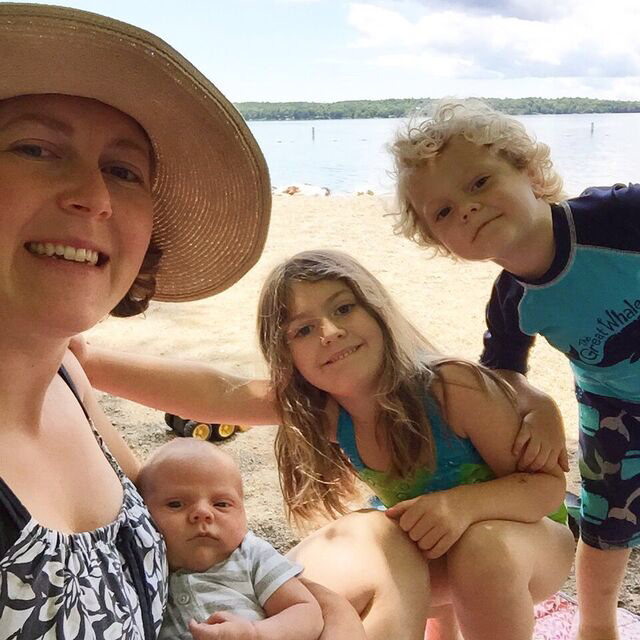
Perhaps the best part about growing our family is the love between siblings. Maddie and Max love their little brother almost as much as he loves them, and seeing the sweet exchanges is heart warming, even on a crazy day.
I’m excited to see this quilt grow with my little guy, and the one-block-per-month requirement still feels more than doable (even if I did make this block last night).
We all have busy lives. Whether it’s work, family, hobbies, friends, or chores that fill your days, there’s always something that needs to be done. As a full time mom with a newborn, I know that there is an endless list of chores–laundry, dishes, cooking, vacuuming, gardening, cleaning up after two busy toddlers, did I mention laundry?–on top of keeping my kids alive and of course loved and engaged in fun activities that easily fills my days and nights. I’ve been asked a few times how I find time to sew with three kiddos include a newborn. My answer is simple: I make time.
Life is full, but you can still make time to do the things you love.
At first I felt guilty taking time to sew and quilt when there was always a long list of chores that could be done. But over the past few years, I’ve learned that I need to make time for myself in order to keep my sanity. Taking time regularly to create something beautiful (since that’s always what we’re doing when we quilt, right?) helps me to recenter and rejuvenate. “Me time” is a necessary part of my existence as a happy full time mom and wife. I know that now.
So how to “make time” in an otherwise jam packed schedule?
1. Set small attainable goals
For me, setting small attainable goals has the most success in helping me find regular sewing time while staying motivated and enjoying the process. As a yoga teacher, students often struggled with maintaining a personal practice at home. The best advice I heard during one of my teacher trainings was to set your bar LOW: make it your goal to roll out your mat and stand on it each day. That’s it. Roll out your mat. Stand on it. Goal accomplished! Once you are standing on your mat, it’s so easy to take a deep breath and do yoga. Rolling out the mat is the hardest part.
The same applies for sewing. Set your bar low. Make it your goal to step into your sewing space each day. Set a timer for 20 minutes and aim to create for 20 minutes per day. If the 20 minutes passes and you’re still going strong (and don’t have any crying kids or impending business meetings), go ahead and take 20 more!
2. Just do it!
Nike was on to something. Take it from me, if you spend the entire day thinking you will take your 20 minute sew break later, there’s a good chance you will be too tired when “later” finally comes. Regardless of whether your goal is to go for a run, clean the bathroom, write a letter to your best friend, or sew for 20 minutes, it’s best to accomplish it sooner than later. Besides, who doesn’t want to start their day with a “win”? Get the hard stuff out of the way early in the day, and you will be surprised how much lighter and more motivated you feel. Who knows–maybe you’ll be inspired to find time to take 20 more later that day!
3. Be gentle with yourself
This is the most important rule, in my opinion. We are our own worst critics, and it’s easy to fall into the pit of “I can’t” or “I should have”. I wish I could remember who told me: “Don’t should on yourself.” (say it out loud–get it?). Should is such a helpless word. The past has passed; there’s no changing it and no use in thinking about what you should have done. Think instead of what you will do now.
Try to create new habits with a gentle heart. If you currently are not consistently sewing at all, maybe make your goal to #sewtake20 four out of seven days this week. (Remember tip #2, though–getting those days under your belt early in the week will keep you feeling pumped and motivated). Once you get into the rhythm of MAKING time for yourself, even if it’s only 20 minutes at a time, up the ante for your goal and try taking time for yourself five days a week. Before you know it, you’ll be taking those 20 minutes daily, feeling efficient, and seeing progress on your formerly stagnant sewing projects.
My friends Stephanie at Late Night Quilter and Mandy at Mandalei Quilts and I are trying a new project to help us make time for ourselves. We’re using hashtag #sewtake20 on social media to help track our progress, and create a support network for those of you who want to join us. We invite you to post your progress, your challenges, and your quilting eye candy so that we can all help encourage and inspire each other.
Are you feeling overwhelmed at your mountainous to do list? #sewtake20
Feeling like there’s just no way you can accomplish your goal? #sewtake20
Want to find a way to make more time for yourself?
#sewtake20
The wise Lau Tzu said, “A journey of a thousand miles begins with a single step.” Taking 20 minute sewing escapes daily WILL result in a finished project. And you just might be a happier, more relaxed mom, wife, friend, or coworker to boot. I know I am.

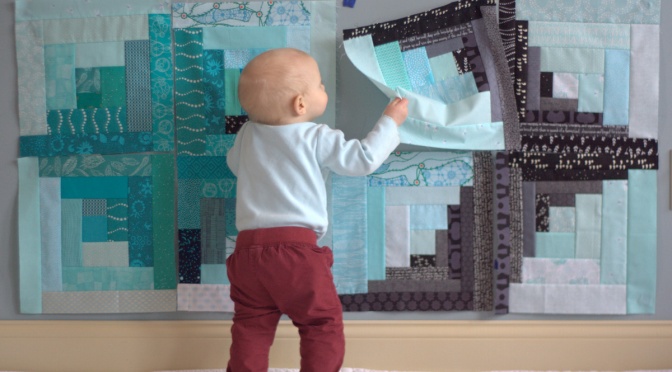
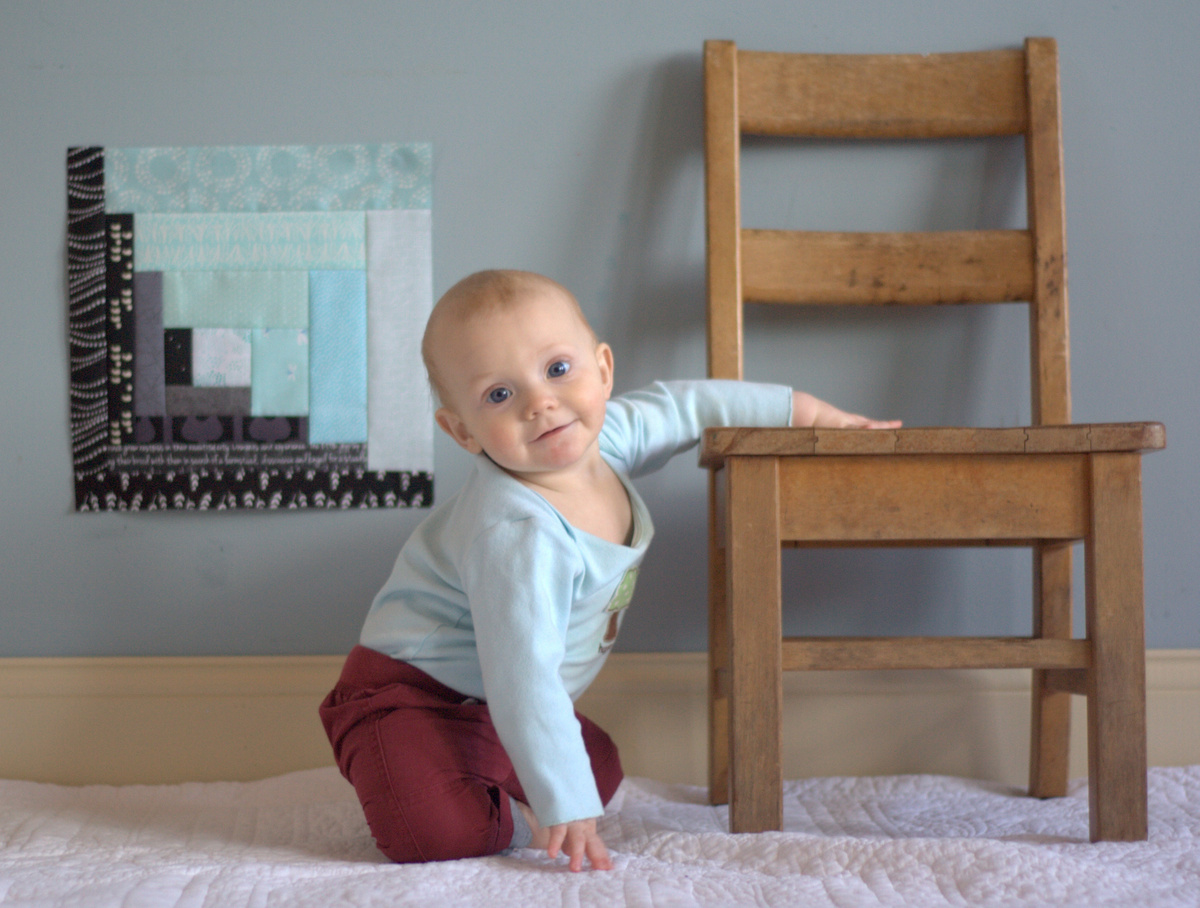 As we know, as Finn grows, so does his quilt. With the eighth block finished, this is really beginning to look like a quilt!
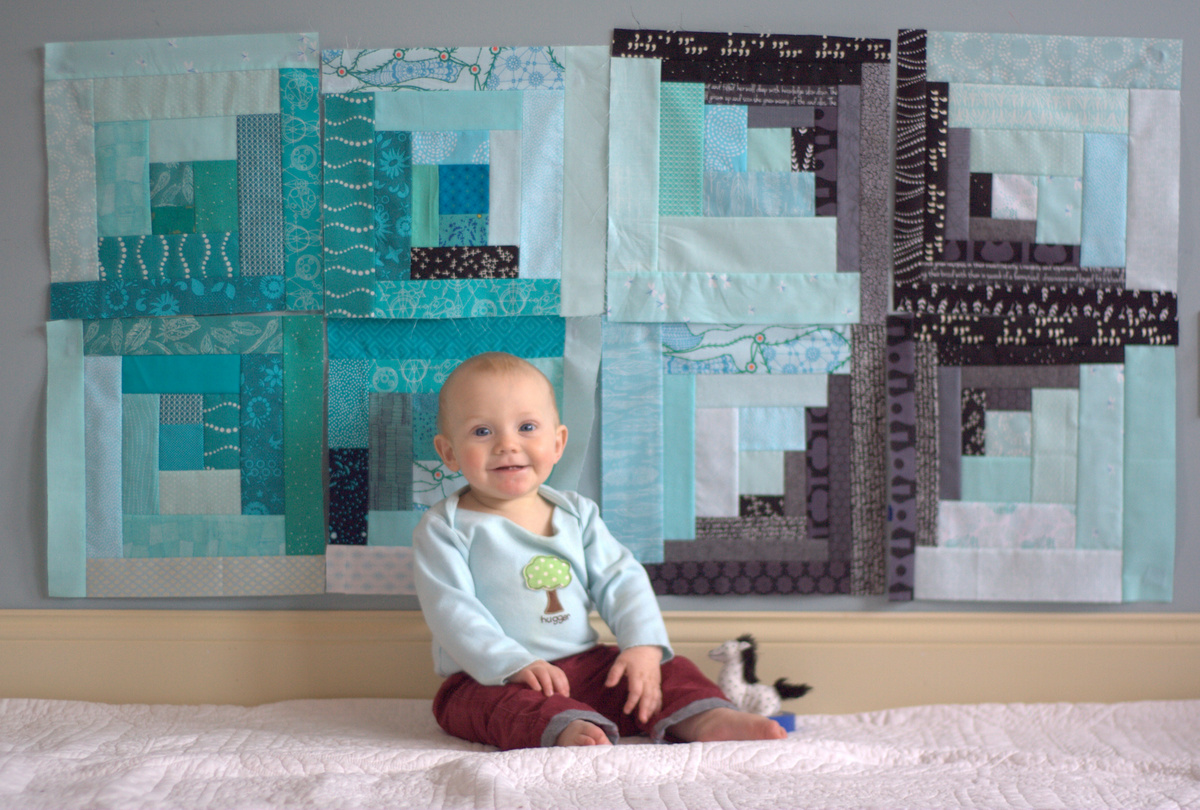 Every month when I’m writing this post and looking at the quilt, I think perhaps I should up the ante and make two blocks per month to make it a bit larger when finished. But then, when the monthly milestone comes (and sometimes goes before a block is complete… ahem, this month), I remember that the reason I am keeping this project small is that it is meant to be attainable and fun, NOT stressful.
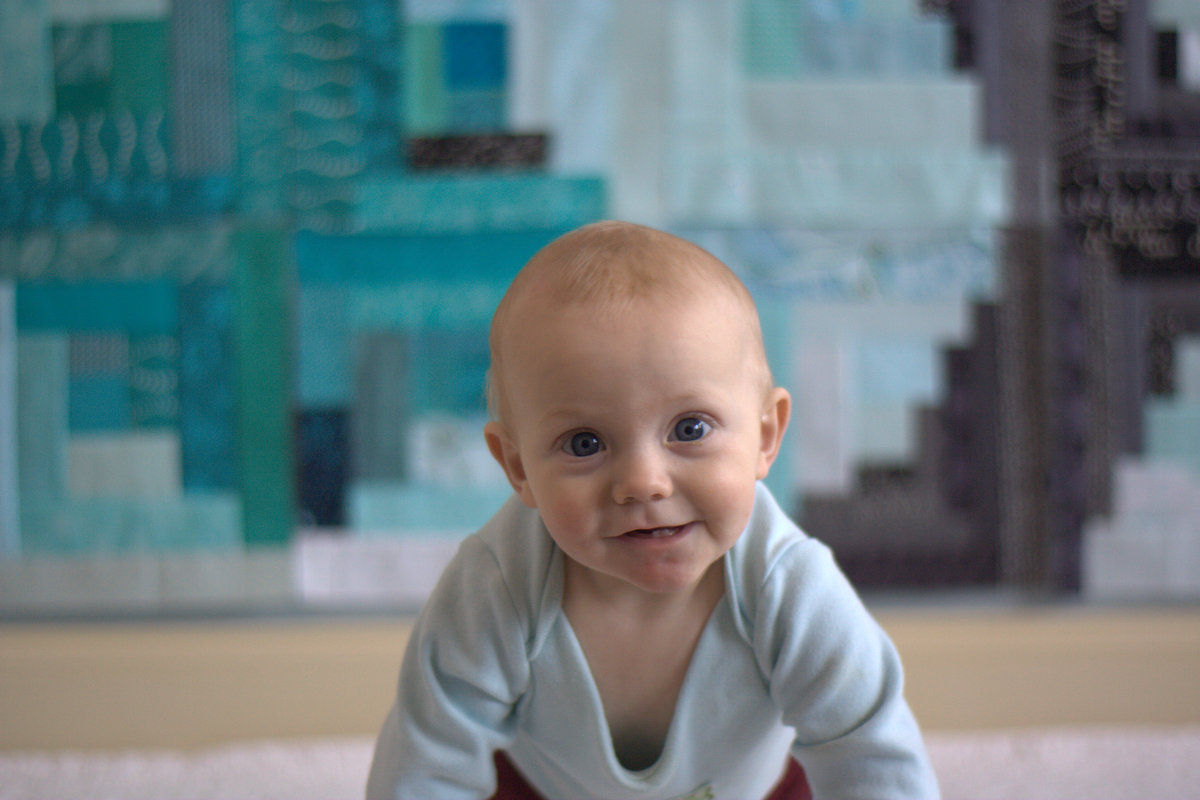 I’ll keep it to one block per month and will focus on the fun. At 36″x48″ finished dimensions, I think it will be the perfect drag-around size for Finn. Plus, this way if he feels like he outgrows his quilt, it can go right into the memory box (in tatters, hopefully) and I will make another one!

 Who knows what kind of new explorations he’ll be tackling next month! Maybe he will be able to help me tape the blocks UP onto the wall instead of just pulling them off?
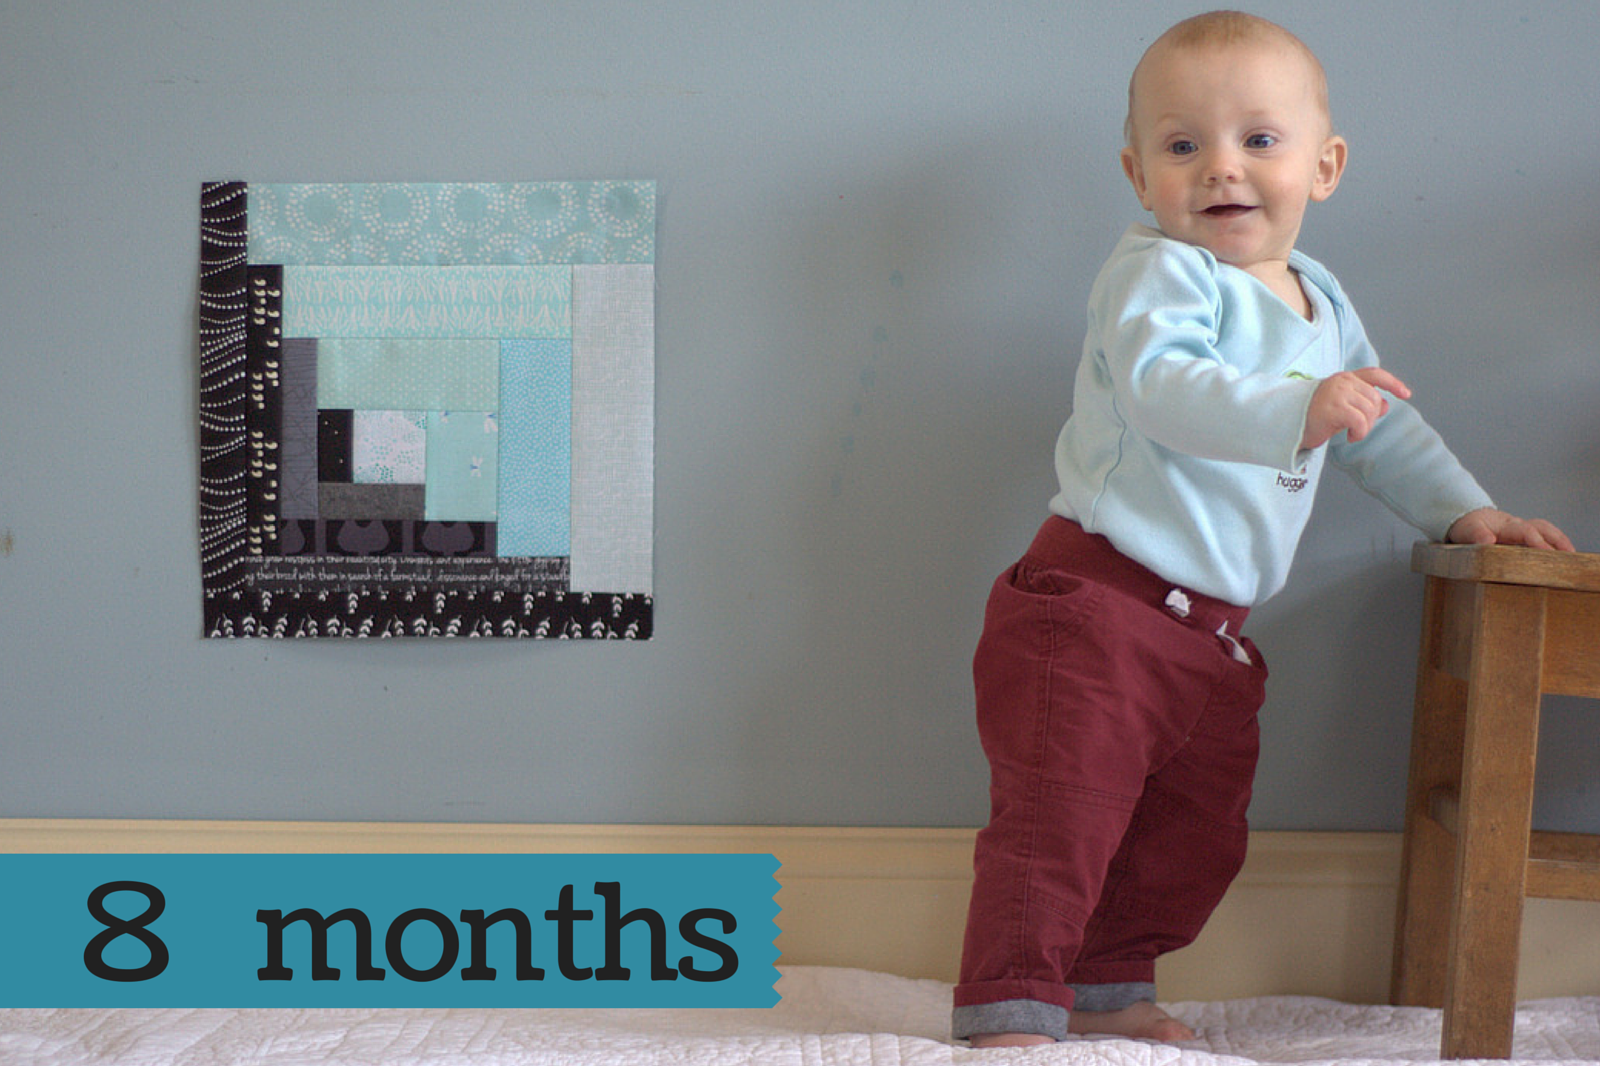 If you want to see the full quilt layout plan, I showed it HERE in the 3 month post. You can see the full progression of Finn and his quilt’s growth so far HERE or by clicking the “Milestone Quilt” tab at the top of my blog. It’s wild to see how he’s grown in such a seemingly short time. Four more blocks to go! Thank you for joining me in creating Finn’s milestone quilt.