

I was bitten by the EPP bug years ago, but this summer I came down with a serious case of Moonstone Madness, and in the best possible way! In June, my talented friend Giuseppe Ribaudo aka @giucy_giuce released his first English Paper Pieced pattern in partnership with Karen of @karenthediyaddict, called Moonstone. He was kind enough to send me a kit and boy has it kept me busy and grinning pretty much all summer! I love EPP and hand stitching is the perfect solution for busily adventuring makers in the summer months, and this pattern didn’t disappoint.
 In the spirit of setting myself up for success, I opted to make four (4) blocks to make a pillow rather than a full sized quilt, and I dove into my bright Alison Glass stash to put together a fully saturated, smooth rainbow gradient. You know how I feel about rainbows. Alison Glass fabric rainbow + Giucy Giuce EPP project = heaven on a summer’s day!
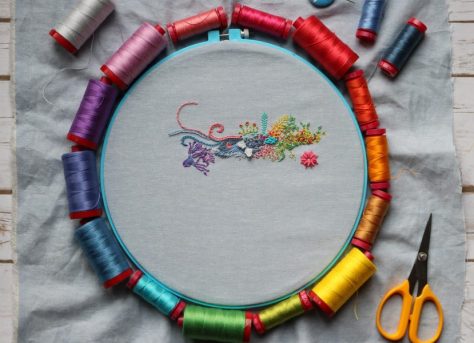
 I used mostly 50wt Aurifil thread, with a few 80wts thrown in, using coordinating colors so that the stitches blend right in with the blocks. The threads shown here are (from top left clockwise): 2535-Magenta, 1154-Dusty Orange, 5015-Gold Yellow, 5017-Shining Green, and 1125-Medium Teal, all 50wt. There’s nothing quite as satisfying as matching the perfect thread to your fabric!
 Alison’s Art Theory print from her Ex Libris line (still my ultimate favorite fabric ever) was my color inspiration, so I planned my 4-block panel around the color flow in the center octagon. Throughout the course of the summer, I finished the four blocks and completely stitched them together!
 Now I am at the point in the game where this could lounge in the works in progress pile for a while, but instead, I am going to use my excitement to forge ahead and aim to finish this beauty, which is sure to be my most favorite pillow of all time.
 My next step is to choose background fabric, press the pieced panel thoroughly, remove the template papers (so that I can use them again!!), and then hand stitch the panel down onto the background fabric. Just last week, I visited my local quilt shop Fiddlehead Artisan Supply in Belfast, ME, in the hopes of buying some yardage of Insignia in charcoal by Alison Glass, which is a nearly-solid. While Fiddlehead did not have the Insignia, they did have two other options that I bought to try out: Flying Geese in Dark Charcoal from Handcrafted, and Ink in Charcoal from Sun Print 2016 (all for Andover Fabrics).
 After looking at those options, I still felt like I needed to see the Insignia before deciding, and with the encouragement of a few friends on Instagram, especially Erin who said, “I’m a strong believer in first instinct=best instinct!”, I ordered a yard of Insignia in Charcoal from Alison Glass’s shop. (Thank you Erin!). Clearly, my first gut choice is the winning choice!
 Next I will hand stitch this epic panel to the perfect Insignia background using Aurifil’s monofilament thread in Smoke. I plan to quilt this with the Smoke monofilament thread, too, and I’m so excited just thinking about how amazing this pillow will be. This will be my first time sewing with monofilament thread, either by hand or machine, so I’ll be sure to share how it goes.
If you’d like to get a Moonstone kit for yourself, you can order one HERE on Karen the DIY Addict’s site. The kit is pretty amazing, with acrylic templates for every piece, as well as enough pre-cut foundation papers to make a full 72″x72″ quilt (or lots of pillows!), a booklet with Giuseppe’s reflections, thoughts, tips, and four (4) different layout suggestions, and of course coloring pages for all four layouts.
 As for me, I’m nearly finished piecing my next rendition of a Moonstone block, going with the Gems layout and a more nautical theme. I plan to make only one block and top stitch it to a large zippered pouch for a friend to whom I owe a quilt. I’m hoping the consolation diaper pouch/zipped pouch will hold her (and her nearly 1 year old baby) over until I manage to make the quilt!
 As you can see, I’ve been absolutely struck with Moonstone Madness and it doesn’t appear to be tapering off just yet. I’ve had a wonderful time piecing together these blocks, and the portable nature of English Paper Piecing ensures that it is still very much on the top of my “summer stitching” projects list!
What did you stitch this summer?
I’m linking up with Let’s Bee Social, since it’s about time I was social in blogland again!


 My dear dear friend Stephanie from
  There’s something amazing about the retreat format, where a group of likeminded strangers gathers in a quiet and often intimate setting, spending hours upon hours together in the spirit of learning, relaxing, and reconnecting with self and spirit. The people and the deep and kindred bond I feel with them at the end of such a relatively short time is always what strikes me most upon returning home from a retreat. Here was this group of nearly complete strangers four short days prior, yet tears flow and hugs abound when it’s time to part ways again and head back into our own individual corners of the game called life. It’s a tiny peek at the innate goodness, compassion, and human connection we all share, yet that is often hidden by the bustle and drama of life during our normal day to day existence. That fiber of human connection is truly beautiful, and I’m grateful to have been a part of it.
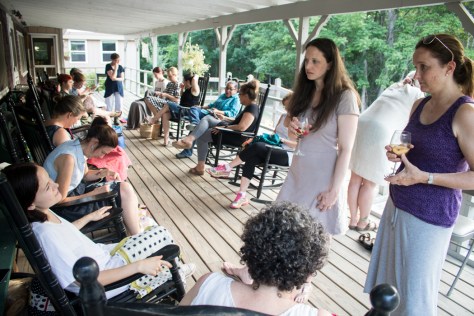 So many things stand out to me about the Slow Stitching Retreat that quietly happened at Medomak Retreat Center in the woods of Washington, Maine, a couple weeks ago. Yes, the people. The new friends, the realization that even the most talented, well-known and revered makers are real people, just like you and me. And that they can be wicked silly and fun to hang out with! The surprising connections and moments of clear understanding that happen in spontaneous conversations over stitching or wine. We came from all over the country, and reflected all sorts of characters. Some quiet, some not so quiet. Some names widely known, some not. All creative. All open. All building and creating and supporting each other. All of us, human. I’m so grateful to Sam for bringing us all together.
 On the first day, I immersed myself in the reverse applique techniques taught by Alison Glass. It was my first time working with knits, my first reverse applique, and my first time transferring a pattern to fabric by *gasp* writing on the fabric! I used a micron pen, since it was a cut line and would not be visible anyway, and amazingly, not only did it transfer the pattern beautifully, no fabric died in the process!
 I decided to create a design based upon the geometry of a chapel ceiling captured by my brother-in-law in Oakland, California, so in light of the whole discussion around “derivatives” in quilting that sparked a heated discussion days before I embarked on the retreat, I spent the week being 100% derivative. And liking it.
 The process of sketching out the design, transferring it to the fabric using the tips shared by Alison on how to create a repeated design, finagling the knit fabrics to do what I wanted (sort of) and finally, slowly stitching and cutting, watching the design come to life before my eyes, was extremely enjoyable.
 Not to mention making slow stitching progress lakeside after a refreshing swim!
 The second day of the retreat, I spent the day giggling uncontrollably while tiny stitching with Chawne Kimber in the amazing barn. Having witnessed this technique the year prior with Chawne, I had a little preview of the fun. There’s something about the mantra “sew smaller; no, even SMALLER” that takes quilting to a whole new level.
 Chawne’s work is epically awesome on many levels, and it was fabulous to get to see many of her creations once again. They never cease to amaze me, and hearing her talk about her process is always inspiring. (Chawne will be returning for this year’s
  I’m very glad I did, since it did not really translate the way I had wanted, BUT I do love what I created and had a ton of fun just going wild and sewing whatever wherever, as long as it was smallllllll. Tiny stitching plus improv curves equals loads of fun!


 …after January’s stitching…
 …after February’s stitching…
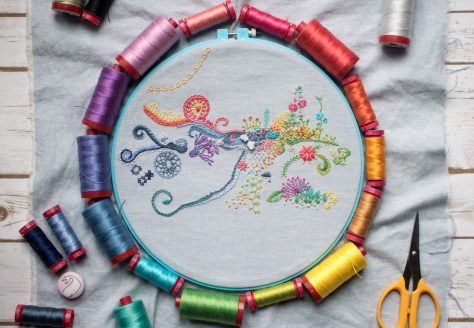 …after March’s stitching…
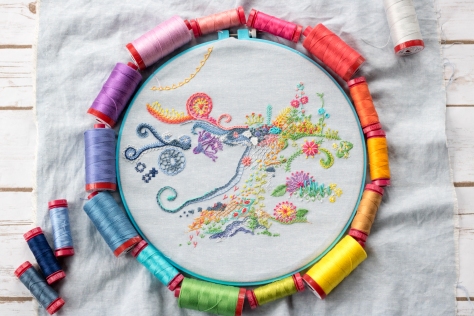 …after April’s stitching…
 …and here it is after May’s stitching!
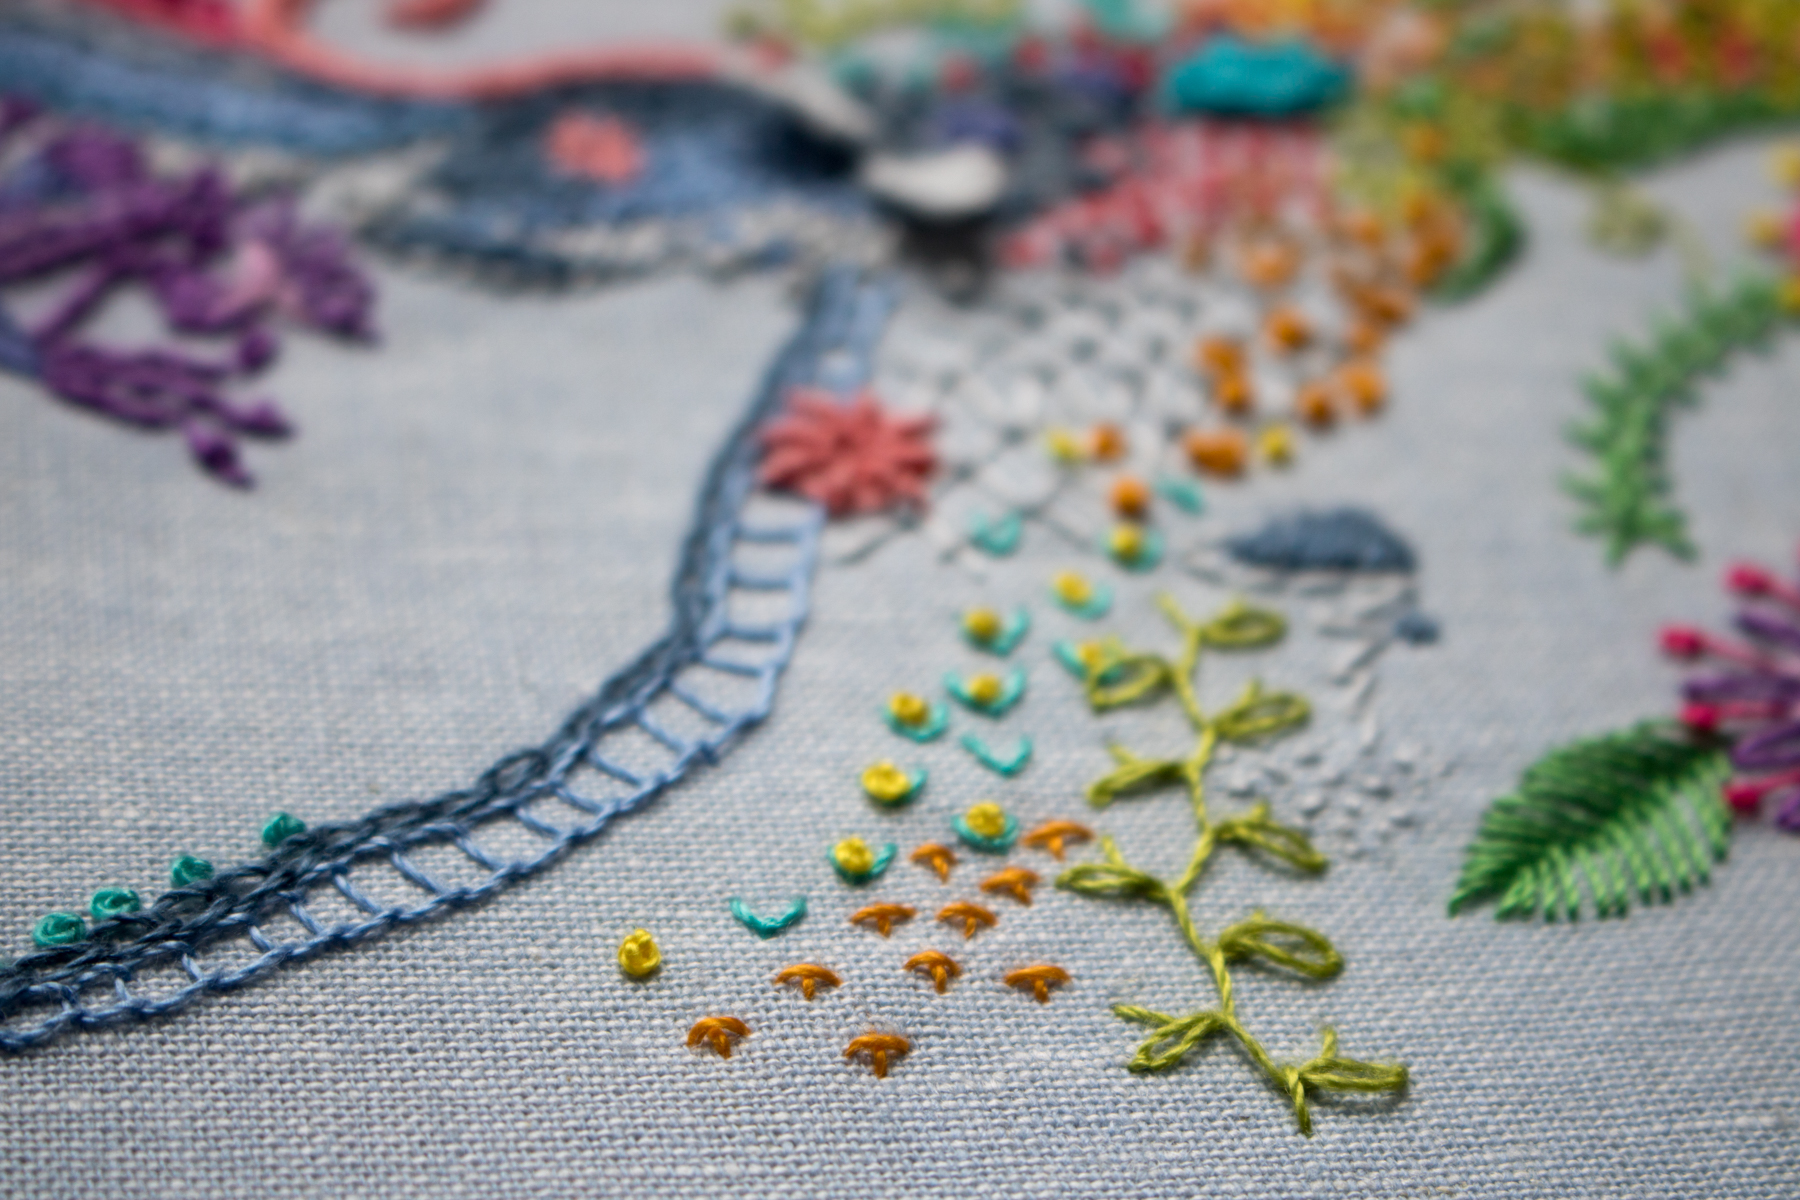
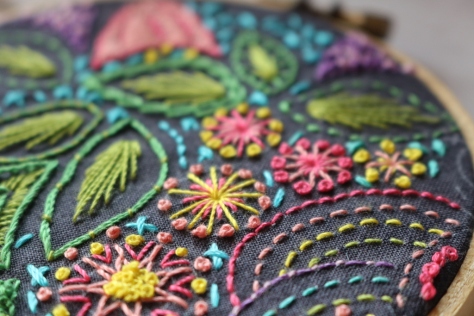
 I added a whole sun burst super nova element in that warm sunny section of the hoop, as well as some added texture with different rows of yellow stitches. This little supernova was very fun to make, and grew day to day. Again, I began with not much of a plan at all, just wanting to add some more bright yellow to the top portion of the hoop. After a few days, it took on a life of its own and continued to grow and take shape until the flowery starbursts decided to cap the growth (for now).
 I also added some “background” plant like elements behind the patch that began this whole hoop back in January. My biggest challenge with this daily stitching challenge is figuring out how to create background behind stitches that have already been stitched. Some attempts are more effective than others, but I figure it’s all part of the learning experience.
 A few more flowers were also added, in the form of lavender roses and their associated greenery. The flower garden continues to grow and blossom.
 A month of progress wouldn’t be complete without adding some motion to the ocean! There wasn’t all that much growth here this month, but some running stitch and french knots helped begin to create some more flow.
 The hoop is beginning to fill out, but knowing that I’m just about halfway through the year, I do think I should be able to fit the entire year in this hoop without extending off the sides. There are lots of little spaces between elements, and while I hope to not fill every *single* one, there is a lot of room for depth and texture and who knows what else!
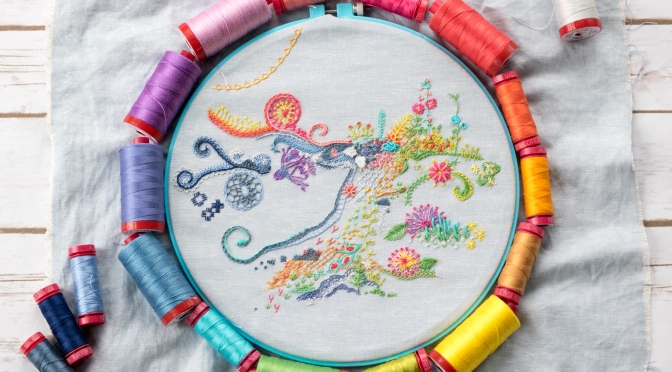
 …after January’s stitching…
 …after February’s stitching…
 …after March’s stitching…
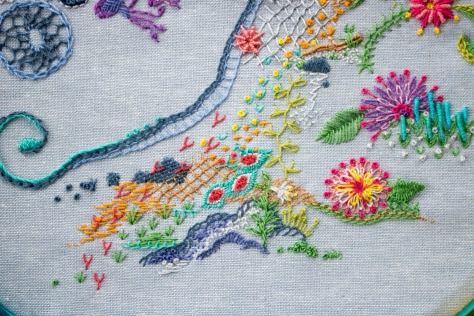 I think it all began with some rocks, and then some little critter footprints, and then took off from there.
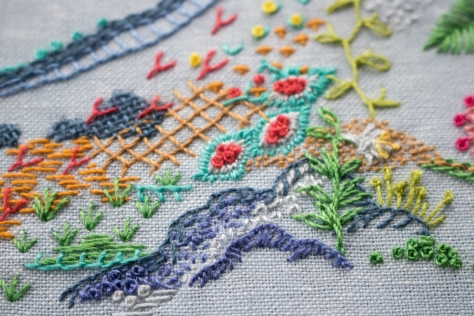 I mostly stitch whatever comes to mind each day, without much influence from my everyday happenings. A couple stitches this month had some subtle meaning, however. I stitched a large rock on Good Friday and a lily flower sprouting out of the rock on Easter. Sometimes it just sneaks in.
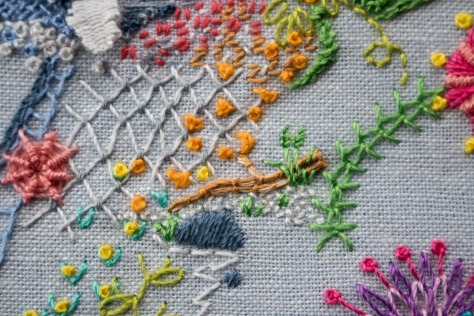 On one particularly uninspired day, I showed my hoop to my husband and prompted, “Where should I stitch? Tell me a color and point to a spot.” He pointed to a spot and said “A piece of driftwood here.” Thus originated the couched stitch driftwood, which was followed by some 12wt Aurifil 2600-Dove sand and a few tufts of beach grass. Some days inspiration strikes; some, not so much.
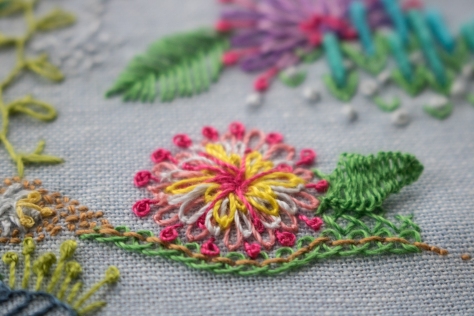 I also added another wild and crazy layered flower consisting of long tailed lazy daisy stitches, lazy daisy, and pistil stitch. There might be a few french knots in there, too.
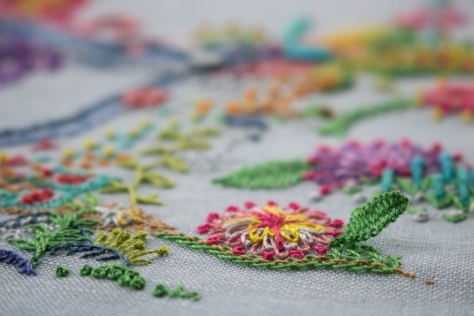 The boldness of the flower begged for some offsetting feature, so another woven picot appeared in the form of a big green leaf. I love the little 3-dimensional elements on this hoop!


 This quilt got its name after it was nearly completed, as I sat hand stitching the binding to the back. A mini quilt made at the request of
 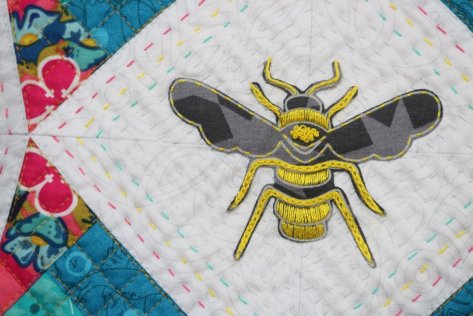 With freestyle embroidery fresh on my mind and
 I had a lot of fun with the
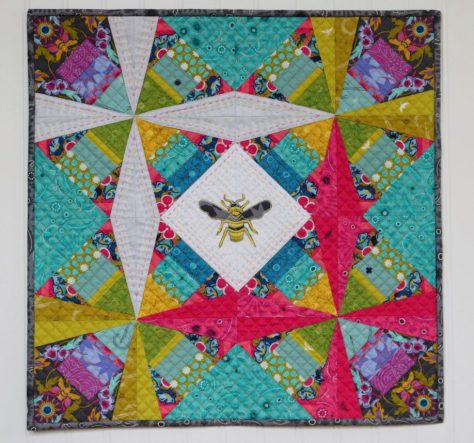
  I knew I wanted to incorporate both hand and machine quilting, and I knew that I wanted the machine quilting to be dense. It took me a while to decide between using 50wt Aurifil 2600-Dove or 5015-Gold Yellow for the quilting, and finally I opted for the Gold Yellow to pull out the gold of the centrally stitched bee. I quilted a diagonal grid approx 1/2″ apart on all of the colored sections of the quilt and I love the texture it created. I wanted the white star and central diamond to pop, so I let them be, patiently awaiting hand quilting.
 I used a rainbow of 12wt Aurifil thread to help pull the rainbow from the gorgeous fabrics into the white sections, and I love the outcome! I decided to switch to 12wt 2600-Dove for the center so that the bee would stand out.
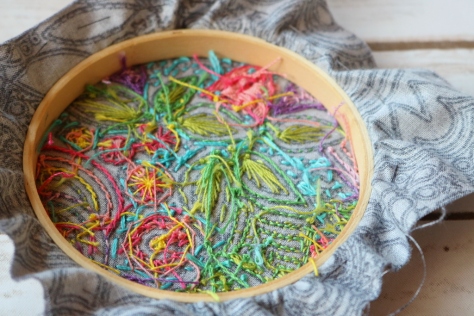
 The back shows that my hand quilting still has plenty of room for improvement (especially when trying to maneuver around the bee), but it’s still fun to see the back, too!
 I used Seventy Six fabrics Rising in Graphite and Numbered in Duck Egg for the back, with an Insignia in Chartreuse label.
 Labeling is one of my favorite parts–maybe because it helps me know that my name is on my work, or maybe because it means I’m finished with a project!!
 This quilt is currently in Andover headquarters in NYC for photography and other fun fabric adventuring before it returns to me, but it was super fun to see it hanging in the booth at QuiltCon (see it, top right??). You can see a photo of me proudly standing next to it in my
 The highlight of the month was getting the chance to chat with Erin from Aurifil on Facebook live while attending QuiltCon in Savannah. You can see my low key chat
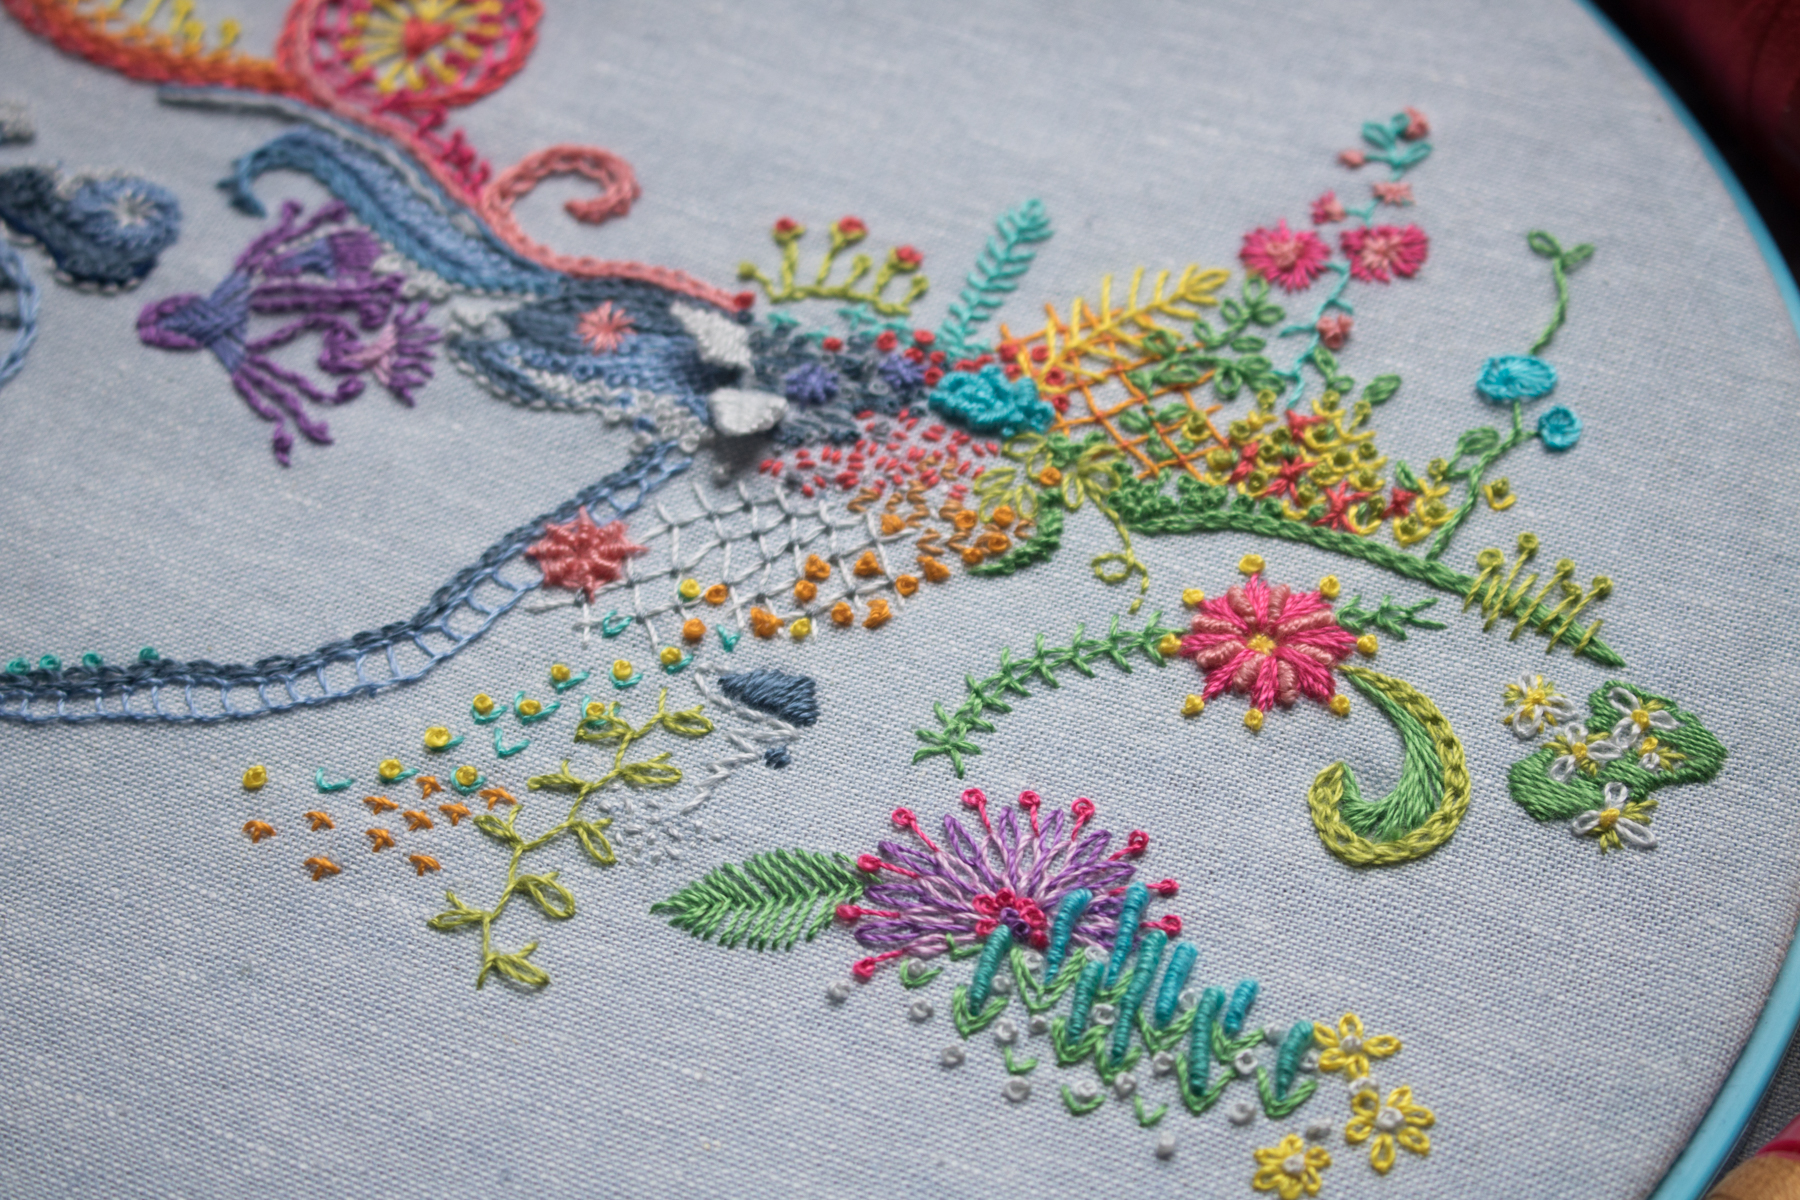
  Back to my embroidery progress! Here are some close up shots of the various sections of this freestyle hoop.
 I am still stitching without a plan, deciding each day’s stitches the morning–or sometimes night!–of the current day. I have tried a handful of new stitches and look forward to trying even more as the year progresses!

 Those little white three-petalled trillium flowers are the most recent addition. Time will tell where this will go from here!
 This month, I had a photography helper, so of course I can’t end the post without a few Finn cameos. I often use the photos on my phone as a reference, so I pulled up January’s photo to make sure I arranged the thread in a consistent way. Finn was please as punch that they matched.
 He also helped me put the thread back into the box, then arranged around the hoop, back into the box, then arranged around the hoop. What a helper!
 Late last year, I kind of got hooked on the quick mental fix that comes with freestyle embroidery while I was creating this
  I went into the year with a 10″ hoop of Robert Kaufman Essex linen in light blue, my stash of
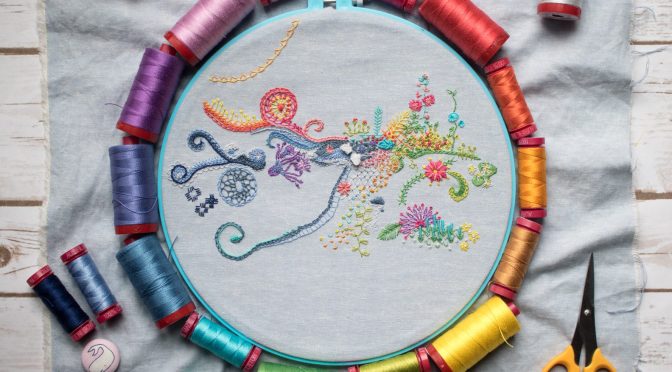
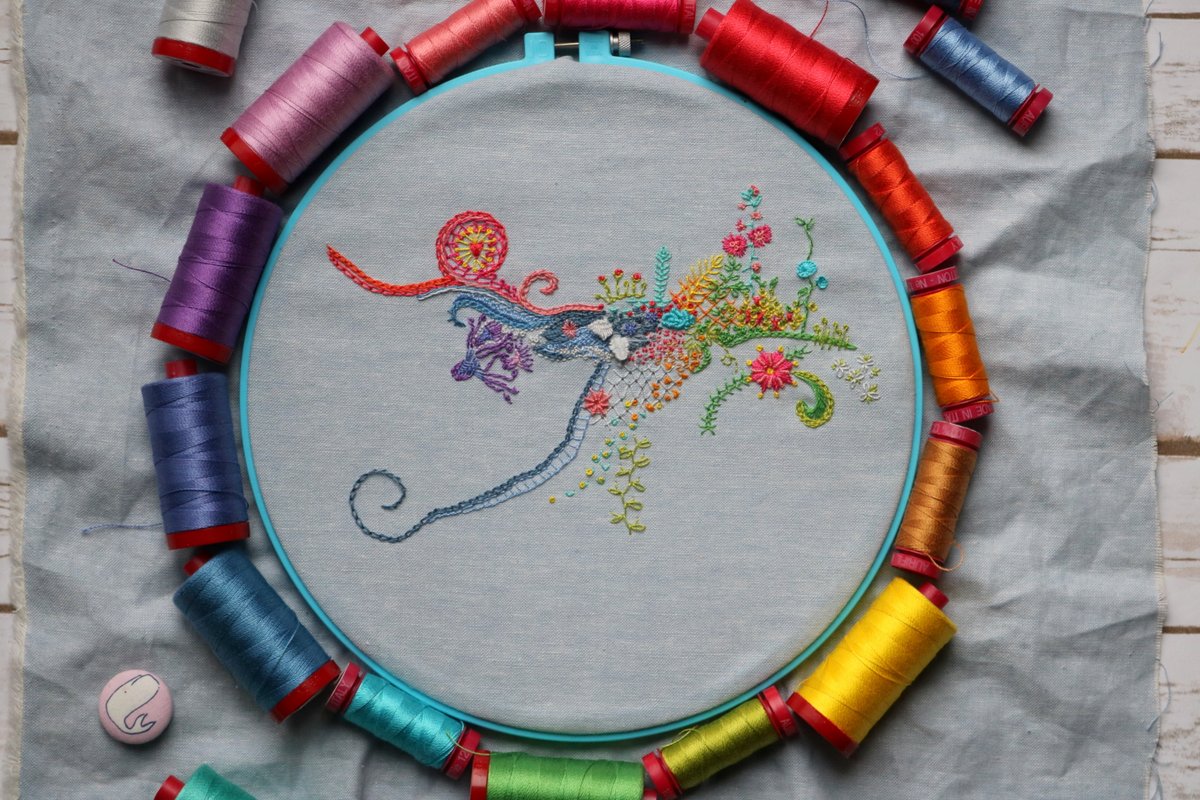
  Here is my hoop after 1 month of daily stitch-whereever-the-wind-blows stitching. Fun, right!? I created a separate account on Instagram
  My basic strategy began as a daily google of “
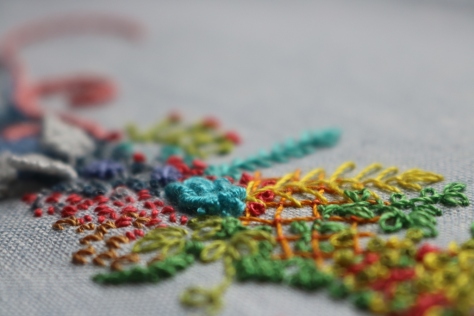 I began by learning bullion knots, so this whole project began with that little mass of turquoise squiggles and has grown organically from there.
 I love the texture that results when you stack embroidery stitches together. Those white floppy things are my first attempts at braided picot stitch, another fun one!
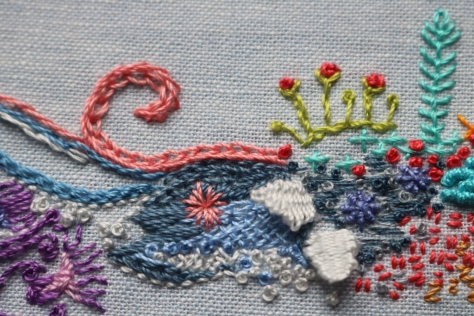 This has been really fun so far, and as of the writing of this post, I’m already over halfway through February, too! (You’ll have to wait until March, or check the IG account, to see those additions, though!) I’ll plan to share an update each month, so that you can see how this grows.
 My personal guidelines include stitching at least one stitch each day, trying to plan as little as possible and simply stitch whatever feels right each day, and not remove any stitches no matter how much I dislike the final outcome (cough, cough, that octopus family, cough). I figure this way, the stress of getting everything *just* right disappears, and instead the thought that it will all work out somehow in the end dominates. No stress!
 This is a really fun, exhilarating project since it is pure spur of the moment random creativity. If you have any cool, unusual embroidery stitches to recommend, I’d love to add some more to my arsenal. There’s something about learning something new that makes my day.
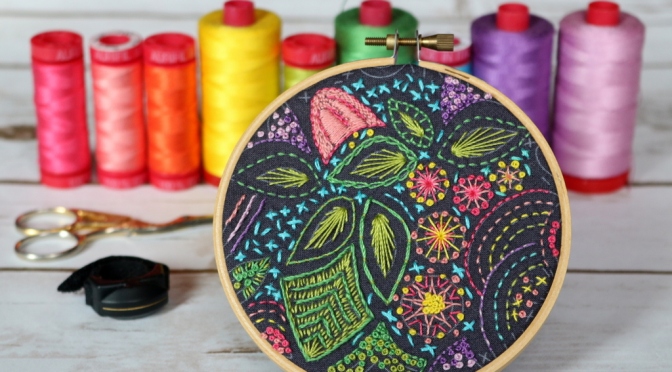
 I’m so happy I obliged, because I just love this little hoop!
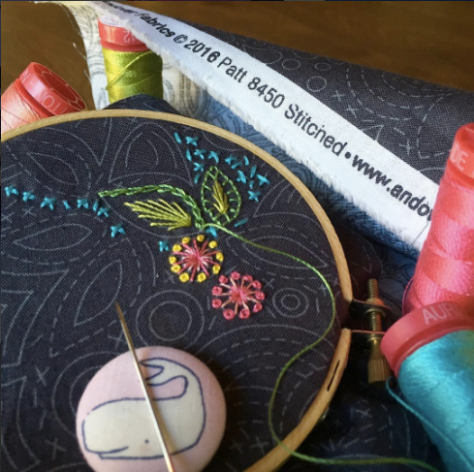
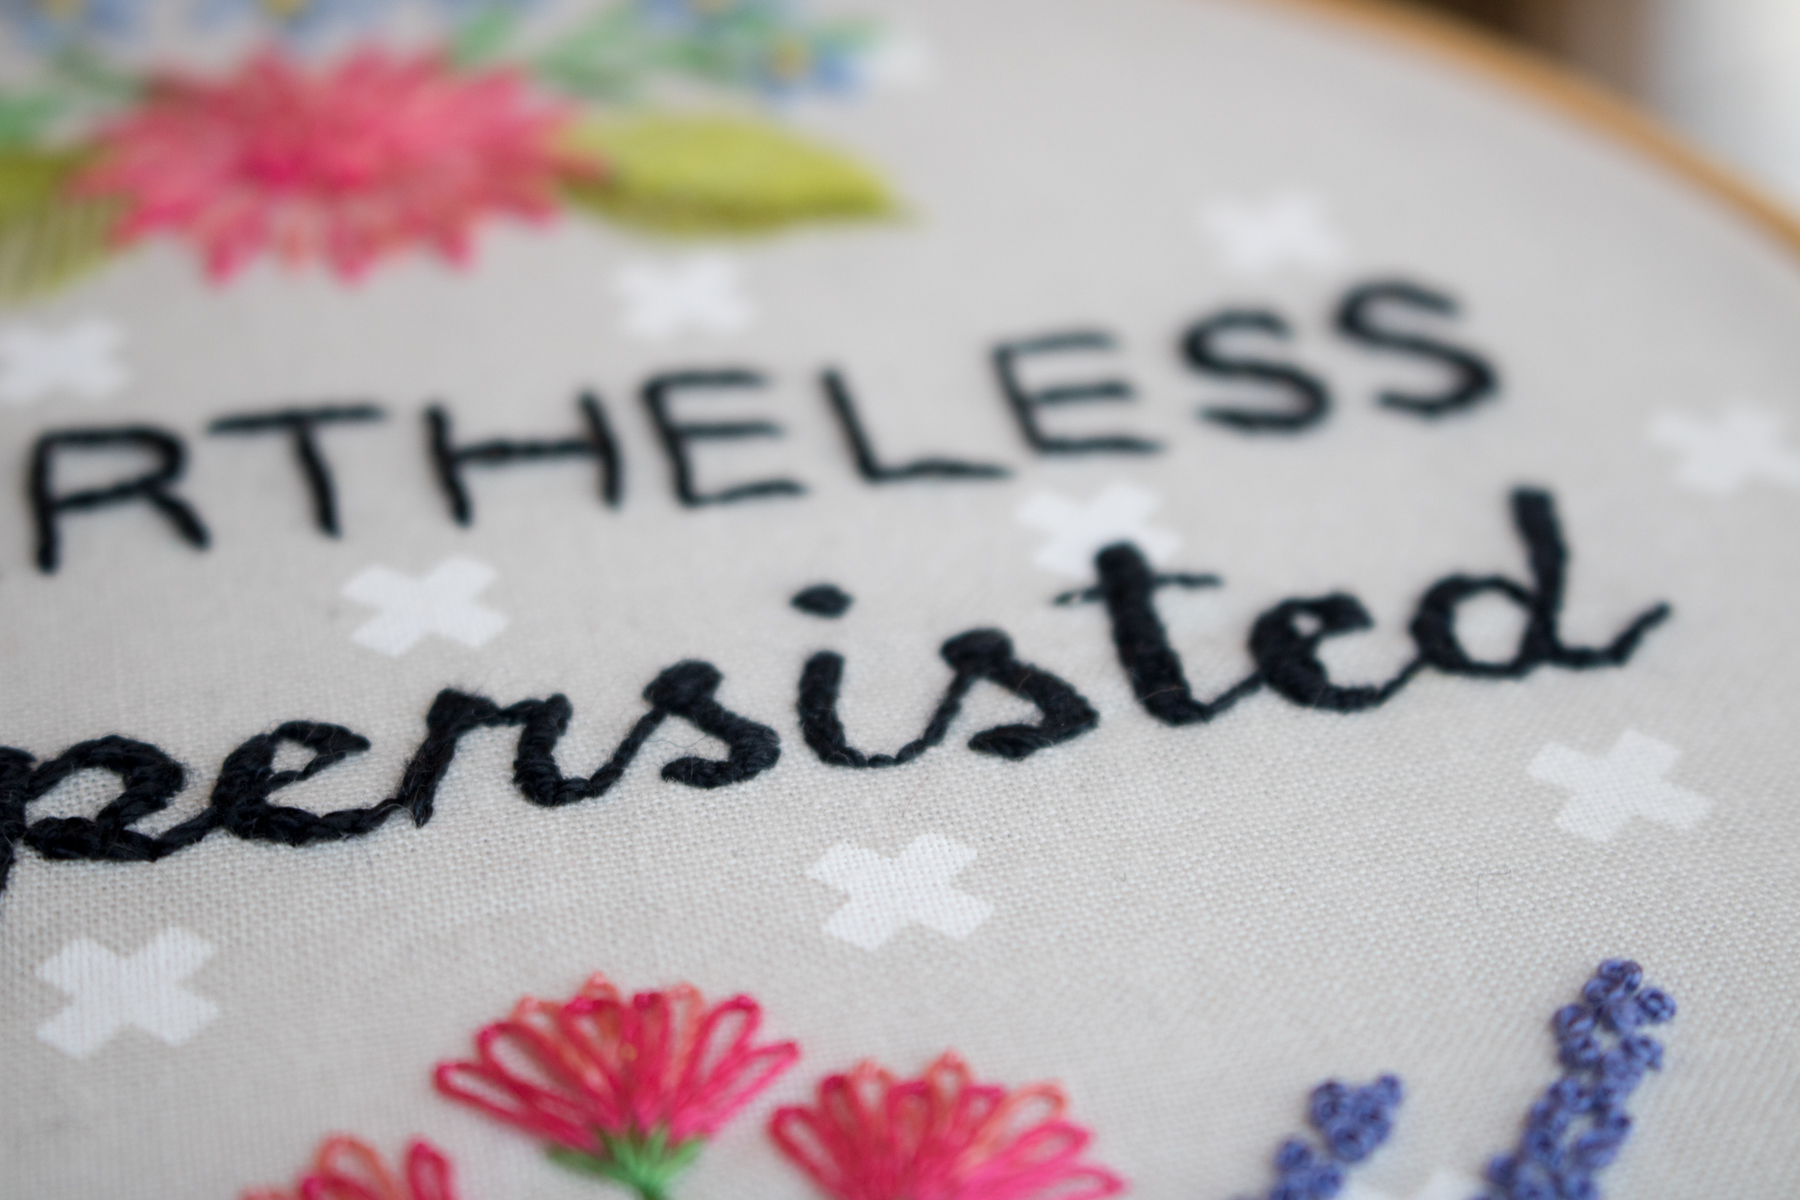
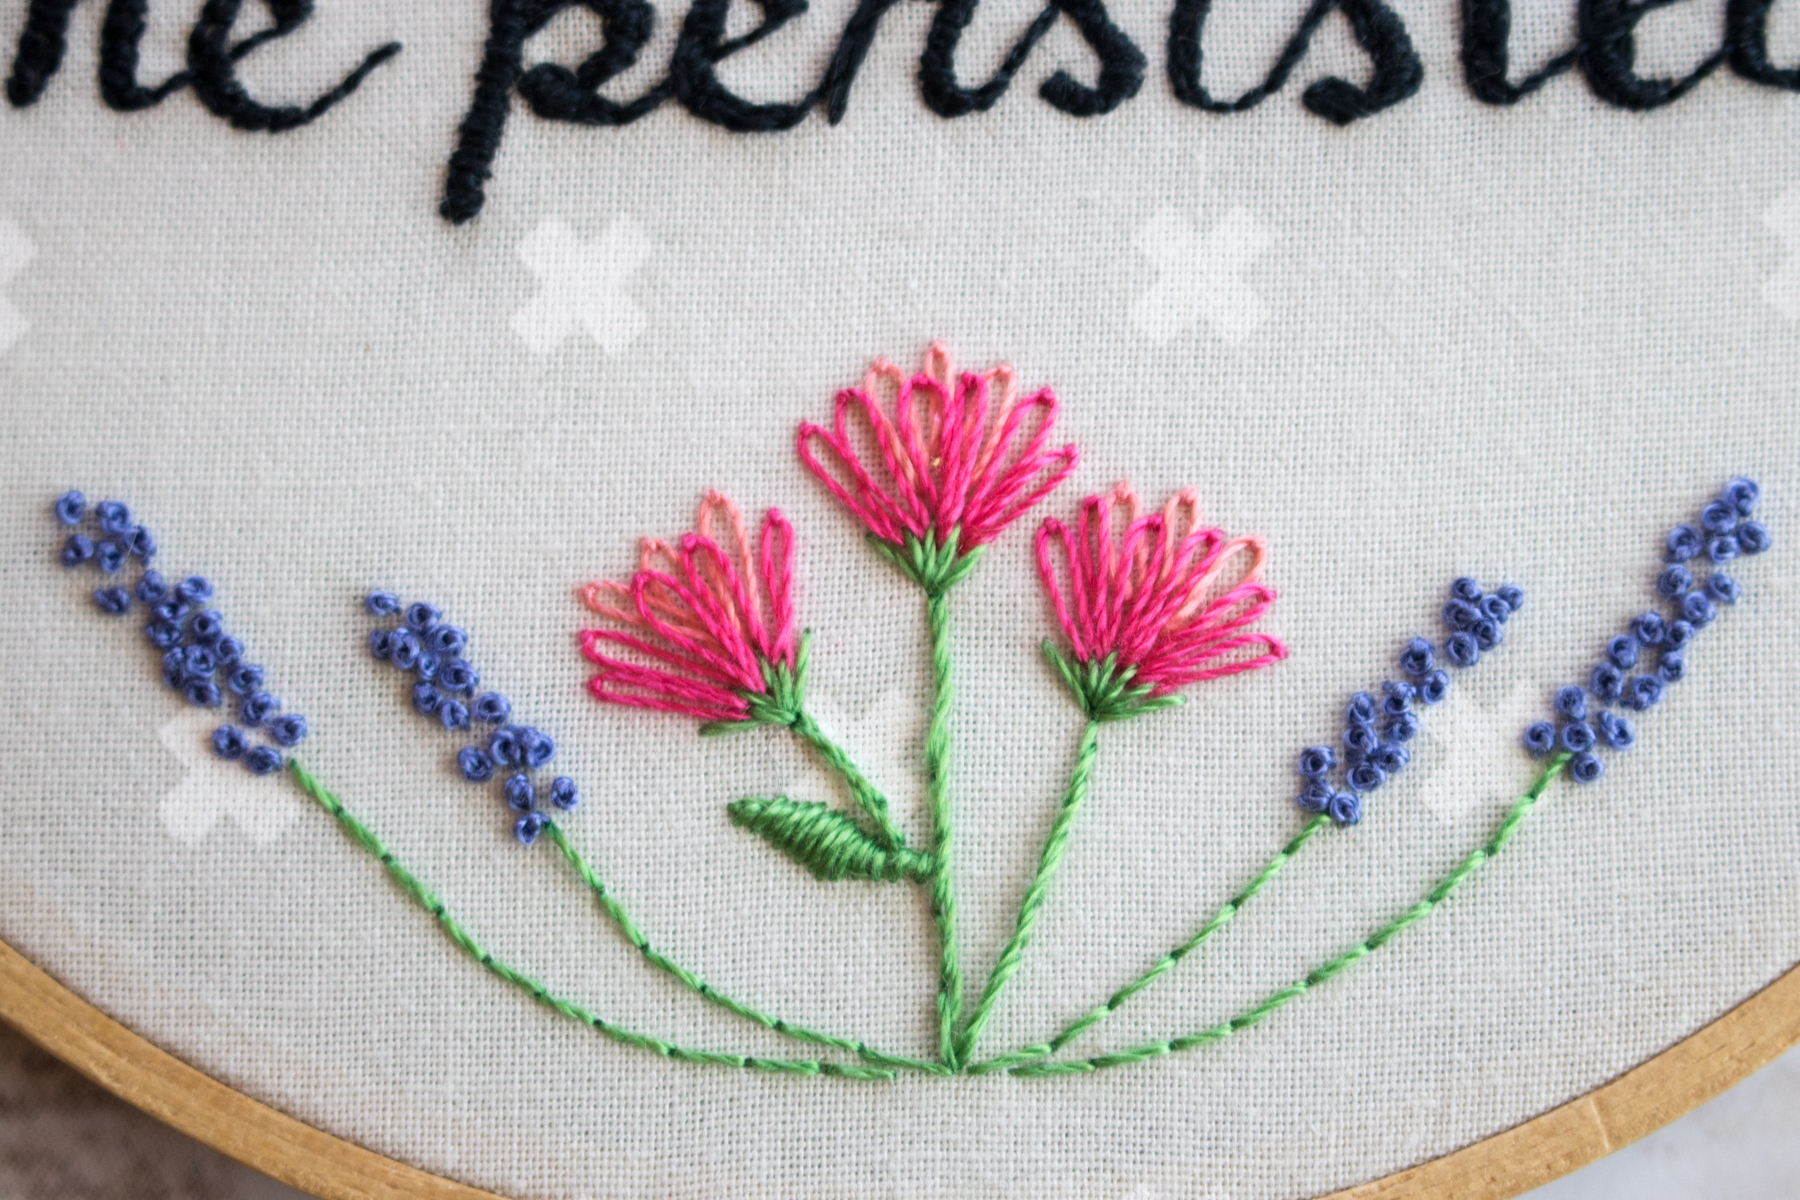
 I stitched whatever I wanted, wherever I wanted, and tried many different stitches.
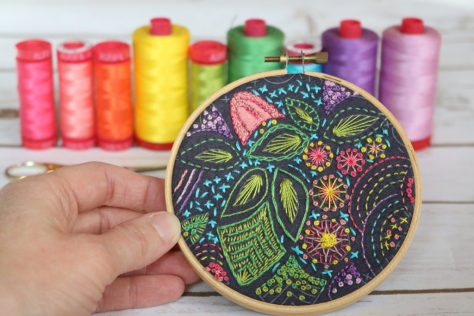
 I used Aurifil 12wt thread from my stash, in colors (left to right from photo above): 2530-Blossom Pink, 2435-Peachy Pink, mystery orange–the only Aurifil tag that has ever fallen off a spool!, 2120-Canary, 1147-Light Leaf Green, 2884-Green Yellow, 5005-Medium Turquoise, 2540-Medium Lavender, and 2515-Light Orchid. I used a single strand for all except the turquoise x’s, for which I use two strands. If I were to do it again, I would probably stick with a single strand since I love the crisp aesthetic that results.
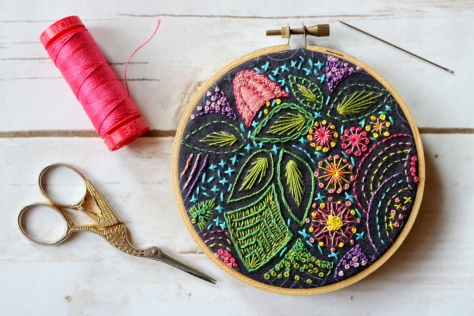
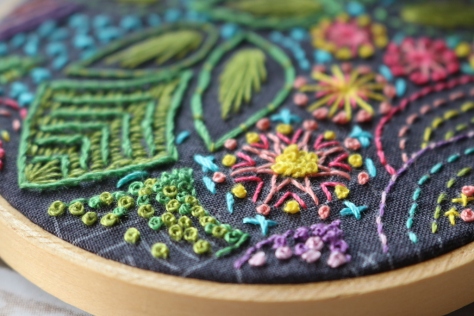 Toward the end, I went a little crazy with french knots, but I do love them so and they make a great “filler” around the edges.
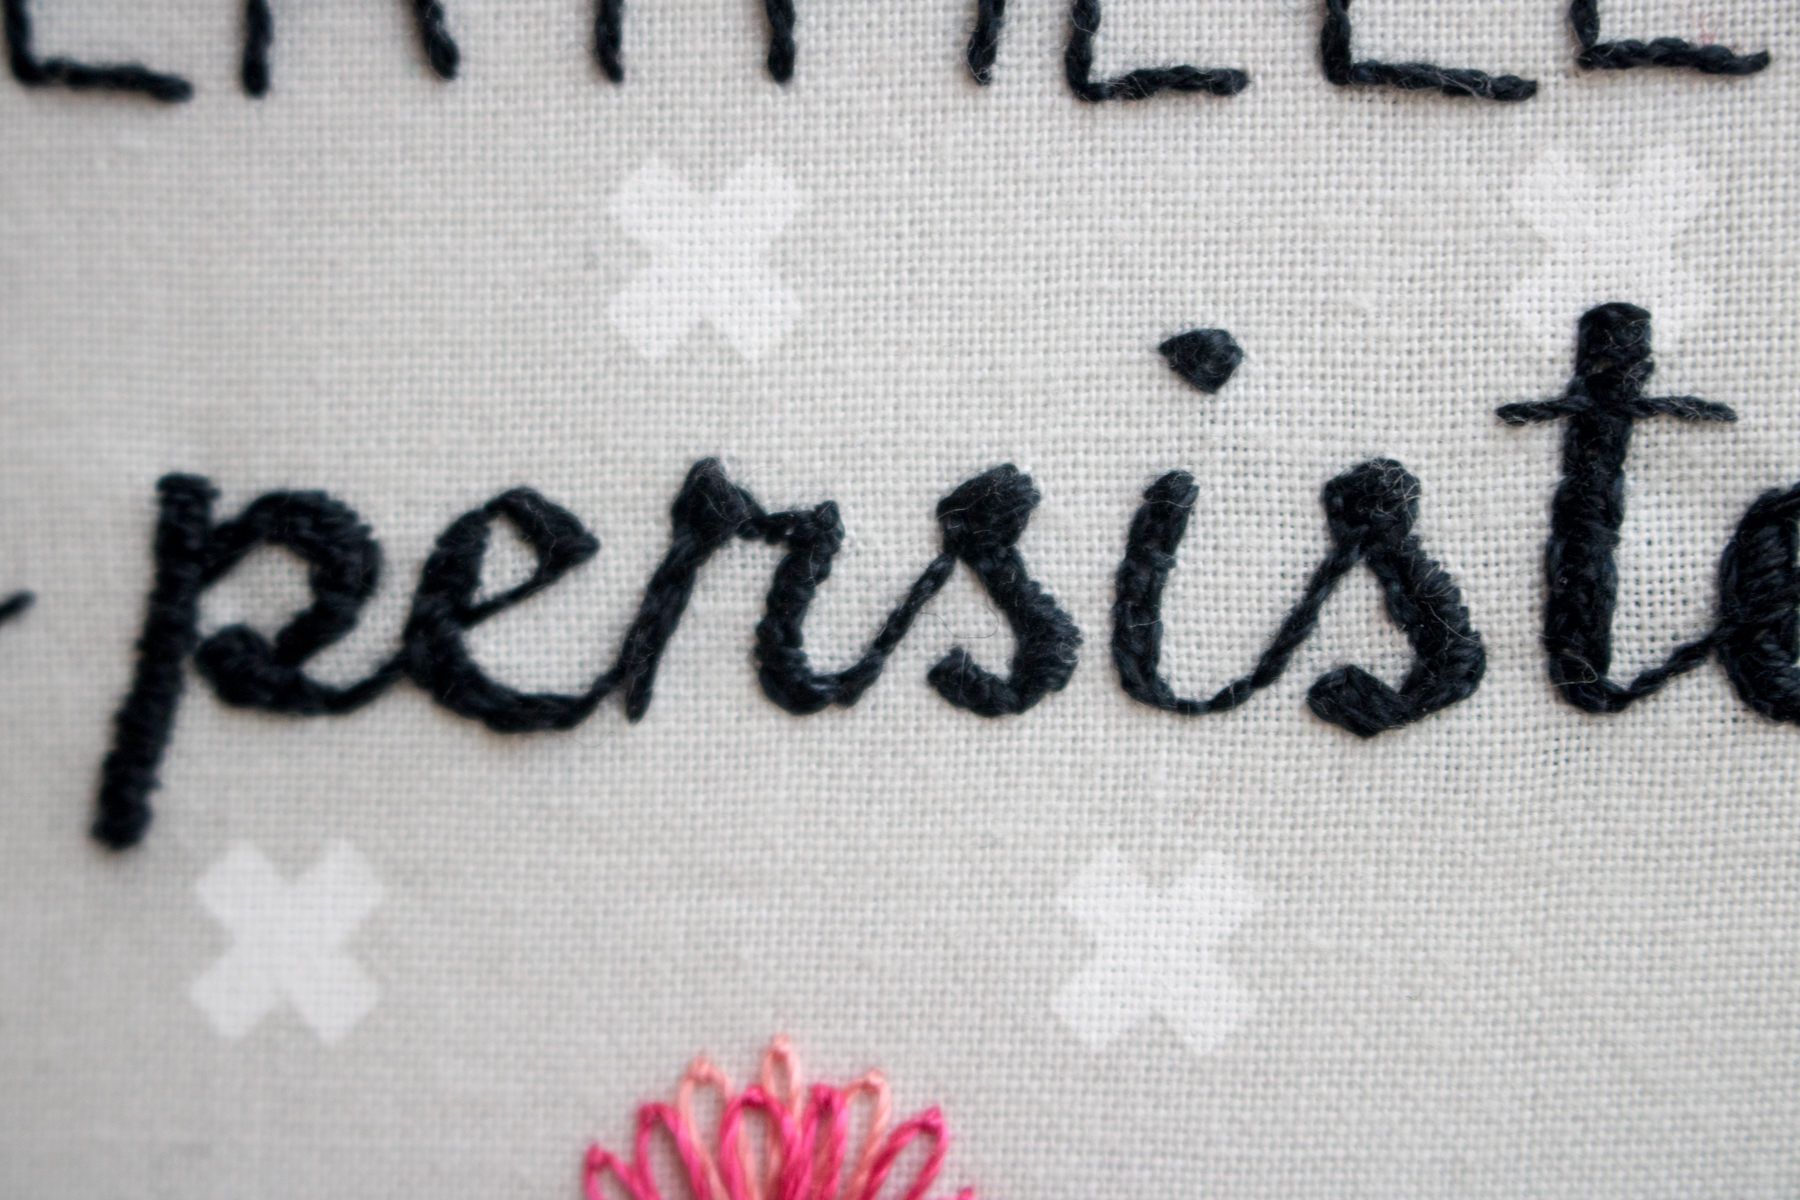
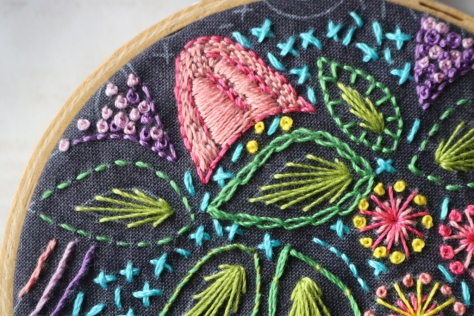 Since the pattern is printed on the fabric, there was no actual end, so it was up to me to decide how close to the edges to stitch. At first I thought I’d leave a bit open, but I just couldn’t stop stitching. As it is, most stitches extend to the absolute edge of the hoop. I kind of love it.
 I finished it using the methods (minus the plan-ahead phase, since I didn’t plan ahead lol) shared in