Remember back before Christmas, when I only showed you tiny peeks at most of my projects since they were to be given as gifts? Well now that the holidays are long over, now that I’m back and getting into the groove of home life, now that I finally have a free minute to blog about them, now I can show you the full gifts!
I also have finalized and posted another Valentine’s Day themed foundation paper piecing pattern, which goes live in my Craftsy (for US buyers) and Payhip (for international buyers) today! It’s a day full of finishes, both new and old. A picture is worth a thousand words, so without further ado…
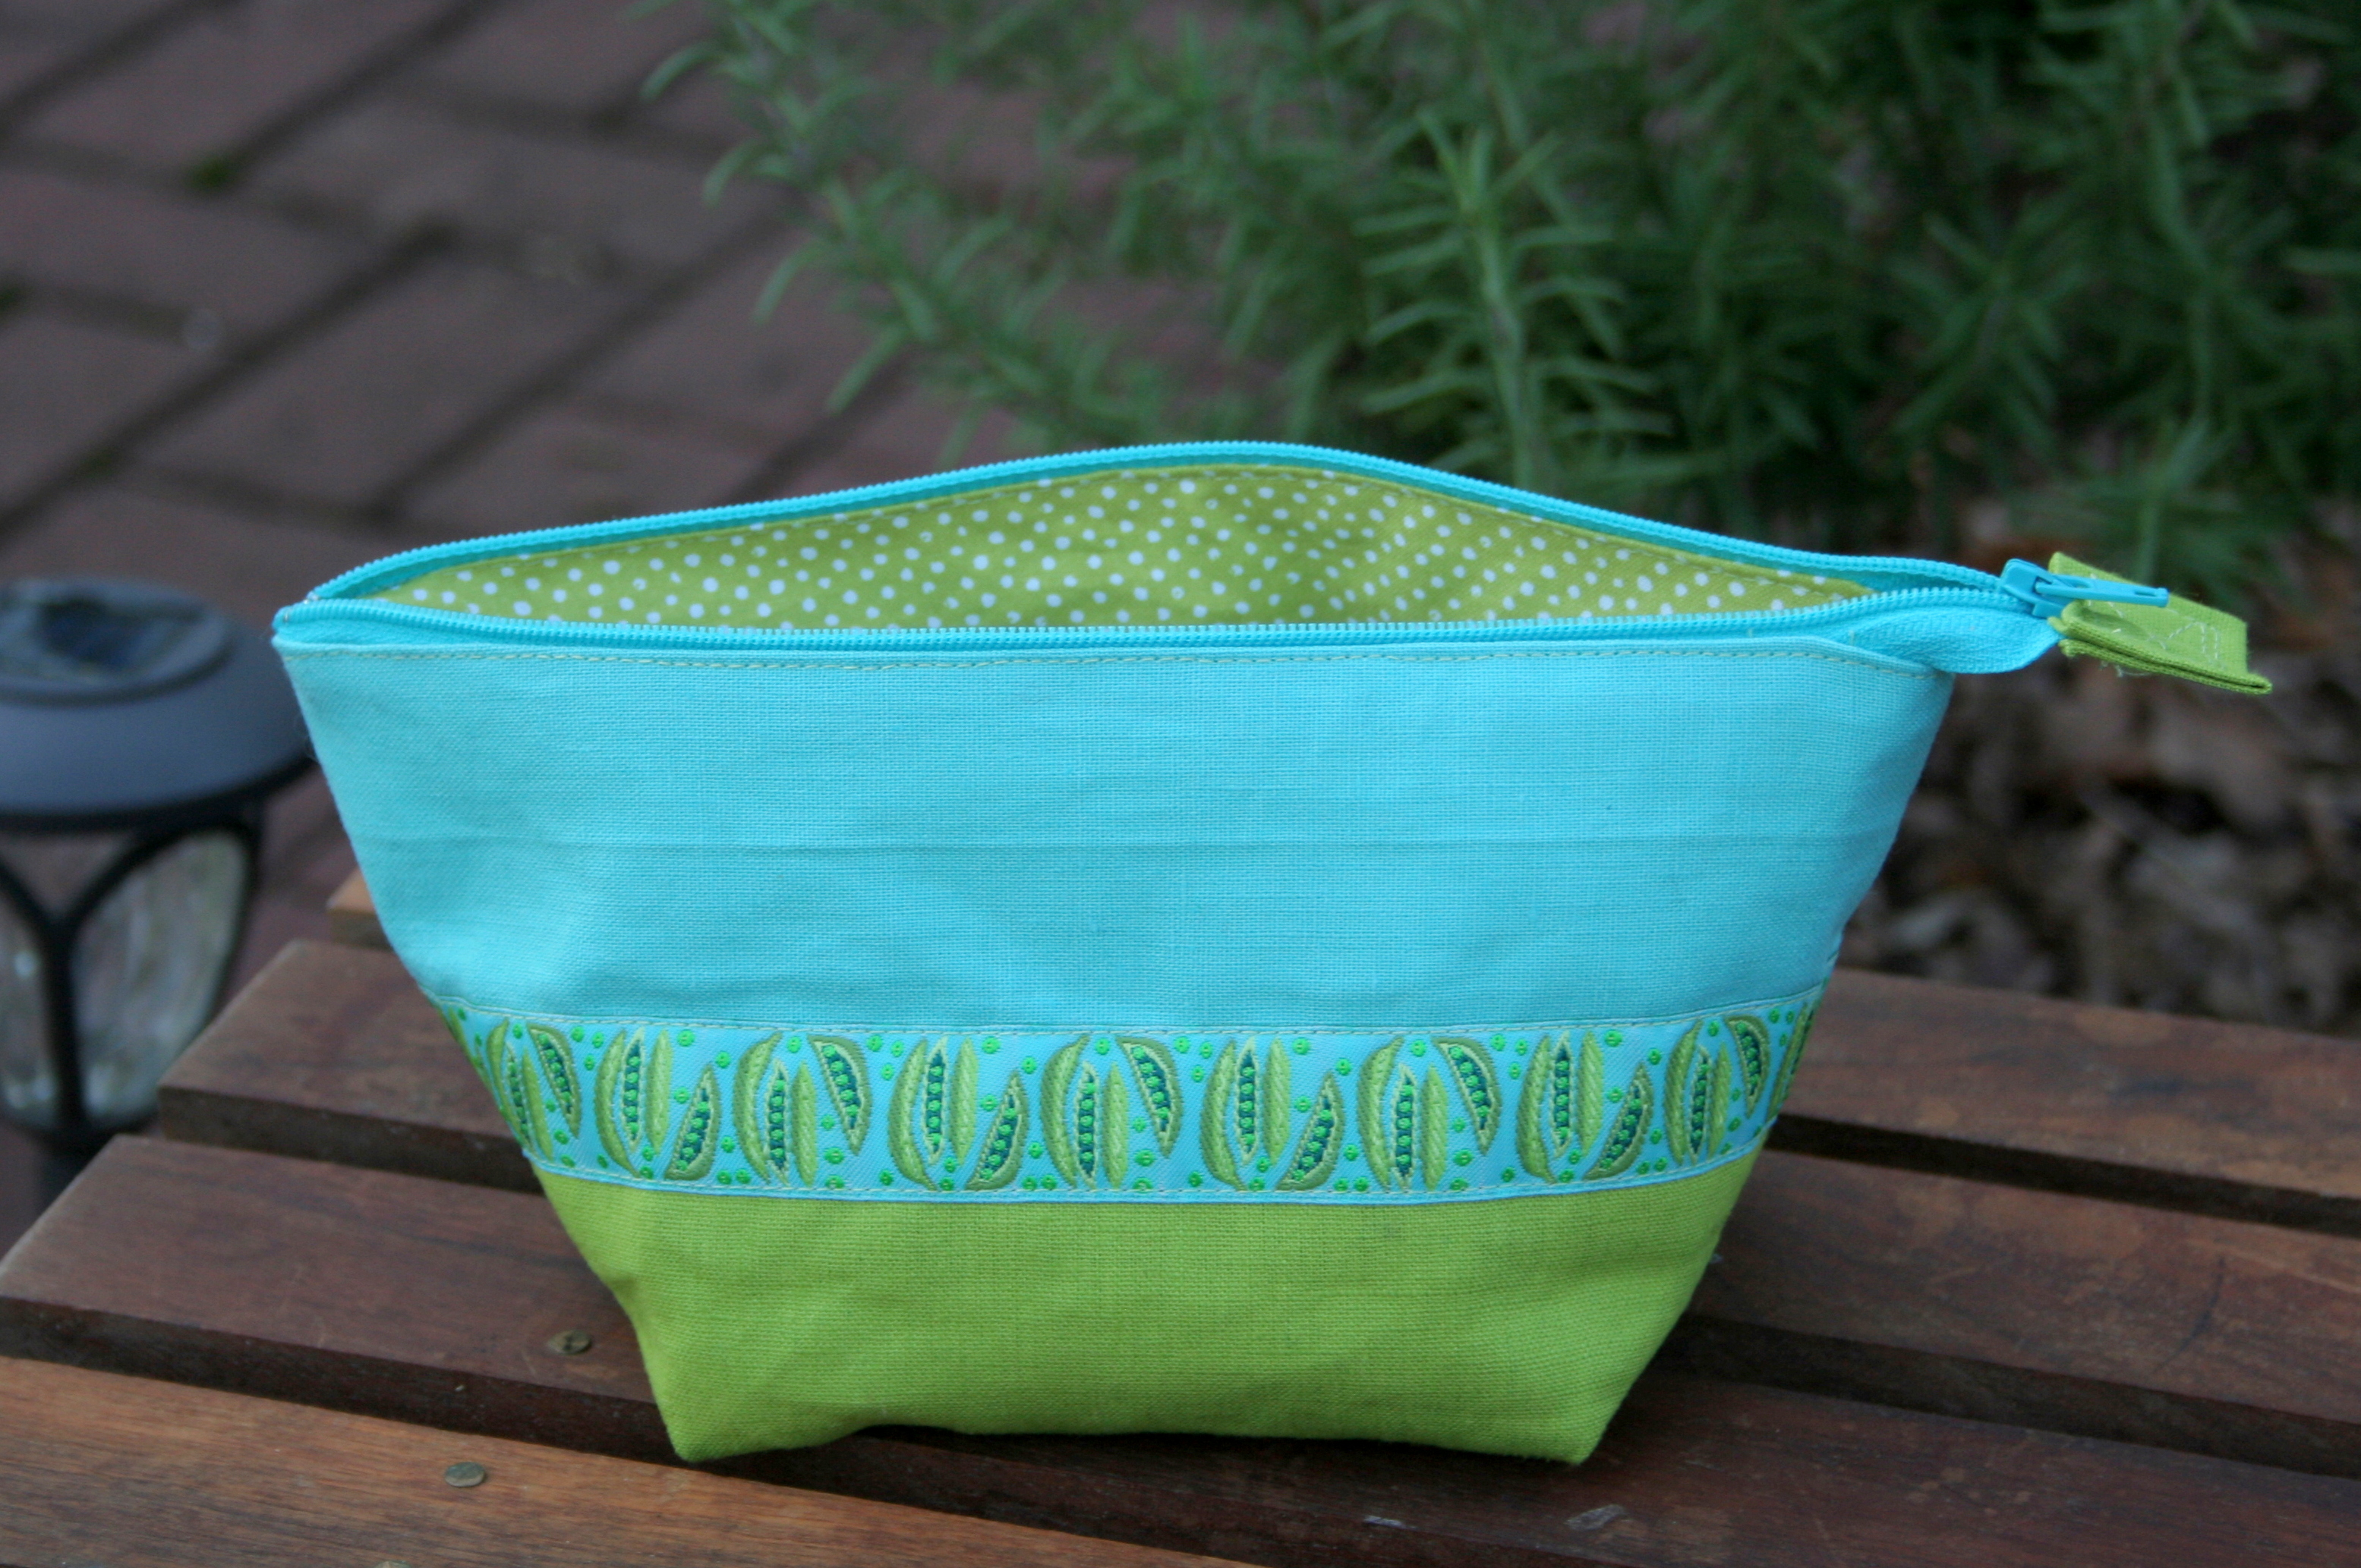
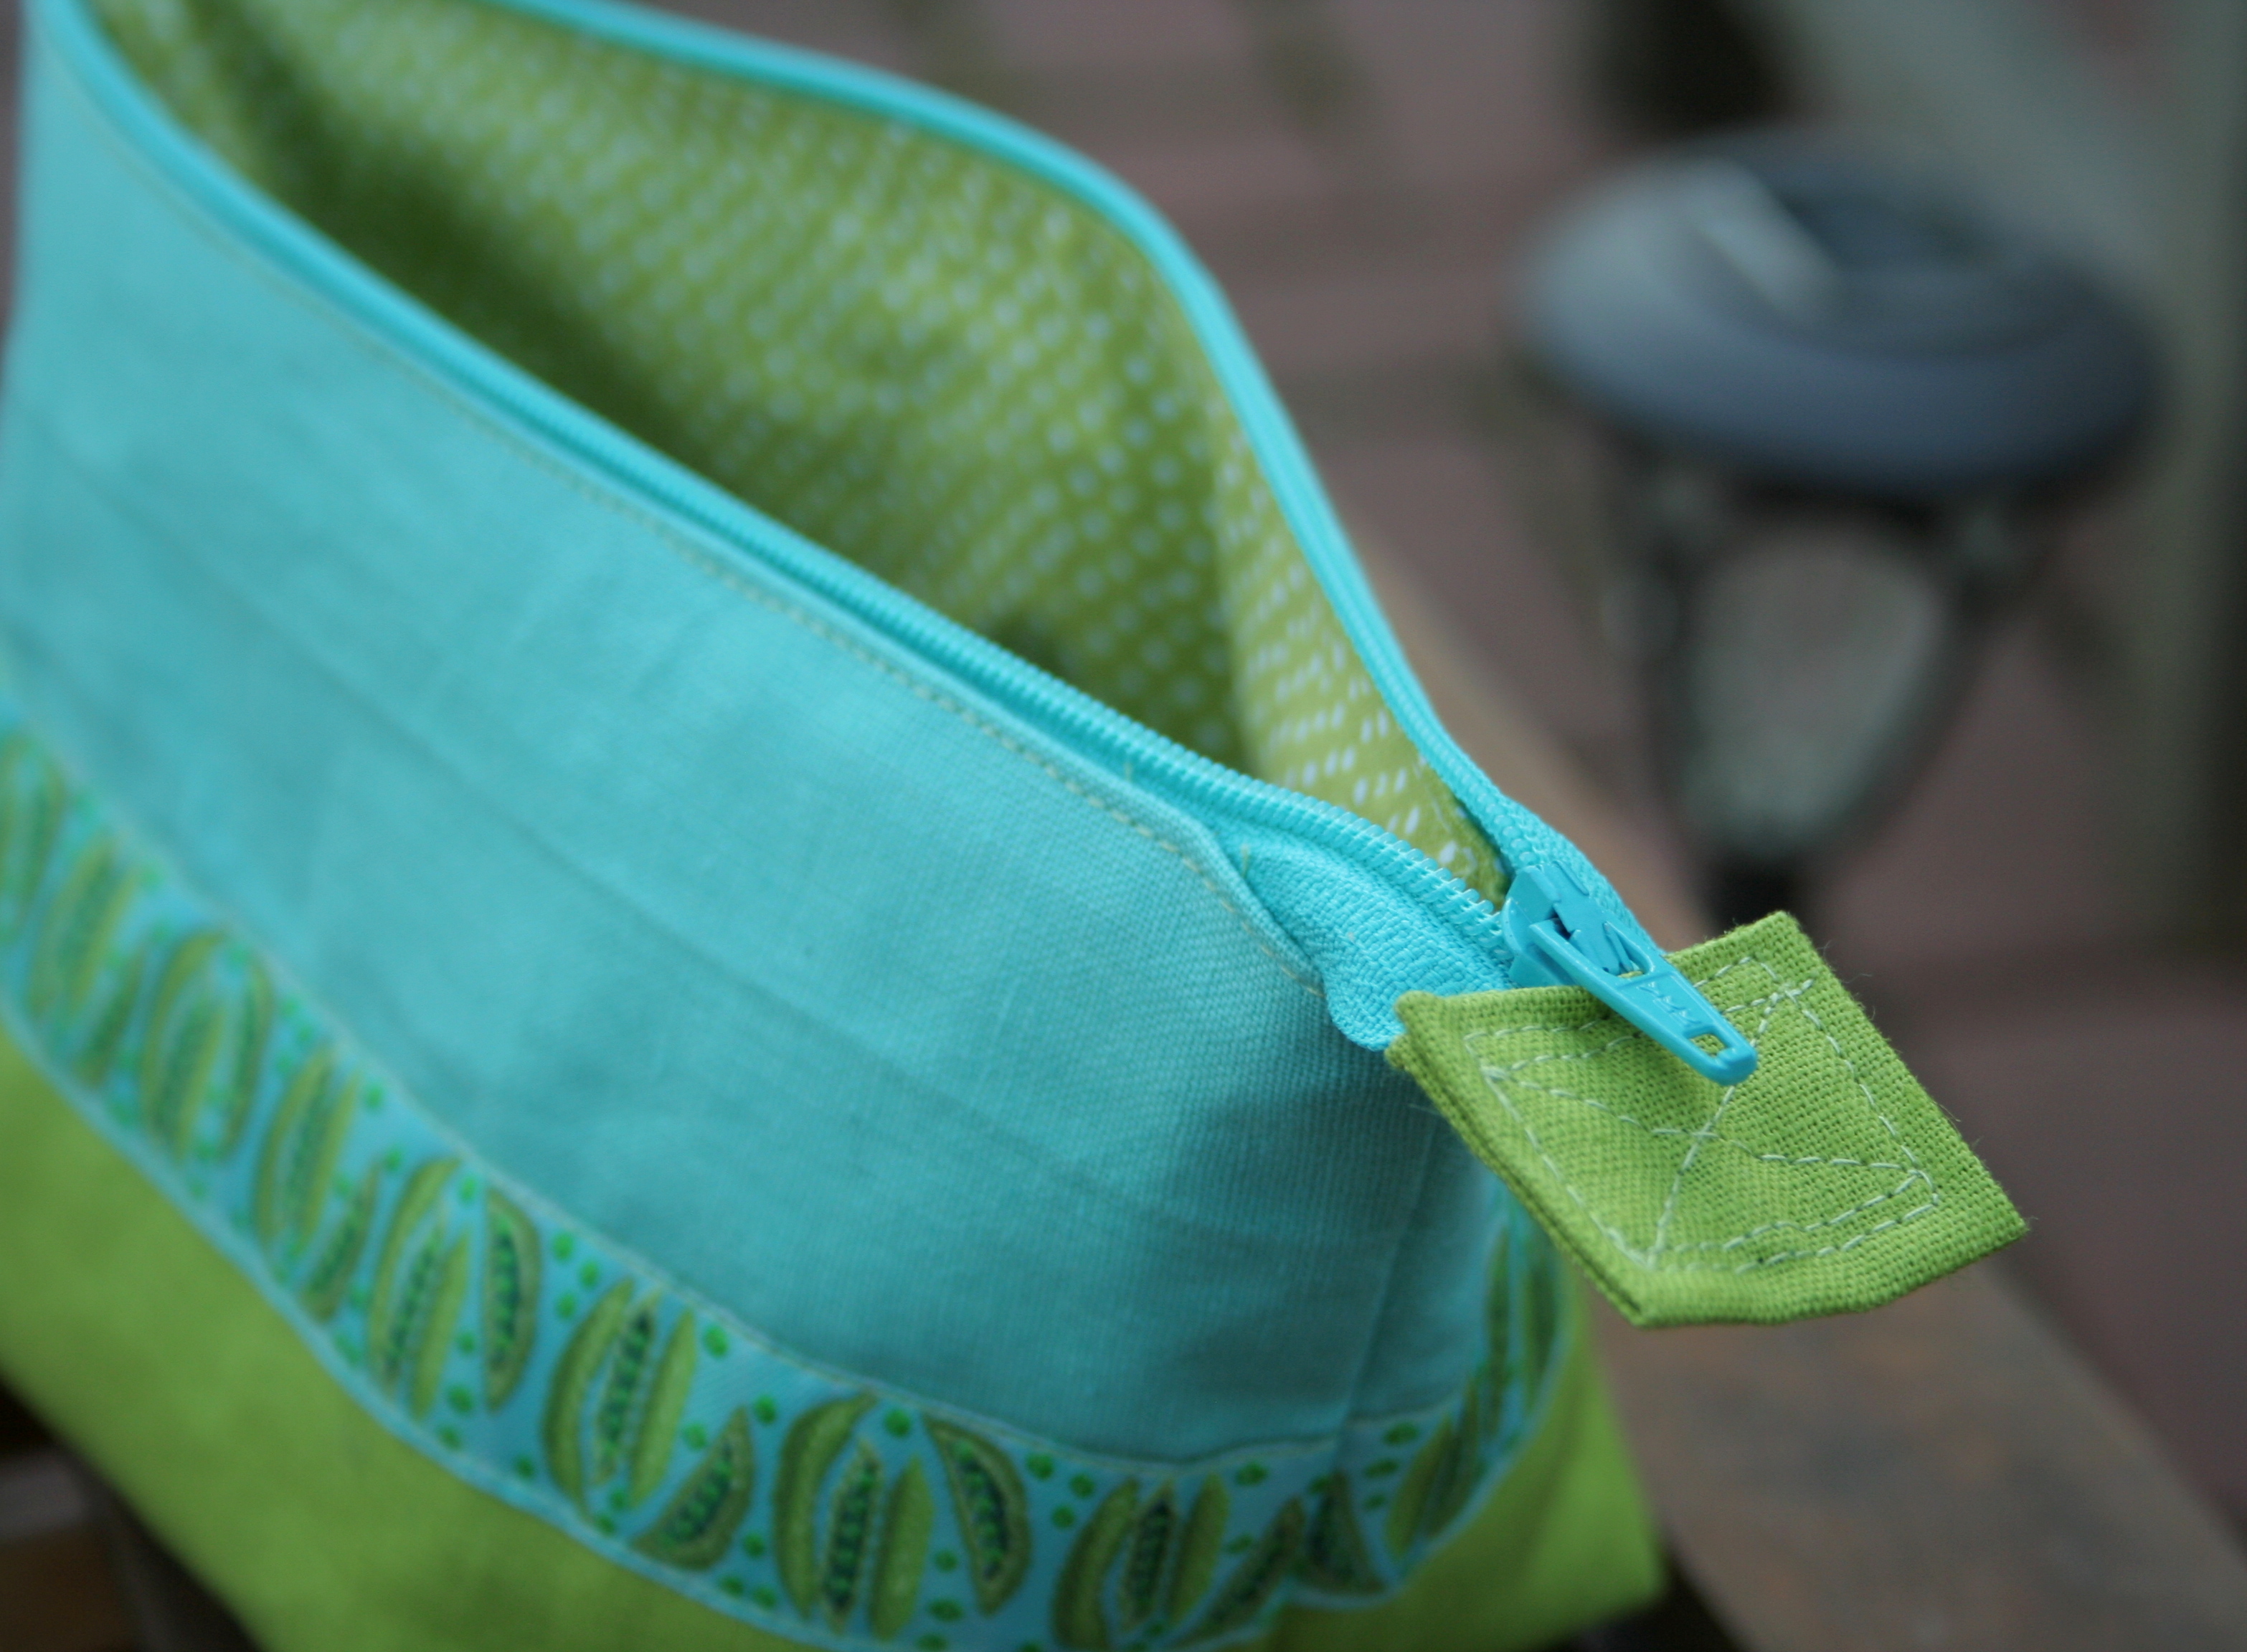
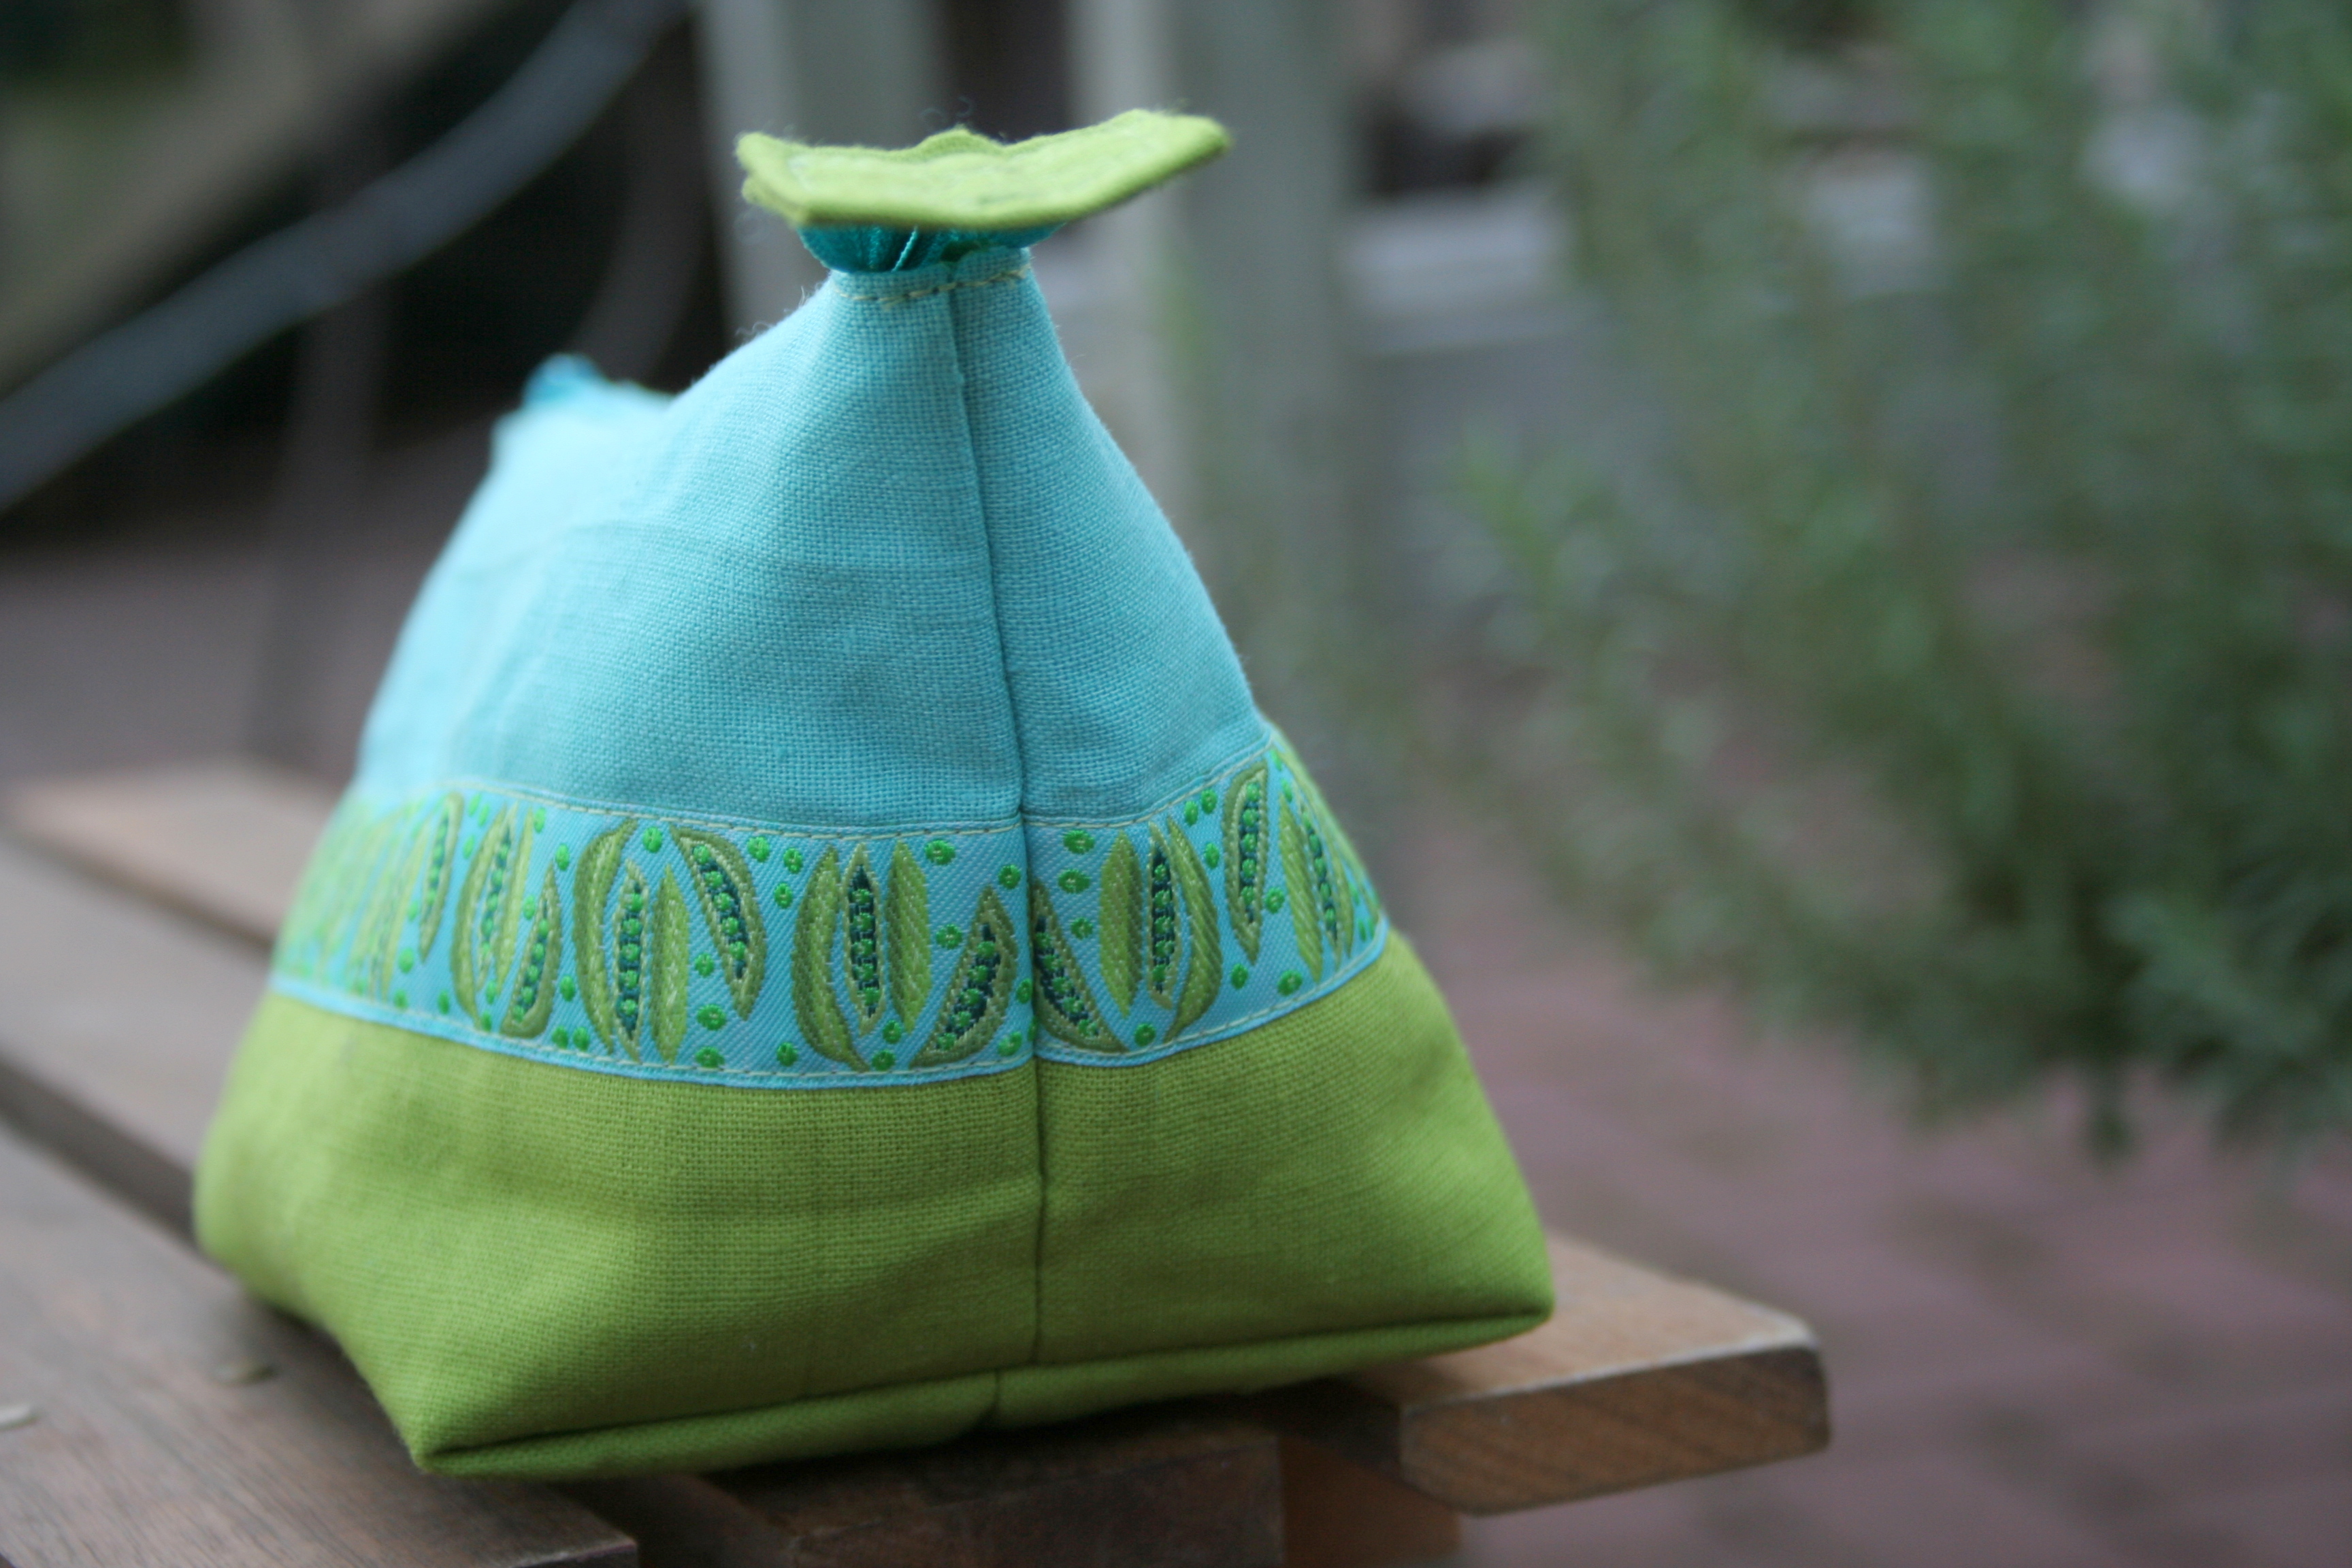
I made this pouch for my sister, since her favorite colors are teal and lime green. The zipper installation was my FIRST ever zipper, and I think it came out quite well. I used linen blend fabric leftover from my Go Anywhere Bag, and I think my sister loved it! Anna from Noodlehead has the best tutorials, and this one was a perfect first-zipped pouch tutorial.
One thing I learned while making this pouch, though, is that when the directions say to “align… the side/bottom seams” while boxing the corners, you really need to line them up perfectly. The bottom and side seams for mine (as you can see in the photo above) did not line up perfectly, since I flew past that little bit of instruction, but now I know for next time! I’m hoping that the chocolates inside the pouch distracted my OCD sister from this slight misalignment! (Love you, Lucy!)
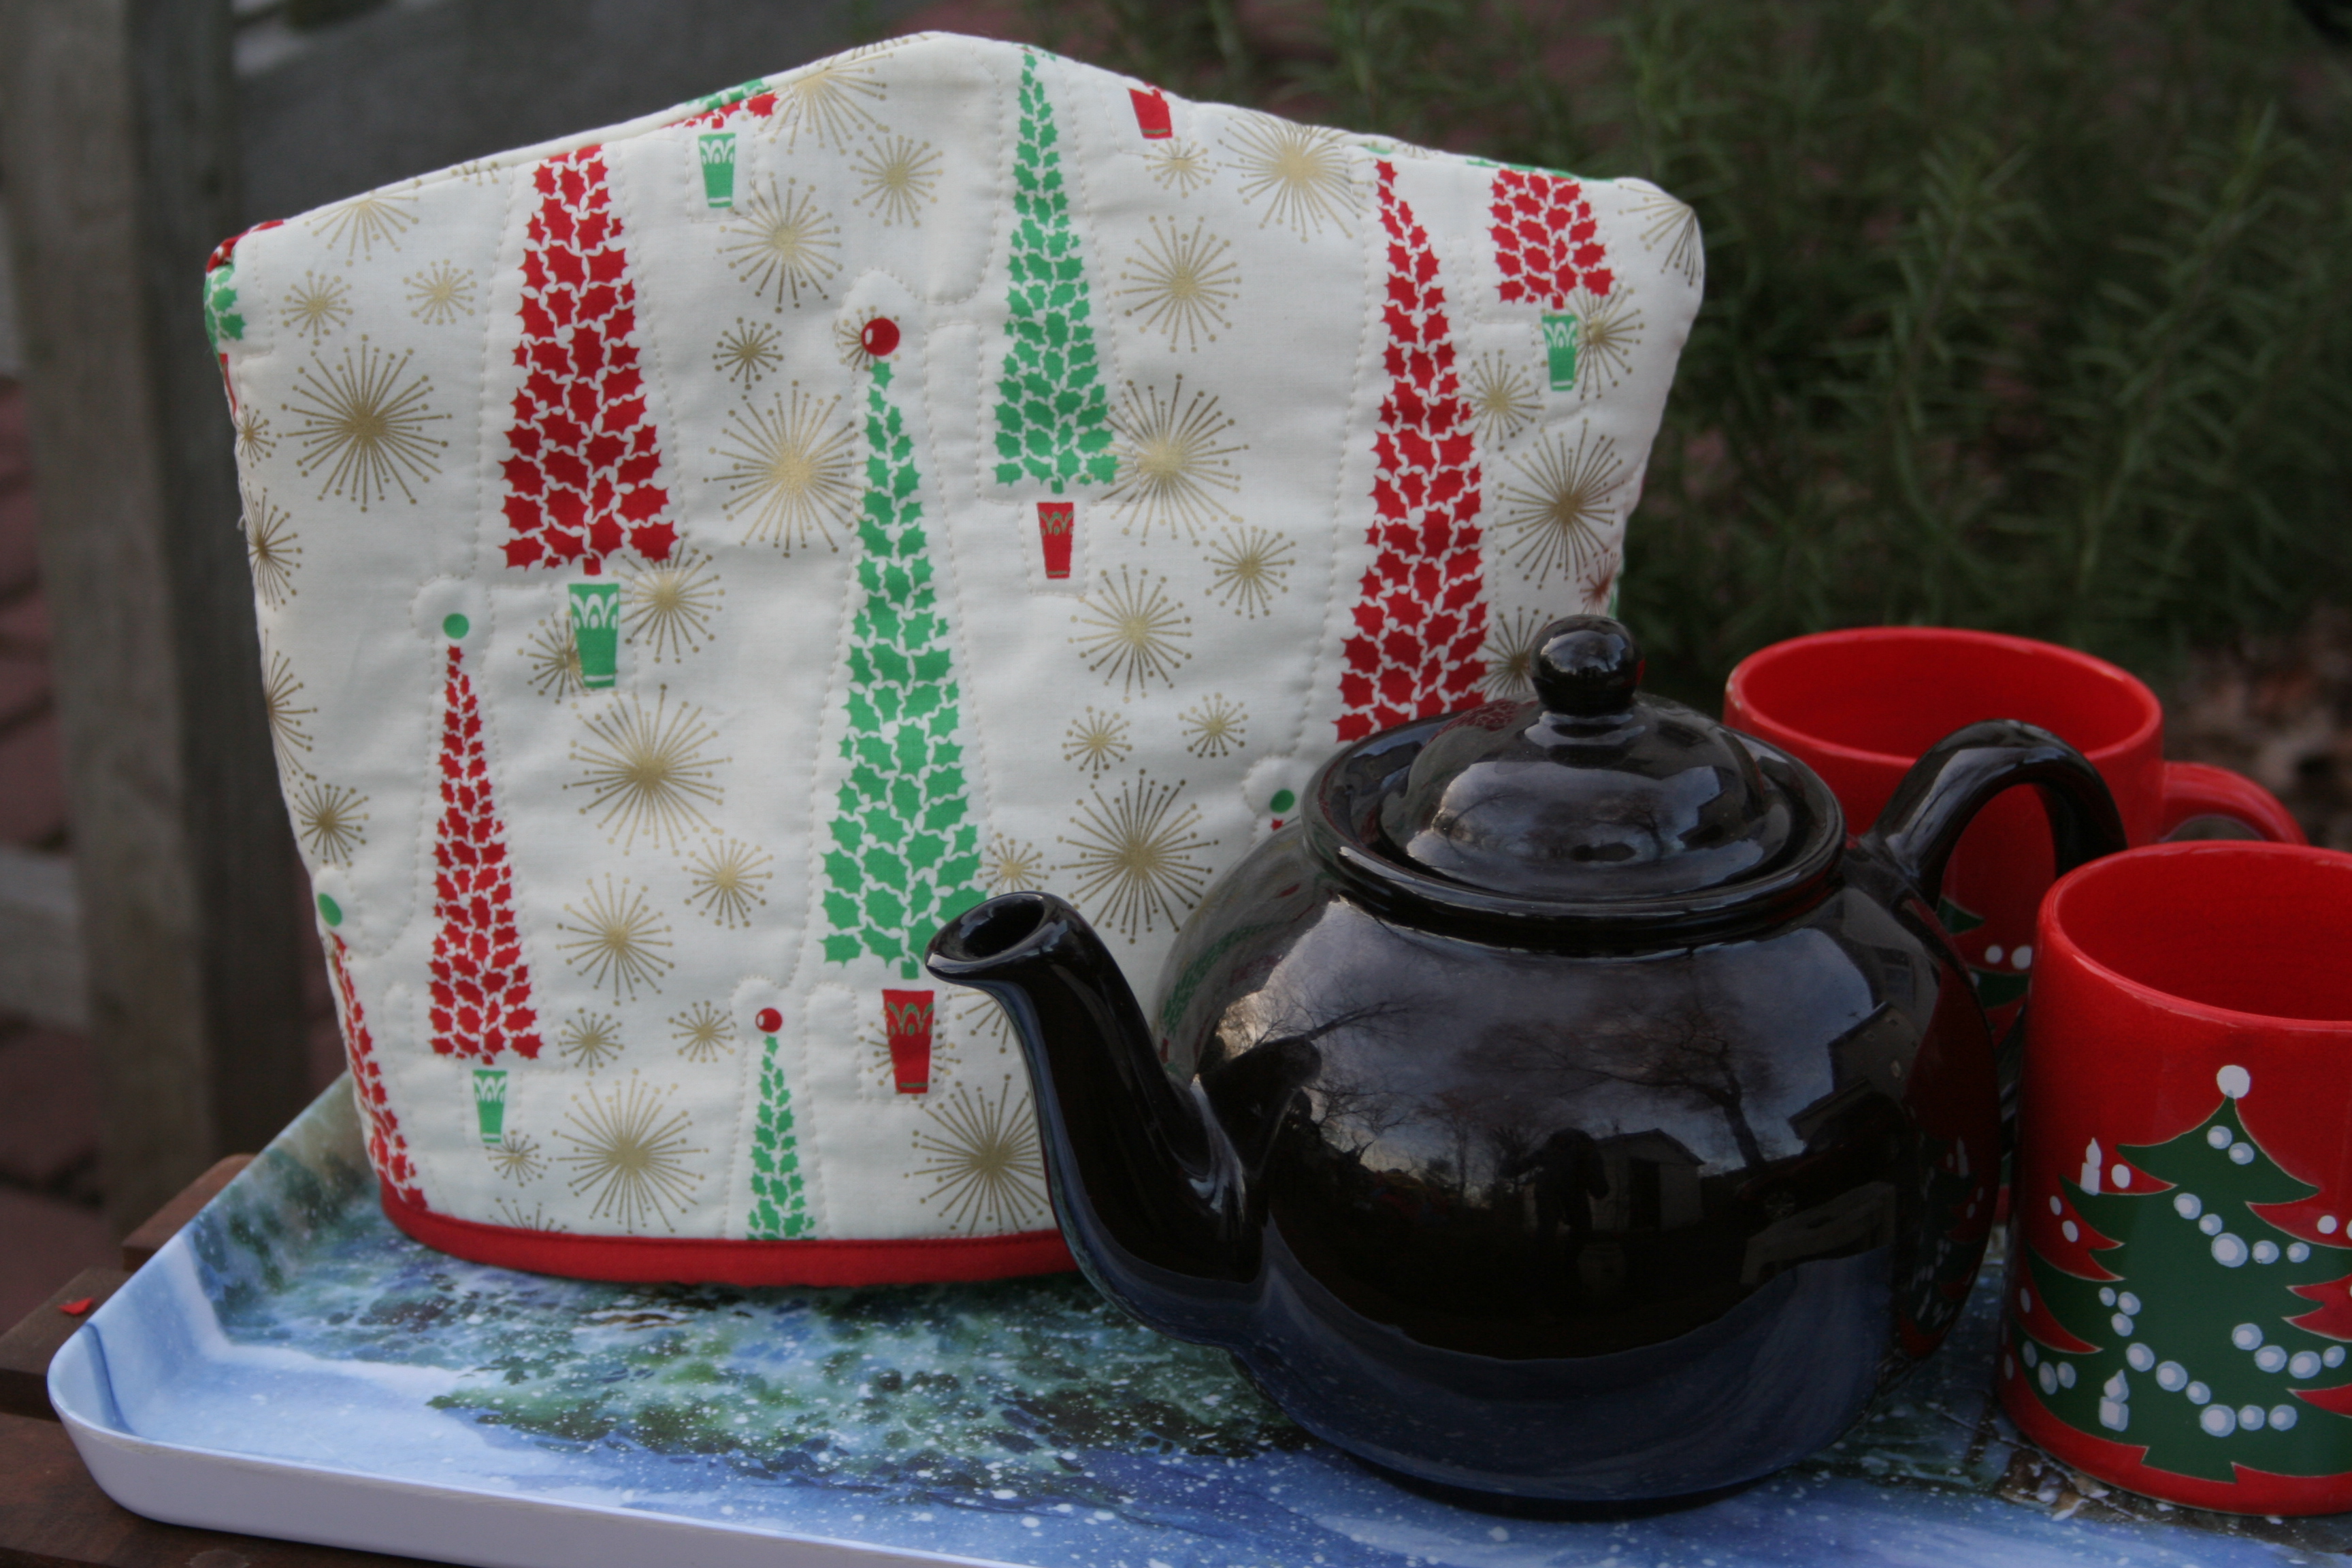
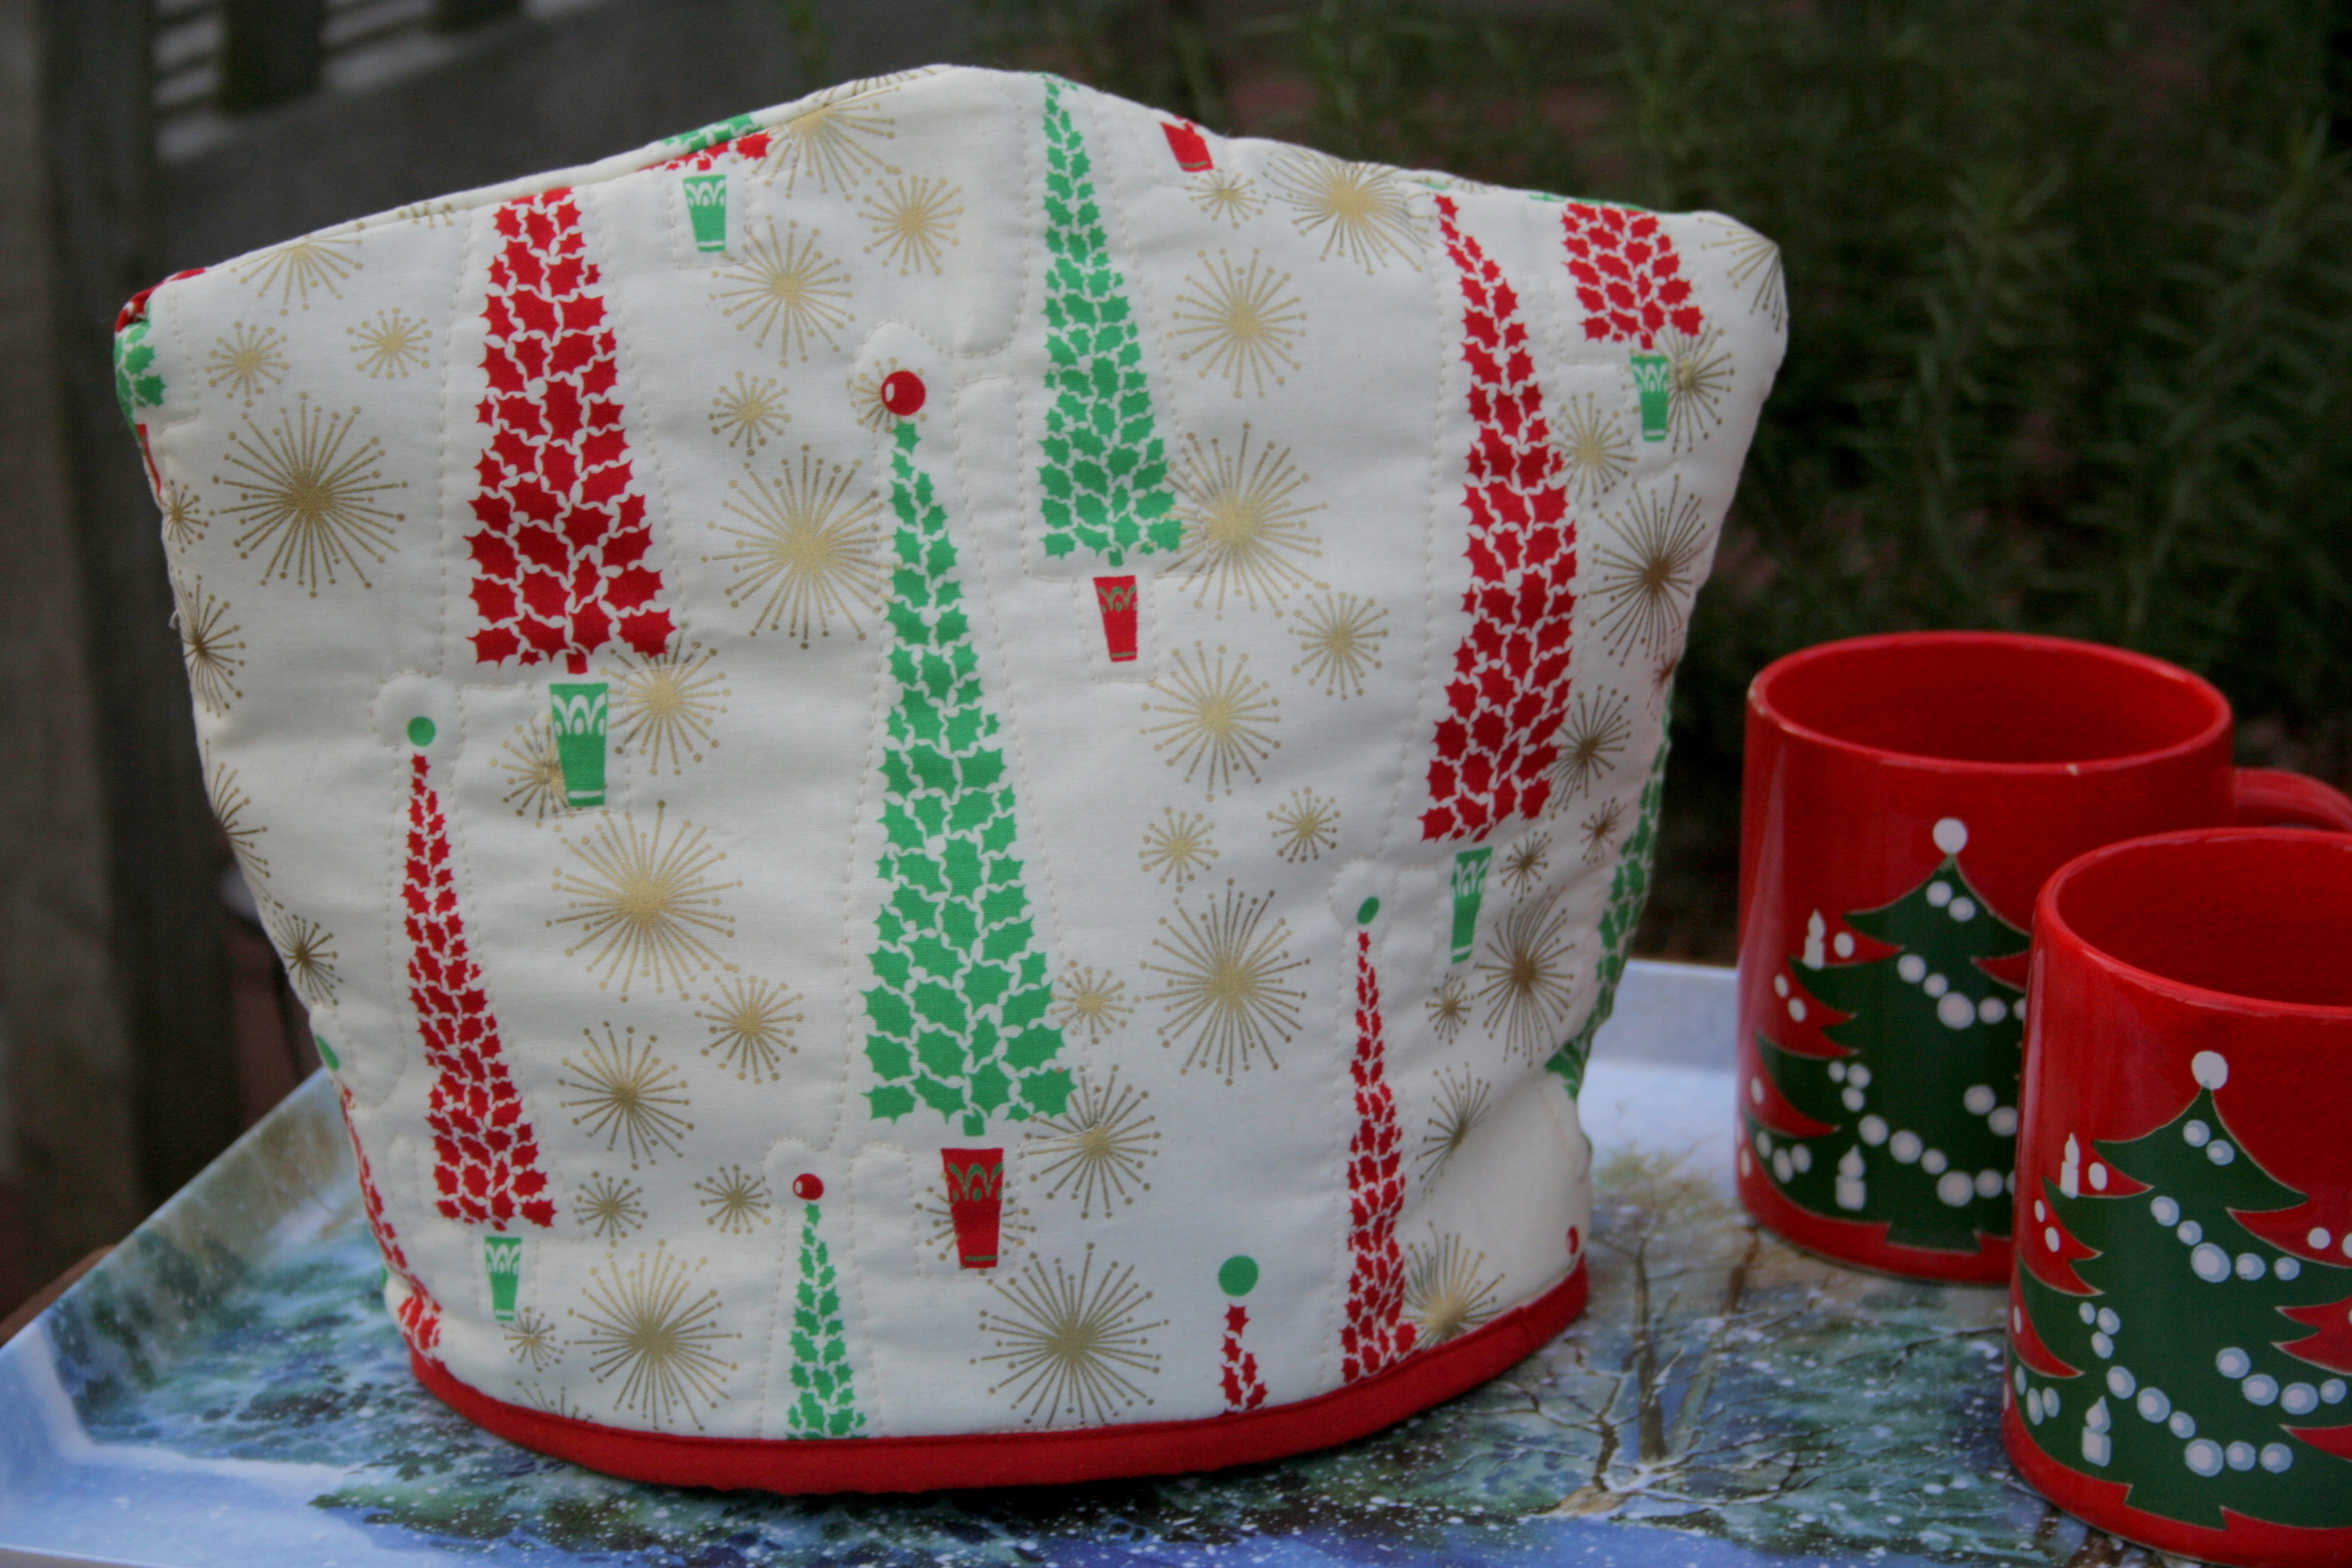
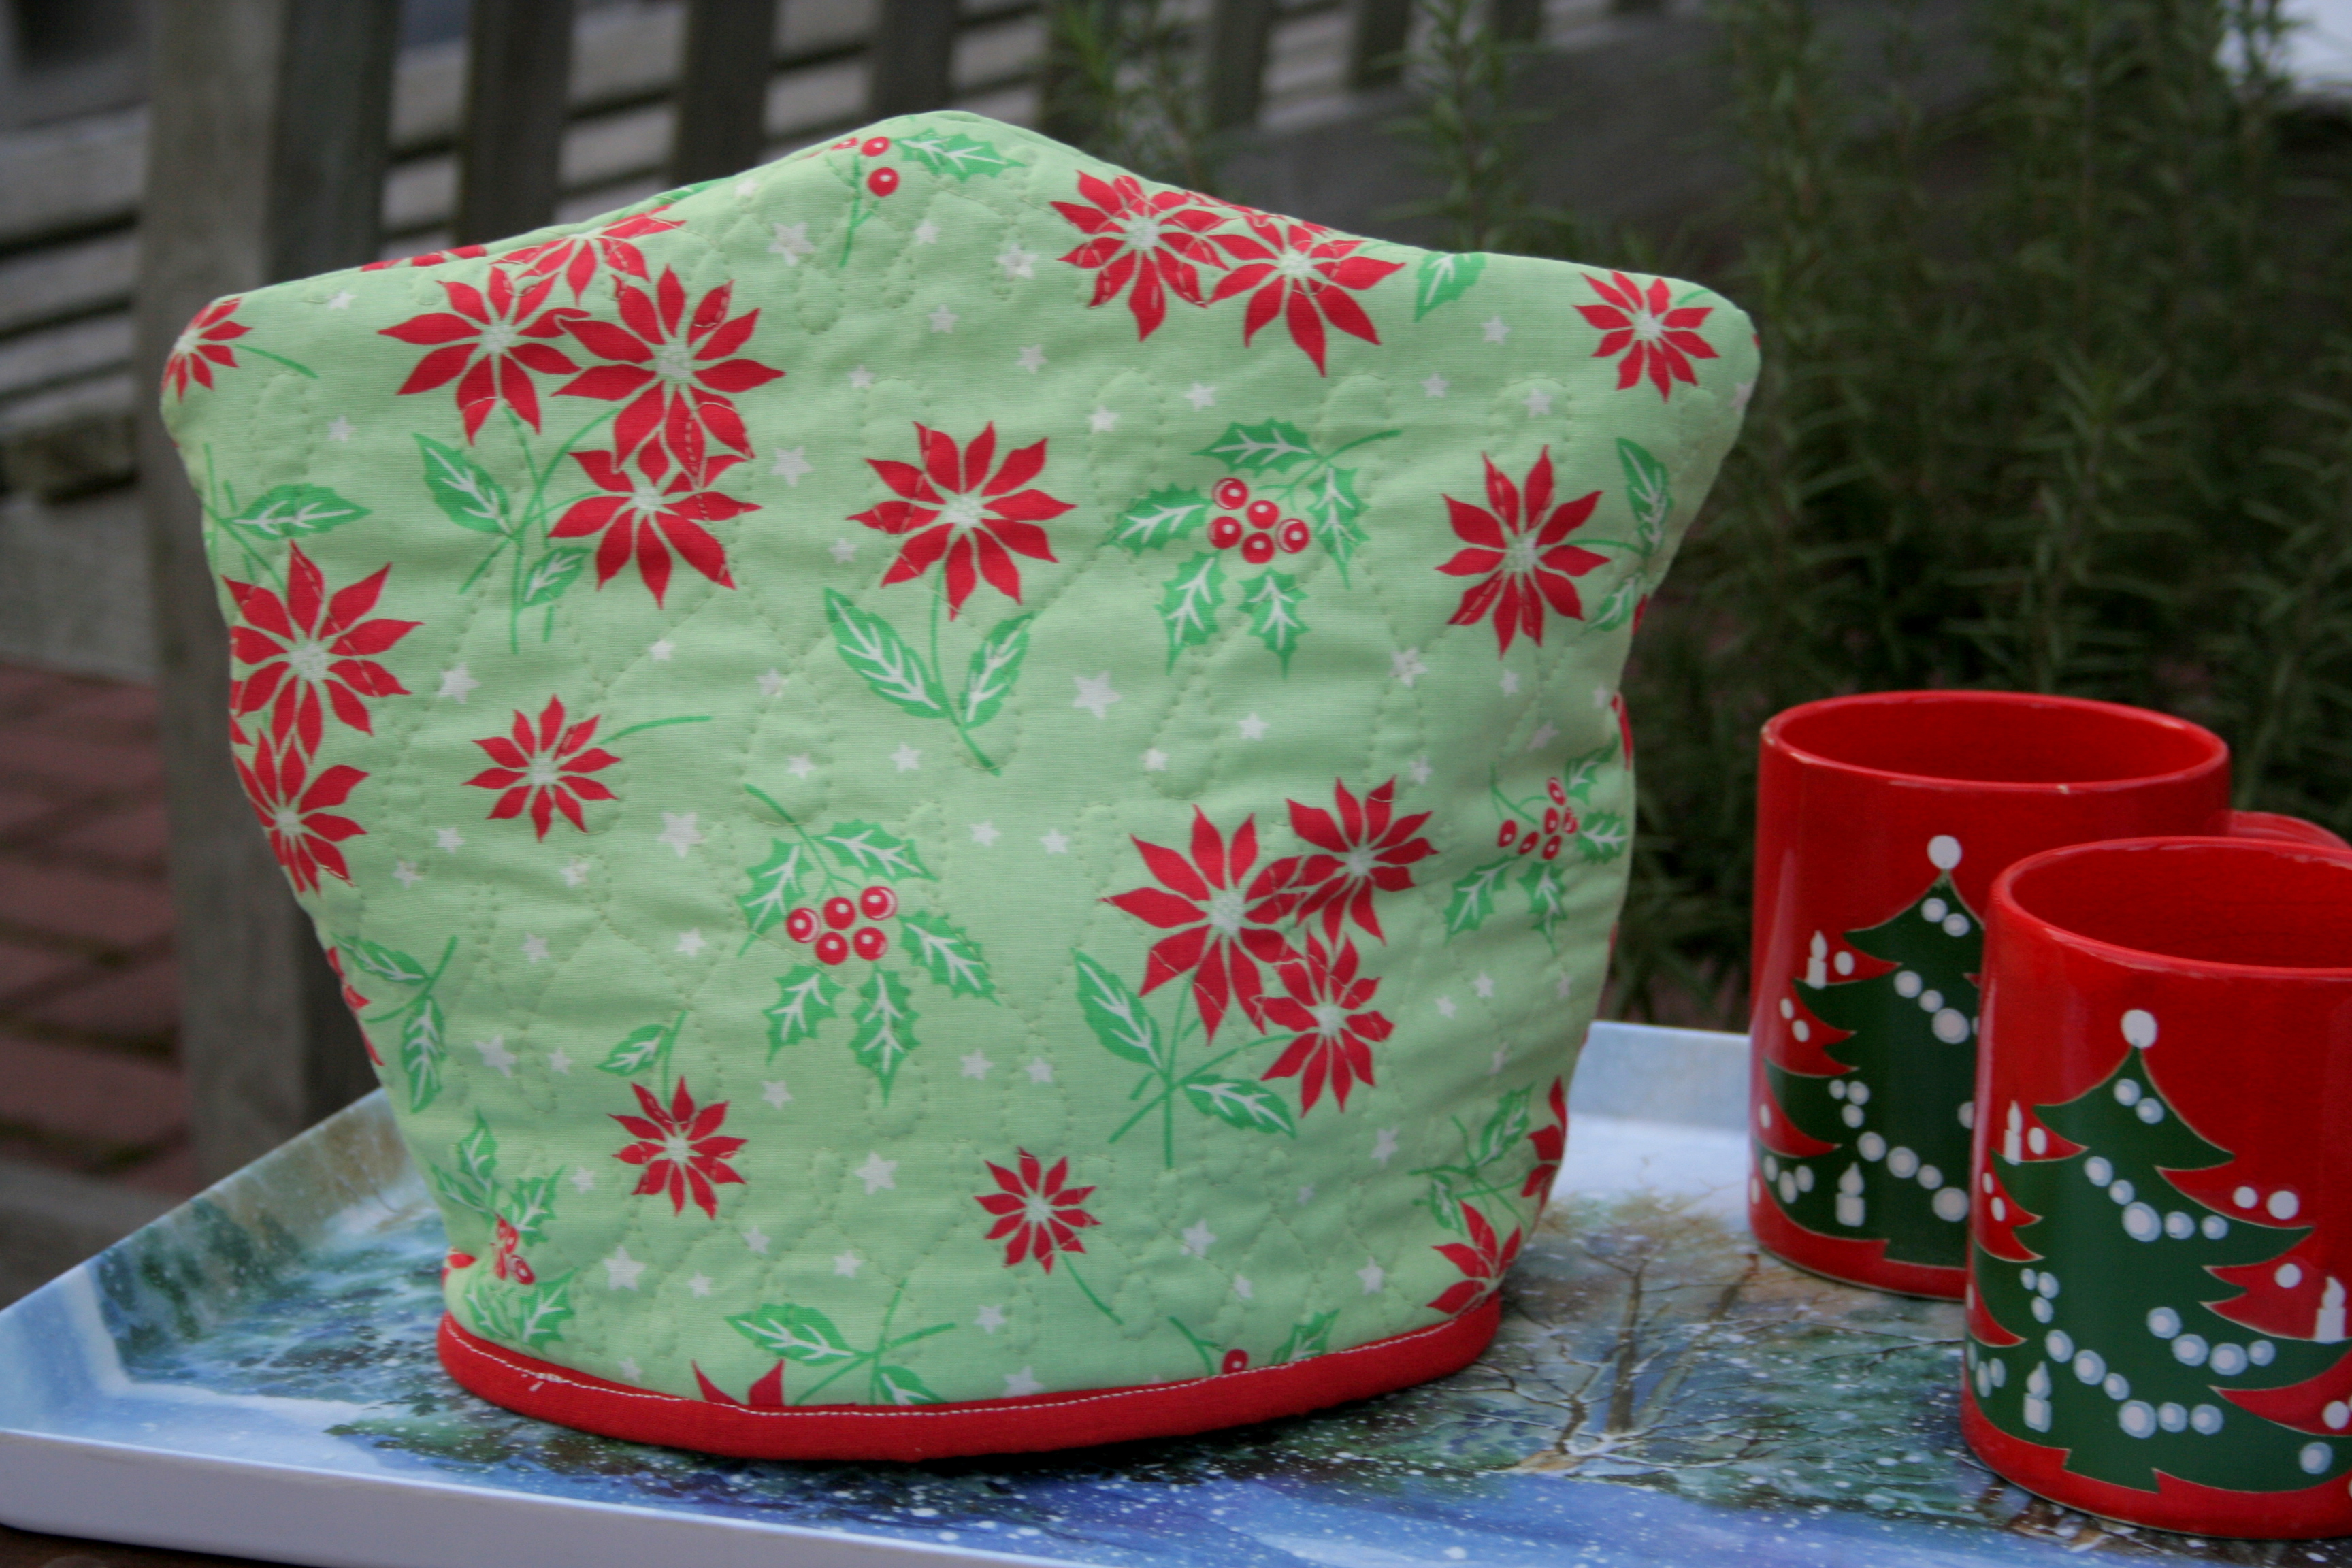
Reversible Tea Cozy
When talking to my mom about quilting about a year ago, she made it clear that she thought making a quilt was too much work and too time consuming, and therefore she did not want me to make her a quilt. She instead requested “a tea cozy for every season”, since it’s a quick project that can be completed in a couple hours. She also drinks tea from her tea pot every afternoon, so it will be well used and loved. It has taken me a while to get this first one made, but I don’t think the next one will be far behind. I used the fabulous tutorial by Yvonne at Quilting Jetgirl. I definitely will be using her tutorial again, since the tea cozy fit my mom’s large teapot quite well. Here are the two Christmas-themed sides of the tea cozy I made for my mom.
A New Paper Piecing Pattern!
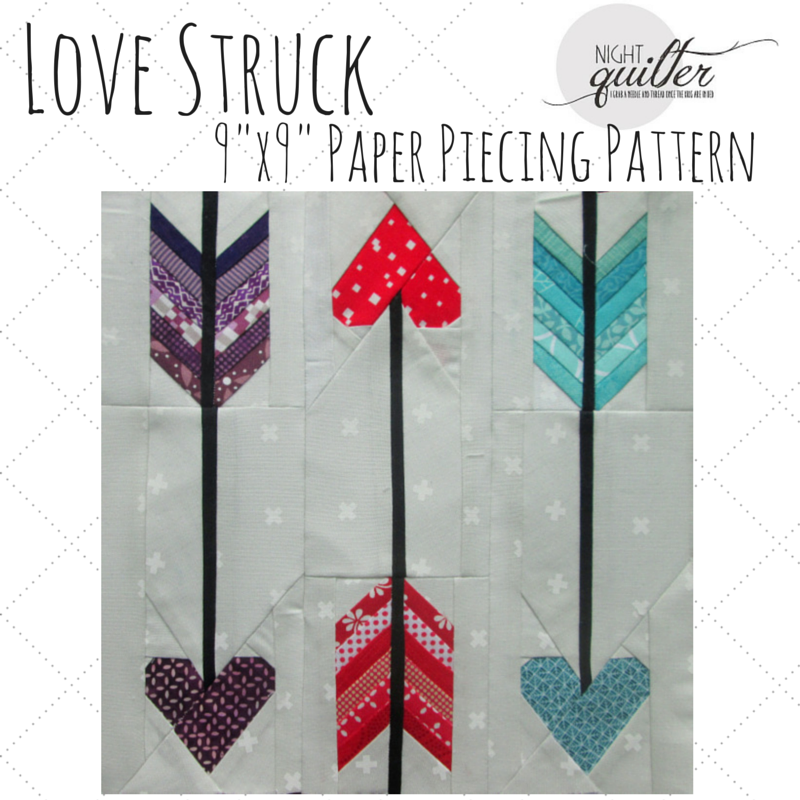
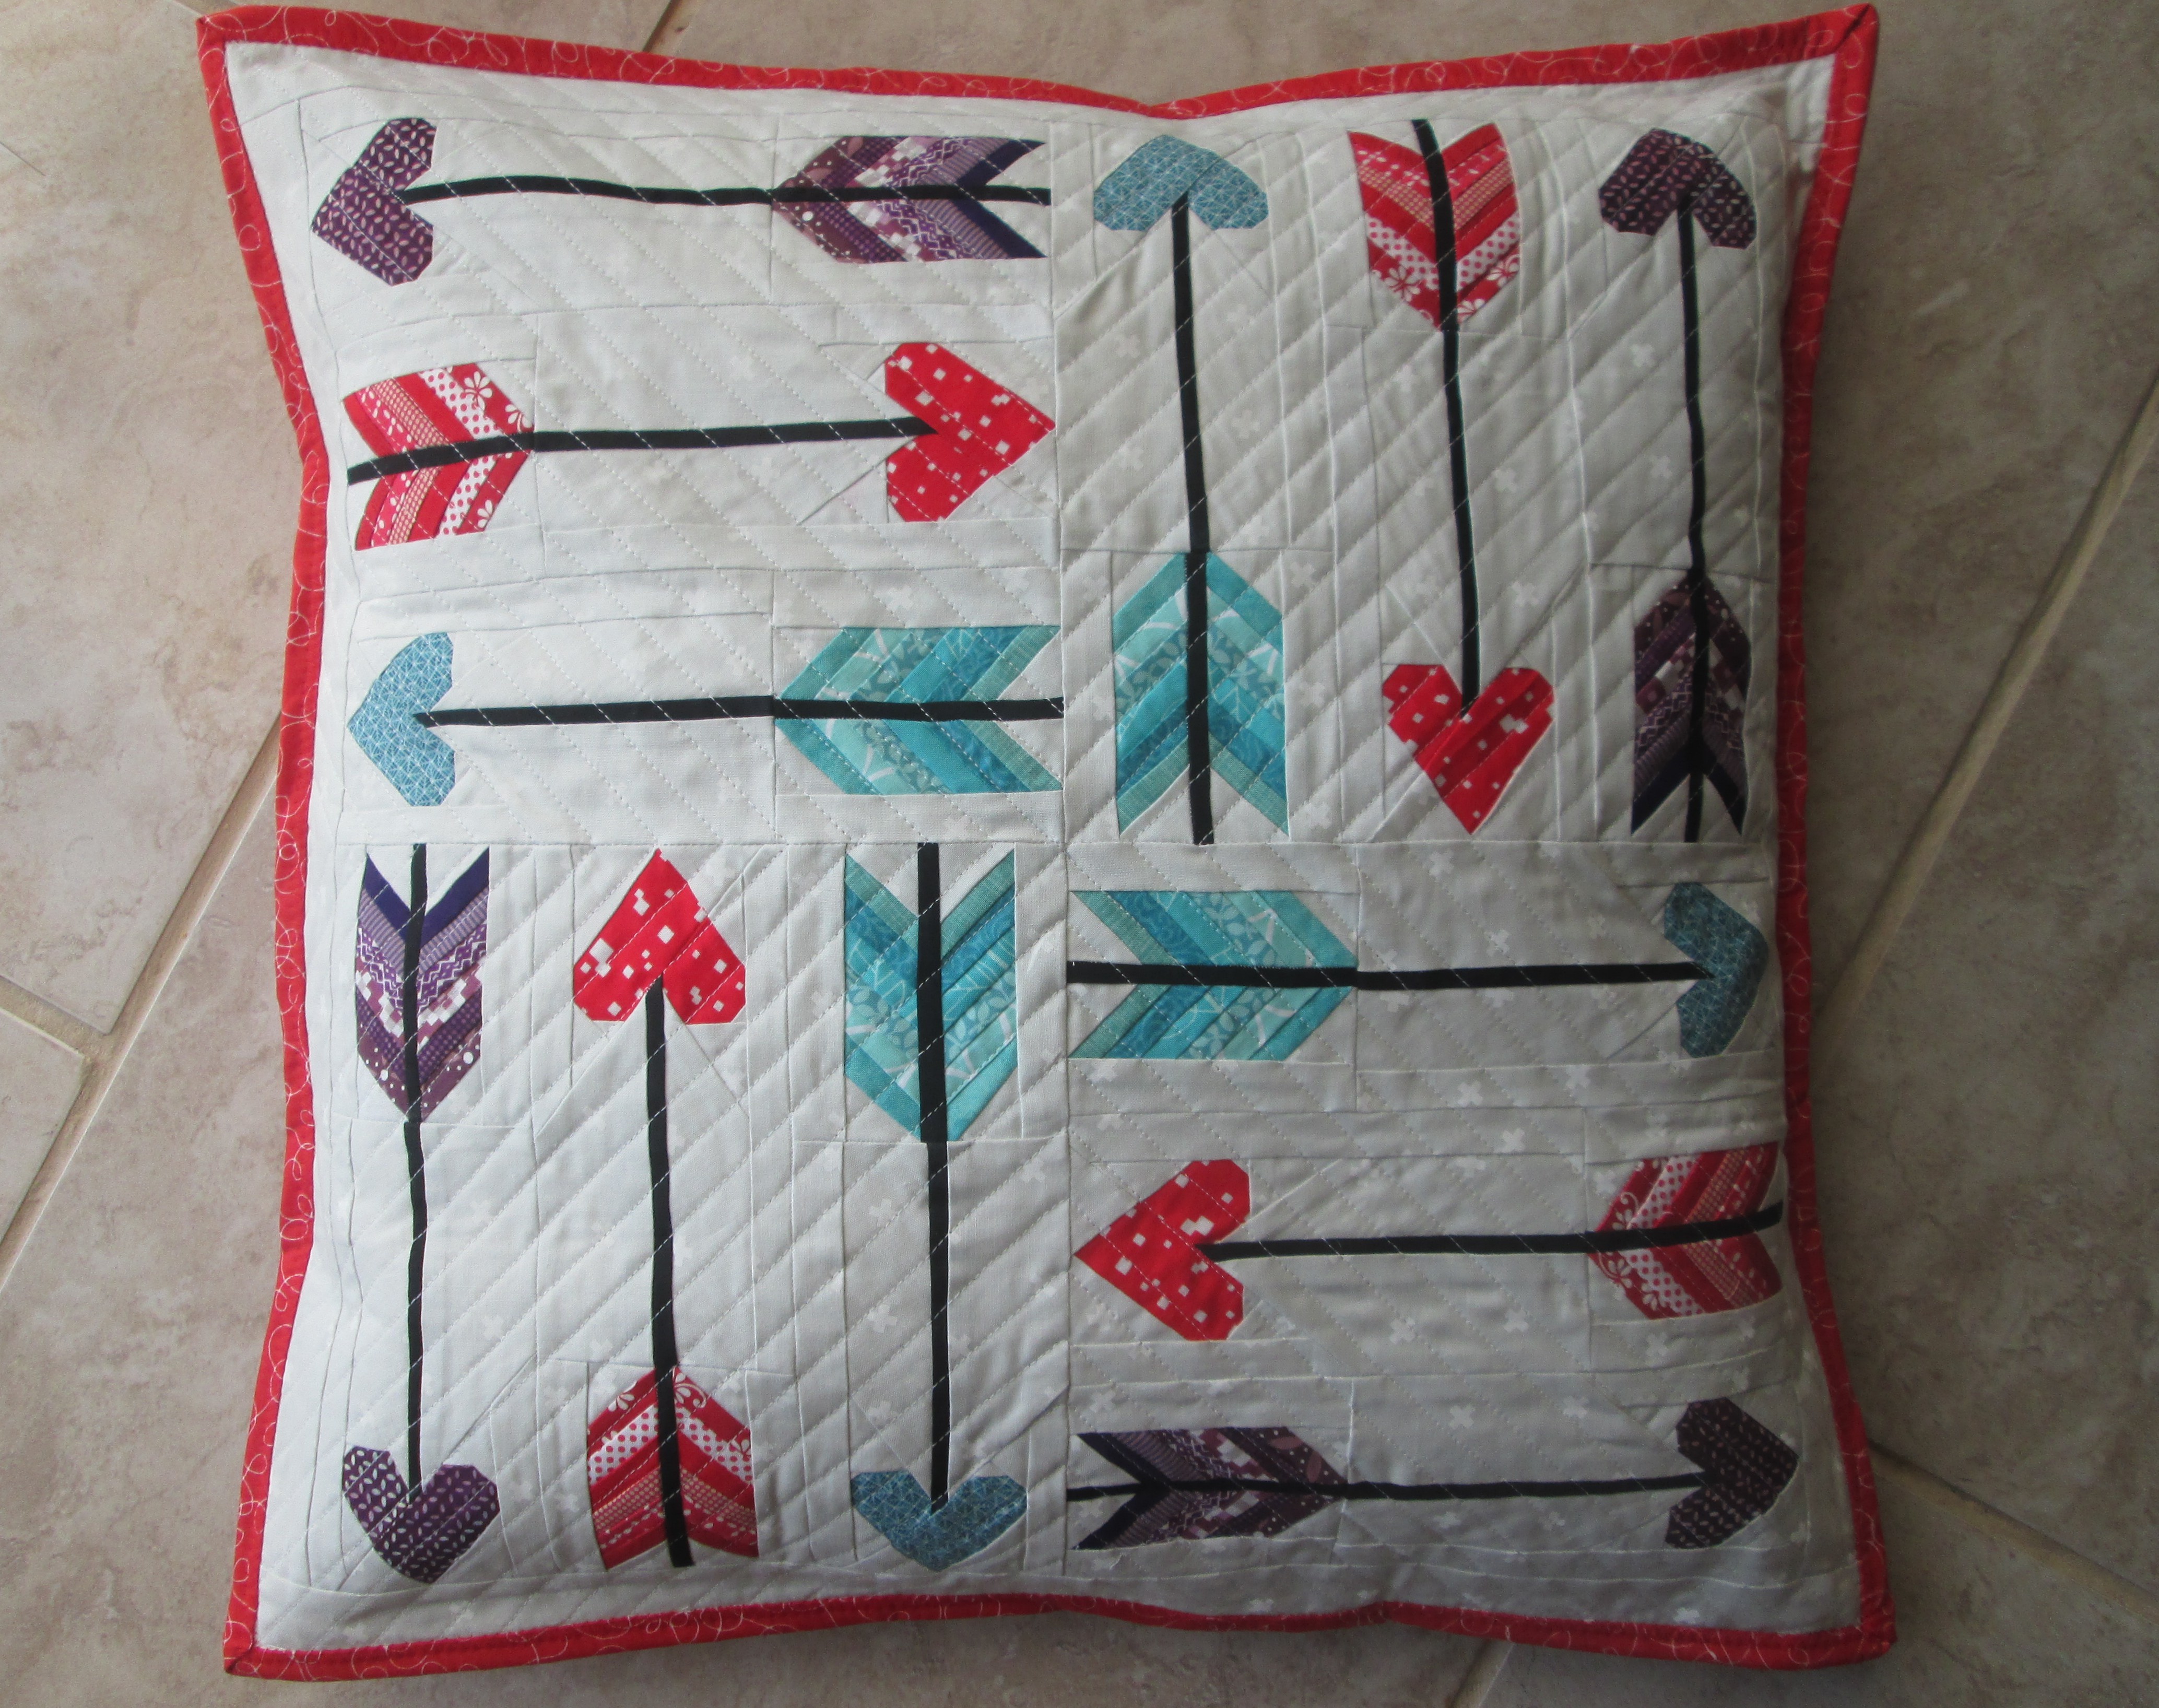
And finally, a recent finish: a new paper piecing pattern called Love Struck. Special thanks to Julie from That’s Sew Julie for her awesome pattern testing! This pattern includes printable foundation paper piecing templates including two “printer pages” to help save paper when printing multiples, clear assembly instructions, a coloring sheet on which you can try out color schemes before beginning, and sewing tips along the way. You can find in on Craftsy here (for those in the US) or on Payhip here(if you’re international). Both this and my Key to My Heart pattern are on sale for $2 until Valentine’s day!
We’re getting lots of snow this weekend up here in Maine, so I know what I’m doing all weekend–sewing (and playing with my kids in the snow). If you’re looking for a good weekend project, turn this block into a festive table runner or pillow. Here’s the pillow Julie made from four blocks. AND she says she “whipped up this whole thing in a week while taking care of five kids, one sick, and getting a double crochet hat order together.” Holy smokes, Julie! You’re amazing!!
Get the pattern here:
Craftsy (if you’re in the US) Payhip (if you’re international)
…or go to Julie’s blog and comment to enter for a chance to win a free copy of the pattern!
If you do decide to make this pattern, share the love and tag me @nightquilter on IG or twitter, and use #lovestruckpattern. I’d love to see!
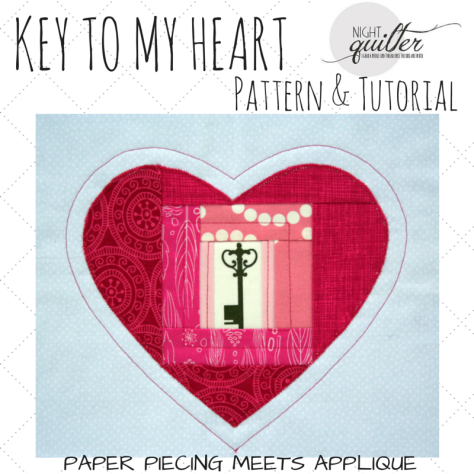
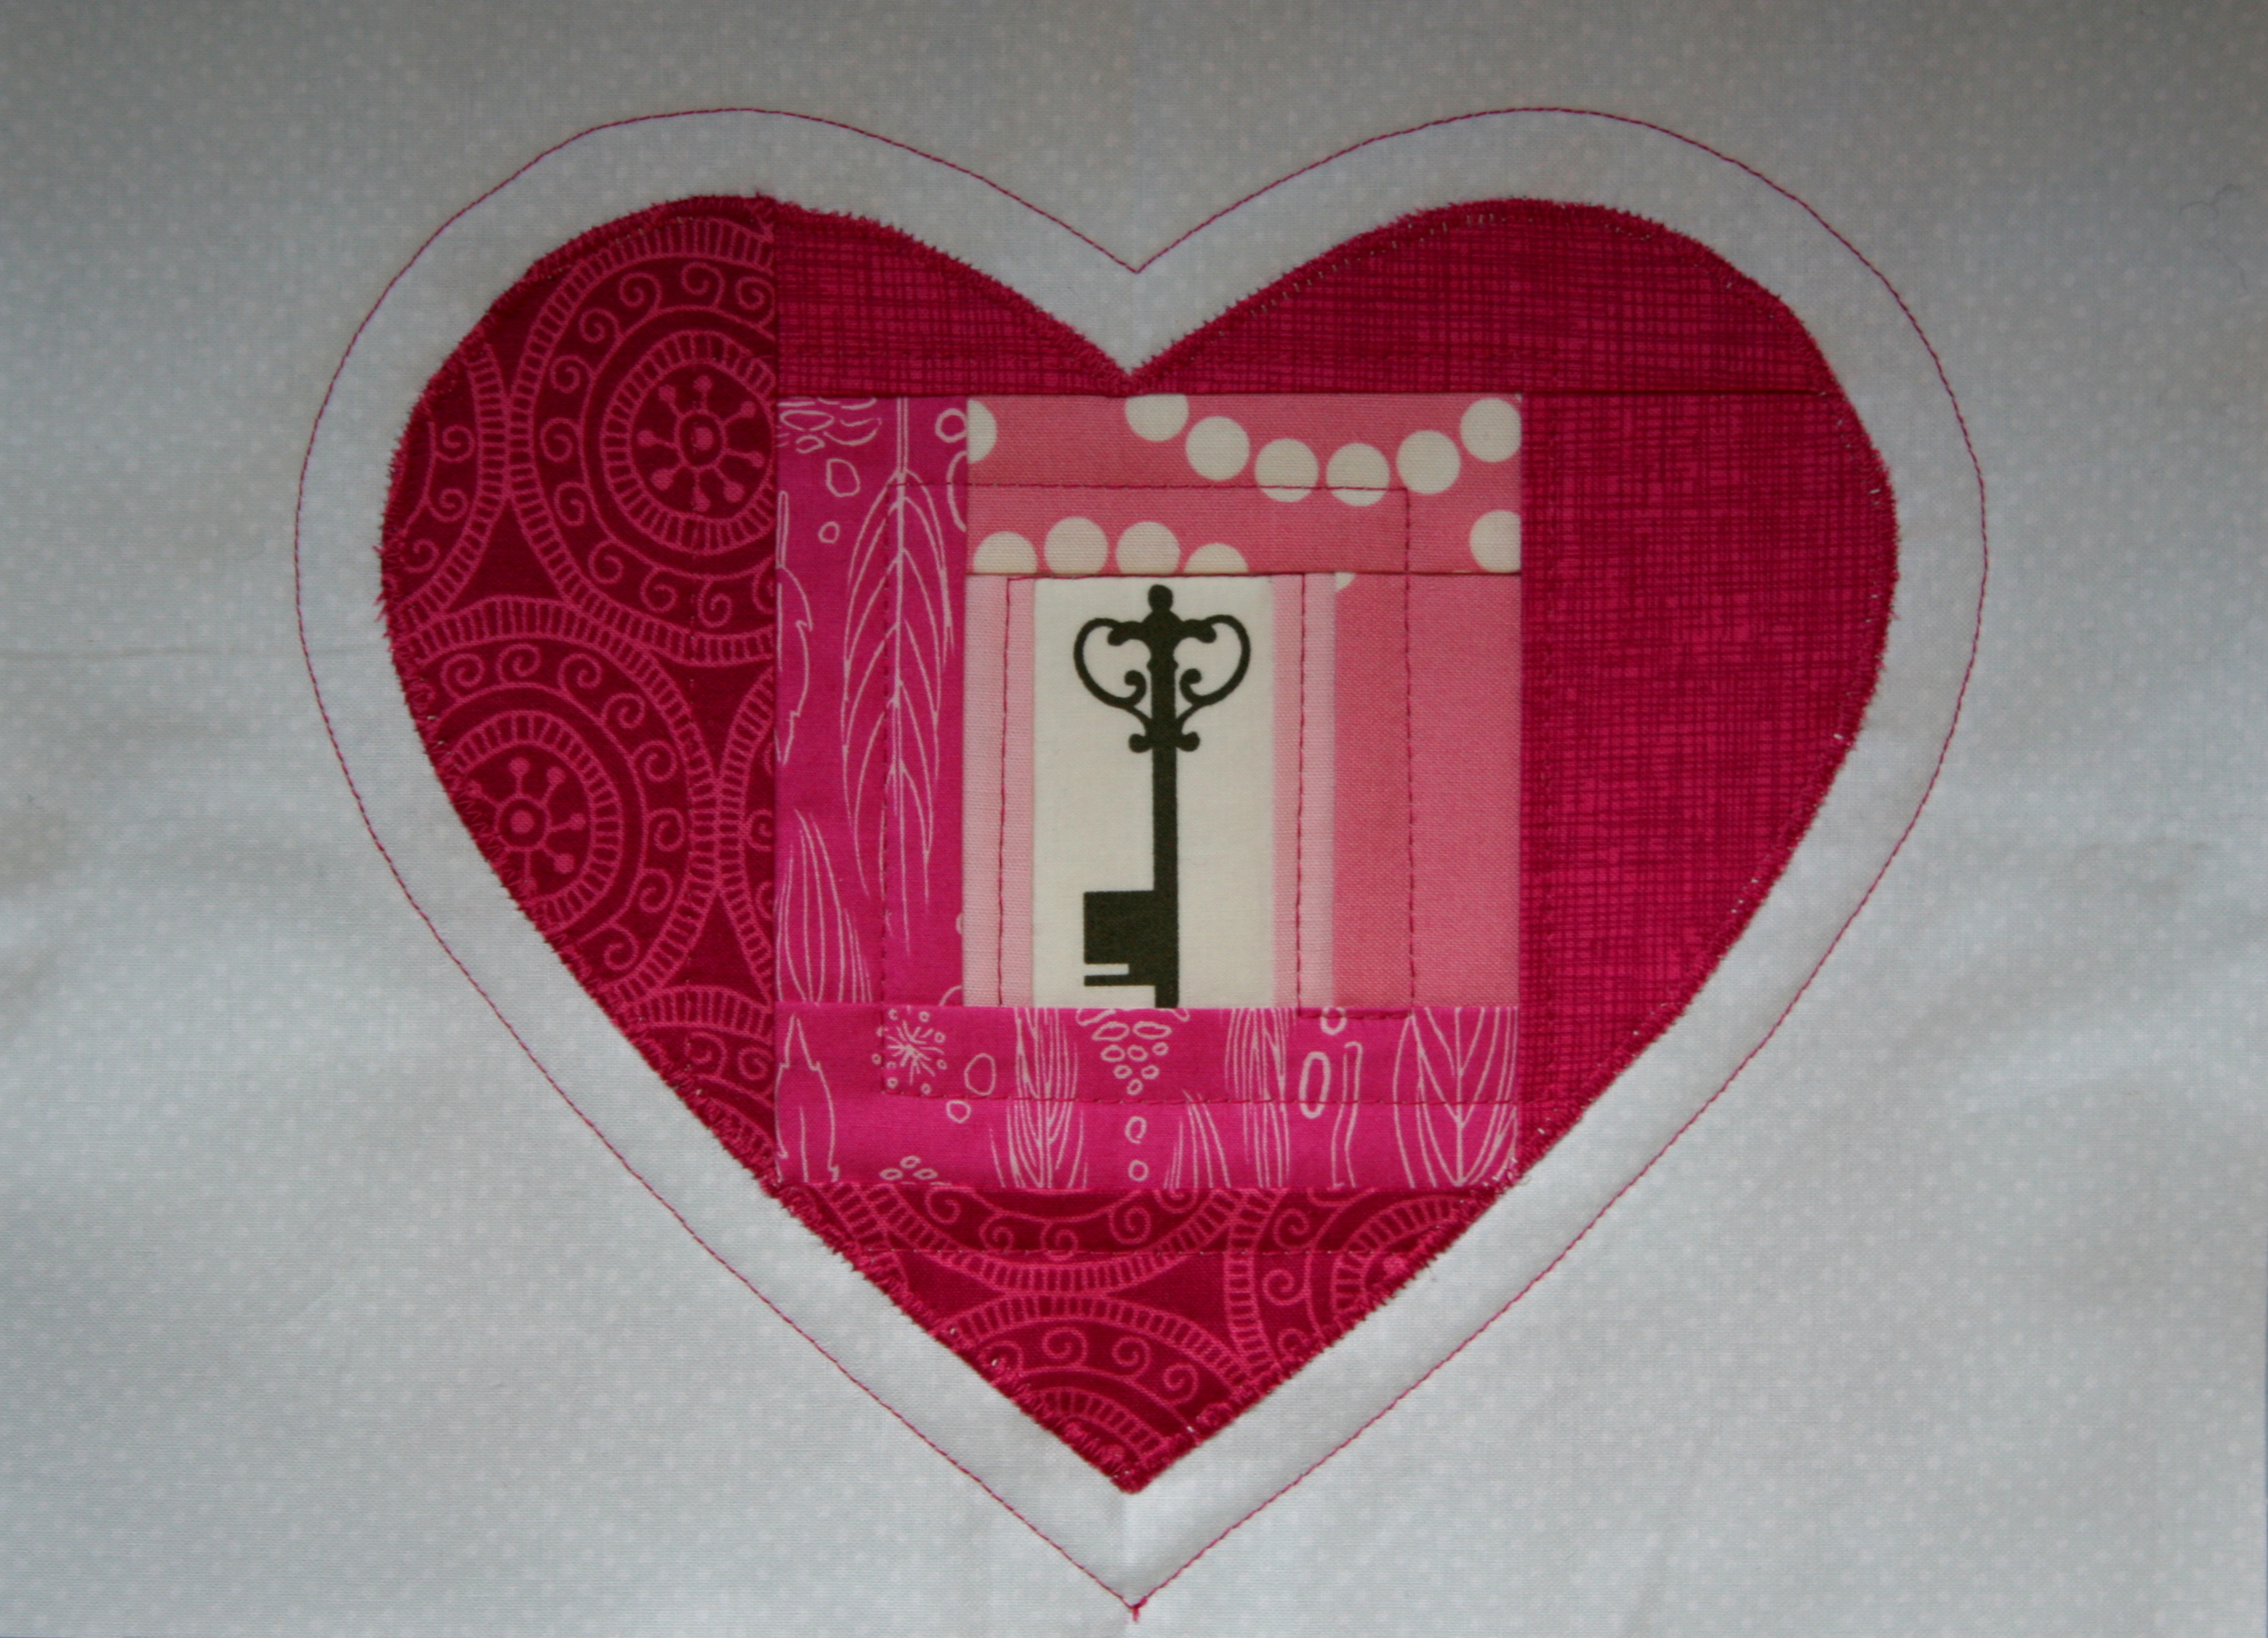
Since returning from vacation, my design wheels have been turning and cranking out ideas faster than I can create them and turn them into patterns. I did manage to finish this pattern, though, complete with a tutorial. Key to my Heart is a pattern that combines foundation paper piecing and applique to help you create a perfect log cabin-style heart on a 9″x9″ block (or a background block of your choice. The heart measures approximately 8″ wide by 7″ tall). The log cabin pattern is paper pieced for quick, “perfect” stitching, and then the heart shape is cut out and appliqued onto the background of your choice. The heart is shown on the paper piecing template so that your block is perfectly centered and ready to go.
This block would be perfect for a variety of Valentine’s Day gifts, or even just to show your love any day of the year. I plan to make my block into a tea cozy using Yvonne’s great tutorial here, but you could make yours into a mug rug, mini wall hanging, table runner, or even add it to a larger quilt.
The pattern is for sale in my Craftsy shop for those in the US, or in my Payhip shop for international folk. It is on sale for only $3.50 until February 1st, when it will be listed at the usual $4.50.
Since this pattern combines paper piecing and applique, I decided to provide a tutorial to help explain and show each step more clearly. Once you’ve printed your pattern template, you are ready to go!
Instructions
Step 1
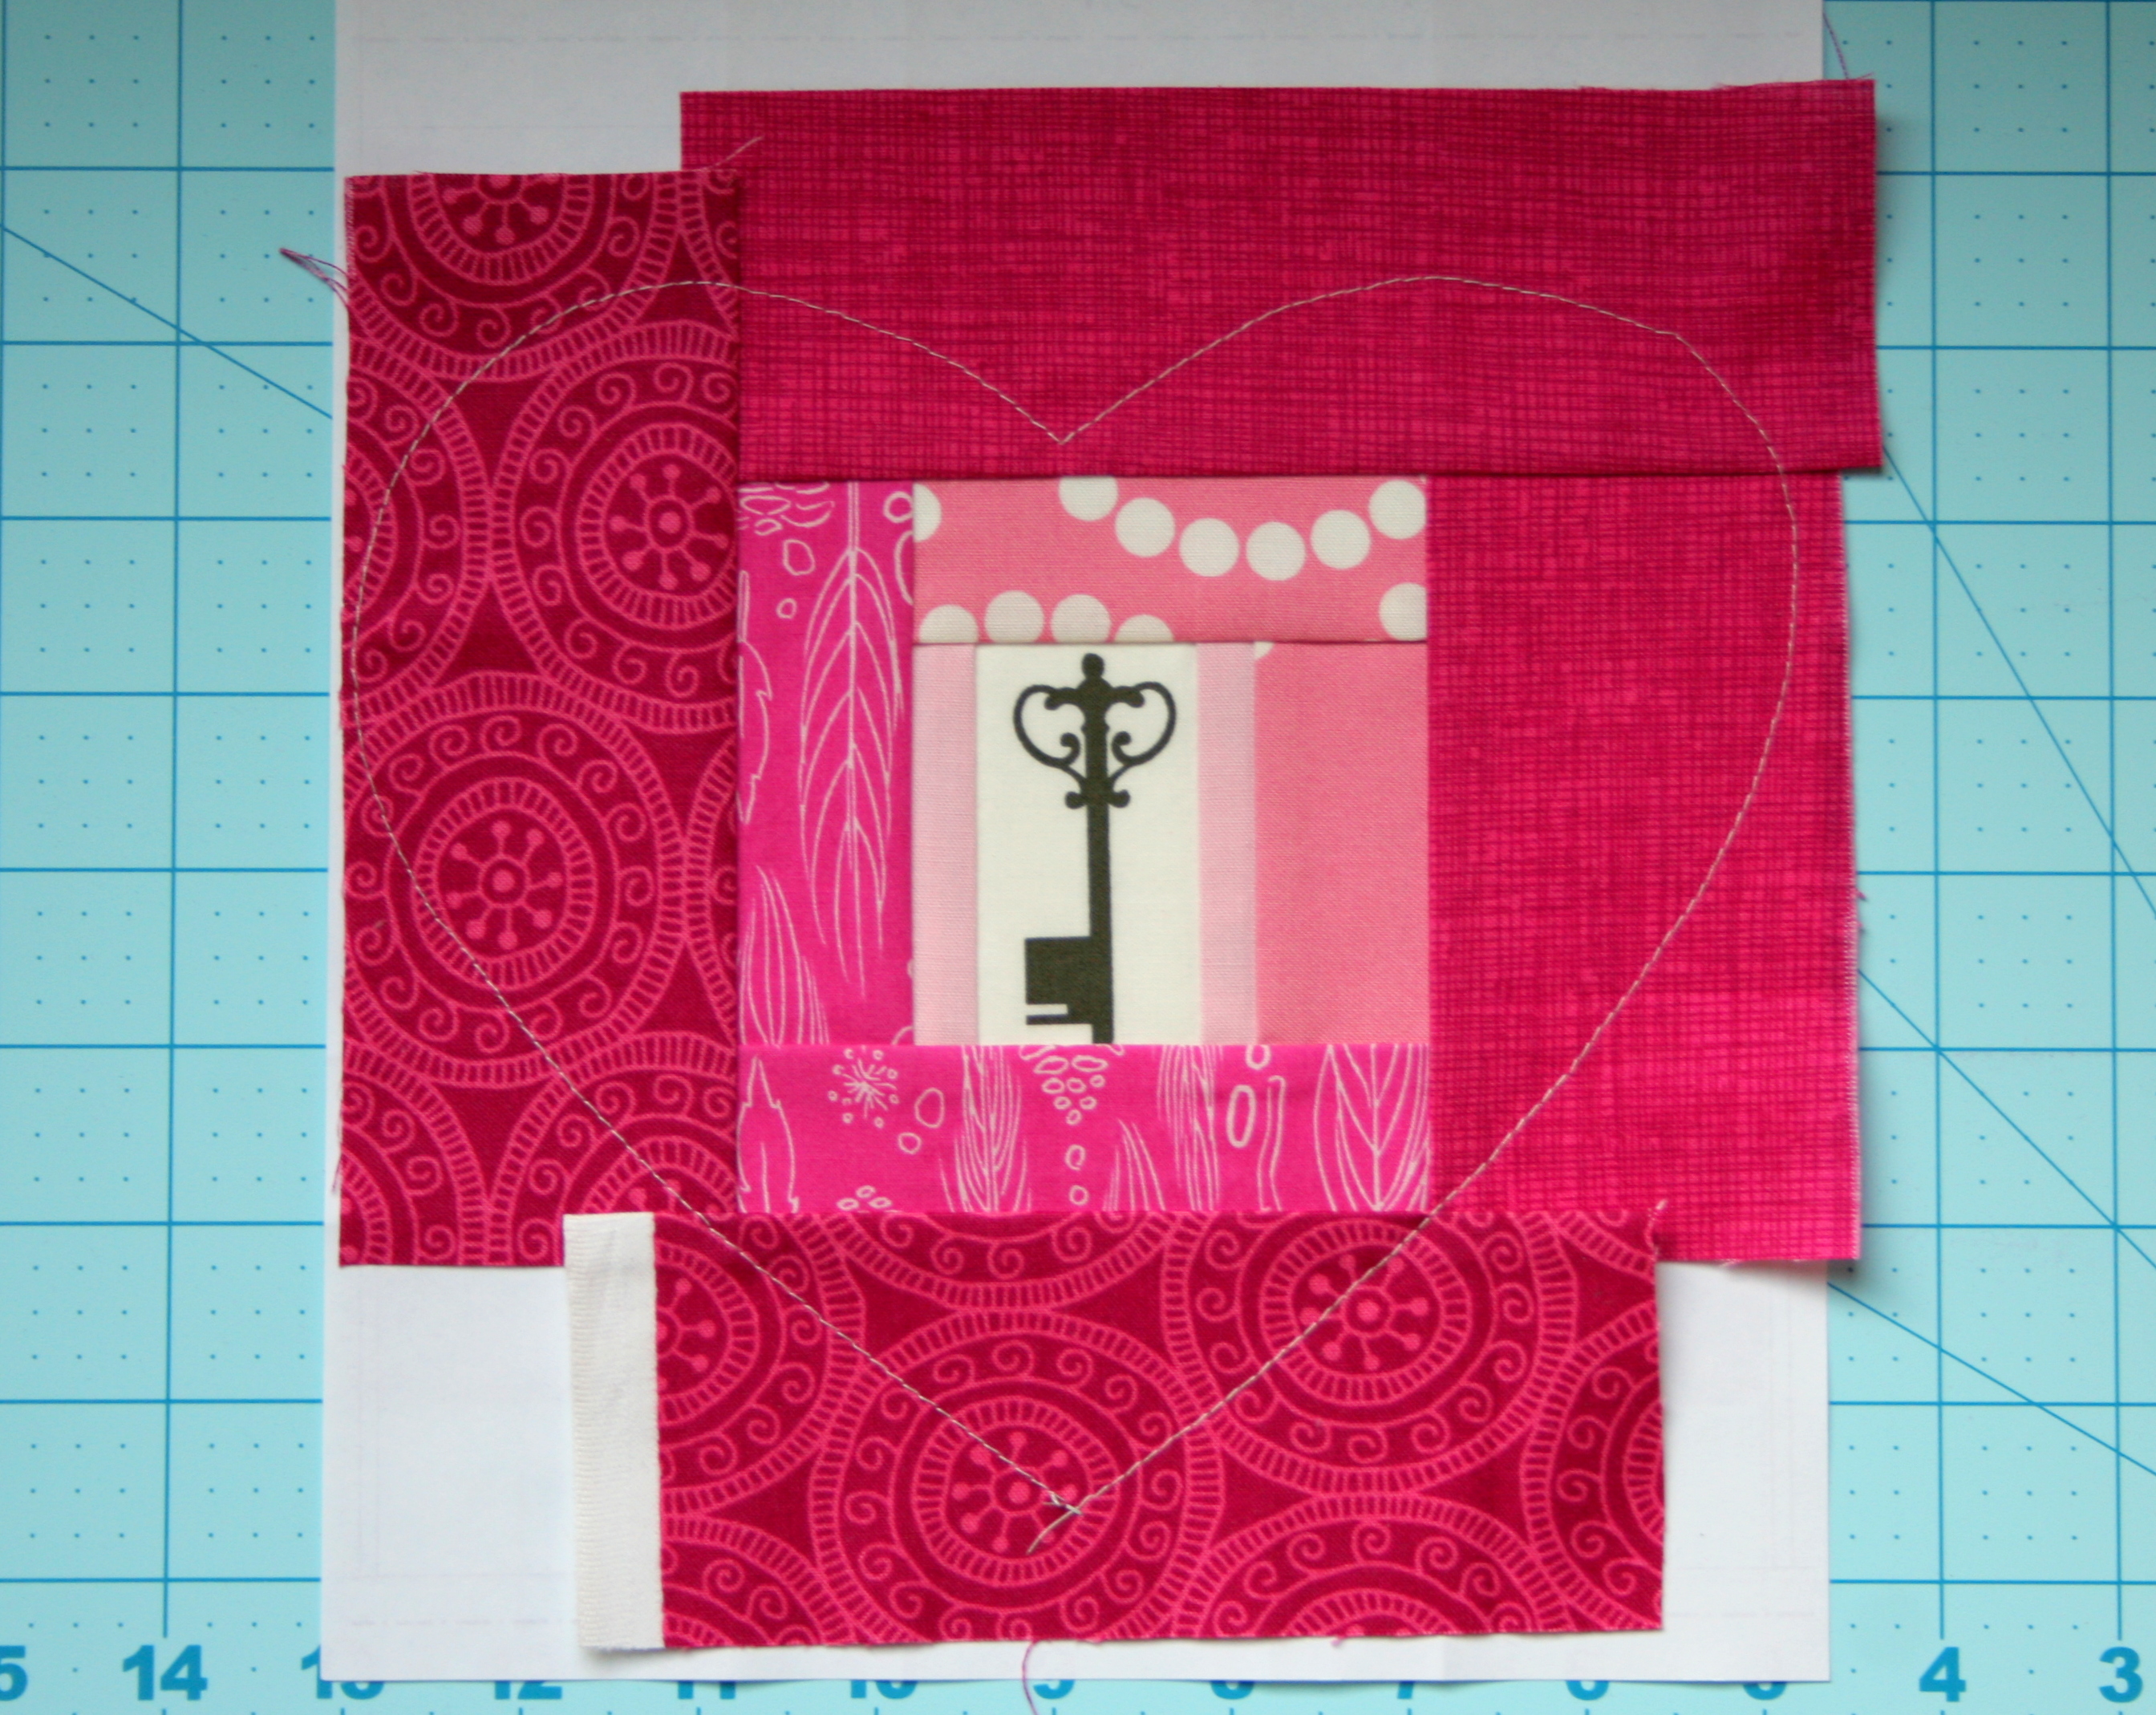
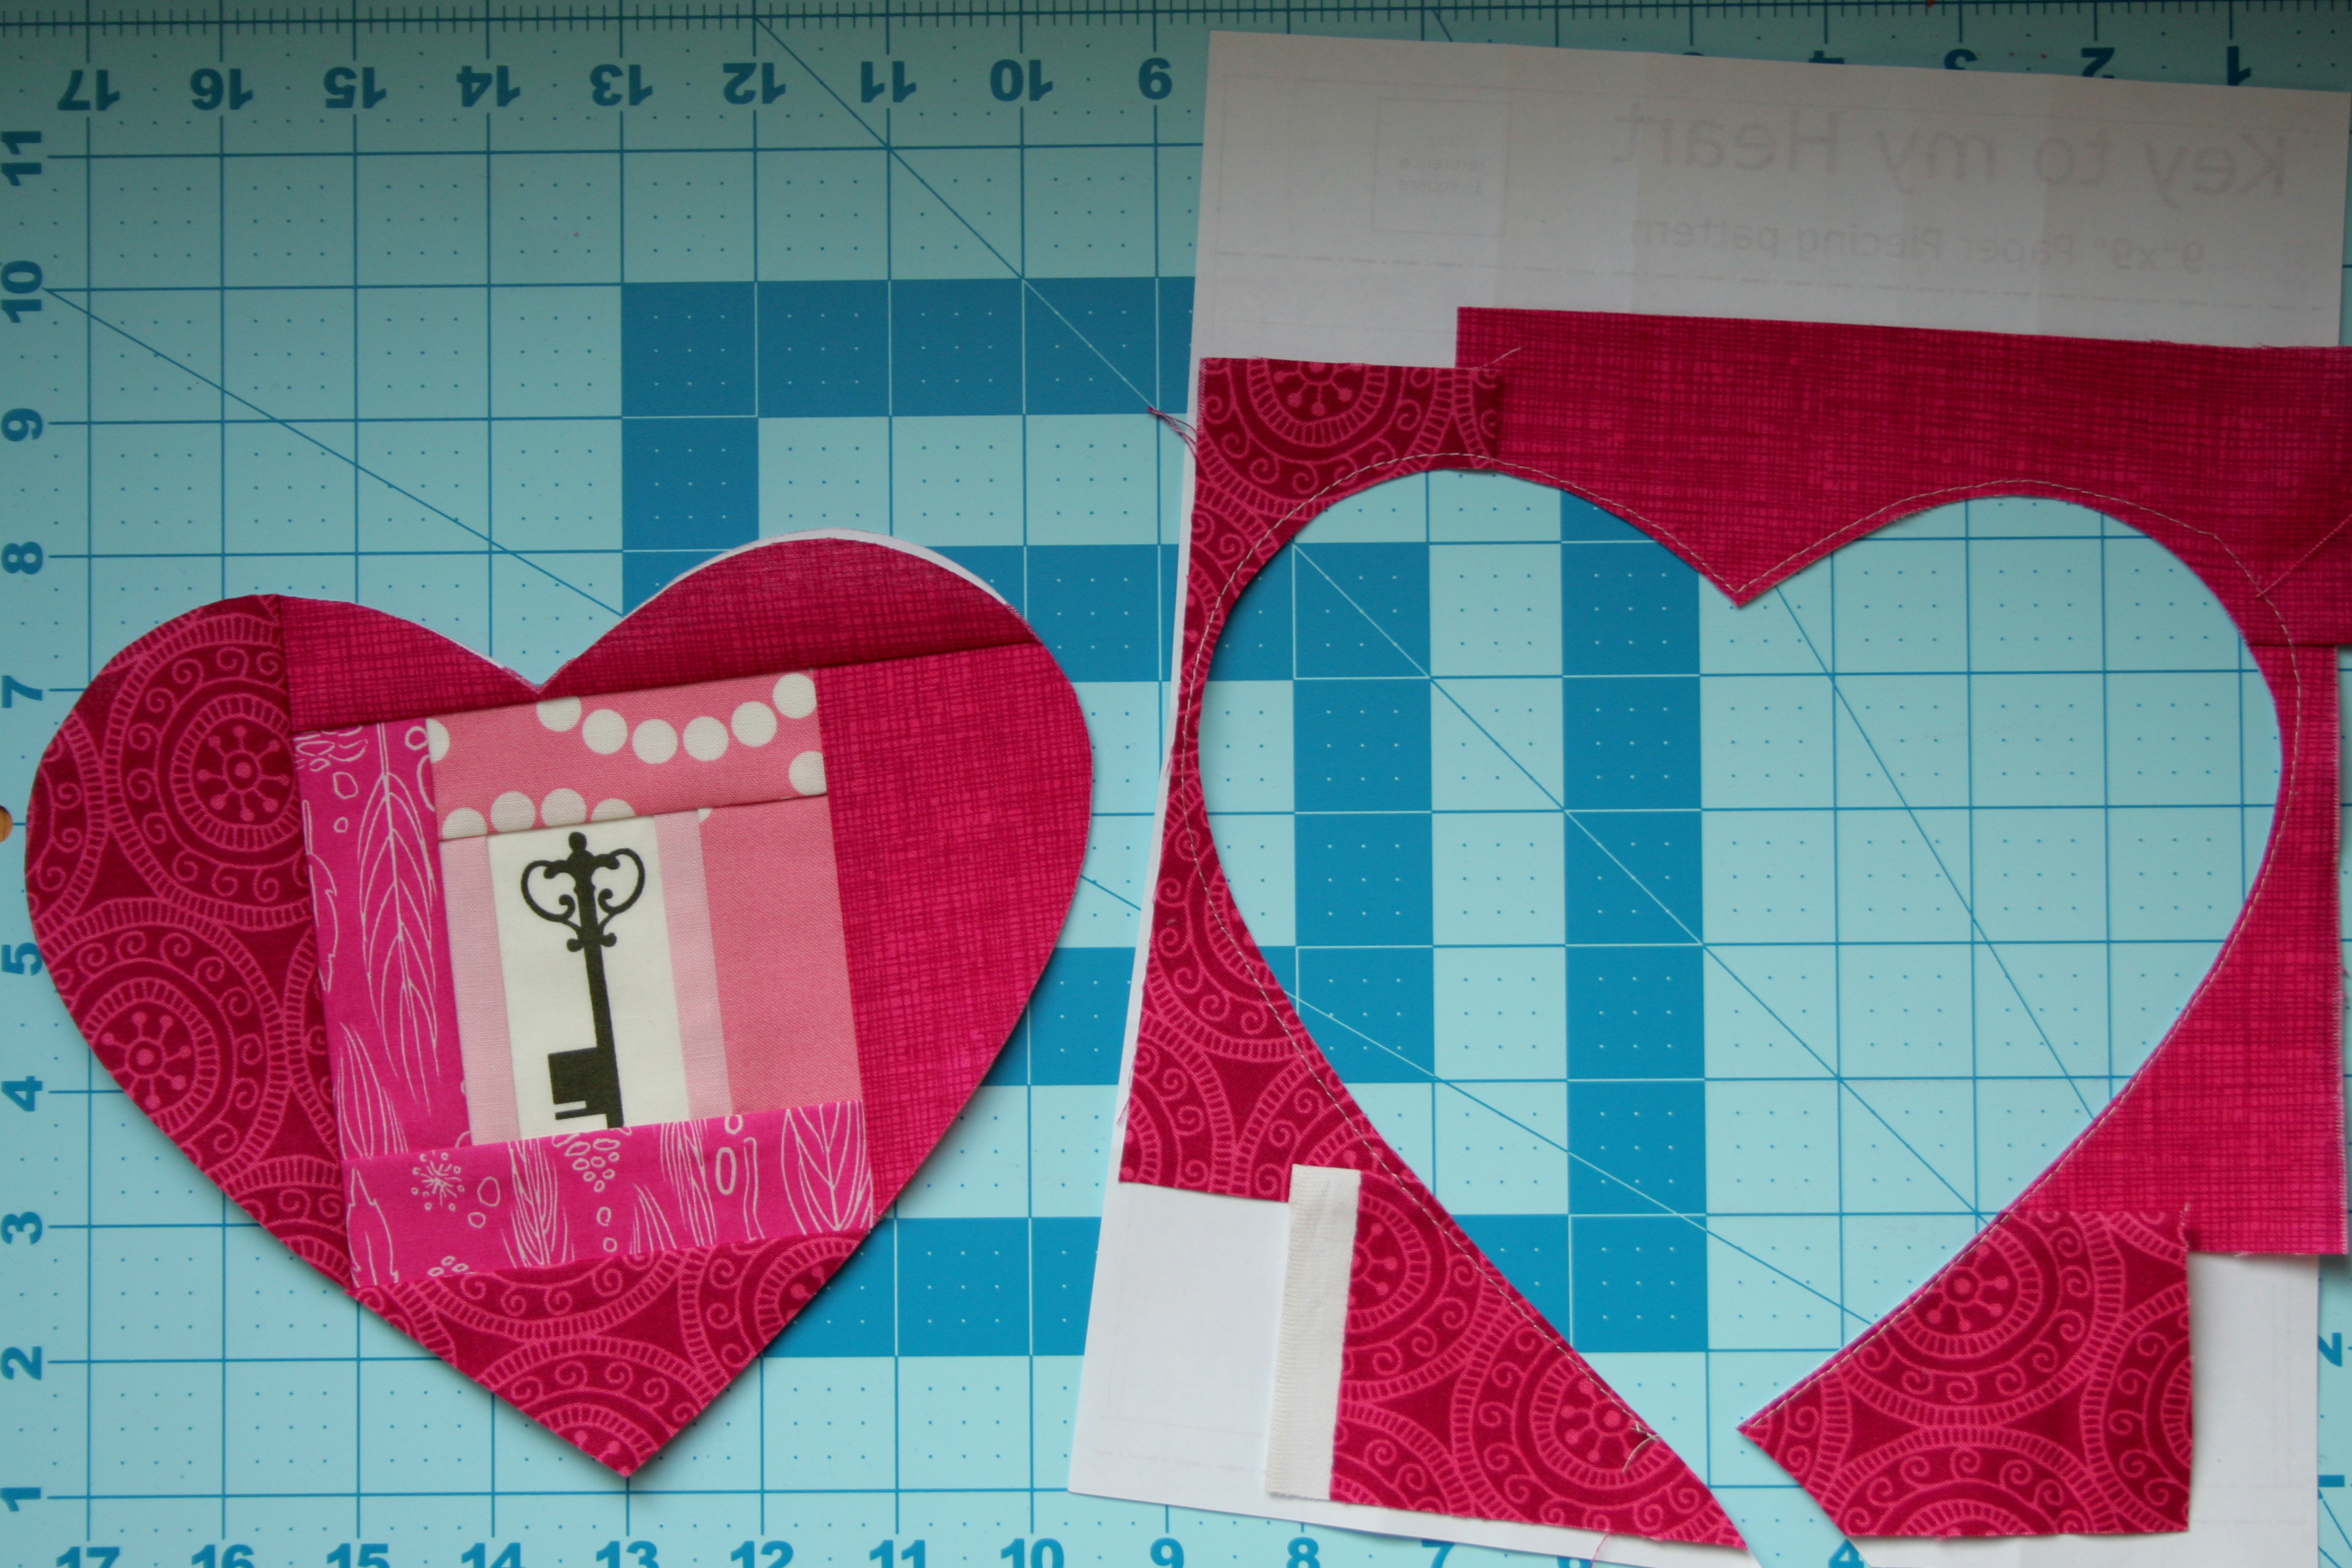
Paper piece the log cabin portion of the block until fabric extends at least 1/4″ beyond all edges of the heart.
Notes:
*Shorten your machine’s stitch length to 1.2 to make paper removal easy.
*The center square is perfect for fussy cutting! Find key fabric to share the key to your heart. Or, be creative! Do you love cats? Fussy cut a cat for the center. Love tea? Fussy cut a teapot for the center. Whatever you or the gift recipient loves can be fussy cut for the center of this heart. Tip:Hold the paper and your fussy cut square up to a bright window or lightbox to be sure your fussy cut feature is centered before sewing.
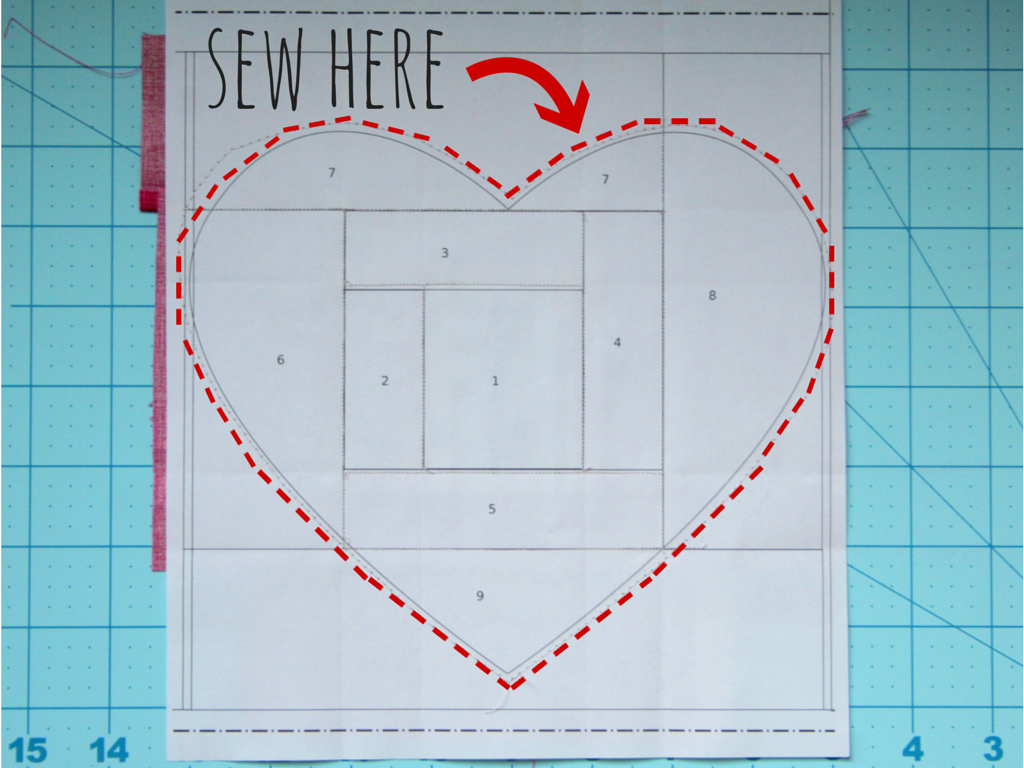
Step 2
Using a long basting stitch (2.5 or larger), sew around the outside of the heart, approximately 1/8″ from the line (this distance does not need to be perfect, nor do the stitches need to be perfect. The purpose of these stitches is to hold all of your fabric flat while cutting out the heart shape.)
Step 3
Using scissors appropriate for cutting both fabric and paper, carefully cut along the dotted heart line.
Step 4
Remove paper piecing foundation paper. Jump for joy at how easy it is since you shortened your stitch length to 1.2 before paper piecing!
Step 5
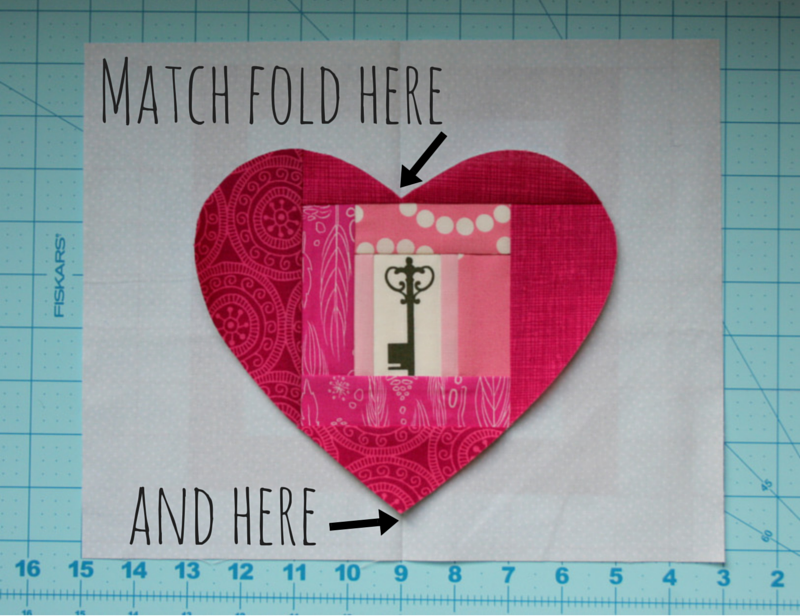
Applique your heart to the center of your background fabric using your preferred applique method.
Notes:
*To accurately center your heart, fold your background fabric in half and press lightly. With the fold running top to bottom, line up the center top and bottom of the heart with the pressed center line of the background fabric. Either measure the distance from top and bottom of the background fabric until it’s equal, or position your heart as desired.
Step 6
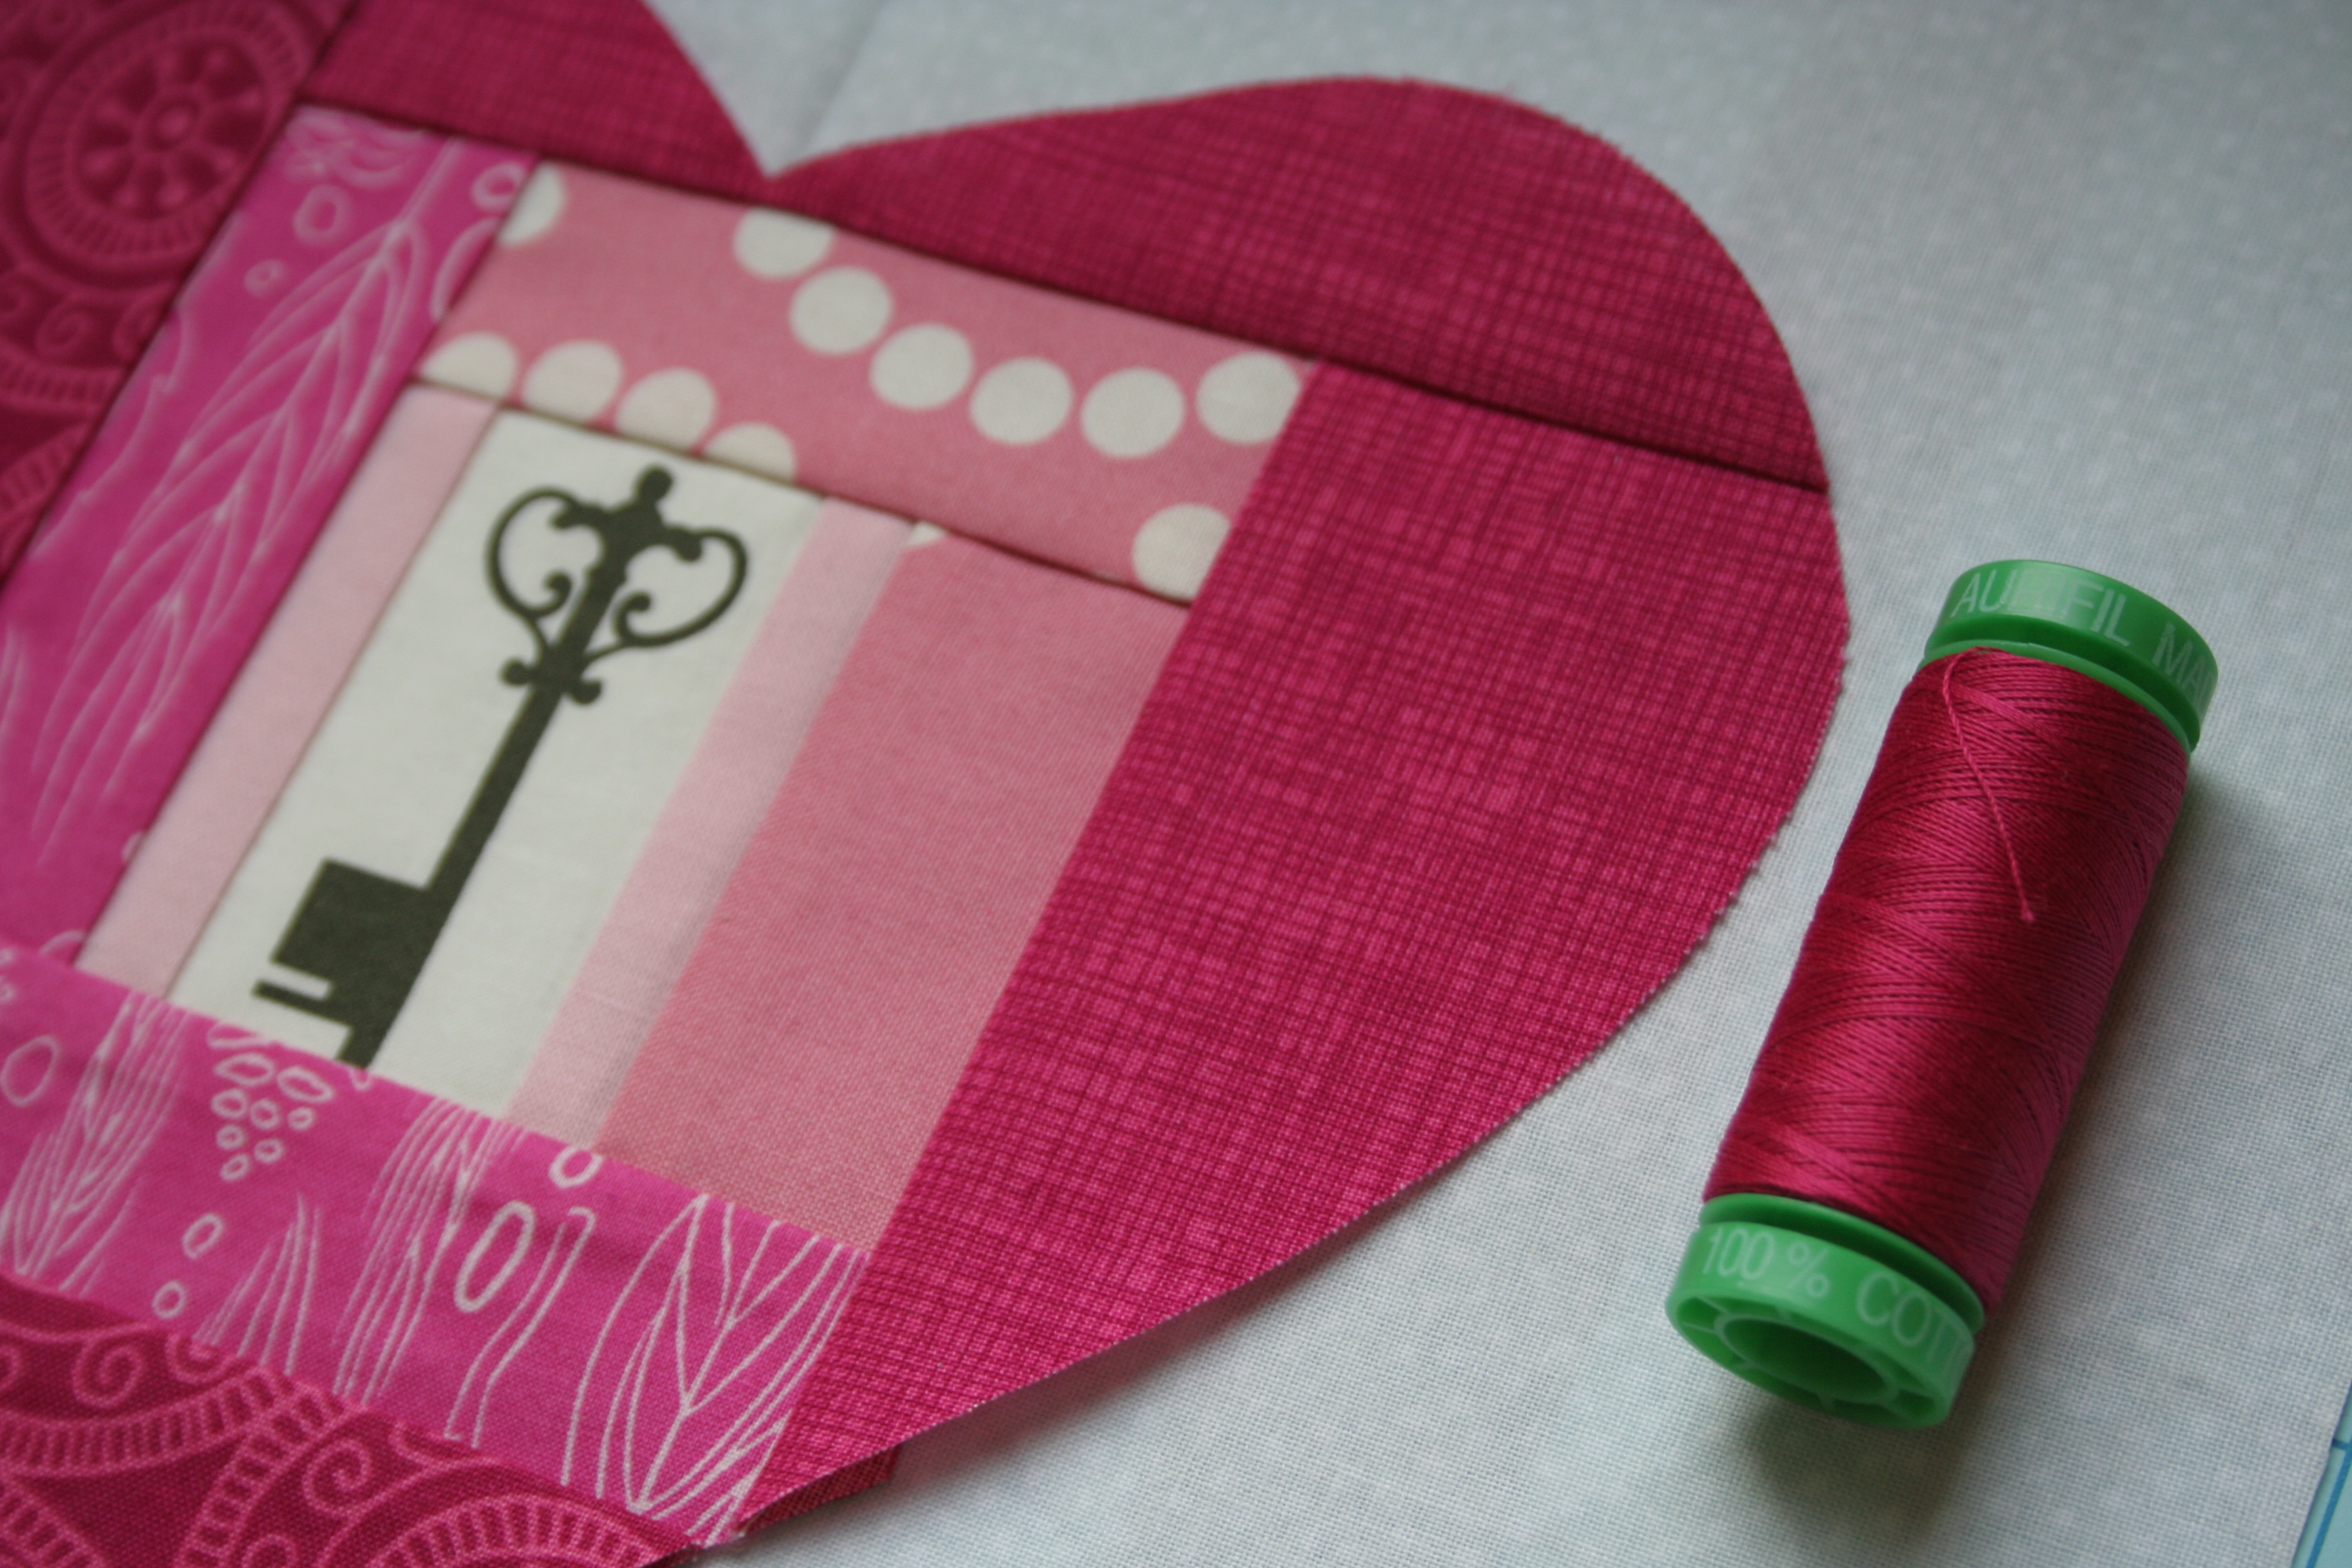
Find gorgeous matching thread. (I love Aurifil, and there’s almost always a perfect match!).
Step 7
Quilt and finish as desired.
I would love to see if you create this block. Photos of your finished block can be posted in my Night Quilter Creations group on Flickr found HERE, or can be added to the Craftsy page HERE. The first three (3) people to buy, complete, and upload a photo of a completed block to either the Flickr group or my Craftsy page will receive a full refund OR choice of another pattern from my shop. How about that for sharing the love!?
Want to share the love some more? Instagram your blocks and tag me @nightquilter.
I finally chose the pattern I am going to use for my Schnitzel and Boo Mini Quilt swap quilt for my partner, and boy am I excited! My inspiration is a quilt I’ve been drooling over since its unveiling by Nicole at Modern Handcraft, and I’m excited to give a go at recreating it.
As much as I was tempted to use Carolyn Friedlander’s Botanics to recreate this stunning quilt exactly, I decided to be a *little* original and use a fabric line by another one of the designers listed as a favorite of my secret partner: True Colors by Anna Maria Horner. I’ve made a little bit of slow progress.
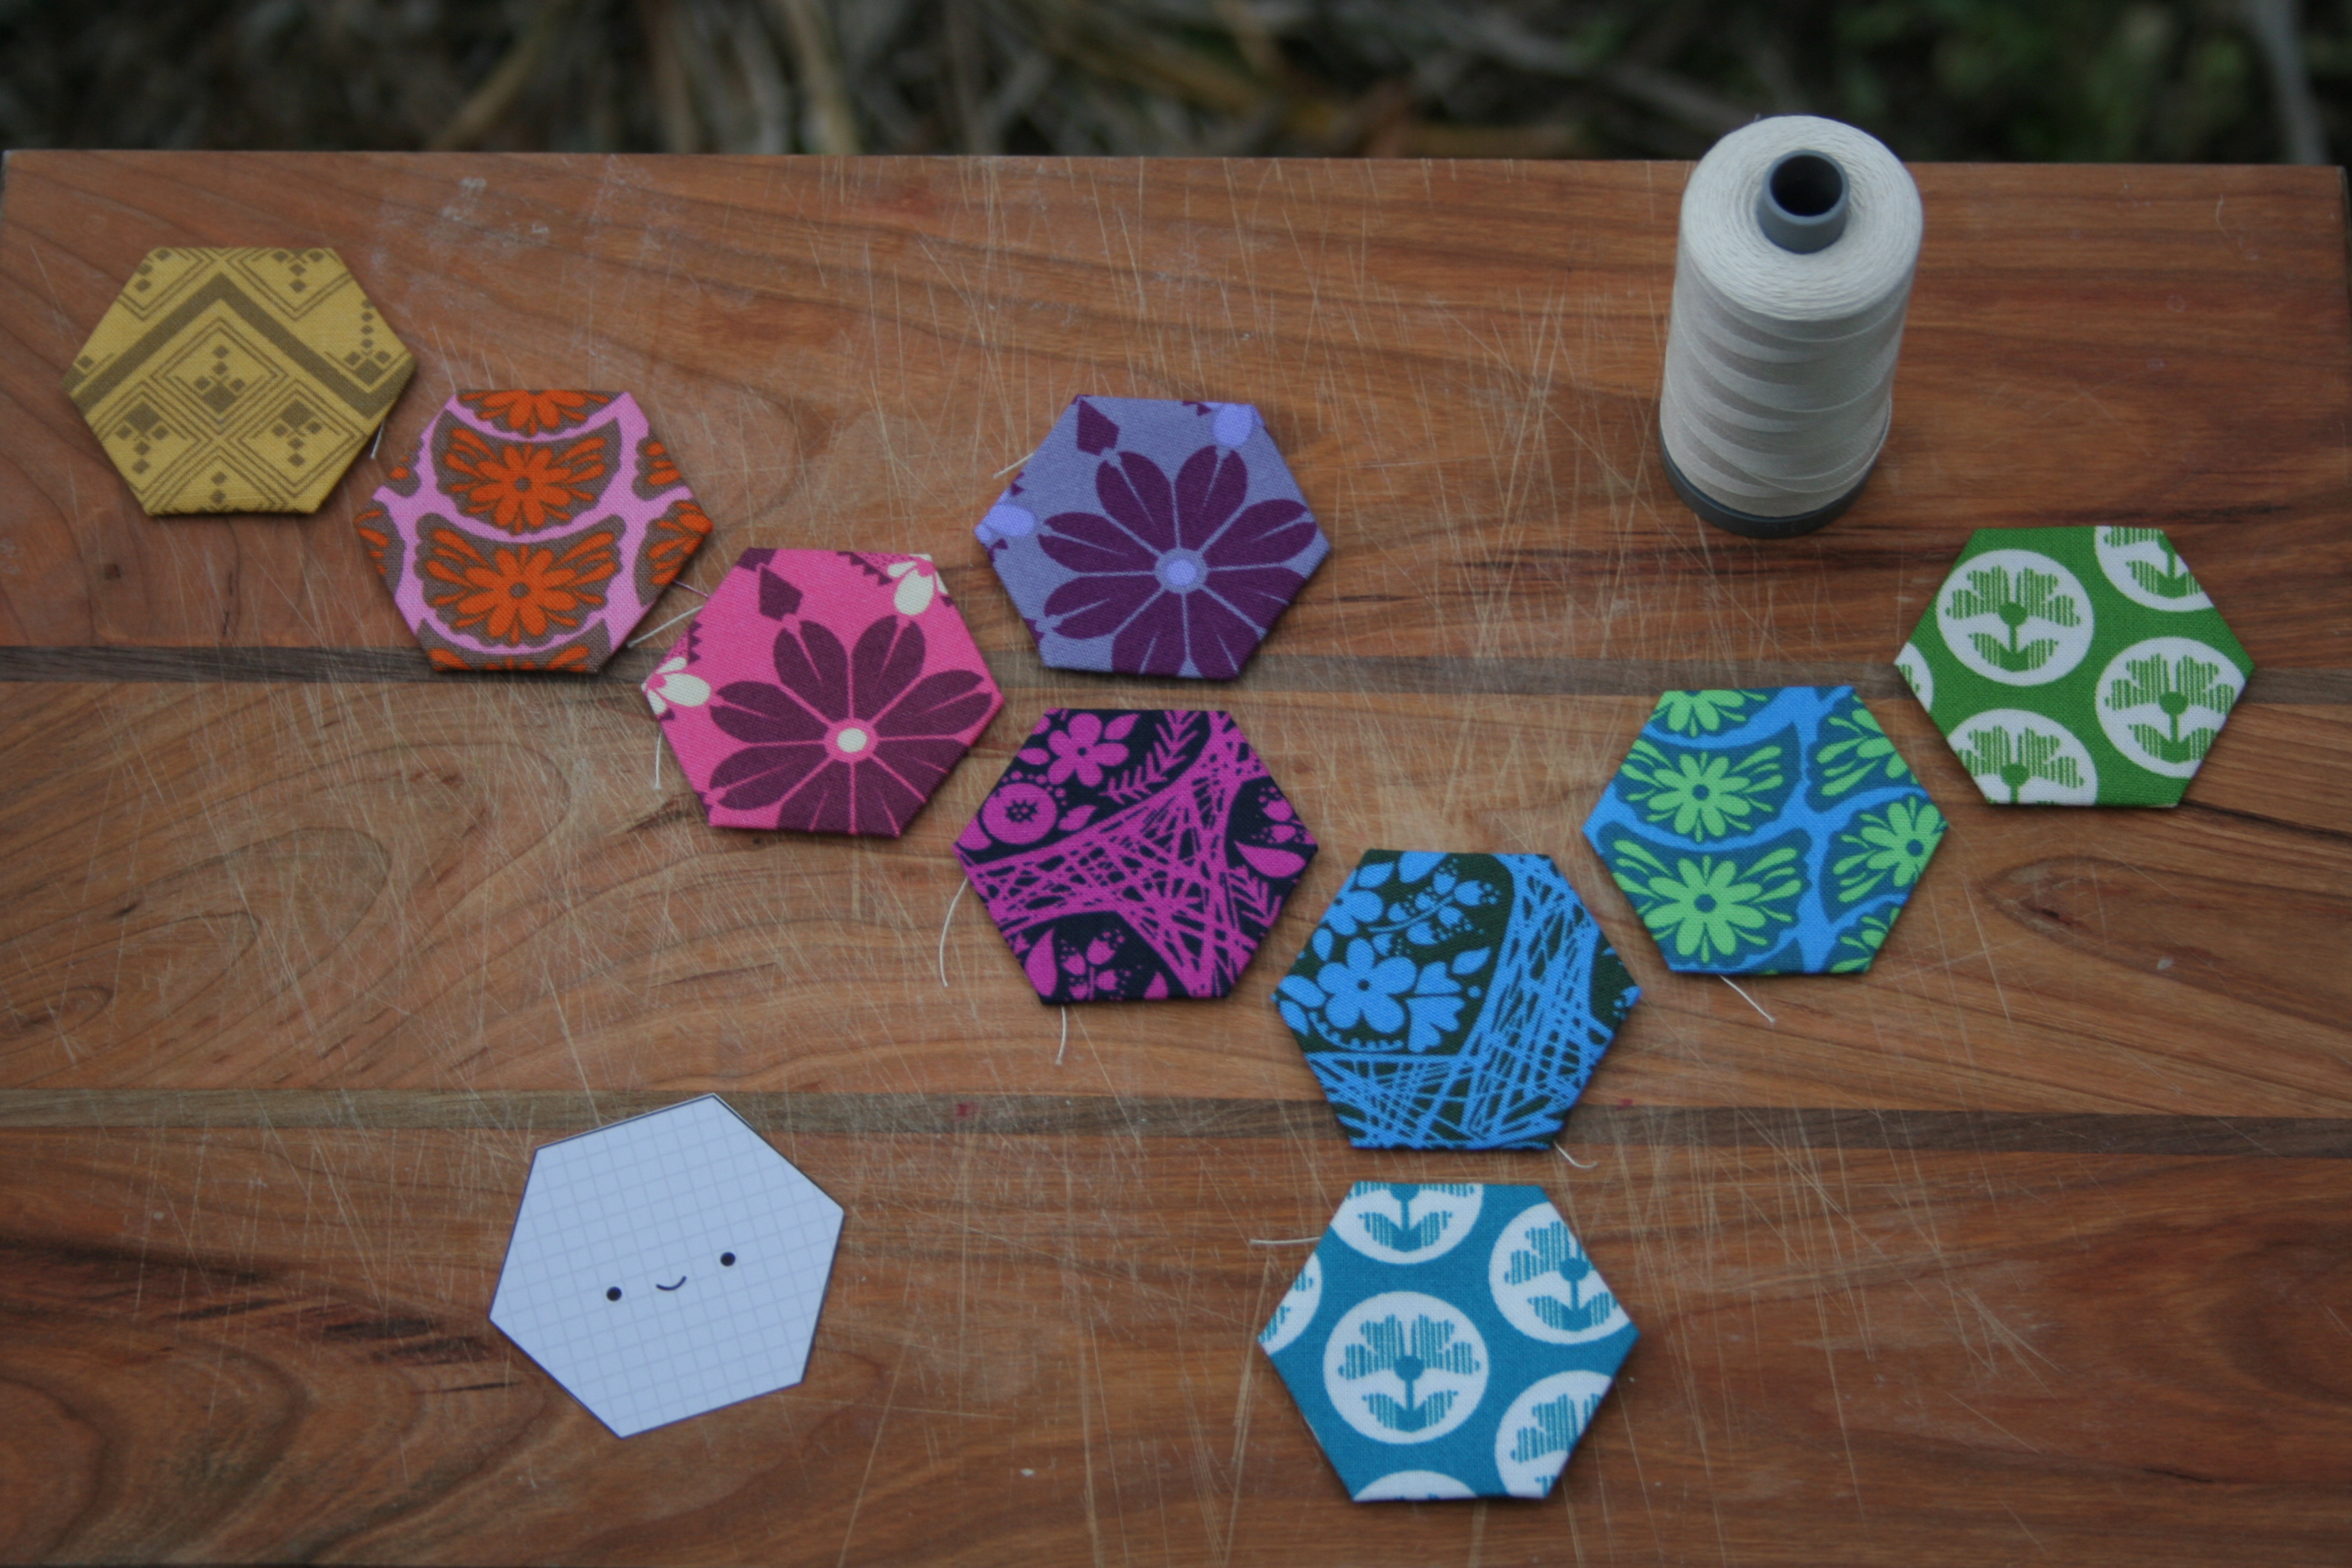
I took my photo shoot outside on a cutting board, since we have yet another cloudy, overcast day and a winter storm brewing. 8-14″ of snow forecast for tonight!
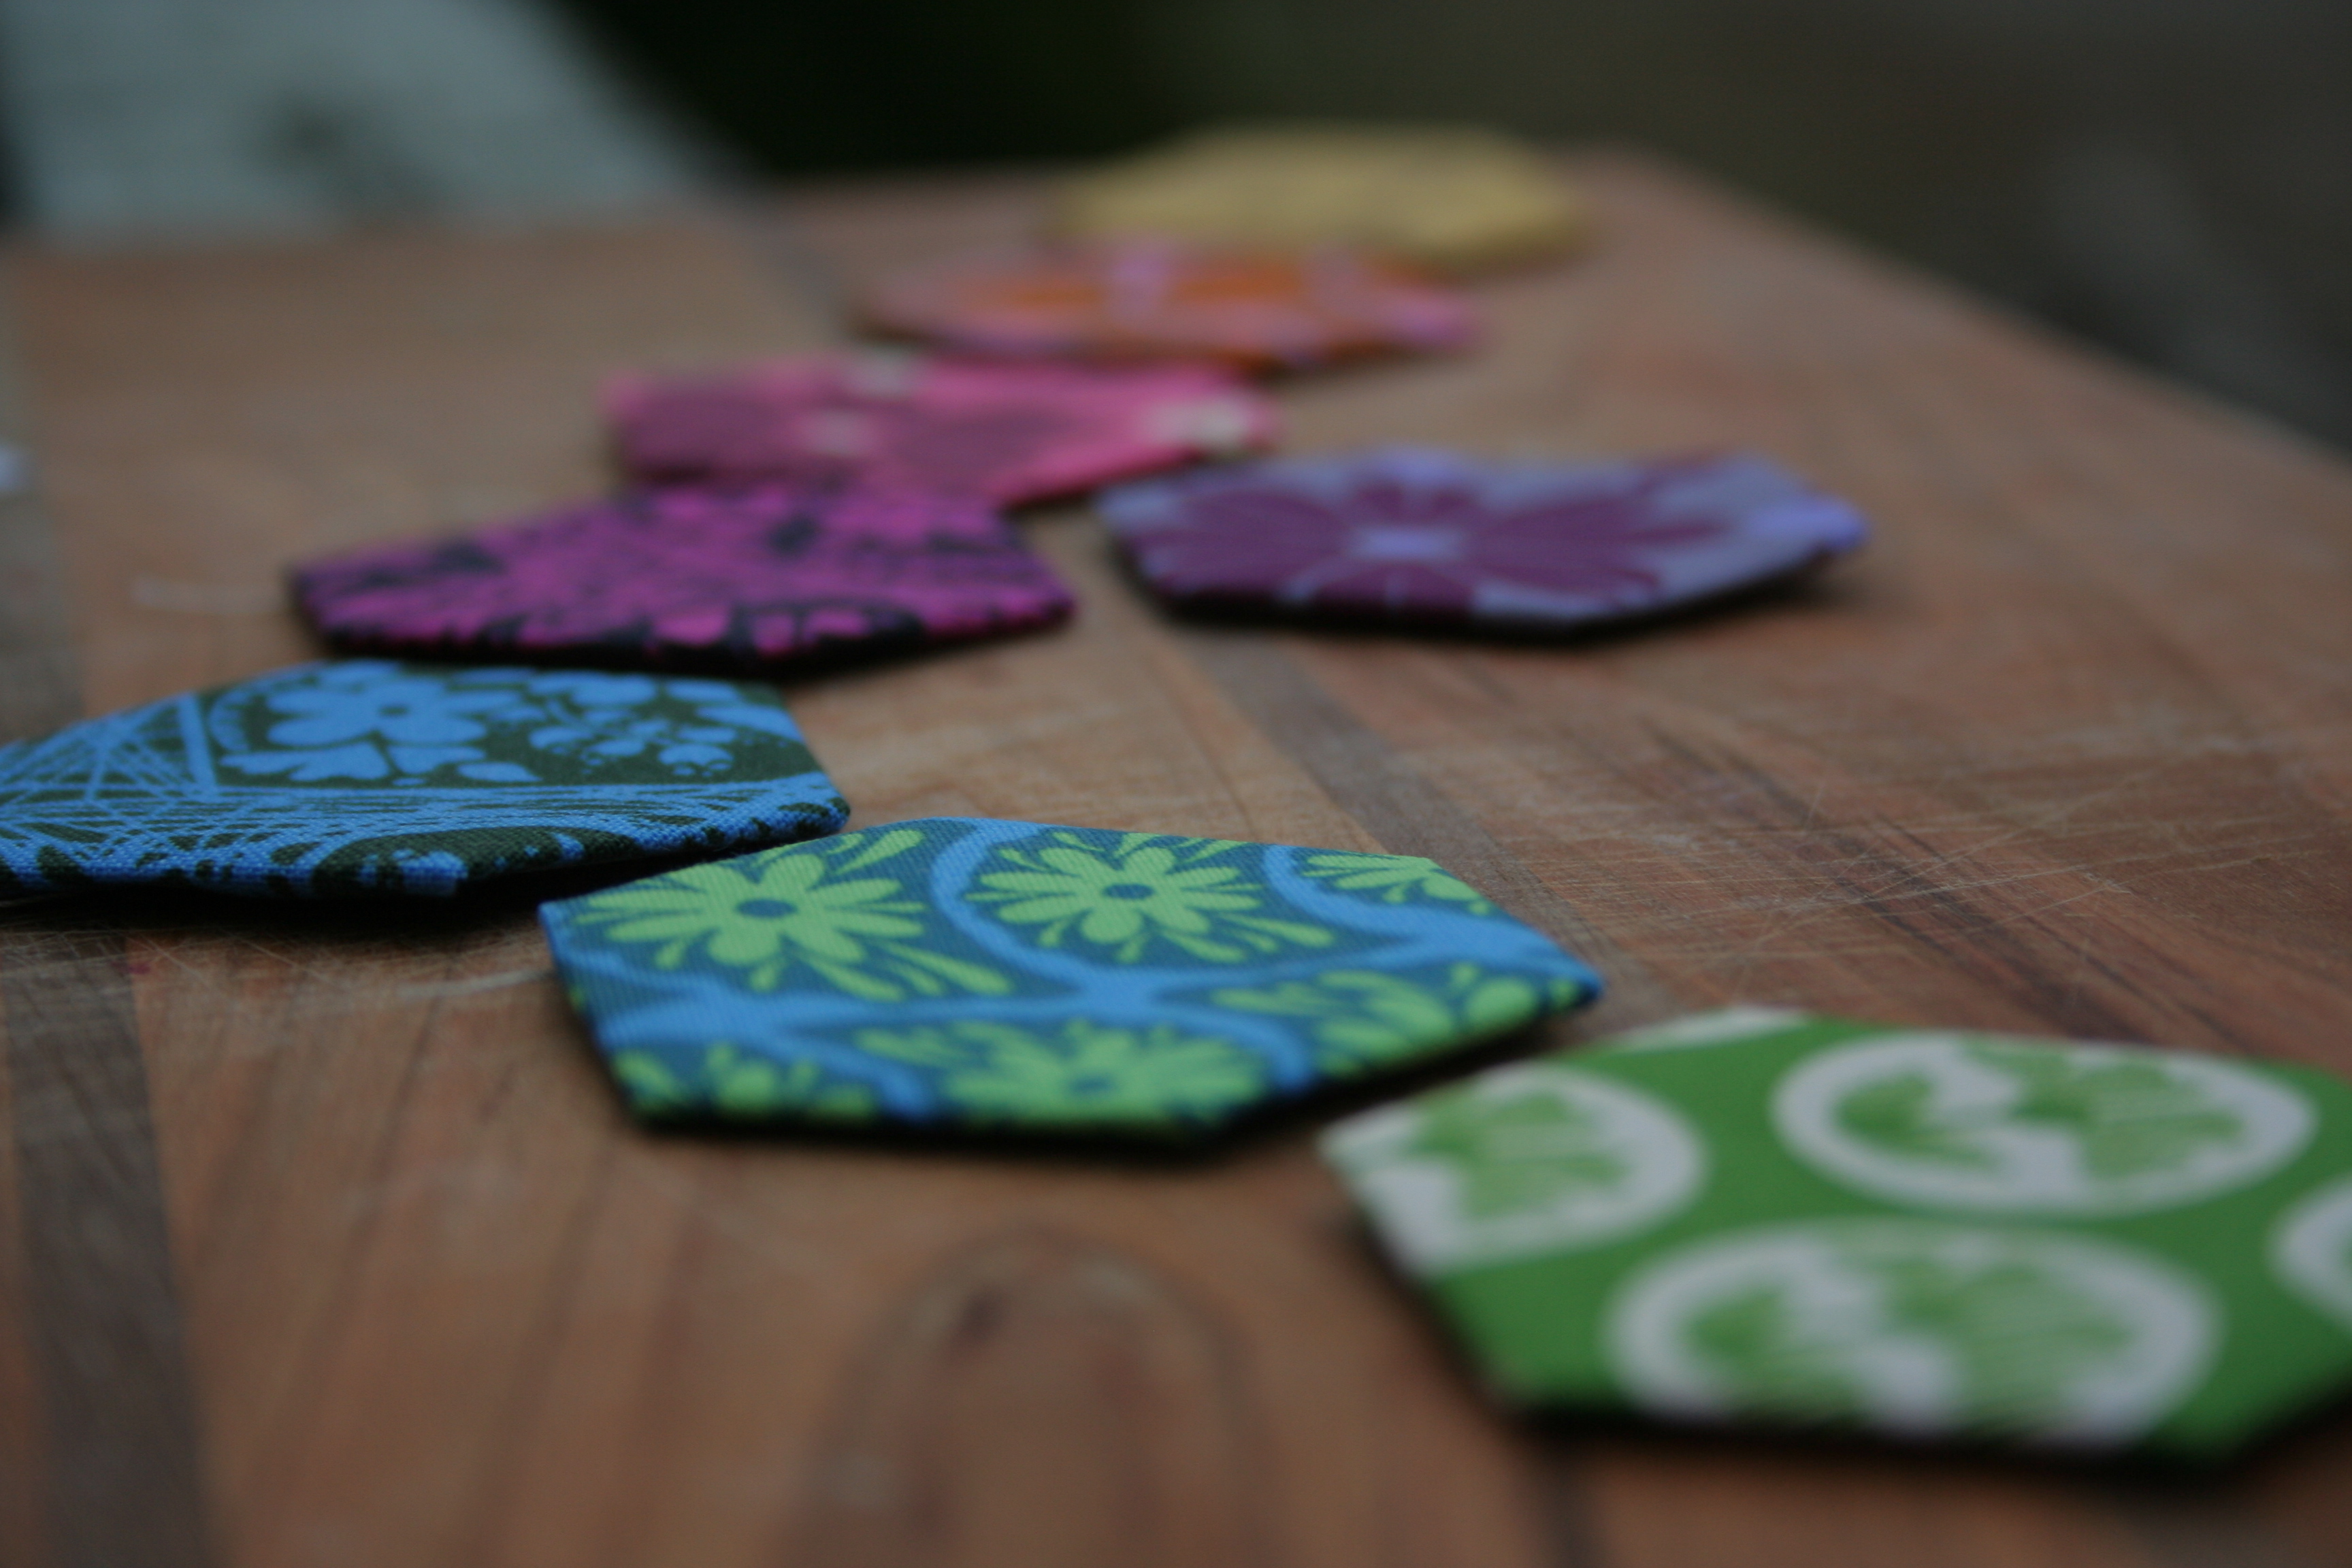
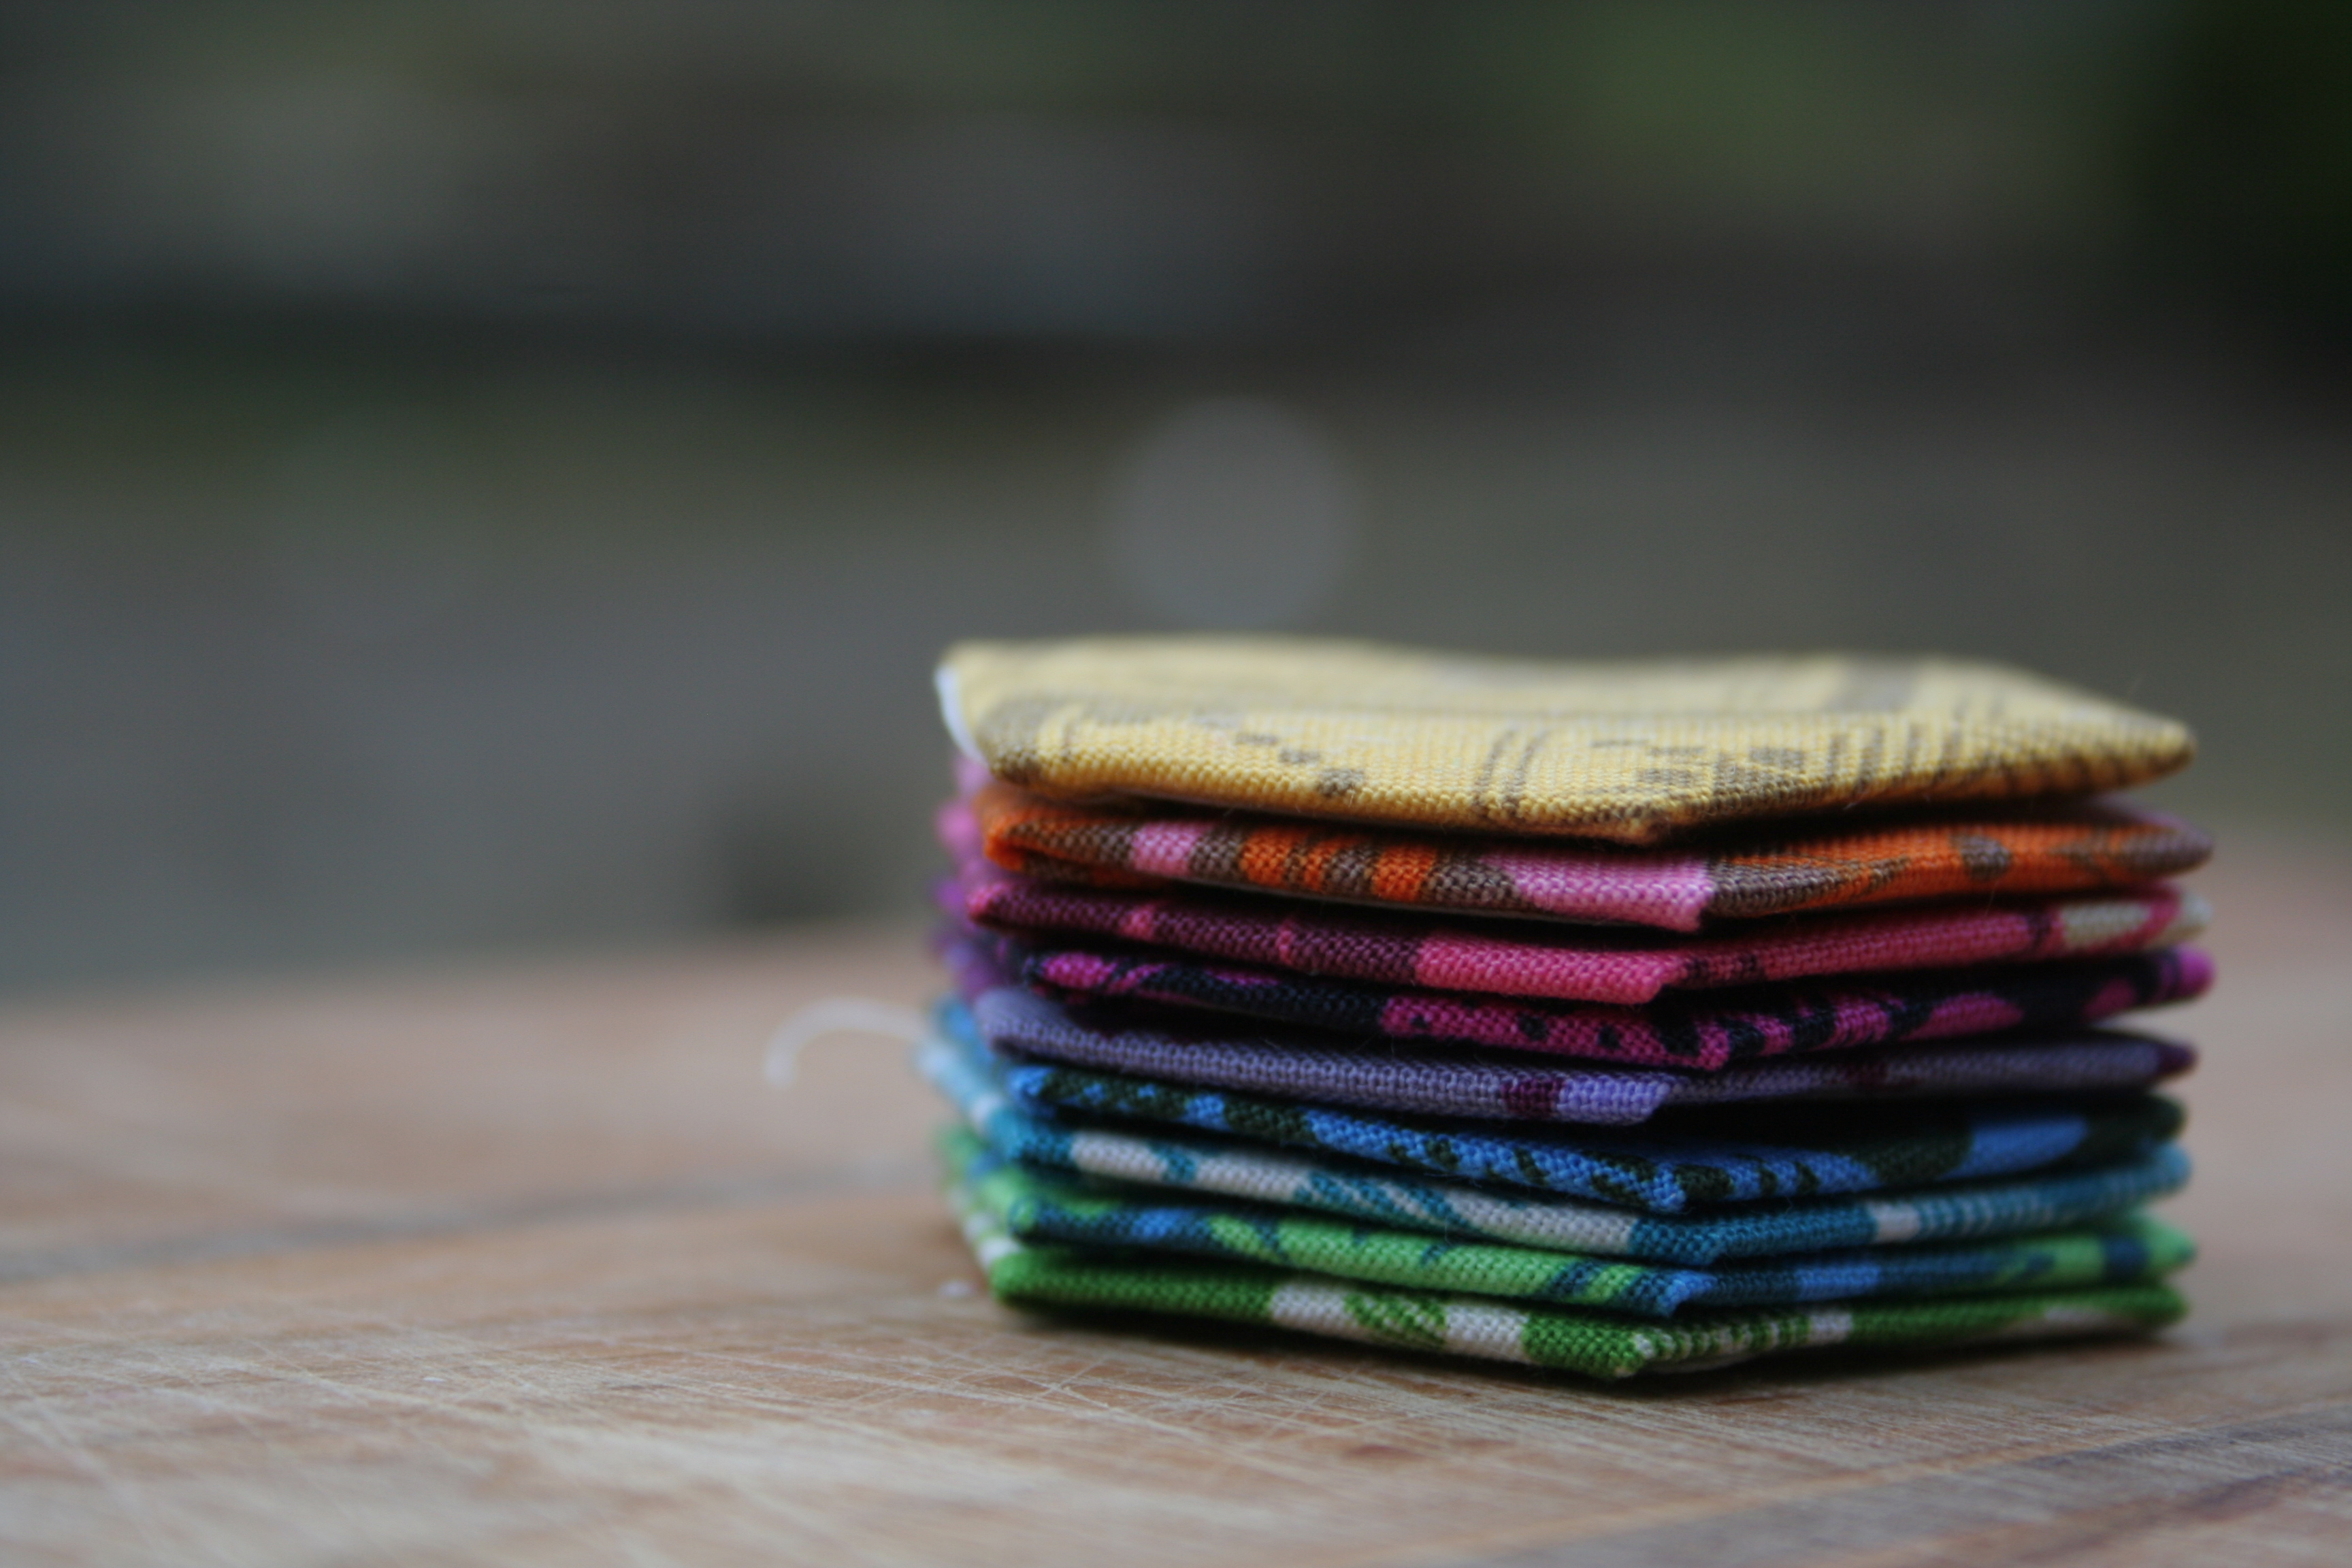
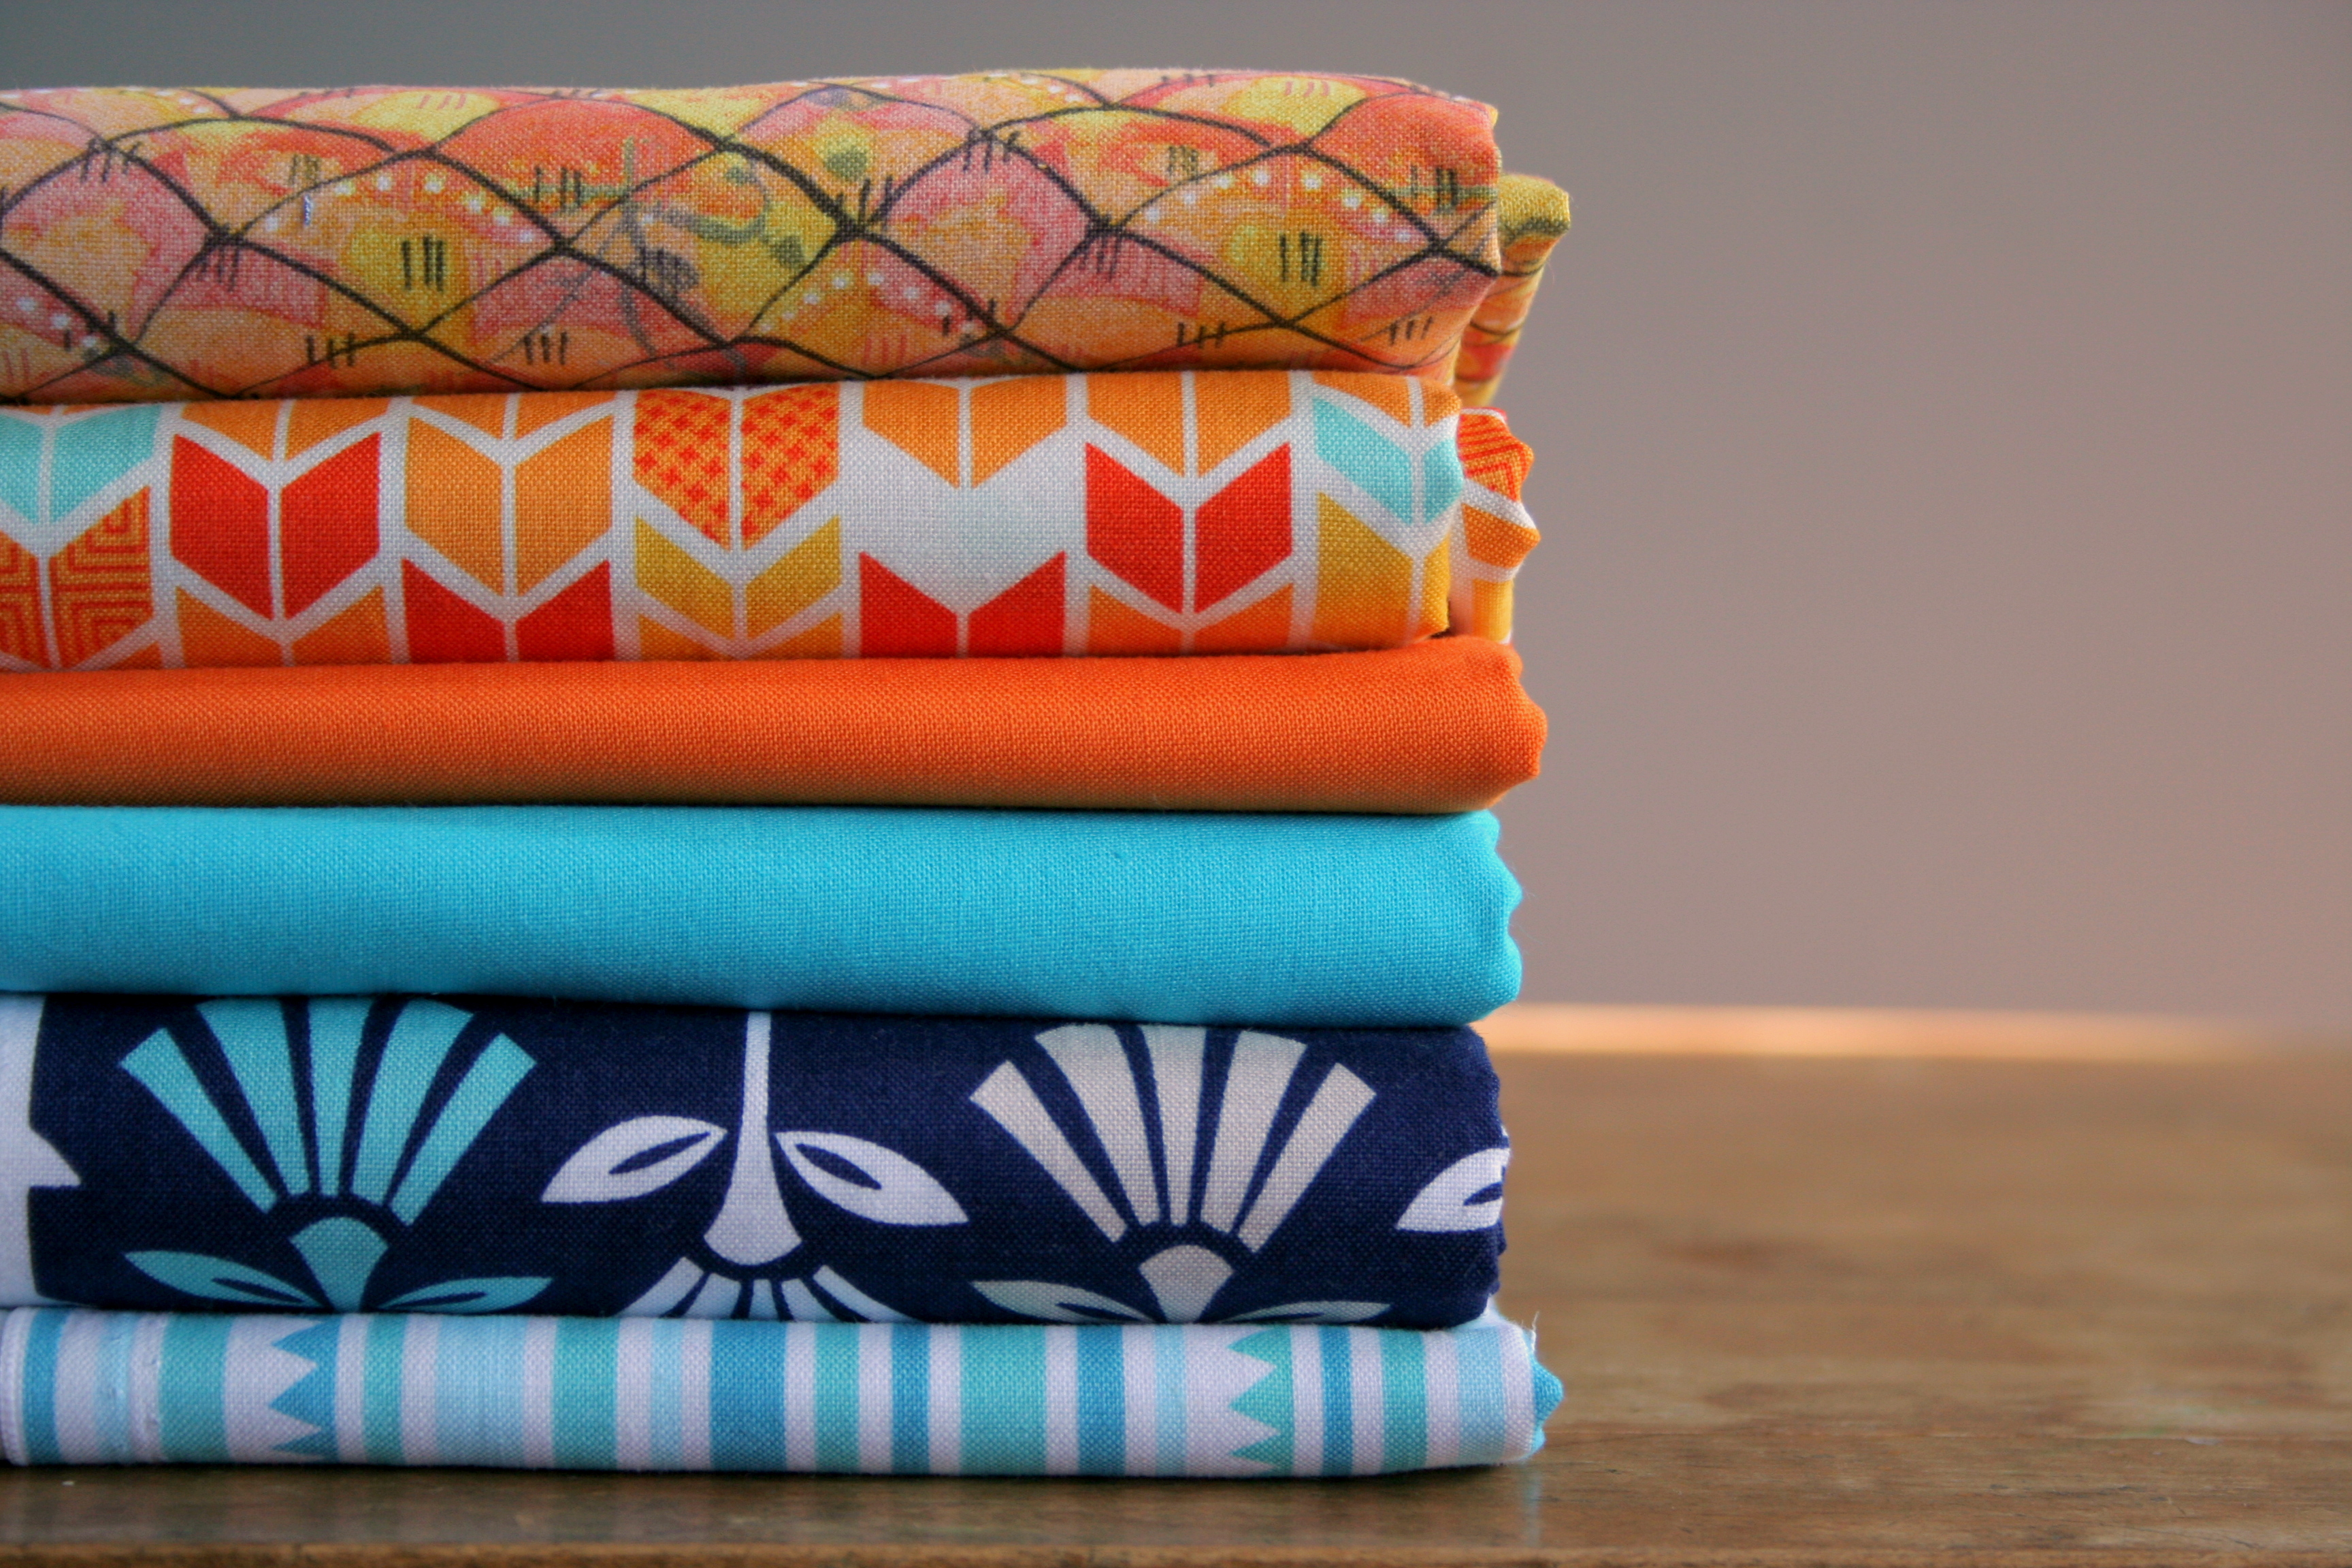
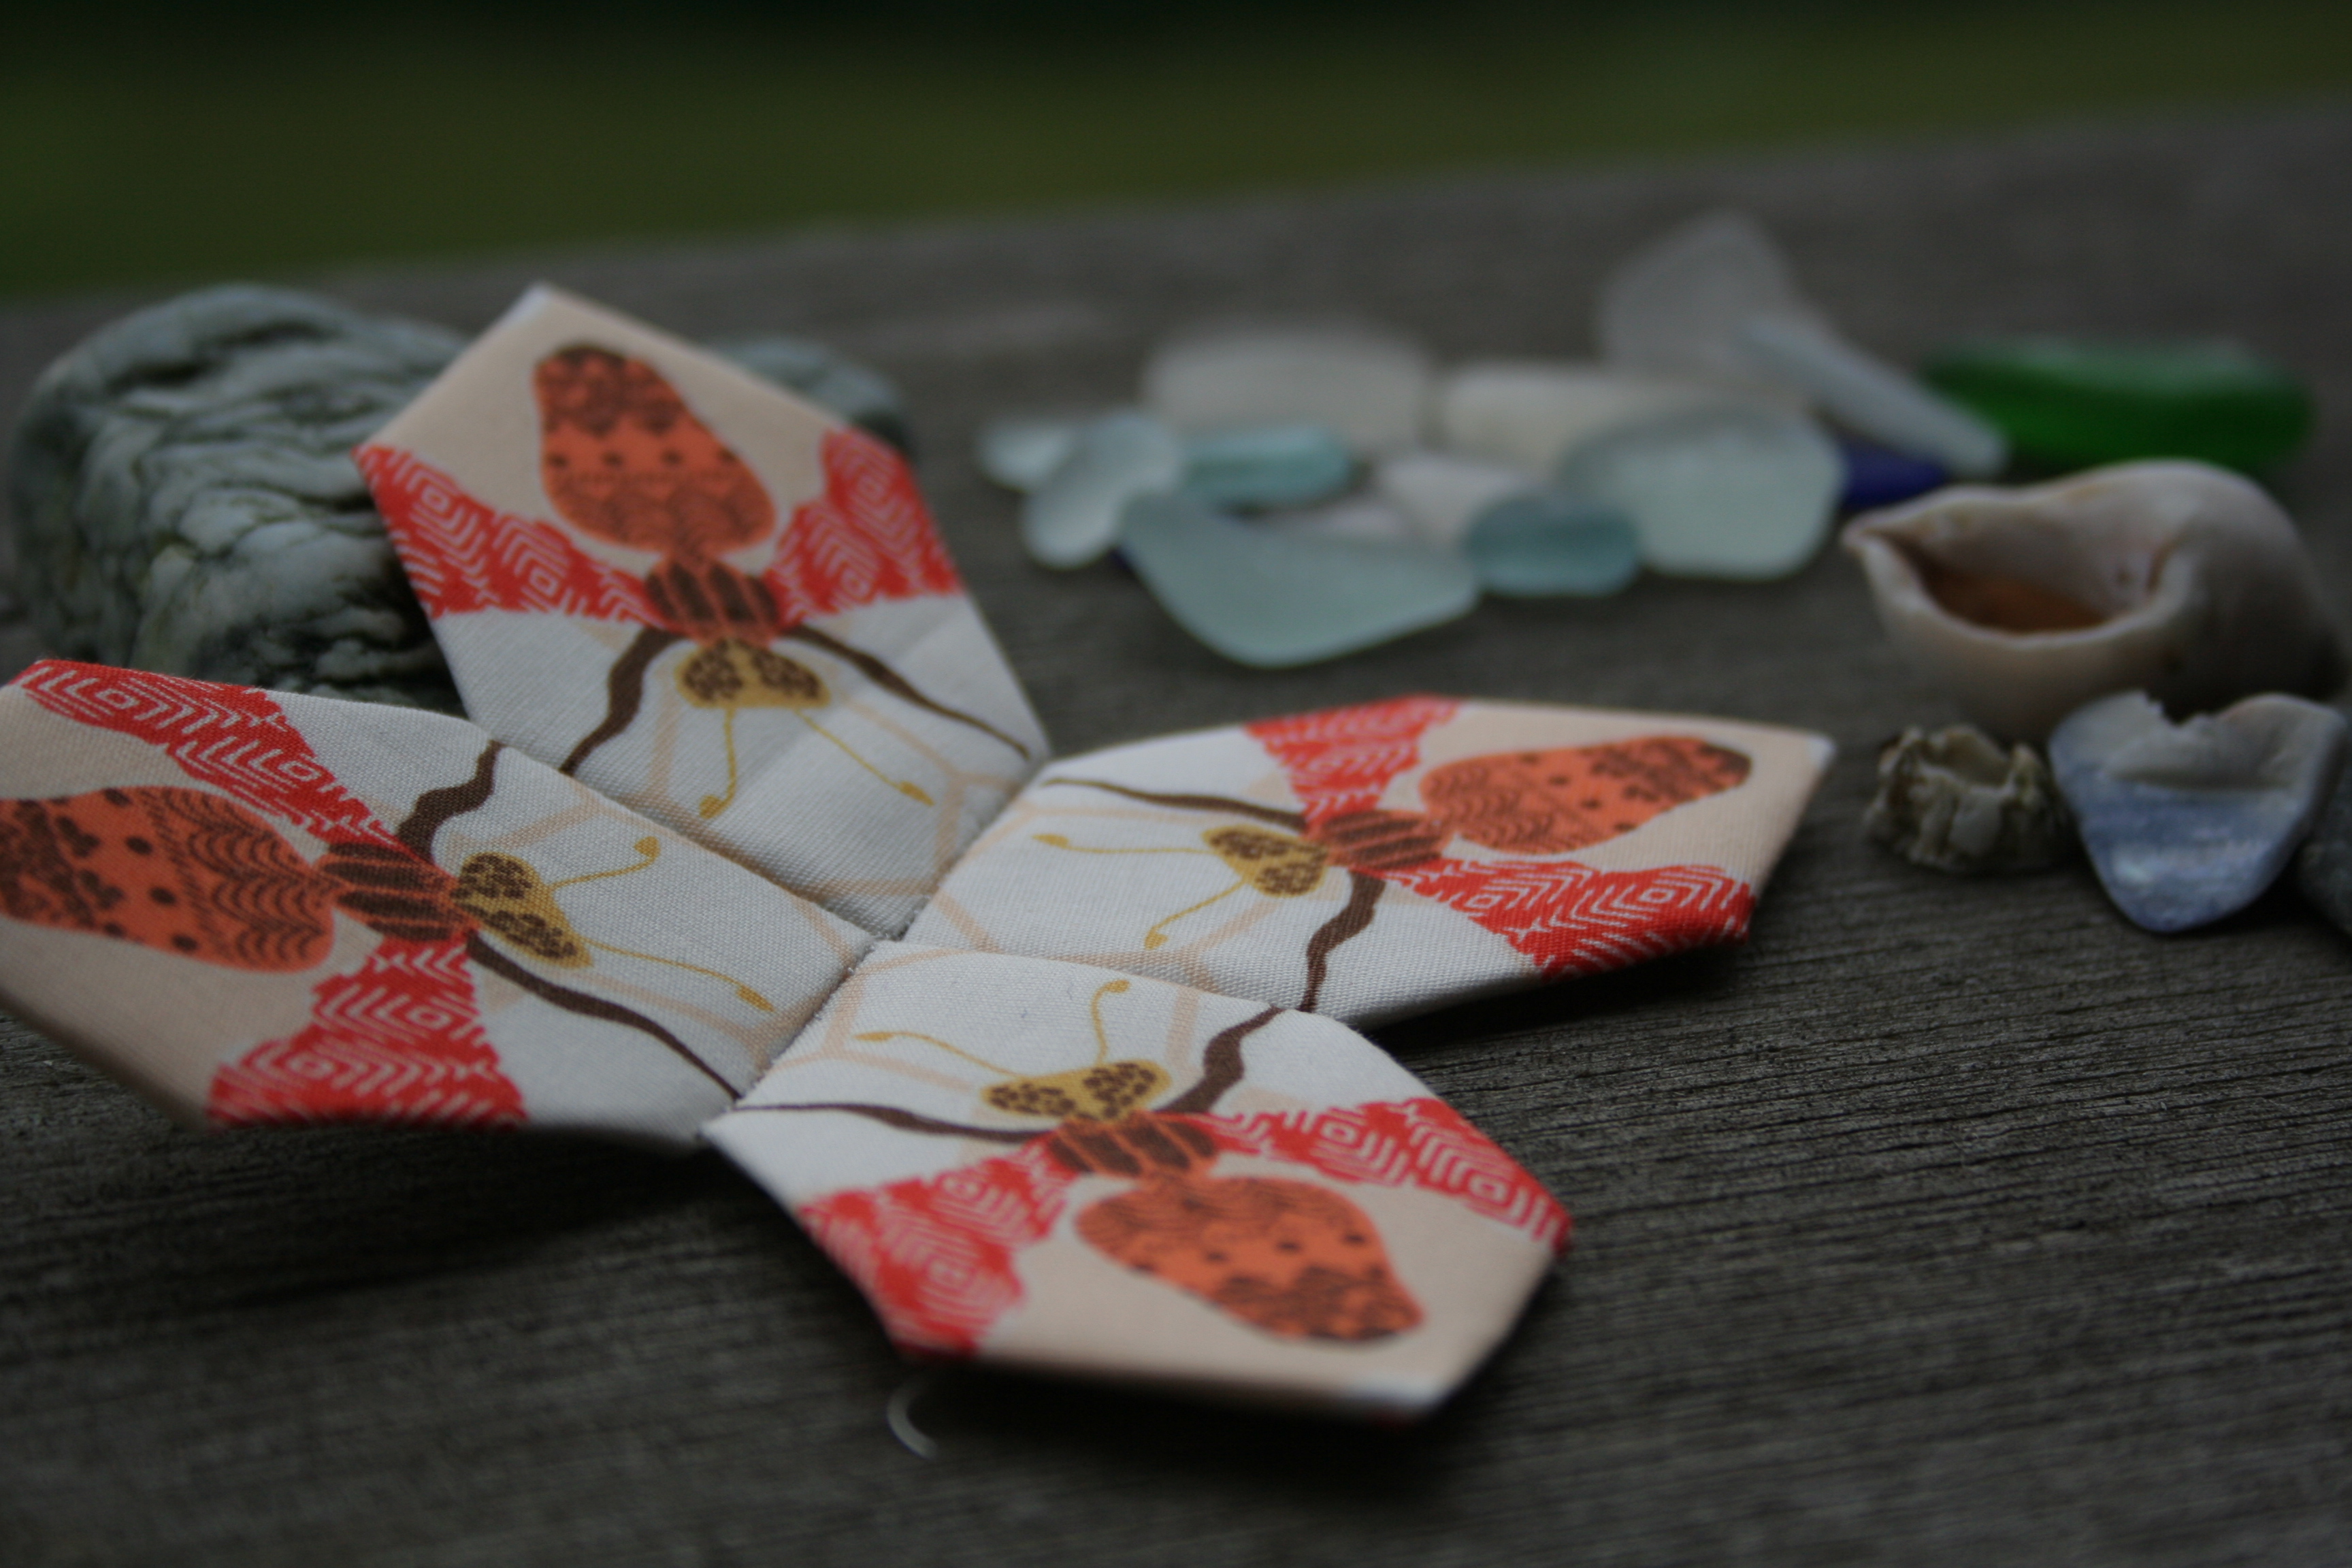
At first, I wasn’t sure about these fabrics and how they would work in a modern hexies mini quilt, but once I put them together and took a photo, I’m a lot more encouraged. For some reason, when looking at the fabrics in a stack, they don’t seem to flow as well as I’d like. Looking at them arranged like so and through the eye of a camera, it definitely “works”. Woo hoo!
I ordered a small pack (100 pieces) of 1″ hexagons from Paper Pieces, but I got a little antsy waiting for them to arrive, since my charm pack of Anna Maria Horner arrived first. Rather than wait, I pulled out some card stock and printed off a page of adorable Happy Hexies by Mollie Johanson of Wild Olive. I had bookmarked these a few months back, and was thrilled to finally use them. I mean, how cute are these little guys peeking out the back!?
Now that my Paper Pieces hexies have arrived, I can go to town on this project, but I’m so grateful for these cheerful little guys and Mollie’s free download since they allowed me to get a little head start on the mini. Hopefully, we will see this cute little stack of hexagons grow and grow and GROW over the next couple weeks!
The hustle and bustle of the autumn harvest season has overflowed into my sewing habits. Over the past couple of weeks, I’ve been finalizing some new foundation paper piecing patterns with the help of some awesome pattern testers. I’m relatively new to the solicit-pattern-testers game, but I managed to find some great and enthusiastic testers through the Late Night Quilters Club facebook group. Here are my new patterns, and a sampling of the fabulous testing:
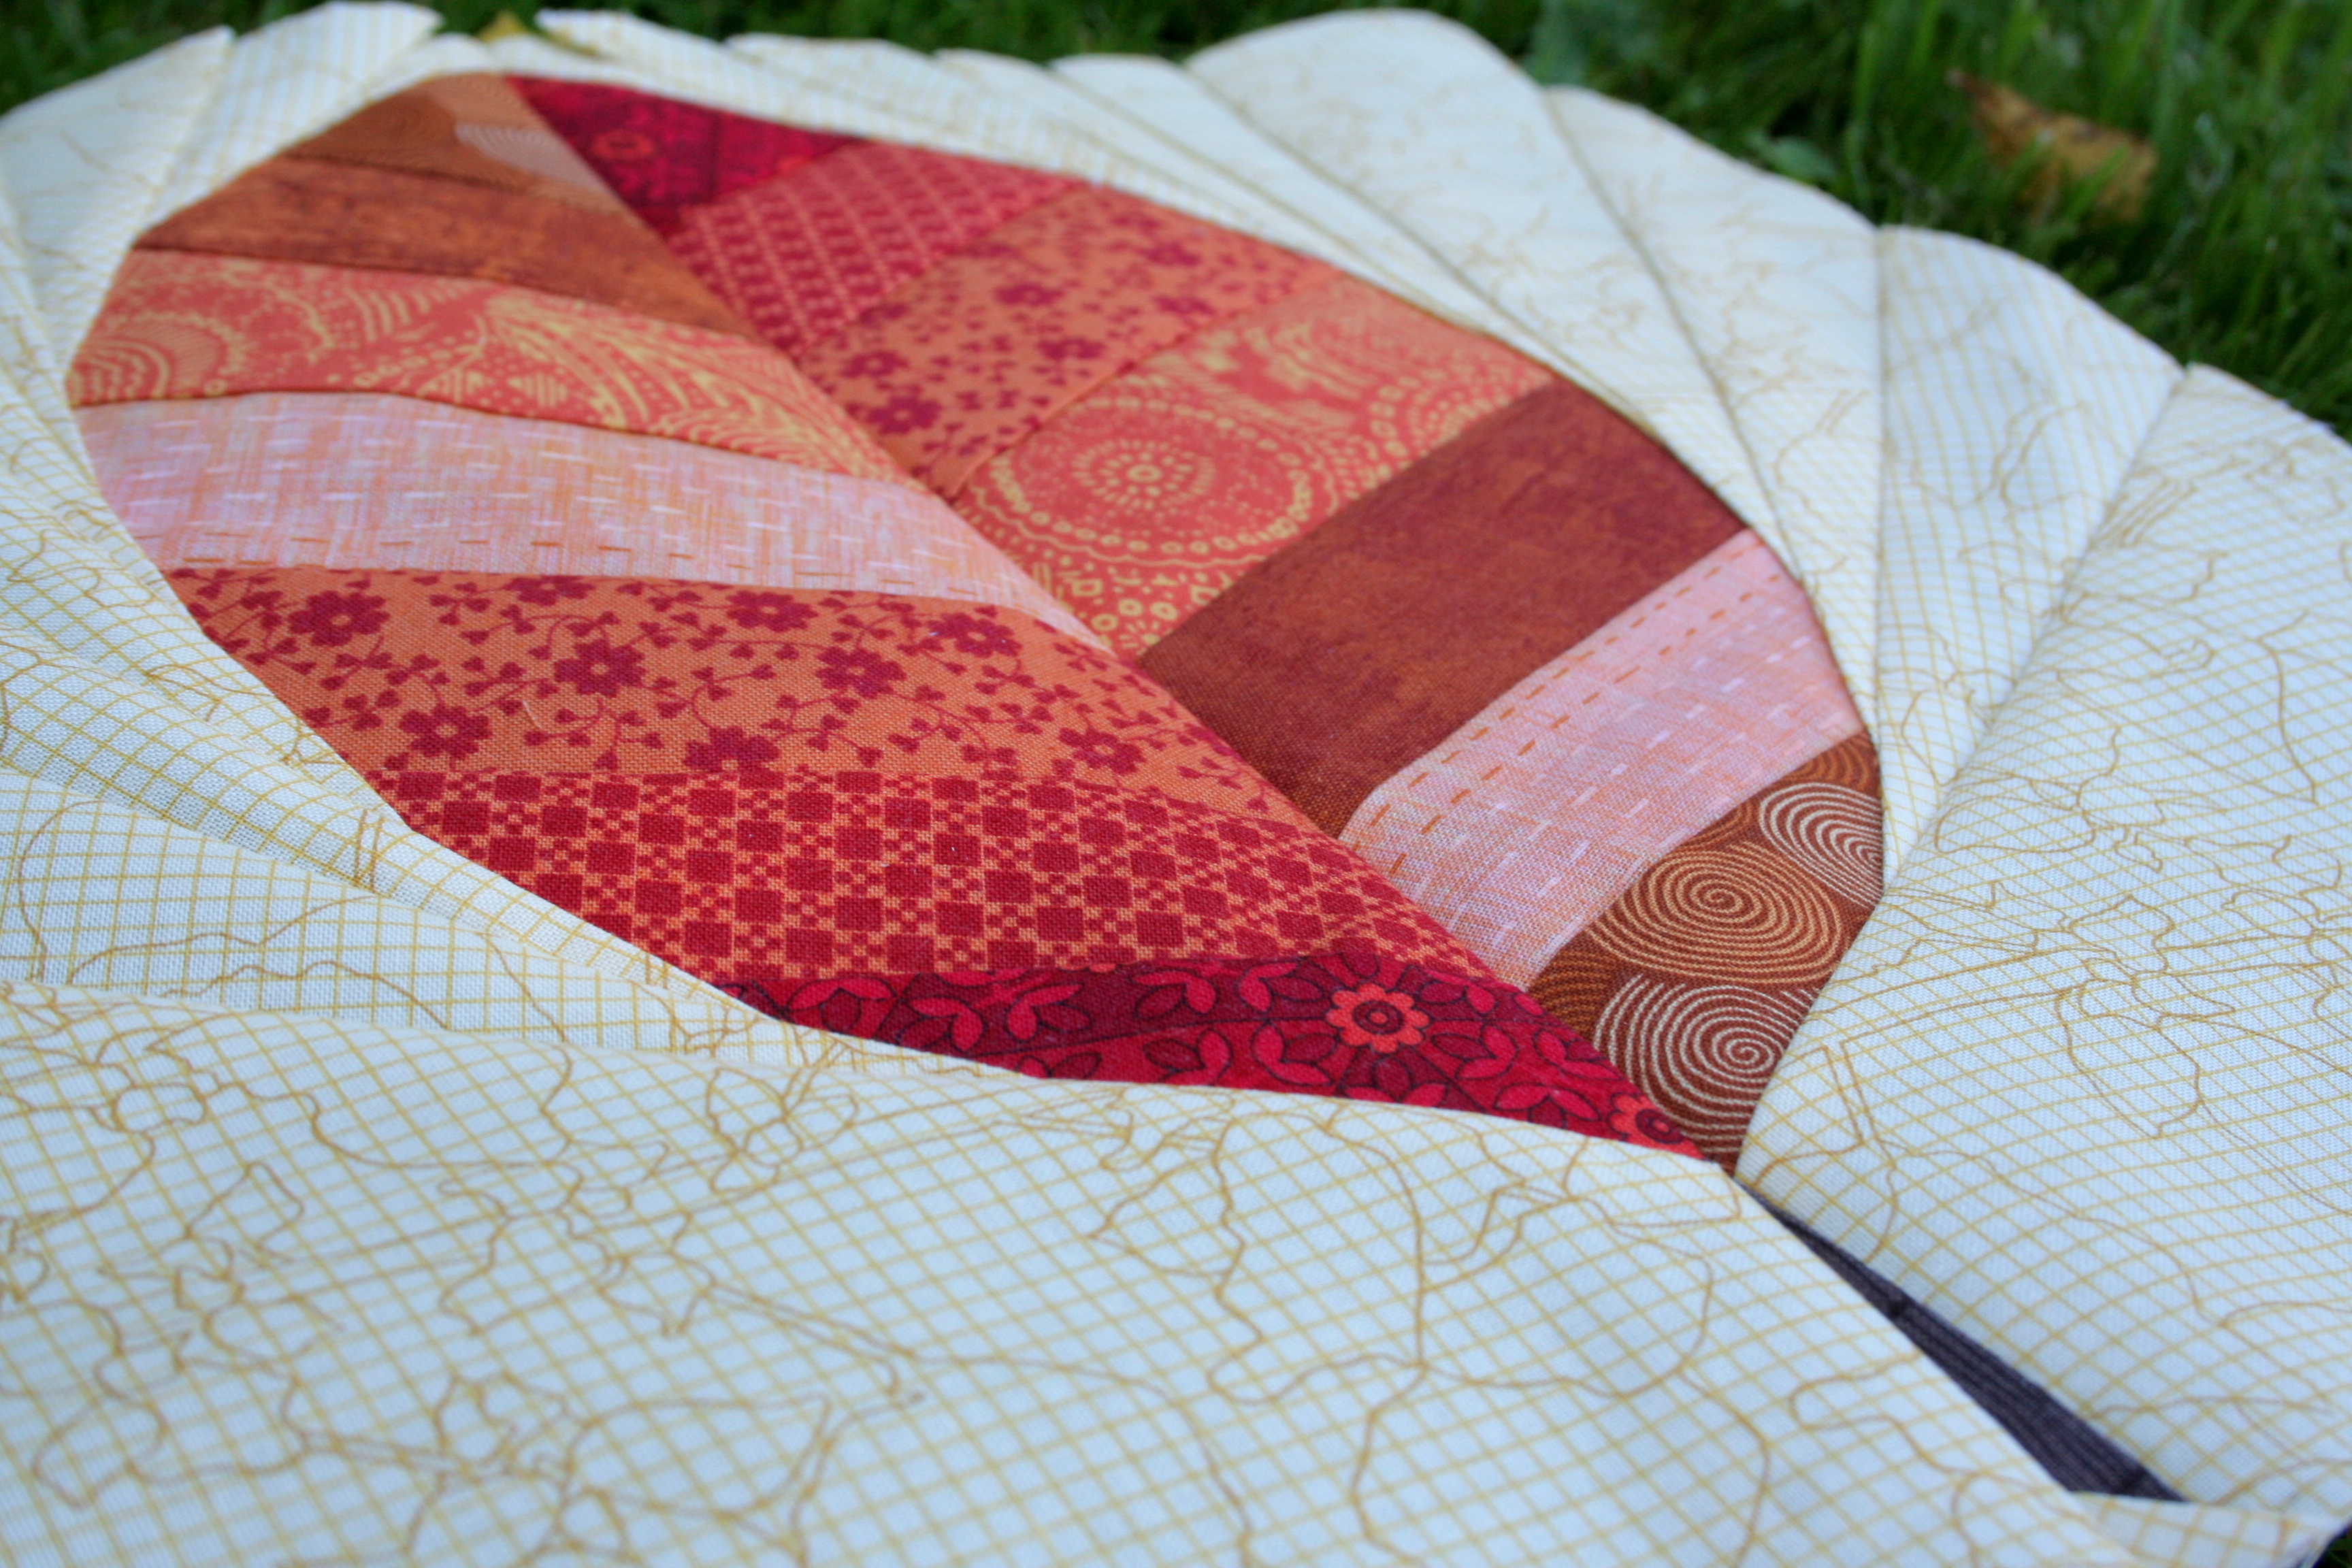
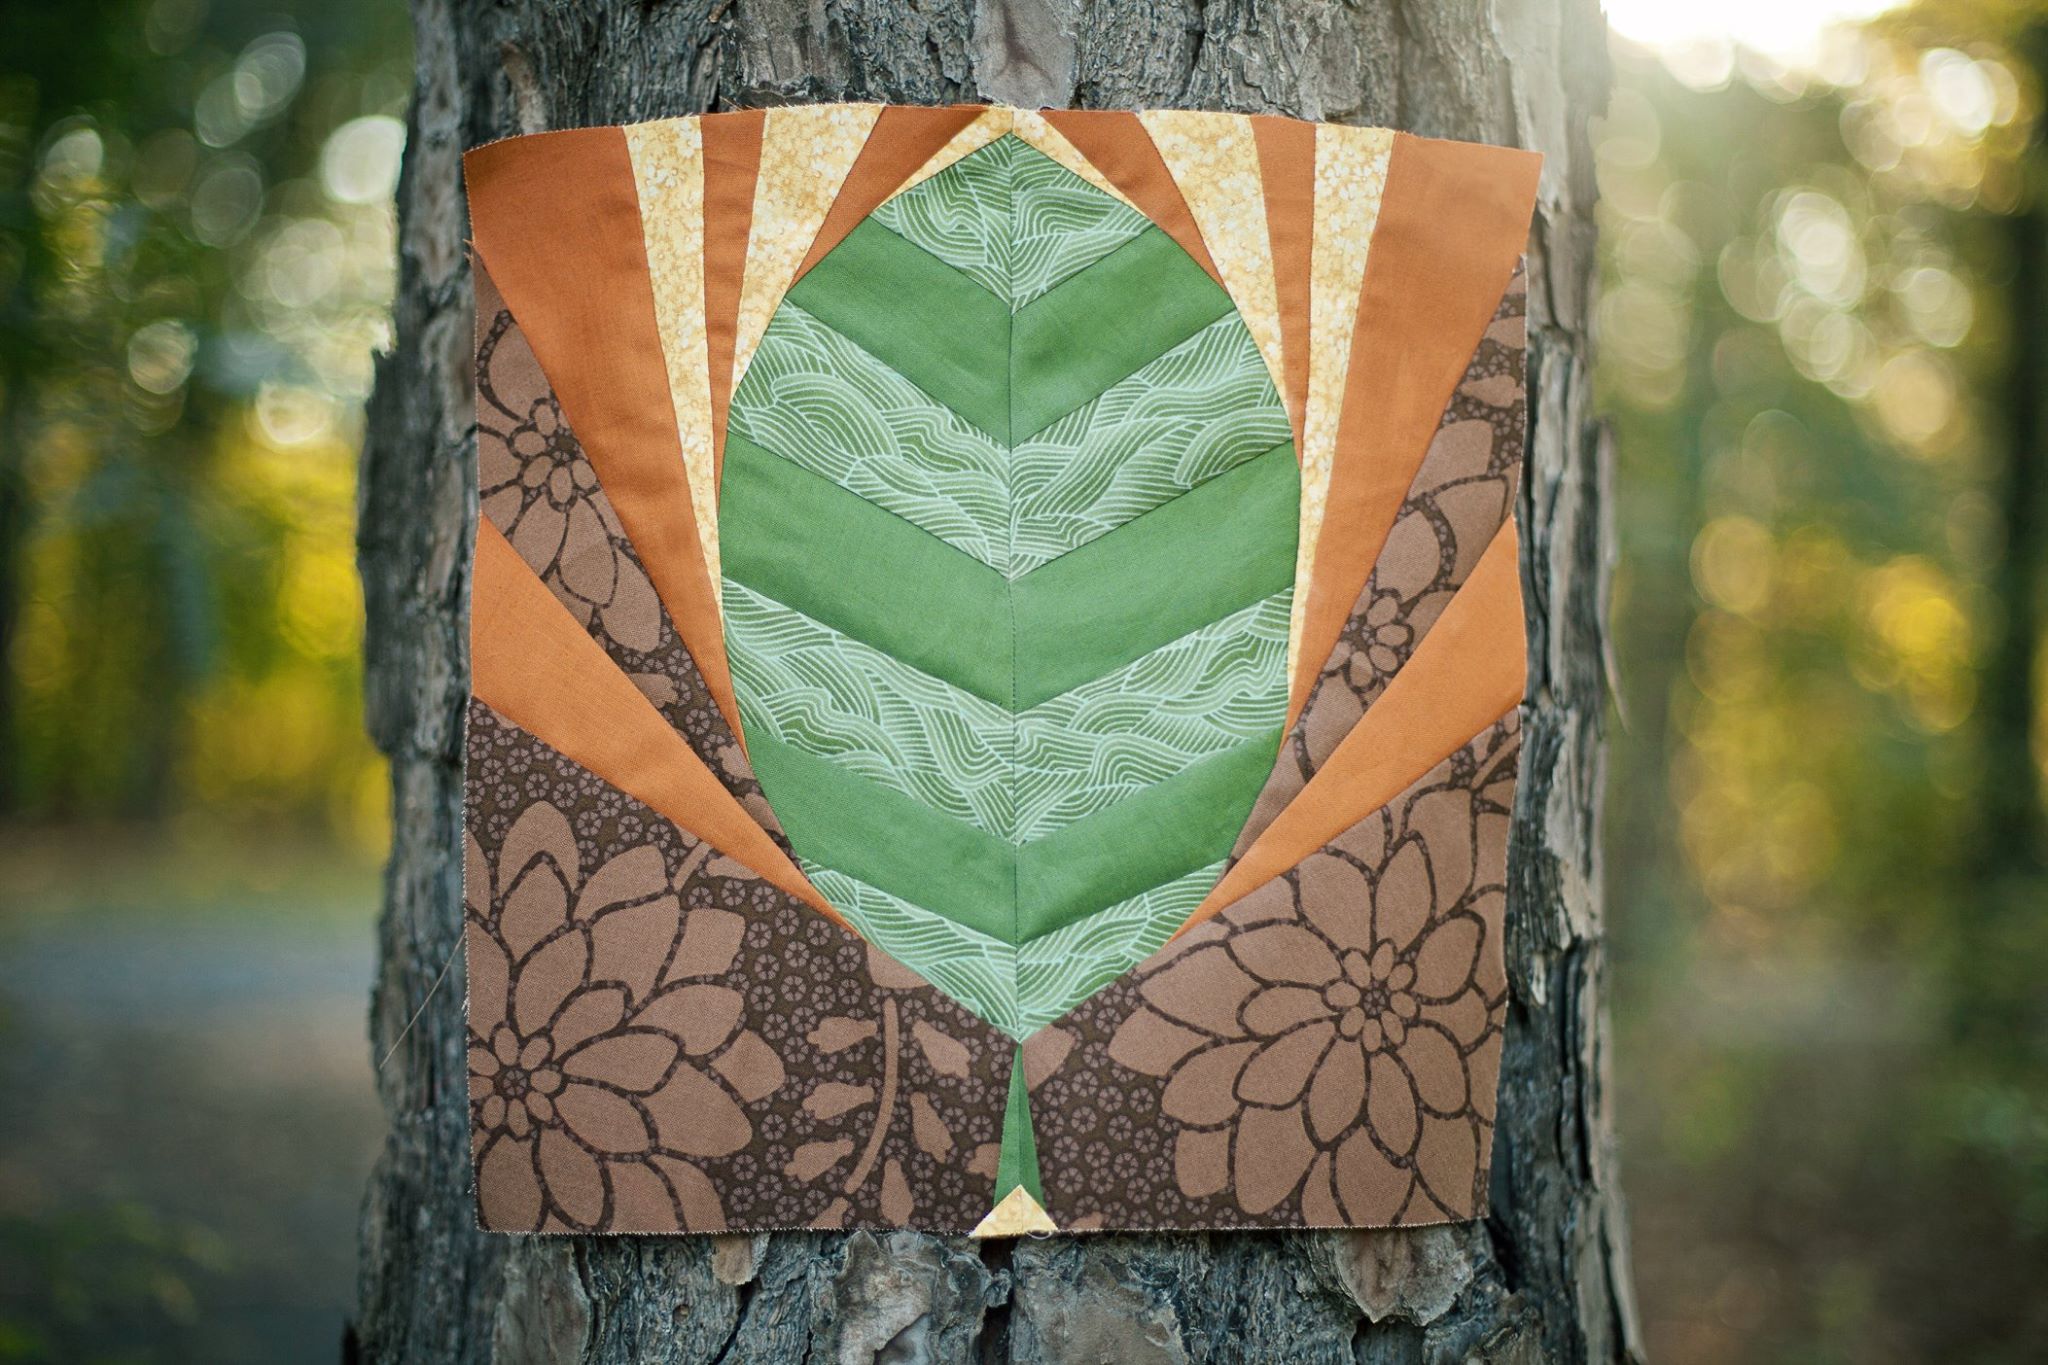
Leaf
This pattern literally came to me as my family was driving home from church one Sunday. I have been really trying to simplify my patterns and focus on geometric symmetry. Perhaps the turning leaves speckling our drive home inspired me, but either way I quickly sketched out this pattern on a scrap of paper while my husband drove (don’t worry–I didn’t sketch it out while driving!). Here we are a few weeks later and it’s ready to go!
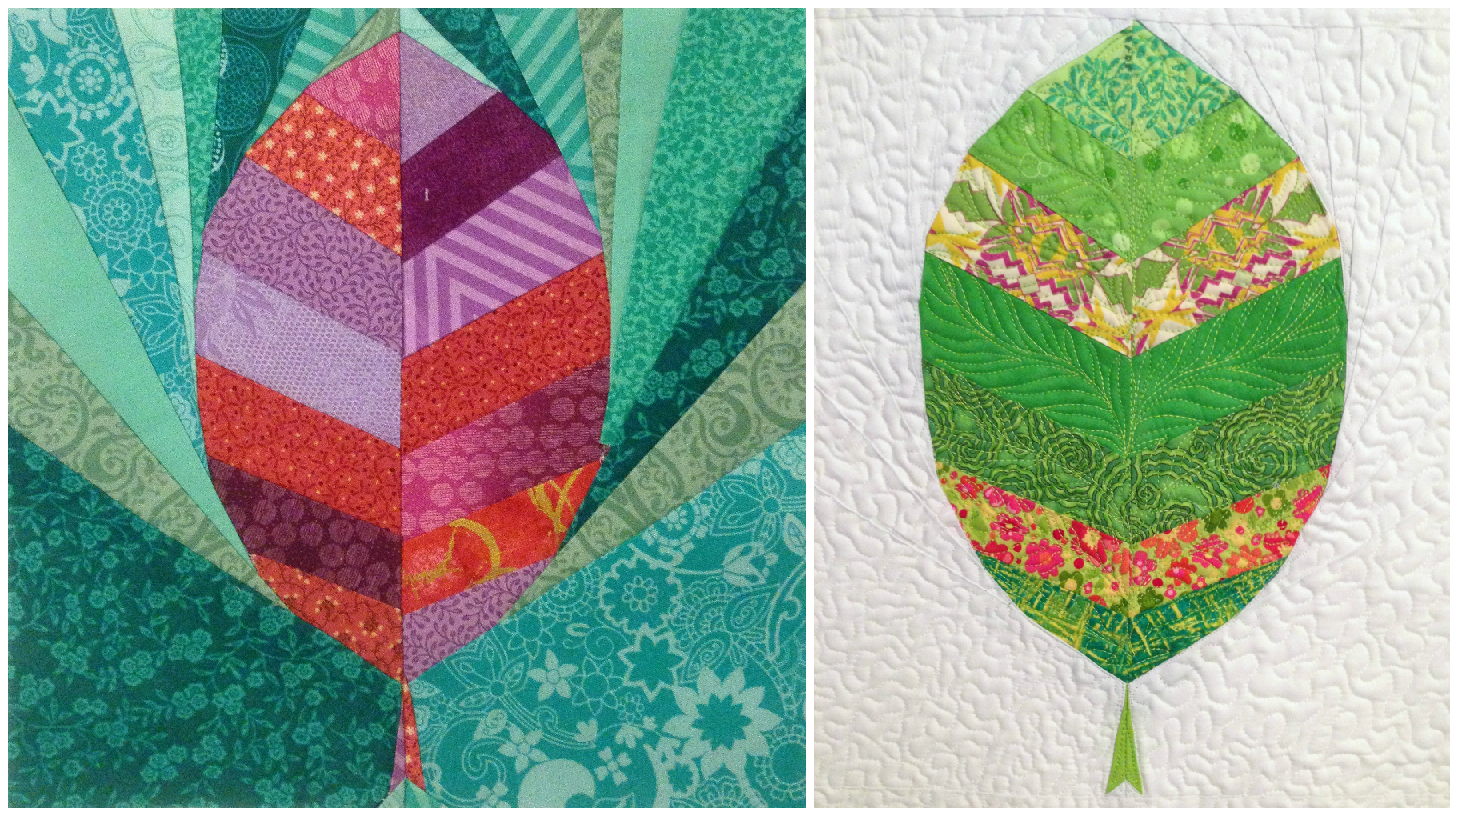
One of the most exciting things about sending your pattern to testers is the anticipation of what color scheme and design each tester will choose. My testers for this leaf didn’t disappoint! Check out these lovely tester versions; they are so incredibly varied and gorgeous!
Each of these three lovely ladies will be giving away a copy of my new pattern on her blog, so head on over to check them out and try your hand at winning this seasonal leaf pattern. The pattern is also listed for sale in my Craftsy store, and will be on sale for $3.50 for one week before it goes back to its usual price.
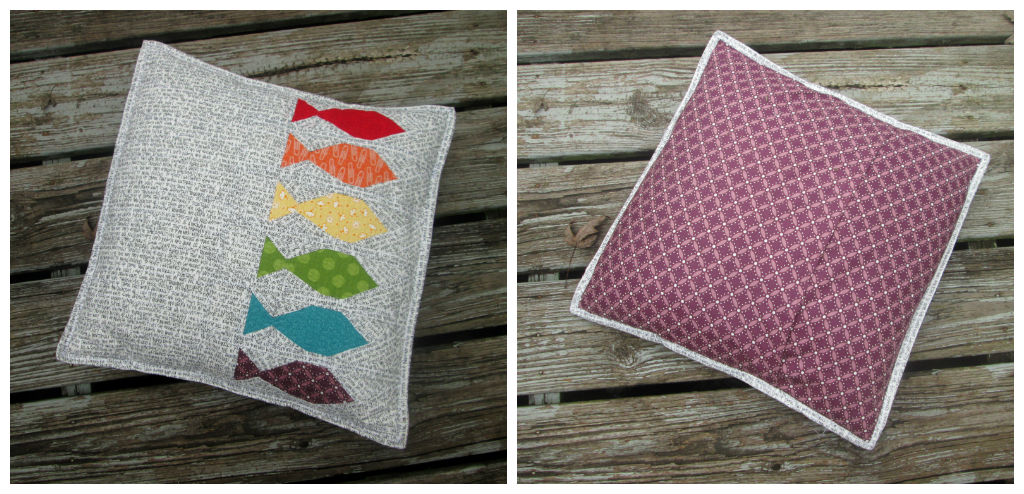
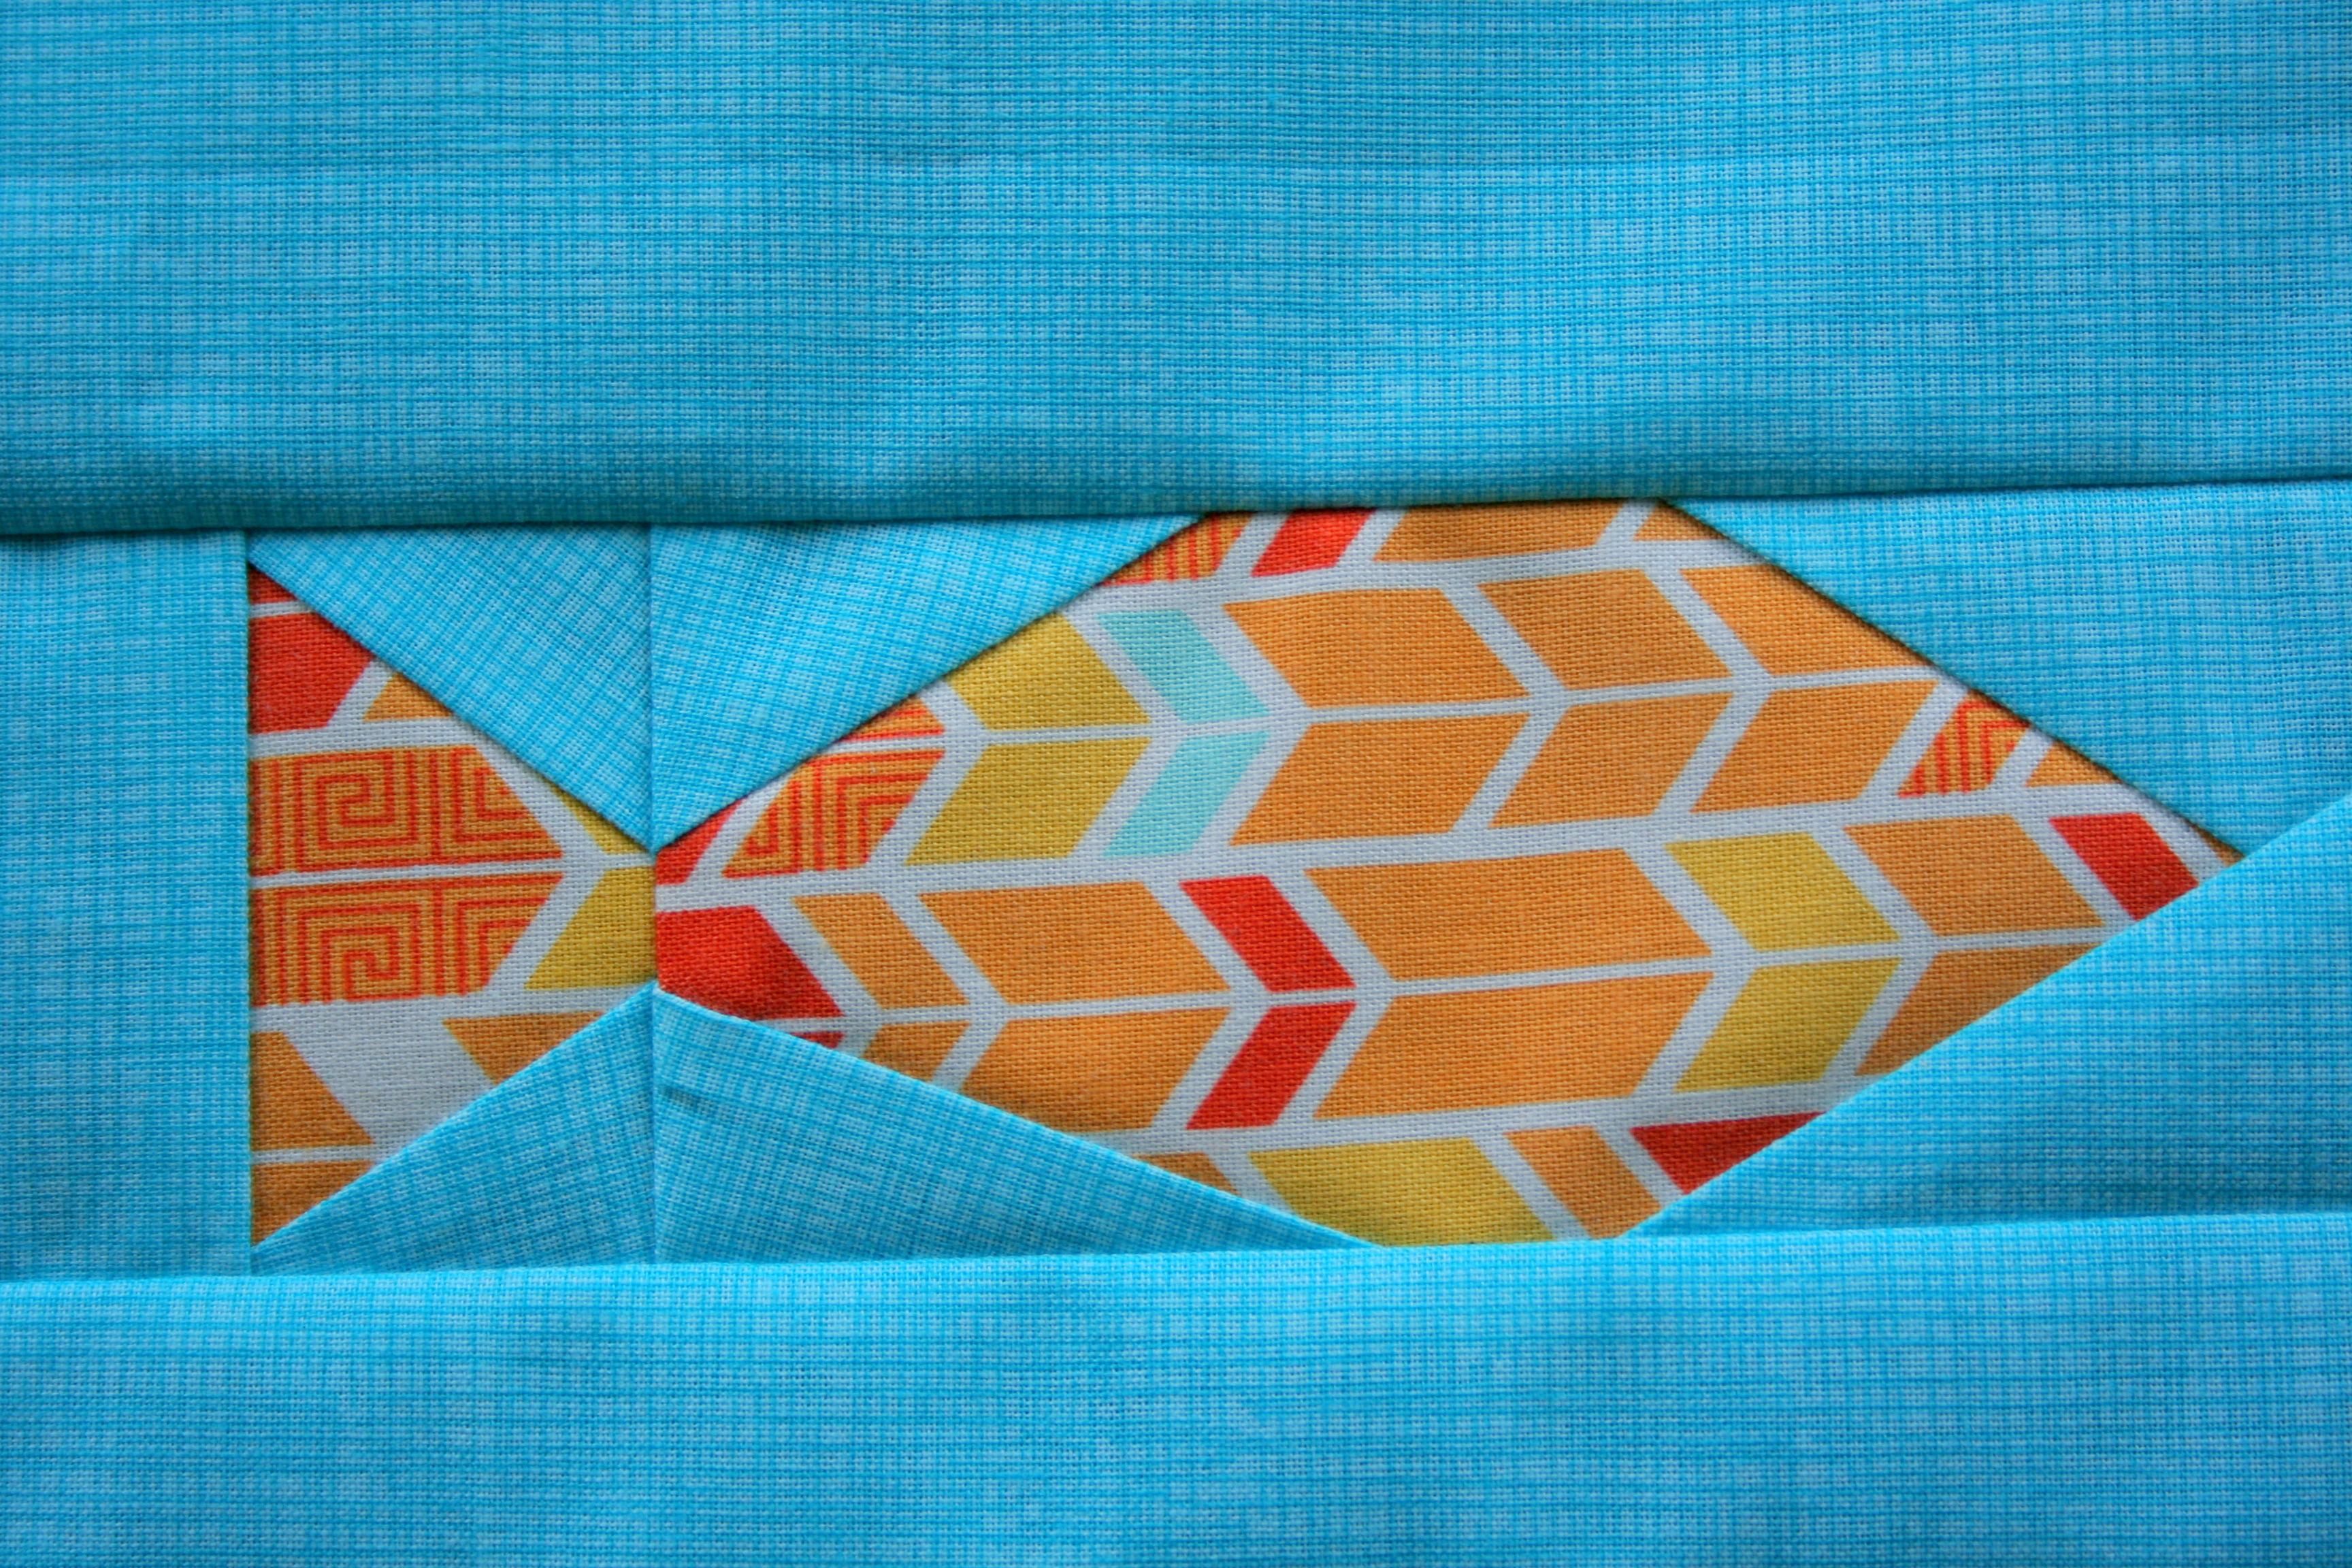
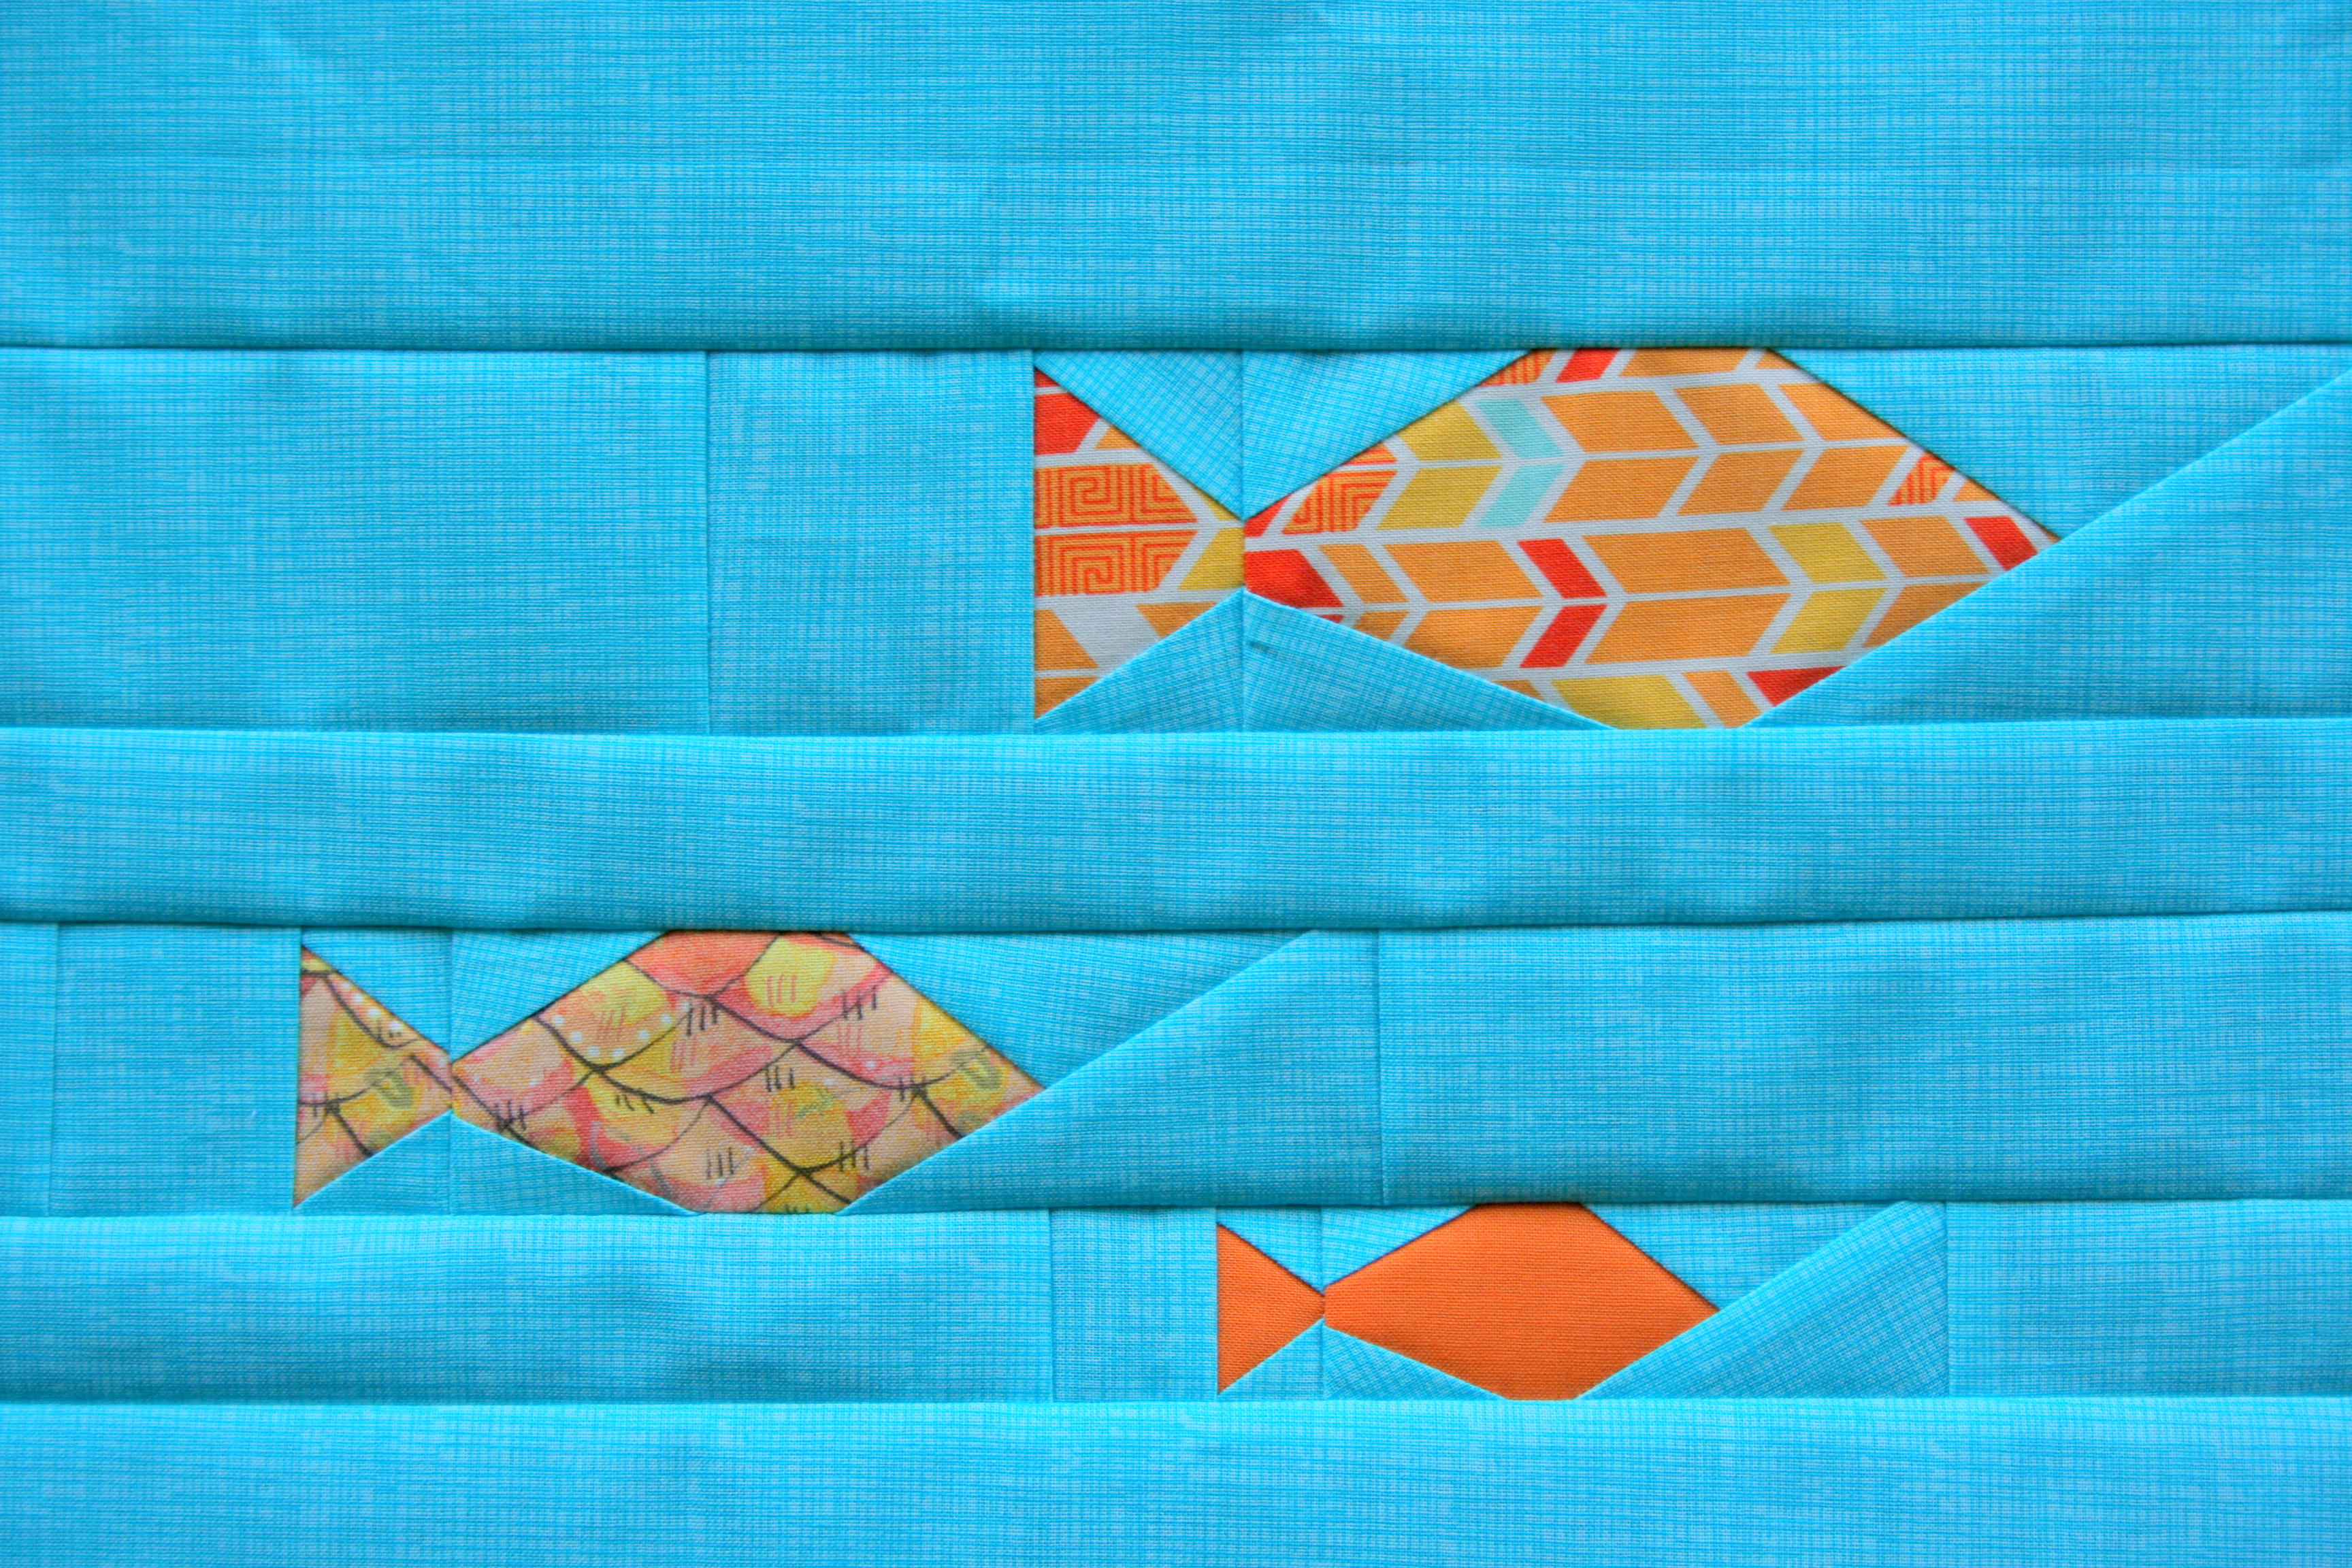
Fishies Rainbow Row
Just about immediately after sketching out my original Fishies panel, the idea for this alternate layout and color scheme came to mind. I sketched it out and wrote out rough piecing instructions and then put it on the back burner. When asking for pattern testers, Julie Schloemer from That’s Sew Julie offered to test my fishies panel pattern. After looking through her blog and seeing her style, I thought she might be interested in making my rough idea into a reality. Little did I know that she would literally make my exact vision into a reality! Here is the Fishies Rainbow Row pattern, exactly as I envisioned it, pieced and quilted by Julie.
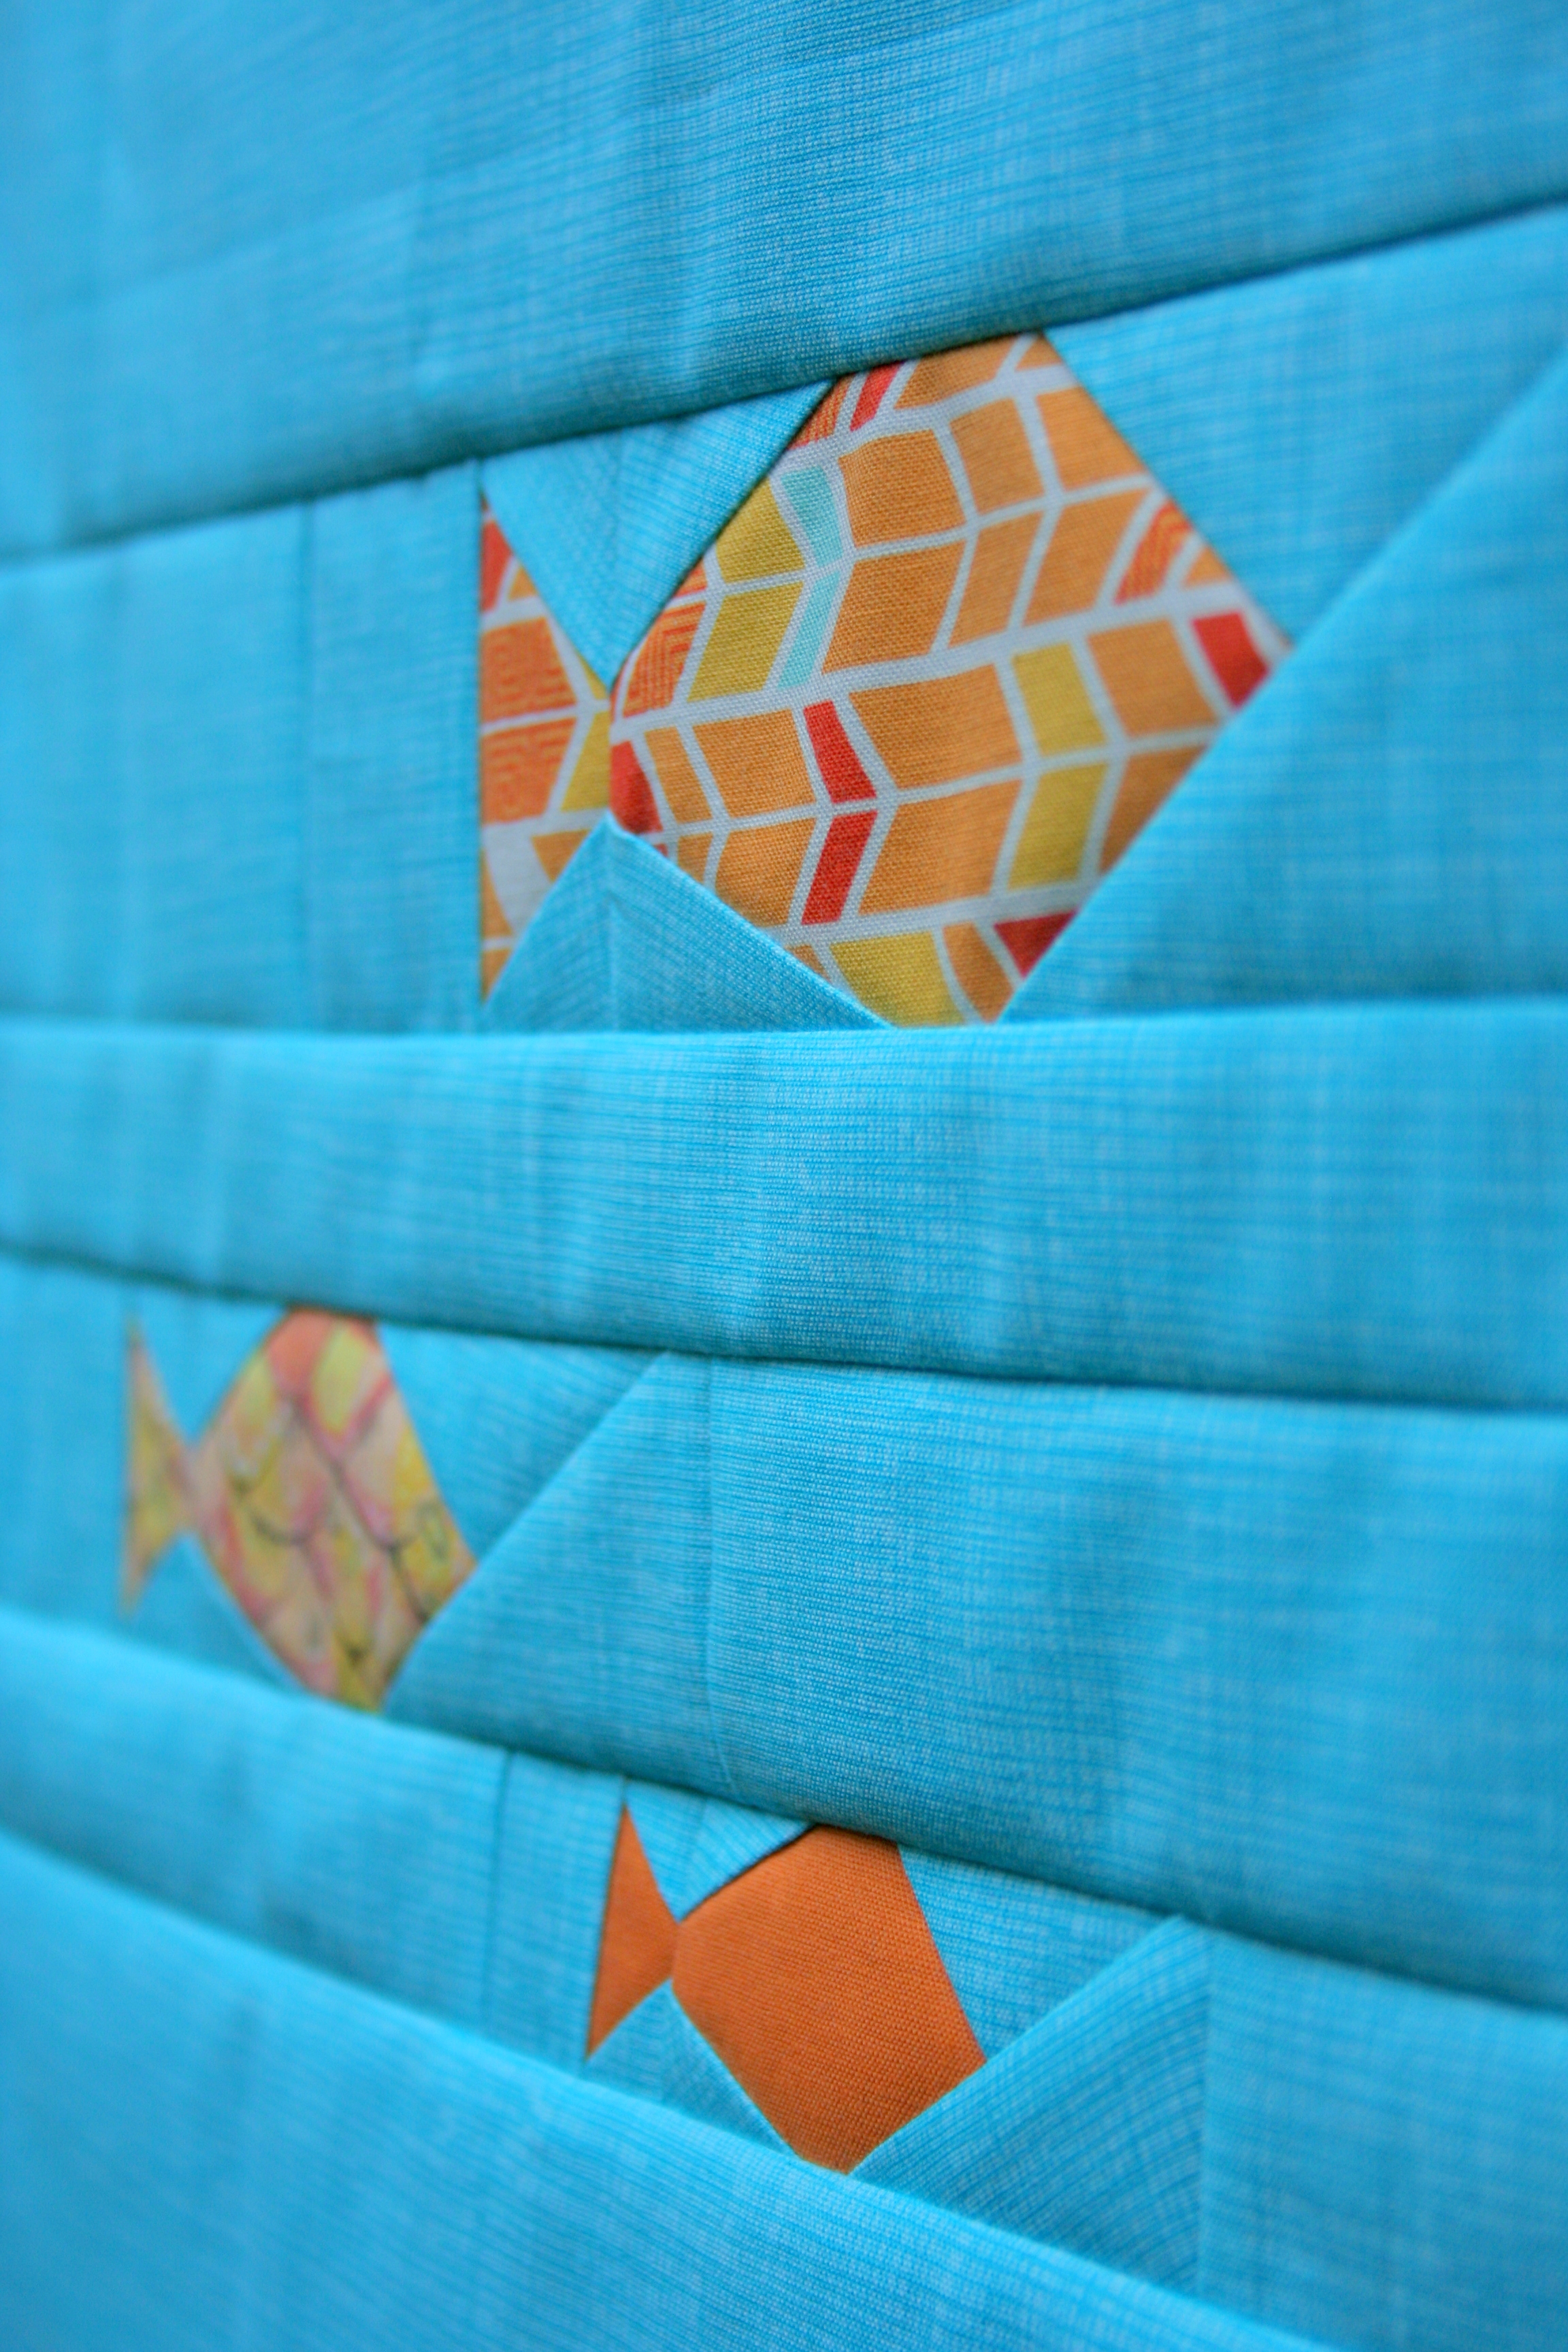
I loved watching Julie’s progress with this on Instagram, from the first pieced fish, to the matching of thread in preparation of quilting, all the way to finishing as a lovely pillow. Check out these great photos by Julie:
Julie will also be hosting a giveaway on her blog, where you can enter for a chance to win a free copy of this pattern. The pattern is also listed for sale in my Craftsy store and will be on sale for $3.50 for one week until it returns to its usual price. Get it now!
I also recently created a Flickr group called Night Quilter Creations, where you can post photos of projects you’ve made using my patterns. If you’re on Flickr, go check it out, join in, and post your photos! I’d love to see what you create!
When Laura from Adventures of a Quilting Diva asked for volunteers to design itty bitty mini paper pieced houses for her Mini House-Along, I thought it would be fun. Little did I know exactly how much fun! I had such a blast sketching out and piecing this little Mini Snail House, and I’m a bit afraid I may be hooked on mini houses!
This mini house block finishes at 5″x5″ (5.5″x5.5″ unfinished) and was super fun to piece. I think it was the smallest block I’ve ever made, and being comprised of five foundation pieces made the itty bitty fun even more extreme! Next time I think I will use a smaller print pink scrap, or maybe even sketch or solid for the snail, but overall I kind of love it! I honestly didn’t think I’d be all about the itty bitty paper piecing, but it was so fun. These mini house blocks are a fabulous way to use up those tiny scraps you know you’ve been saving.
This block is available for free in my Craftsy shop, as the October block for the Mini House-Along. While typically one might think of haunted houses being more fitting for October, I think this works perfectly: it’s a snail dressing up as a house. Or maybe a house dressing up as a snail? Either way, we’ve got Halloween covered.
You can download the previous blocks in Laura’s Mini House-Along here:
or visit Laura’s blog for more details about the inspiration and design of the previous blocks in the Mini House-Along.
Design Inspiration
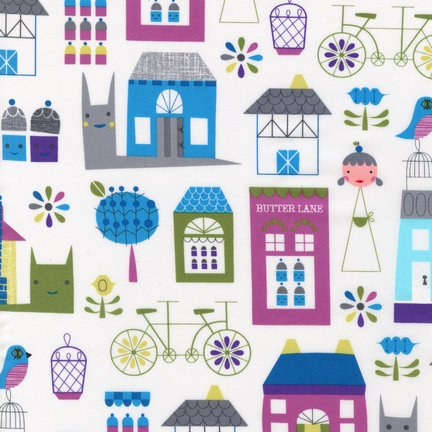
This block was heavily inspired by Suzy Ultman‘s fabric collection Suzy’s Dollhouse for Robert Kaufman. Once I agreed to design a miniature house, I started looking for house styles, sizes, shapes, and features everywhere. I found my inspiration right in my very own fabric stash!
Suzy Ultman fabric line Suzy’s Dollhouse was my inspiration for this mini snail house block.
Wow, that’s a mouthful!! Friday Finish Fishies Foundation Paper Piecing Panel Pattern. If you can say that three times fast, you can have the pattern for free! Thank goodness for abbreviations. (FPP stands for Foundation Paper Piecing, for those who don’t have a full arsenal of quilting jargon).
Fabric pull for testing out my new paper pieced pattern.
This pattern began as a pillow pattern (in the fabric pull above, the bottom fabric is intended as binding and the second-from-bottom is the backing fabric), but as I pieced it and envisioned it more, I realized it would make a great center panel for a baby quilt or underwater nursery wall hanging, too. I decided to offer the pattern simply as a panel pattern so that the end product can be left to your creative desires. The pattern includes foundation paper piecing patterns for three different sized fish, finishing at 2″x9.5″ (large), 1.5″x7″ (medium), and 1″x4.75″ (small), as well as cutting instructions and a piecing diagram for a full 16″x16″ finished panel (16.5″x16.5″ unfinished).
I can see this pattern being created with any number of fabric color and pattern vs. solid combinations, as well as different layouts. For color, I’m itching to make a version with a scrappy low volume background and rainbow fish. I could also see using the fish individually for other smaller projects, maybe fabric bins for a playroom, kids’ place mats, or even at the bottom of a little girl’s dress.
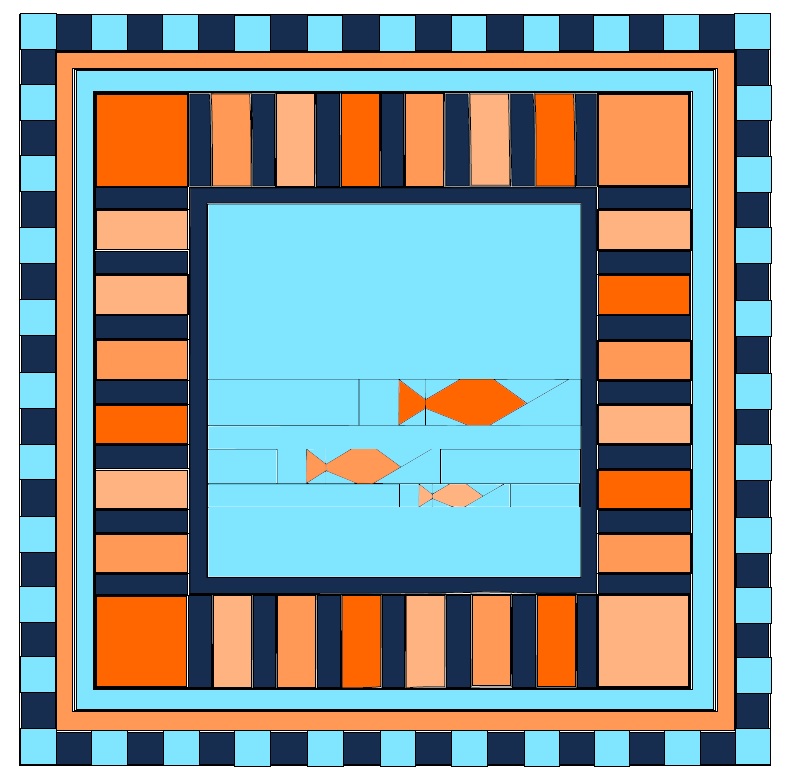
While the specific instructions for making this panel into a pillow or baby quilt are not included in this pattern, I included a “project inspiration page” with different color possibilities and a rough sketch of one way this panel would work in a baby quilt.
Yes, I said it was rough! It’s in creating patterns like this that I really wish I had EQ! It gets the idea across, though, which is what matters… right? On IG, @onceuponadonkey suggested cutting this finished panel into a fishbowl shape to be used on a baby quilt panel. How adorable would that be?!
This Fishies Foundation Paper Piecing Panel pattern is available in my Craftsy shop. I plan to list additional patterns with step-by-step instructions for making the panel into a pillow and perhaps for making the baby quilt shown above in the near future. What would you make with the pattern?
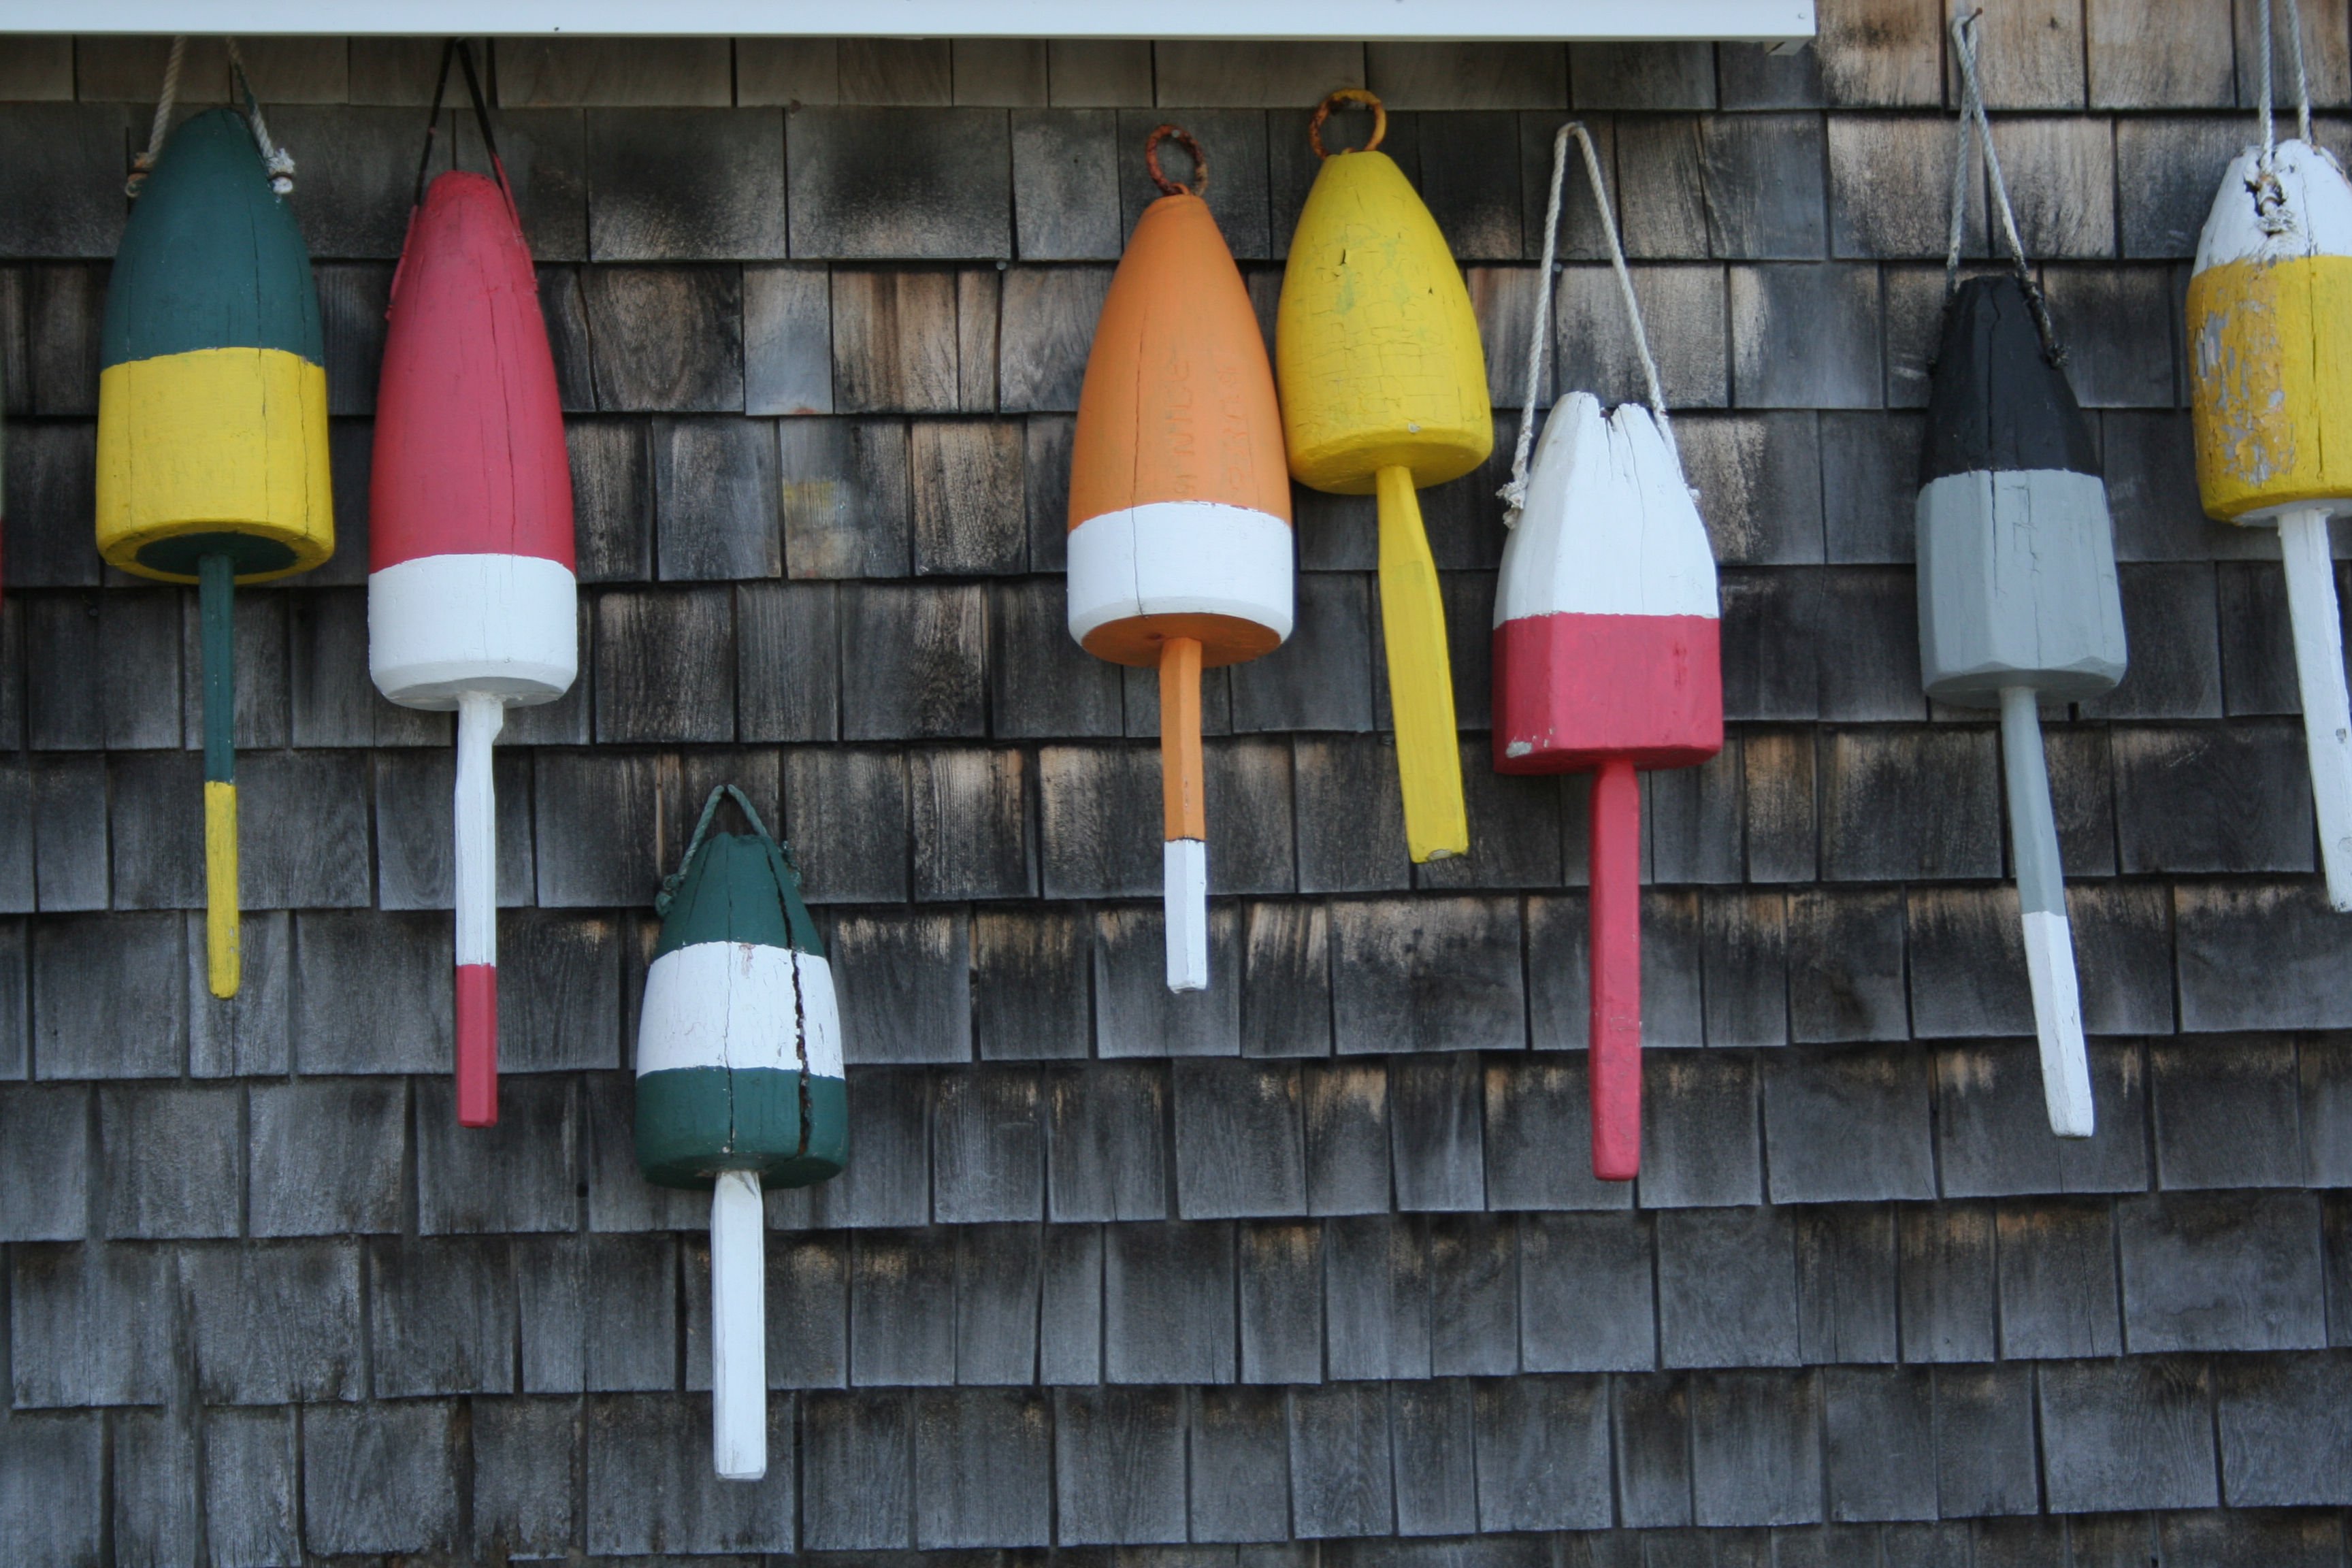
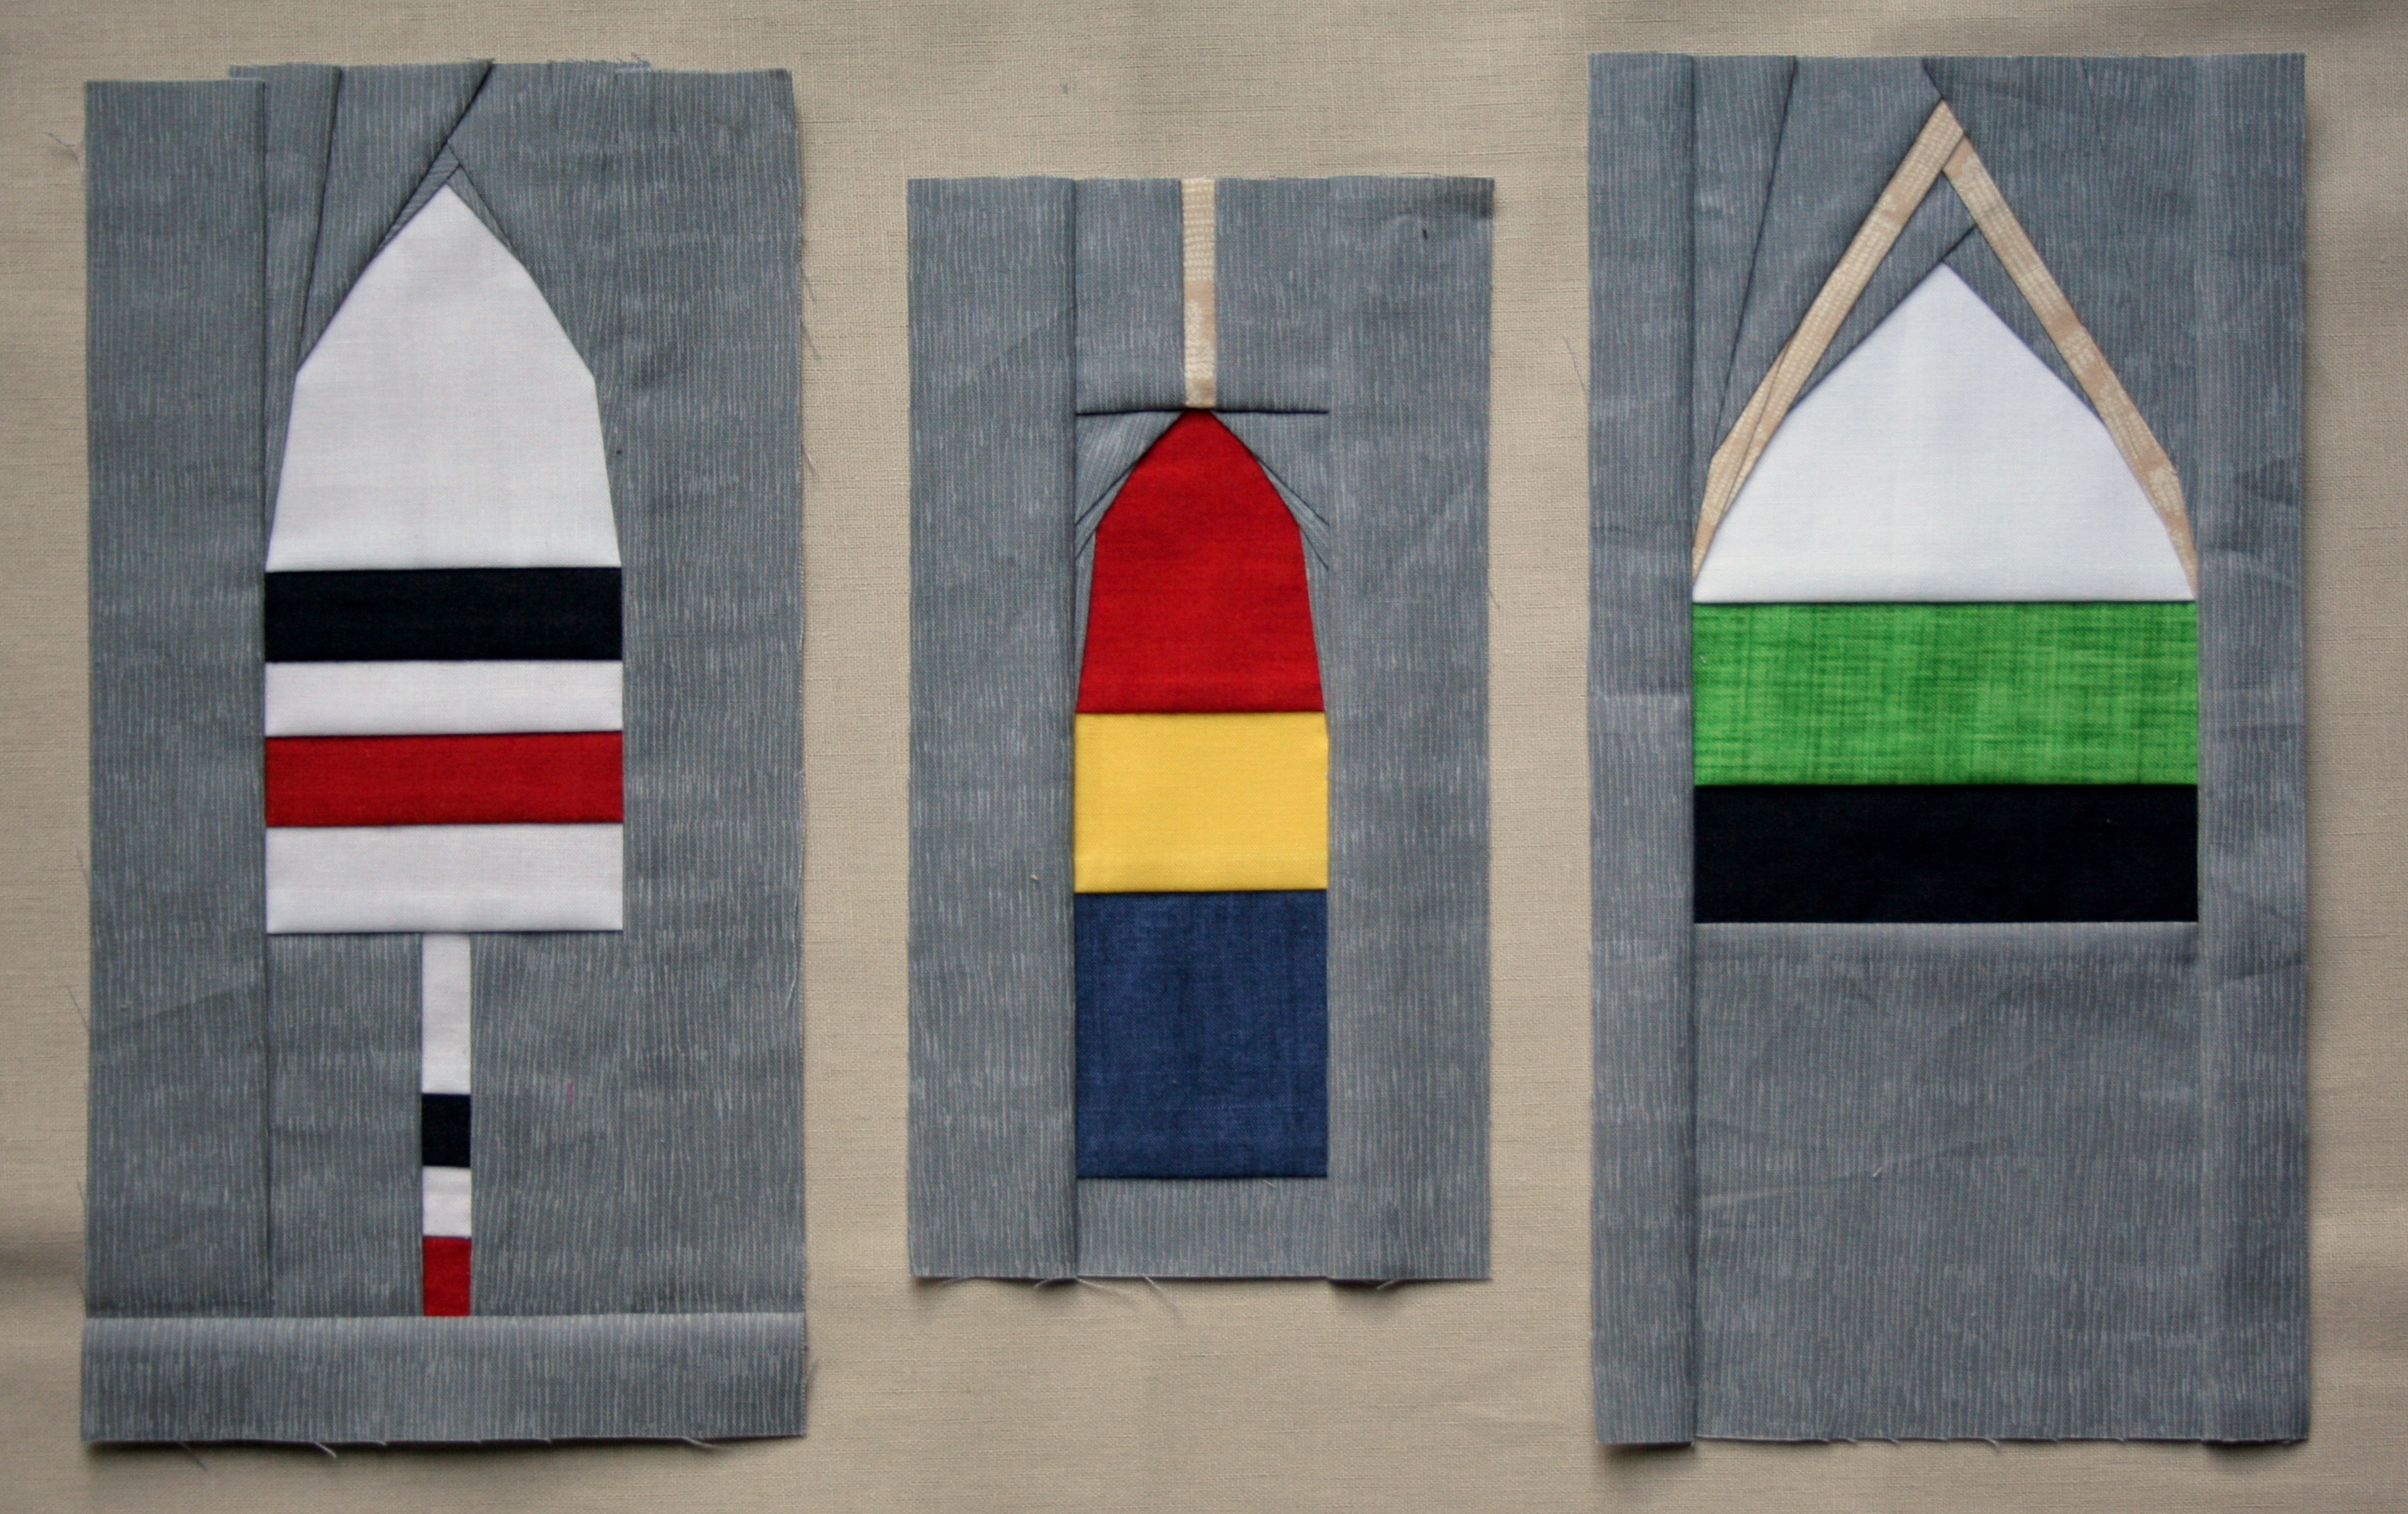
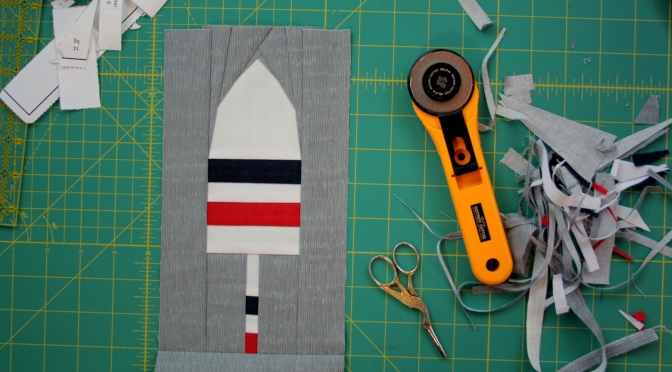
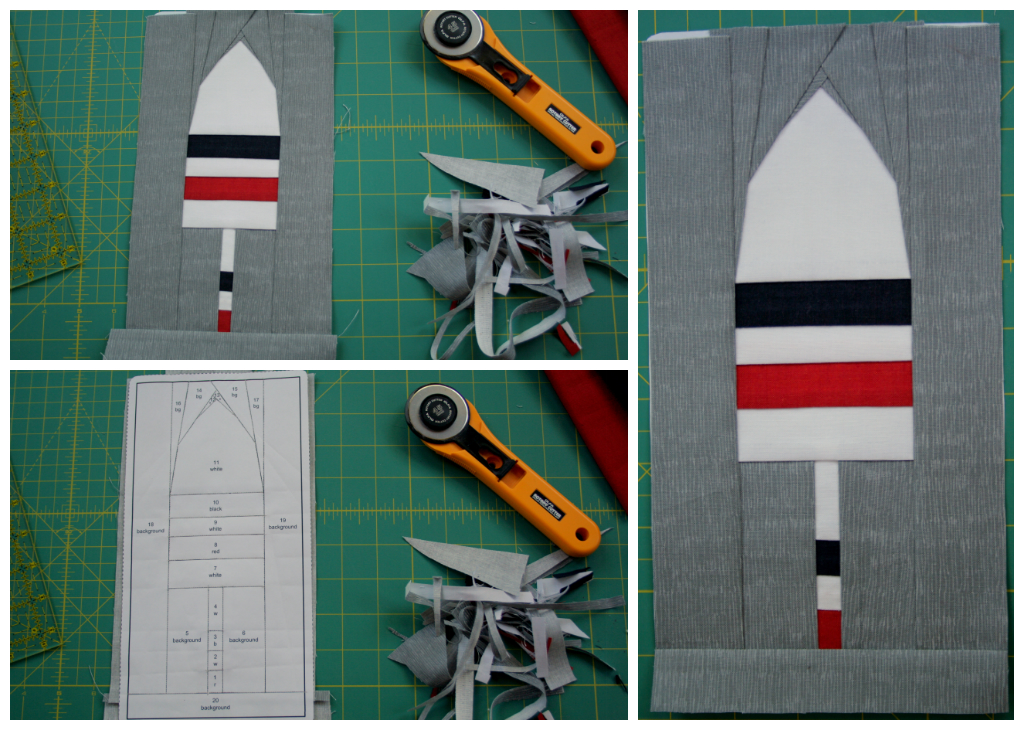
On the coast of Maine, lobster buoys freckle the harbors and are often seen hanging on the sides of buildings, sheds, boat houses, and even near mailboxes further inland. Many of my patterns are inspired by the Maine coast, and my latest works in progress are certainly not exceptions. I’ve finally completed and posted all three of my buoy foundation paper piecing patterns in my Craftsy store.
Lobster buoys come in all shapes and sizes, and definitely many different colors. I tried to create patterns for at least the three most commonly seen shapes, and I am happy with how they turned out.
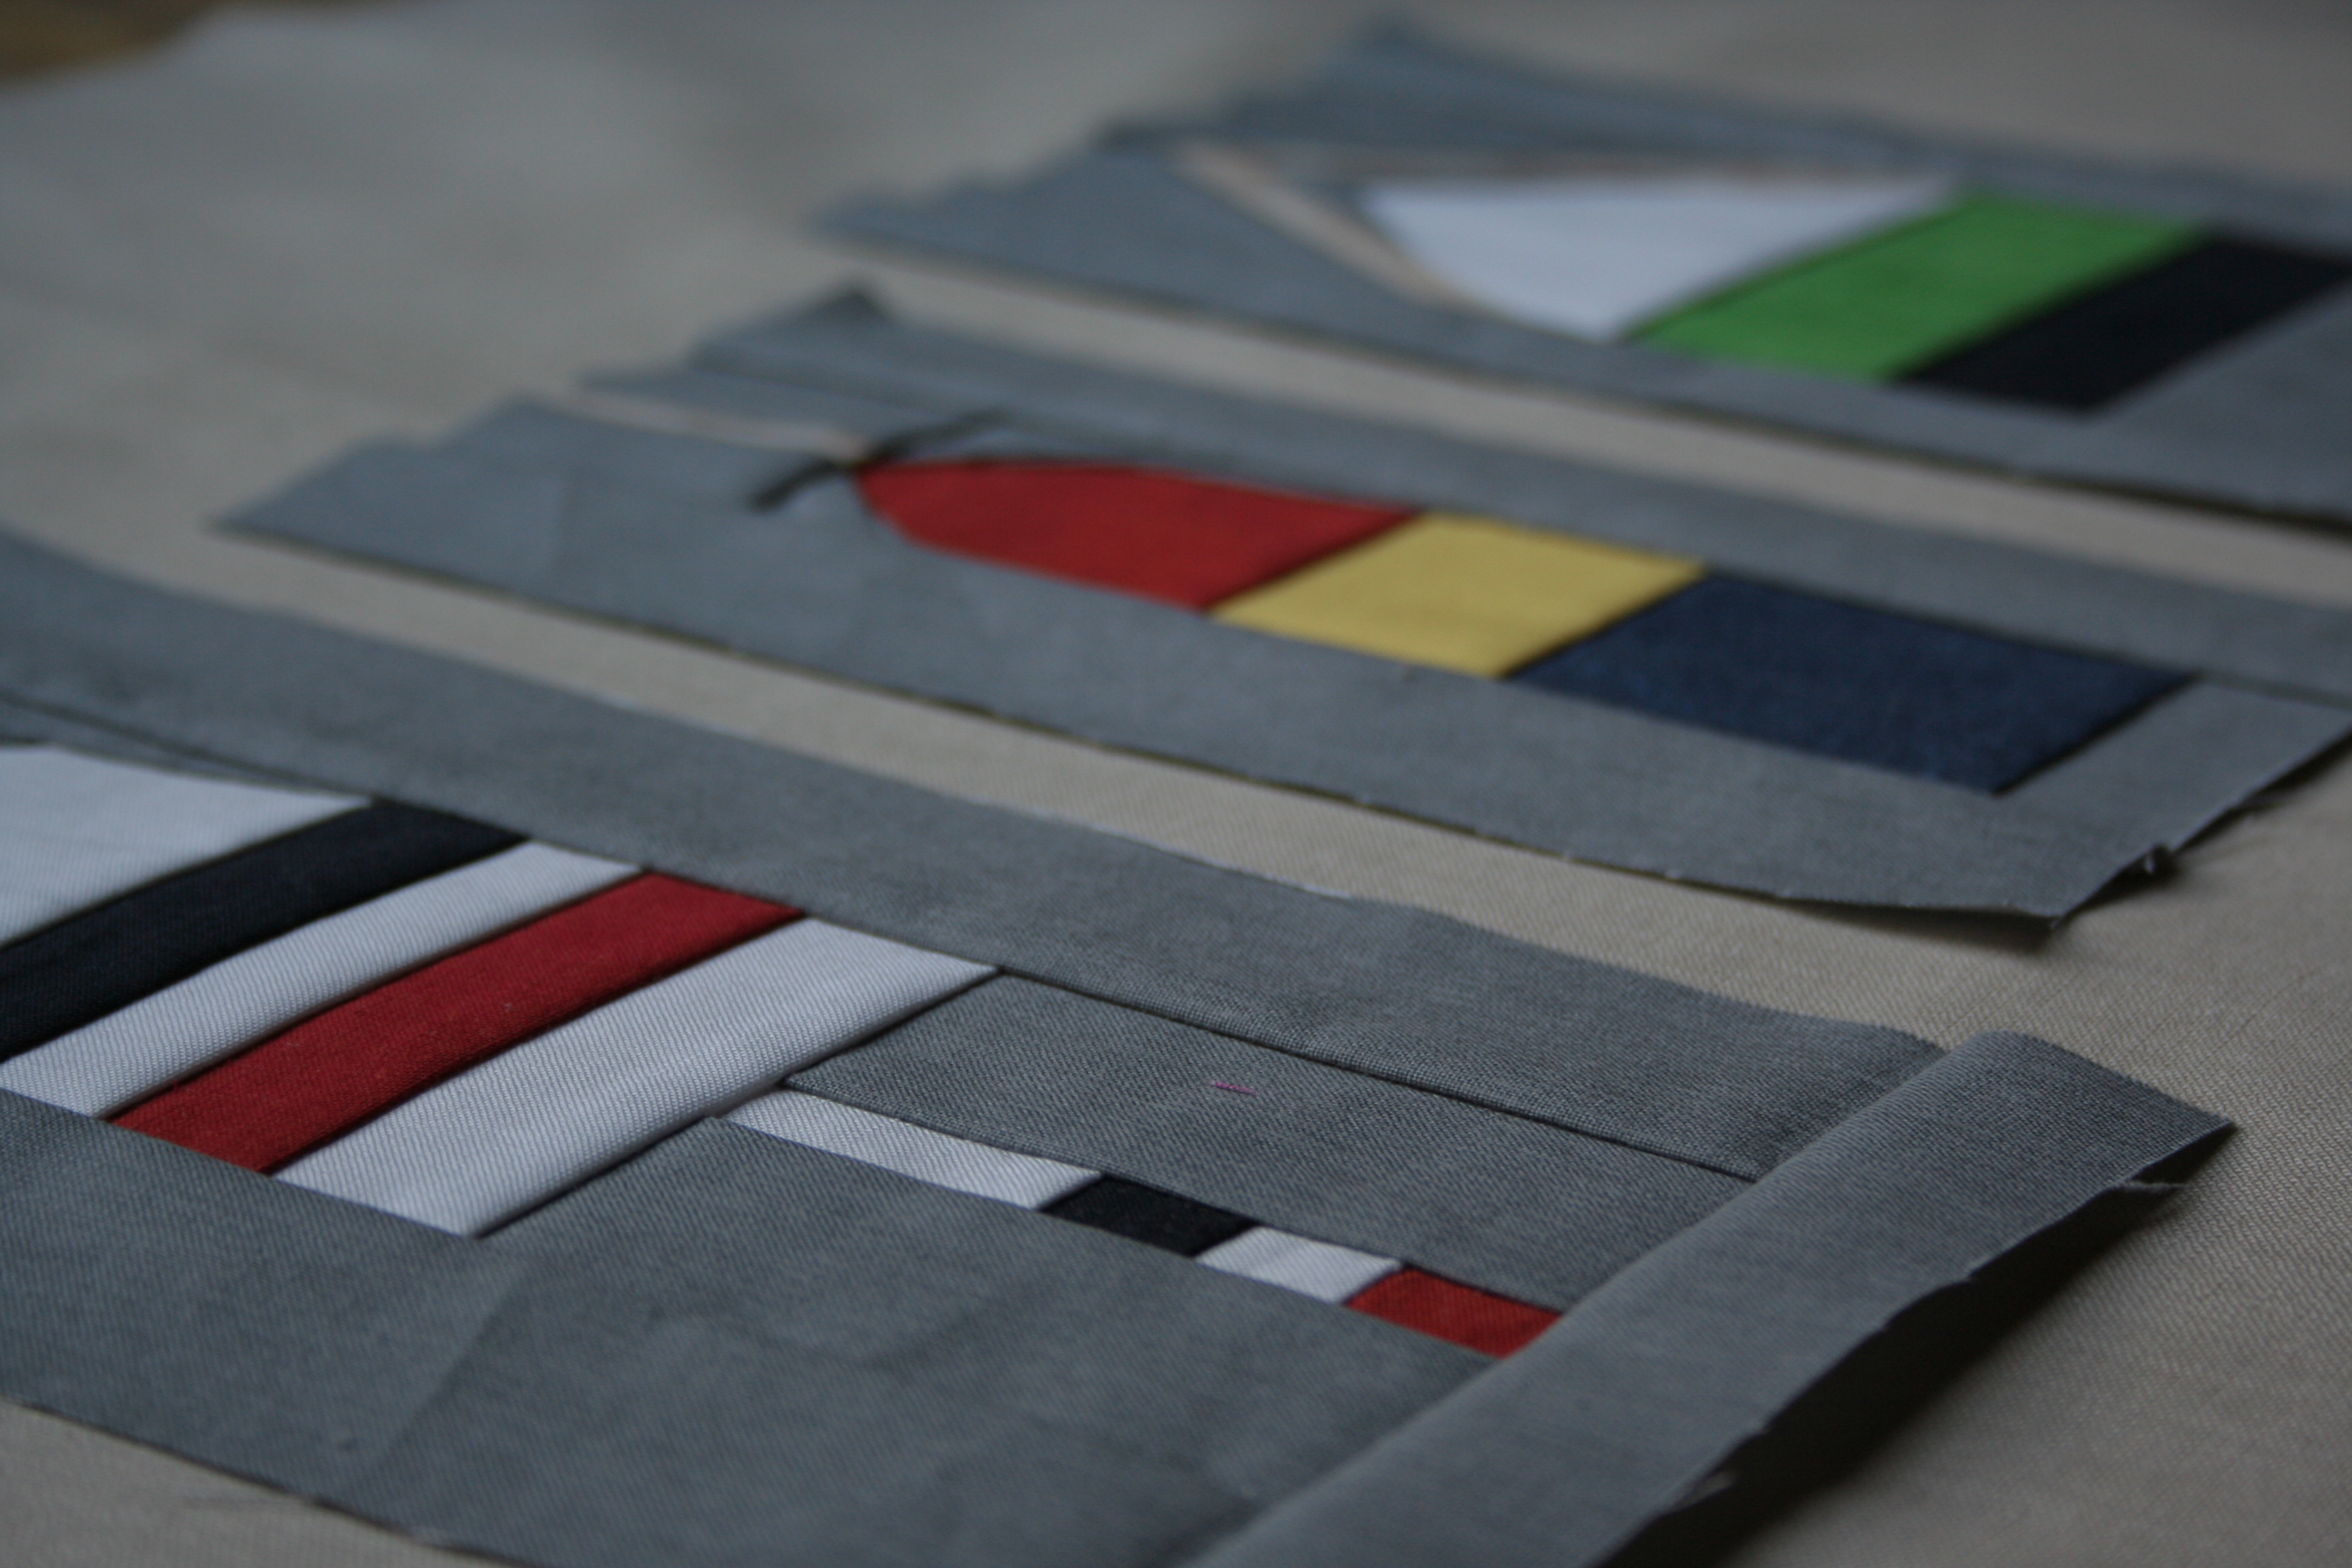
The patterns are super simple and extremely versatile. While testing these patterns, I accidentally sewed the 4″x8″ of the middle buoy, instead of the intended 5″x10″ version. I’m not quite sure what I will do with the little buoy yet, but the larger ones will be made into a pillow once I make a 5″x10″ of that pesky middle one.
I love the detail and precision of foundation paper piecing. There’s something about the exactness of seams and the ability to create anything with fabric that makes me happy.
Buoy 1 foundation paper piecing pattern detail.
Since I still need to remake a larger version of the Buoy 2 pattern and stitch these all together, I’m linking up with Freshly Pieced’s Work in Progress Wednesday. Stay tuned to see the completed pillow, and stop by my shop if you have an inkling of making some nautical lobster buoy creations!
I never wish for rain while I’m on vacation, and this trip isn’t any different. Sometimes, though, you get rain even if you don’t want it. We are on vacation on Hancock Point, Maine, for the week with my husband’s family. The rental house is right on the ocean and has an amazing view of Bar Harbor and Acadia, located directly across the bay.
Acadia and Bar Harbor as seen from our rental house on Hancock Point, Maine.
Until today, we have had gorgeous weather and have spent much of our time swimming (or quickly dipping, in my case) in the ocean or walking along the beach looking for treasures. I don’t think I could ever tire of gazing at the beauty left by the tides.
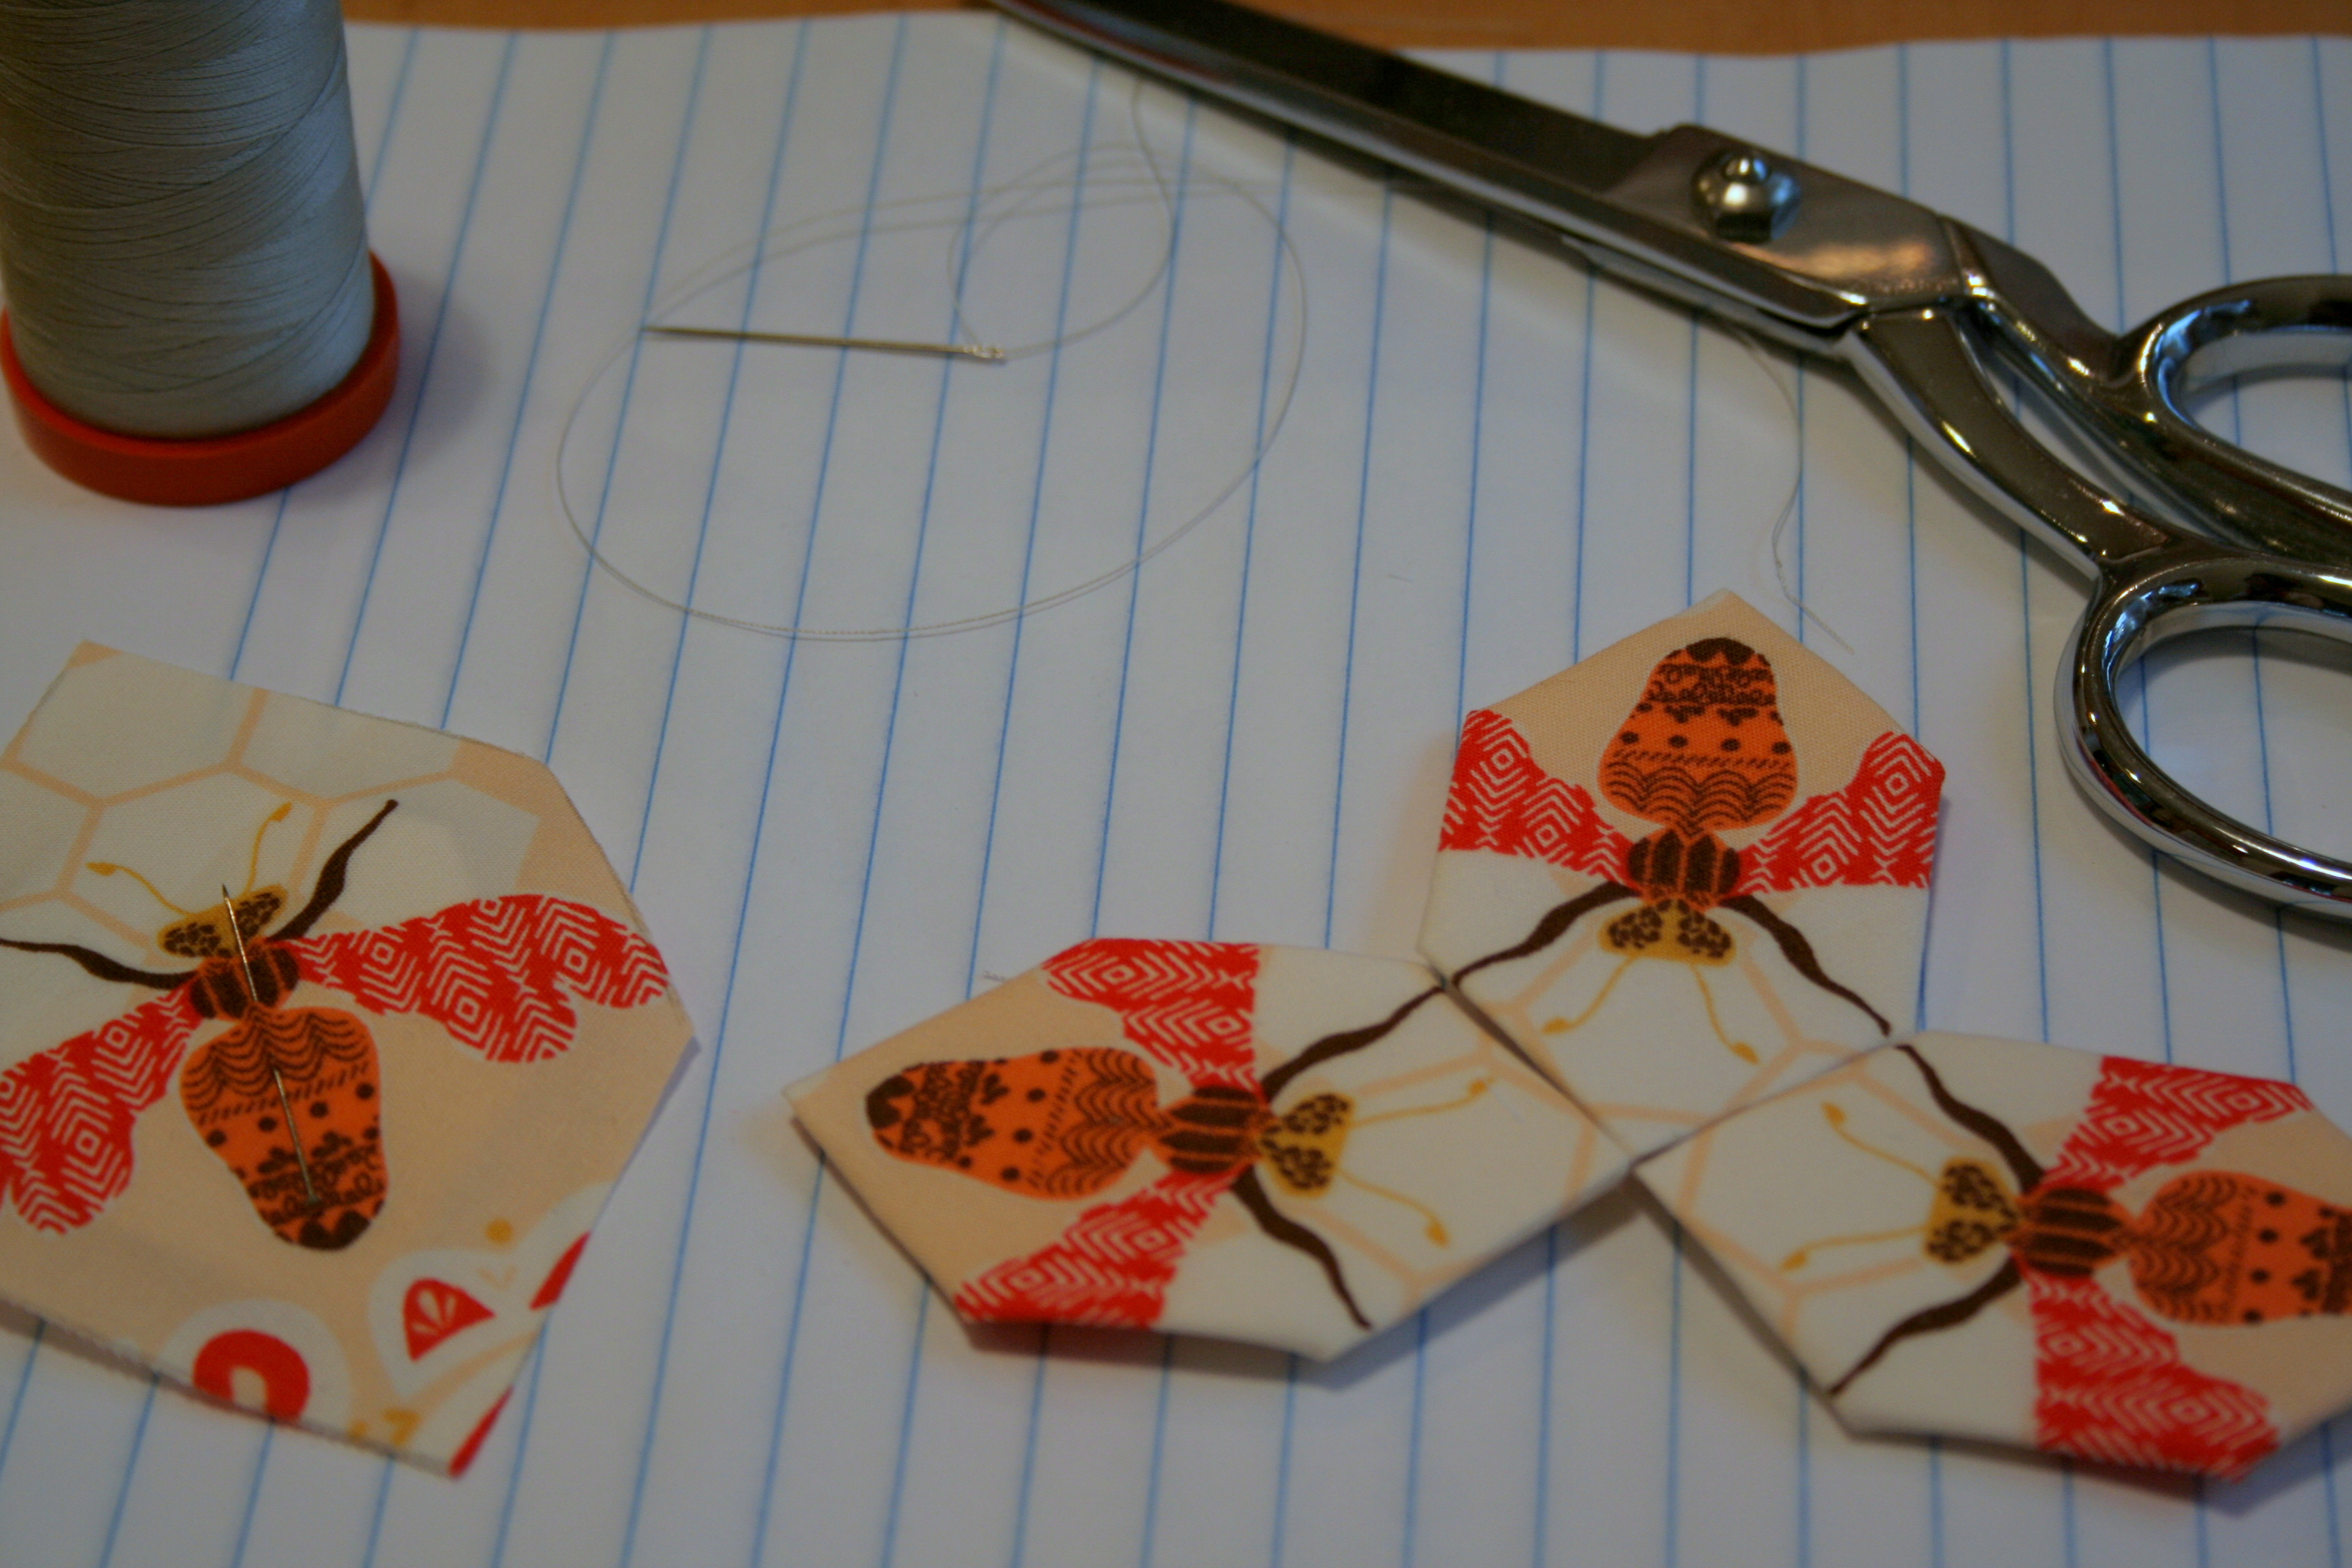
Today, it is cold, dreary, and pouring. In trying to beat the rainy vacation day humdrums, I decided to pull out my sewing stuff. This morning I tried my hand at English Paper Piecing, starting with the fussy cut center for a Lucy Boston Patchwork of the Crosses. I must say, handwork is quite fun!
I had to unstitch and retry one of the honeycomb pieces since the pattern didn’t even come close to lining up on one side. Admittedly, it wasn’t a whole lot closer after I redid it, but I decided to go with it.
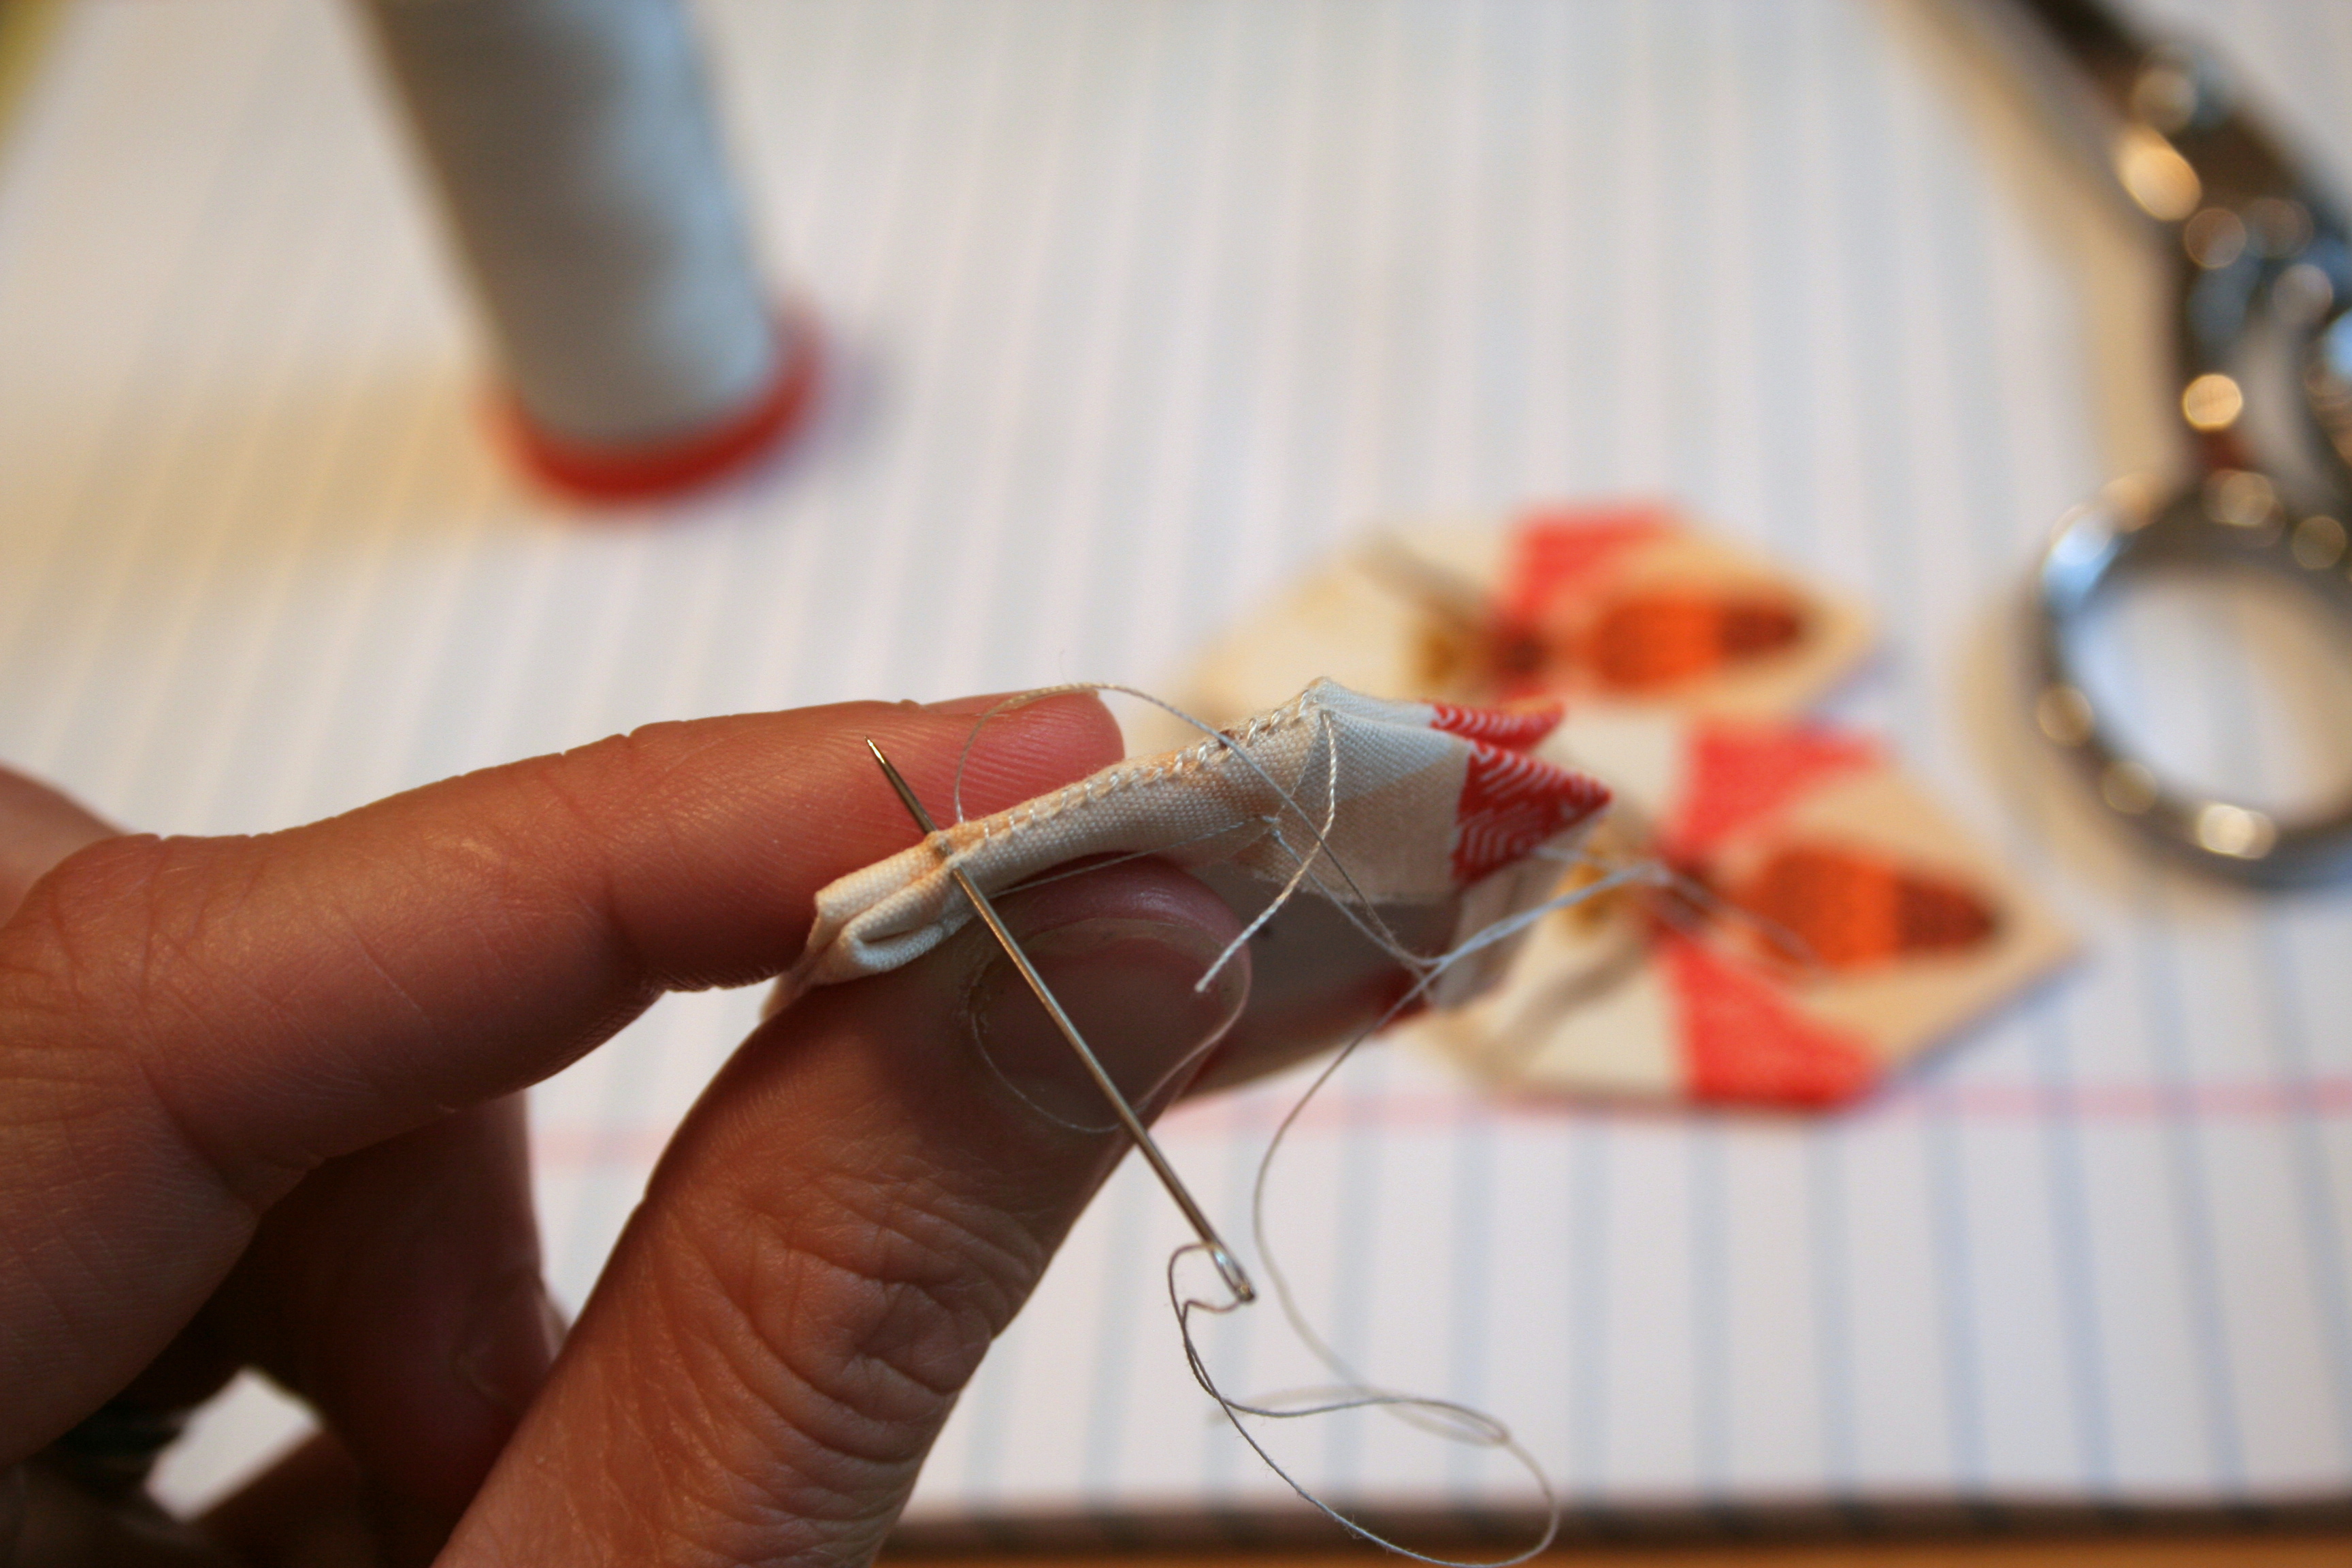
Having never done any handwork before, I felt like I was flying by the seat of my pants. How far apart should the stitches go when joining pieces? How exactly does one “whip stitch” the corners? I think I did two whip stitches, but it seems to have worked for the moment. I can see the stitches a bit, but my mother-in-law said that the slight peek of stitches is part of the charm of hand sewn creations. I’ll take her word for it.
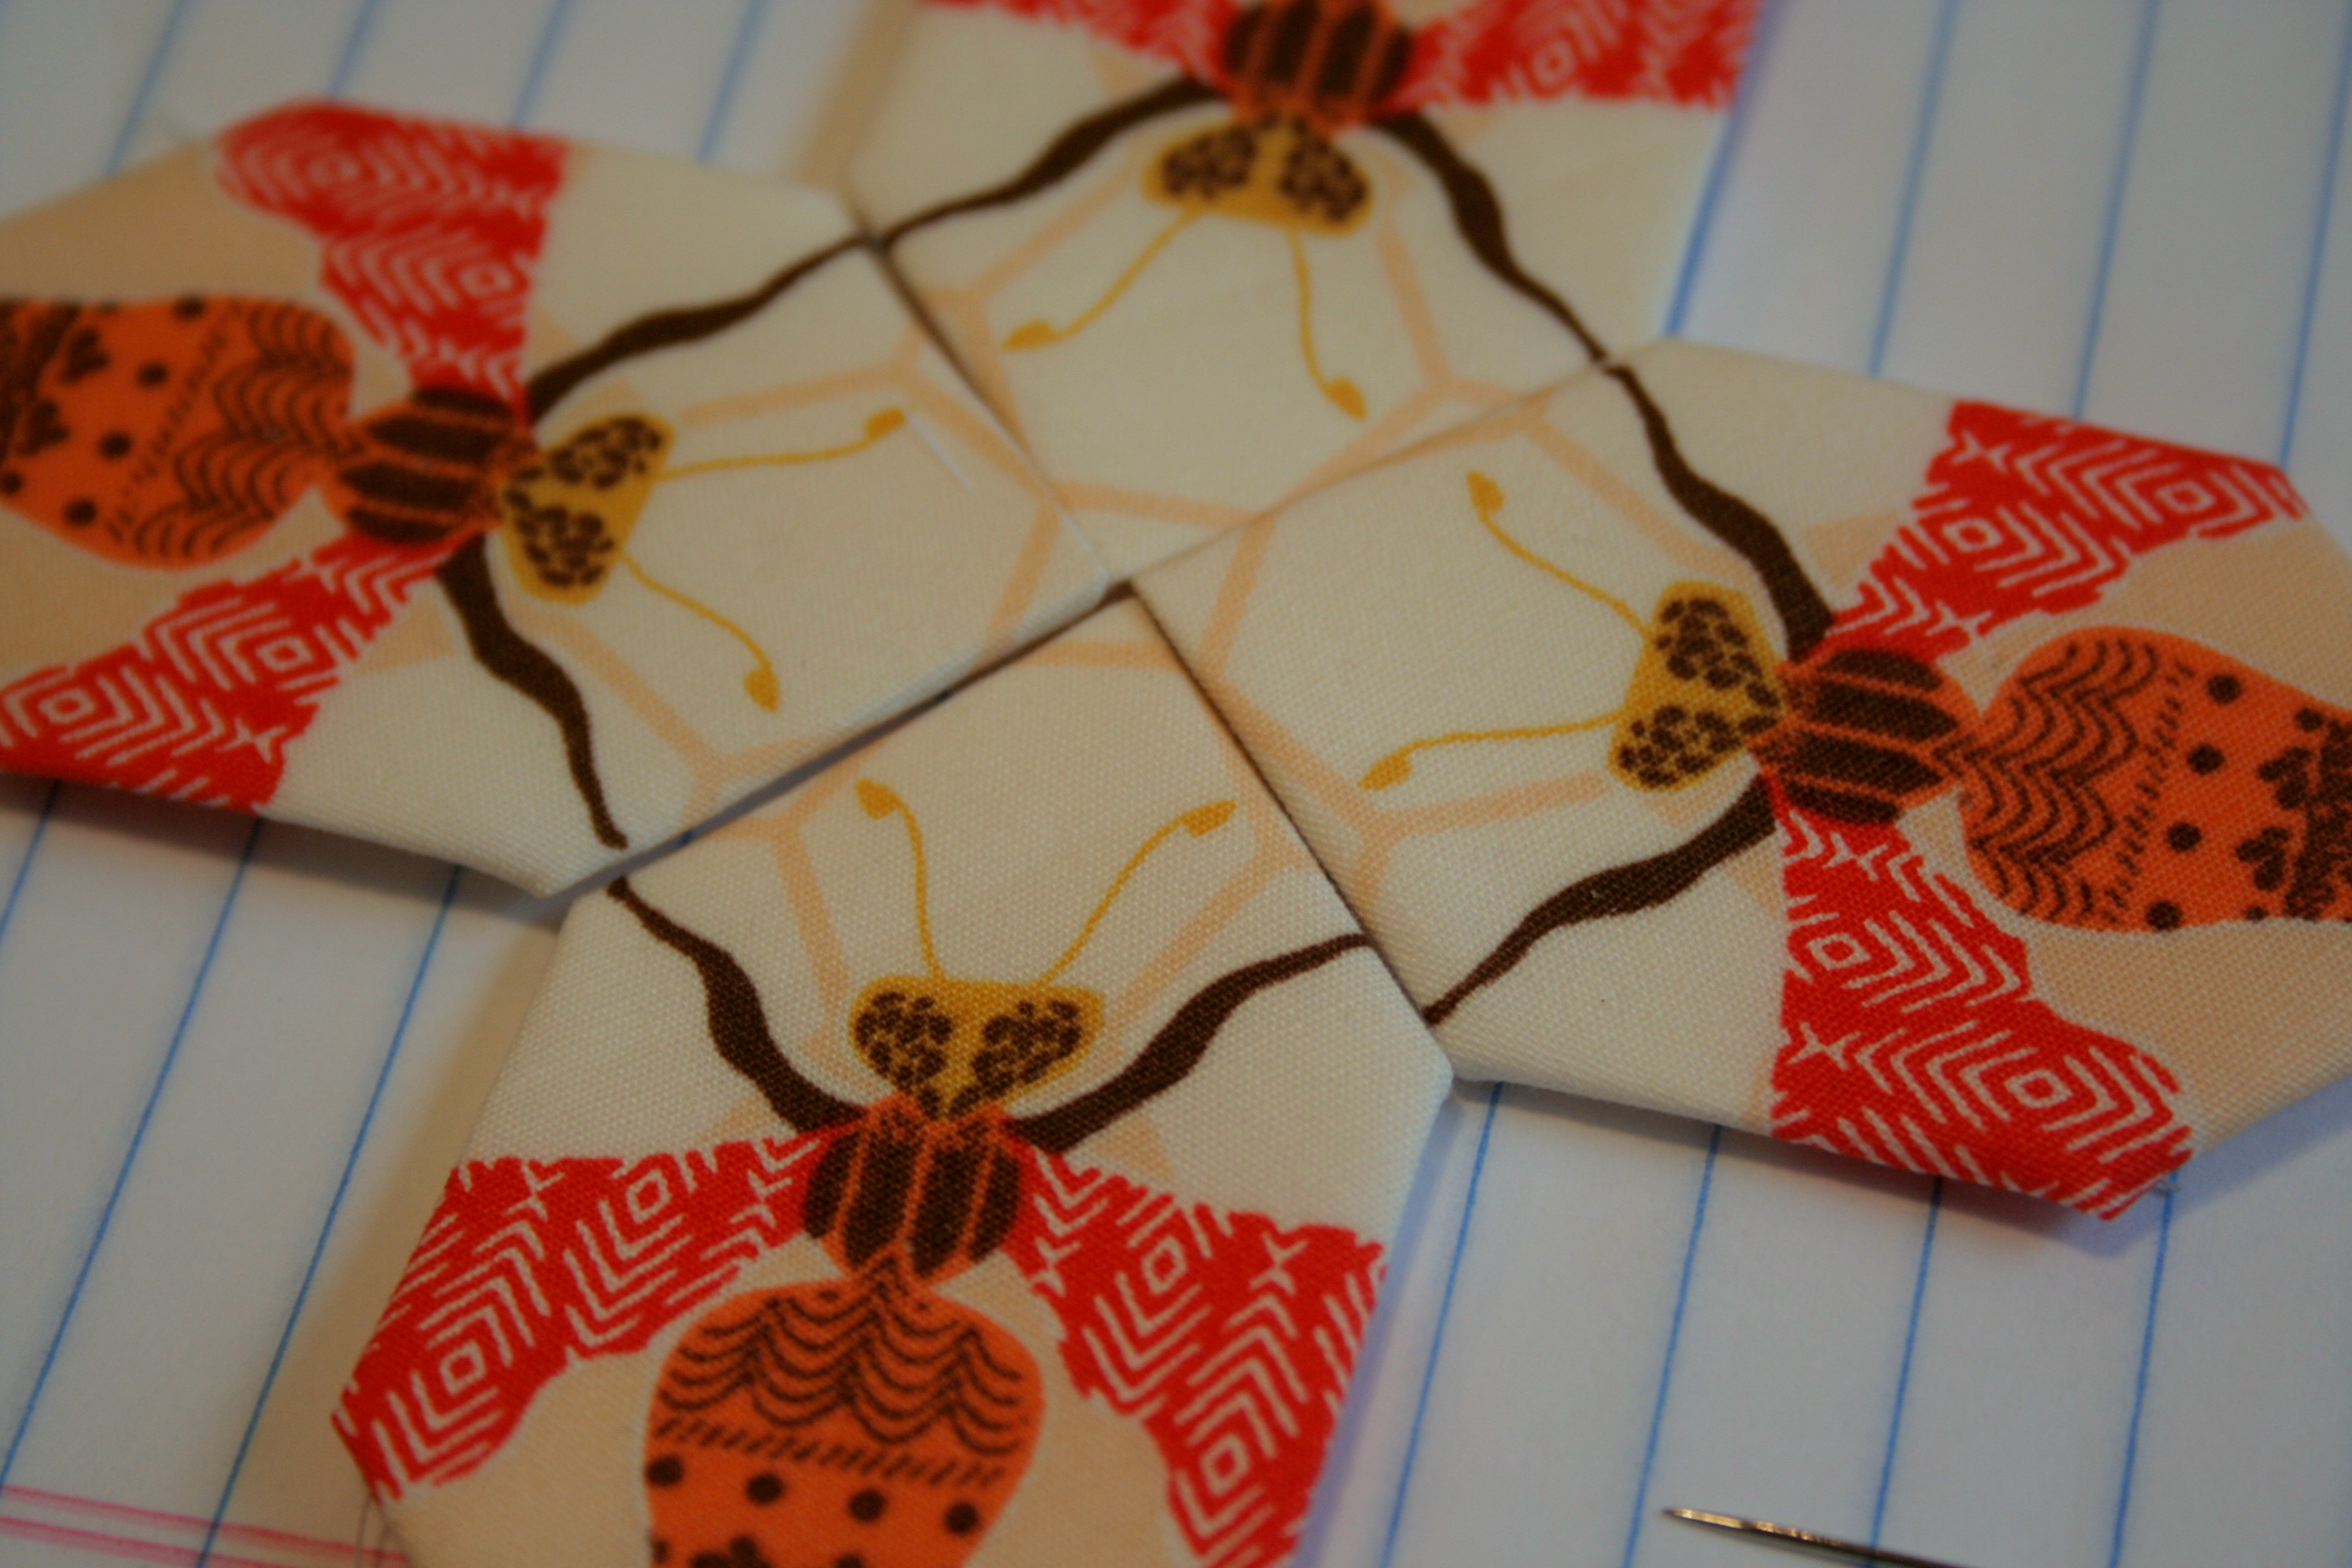
I can certainly see why so many people travel with their English Paper Piecing projects. Progress is made in small bits, so it is easy to pick up and put down as needed. I finished sewing the center four honeycombs together at the breakfast table this morning, and once I figure out what color scheme to go with for the rest of it, I am looking forward to passing the rainy days with stitching.
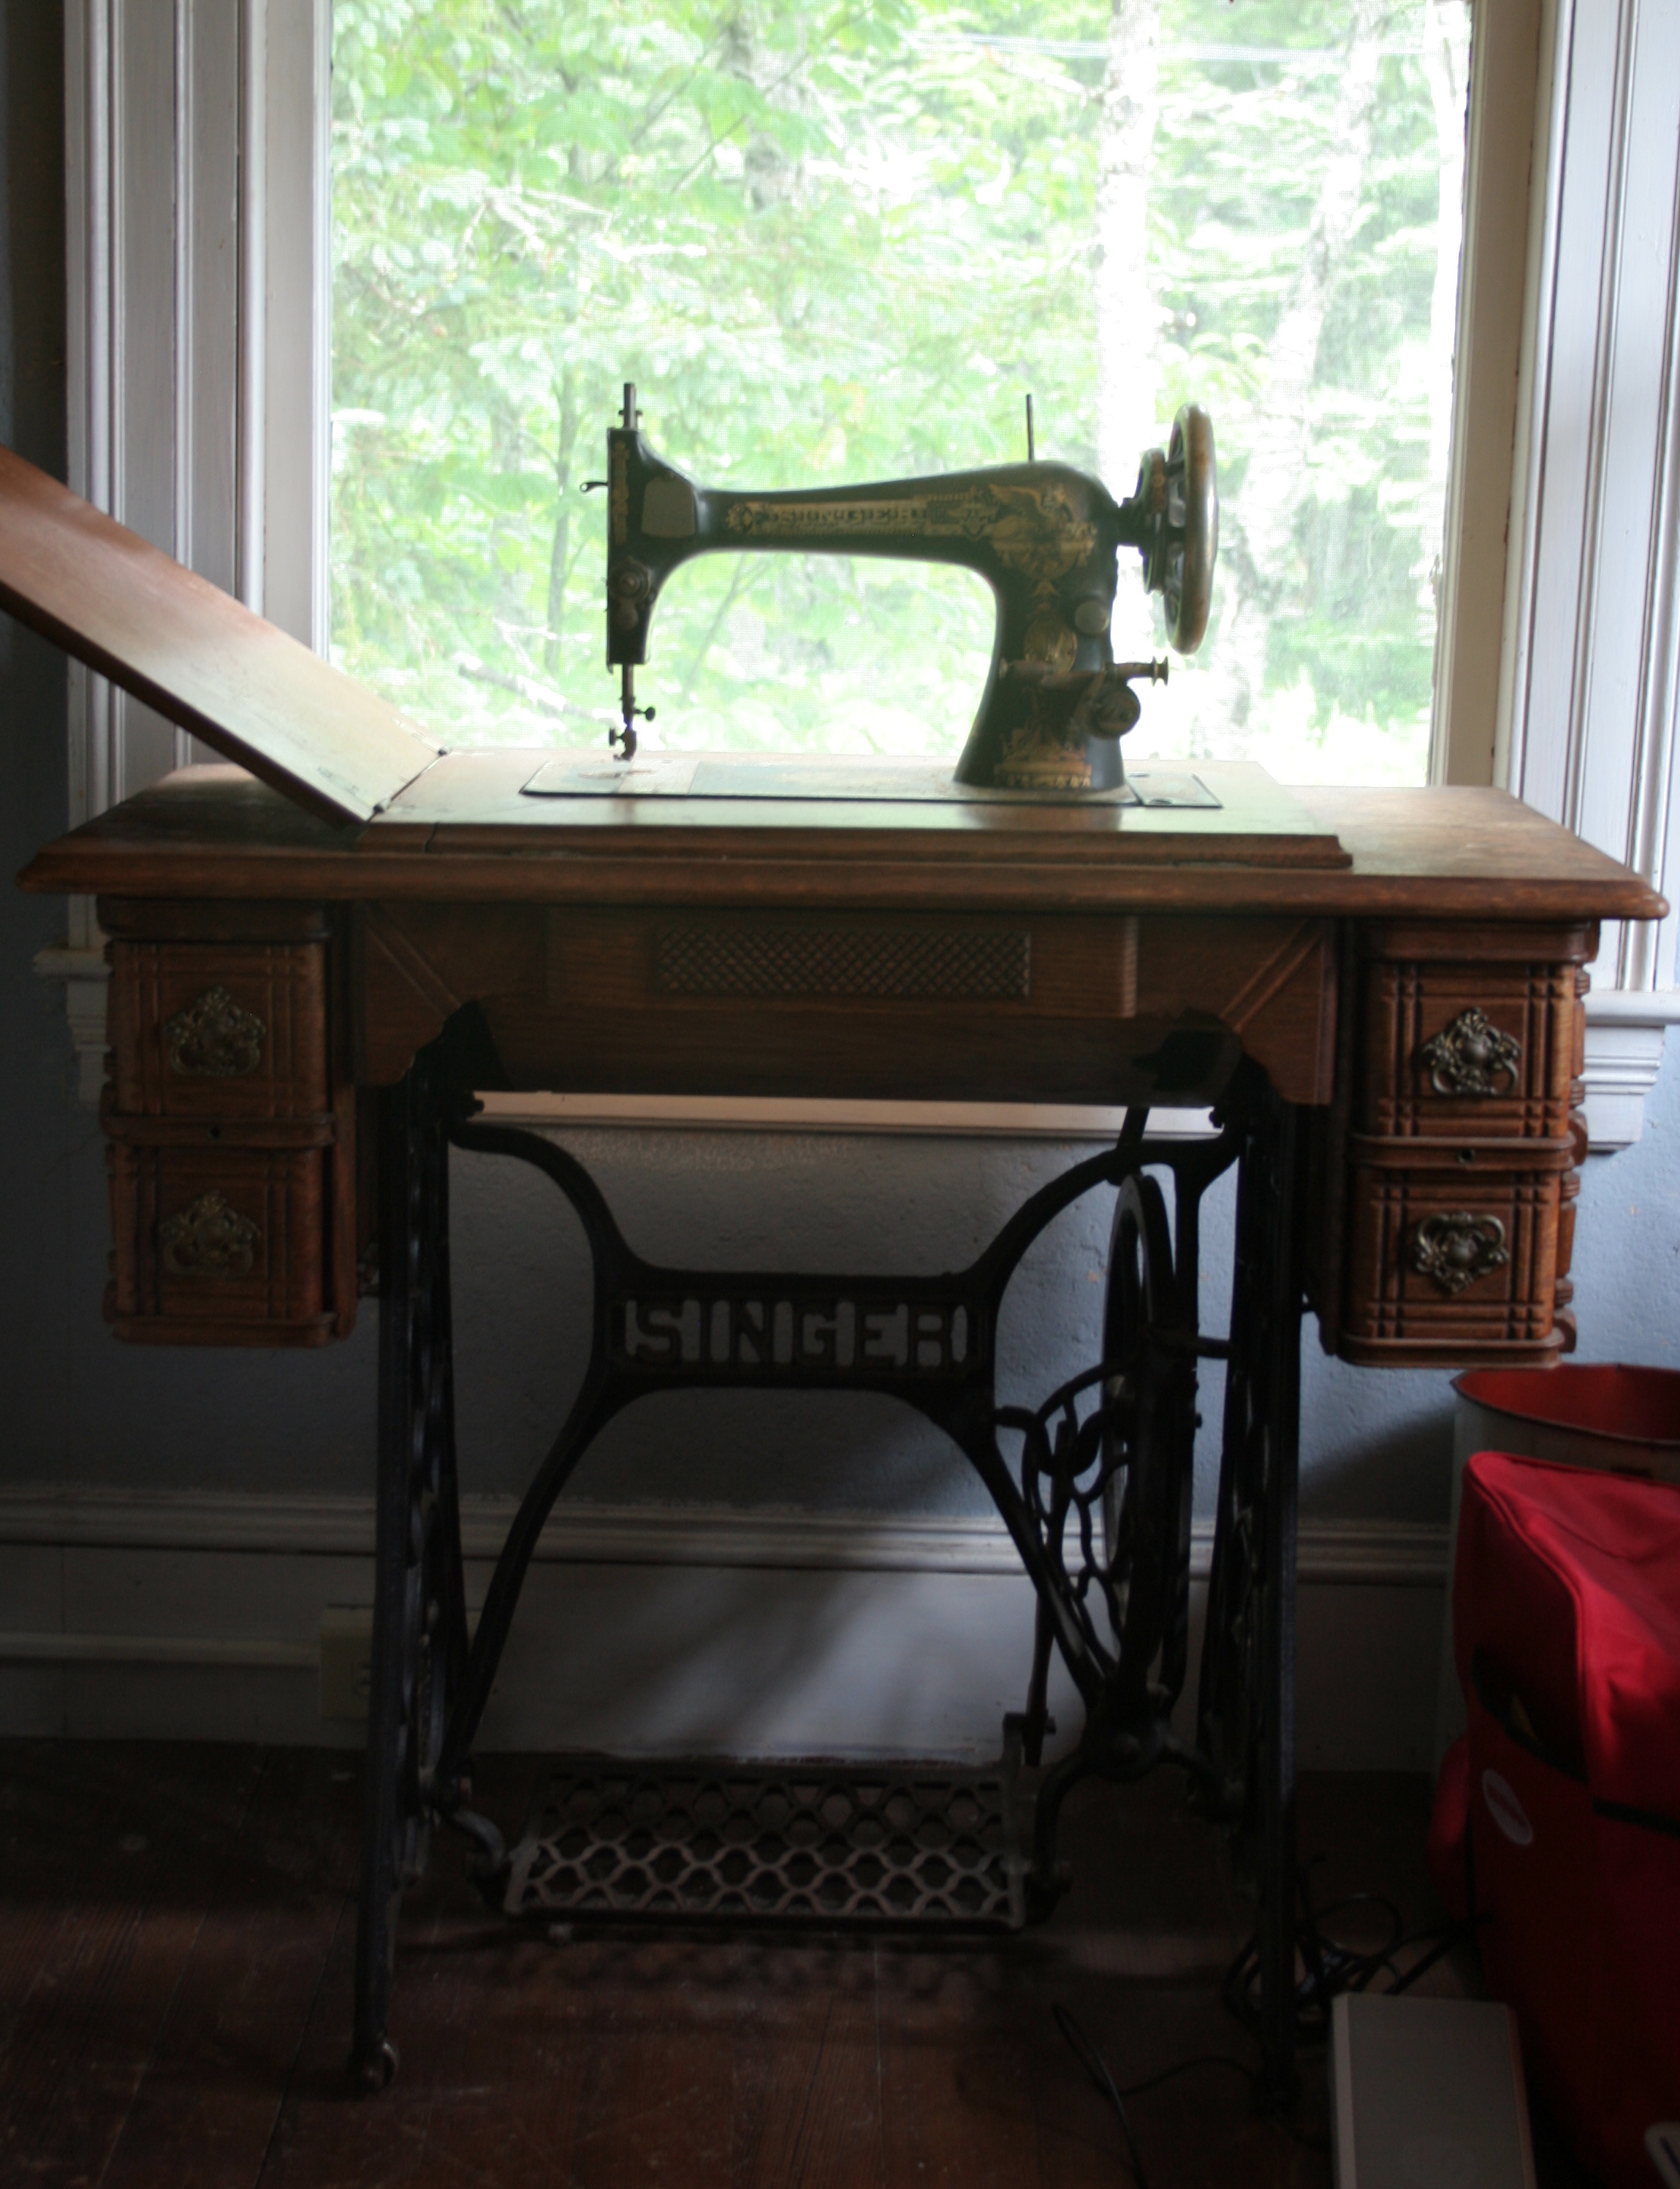
I also brought my sewing machine with me on this trip. It’s the first time I’ve ever brought a sewing machine on vacation, and I debated for quite a while whether I should take it with me or not. Now, with the next two days forecasted as torrential rain and chilly cold, I’m so glad I did. Not to mention the fact that there is a singer treadle and table right next to my bed in our bedroom.
While this treadle is missing its belt and therefore doesn’t work, I am taking it as a clear sign that I was meant to bring my sewing machine on vacation with me. Perhaps this afternoon I’ll do a bit of machine sewing as well!
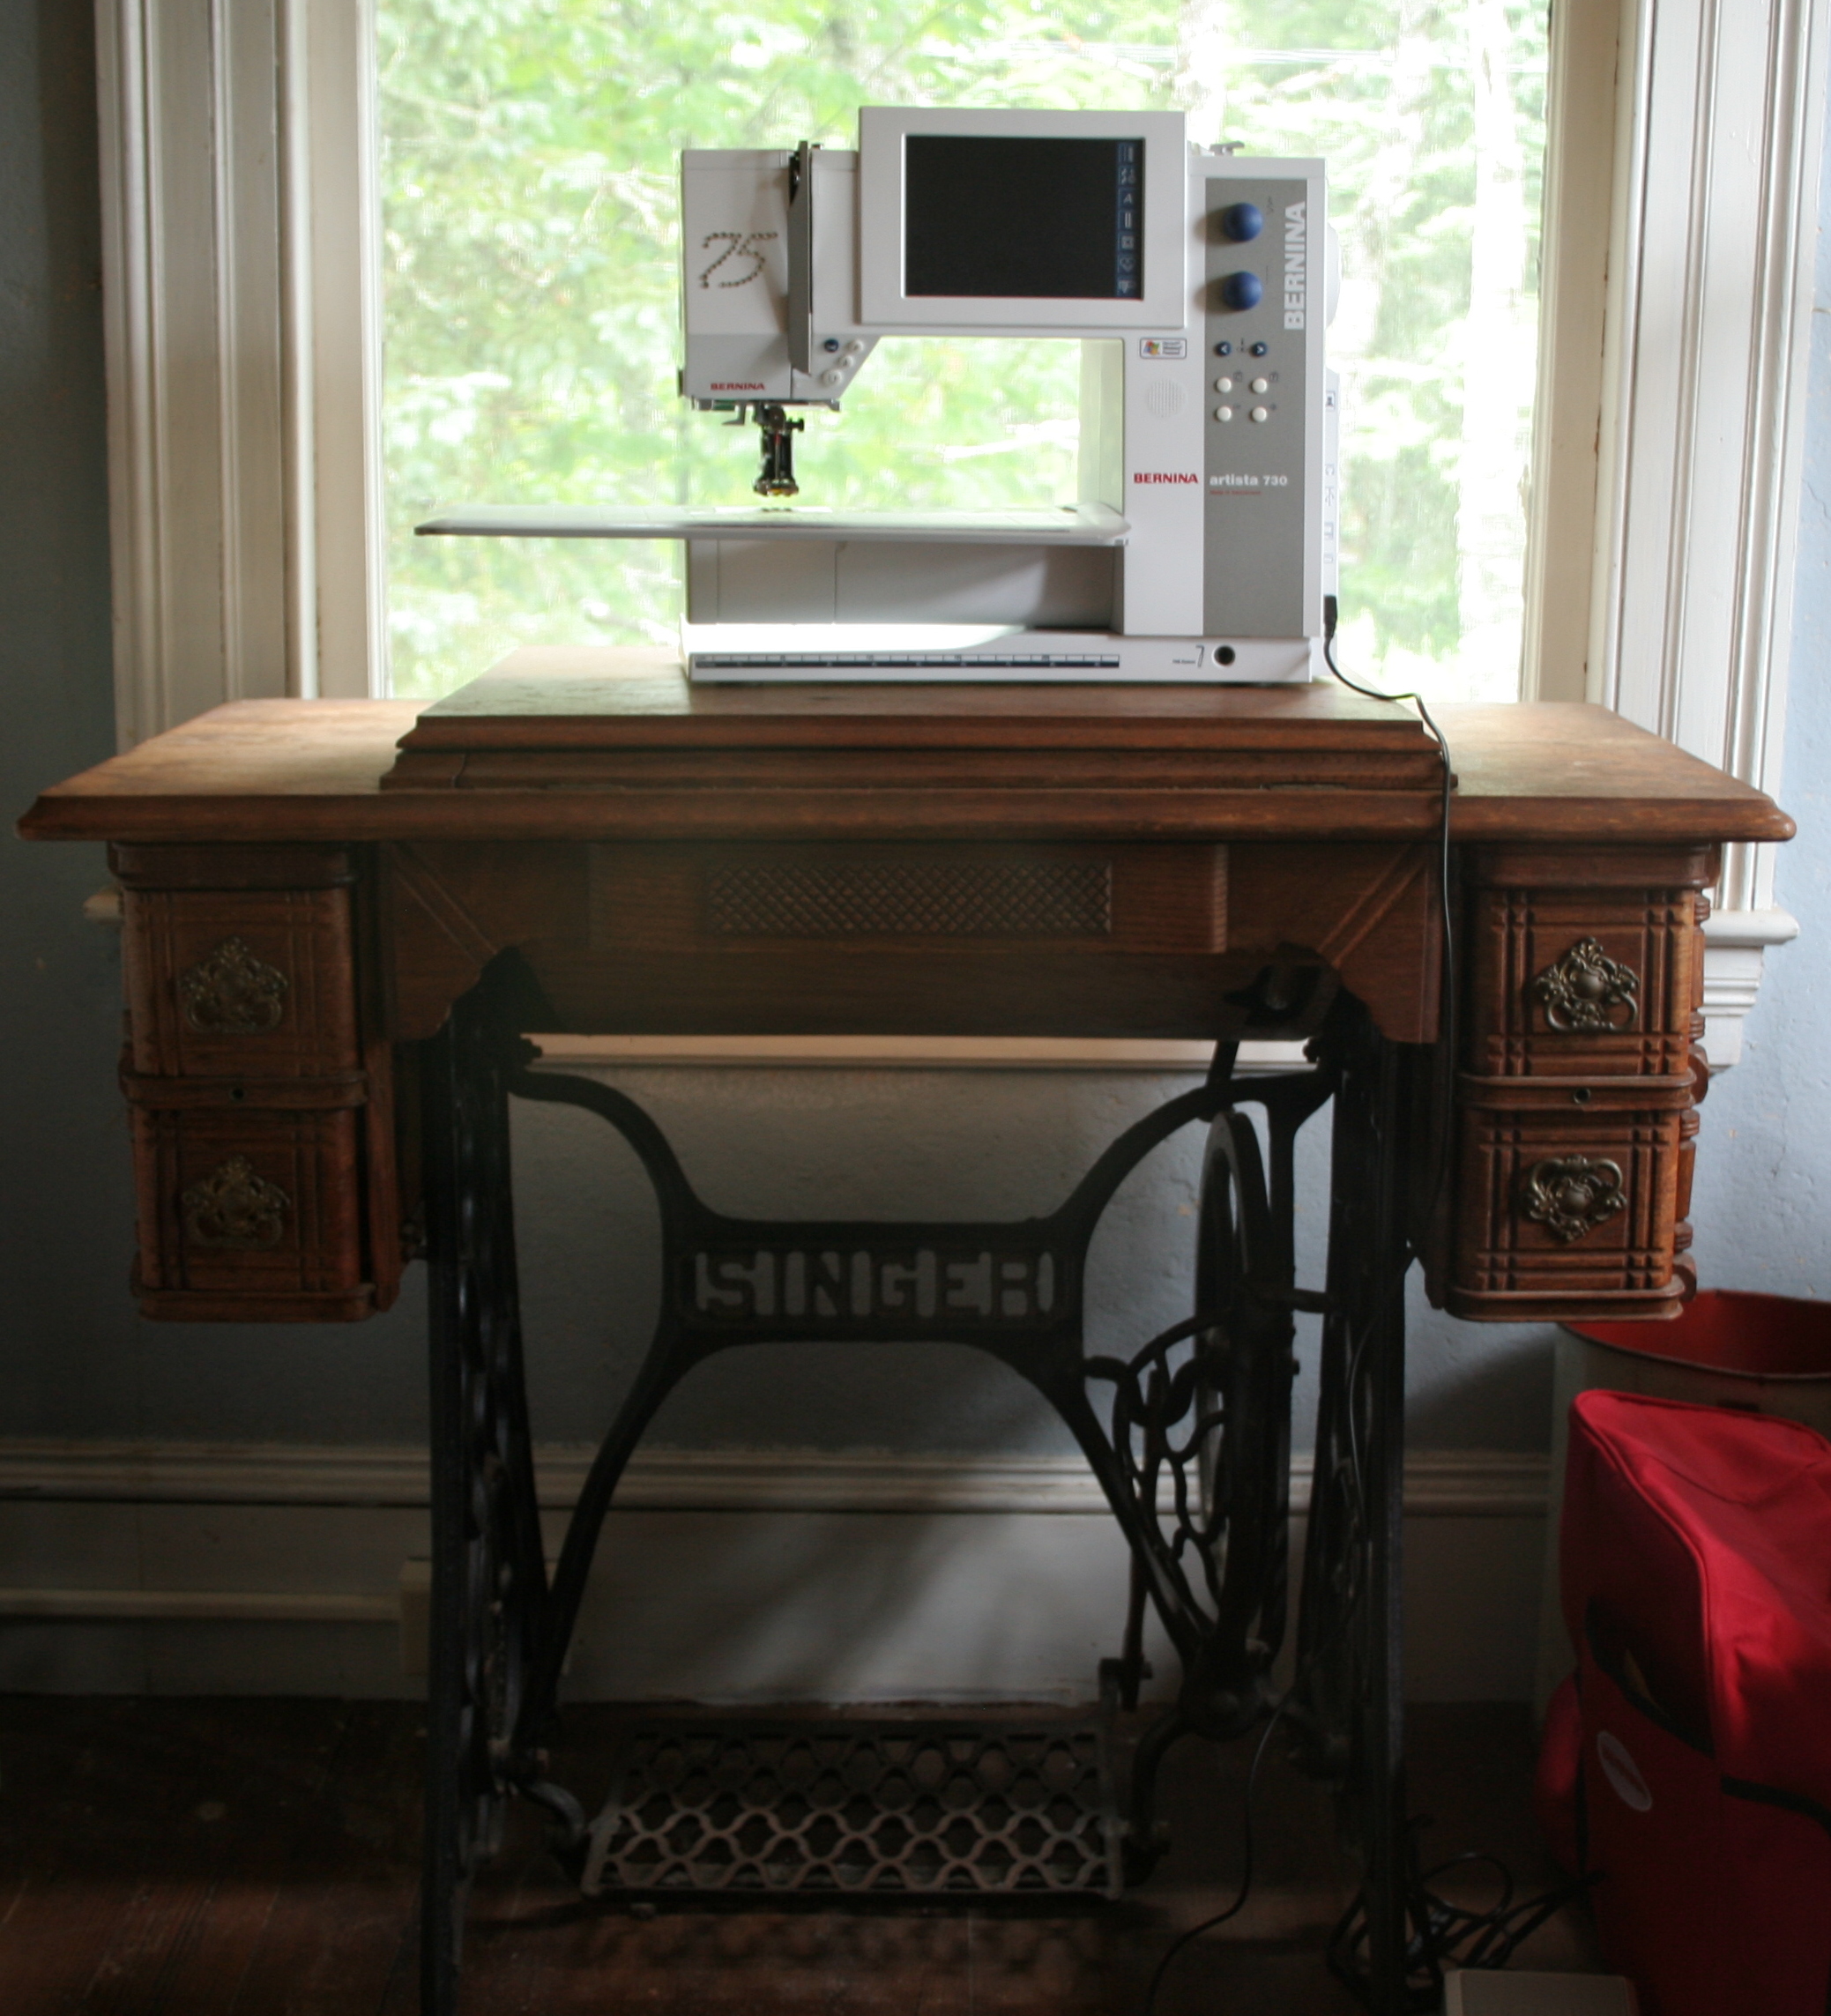
My loaner Bernina, ready to go on her Singer table.
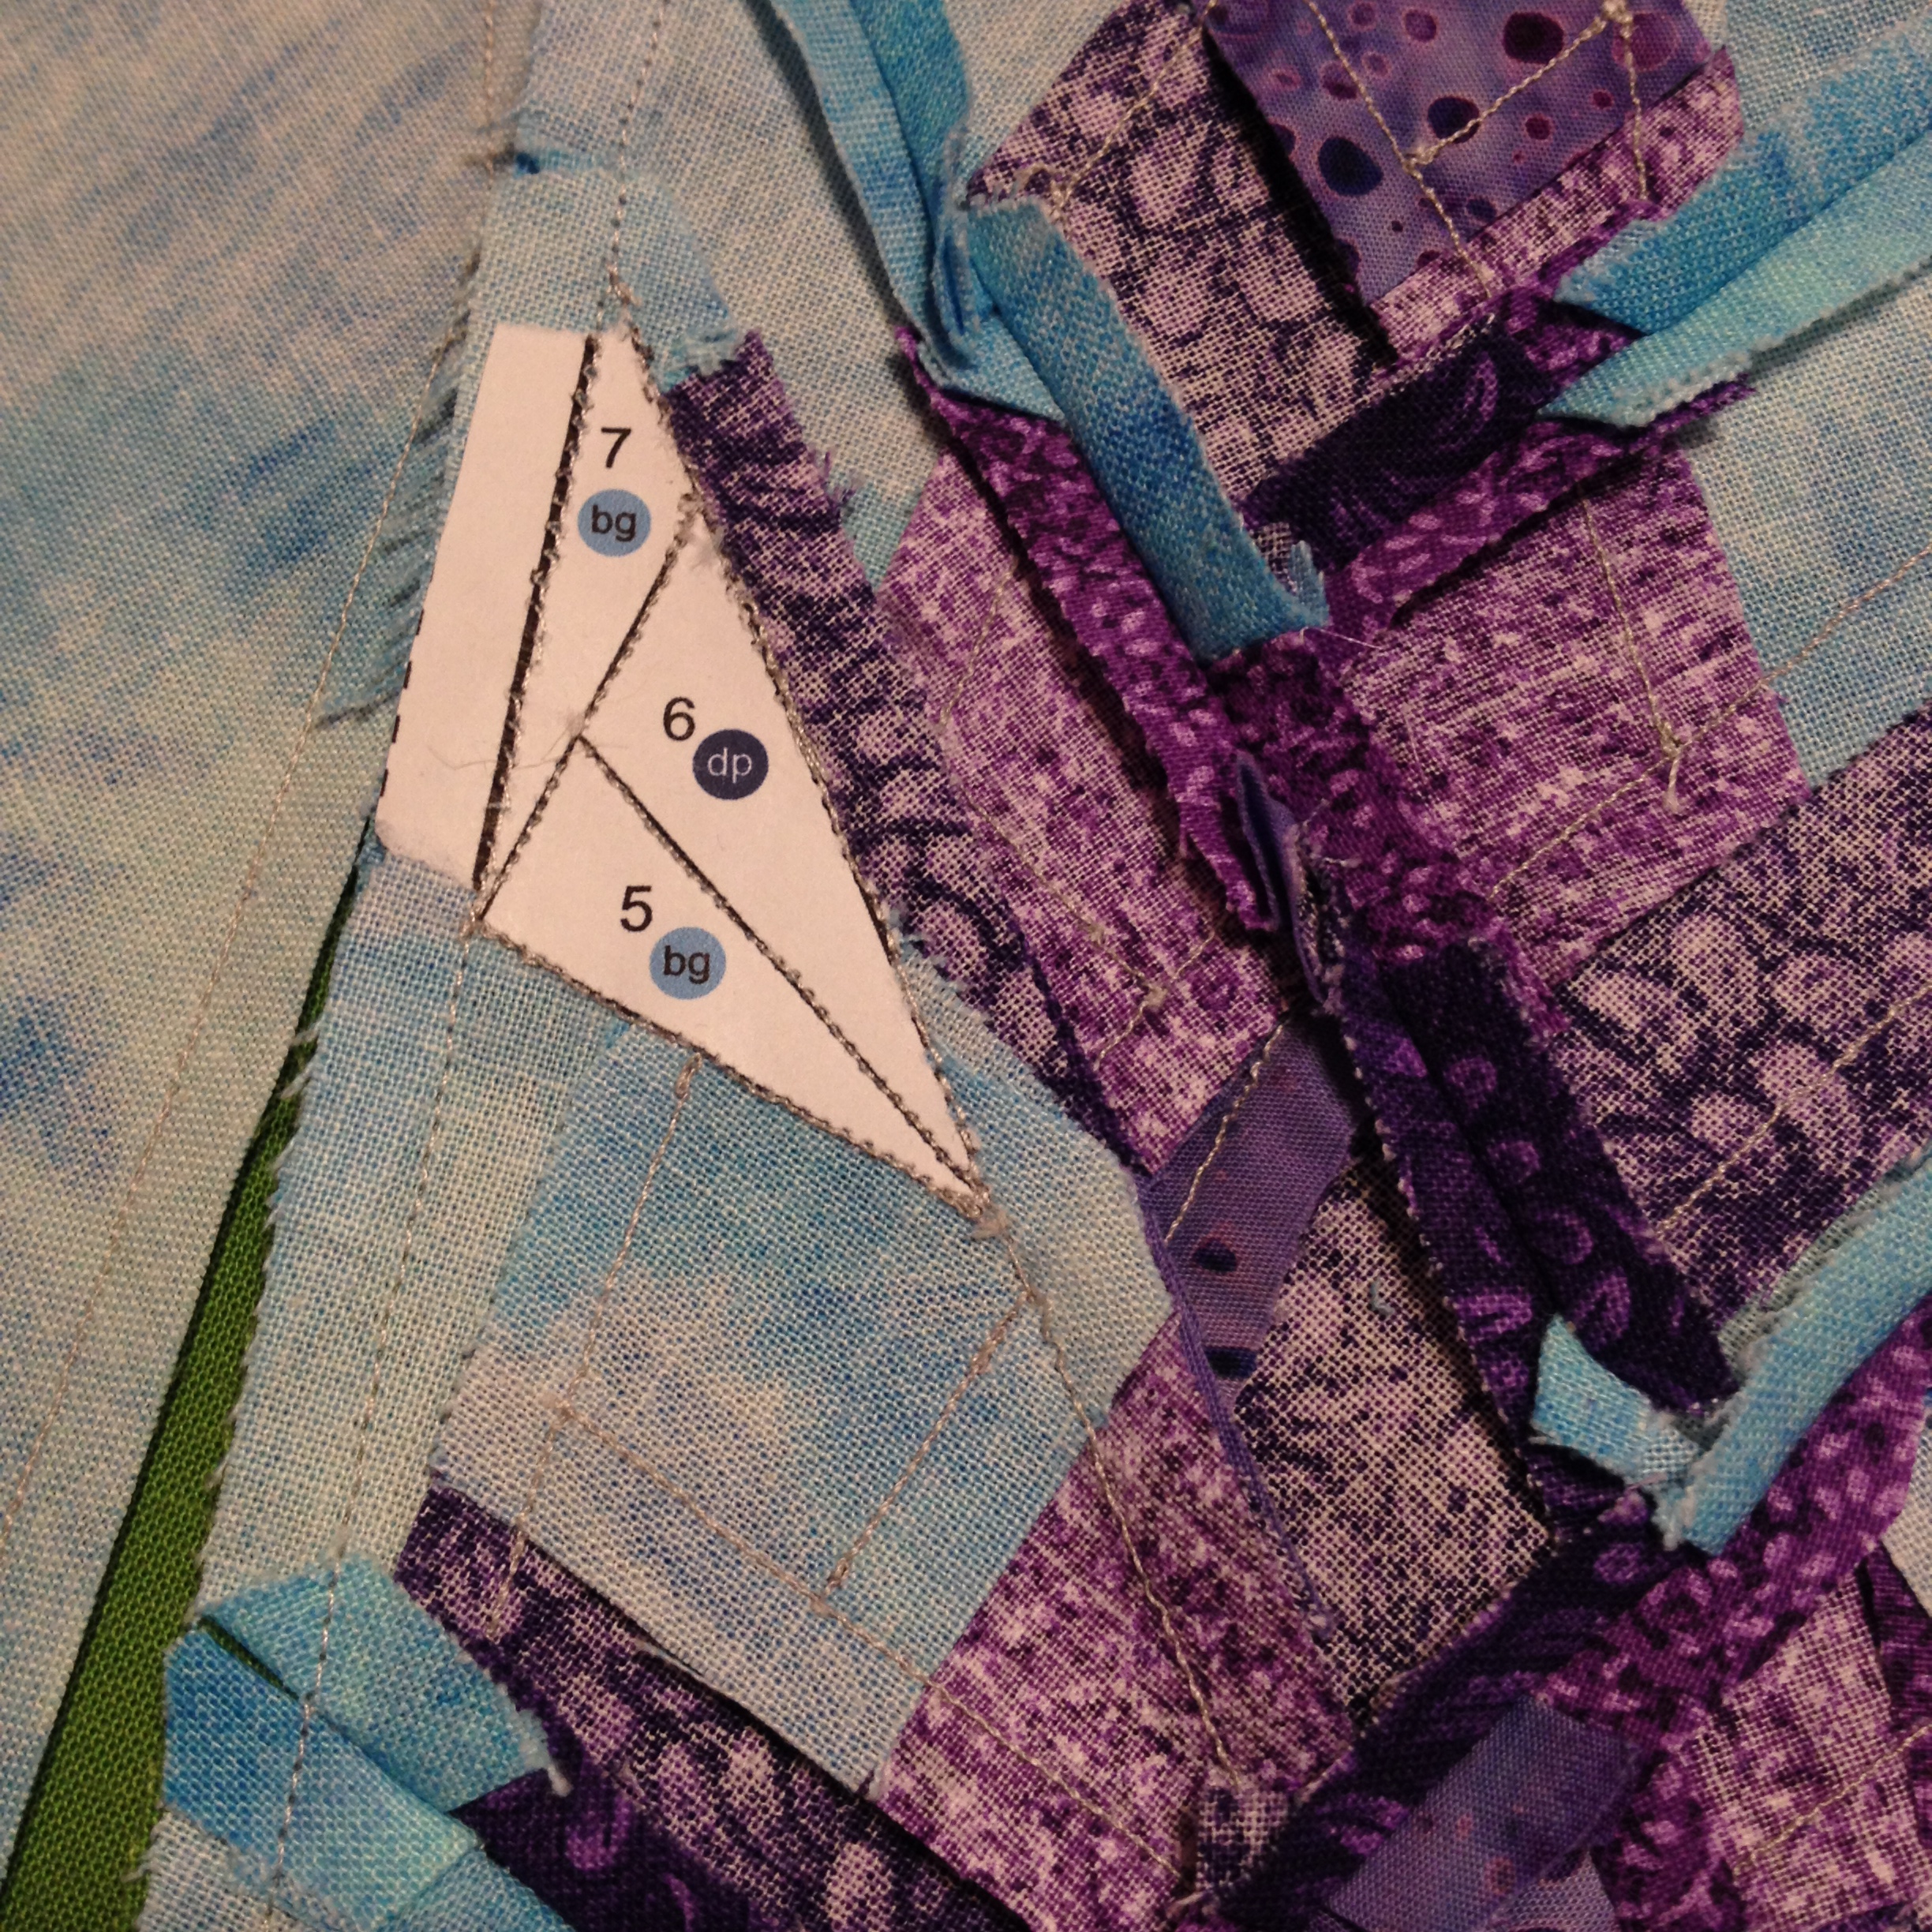
Foundation Paper Piecing is one of those things that when first encountered, may seem daunting enough to send you running for the hills. But once the general concept is grasped, paper piecing opens the door to a whole new world of quilting and fabric-play. Trust me, it’s worth giving it another go. As with anything, the best way to get more comfortable with foundation paper piecing is to practice, practice, practice, and then practice some more. Today I thought I’d share my process with tips along the way, in the hopes that it helps clarify the foundation paper piecing process.
For me, once I wrapped my brain around the fact that I was sewing something backwards while looking through a mirror, it all clicked. I’m a very spatial person, so once I could visualize that the picture was being created on the BACK, I was fine. Yes, the lines along which you sew will be on the back, or wrong-side of your sewn design. Think about that for a minute, and then let’s begin. Take your time, and have FUN!
Basic Foundation Paper Piecing Tutorial
First of all, why paper piecing? The ability to create life-like pictures with fabric is what first got me hooked on foundation paper piecing. Once I got the hang of it, I realized many more benefits to paper piecing:
No other method results in such precision and accuracy when sewing. You can make two blocks that are EXACTLY the same without too much muss or fuss about seams.
It is a great way to use up scraps.
My favorite perk of paper piecing is that it gives me a way to create gorgeous gifts for family and friends without the time invested in sewing an entire quilt. Paper piecing patterns are perfect for wall hangings, table runners, tea cozies, mug rugs, pillows, bags, and even as framed art.
Convinced? Let’s get started!
1. Choose a pattern. I am using my Buoy 1 pattern for this tutorial, since it’s fairly straightforward and consists of only one foundation piece. Summertime is calling my name, so this nautical pattern will soon become a pillow perfect for a beach house or someone’s nautical nursery. Buoy 1 used to be on Craftsy but is now no longer available, so you will need use another beginner pattern of your choosing. My available foundation paper piecing patterns are located on Payhip.
2. Assemble your tools. You will need:
– pattern & paper (I use regular printer paper. Some prefer velum or tracing paper)
– fabric & thread (I love Aurifil)
– rotary cutter and mat
– scissors (be sure to use non-fabric scissors to cut out your pattern. I suggest having fabric scissors, craft scissors, and small scissors for trimming threads)
– ruler (add a quarter rulers work well, but so do any quilting rulers with a 1/4″ measure)
– iron and pressing surface
– sewing machine
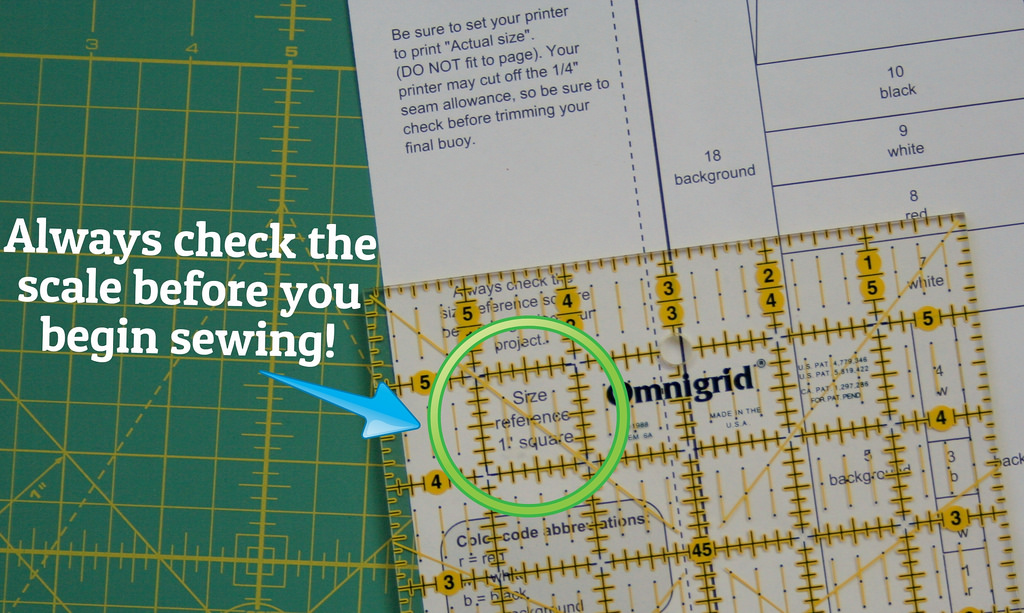
3. Print the pattern with your printer set on “Actual Size” and check the scale. ALWAYS check to make sure the pattern is printed to the correct scale before beginning to sew.
Cut out pattern using craft scissors. Many patterns have a dotted line showing a 1/4″ seam allowance on the pattern. Be sure to check that the seam allowance is included, and if it isn’t, add it on before you cut.
*Here, some people like to color their pattern with colored pencils to help with accurate fabric piecing. I only do this for complicated patterns or when I am using different fabric colors than indicated on the pattern, but you are welcome to get out the colored pencils and do some coloring here if you want!*
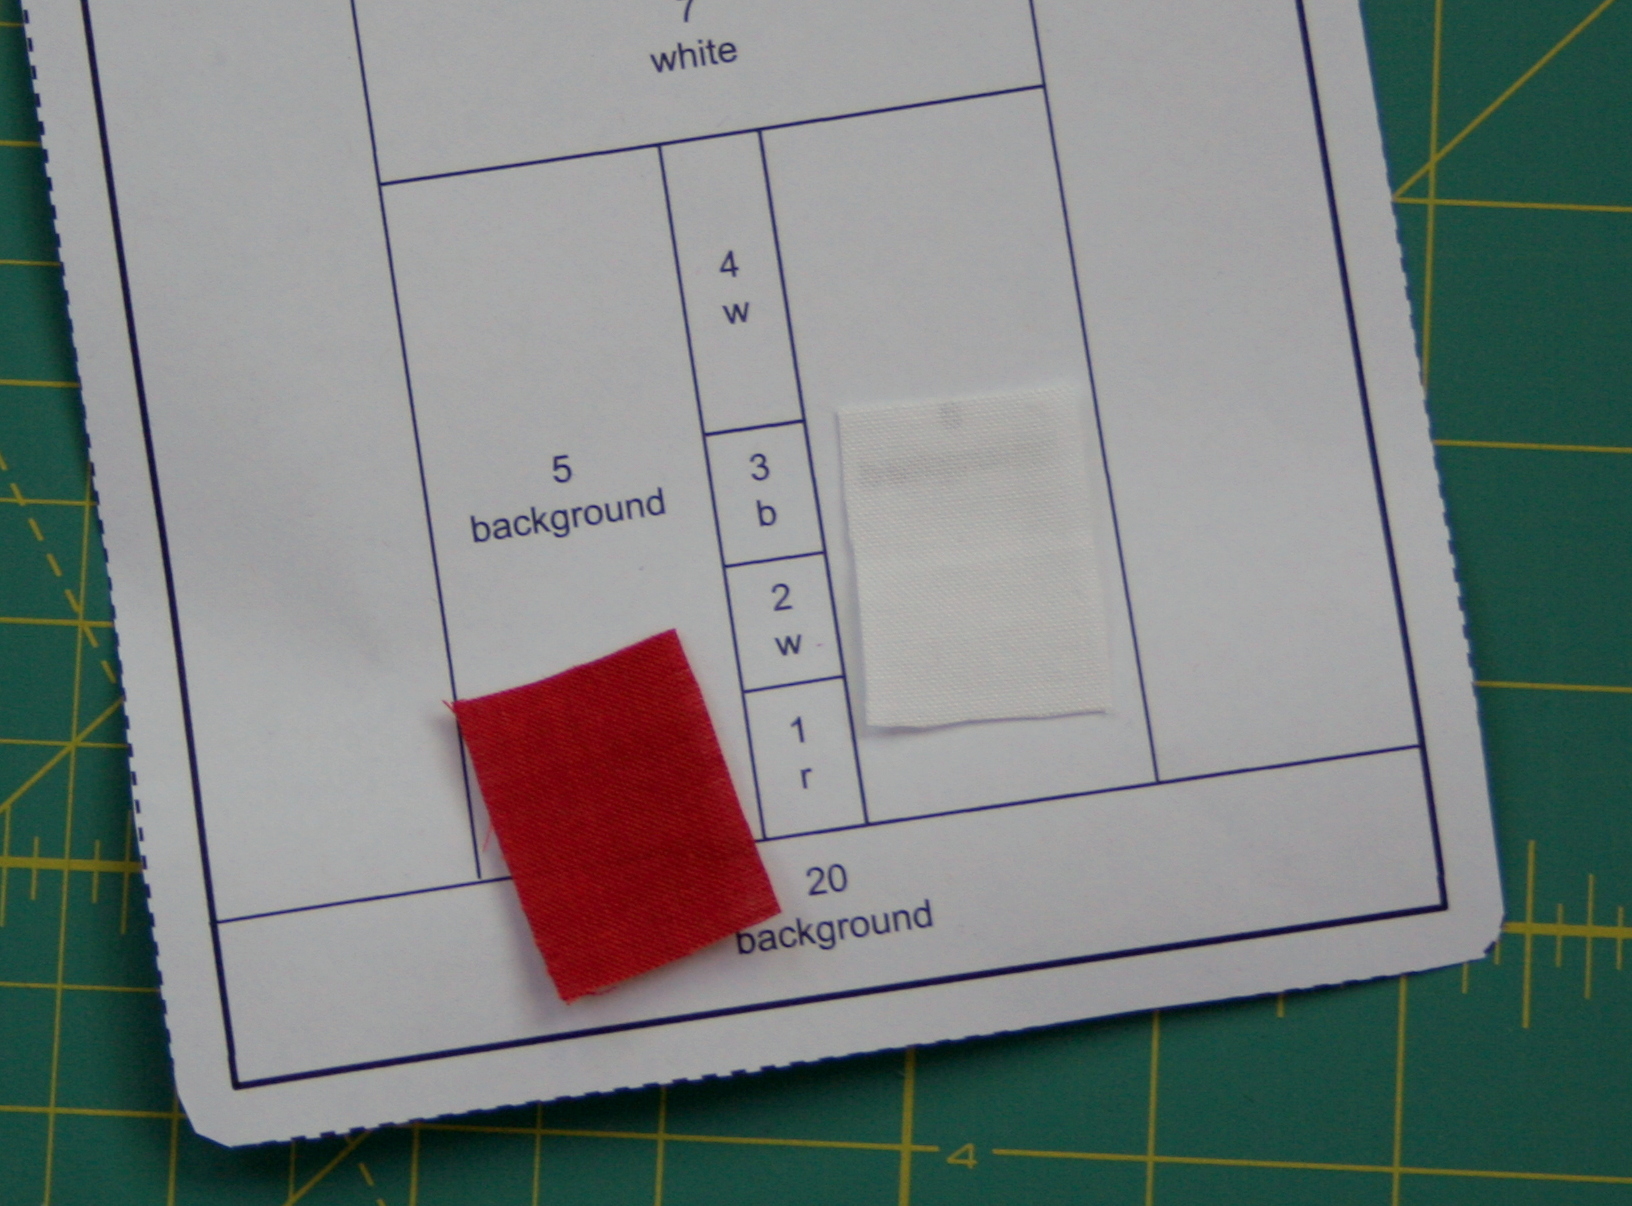
4. You’re ready to begin! Cut fabric pieces (or find scraps) to fit spaces 1 and 2 on the pattern. Be sure to include a 1/4″ seam allowance on all sides. Paper piecing is kind of like paint by number, but with sewing, and always in order. You start with piece 1, sew on piece 2, then piece 3, etc. *When cutting fabric for paper piecing, I am generous in my cutting. I cut pieces that are amply large enough to cover the space and seam allowance and then some–lots of wiggle room. Yes, it may waste a bit more fabric, but it makes the process a lot smoother. To me, smooth (no seam ripper required) sewing is worth more than a few tiny scraps of fabric. Also, when you trim your seam allowances, any large pieces of excess fabric can be used for other pieces of the pattern. Go big!*
5. Here’s where the spatial part comes in, so get ready. Remember, you are using the paper foundation to help you make the pattern on the back, as if you are looking through a mirror. Ready?
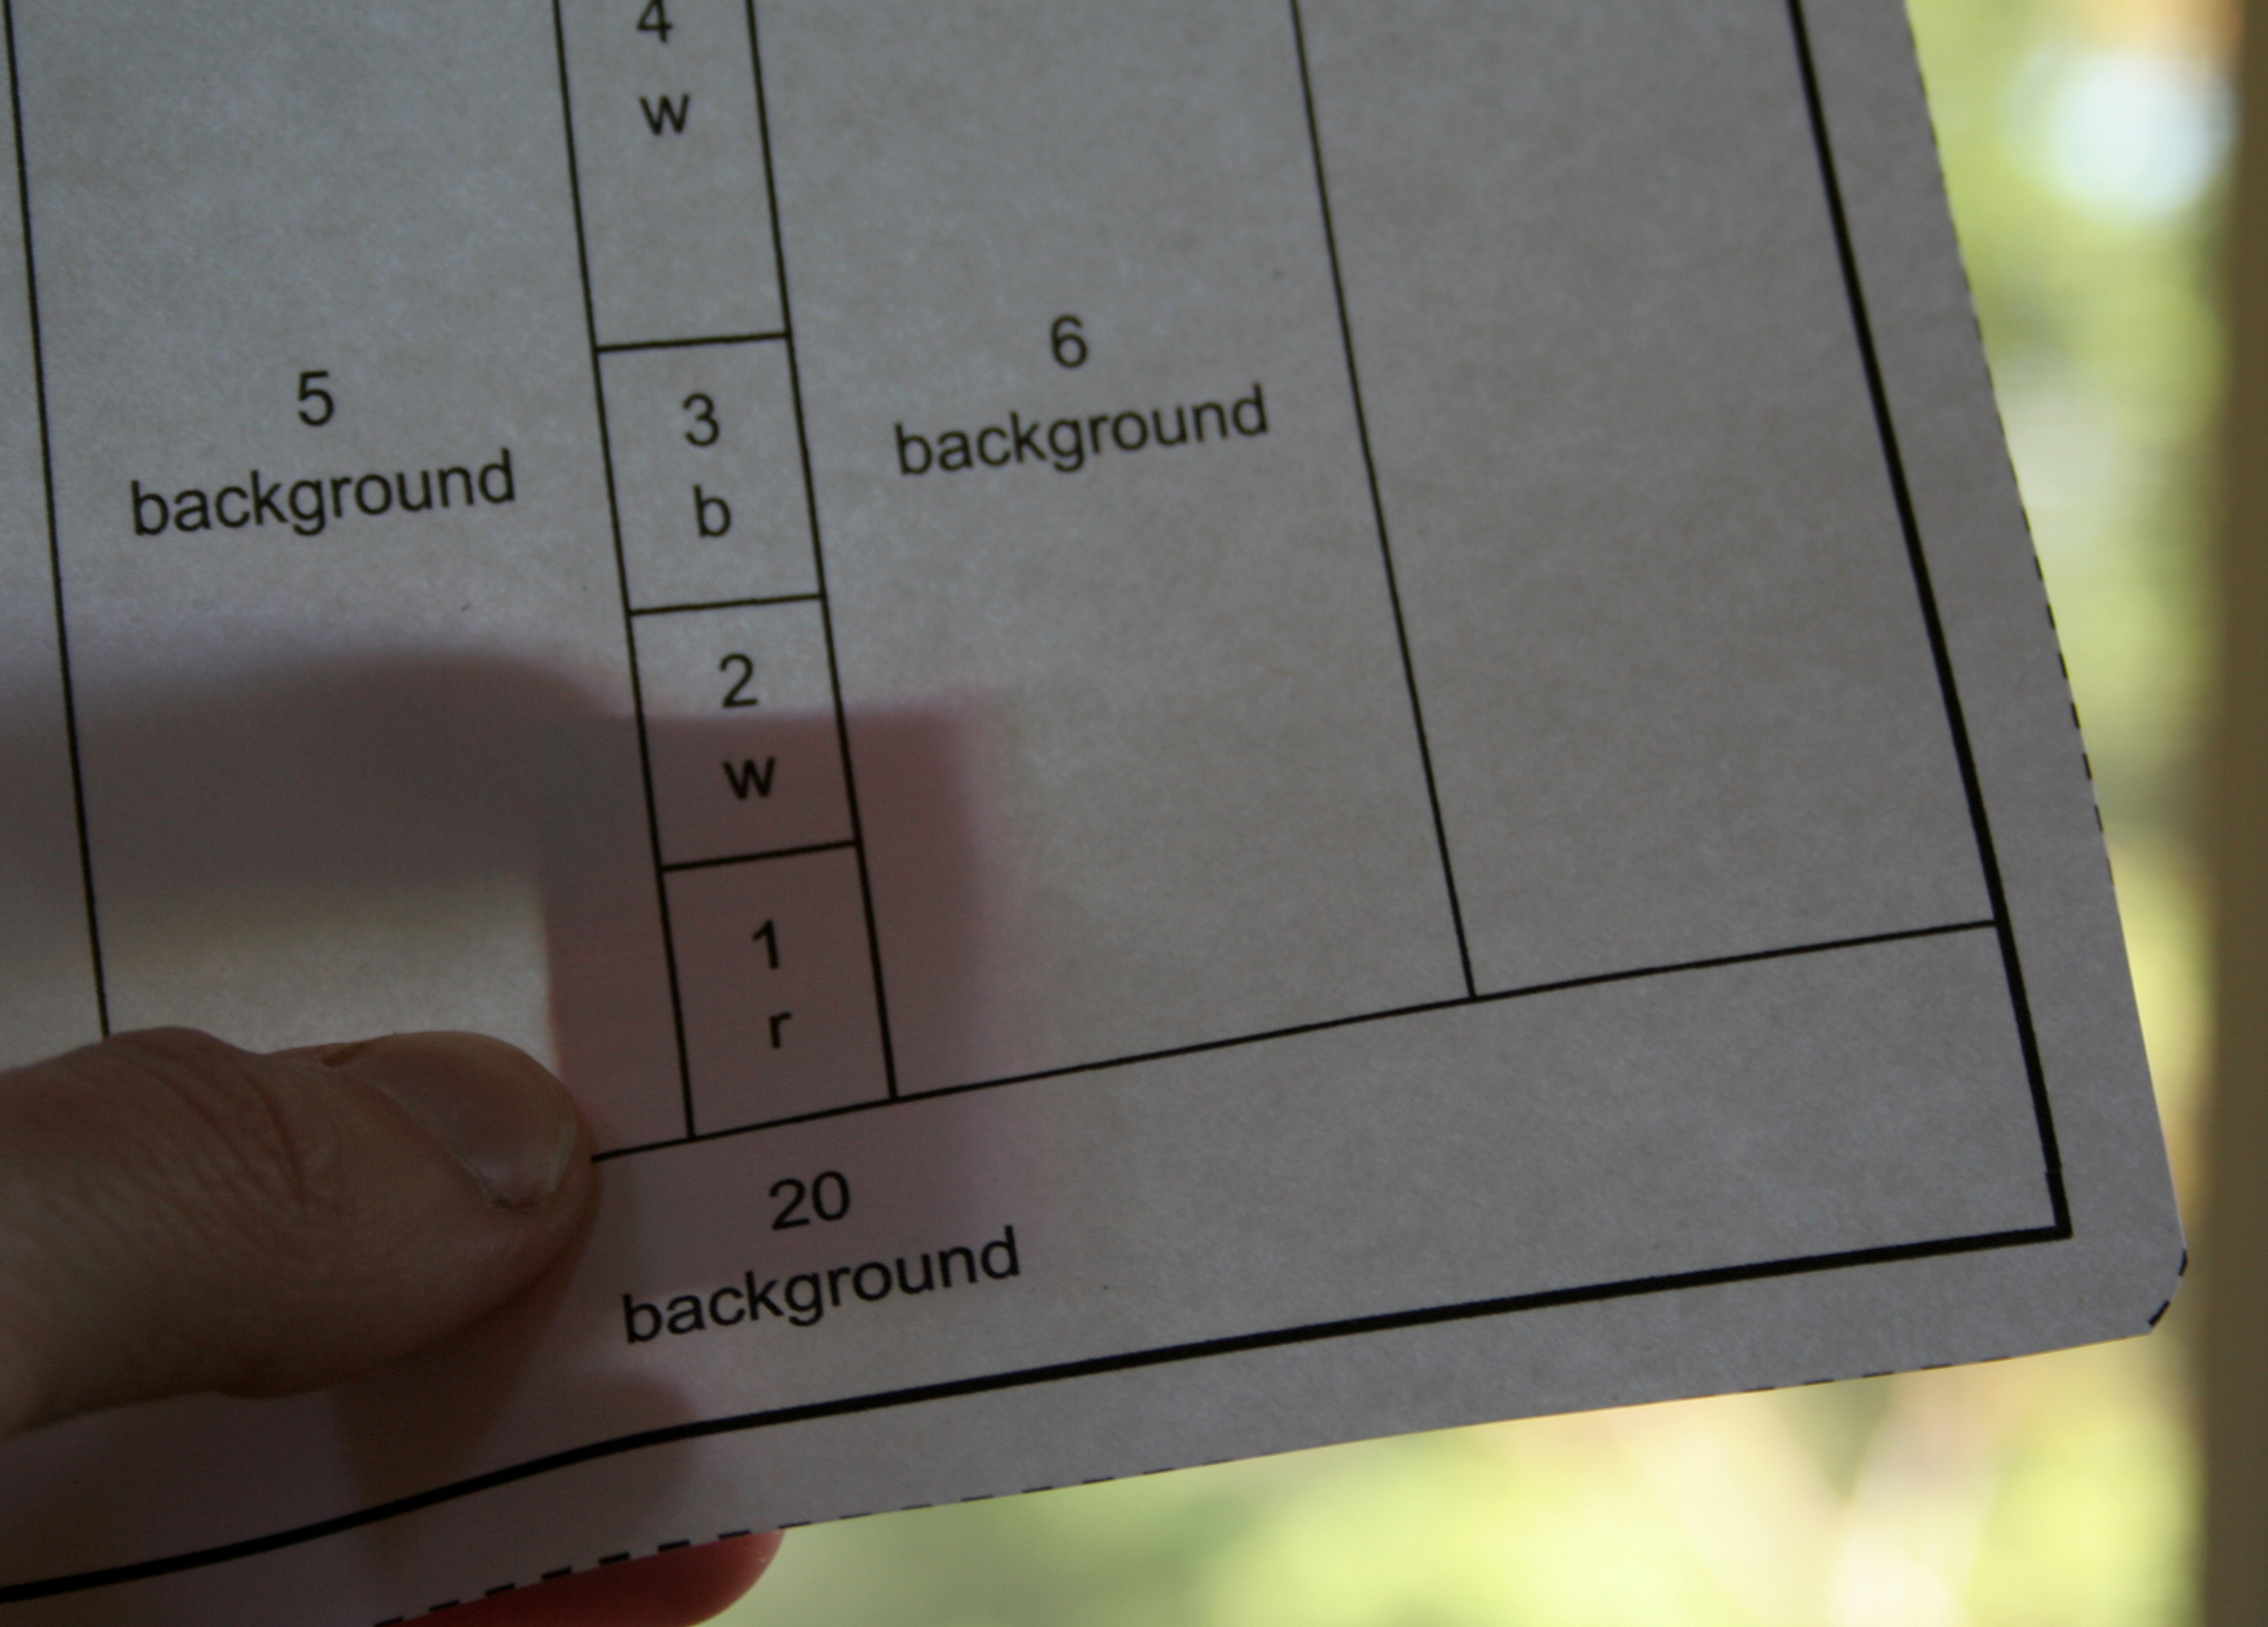
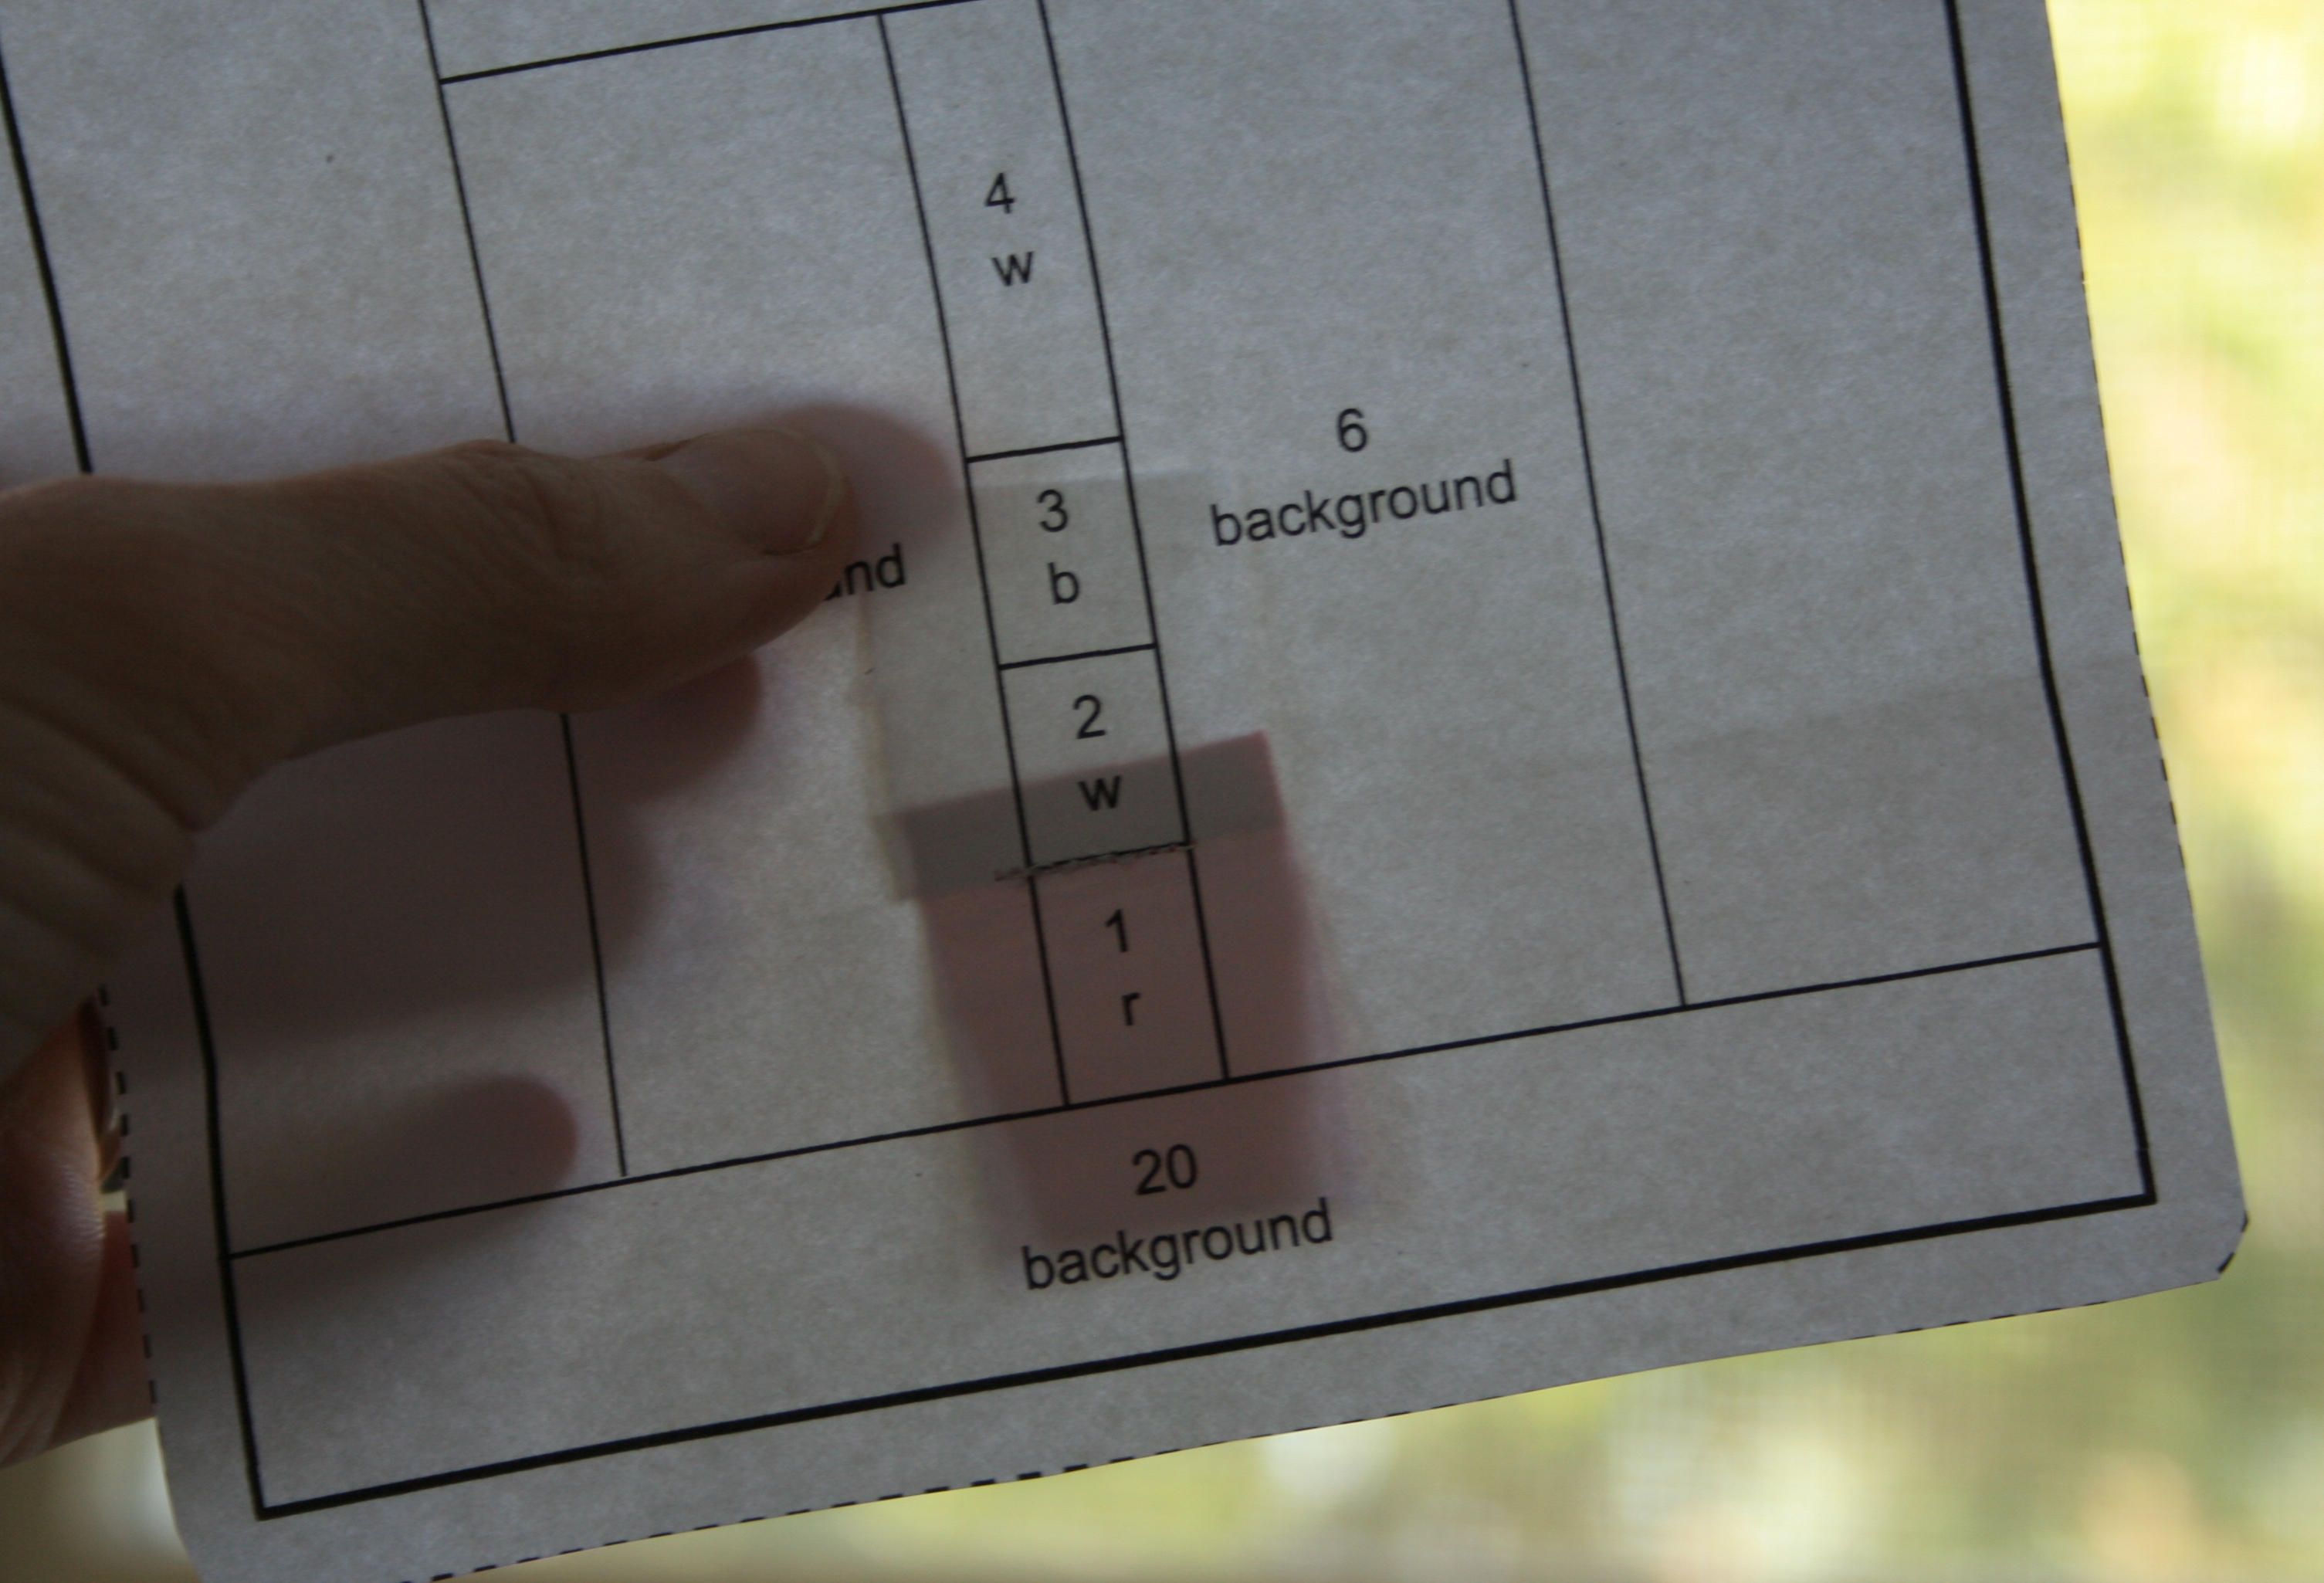
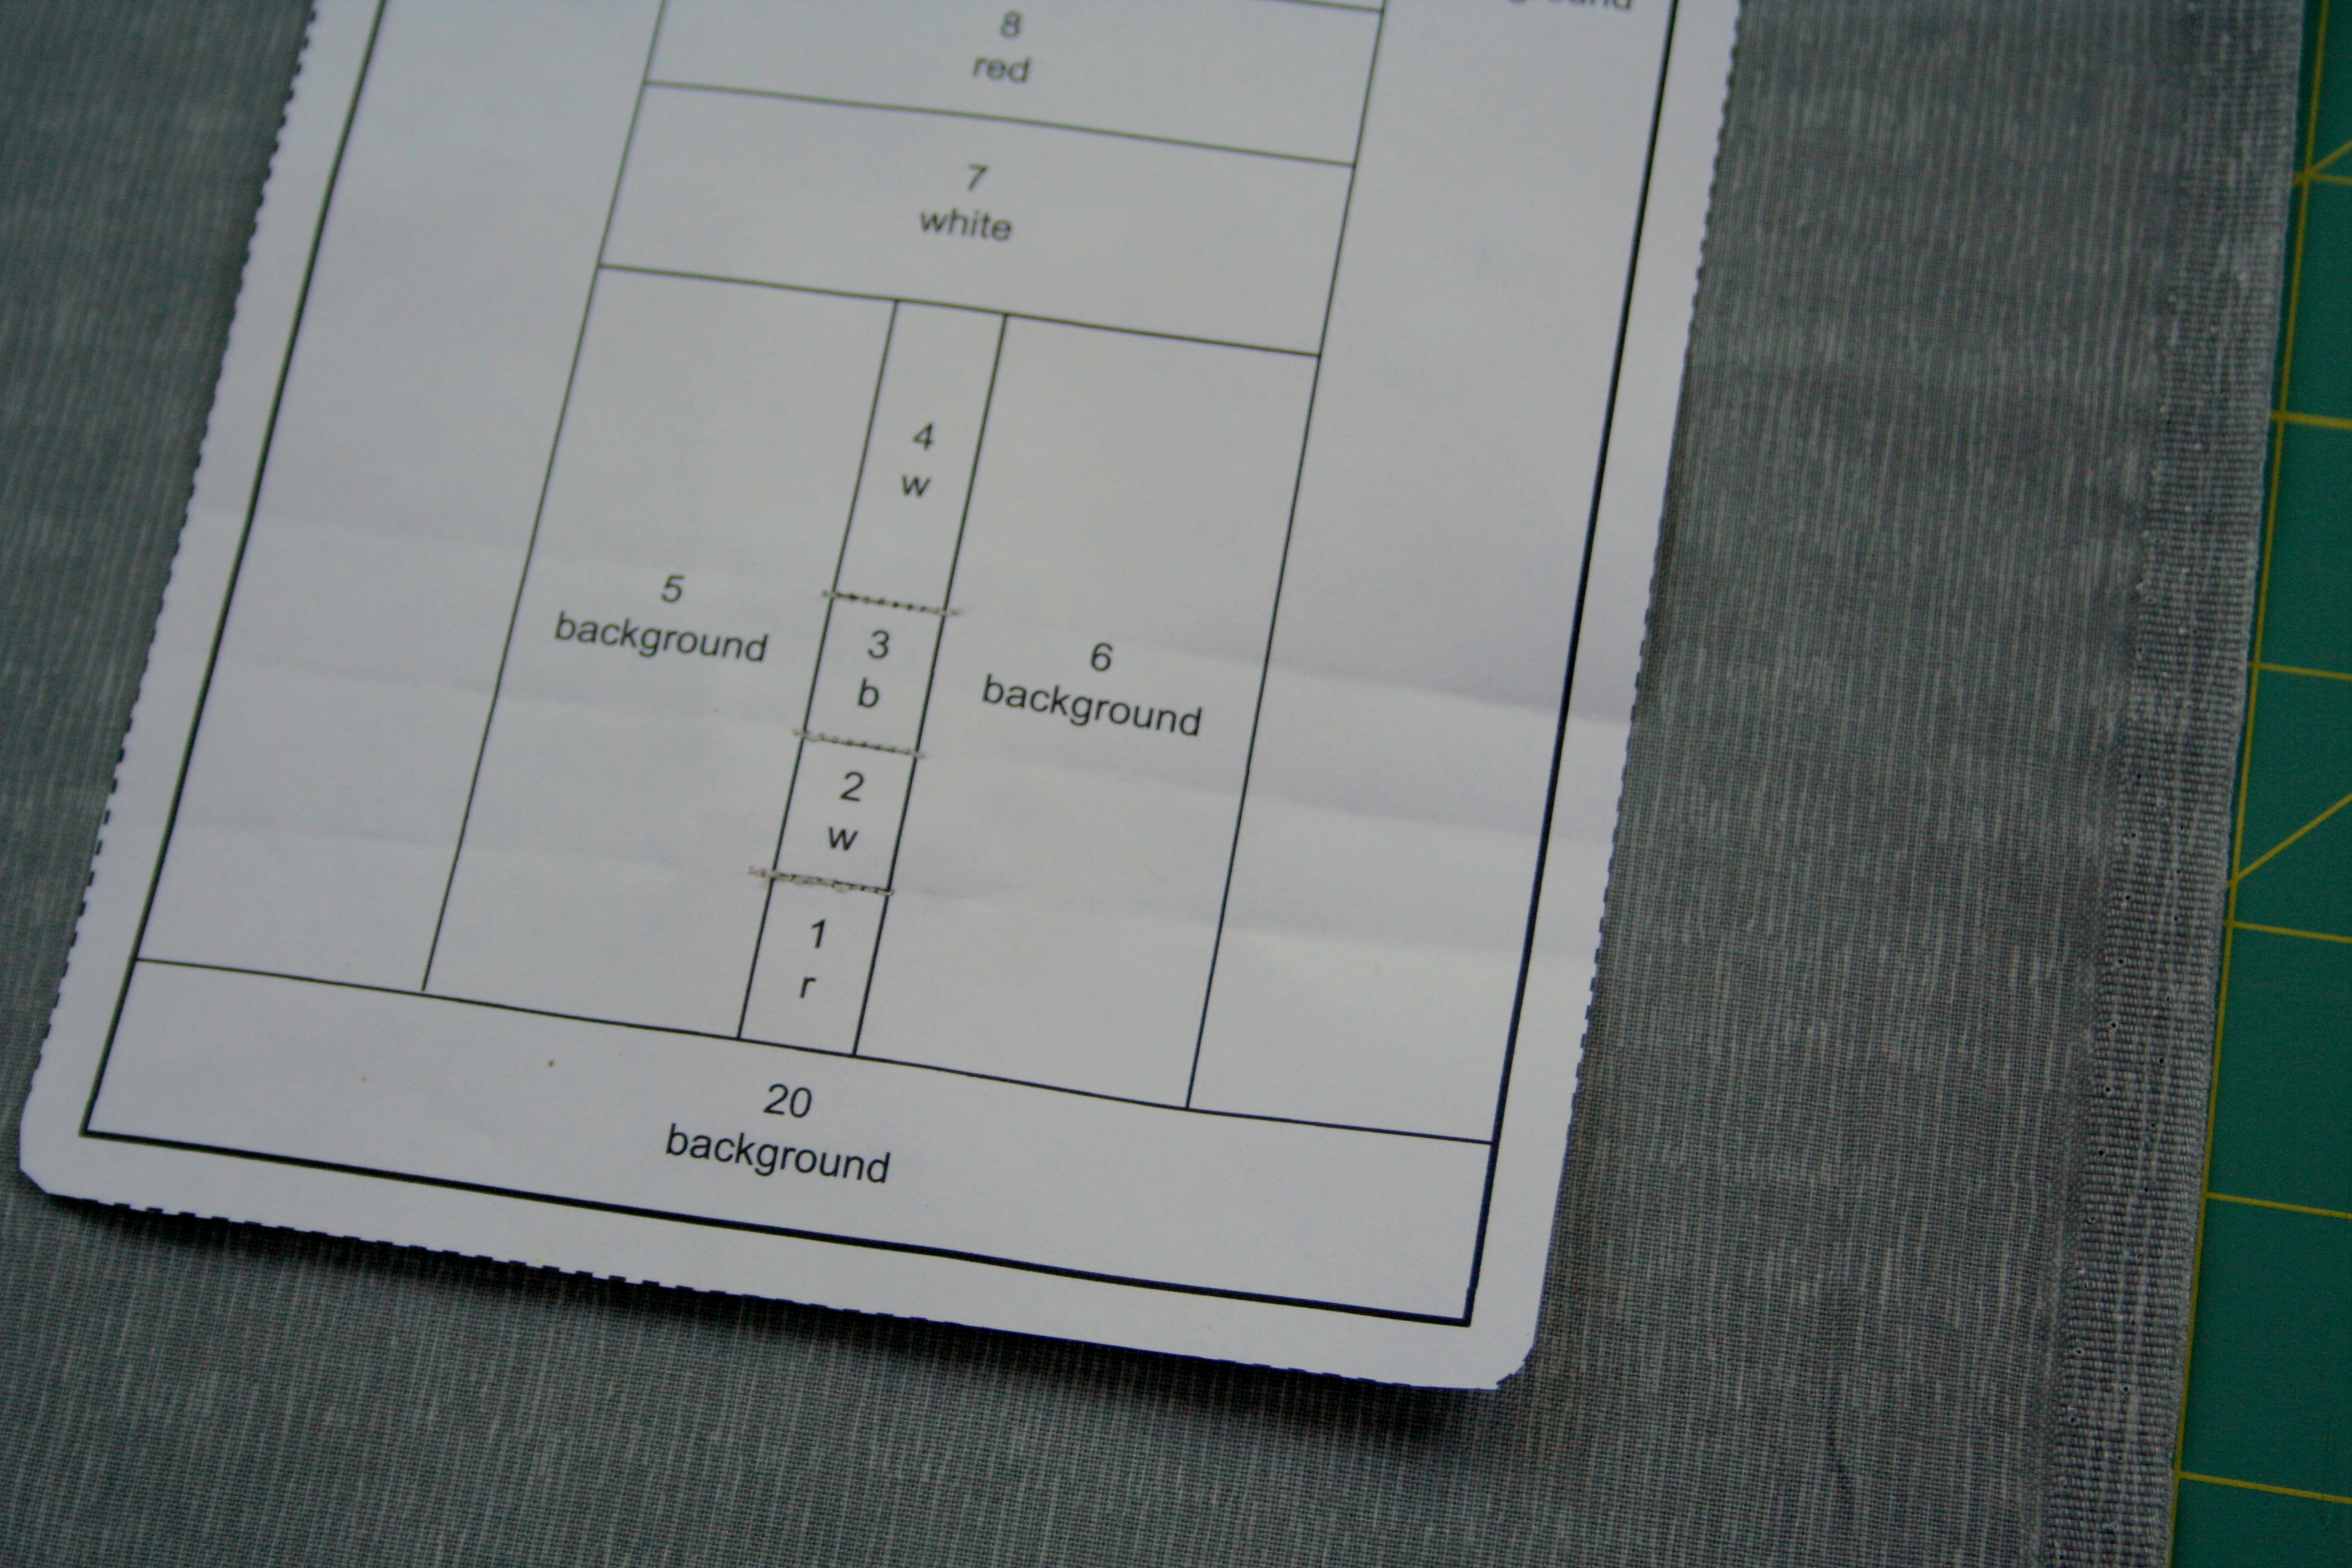
Place the fabric for piece 1 on the back of the paper, wrong side of the fabric facing you (against the paper). Hold it up to a window or a light-box to ensure the fabric fully covers the #1 space, plus seam allowances.
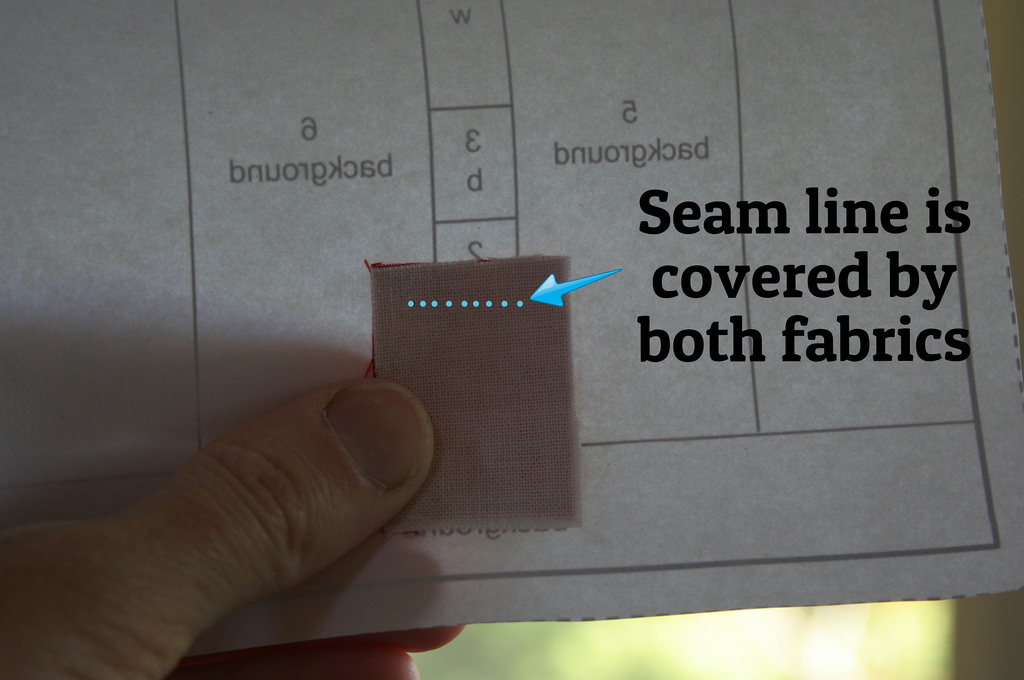
6. Holding fabric 1 in place, position the paper so that the printed side is away from you. Take the fabric scrap for space #2 and place it right side down, on top of fabric 1. Be sure the seam line between 1 and 2 is covered by both fabrics, holding up to the light if needed. The fabrics should now be right sides facing each other, and when you sew along the seam line and fold fabric 2 up, it should cover the #2 space plus seam allowances.
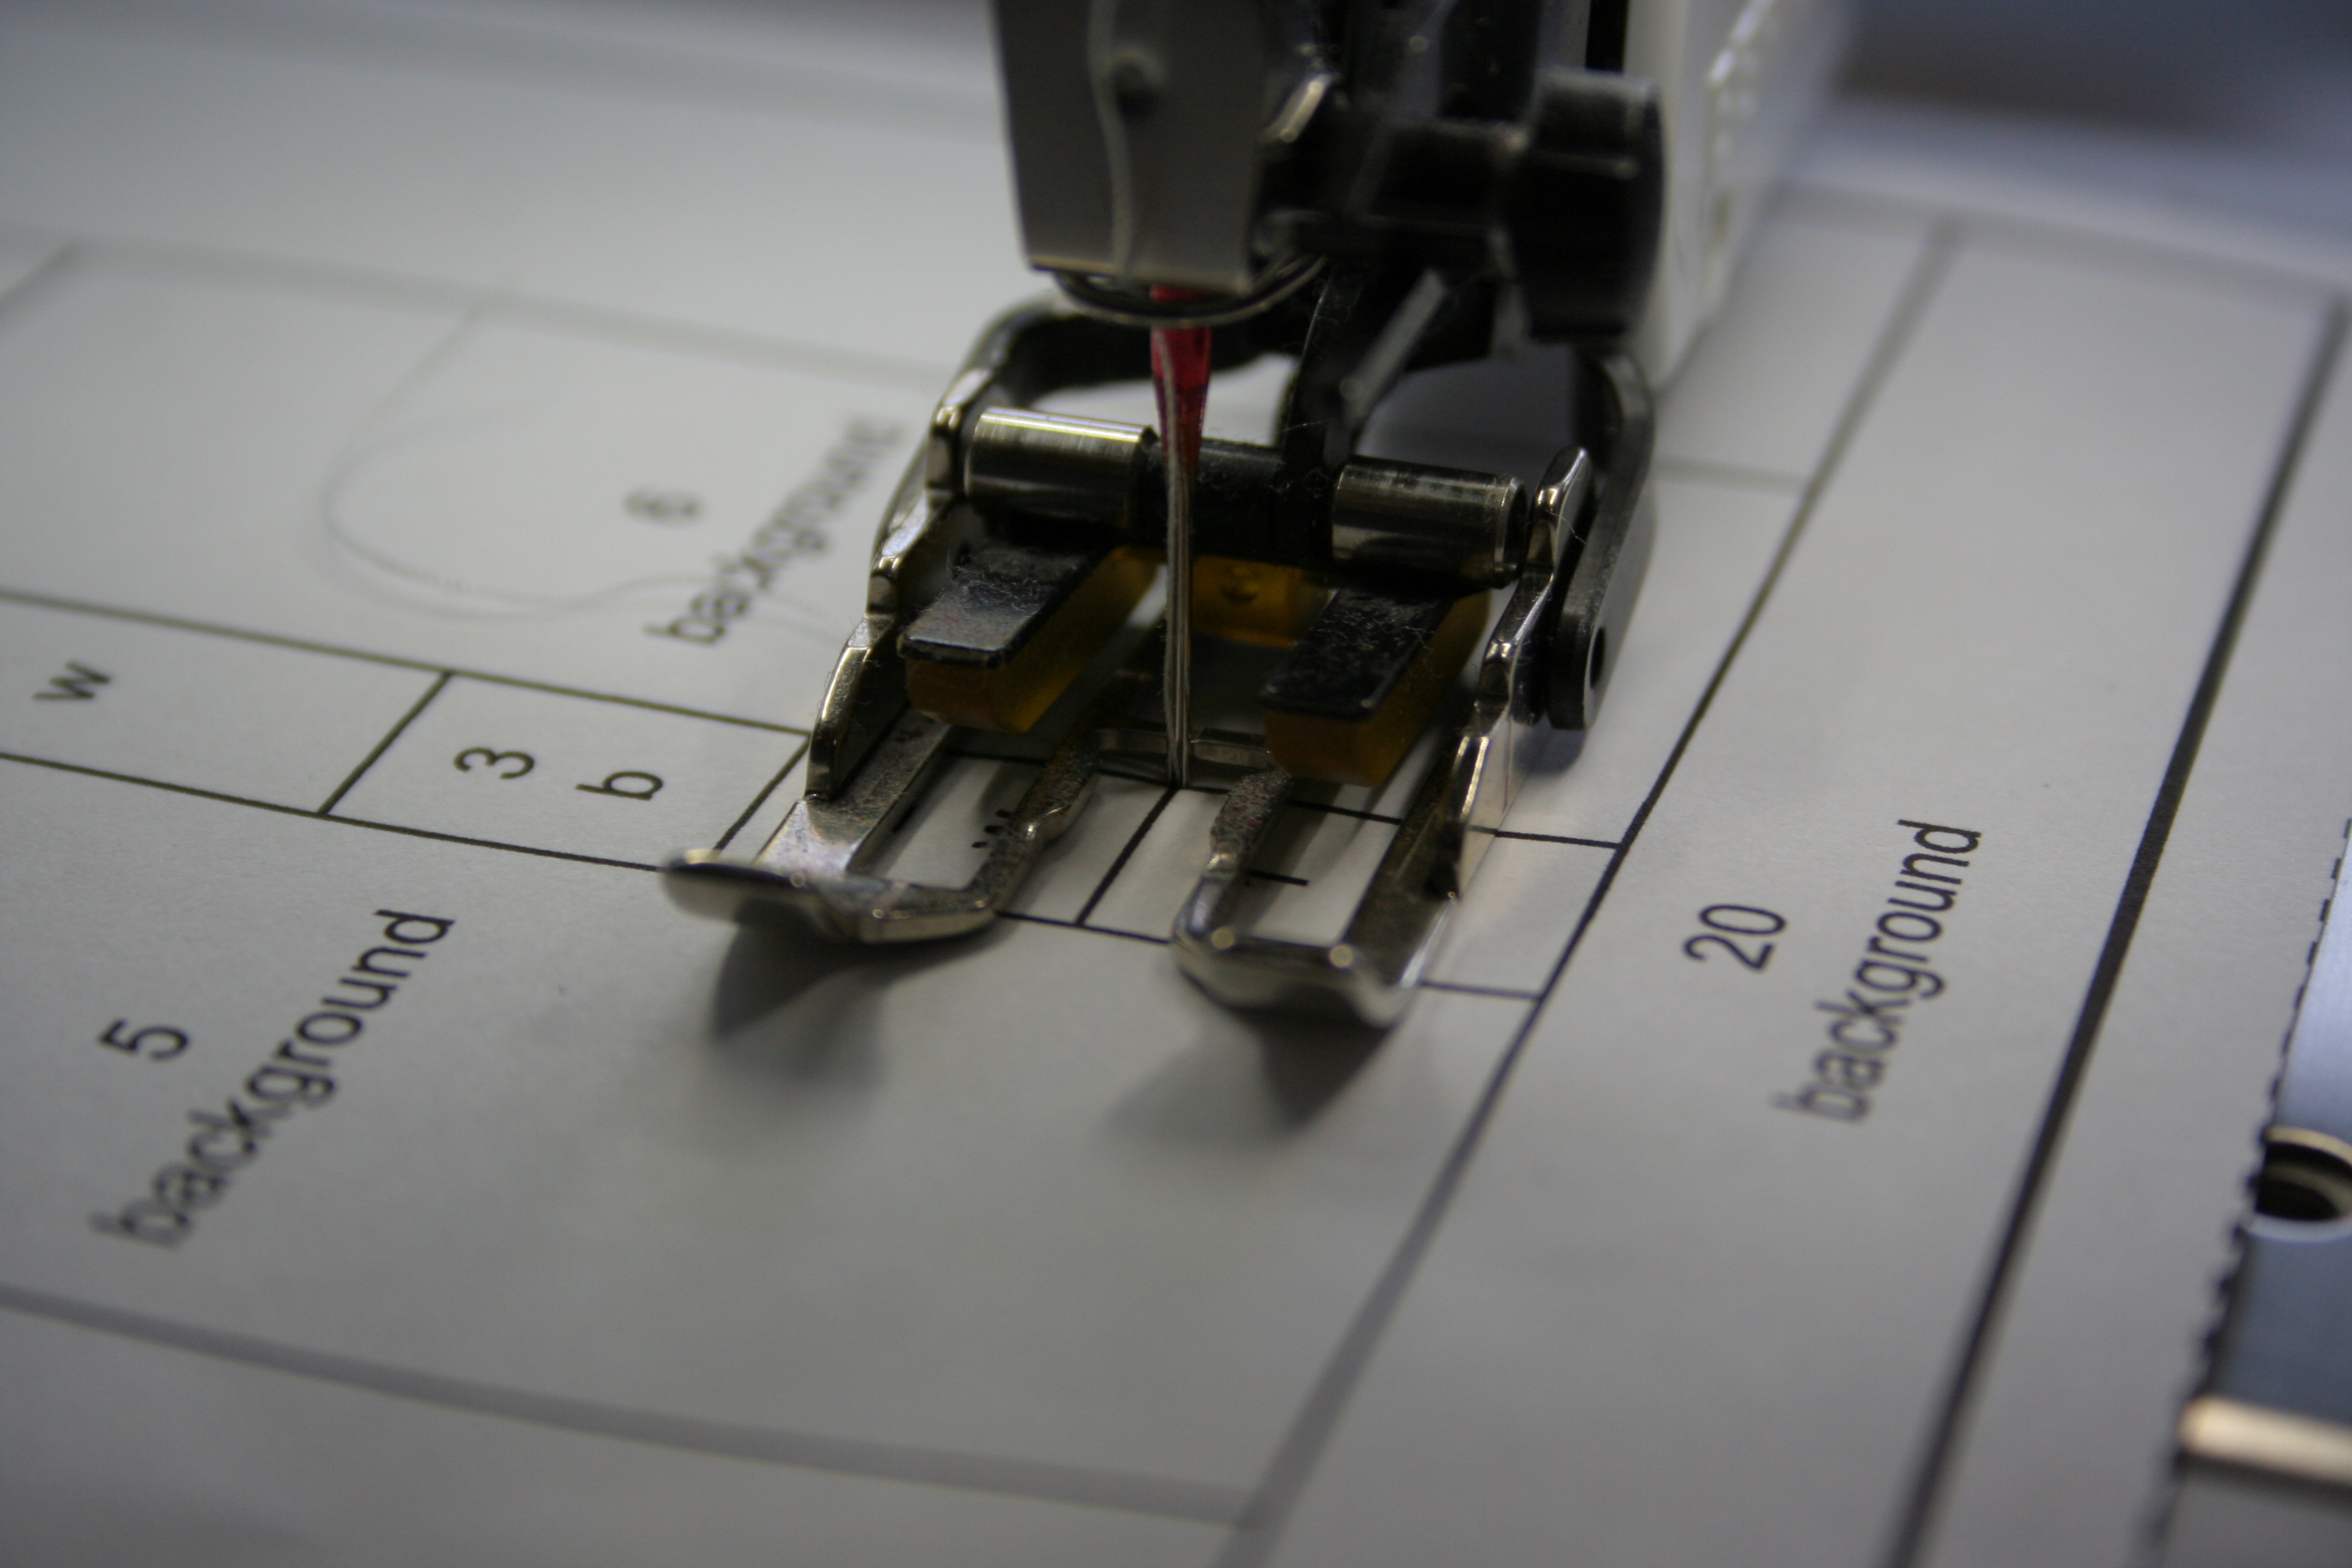
*Before you sew, shorten the stitch length on your sewing machine. I set mine to anywhere between 1.4 and 1.5. That way the paper is very easy to remove at the end.*
7. Holding both pieces of fabric in place, sew along the line between spaces 1 and 2, with the paper on top. Some people like to pin or even glue their pieces in place before sewing, since the fabric is underneath the paper. I personally just carefully hold them in place with my finger. I haven’t had a problem yet, and it’s one less step if that works for you.
Accuracy tip: Lower the needle by hand for the first stitch, ensuring that your sewing will be straight along the line. Back-stitch for one stitch at the end to secure your threads.
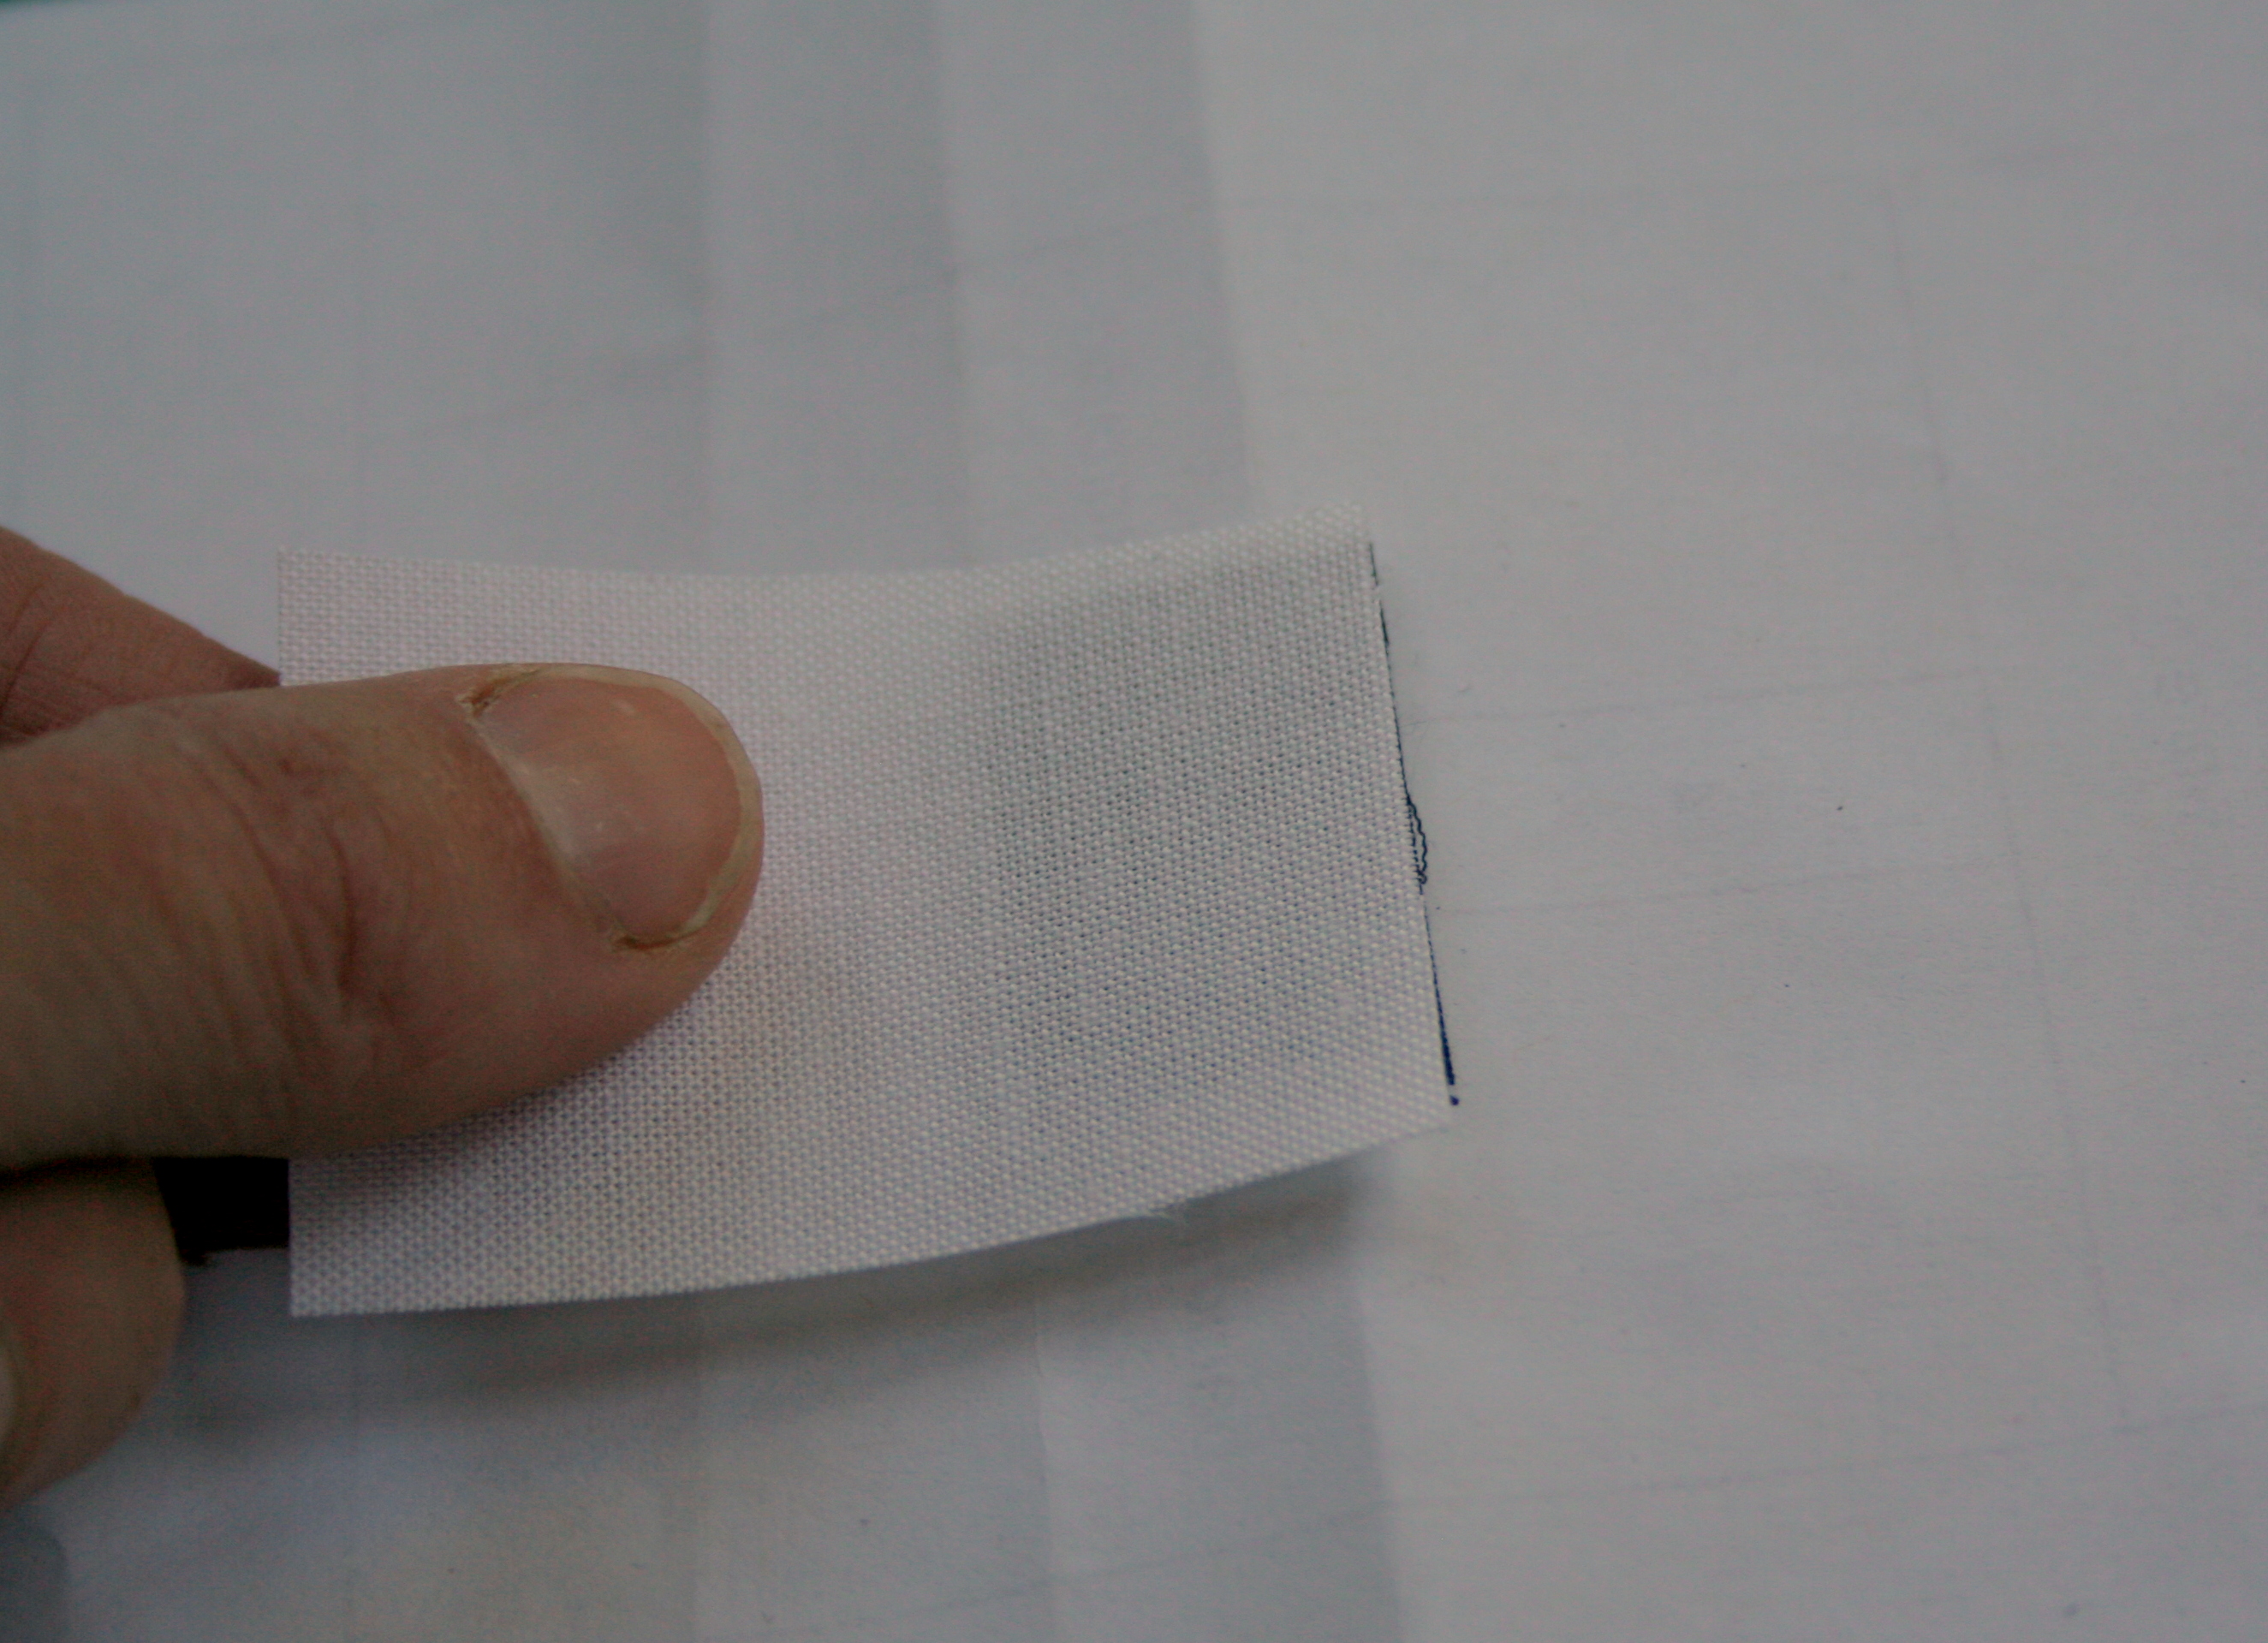
8. Trim thread ends. (If you want to make yourself a cute little thread catch, I have a free tutorial HERE!)
9. Fold the paper down along the seam you just sewed, and trim the fabric to 1/4″.
10. With the foundation paper flat and unfolded, press and set the seam with a hot iron (no steam). Finger press fabric 2 up to cover its space and press again.
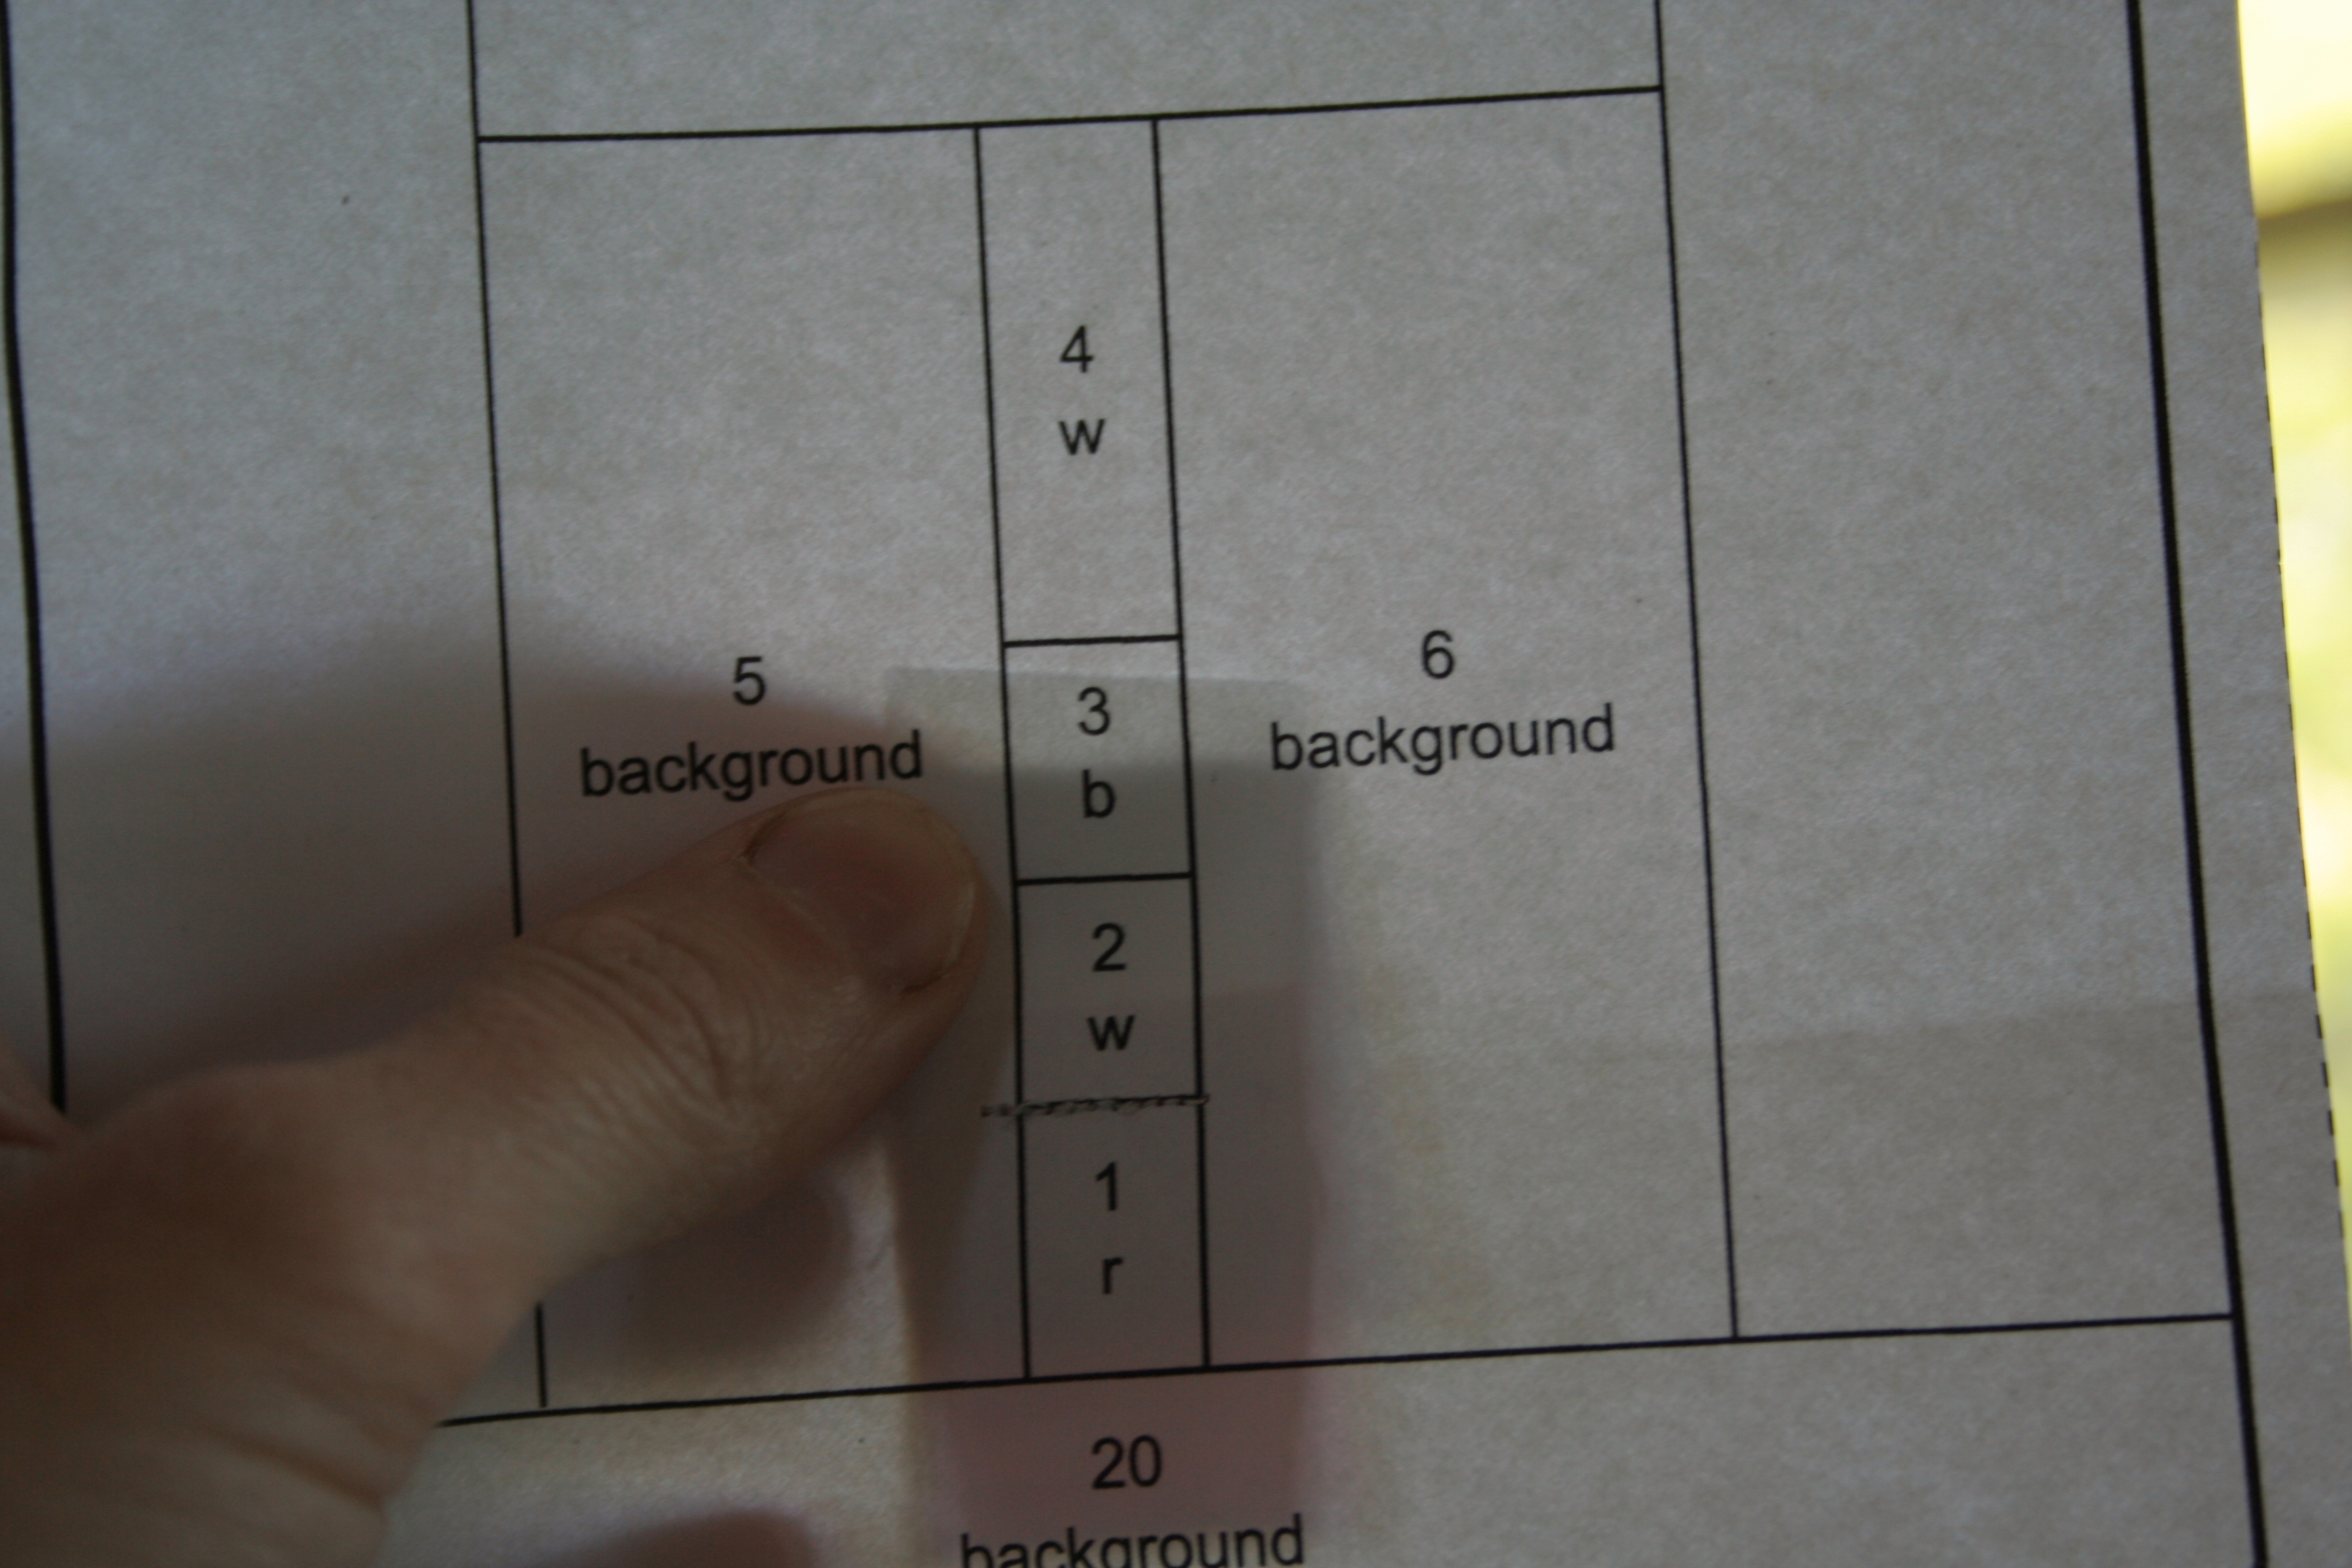
When you hold the paper up to the light, you should see that fabric 1 covers the #1 space and fabric 2 covers the #2 space, with seam allowances.
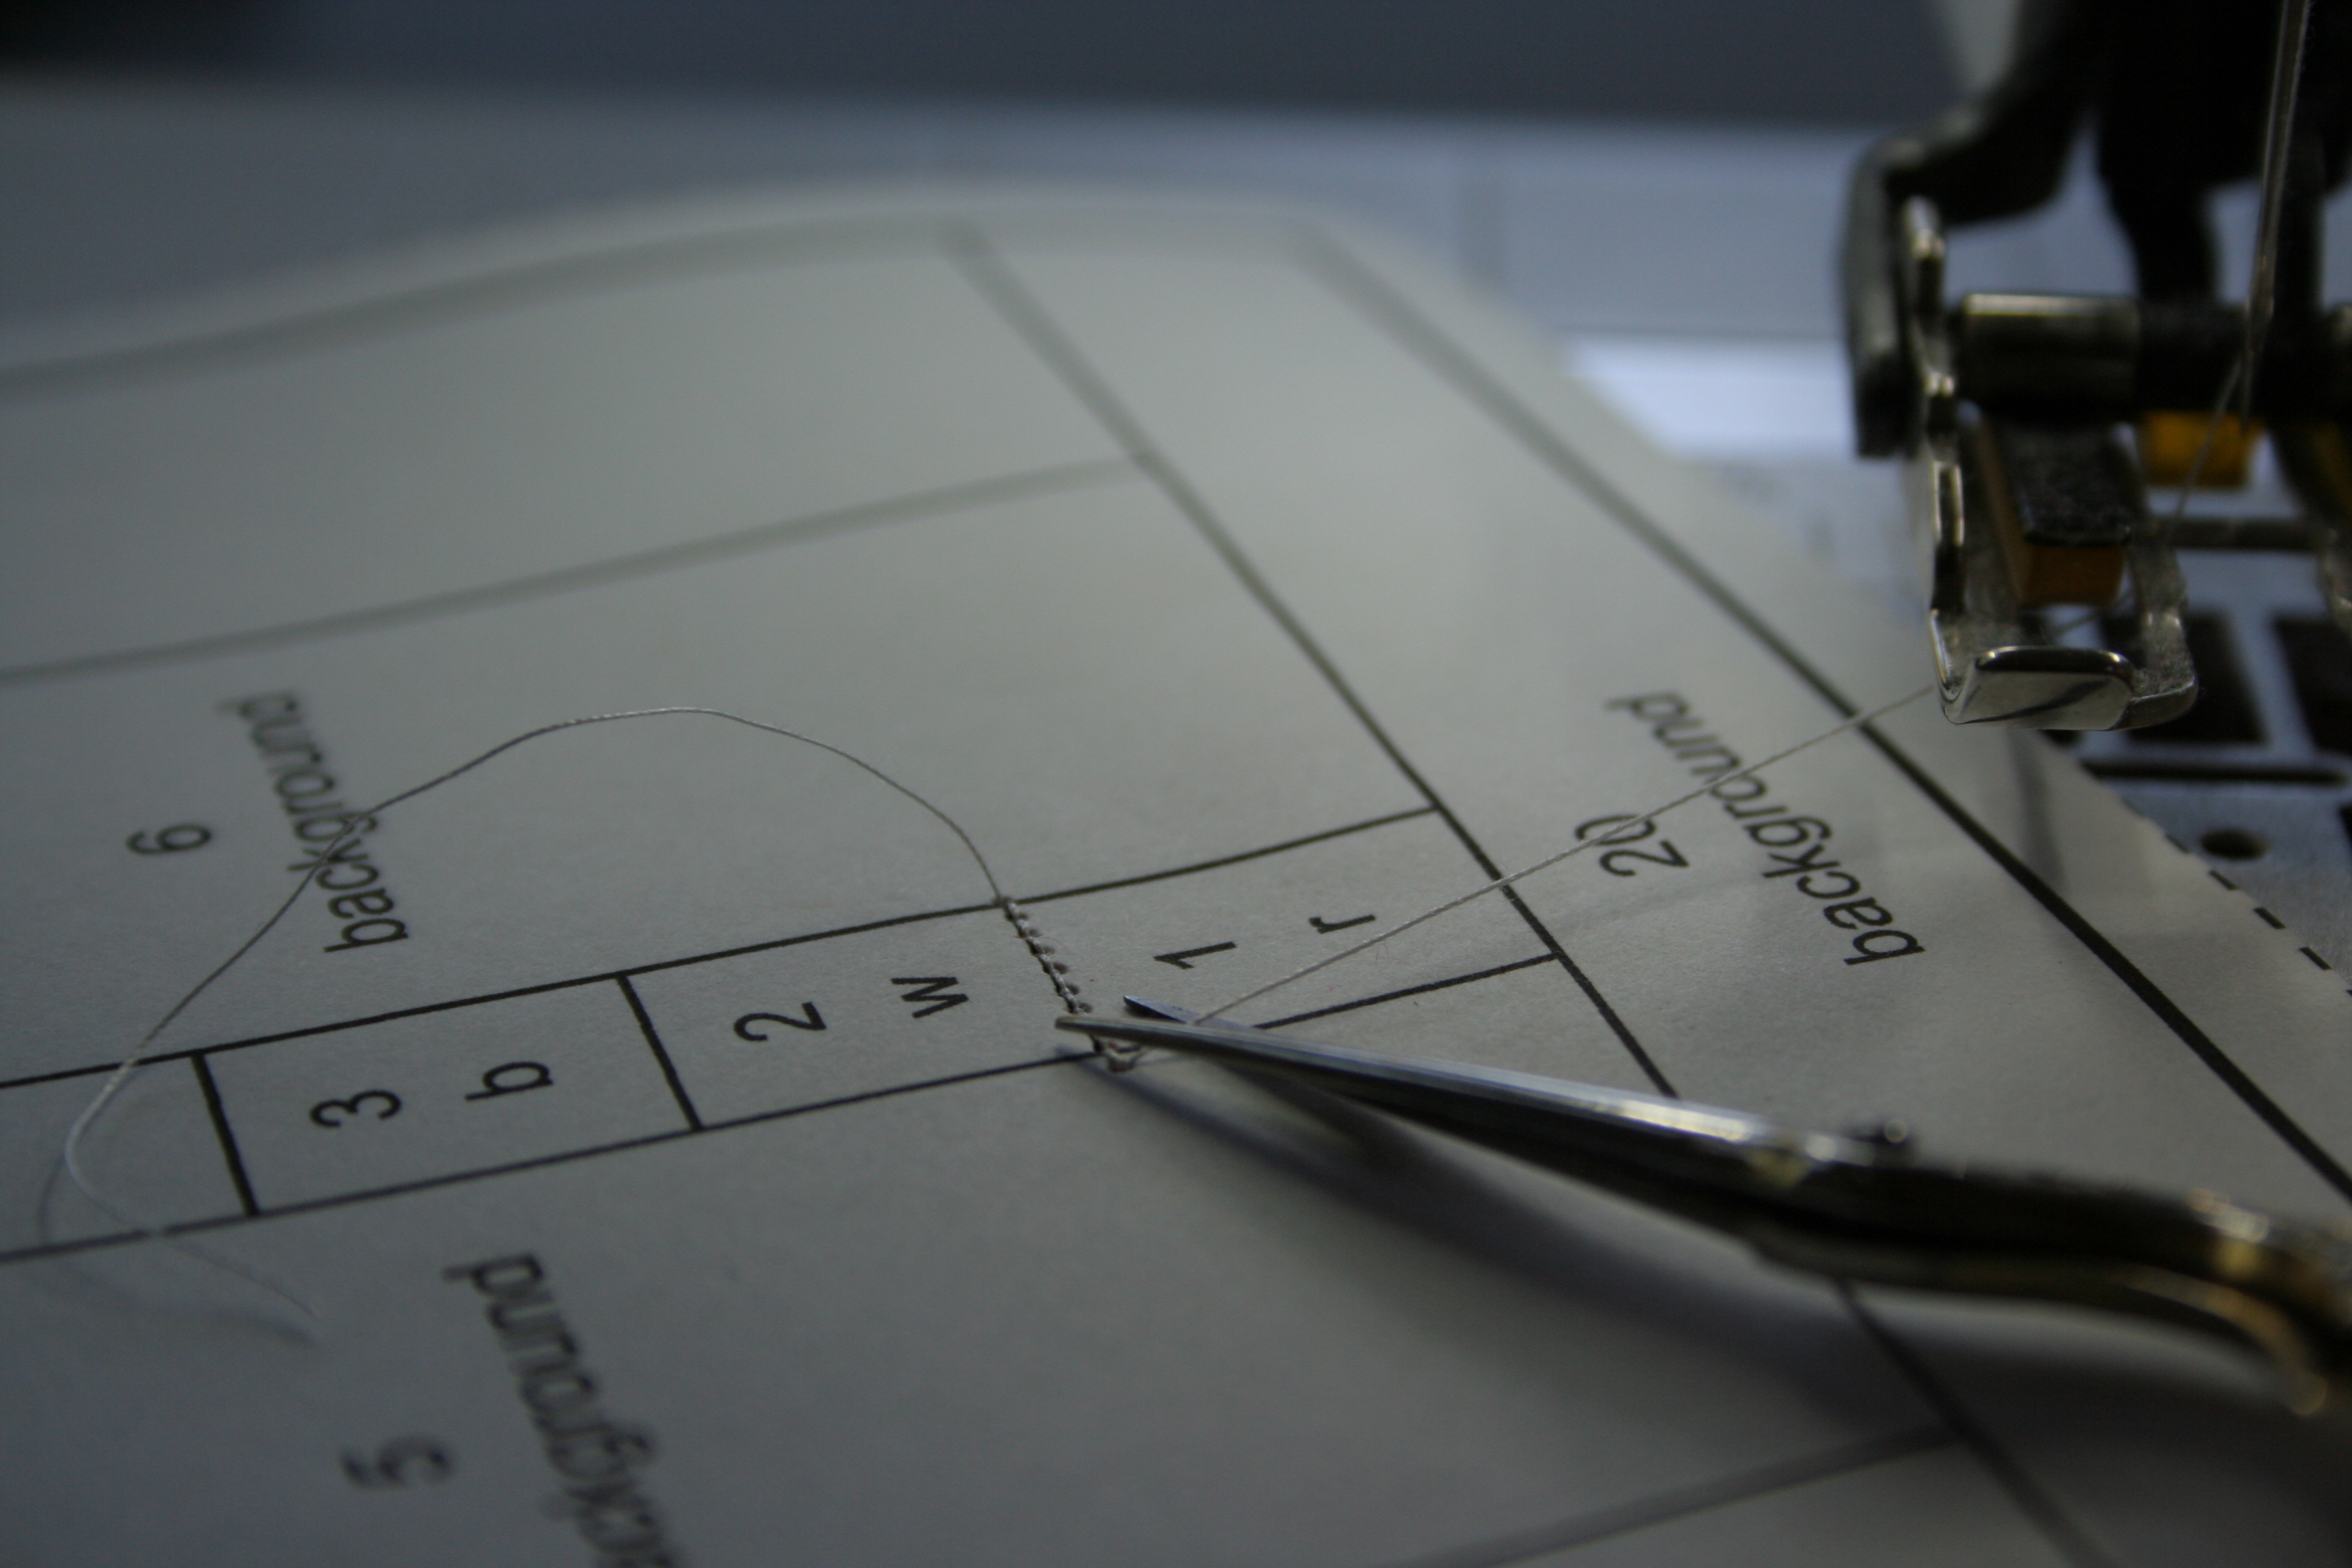
11. Continue this method for the rest of the pattern pieces. Cut, line up, sew, fold & trim, press. Cut, line up, sew, fold & trim, press. Repeat.
Getting ready to sew on piece 3–front view.Getting ready to sew on piece 3–back view. Remember: the fabric has right side facing the pattern paper, with the seam along the top edge. Once sewn, the fabric will be pressed up so that the right side is showing.
If you’ve got the hang of it, you can skip the next few parts and just scroll down to the finishing steps. For those of you who run into tricky spots along the way, here are some additional tips to help smooth the process.
Tips for Lining Up Seams:
If you are truly generous in your fabric cutting, this tip is not as necessary since you’re bound to have enough fabric even if your seams end up being larger than 1/4″. However, if the frugal part of you just can’t cut those fabric bits ginormously, here’s a tip to get accurate 1/4″ seams to conserve fabric. Note that this works best for straight-forward seams, and not nearly as well for long, skinny, tricky angles (I’ll address those in a bit).
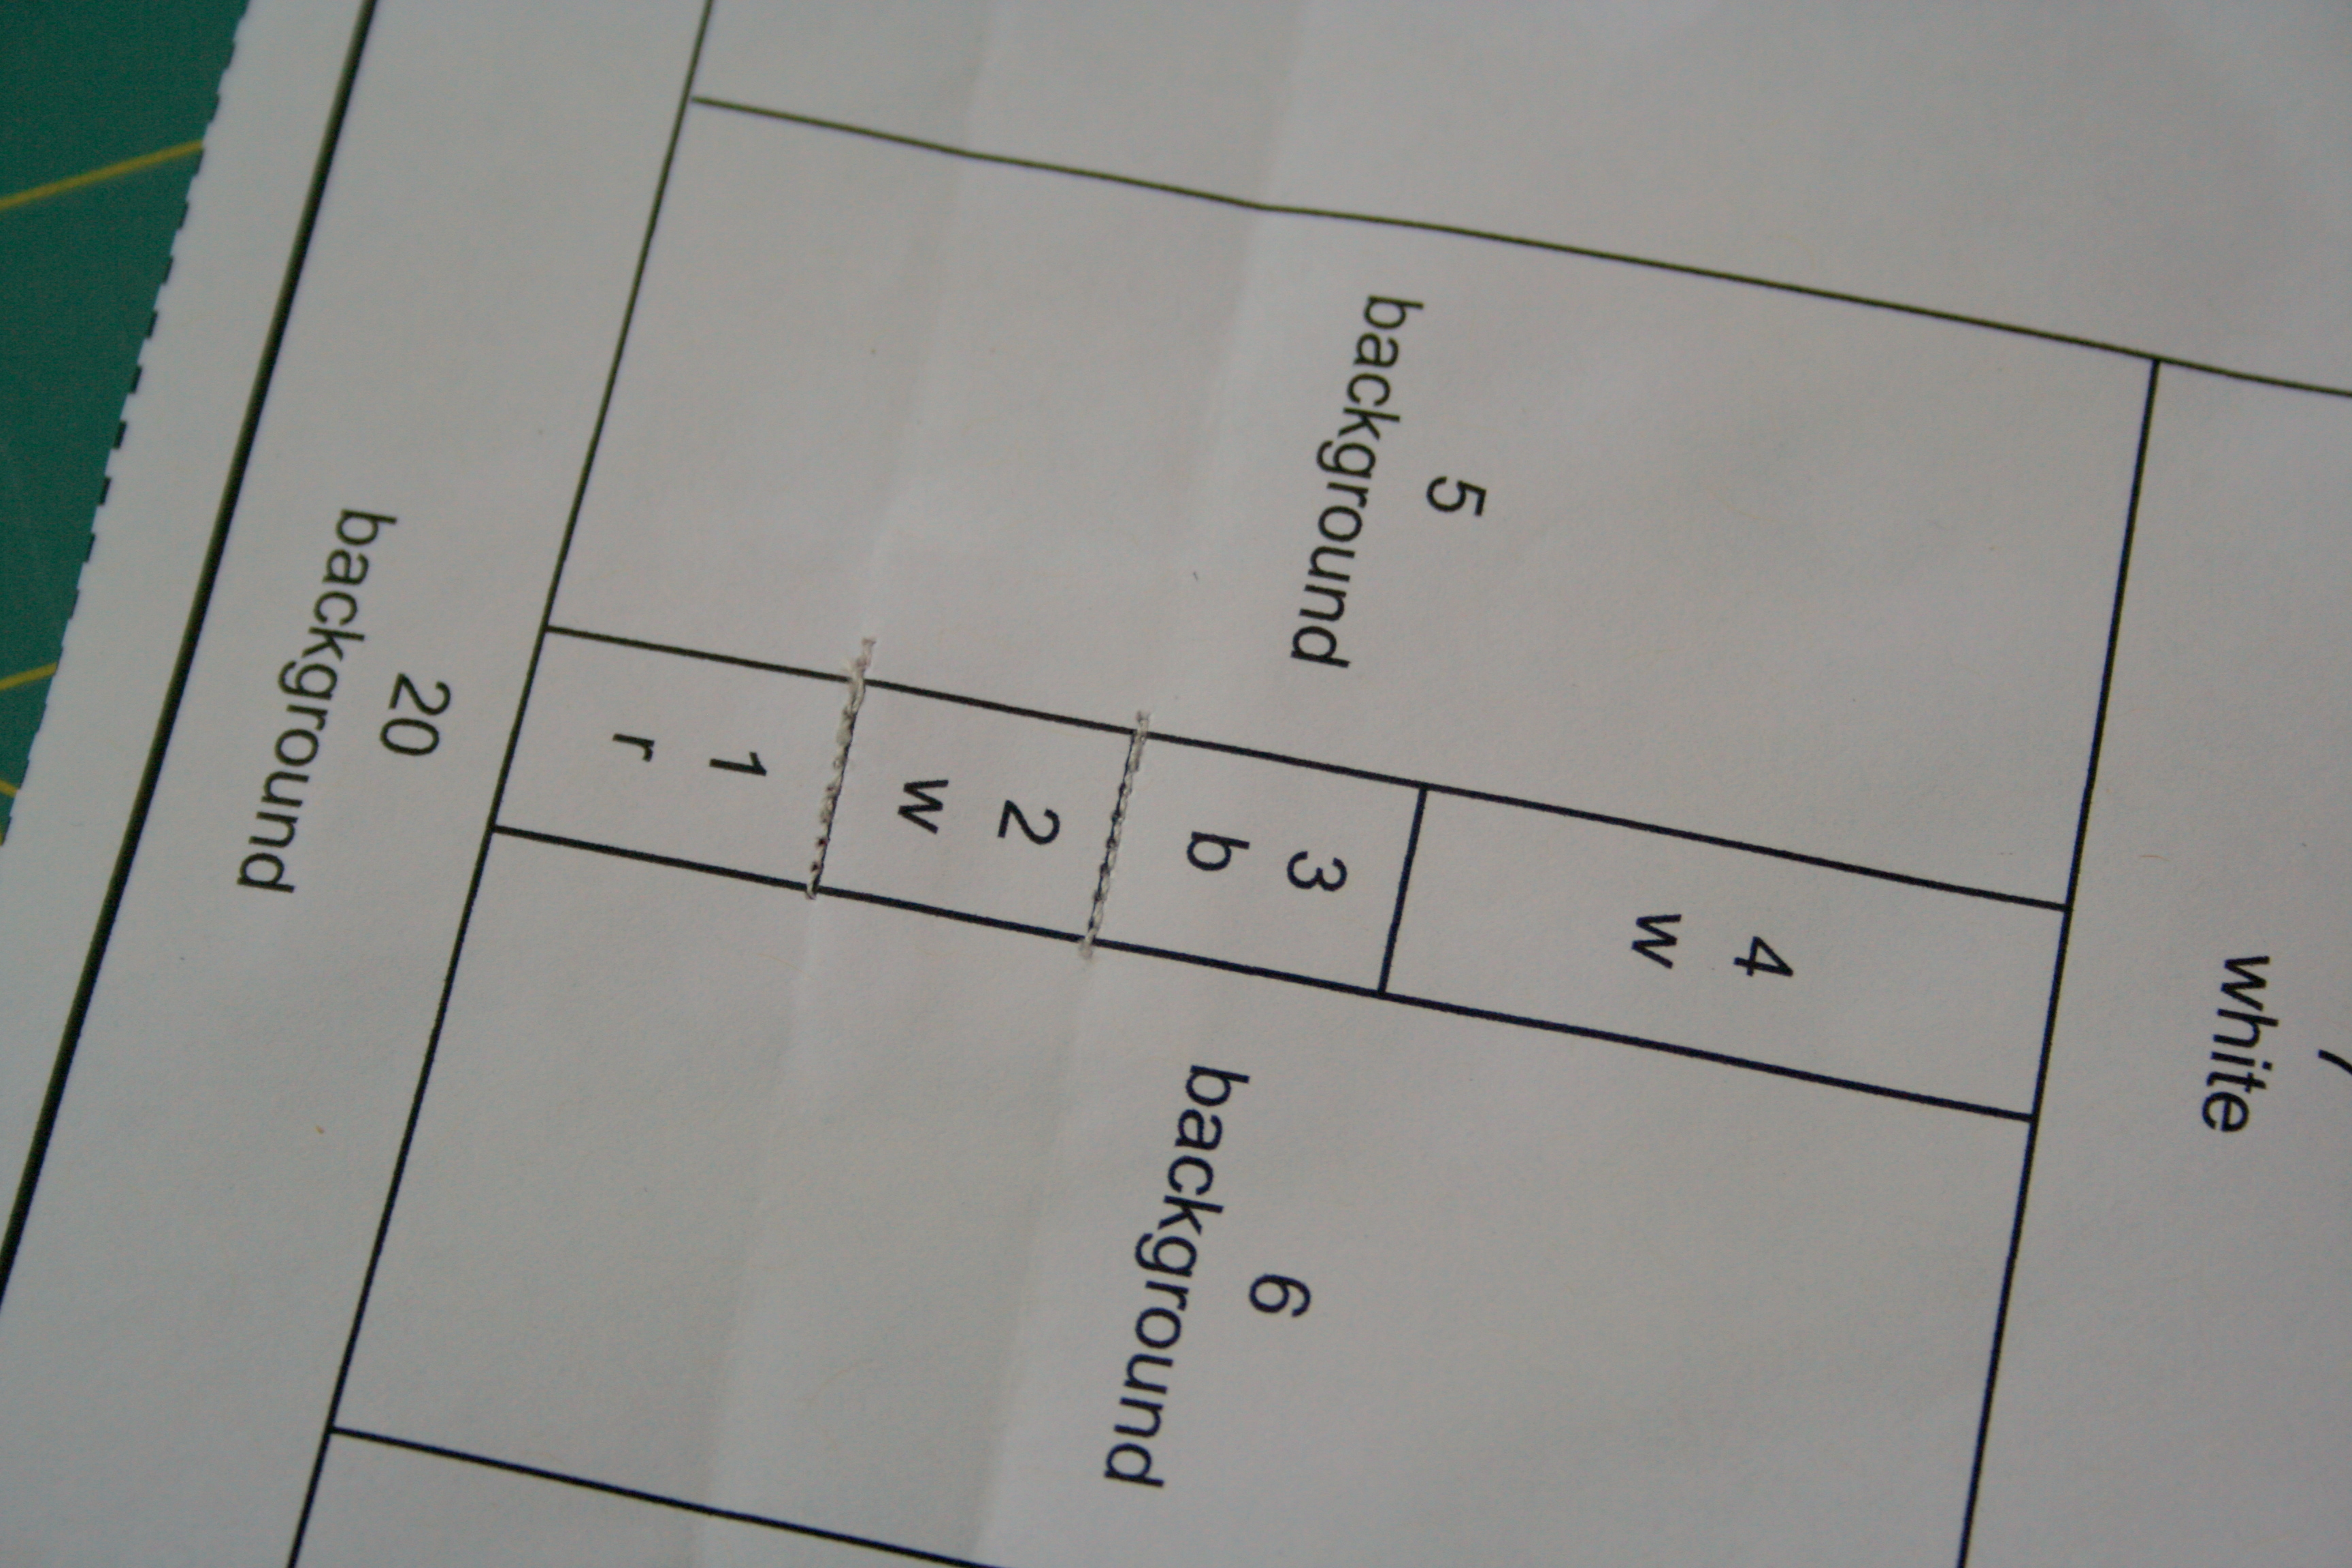
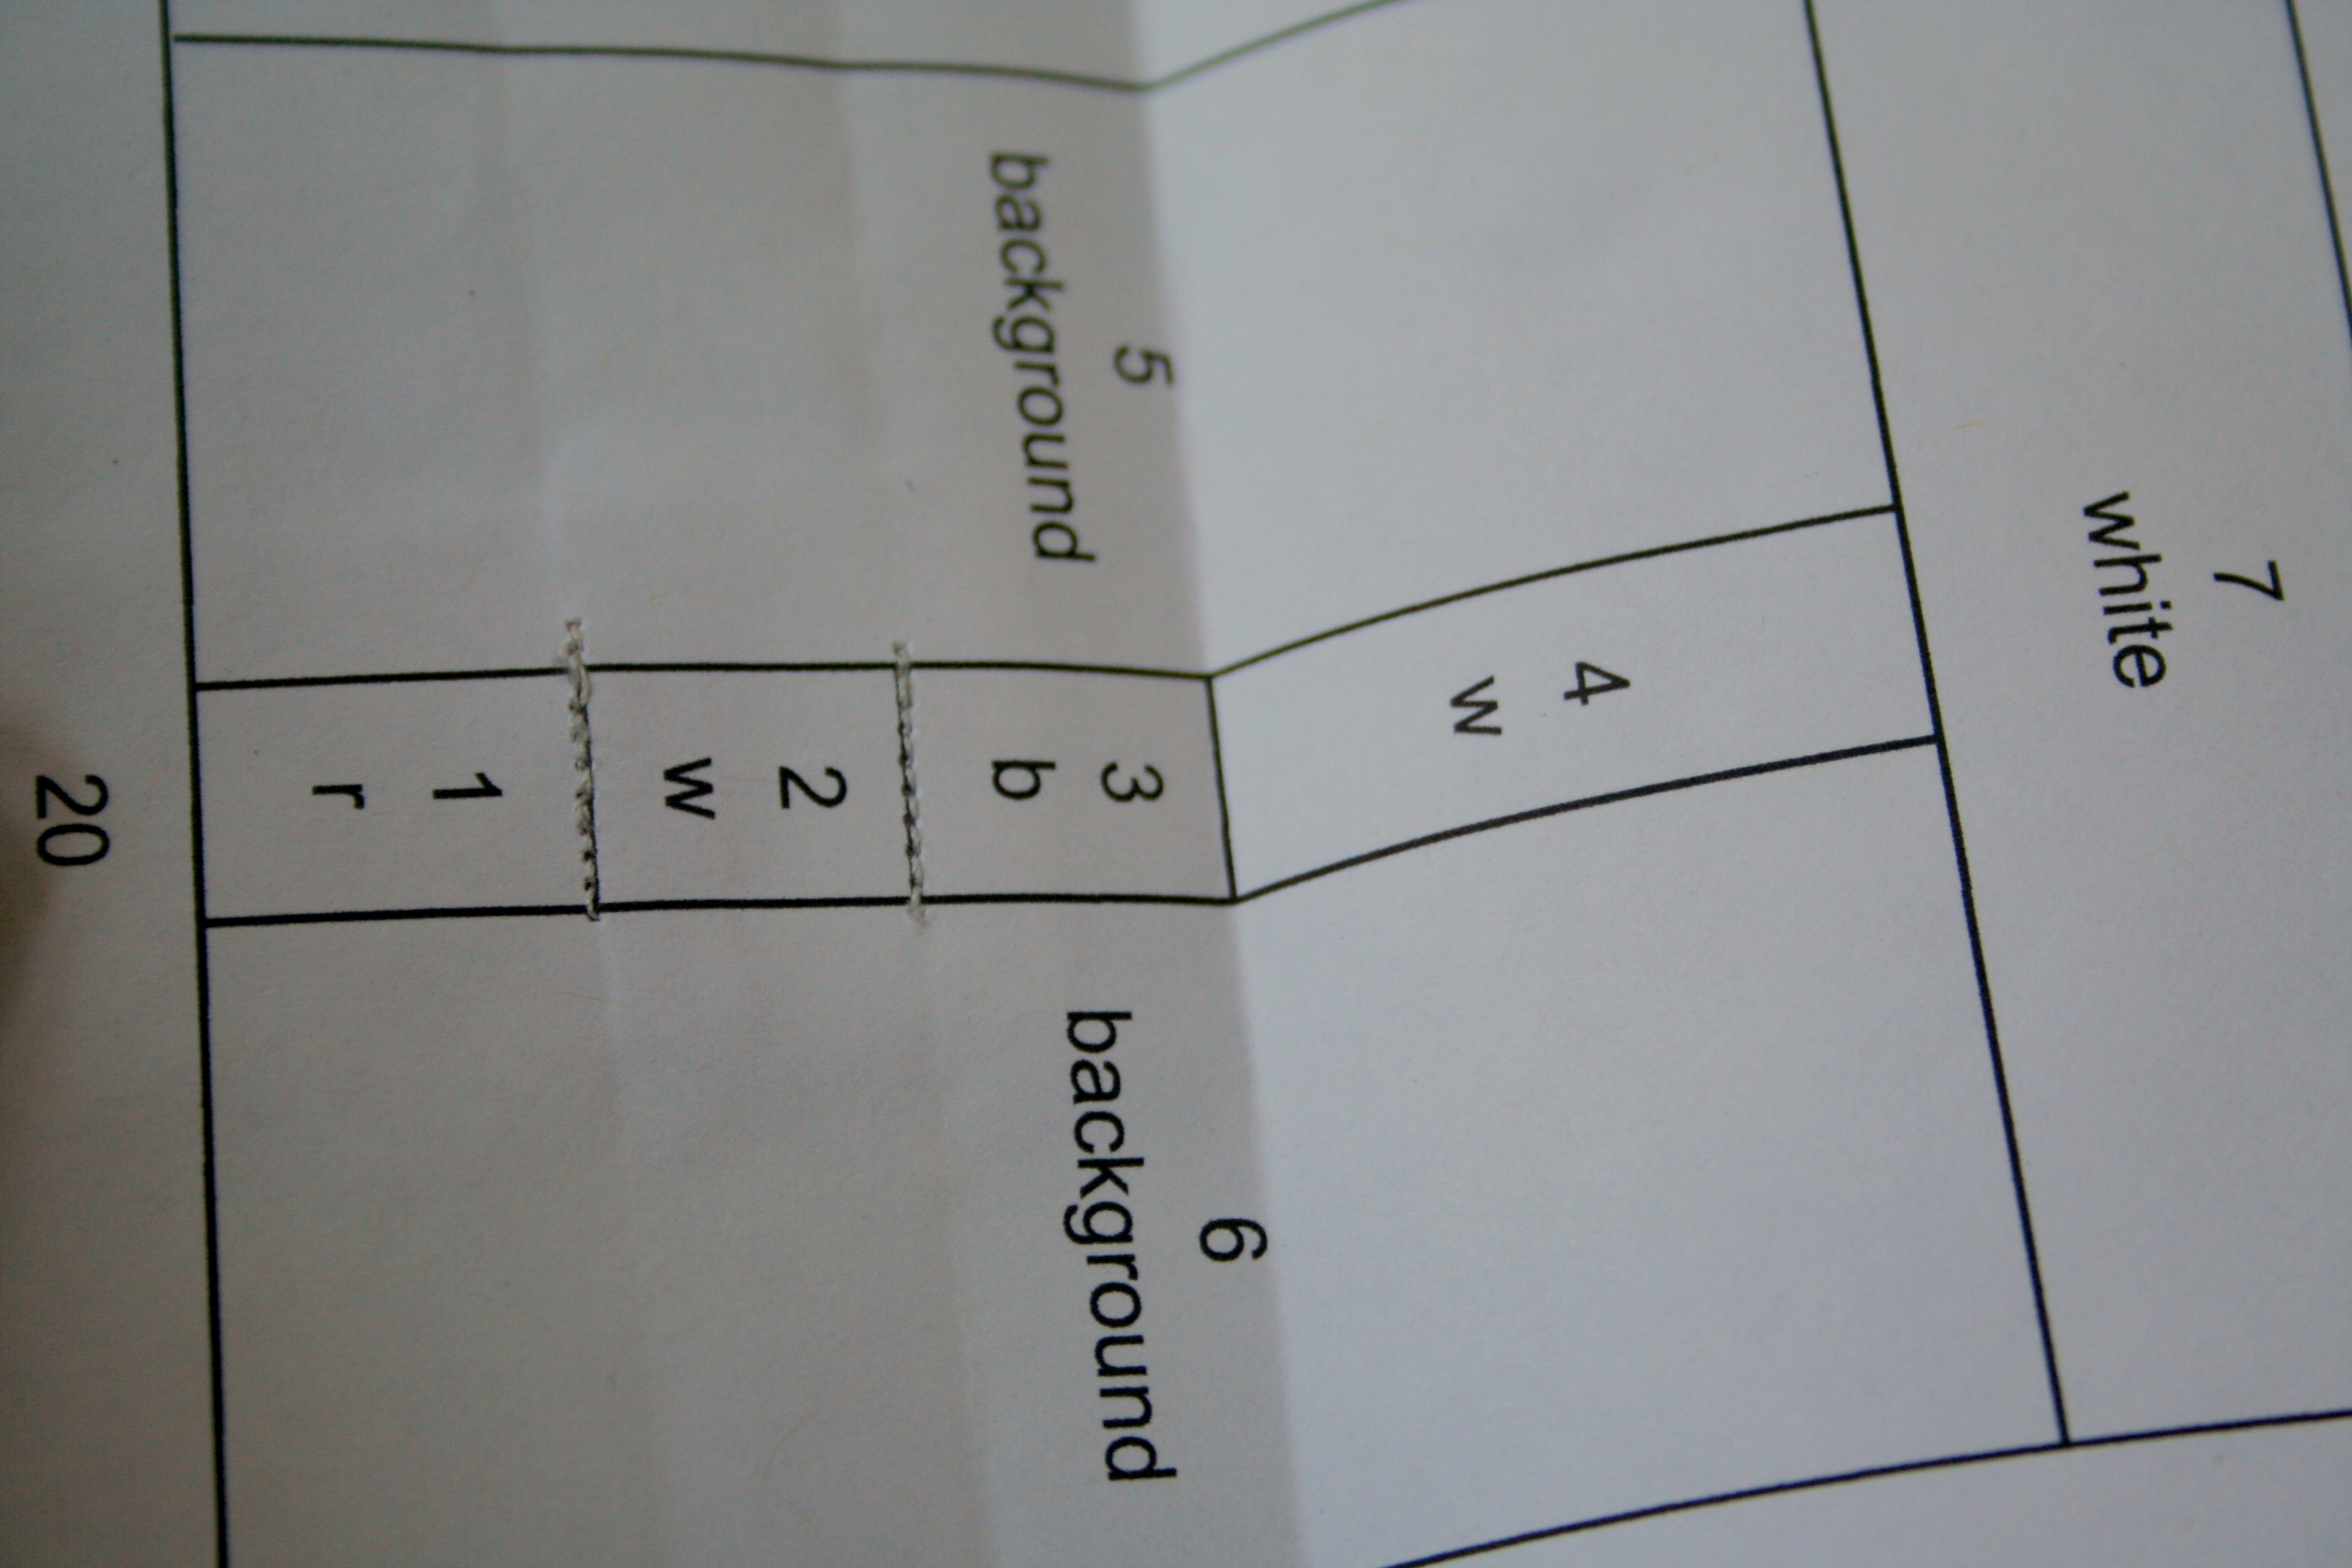
For this example, I have just sewn on piece 3, and I’m getting ready to sew piece 4.
First, fold the paper along the seam line between pieces 3 and 4.
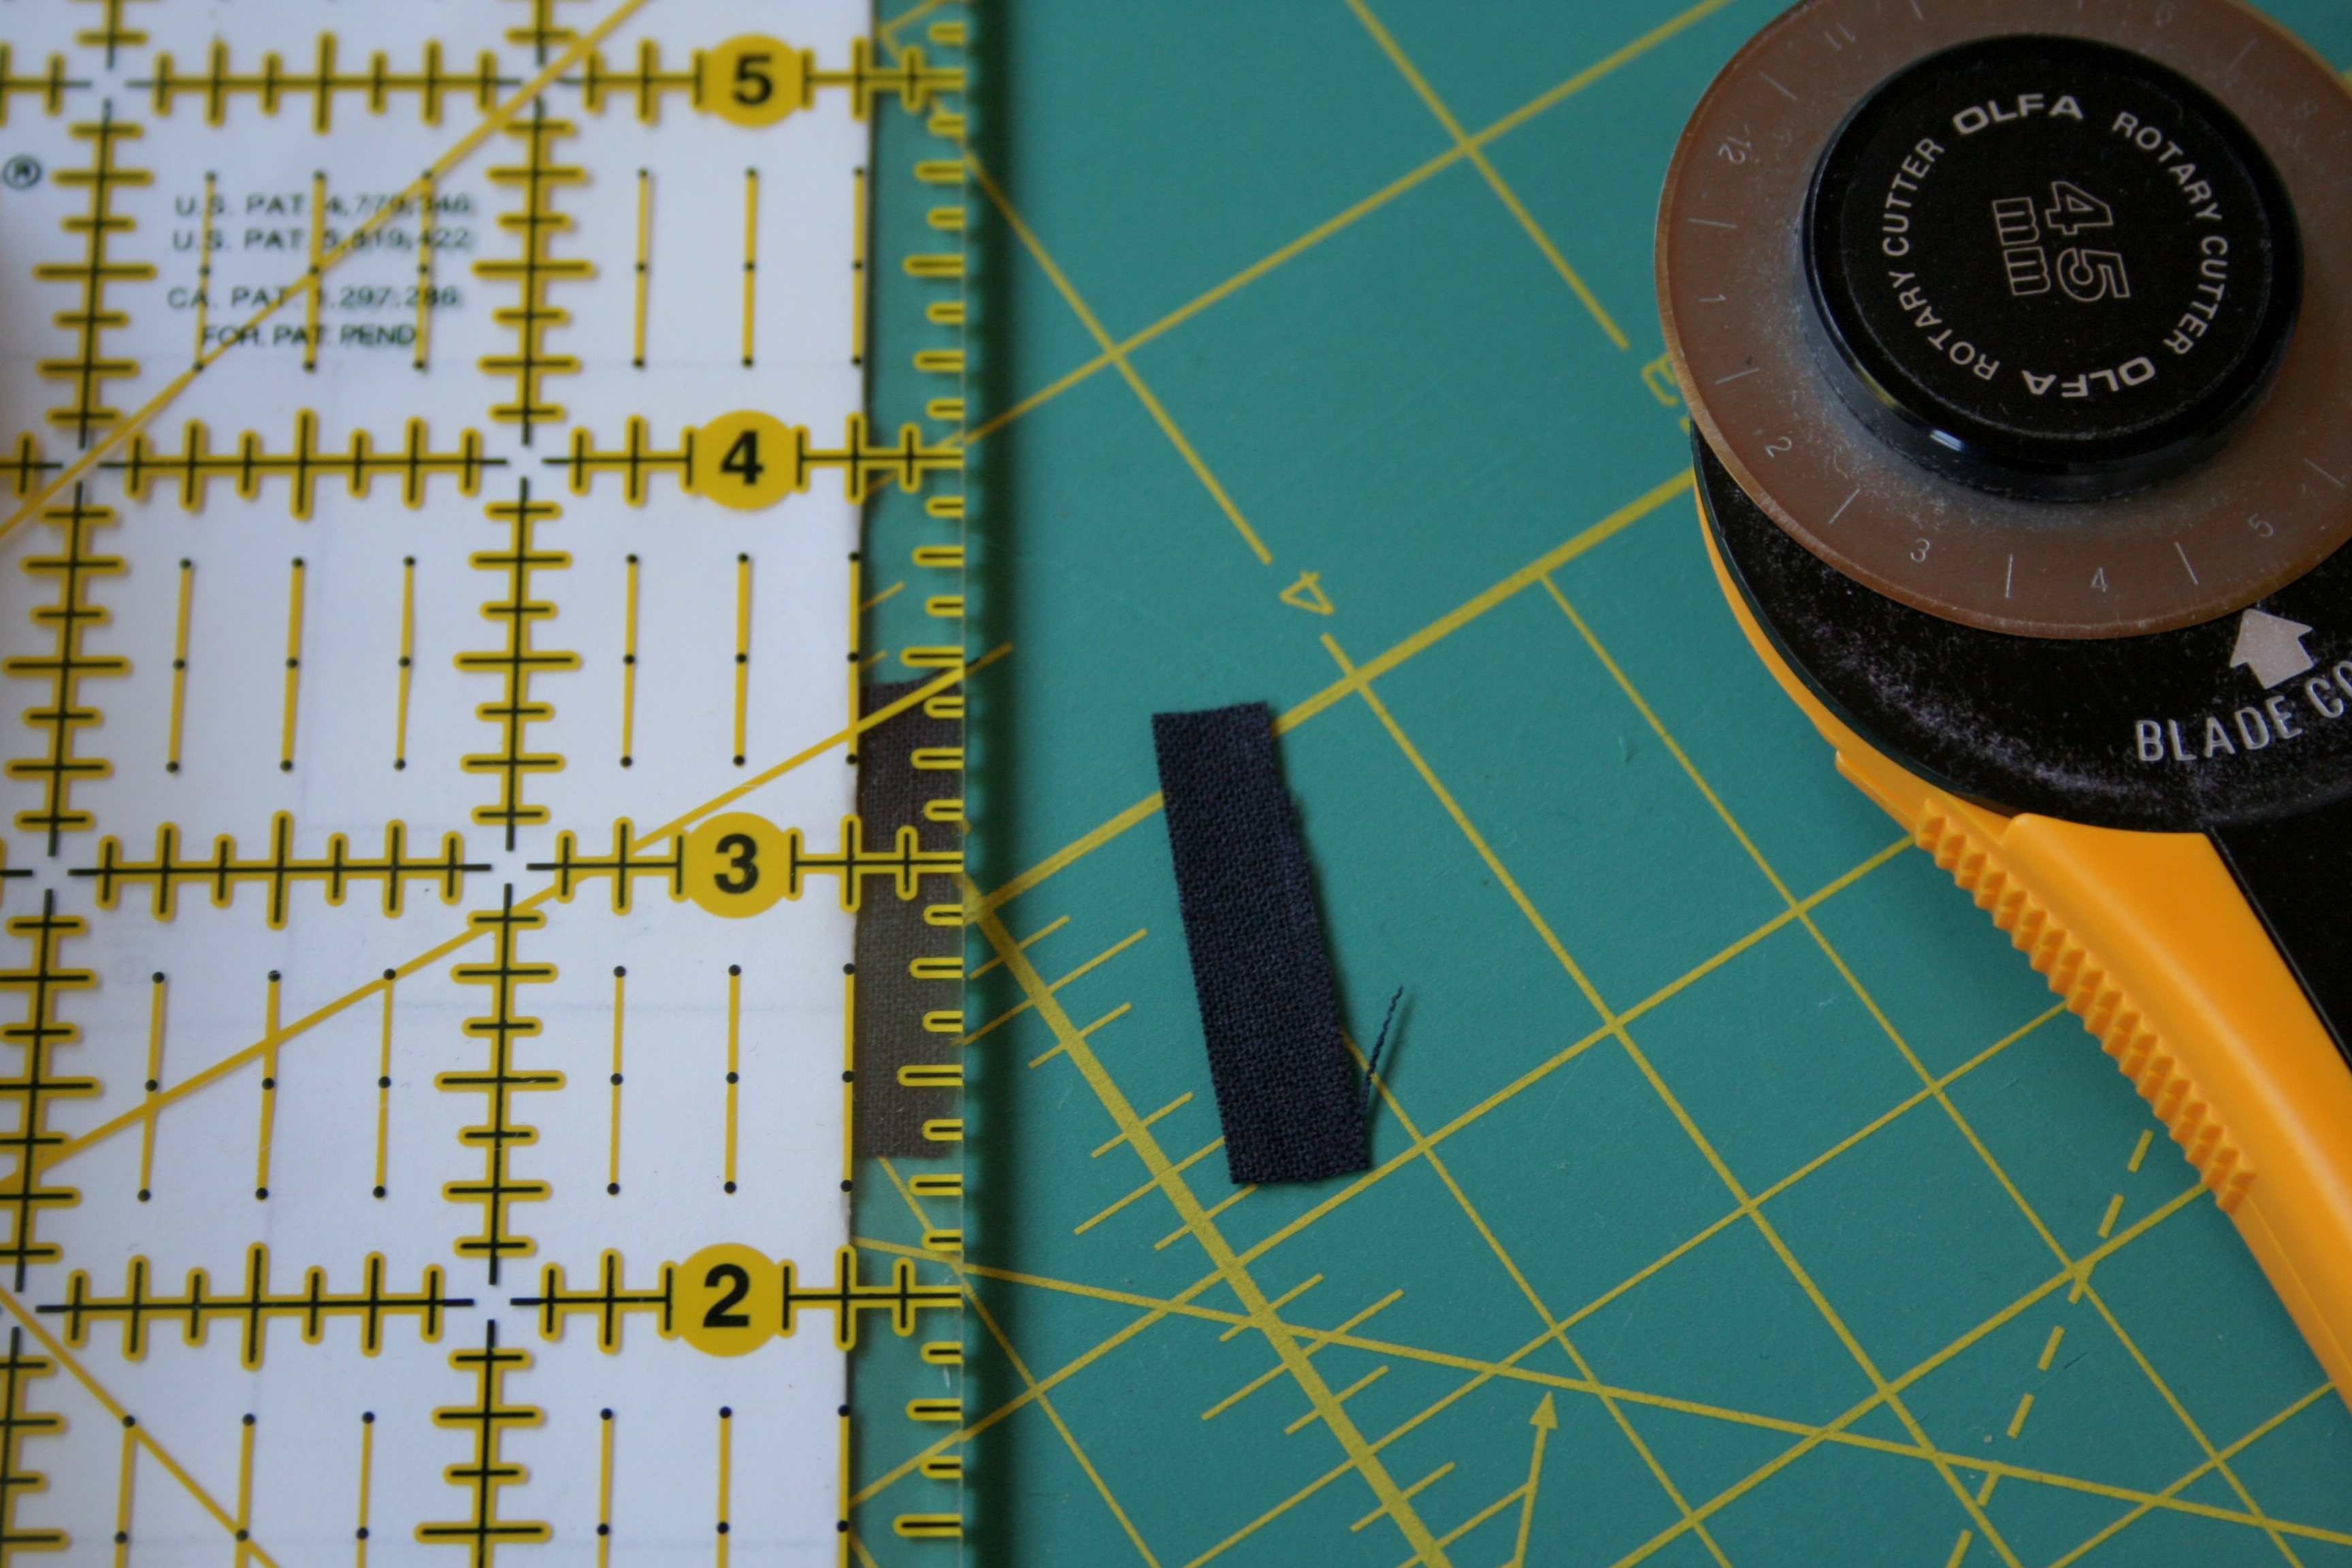
With paper folded over, trim the excess of piece 3 to 1/4″ beyond the fold. This will give you an accurate edge with which to line up the edge of piece 4.
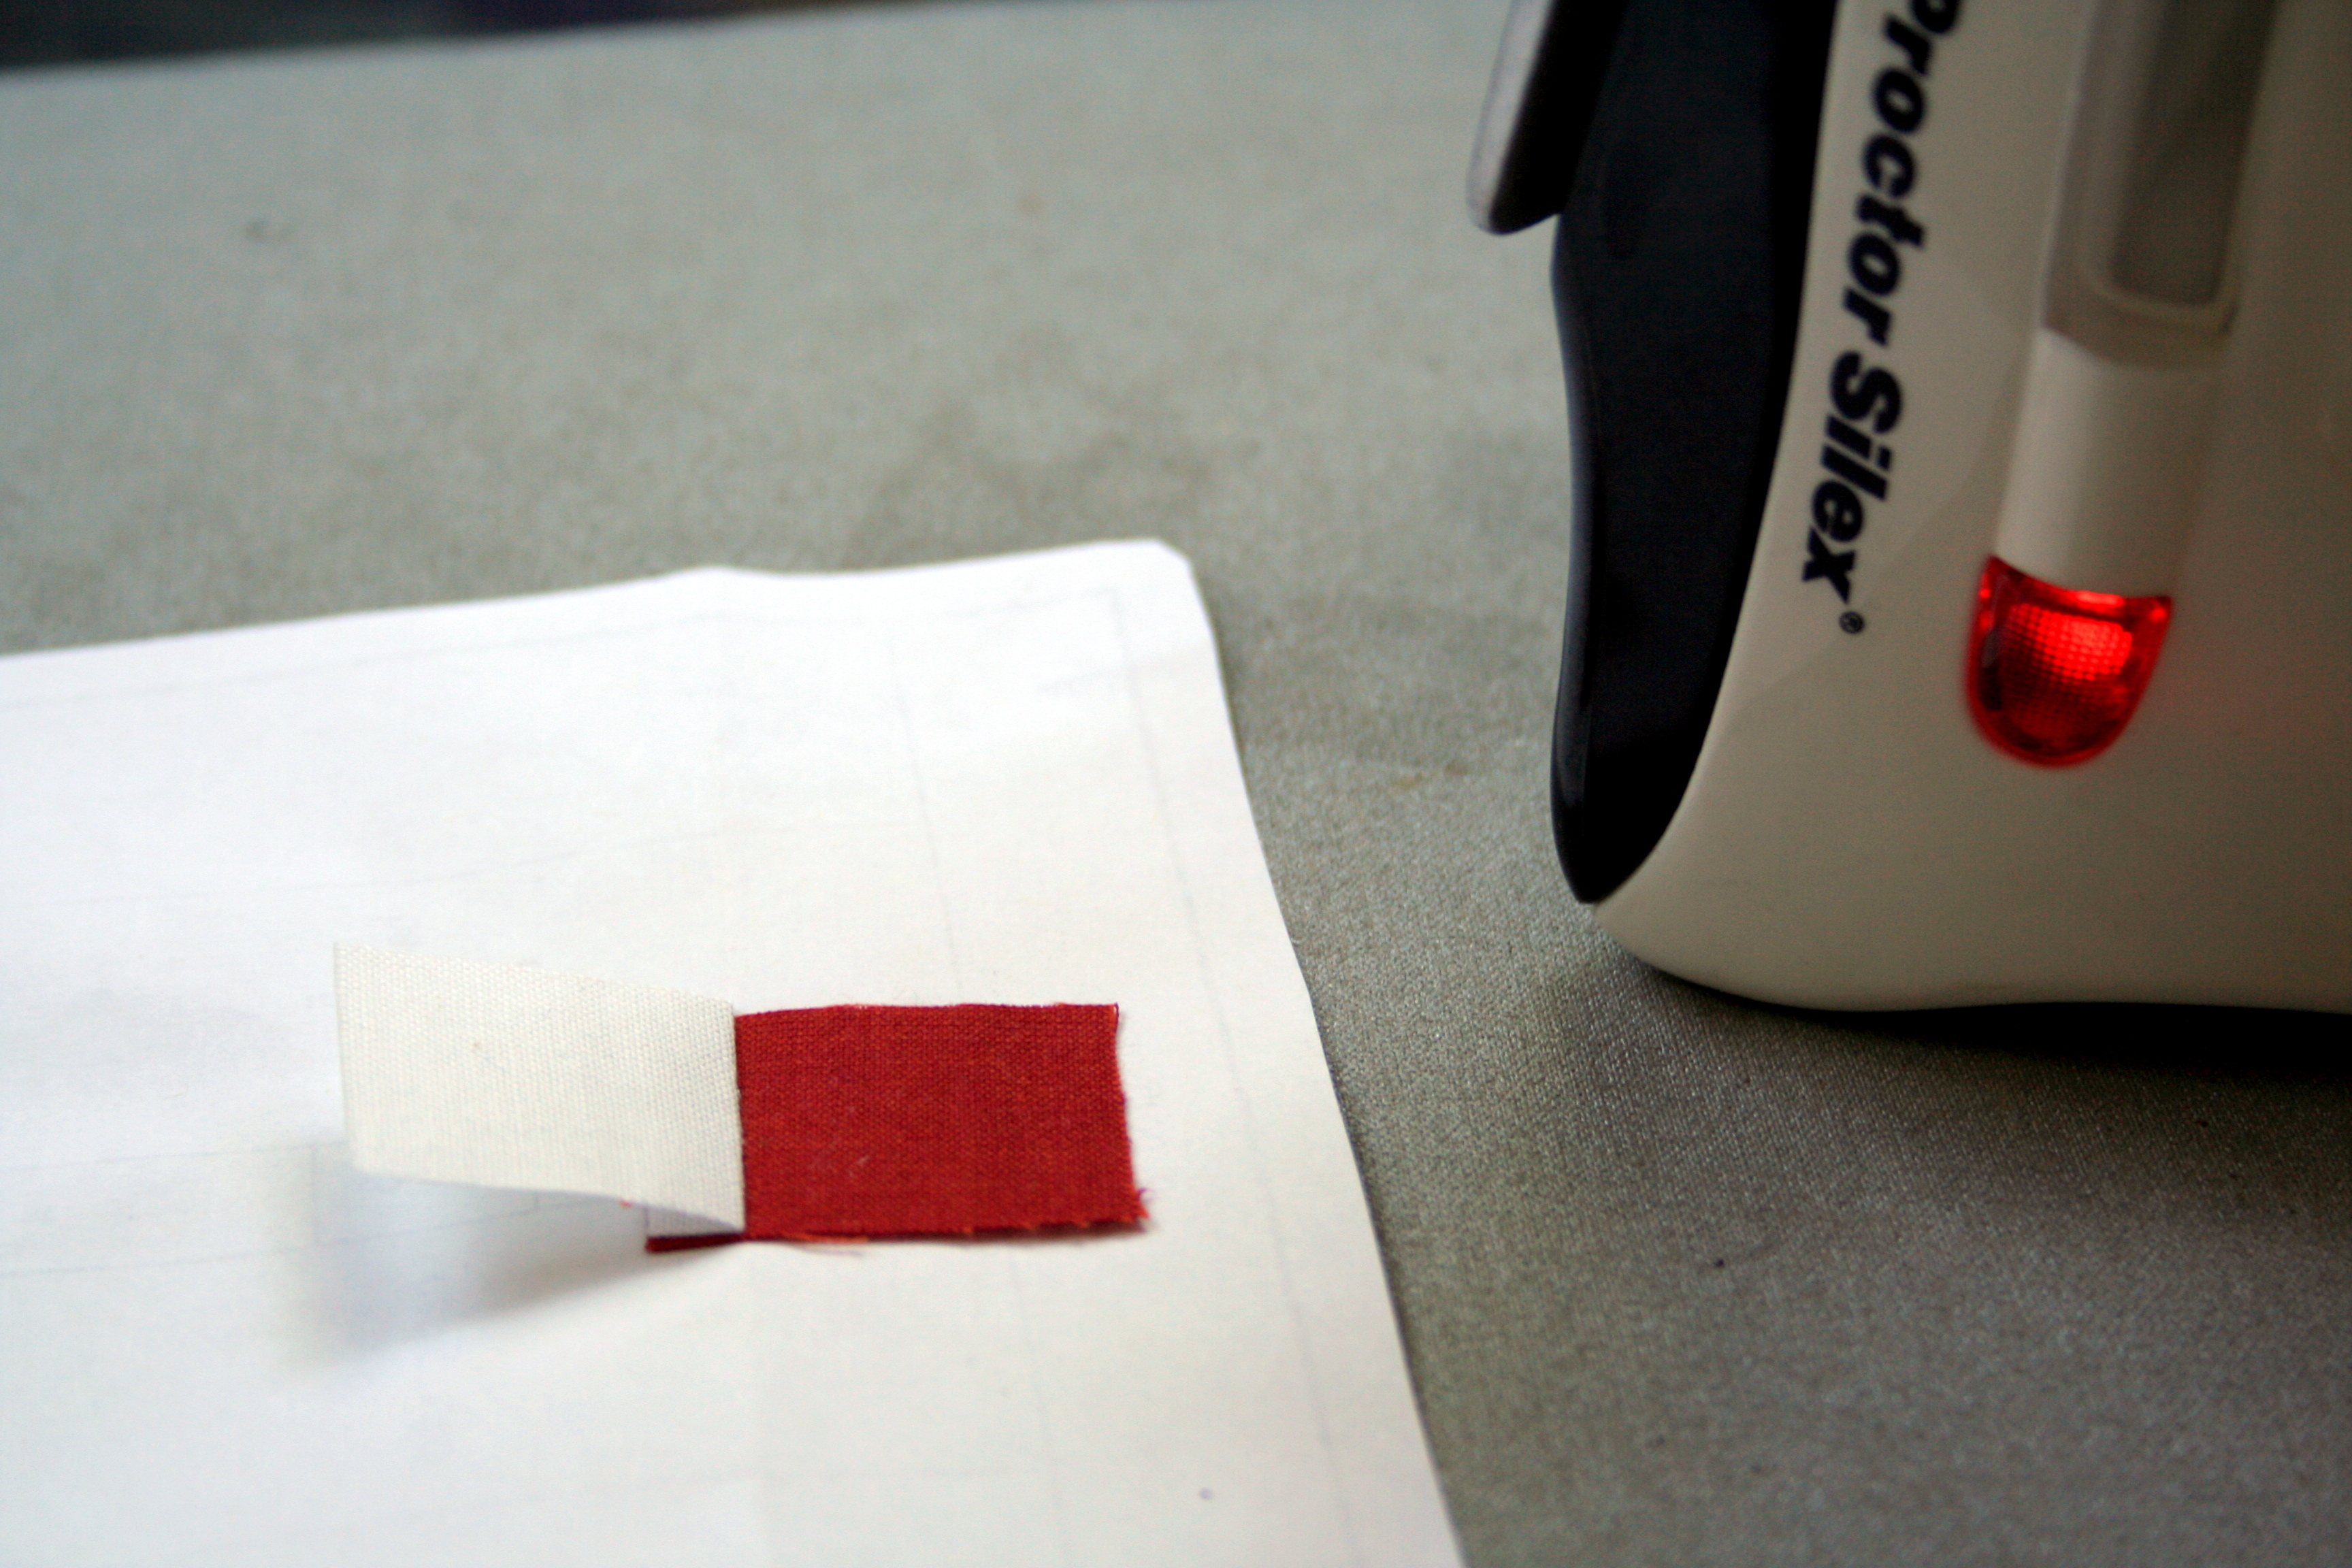
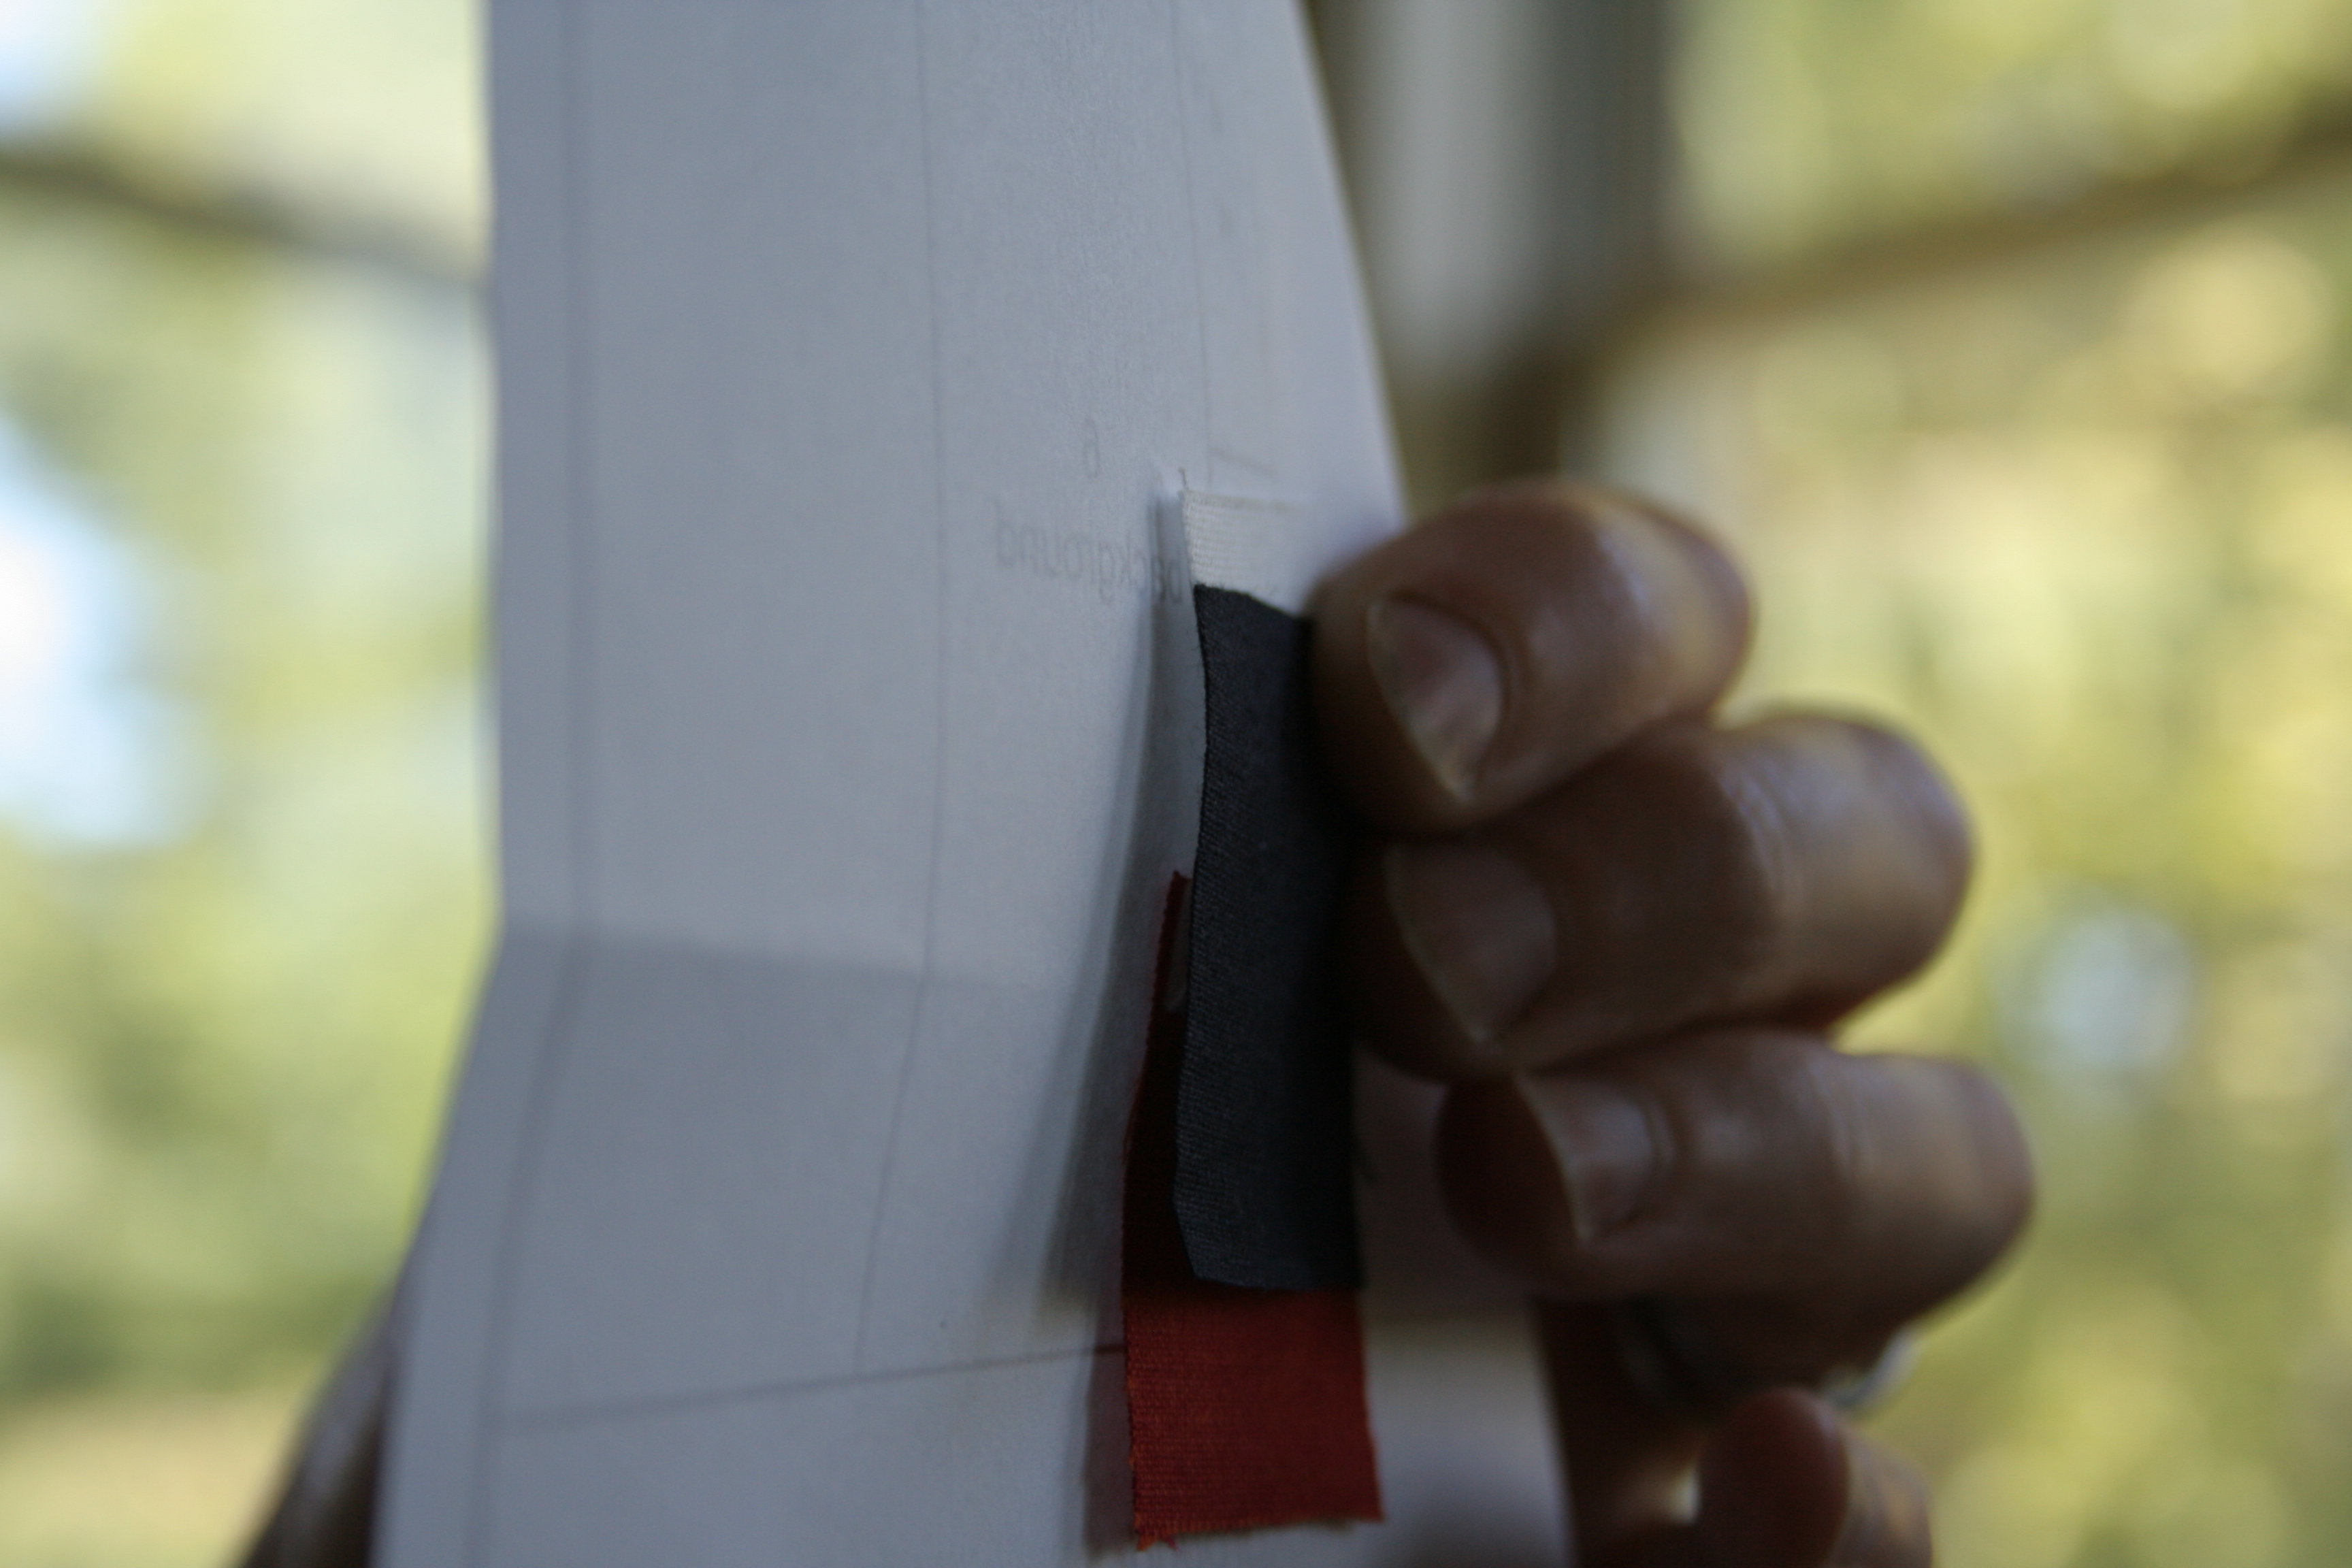
When lining up piece 4 (white) with the edge of piece 3 (black), if you match the edges, the seam will be exactly 1/4″. Note that the right side of fabric 4 is facing the right side of fabric 3. Hold in place, sew, and you’ve got as close to a perfect seam as you’re going to get!
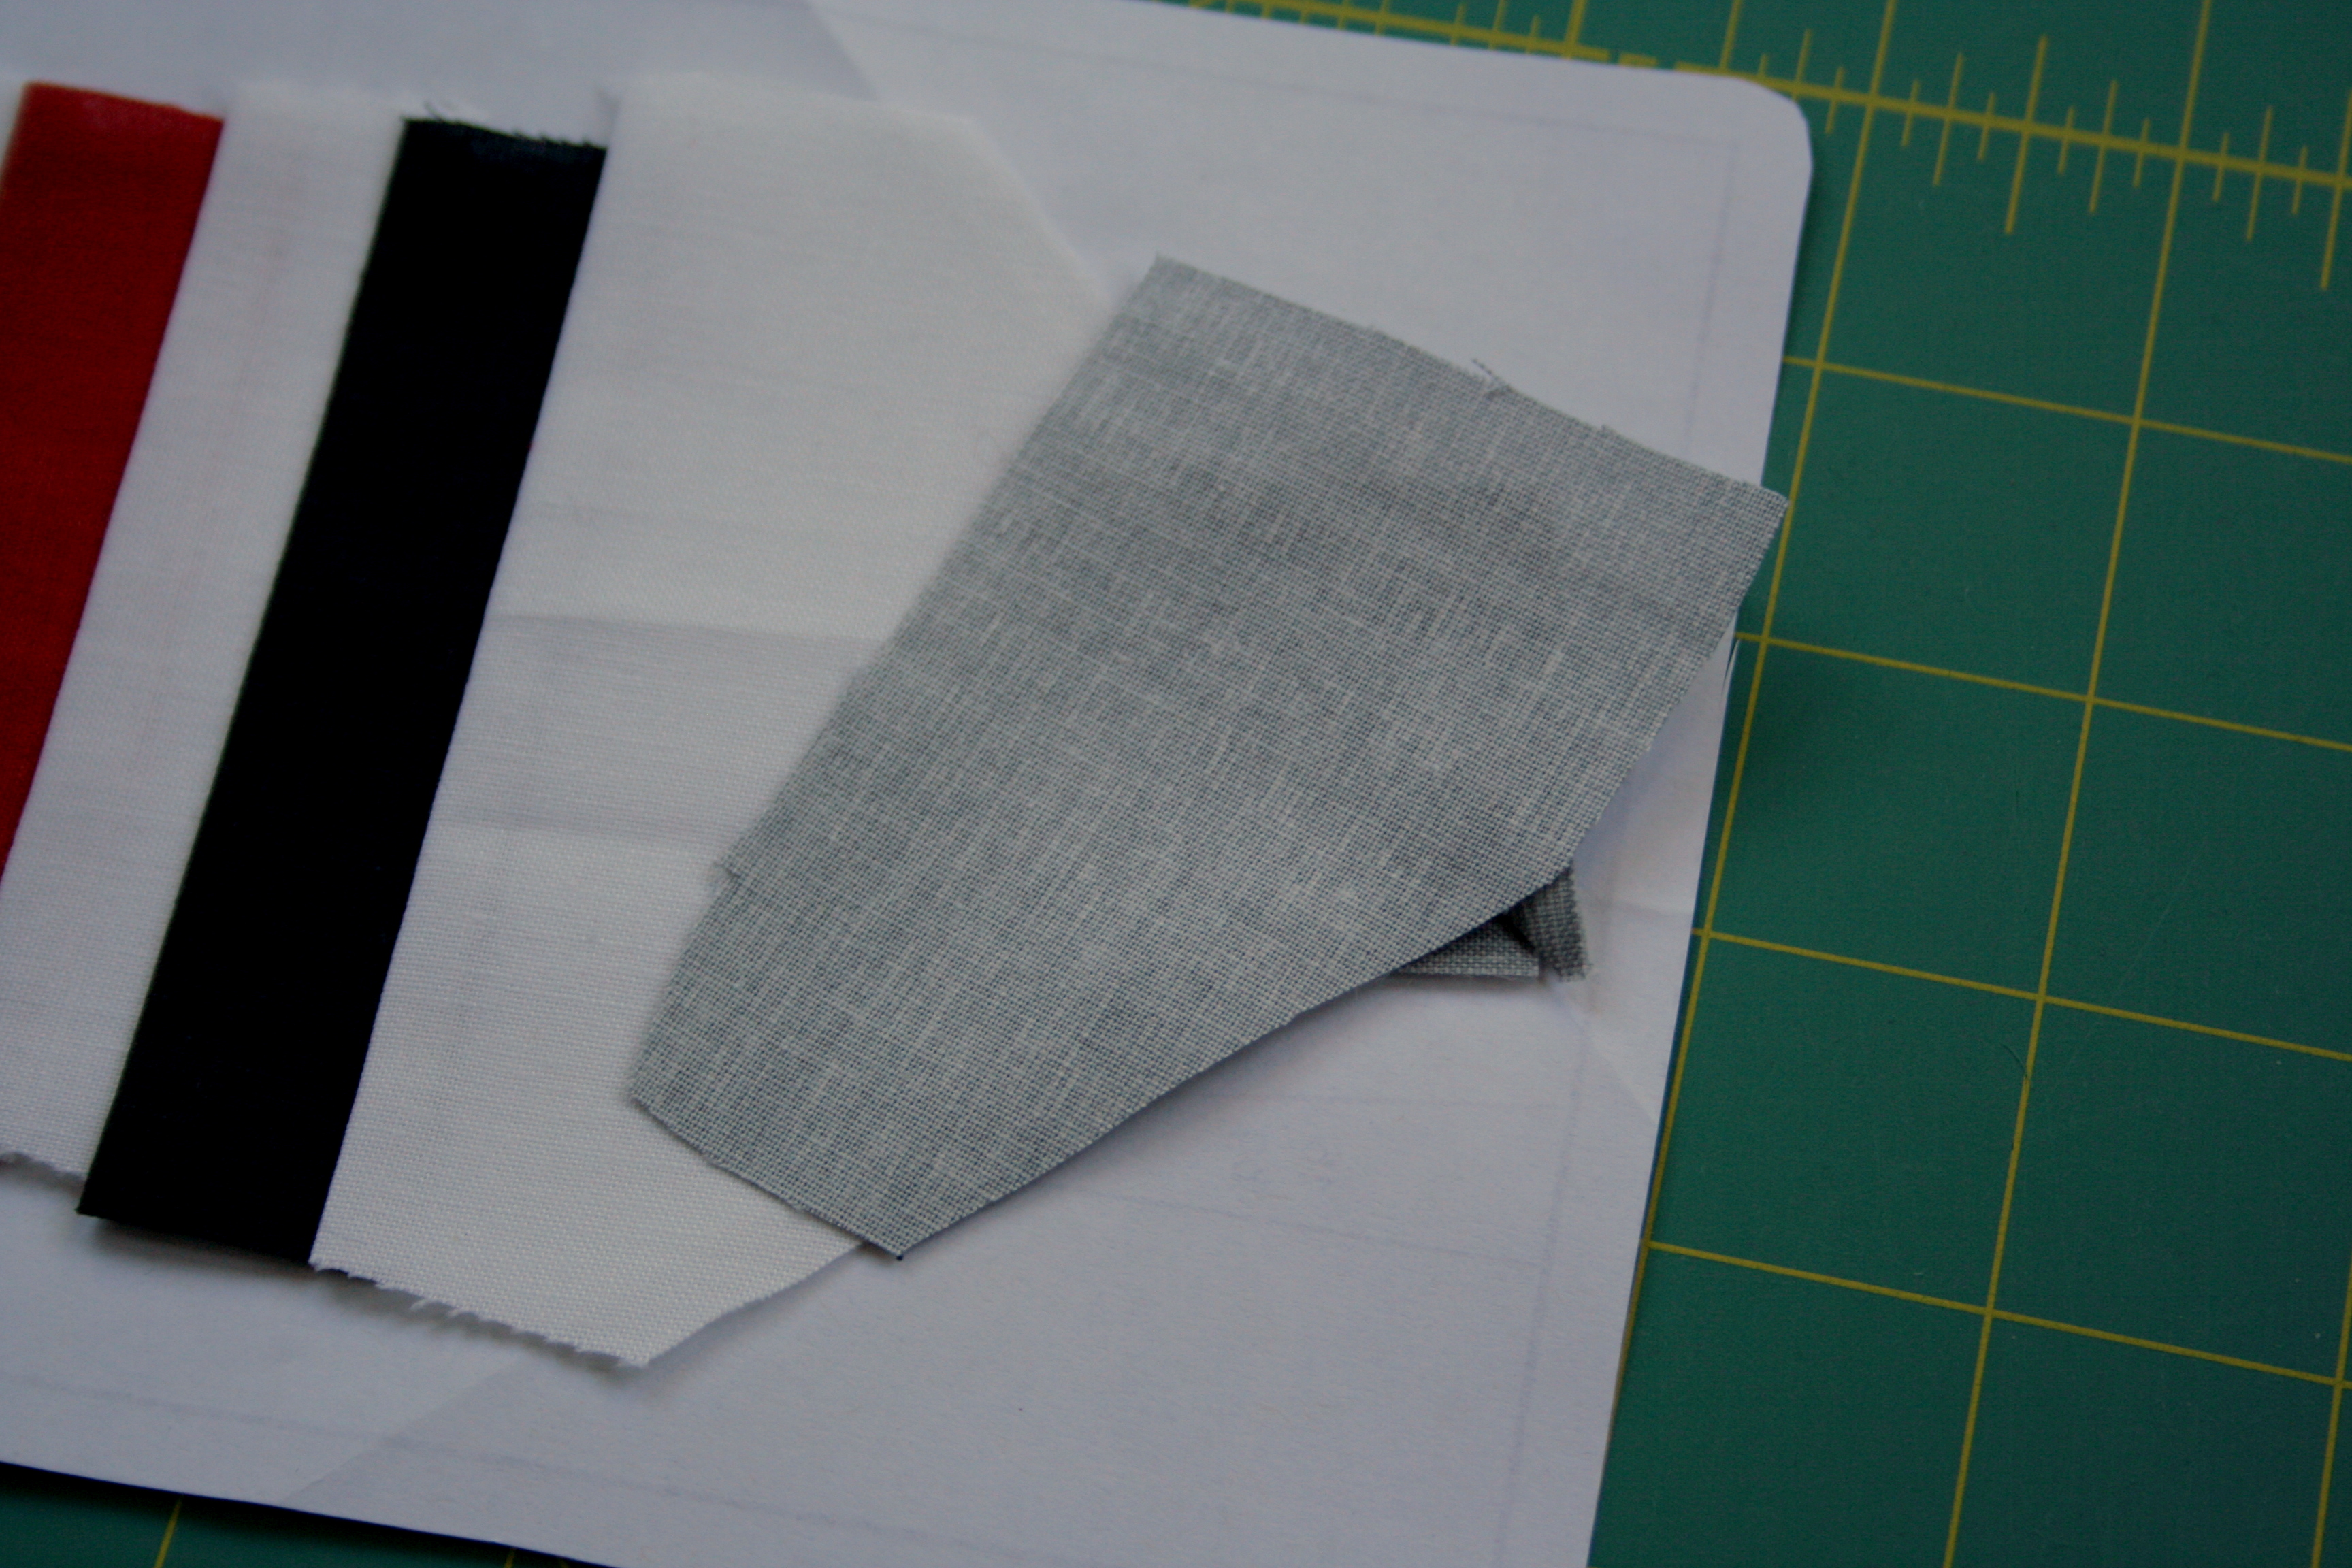
Tips for Using Directional Fabrics:
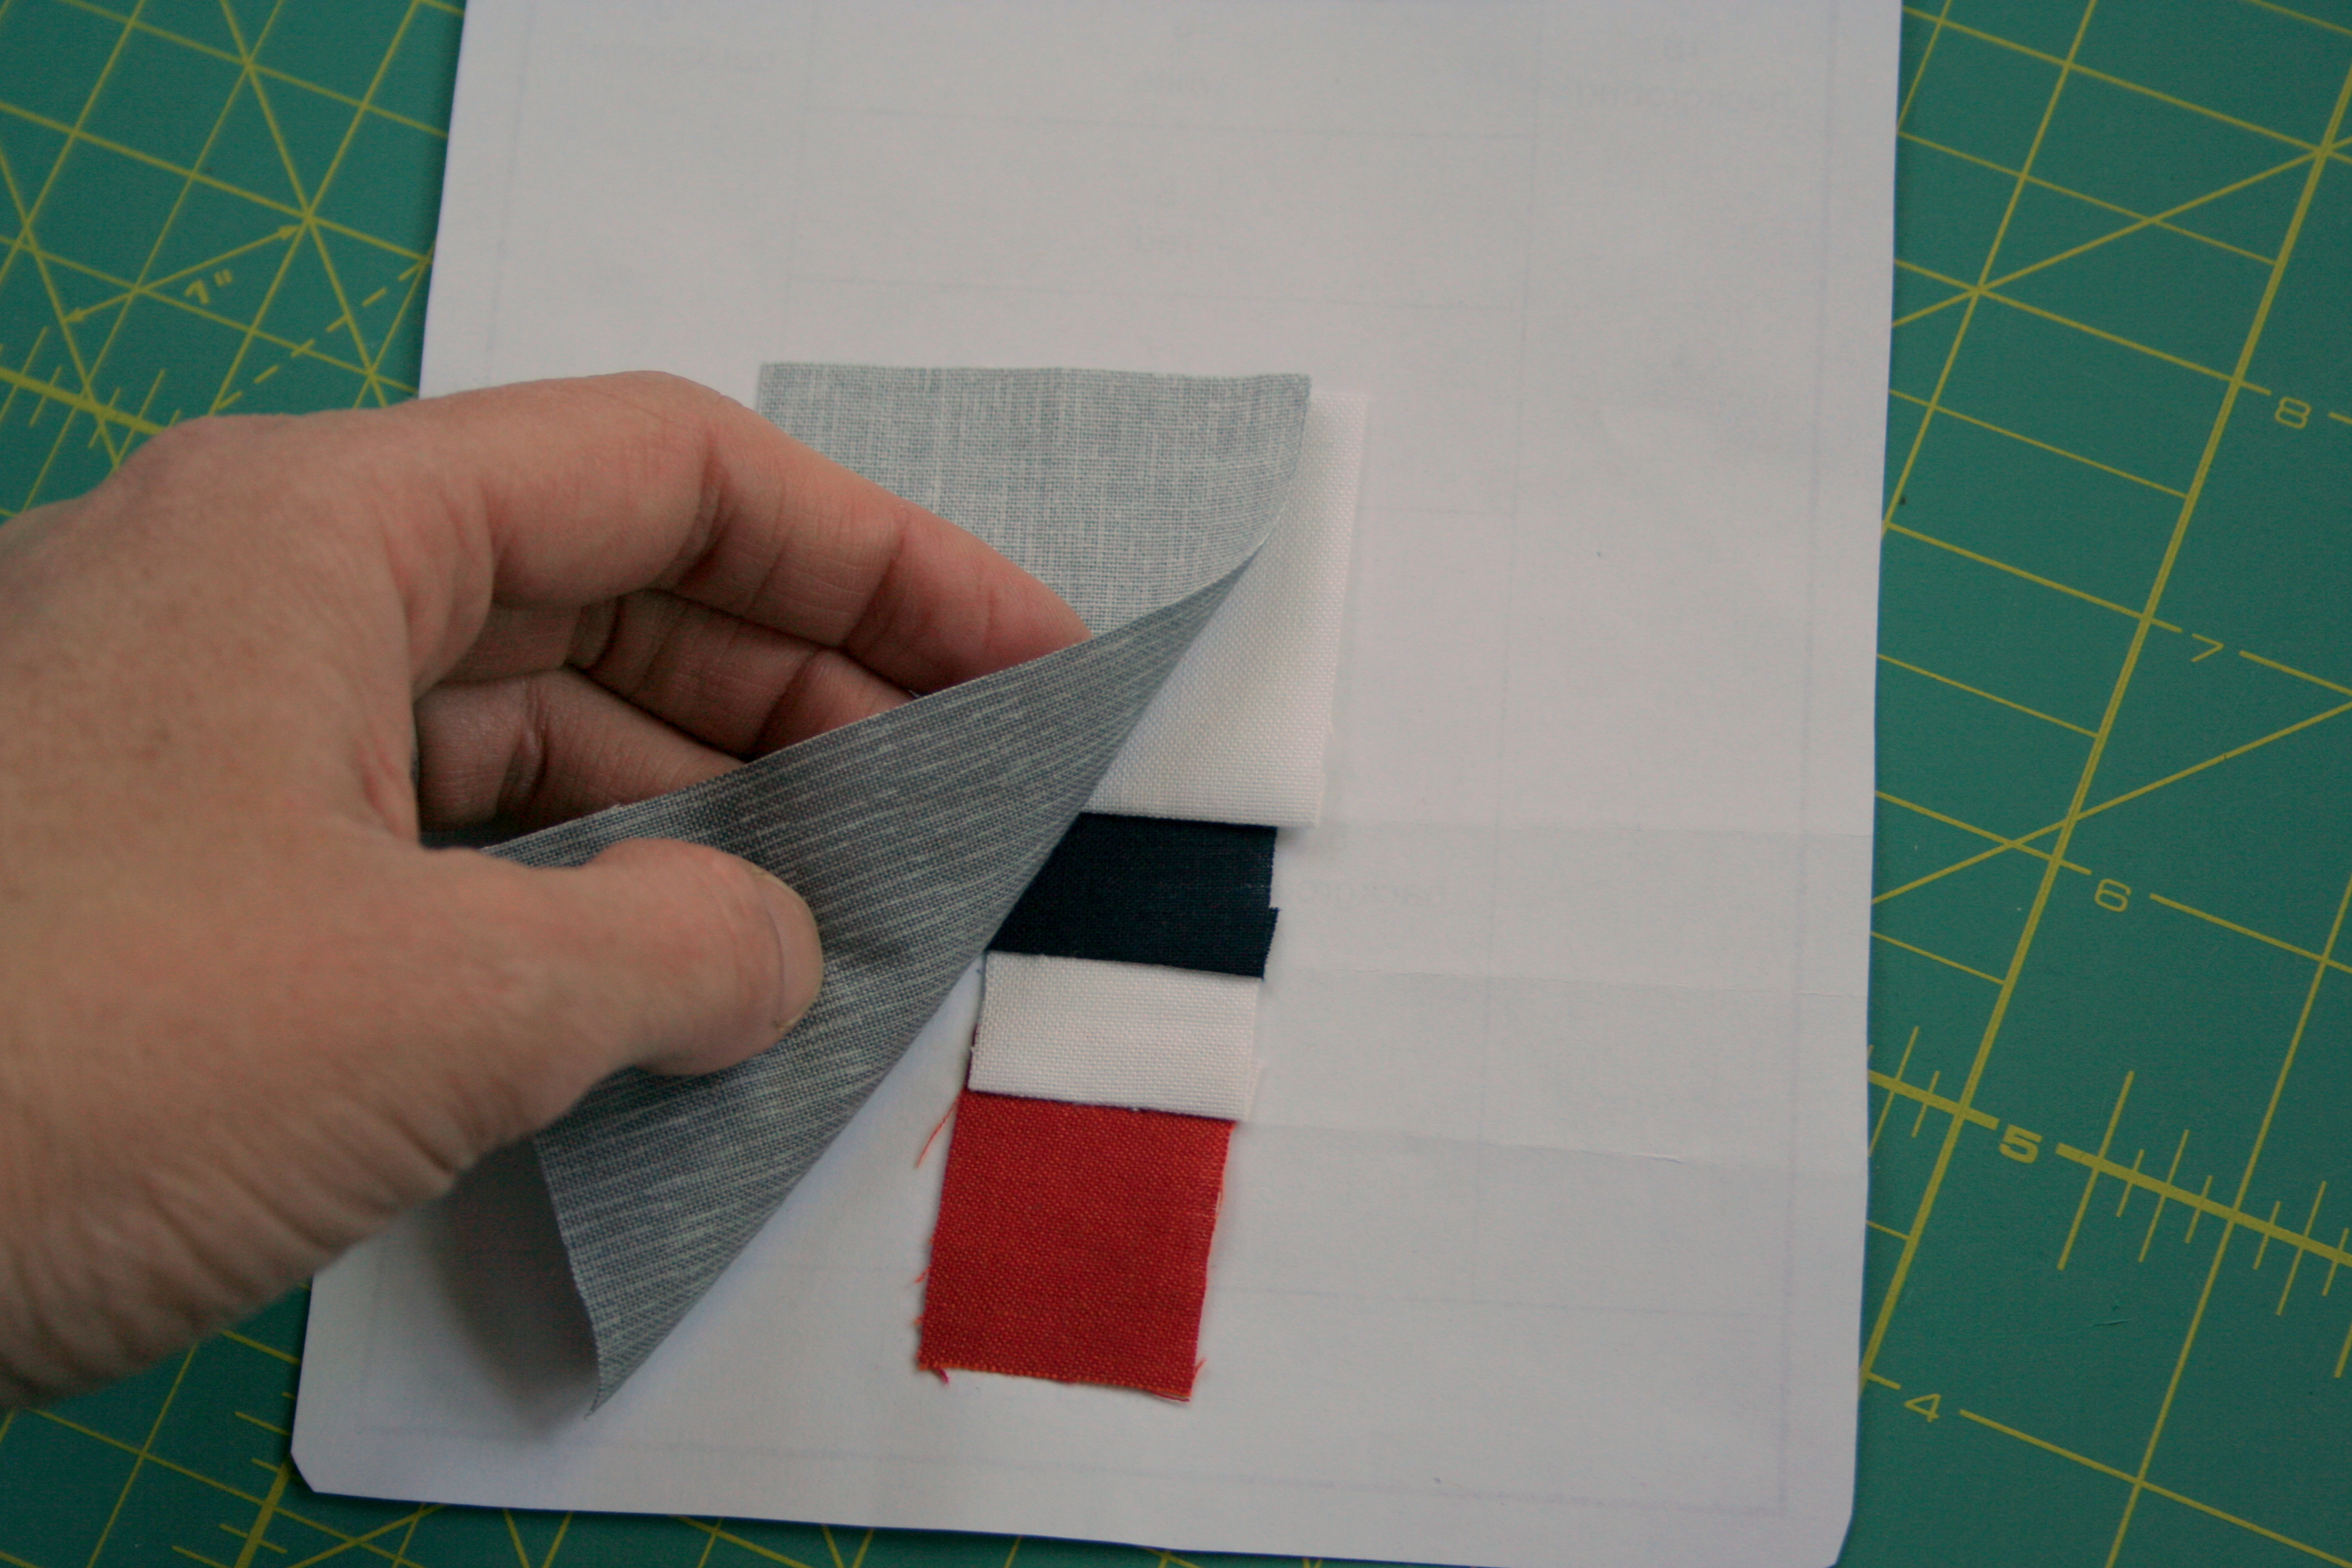
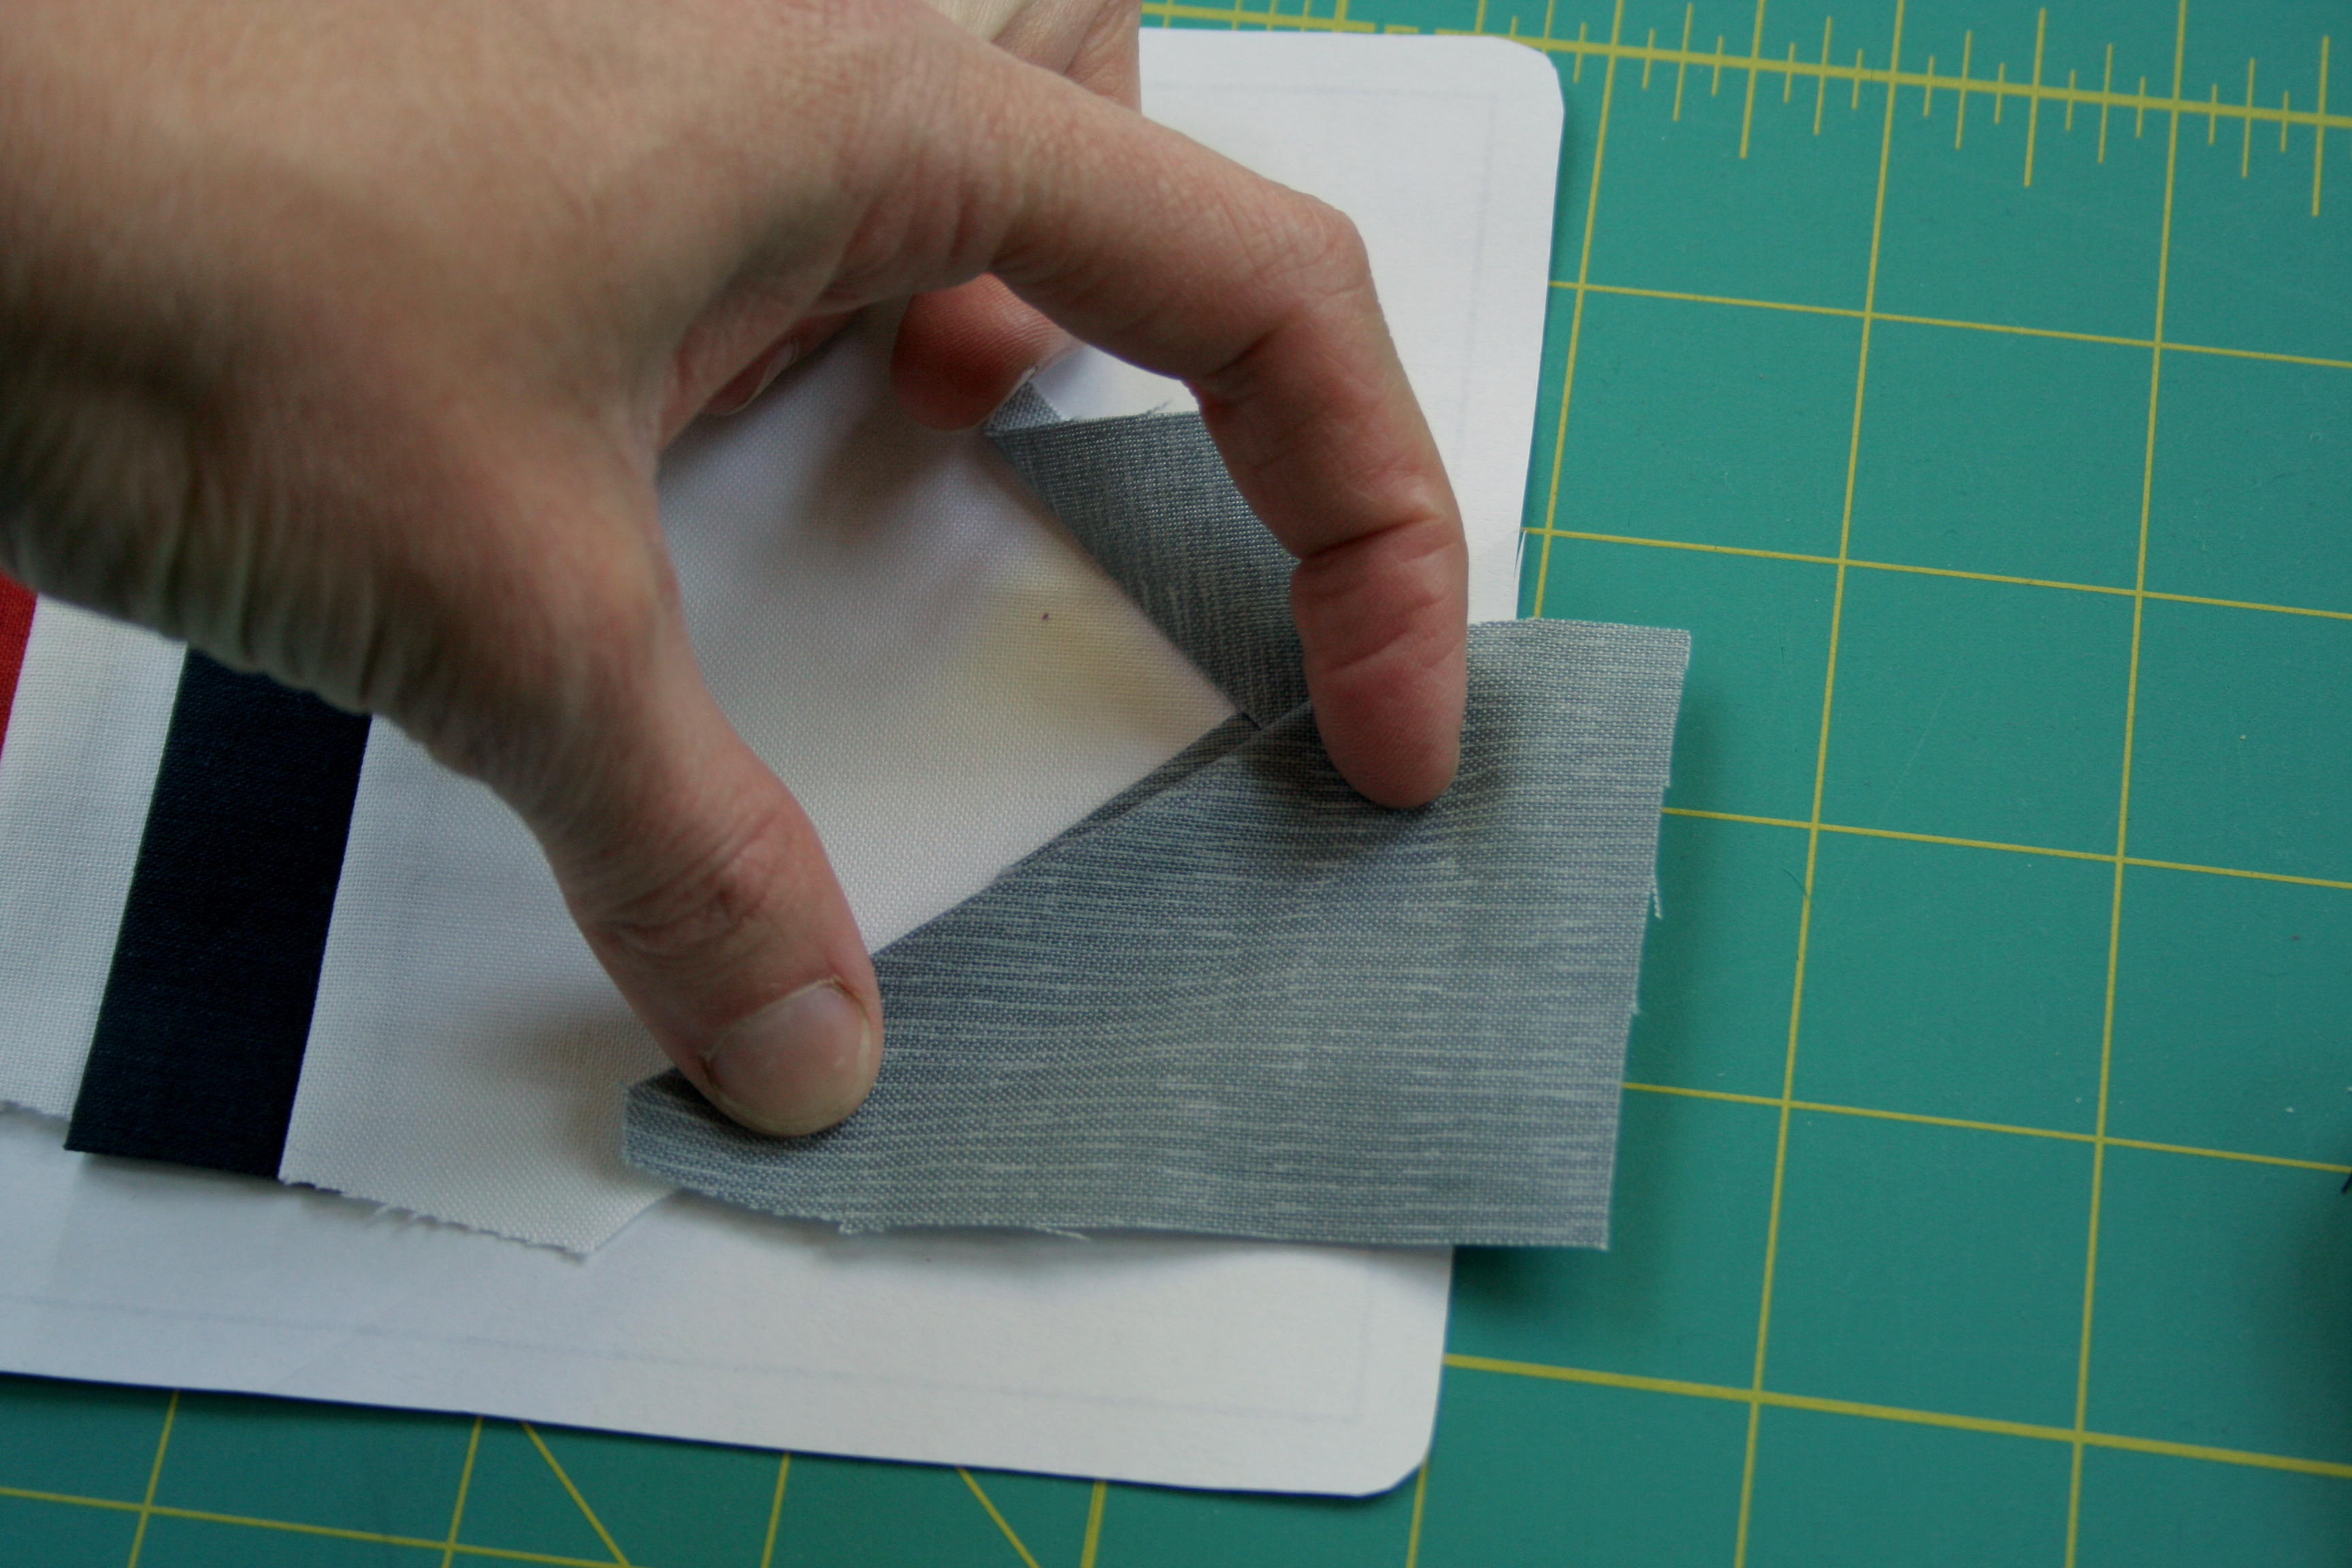
Using fabrics without a directional flow is fairly straight-forward, but if you are using a fabric with a directional pattern that you’d like to keep consistent, it takes a bit more forethought when you cut. First, line up your pattern and your fabric to decide in what direction the fabric should go. To cut the fabric, position the pattern with the printed lines up, and the fabric wrong side facing up. This way, since you are creating your pattern on the back, the shape of the fabric piece will be accurate (note that the above photo shows the fabric right side up, before pieces were cut).
Once your piece is cut, proceed as usual, paying close attention to the direction of the fabric. Remember, right side of fabric piece is placed facing the right side of the emerging picture, on the wrong side of the foundation paper.
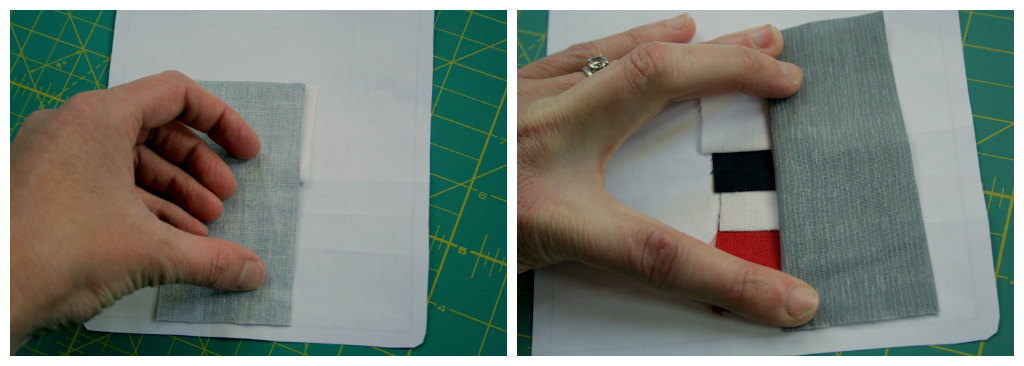
Until you get the hang of aligning the fabric correctly, it’s a good idea to check the direction of the fabric before sewing. Unpicking paper pieced (tiny stitches!) seams is less than desirable (trust me, I know!). To check the fabric direction, simply place the fabric wrong side down, hold along seam line, and fold back. Once you are sure the direction of the fabric is the way you want it, fold it back and sew.
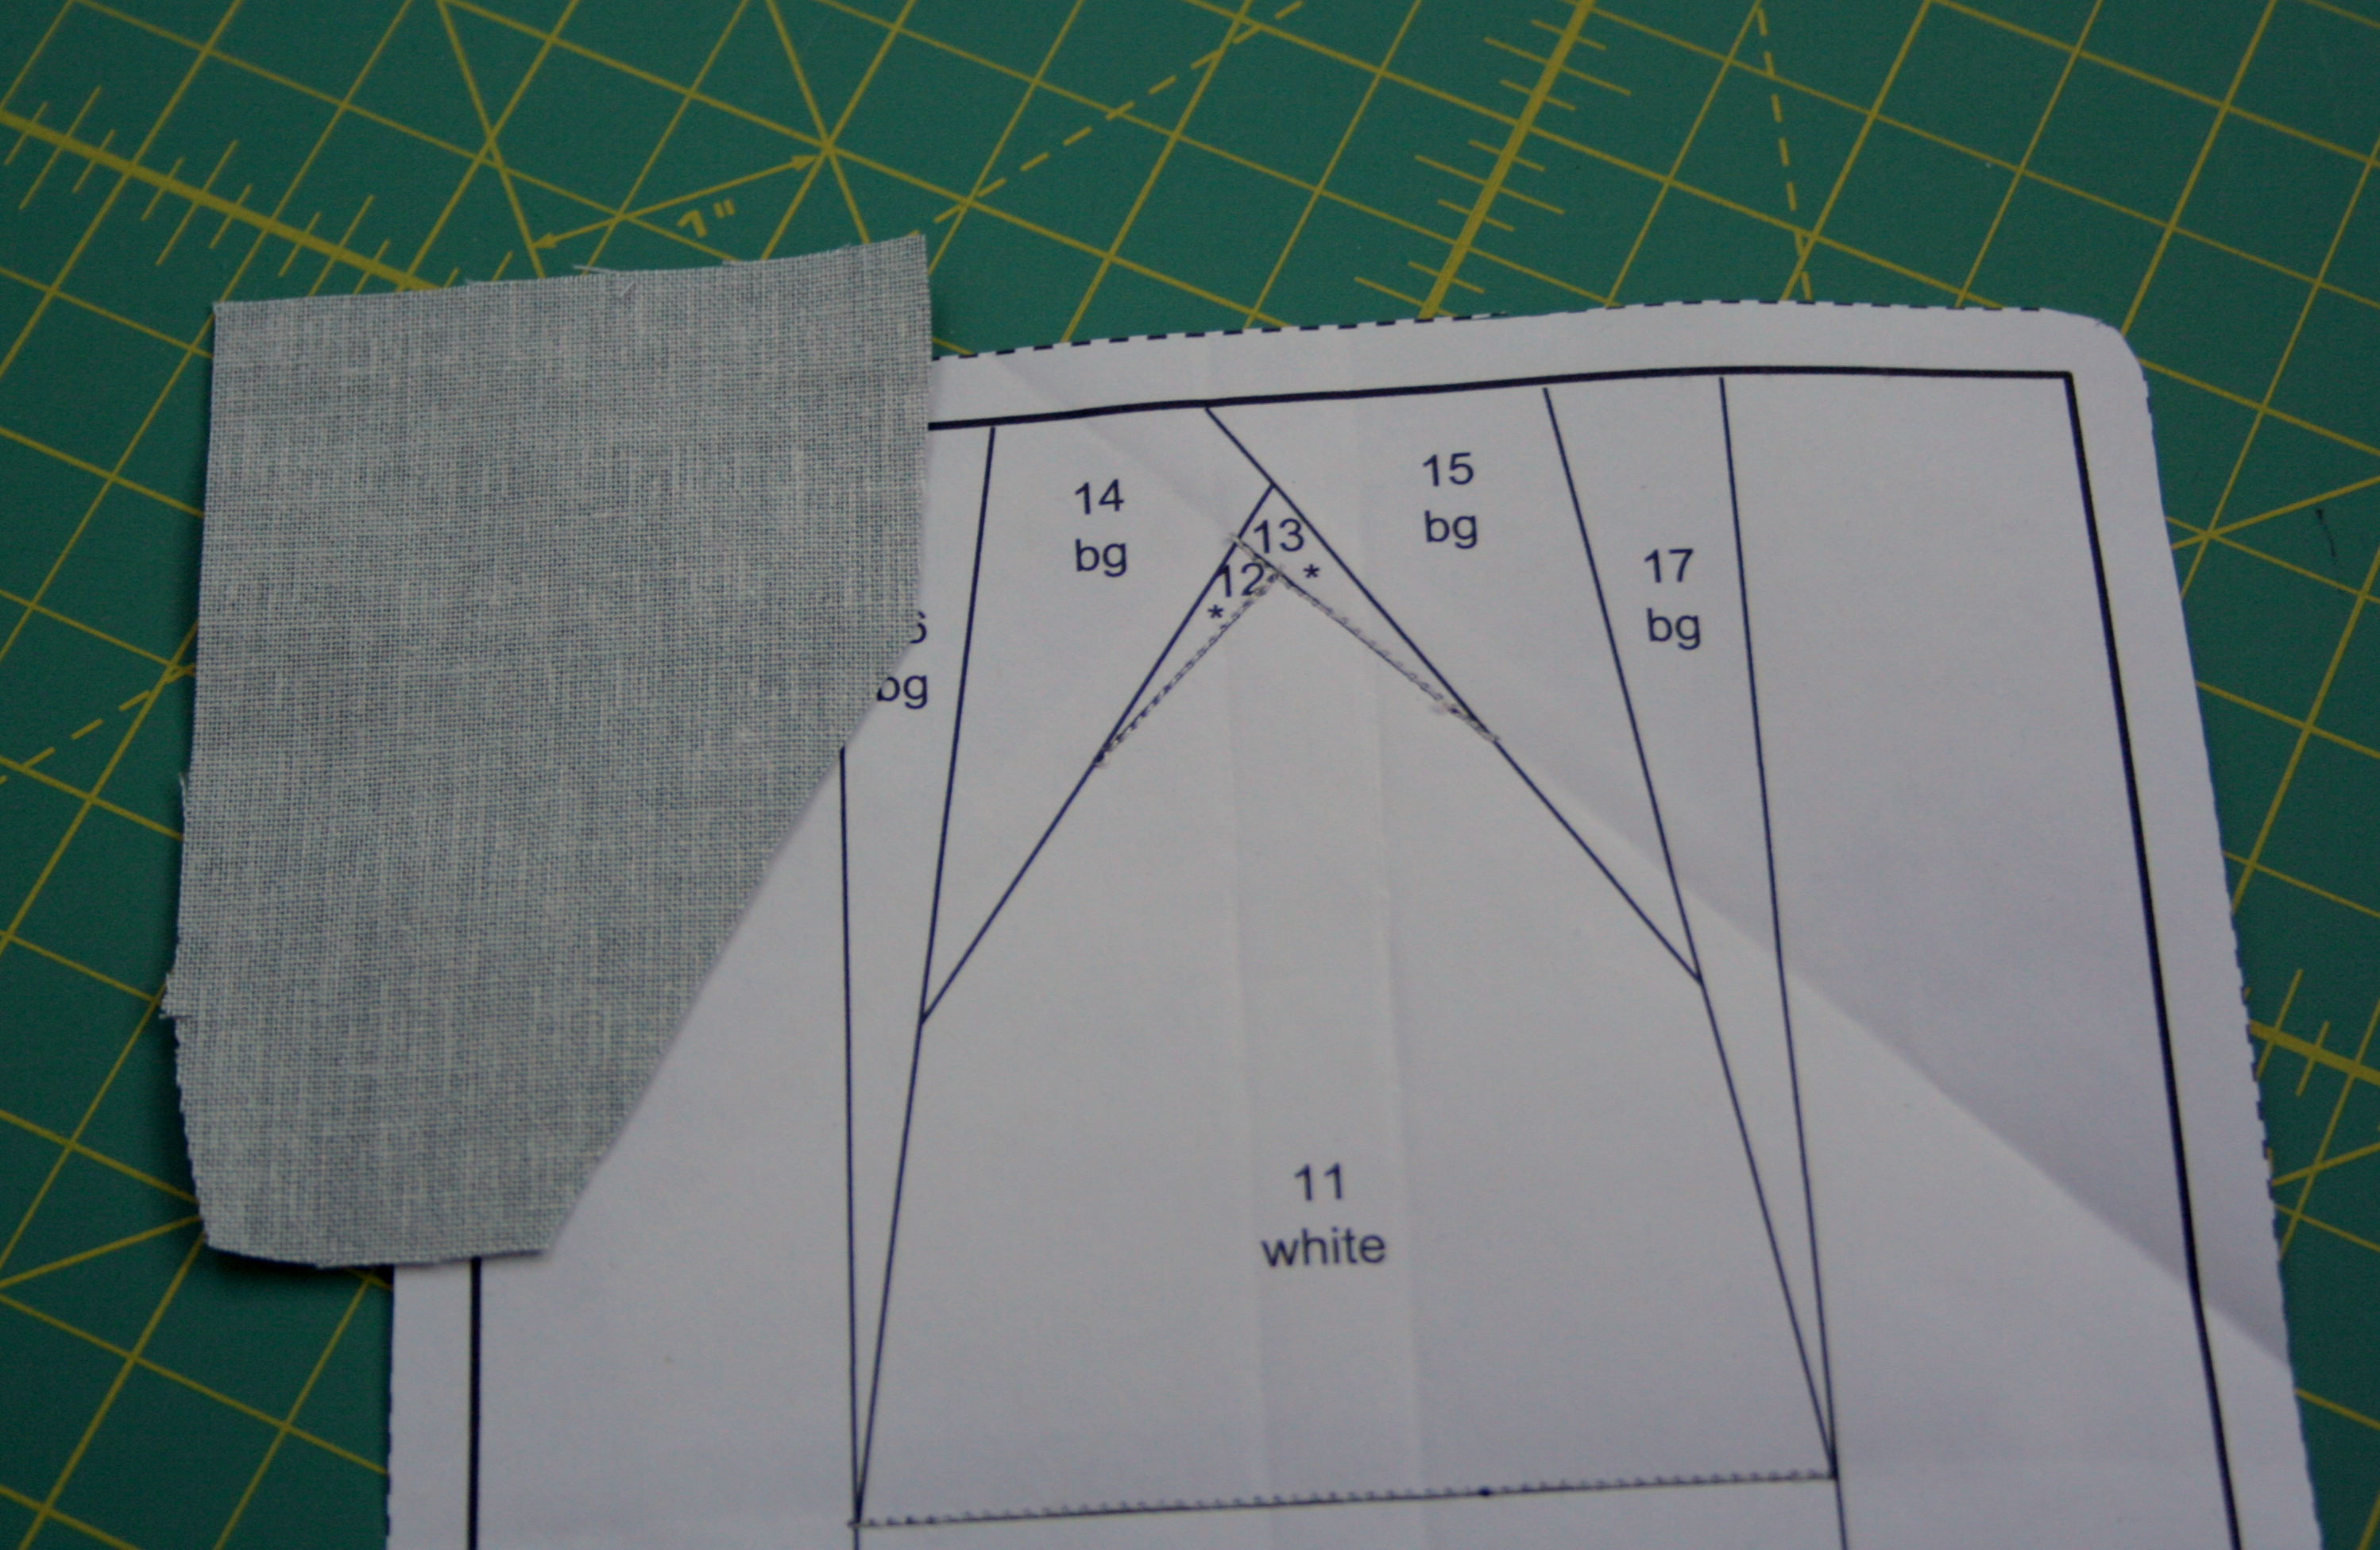
Tips for Tricky Angles:
Many angles in basic paper piecing patterns are fairly straight forward. Sometimes, though, you have an angle that really makes you crunch your brain to properly line up the fabric before sewing so that it fully covers the necessary space with seam allowances. Rather than sew, unpick, sew, unpick, sew, unpick, here are some tips to help get it right the first try.
Here I’m trying to piece section 14. When cutting my fabric piece, I’ve been generous with size, and included the angle of the seam I’m about to sew. Note that the fabric is wrong side up, with my foundation paper right side up.
The fabric piece generously covers the space needed, with lots of wiggle room. The angle cut into the piece is key, since that will help align the seam correctly. If just eyeing the angle while cutting doesn’t work for you, you can put your pattern paper on top of your fabric, and using a Herra marker, deeply mark the seam line. Add 1/4-1/2″ to all sides and cut your fabric piece.
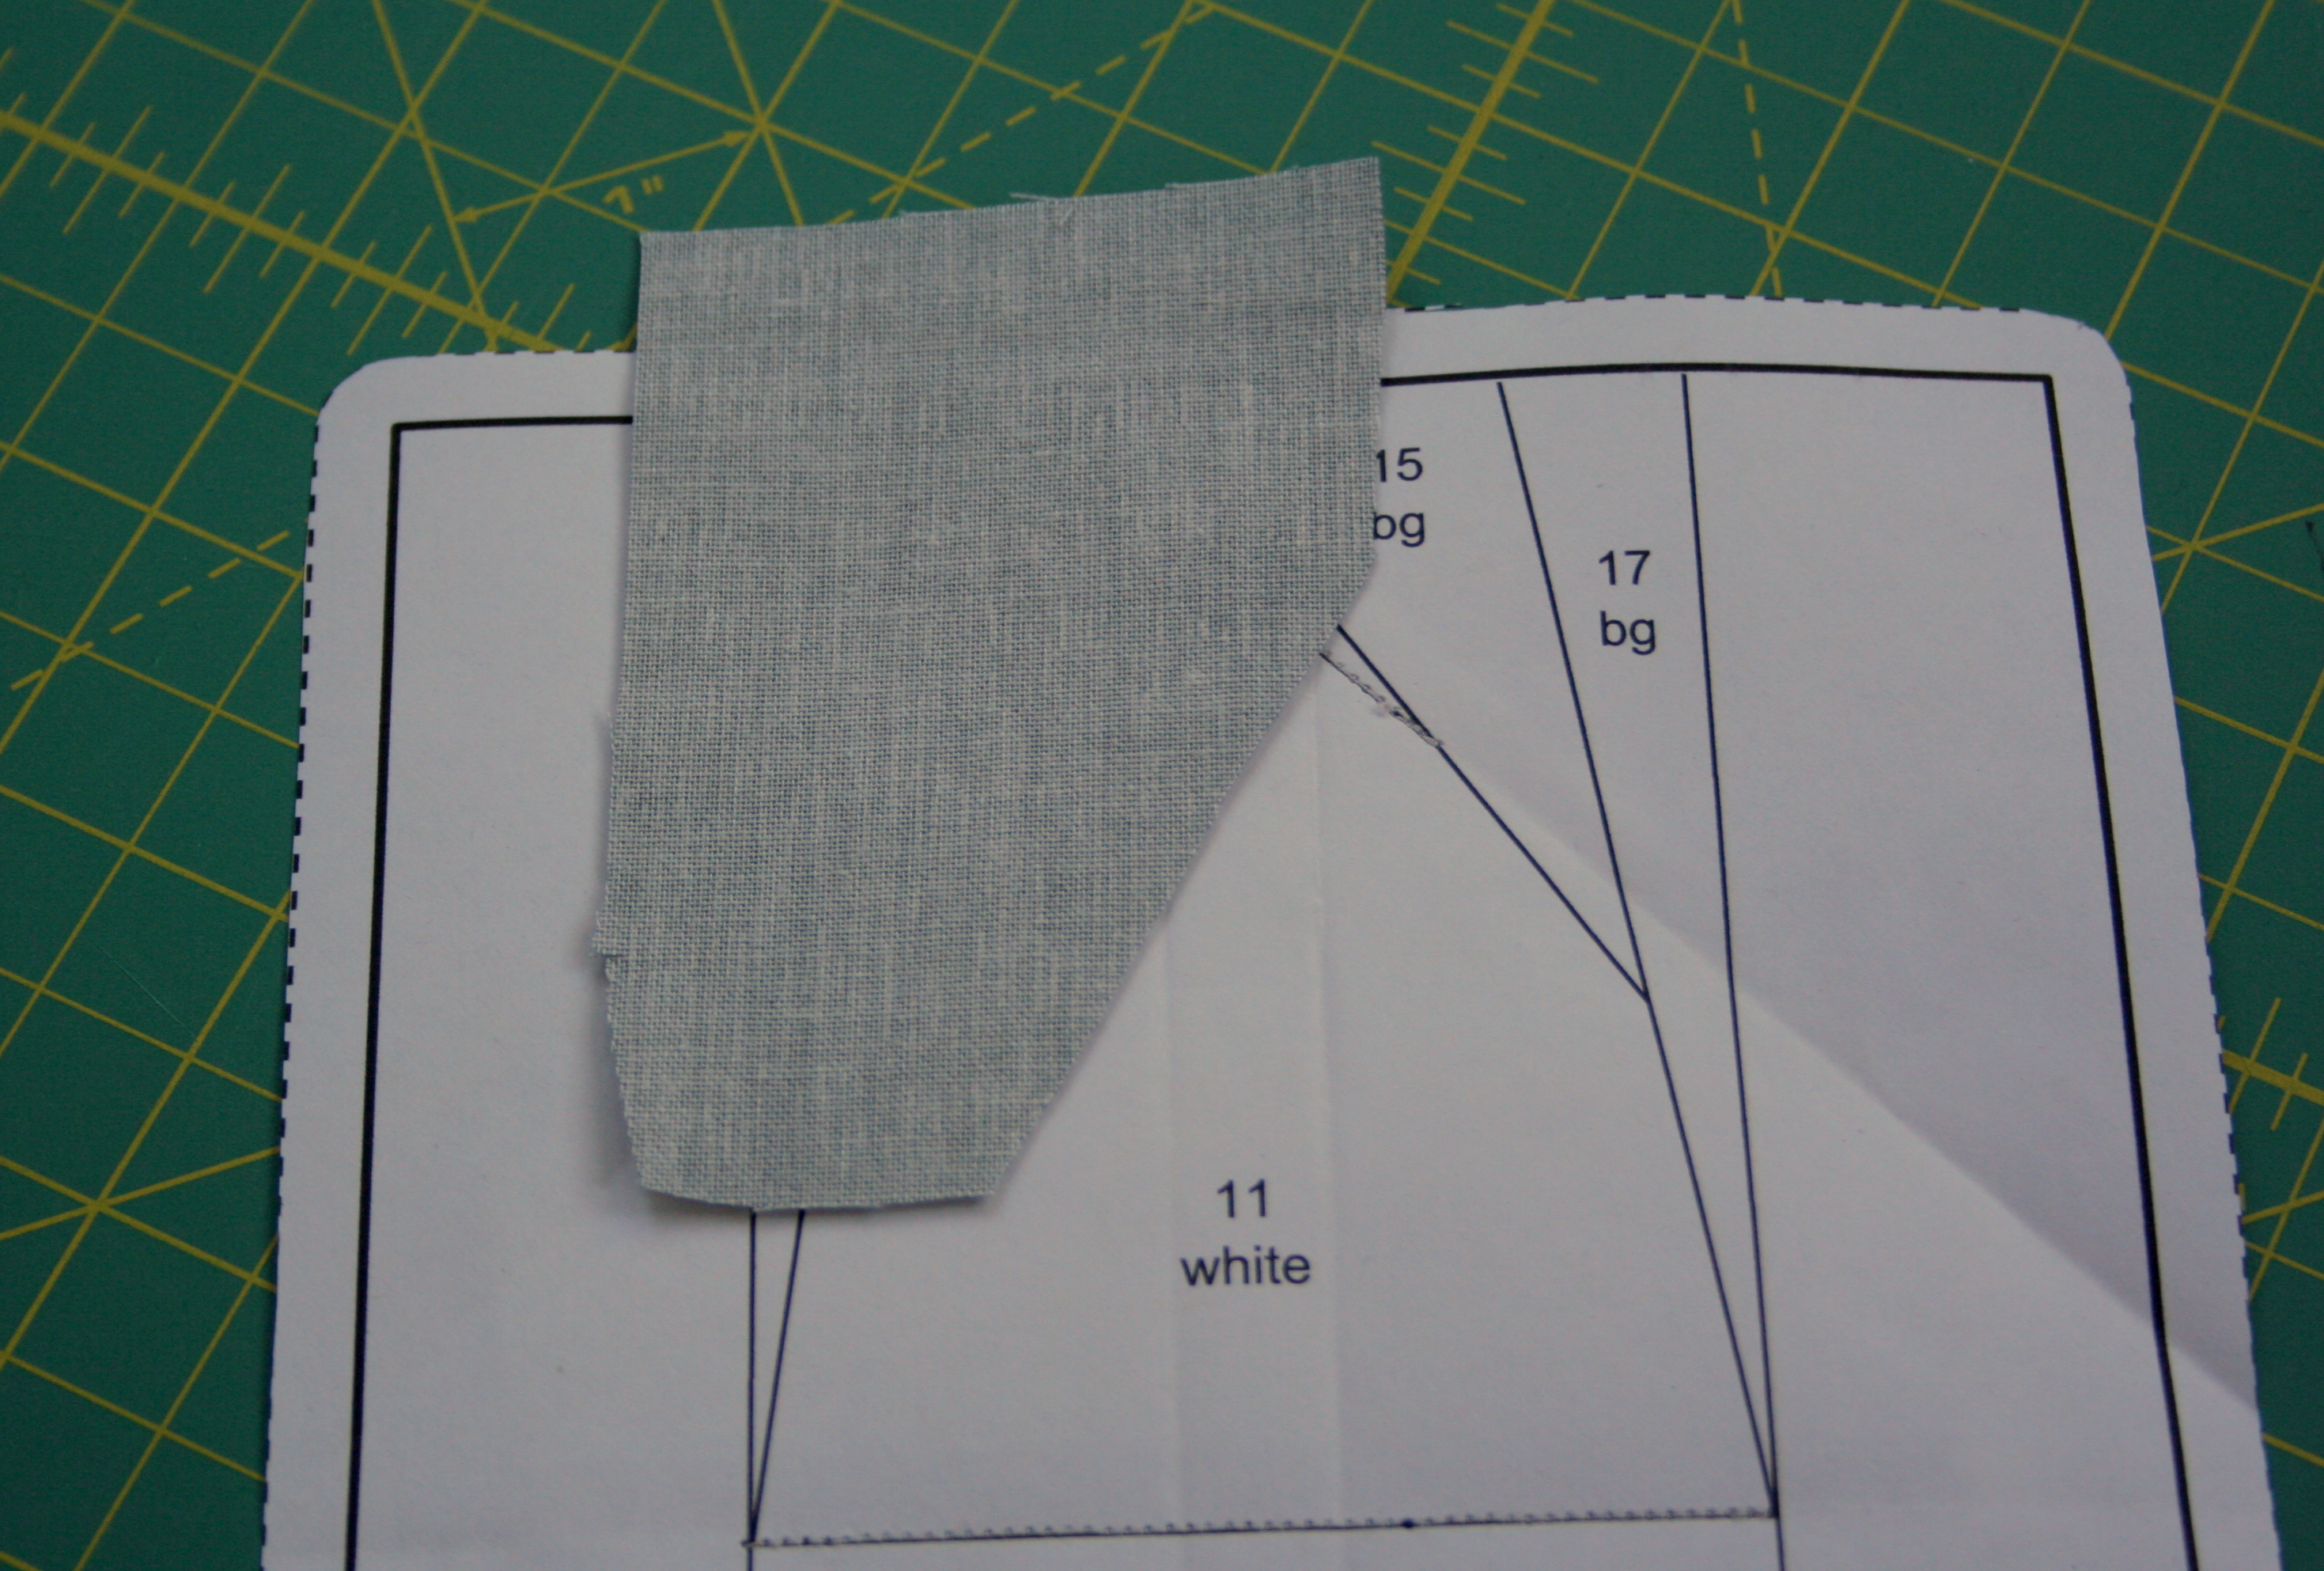
Holding it up to the light, I can see that my fabric piece covers the space, extends amply beyond the seam allowance, and that the general angle of the seam line is consistent with the angle of the fabric piece.
Here’s the tricky part. Placing your fabric right side facing the wrong side of the foundation paper, line your angled seam edge with the seam line on your block. It will look wonky, and may seem like it is headed in the wrong direction.
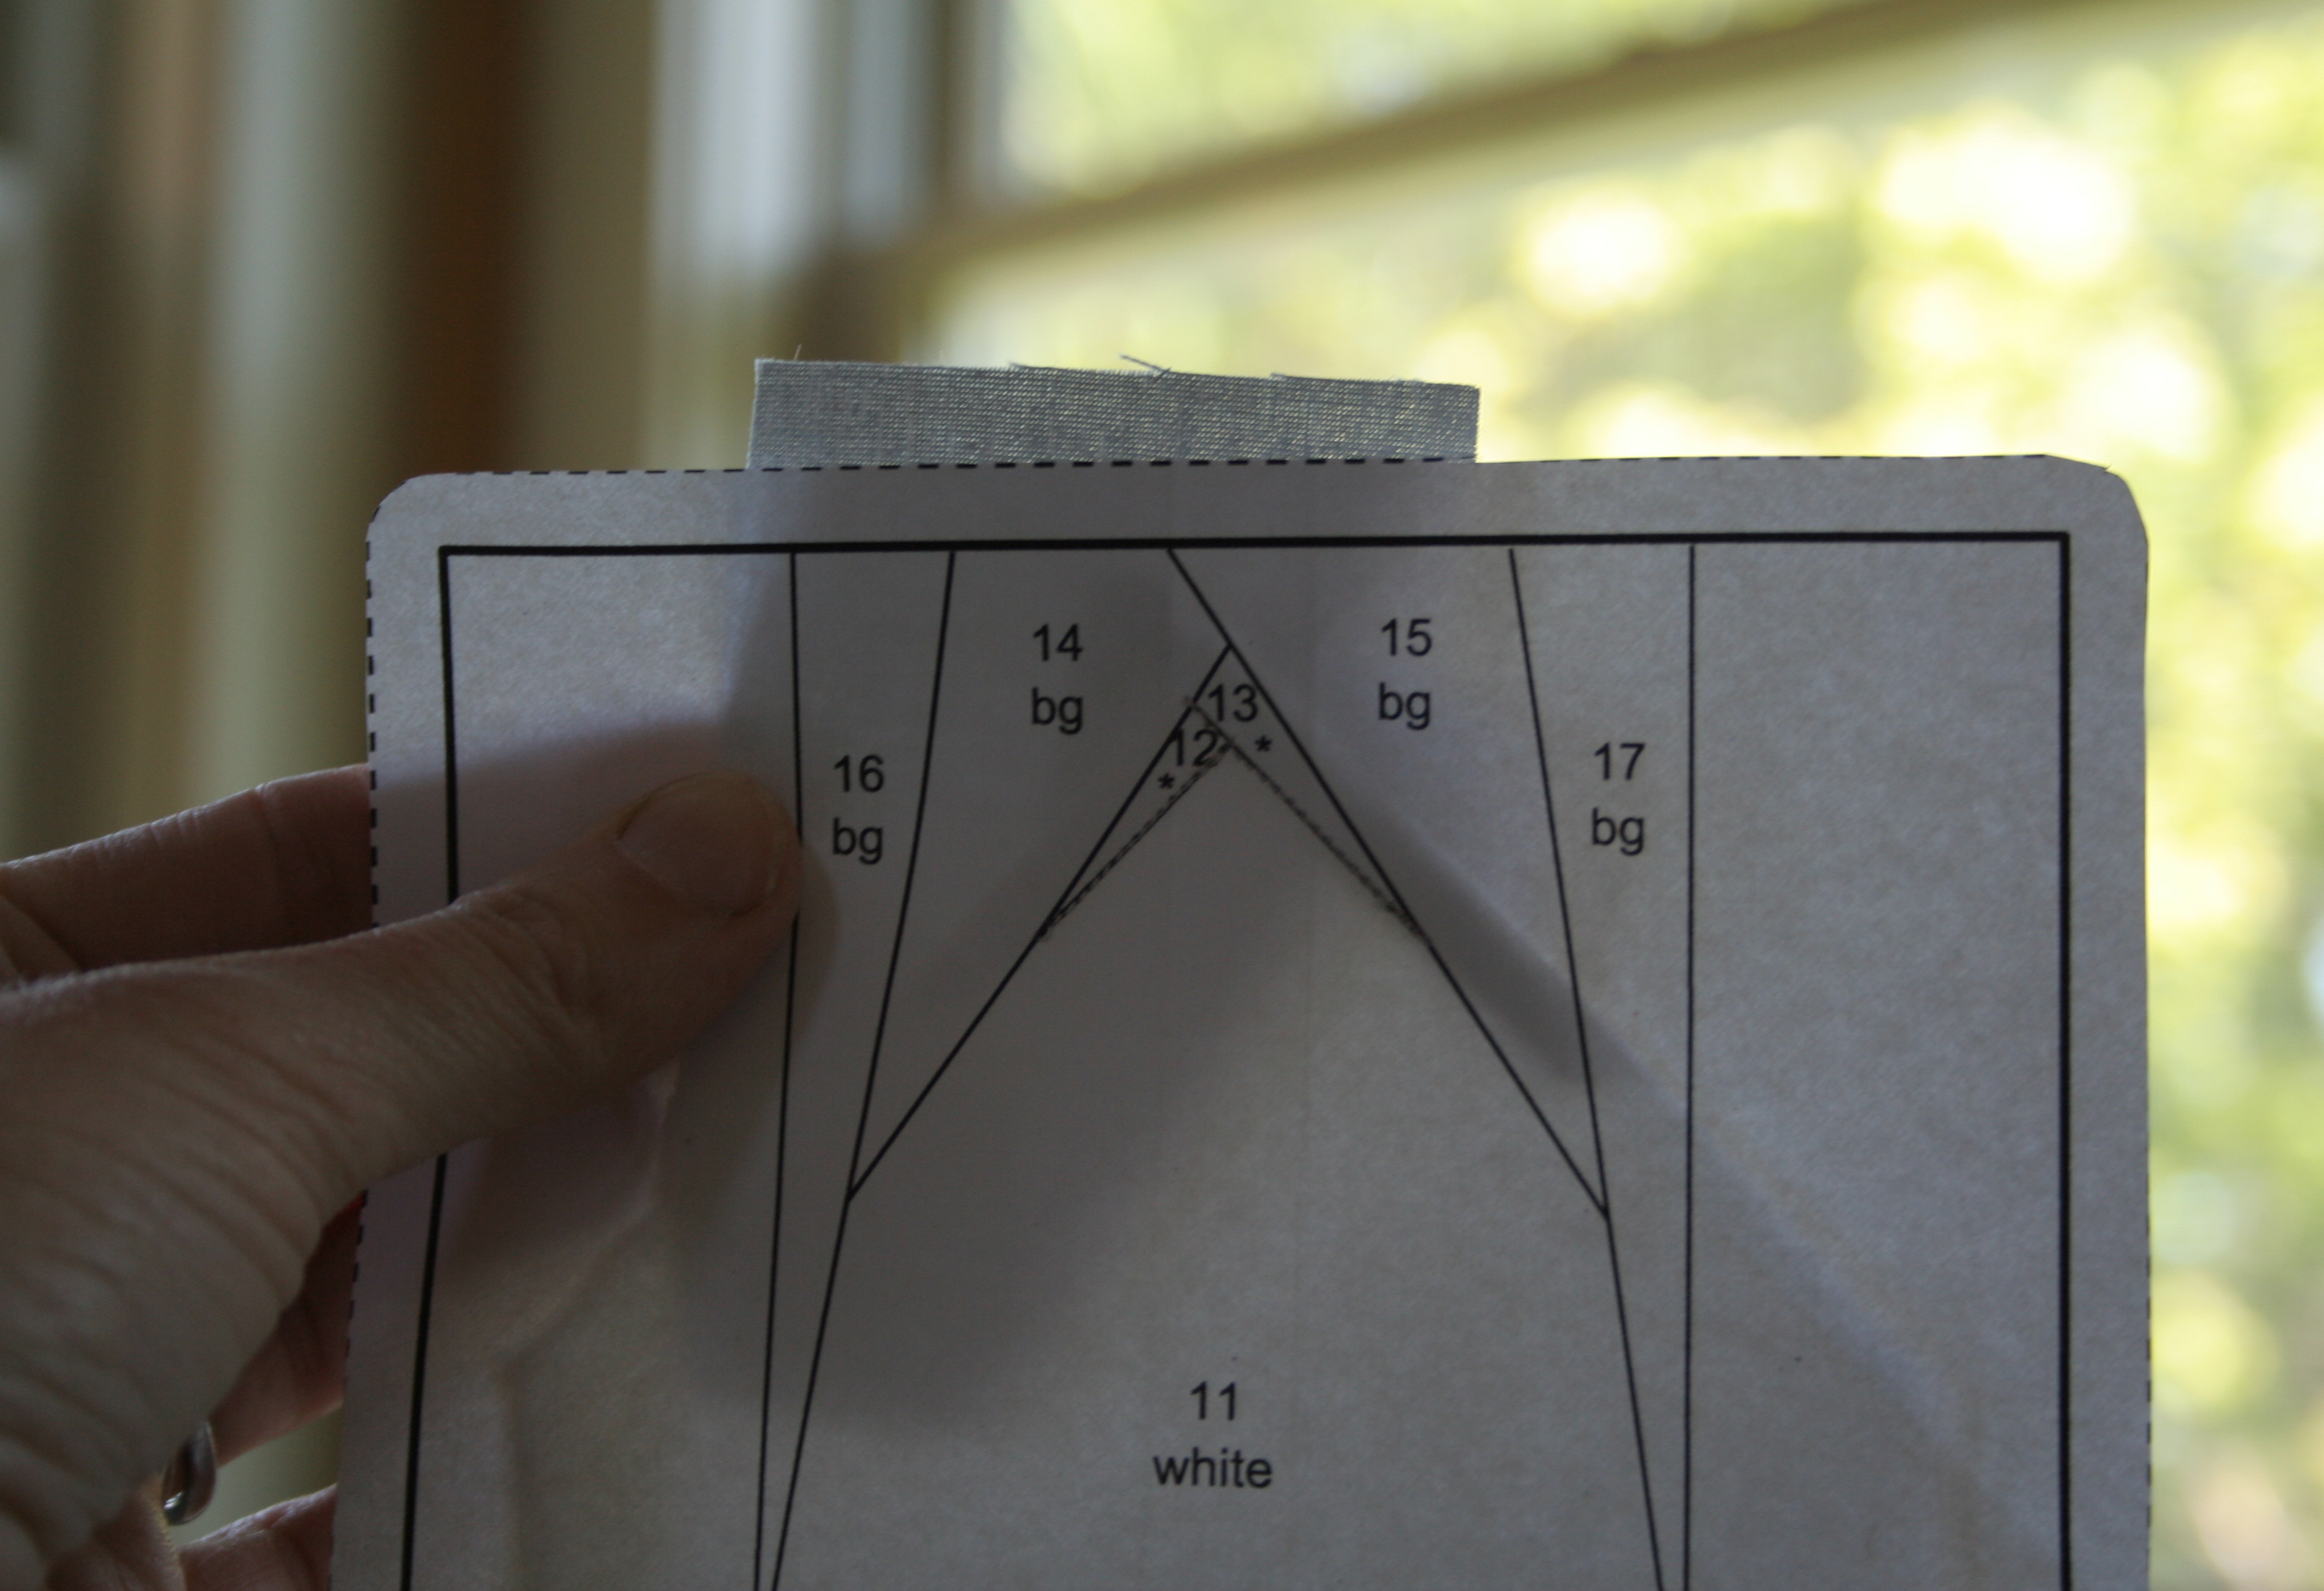
Fold along the seam line to ensure the fabric will cover the correct area. Once satisfied that it’s all lined up properly, fold back and sew the seam. With particularly wonky angles, I sometimes pin along the seam line, both to ensure I’m accurately checking the fold, and to hold the fabric in the proper place before sewing.
So now you’ve got the basics of foundation paper piecing! Once your entire block is pieced, square up the edges being mindful to keep the 1/4″ seam allowance around the block if you plan to sew it into a quilt, pillow, or just about anything else.
I often will leave the paper on if I plan to sew the block to another paper pieced block, since the 1/4″ seam allowance line helps me with accurate sewing. If you are already a pro at 1/4″ seams or are planning on using a single block for your project, now comes the fun part–removing the paper!
To remove the paper, gently tear away, holding the main block in place and pulling gently away and to the side, similar to how you would tear any perforated piece of paper. With your narrow stitch length, the paper should come away easily.
Once one side of the paper is off, the other side often will just pop out. Go slowly and tear gently to ensure your seams stay tight. If you end up with bits of paper stuck in the seams, carefully use blunt tweezers to remove the final bits. Alternately, I’ve heard that spraying the paper with water helps with removal. I haven’t had to try it yet, though, so can’t vouch for the method.
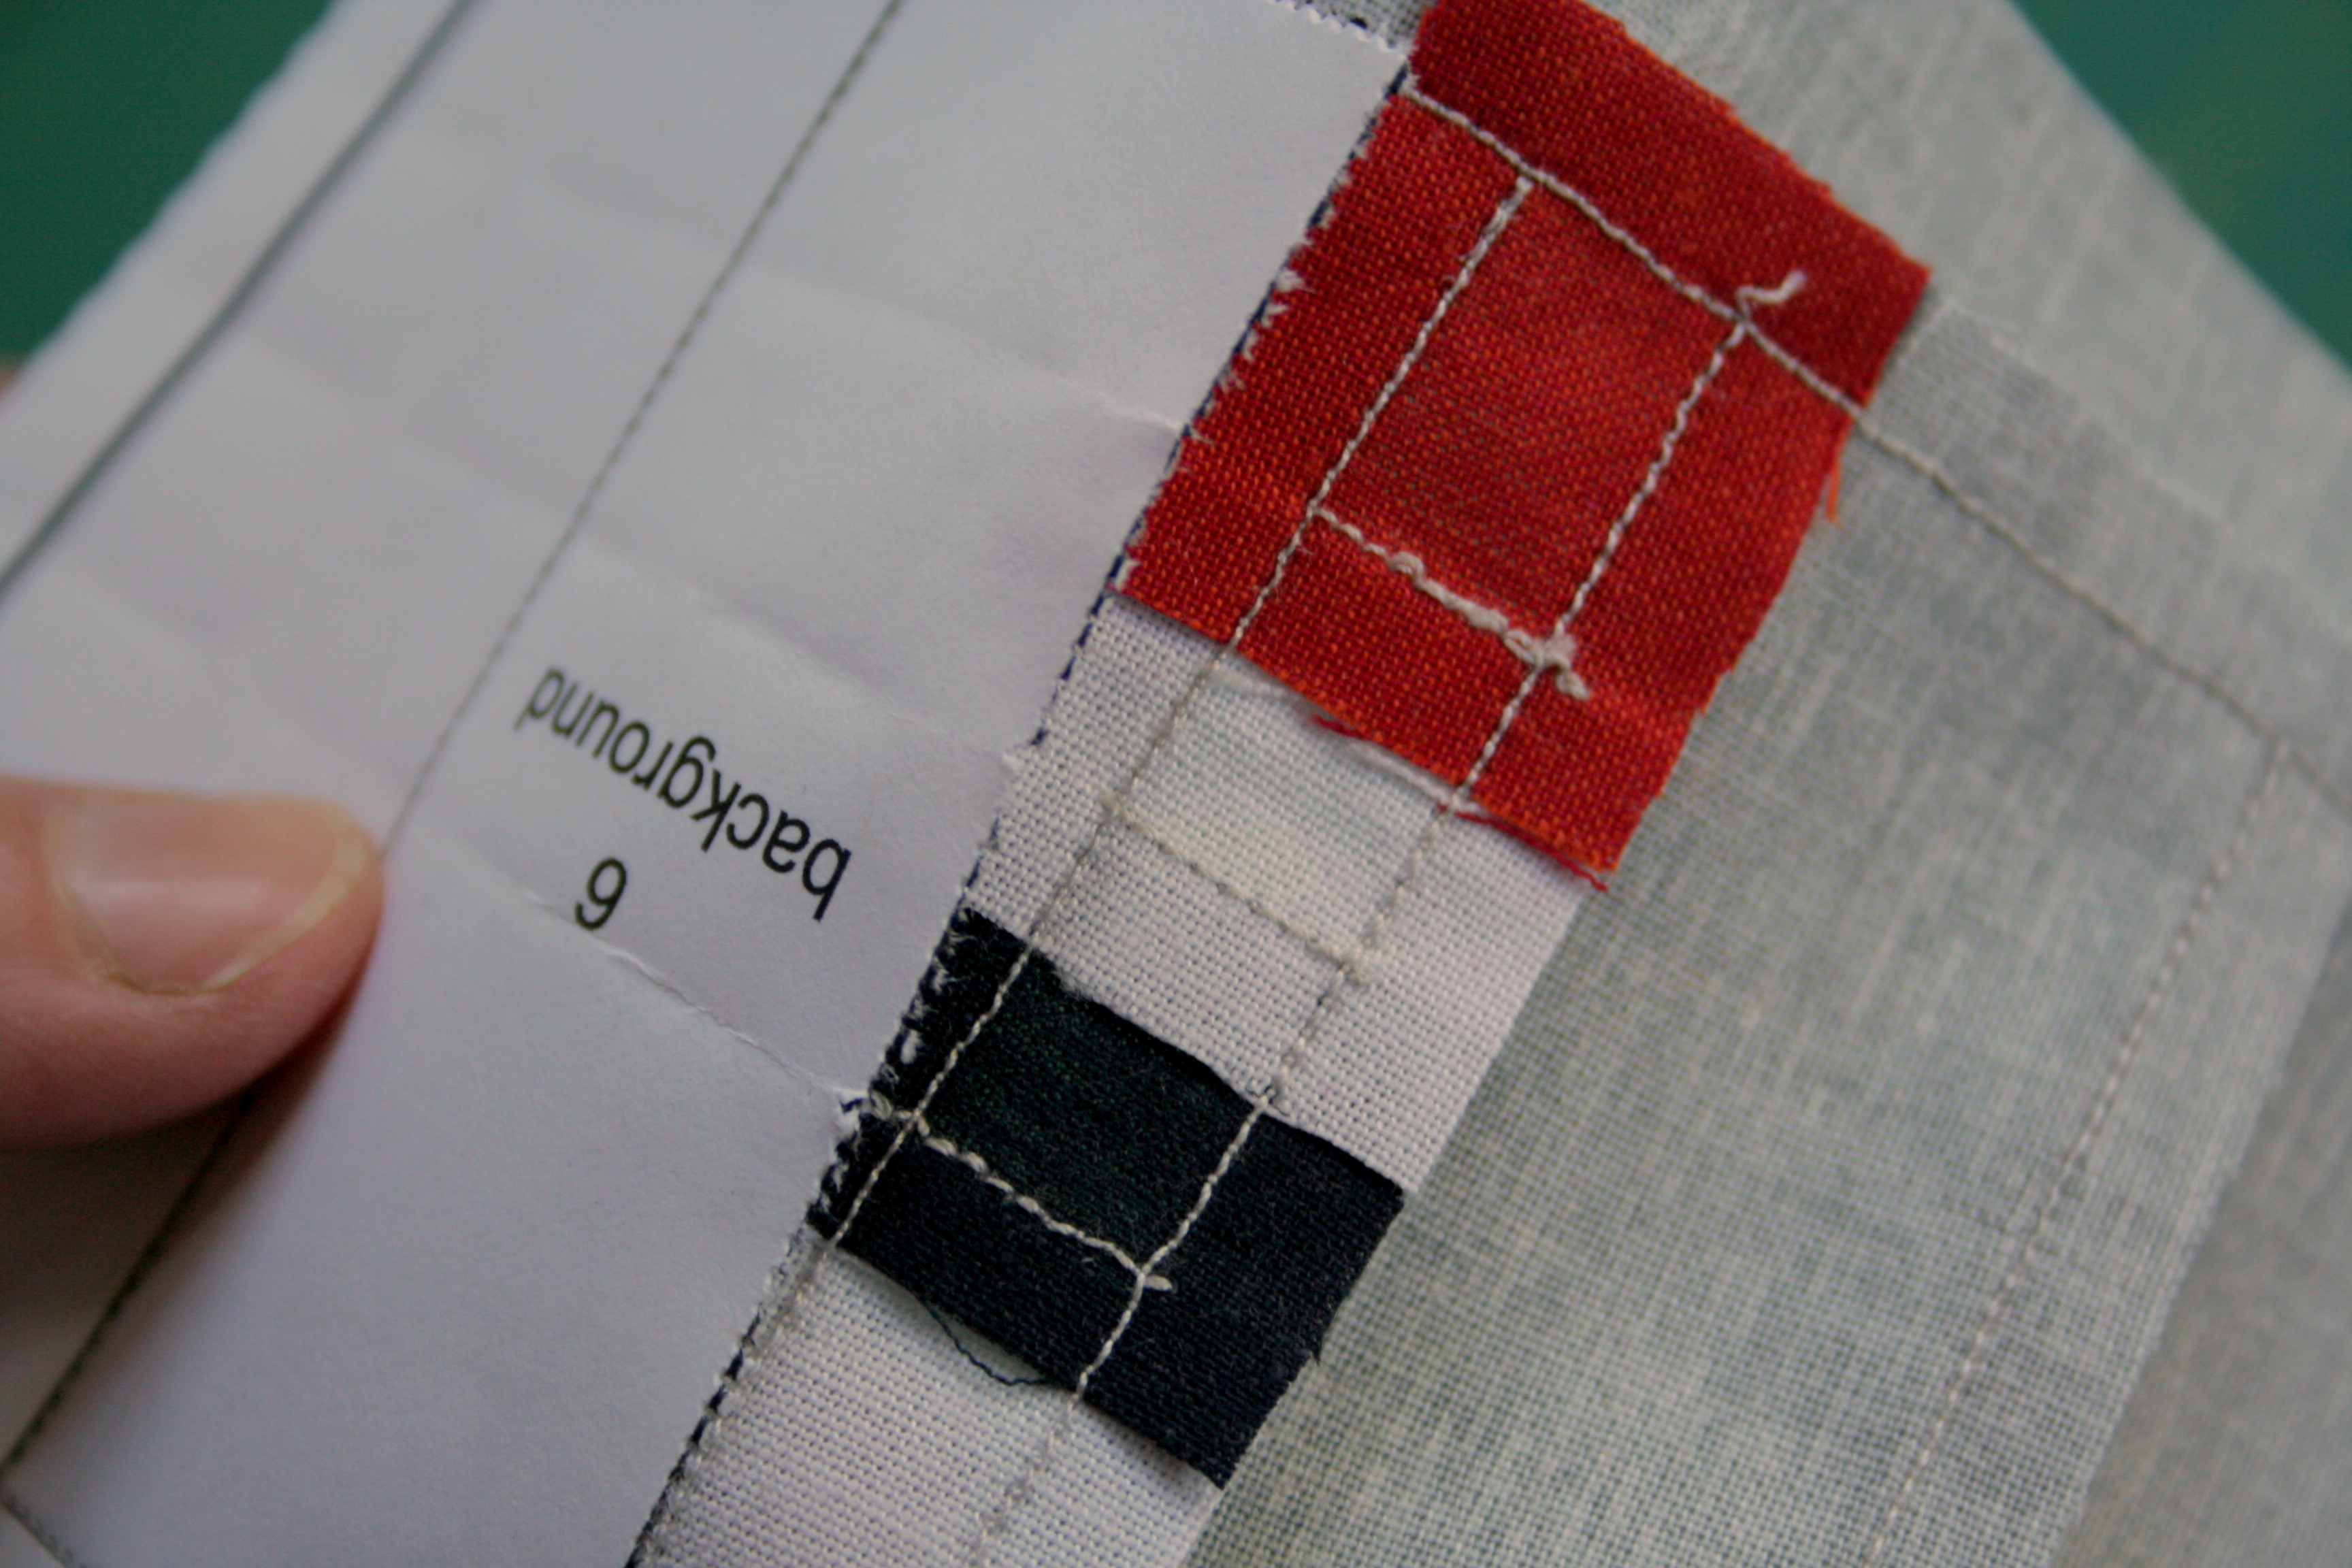
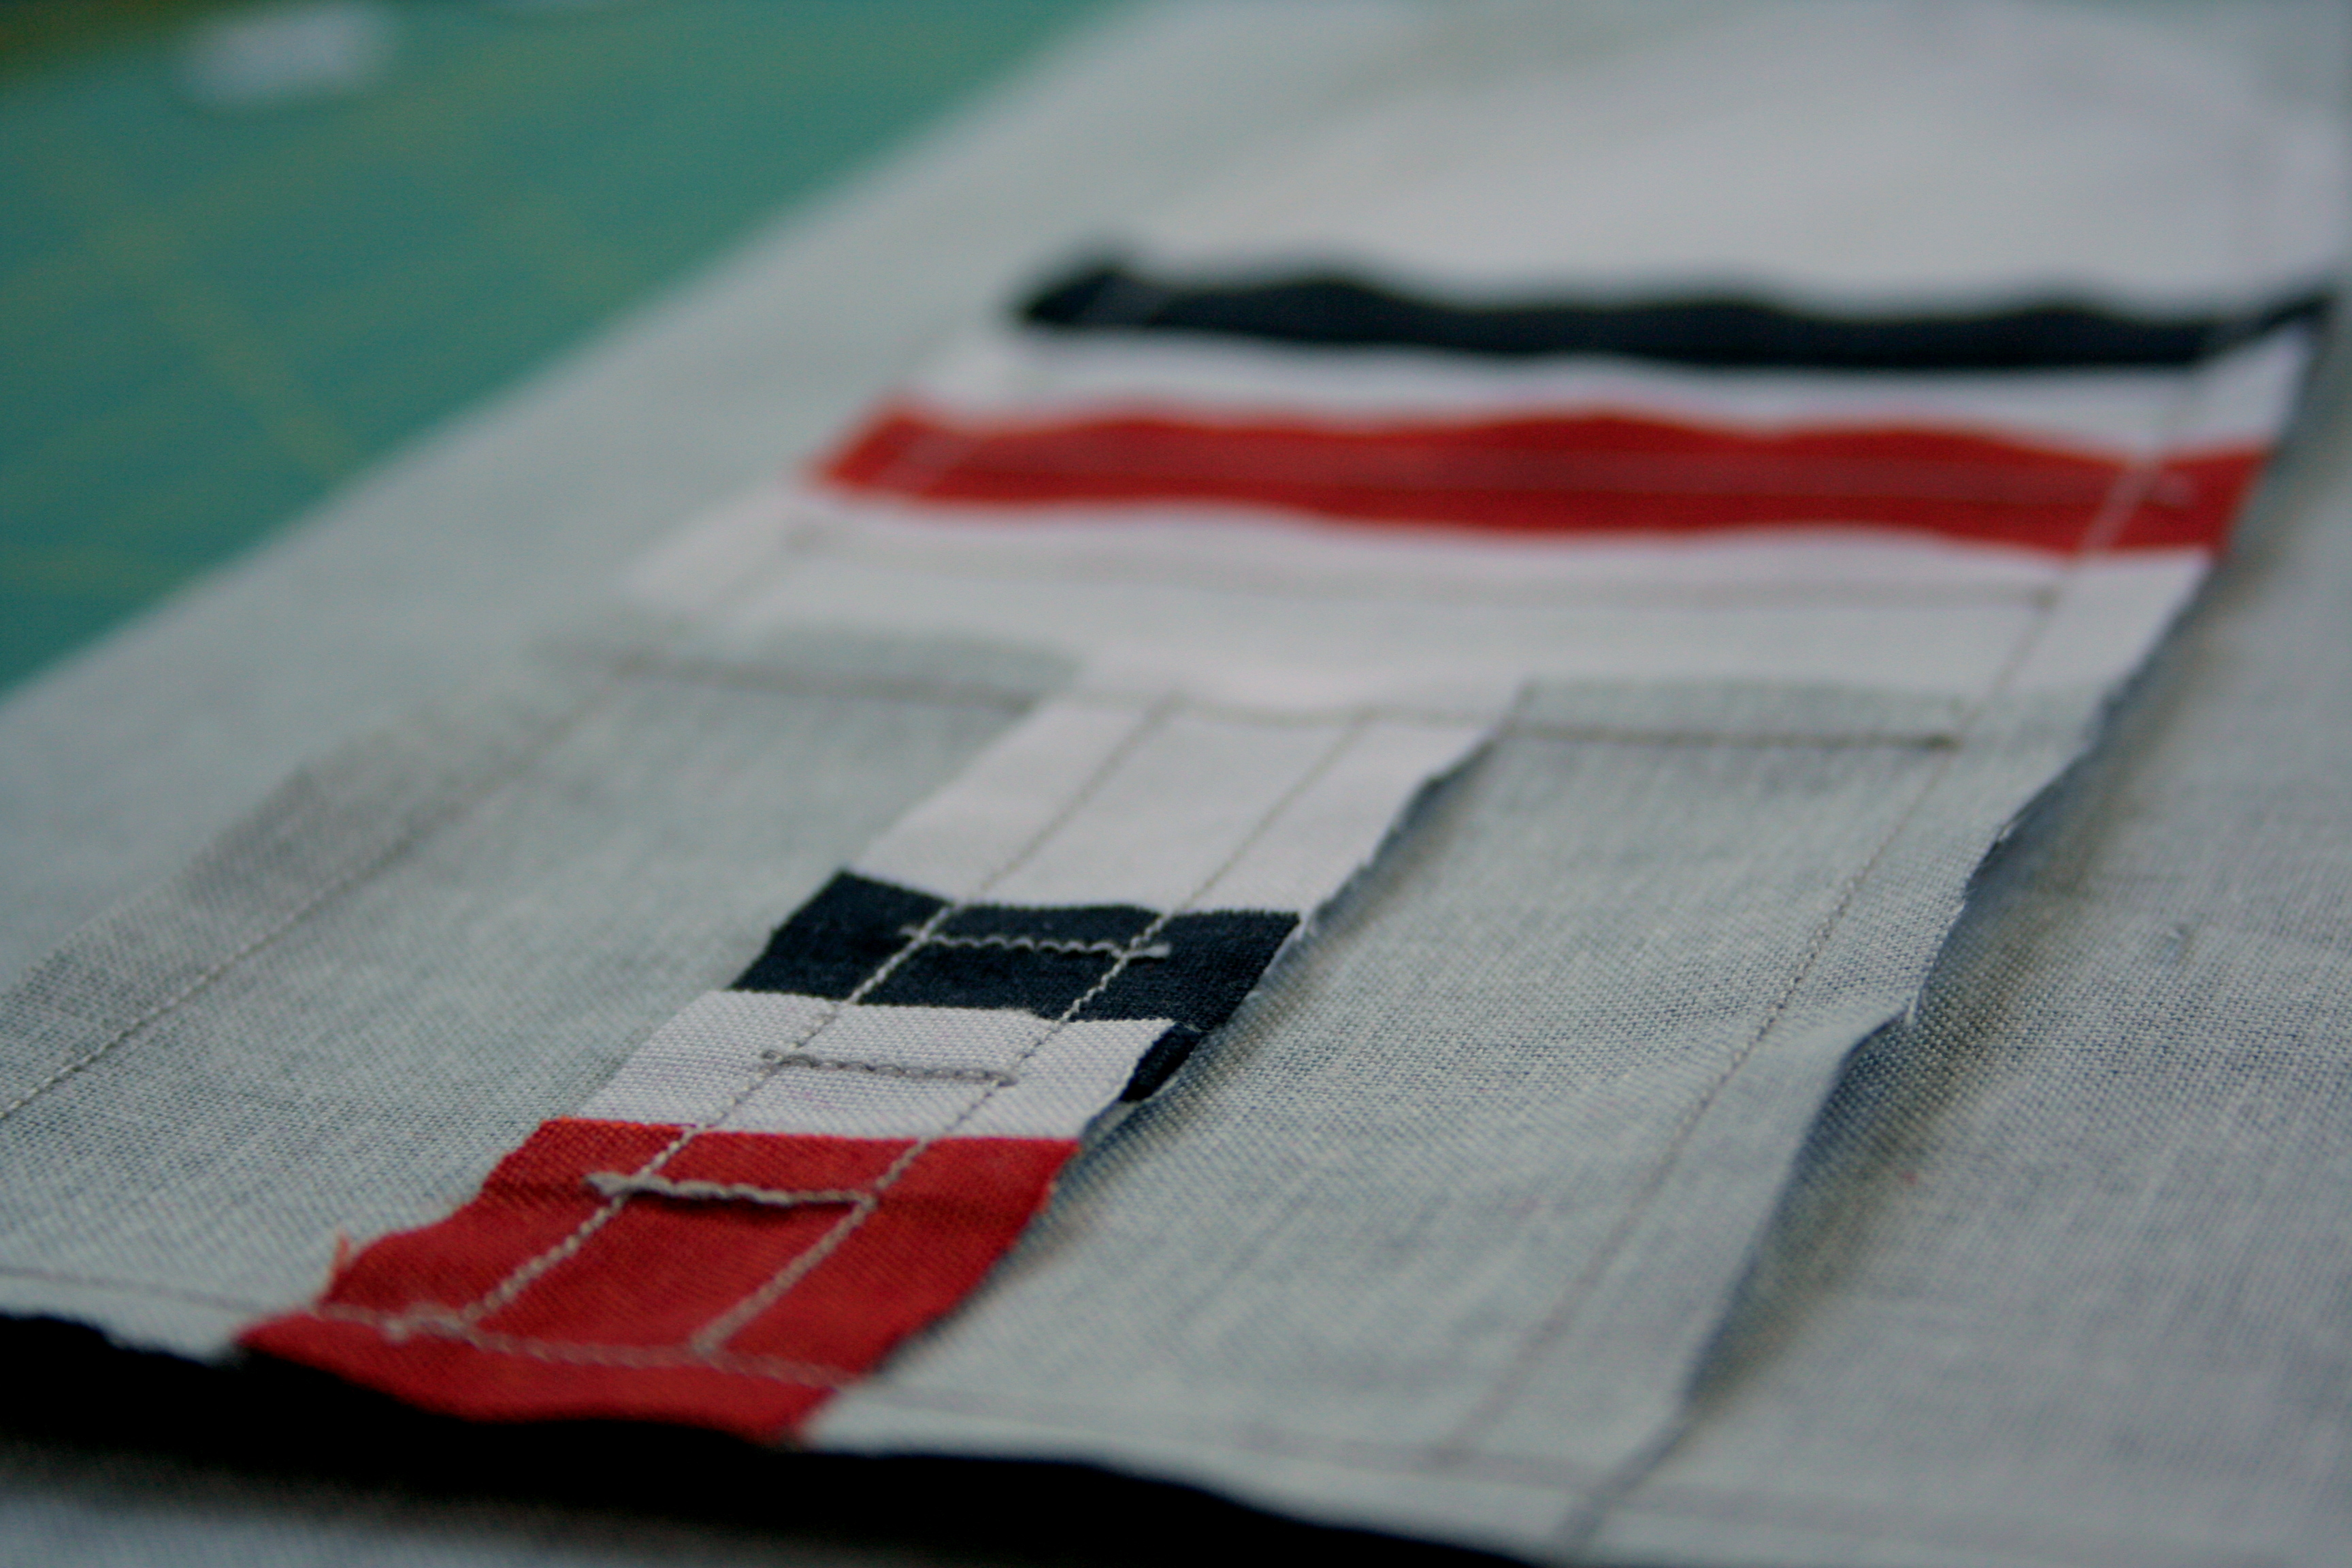
I just love the backs of paper pieced blocks. The precision and accuracy, all the little seams that are proof of my cut, line up, sew, fold & trim, press marathon… they make me happy. Take a good, long, admiring look at the back of your block, and then flip it over and admire your finished block. Gorgeous!
I hope this tutorial was helpful, and that you enjoy paper piecing as much as I do. Coming soon on my blog, I’ll talk about what’s next; now that you’ve made your paper pieced block, what can you do with it!?
Do you have any other tips for beginner paper piecers?
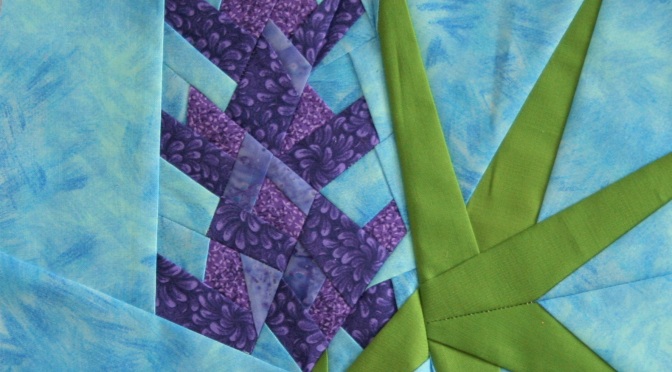
I had never seen lupine before traveling to Maine, but now that I live here they are among my favorite flowers. There is a depth and richness to their color that force me to get really close and admire their intricacy. They are very advantageous growers, almost invasive, and the sheer numbers of lupine seen along roadsides, in fields, and in happy gardens make the color incredibly apparent.
Photo by Steffen Ramsaier, found on Flickr
Early in my sewing days, I was trying to think of a gift to make for my mother-in-law. I immediately thought of lupine, since they are her favorite flower. (If you have children, do you know the book Miss Rumphius? aka the Lupine Lady? Well that’s my mother-in-law–okay, it’s not really, but it certainly could be!) I had recently found paper piecing and wanted to make her a paper pieced lupine pillow. The only problem was that all of my searches for paper pieced lupine patterns came up empty.
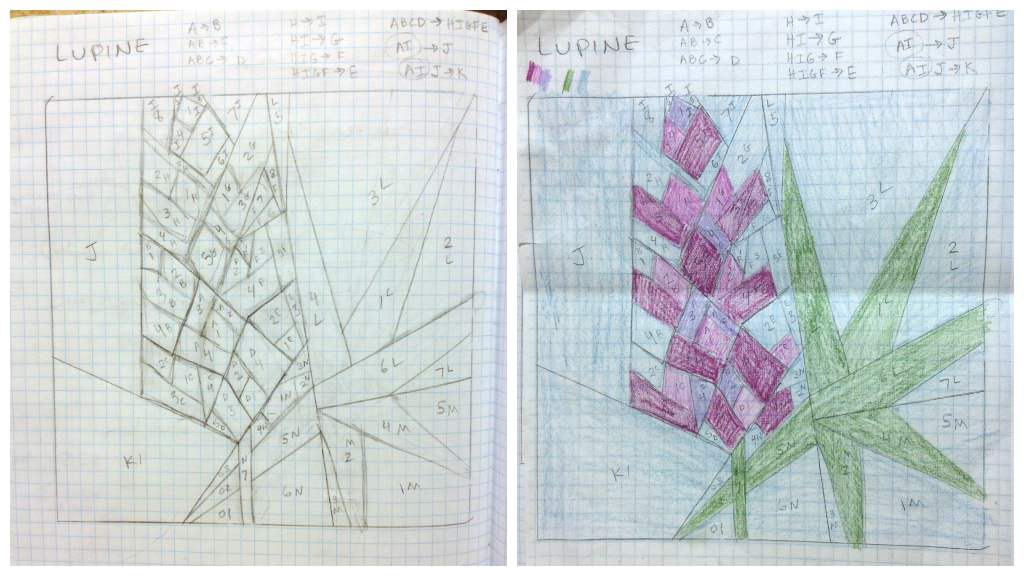
Flash forward a month or so, when I discovered that I could design paper piecing patterns. A lupine flower was one of the first sketches I did. Talk about complex! I really wanted to get the heart-shaped petals into the pattern, but I knew it had to be fairly simple to be able to be pieced. I drew out a few sketches, chose my favorite, and began to try to break it down into logical pieces. My brain instantly scrambled. I had to put the pattern aside, and work on a few different projects for a week or two.
It all starts with the graph paper and sketch.
After that much needed breather, I picked up the lupine again one evening and smoothly worked it into numbered paper piecing sections. After a month or so of fine tuning and testing, the pattern is ready!
Don’t you love it!? I wasn’t sure about my fabric choices at first, but now that the block is done, I think they were perfect! They blend together just enough to give the flower depth without detracting from the congruence of the bloom.
This is not a beginner paper piecing pattern in that there are many pieces and a few sharp angles. There are only simple joining seams, though; no y-seams! If you have a good sense of paper piecing, this block shouldn’t be too tricky. It took me about 4 hours to complete and measures 10″ square (10.5″ with seam allowance).
If you follow me on Instagram, you’ve watched this lupine block’s progression. For those of you who don’t follow me yet, here’s a peek at the process from my Instagram feed (@nightquilter). Of course these are taken with my iPhone during my late night quilting foray, so pardon the blur!
Little by little, it comes together.
The back is my favorite! Stragglers hanging on after I’ve removed most of the paper.
The pattern will be available in my Payhip Pattern Store by the end of today, so now if you need to make your mother-in-law (or mom, sister, brother, cousin, friend, or yourself!) a lupine pillow, wall hanging, table runner, bag, etc. you can get right to it!
This particular block will soon become a long-awaited Lupine Pillow for my mother-in-law. I’d say it was worth the wait.
This is my exciting Friday Finish, so I’m linking up!


 If you follow me on