Time is not the only thing that has been flying by. Finn is already seven months old and is officially on the move! While he still moves primarily through his inching army crawl, he is getting a lot more adept at moving his body around from belly to sitting to up on all fours, *flop* to belly and across the floor!
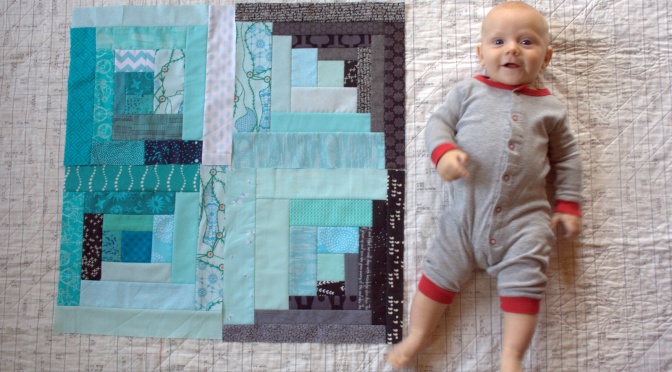
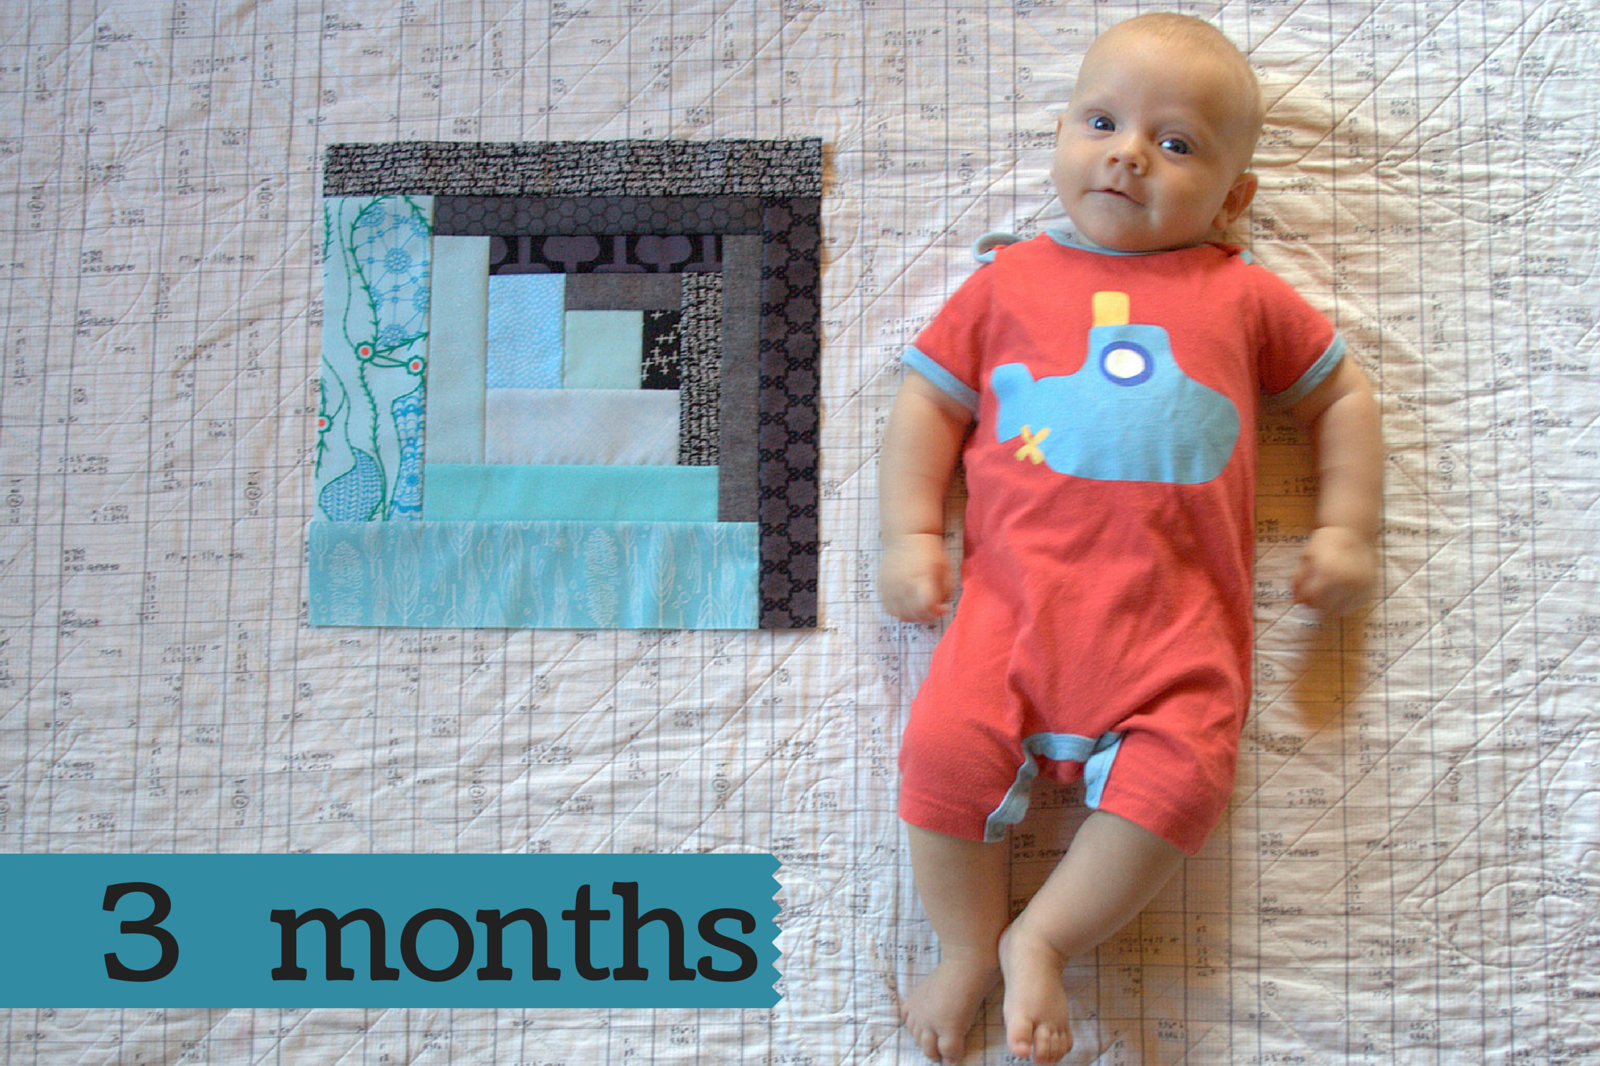
While I didn’t finish it before Christmas, I did finish Finn’s 7 month milestone quilt block. I’m on course to have 12 blocks by his first birthday. The photography part is definitely getting fun, since as soon as I sit Finn down, he wants to move. That squirmy wormy desire to *move* just shows his growth and personality, so I’m embracing it. It’s one more opportunity for creativity!
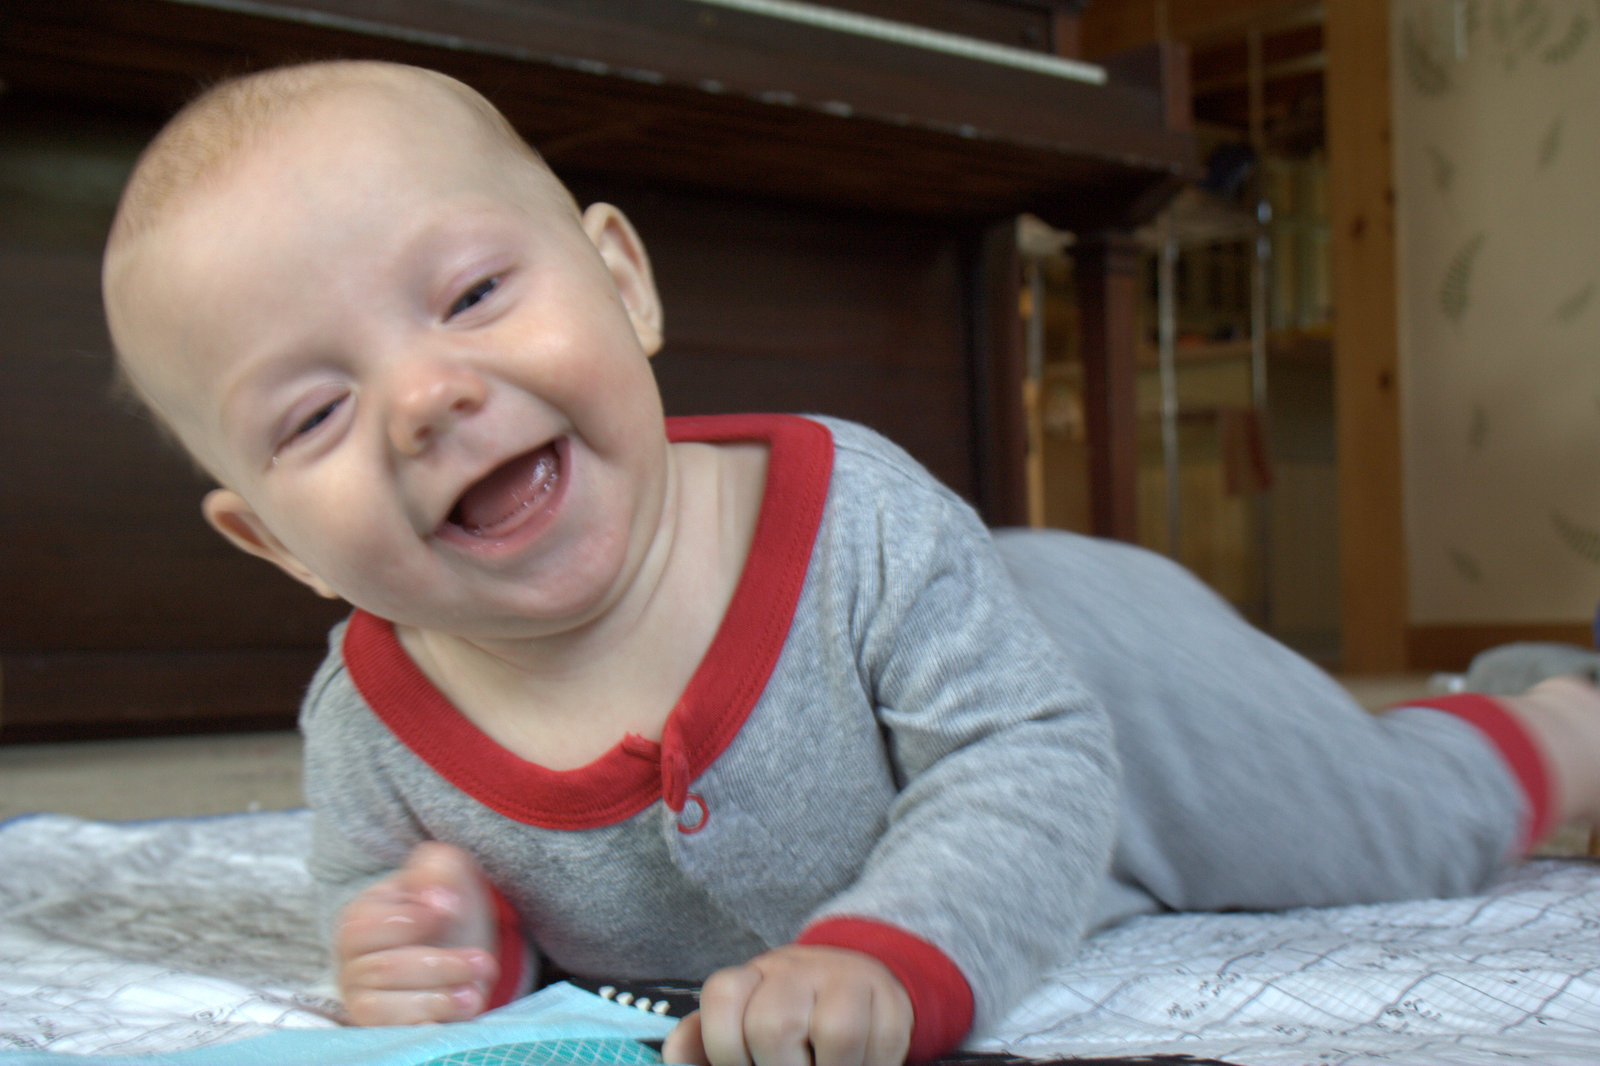
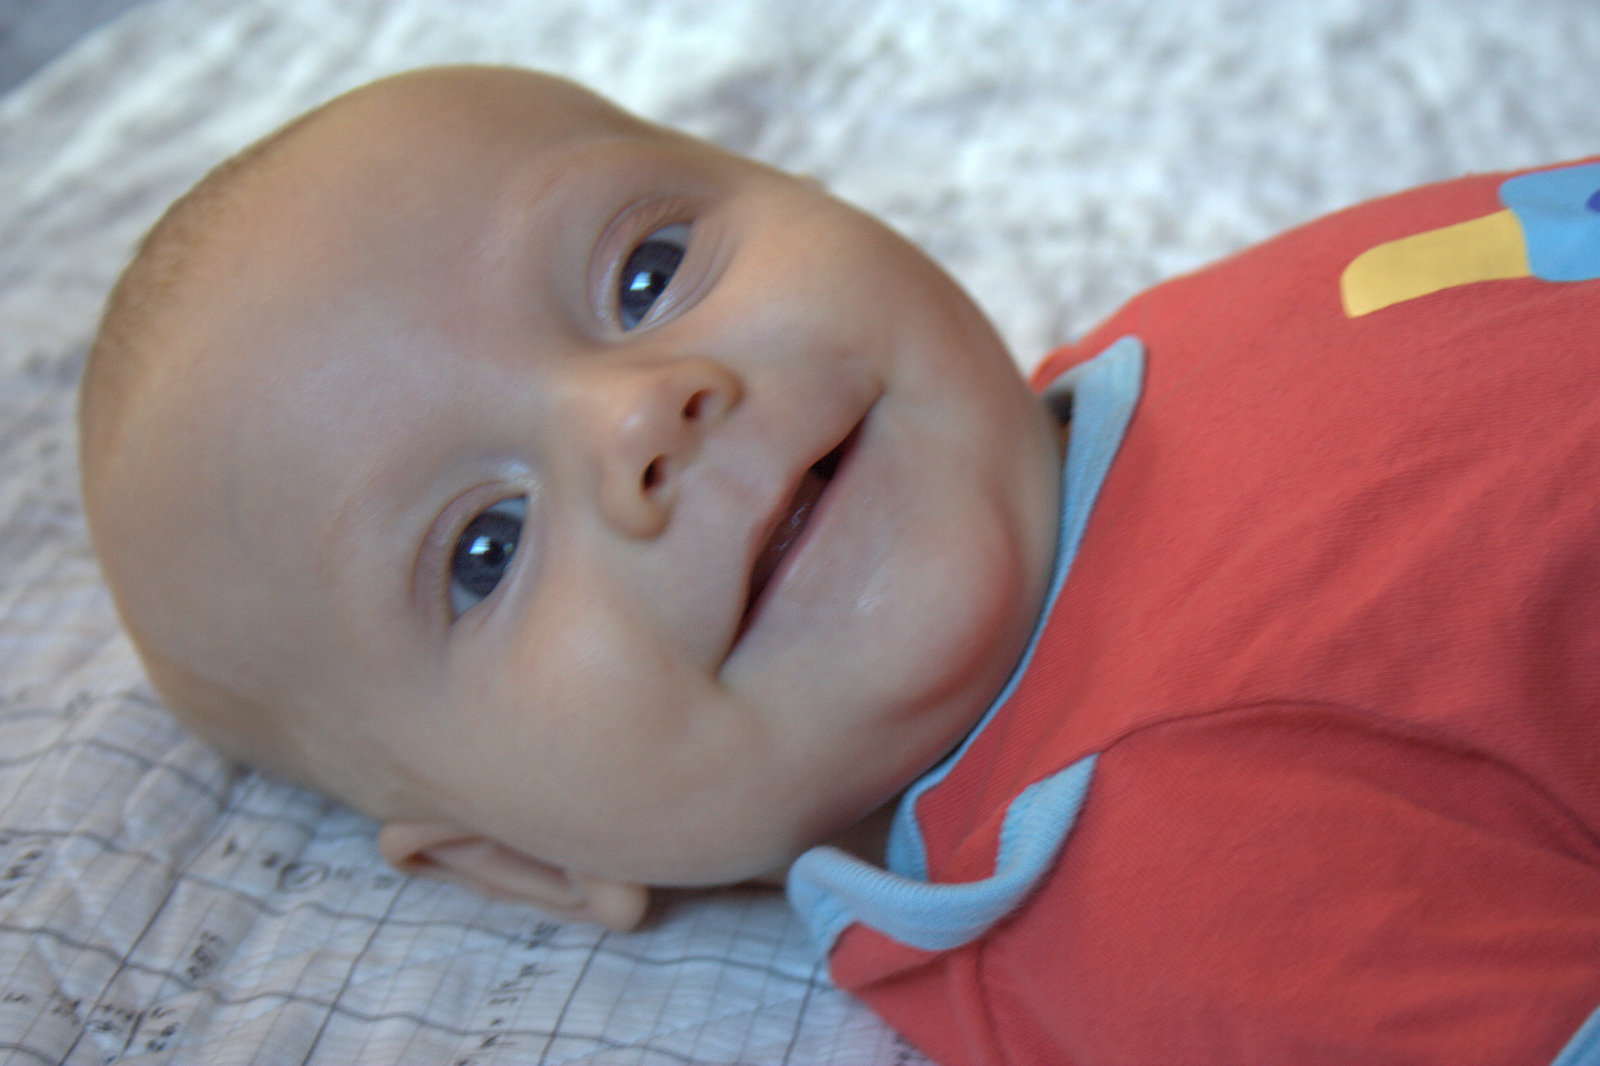
The biggest news this month is: teeth! Finn’s two bottom teeth are in and now big enough to see when he gives his gummy smile. Teething is never fun, but Finn (and mommy & daddy) have been handling it like champs. Between his big sister’s birthday, Christmas, and holiday travel, it has been a full and busy month!
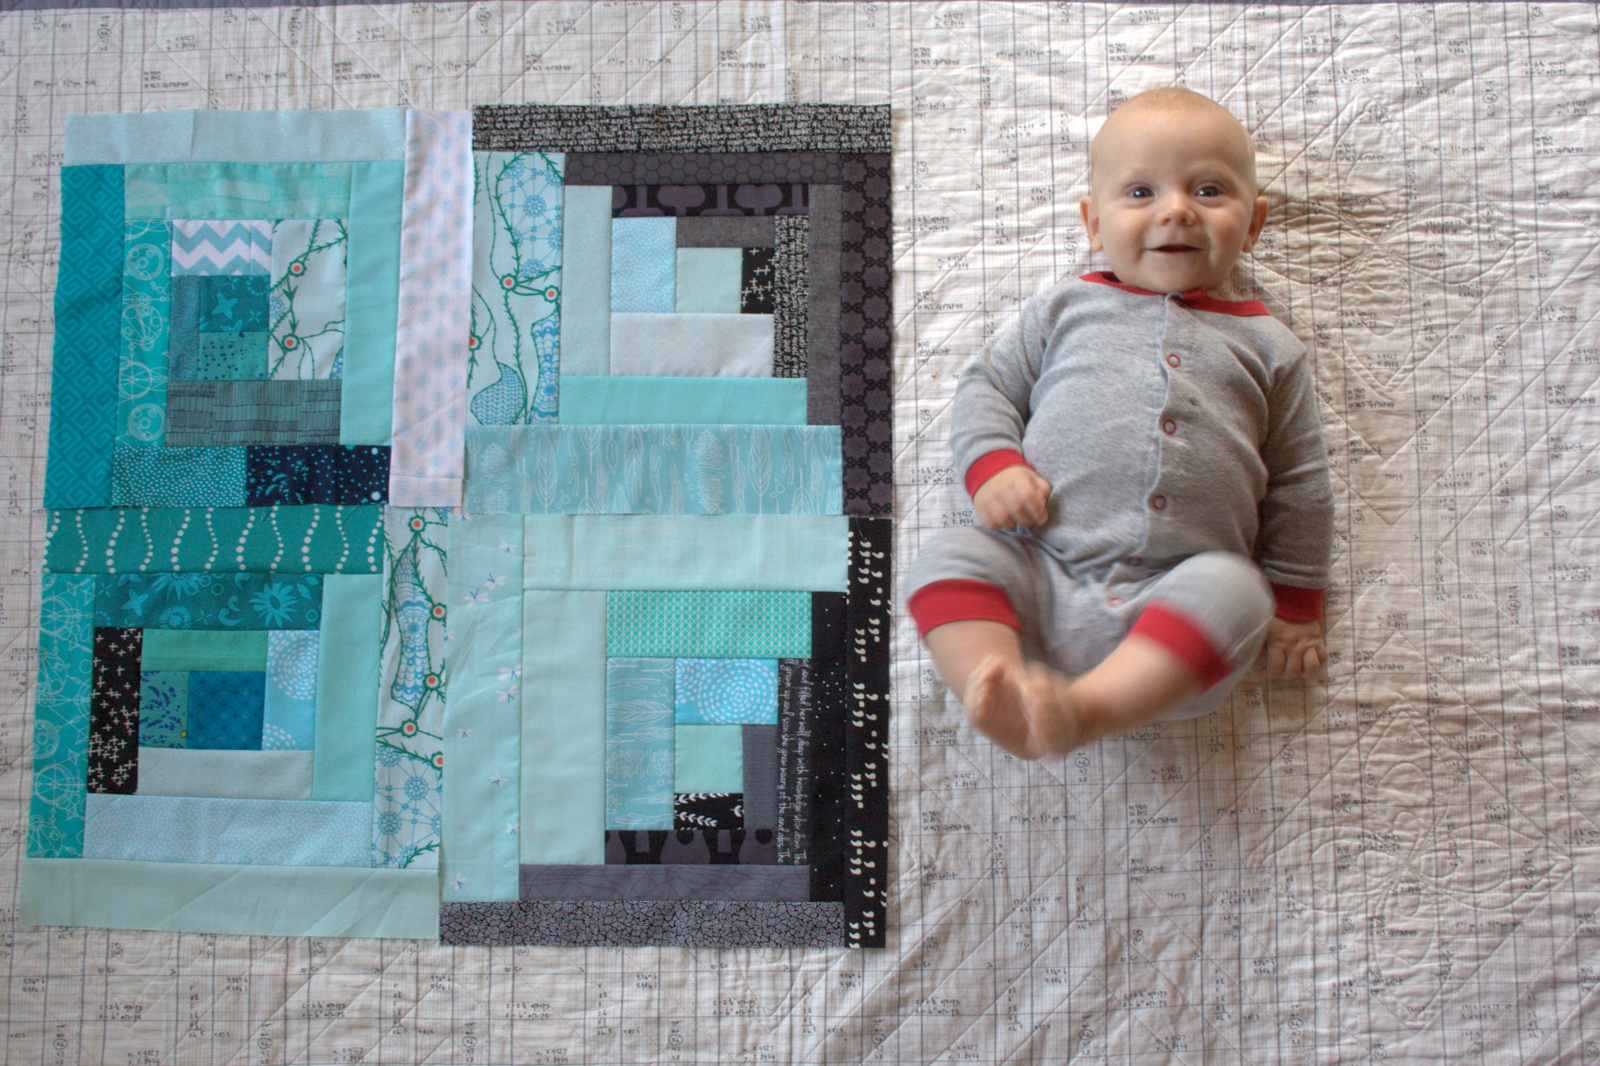
Not much stands in Finn’s way these days. Trying to get him to stay on the quilt near his quilt block was tricky, so most of the photos this week are movement or snuggle photos. I’m sure you don’t mind. This was what I saw less than a minute after putting him down right next to the wall. “I want to play, Mommy!”…
…until he got distracted by a design in the carpet. He is also really working on his fine motor skills, trying to grab tiny bits off the carpet and floors. I love watching his little mind at work. Babies are amazing; they learn so much so quickly!
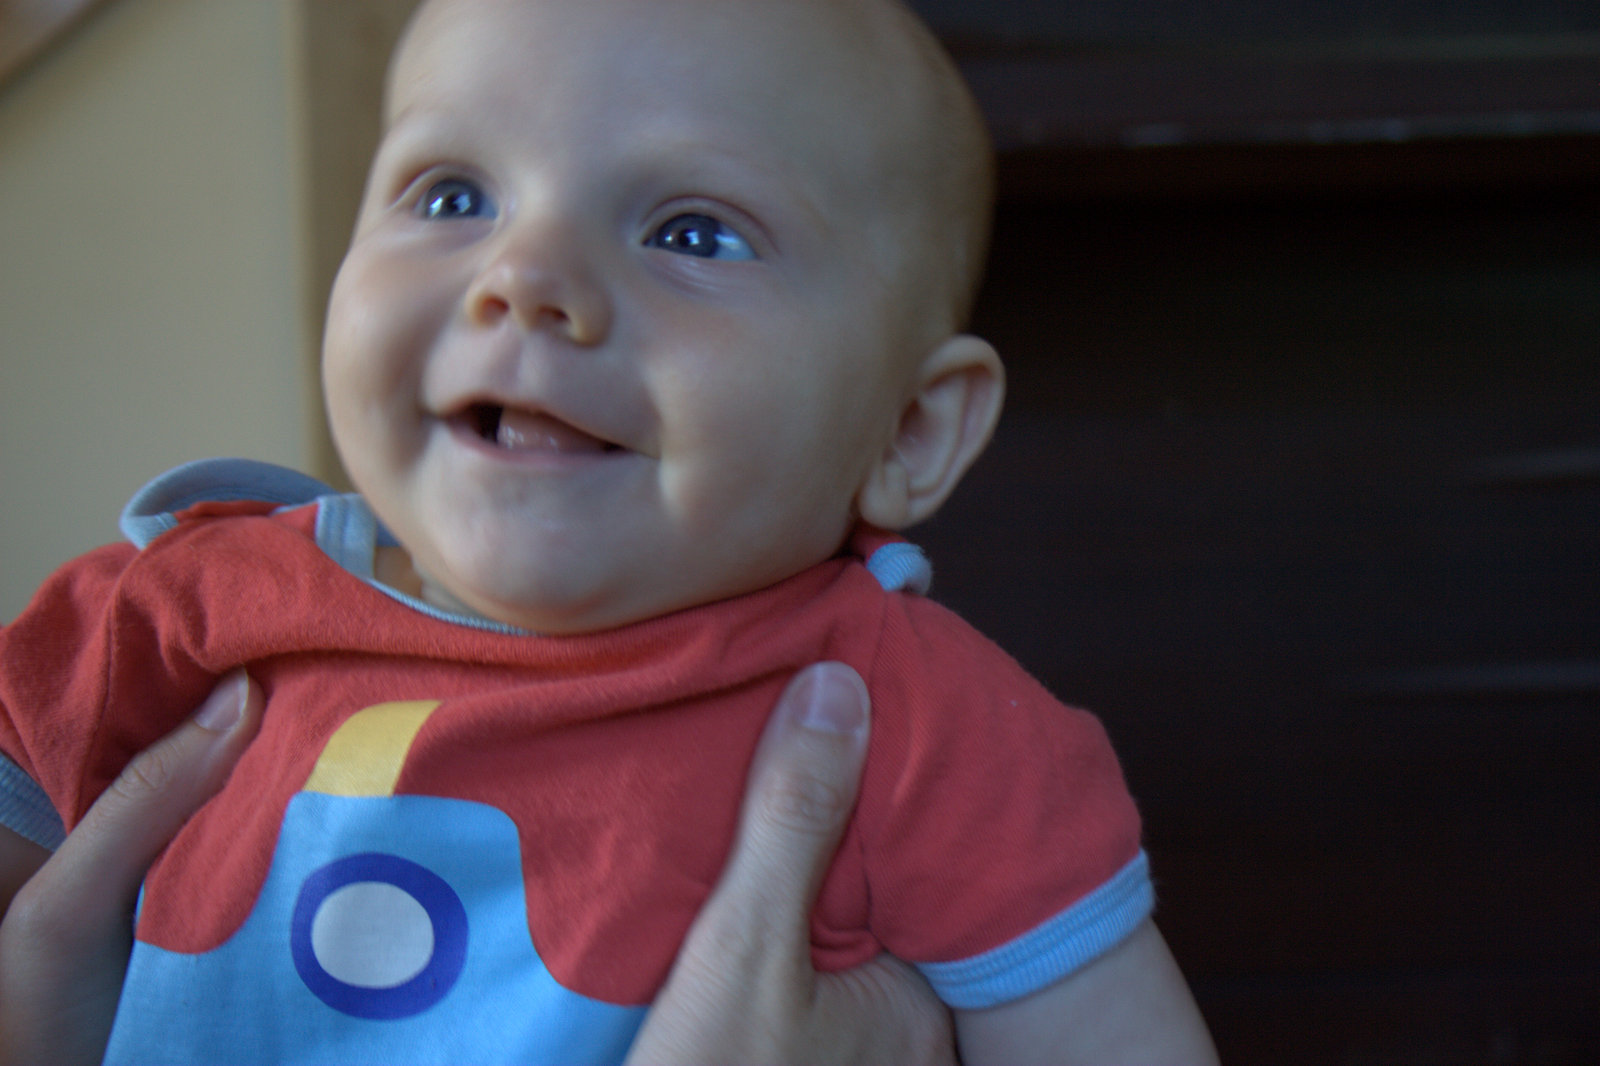
“I like this one, Mommy!”
Finn’s quilt is really taking shape! You can see my full layout plan here in case you missed it a few months ago. I’m tempted to begin sewing blocks together but I think I will wait until the end to be consistent with photos. Here’s a quick photo burst since who doesn’t want to see babies in front of gorgeous quilt blur?
He loves to stand while holding onto my knees, and was trying to eat my colorful knees.
This project is so much fun, and I love that even if I procrastinate, sewing up a block takes less than an hour; sometimes it comes together as quickly as a half hour. For a busy mom with a million things on her plate (Hi, that’s me!), this project is a breath of fresh air and a chance to see and make progress without a huge time commitment. Plus, it’s such a fun way to document Finn’s growth and milestones.
Welcome to my stop on the Wanderlust Quilts blog hop! Here I’ll tell you a bit about Amanda Leins (Mandy’s) new book Wanderlust Quilts, invite you to venture into the woods with me after drawing inspiration from the book, and then tell you how you can win your very own copy of this invaluable book.
Courtesy of Stash Books. Photo by Nissa Brehmer.
When I was first sent a review copy of Wanderlust Quilts, my initial reaction was Wow! I love how her quilt designs break all the rules! When I mentioned this to Mandy, she replied, “It’s good to know all of the rules so that you know which ones you can break”. I love how Mandy truly draws inspiration from the world around her, specifically classic art and architecture, unbridled by labels or quilt police. She doesn’t confine her quilts to the limits of a rectangle while still employing skillfully precise quilting techniques, and she spells it out so that we can utilize the techniques, too.
Going Places. Courtesy of Stash Books. Photo by Nissa Brehmer.
One of my favorite aspects of Wanderlust Quilts is that Mandy includes photos of her sources of inspiration, so that we can see how each inspiration photo is translated into a quilt. A cobblestone path in Europe becomes a baby quilt, “the beginning of the road for some little person.”
Lovely Fishbourne. Courtesy of Stash Books. Photo by Nissa Brehmer.
In Wanderlust Quilts, Mandy not only invites us to travel to our favorite places, stretch our imaginations, squint our eyes a bit, and see the world as a quilt, but she also gives us the technical tools and skills necessary to fine tune our visions and make them a reality. Included in the book are clear instructions and tips on turning your photos or sketches into a quilt, both improv and precision piecing, sewing Y-seams, sewing curves, and more. Wanderlust Quilts is a great resource for inspiration and technique, which makes it one book that I would happily add to my library.
C&T Publishing is generously offering a copy of Wanderlust Quilts to a reader at every stop along the blog tour. Keep reading to find out how you can enter to win your very own hard copy. If you can’t wait, Mandy is selling autographed copies in her store here.
But first, travel into the woods with me for a moment. When Mandy invited me to be a part of her Wanderlust Quilts blog hop, she suggested that I choose a place or thing that is inspiring to me and talk about what techniques I might employ to make a quilt based on that spot. With a background of environmental science and an innate love of nature, I immediately knew that I had to shrink the book to smaller than a dime and take it down to the forest floor.
As I’m sure you’ve noticed in my weekly color inspiration posts, I love to get really close to nature, since changing your perspective can open up an entirely new world of beauty. I took this photo over a decade ago, in gorgeous Sussex County, New Jersey. To this day, it inspires me.
Thinking about the process I would take to turn this photo into a quilt was not enough; I had to jump right in, newly inspired by Mandy’s ten unique and fabulous patterns in her book. Wanderlust Quilts not only inspired me to give improv a go, but it also inspired me to sew with brown fabric (what!?). Above is my first attempt at creating a quilt inspired by the minuscule mushrooms that unfurl from the leafy loam during particularly wet mornings.
As is my style, I let excitement drive me and I dove into piecing improv half circles without consulting Mandy’s book. After seeing that my first try was less than perfect, I realized that this book full of techniques and tips was available right at my fingertips. Slow down, inspiration; sometimes reading and studying a technique before jumping in is key.
After flipping through the many techniques offered in Wanderlust Quilts, I decided to put my wonky mushroom tops aside and try the freezer paper method clearly outlined by Mandy. I didn’t have time to complete the experimental quilt before the hop, but I’m excited to put the masterful techniques Mandy includes in her book to good use in making this favorite photograph into a quilt. I’ll be sure to show you my finished work of art upon completion.
Wanderlust Quilts Giveaway
As I mentioned above, C&T Publishing is generously offering a hard copy of Wanderlust Quilts to a lucky reader at every stop along the blog tour. You can enter by leaving two comments:
What location most inspires you?
If you follow me, Night Quilter, let me know how–or visit my right sidebar to follow me if you don’t already, then tell me how! (e-mail, WordPress, Bloglovin’, Instagram, Twitter, Craftsy)
The giveaway will be open until Sunday, November 15th, 12noon EST. I will select one winner randomly from the comments below. Good luck!Note: This giveaway is now closed! Congratulations, Sandra!
Once you enter, be sure to check out the other great stops along the tour to see where else in the world has been visited by Wanderlust Quilts:
Four months old! Which means I’m now four blocks into my milestone quilt for Finn. For those of you new to this project, my husband had the brilliant idea (through jest) to make a quilt block every month with which to photograph my baby Finn as he grows, and sewing them into a quilt for him as a birthday present in celebration of his first year. I took the idea and ran, and haven’t looked back yet.
This project is still feeling very doable and I’m considering adding an additional four blocks to make it a big larger of a quilt at the end of the year. For now, though, I’m sticking with the one quilt block per month idea, and so far I’m four for four (great record!). You can see my planned layout in my 3 Month post here.
Finn is growing as only babies can. He’s a very stretched out baby, who loves to flex his legs and stand whenever he can, but he also has found the potential in rolling to the side, and has made it halfway over before getting stuck. He sucks and chews on his fingers, either for soothing or maybe he’s teething already (I sure hope not!). He is still so aware of everything around him and loves to “talk” with his baby babble and big bright eyes.
His newfound love of movement makes it quite difficult to get a good photo, but I managed to get a few. Even today, when he’s in the thick of a slimy, drippy, coughy cold, he is so full of bright eyed smiles and giggles. I caught myself almost defiantly asking him the other day, “How are you so happy ALL the time!?”, feeling like I was missing out on something. But then I realized since smiles are contagious, seeing him smile makes me happy no matter how stressed, tired, or otherwise cranky I might be. He’s a gift for sure.
Always on the move, with a smile in his heart.
I am really enjoying creating this quilt along with Finn’s growth. Setting small, attainable goals makes the entire quilt-making process not only doable, but it makes it part of my journey through his first year.
Now up I go to relieve my husband and take my shift holding our poor slimy guy upright so that he can get some sleep without coughing and spitting up slimy gunk. It may be a long night ahead, but hey… it’s all part of the journey and it’s a blessed one indeed.
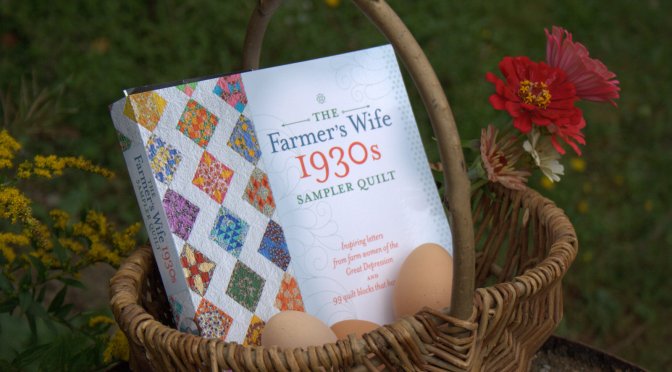
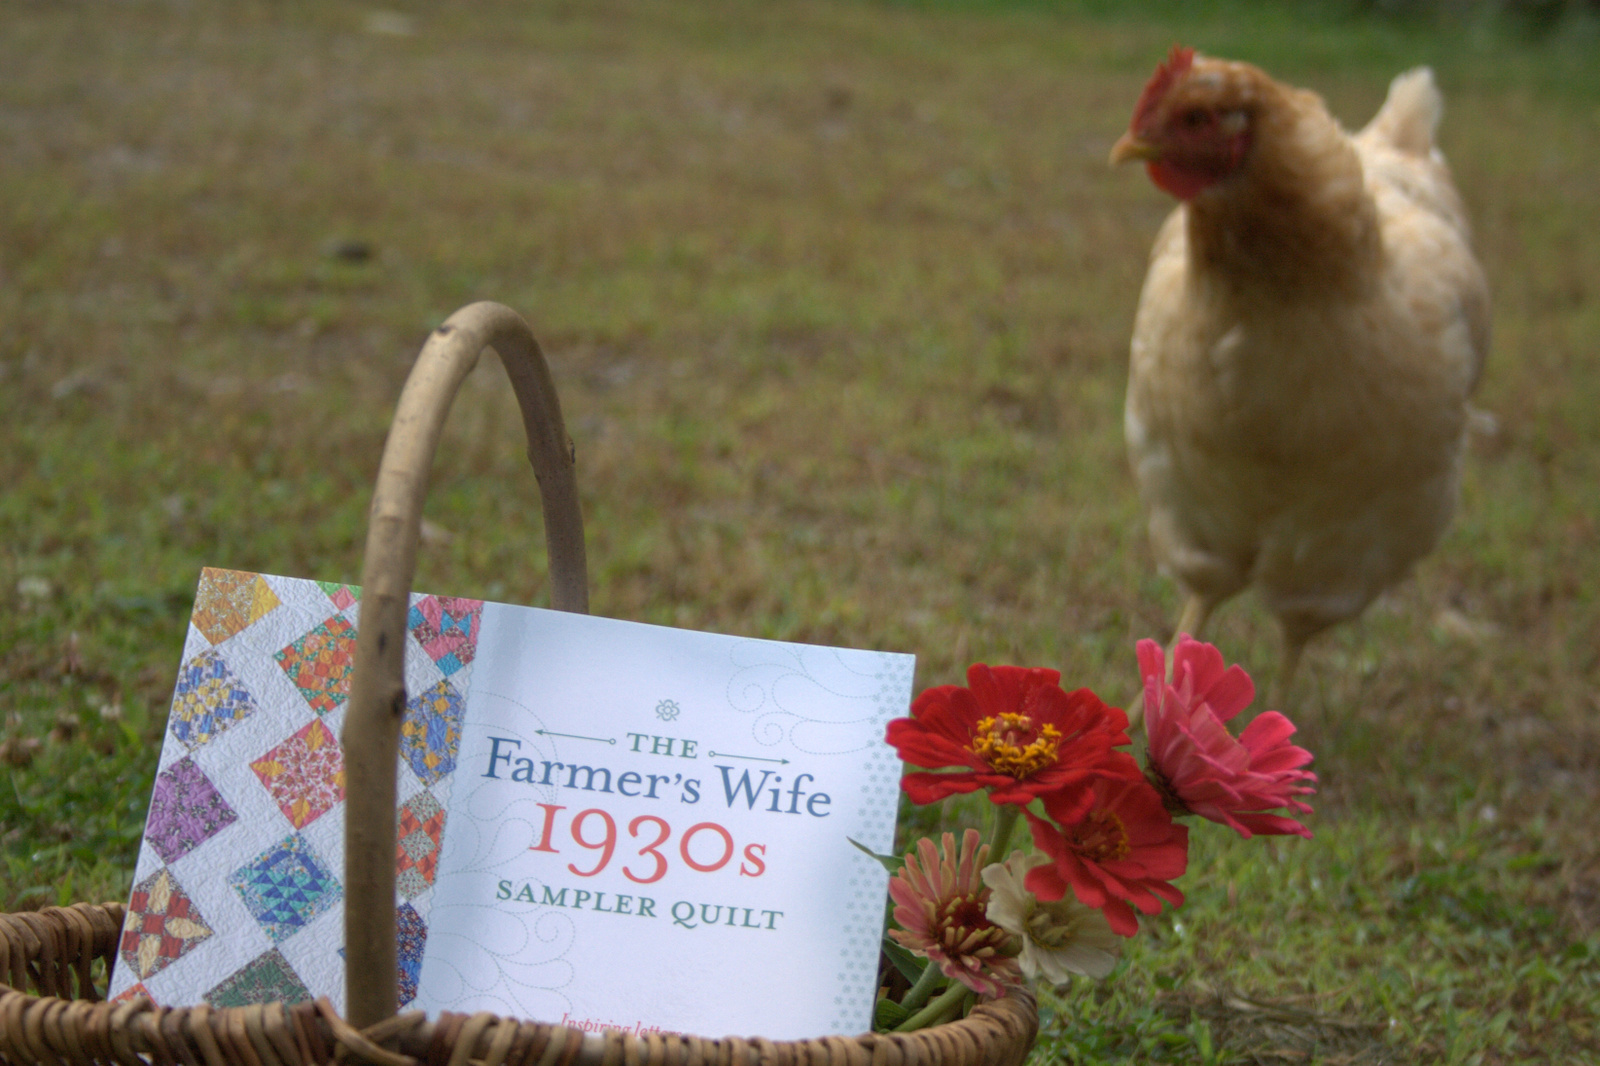
The Farmer’s Wife quilt is one that while straight-up traditional, I’ve been itching to make for a while now. I’m not technically a farmer’s wife, but I certainly live in farm country and some of my closest friends are farmers (I’ll call mine the Programmer’s Wife in Farm Country quilt). There was just something about the idea of reading “inspiring letters from farm women of the Great Depression” and then making the respective quilt blocks that really appealed to me. Inspiration plus quilting: what’s not to like? When Angie asked if I would join the official bloggers team for the sew along, I knew that this was my chance–how could I say no?
This sew along is going to be super cool. All you need to participate is a copy of Laurie Aaron Hird’s book The Farmer’s Wife 1930s Sampler Quilt and your fabric of choice. I’m going to try to make mine almost entirely from stash, since frugality is part of the farmer’s wife experience.
Over the course of the year, Angie and the blogger team (including me!) will share tips and tricks to help you create all 99 blocks from the book, 2 per week in a non-chronological, easy to more difficult, order. Blocks finish at only 6″ square, and can be paper pieced, hand pieced, you can use templates, do English paper piecing, use a rotary cutter and sewing machine, or try all methods. I will most likely use a variety of methods, heavily favoring the rotary cutter-machine piecing and foundation paper piecing options.
I have my book, took it for a little photography tour of our homestead, introduced it to our chickens, and have been thinking about how I want to make my quilt. I really lean heavily toward the modern aesthetic, so I want to try to make this uber traditional quilt “night quilter style”. We’ll see if I can pull it off.
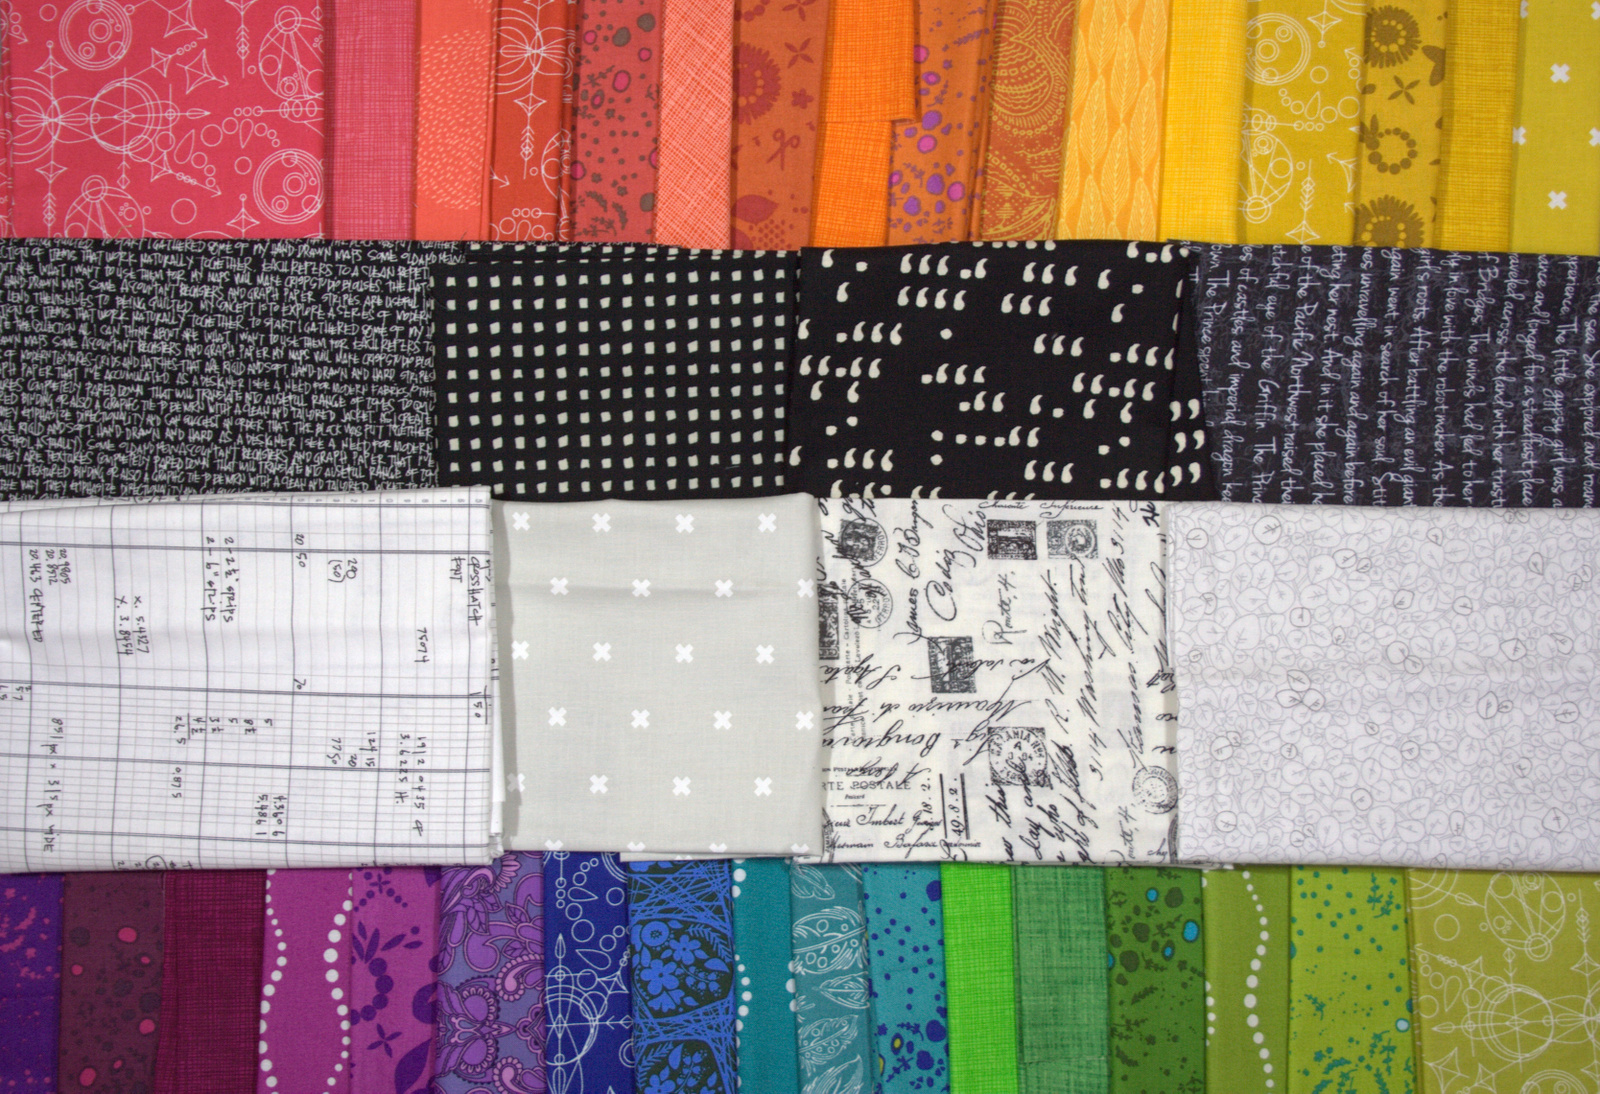
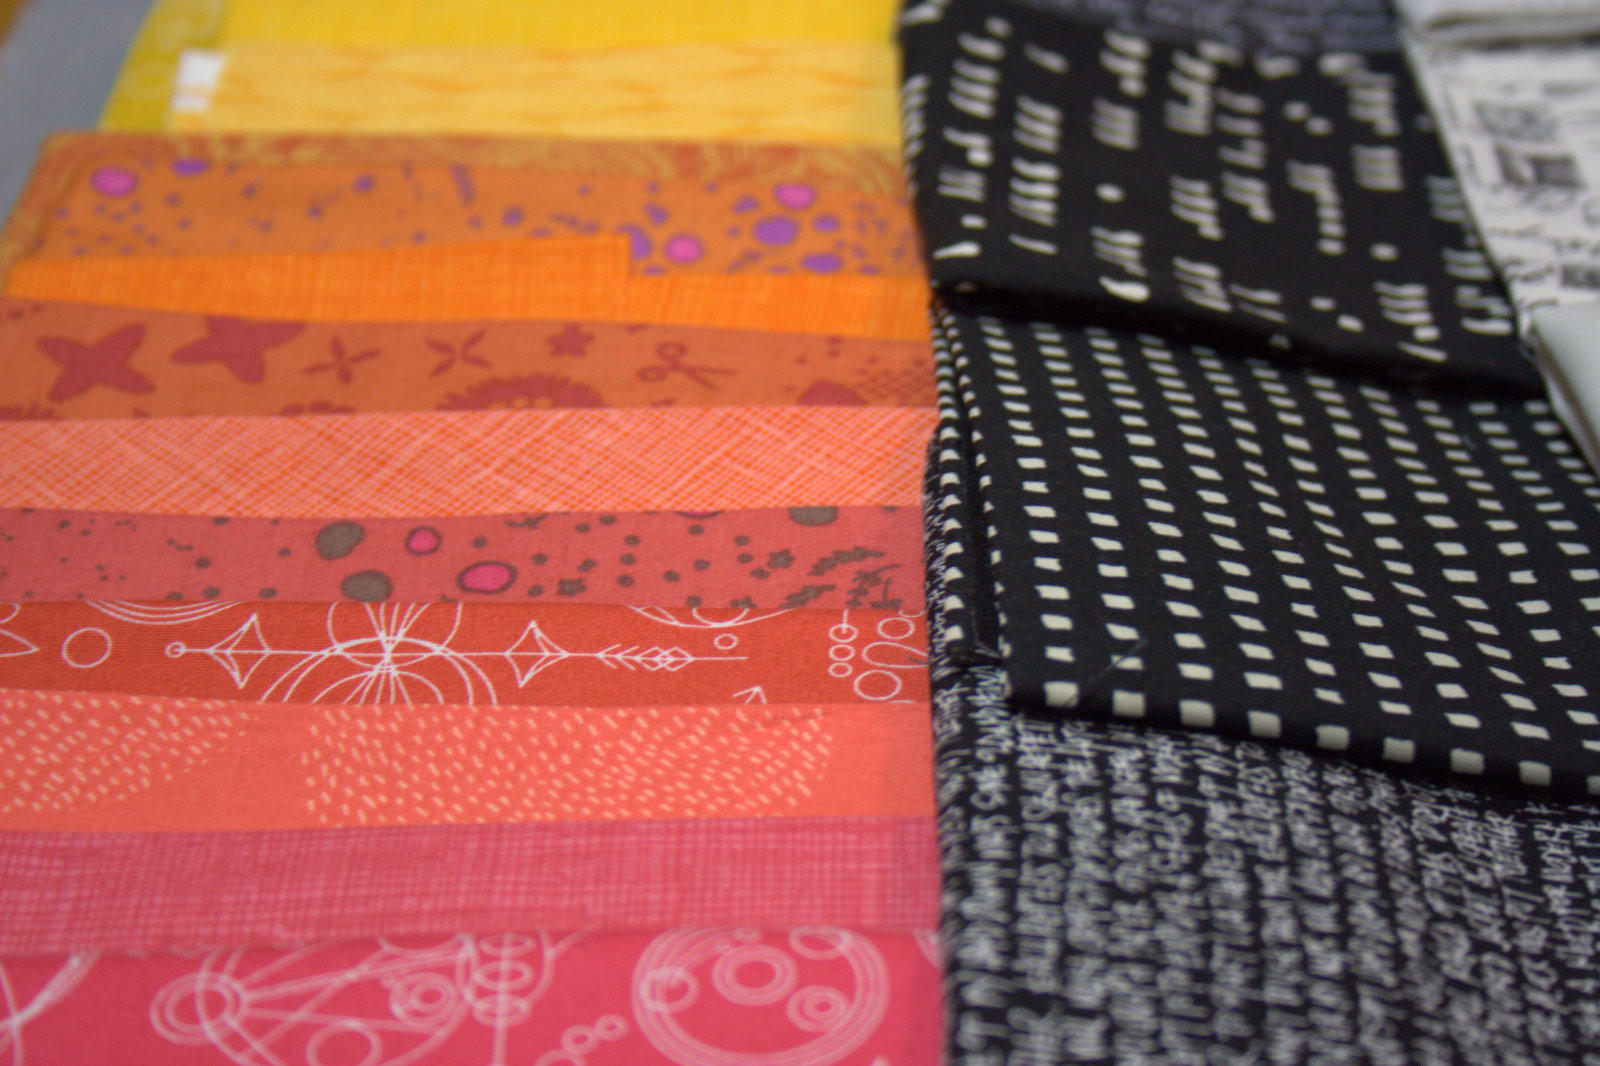
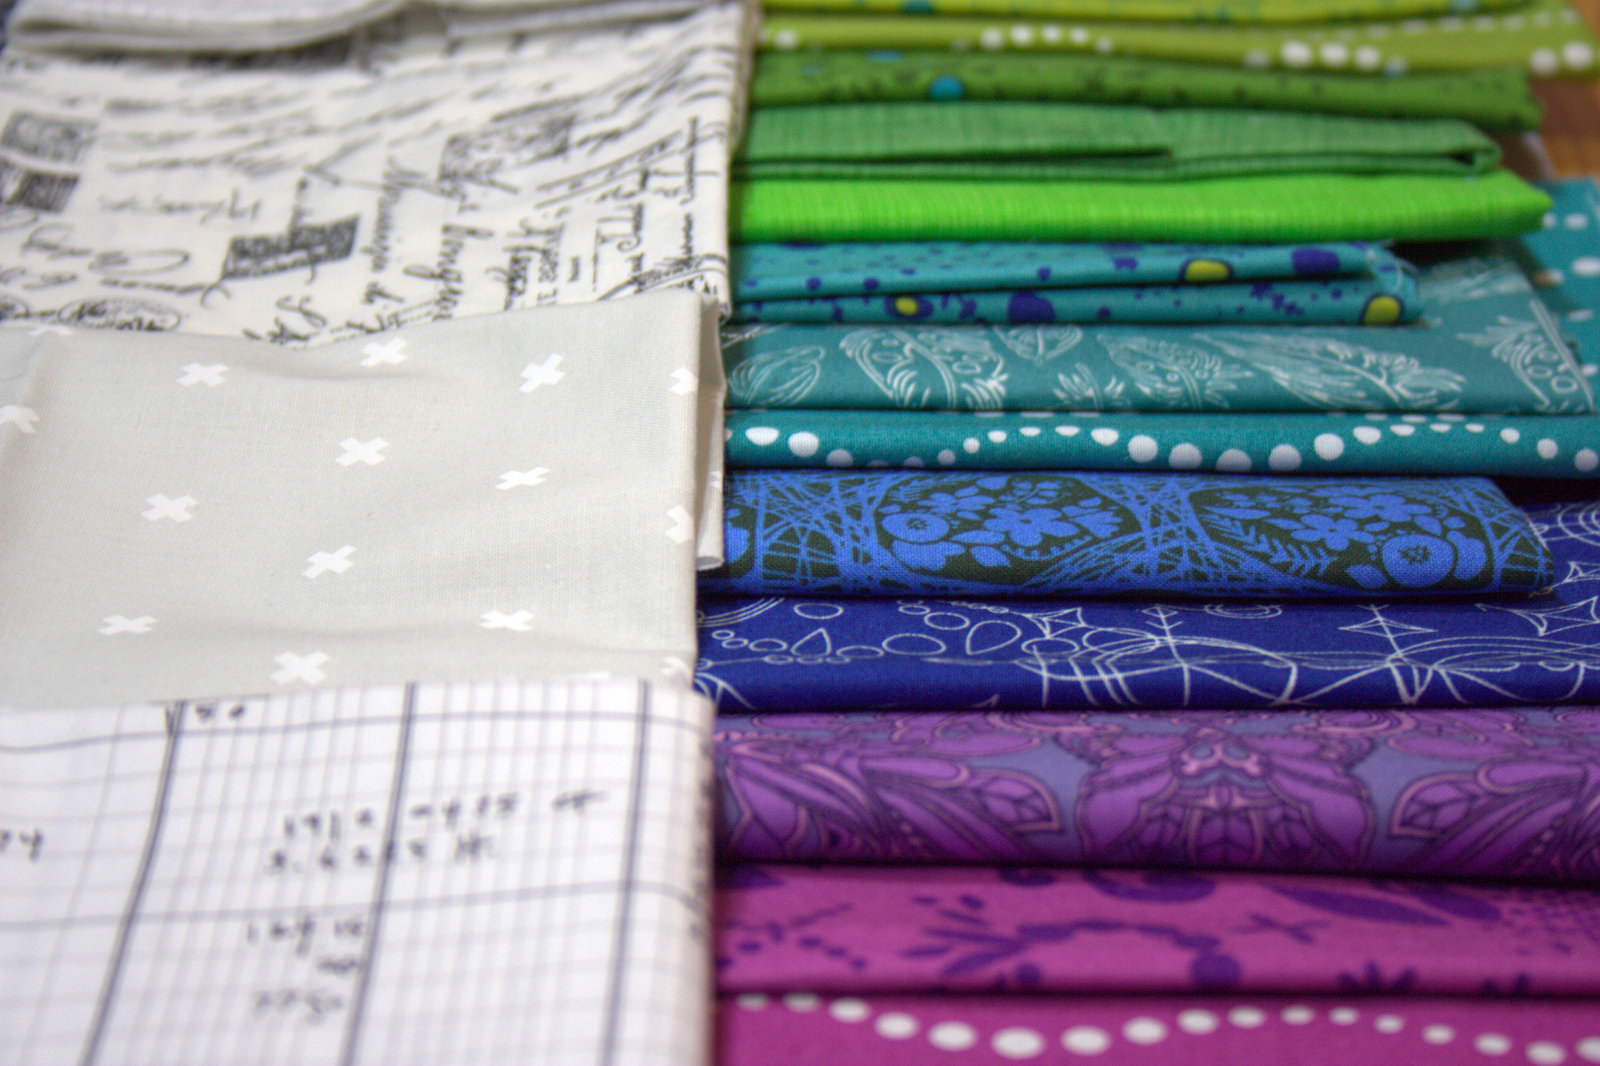
The fabric pull is pretty predictable, but this time instead of a simple rainbow gradient, I want to play with warm vs. cool colors. I’m planning on making the warm colored blocks with a black background and the cool colored blocks with a low volume/white background.
I really like how fiery the warm colors look paired with black.
Conversely, the cool colors look almost icy paired with the low volume/whites. I’m really hoping I can find a layout that emphasizes these visual characteristics!
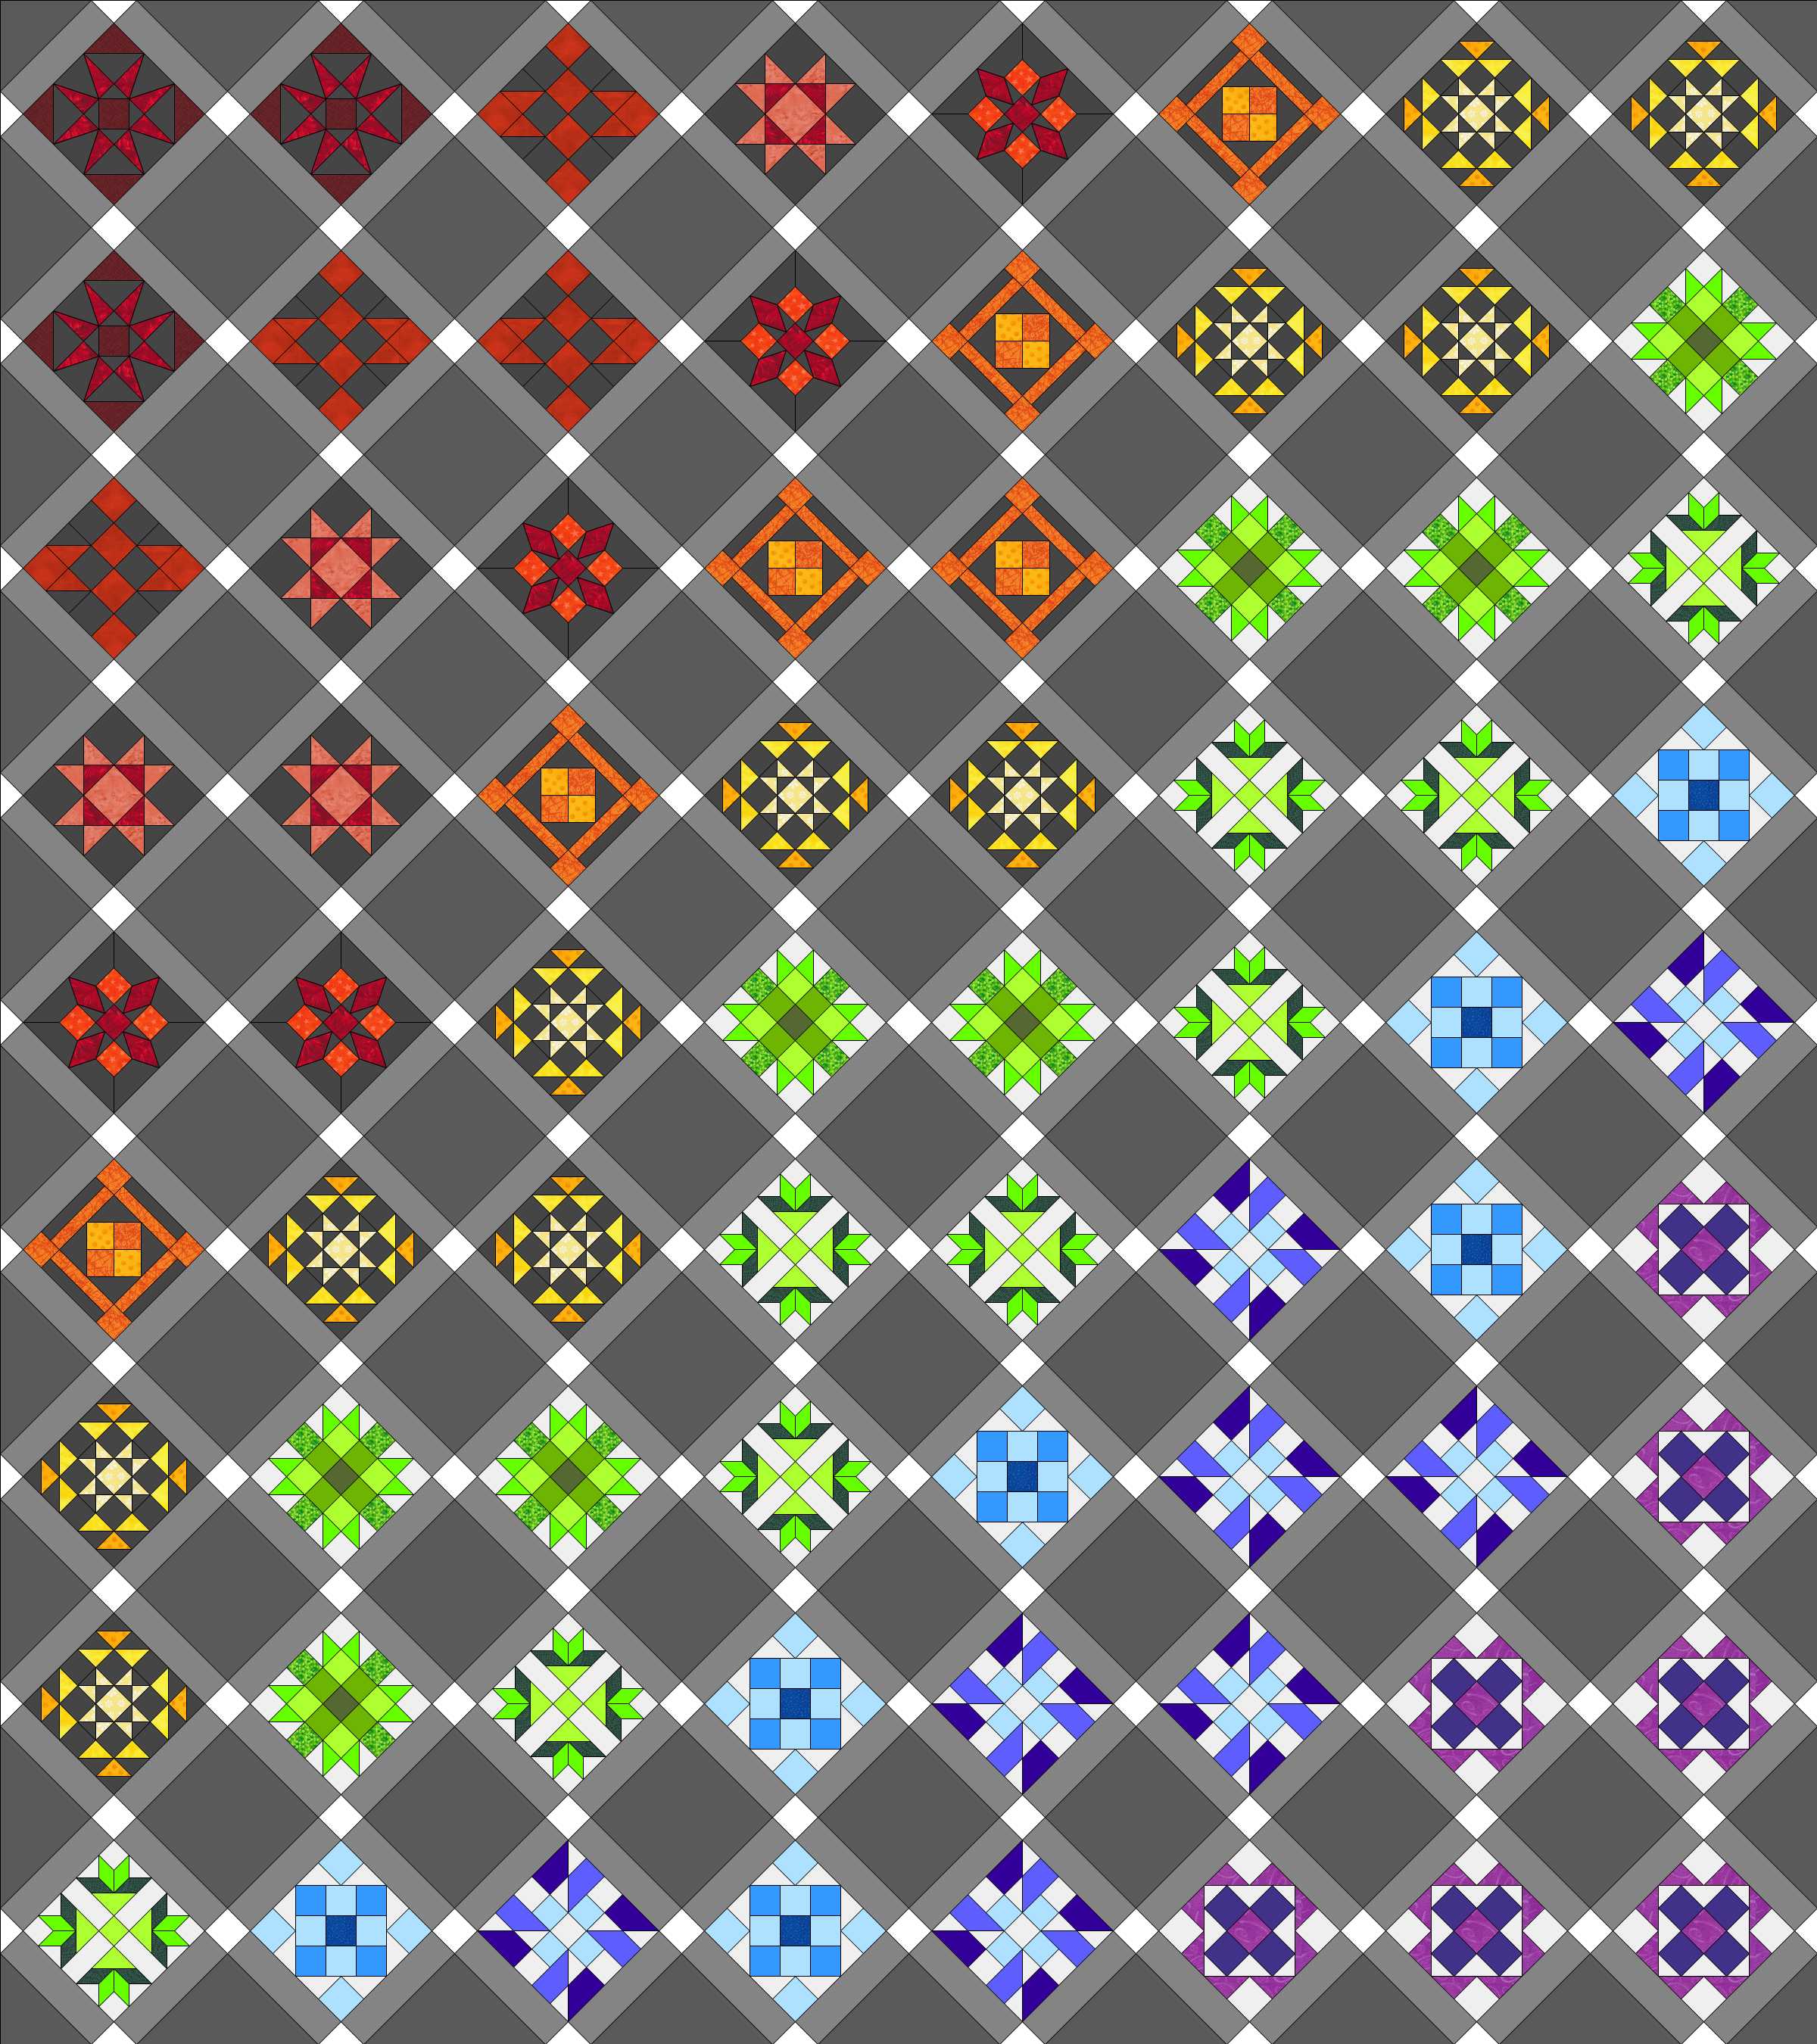
Now that I have EQ7, it makes playing with layout options *really* quick and easy. Knowing that I am a busy, busy mama of three and that there is a decent chance I won’t be able to make ALL 99 blocks, I’ve opted for a layout that includes whole cloth background squares between the blocks, as well as sashing. I plan to use Essex yarn dyed linen in charcoal for the whole cloth background squares, or *maybe* (with the last layout) a gradient from even lighter to darker. Here are some of the layouts I’ve played with. I haven’t landed on one I LOVE yet. What do you think?
Note that rather than buy the entire Farmer’s Wife block file for EQ7, I just used some of the free quilt blocks included in the program. I made them the colors I wanted and then used them in duplicate to get the general aesthetic of the quilt.
Farmer’s Wife Layout 1: Warm Cool Converge
Layout 1. This one feels too stark to me.
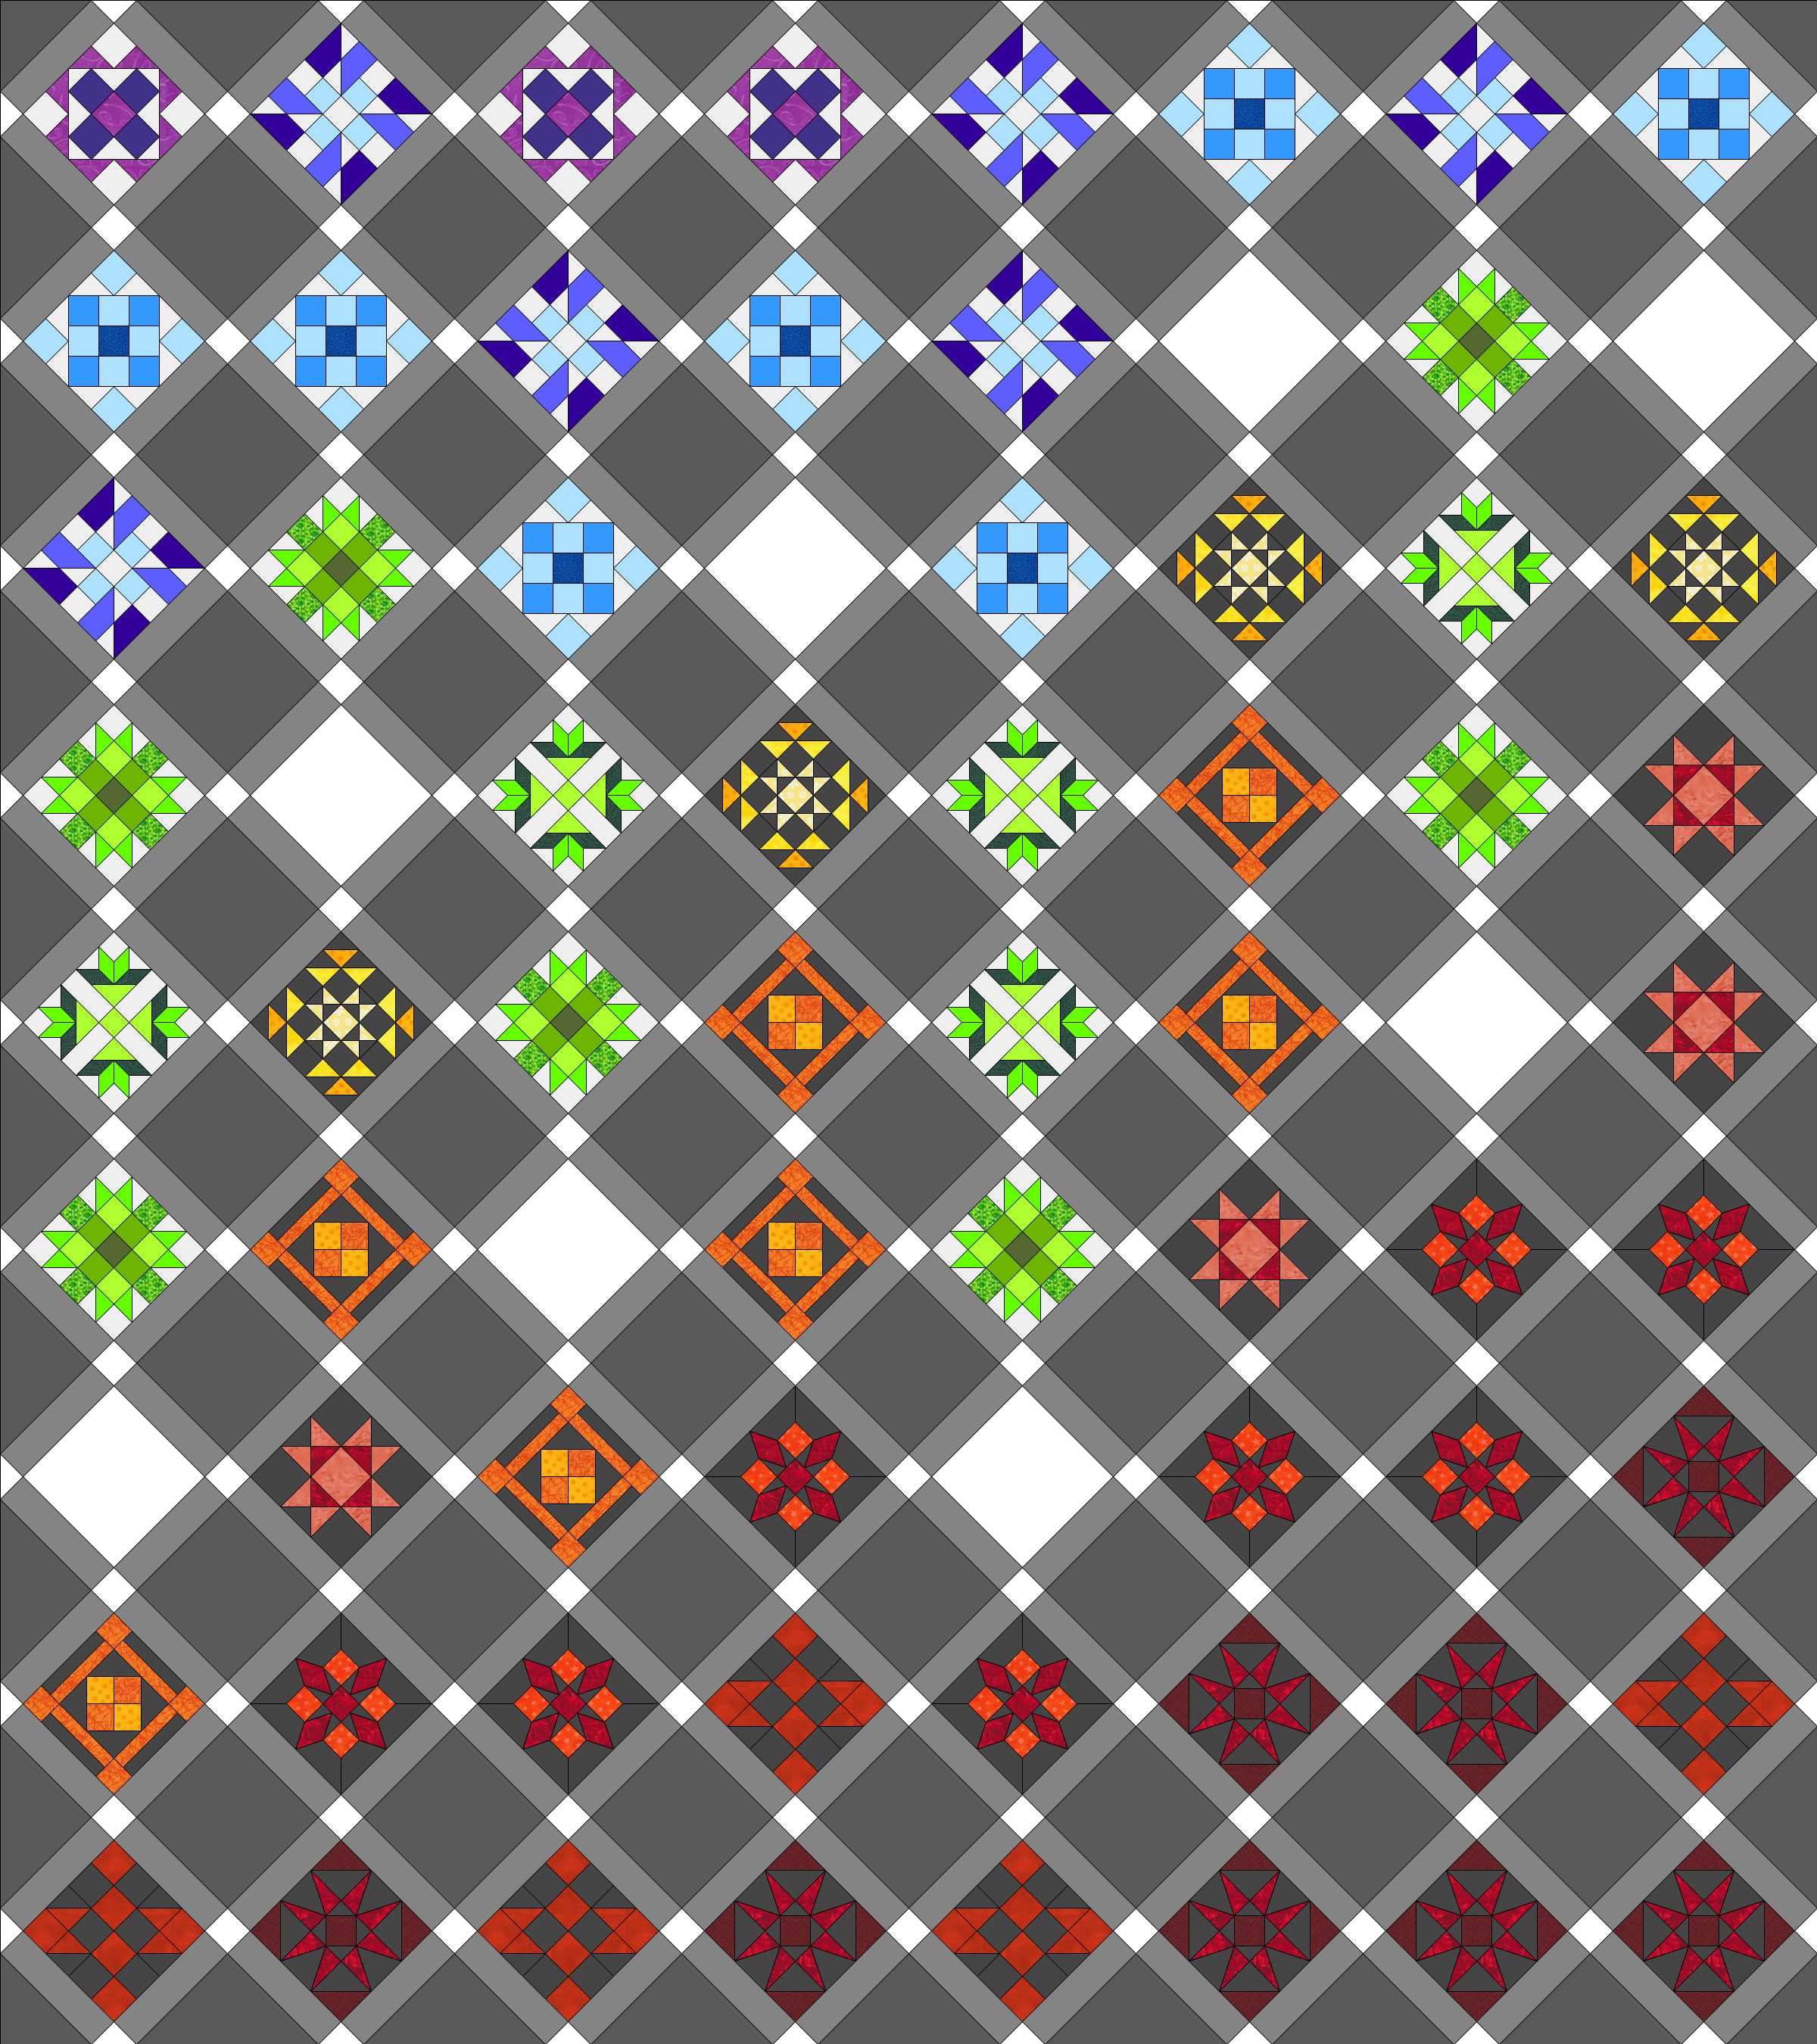
Farmer’s Wife Layout 2: ROYGBIV blend
Layout 2. Note that I’ve pretty much decided I’m not going to use this layout. It’s easy, sure, and looks great, but I want to try to stretch my color play muscles a little bit.
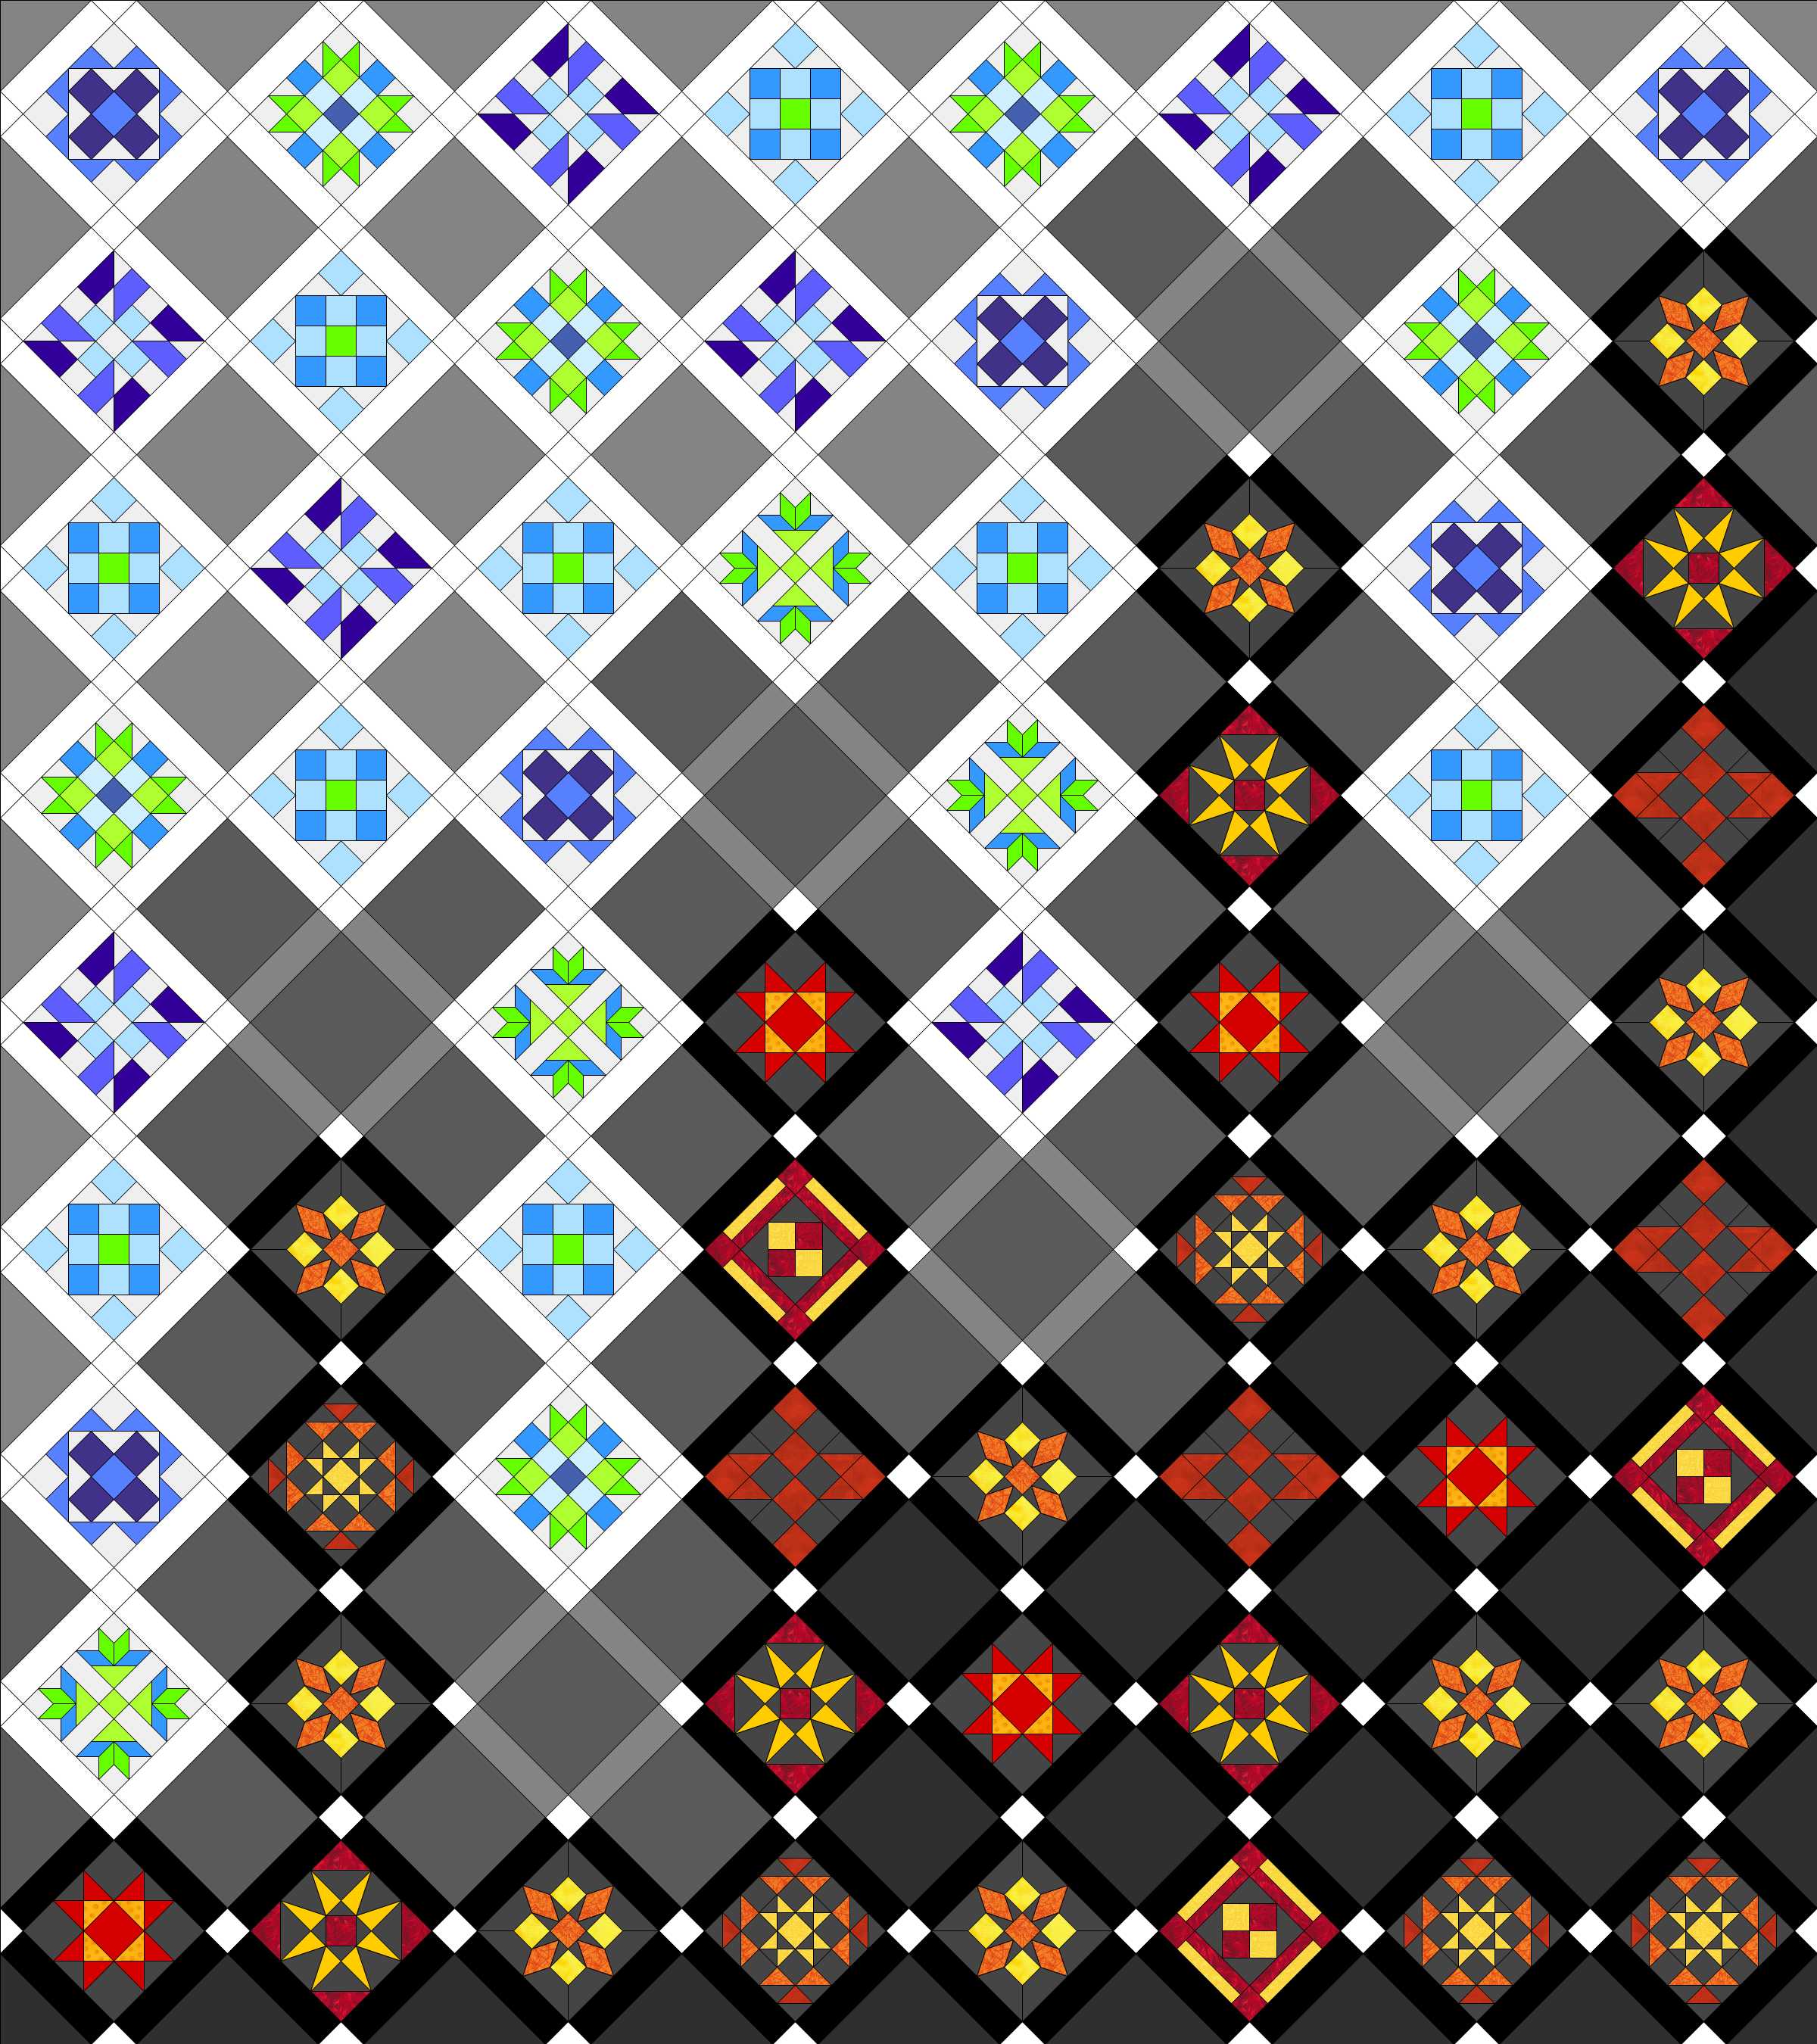
Farmer’s Wife Layout 3: cool warm
Layout 3. I like this one, with consistently colored sashing and background/filler squares. But I’m still not sure it’s exactly what I want. I want to create the effect of the fiery warms rising to meet the cool colors, which are dripping to meet and mingle with the warm.
Layout 4: Cool Warm Converge Blended Background
Layout 4. I like this one more than Layout 1, but I’m still not sold completely.
For now I will plan to start making my cool/warm blocks when the Sew Along begins in two weeks, and will continue to play with layout until I find one I love. Will you be joining in on the Farmer’s Wife Sew Along? If you do, be sure to join the super active Facebook group, too. It will be a fun journey!
Time flies. Really, it does. It’s so cliche, but when it hits me how quickly hours become days, days become weeks, weeks become months, and then, surely, the months become years, it makes me slow down and remember how important it is to make the most of each moment. Three months have already passed since little Finn joined us on the outside. The first quarter of his first year is complete. I actually planned ahead this month, too, so that means a quarter of his monthly milestones baby quilt is complete.
“Wow, that’s growing!”
As promised, I finally settled on an overall layout and design for this quilt, and now I’m even more excited for the outcome.
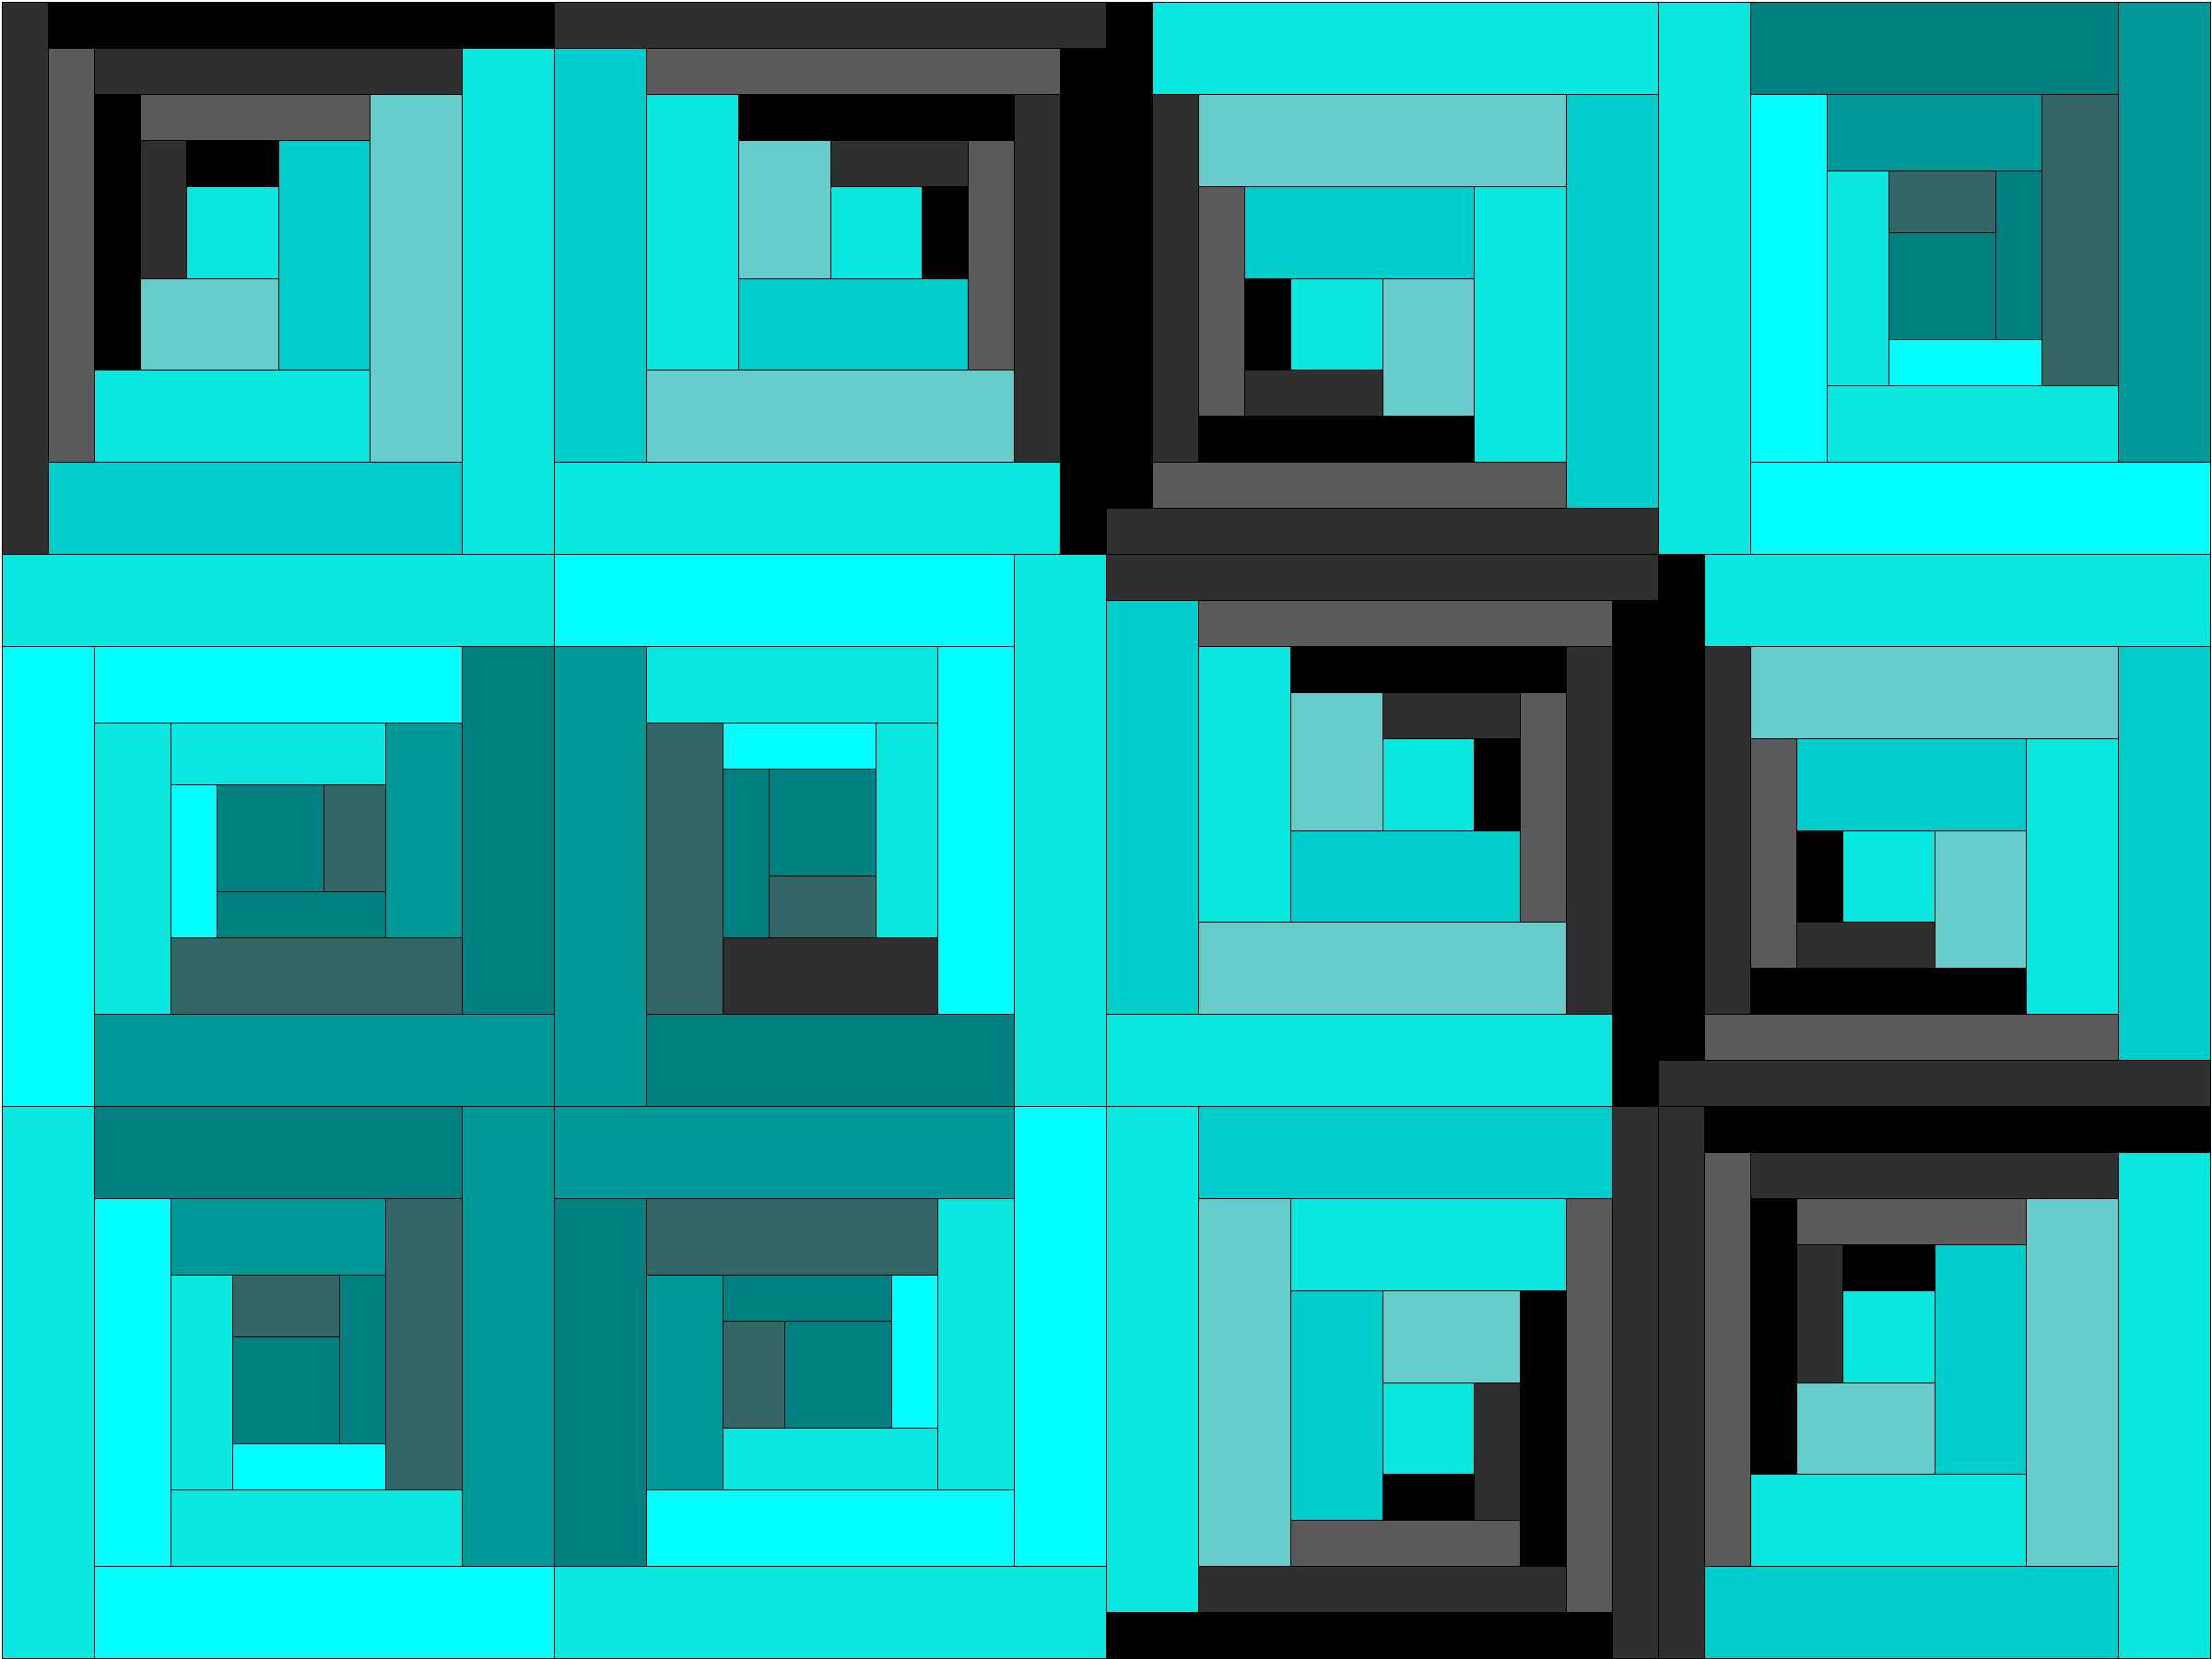
I settled on a color scheme of dark and light teal and blacks/greys, both because they are fabulous colors, but also because I have plenty of teal and black/grey fabric in my scraps pile and stash. I also added a slightly skewed log cabin block to help provide the appearance of some curves and to add some interest to the overall quilt.
Monthly Milestones quilt Block 2
This month I made a Block 2, with wide light teal and narrow black/grey pieces. Creating the illusion of a curve is really quite simple with log cabin blocks. I drafted this block from the outside in, with 1″ strips on two edges and 2″ strips on the opposite two edges, ending with a 2″ square in the off-set center.
The finished quilt will require five (5) block 1s and seven (7) block 2s. Block 1 is a more improv, scrappy log cabin with strips varying in widths, but generally around 2″ or 2.5″ in width. Both blocks are quick and easy to make.
Enough about the quilt, though; I know you really want to hear about Finn! He is truly a blessing. He still loves to “talk” back and lights up whenever anyone looks him in the eye. His favorite thing as far as I can tell is having conversations with anyone who will sit and look at him, replying to his baby babble and grunts. He is generous and unbiased with his smiles, but the looks of true adoration are directed toward his siblings.
Finn just recently started finding his hands, which is really fun to watch. I love seeing him deep in thought, examining his hands and clearly working hard at figuring out how to get them to do his bidding. He grabs my arm or hand when it’s within his reach, but he’s not quite reaching out to grab things yet.
Now that I have a clear plan for the quilt, I’m even more excited to see it come together as Finn grows. While I’m tempted to up the ante to two blocks per month (one every 2 weeks feels doable), I am going to be easy on myself and stick with the one block per month plan. A finished 36″x48″ will be a great drag-around size as he grows into toddlerhood.
Use the code LaborDay2015 at checkout to get 15% off anything on their website all weekend (today, Saturday, September 4th through Monday, September 6th). Fiddlehead now has international shipping available, too! Check out the details on their Shipping Page.
Do you ever get to the point in a project where you are *so* close to finishing that you sort of let your mind think you already have, and it hops right over and latches onto a new project idea or three? Yeah, me too. I have at least three projects that are in their final stages yet have been put aside for the past month, while I instead started a handful of new projects. Who doesn’t love a new project?! Yesterday I decided it was time to get those nearly finished projects into the finished pile, and I pulled my favorite one to the top to start.
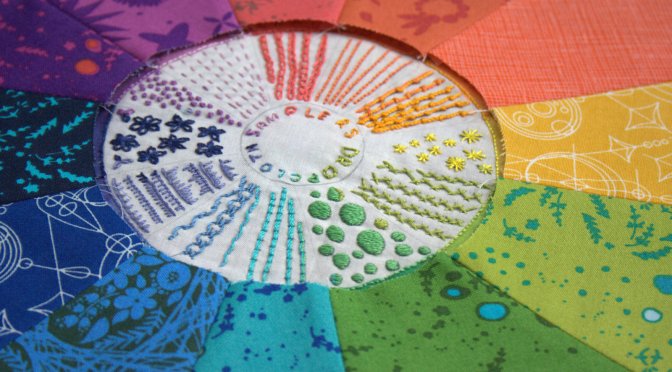
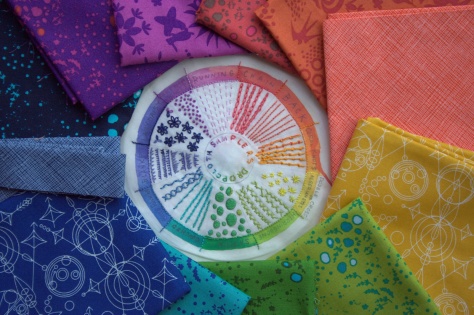
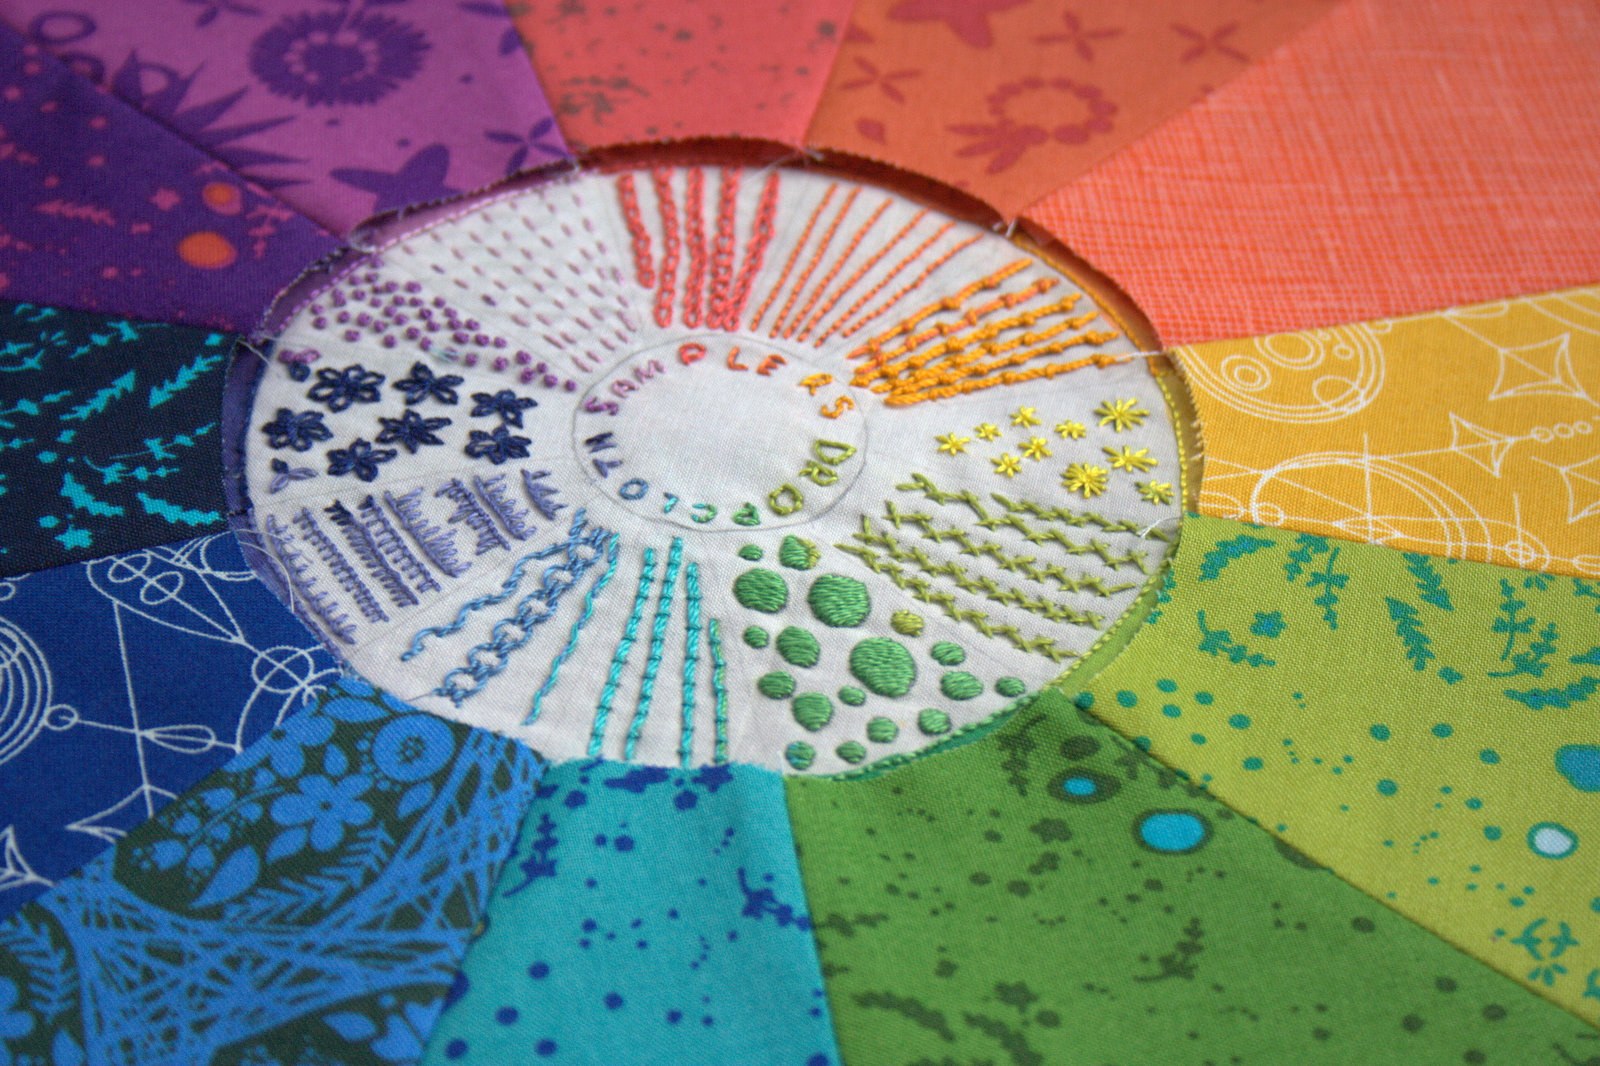
Remember this? Over a month ago, I finished my first ever embroidery sampler, this Color Wheel by Rebecca Ringquist of Dropcloth. I used Aurifil 12wt thread for the first time, learning the stitches as I went, and loved it SO much when it was finished that I just couldn’t let it be actually finished. So I hatched the plan to extend the color wheel using none other than my favorite saturated rainbow: Alison Glass’s 2015 Sun Prints. Putting it aside was not out of lack of love or excitement, don’t get me wrong. I LOVE this project and it feels so good to pick it up again. I just get into spots where the ideas burst and I have to get them started so that they are real. You know what I mean… a project with fabric cut and design sketched and a few stitches invested is a real project. It’s a lot less likely it will sit stagnant in the pool of unrealized ideas once it’s been at least partially begun.
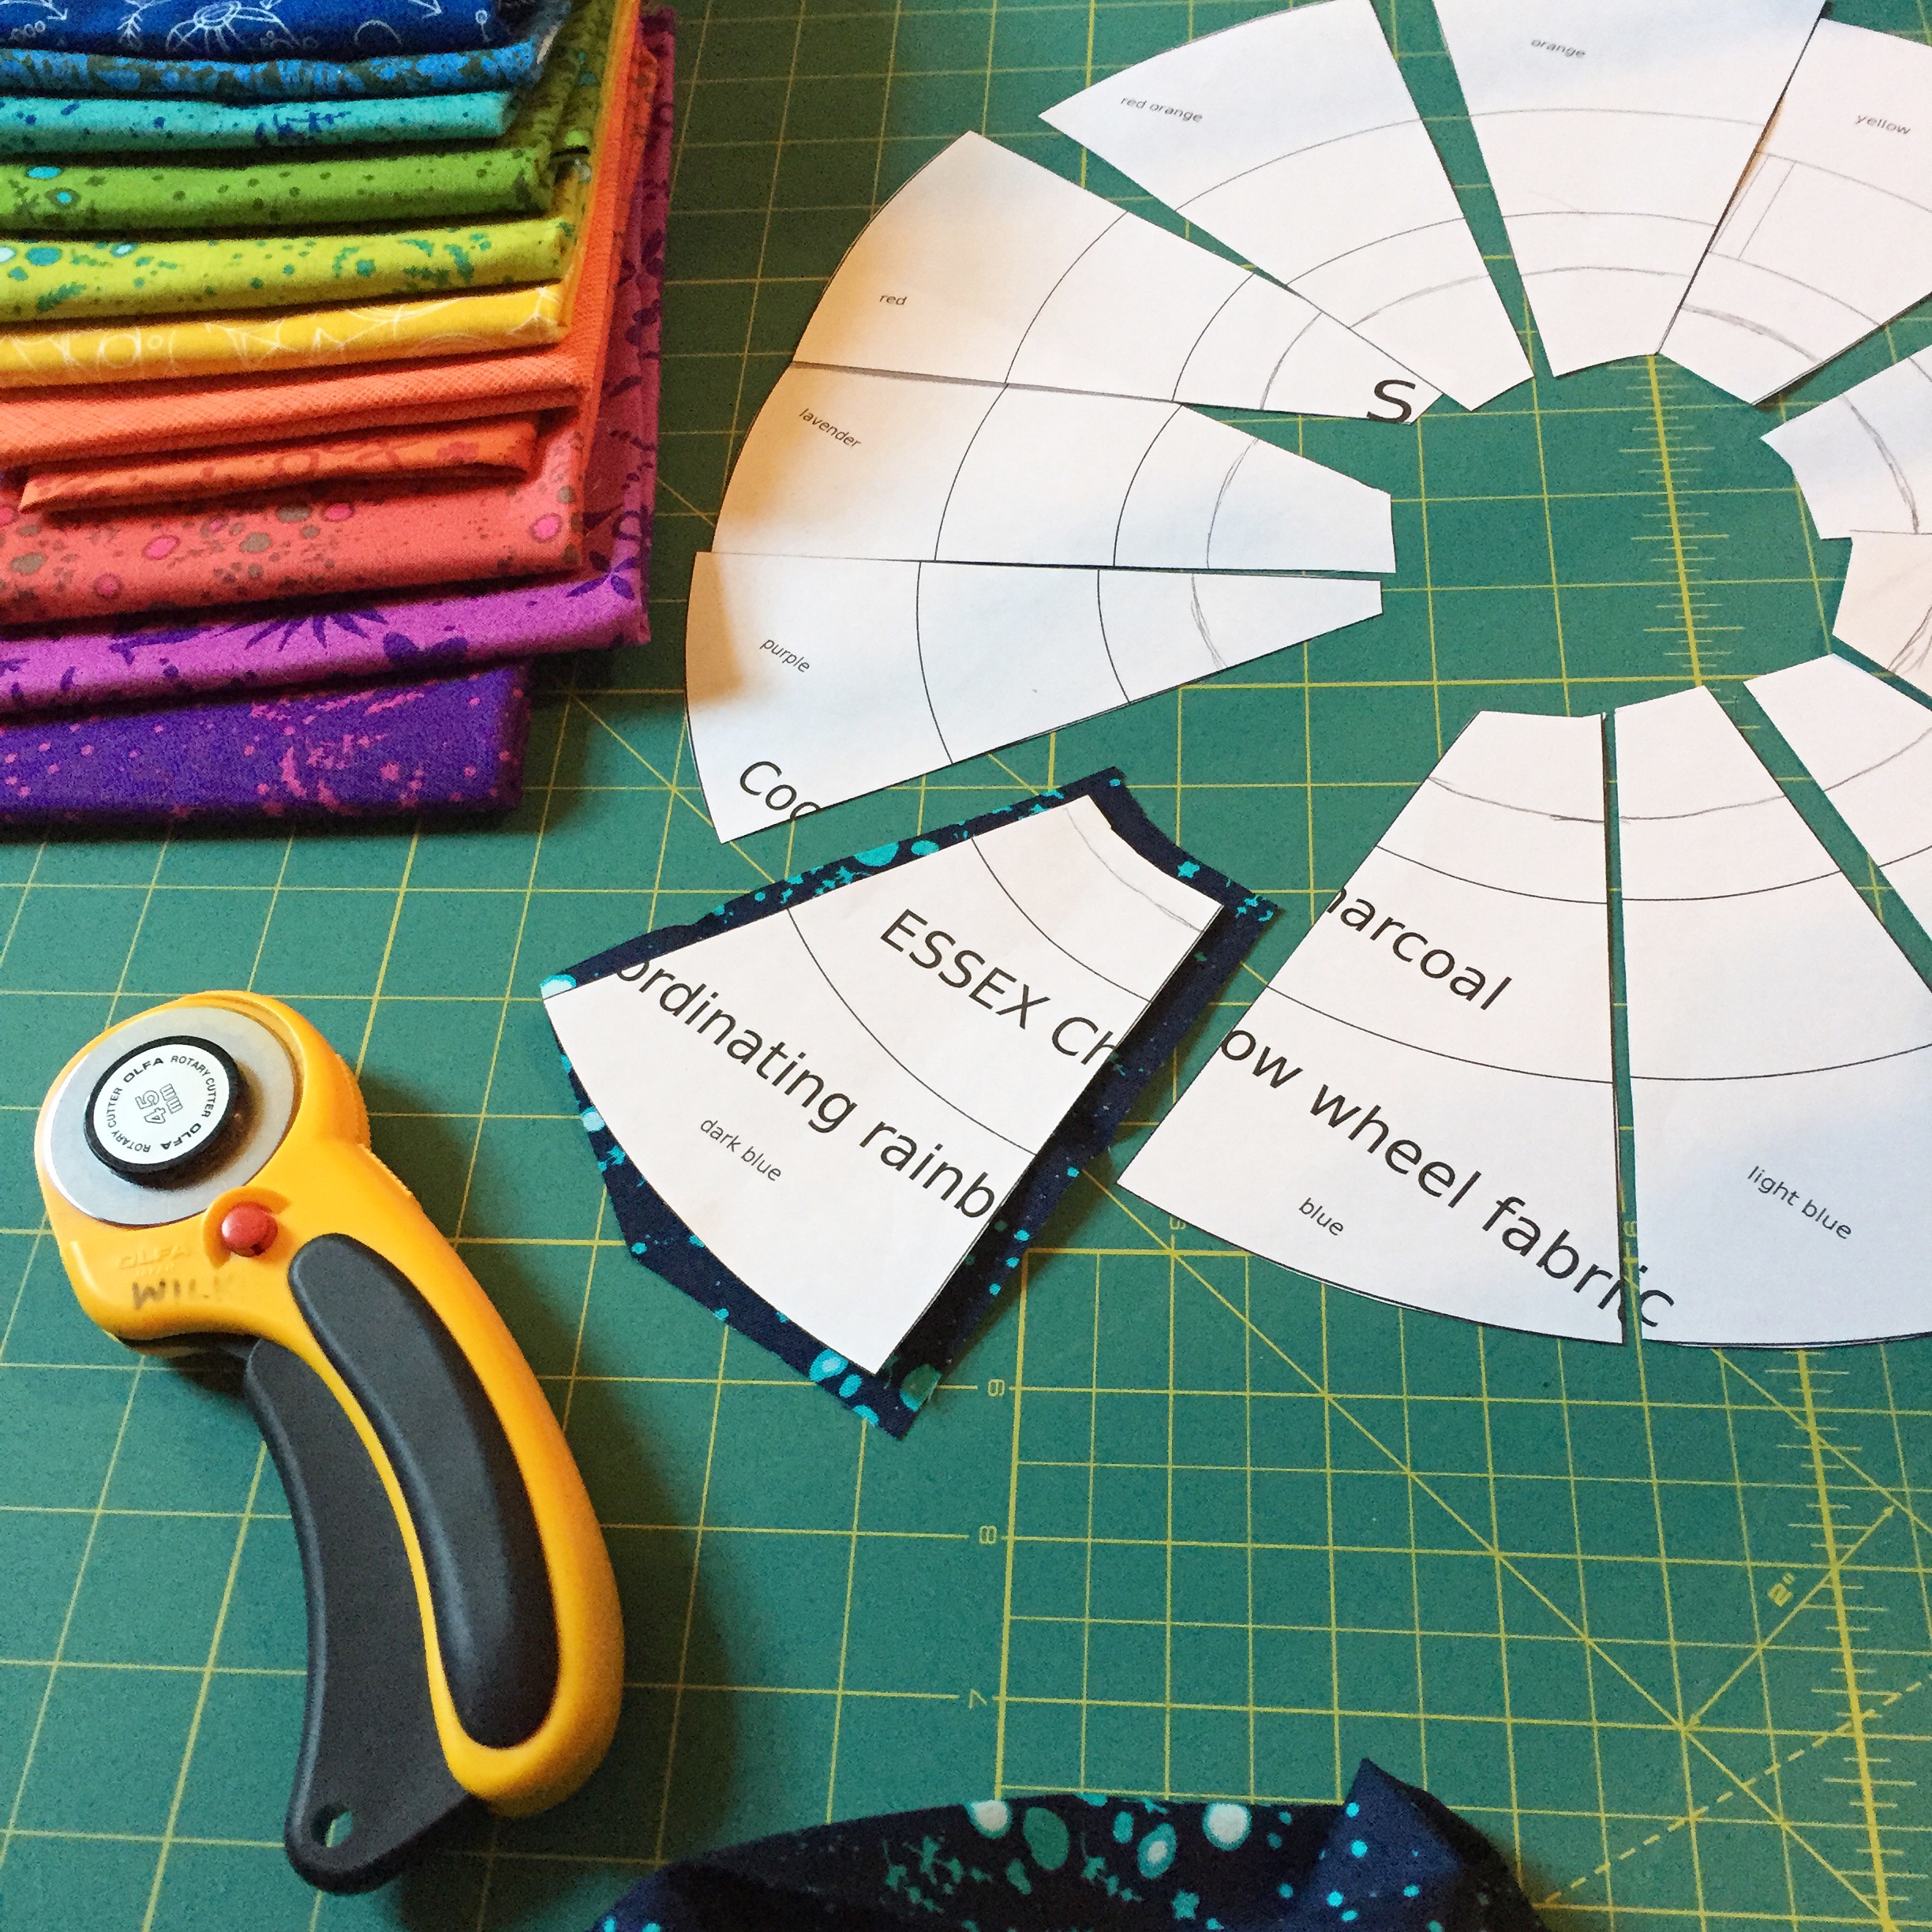
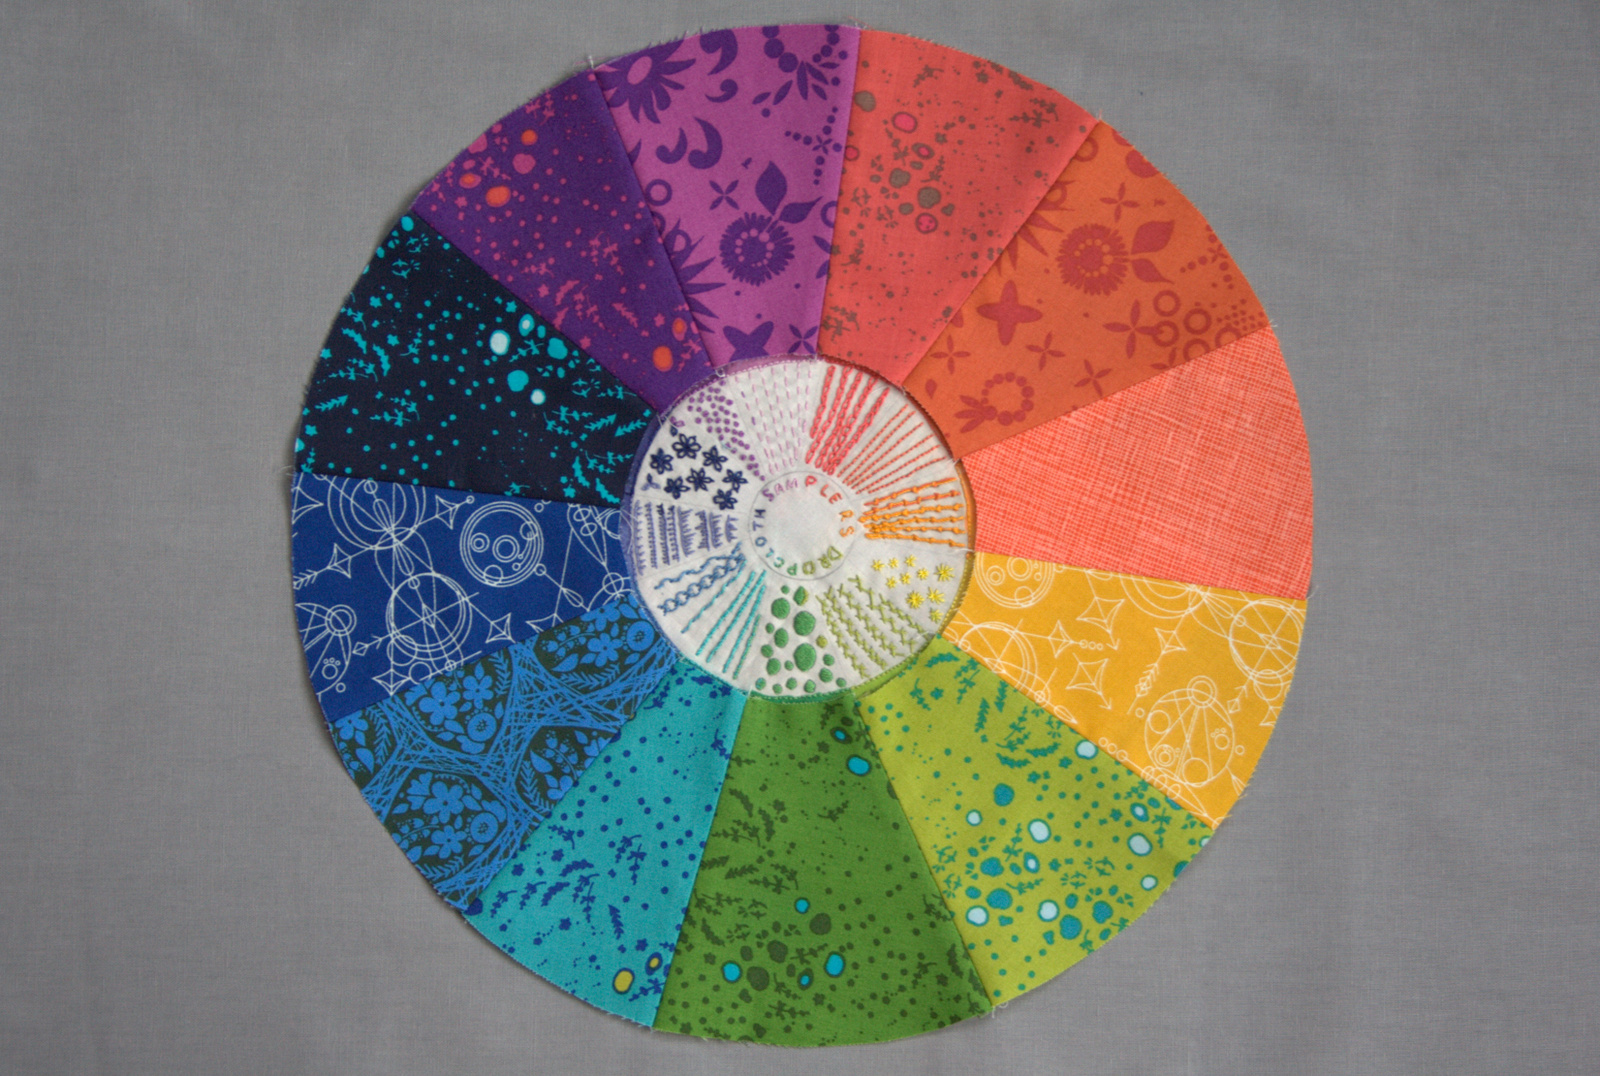
So back to my color wheel. I managed to match the fabrics almost exactly to the colors of the Aurifil embroidery, which is incredible. It seems like Alison Glass and Rebecca Ringquist and Alex from Aurifil must have all gotten together to design this harmonious flow with the perfect combination of design, color, thread, and fabric, it goes together that well. I wanted to be sure that the prongs of the outer color wheel aligned with the organically drawn prongs of the embroidery wheel, so I scanned my embroidery sampler and uploaded it to Inkscape, the free vector program with which I design patterns. I created larger circles, centering the embroidery, and extended the lines on the sampler to create wedges. I then printed it, cut out the wedges with scissors, and used them as templates to cut the fabric wedges, as shown in the Instagram photo above. I winged it, really, but amazingly it came together beautifully.
Right now the rainbow circle overlaps with the embroidery sampler’s edges, but don’t worry–I plan to either trim or fold the edge under so that the entire sampler is visible.It was an exciting day, since this is the first project sewn on my new sewing machine: a Bernina 560, which I recently purchased during one of their 0% interest, 60-month payment plan offer days. (I’ll give you a formal introduction soon, promise!)
I also used Flatter by Soak spray for the first time since QuiltCon, and I’m amazed I survived without it. Between the new machine sewing like a dream and the seam-relaxing Flatter spray, this circle came together without a hitch.
Now I am going to study up on circles by watching Cheryl Arkison’s class Inset and Applique Circles by Machine on Craftsy (affiliate link). It’s my first time trying a class on Craftsy, but I hear there are subtitles. I also was fortunate enough to take a class with Cheryl Arkison at QuiltCon, so I have no doubt of her depth of knowledge and skill. I’m really looking forward to trying to attach these circles!
Having never sewn a circle by machine, and perhaps only one by hand, this will be a creation filled with firsts. I’m getting awfully close to completing this beauty, though, and I’m loving every step of the way.
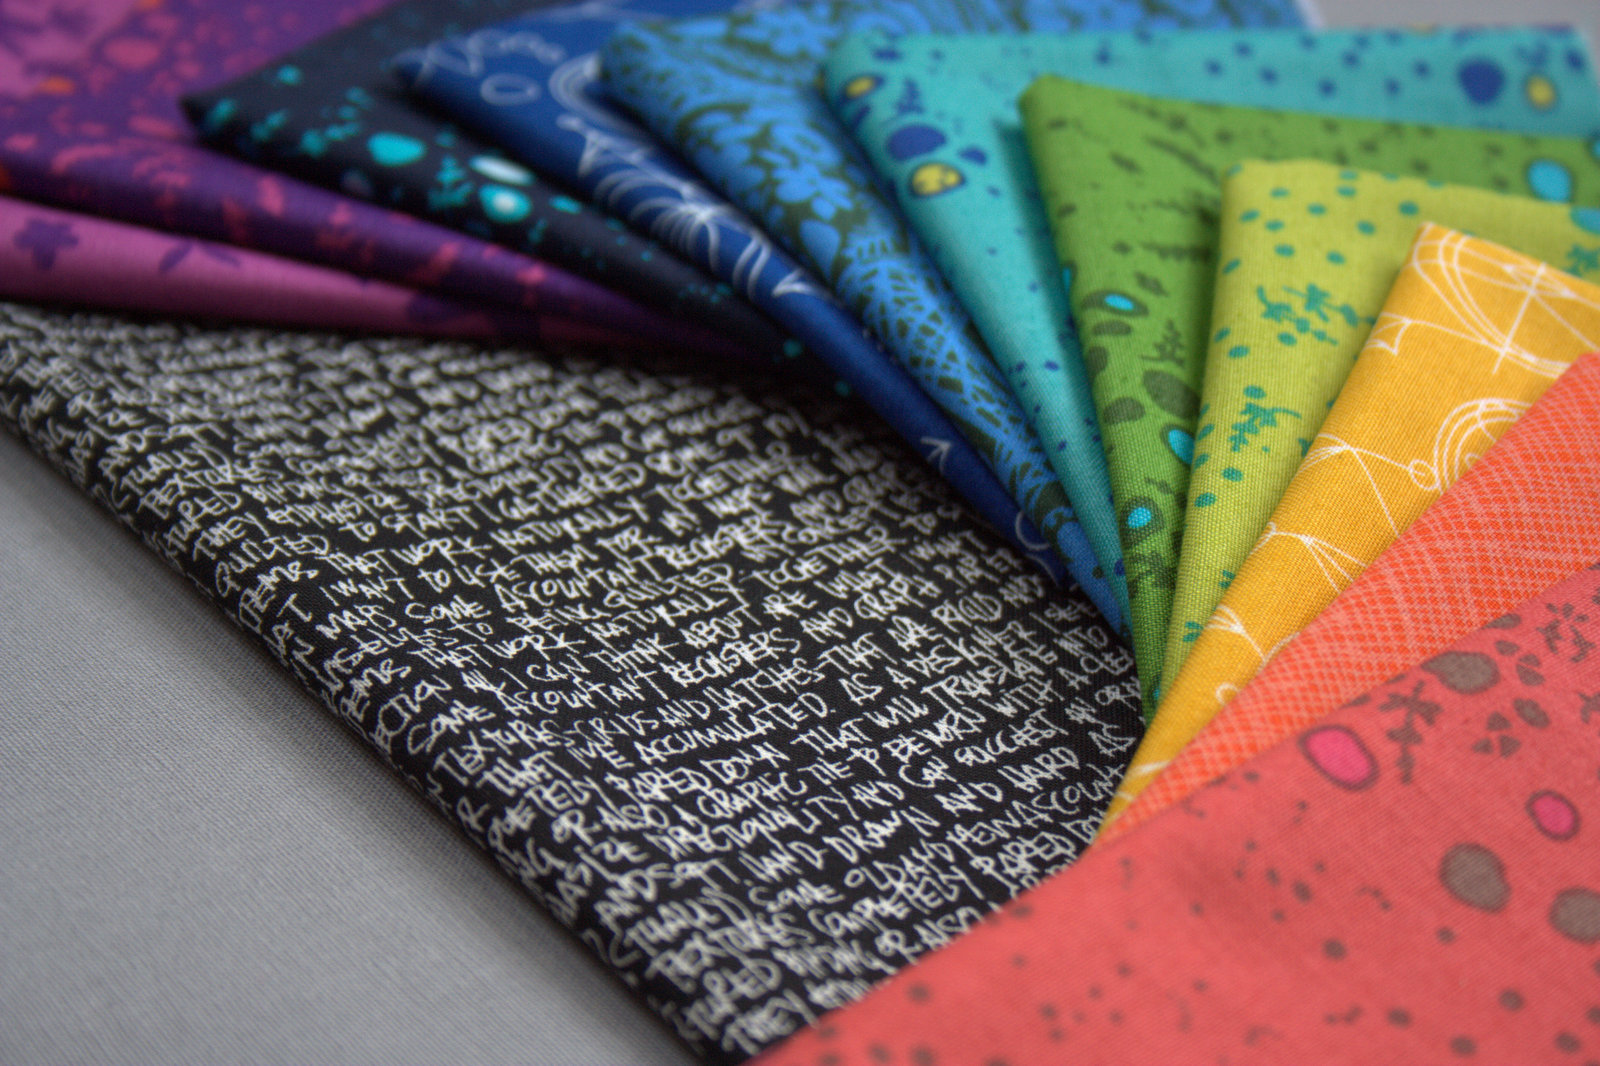
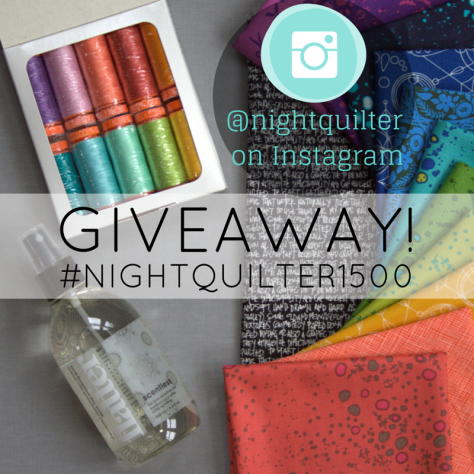
Also, for those of you on Instagram, I’m having an awesome giveaway to celebrate passing 1,500 followers, sponsored by Aurifil, Soak, and moi (with a fat eighth bundled pulled straight from my stash favorites, basically this color wheel!). Head over, follow me @nightquilter, and tag a quilty friend to enter. Here are some sneak peeks for eye candy (Note: This giveaway is on Instagram only):
Fat eighths bundle pulled from my stash favorites. Giveaway on Instagram only.Aurifil thread set and Flatter by Soak, graciously provided by Aurifil and Soak. Giveaway is on Instagram only.
I completely missed May for A Lovely Year of Finishes (ALYoF). It actually is a good thing, since I was going to make my goal “have a baby“. Here we are in June and I still have not had this baby, which means I wouldn’t have had a successful finish to link up anyway! (Enter: haveyouhadthatbabyyet.com)
For June, my goal is to have this baby! He absolutely must make his way out by the end of the month (fingers crossed for by the end of the week!) Since I know that I need to have some little quilting/stitching project in the works, too, I’m also going to make another small goal: to finish piecing the top of the English Paper Pieced table runner I started last summer.
While going through my mental list of old works in progress I could dig out and make a bit of progress on while waiting for this baby, I mentally stumbled upon my Sweet as Honey EPP table runner. I realized that the color scheme is exactly the same as my newly started summer placemats, and decided it would be the perfect handwork project to add to my active to-do pile.
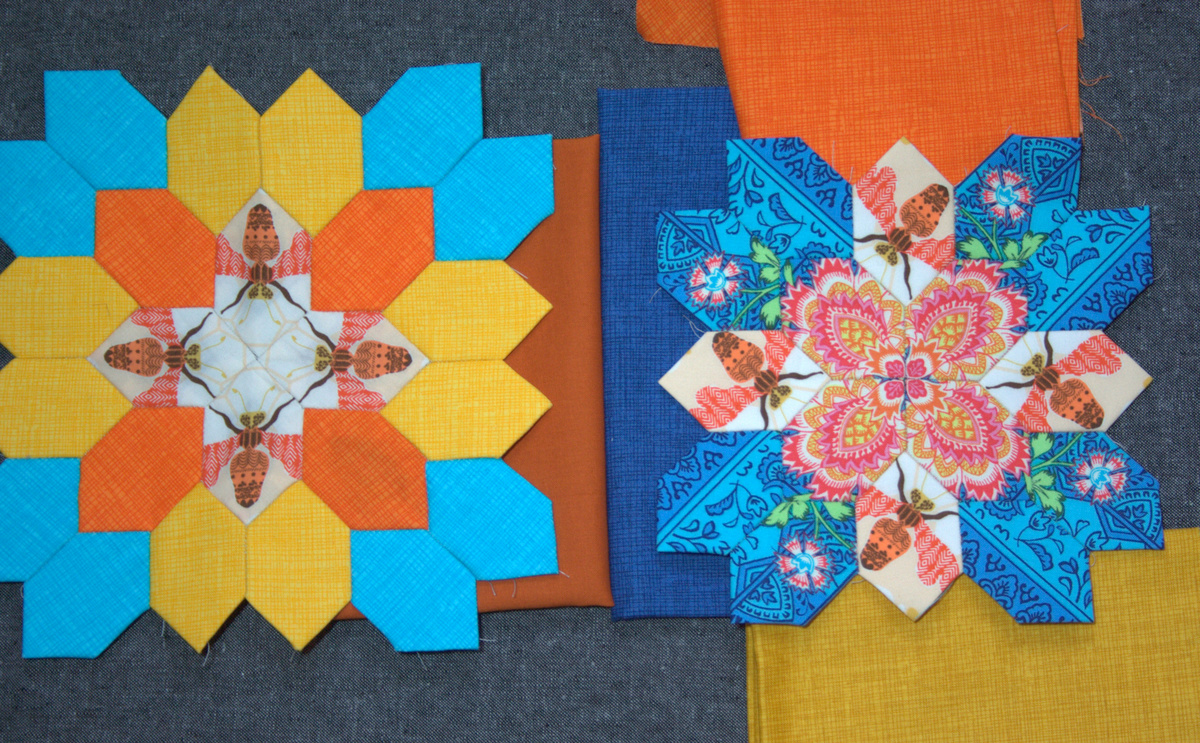
When I last left off on this EPP project, I was planning on making the next row of honeycombs either orange or yellow. In looking at the bundle of fabric for my placemats next to the project, I am going to take a design turn and make the next row of honeycombs for the center Lucy Boston block (the one shown on the right, below) in the dark blue. Then, I plan on making a bunch of 1″ squares (or maybe more honeycombs?) with which to border each of the blocks before joining them together in a row and binding.
Border option 1: burnt orangeBorder option 2: medium blue
I’m planning to buy a little extra yardage of one of the Moda Bella Solids from the August bundle from Fiddlehead Artisan Supply to complete the border squares, and am leaning toward option 2 above: the medium blue. I’m excited and think that this table runner will go really well with my pixelated summer placemats.
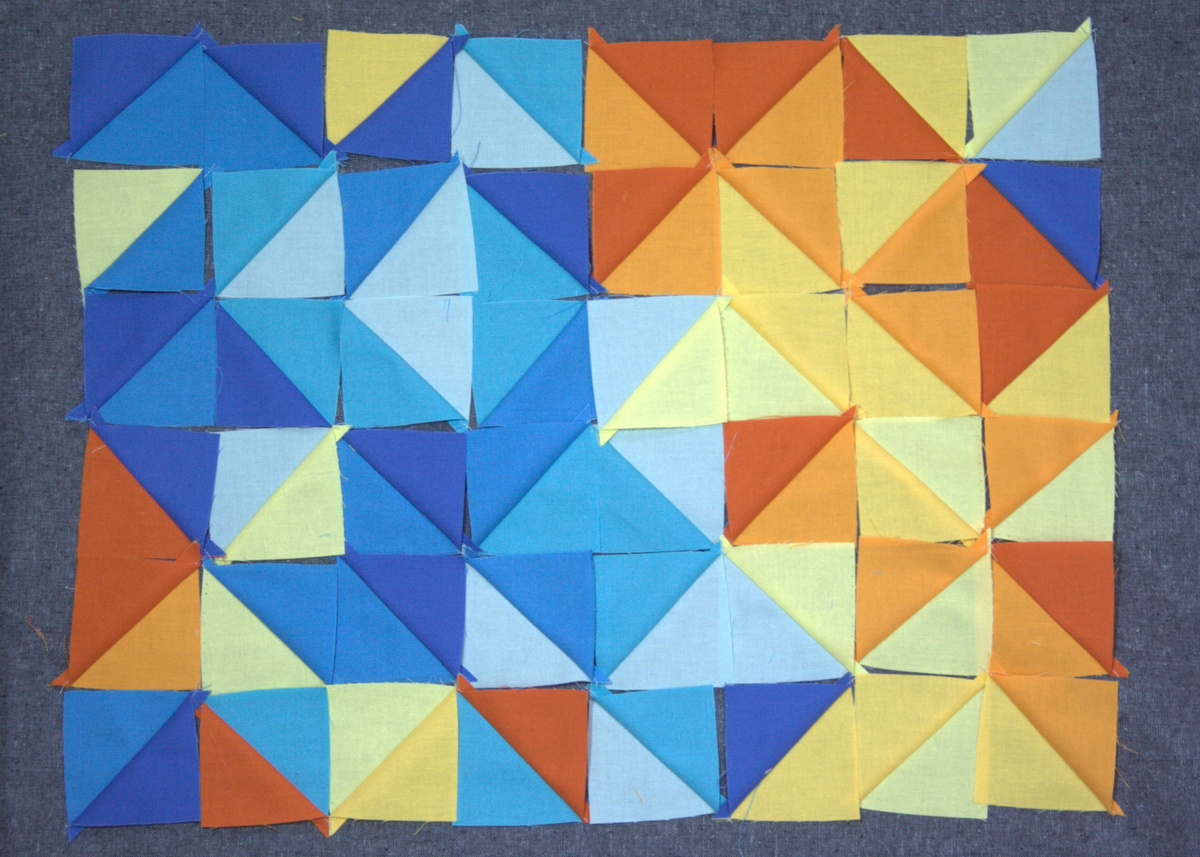
This is only a rough visualization of a placemat, but I’m excited at the potential outcome. It looks like even with only 8 colors, the aesthetic works for me. I love that each placemat will be different, and I am looking forward to playing around with color placement. For this progress shot, the half square triangles (HST) aren’t squared up or sewn together yet, and I may make a bunch more and play around with layouts before sewing them together. According to my initial math, I will be able to make a set of six (6) placemats with my bundle of 8 FQs. I may buy another bundle just to be safe.
In lieu of the popular “feet in the photo” quilt shot, here’s my 41+ weeks pregnant version, posted on Instagram a few days ago (and in posting this, I’m realizing I laid out the bottom row backwards in the photo above!):
For those of you who want to get your hands on an August bundle like the one I’m using for the placemats, use coupon code nightquilter15% to get 15% off your entire order from Fiddlehead Artisan Supply‘s online shop from now through June 21st.
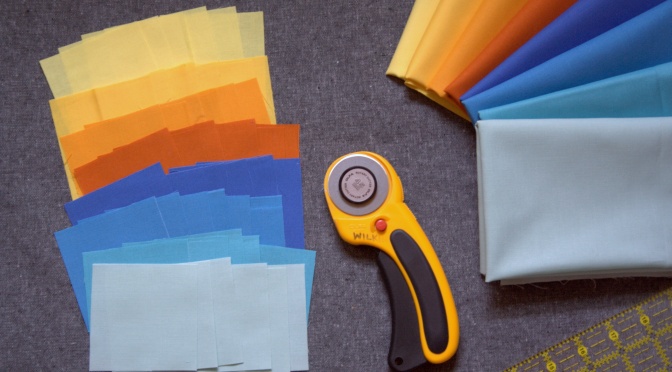
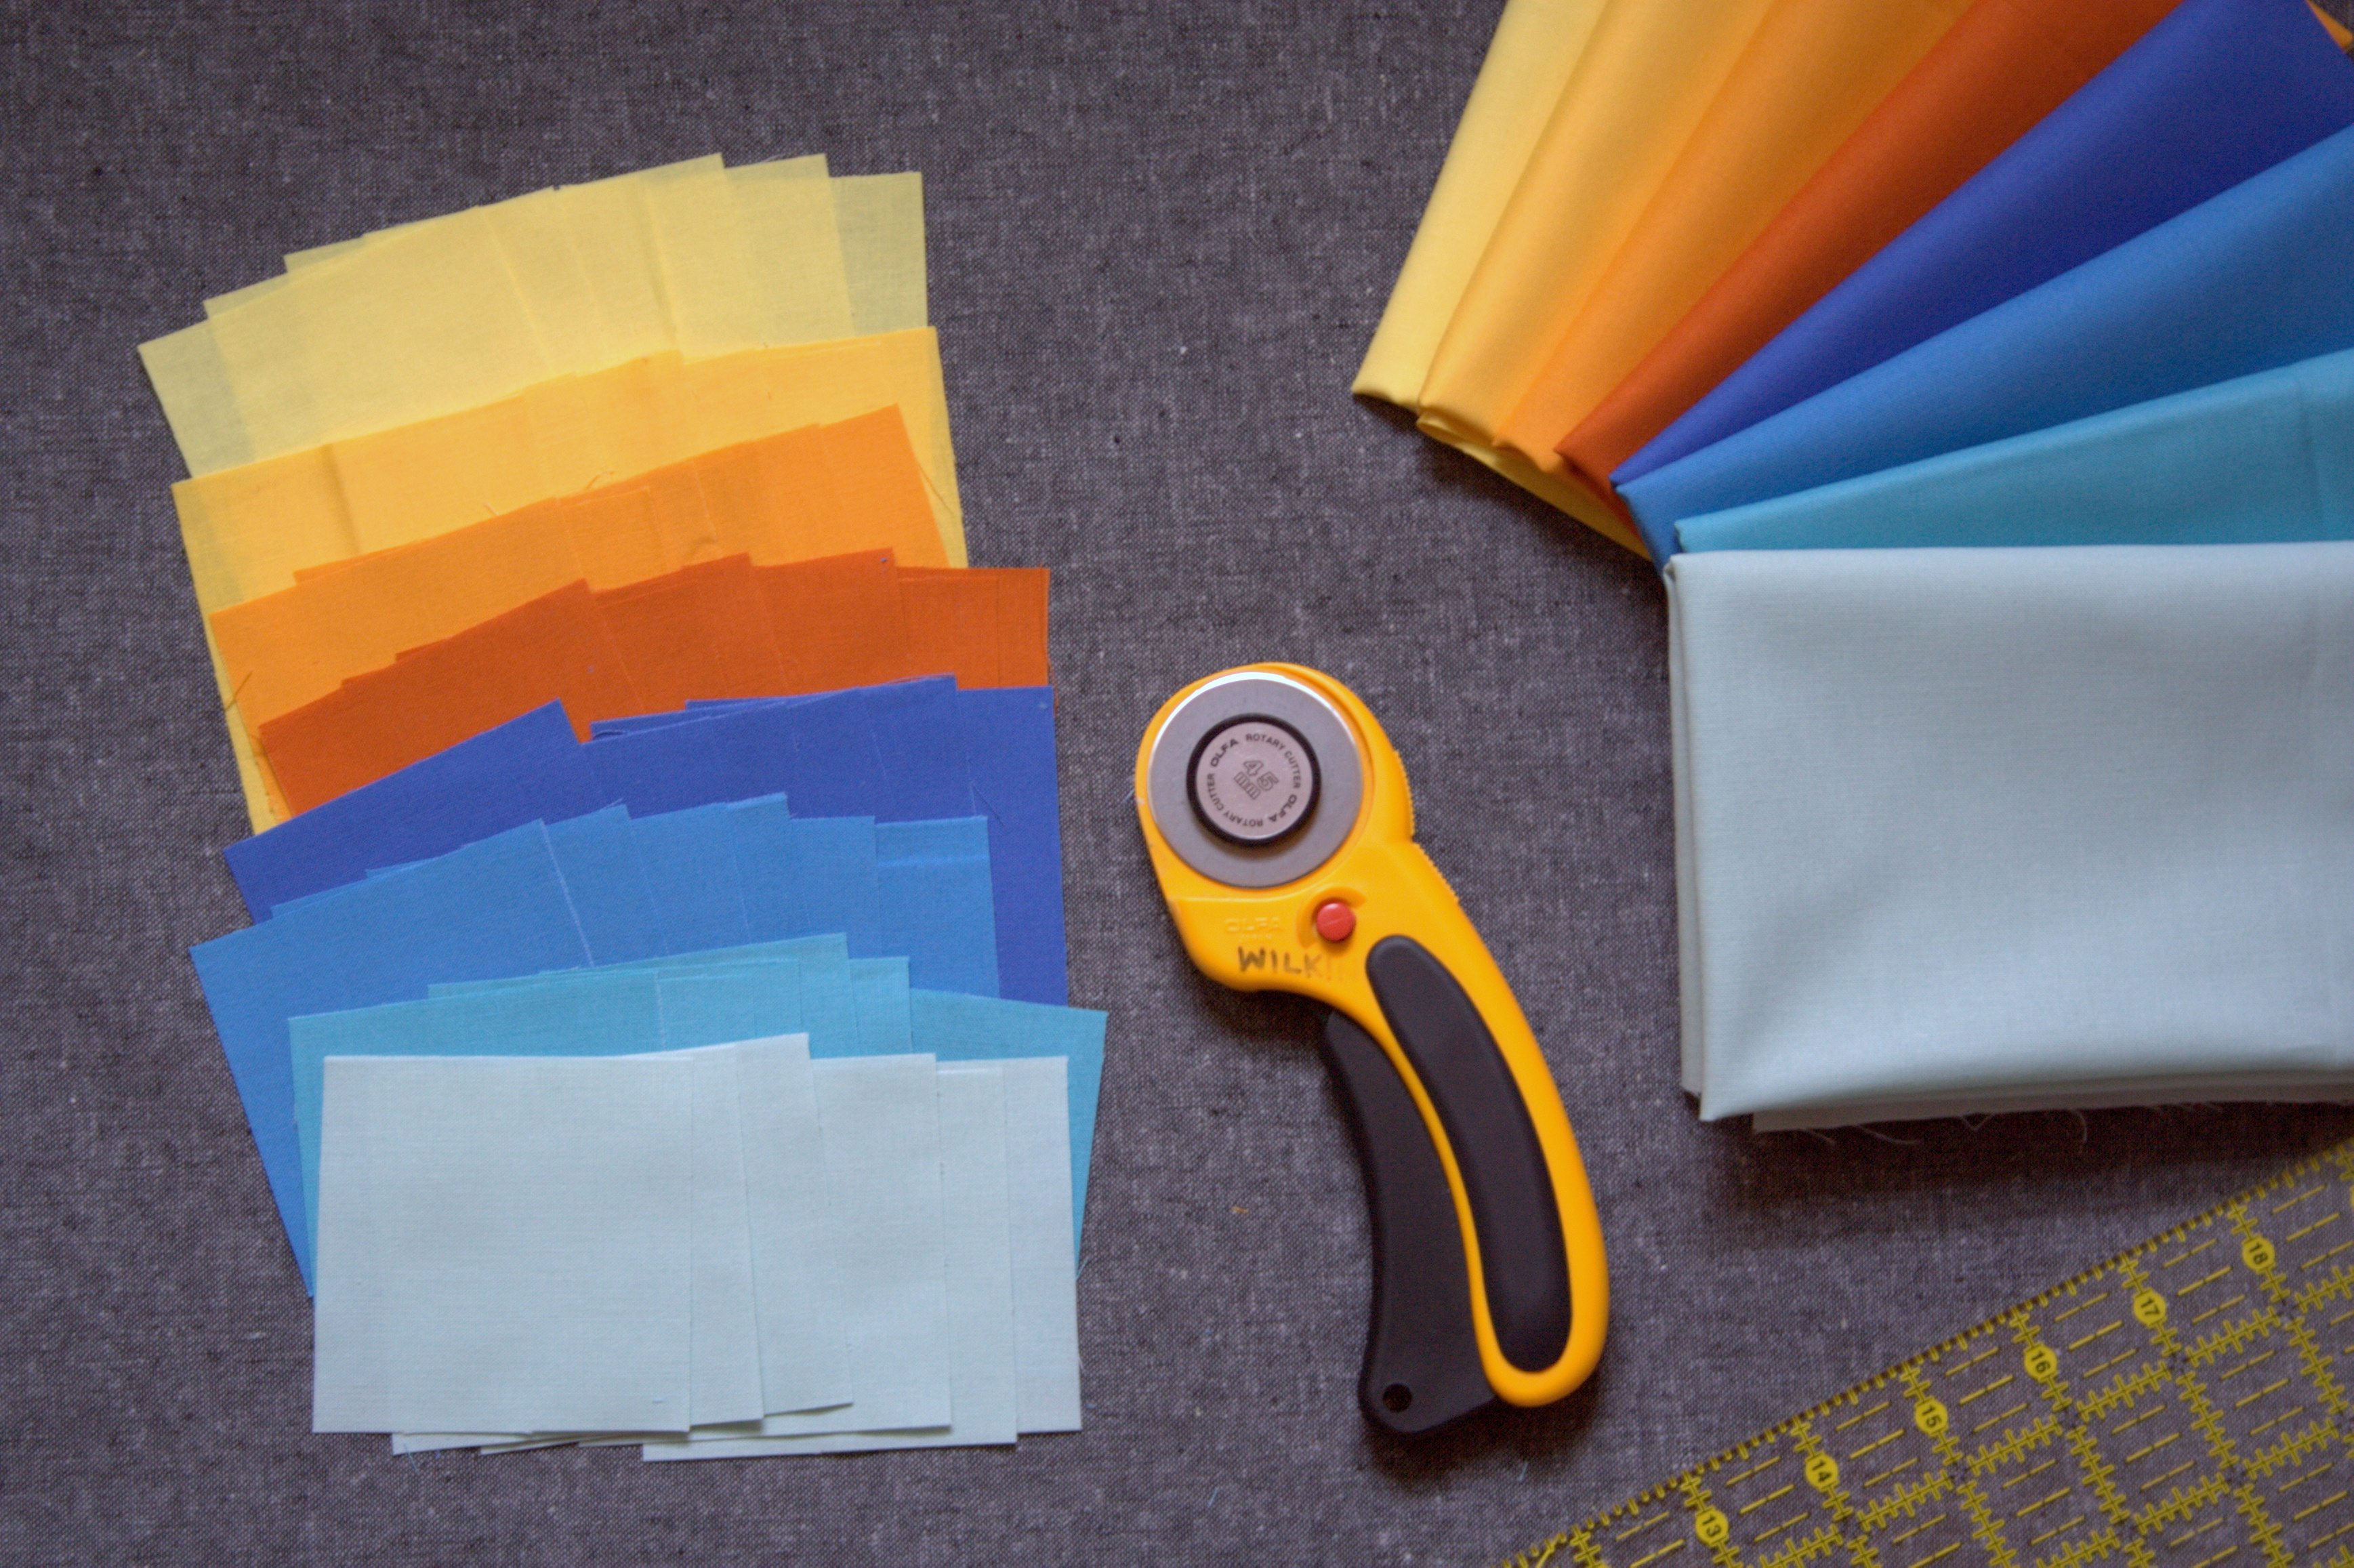
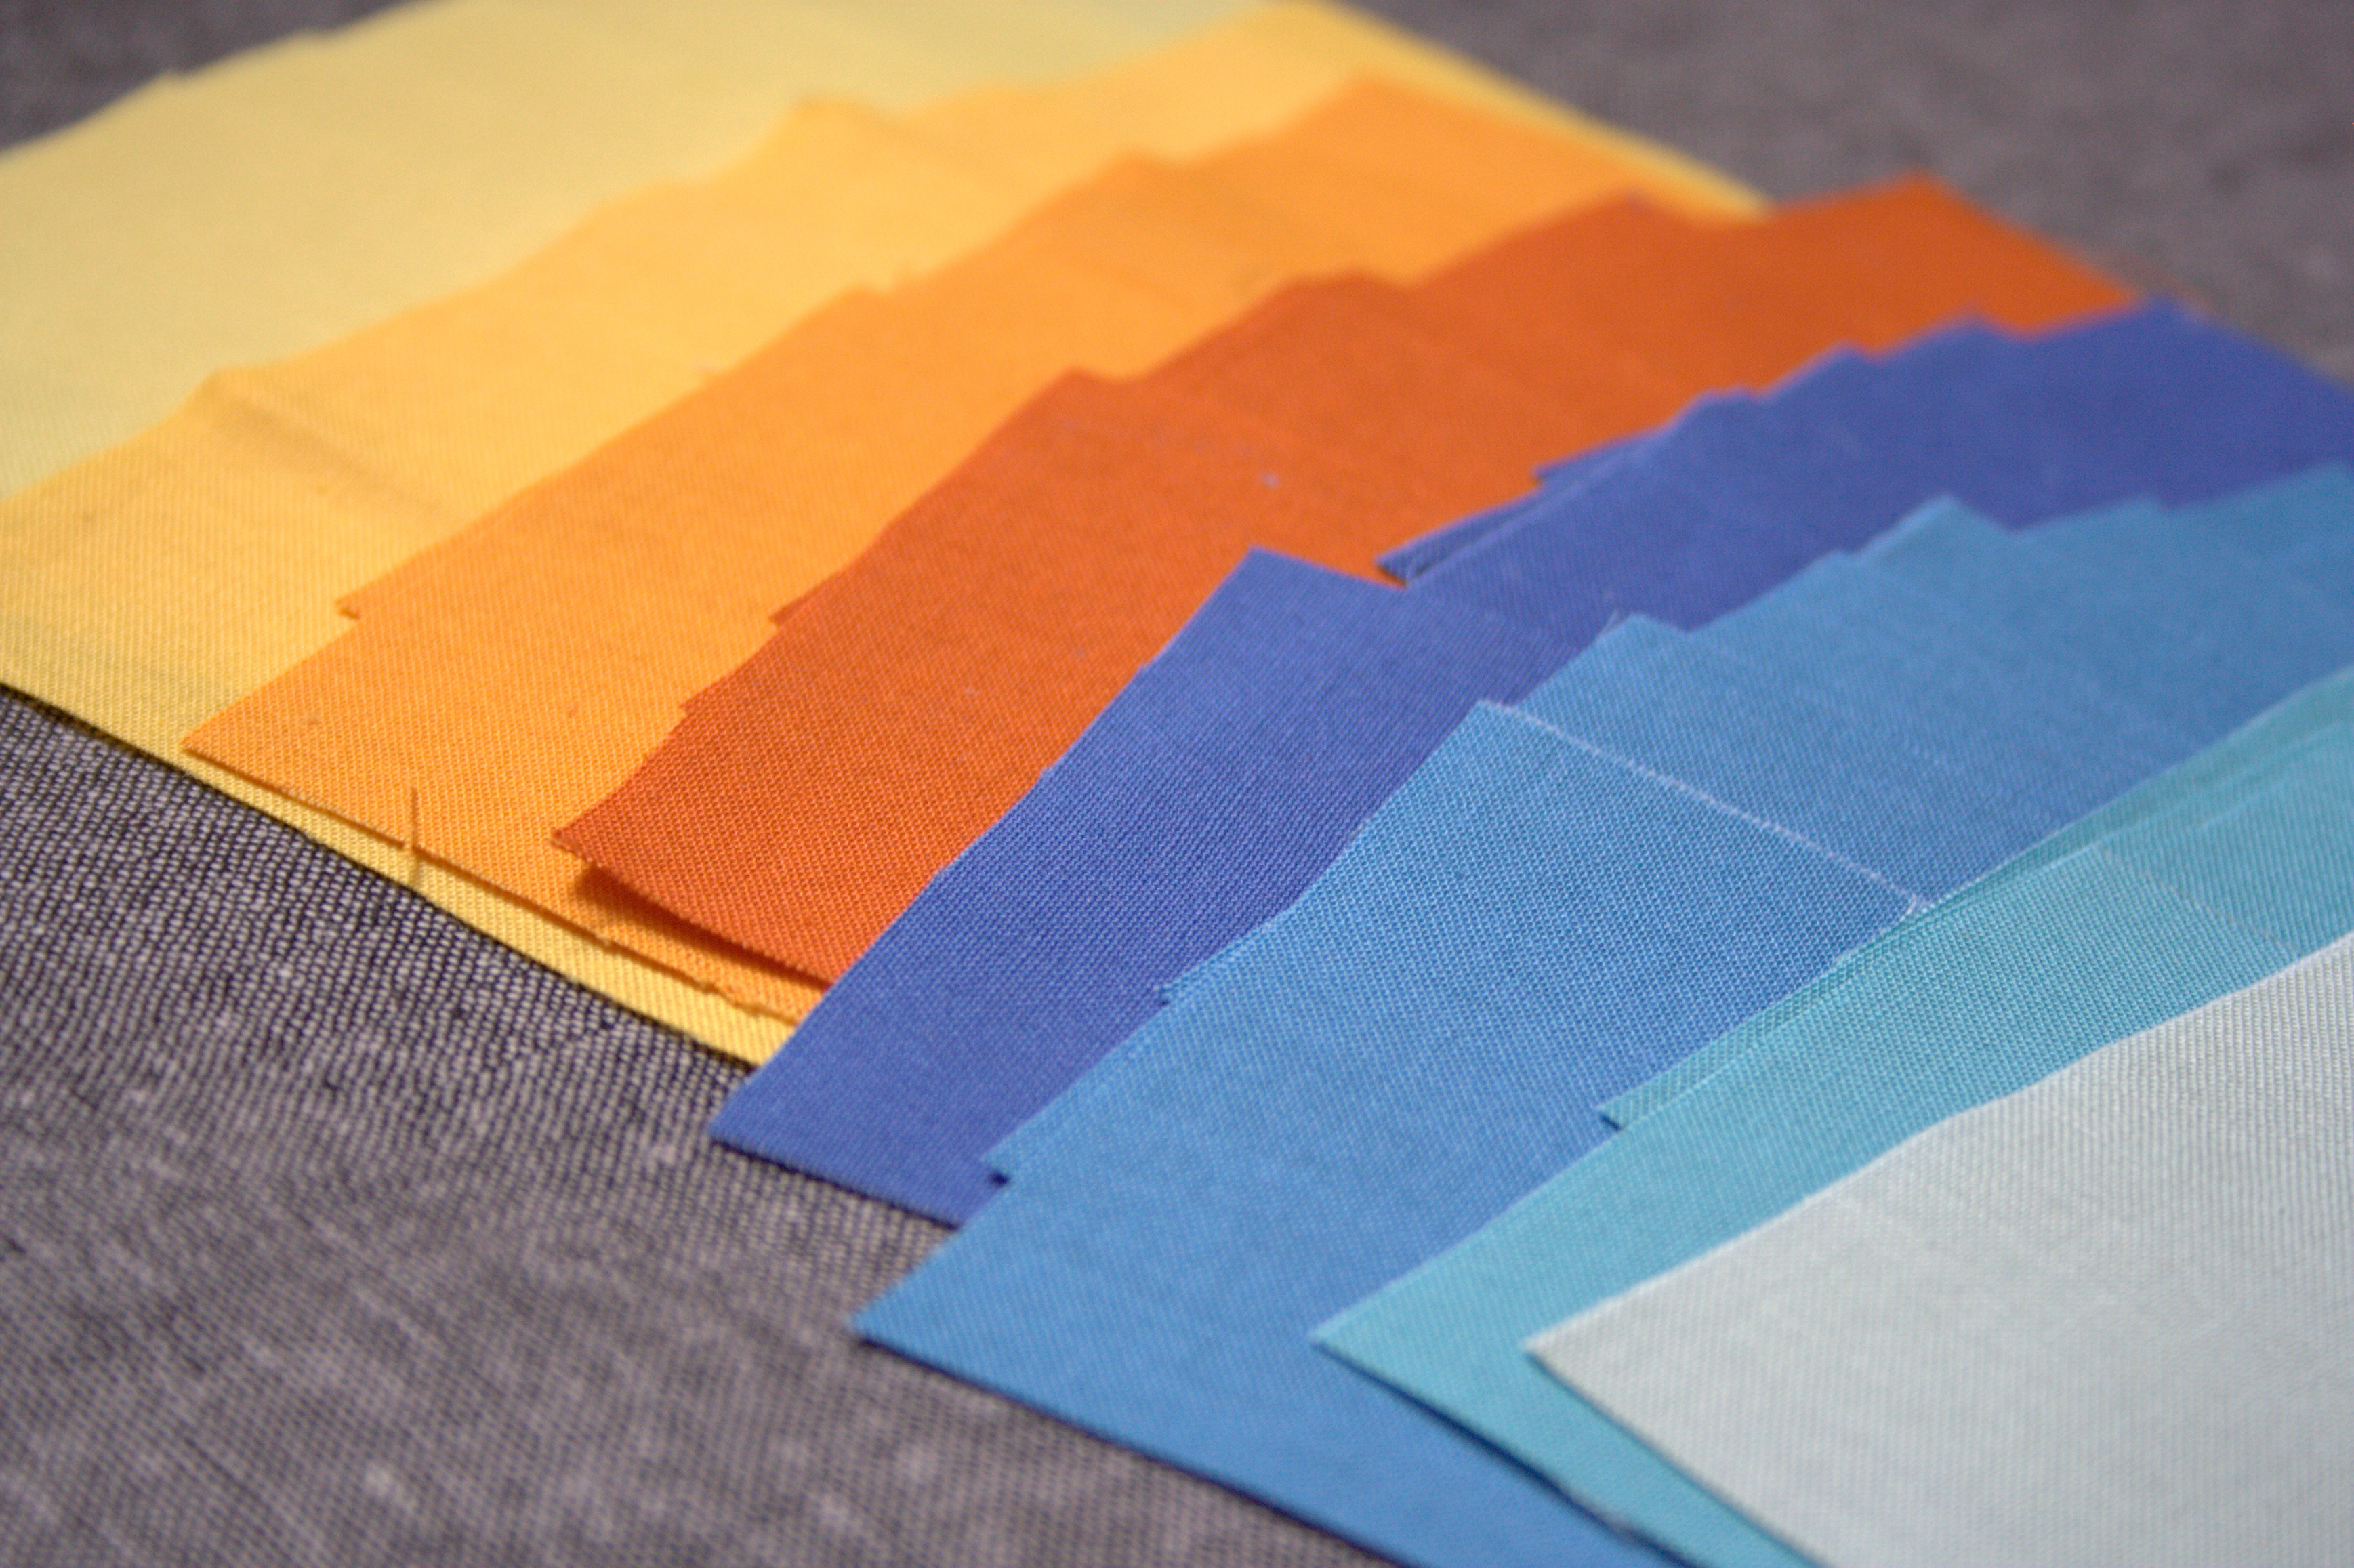
Today I cut into a gorgeous bundle of Bella Solids that just screams summer. I’m beginning a new project, since my baby boy has yet to make his arrival and I amazingly have completed my other big pre-baby sewing project goals. Plus, Memorial Day, the unofficial start of summer, is a perfect day to begin a summer project, right? My plan is to make a set of six (6) placemats, since we have a surprising lack of quilted home accessories.
I bought this bundle of Moda Bella Solids, called “August”, at Fiddlehead Artisan Supply when I went in to choose the bundle I gave away for the Sew Mama Sew Giveaway Day. The hot days of summer were still teasing us, and I couldn’t resist the summery feel of these colors together. (For those of you who want to get your hands on this bundle, too, the coupon code nightquilter15% will get you 15% off all online orders from Fiddlehead between now and June 21st!)
I’m hoping to make these placemats using a prismatic half square triangle (HST) style inspired by these quilts by Nydia Kehnle:
These two quilts by Nydia Kehnle are inspiration for my placemat design.
Nydia’s advice for making quilts like this was to use MANY different colors to allow a smooth gradation. I know that since the fabric bundle I’m using has only eight colors, my placemats will have a more jumpy color transition, but I’m hoping that they still look cool. I love the transitions of yellows and blues, and hope the jump between the two can be smooth or at least look intentionally jumpy. Time will tell!
I’ve only cut one strip from each fat quarter to start, and plan to pair up HSTs and try a test layout before cutting the fabric for all six placemats.
I’m hoping this will be a good project to continue after my baby is born, too, since I can do it in little bits. Cut a little, sleep, snuggle, nurse, pair a little, sleep, snuggle, nurse, sew a little, sleep, snuggle, nurse, cut a little, sleep snuggle, nurse, repeat.
Inspiration is everywhere. It is clearly decided that we creative folks pull our inspiration from just about anywhere.
There were 478 comments on my Sew Mama Sew Giveaway Day post, and I truly wanted to respond to them all. I asked you to share what inspires you to create, and the answers were inspiring in and of themselves! Thank you so much for sharing your inspiration. Many of the inspiration sources resonated deeply with me, since I, too, seem to find inspiration just about anywhere. I’ve decided to share some of the top sources of inspiration, as shared by you, my readers.
But first, a winner! Mr. Random chose comment 362 as the winner of the fabric bundle and two patterns of choice from Quilting Jetgirl. Congratulations Amanda! Please check your email and get back to me with your mailing address and patterns of choice!
Here are some of the top sources of inspiration pulled from your comments:
Blogs, Instagram, Pinterest, and other online inspiration
Many of you find inspiration in the beautiful things that others have made. Our extensive online community of creative souls makes it possible for us to draw inspiration from such a wide world of creativity!
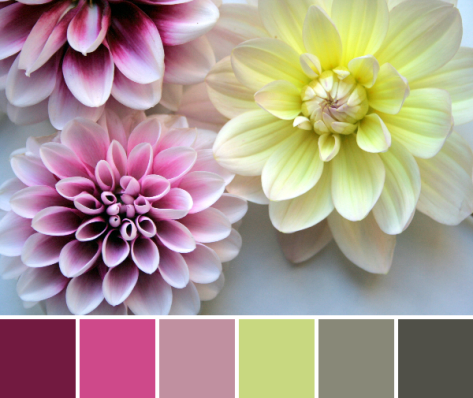
Color and Texture
Color and texture is literally EVERYwhere, and you creative folks can see it! Many of you said that color, either in nature or in general, and texture were top sources of inspiration for you.
A palette created for my Color Inspiration {22} post. Color in nature!
Patterns in Life
Whether a gorgeous miracle found in nature, or a man made structure, patterns in life inspire many of you to create. Some of the top sources are:
Nature
Geometry
Tiles
Architecture
Art
People
People in our lives inspire much creativity. Some create for charity, so the knowledge that someone in need will be gifted a quilt filled with love drives the sewist’s inspiration. Some create for their family and friends. Children, especially, seem to be a big source of inspiration. Sometimes, it’s the people in our lives who have passed, or the one who taught us how to quilt who inspires us most.
Learning New Techniques
Some of you are inspired by the desire to learn new techniques, or experiment with different mediums.
Peace & Quiet
The ability to escape to a place of silence and peace is inspiration for some. I can certainly relate to this as a mom of two-soon-to-be-three rambunctious and spirited children. Life is busy, loud, and often chaotic. Moments of silence and peace are inspiring indeed!
The amazing quilters of the past, and the creativity of the ones who first began to sew scraps of fabric together to create quilts are inspiration.
Materials
The materials themselves are a source of inspiration for many. “A lovely hand-dyed yarn or fetching pattern on fabric are my starting points and then I go from there to find a pattern to use them with.” shared Laura aka aprilshowers.
The NEED to Create
This is my favorite, and also a strong source of inspiration for you creative folks. Many of you mentioned that the root of your inspiration is simply a need to create. Afton from Quilting Mod nailed it with her comment:
I’ve discussed this feeling before, and agree that for me, while inspiration truly comes from everywhere–family, friends, nature, texture, color, blog and IG posts, people who need or request quilts, architecture, pattern, fabulous fabrics and threads–my sewing is driven by an innate desire to create.
Thank you for sharing your sources of inspiration, and most of all, thank you for creating. Each of you makes the world a bit more beautiful with every stitch!
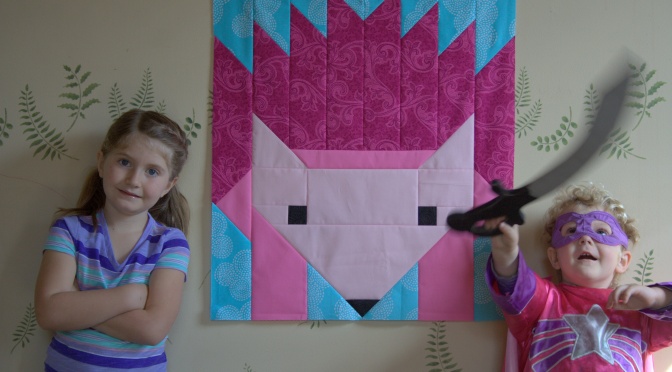
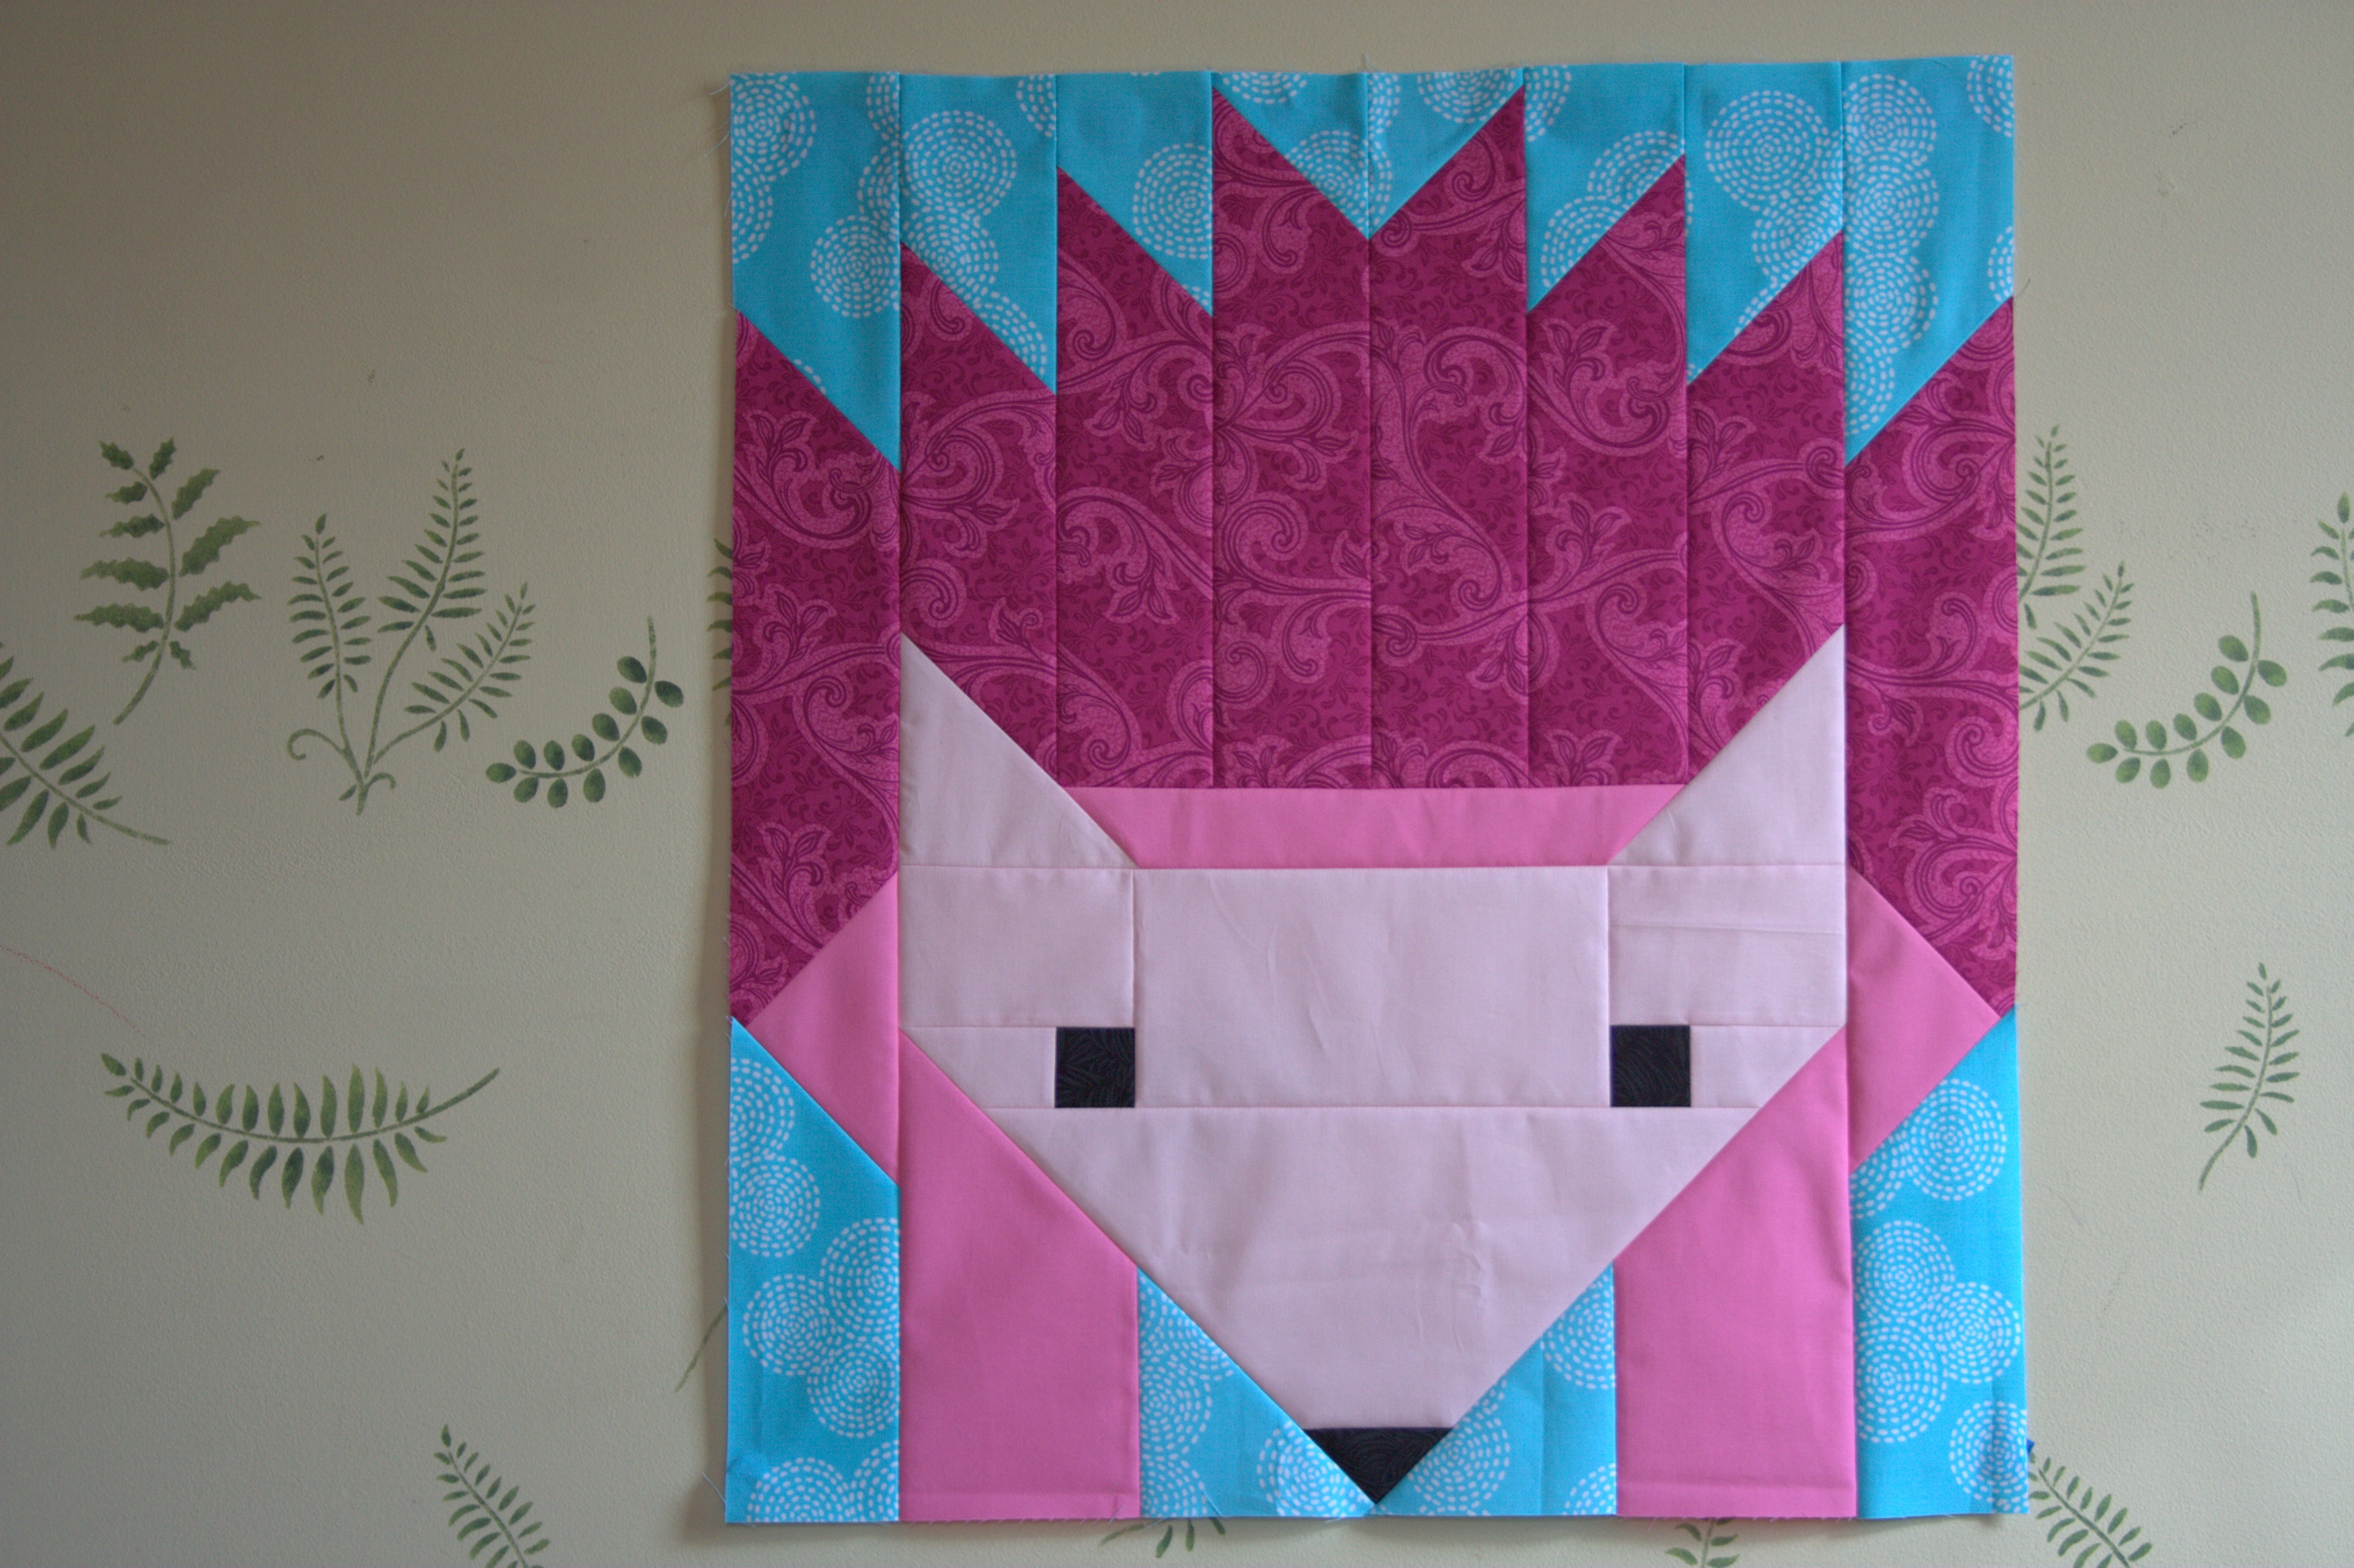
The giant version of Elizabeth Hartman’s Hazel the Hedgehog pattern goes together quickly! I thought that it might, but I’m pleasantly surprised by exactly how quickly I was able to get this adorable pinkalicious hedgehog together. I cut the fabric for this project on Monday, and after only two short nights of sewing (a total of just under 3 hours), Hazel is complete!
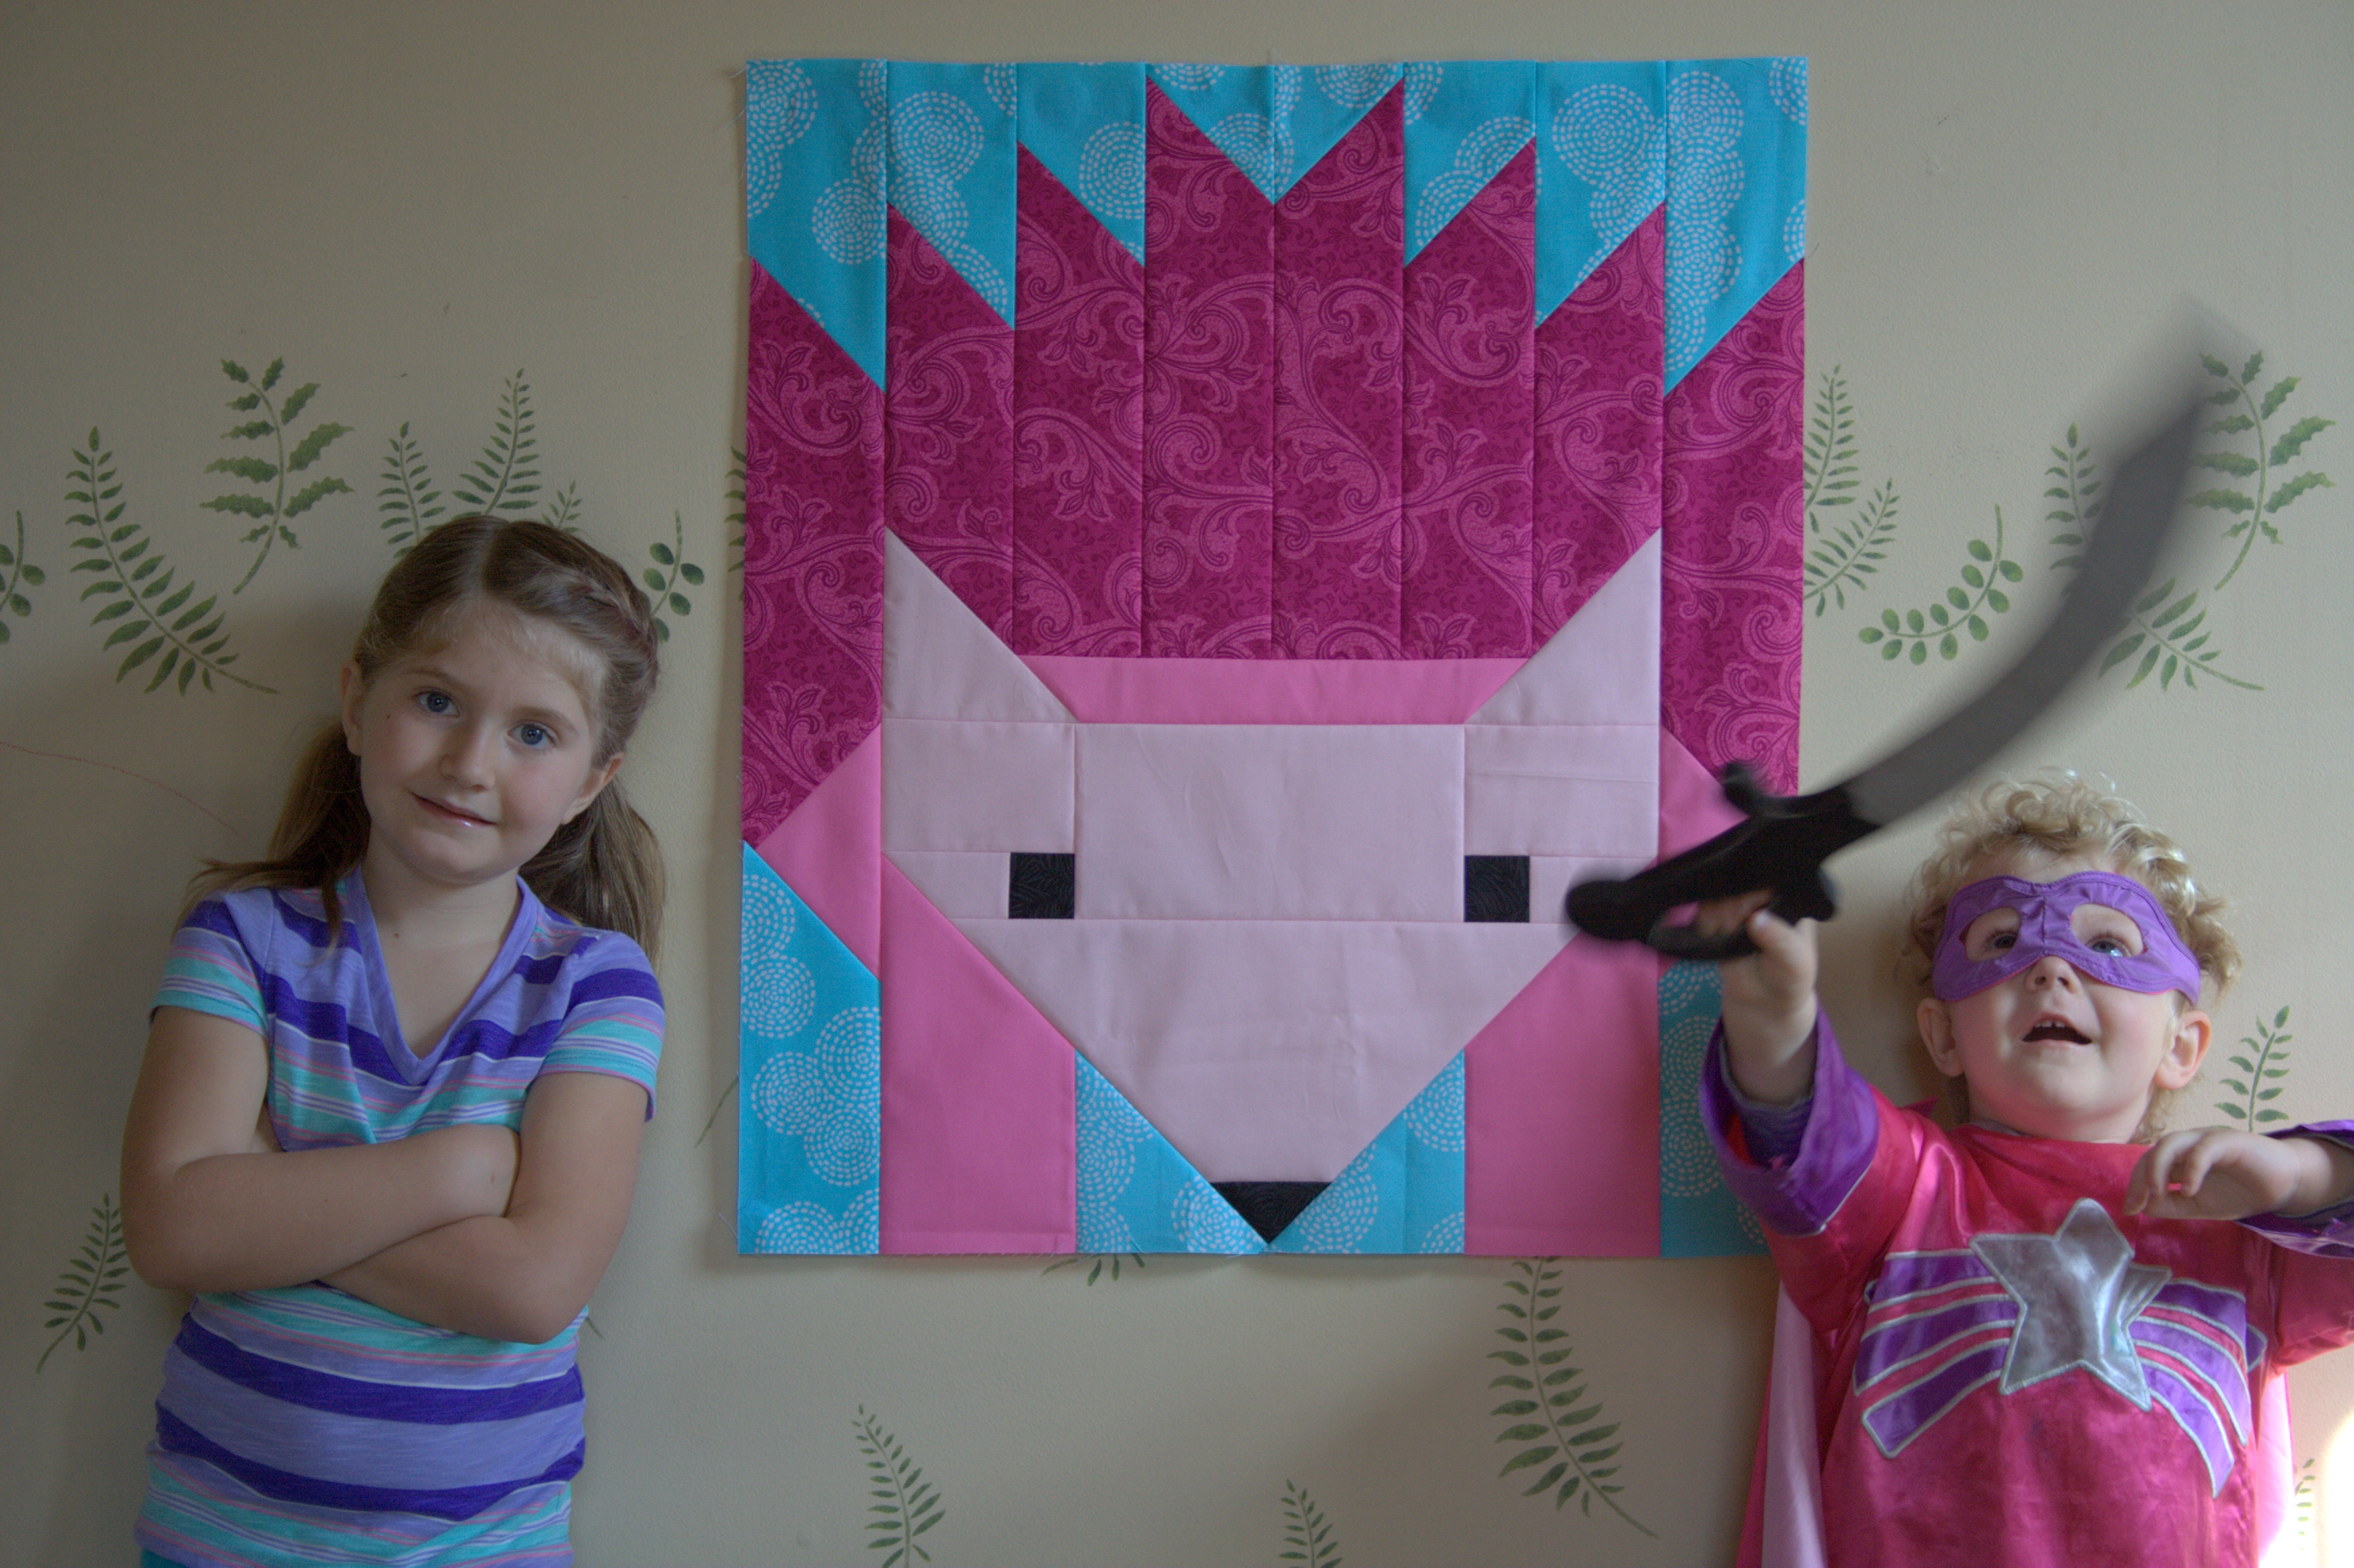
She finishes at 24″x27″ since I have not yet put the borders on. She’s huge! Here are a few photos of Hazel with my kiddos for scale. Don’t mind my sword-bearing super hero son; he’s harmless, really!
I want to use a single giant hazel, but have the baby quilt finish a bit larger than the 34″x37″ baby quilt version in the pattern. Since I’ve pieced Hazel so quickly, of course my brain immediately came up with a lovely idea of how to make it super adorable (and not as quick to finish).
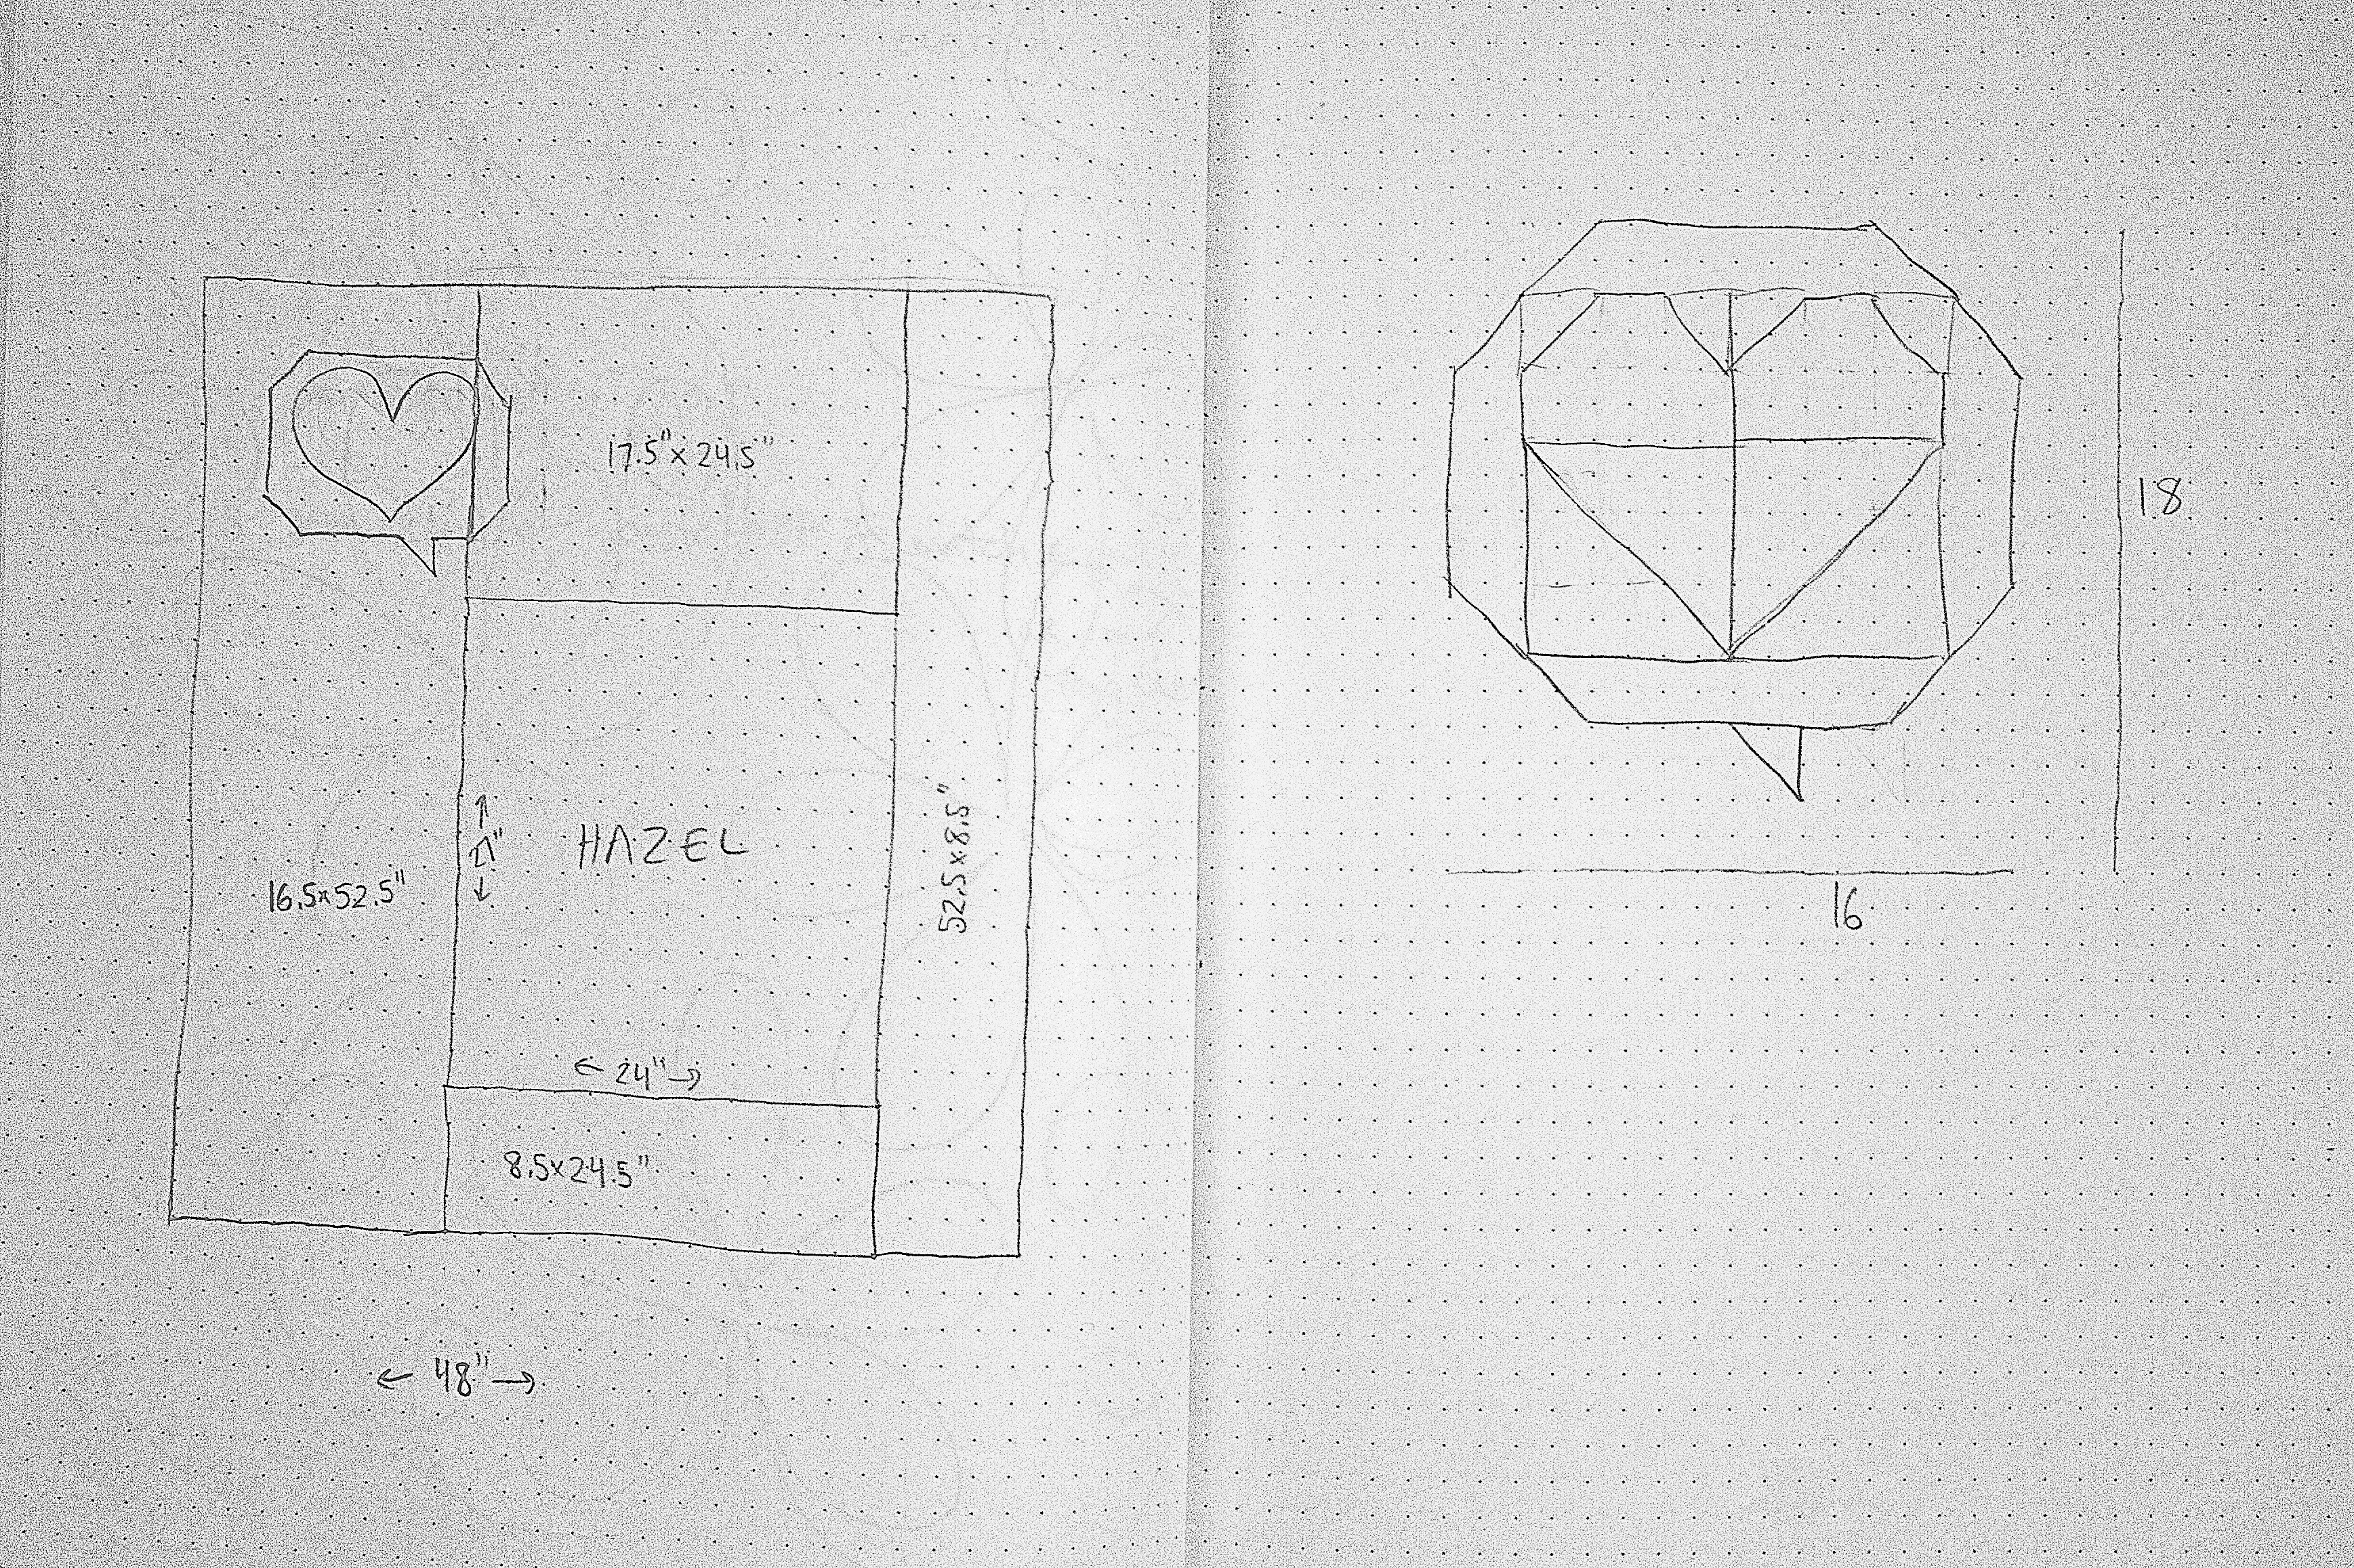
Glimpse into my sketchbook.
Originally, I was planning to add borders to have Hazel in the bottom right of a 48″x52″ baby quilt, with simple negative space/background around her. Easy peasy. There is actually a good chance I could have the quilt entirely finished by the baby shower on Sunday if this plan is chosen. Then, as I was sketching it out to calculate how big the borders should be, I thought an appliquéd heart in the top left would be a cute touch, which then progressed to a pieced speech bubble heart. How adorable would that be, though!? This is how my brain works, folks. If something is easy, I will immediately find a too-cute-to-ignore way to make it more complex (but awesome).
What would you do? Stick with the original, adorable, but super simple and easily completable-ahead-of-schedule plan? or try out the speech bubble heart idea? Only time will tell which I will choose!

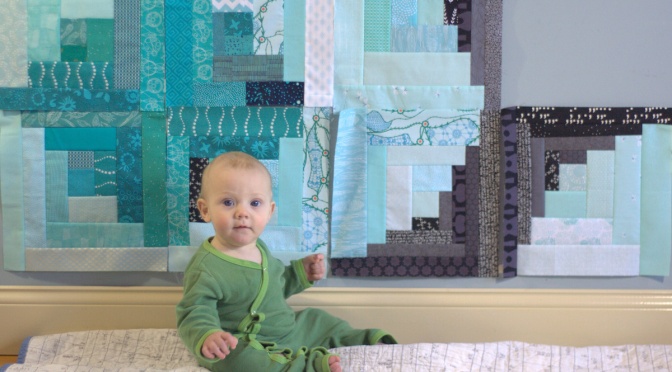
 While I didn’t finish it before Christmas, I did finish Finn’s 7 month milestone quilt block. I’m on course to have 12 blocks by his first birthday. The photography part is definitely getting fun, since as soon as I sit Finn down, he wants to move. That squirmy wormy desire to *move* just shows his growth and personality, so I’m embracing it. It’s one more opportunity for creativity!
 The biggest news this month is: teeth! Finn’s two bottom teeth are in and now big enough to see when he gives his gummy smile. Teething is never fun, but Finn (and mommy & daddy) have been handling it like champs. Between his big sister’s birthday, Christmas, and holiday travel, it has been a full and busy month!
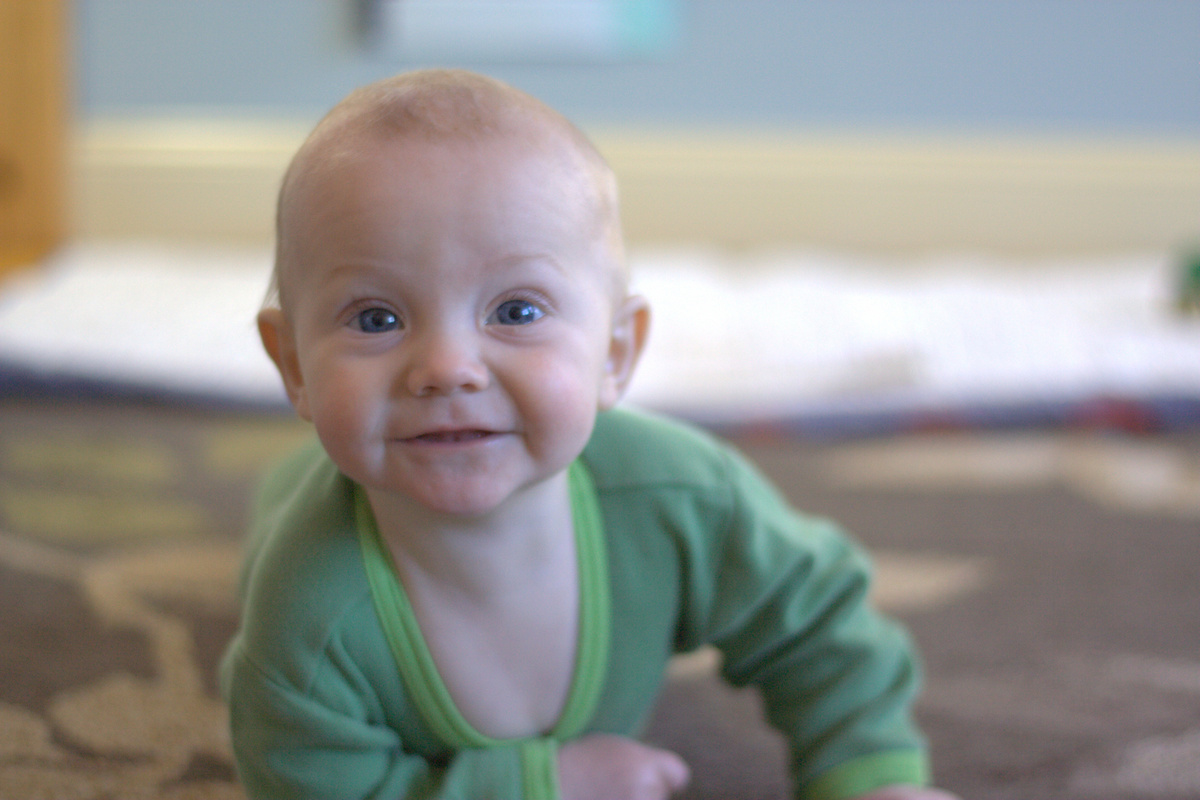 Not much stands in Finn’s way these days. Trying to get him to stay on the quilt near his quilt block was tricky, so most of the photos this week are movement or snuggle photos. I’m sure you don’t mind. This was what I saw less than a minute after putting him down right next to the wall. “I want to play, Mommy!”…
 …until he got distracted by a design in the carpet. He is also really working on his fine motor skills, trying to grab tiny bits off the carpet and floors. I love watching his little mind at work. Babies are amazing; they learn so much so quickly!
 Finn’s quilt is really taking shape! You can see my full layout plan here in case you missed it a few months ago. I’m tempted to begin sewing blocks together but I think I will wait until the end to be consistent with photos. Here’s a quick photo burst since who doesn’t want to see babies in front of gorgeous quilt blur?


 Thank you for following along!


 As I’m sure you’ve noticed in my weekly
  Thinking about the process I would take to turn this photo into a quilt was not enough; I had to jump right in, newly inspired by Mandy’s ten unique and fabulous patterns in her book. Wanderlust Quilts not only inspired me to give improv a go, but it also inspired me to sew with brown fabric (what!?). Above is my first attempt at creating a quilt inspired by the minuscule mushrooms that unfurl from the leafy loam during particularly wet mornings.
 As is my style, I let excitement drive me and I dove into piecing improv half circles without consulting Mandy’s book. After seeing that my first try was less than perfect, I realized that this book full of techniques and tips was available right at my fingertips. Slow down, inspiration; sometimes reading and studying a technique before jumping in is key.
 After flipping through the many techniques offered in Wanderlust Quilts, I decided to put my wonky mushroom tops aside and try the freezer paper method clearly outlined by Mandy. I didn’t have time to complete the experimental quilt before the hop, but I’m excited to put the masterful techniques Mandy includes in her book to good use in making this favorite photograph into a quilt. I’ll be sure to show you my finished work of art upon completion.