

Meticulous cutting is one of my favorite quilting past times, and with all of the new English Paper Piecing (EPP) patterns coming out, there’s ample opportunity for carefully cutting up fabric and piecing it back together in clever ways (widely known as fussy cutting, but read why I prefer “meticulous cutting” here). As soon as I saw Patty Young‘s new Flit and Bloom fabric line for Riley Blake Fabrics, I knew I wanted to create meticulously cut EPP masterpieces with it. From the fanciful hummingbirds and elegant peacocks, to the fact that there are both floral and geometric patterns in the line, there are SO many opportunities for pattern play.
 Today I’m excited to be the first quilting stop on Patty’s Flit and Bloom Blog Tour, where I get to show you what I’ve been working on these past couple of months using her newest fabric line for Riley Blake Designs. Let’s just say there’s been some meticulous cutting madness in this house lately!
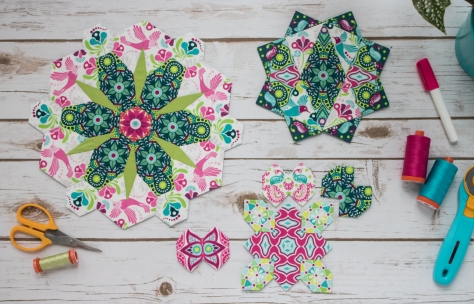
 I began with one of my favorite EPP patterns, Moonstone by Giuseppe (aka @giucy_giuce). I built around the stunning Bloom Henna Blossom in Teal fabric as the center, adding flitting hummingbirds and flowers, some geometric fun to tie the colors together, and coy little pairs of peacocks dancing around the outer edges. I love how this block came together!
 Aren’t these peacocks fun as they dance in pairs around the block?
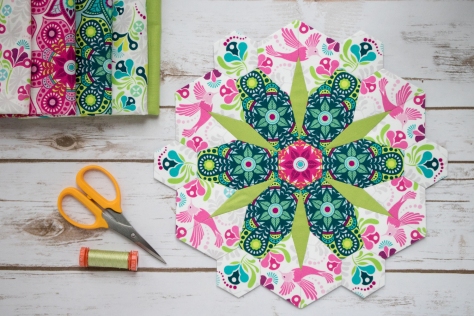 While I was stitching my Moonstone block, Mathew (aka @misterdomestic)’s new Flowermania quilt EPP pattern arrived on my doorstep. You know I wasn’t going to just let it sit there!! So I dove in, meticulously cutting that same Bloom Henna Blossom in Teal fabric as the petals, showing how versatile this print is with fussy cutting.
 I knew I wanted to incorporate the hummingbirds into this flower block, since hummingbirds and flowers go together like rock and roll, but couldn’t fit them onto any of the individual shapes. Then I realized that I could split the hummingbirds across two background fabrics and decided to go headfirst into meticulous cutting at its best.
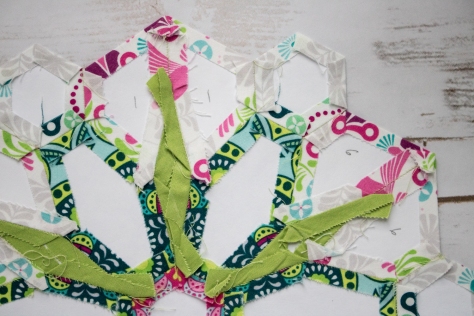 I labeled the humming bird front-back pairs since the Flowermania block is pieced in such a way that they are only joined right at the end as the segments are stitched together. This fussy cutting feat was no easy task, I might add. From the careful cutting to make sure the hummingbird halves would seamlessly meet when stitched together, to basting the pieces *just* so, to then stitching it all together and having it meet perfectly around the green diamonds, this was a challenge. They are not all perfectly matched up, and I learned a few tricks along the way that I’ll keep in mind next time, but overall I’m happy with the outcome.
 Some hummingbirds match perfectly, but even the imperfect ones are perfect in their own way. Hummingbirds are happily flitting around this Fowermania bloom, and it seems to me that it’s the perfect poster-child block for Flit and Bloom fabrics. Right!?
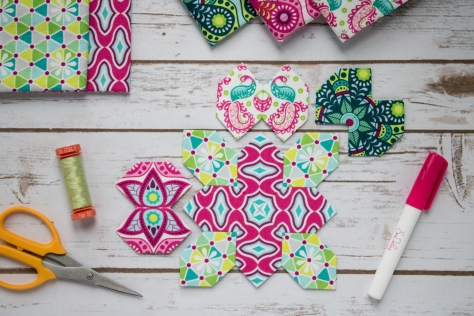 Finally, I started to dive into a Lucy Boston Patchwork of the Crosses block, since what is EPP without Lucy Boston? I love how rotating the fabrics creates even more meticulously cut geometric fun, and I look forward to seeing how this block shapes up.
 One of my favorite parts of planning with Lucy Boston blocks is in the outer pairs. I like to make a few “test pairs” with different fabrics and arrangements to see which ones I visually like best.
 I love that Flit and Bloom has plenty of opportunity for mirror image fussy cutting, since those are my favorites–can you see why?
 Which arrangement is your favorite?
 I used Aurifil 50wt 2886-Light Avocado thread for all of my piecing, and with the varied colors in these fabrics, its light green color seemed to be the best choice for blending in. Between careful stitching and practicing the flat back stitch, the thread blends right in. I love Aurifil thread for hand stitching!
When I first began piecing these blocks, I was envisioning a sampler EPP pillow, but with the varying sizes of the blocks, I’m thinking I may opt for a table runner instead. That giant Flowermania bloom would make a fantastic centerpiece, wouldn’t it?
I hope I’ve inspired you with my meticulous cutting fun with Flit and Bloom fabrics! Fussy cutting opens a whole new world of design, and I encourage you to give it a try!
Giveaway
To help spread the fussy cutting Flit and Bloom love, I have a bundle of Flit and Bloom fabrics left over from my project that I am giving away to one lucky reader.
To enter the giveaway today, let me know what you would make with Flit and Bloom. Leave a comment and make sure I’m able to get ahold of you if you win. For an additional entry, leave another comment telling me how you follow Night Quilter (email list, instagram, facebook, twitter, blog follower, etc.).
This giveaway is open internationally. The giveaway will be open until Saturday, November 11, at 8pm eastern time when I’ll select the winner randomly with random.org. Giveaway is open to participants 18 years or older. This giveaway is now closed. Congratulations to Pamela!
 Be sure to visit the rest of the stops on the Flit and Bloom Blog tour to see what everyone has made with this fun fabric:
Monday, Nov. 6th – Night Quilter <—YOU ARE HERE!
Tuesday, Nov. 7th – Winging It!/Hummingbird Highway
Wednesday, Nov. 8th – Blue Nickel Studios
Thursday, Nov. 9th – ReannaLily Designs
Friday, Nov. 10th – The Sewing Loft
Saturday, Nov. 11th – The Cloth Parcel

 While I was piecing my newest Quilt Theory quilt,
 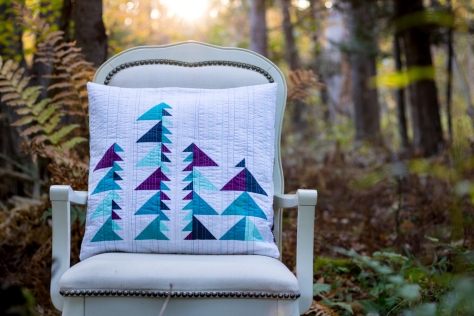 Thus, the Glade Pillow was born. A free bonus pattern for all who purchase Into the Forest, the Glade Pillow uses up a large majority of your scraps, and the pieces are actually sewn while you piece your quilt blocks. That’s a win in my book. I hope you like it, too.
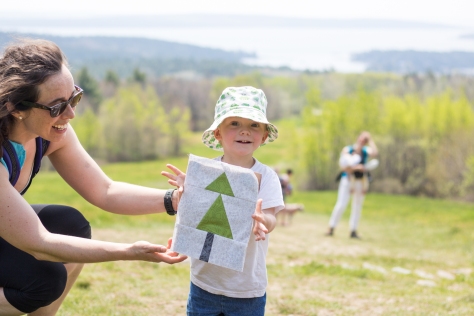
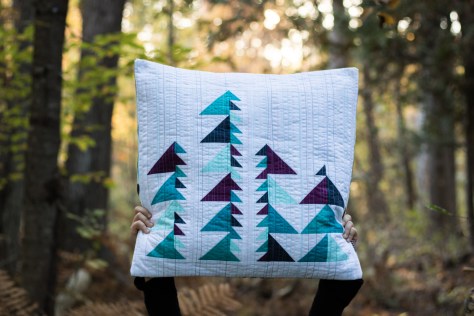 I had a fun photoshoot for this pillow, caught right at dusk with two of my little ones in tow, and thought it would be fun to show you a bit more about the pillow, as well as share peeks at our fun photo shoot. The light is low, and less than optimal, but the photos and memories made are fun ones. It turns out kids have as much fun with a fancy arm chair in the forest as quilters do!
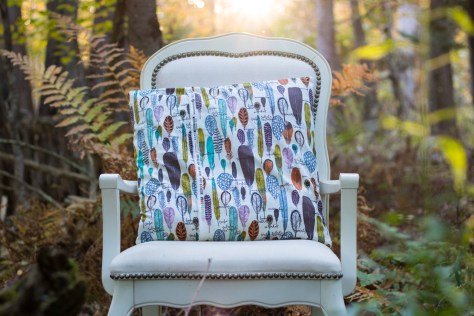 First, how about some more details about the pillow? Here’s the backing, which I absolutely love! I made an envelop closure but plan to add snaps or buttons in the near future.
 I used scraps from my Into the Forest quilt backing,
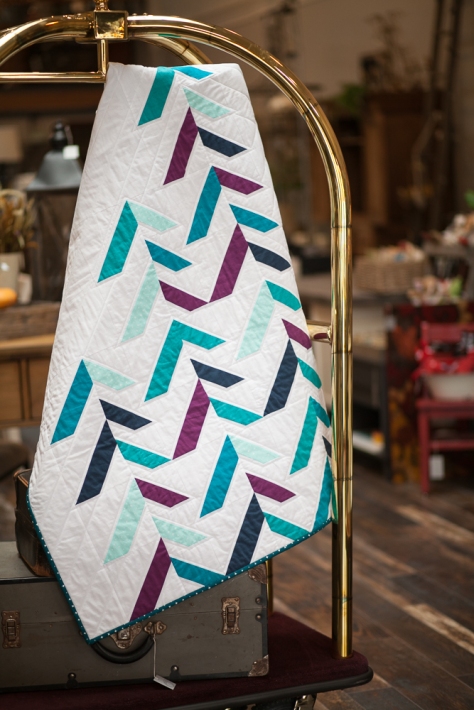
 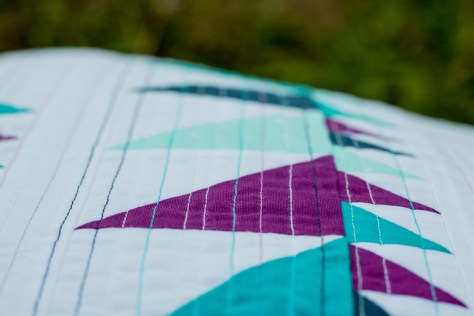 I had fun quilting my Glade Pillow with an assortment of
 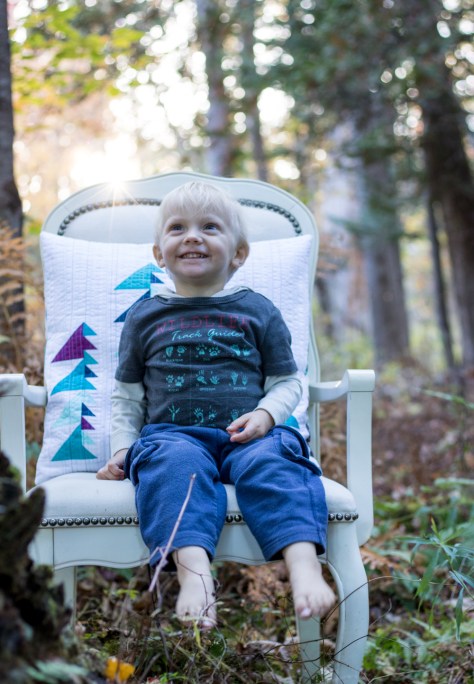 Getting photos of this pillow proved a bit tricky, since an eager 2 year old helper often means photos like this (above). Add a 7 year old sister helper, and they quickly morph to this:
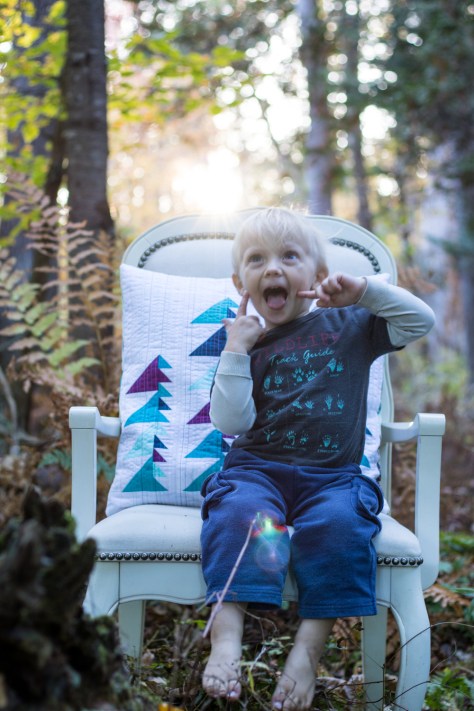 Seriously cute!
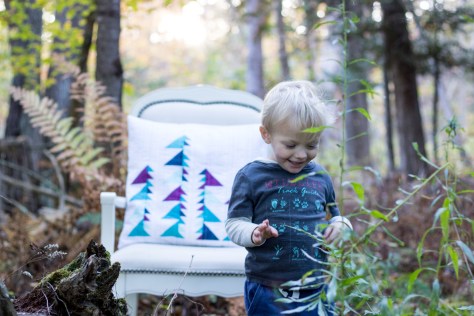 Finn was soon once again distracted by a nearby plant, so Maddie stepped in for her turn.
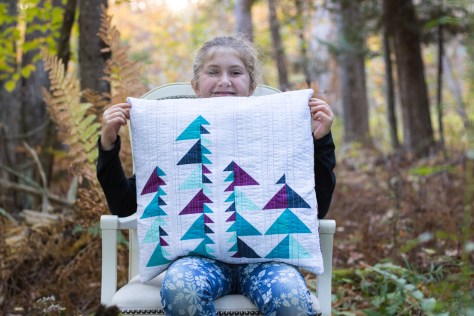 Big girl helper, in so many ways! After the photo shoot, Maddie wanted a turn with my camera. With the strap securely around her neck and extra reminders to be extremely careful, I let her commandeer the camera.
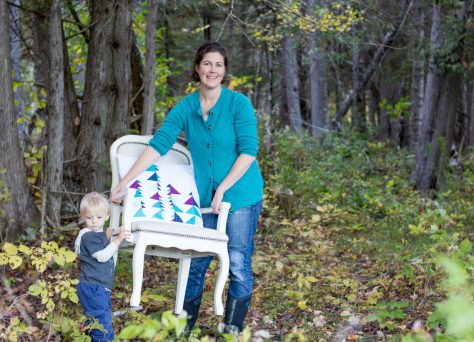 As a result, there’s a bit of proof of what it looks like to have quilty photo shoots with little ones’ help. My middle son was inside intently building with legos and had no interest in helping with our forest romp, but it was really fun to wander into the forest behind our house for a bit. Maddie and Finn had a wonderful time rolling around and being silly in the grass afterward.
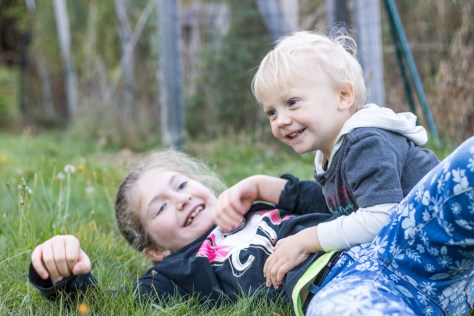
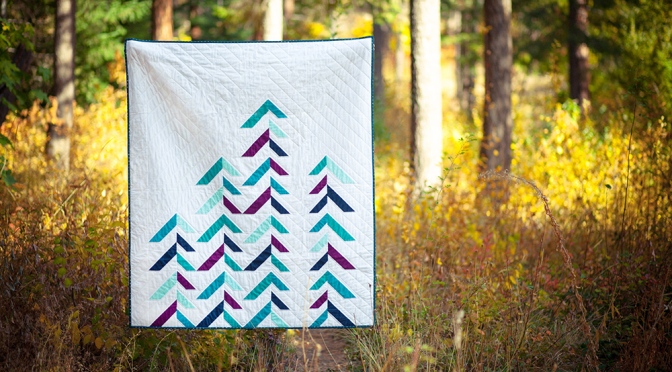
 First, to introduce you to my contribution to the third Quilt Theory pattern collection! Inspired by my frequent family hikes, Into the Forest is a reminder of where you should always head–into the forest!
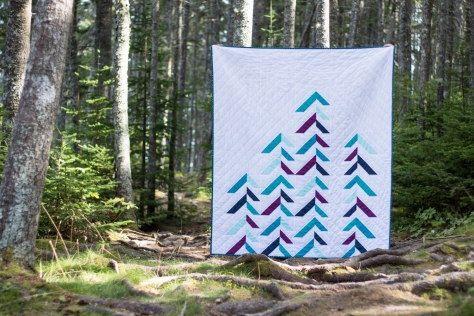 Take a leisurely stroll with me into the depths of nature. Into the Forest plays with two sizes of the same block to create a simple graphic tree design with a crisp and clean aesthetic, like a morning stroll through a cool forest. Inspired by the majestic evergreen trees ubiquitous in Maine, this quilt uses your 5 favorite fat quarters to make a nature inspired lap quilt finishing at 52″ x 60″. Use organic, repurposed, or naturally dyed fabrics to really become one with nature.
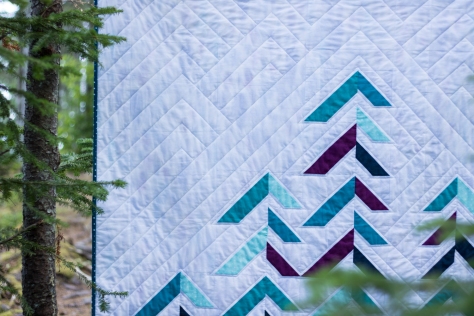 It seemed only natural to choose
 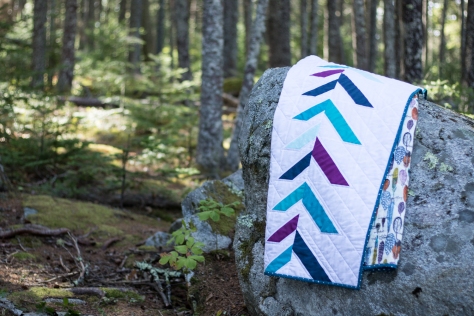 My Into the Forest quilt was partially pieced and quilted by me, and partially pieced and quilted by
 All of the Quilt Theory patterns are simple enough to be printed on 4″x6″ cards or a single page downloadable pdf. At only $4 each, they are perfect for gift giving or collecting, too!
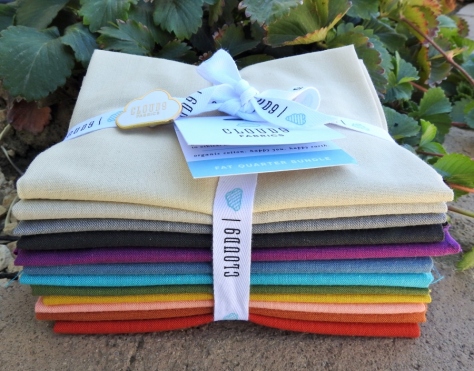 Cloud 9 fabrics was generous enough to offer a fat quarter (FQ) bundle of 12 of their luscious organic cirrus solids to one of my lucky readers!
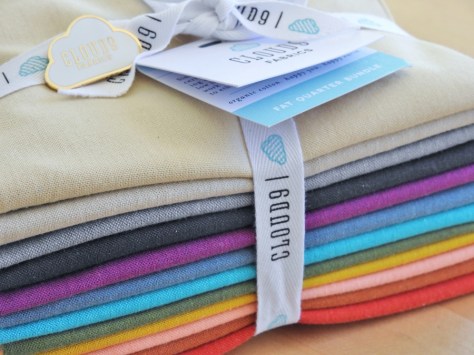 organic cotton | happy you | happy earth

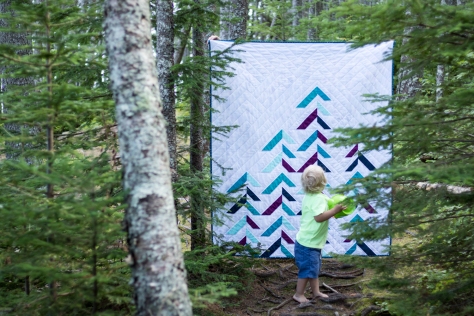
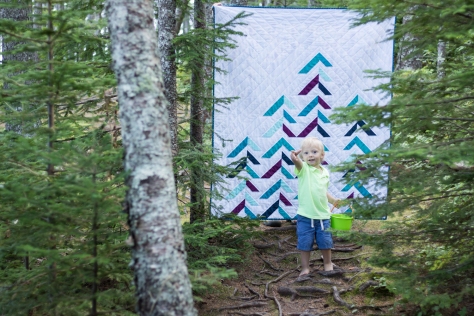 He finally realized that I was on the other side taking photos! No photo shoot is complete without a kid cameo, though, right?
 Wandering into a west coast forest…
 Wandering into an east coast forest…
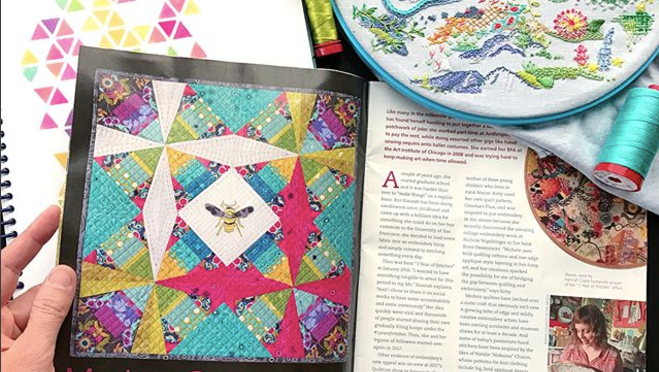
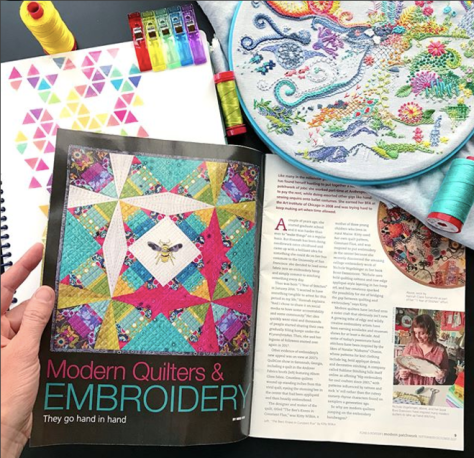 The article, written by
 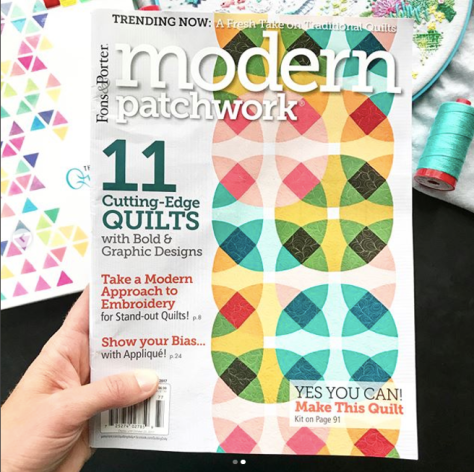 I ordered my copy of the magazine through the
 In the spirit of setting myself up for success, I opted to make four (4) blocks to make a pillow rather than a full sized quilt, and I dove into my bright Alison Glass stash to put together a fully saturated, smooth rainbow gradient. You know how I feel about rainbows. Alison Glass fabric rainbow + Giucy Giuce EPP project = heaven on a summer’s day!
 I used mostly 50wt Aurifil thread, with a few 80wts thrown in, using coordinating colors so that the stitches blend right in with the blocks. The threads shown here are (from top left clockwise): 2535-Magenta, 1154-Dusty Orange, 5015-Gold Yellow, 5017-Shining Green, and 1125-Medium Teal, all 50wt. There’s nothing quite as satisfying as matching the perfect thread to your fabric!
 Alison’s Art Theory print from her Ex Libris line (still my ultimate favorite fabric ever) was my color inspiration, so I planned my 4-block panel around the color flow in the center octagon. Throughout the course of the summer, I finished the four blocks and completely stitched them together!
 Now I am at the point in the game where this could lounge in the works in progress pile for a while, but instead, I am going to use my excitement to forge ahead and aim to finish this beauty, which is sure to be my most favorite pillow of all time.
 My next step is to choose background fabric, press the pieced panel thoroughly, remove the template papers (so that I can use them again!!), and then hand stitch the panel down onto the background fabric. Just last week, I visited my local quilt shop
  After looking at those options, I still felt like I needed to see the Insignia before deciding, and with the encouragement of a few friends on Instagram, especially Erin who said, “I’m a strong believer in first instinct=best instinct!”, I ordered a yard of Insignia in Charcoal from Alison Glass’s shop. (Thank you Erin!). Clearly, my first gut choice is the winning choice!
 Next I will hand stitch this epic panel to the perfect Insignia background using Aurifil’s monofilament thread in Smoke. I plan to quilt this with the Smoke monofilament thread, too, and I’m so excited just thinking about how amazing this pillow will be. This will be my first time sewing with monofilament thread, either by hand or machine, so I’ll be sure to share how it goes.
 As for me, I’m nearly finished piecing my next rendition of a Moonstone block, going with the Gems layout and a more nautical theme. I plan to make only one block and top stitch it to a large zippered pouch for a friend to whom I owe a quilt. I’m hoping the consolation diaper pouch/zipped pouch will hold her (and her nearly 1 year old baby) over until I manage to make the quilt!
 As you can see, I’ve been absolutely struck with Moonstone Madness and it doesn’t appear to be tapering off just yet. I’ve had a wonderful time piecing together these blocks, and the portable nature of English Paper Piecing ensures that it is still very much on the top of my “summer stitching” projects list!
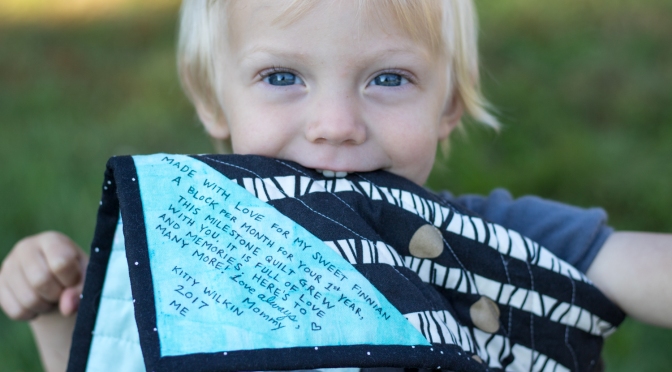
 This is a bittersweet post to share.
  Finn is jumping into the twos with a gusto, expressing his emotions and emphatically requesting (demanding?) “I do it! I do it!” for just about every activity in life. He’s a joyful, social boy who absolutely adores his older siblings, and thusly, mimics their every move. While heart-meltingly adorable, this poses difficult when the 5 year old pitches a fit and storms off in a rage because he can’t cut up all the fruit and vegetables in the house and make soup in a giant pot on the stove at 8 in the morning. I should note that if he ate the soup, I would have no problem with this plan. Finn will watch, then as soon as Max storms off, will exactly replicate his angry sounds and stomps and follow him in an adoring rage. Life is… fun.
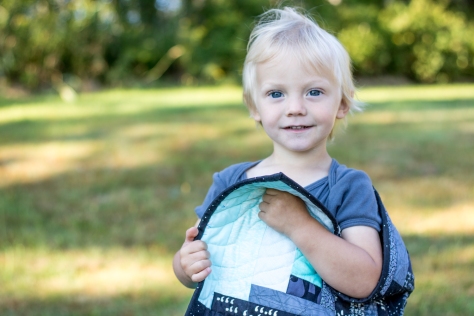
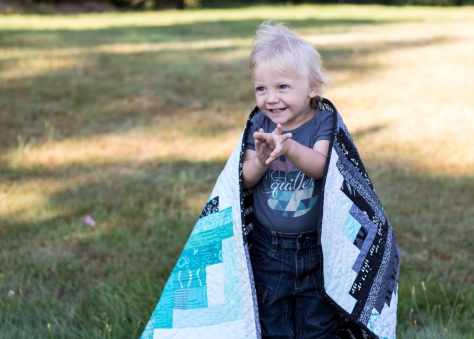
 Truly, though, I’m blessed. Even on the most challenging days, I know that I will look back at these years with longing, wishing for Finn to come ask for kisses only so that he can impishly wipe them off with a giggle, then ask for more. Remembering how magically a mommy kiss can heal a hurt, and how simply holding my hand makes even a fearful task manageable. Wouldn’t it be fun to be able to hold onto the blissful moments, and like childbirth, block out the chaotic torpedoes of childhood destruction? Or will I miss those too? Only time will tell. For now, I’m happy to have completed Finn’s quilt and hope to see him drag it around behind him on his adventures.
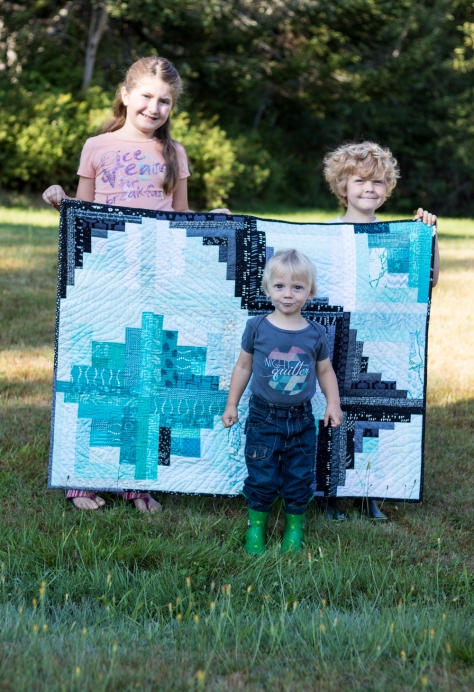
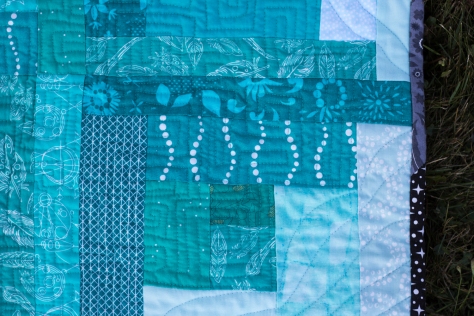 After debating whether to use different quilting designs in different sections, or going with an all-over quilting design, I decided to mix it up. I quilted with a variety of
 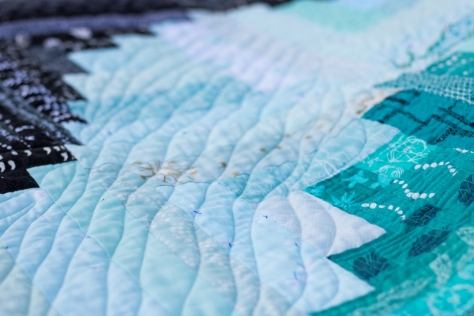 I used my go-to 50wt 2600-Dove to quilt wavy straight lines with my walking foot in the lightest areas, creating a smooth flowing feel.
 Then I used 50wt 2692-Black to stitch nearly in the ditch, tracing the seam lines in the black log cabin section. This helps define the log cabins while emphasizing their boxy nature. I like the way the squared quilting in the darker sections plays with the smooth flow of the quilting in the lighter section. I certainly need to practice my free motion quilting more, but I’m happy with this quilt finish!
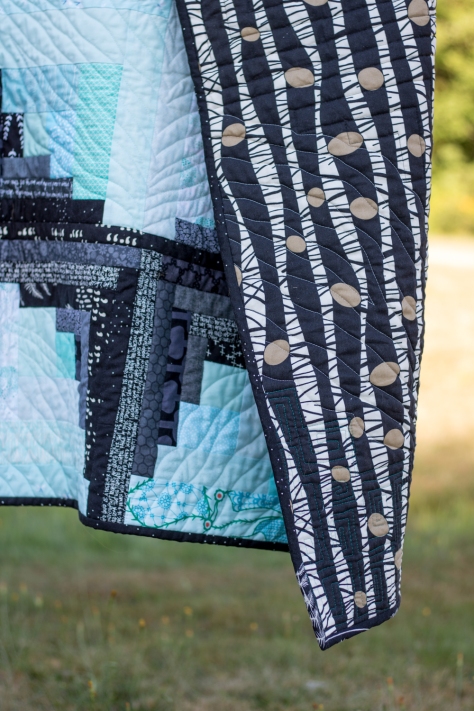 I opted for the Stoff fabric that looks like birch trees as the backing, and honestly until writing this post, I forgot that I had mentally decided on the *other* fabric I bought
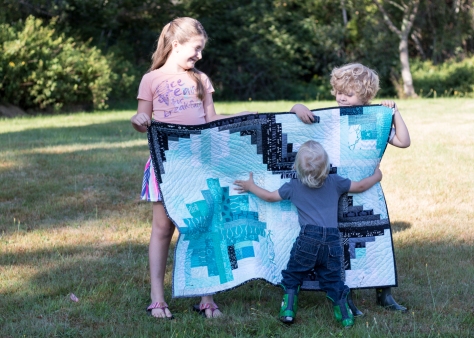
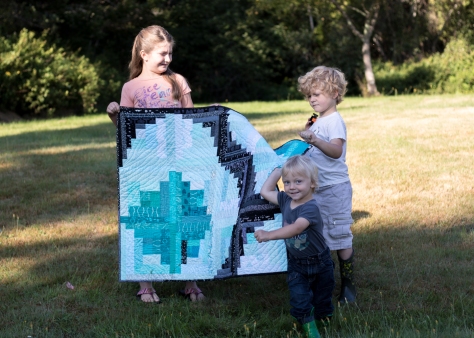
 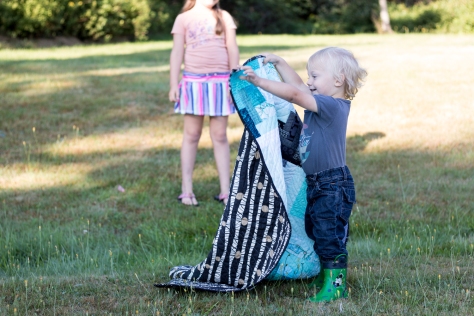 I used a scrappy binding, perhaps for the first time, using up some of my black and dark grey strip scraps. I machine stitched the binding to the front of the quilt, and then hand stitched it to the back with 50wt black Aurifil thread. Normally, for a baby quilt I would machine stitch the binding completely, but I wanted some extra time to reflect on the making of this quilt, and stitch my love into it just a tiny bit more. Or maybe I’m finish-averse. I haven’t decided yet! Either way, I know that if the binding ever begins to fall off, I know just how to fix it, so no worries! I think it will be nice and secure.
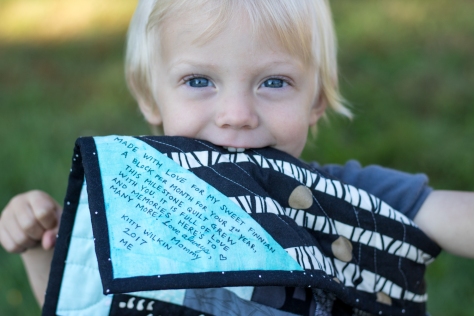 I hand wrote a label and stitched it down with the binding on one of the back corners. Doesn’t it look delicious? For as easy as labels normally come to me, this one was tough. I wanted to write more than the usual “Made for x, by y, date, location” but also didn’t want to write a novel. I definitely could have written a novel. This will have to do. My love is there. My silly boy clearly knows it! (Click the photo above to see a larger version for easier reading).
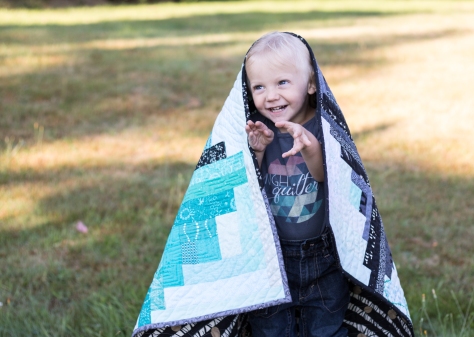
 So, thus ends the era. The exciting, fun, endearing, and so sentimental Milestone Quilt project has officially come to an end. Finn will continue to grow, quilts will continue to be made, but I can’t help but be more than a little sad that this project is finished. Next up: I hope to create a photo book with all of the progress photos and growth updates. One more way to drag this project out juuuuust a little bit longer! I will also be lecturing about this and other
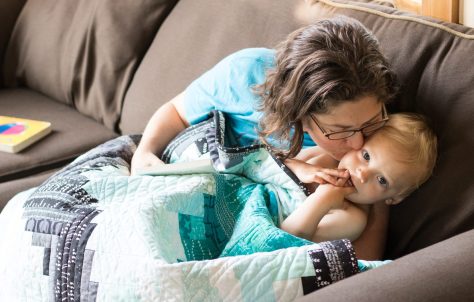

 In the spirit of documenting our days through the creation of a quilt, I’ve decided to create a Summer Adventure Quilt with each block representing a different family adventure. Each block will accompany us on its adventure, be photographed along with our fun, and then become a part of a quilt stitched together in the fall.
 Since our adventures primarily consist of hikes and beach days, I am making an improv tree block for every hike and an oceany, quasi-improv block for every beach day. The beach day blocks are entirely inspired by the
  I will be making a few unique blocks here and there to represent other adventures, such as a tent for when we go camping in the Adirondacks with my parents, a bridge for when we visit my husband’s dad and stepmom (GrandDude & GrandPrincess) in Pittsburgh, and a big sailing ship I made for a Camden Harbor tour we went on last weekend while GrandDude and GrandPrincess were visiting us here in Maine, shown above. I hope to fit these blocks in smoothly with the rest of the quilt and think it will work nicely!
 Here’s my progress so far!! As of today, we’ve been on 8 hikes and 1 Camden Harbor tour (on a lobster boat, but the tall ship is representative of the harbor, not the vessel!). We have not yet “earned” the ocean block to the right of the ship block, but I included it for the photo to help show how the block will work into the overall quilt.
 Perhaps the most fun aspect of this quilt is that one block accompanies us on each adventure, and therefore appears in memorable photographs. I’m hoping to be able to put a photo book together at the end of the summer with photos from each adventure. It’s a big hope, since my list of hopes is endless, but I really think it would be the icing on the cake for this project.
 I’m grateful to have a wonderful group of mom friends who also have kids the same ages as mine and who love to get out and hike. We have created a Mommy Hiking Club (unofficially coined Mountain Mamas Lugging Babies & Towing Trekking Toddlers… it’s a bit of a mouthful, but gets the idea across!!) and we are determined to hike at least once per week with all of the kids. Our hiking groups vary from 3 moms plus kids to up to 5 or 6 moms plus kids, just about every mom is also carrying a baby or toddler in an Ergo or similar carrier, and everyone is welcome. Sure, sometimes there are crying babies, whining toddlers, bug bites, scratched knees, and I’ve been known to have to carry both of my boys (ages 2 and 5) simultaneously on some hikes, but it’s all worth it! Here are some memories from a few of our hikes (since we are 8 hikes in, I am not including every one, but from here on out I will try to share regular updates!).


 Here’s to many more adventures, and to keeping up with the quilt blocks so that there’s always one on the ready for any given adventure. I currently have 3 extra trees and 3 beach/ocean blocks ready to go, so right now I’m feeling ahead of the game!
 My husband has been requesting a pillow made with
 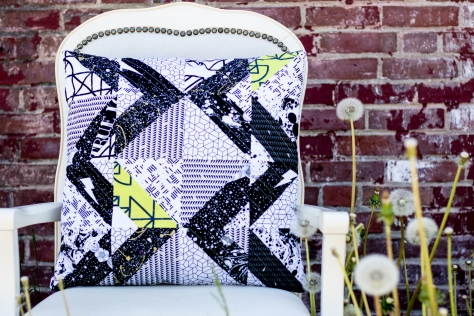 I made 16 quick blocks using the white heavy fabrics and black-heavy fabrics from
 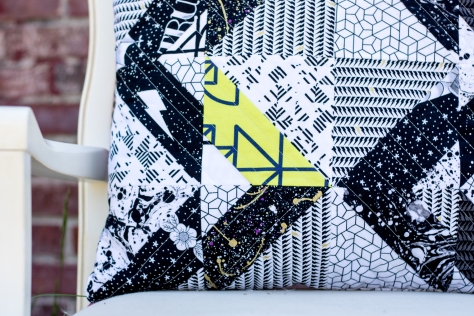 I quilted it with straight lines on my Bernina 560 using my walking foot and 50wt
 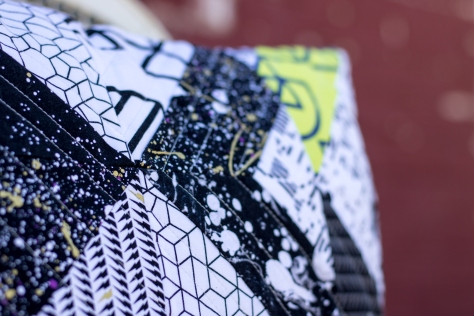 I threw in a few sharp angles to help keep the edge, and staggered the distances between lines for some fun.
 I used the large scale Wound Up in Bright for the pillow backing, and closed it with my first ever side-seam zipper.
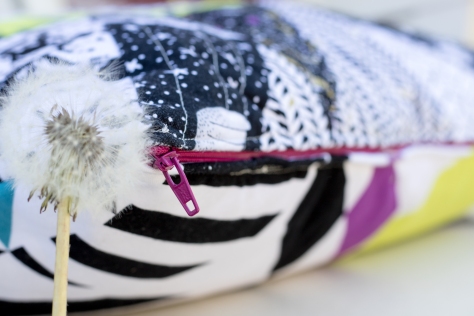 I love how this magenta zipper I had on hand coordinates with the pink from the Wound Up print. Perrrrfect. I do need quite a bit of practice with sewing zippers, but we won’t focus on the wobbles and such. The pillow was well received and lives happily on our couch. Now I just need to make about 5 more to cover the rest of our *cough-cough-ugly-cough* couch pillows, and then redo our living room decor to match our more modern design aesthetic. All in good time, right? (haha laugh with me here).
 I did enjoy making this pillow, though, and I’m happy I can finally say I’ve sewn something for my husband. Today is our 10th wedding anniversary, too, so it seems fitting that I share this true love pillow gift!
 The first spot that seemed like it could potentially work was the shaded side of a cafe. The dark blue-grey surface first attracted my attention, and the fact that it was in full shade was a big plus. However, it seemed flat. Above you can see try #1. I did a full photo shoot here, just in case I didn’t find anything better. Fortunately my nearly 5 year old son was asleep in the car, and my 2 year old was content to watch from his carseat. After the shoot, I drove around a bit more seeing if I could find a better spot.
 The second spot I tried was a rusted metal shed in a back parking lot, which I spied while turning around to get back to the main road after my first attempt. This was a bit more of the urban feel I was looking for, but still a bit flat. A bit of graffiti or added interest would have made this potentially a winner, but still, I felt there had to be a better spot. While running back and forth from the shed to the trunk of my car, I spotted the back of a red brick building. The big concrete slabs and tall seeded dandelions are what attracted my attention most. Rather than move my car again, I simply carried everything the extra 50 feet to this next, winning location and had at it!
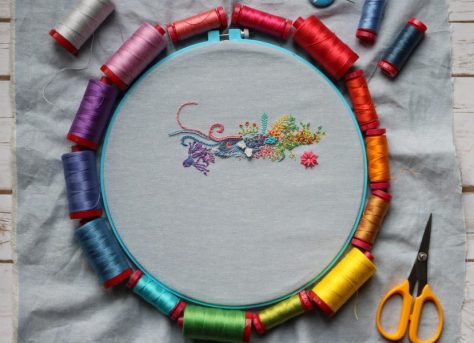 …after January’s stitching…
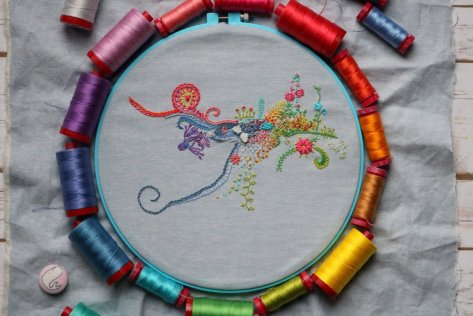 …after February’s stitching…
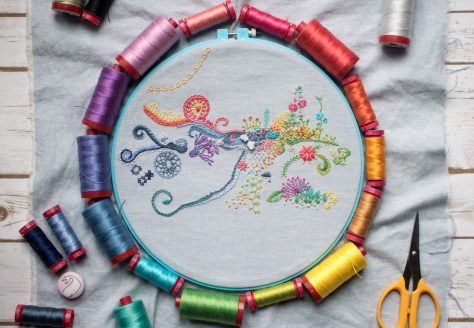 …after March’s stitching…
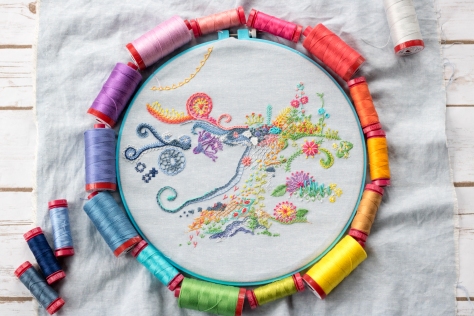 …after April’s stitching…
 …and here it is after May’s stitching!
 I added a whole sun burst super nova element in that warm sunny section of the hoop, as well as some added texture with different rows of yellow stitches. This little supernova was very fun to make, and grew day to day. Again, I began with not much of a plan at all, just wanting to add some more bright yellow to the top portion of the hoop. After a few days, it took on a life of its own and continued to grow and take shape until the flowery starbursts decided to cap the growth (for now).
 I also added some “background” plant like elements behind the patch that began this whole hoop back in January. My biggest challenge with this daily stitching challenge is figuring out how to create background behind stitches that have already been stitched. Some attempts are more effective than others, but I figure it’s all part of the learning experience.
 A few more flowers were also added, in the form of lavender roses and their associated greenery. The flower garden continues to grow and blossom.
 A month of progress wouldn’t be complete without adding some motion to the ocean! There wasn’t all that much growth here this month, but some running stitch and french knots helped begin to create some more flow.
 The hoop is beginning to fill out, but knowing that I’m just about halfway through the year, I do think I should be able to fit the entire year in this hoop without extending off the sides. There are lots of little spaces between elements, and while I hope to not fill every *single* one, there is a lot of room for depth and texture and who knows what else!
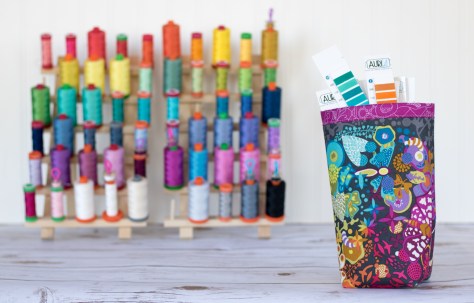 As I mentioned in my post a few week ago, the list of use ideas for this tall and skinny fabric bin just keeps growing. From sorting tiny fabric scraps to housing your favorite adult beverage bottle, the sky’s the limit.
 Today I’m also sharing one such use over on
  Head on over to the