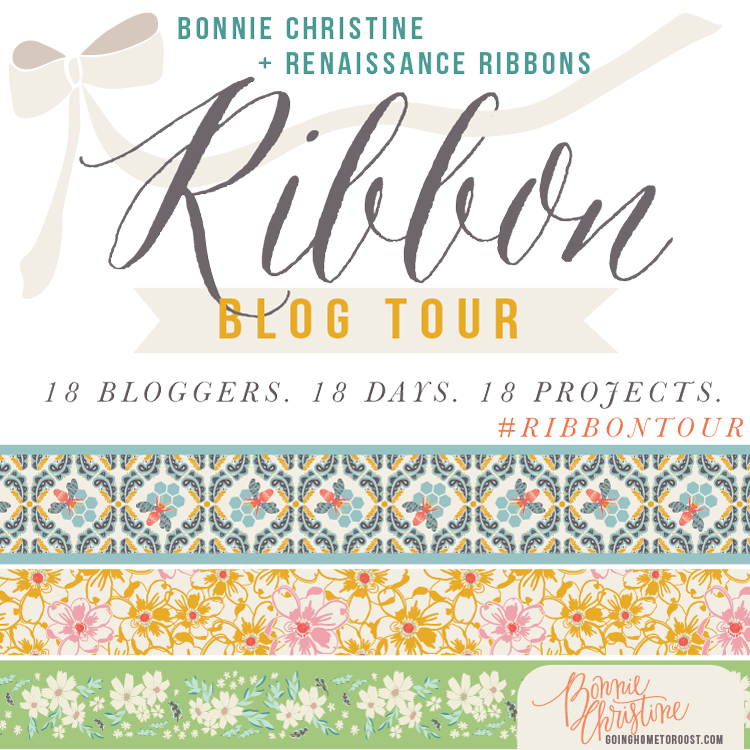
Welcome to my stop on the Bonnie Christine Ribbon Blog Tour. We’re entering the final days of the tour, so be sure to check out the fabulous projects that have already been posted, including Caitlin Topham’s post at Salty Oat from yesterday, and visit the final stop on the tour, Corri Sheff at The Lions Dandy tomorrow to see what gorgeousness she creates.
 Bonnie Christine is a surface pattern designer, mother hen of the Roost Tribe and author of Going Home to Roost – a blog dedicated to living an extraordinarily creative life. She is inspired by the great outdoors and is passionate about sharing what she knows and creating community around creativity. Sing it, sister! These ribbons may seem familiar, since the coordinating fabrics in her Sweet as Honey fabric line inspired my very first wine and fabric pairing!
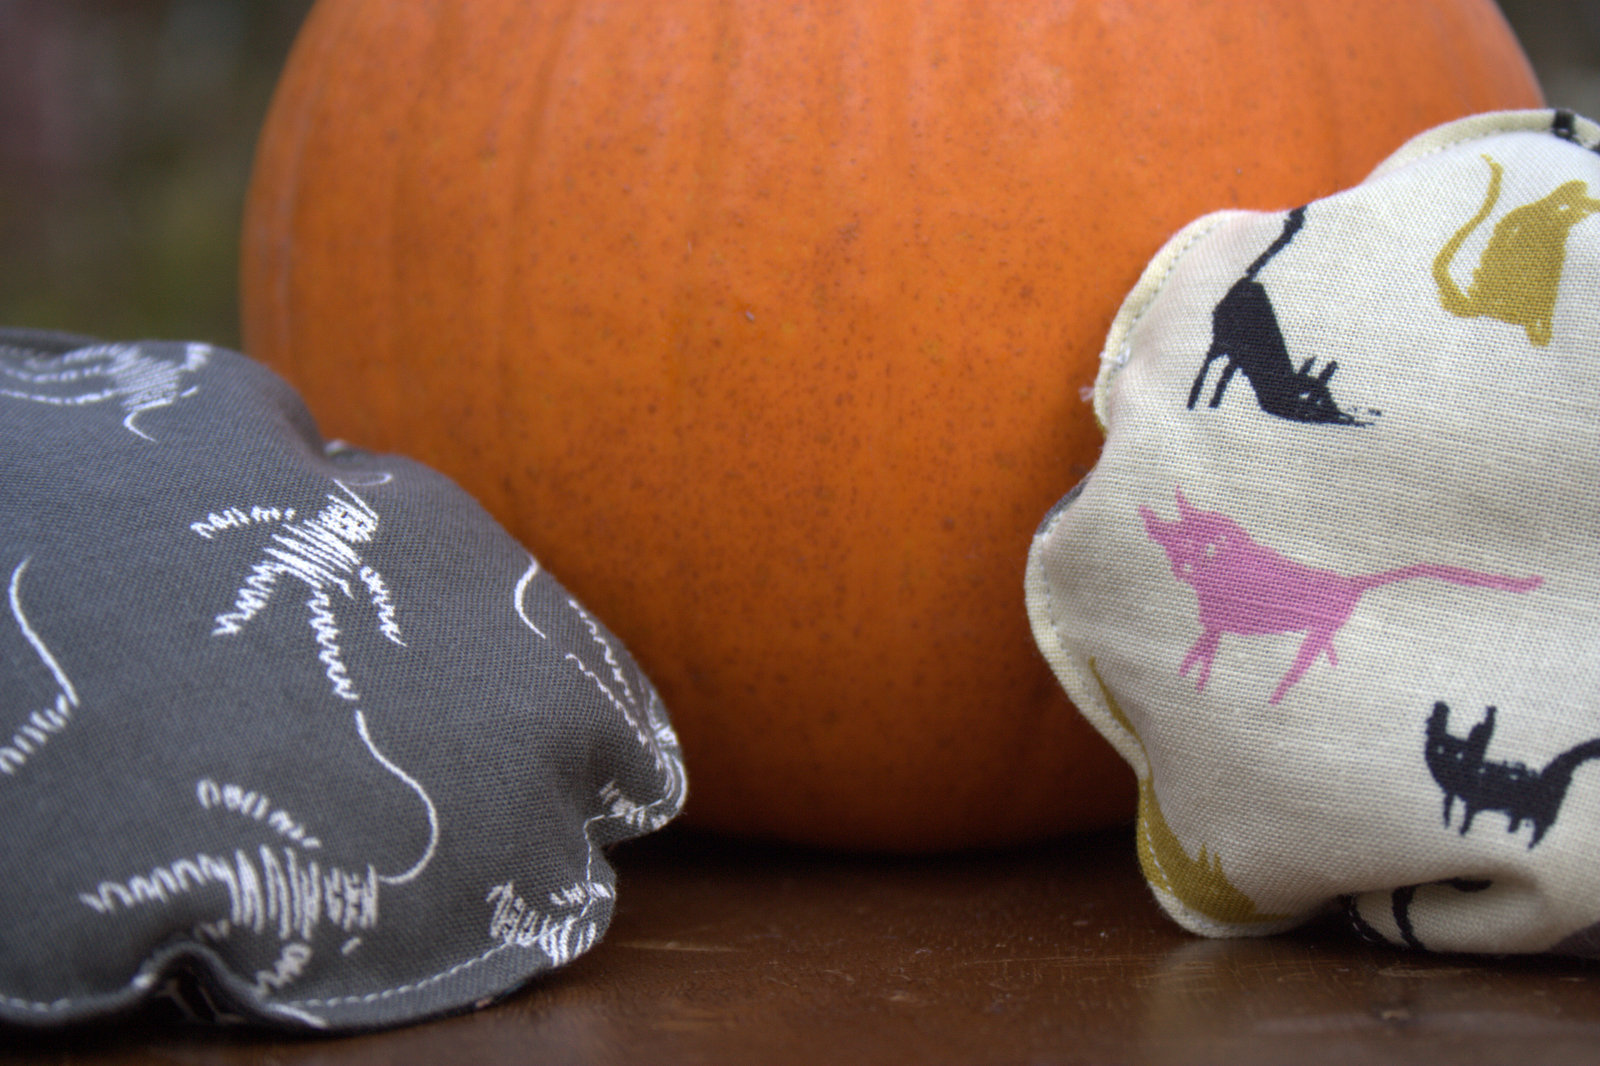
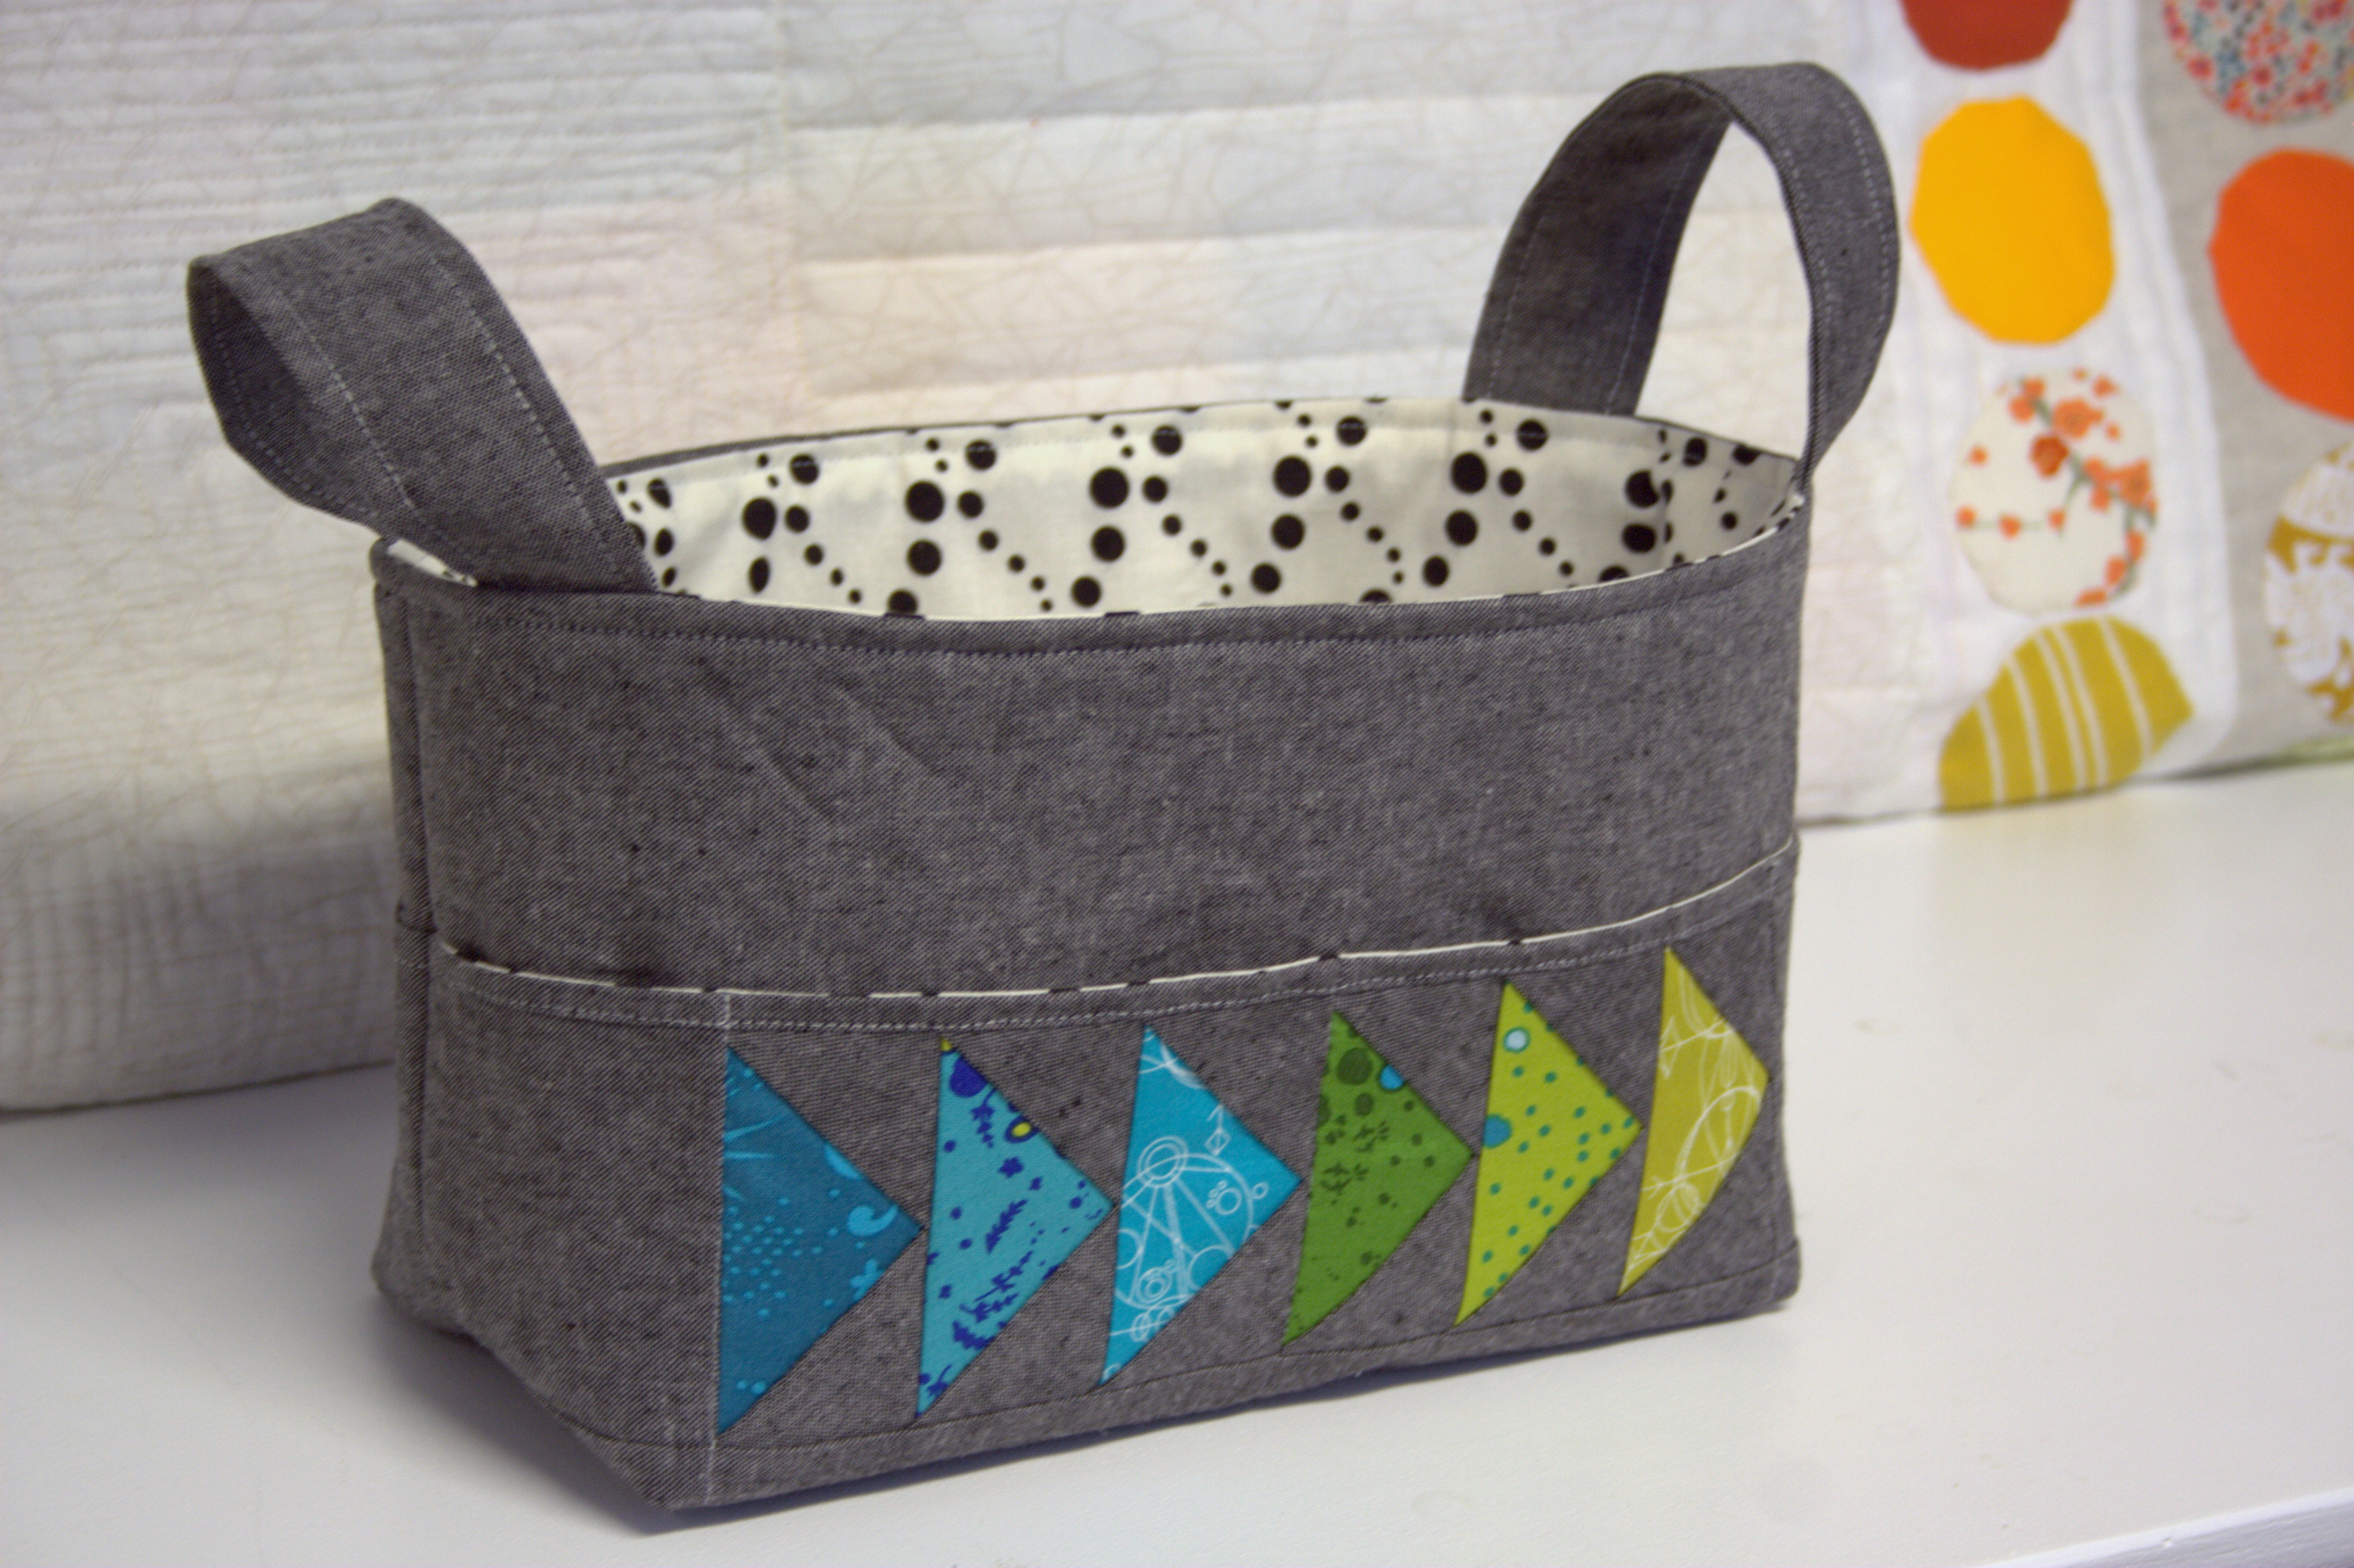
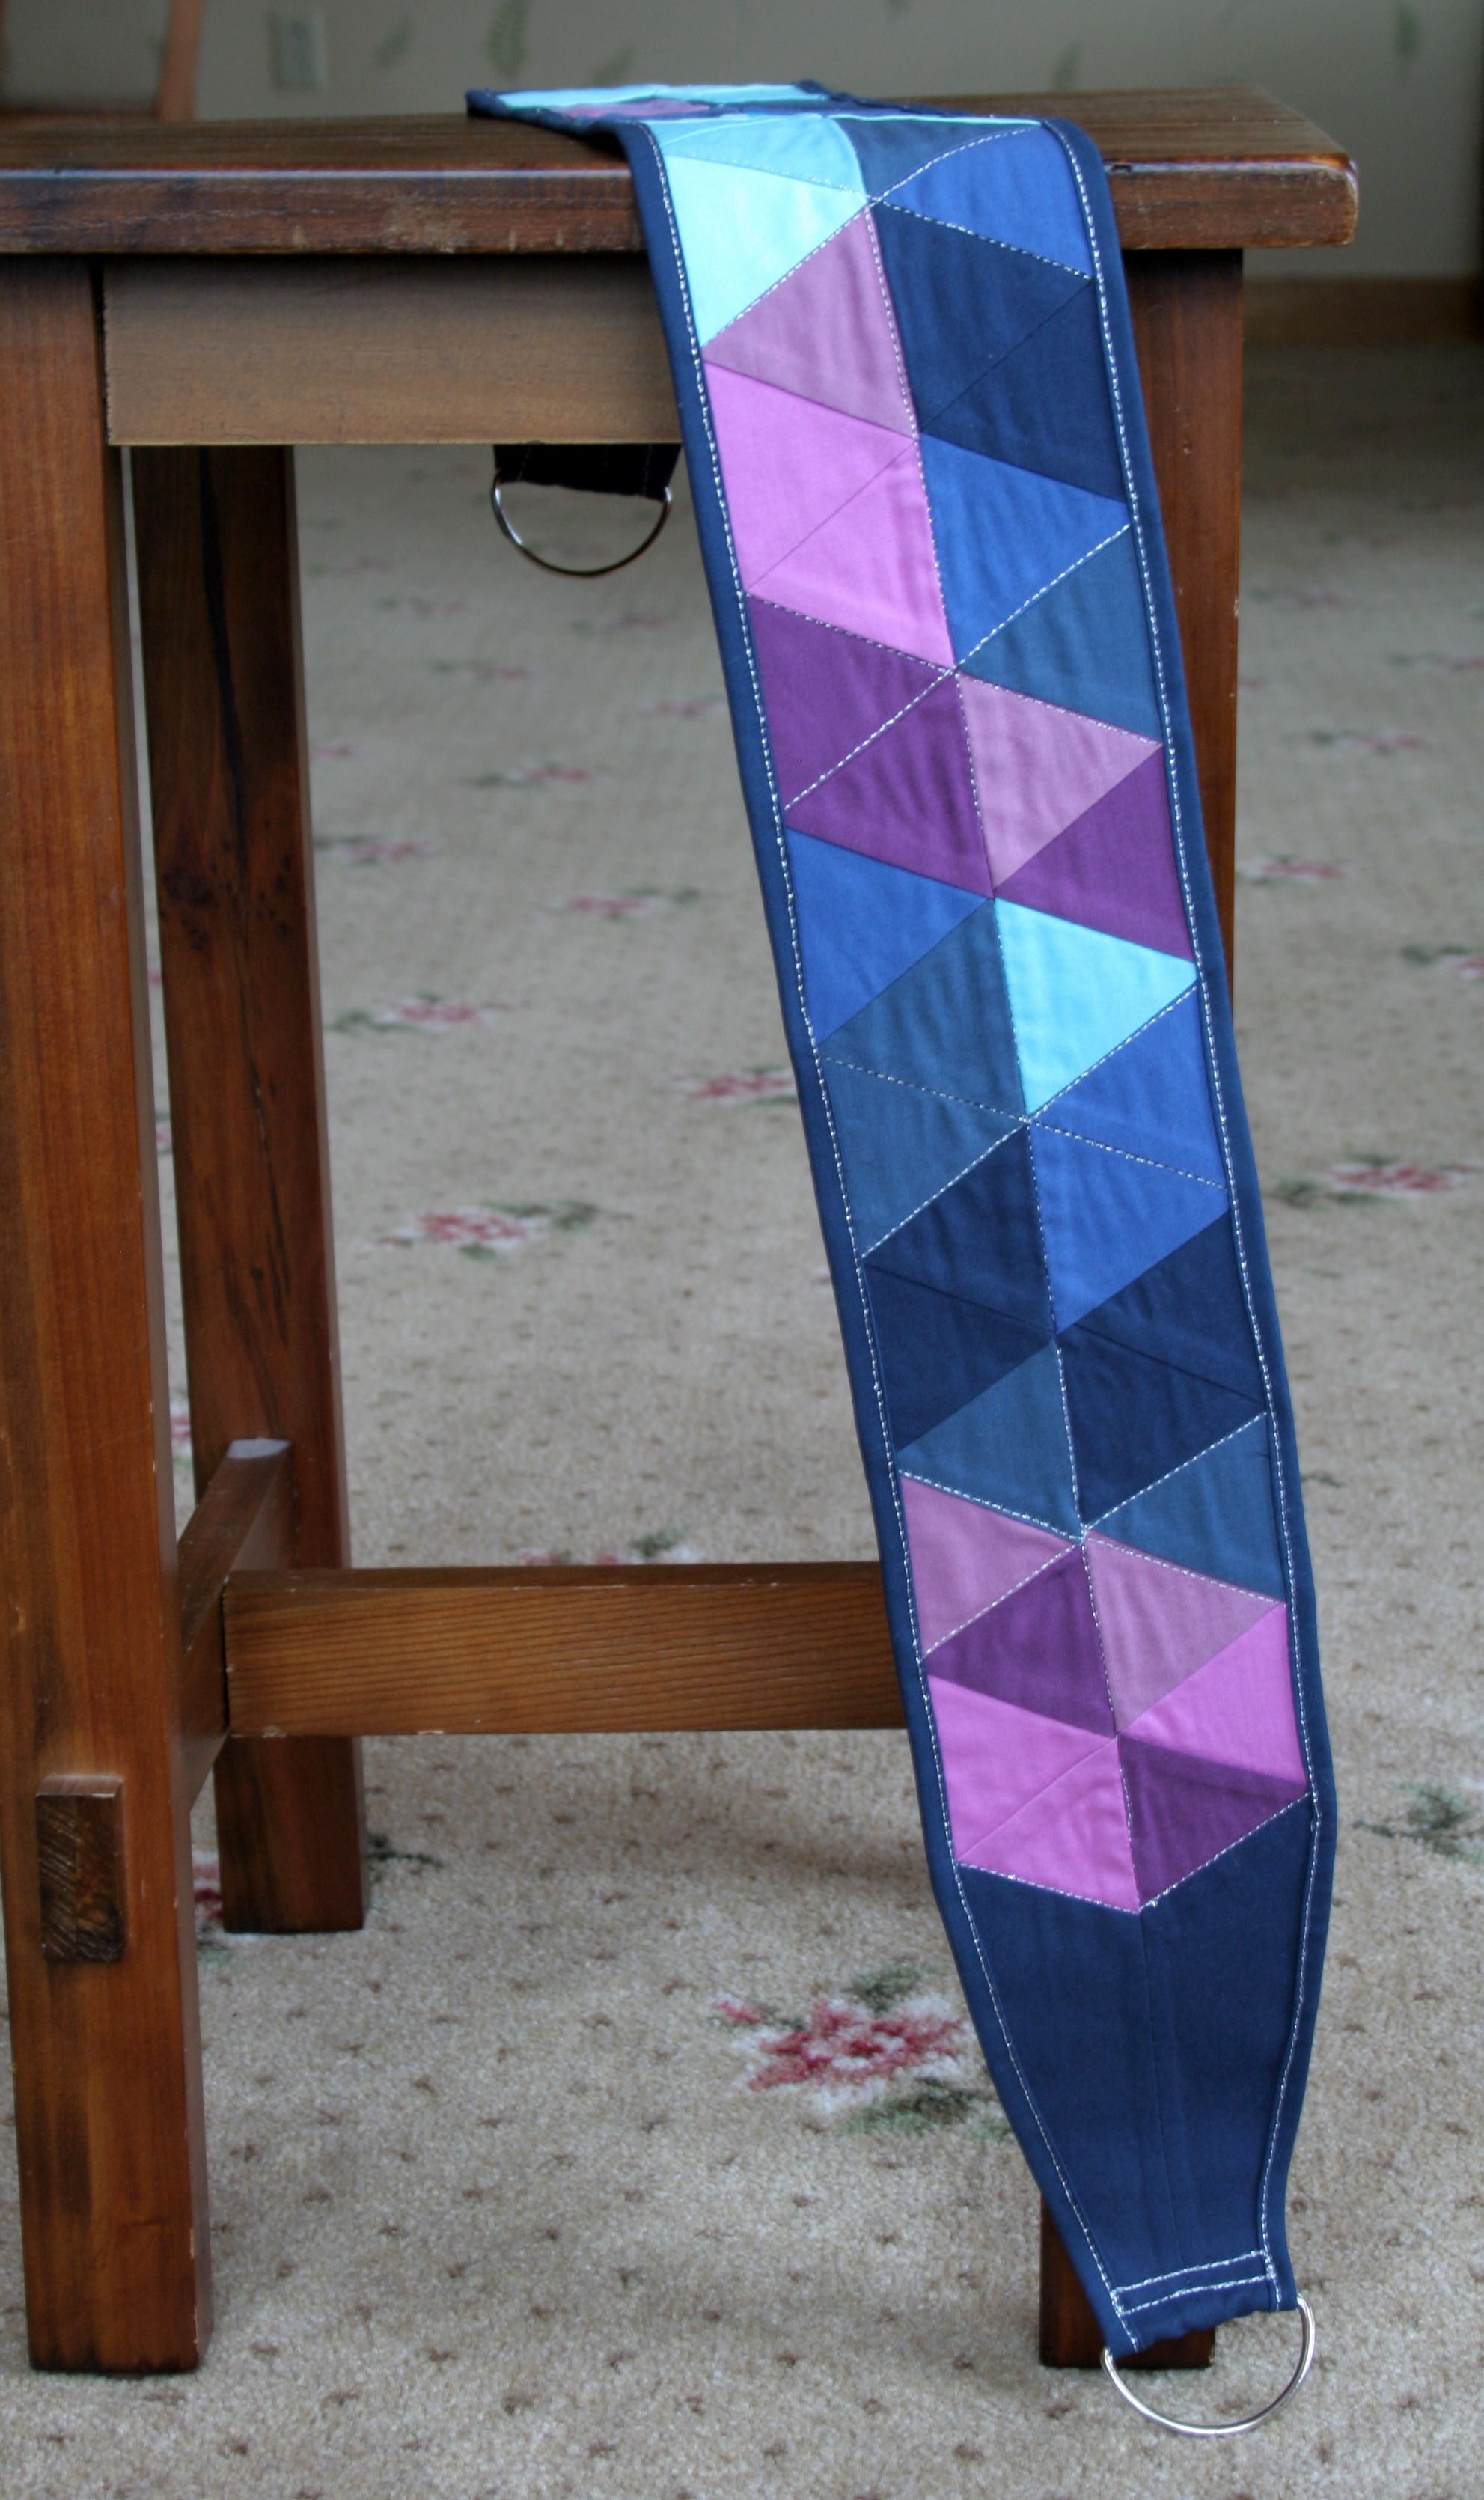
This line of ribbons was inspired by a love for nature and sunshine. They represent working in the garden, growing flowers and watching the bees, birds and butterflies take flight. This description embodies so much of what I hold dear, and when I saw that Bonnie Christine was looking for bloggers to help spread the word about her new line of ribbons, I knew I had to be a part of this blog tour.
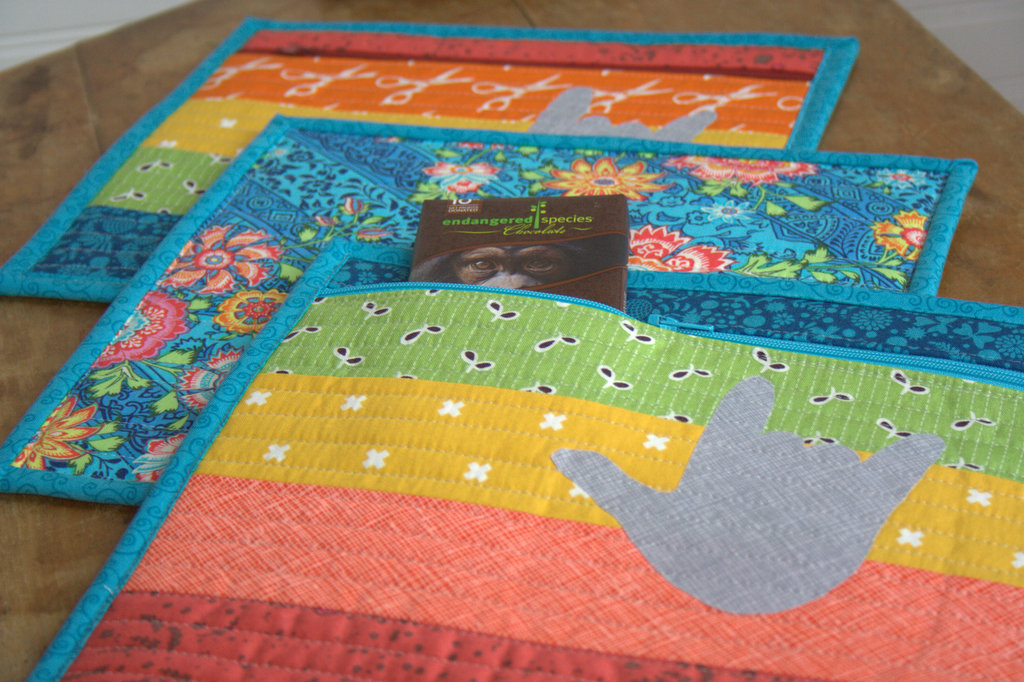
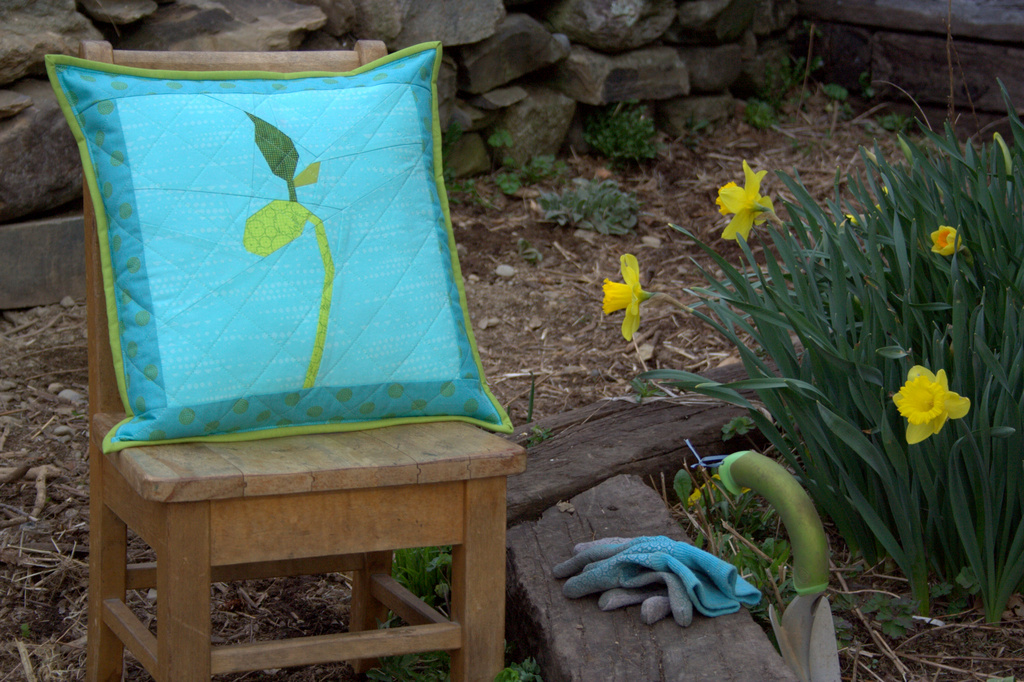
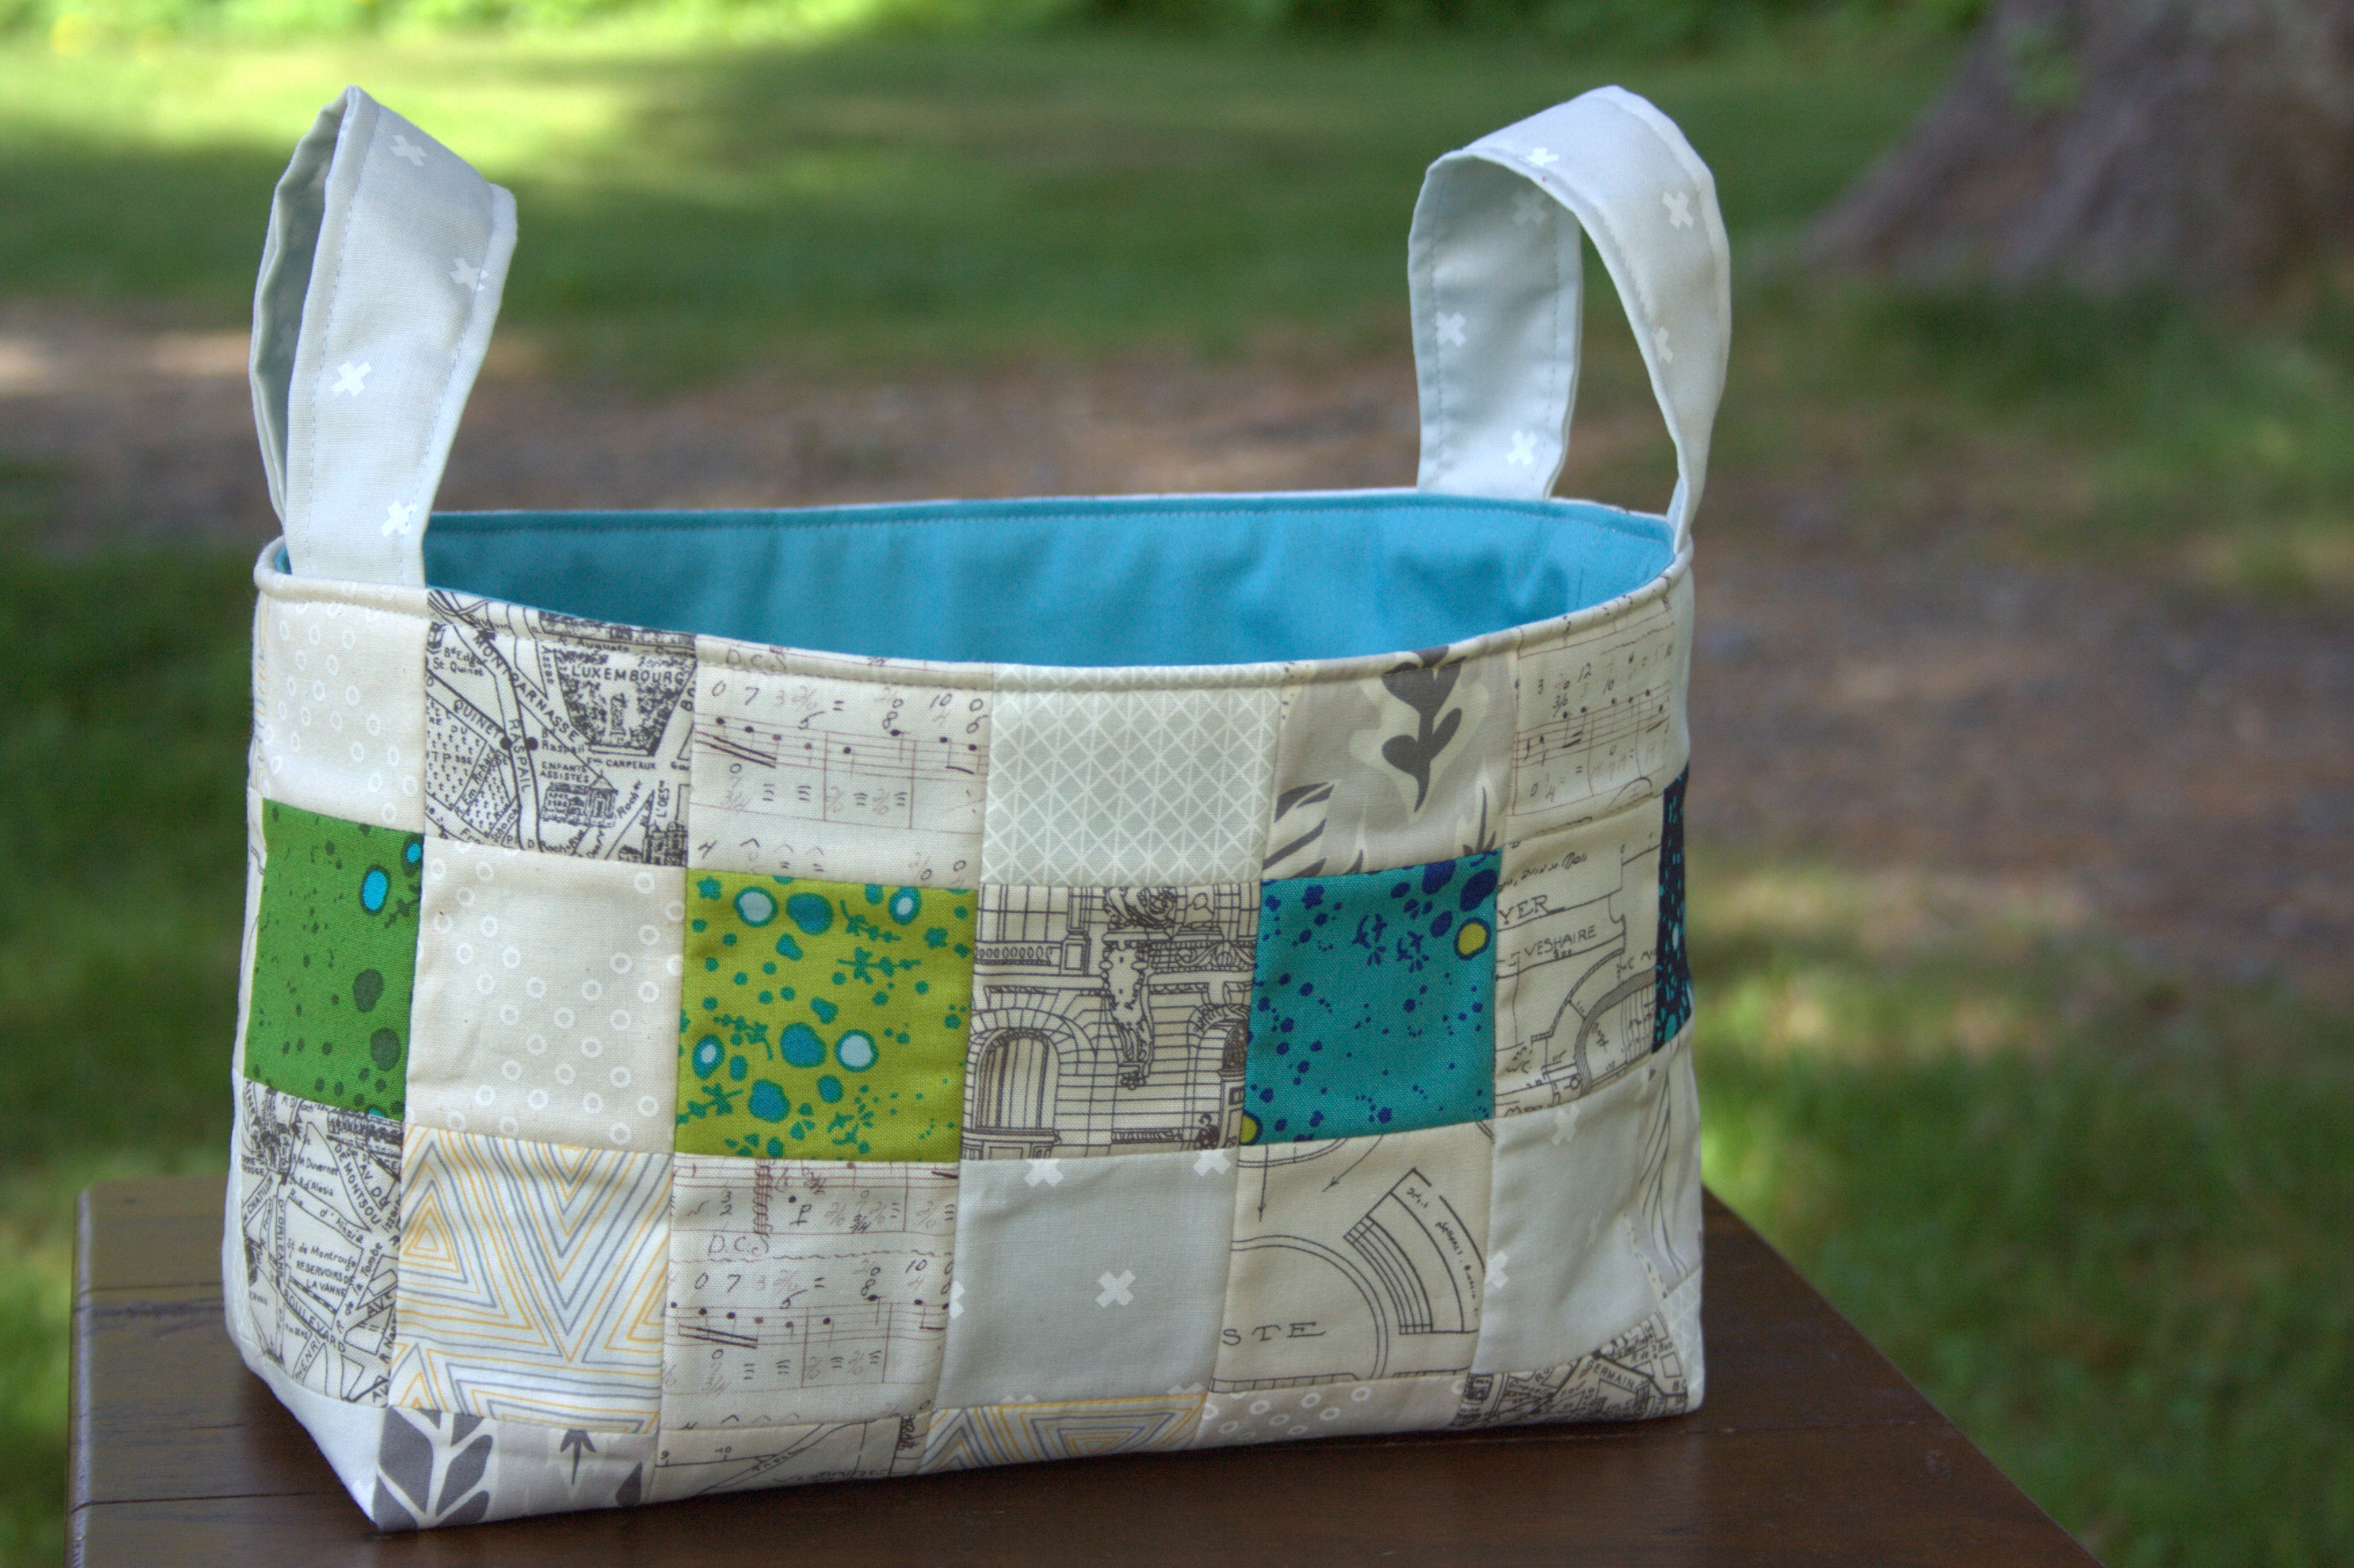
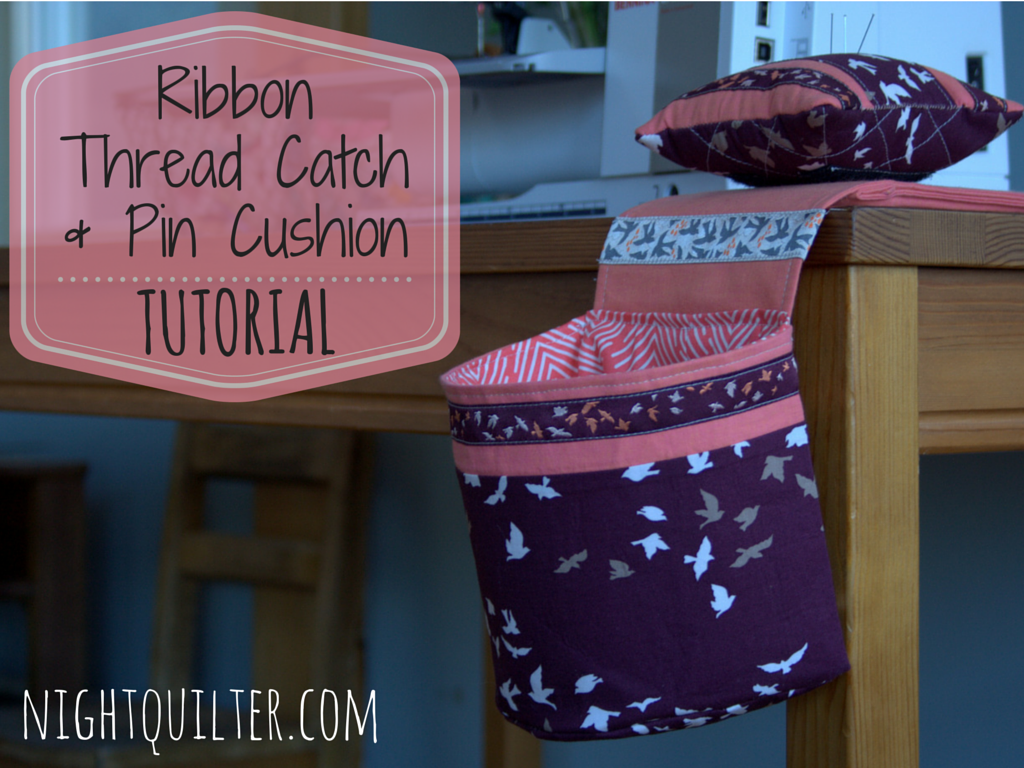
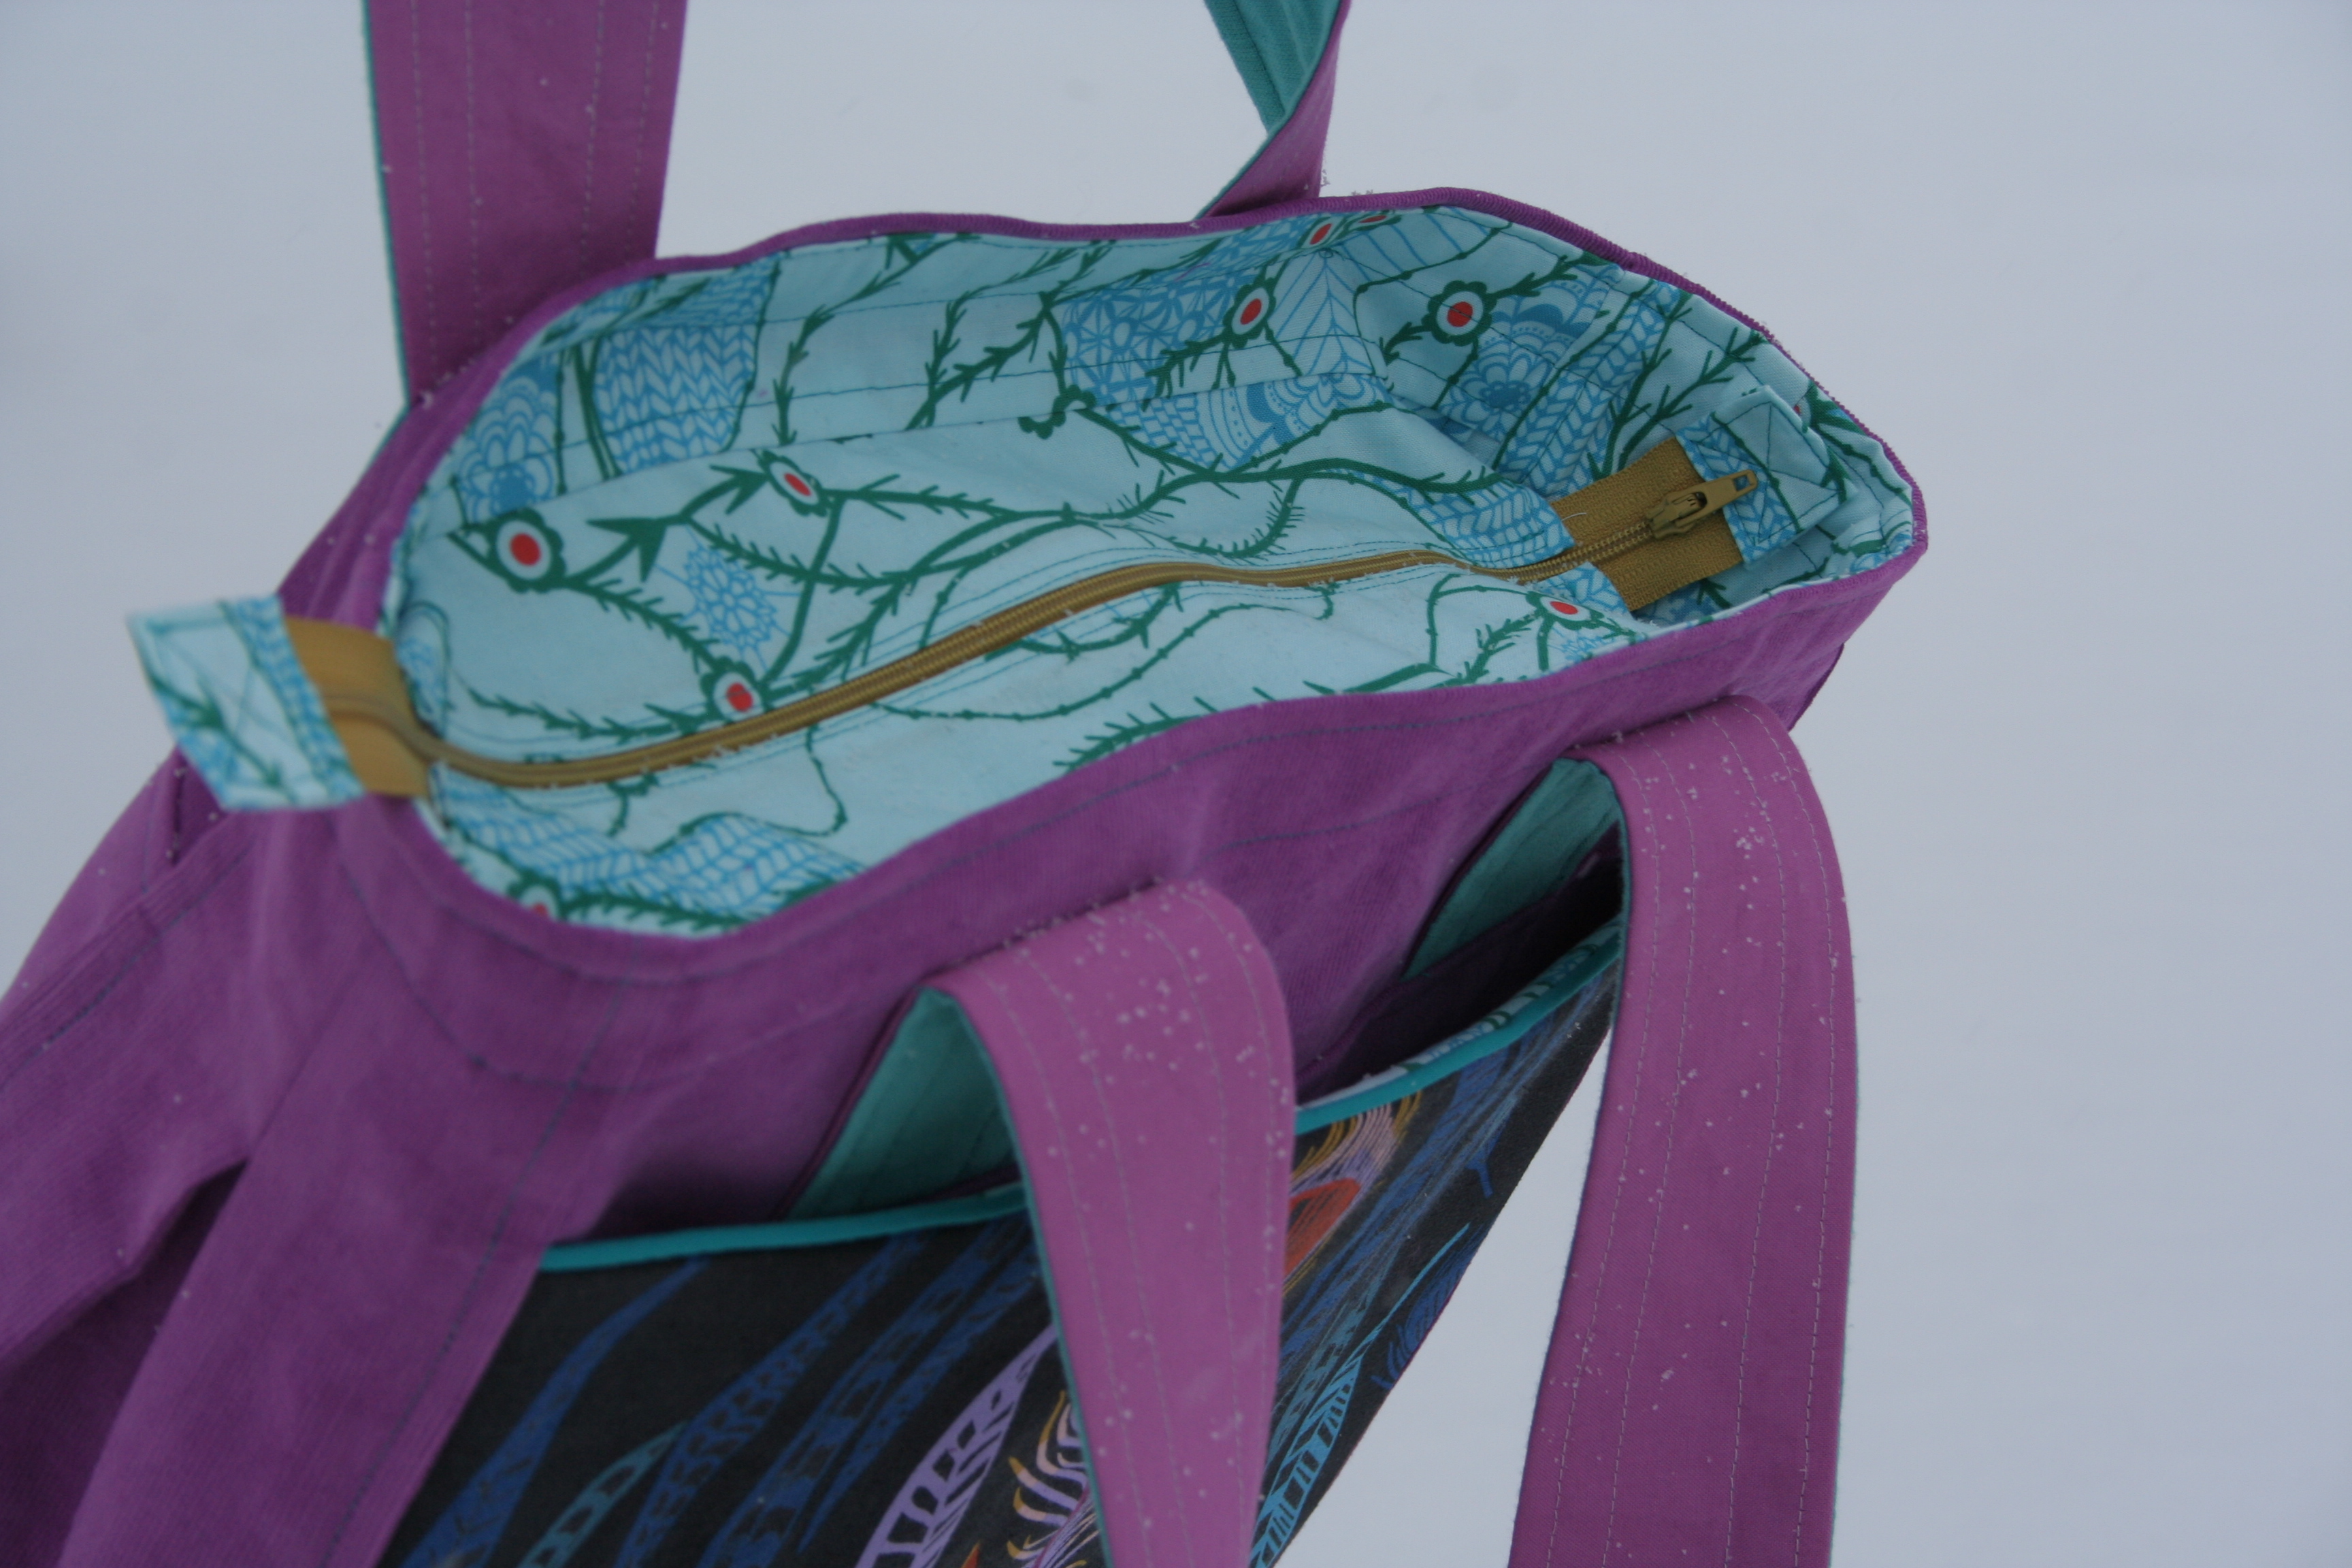
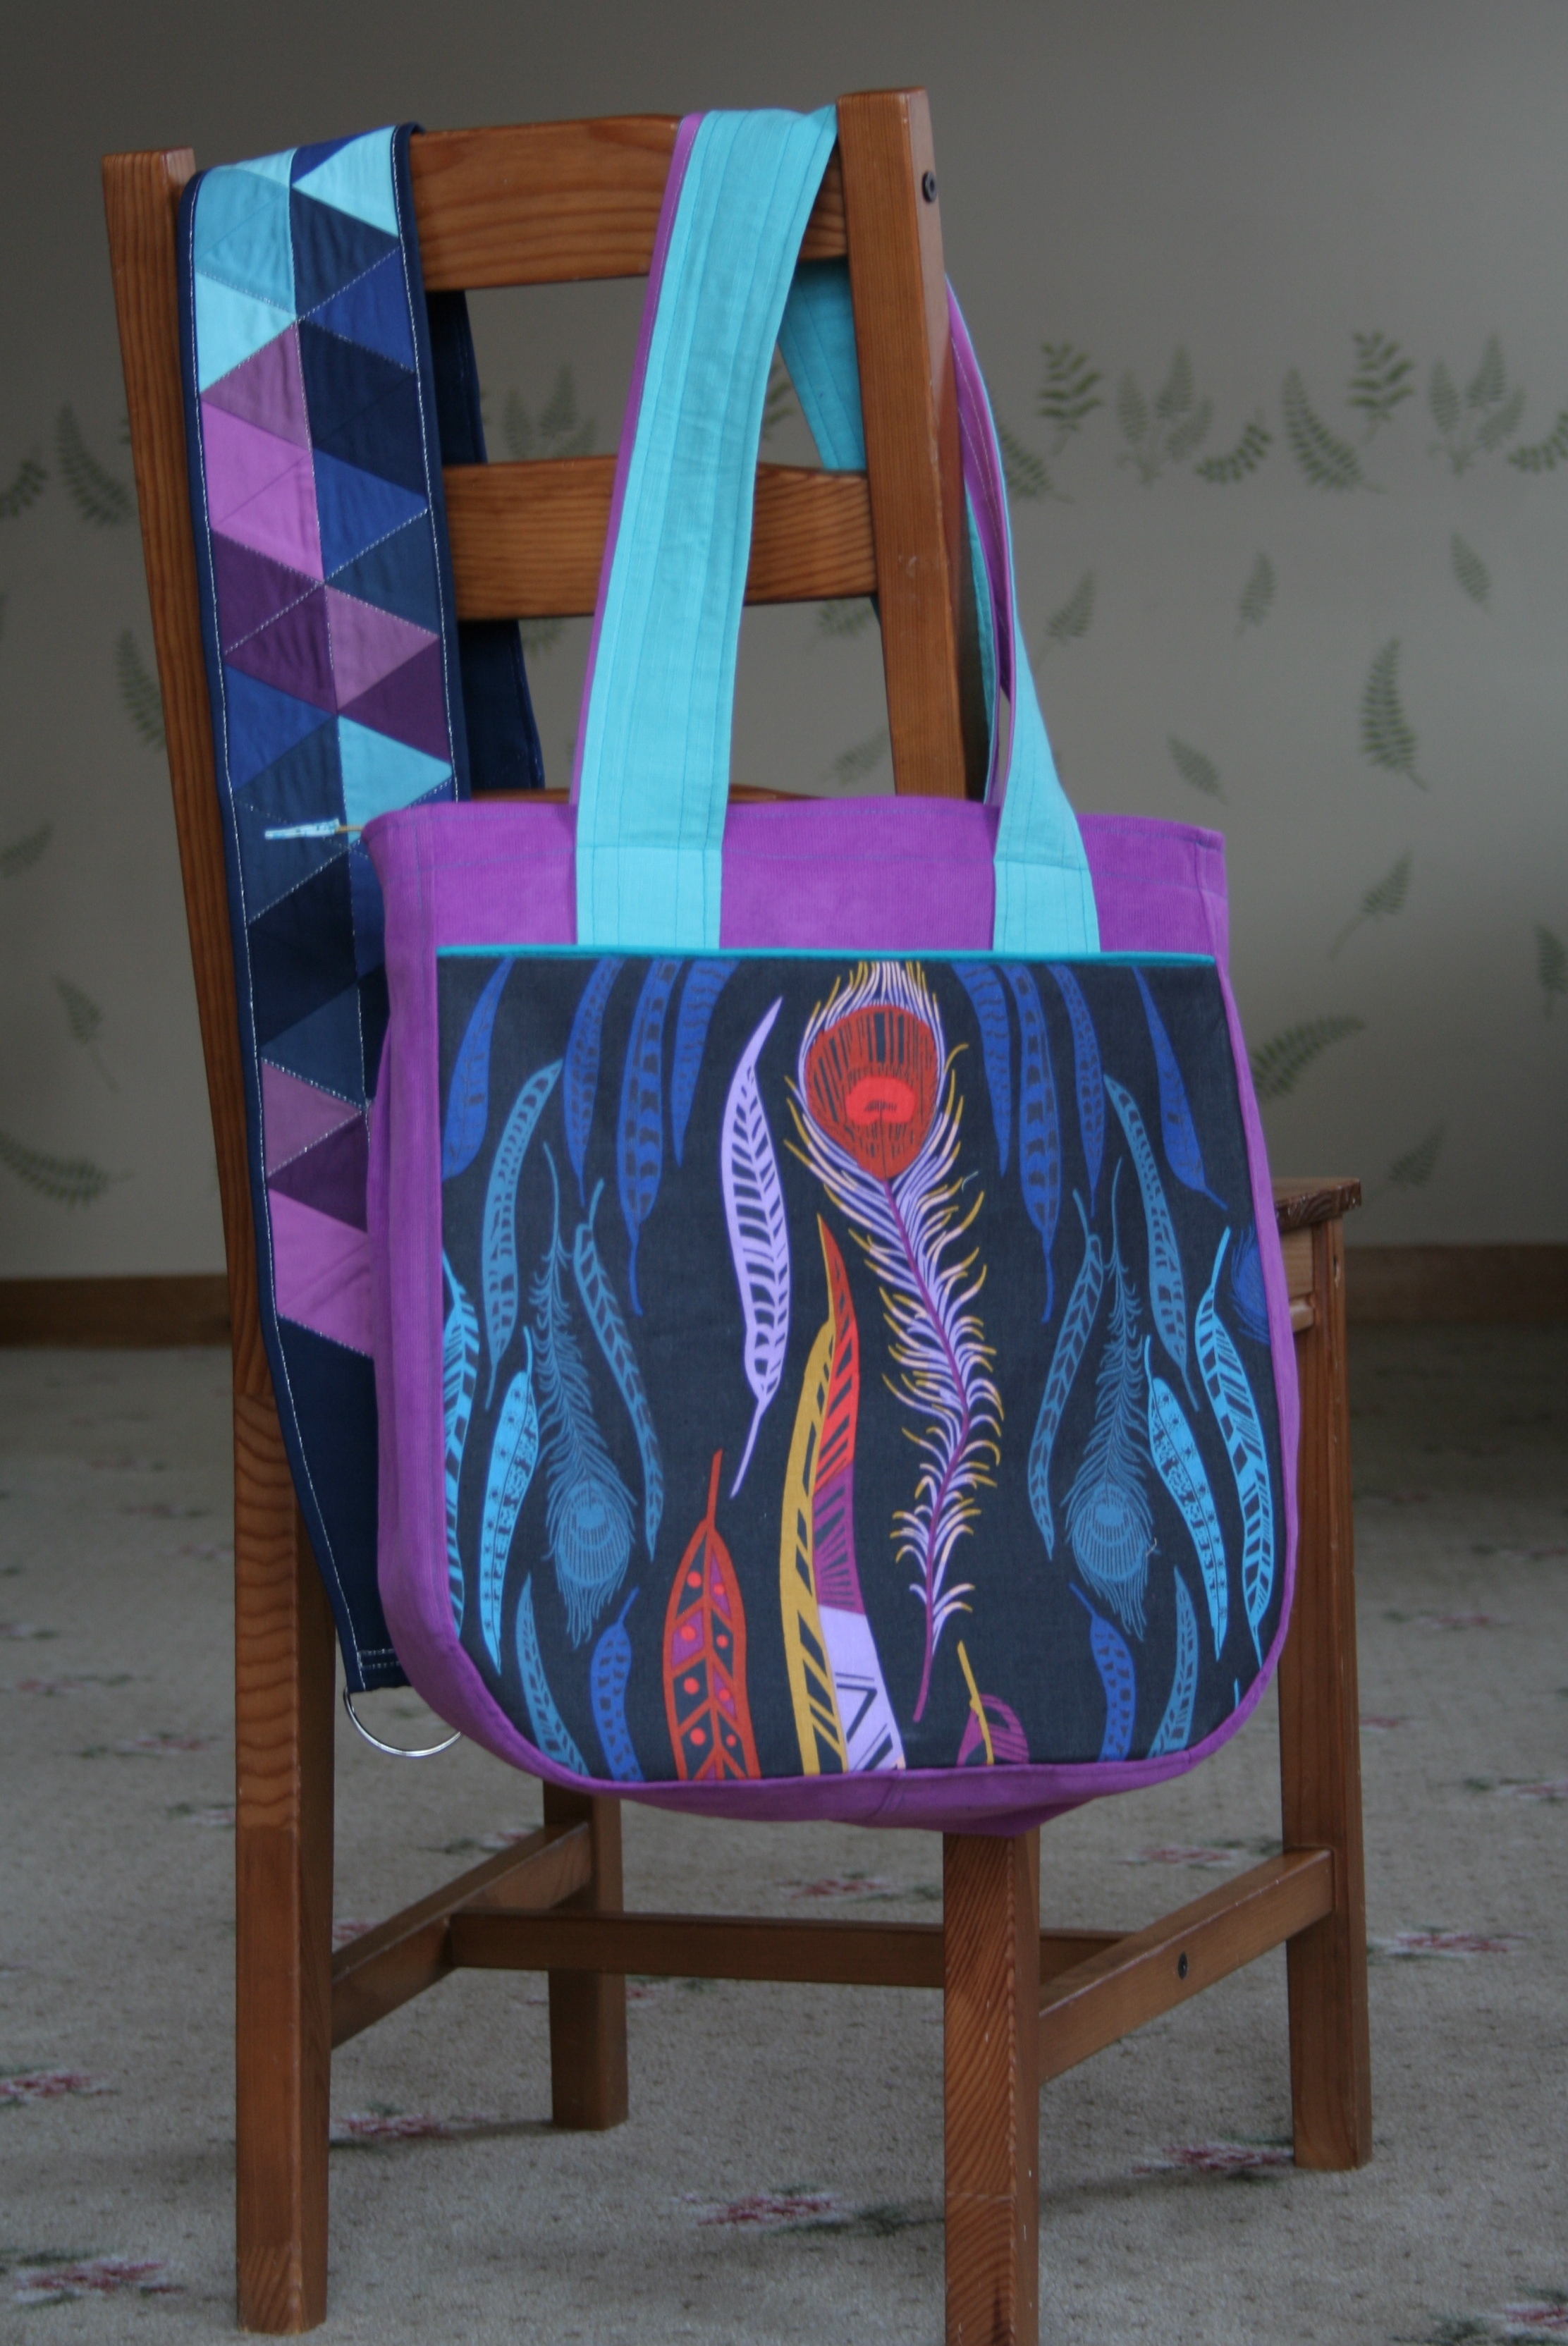
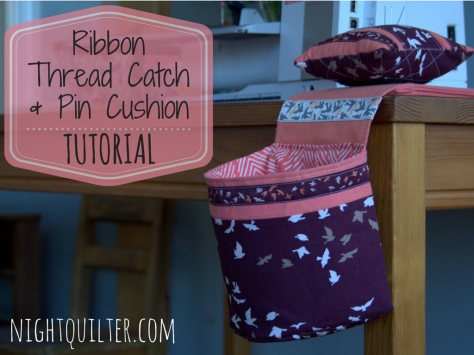
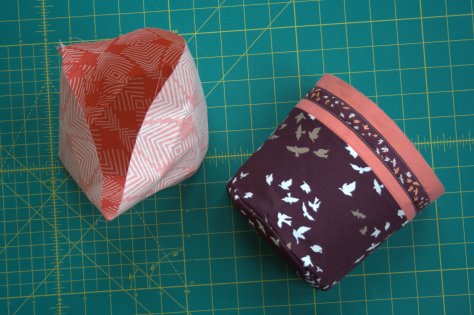
I decided to create a weighted thread catch and matching detachable pin cushion so that these ribbons and fabrics can brighten up my sewing space forever. The ribbons are silky smooth and coordinate with Bonnie’s fabric lines Winged and Sweet as Honey, but truly they coordinate with many of her fabric lines and look AWESOME paired with coordinating solids.
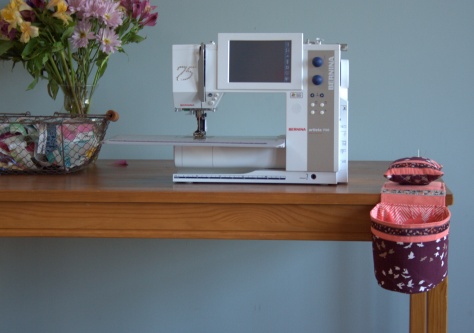
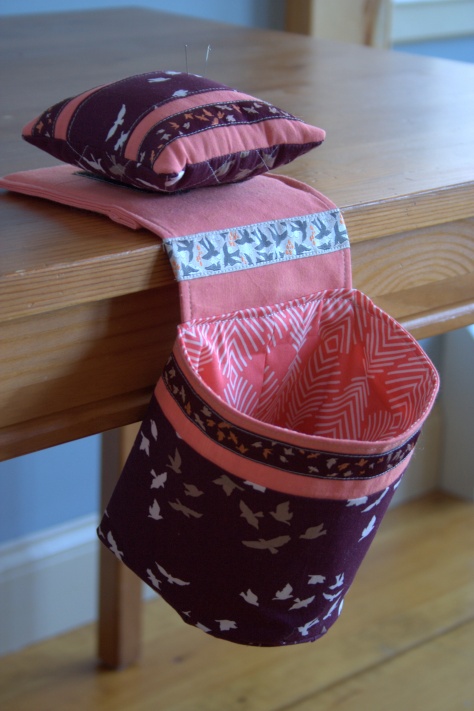
I’m super happy with how this thread catch turned out, and thought I’d share a tutorial with you so that you can make one, too! Special features of this Ribbon Thread Catch & Pin Cushion are:
- Pin cushion is removable so that you can tote it from workspace to workspace;
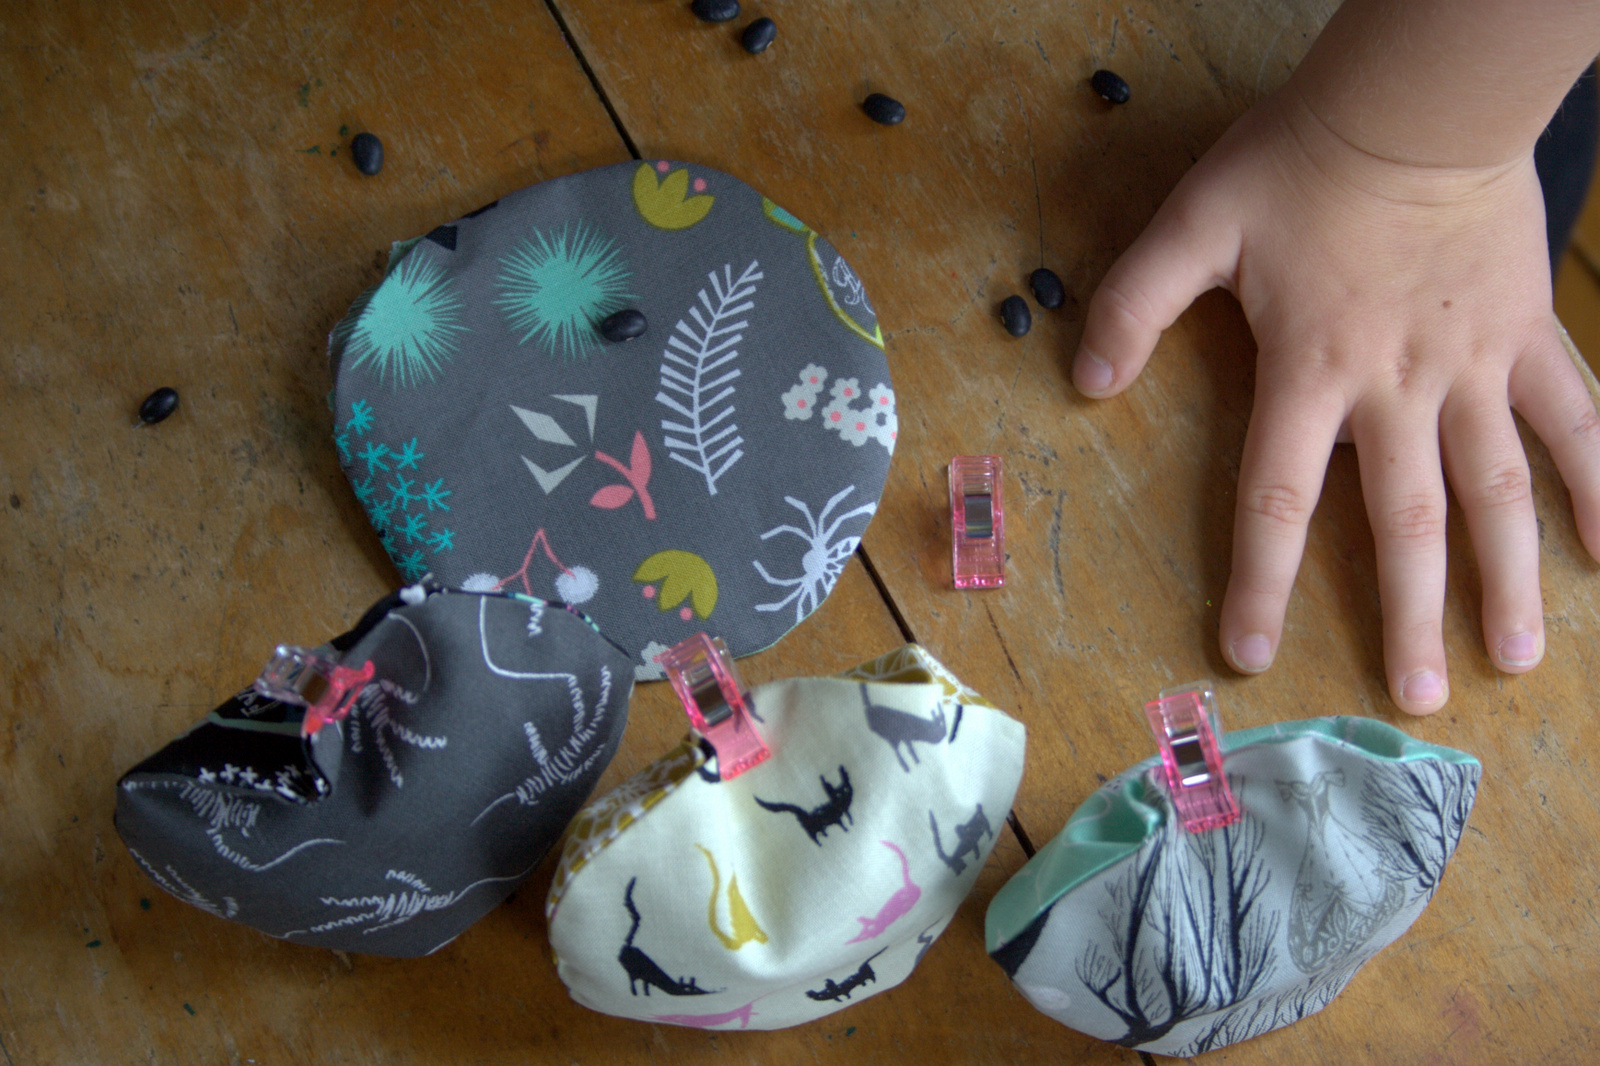
- Tile weight is removable, meaning you can be creative with what you use to weigh down the thread catch, and/or replace the tile if broken (I have a busy nearly-3 year old, so I’m anticipating at least one broken tile in my future);
- Since both the pin cushion and tile can be removed, you can position the thread catch base underneath your machine for convenience if you want; and,
- Double thick interfacing and the half-moon thread catch base create a wide open, but still reasonably sized space in which to toss your threads.
If you want to use Bonnie’s ribbons, too, you can buy them at Renaissance Ribbons or at Bonnie’s mom’s quilt shop A Stitch in Time. Here we go!
Ribbon Thread Catch and Pin Cushion Tutorial
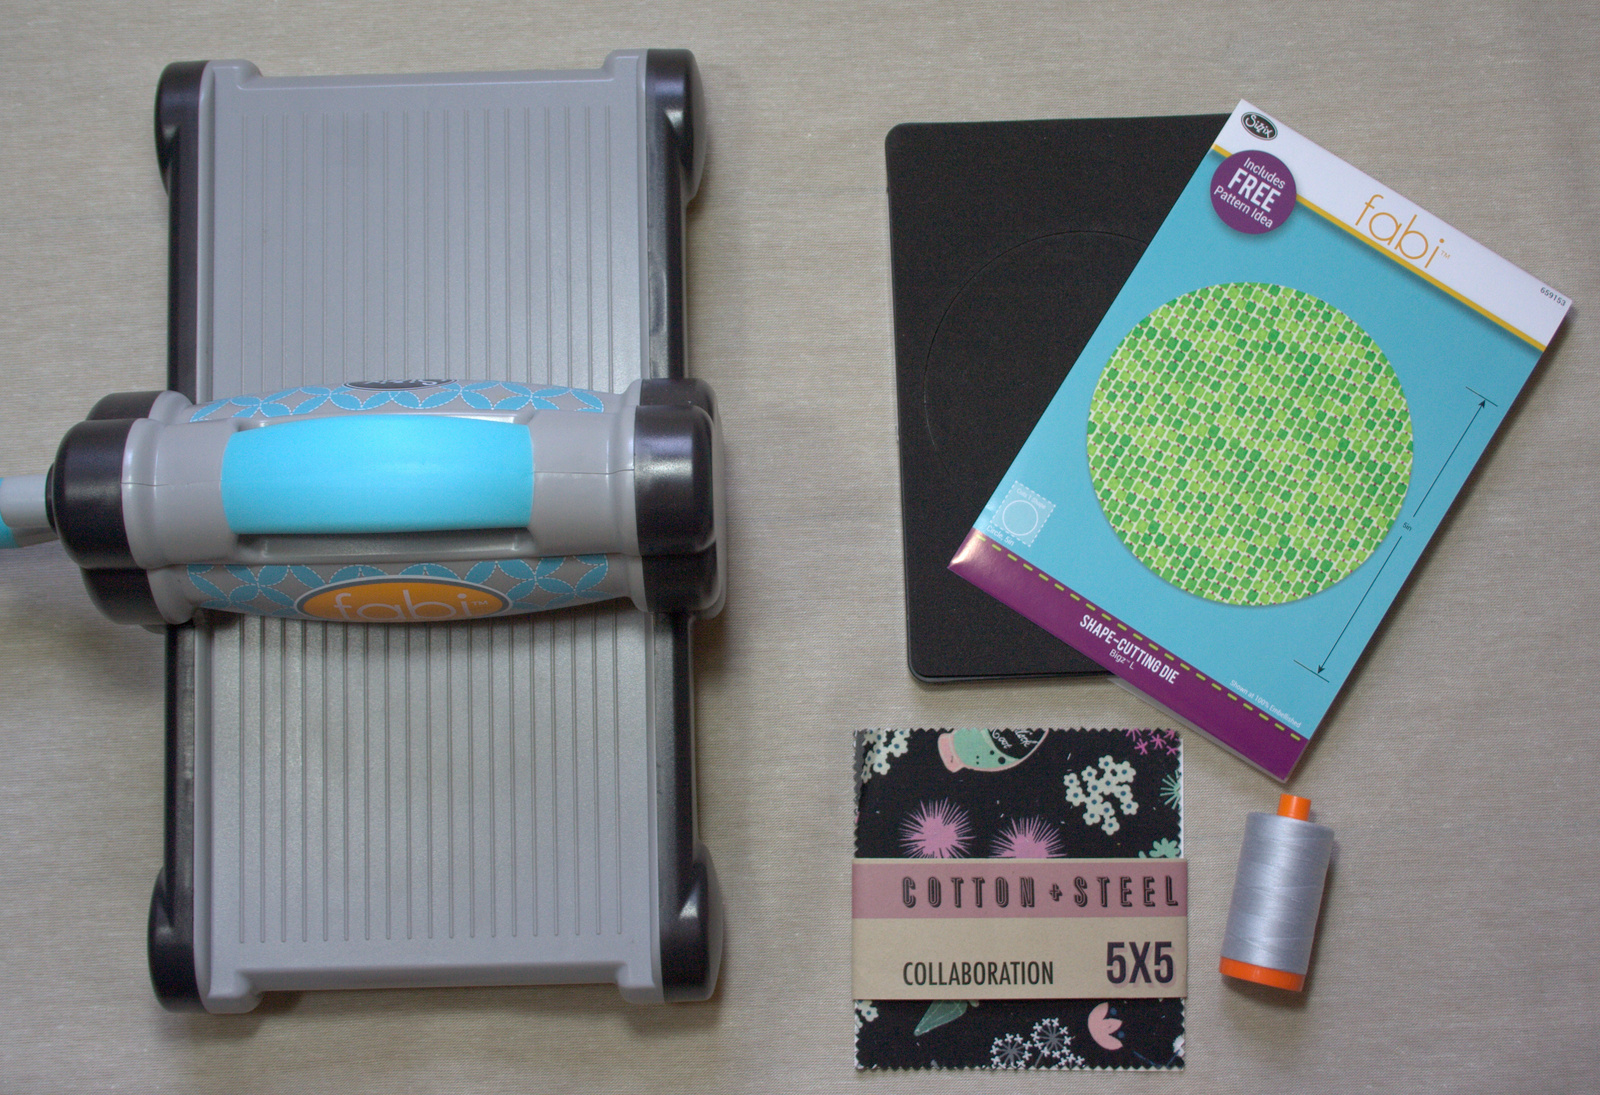
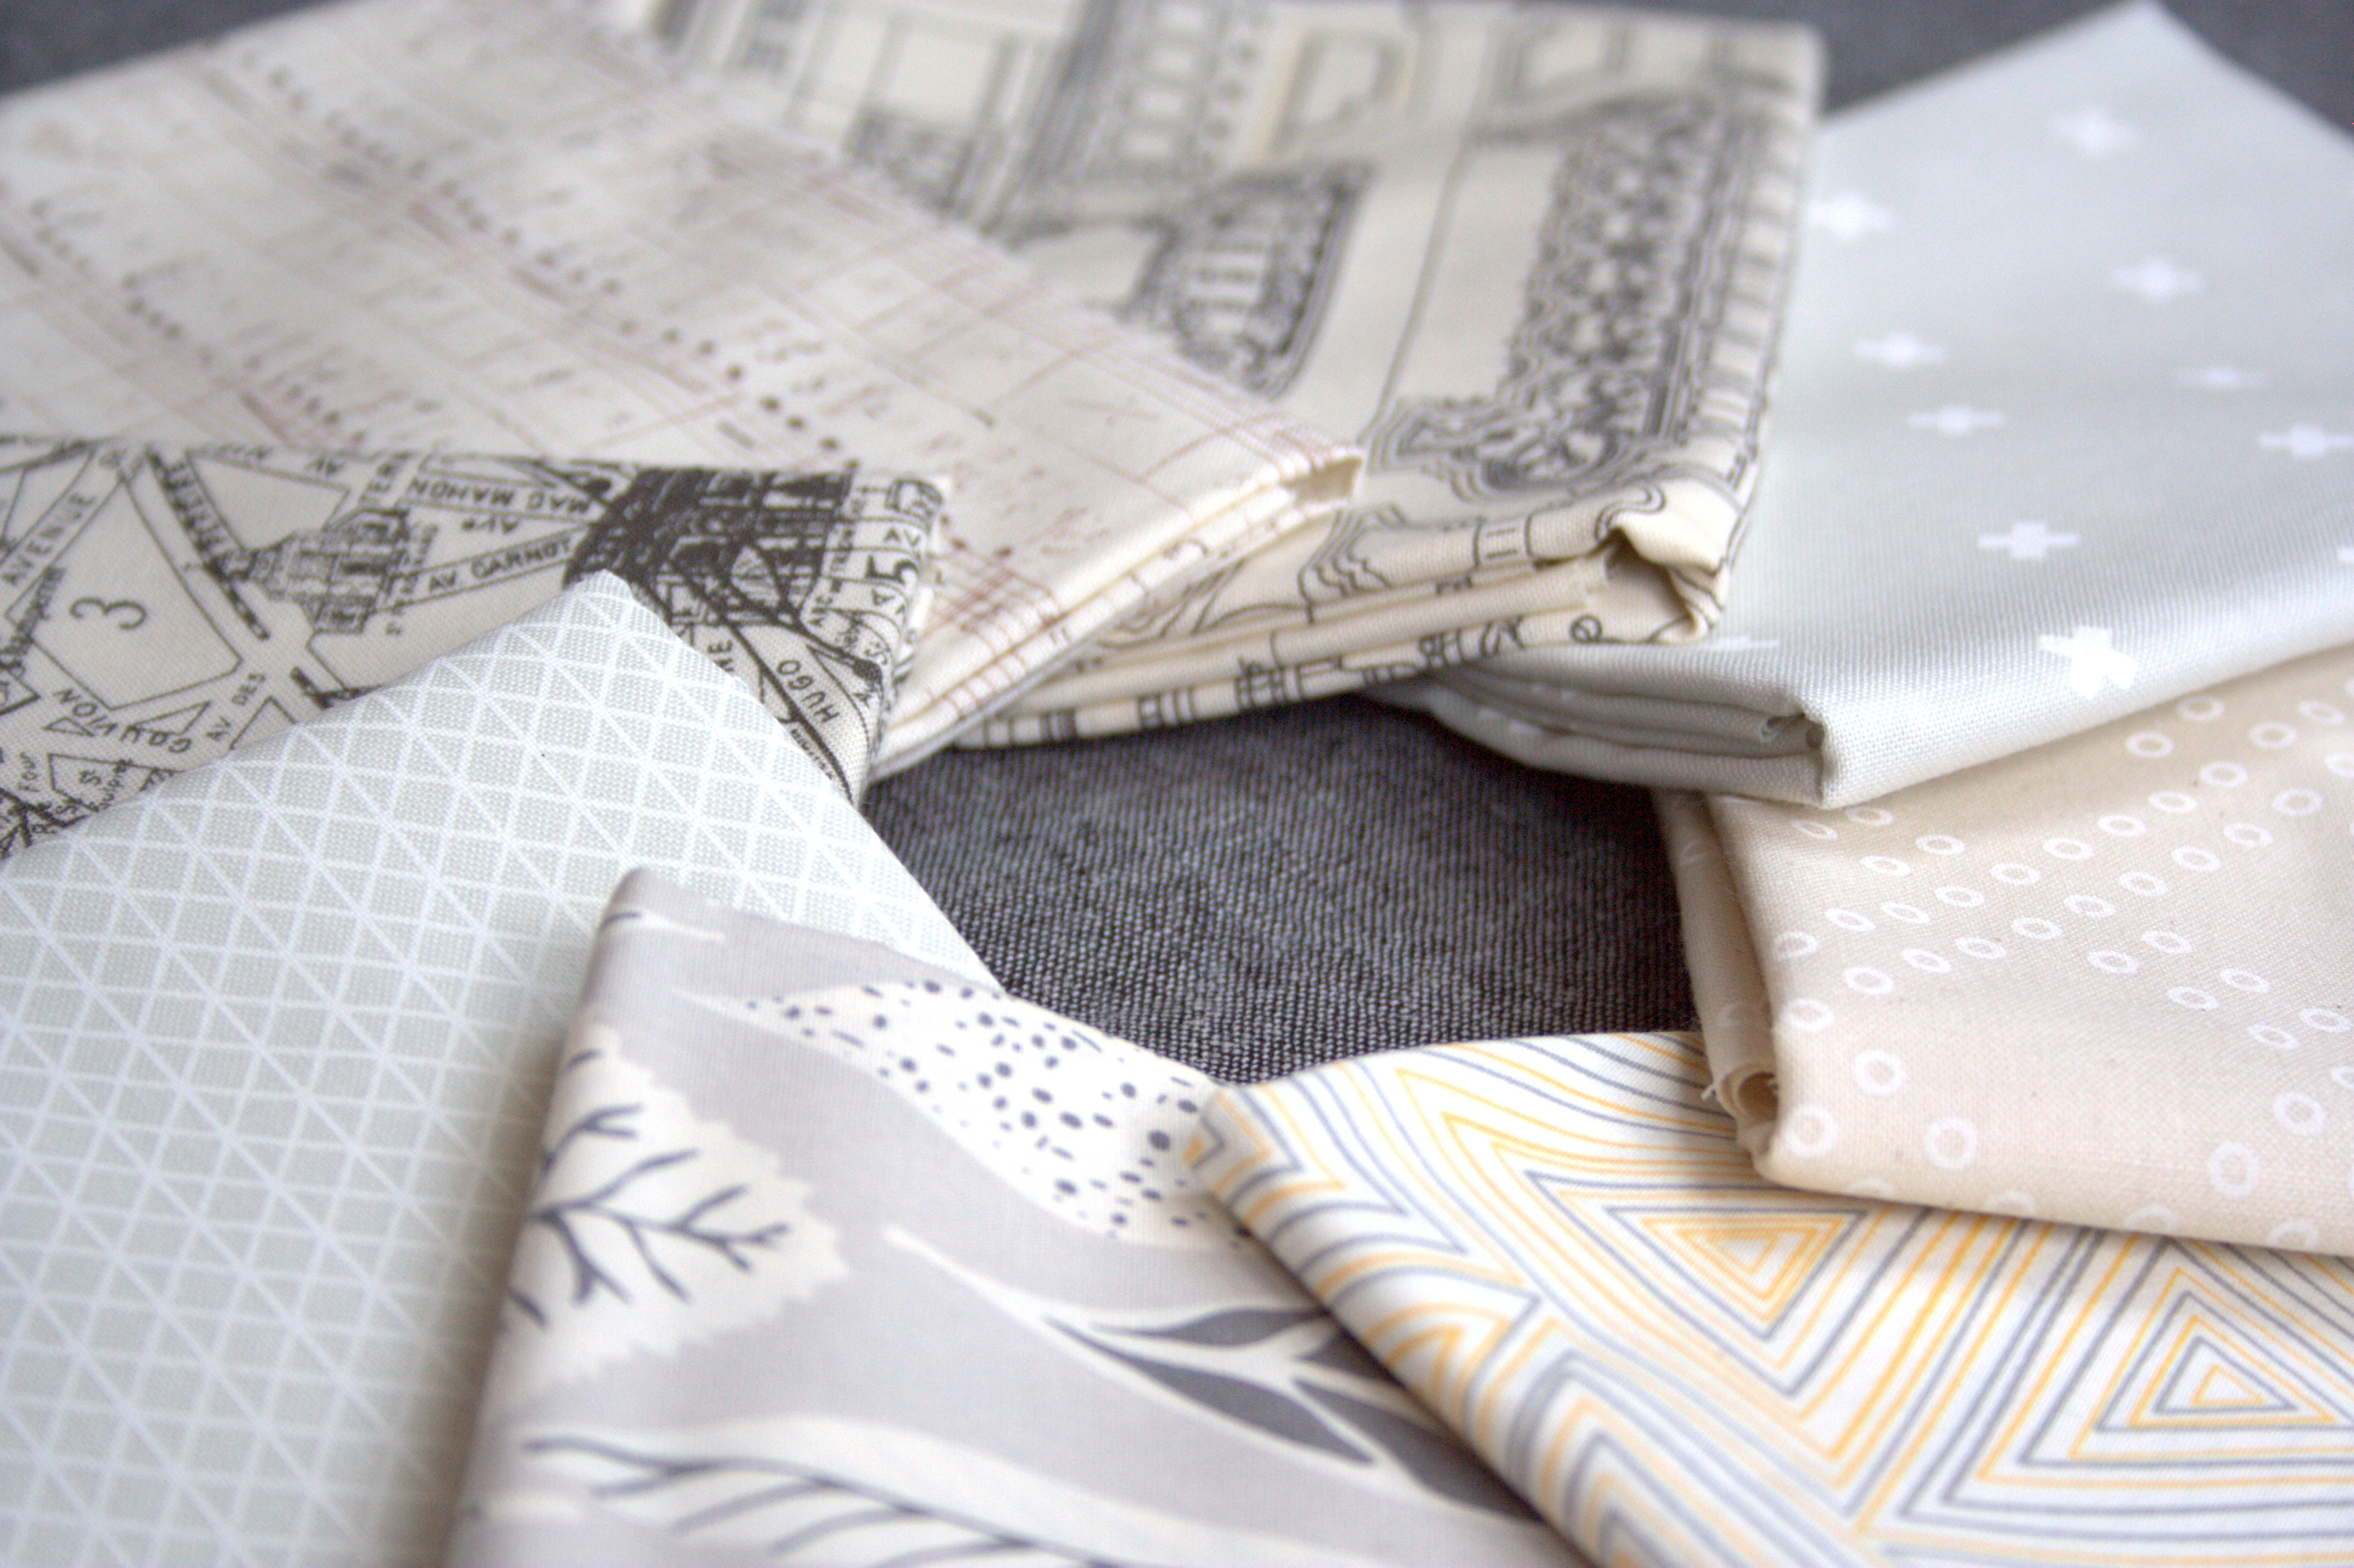
First, gather your materials. General requirements are listed first; specific materials I used are in parenthesis. You will need:
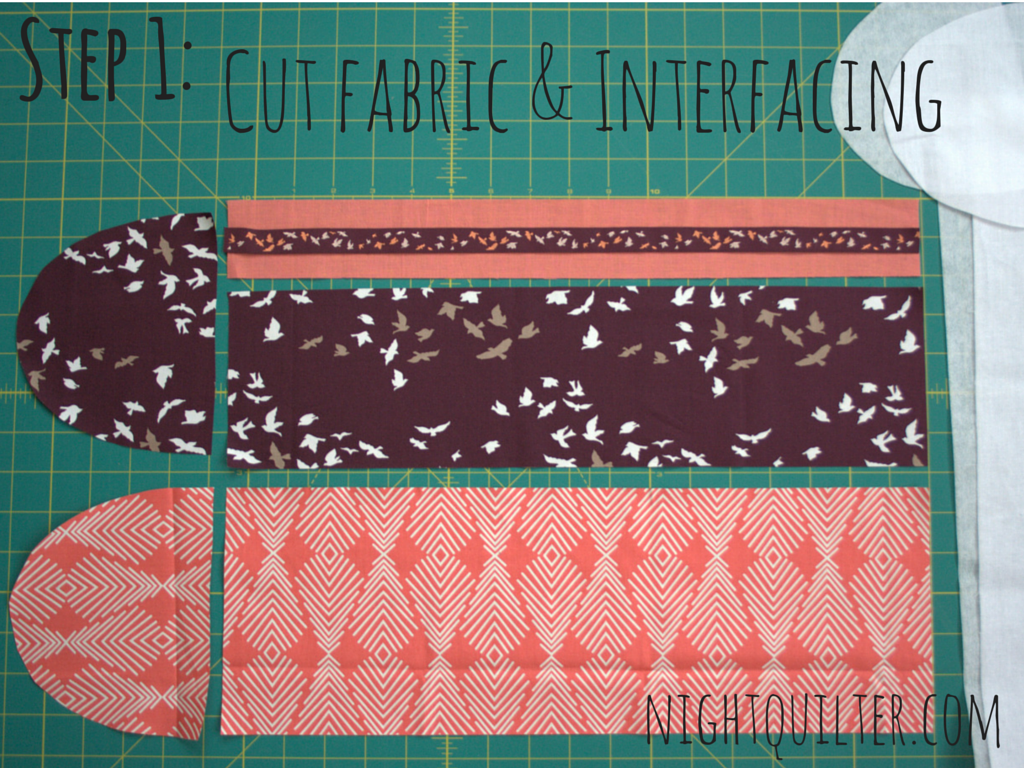
Cutting Instructions
Please read all of the instructions before cutting. There are some time saving tips for working with interfacing in the “making the base and hanging tab” section.
For pincushion:
(Cut 1) 5.5″ x 5.5″ print
(Cut 1) 2.5″x5.5″ print
(Cut 2) 1.75″x5.5″ coordinating solid
(Cut 2) 5.5″ x 5.5″ batting
For base and hanging tab:
(Cut 2) 14.5″x5.5″ coordinating solid
(Cut 1) 14.5″x5.5″ stiff fusible interfacing (Pellon 808)
(Cut 1) 5.75″ accent ribbon (approximately)
For thread catch:
(Cut 1) 2″x17.5″ coordinating solid
(Cut 1) 4.5″x17.5″ print
(Cut 1) 6″x17.5″ lining fabric
(Cut 4) Ribbon Thread Catch bottom template:
– print fabric
– interfacing Pellon 101
– stiff interfacing Pellon 808
– lining fabric
(Cut 1) 6″x17.5″ stiff fusible interfacing (Pellon 808)
(Cut 1) 6″x17.5″ fusible interfacing (Pellon 101)
Assembly Instructions
Use 1/4″ seam allowances throughout.
Make the pincushion:
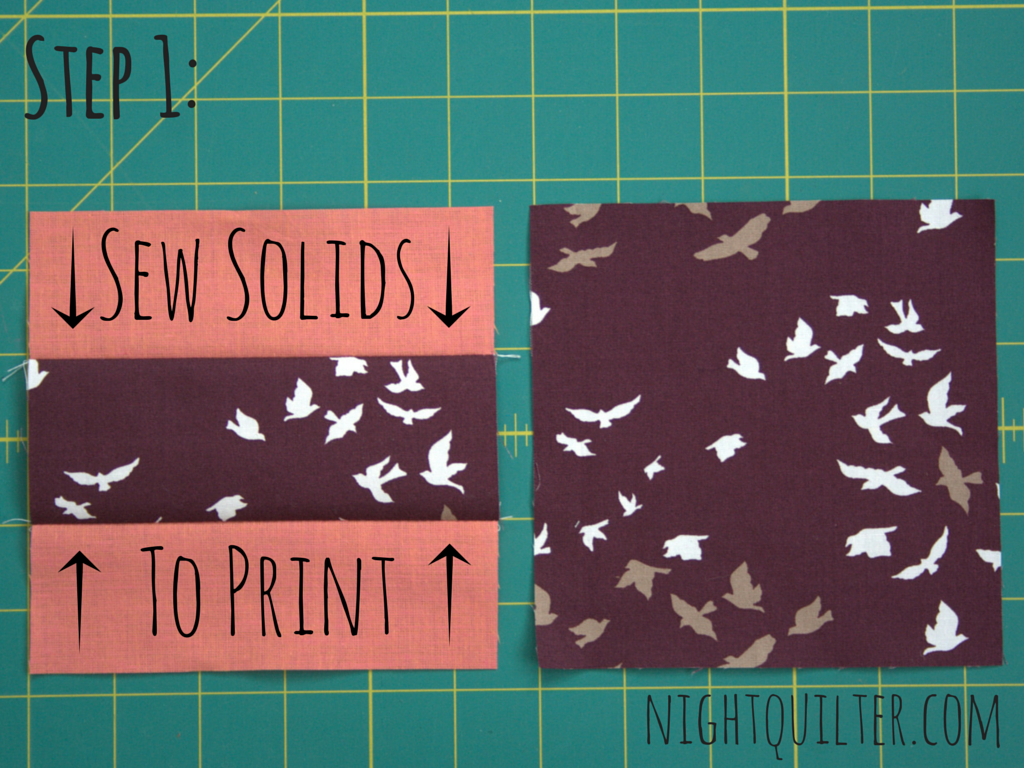
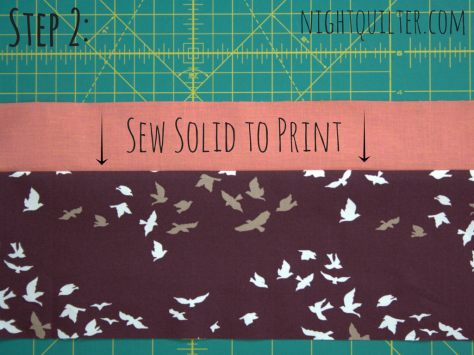
Step 1
 Sew 1.75″x5.5″ coordinating solid pieces to 2.5″x5.5″ print fabric as shown, pressing seams toward darker fabric. You should now have two 5.5″ squares.
Step 2
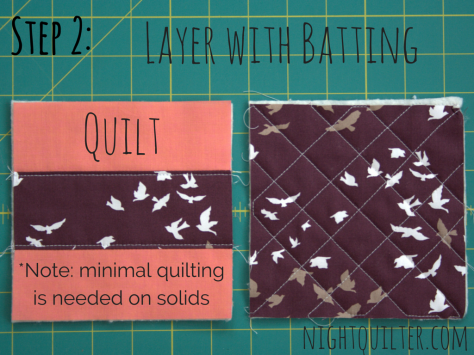 Layer each 5.5″ square with a 5.5″ square of batting and quilt as desired (Note: Do not quilt in solid fabric, or keep in mind that the ribbon will be sewn on in the next step). Quilt the bottom (5.5″ print fabric) square fairly densely to help withstand the pull of velcro once in use. The top square needs minimal quilting.
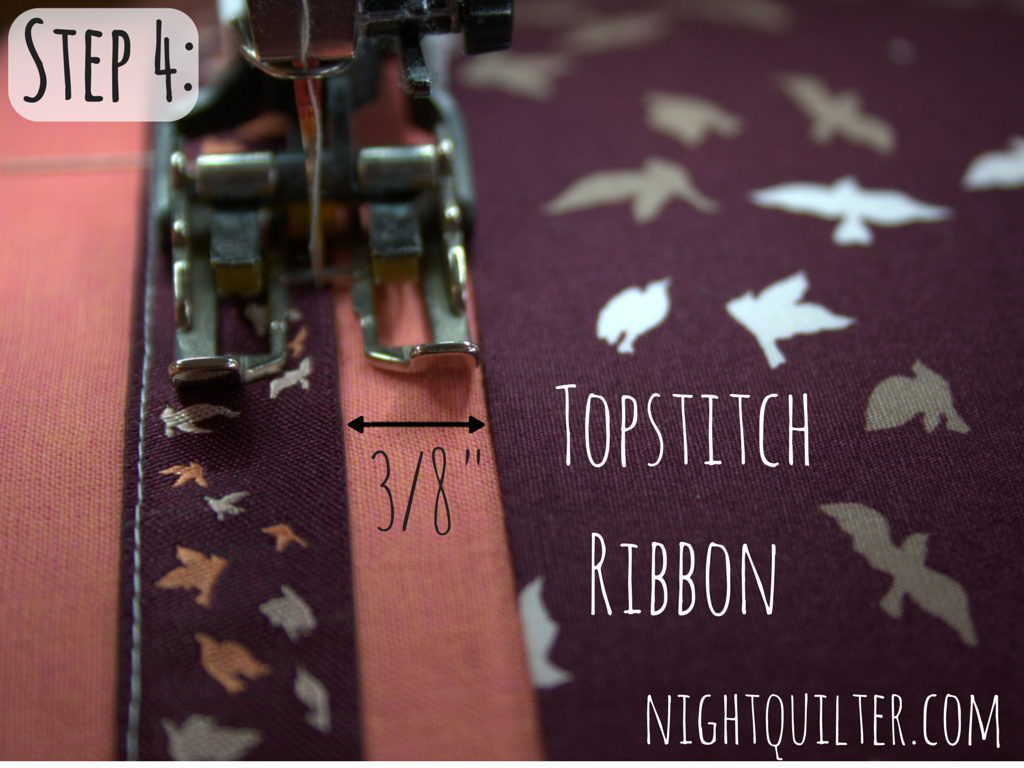
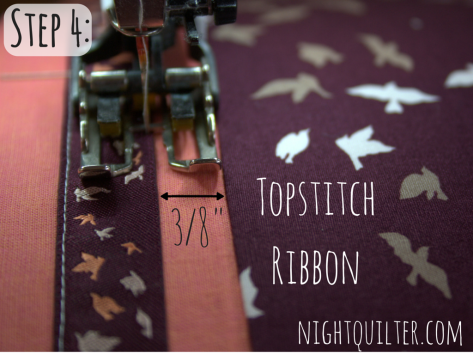
Step 3
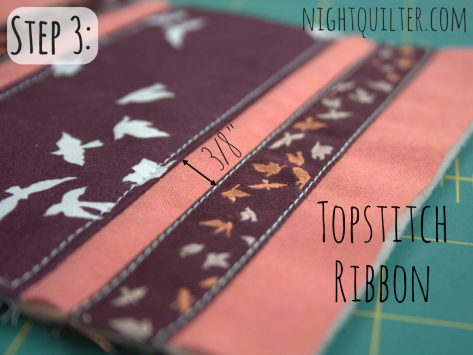 Top stitch ribbon to both coordinating solids approximately 3/8″ away from the print fabric. Note: If you use a different width ribbon, you may want to adjust this distance. Keep in mind the 1/4″ seam allowances on the outermost edge.
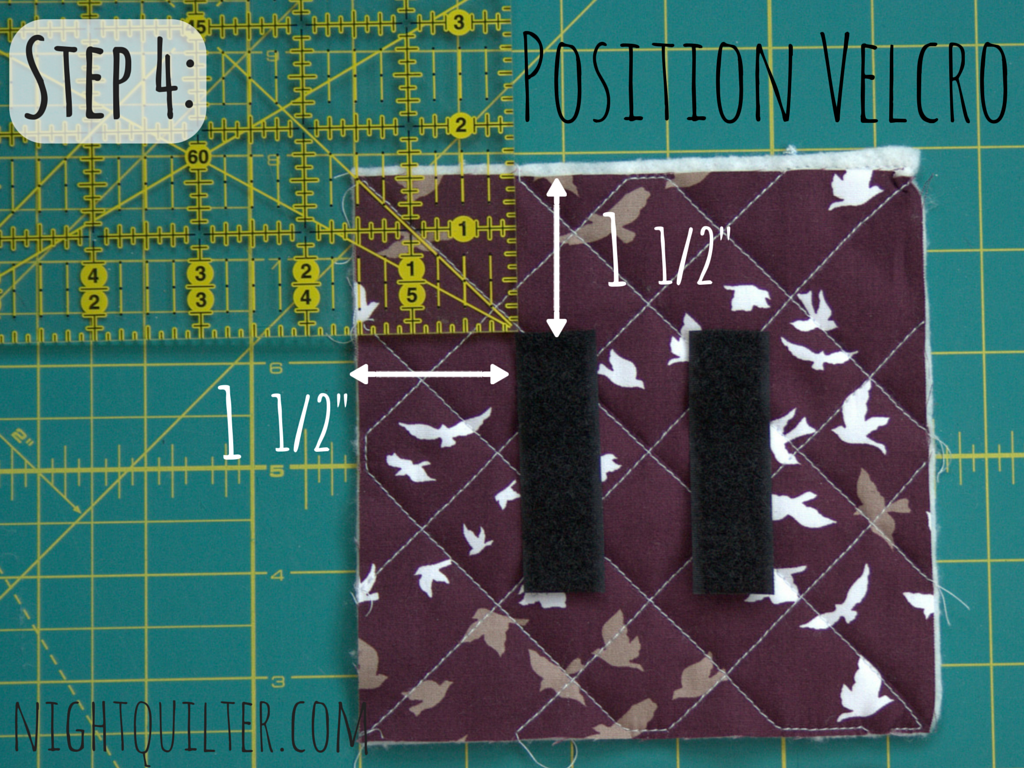
Step 4
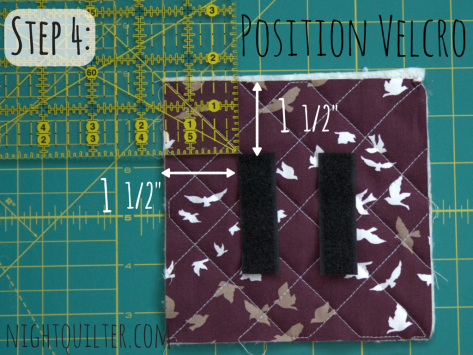 Align velcro approximately 1.5″ from each corner and top stitch securely. I stitched around each strip twice to ensure that it will withstand a lifetime of use. Note: Use the soft side of the velcro on the pincushion so that it doesn’t pick up thread and fuzz and everything when you move it around your workspace. The hooked side of the velcro will be sewn onto the base.
Step 5
Right sides facing, sew around all edges leaving a 3″ opening in one side. (Leaving the opening in the side will make for much less visible closing stitches after stuffing)
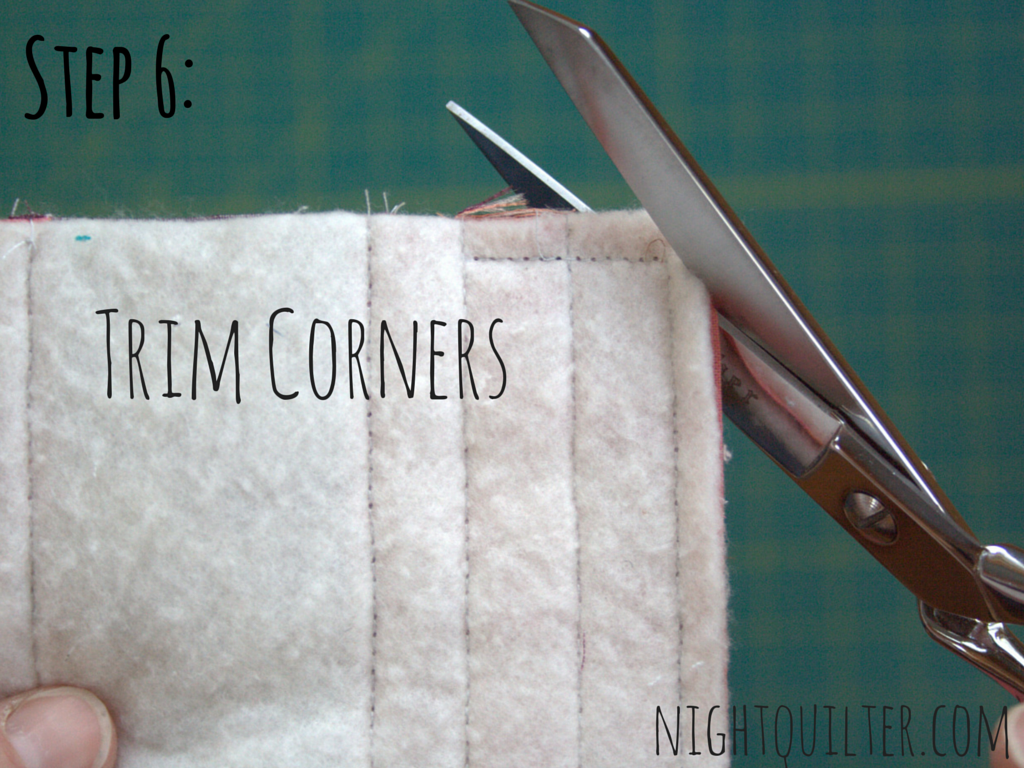
Step 6
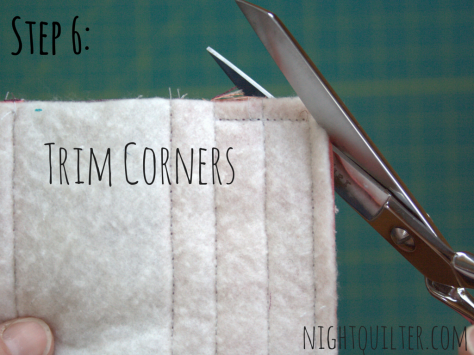
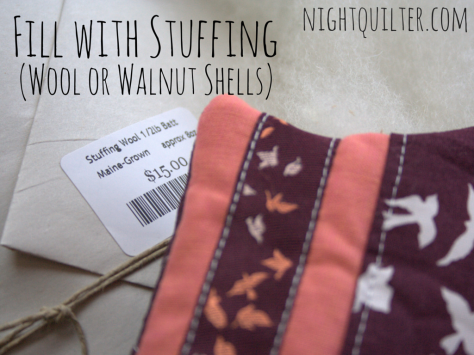 Trim corners and turn right-side out. Stuff to the gills with stuffing of choice (I recommend 100% wool batting–the stuffing kind, not batting like we use between layers of a quilt–or crushed walnut shells to help keep your pins and needles clean and rust-free).
Step 7
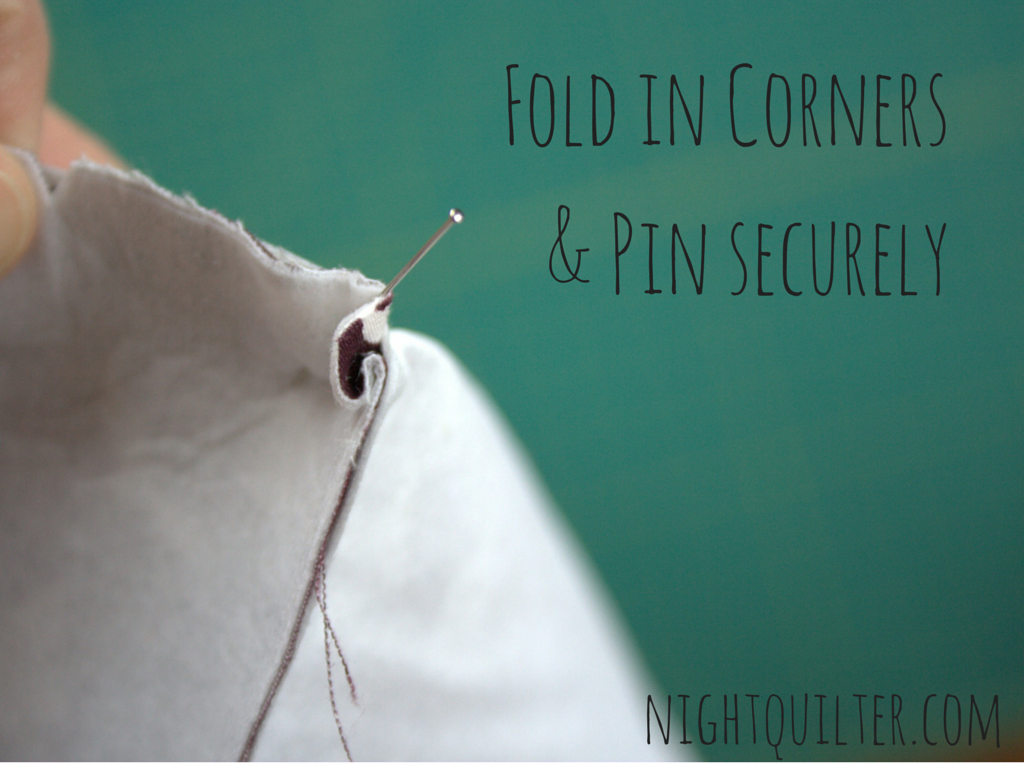
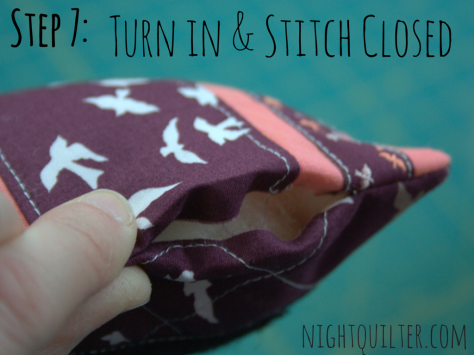 Fold in edges around opening and pin or finger press closed. Using a blind stitch (or visible whip stitch), hand stitch closed using coordinating thread.
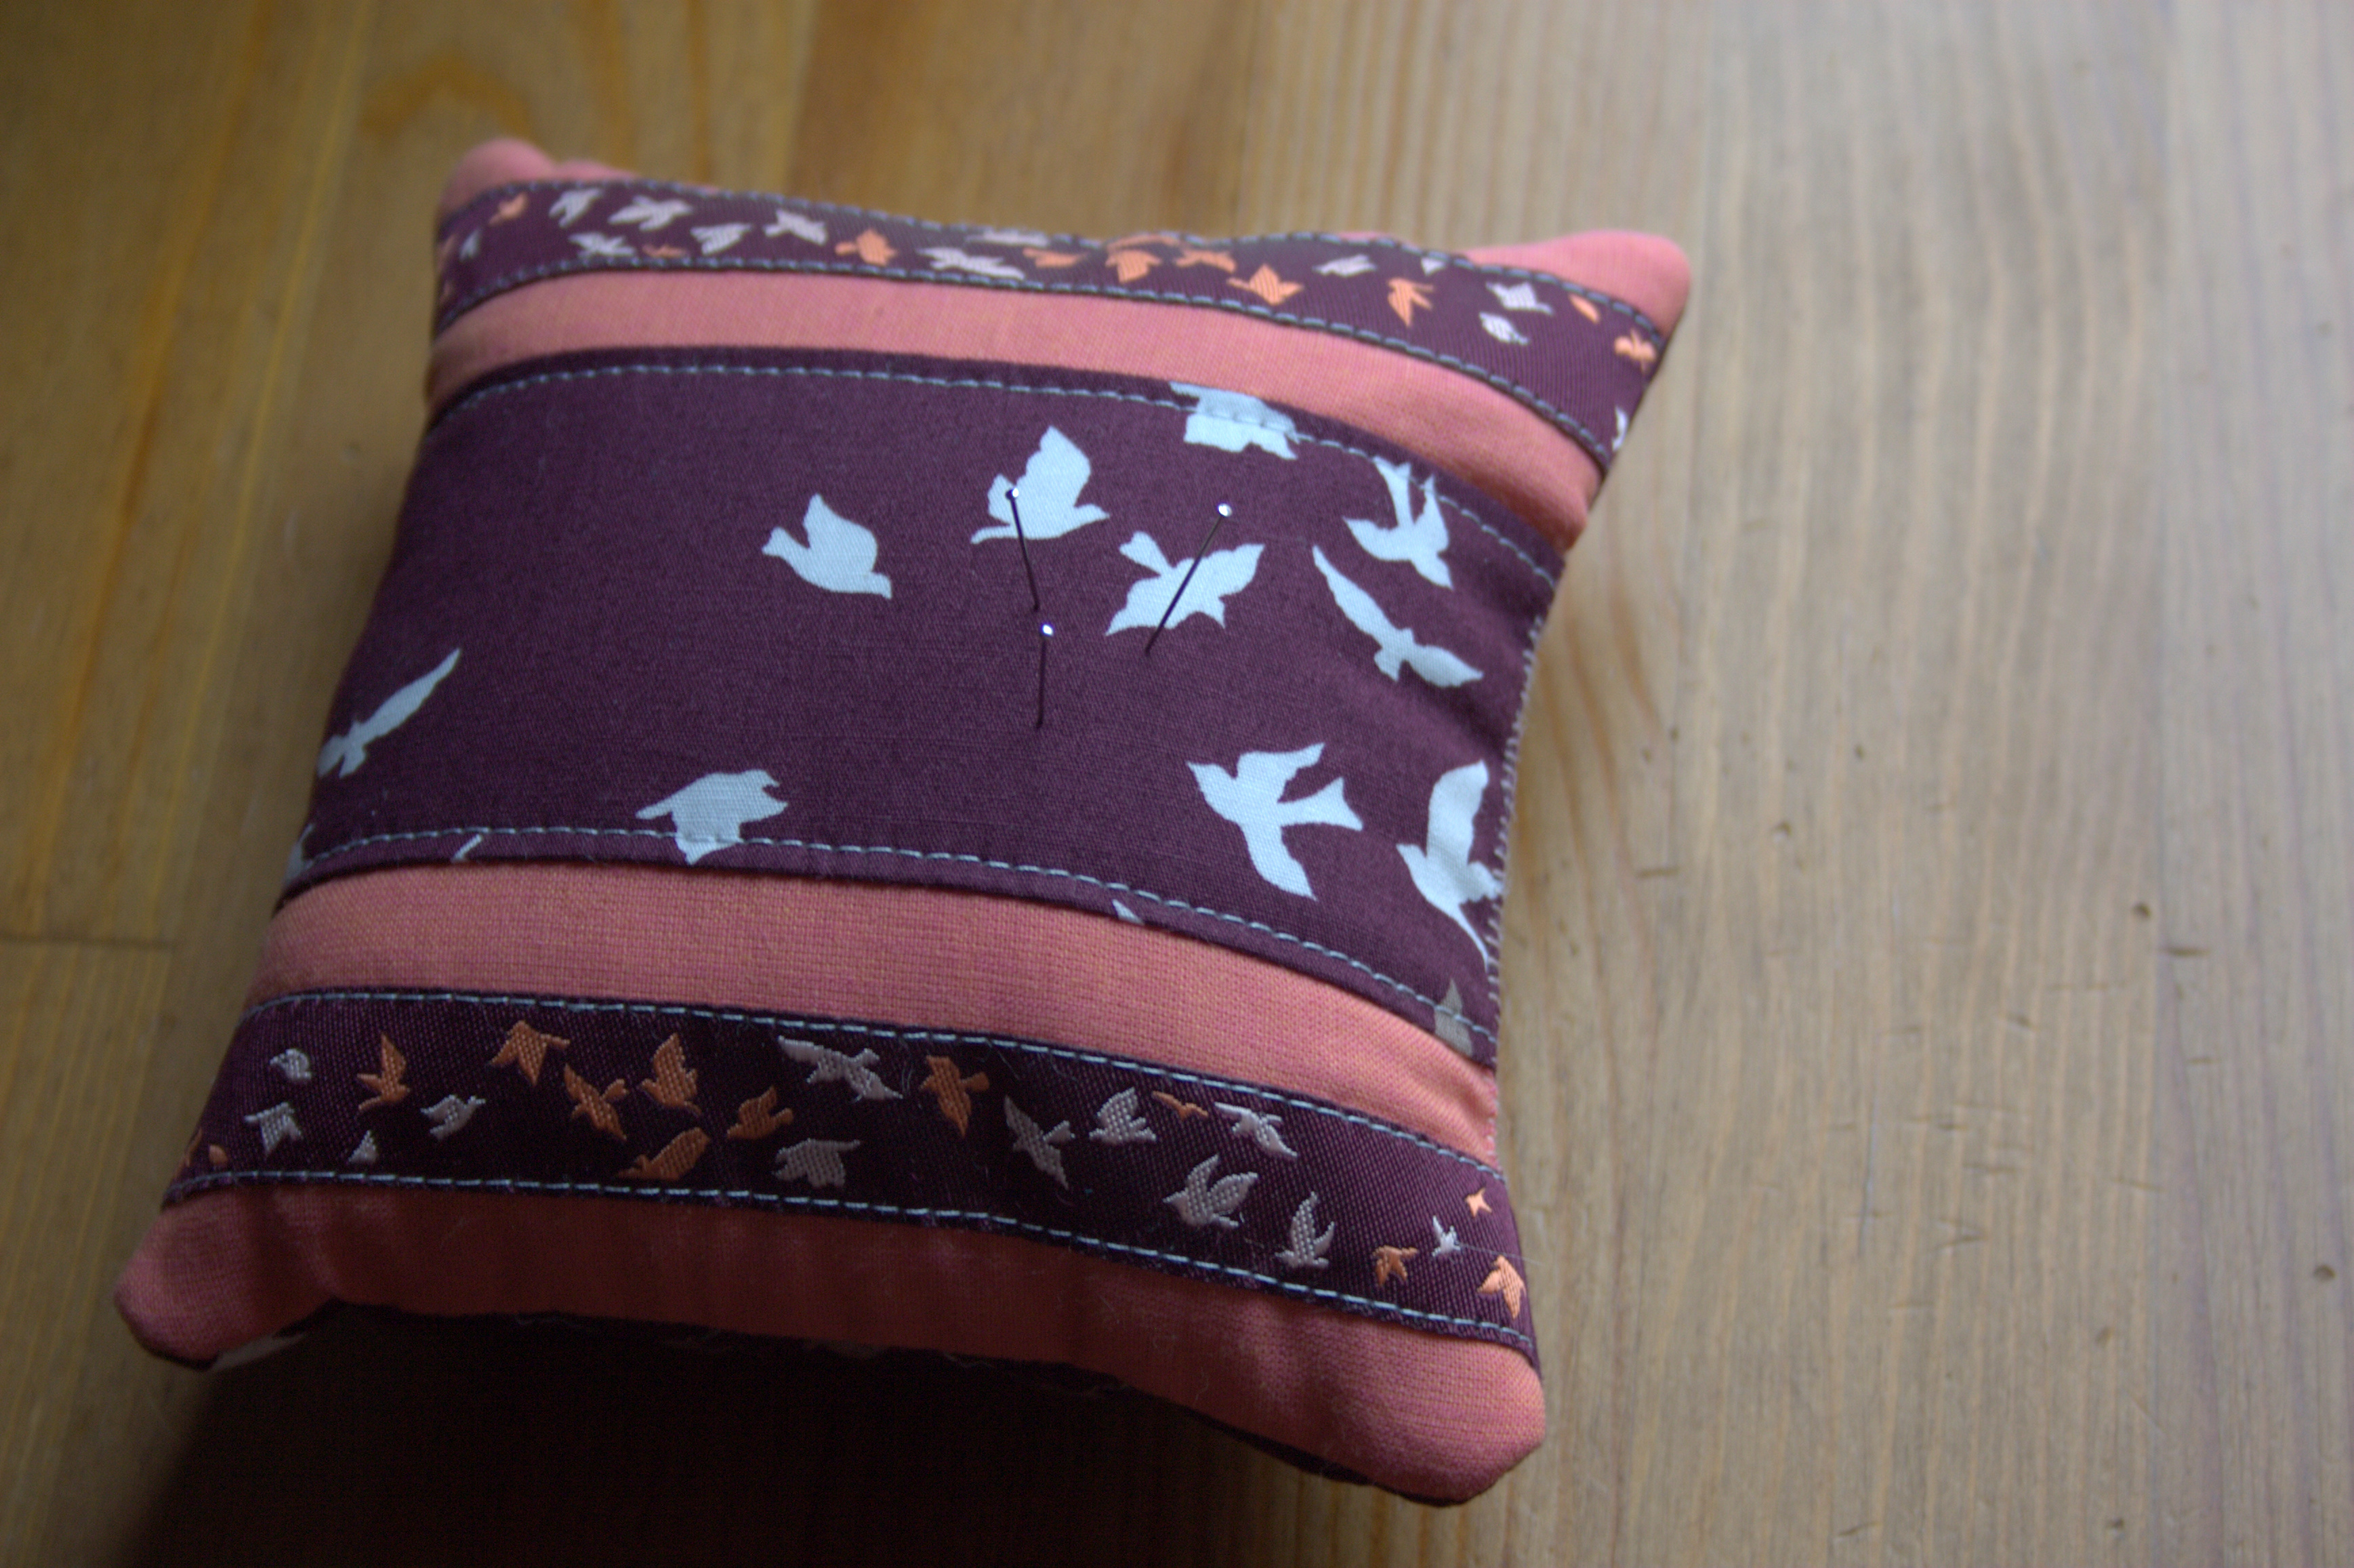
 Admire your pincushion! Set aside while you make the rest of the thread catch.
Make the base and hanging tab:
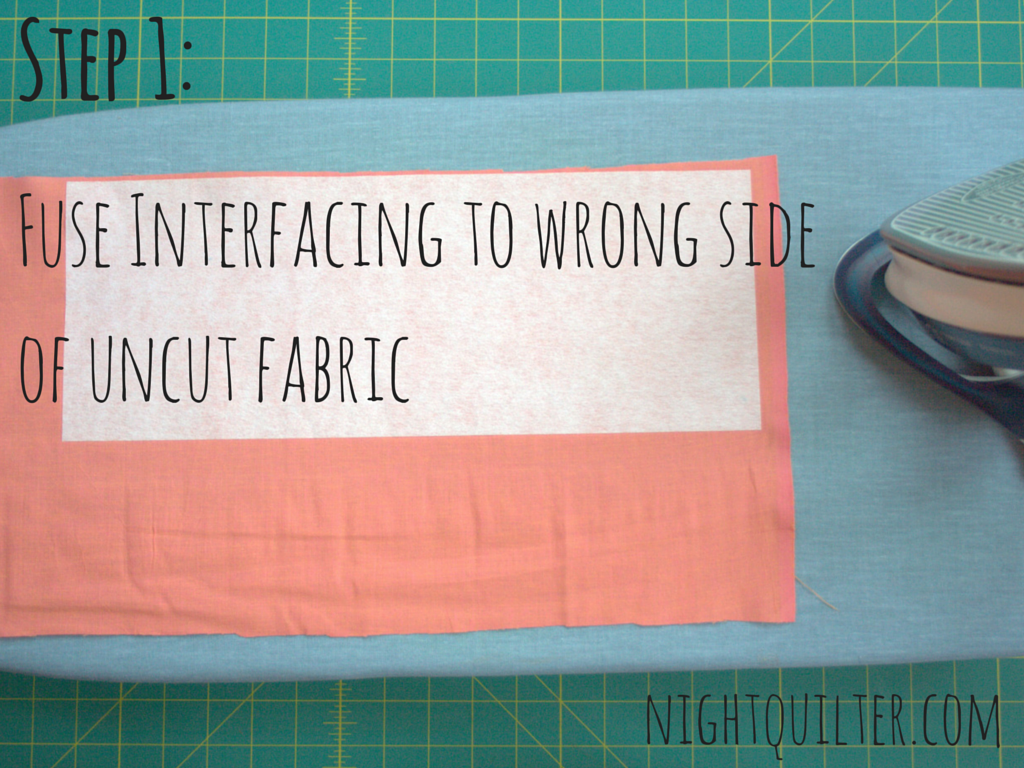
Step 1 *time saving tip*
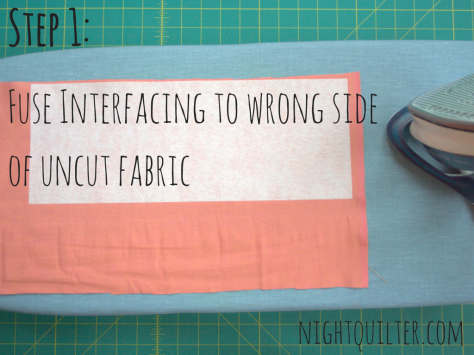 Cut the 14.5″x5.5″ piece of stiff fusible interfacing (Pellon 808). Following the instructions on the interfacing, fuse to wrong side of coordinating fabric (fabric is uncut at this point).
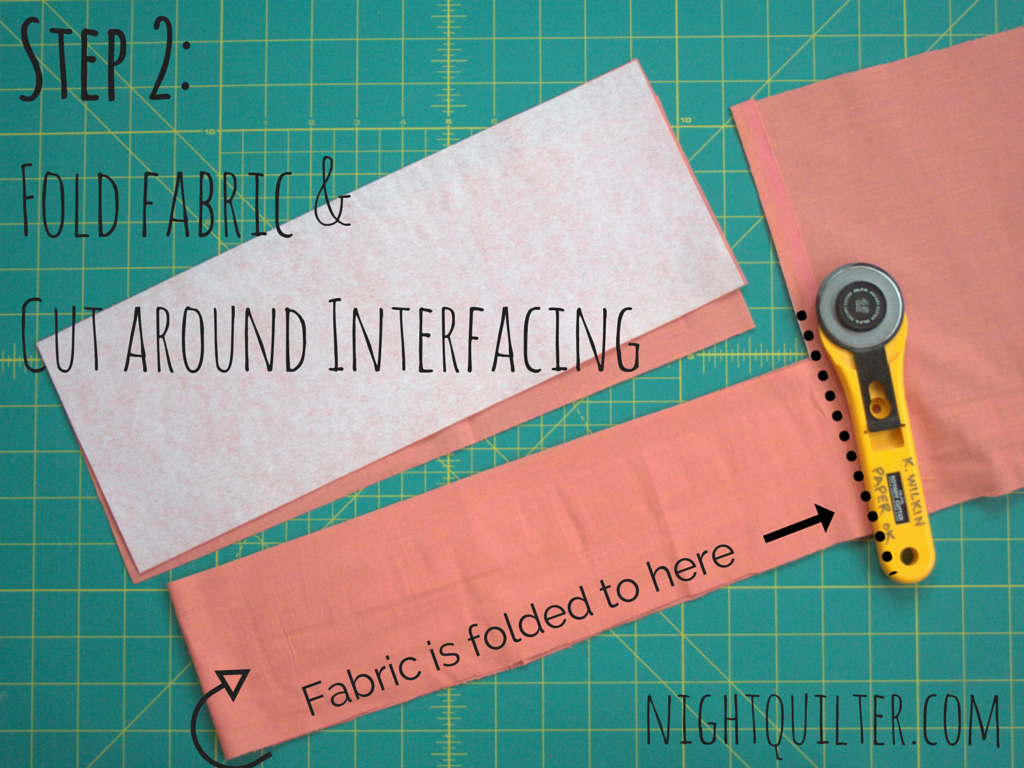
Step 2
 Once interfacing cools, fold fabric in half and use rotary cutter and ruler to cut around the 14.5″x5.5″ interfacing. You will end up with two perfectly sized fabric pieces with the interfacing fused to one of them.
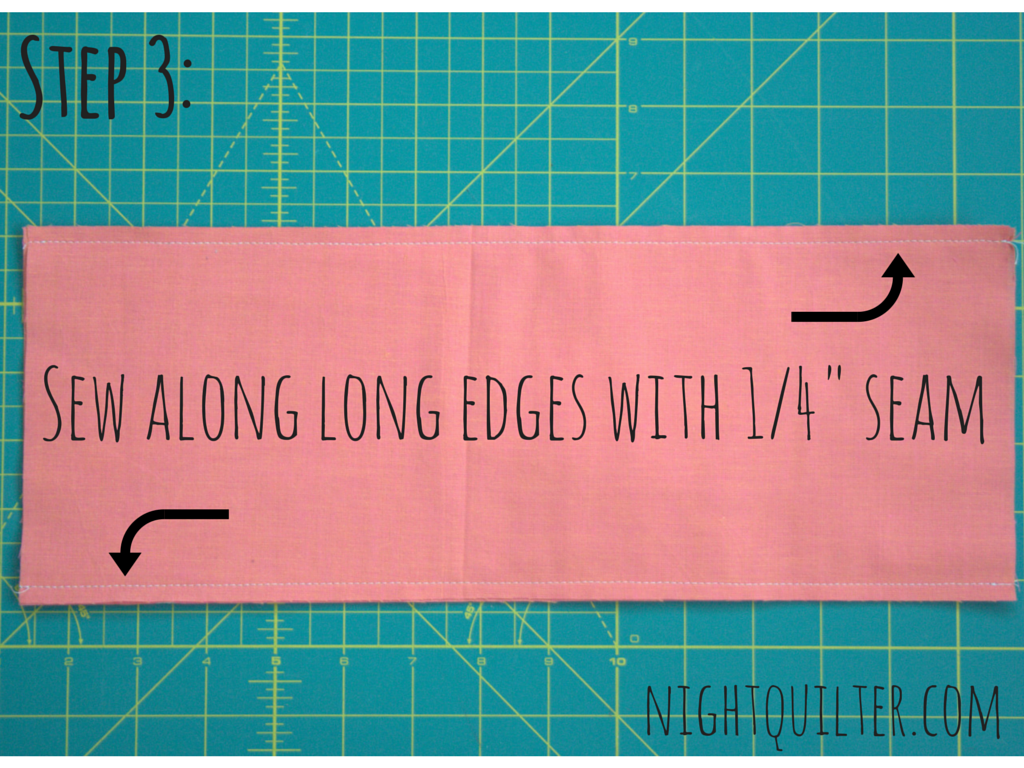
Step 3
 With right sides facing (interfacing out), sew along long sides with a 1/4″ seam. Set seams, turn right side out, press.
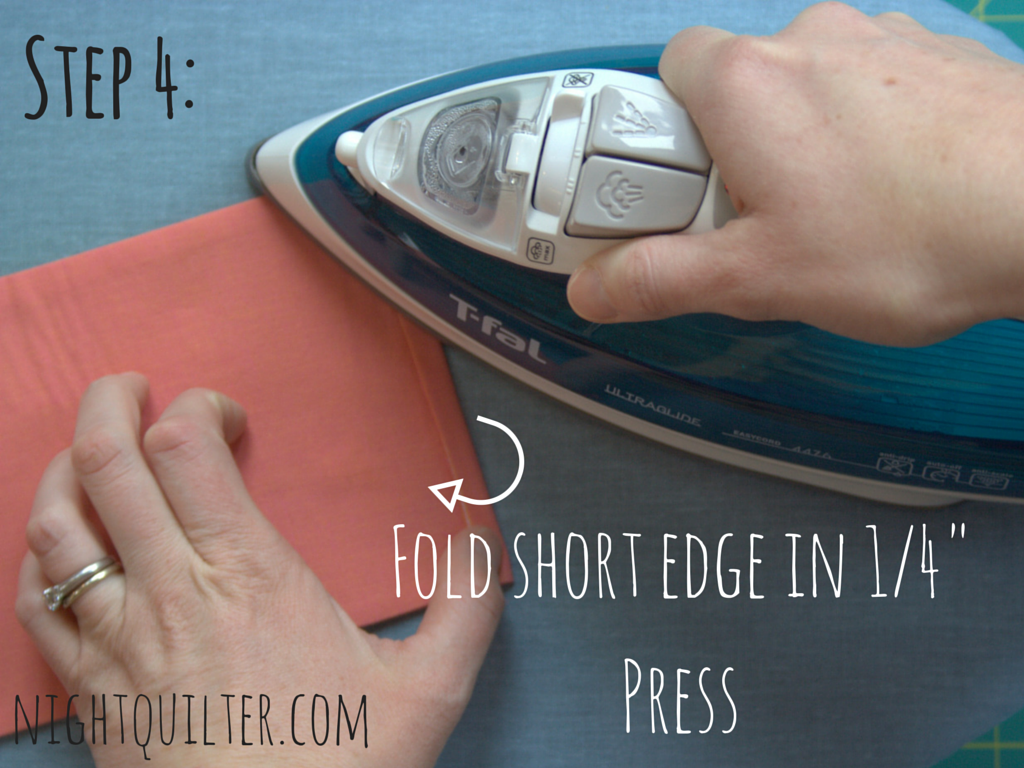
Step 4
 Fold in 1/4″ from one short edge. Press.
Step 5
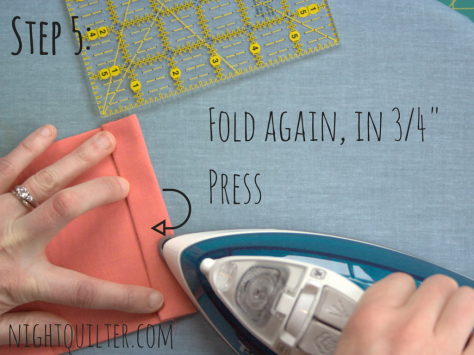 Fold in again, 3/4″. Press.
Step 6
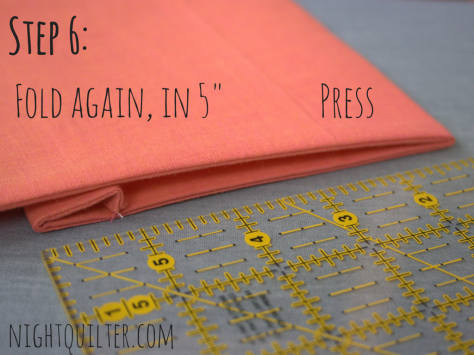 Fold long end 5″ from pressed edge, over on top of itself. Press.
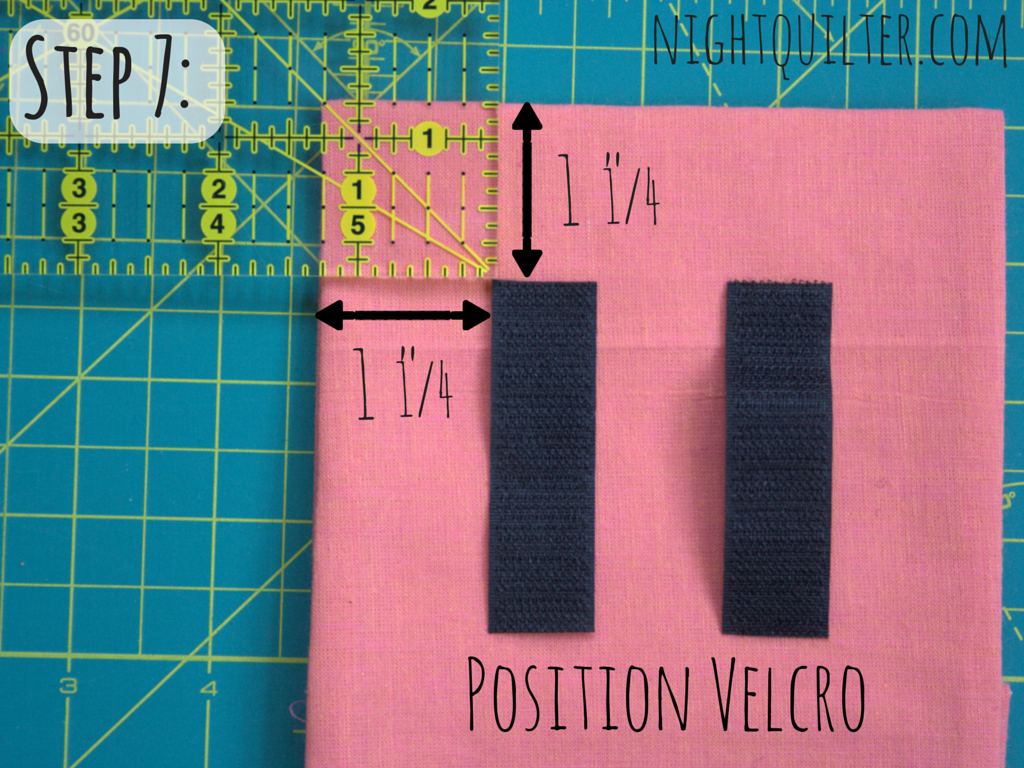
Step 7
 With the folded portion facing away from you, and the unfinished long end facing down, position the velcro strips 1 1/4″ from each top corner. Pin in place.
Step 8
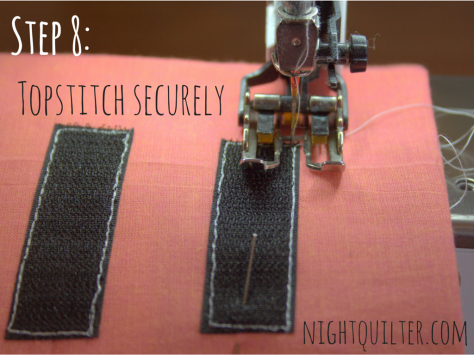 Topstitch the velcro in place, being careful to only sew through one layer of fabric (the portion that was pressed under will be folded up out of the way.) I stitched around each velcro strip twice to ensure the velcro stays in place even with frequent use.
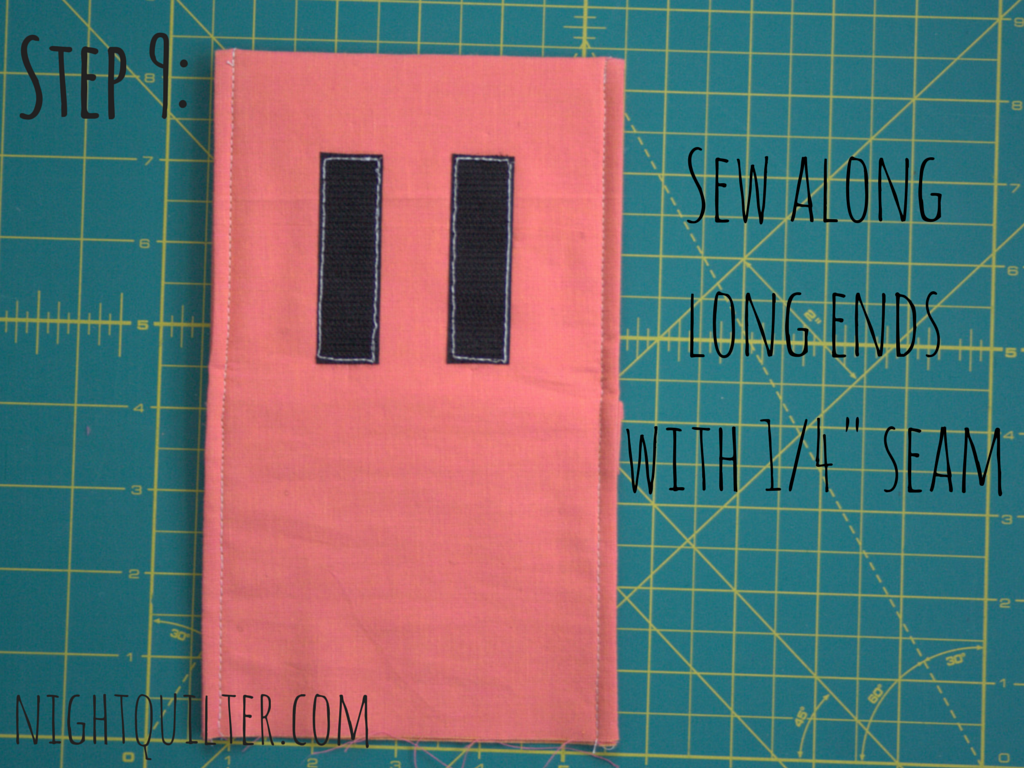
Step 9
 Refold according to directions above. Sew along long edges only, using a 1/4″ seam allowance.
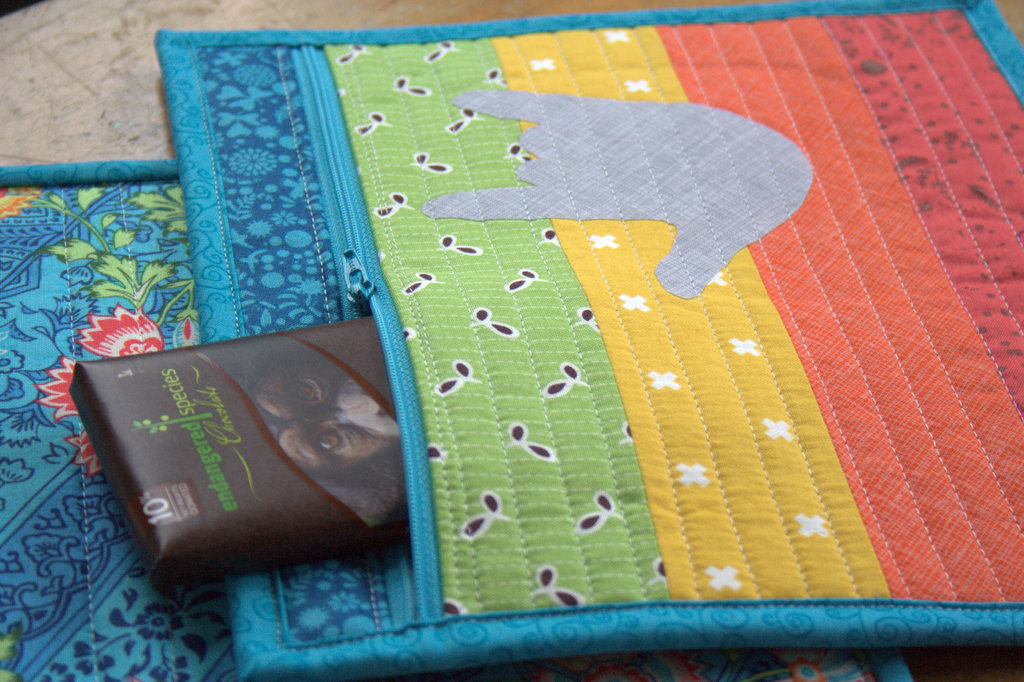
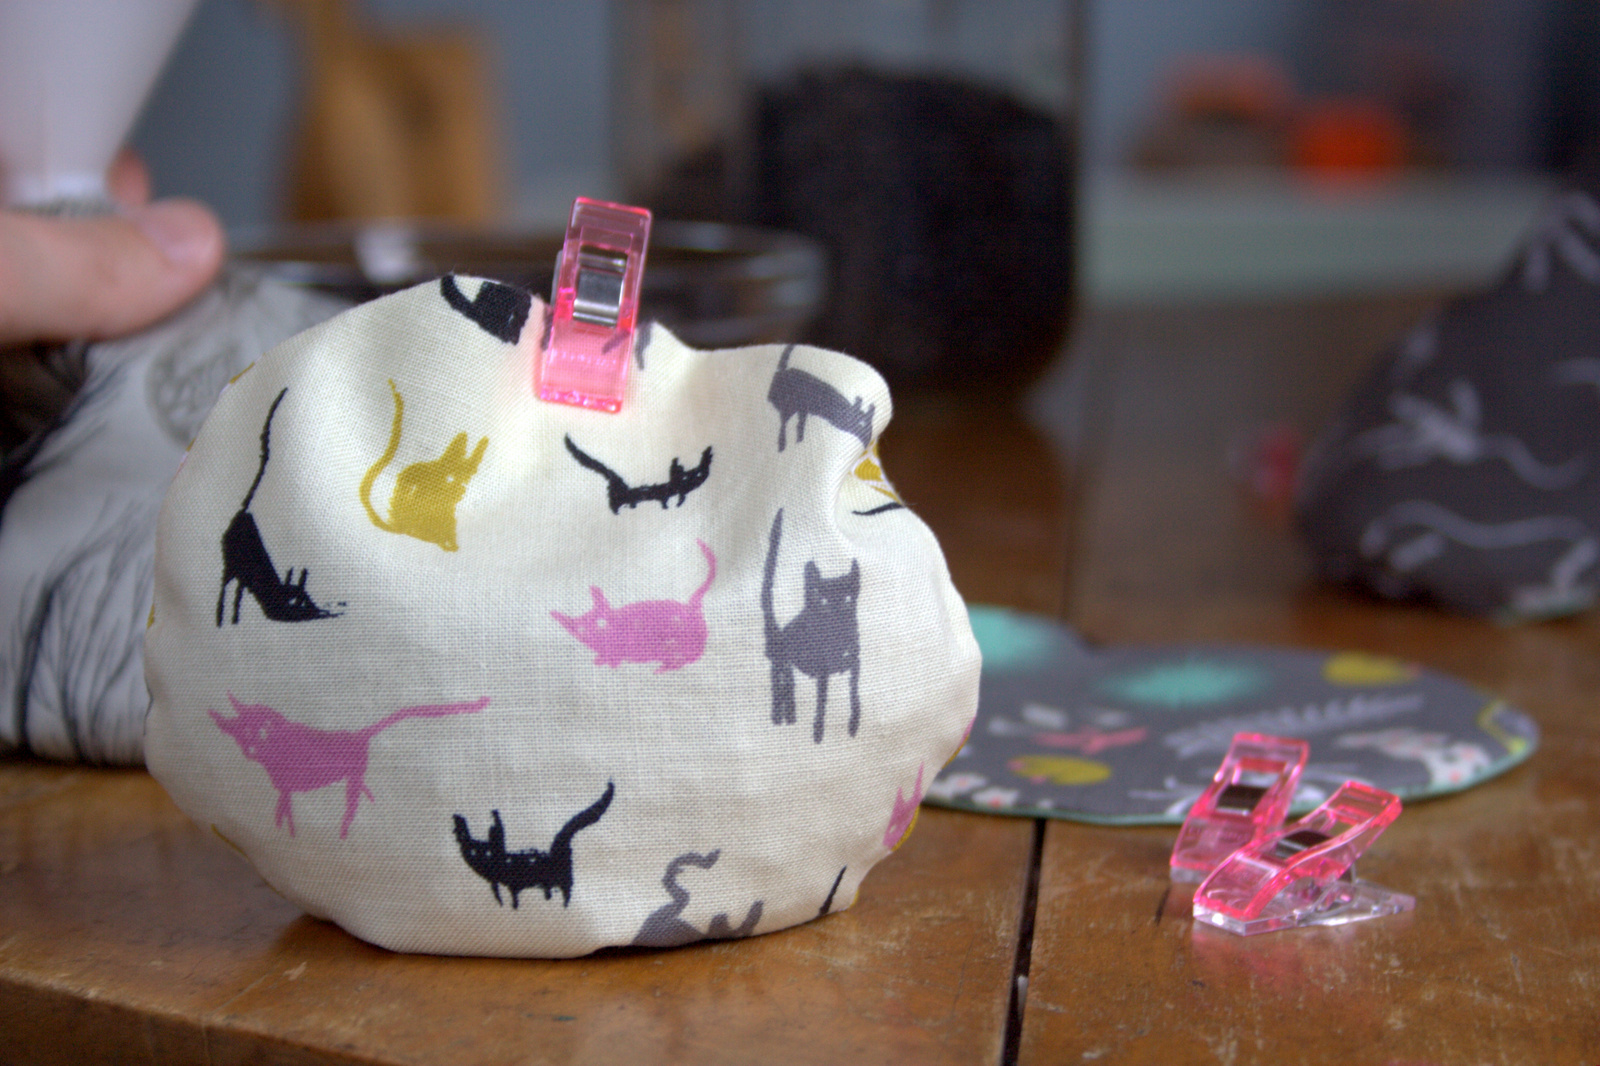
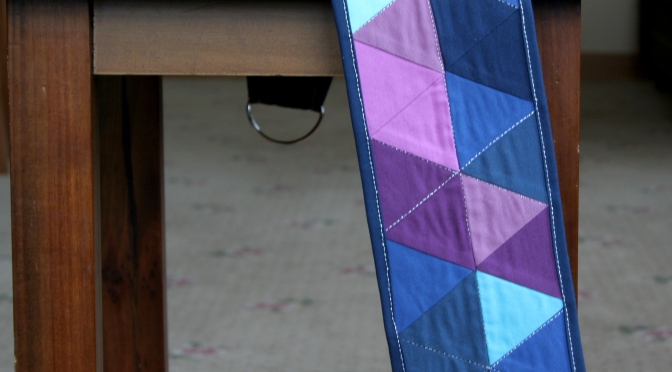
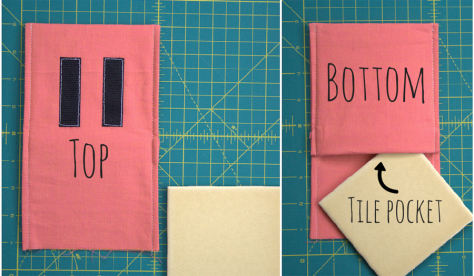 You have just created a tile pocket. I have seen some thread catches weighted with completely sewn-in tiles, but decided to design this with an opening where the tile can be inserted or removed as needed. This means that you can use anything you want to weigh down your thread catch, and if you have a little “helper” who happens to smash it to the ground, you can take out the tile shards and replace with a new tile. Once your tile is inserted, you can pull the little lip of fabric over the end of it to hold it in place more securely (like those fancy pillow cases). Don’t insert your tile yet–we’re still sewing! Now you know how the tile pocket will work, and hopefully can visualize where we are going with this a little better.
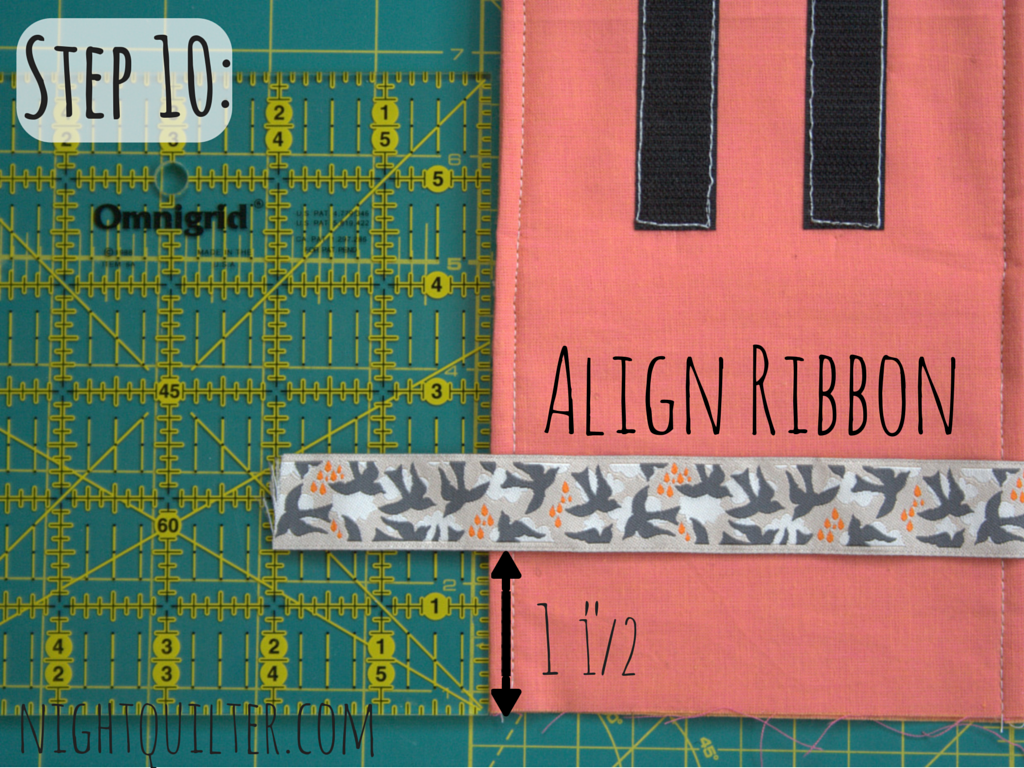
Step 10
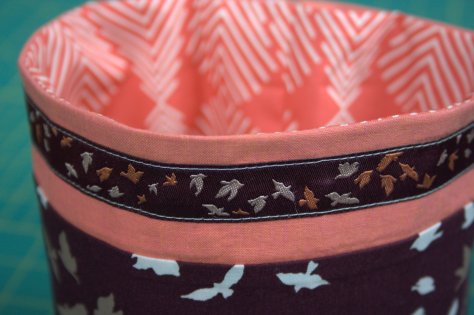
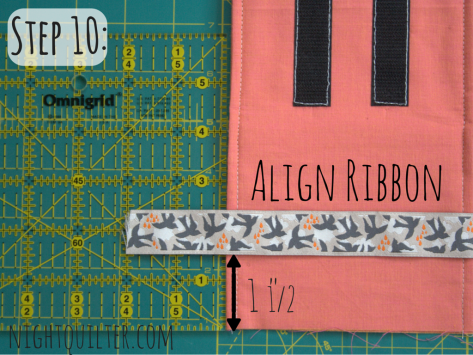 Align accent ribbon 1 1/2″ from the unfinished short edge of the top of the base. Note: The ribbon shown is longer than 5.75″ and I trimmed the edges before the next step. Yours should fit well, with a bit over 1/2″ overhang on each side.
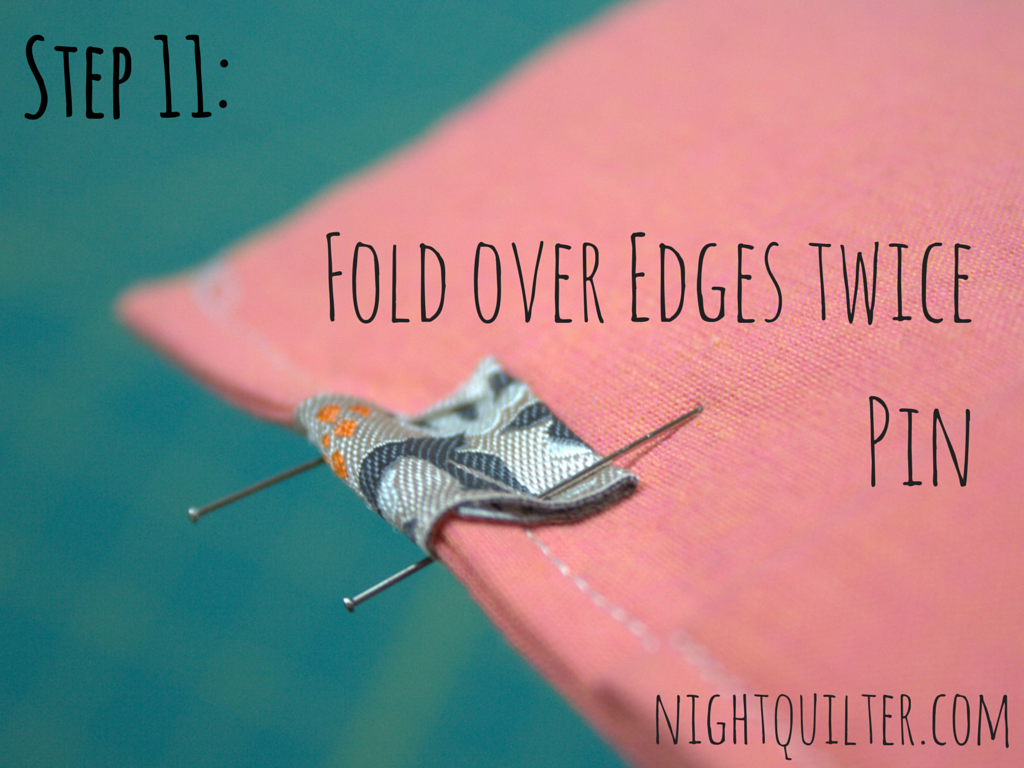
Step 11
 Fold excess ribbon over the edges twice (Fold so that the cut end meets the edge of the base, and then fold over again). Pin in place.
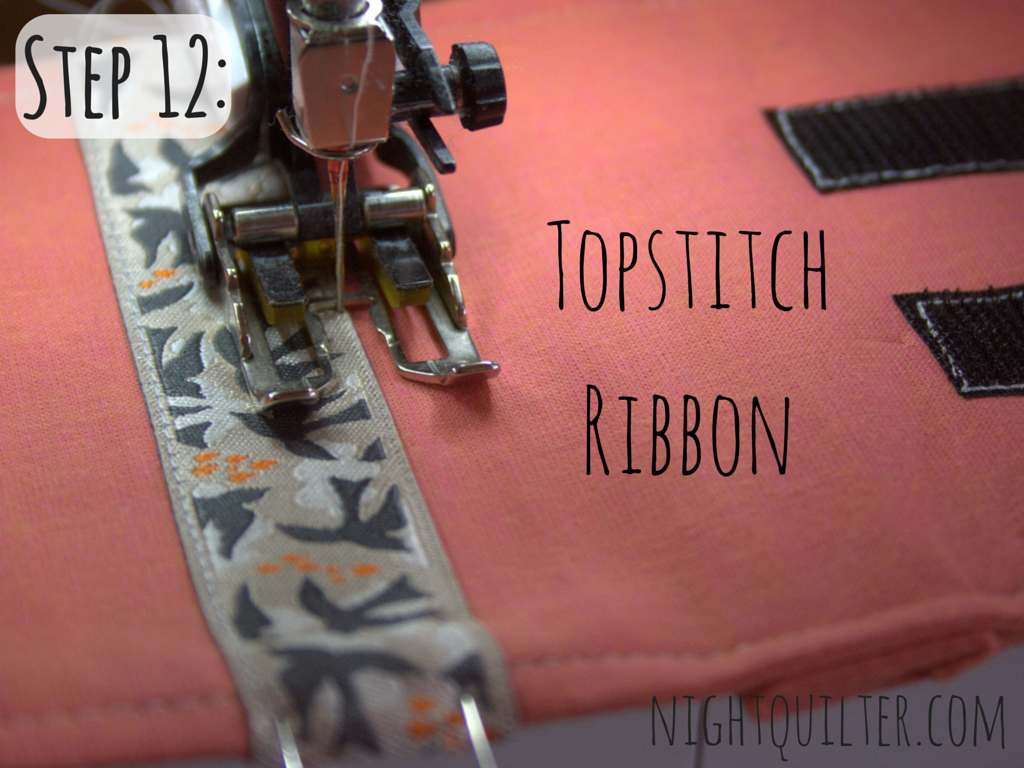
Step 12
 Topstitch ribbon in place using coordinating thread. Your base is now finished, ready to attach to the thread catch basket. Set it aside while you make the thread catch.
Make the thread catch & Final Assembly:
Step 1
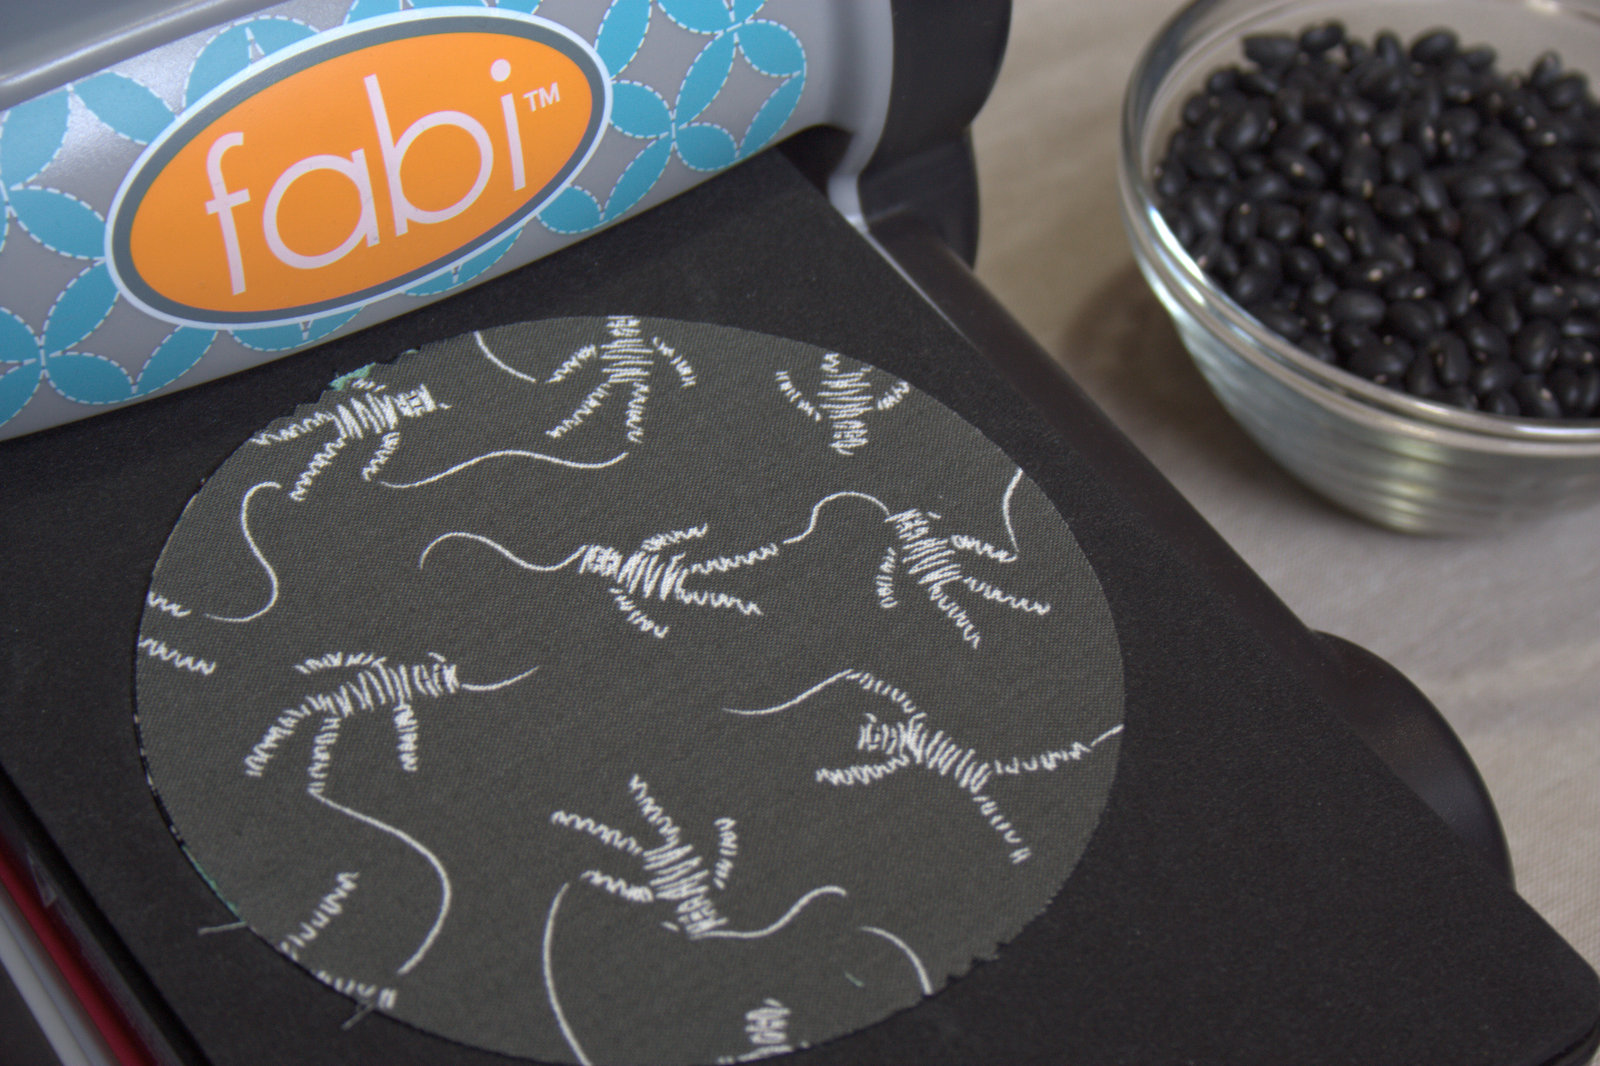
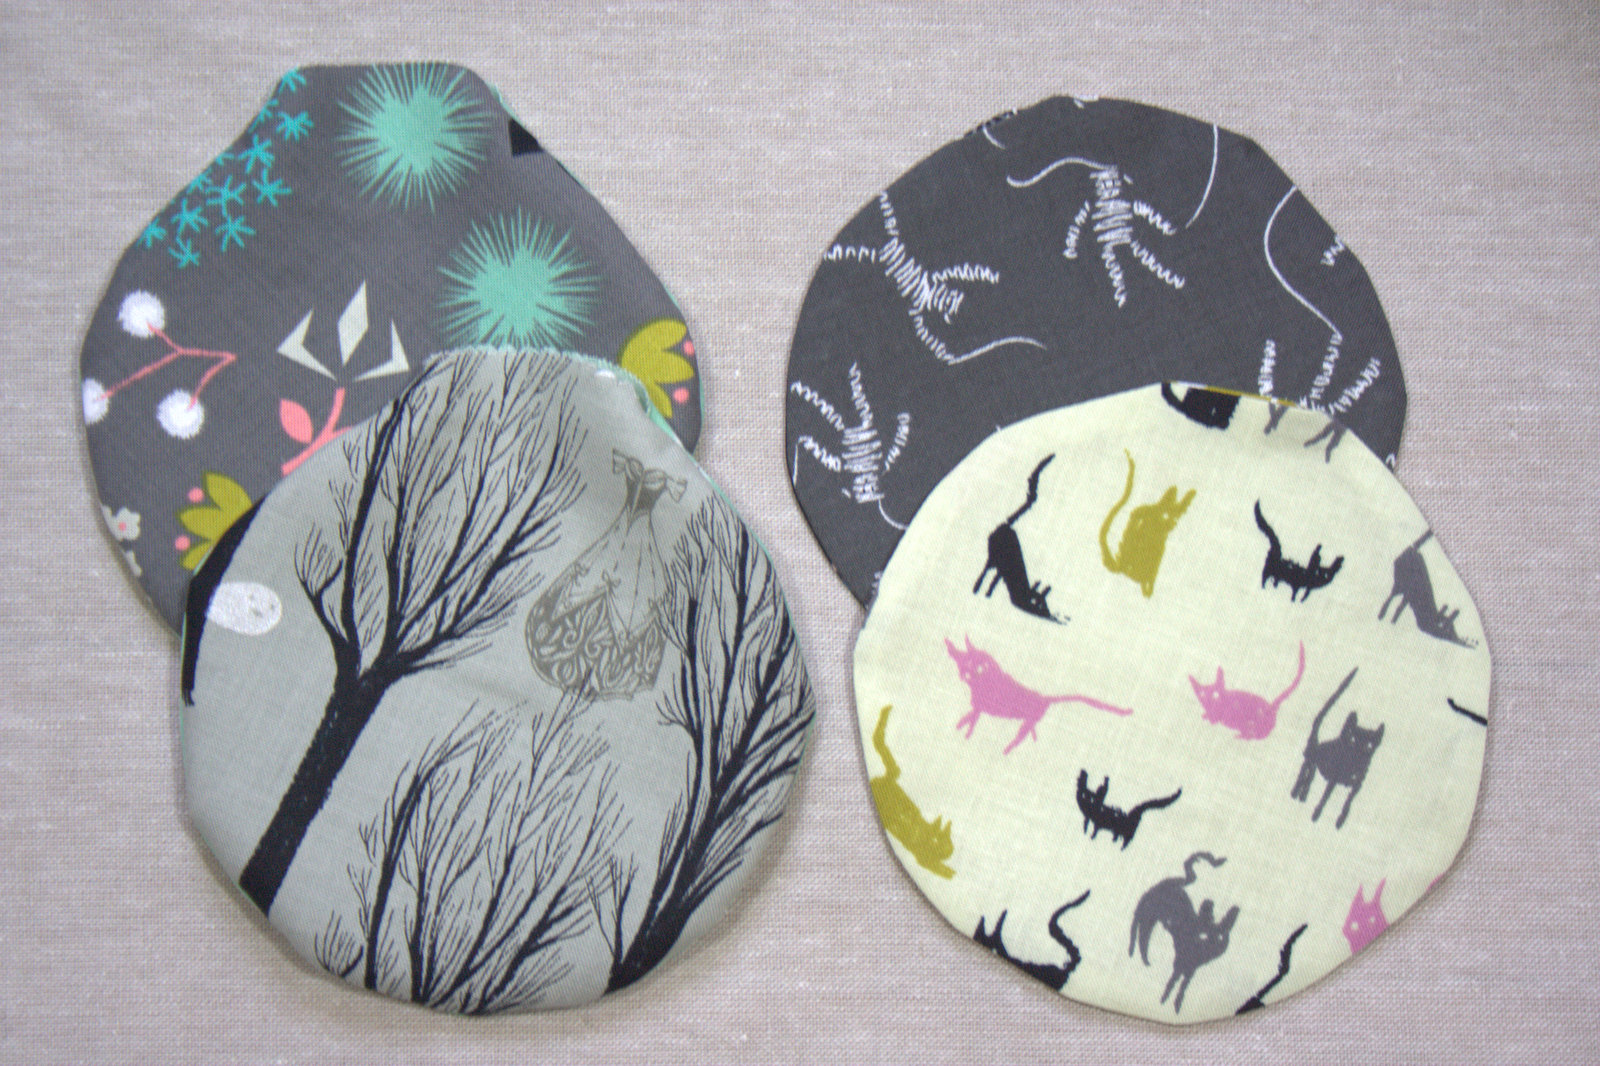
 Gather your cut pieces and interfacing. Normally, I would suggest cutting the interfacing, pressing to fabric, and THEN cutting out the outer fabric pieces around the interfacing, but since we will be sewing the print fabric to the coordinating solid before fusing to the interfacing, I would suggest cutting it all in advance. If you want to take a little shortcut, you can use the Ribbon Thread Catch bottom template to cut out the interfacing bottom, fuse to the print fabric and then cut the fabric once the interfacing is fused.
Step 2
 Sew the 2″x17.5″ coordinating solid to the 4″x17.5″ print fabric, pressing the seam toward the darker fabric. This is the outer panel of the thread catch.
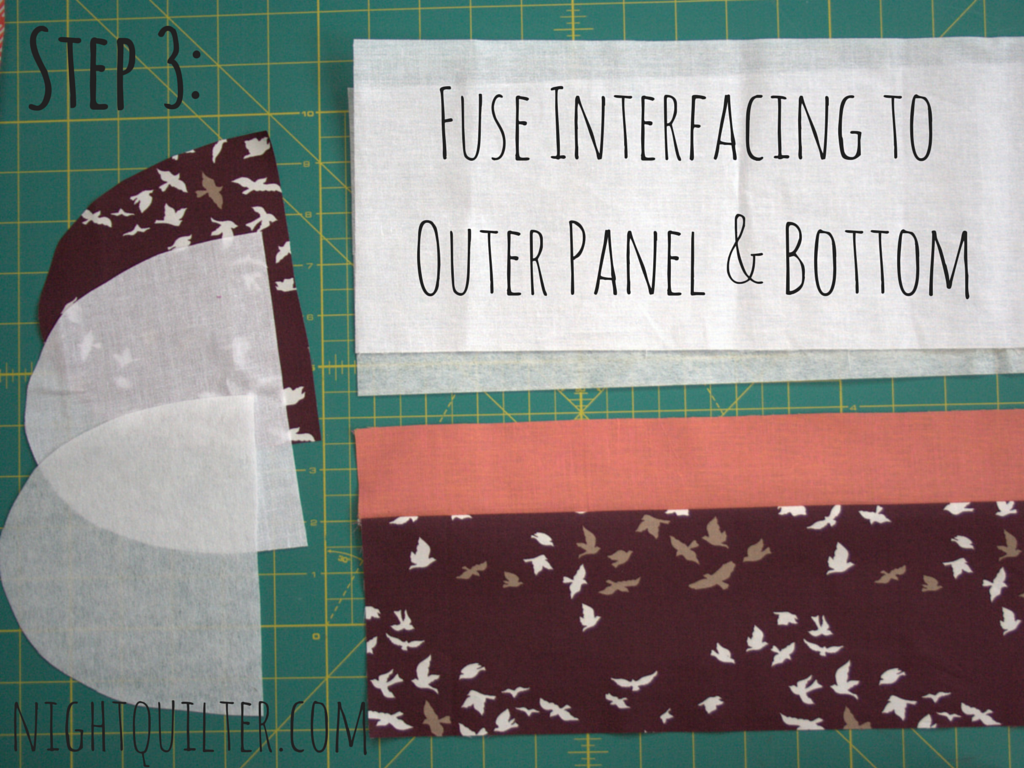
Step 3
 Following the instructions on the fusible interfacing, fuse both layers of interfacing to the wrong side of the outer panel, and to the thread catch bottom. Note that if using Pellon 101 and 808, you should fuse the 101 first since it calls for a damp press cloth and steam. Once fused and cool, then fuse the 808 for added structure. Note: Be sure to use a press cloth or other scrap fabric beneath and above your fabric and interfacing to protect your iron. Interfacing melted onto the iron is no fun!
Step 4
 Align the ribbon 3/8″ from the print fabric and topstitch in place. Note: If you are using a different width of ribbon, you may want to adjust this distance. Keep in mind the 1/4″ seam allowance at the top of the thread catch! You can use either coordinating or contrasting thread depending on the look you’d like to achieve. I opted to use Aurifil 50wt 2015 – Aluminum for the entire project. It seems to go with everything, in my opinion!
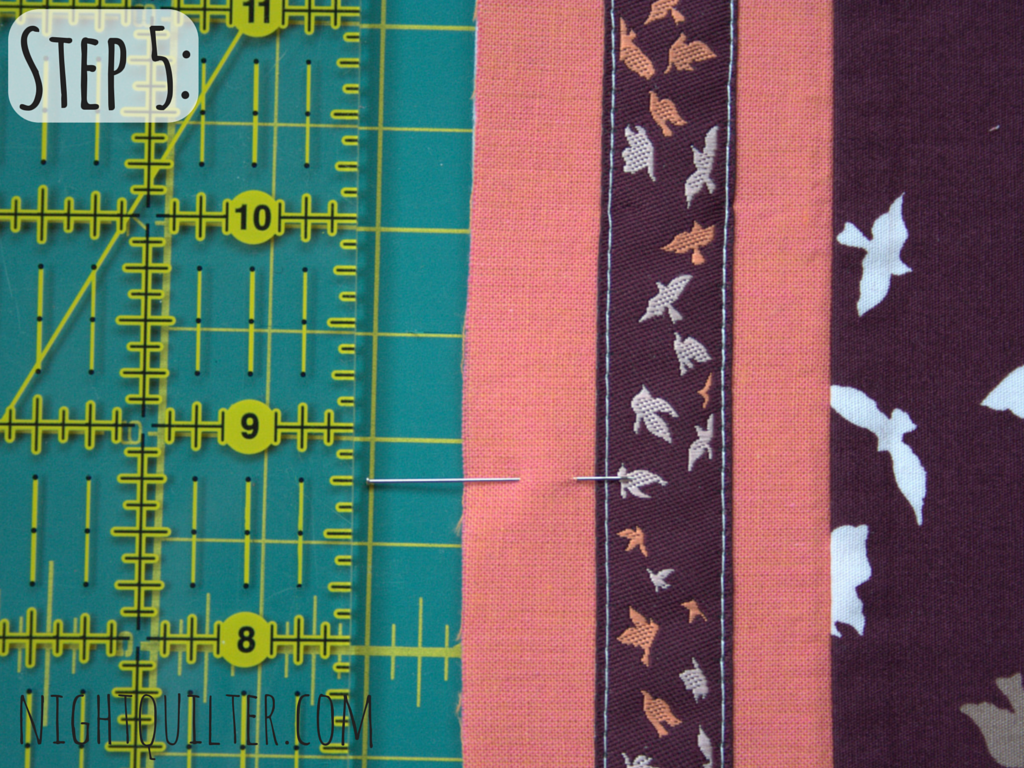
Step 5
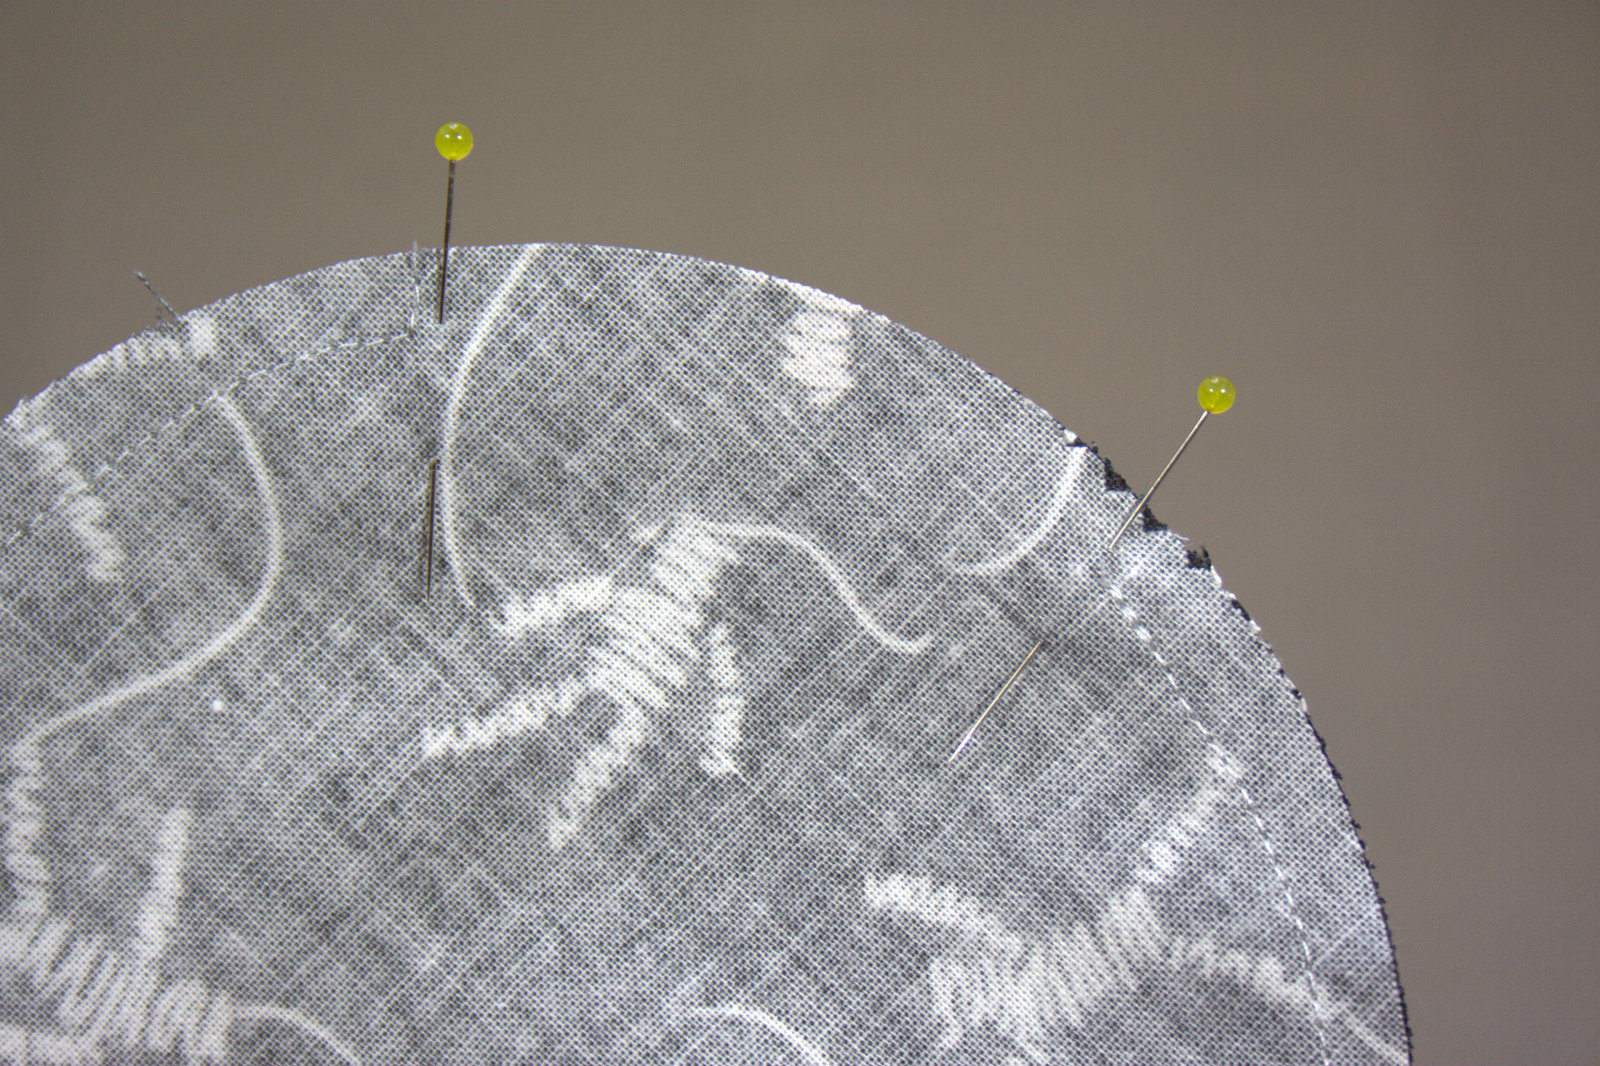
 Find the center of the outer panel (8.75″ from an edge) and pin. Note that in the photo, I pinned the top of the panel. You should pin the bottom of the panel instead. (Oops)
Step 6
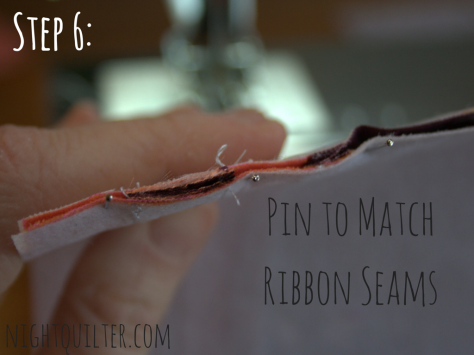 Right sides together, sew short ends of the outer panel together. Be sure to line up the ribbon and seams, pinning right next to the join for accuracy. Press seam open.
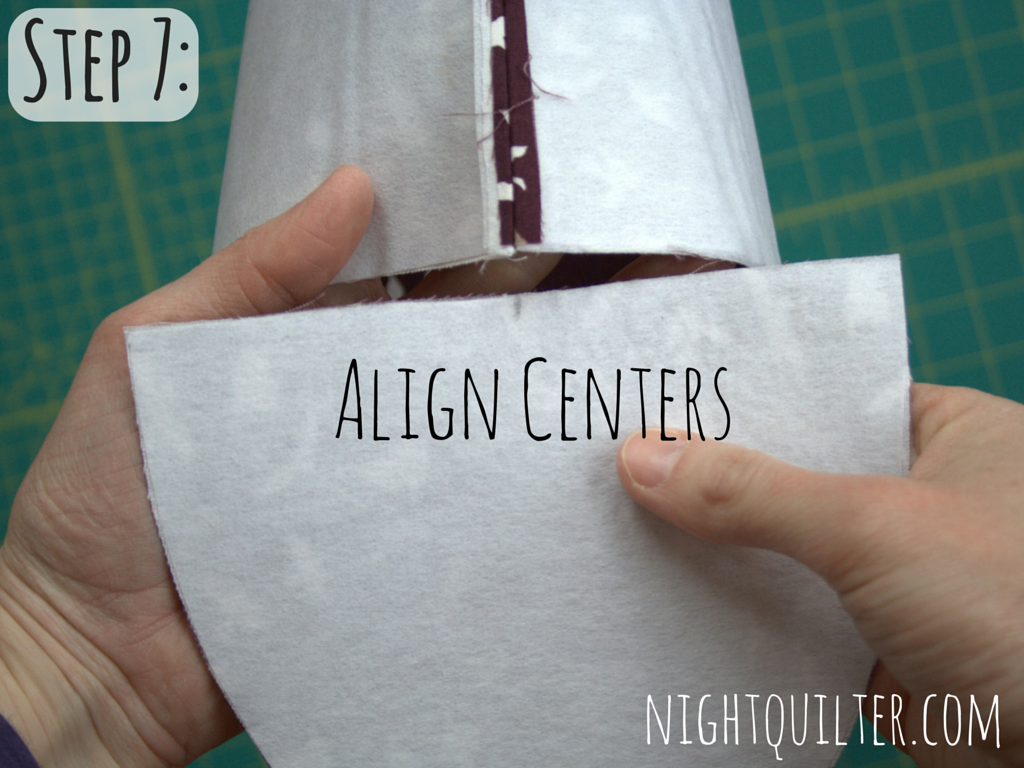
Step 7
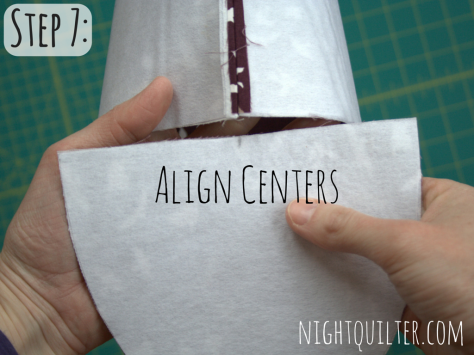 Mark the center of your interfaced thread catch bottom (folding in half and creasing lightly to find the center point works wonderfully). Align the center of the bottom to the bottom seam of your outer panel. Be sure that right sides are facing away from you (you should be looking at a whole lot of interfacing) and also be sure that you are attaching your bottom to the bottom of the thread catch body (the ribbon is on the top).
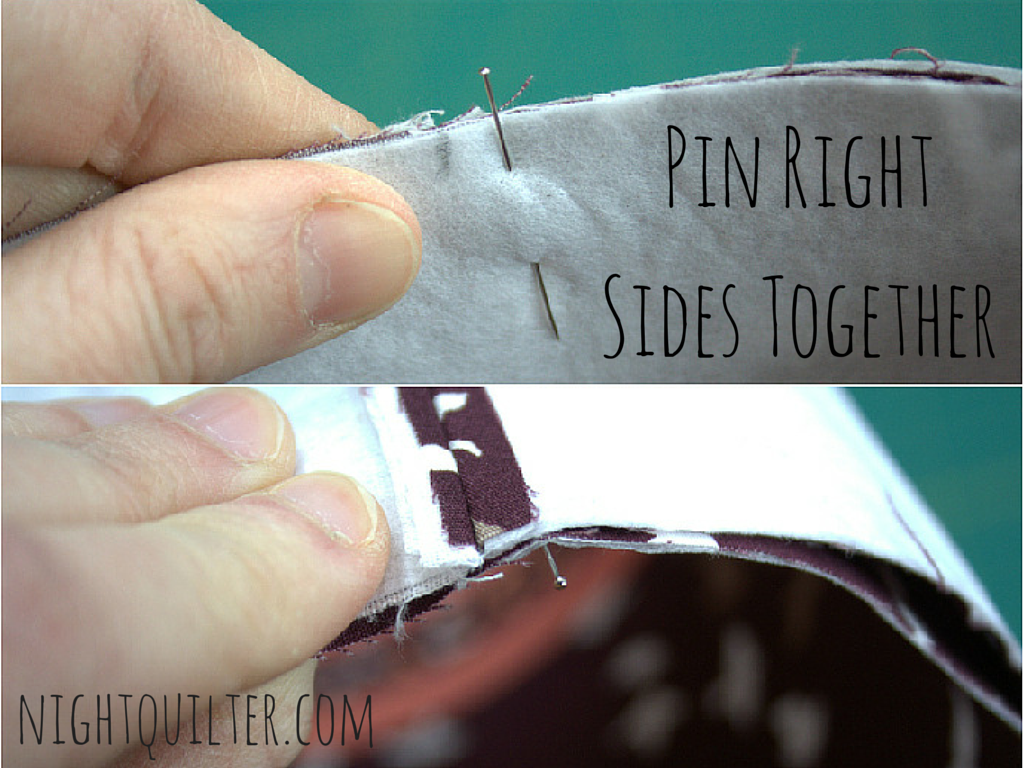
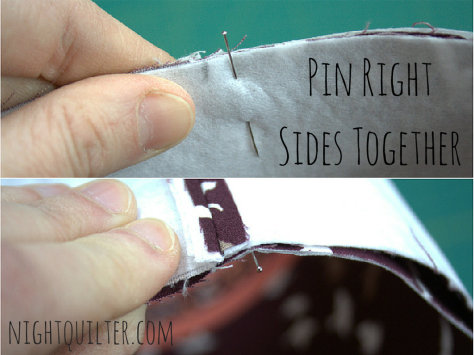 Pin right sides together.
Step 8
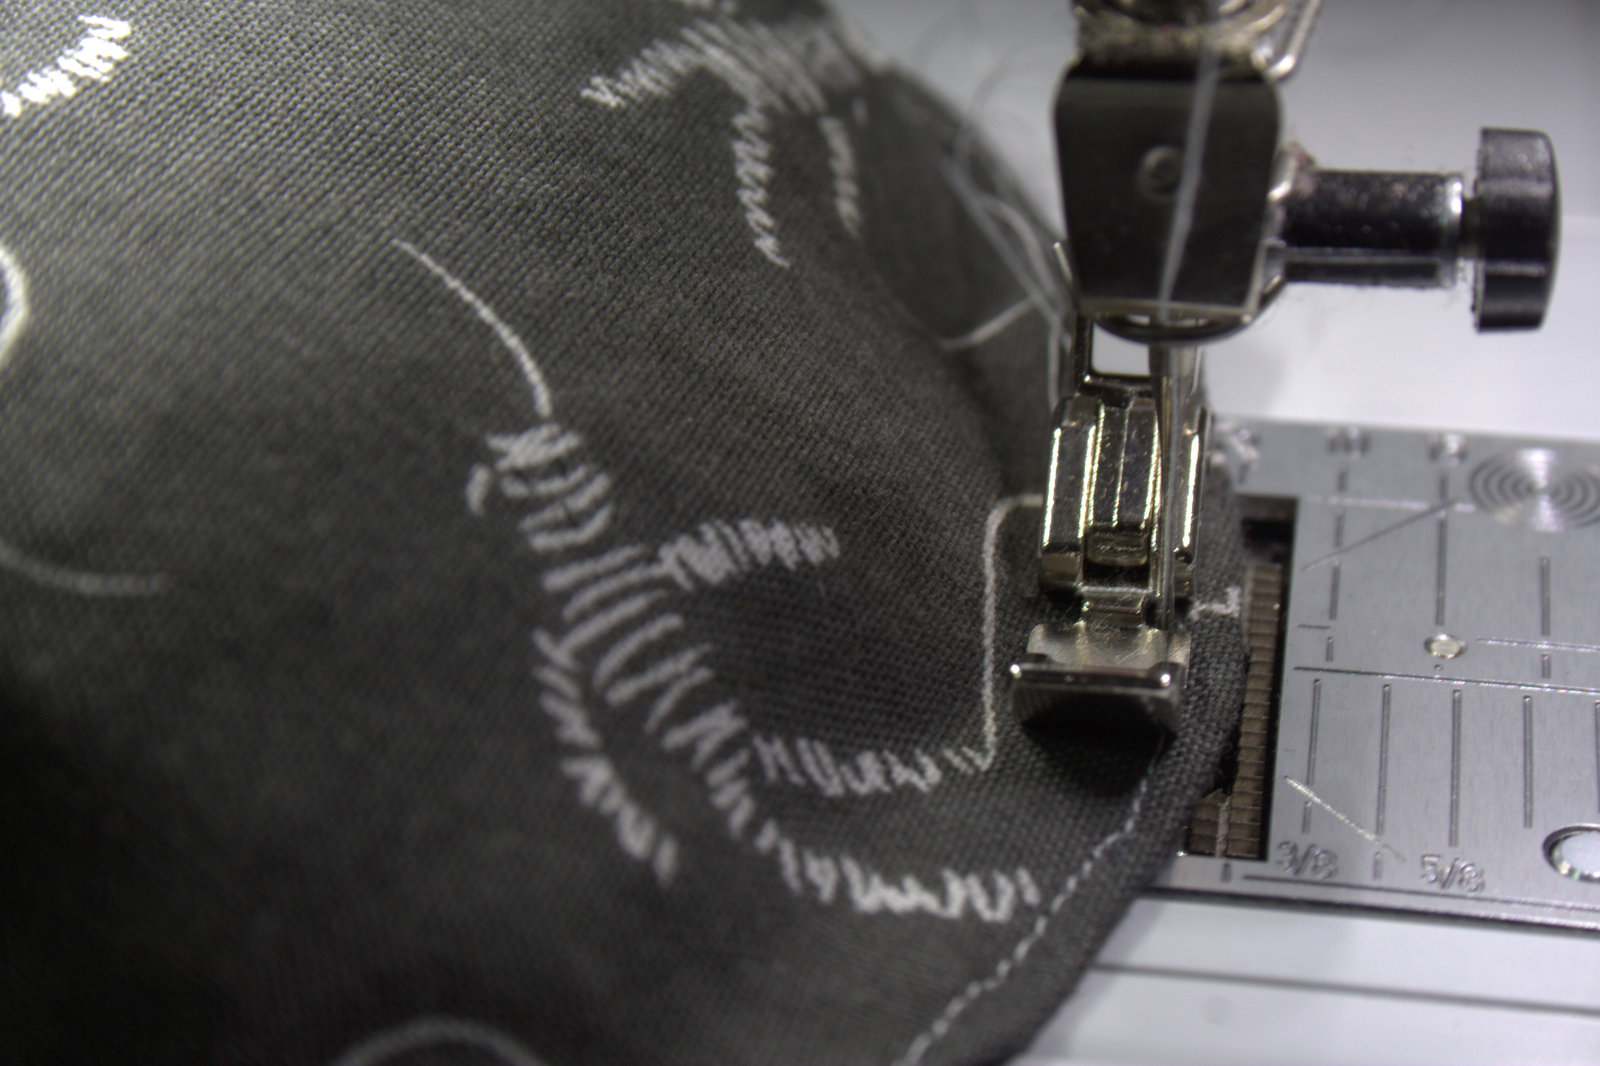
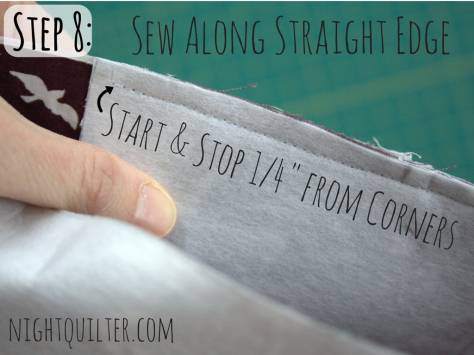 Using the bottom of the thread catch as your reference and making sure it is lined up with the outer panel, sew along the straight edge of the bottom. Be sure to start and stop 1/4″ from both corners, backstitching at the beginning and end of your stitches.
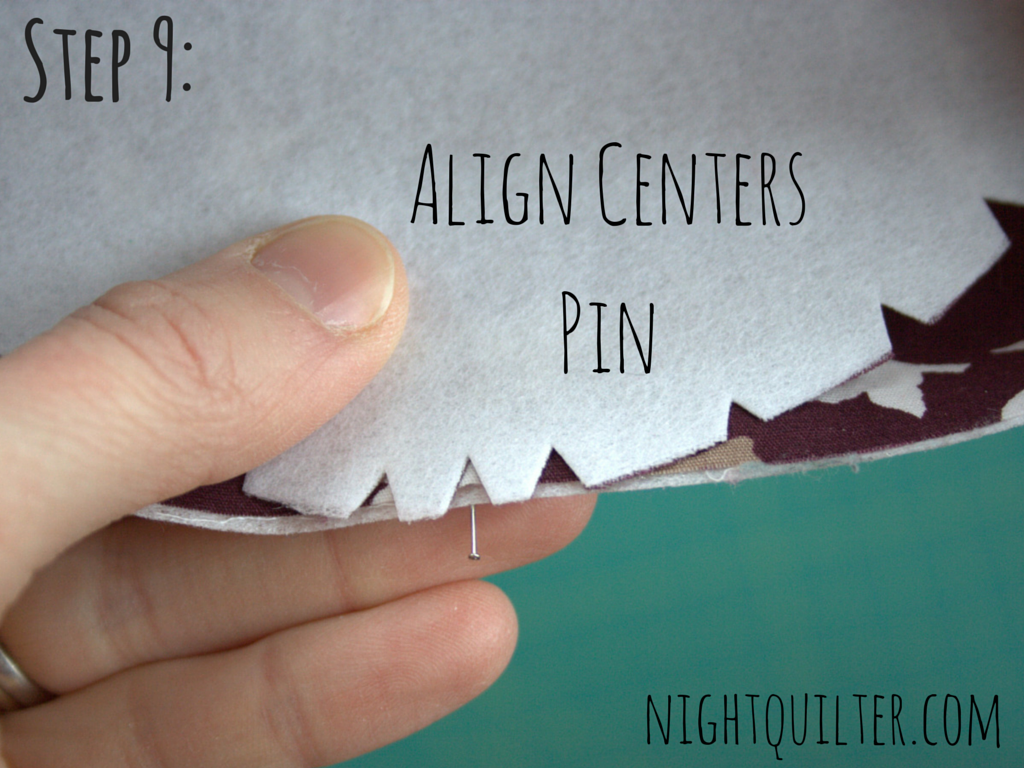
Step 9
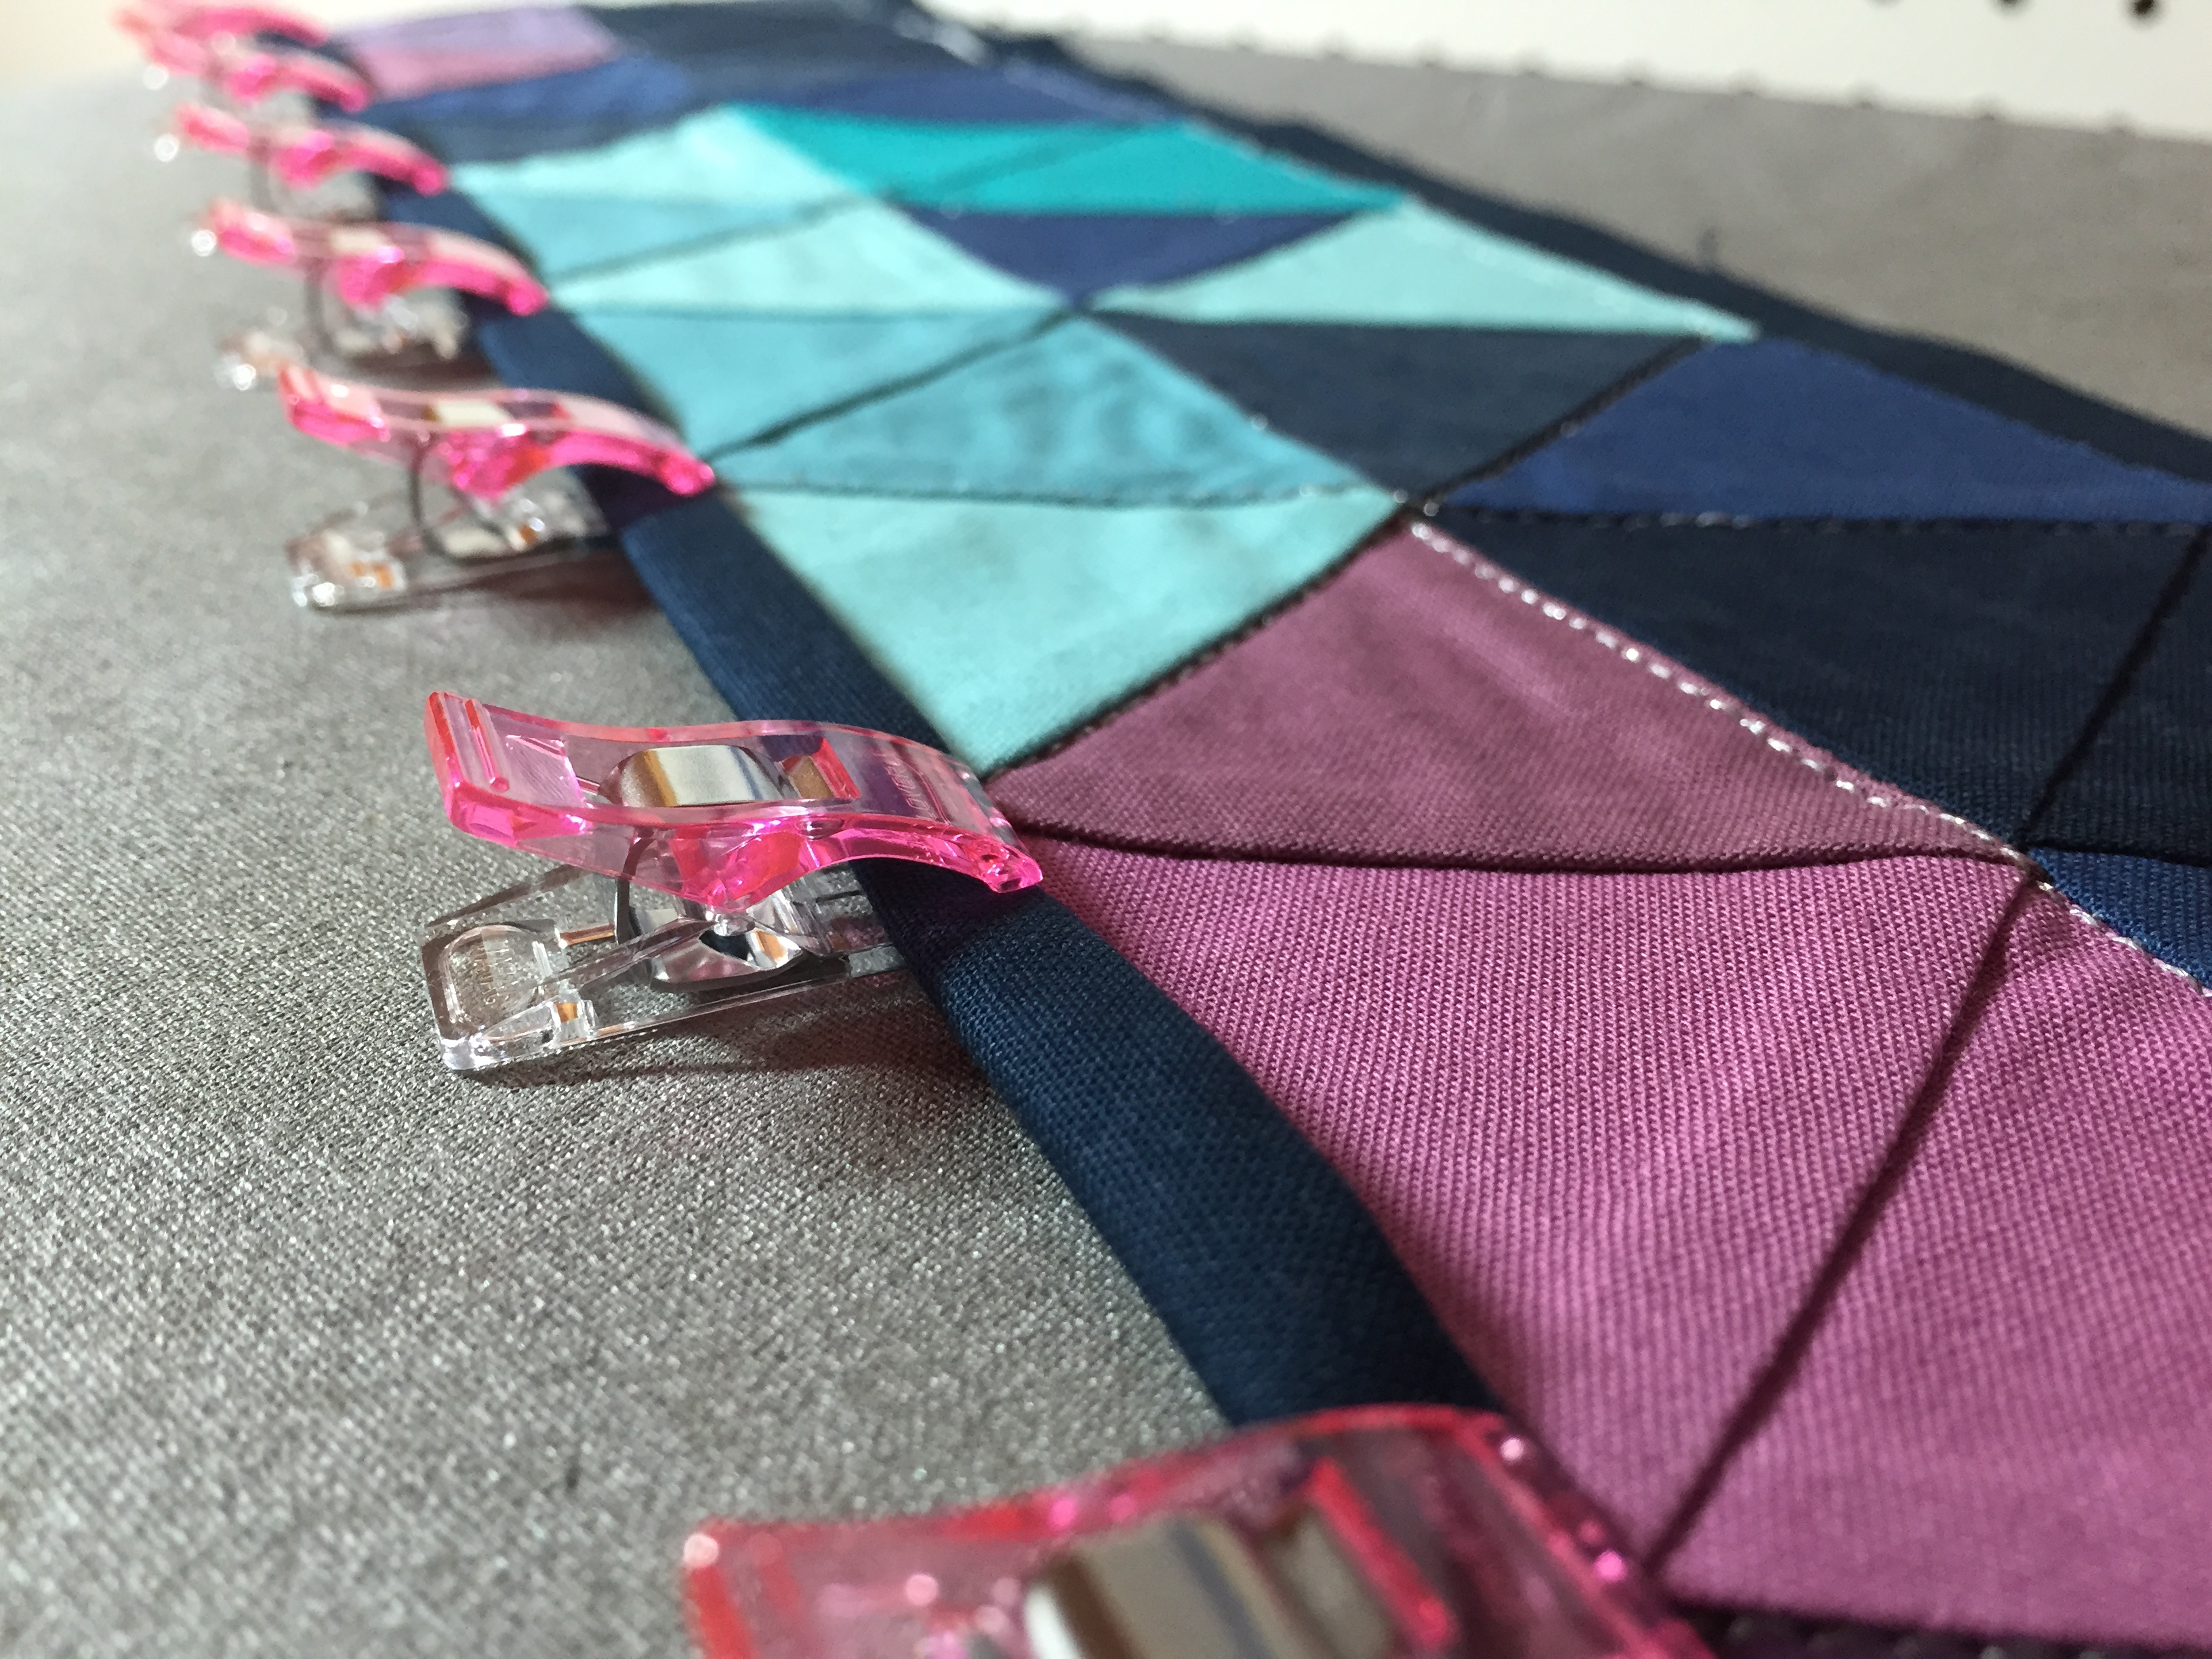
 Here’s where that center-marking pin comes in handy! First, clip the curves on the bottom. Then, align the center of the bottom with the pin marking the center of your thread catch body, right sides together. Pin.
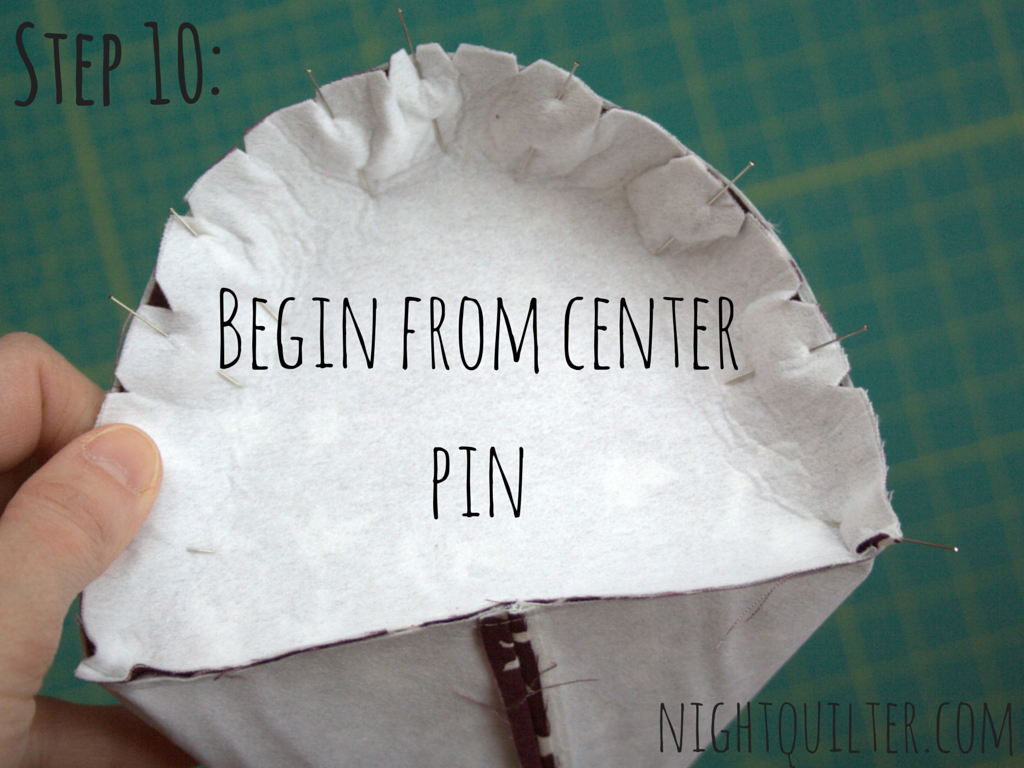
Step 10
 Continue to pin the bottom to the thread catch body, working from the center out, aligning the edges as best you can.
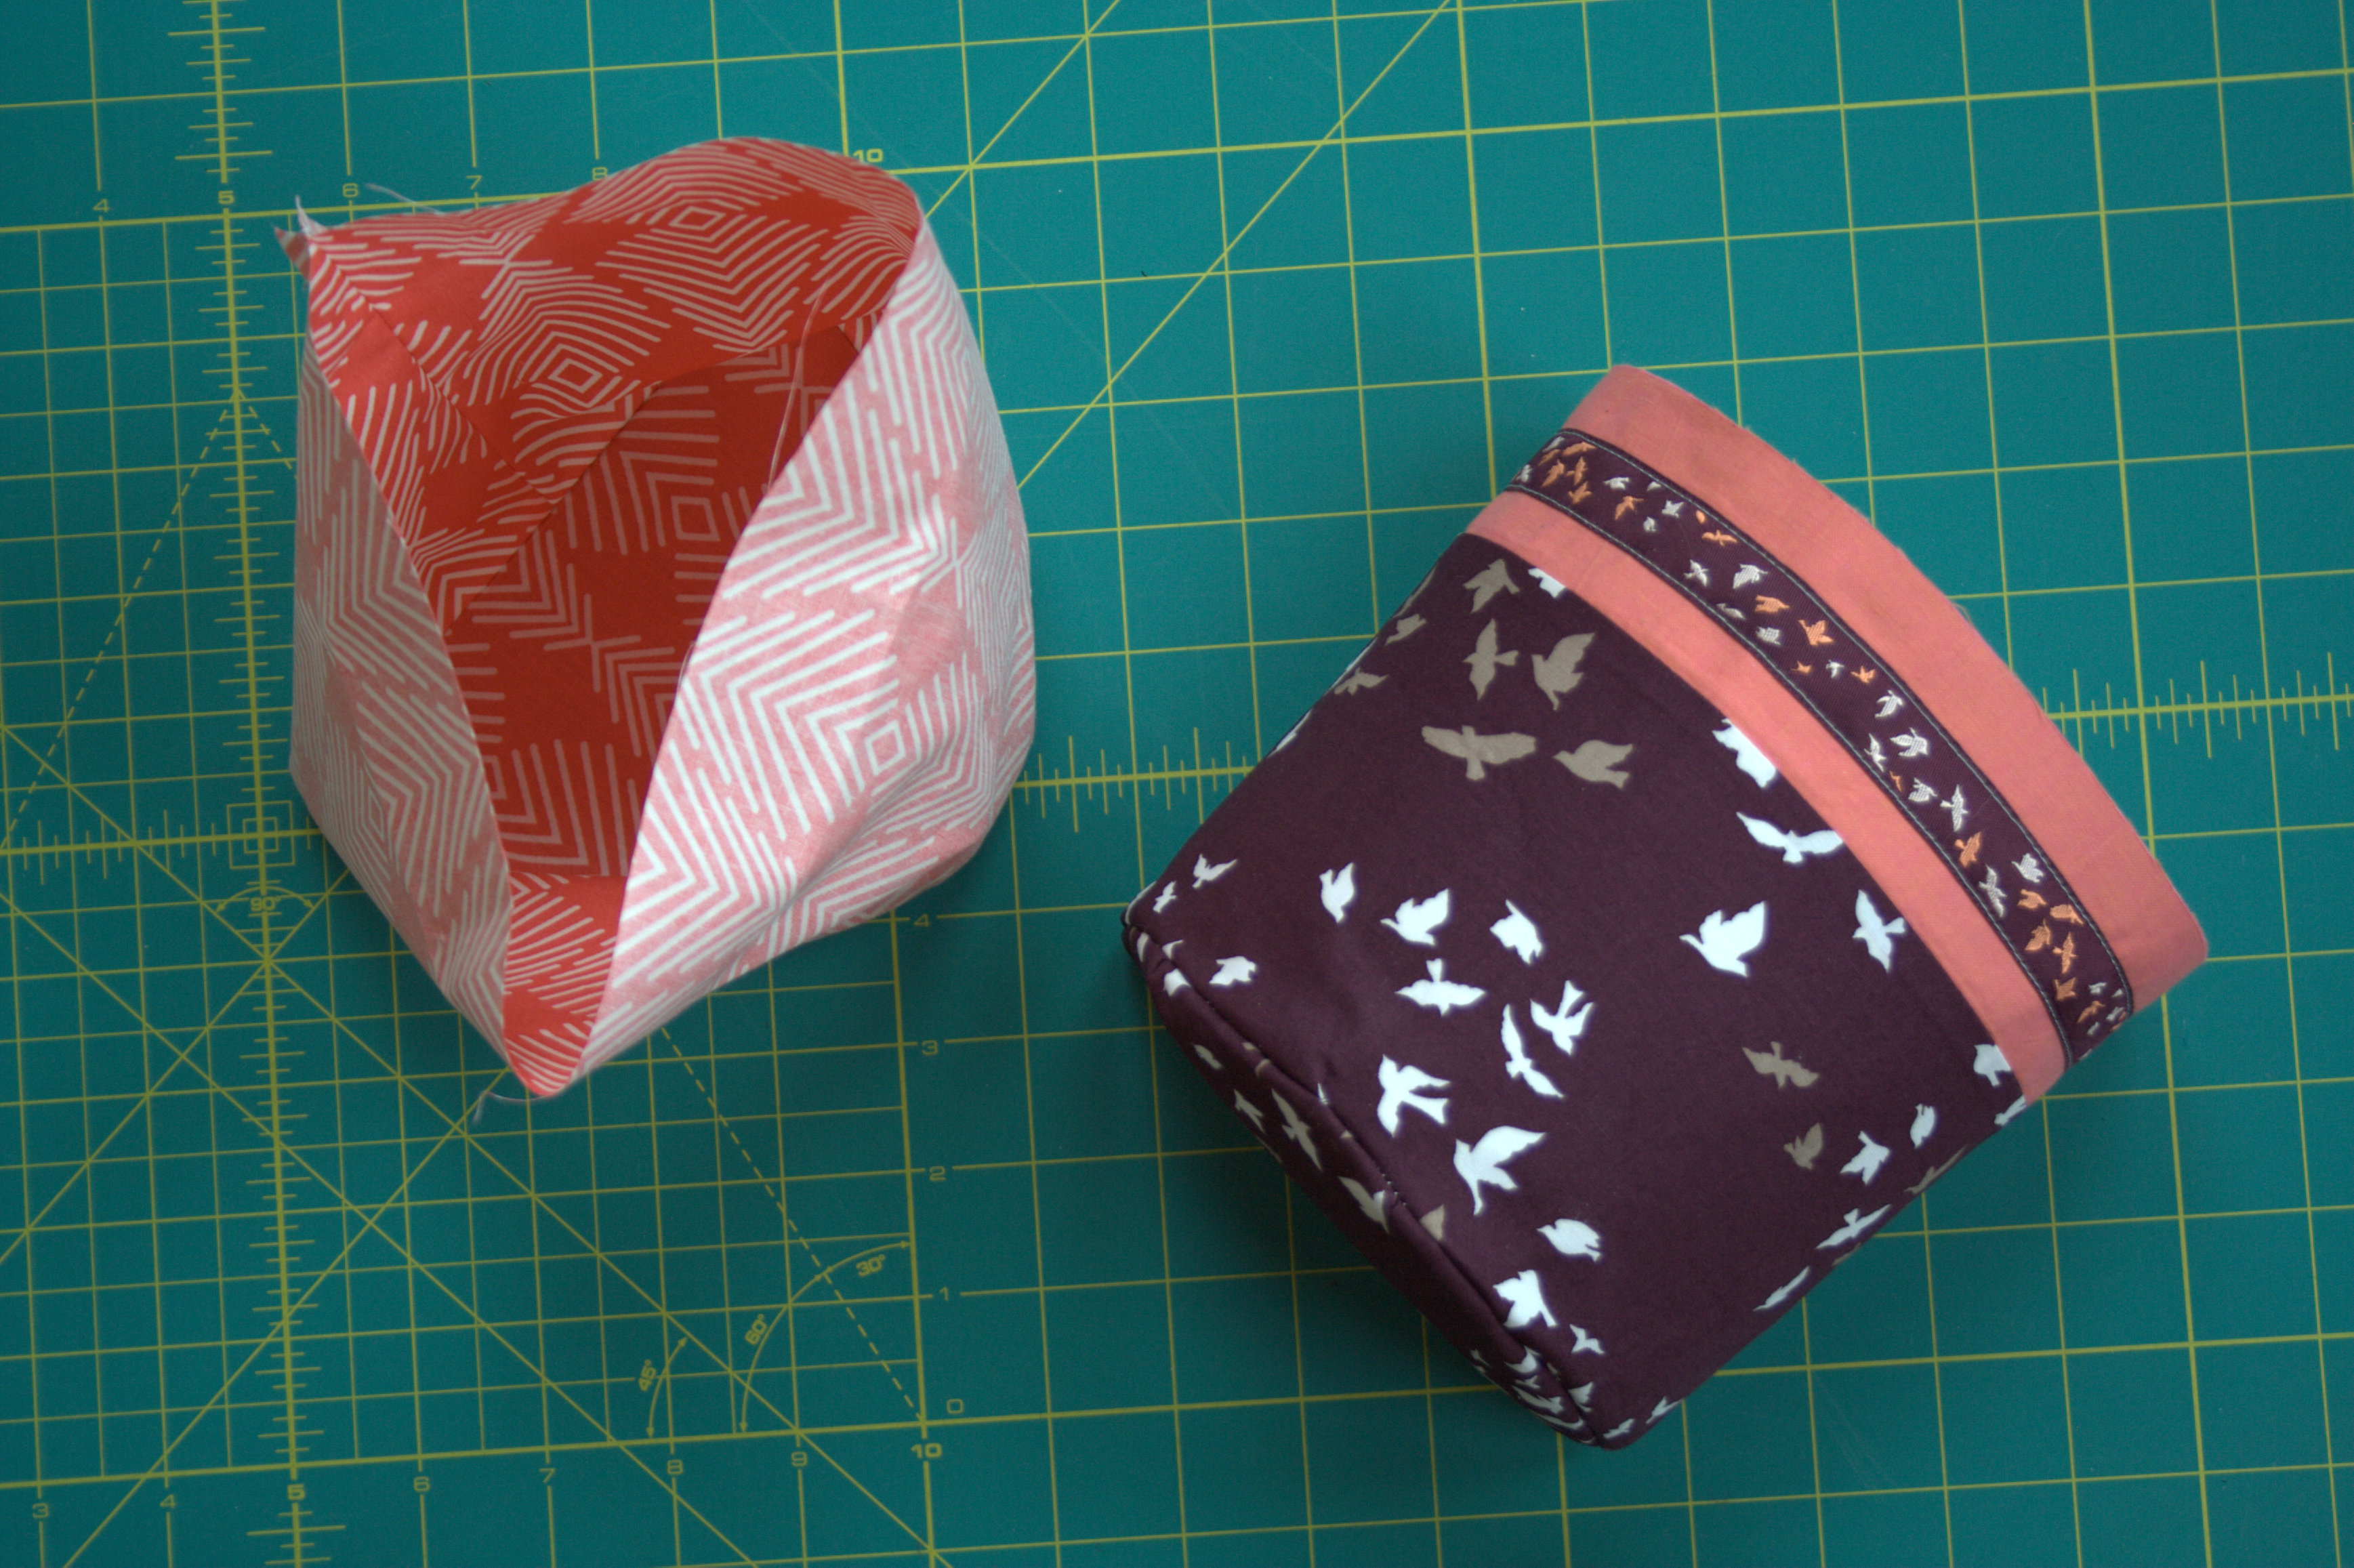
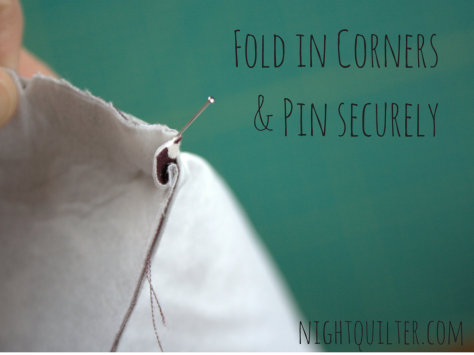 For the corners, fold as if you were turning a corner while binding, and pin securely. Sew together, beginning in the center and working out toward the corners. To keep the corners crisp, I stopped about 1″ short of each corner, backstitched, cut my thread, and began again starting in the corner, sewing out to meet the spot where I left off. If you’re a pro at curves and 3D sewing, feel free to do what works for you! Press seams toward thread catch body if possible.
Repeat steps 6-10 for thread catch lining, disregarding the ribbon-specific bits.
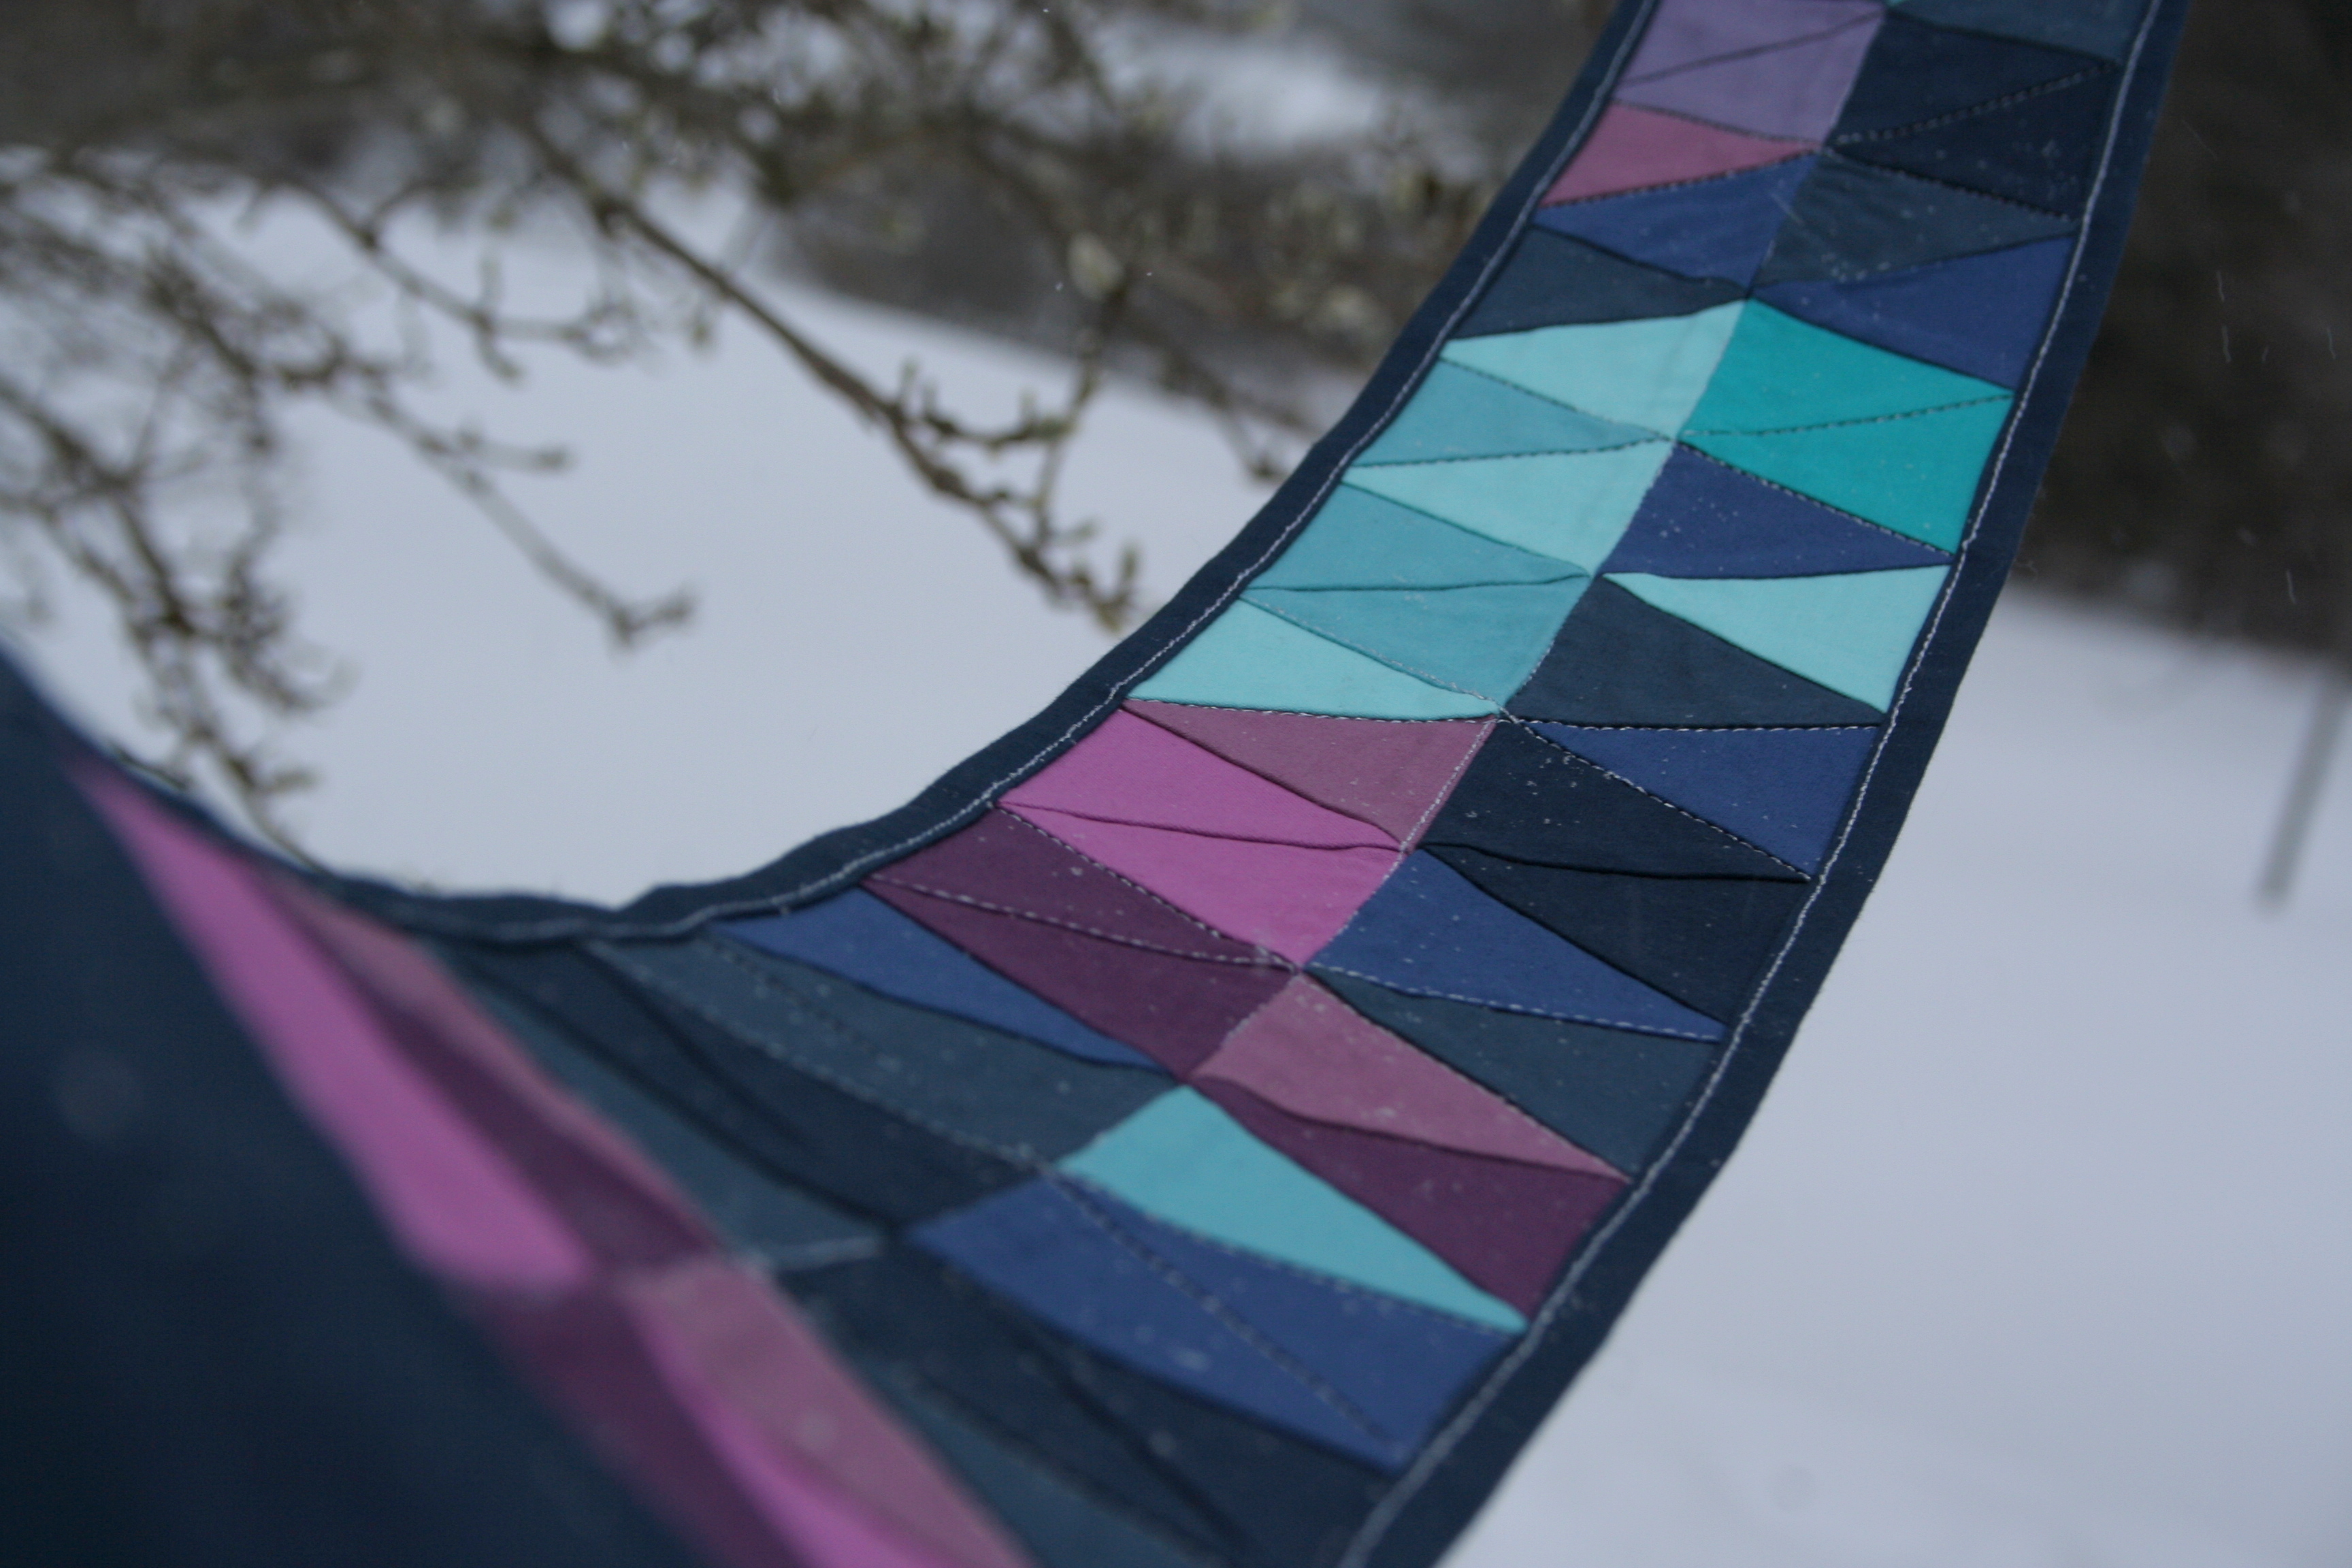
 You will now have the fully sewn outer body and liner for the thread catch! On to the final assembly!
Step 11
Turn outer thread catch body right side out. Slip the lining over the outer thread catch body, aligning raw edges, right sides together. Line up the center seams and back panels.
Step 12
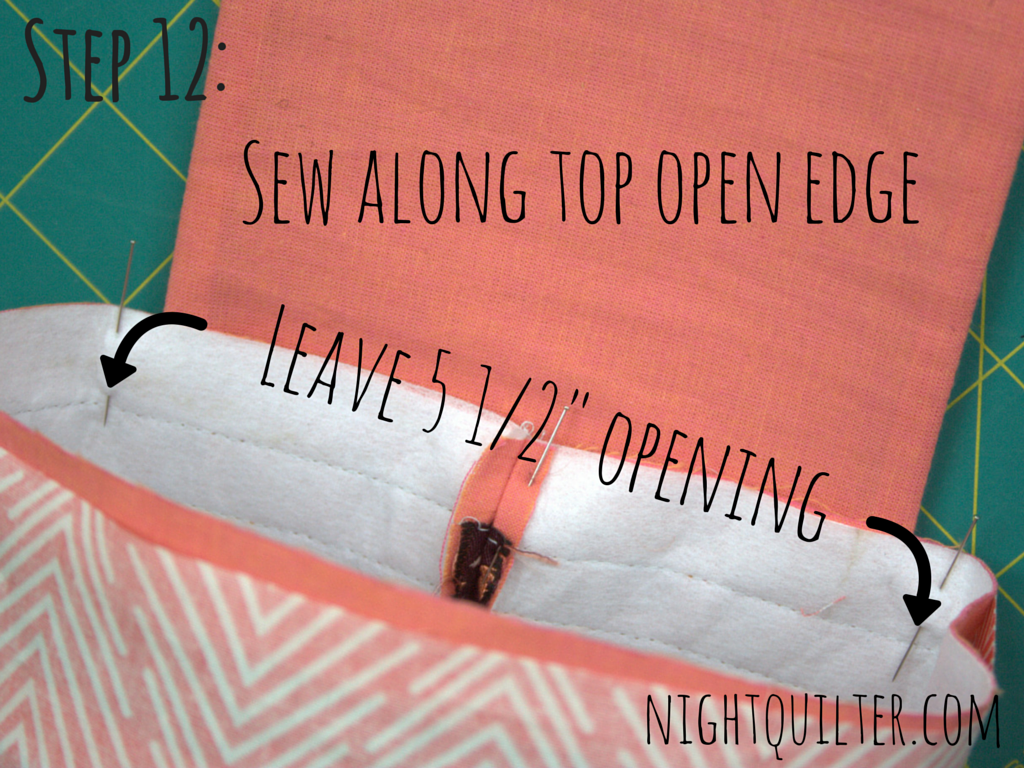
 Pin in place and sew along top open edge, leaving an opening at least 5.5″ wide along the back panel (you can use your thread catch base and hanging tab to make sure there is enough space, but remove it before sewing. I found that it was easiest to sew together with the outside facing up.) Backstitch at the start and finish of your stitching to hold stitches during turning.
Step 13
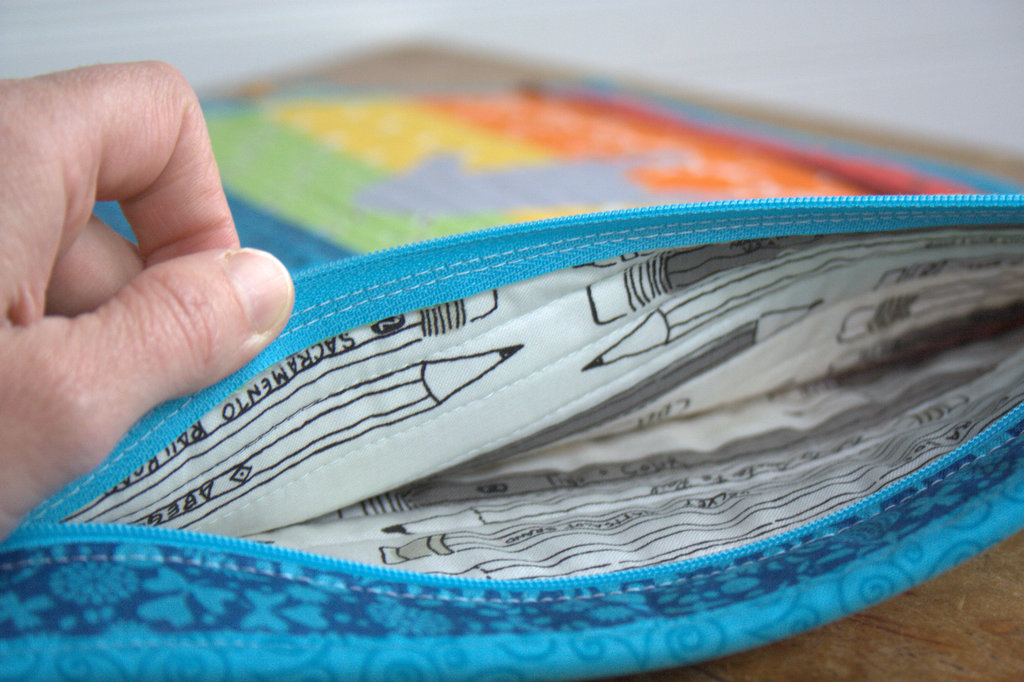
Turn right side out through the opening in the top. Push lining down into the outer body. Press top edge, tucking in raw edges of the opening and pressing well.
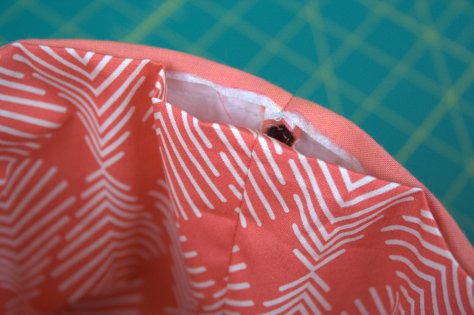 You now will have the thread catch body fully assembled, with an opening along the back top, flat edge.
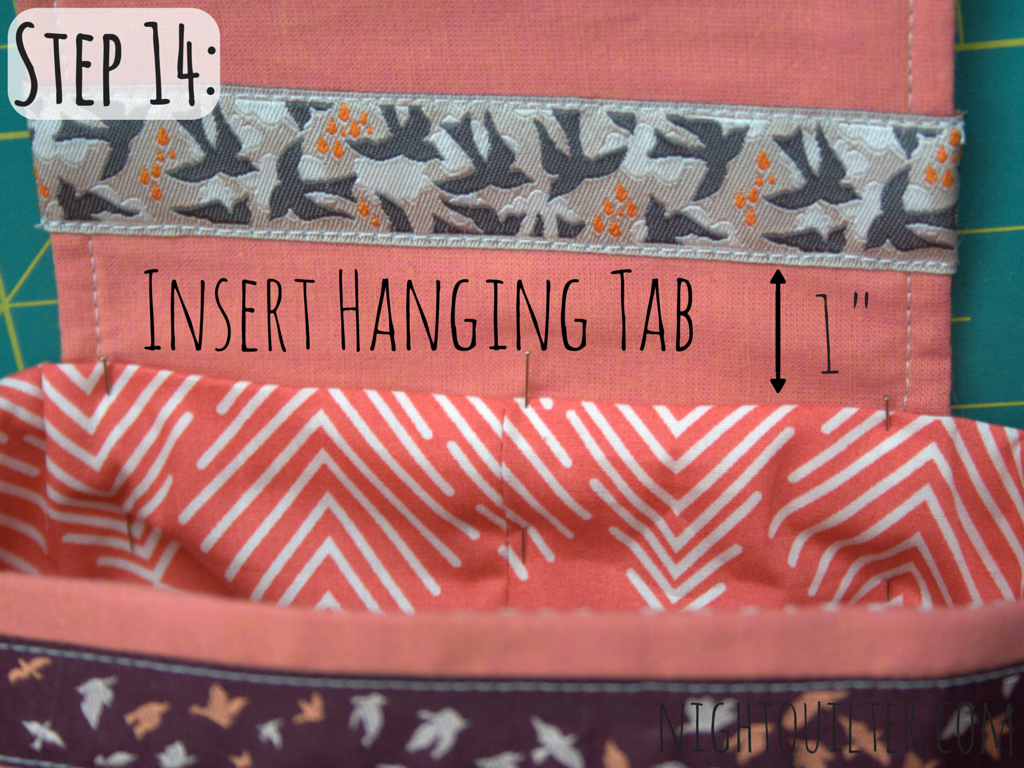
Step 14
 Insert the raw edge of the thread catch base and hanging tab into the space left open in the thread catch body. It should be inserted 1/2″ into the body, leaving 1″ between the thread catch and the accent ribbon on the hanging tab. Pin.
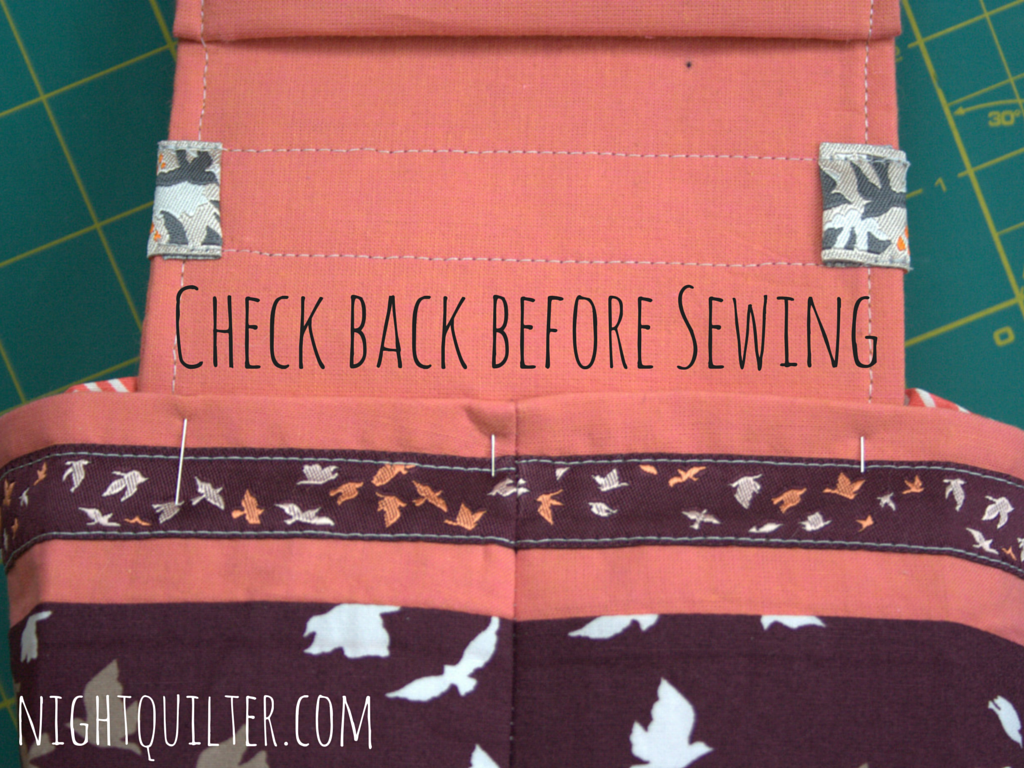
 Tip: Check the back to make sure that the back raw edge is properly tucked in before sewing.
Step 15
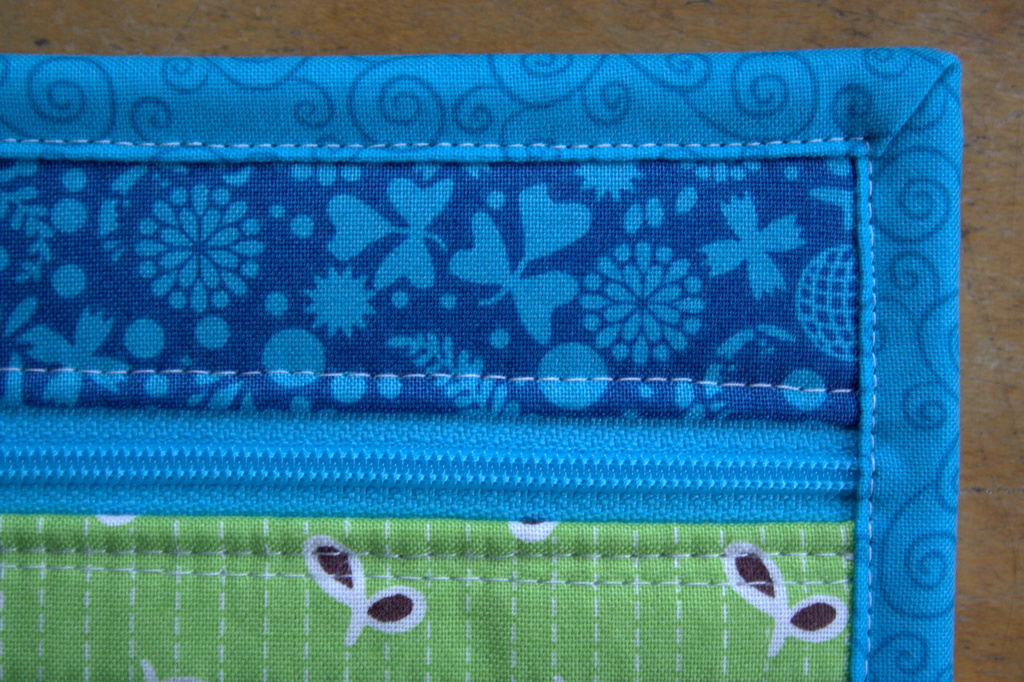
Sew along top edge, sewing the hanging tab into the thread catch body. I sewed the opening closed (with the hanging tab inside) first, with the thread catch body & lining facing up so that my top stitches show and I could control the seam distance better.
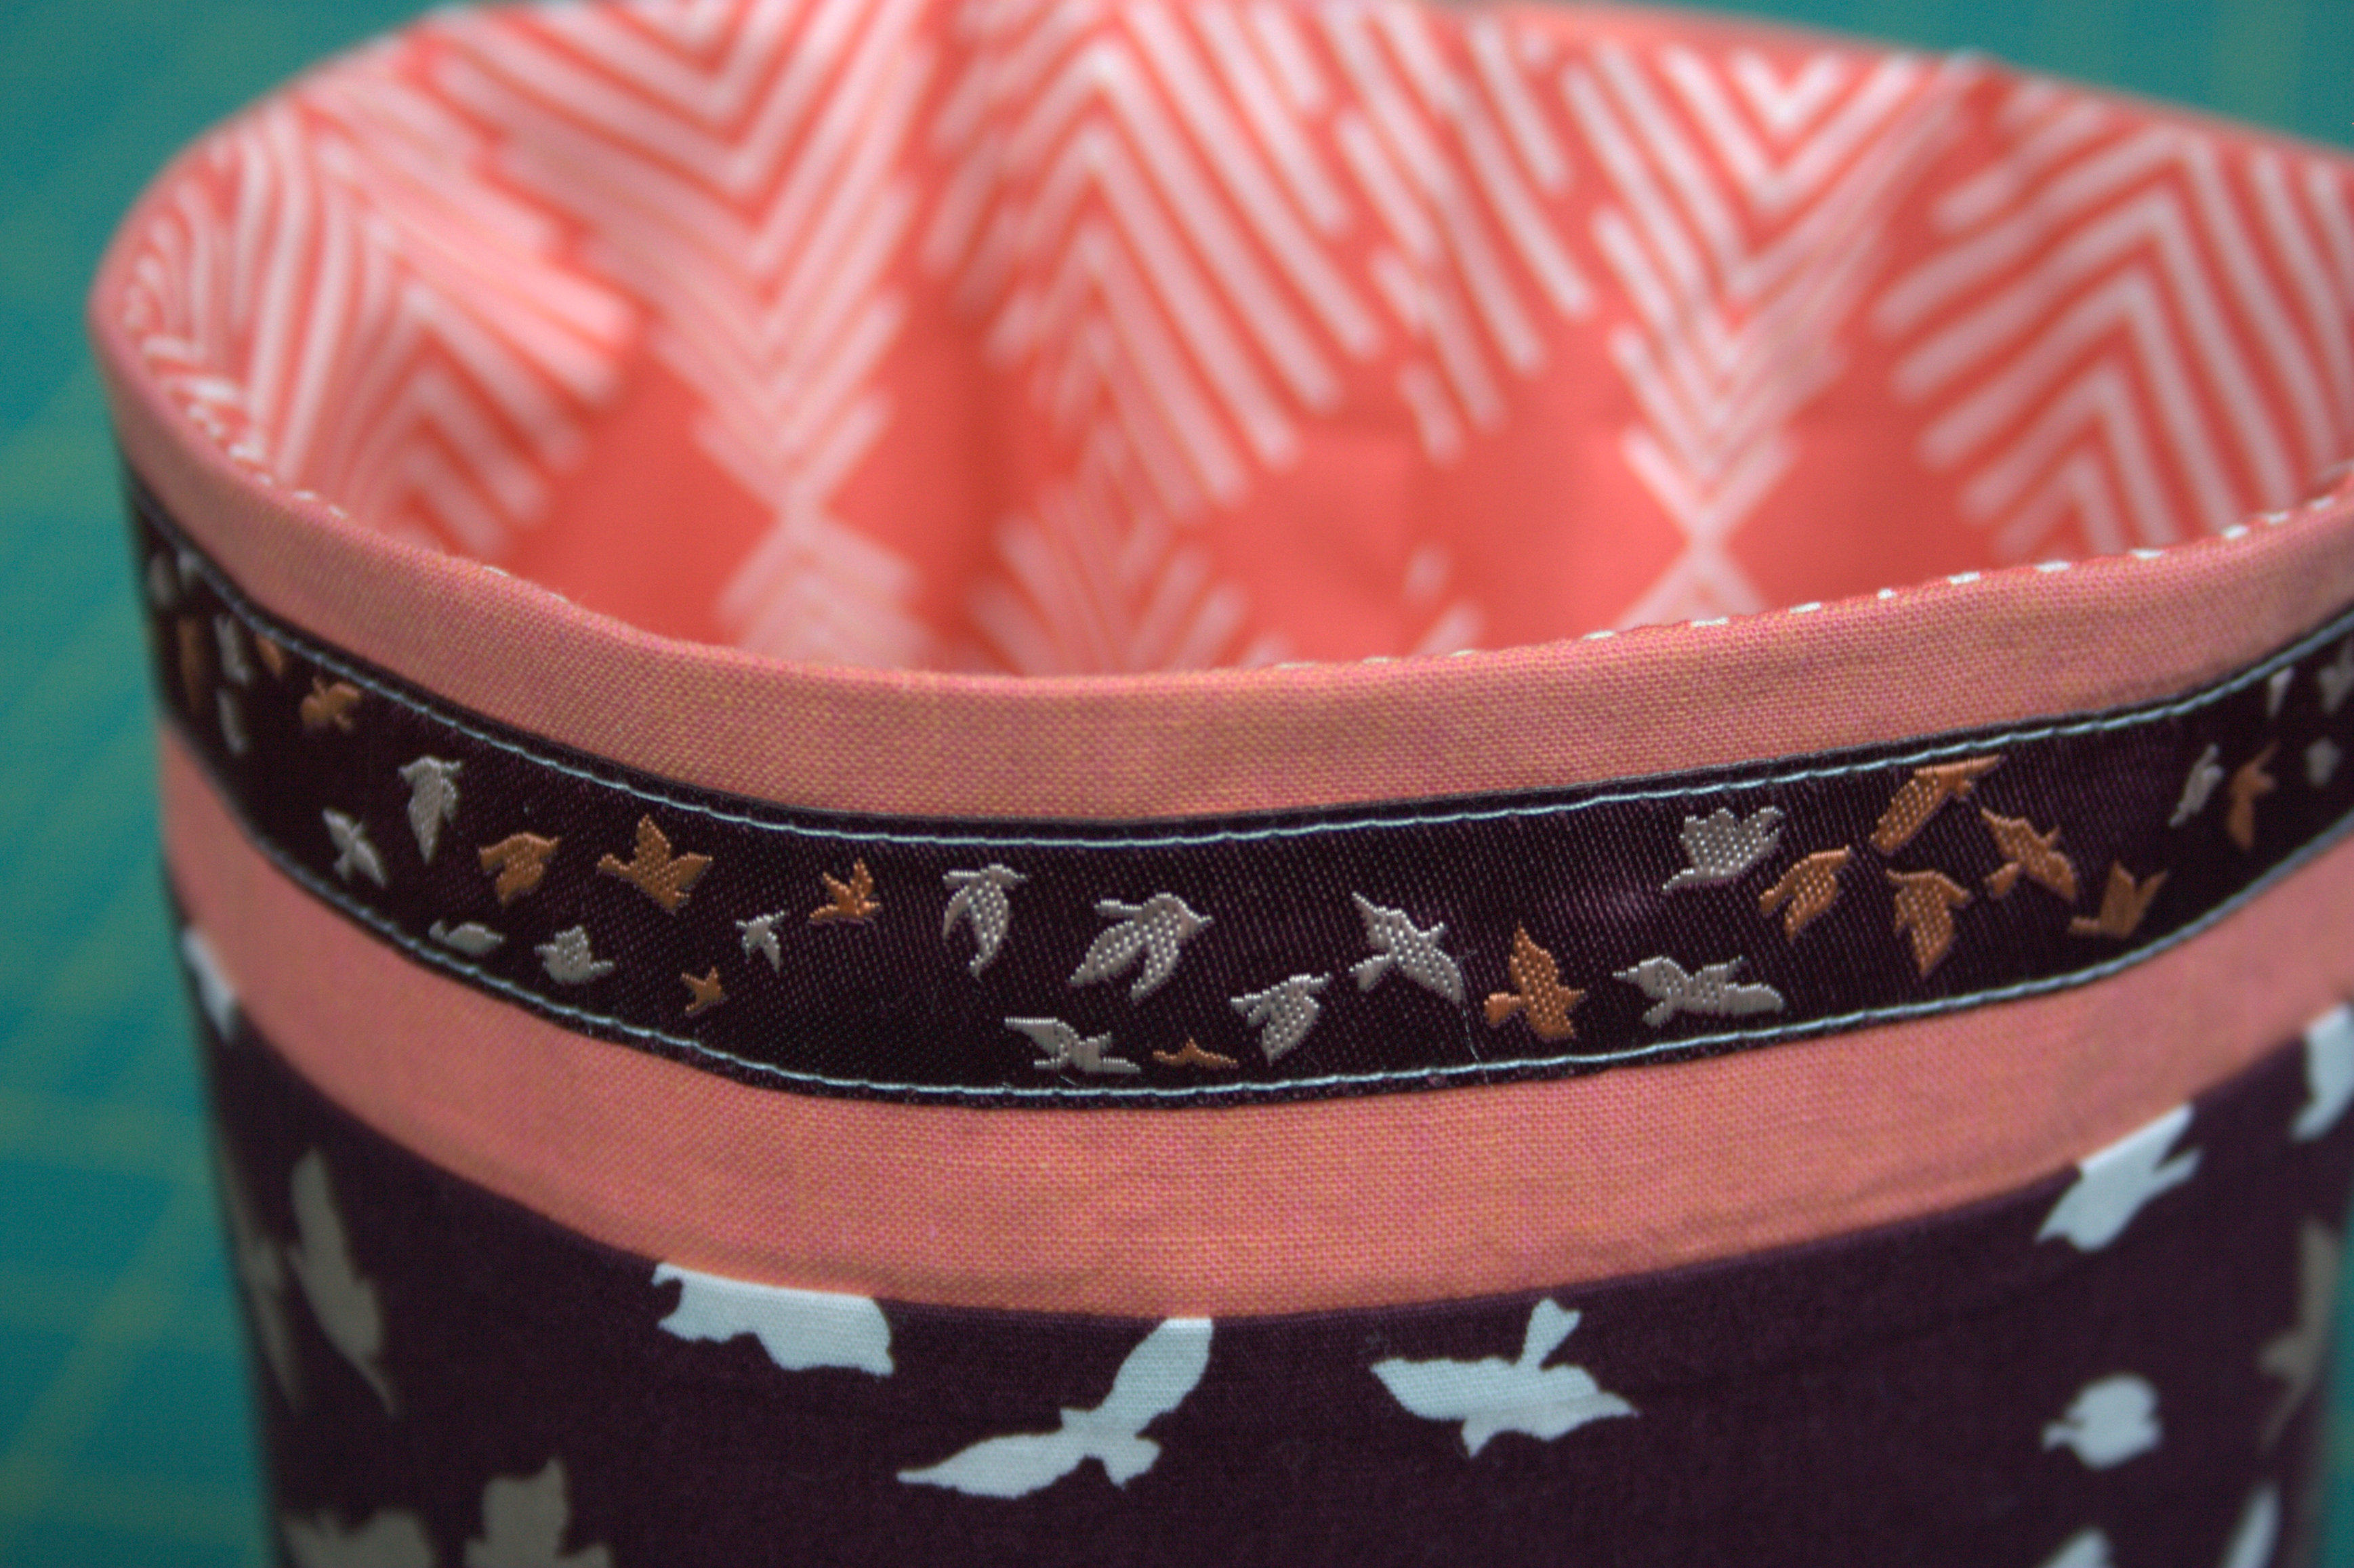
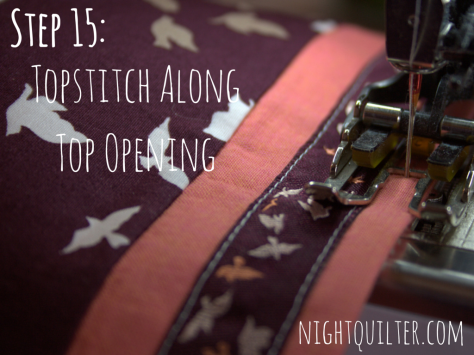 Next, top stitch along the entire top of the thread catch opening using a scant 1/4″ seam. Once the hanging tab was securely sewn in, I backstitched and cut my thread, again flipping the thread catch the other way (outside of the thread catch facing up) so that I could ensure that my top stitches are even since they are the ones that show.
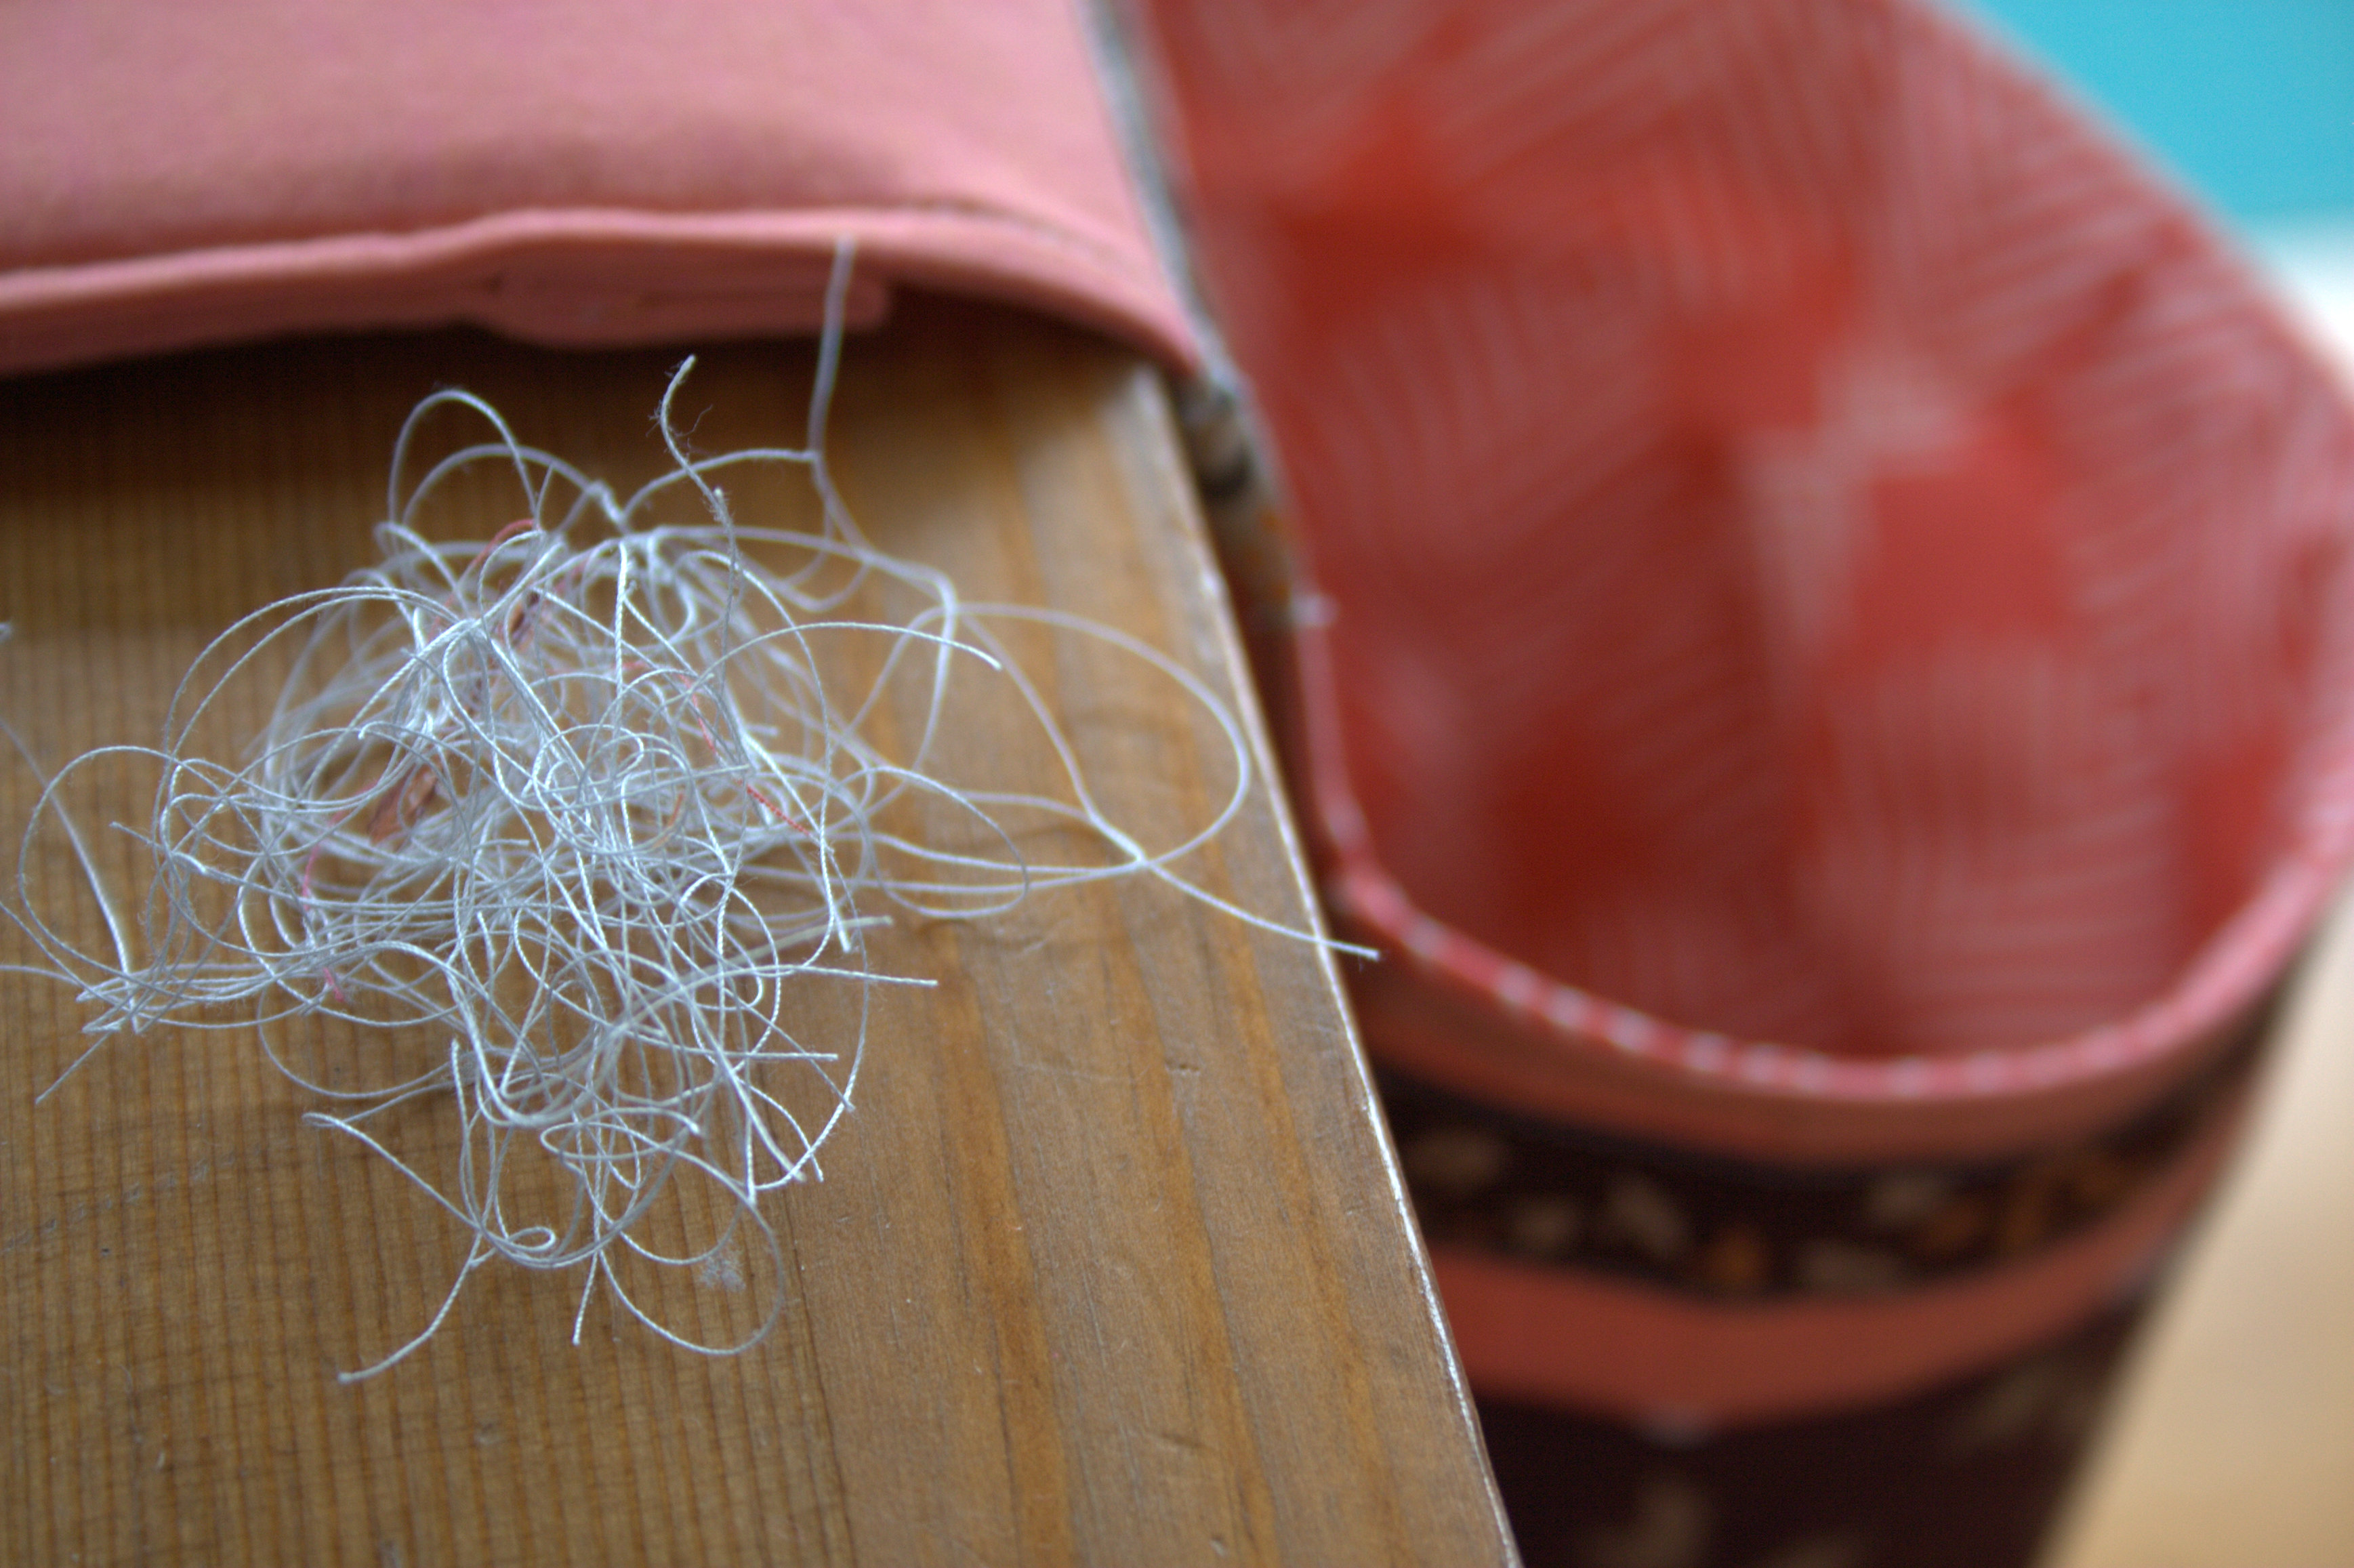
You’re finished!!
Go ahead and put your pile of threads accumulated during the making of this project into your gorgeous new thread catch!

Phew! Congratulations, you made it! I sure hope that this tutorial/pattern is clear, and please let me know if you have any questions or comments. I would love to see if you make this, too. Please tag me @nightquilter if you post on Instagram or Twitter.
Thank you so much to Bonnie Christine for including me in this blog tour, and be sure to check out Caitlin Topham’s post at Salty Oat from yesterday, and visit the final stop on the tour, Corri Sheff at The Lions Dandy tomorrow to see what gorgeousness she creates.
I’m linking up with Late Night Quilter’s Tips & Tutorials Tuesday & Crazy Mom Quilts Finish it up Friday.


 I’m excited to be joining a fantastic group of pattern designers to bring you a Christmas in July pattern bundle, available for $25 for three days only. There are 23+ great patterns included, as well as some great sponsor prizes. Both of my top selling foundation paper pieced patterns Lupine & Love Struck are included in the bundle, as well as a variety of other fantastic patterns by talented designers, both holiday themed and all purpose patterns great to have in your library.
 As an extra special incentive, if you buy the bundle from me, you will also be entered to win a Quilter’s Planner 2017 Starter Kit, which includes a 2017 Quilter’s Planner as well as pens, stickers, and highlighters to help you stay organized, productive, and inspired! (Note: The winner will receive the starter kit as soon as it’s available, expected to be shipping in October). Congratulations to Sharon, the winner of the Quilter’s Planner Starter Kit!
 You will get immediate digital download of all of the patterns shown above, plus:

 I really love clear video tutorials since I am very much a visual learner. Seeing each step helps make the process smooth and easy to complete without hang up or confusion. That, to me, is a big win!
 I decided to make my pin cushion with a range of warm Alison Glass Sun Prints 2015 and 2016, and once it was finished, it begged to be photographed out in the garden with the peonies. Such vibrant colors need to be in colorful company.
 I used a Tula Pink ribbon I won in a giveaway from
  I backed the pin cushion in Ex Libris Bookplate in Charcoal by Alison Glass (Andover Fabrics), and really would be tempted to use the pin cushion upside down every so often, it’s so pretty. This pin cushion is not for me, though, so the recipient can do with it as she pleases!
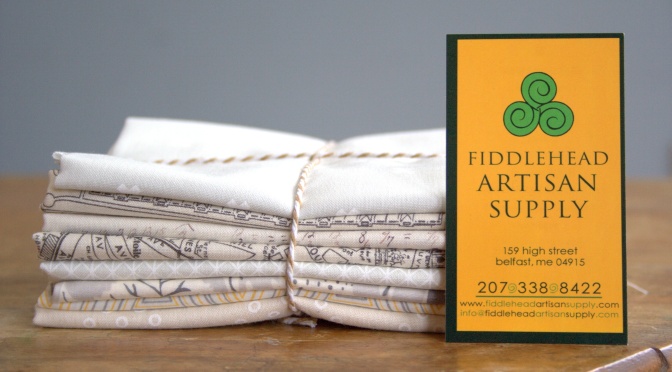
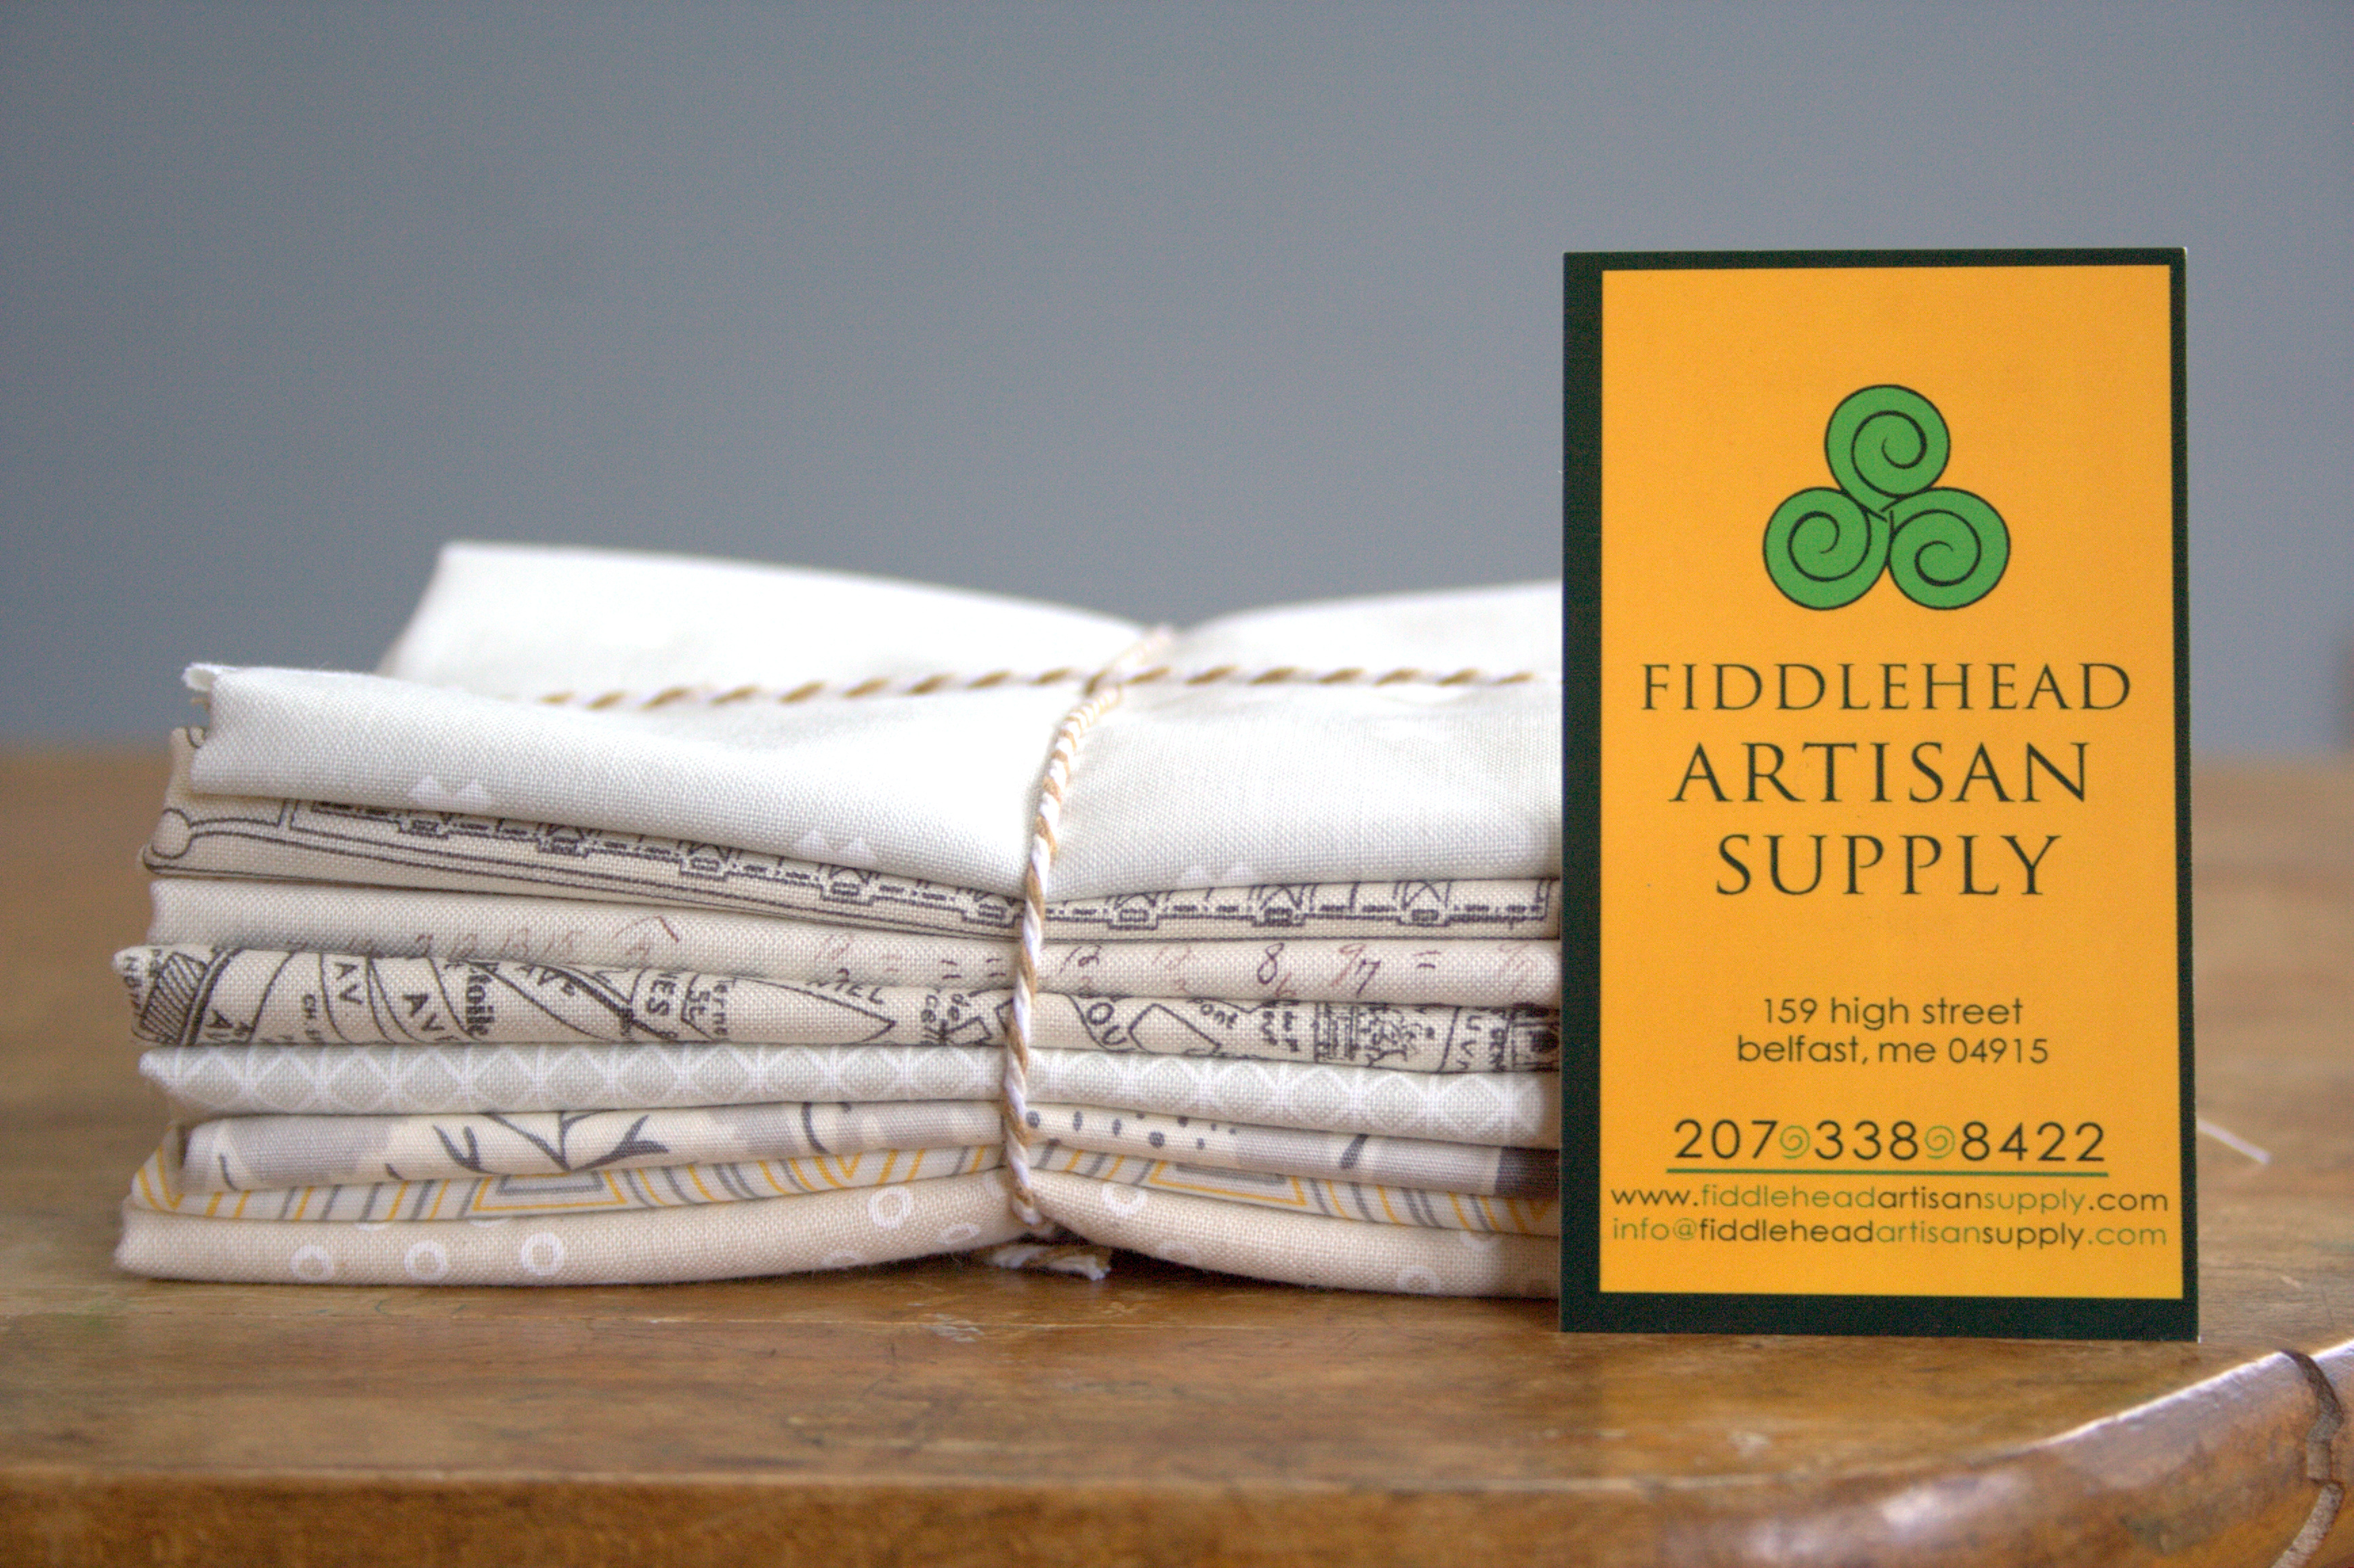
 This is the first pin cushion I’ve stuffed entirely with crushed walnut shell, at Sherri’s suggestion, and I really like the sturdiness and ease with which pins go into it. I bought the crushed walnut shell from a quasi-local, fabulous quilt shop,
  Check out the video below and make your own pin cushion if you want! There’s no such thing as too many pin cushions, right?