Category Archives: Paper piecing

Make Modern Mini Mini Quilt Challenge: Finally, Mini Minis

Remember that mini mini quilt craze that spread like wildfire among quilty bloggers about eight months ago? Yeah, me too. The fun news is that with the recent feature in Make Modern magazine, the mini mini quilt spark is being fanned back into life with a Mini Mini Quilt Challenge. You can see a fun inspiration gallery of mini mini quilts in the recent issue of Make Modern (Issue 11), including a couple made by yours truly, and there’s a community wide challenge running now through June 20th to help inspire more mini mini madness. Read more about the challenge here, or check out the hashtag #MMminimini to see what creative mini mini quilts have been created thus far (and add your own to the pool!).

mini mini quilts with aurifil for scaleI’d like to say the mini mini quilts I’m sharing today are newly inspired and whipped up in response to this fun challenge, but no. I’ll be honest. I began both of these many, many months ago, and they were worked on at a snail’s pace, off and on. I’m almost embarrassed to share these finishes, since they have taken me so ridiculously long to finally finish. But I know that you understand, and that you would want to see the finished mini mini quilts even if it took over 8 months (gah!) for me to finally buckle down and finish them. So, without further delay, my latest mini mini quilt finishes:
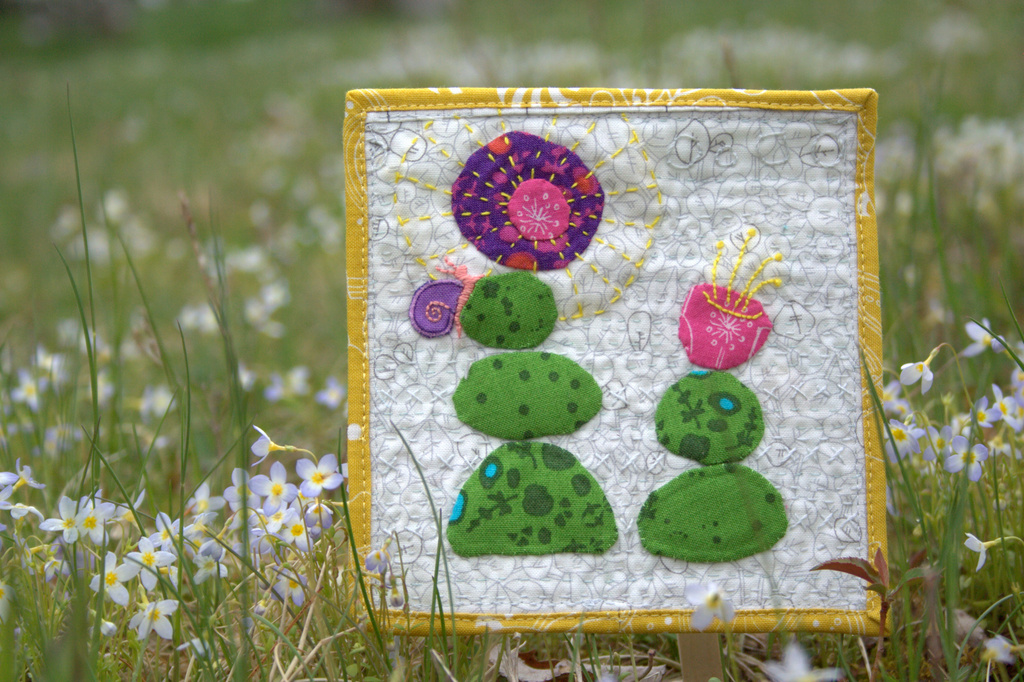
Slow Growth

slow growth mini mini quilt finish
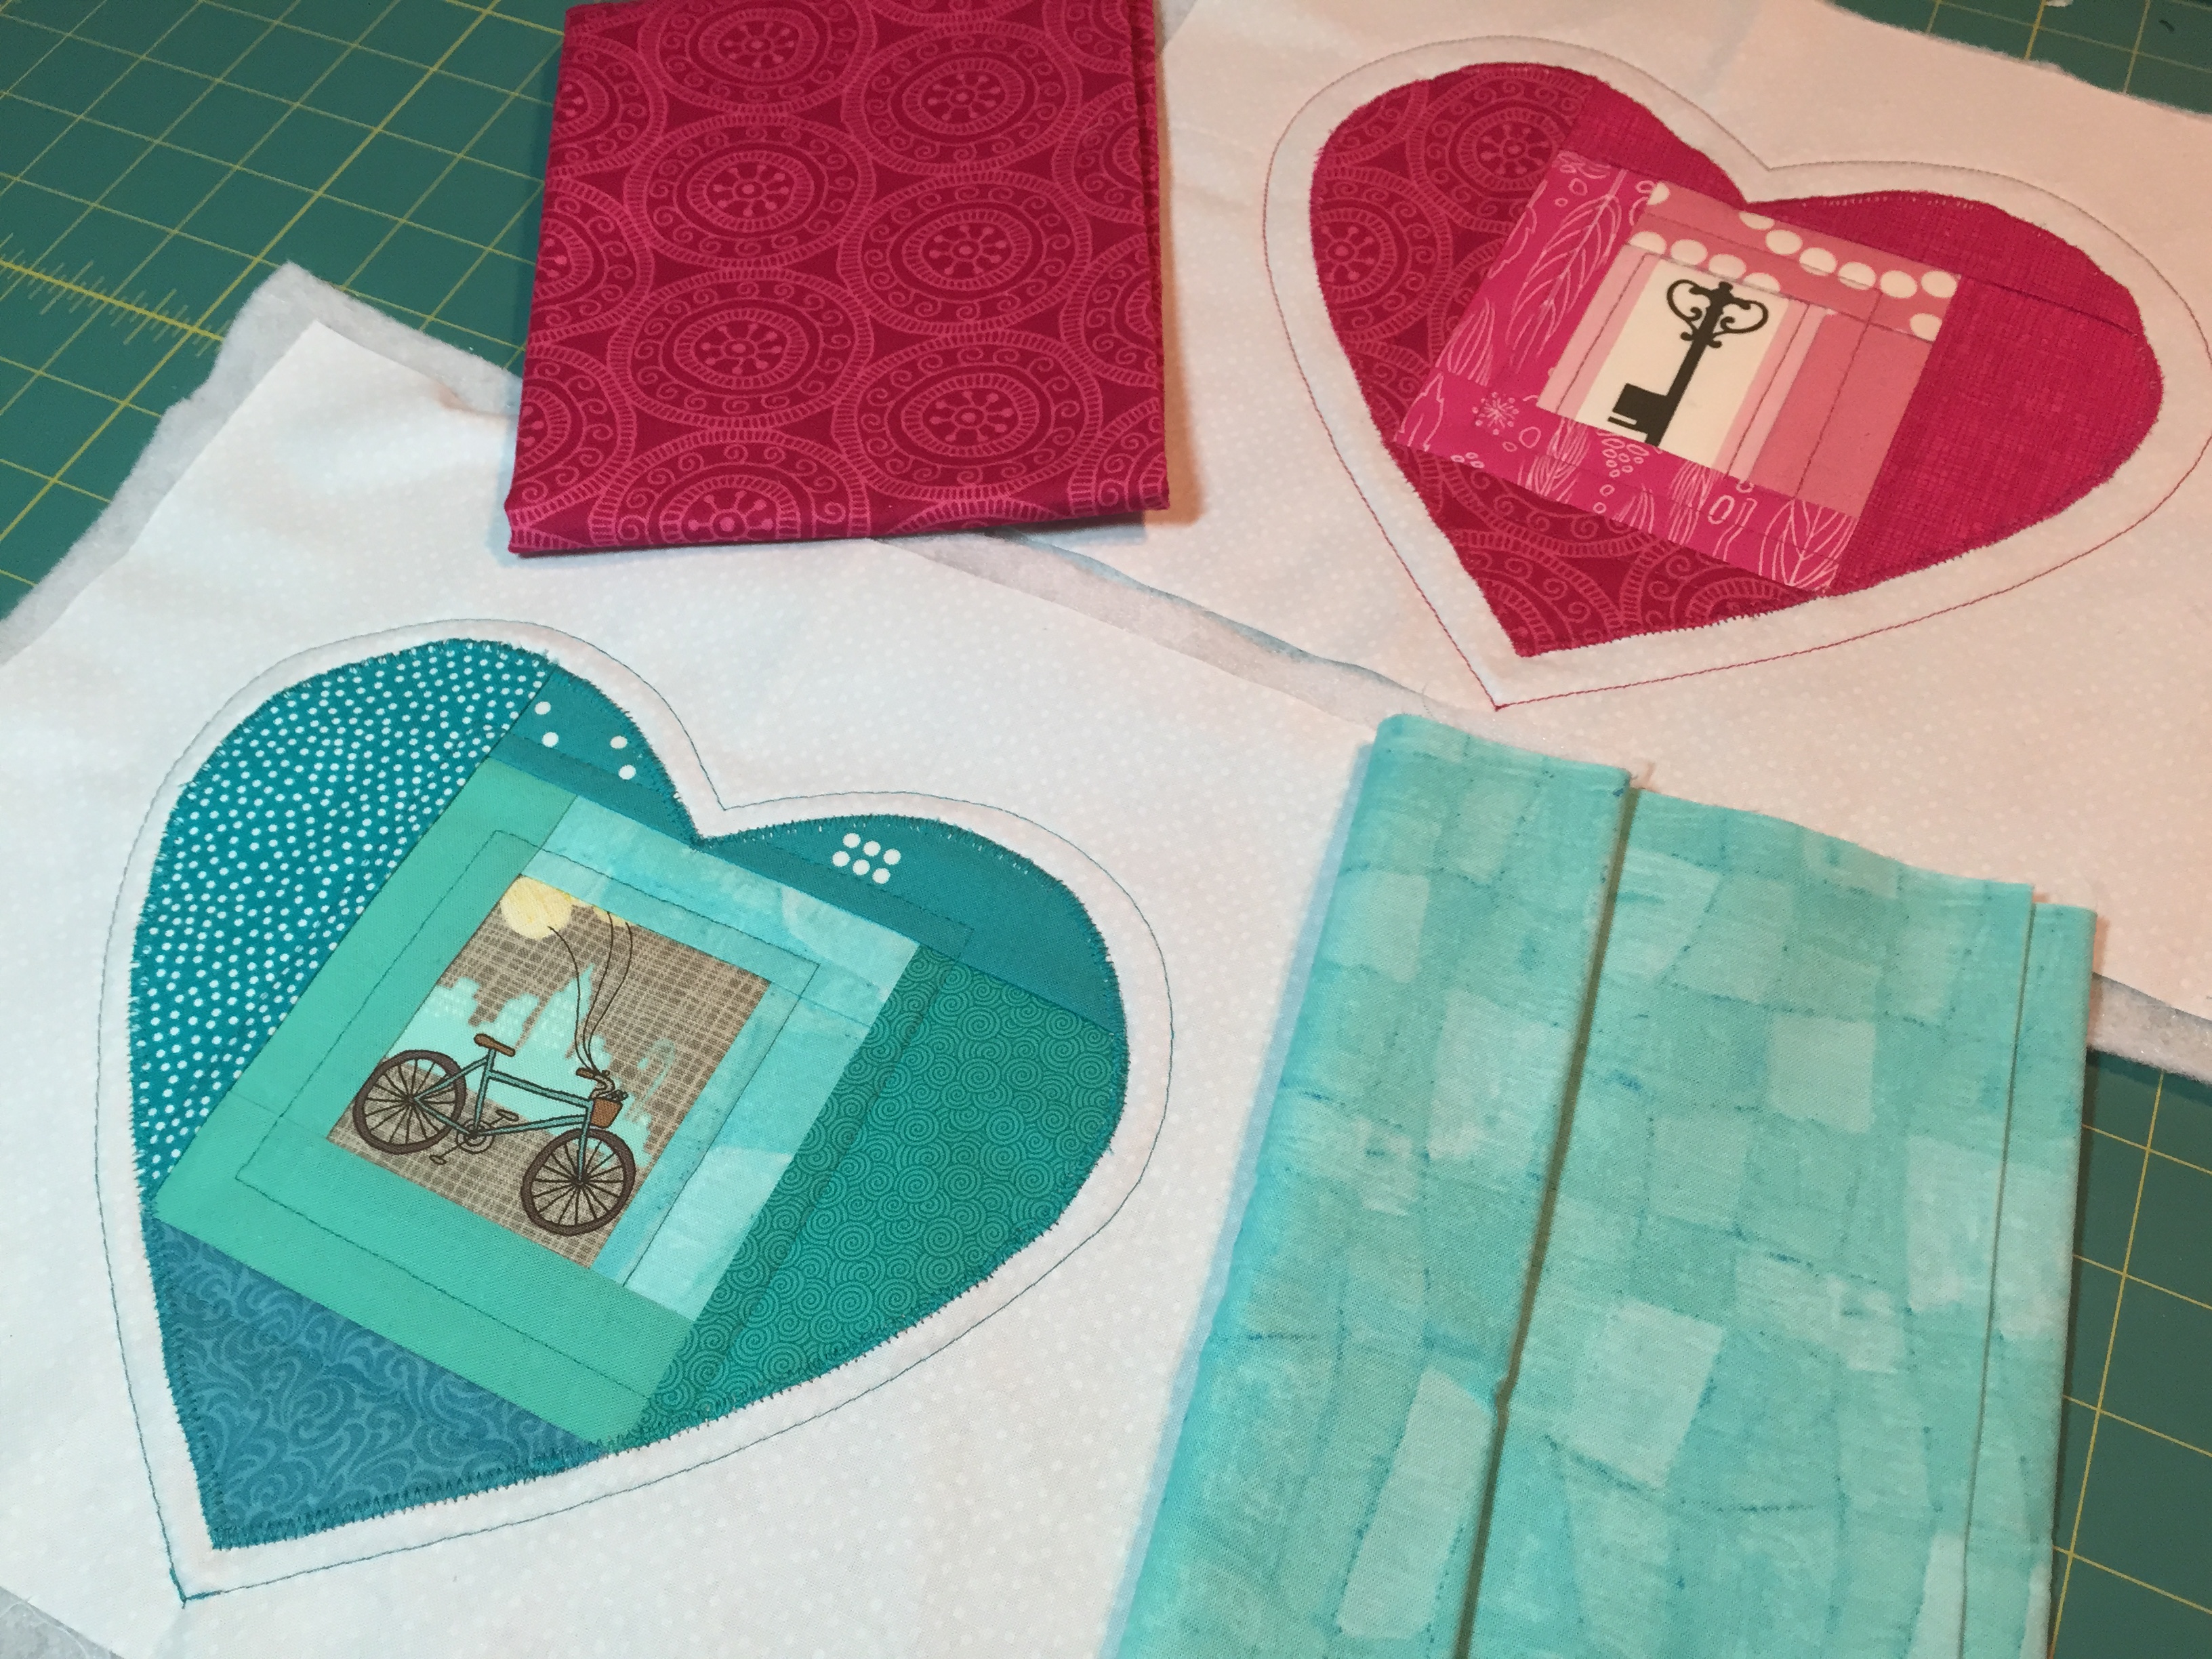
This mini mini quilt was made for Allison at Campbell Soup Diary (you can see the amazingly wonderful mini minis she made me here and here). When we first decided to exchange mini minis, she offered this as guidance: “As for colors that I like… AG grove in grass green is THE perfect shade! I tend towards pinks, purples, oranges, yellows, but generally stay away from blues unless it’s a really nice royal. Turquoise is great, but red is the one color that is almost always left out of my color palette. (don’t ask me why, but I even avoid it in my garden and my wardrobe) If given the choice between straight lines and wonky, I prefer straight. I love natural and soft shapes, but I also realize that that cannot easily be pieced.

slow growth mini mini quilt finish
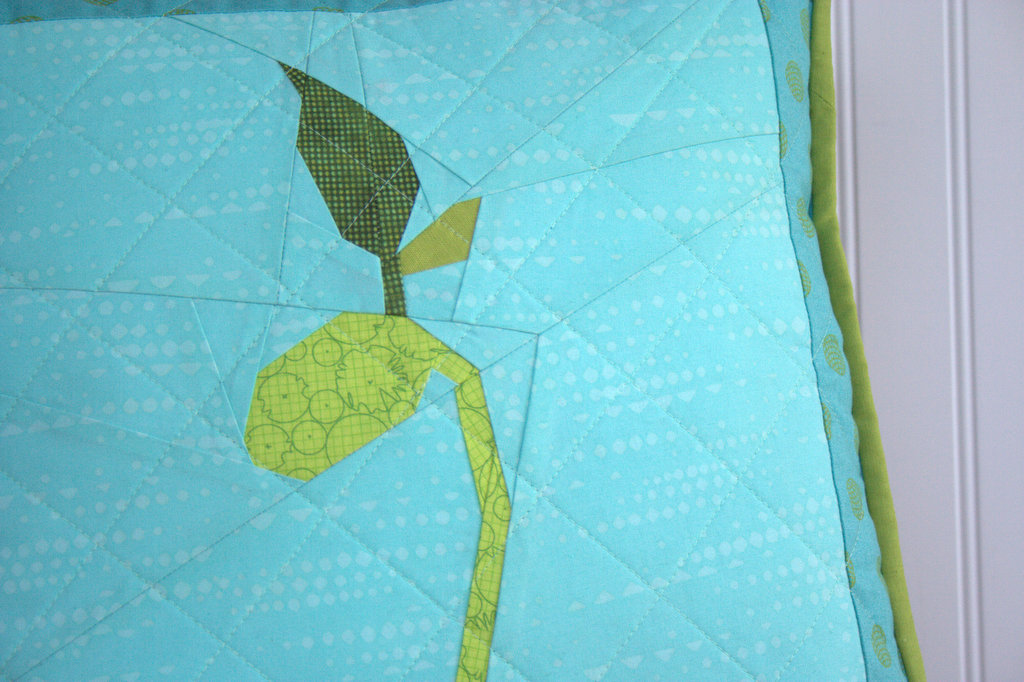
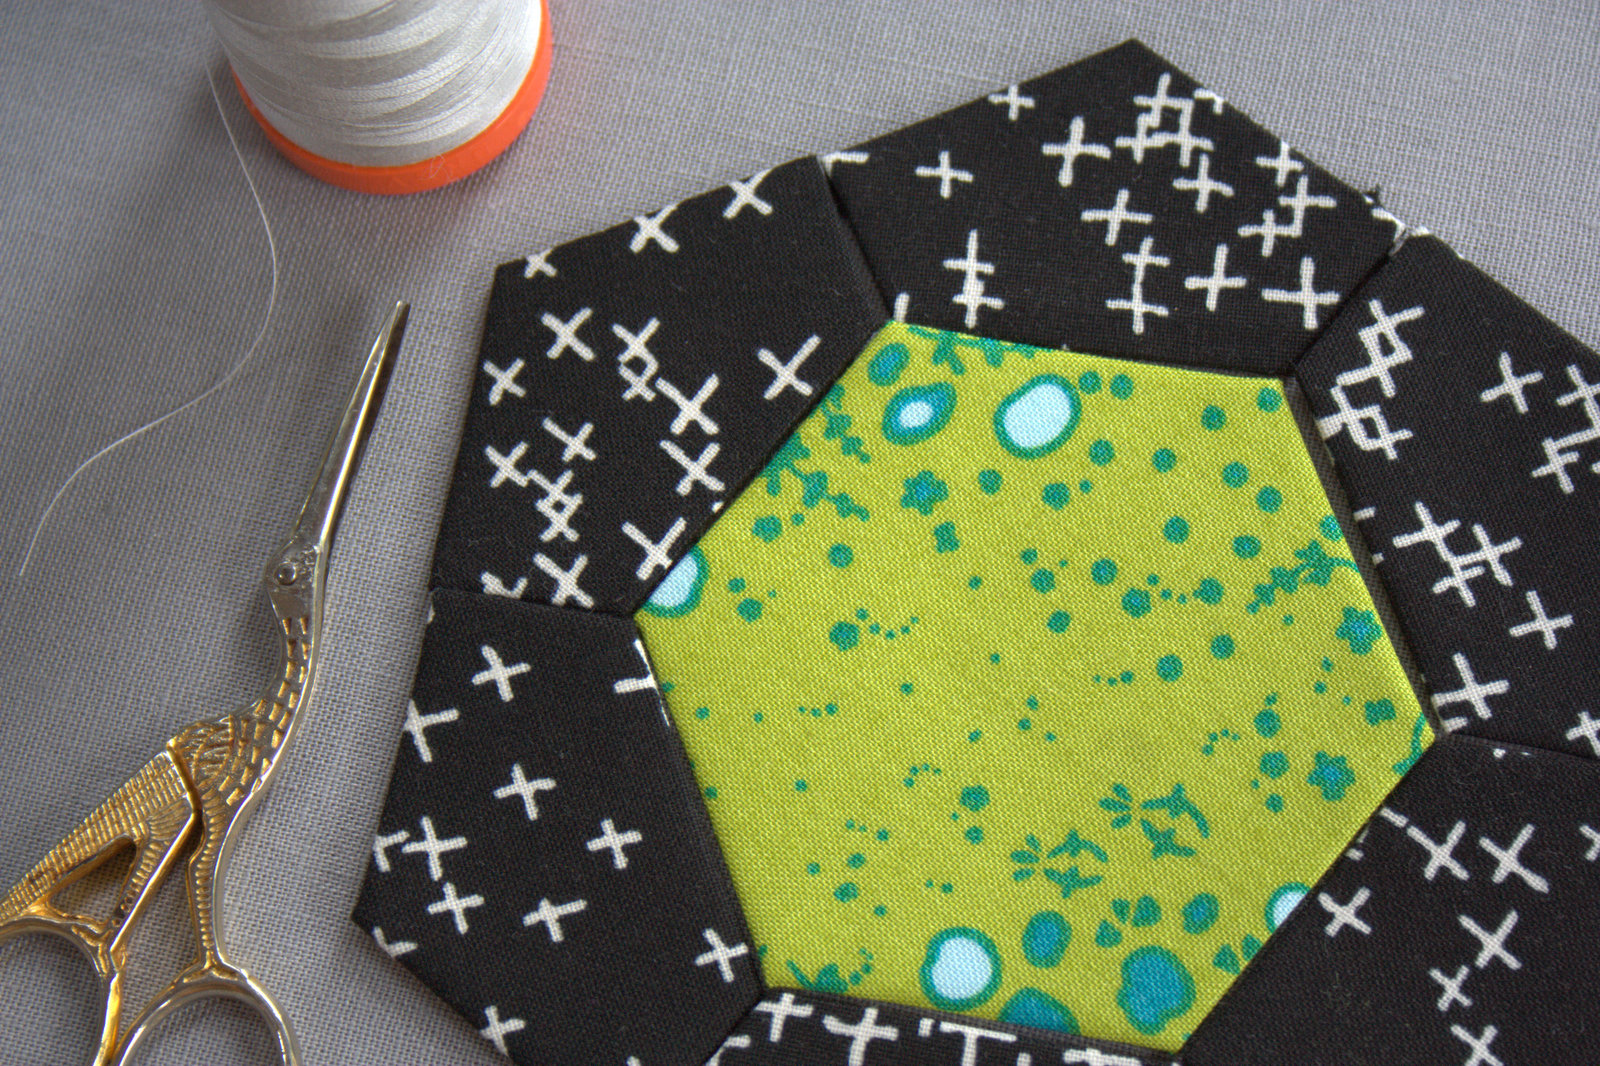
For some reason, I latched onto the AG grove in grass green (of course), paired with the favorite colors of pinks, purples, oranges, yellows. I wanted to create something with natural and soft shapes, so immediately thought of needle-turn applique. The rest of this mini mini just sort of happened as I stitched. The mod leaves and flowers are needle-turn appliqued, and then I used 12 wt Aurifil thread to embroider details on the flowers.

slow growth mini mini quilt finish snail detail
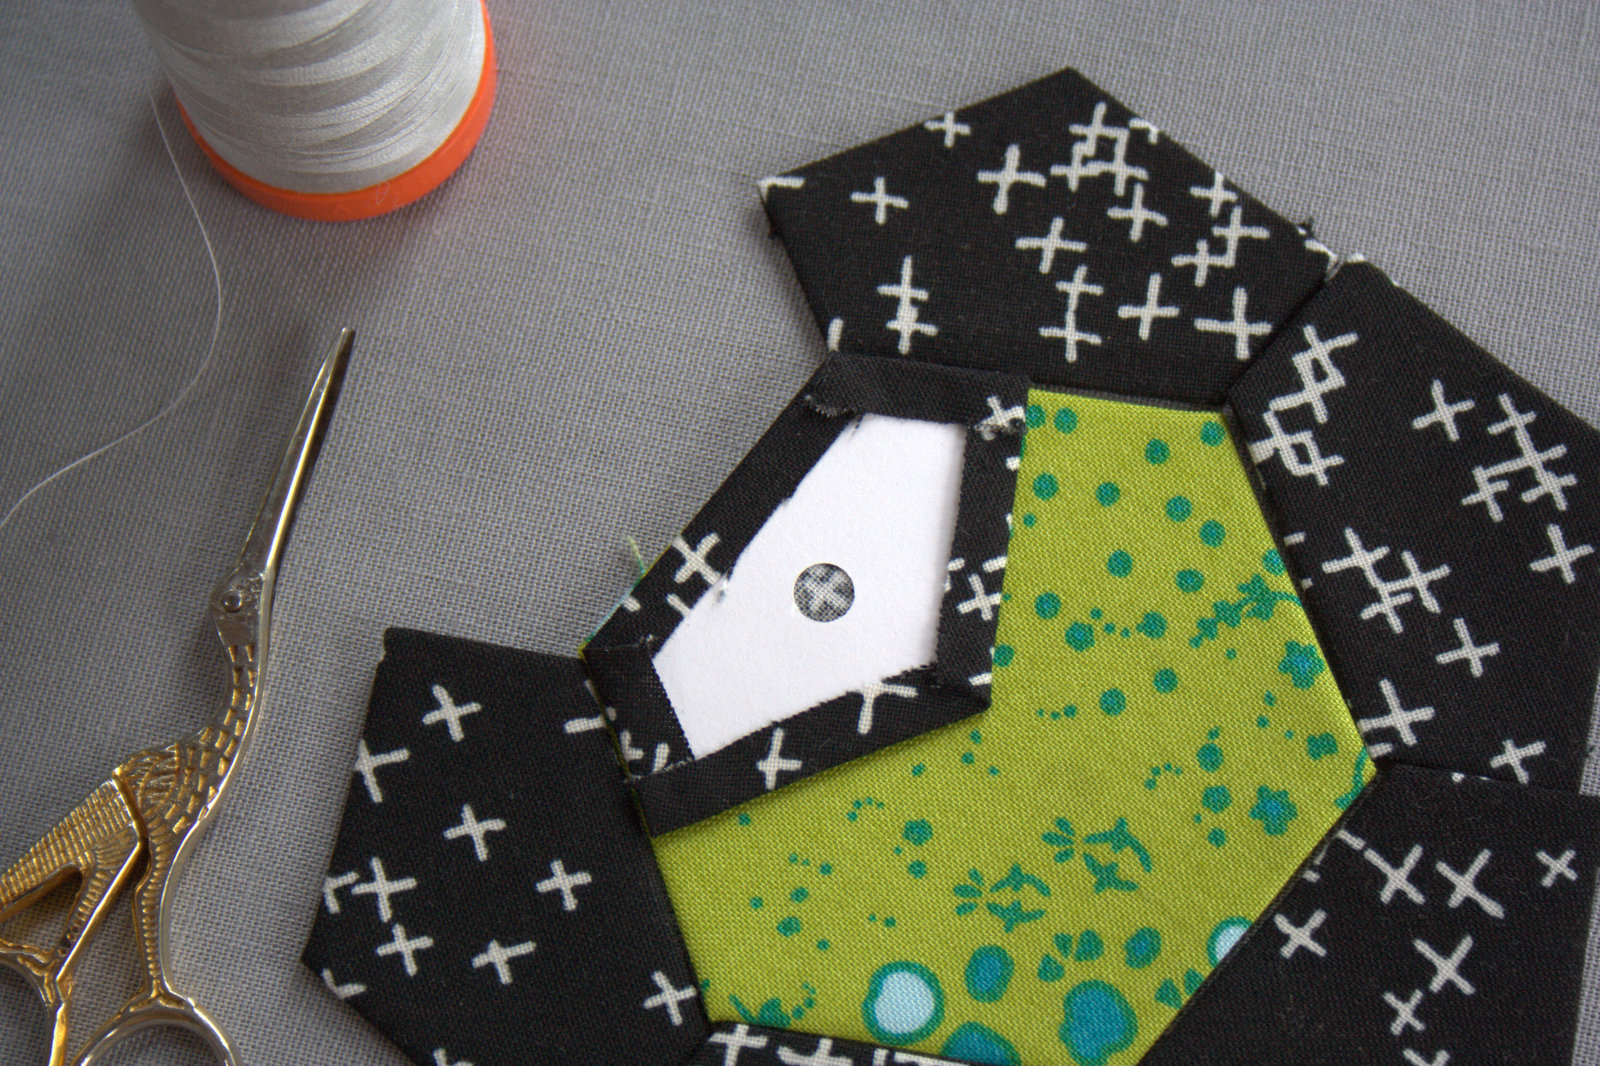
The snail was not initially intended to be part of this mini mini, but in fact was the result of a mini mini travesty: my three year old son found my little scissors and in playing around, cut a small hole right in the mini mini quilt!! After taking many deep breaths, probably yelling at least once and emphatically saying that it was NOT ok to cut mommy’s sewing, I decided to make lemonade out of lemons and needle-turn a little patch over the hole. With a bit of embroidery embellishment, a little slow growing snail was born. It ends up this snail was the perfect symbol of this project, and ultimately inspired its name: Slow Growth.

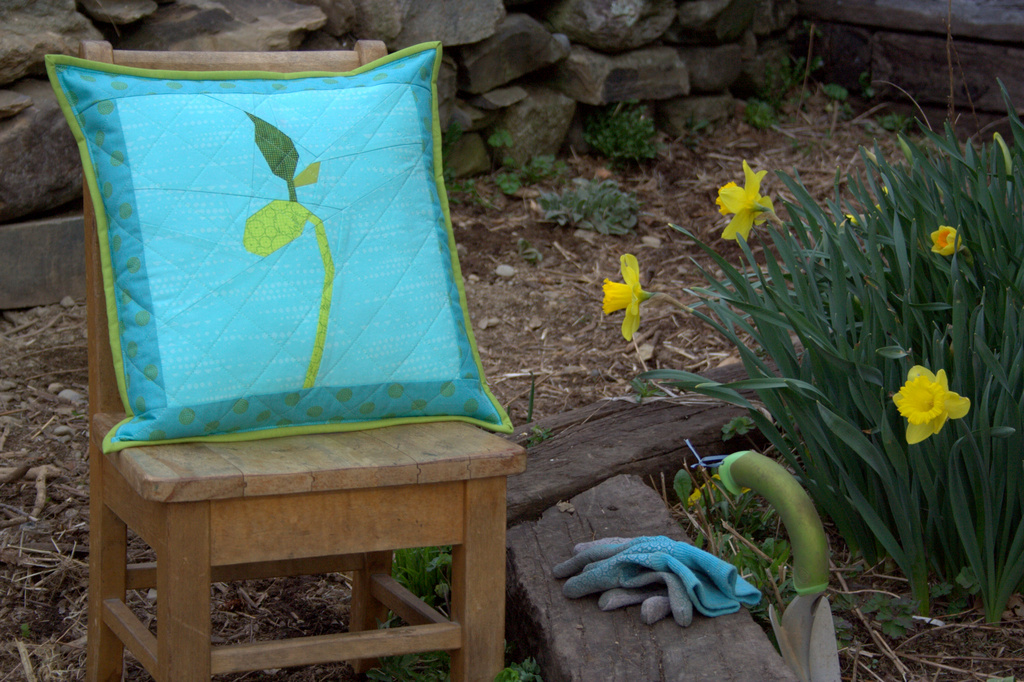
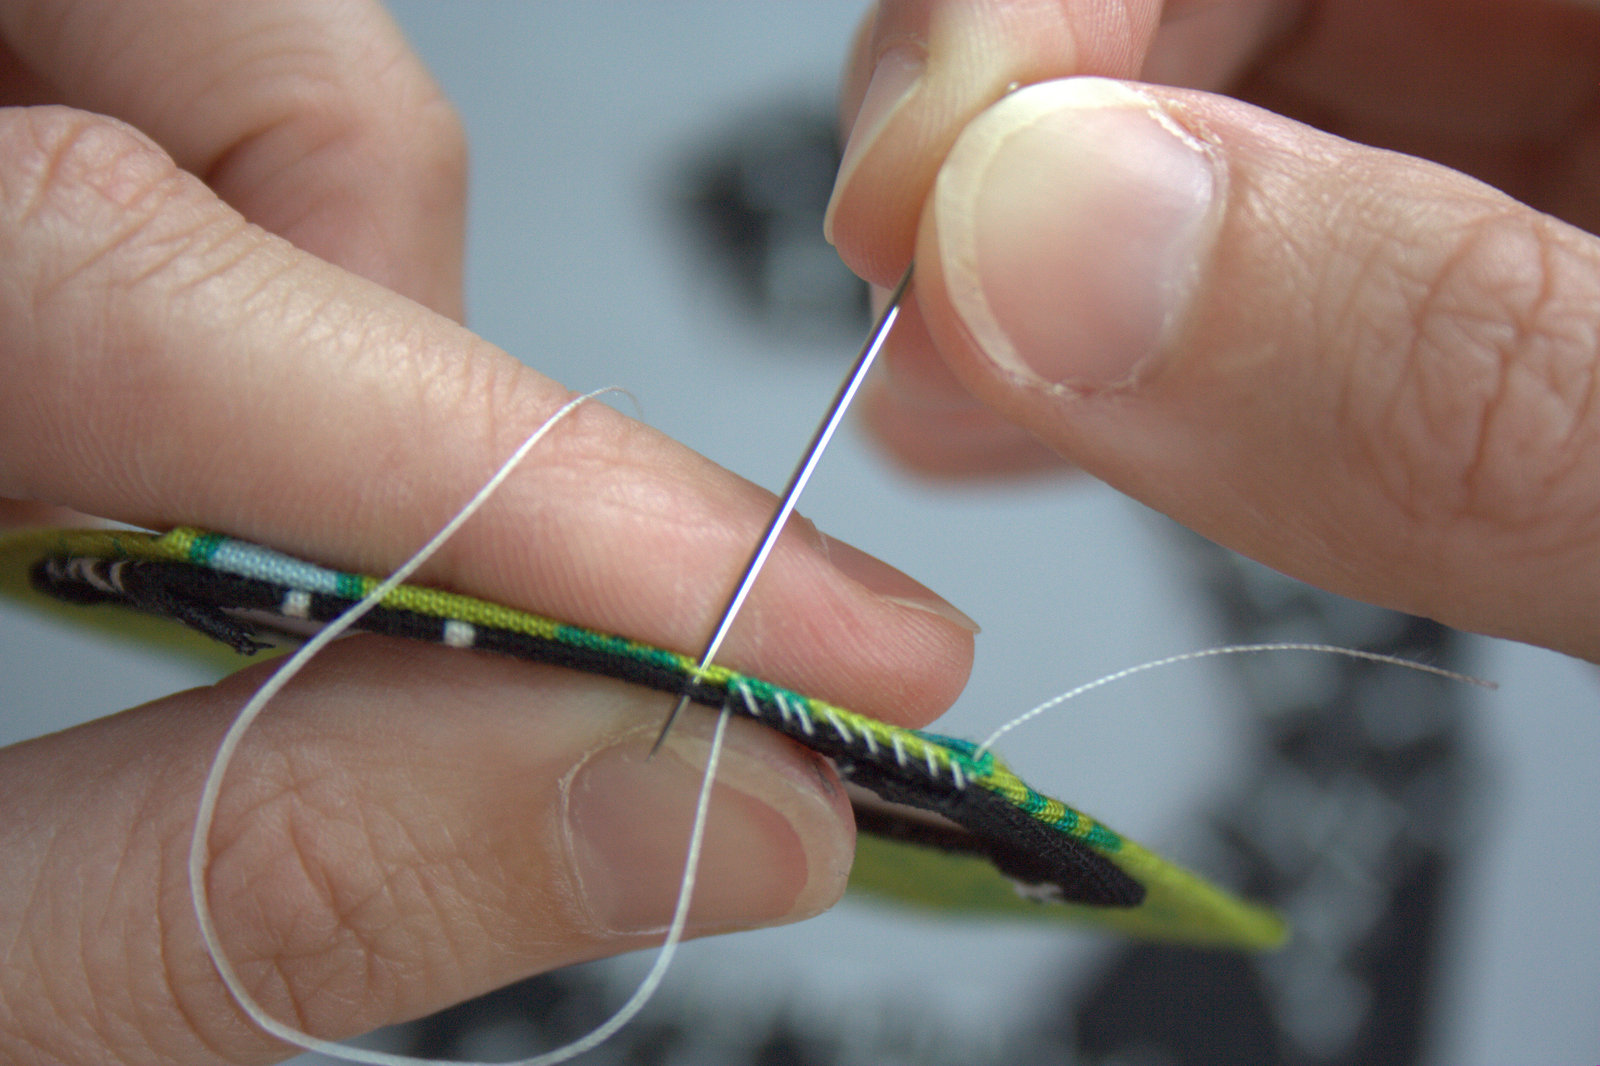
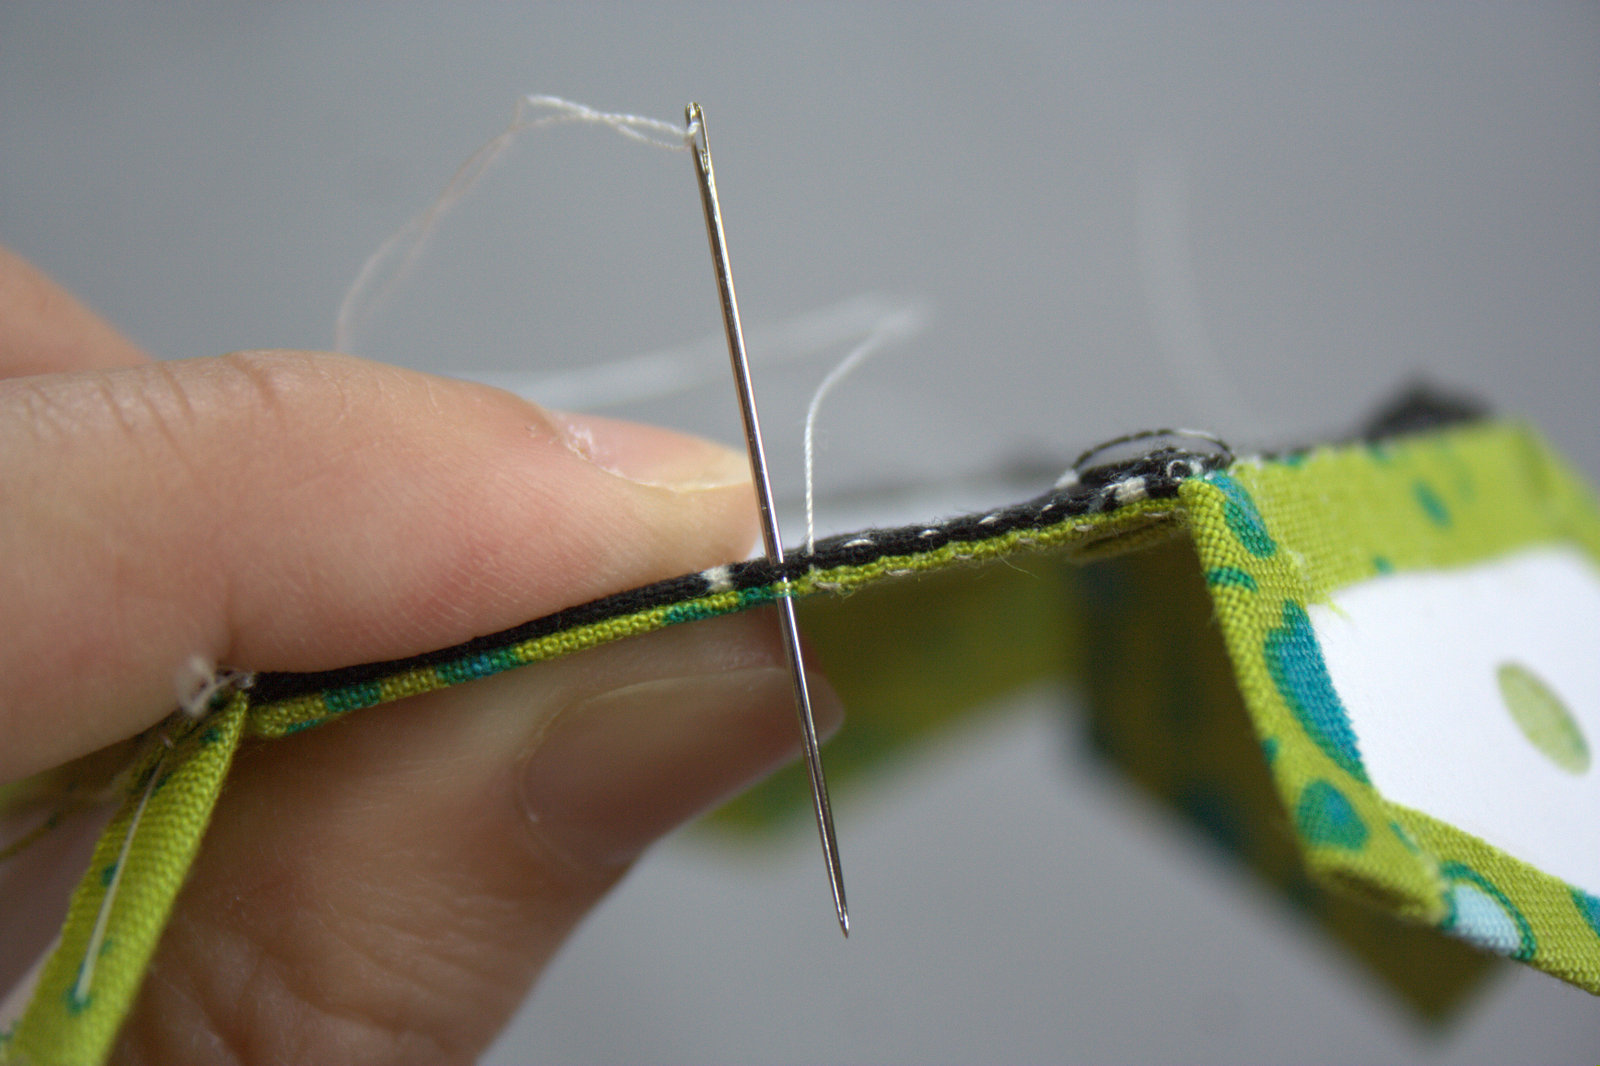
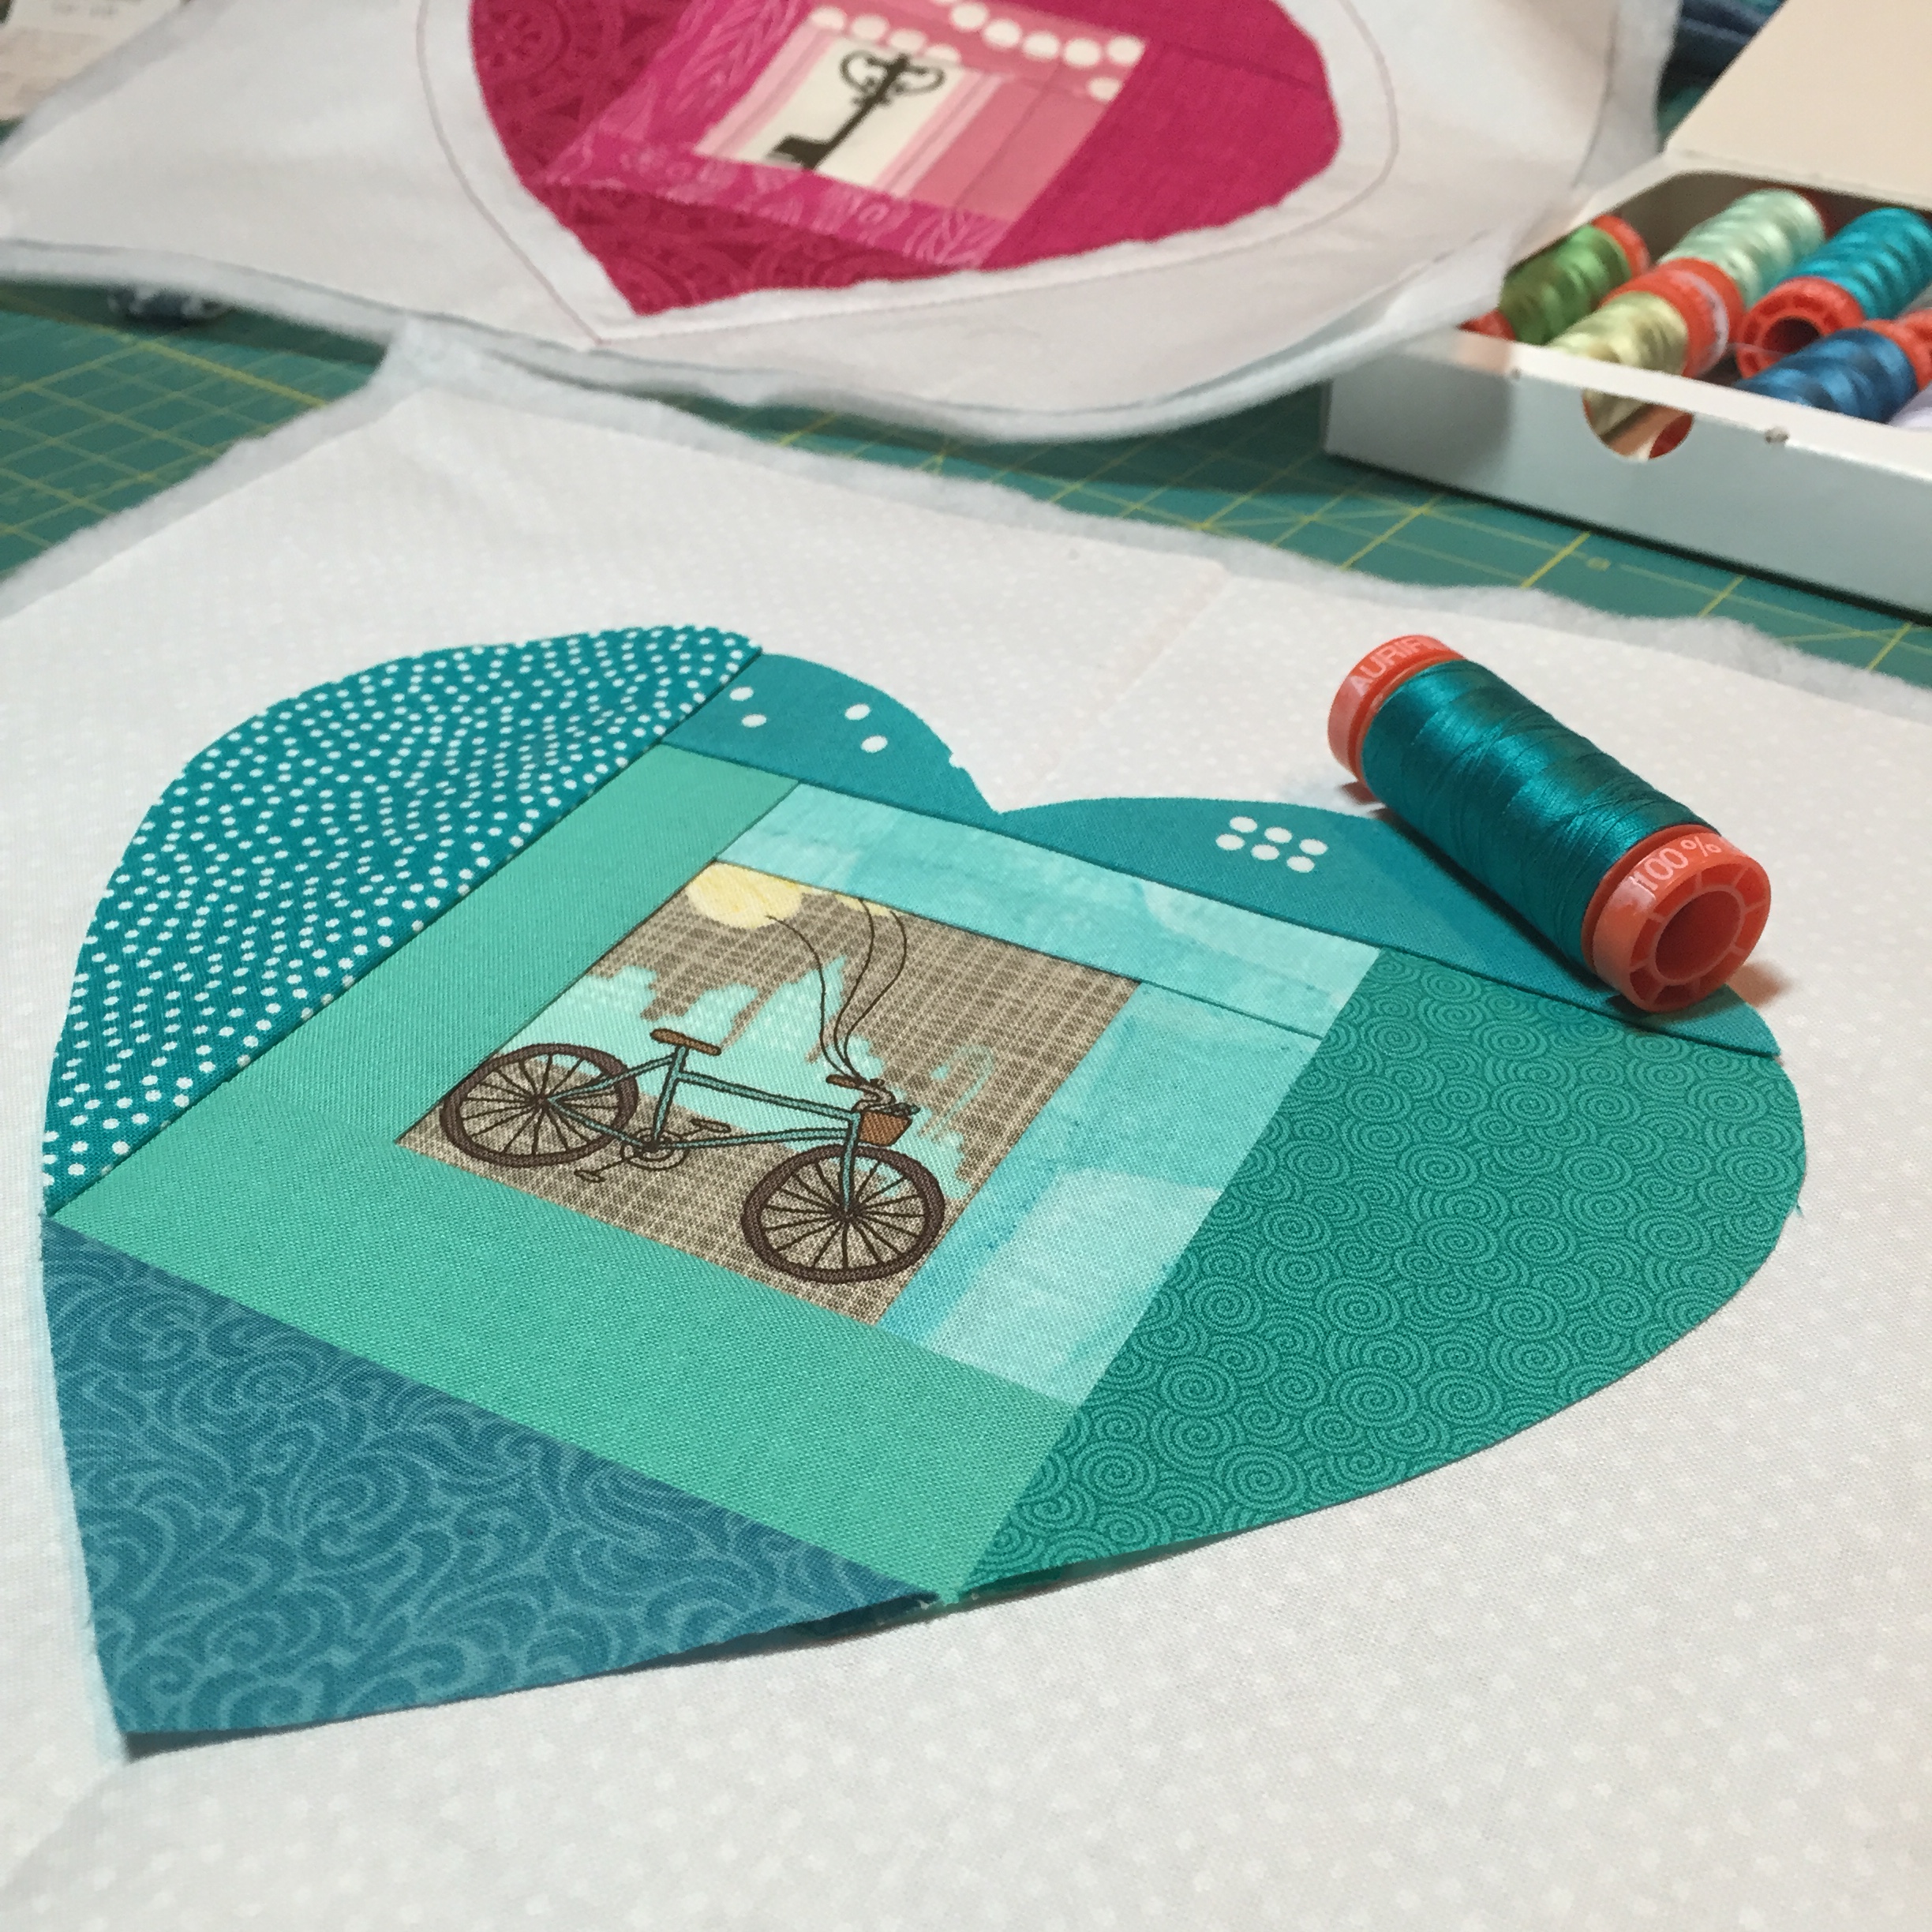
I densely hand quilted this mini mini with a variety of weights of Aurifil 2600-Dove (50wt, 28wt, and 12 wt), essentially hand-matchstick-quilting the 5″x5″ quilt. I improv-ed the quilting and included a few rows of X’s and one of little bubbly O’s for interest. I used a super thin binding for this (1″ strip to start, single fold), and although finicky to sew on, I really like the feel and aesthetic of the skinny binding. Even if it took ages, there are many positive, grateful, creatively generous thoughts stitched into this mini mini, Allison! I hope you like it!

Too Tiny

fpp feather mini mini quilt finish
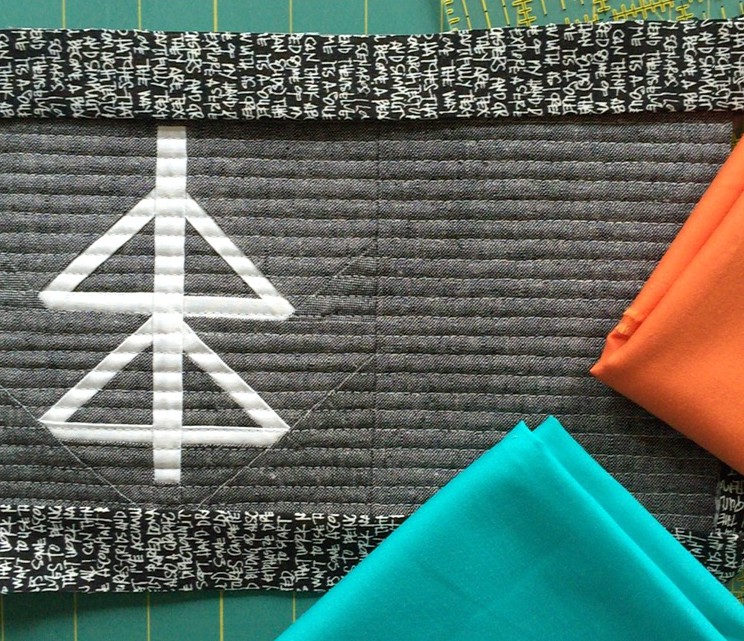
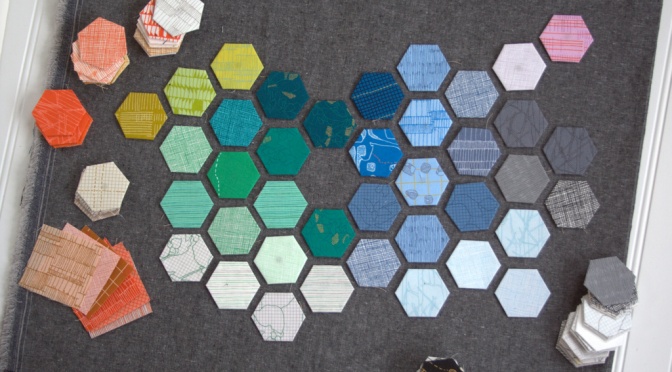
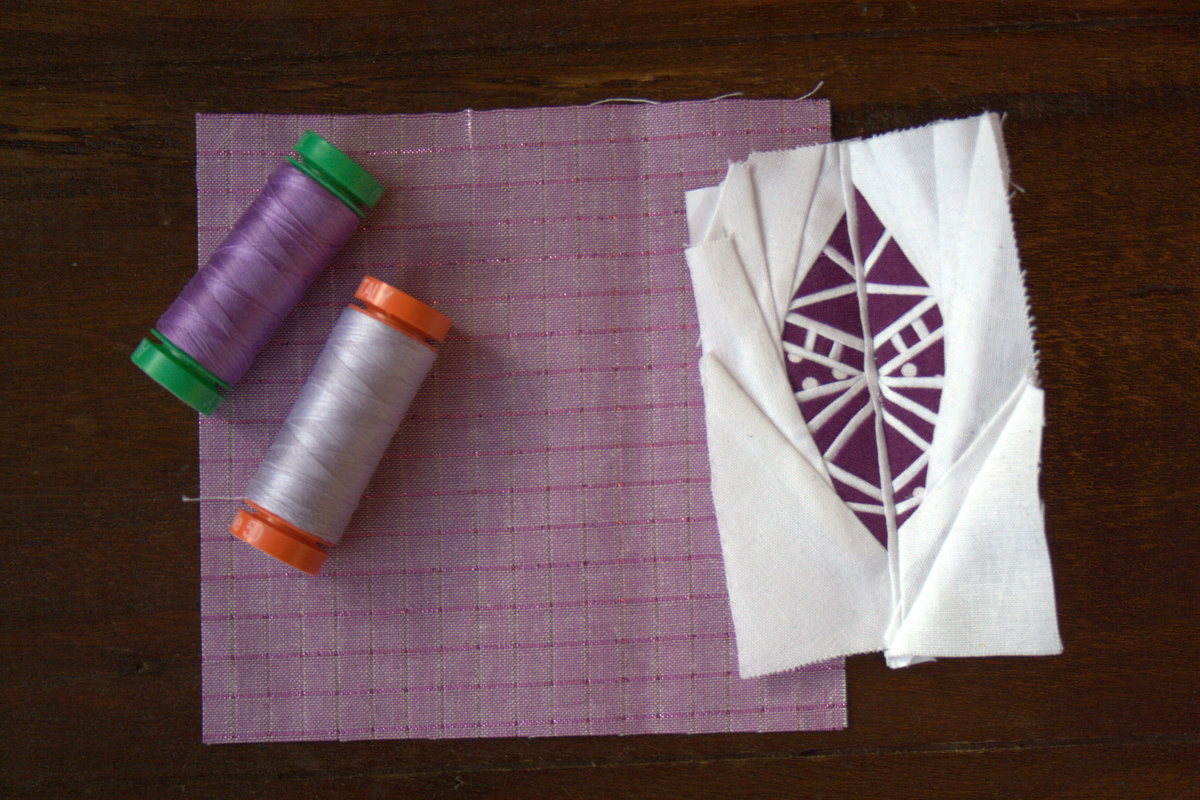
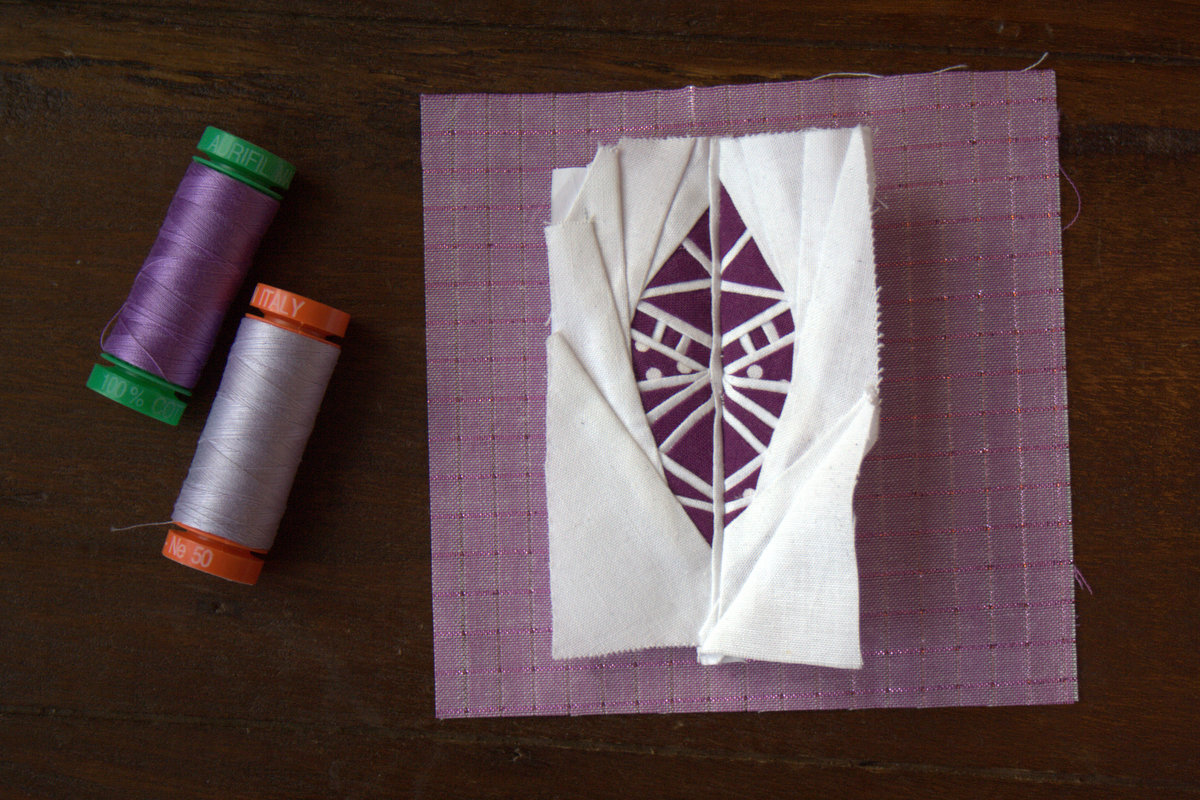
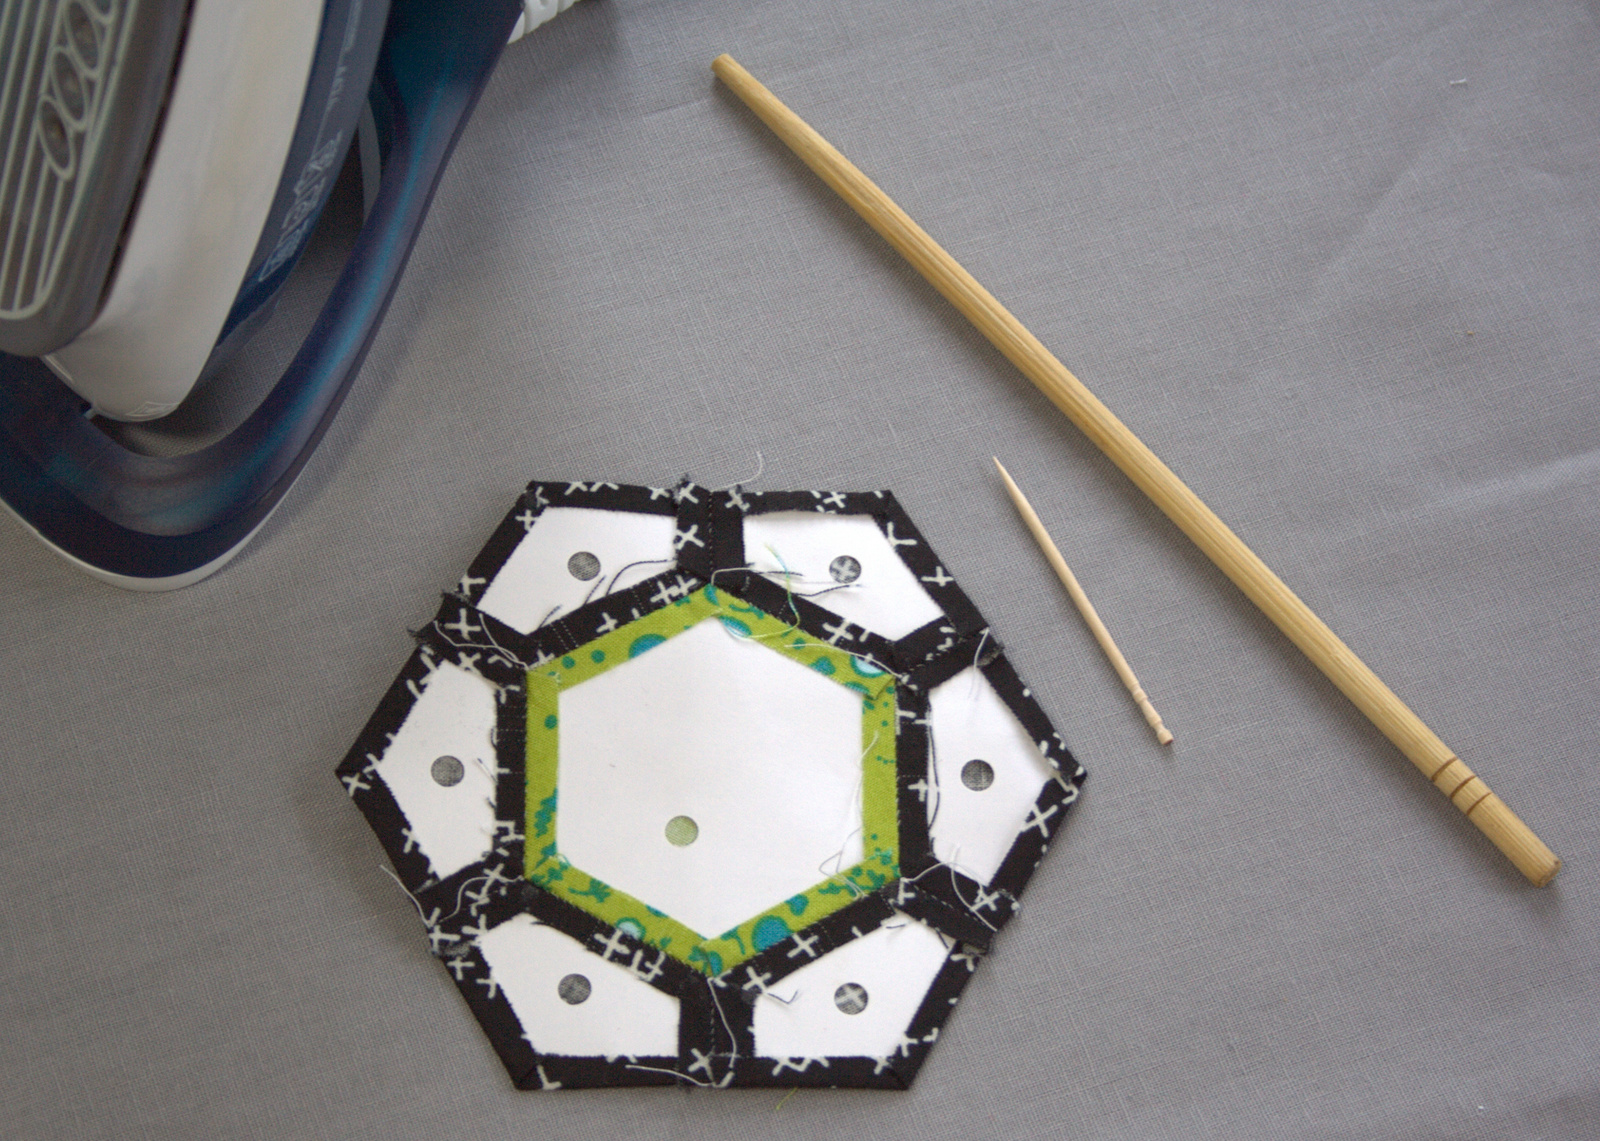
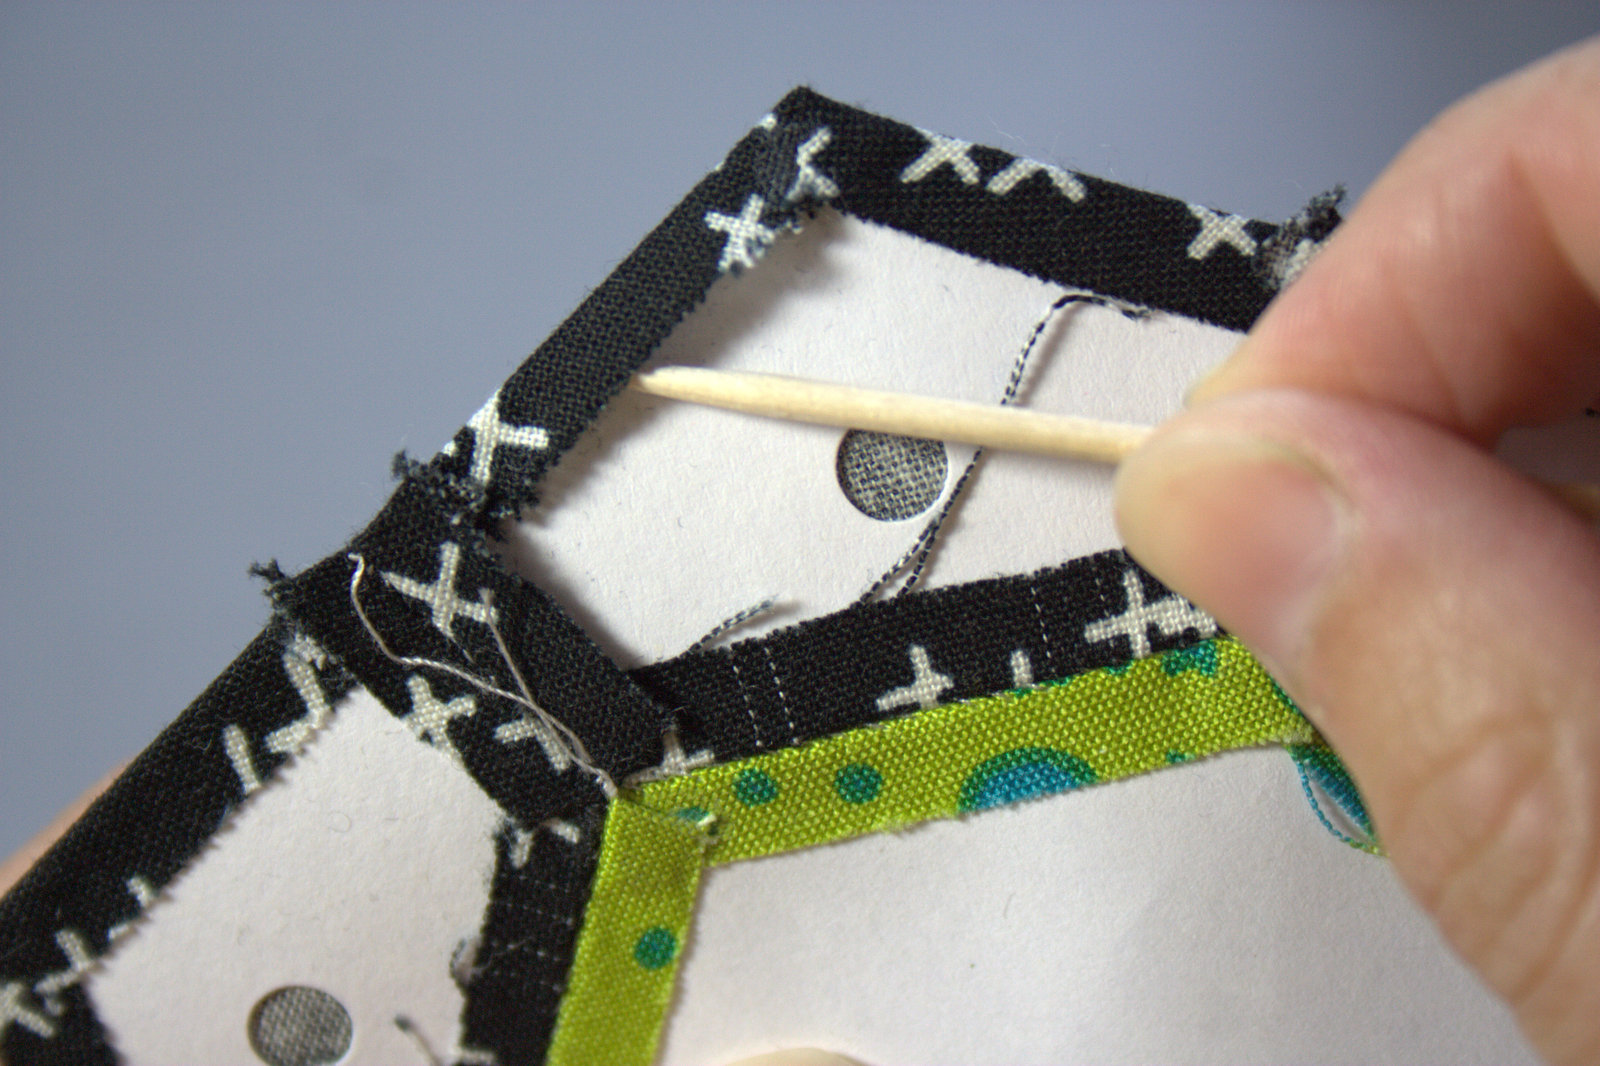
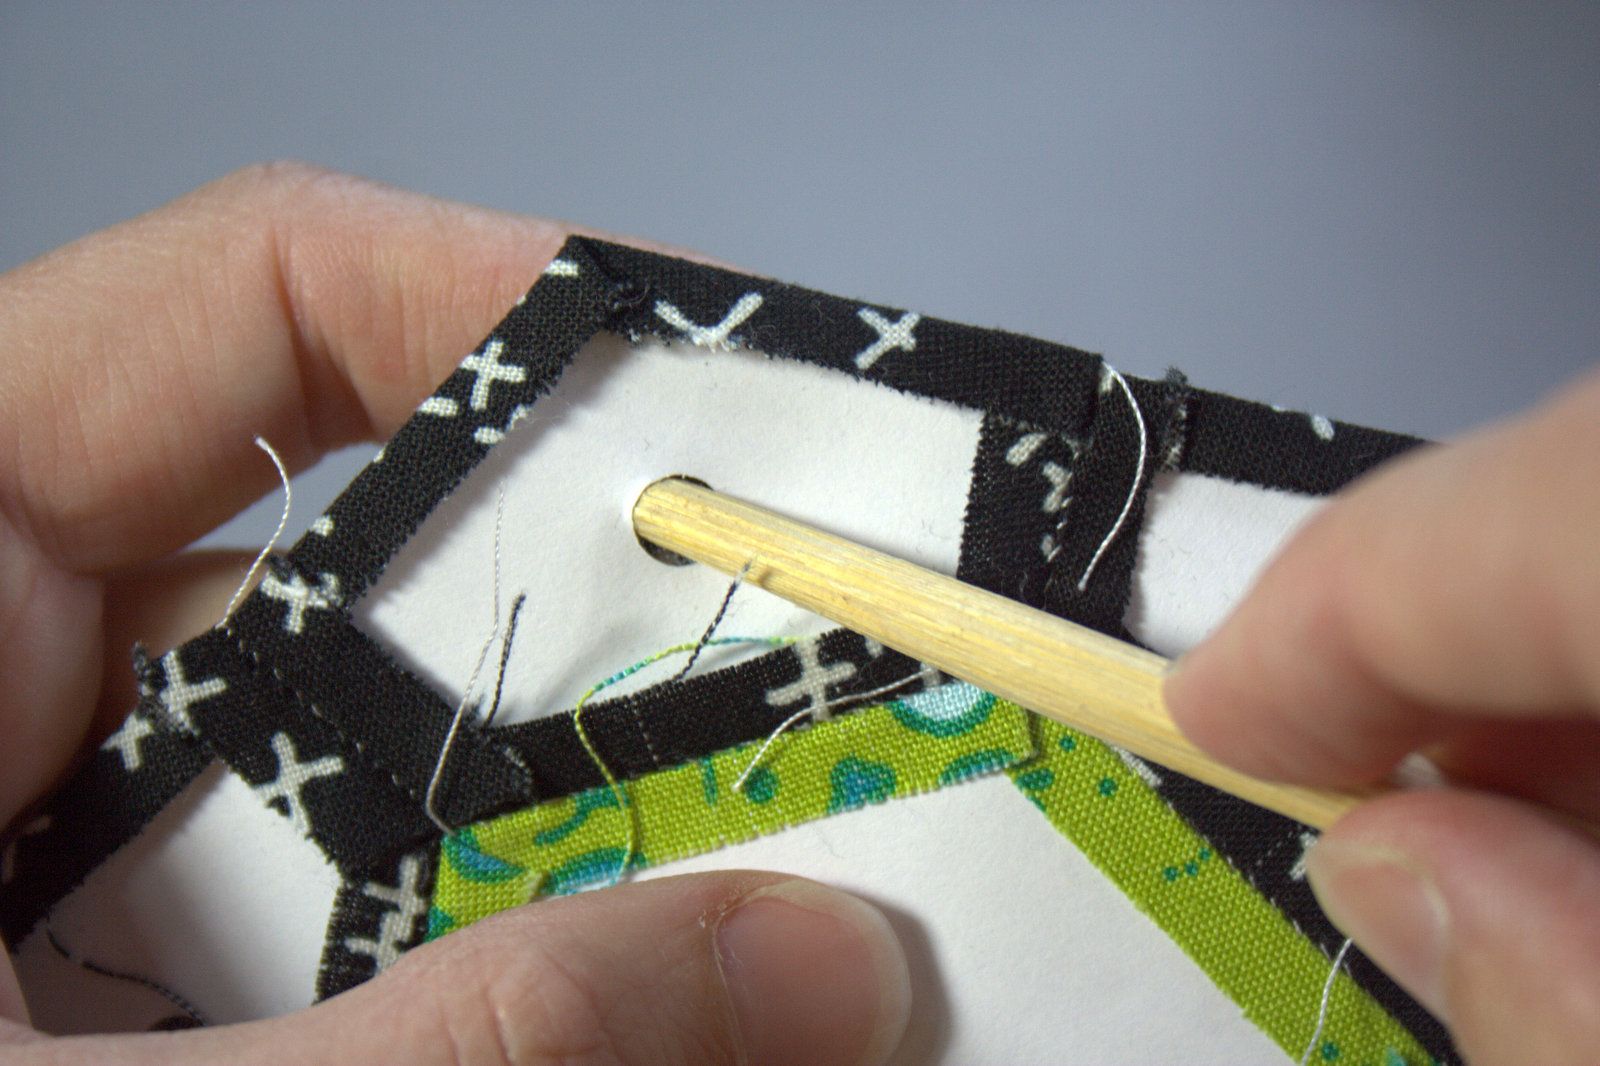
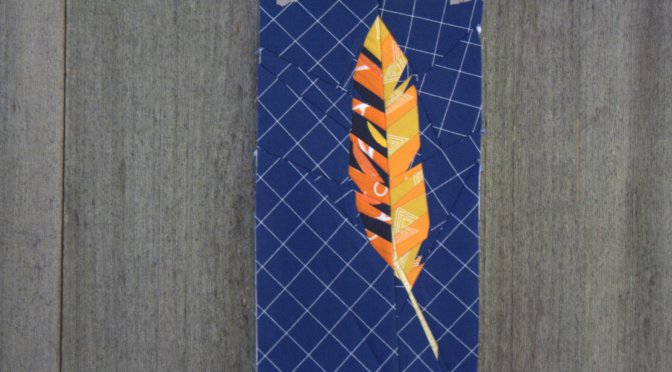
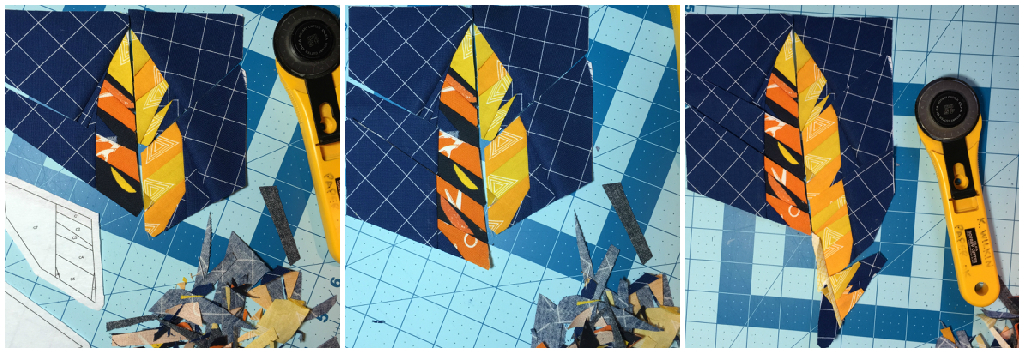
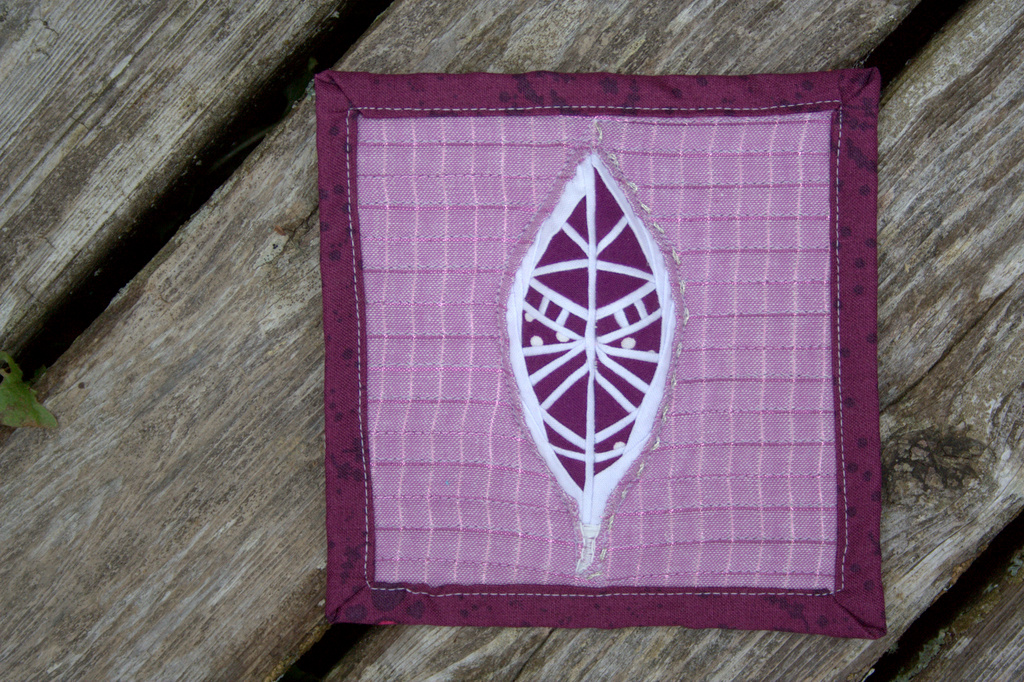
This next mini mini quilt was an experiment in how small can you go, and I determined that I reached my tiny threshold, at least with this foundation paper pieced pattern. The intended recipient of this mini mini is a big fan of the color purple, and I also knew I wanted to make her a feather mini mini. I wanted it to be unique, though, so I designed my own teeny foundation paper pieced pattern of a geometric feather.

fpp feather mini mini quilt finish
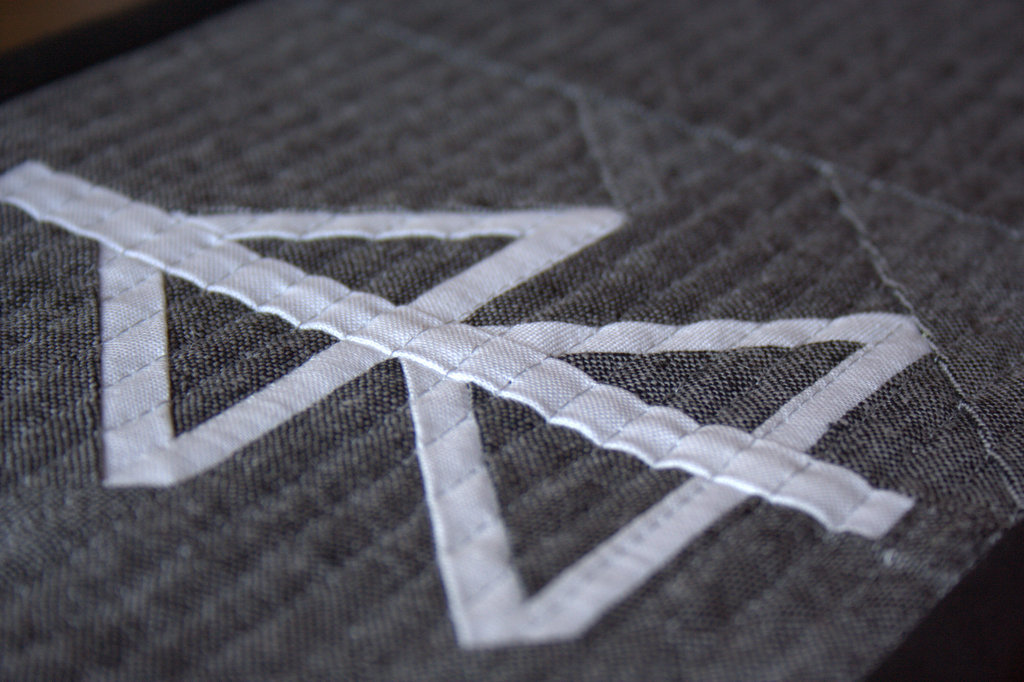
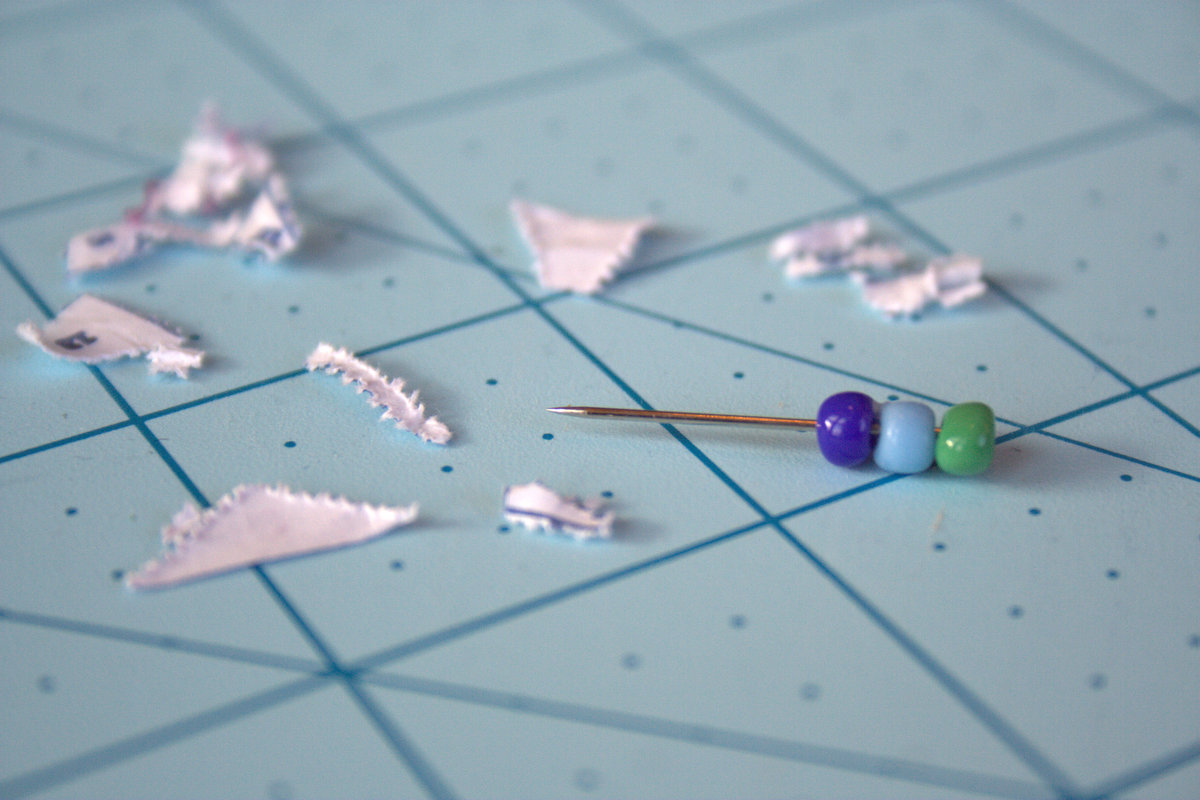
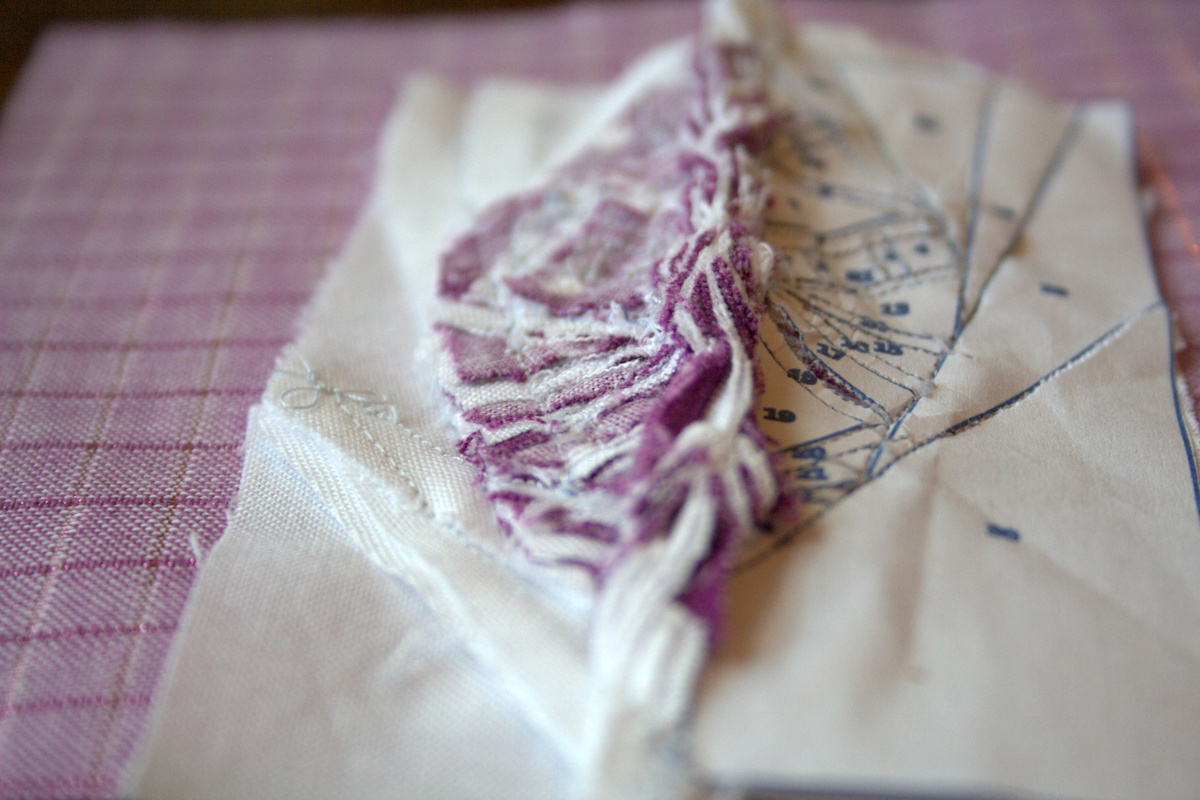
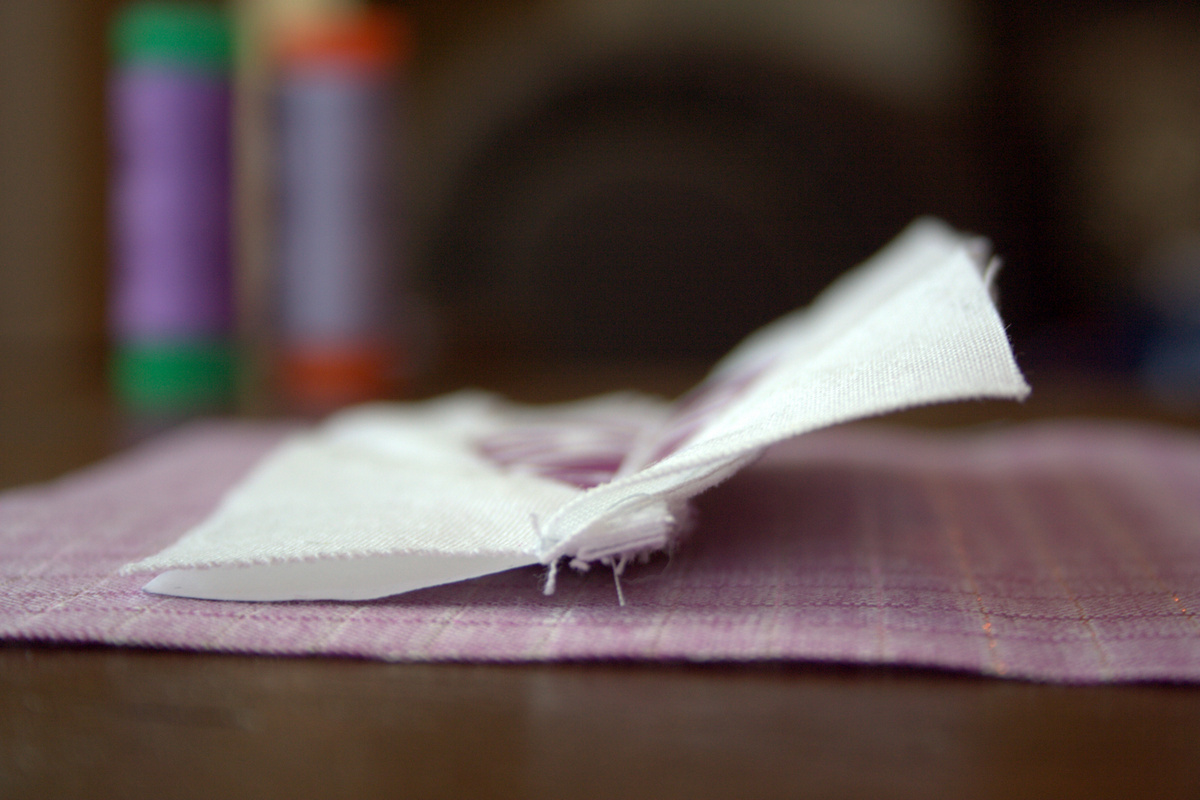
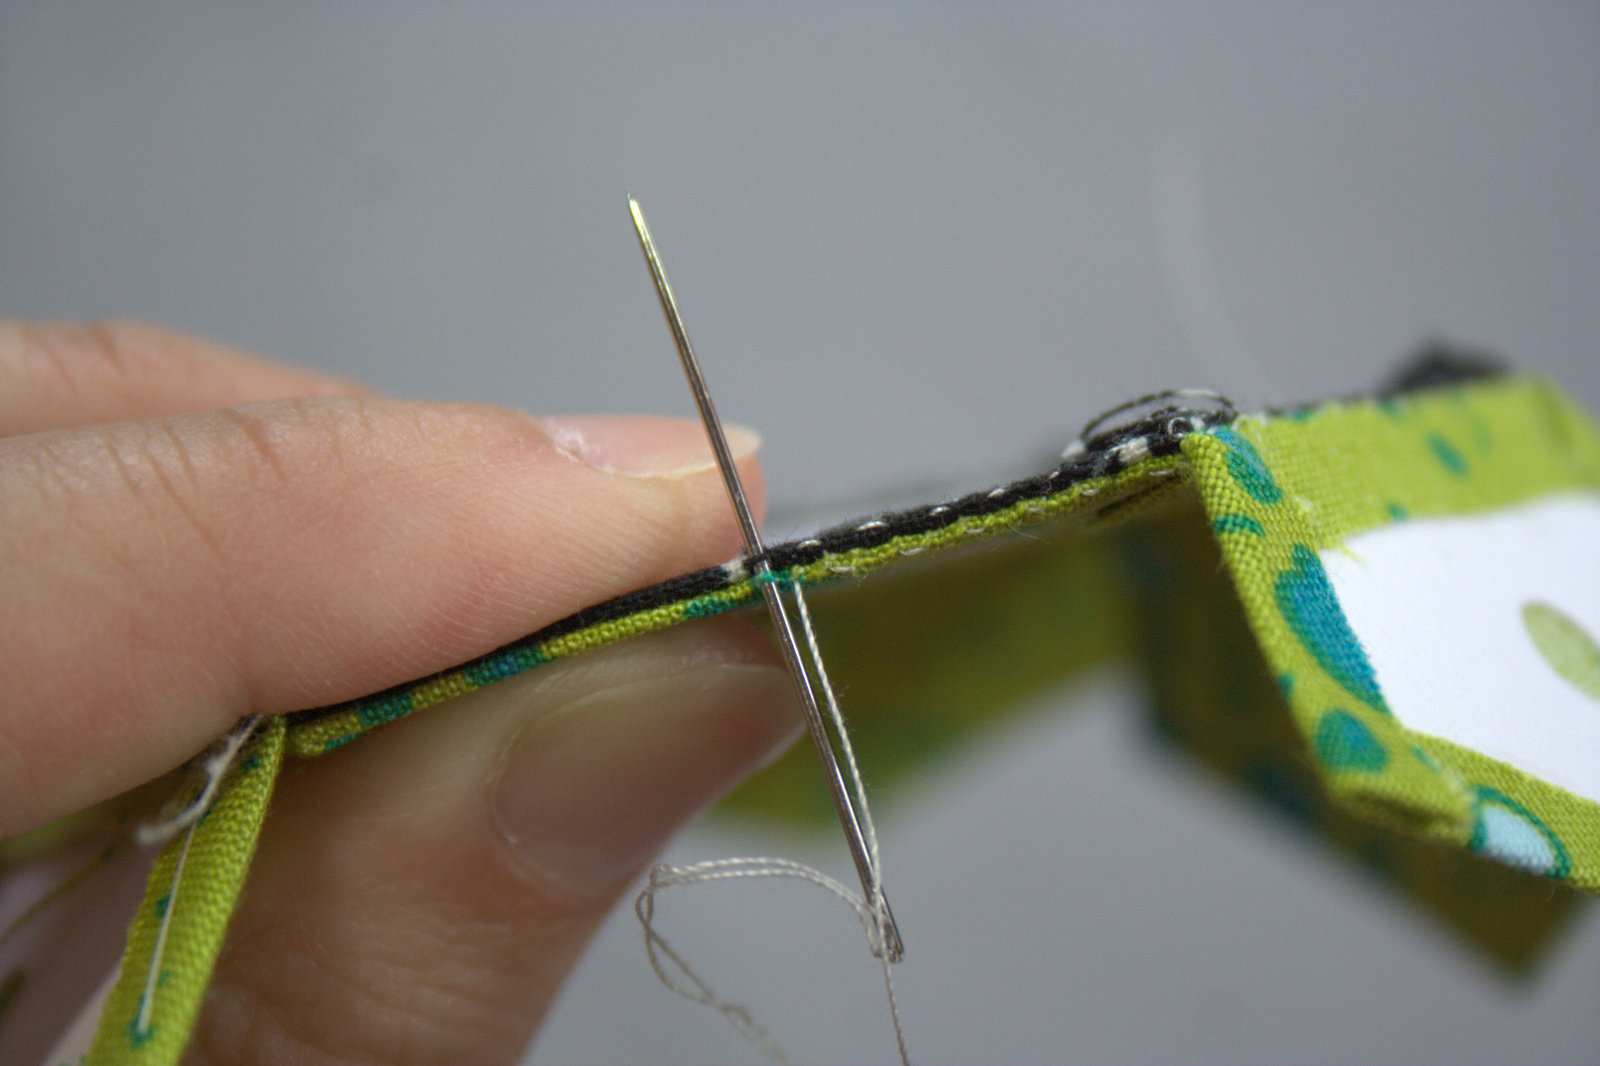
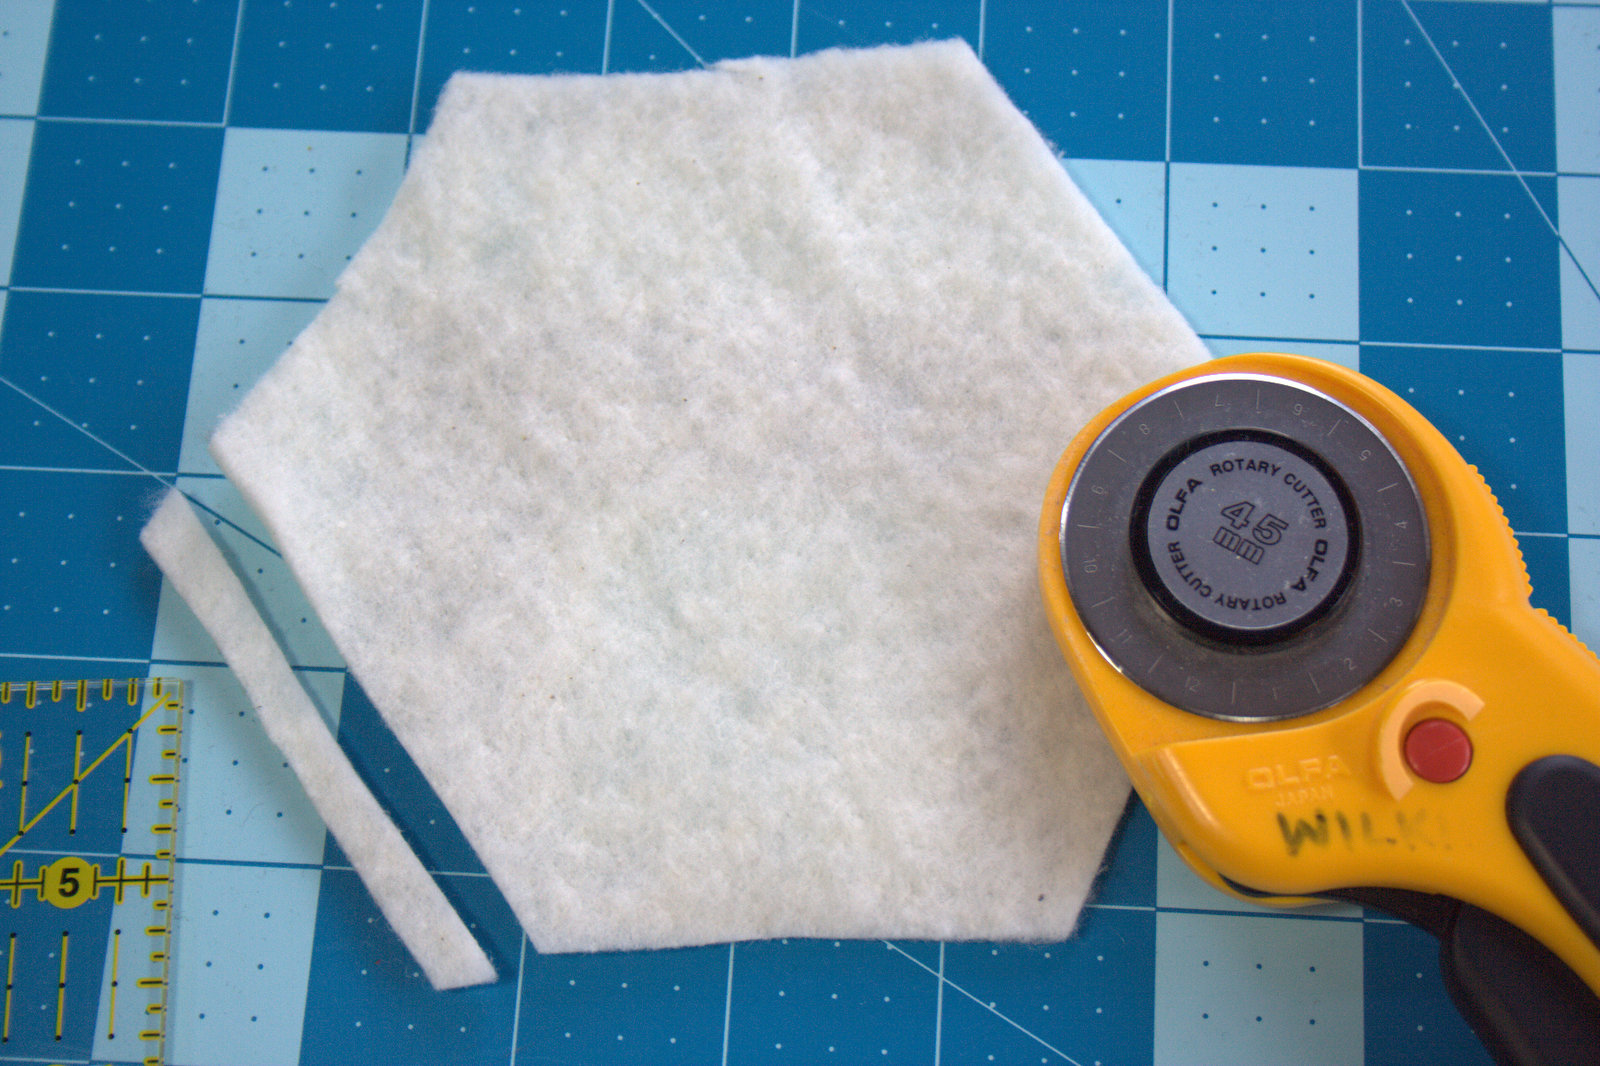
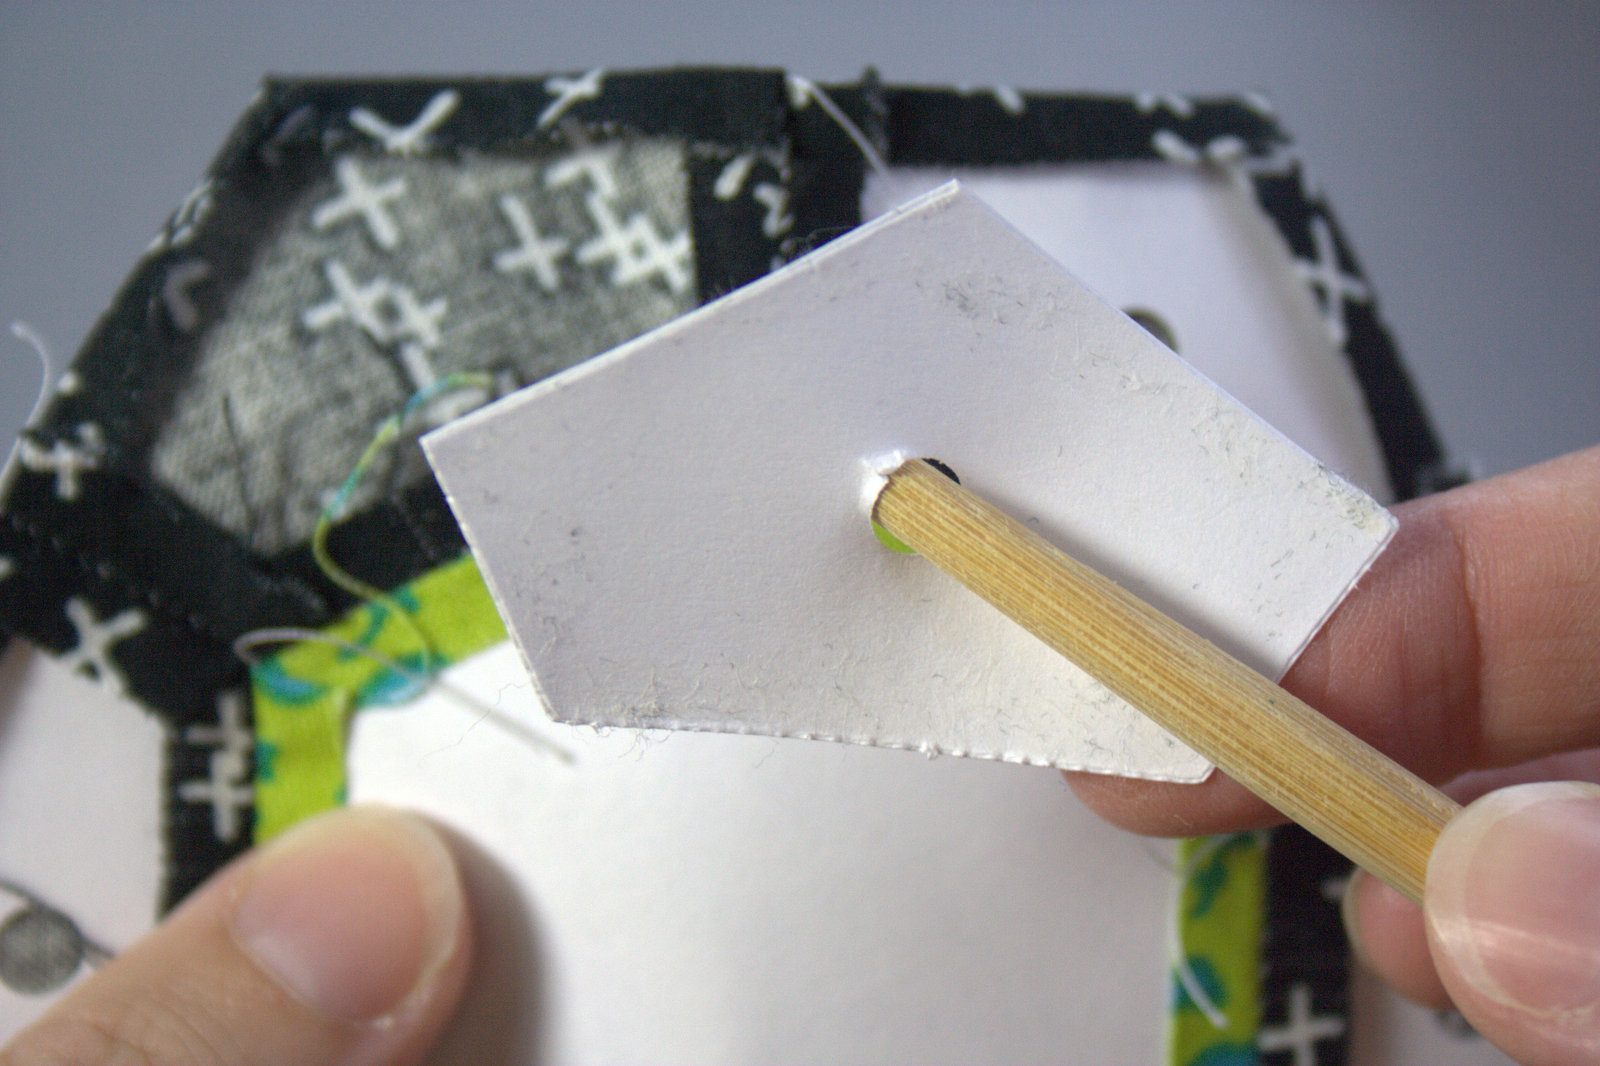
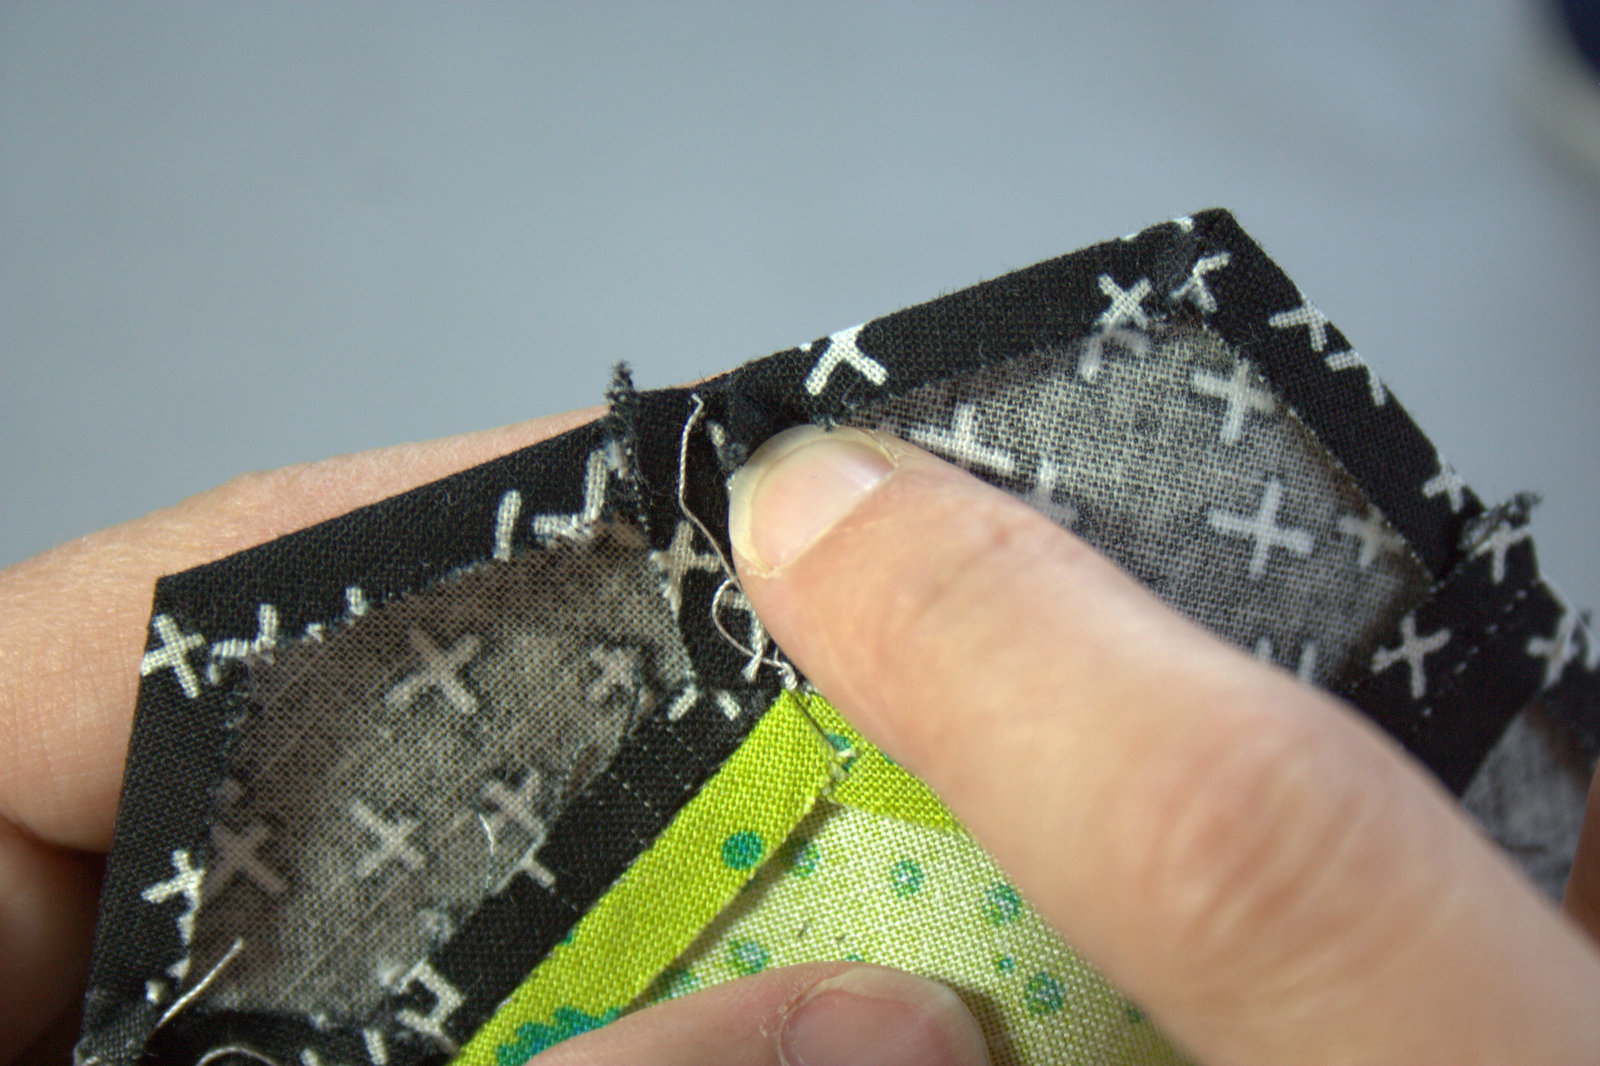
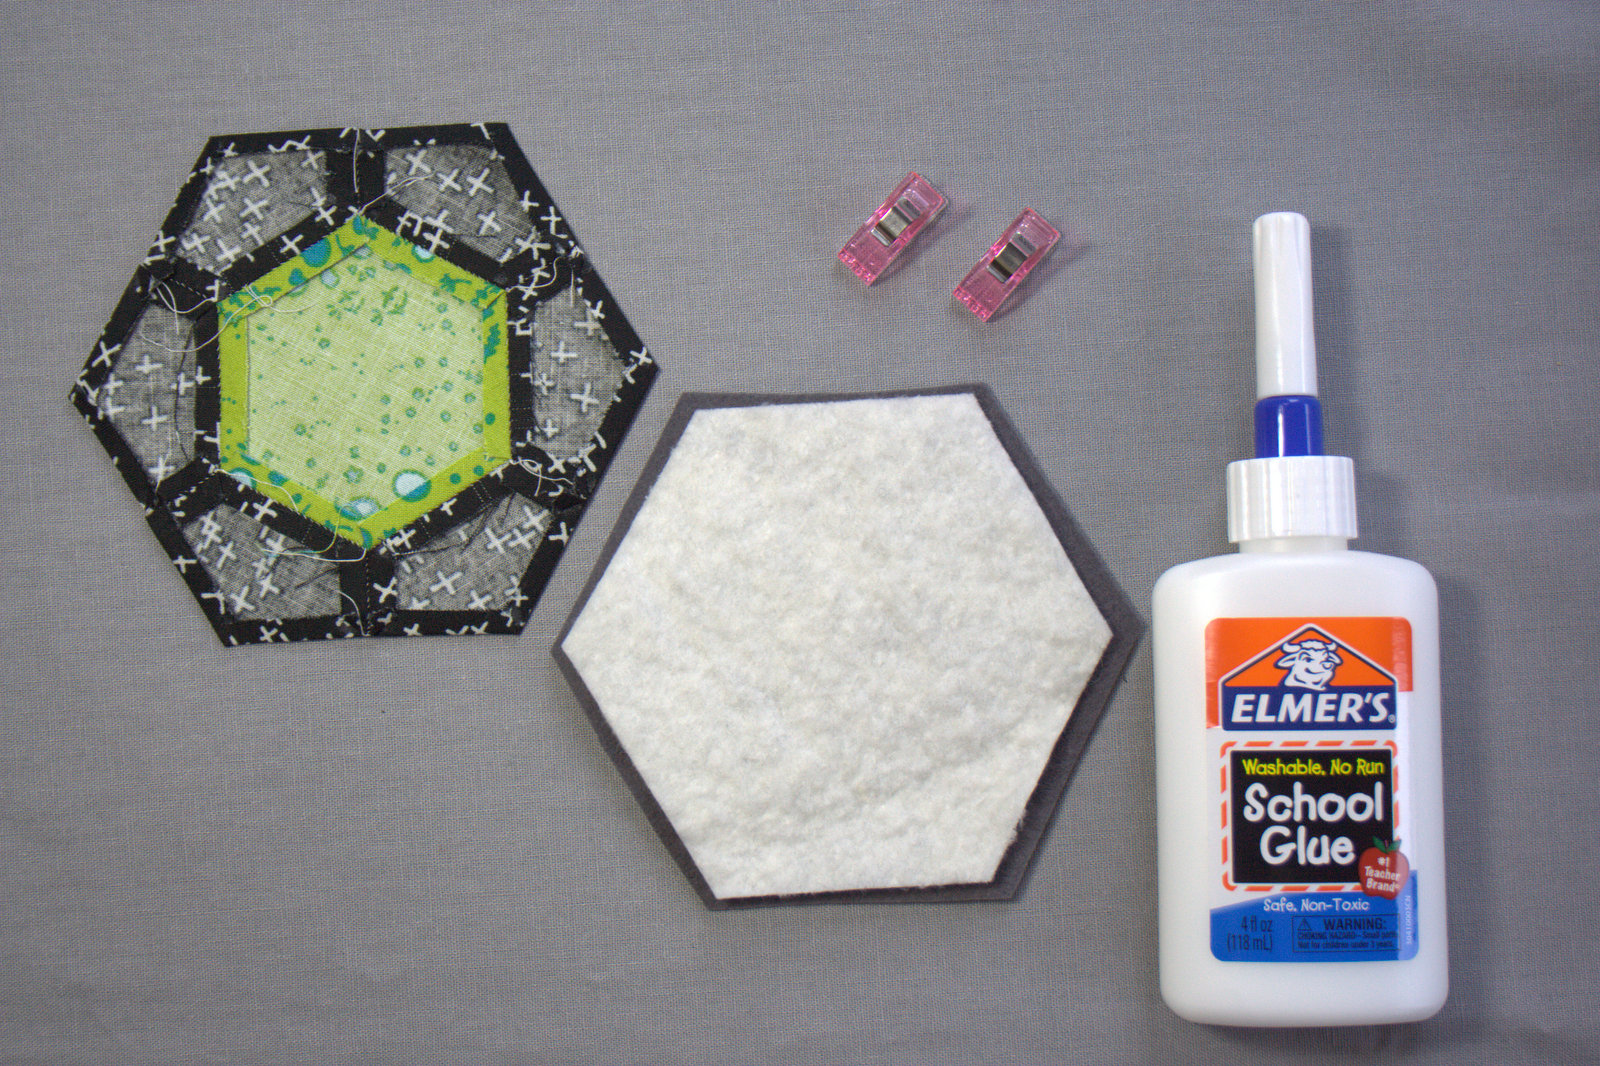
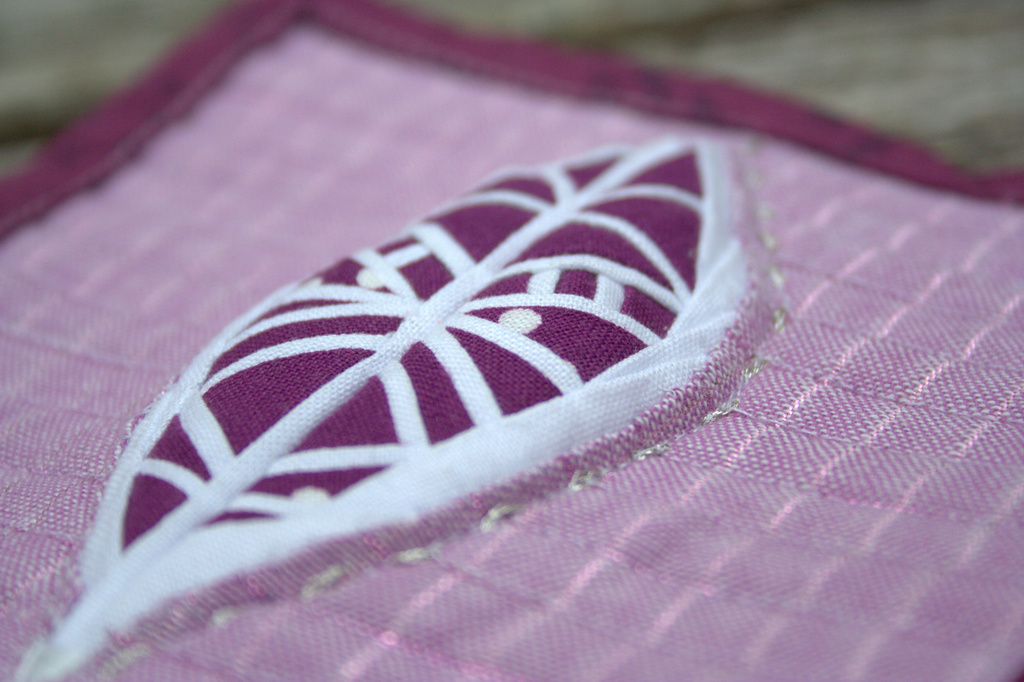
I absolutely love tiny stitching, mostly because of the giggles that reflexively bubble over while I’m piecing the ridiculously tiny pieces. This tiny feather was no different, until it came time to sew the two sides together. The seam was crazy thick; so thick, I had to hand crank my sewing machine to get the needle through it without breaking (I broke a needle trying the first time). With a seam that thick, you can guess how great my chances of pressing it flat might be–slim to none! My solution? I stuffed actual wool batt behind the feather and then quilted around it as best as I could. It’s not exactly trapunto; it’s more a stuffed feather!

fpp feather mini mini quilt finish
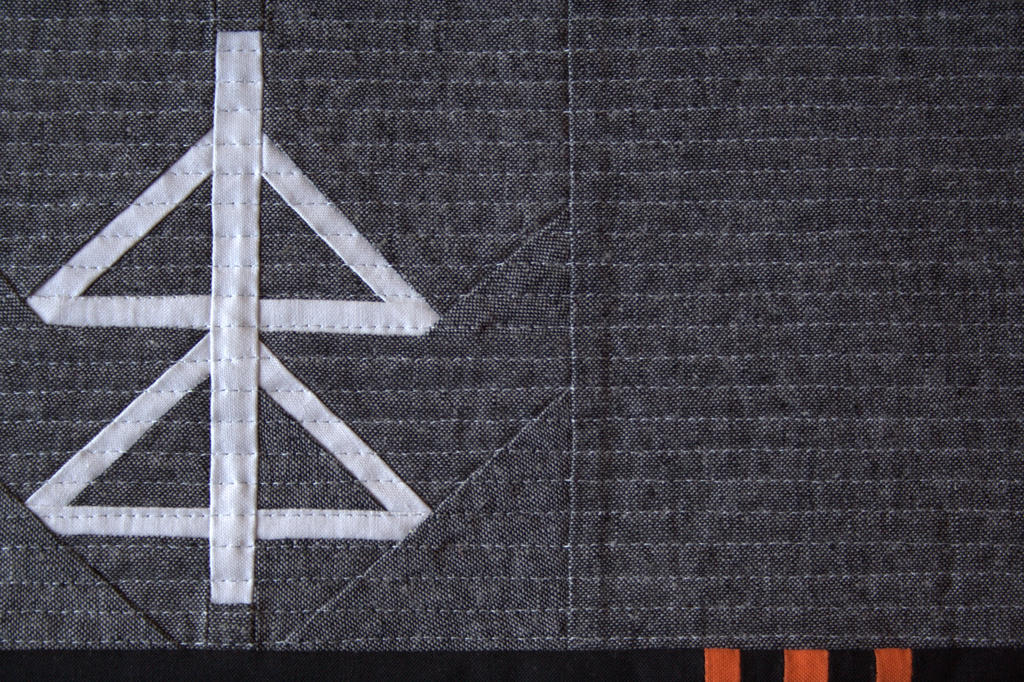
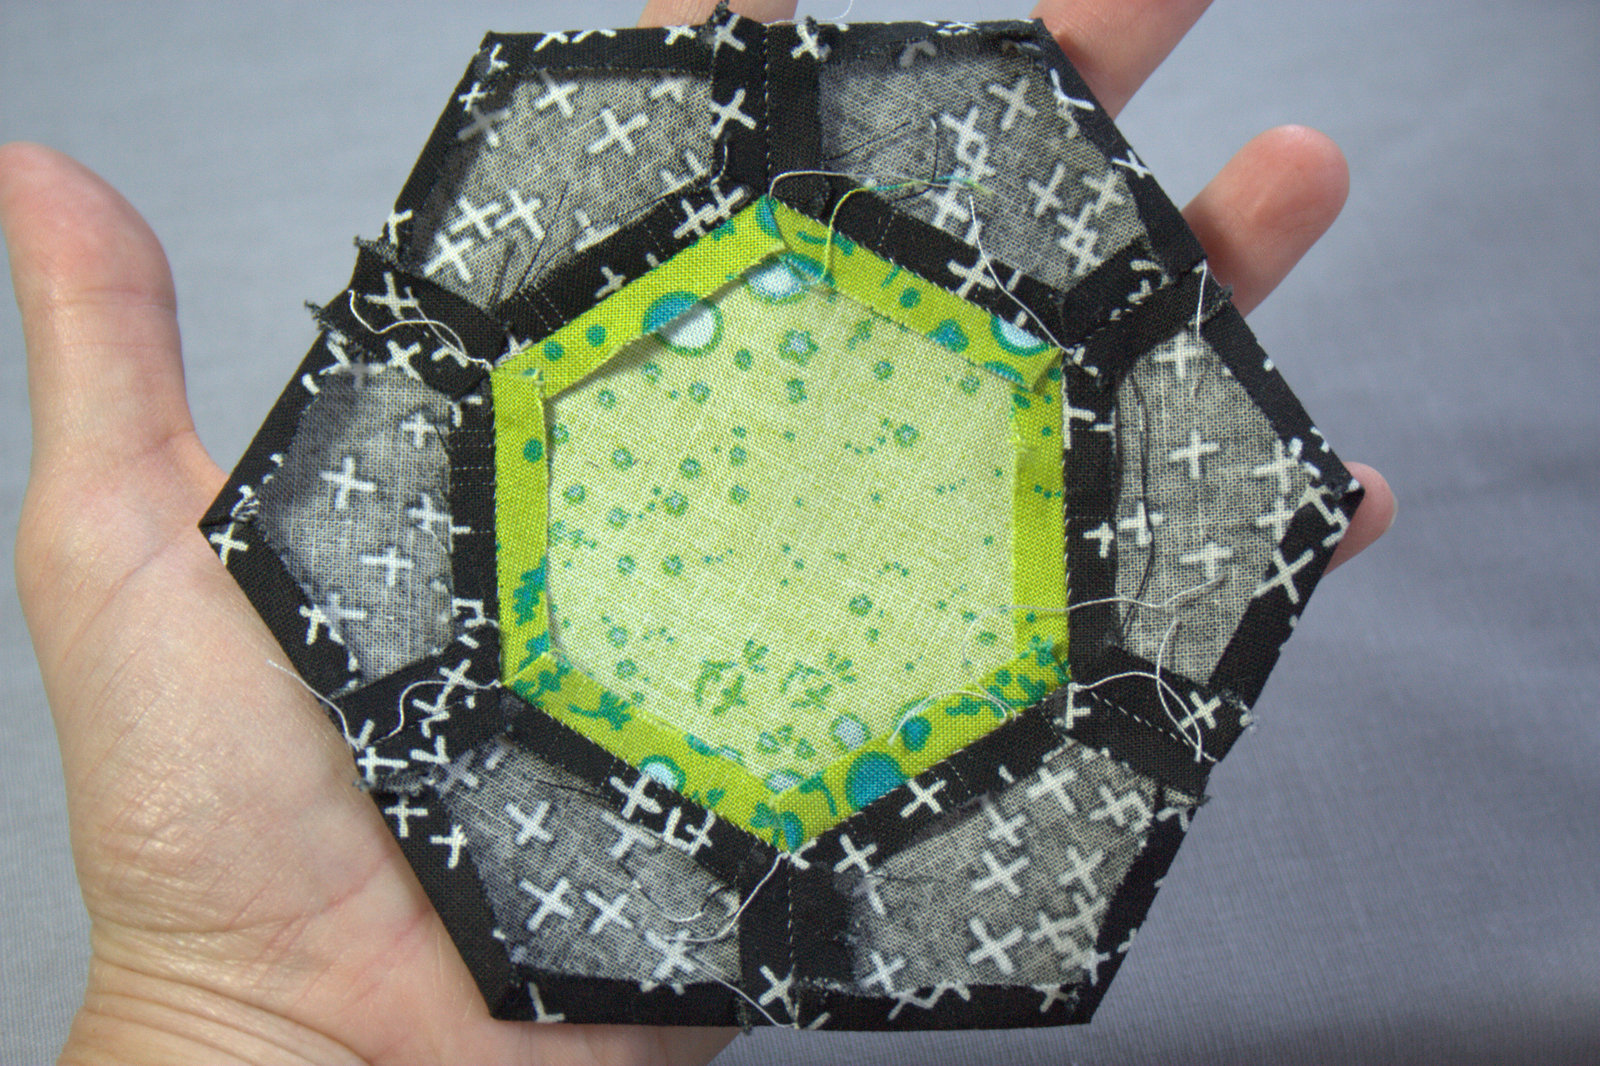
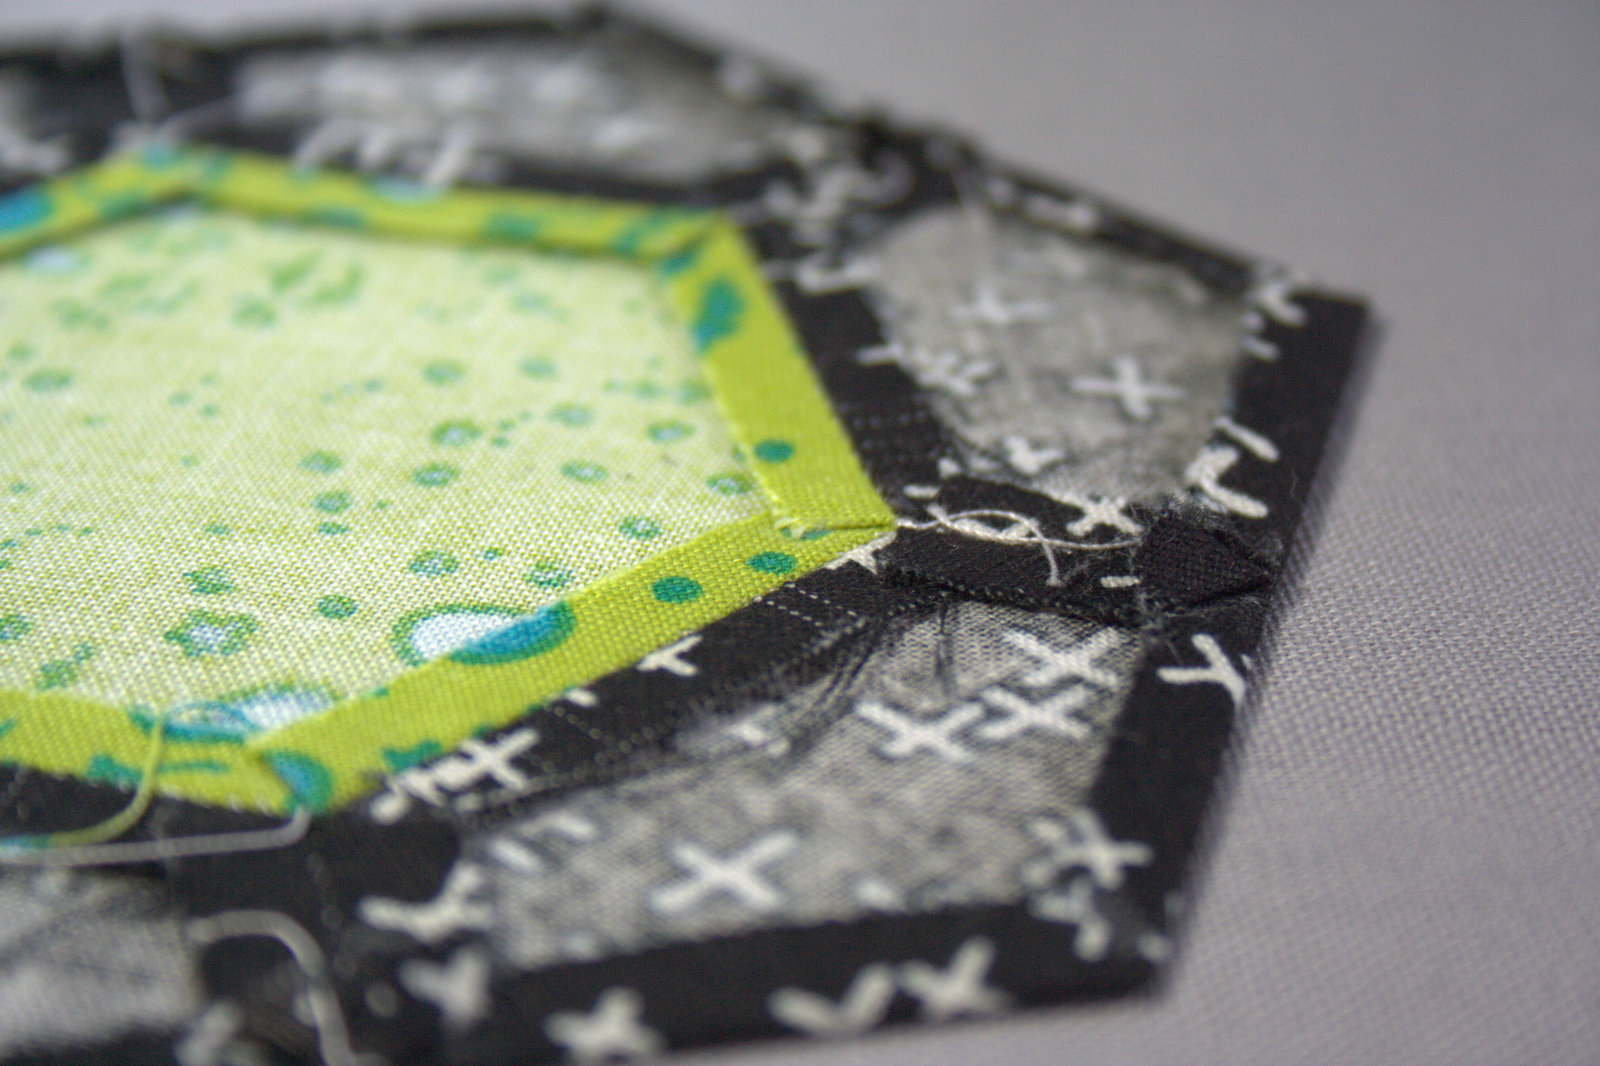
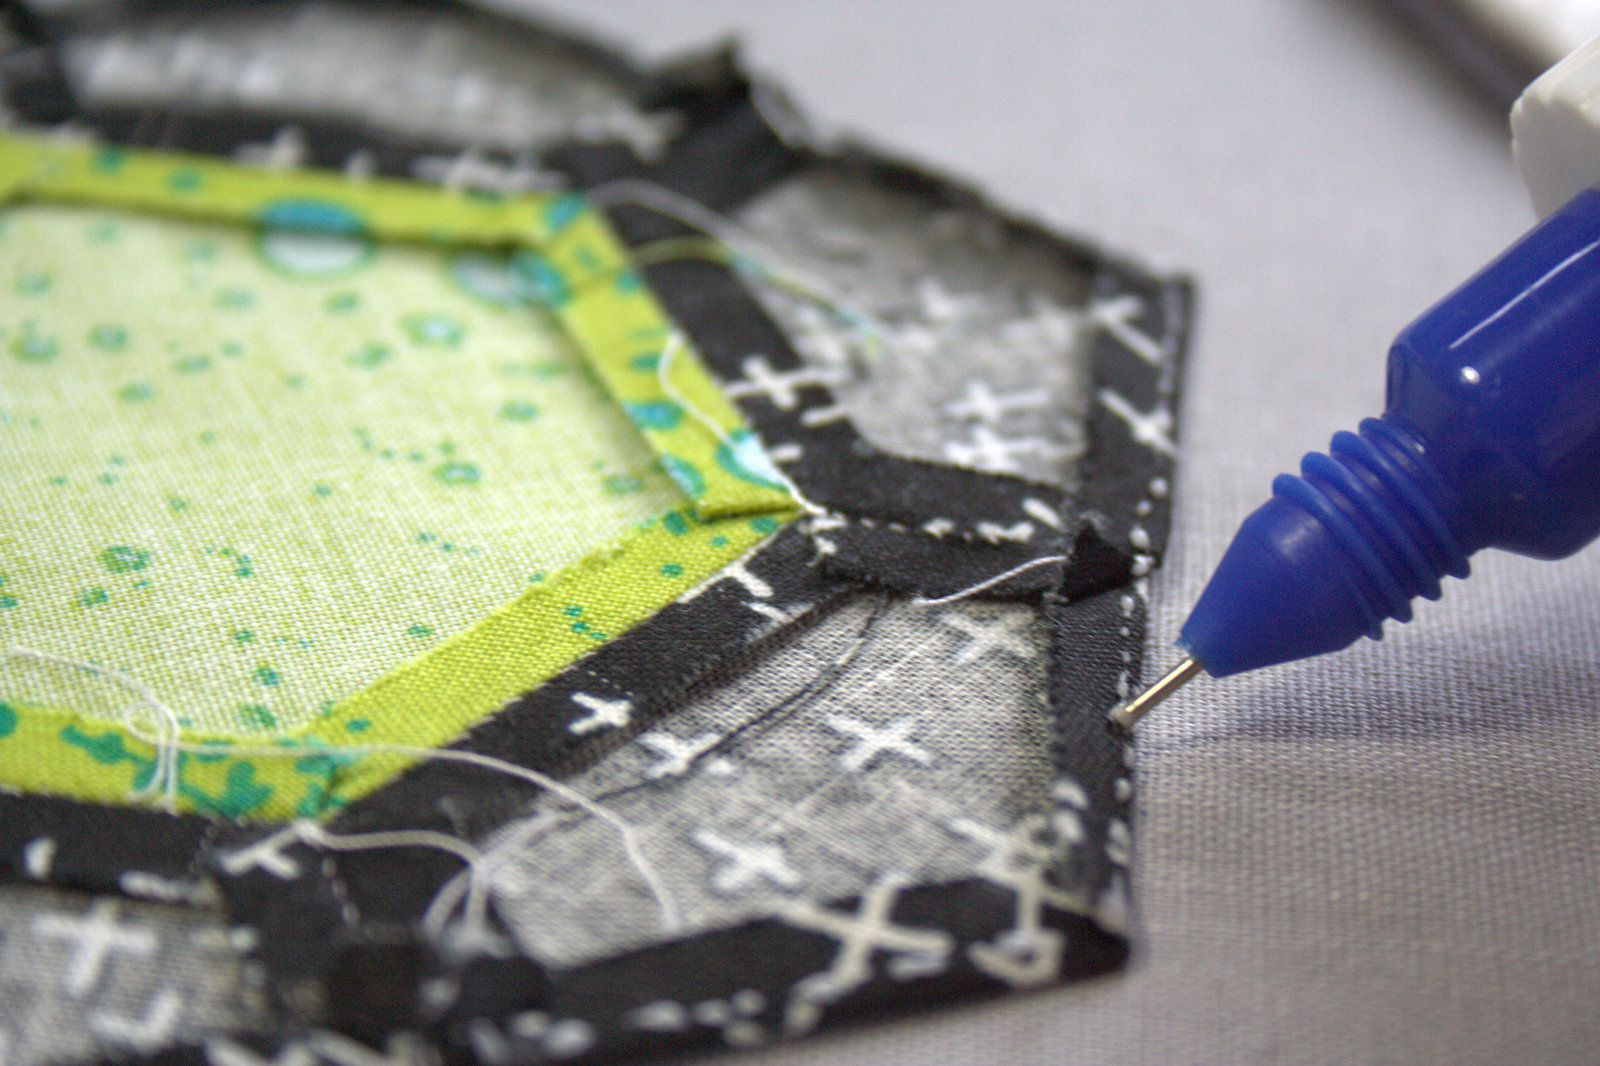
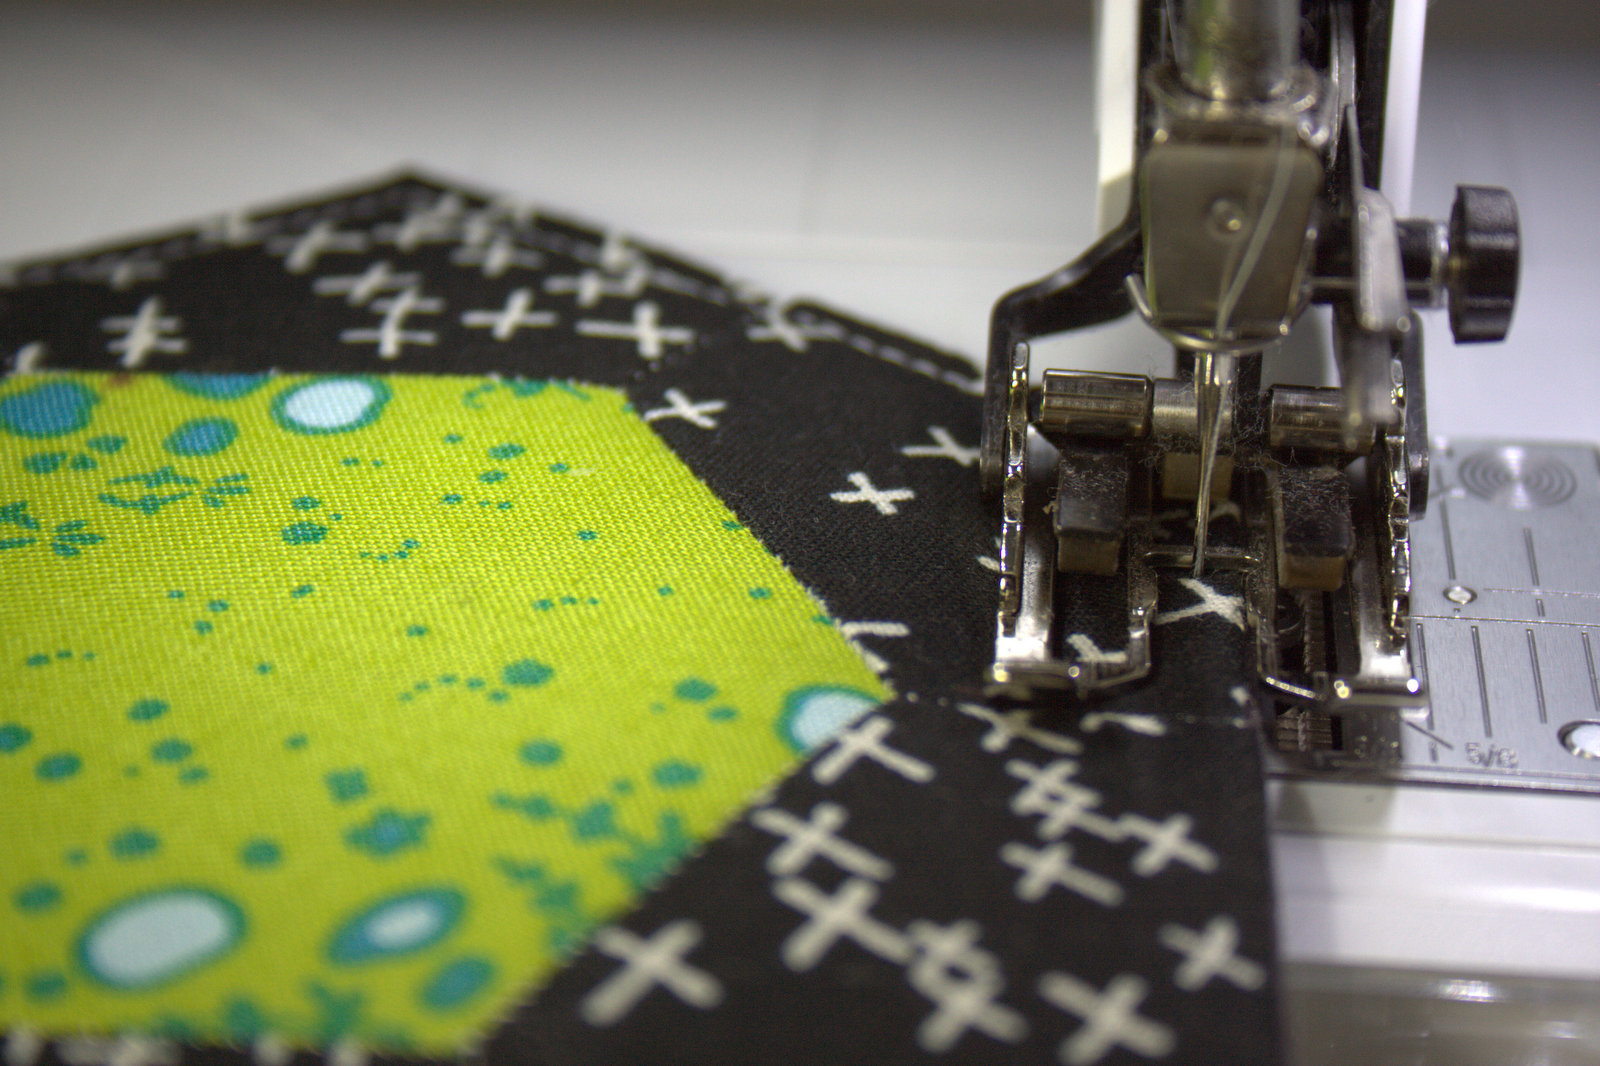
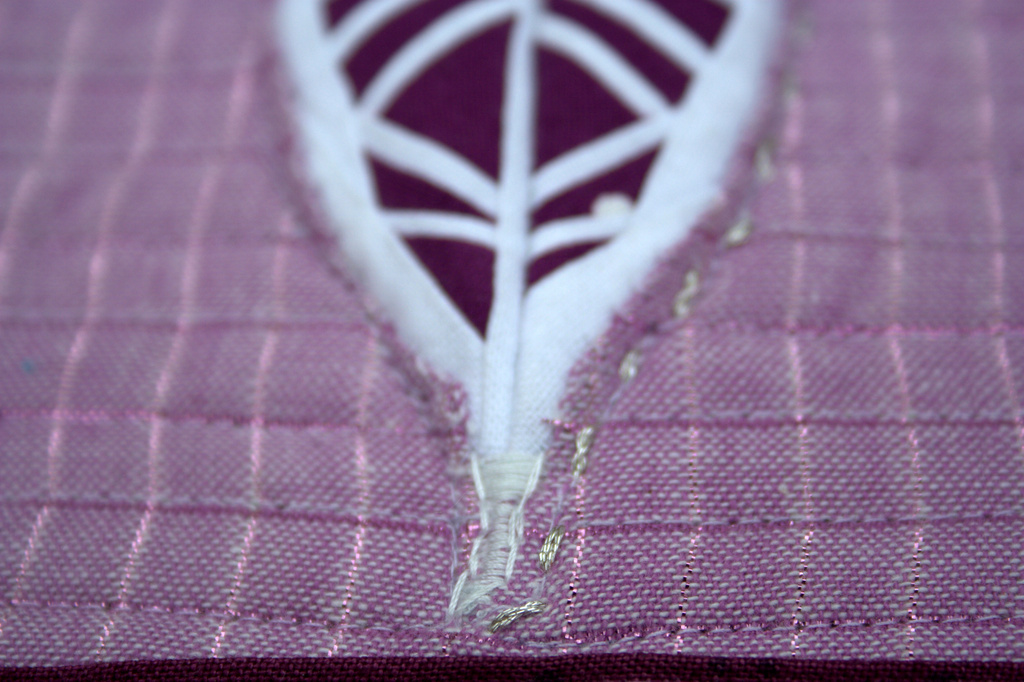
My reverse needle-turn applique skills have room for improvement, and the shaft of the feather didn’t work as well as I had hoped. I decided to embroider over it with 12wt Aurifil to try to give it a more intentional look, and I’m much happier with the result. The Anna Maria Horner loominous fabric was the perfect background, and I machine quilted horizontal lines with 50wt Aurifil 2560-Iris.

fpp feather mini mini quilt finish
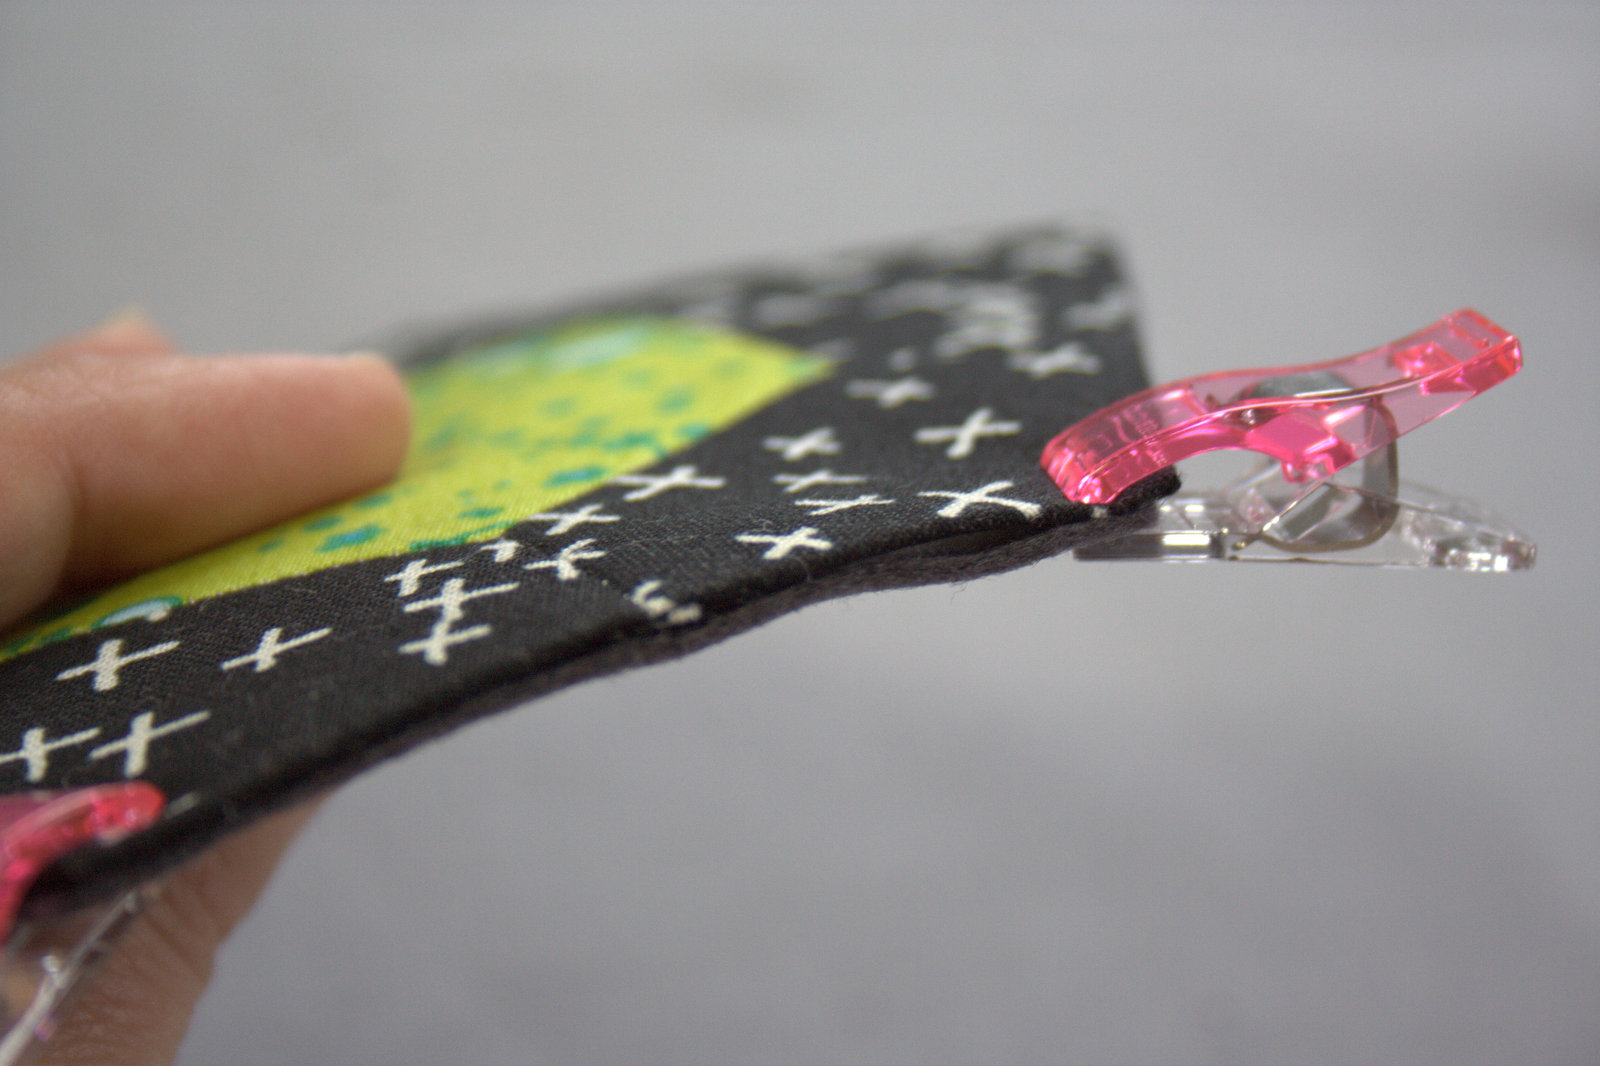
I used the backing as binding and folded over a larger portion on this mini mini quilt, since I felt it needed a stronger frame due to the visual weight of the 3-dimensional feather. Mini mini quilts certainly keep me humble, since every little stitch is visible, and the wobbles and less-than-perfect corners are part of the charm.

fpp feather mini mini quilt finish
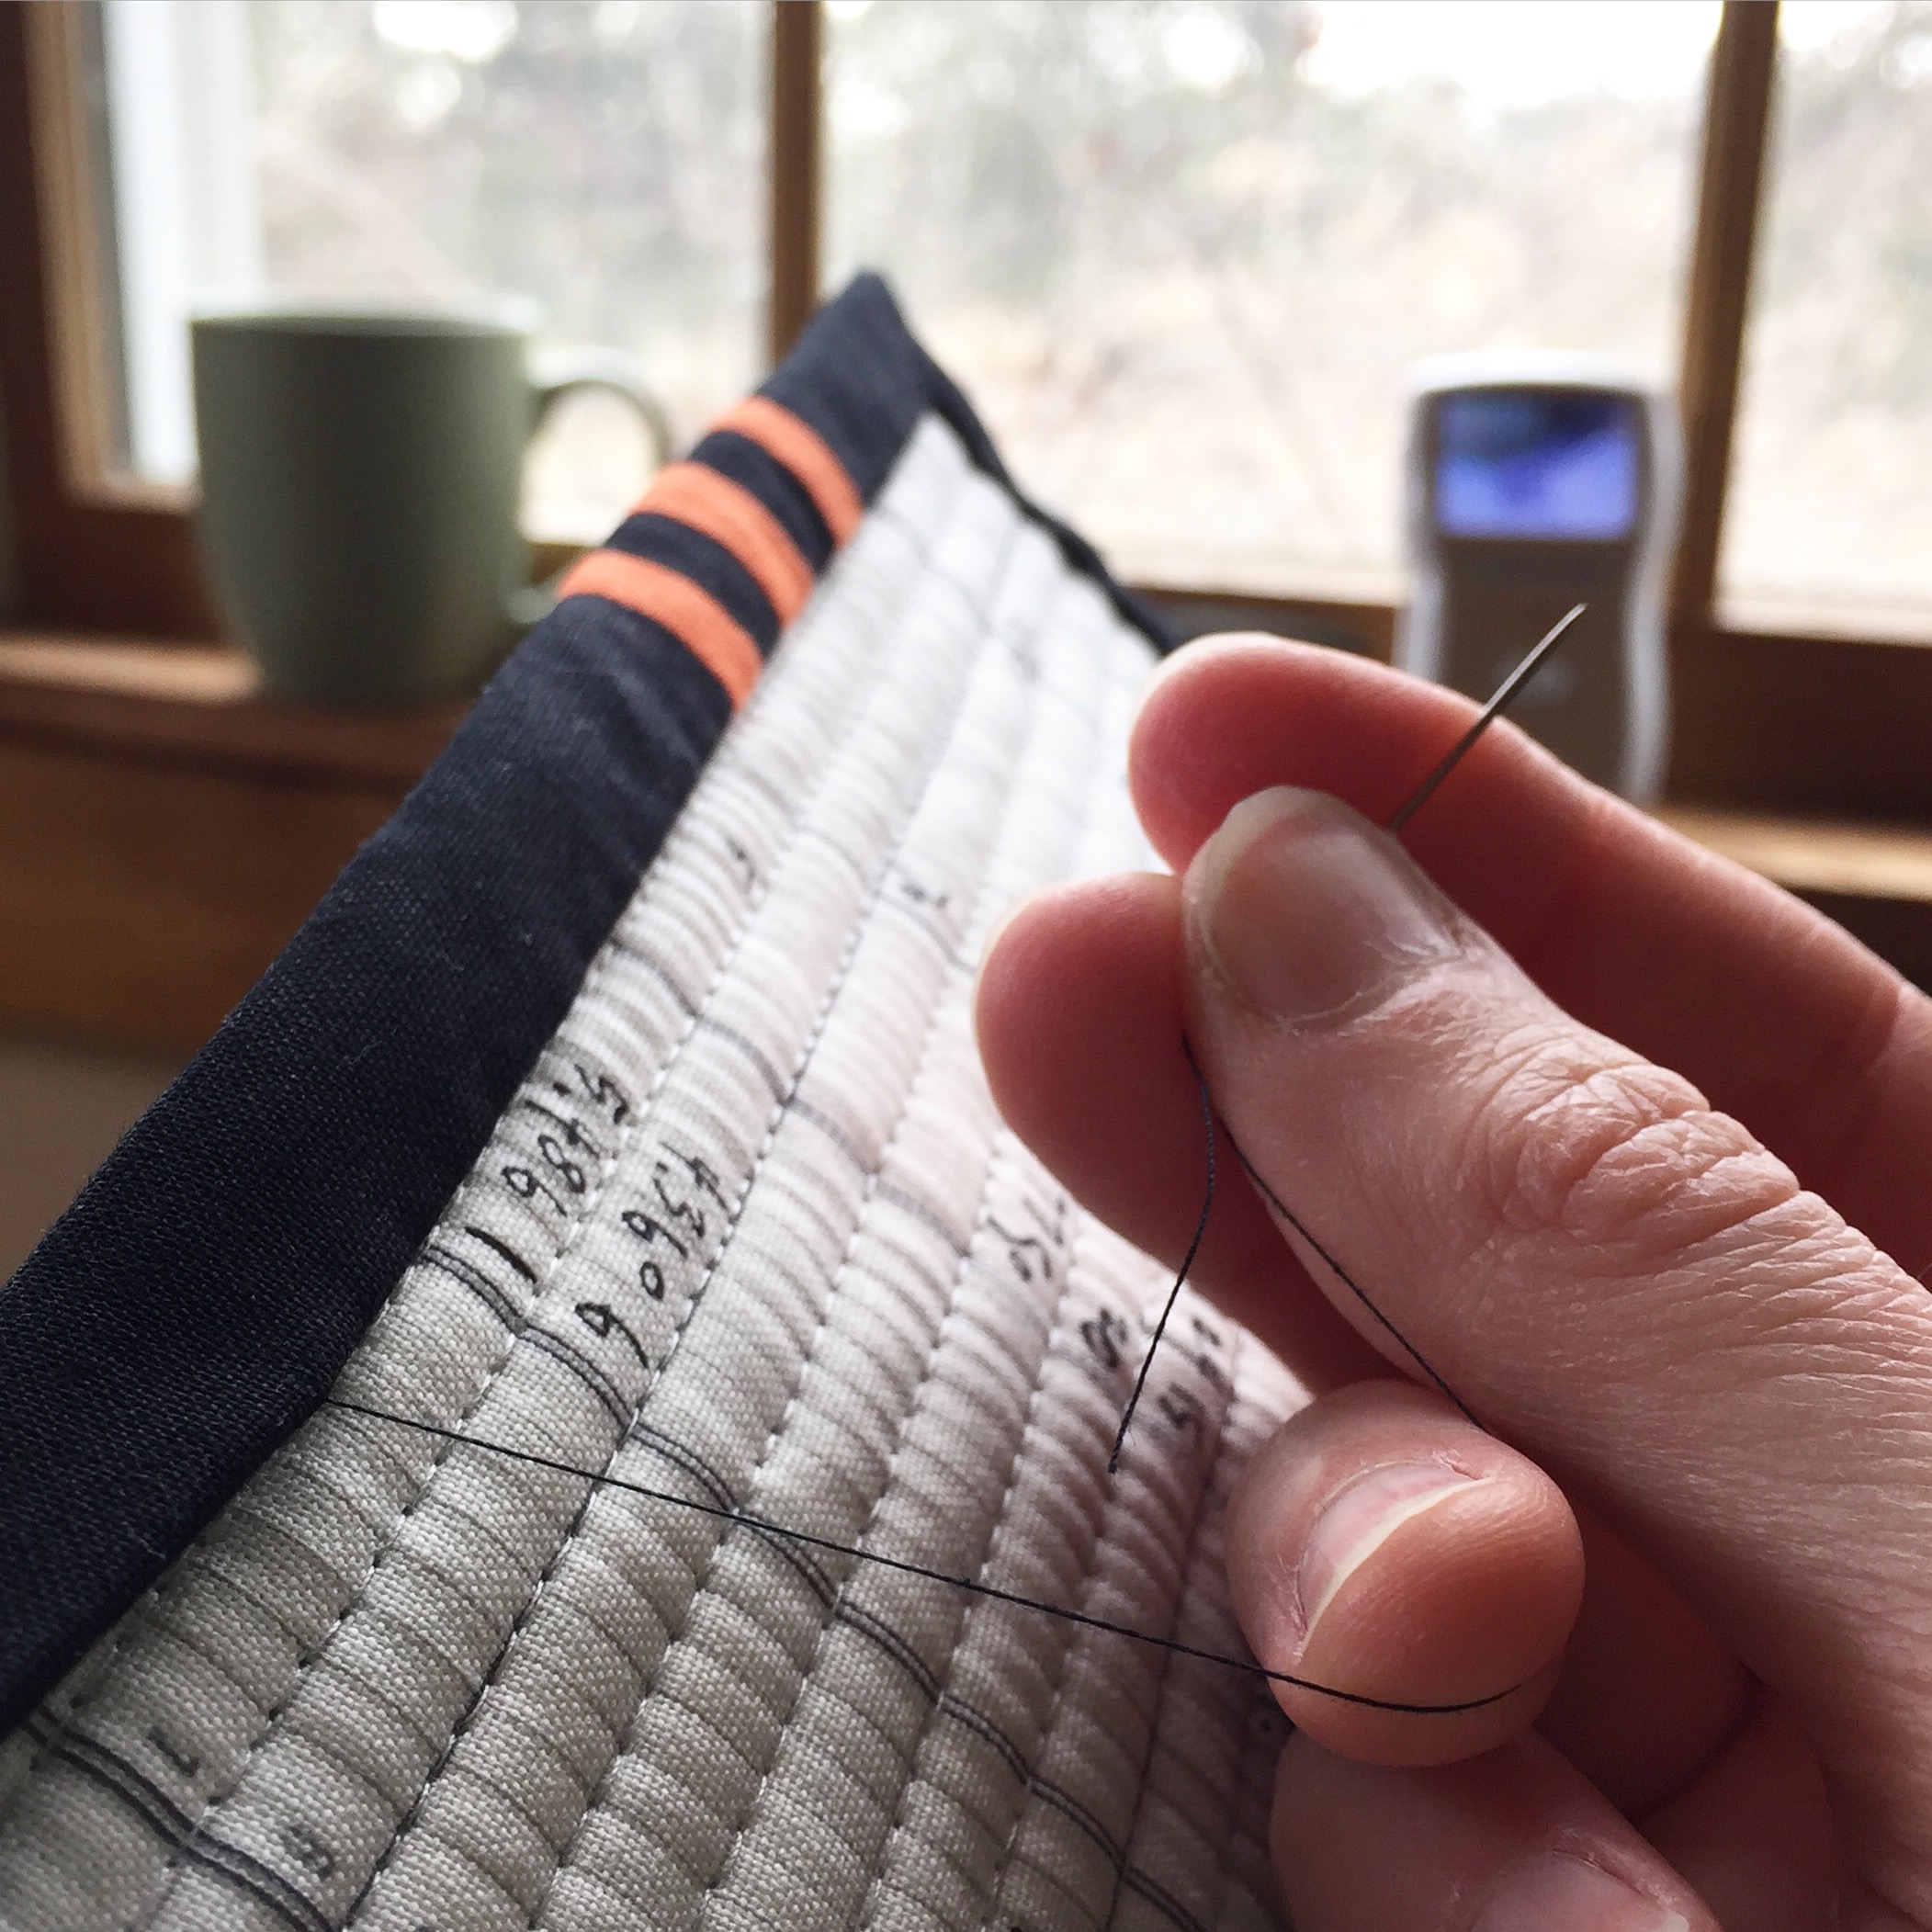
I signed the back with quick embroidered initials and date, since I feel strongly about signing all creations, no matter how small.

Both of these mini minis are going in the mail today. Once I finish a bit more of the projects on my to-do list, I am sure to revisit the mini mini quilt making scene. I still have one more promised mini mini quilt that is in progress for a friend who has already sent one in return (ages ago), and my very first mini mini swap for which I need to redo the binding. I think I agreed to swap with at least two others, but we left it open and relaxed and since I have not received a mini mini in return, I don’t feel *quite* so bad letting the creation of my mini mini quilt slide. All in good time, right?

make modern mini mini challengeHave you made a mini mini quilt yet? If you feel so inspired, I encourage you to post a photo on Instagram with #MMminimini to join the fun (and enter to win prizes!). I’d also love to see it, so tag me @nightquilter so that I can see your tiny beauty!

I’m linking up with Let’s Bee Social and will link with Crazy Mom Quilts Finish it up Friday, and TGIFF, since community is fun!

Bean Sprout: FPP Pattern Release

Today I am excited to release my newest foundation paper pieced (FPP) pattern, Bean Sprout. Today is arbor day, so for now I’m thinking of it as more of a tree sprout, but regardless of which species you’re growing, this block pattern is ready to roll!

bean sprout foundation paper pieced pattern nightquilterTo me, the bean sprout is the epitome of spring, new life, and the wonder of discovery. I have watched my children’s excitement over the first sprout of newly planted seeds, and wanted to capture that fresh promise. This block is perfect for the gardeners among you, and I can see it as a focal block in a quilt, or even turned into pillows, tote bags, wall hangings, or table runners.

grow bean sprout pillow finishYou may remember my first iteration of this Bean Sprout block, which I turned into a pillow and donated to my daughter’s school for their annual fundraiser auction/raffle. Since then, I made a few tiny tweaks to the pattern to make it a bit more versatile, easier to piece, and clearer to follow. The block finishes at 8″x12″, but can easily be made into a 12″x12″ finished block by adding two side strips, which is explained in the pattern.

pattern piecing diagram bean sprout fpp
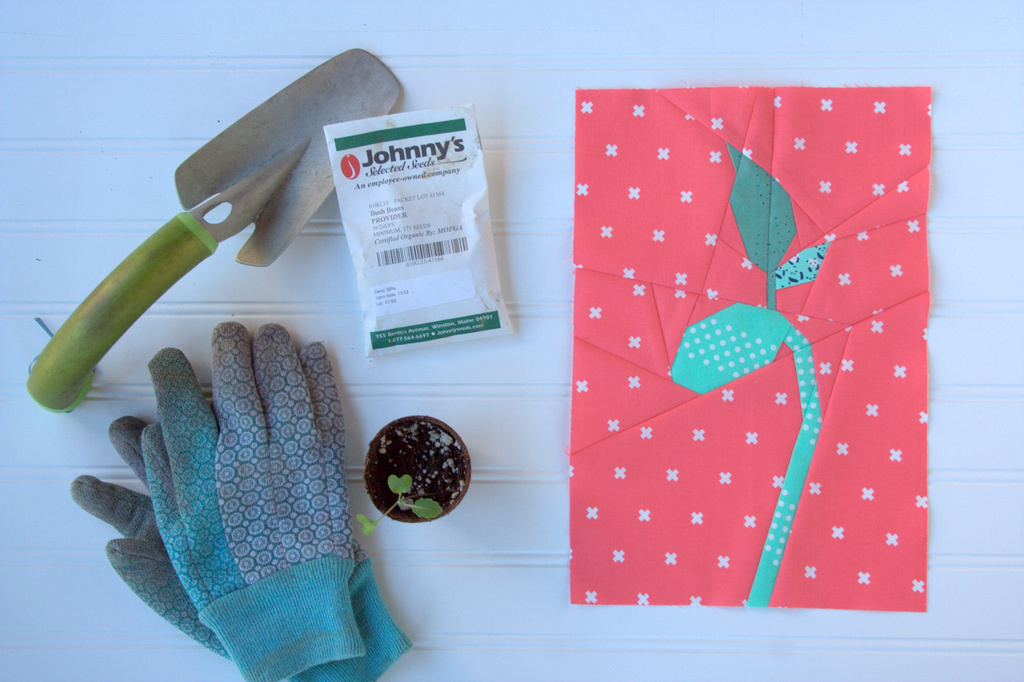
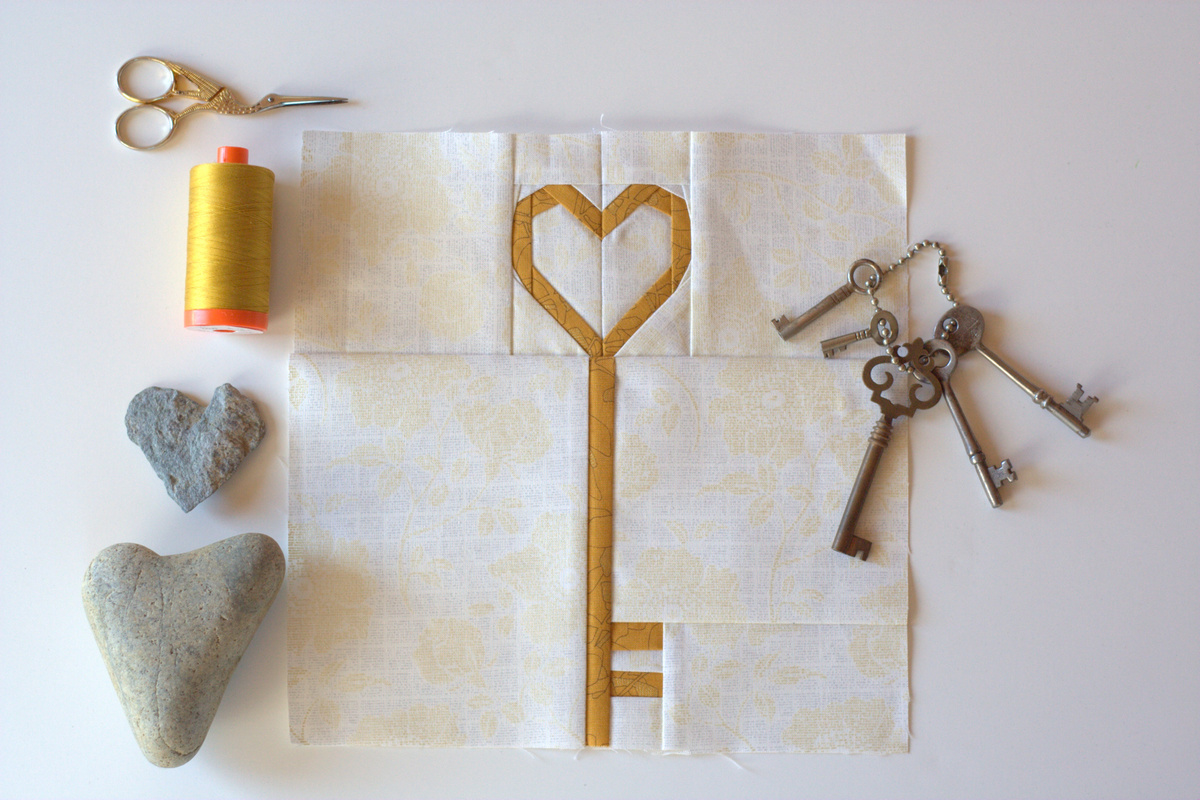
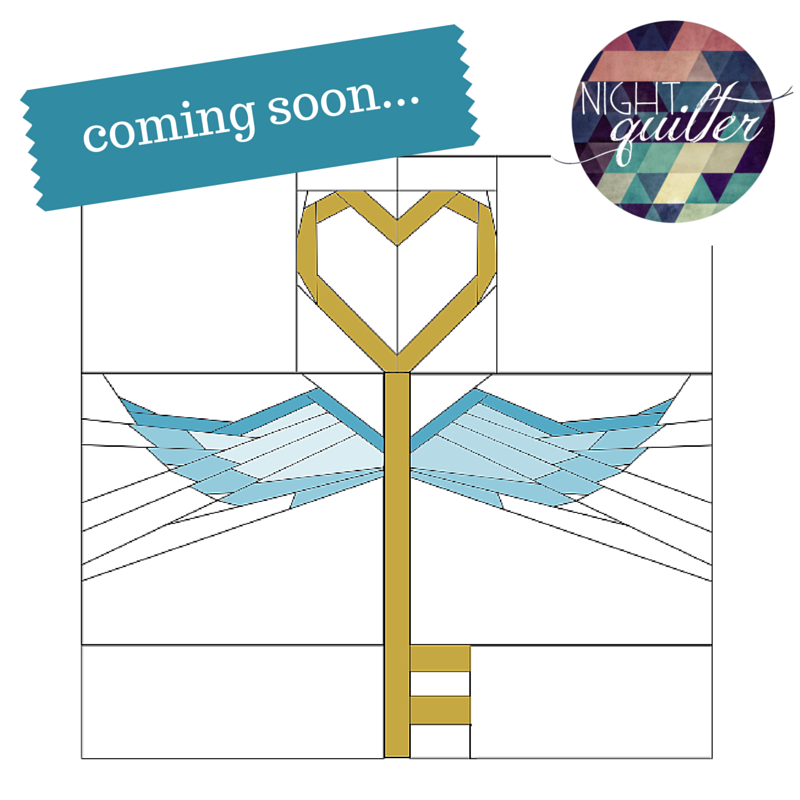
The pattern includes clear piecing diagrams, sewing tips, and templates for the 8″x12″ finished block, with various shading to help with accurate fabric placement. Quarter inch seam allowances are included on all pattern pieces to help ensure easy piecing, and a 1″ reference square is on every printable page so that scale can be confirmed. Full foundation paper piecing instructions are not included in the pattern, but I have a thorough paper piecing tutorial HERE. Lee Heinrich from Freshly Pieced also has a fabulous tutorial on the Bernina We All Sew blog HERE, which will ensure you will never miss corners again. Knowing all of the information in these two tutorials will help demystify FPP, or at the very least will GREATLY reduce seam ripping.

bean sprout block bring spring no matter the weather
Sew up the bean sprout block to bring spring no matter the weather!!

Bean Sprout is available for sale in my Payhip shop, at an introductory price of $2.50 through the weekend. Tuesday morning EST, it will go up to its standard price of $5.00.

bean sprout foundation paper piecing pattern nightquilterI pushed spring into summer with my latest version of the block, using Cotton + Steel teals and coral that remind me of watermelon. I wanted to show the versatility of the color possibilities with this true-to-life block. While my brain initially goes to the greens and blues true to real life bean sprouts and summer sky, there are many other combinations that could work well to make the block shine! (For the avid gardeners among you, yes, I know the seedling shown is a brussel sprout plant, not a bean!)

There’s not much more exciting than seeing what others create with my patterns, so if you make this block, please use the tag #beansproutblock on social media and tag me @nightquilter. Sending an email would also work! Enjoy, spread the word, and go grow some quilts!

I’m linking up with Crazy Mom Quilts Finish it up Friday, Needle and Thread Thursday, and Let’s Bee Social.

Make Earth Day Every Day: Grow Pillow

Earth Day has always been one of my favorites days. I strive to fully embody the “Earth Day is Every Day” ideal with my day to day life, from adopting a whale in third grade and frequent stream clean ups as a child, to majoring in environmental science in college, to aiming to instill a love and respect for the earth and all its creatures and functions in my children. The earth is our home, and it is our responsibility to help nurture and care for it. Today seemed like the perfect day to share my newly finished pillow featuring my bean sprout foundation paper pieced pattern.

grow bean sprout pillow finishI’m calling this pillow “Grow” and it will be donated to a fundraiser auction/raffle at our local school. The theme for the fundraiser is “Growth & Gardening” so it fits perfectly!

grow bean sprout pillow finishI used my coveted Carolyn Friedlander bright green Architextures fabric (Robert Kaufman) for the sprout, with little leaves of lime linen leftover from a previous project and a dotty dark green that was in my stash, but has no selvedge. A light turquoise modern Indah batik by Me + You (Hoffman Fabrics) makes a perfect summer sky for the background. Alison Glass Sun Prints 2016 Sphere (Andover) as the border rounded out the pillow nicely. It’s bound in the remainder of the lime linen blend and backed in that same mystery, beautiful dark green fabric. I quilted the pillow front with coordinating 50wt Aurifil thread in 2800-Mint Ice, since it blends right in with both the background and the green bean sprout.

grow bean sprout pillow finishI was hoping to release the Bean Sprout Pattern today, too, but lo… life got in the way and it’s not quite ready yet. Soon, hopefully. The pattern finishes at 12″ square so I added 2″ borders all around to bring the pillow to 16″ square.

grow bean sprout pillow finishgrow bean sprout pillow finishI also inserted my very first hidden zipper in the back of this pillow, which is SO exciting! I used a fabulous tutorial by S.O.T.A.K. handmade and it worked like a charm. I am definitely installing hidden zippers in the backs of all of my pillows from now on.

grow bean sprout pillow finishNow that this pillow is finished and photographed, it will be delivered to my daughter’s school for their annual fundraising auction/raffle. Last year’s donated project taught me a lot about the art of giving, and this year’s gift seems no less serendipitous. A quilted item was needed for a growth-themed fundraiser, right as I had tested my bean sprout pattern–perfect! I’m curious to see what next year brings, and I hope this pillow is able to raise some money for our local school!

I’m linking up with Crazy Mom Quilts, Needle and Thread Thursday, and TGIFF, since a finish ALWAYS warrants celebration! Now, off I go on a hike to celebrate this gorgeous Earth Day! Head on outside and love your mama!


Inviting Ancestors to Tea: A Mug Rug Gift

A few months ago, my brother-in-law posted the coolest picture on Instagram of what appeared to be a little metal pin or charm. My first thought (of course) was, “That would make a cool paper pieced pattern!” His caption read: “Our ancestral emblem dates back to the 1800s.”  That sealed the deal. This HAD to be made into fiber art of some sort. How awesome is it to have an ancestral emblem!? I’ve been prodding my artist brother to design one for our family, since you’ve gotta start somewhere, right?!

ancestral emblem IG postWhen I got the reminder from my mom that his birthday was in early March, I decided it was time for this ancestral emblem creation to become a reality. I drafted a foundation paper pieced pattern, decided a mug rug would be the perfect doable yet useful gift, and set to work.

finnish ancestral emblem mug rugI’m very happy with the result!

This gift was a surprise for my brother-in-law, so I had to do some secretive research into favorites. He and my brother both have a very distinct style and I wanted to be sure to make a gift he’ll sincerely love (for more than just the fact that I made it for him). First up was to do some research to figure out a favorable color scheme. Word back from my brother was that colors were tough, and the safest bet was to go with grey, black, or white. Since Robert Kaufman’s Essex yarn dyed linen in charcoal is one of my all-time favorite fabrics, this color scheme sounded perfect to me!

finnish ancestral emblem progressWith Kona white and Essex yarn dyed in charcoal, I pieced the top using my newly created foundation paper pieced pattern. I made some binding with my go-to Carolyn Friedlander text on black from Architextures and decided the whole thing needed an accent–just a pop of color in the binding to round it out. I sent my brother the photo above for his opinion, and I’m glad I did! The texty print was vetoed and orange and black apparently are a favorite color combination (you know me–I was leaning heavily toward turquoise).

hand stitching binding relaxationI easily switched in Kona black instead of the Architextures (I’ll save that for another project!) with three narrow bits of Kona Persimmon and before I knew it, I was relaxingly hand stitching the binding to the back to finish it up.

finnish ancestral emblem mug rugI am really happy with this mug rug, and I hope that my brother-in-law loves it and better yet–uses it ALL the time! He can now invite his ancestors to tea whenever he wants.

architextures ledger perfect backing fabric straight quiltingThose of you who follow me on Instagram most likely already saw my secret trick to perfectly straight quilting lines, but I’ll share it here for those who missed it. I used Ledger from Carolyn Friedlander’s Architextures line for the backing and quilted straight lines with the backing facing up. This project was small enough that I could easily line up the backing with the front, so the lines were perfectly straight, evenly spaced, and horizontal on the front. I used 50wt Aurifil 2600-Dove thread for piecing, quilting, and binding (of course).

finnish ancestral emblem mug rugThis was mailed off yesterday (better late than never!), so it should be arriving soon.

Project Stats – Mug Rug

Pattern: Finnish Ancestral Emblem foundation paper pieced pattern designed by me, inspired by a photo of a metal pin.

Size: 6.5″x11″

Fabric:
Front: Kona White (Robert Kaufman), Essex Yarn Dyed Linen in Charcoal (Robert Kaufman)
Back: Ledger in Ivory from Architextures by Carolyn Friedlander (Robert Kaufman)
Binding: Kona Black with three accents of Kona Persimmon (Robert Kaufman)

Batting: 100% cotton Soft n’ Crafty batting

Thread: Aurifil 50wt in 2600 – Dove for both piecing and quilting

Quilting: Straight line quilting using the lines in Ledger as a guide, with my Bernina 560 and a walking foot

*******

I’m linking up with Crazy Mom Quilts Finish it Up Friday. I have a lot of finishes to share in the coming weeks, which explains my relative quiet here on the blog. Time to show you what I’ve been making!


Carolyn Friedlander Modern Hexies Progress

It’s no secret that Carolyn Friedlander is one of my favorite fabric designers. Last year, I made an entire quilt featuring her Doe fabric line, with cameos from Botanics and Architextures. But as her new fabric lines come out and continue to coordinate so well with her originals, I decided I wanted a quilt that truly showcased her varied and gorgeous fabrics. What better than a Modern Hexies mini quilt using Nicole at Modern Handcraft’s fabulous method?!

carolyn friedlander modern hexies progressNow, I’m already putting myself up against a wall a bit, since I began this project after Architextures became all but extinct. I’m hoping, though, with a bit of luck and a few insider tips, I can eventually acquire at least a 2 1/2″ square of each of the fabrics from Architextures.

architextures by carolyn friedlanderThanks to a tip from Allison at Campbell Soup Diaries, I recently picked up one of my all time favorites, plus Ledger in Ivory, from Westwood Acres.

architextures by carolyn friedlanderThrough the #getyourquiltywishesgranted event on Instagram a few months back, I obtained a few more archaic Architextures prints, as well as the Carkai mini charms I’ve nearly made into hexies.  I’m on my way!

hexagons carolyn friedlander fabricI already have basted hexagons from all of Botanics and most of Carkai. I have some scraps left from my Doe quilt, so I’ll see where that brings me and go from there.

backed in text from architextures
Might be a bit too busy for my aesthetic.

I think I will make a few more hexies before ultimately deciding whether to back the hexies in my favorite Essex yarn dyed linen in charcoal, or to stick with solid white. Perhaps I’ll be crazy and use one of the still easily attainable text prints from Architextures as the background. Time will tell.

If you have any tiny (2 1/2″ square at least) scraps of Carolyn’s Architextures fabric, please let me know if I can persuade you to send them my way! I will be happy to compensate with fabric, chocolate, or cash money. And of course gratitude. Lots and lots of gratitude.

I thought I would link up with Lee’s Work in Progress Wednesday, but it appears I’ve been out of the WiP loop long enough to have missed that she’s taking a (potentially permanent) break from her link up.  Oops! Still check out her blog at Freshly Pieced since she’s always making something gorg! I’m also going to go wild and link up with Molli Sparkles’ Sunday Stash since I’m finally sharing my new CF acquisitions.

Love is the Key: Pattern Release and Sale!

Love is always the key. We know that. But now we can also SEW that! Those who know me know that I am a sap for hearts and I see them literally everywhere. One of my proudest moments was the first time my daughter brought me a heart she found in nature. It was a dirty old dried up piece of orange peel that she had found in the gravel driveway, and she was filled to the brim with excitement that she had found a heart. Since then, Maddie and I (and now Max, a bit) have found countless heart rocks, heart sea glass, heart snowballs, heart leaves, and more… since truly, love is everywhere. Reminiscent story aside, today I’m excited to release my newest pattern: Love is the Key.

Love is the Key CoverLove is the Key is a foundation paper pieced pattern that measures 9″ square, but with an option for a 4.5″ wide by 9″ tall version. It features a heart-topped key and is a very easy, beginner-friendly paper piecing pattern. Believe it or not, this pattern was first conceptualized and sketched almost a year ago, on my flight home from QuiltCon. It’s a mash-up of my Unlocked and Love Struck patterns, since who doesn’t need more heart-filled pattern options?

love is the key foundation paper pieced patternTo help celebrate the month of love, this pattern release is also kicking off a pattern sale of all of my love-themed patterns, today through Valentine’s Day. That gives you ample time to sew up some love for your partner, your kids, your parents, or hey–even for yourself!

pattern sale loveGrab Love is the Key for only $3 while you can! The prices have already been reduced in my Craftsy and Payhip shops. After Valentine’s Day, all patterns will return to their standard prices of $4.50 (but my love will still be there).

I always love to see what you create, so please use the hashtag #loveisthekeypattern and tag me @nightquilter when you share on social media.

coming soon... Flying KeyI’m also excited about a few add-on pattern features I’m hoping to release soon. Most likely not by Valentine’s Day, but soon you will be able to stitch up a flying heart key, and will have top and bottom options for a “create your own adventure” key. So much fun. So much love.

I’m linking up with Crazy Mom Quilts’ Finish it up Friday since I’m psyched I finally finished this pattern, even if it did take me a year!


How Small Can You Go?

I’m certainly testing this question lately! I’ve written about the mini mini quilt swap craze, and while it seems to have died down a bit on Instagram, I’m still plugging along working to complete the many mini minis I have promised to swap. Such is life when sewing gets done 20 minutes at a time! One such mini mini has morphed into a true test of “how small can you go?”

mini mini fpp featherI designed a tiny foundation paper pieced geometric feather for the mini mini I’m making for Renee at Quilts of a Feather, since I wanted to create a purple feather (her favorite color is purple and feather is probably a clear choice), but I also wanted it to be unique. The tiny pattern crazy me developed has 60 foundation paper pieced pieces in block smaller than 3″x4″.

mini mini fpp featherBelieve it or not, the foundation paper piecing part went smoothly. That’s one of the wonders of foundation paper piecing–you can literally sew ANYthing.

quilting stiletto in useI’ve only removed the papers from half so far, but even that isn’t too bad. I quite enjoy it, actually. When foundation paper piecing, I set my stitch length to 1.2 so the paper basically melts off. I encouraged some of the teeny tiny smaller than 1/16″ bits to come off using a cute stiletto I received as part of a swap last year. (Aside–did you know that a stiletto in quilting is a skinny tool that is thicker and a bit more blunt than a pin, and is used to help feed your fabric through your sewing machine, hold down little corners while sewing, or any other task you can derive? I *just* learned what a stiletto was and so I’m trying to use it more!)

mini mini fpp featherJoining the two halves, on the other hand, was where the challenge truly arose. I broke a needle trying to get through all of those layers, and eventually settled on hand cranking my machine through the thickest part.

mini mini fpp featherNeedless to say, this baby does not lay flat, nor can I hope to press it flat no matter how much Flatter I use.  But no worries! I plan to use a double layer of batting, perhaps only under the feather (I think it’s called trapunto) so that at least it won’t seem too out of place. But it appears I have my answer: this is as small as I can go, at least with this pattern!

I originally planned to trim the outer edge and needle turn appliqué the feather to the background fabric, a gorgeous glimmering square of Anna Maria Horner’s Loominous. After requesting some tips/advice from Carolyn Friedlander via email, I am approaching it in a different way per her advice; instead I’ll do reverse appliqué, where I’ll cut the hole in the background fabric, place it on top of the feather, and stitch it down around the feather’s edge. While it will be my first time trying reverse applique, I think I have a much better chance at success using this method. Thank you, Carolyn!

mini mini fpp feather
I’m leaning toward the lighter purple Aurifil for the stitching, so that it will blend in with the Loominous.

I’ll be sure to keep you posted on how this mini mini turns out!

I’m linking up with Works in Progress Wednesday at Freshly Pieced, since it feels like ages since my last link up!

A Quick Gift: EPP Rose Star Coasters {Sizzix Tutorial}

Today I’m sharing a tutorial for some quick and easy English Paper Pieced (EPP) coasters, made particularly quick and easy by use of a Sizzix fabi die cutting machine to cut all of the fabric and templates, glue basting the EPP pieces, and backing the coasters with felt (photos and instructions for all steps are included in this tutorial!). They are also a great way to showcase your hand-stitched EPP and meticulous (fussy) cutting if you so desire.

epp sizzix rose star hexi coastersWhile I was planning out and putting together the mug rug I’m making for my sister using the Sizzix Rose Star die (you can see my tutorial for getting started on the mug rug on the Sizzix blog HERE), I realized that the center of the Rose Star would make a perfect hexi coaster. Of course that idea stuck and I decided to play around with fabric arrangements and make a set of coordinating coasters to go along with my sister’s mug rug. Thus, this tutorial was born.

I’ve included affiliate links throughout this post so that if you decide that you want to give the Sizzix and Rose Star die a go and click through my link, I will receive a small compensation at no cost to you. Share the love, right?

Without further ado, here we go!

EPP Rose Star Coasters Tutorial

For this tutorial, I used the Sizzix fabi die cutting machine and the BigZ L Rose Star die, but many of the techniques can be applied to any EPP project.

sizzix fabi die cutting machineFirst, gather your fabric and get your die cutting machine ready. As I shared in my Sizzix mug rug tutorial, I like to pass a piece of regular printer paper through the machine, and label the pieces to help with planning. The Rose Star die is designed for EPP, so the single die can cut all of the templates and fabric needed (pretty awesome, huh?).

For this project, we will be using the A and B pieces. Begin by cutting the templates needed: 1 A and 6 B for each coaster. Since I made four (4) coasters, I cut 4 As and 24 Bs. I use cardstock for my templates, and hole punch the centers to facilitate easy removal after the stitching is complete. Use what works for you.

cuttingThe paper practice pieces can help you save time in cutting, too. For fabric shapes needed in duplicate, use the fabric piece to determine how wide of a fabric strip you will need, then use your rotary cutter and mat to cut a strip. As you can see, I gave myself some wiggle room, but if you’re a die cutting pro, you can really save fabric by lining up the shape flush with the edges of the cut strip.

fabi die cutting machineOnce you have your fabric strip, fold it accordion style and position it in your Sizzix sandwich: bottom cutting pad, die with the blades facing up, fabric over the fabric blades, and top cutting pad (not shown in this photo). Pass it right through the die cutting machine (or have your three year old crank it through for you), and you’ll have all of the pieces needed for a coaster. You can cut all the fabric needed for a coaster in one pass.

Now it’s time to baste our pieces.

glue basting epp with sewline fabric penFor this project, I decided to finally try glue basting instead of thread basting. I got a Sue Daley fabric glue pen, but any washable glue stick or pen will also work (Elmer’s, Sewline, etc.). I’ve heard so much about how glue basting saves a ton of time with EPP, so I figured if I paired it with the time saving cutting from the Sizzix fabi, I’d be golden with a fun, fast, fabulous gift idea. (Pst… I was right!)

sue daley glue basting eppGlue basting is similar to thread basting in that you are securing the fabric around the cardstock template. With glue basting, first put a dab of glue on the center of your template and stick it to the center of the wrong side of your fabric.

sew daley glue basting eppNow is the time to double check any fussy cutting you did to make sure it all lines up how you want it.

sew daley glue basting eppNext, apply a thin line of glue along one edge of your template. Be careful to keep the glue from getting all the way to the edge of the cardstock, since it will make it much more difficult to remove the templates once you are finished (ask me how I know).

sew daley glue basting eppHere’s one way glue basting differs from thread basting. Instead of working your way around the template, apply glue to opposite sides of the shape to help even out the pull of the fabric.

glue basting stepsBefore you know it, you’ll have your first piece.

glue basting stepsContinue glue basting all of the pieces needed for your coaster. With irregular shapes, start by gluing the longest side to help make the process smoother.

epp fussy cutting bunny rabbitHave fun with your meticulous cutting. This is a great project for using those adorable little bits of fabric you’ve been saving.

epp coasters tutorialOnce all of your pieces are basted, it’s time to start stitching them together! I made a set of four (4) coasters, but you can make as few or as many as you want.assembling epp coastersAll you need for this step is your basted pieces, sharp scissors, a sewing needle, and some thread in a coordinating color (I love using 50wt Aurifil thread). Sometimes, when the two pieces you’re sewing together are very different colors, there is no color that coordinates with both (like in my case). You can choose one of the colors to match, or just use a neutral color thread. I didn’t have black thread (Aurifil #2692, how have you evaded me!?), so I went with a contrasting light grey (Dove #2600) since I had already decided to quilt these with the contrasting colored thread. Once you have your supplies, this is a great project to take on the go, to stitch here and there.

assembling epp coastersTo get started sewing the pieces together, arrange your basted pieces the way you want the finished coaster to look. Flip the first piece over one edge of the center hexagon, right sides together.

assembling epp coastersWith a knotted thread, beginning at one corner, carefully stitch the two pieces together. The needle should only pass through the edges of the fabric, not the cardstock template, and only needs to catch a few threads of each fabric to hold. Many people use whip stitch to hold the pieces together (shown above). Sew the edge completely, then pick up the next basted piece, hold it right sides facing the next edge of the center hexagon, and continue sewing along that joining edge. There’s no need to knot your thread after each side; continue stitching the pieces together until you either run out of thread or you get to a point where no other piece can be directly joined.

ladder stitch to join eppladder stitch to join eppI recently saw the idea of using ladder stitch to join EPP pieces, so had to try it. I LOVED it! With ladder stitch, instead of entering the edge of the fabric from the same side every time as with whip stitch, you pass the needle from the side you’re on to the opposite side with each stitch. It may take a bit more time because of the back and forth of the needle, but I prefer it since it results in a nearly invisible join and I’m a slow and steady stitcher to begin with. Use whichever stitch works best for you and sew all seams. Don’t be afraid to fold your center template in order to get the outer seams lined up and sewn together.

Once your coaster EPP tops are all stitched together, it’s time to assemble the coasters.

tracing and cutting EPP coaster backingFirst, trace your EPP top onto a piece of 100% wool felt. I bought mine at my local quilt shop, Fiddlehead Artisan Supply, where there’s a huge wall of gorgeous wool felt from which to choose. Trace one hexagon backing for each of the coaster tops. I used a Sakura Micron pen since we are going to cut just inside the line and therefore it won’t be visible. Plus, Micron pens are the best.

EPP coaster assemblyCarefully cut *just* inside the line you traced.

EPP coaster assemblyThis next step is optional, but if you plan to use the coasters for hot beverages I would recommend it. Gather some batting scraps. This is a great way to use those batting trimmings you’ve cut off the edge of finished quilts. Again, trace your hexagon coaster top and cut out along the line.

EPP coaster assemblyTrim 1/4″ off each edge of the batting hexagon. This way, the batting won’t stick out from the edges of the assembled coaster. I used my rotary cutter and ruler, but be sure to count how many edges you trim since it’s easy to lose track. You should have six (6) trimmings after trimming each hexagon. Set your felt and batting hexagons aside.

EPP coaster assemblyNow, back to your coaster tops. It’s time to take out those template papers! You will need your EPP coaster tops, a toothpick, a chop stick (or crochet hook), and an iron. Trust me, and no, we’re not making dinner!

use toothpick to release glue bastingGently slide the toothpick under the glued edges of the fabric, separating the fabric from the cardstock template. Be particularly careful around the outer edges to separate the fabric from the cardstock without pulling it out of shape too much.

chopstick removal of epp templatesOnce the fabric edges are separated from the cardstock template, grab your chopstick and stick the end of it in the hole punched hole of the template.

chopstick removal of epp templatesGently pull the edge of the chopstick up and the cardstock template will pop right out. This chopstick removal method works much more smoothly with thread-basted EPP pieces, but as long as all of the glue spots have been unstuck, it should still smoothly remove the template. You can save the template and use it again!

EPP coaster tutorialOnce all of your templates have been removed, give your coaster top a good press with a hot, dry iron, ensuring that all of the outer corners are still folded in the way they should be.

EPP coaster tutorialWhile you’re pressing your coaster top, fold in the edges of your outer seams like you’re making a paper airplane and press well. This will keep them away from the edges when you sew your layers together, keeping the edges of your coaster neat and clean and free from peeking-out seams.

EPP coaster tutorialIt should leave a nice neat edge.

epp coaster assembly tutorialNow it’s time to assemble our coasters! You can probably just pin the layers together: felt on the bottom, then batting, then EPP coaster top, but I like to glue baste and use Clover Clips* to hold the layers together before sewing since it results in a nearly perfect alignment.

glue basting epp coaster tutorialUsing Elmer’s washable glue, make a tiny path of glue around the outside edge of the entire coaster. I use Fine Line Glue applicator tips provided by Pile O’ Fabric and they are fantastic. They are superfine applicators that screw onto a regular bottle of school glue, but they control the flow so that you don’t end up with gloppy globs of glue all over your project.

glue basting epp coaster tutorialAssemble your layers: wool felt on the bottom, then batting centered within that, then EPP coaster top carefully positioned on top. Give it a gentle press with a warm iron (note that wool is now involved) to set the glue. Clover clip the edges for extra stability and head over to your sewing machine!

glue basting epp coaster tutorialTop stitch about 1/8th inch from the edge of the entire periphery of the coaster.

glue basting epp coaster tutorialYou can also add additional quilting if desired and for added durability. I added a top stitched hexagon about 1/8th inch from the edge of the inner hexagon mirroring the outer edge stitches.

EPP coasters in useCarefully trim any wool felt that extends beyond the coaster top, and admire your EPP Rose Star coasters. Weren’t those quick and easy gifts? (You can give yourself gifts, too, you know!)

Sizzix Tutorial- EPP Rose Star CoastersBetween cutting the fabric and templates with the Sizzix die cutting machine, glue basting the EPP shapes, and backing the coasters with felt, these whip up as quickly as you can stitch the top together. It’s a great introductory project to EPP since it’s a quick finish, yet is still a handmade, hand stitched gift. I’m definitely planning on making more of these, and playing around with my fussy cutting, too.

*Disclaimer: Clover Clips are a favorite treasure for most toddlers. Use with discretion and awareness that there may be a pudgy hand lurking around any corner waiting to snatch your Clover Clips away.

clover clip toddler treasure

I’m linking up with Late Night Quilter’s Tips and Tutorials Tuesday. Enjoy your coaster-making foray! (You know you want to make some!)

Feather on a Summer’s Night {& a Giveaway}

I’ve wanted to make the feathers from Shape Moth’s Forest Quilt Along since I first began paper piecing. After recently selecting a fabric bundle for Fiddlehead Artisan Supply, I was trying to decide what project to make with the bundle. I asked my friend Stephanie and she immediately replied, “Feathers!”. Done deal.

summer nights fabric bundle fiddleheadIt’s no secret that I love high contrast and bright colors. Dark midnight blues paired with bright oranges and yellow compose this month’s blogger bundle for Fiddlehead Artisan Supply. It’s called “Summer Nights“, reminiscent of fireflies and popsicles. Scroll down to enter for a chance to win a Summer Nights bundle for yourself.

summer nights fabric bundle fiddleheadThere’s just something about this bundle that was begging to be stitched into feathers, or maybe fireflies. I might have to work on a firefly pattern, now that we mention it. Inspiration is everywhere!

shape moth featherI love how bright and bold the yellow and orange look against the dark blue. The fact that the fabrics include some of my favorites (Doe, Prisma Elements, Plume, and a fun new find by Lecien) surely adds to the appeal.

foundation paper pieced back detailI used wash-away stabilizer sheets provided to me by Alyssa at Pile O’Fabric, and I’m both excited and nervous to soak this block in water so that the sheets dissolve. Imagine that–foundation paper piecing without having to remove the paper at the end! I’ll be sure to write a post about how it all goes once I build up the bravery to let the feather take the plunge.

Growth of a Feather
The growth of a feather, via Instagram #sewtake20 posts.

I’m not quite sure what I will create out of this bright feather block; I think for sure I will make its little buddy (the second feather in the pattern) before fully finishing. I’m on the fence about whether to make it into a pillow or a mini wall hanging. I’m leaning toward a pillow, with the Plume fabric as the back. What would you make?

summer nights fabric bundle fiddleheadFiddlehead Artisan Supply is generously offering a Summer Nights fat quarter bundle to one of my readers. The bundle includes fat quarters of the following six fabrics (clockwise from the feathers):

  • Plume in Onyx from Nomad by Urban Chiks for Moda
  • Lecien Chatter Tailors #40507
  • Doe Trellis in Blue by Carolyn Friedlander for Robert Kaufman Fabrics
  • Prisma Elements in Solar Quartz for Art Gallery Fabrics
  • Moda Half Moon Modern Scissors in Orange
  • Prisma Elements in Apricot Sunstone for Art Gallery Fabrics

To enter the giveaway today, share what you think of when you hear “summer nights”. Feel free to share word associations or stories; just fill the comments with summer night favorites! Leave a comment and make sure I’m able to get ahold of you if you win.  If you’re a follower of Night Quilter, leave a second comment telling me how you follow for a second entry. Like Fiddlehead Artisan Supply on Facebook or subscribe to their newsletter and tell me how you followed them for a third entry.

This giveaway is open to US and international participants.  The giveaway will be open until 8pm Wednesday 8/5 when I’ll select the winner randomly with random.org. Good luck!Note: This giveaway is now closed! 

I also completed my July Goal for A Lovely Year of Finishes, but I can’t show you yet! The goal was to complete the quilt and pattern that will be published in the September issue of Make Modern Magazine. Rather than post a boring, photoless post to document that I’ve met my goal, I’ll use this post as a multi-finish! I’m linking up with Crazy Mom Quilts Finish it up Friday, and ALYoF as my July Finish post.

Key to a Cyclist’s Heart

Despite 18″-24″ of snowfall over the past 48 hours, we managed to keep our power!! Huzzah! That means I was able to sneak some sewing time in between the outdoor snowy play and the indoor snuggly game playing and movie watching time. I’ve been working on a second version of my Key to My Heart pattern (only $2 on Craftsy and Payhip), with the plan to make them into another seasonal tea cozy for my mom. I’m fairly certain my mom doesn’t read my blog, so I think the gift surprise is safe. If I’m wrong and my mom is reading this, —hi, Mom!!– I hope to get it in the mail so that she gets it before Valentine’s Day.

key to a bicyclists heart
I love matching thread! Aurifil hasn’t let me down yet!


key to a cyclists heart quilt

I can see myself making this block with MANY different fussy-cut centers. This one will become another reversible tea cozy, using Yvonne’s tutorial on Quilting Jetgirl. I was toying around with the idea of making one side both hearts, and the other side solid, but I think I’m going to mix it up. One side of the tea cozy will be the pink heart and pink solid fabric, and the other side will be the bicycle and teal fabric. That way, this tea cozy will be seasonally appropriate throughout the spring and summer, too! Key to my heart tea cozy progress

I’m linking up with Freshly Pieced for Work in Progress Wednesday.