I’m excited to be joining in the fun with Mathew aka Mister Domestic’s Aura Blog Party celebrating his Aura fabric line for Art Gallery Fabrics (AGF). Fridays are always reason to party, but when you add Mathew’s energy and enthusiasm for life, the party is impossible to resist! I figured I’d throw a pillow into the ring since a pillow fight seems like a great addition to any party, right?
 When I first saw Mathew’s Aura fabrics, of course I immediately dreamed of meticulously cutting them for days. I decided that a Pollen Pillow would be the perfect project to showcase these gorgeous fabrics while maintaining a tropical vibe that does the Hawaii-inspired fabric line justice. The Pollen Pillow is the EPP pattern that is included in the 2019 Quilter’s Planner magazine, and is a baby version of my Pollinate Quilt, distributed by Karen the DIY Addict.
 I’m so thrilled with how it turned out!! AND pillows are hard to photograph! I just solved that issue by taking lots, and hope my single monstera potted plant can help bring a bit of tropical vibe to the mid-winter Maine photos.
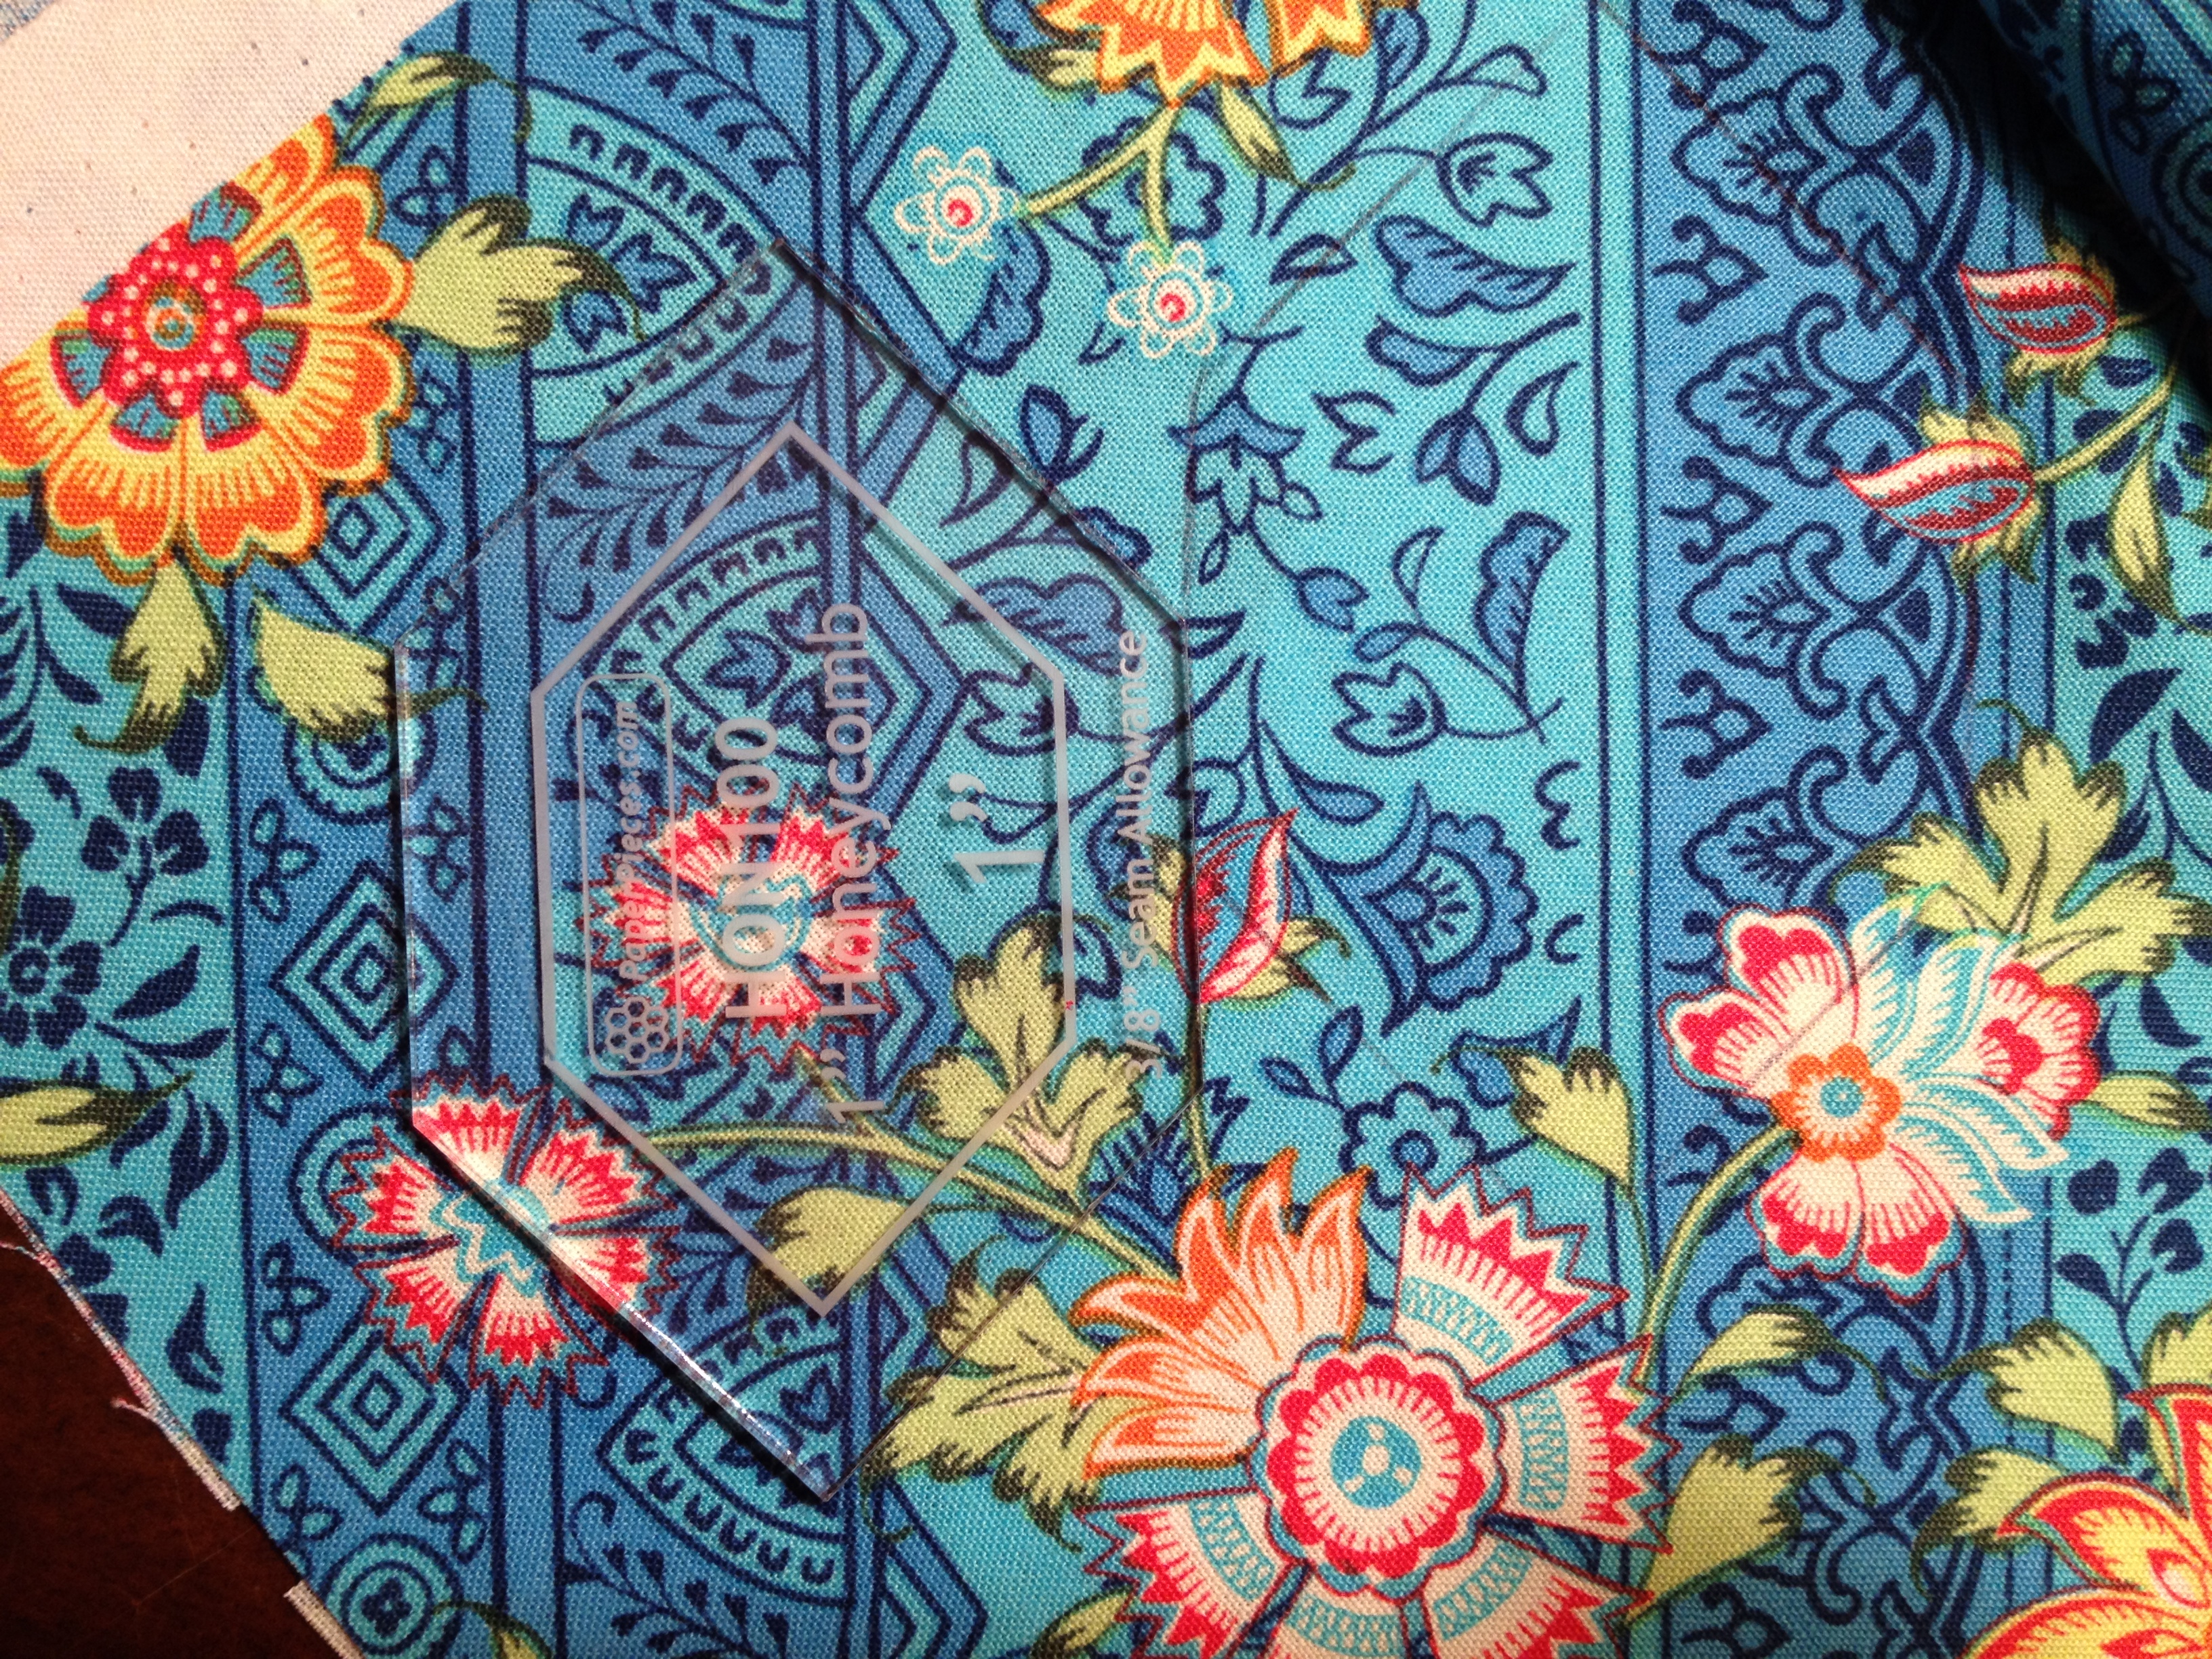
With fussy cutting on my mind, my initial plan was to meticulously choose individual flowers from the Laki Island Daylight fabric, using 5 individual flowers in the center and then a radiating spiral of each individual flower in the outer piehex shapes. However, the scale of the flowers on the fabric were a *bit* too big to make that happen (or maybe my templates/pattern is too small?), so I had to come up with Plan B.
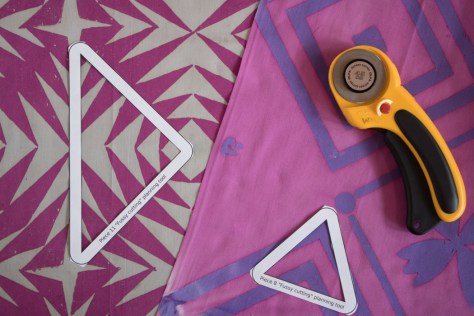
 Looking at the varied and gorgeous flower bundles on Laki Island Daylight, I really didn’t want to chop them up tooo much, so I decided to go wild and fussy cut the fabrics so that the piehex looked like it was an uninterrupted flower bouquet, but with a blue section radiating from the center. I taped 3 templates together for the top half, and fussy cut the bottom 3 so that the fabric pattern was continuous when stitched.
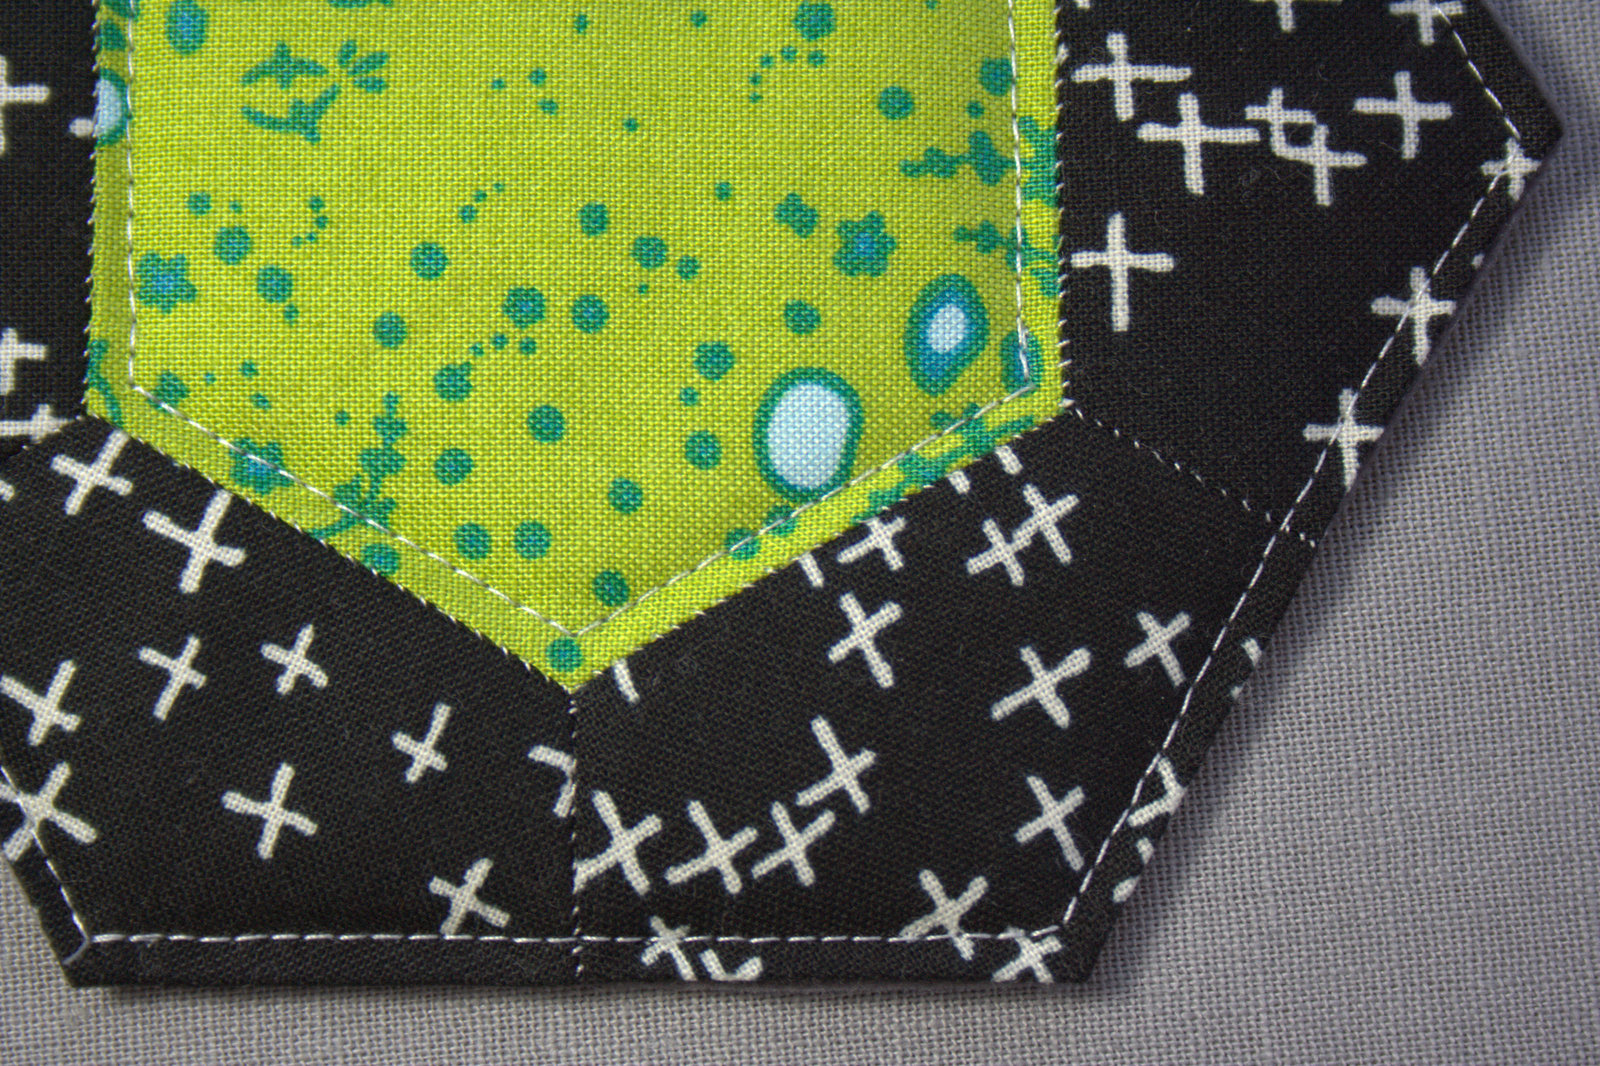
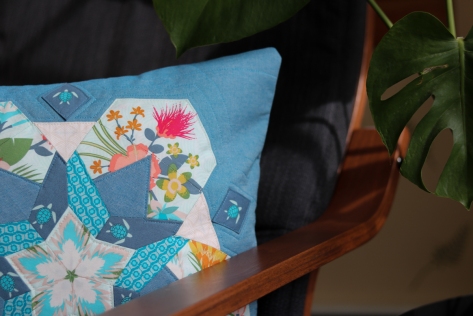
 They aren’t all perfect, but I’m mighty happy with the result! I also love how the blue section emphasizes the center star, while also helping blend into the Endless Paradise AGF denim background. One of my favorite aspects of the Pollen Pillow & Pollinate quilt patterns are how incredibly versatile they are.
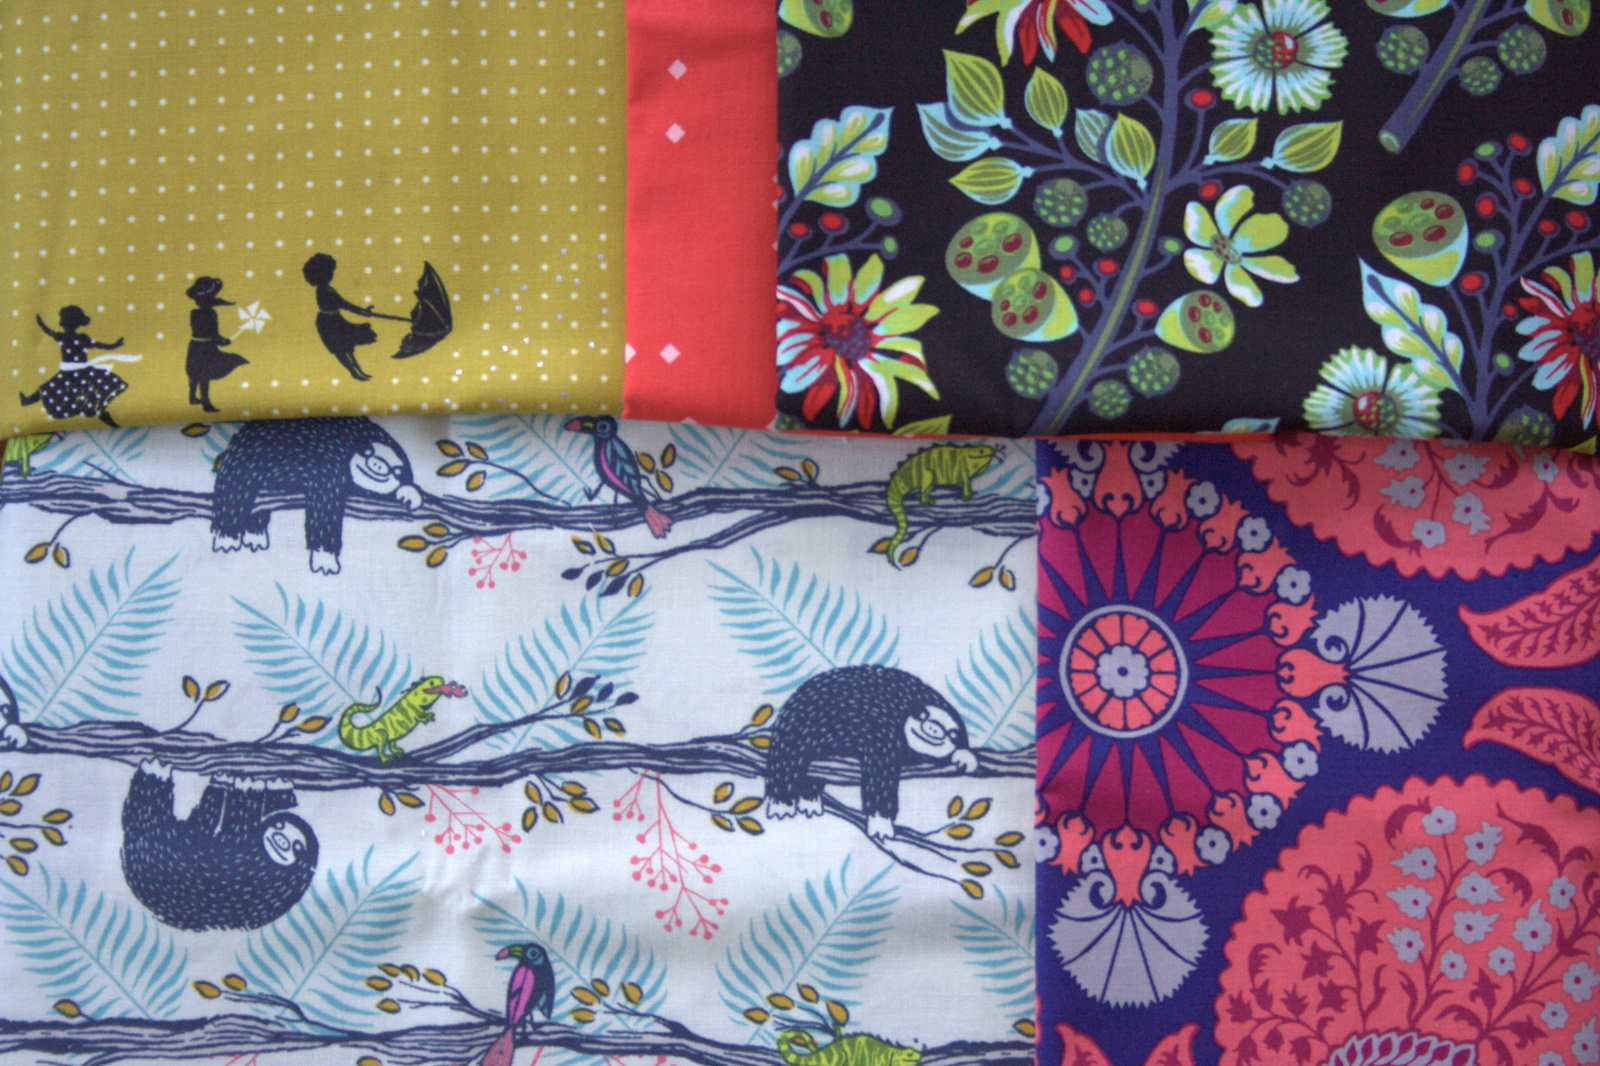
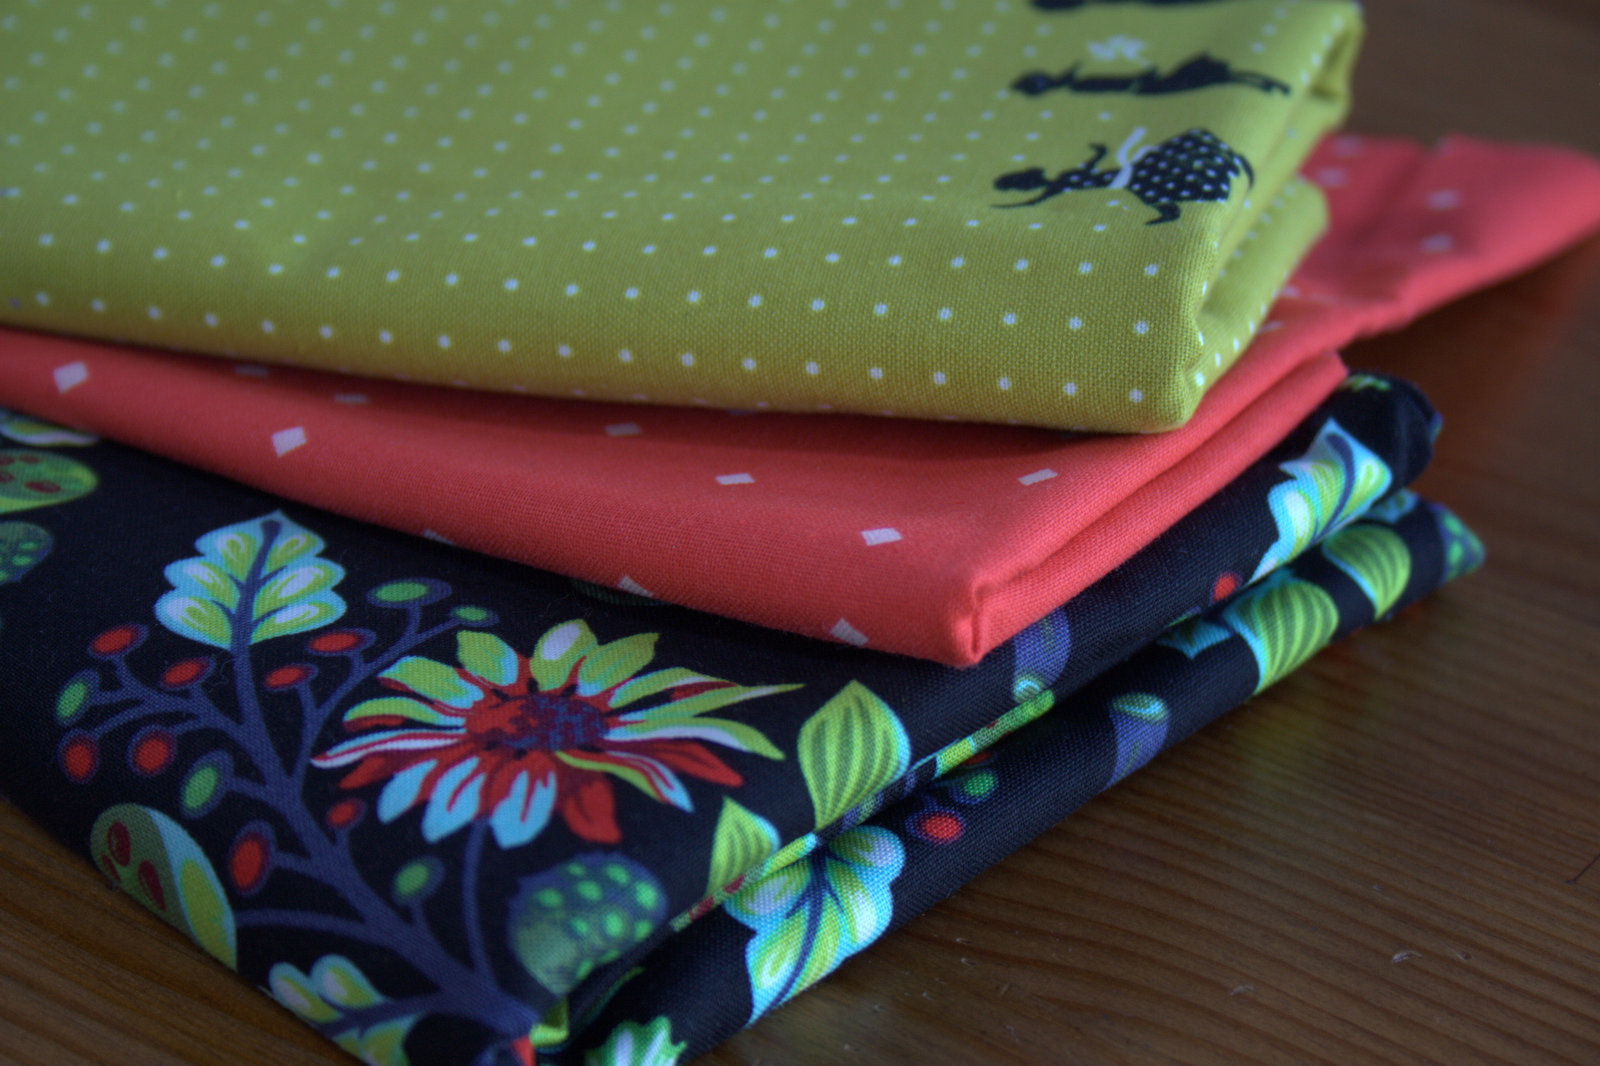
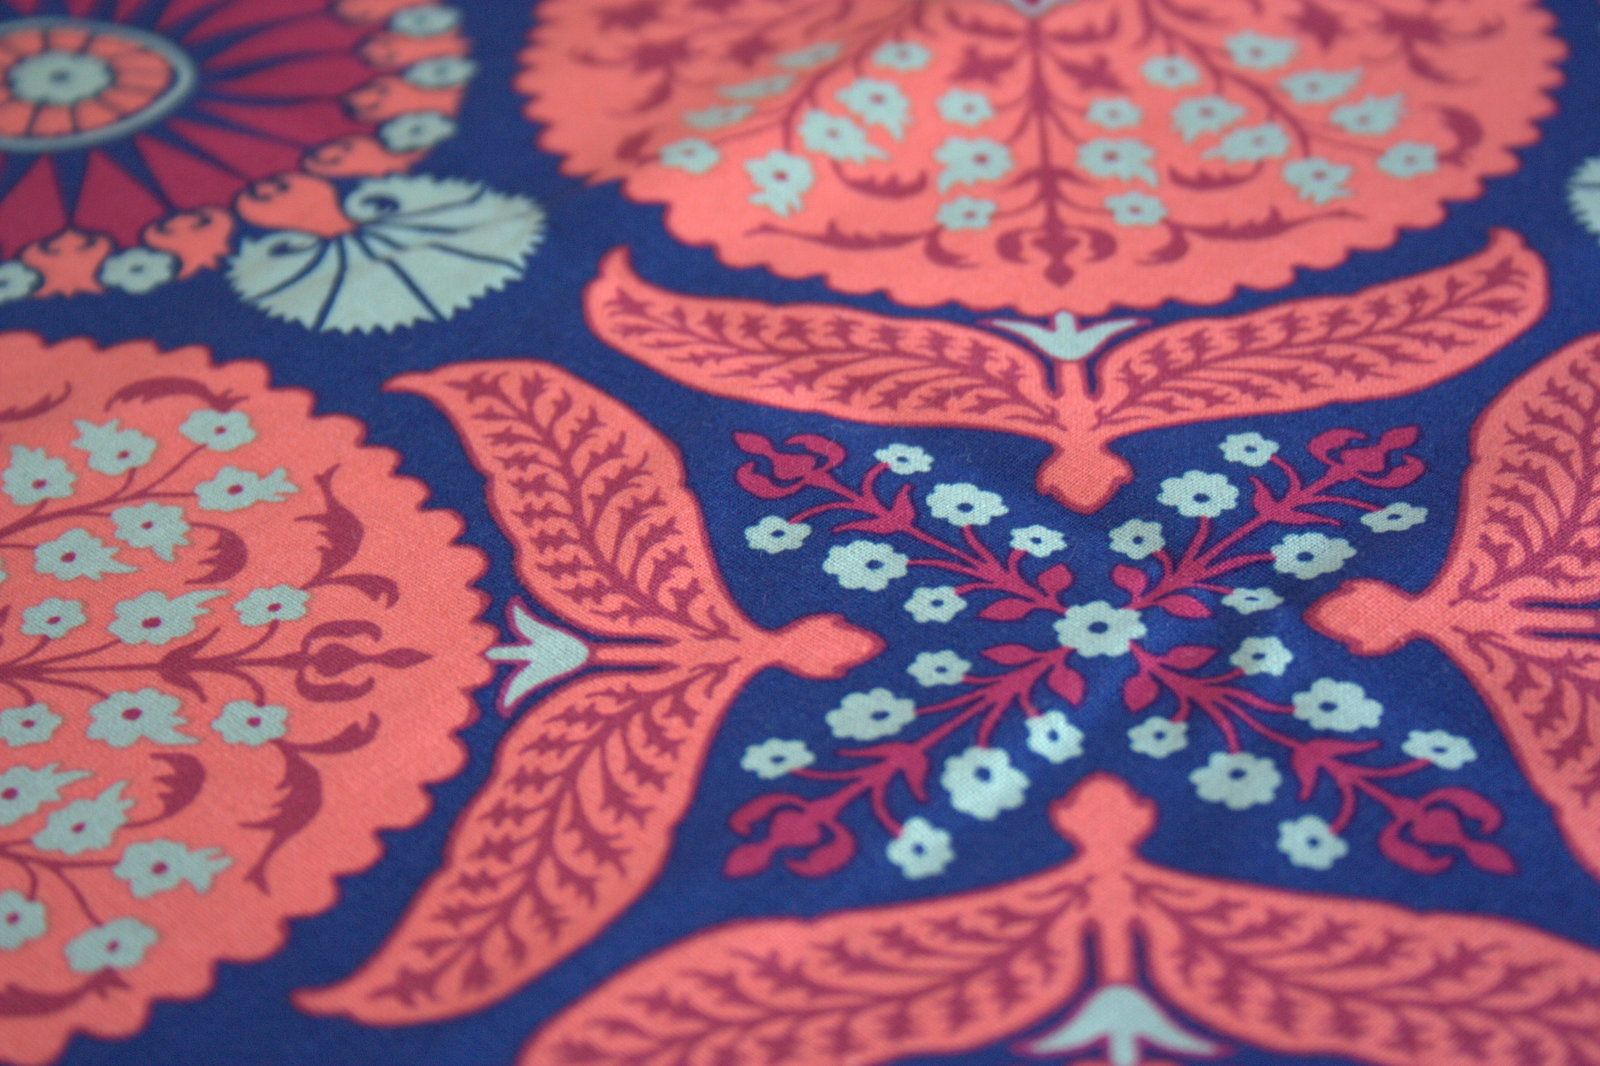
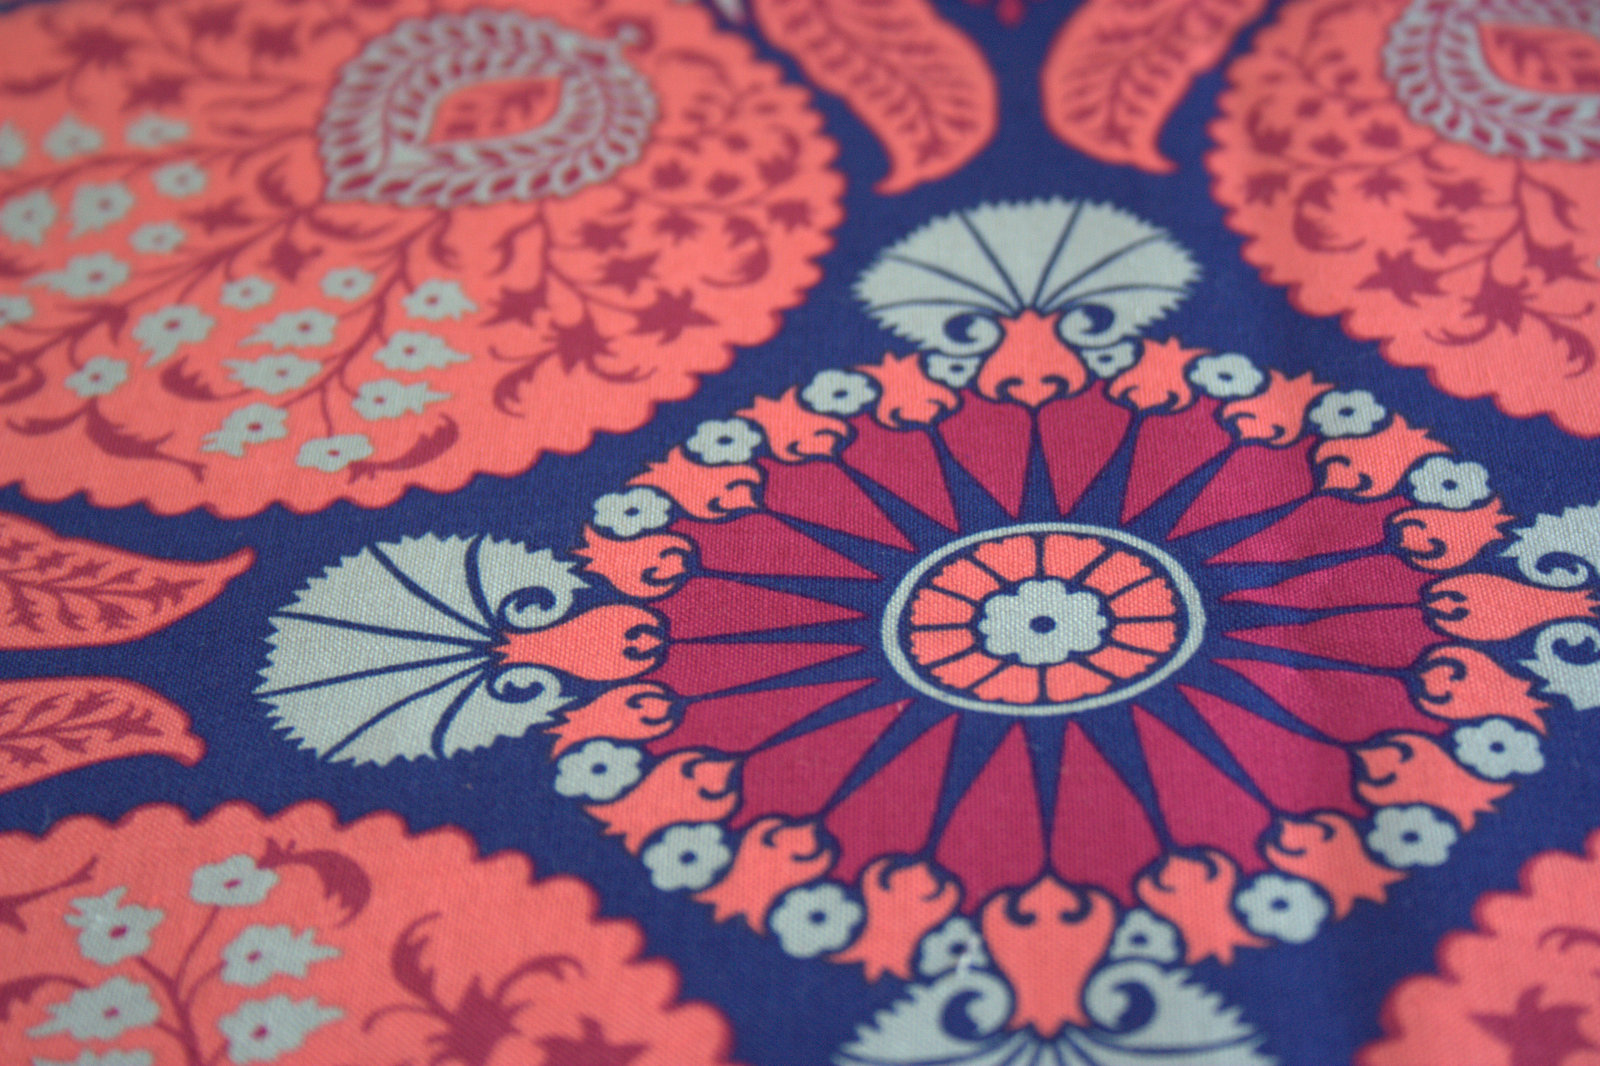
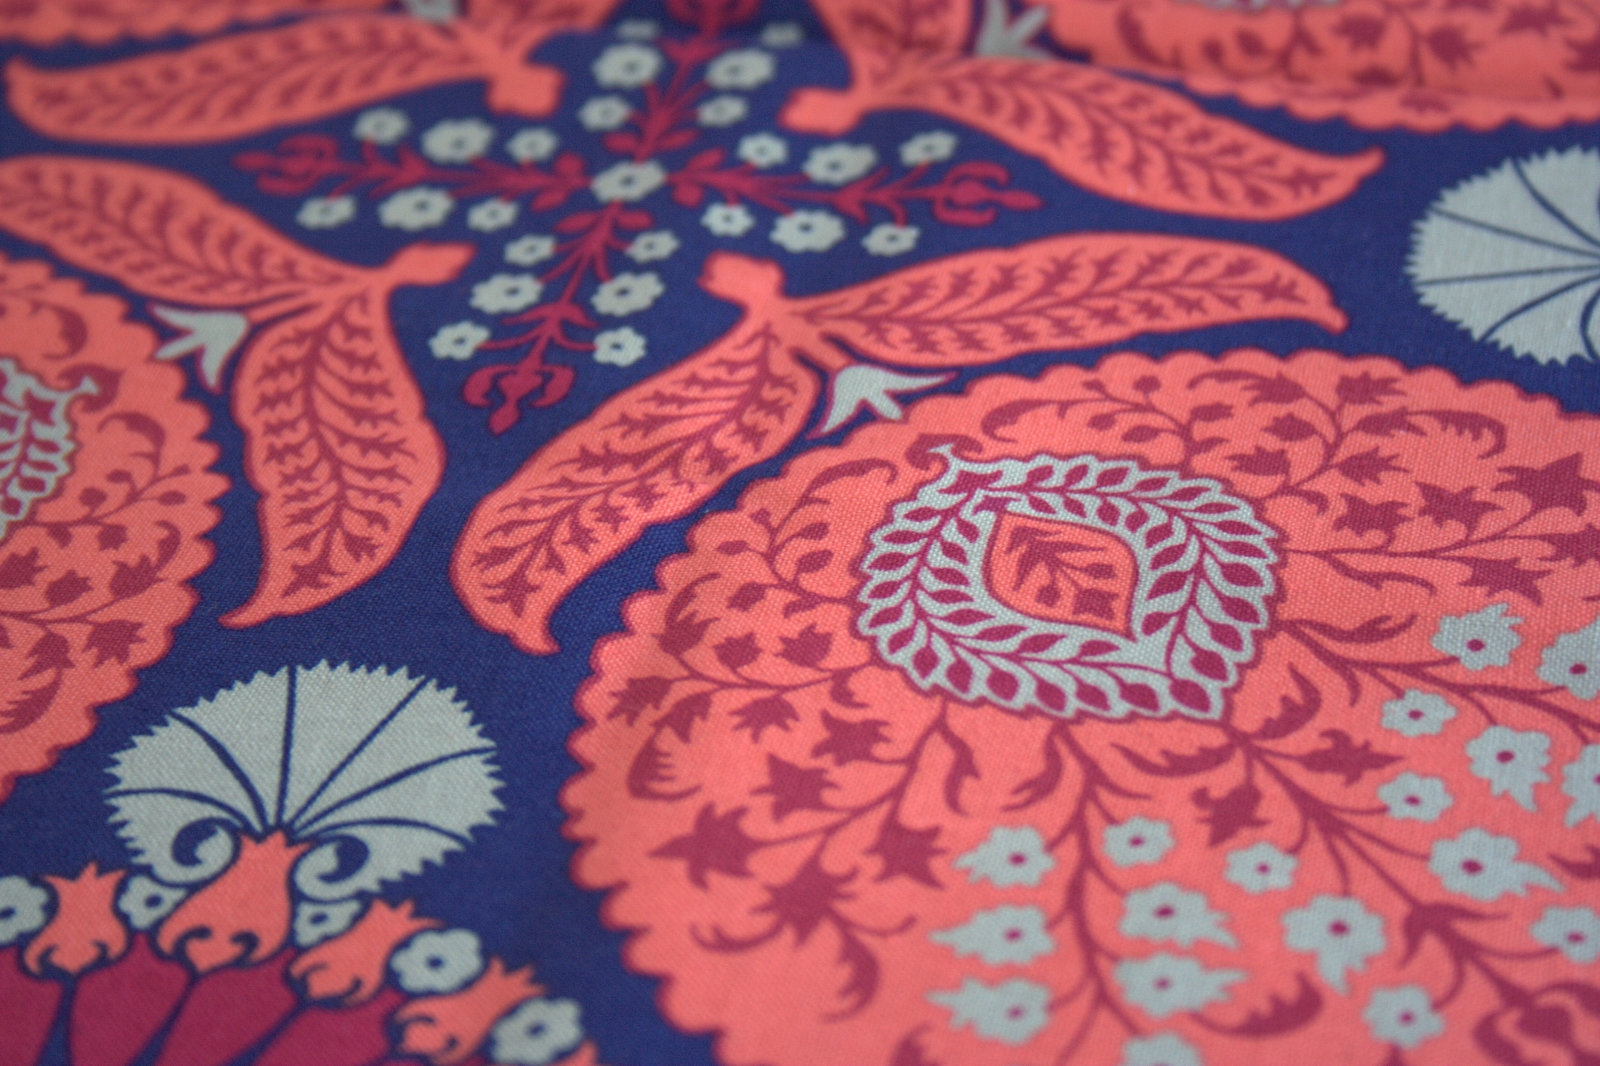
 Here’s a look at the pillow top after it was pieced and quilted, but before it was stuffed as a pillow, so that you can see the fabric placement details a bit better. Here are the Aura fabrics I used: Laki Island Daylight for the center star and outer piehexies, Hawaiian Honu Dusk (turtles!) and Hula Dolphins Ocean (tiny dolphins circle around this one) for the star, Loulu Fans Sand for the outermost triangles, Hawaiian Honu Dusk for the turtle diamonds around the outside edge, and AGF Denim in Endless Paradise for the accent pieces in the outer piehexies and the background. I LOVE the fabric names, too!
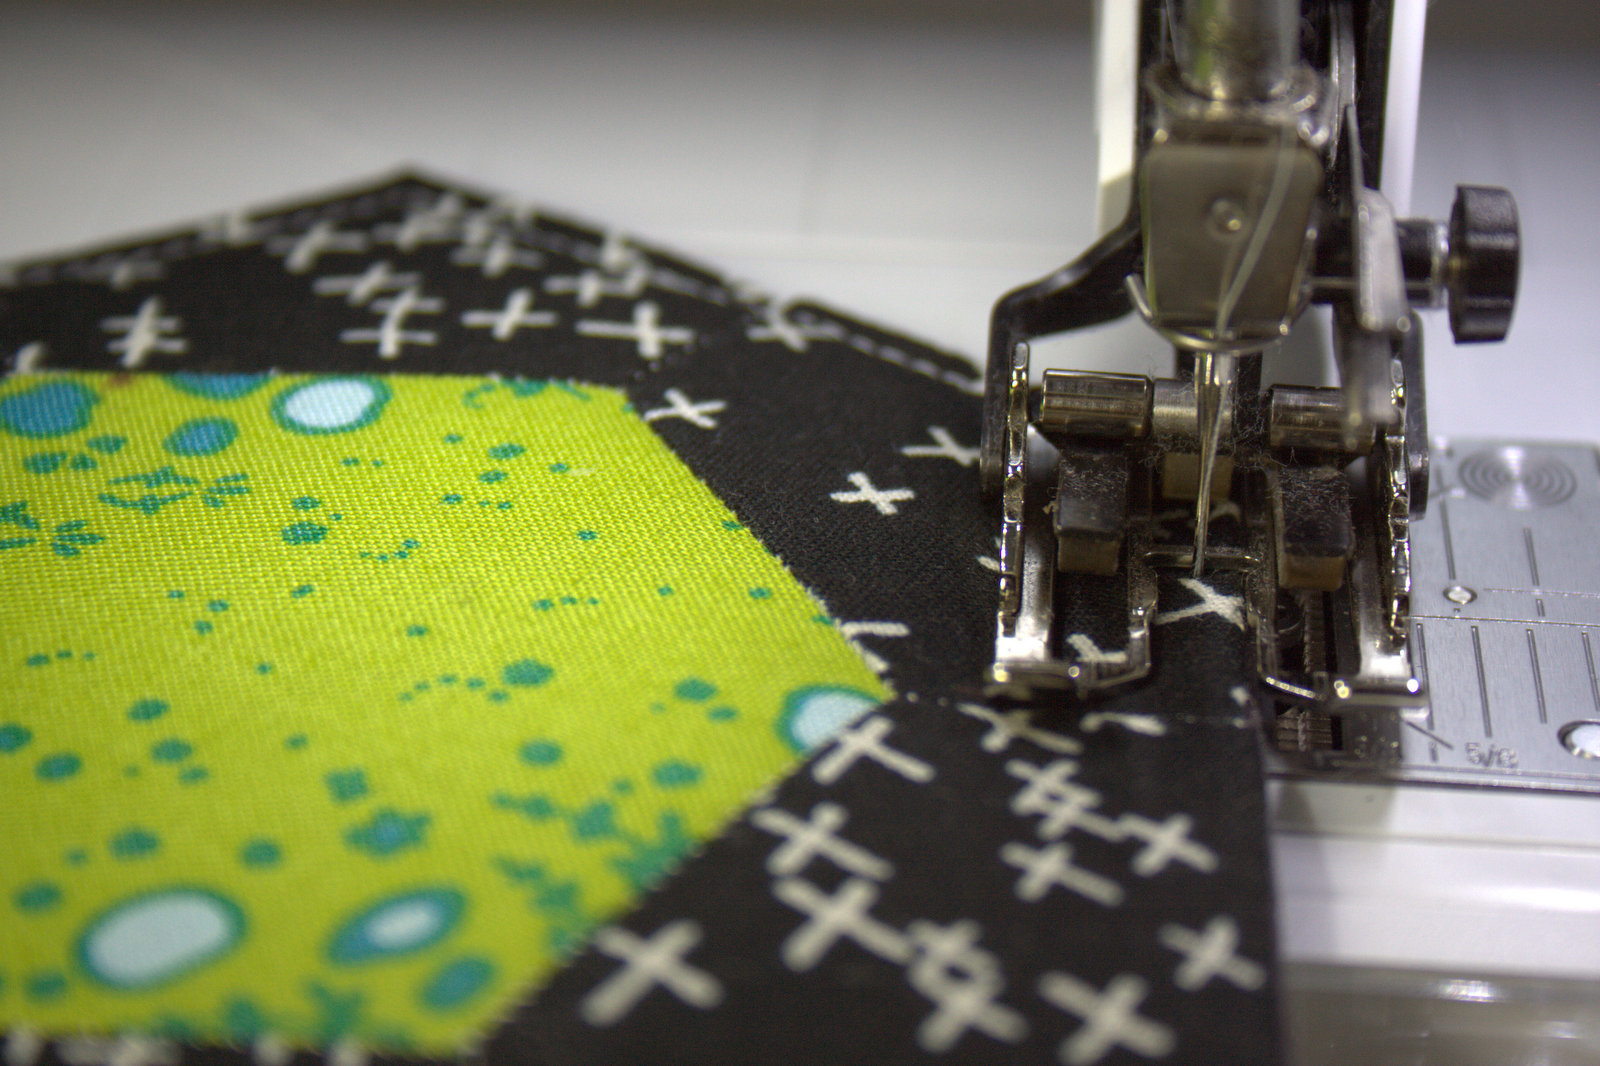
 I used coordinating 50wt thread to hand stitch the full Pollen Pillow design, stitching during travel to QuiltCon, in cafes, or in the car while waiting for preschool pickup. I adore the portability of English Paper Piecing (EPP)! When the Pollen Pillow design was fully stitched, pressed, papers removed, etc., I then stitched it to the backing using 50wt thread in 2000-Light Sand and 1320-Bright Teal. I quilted the pillow with some minimal quilting to secure the pieces while still letting the fabrics shine. I quilted a fun geometric echoey pattern in the background using the walking foot on my Bernina 560, and making it up as I went along. I love using the wide width of my walking foot as a gauge when quilting, since I avoid marking fabrics whenever possible!
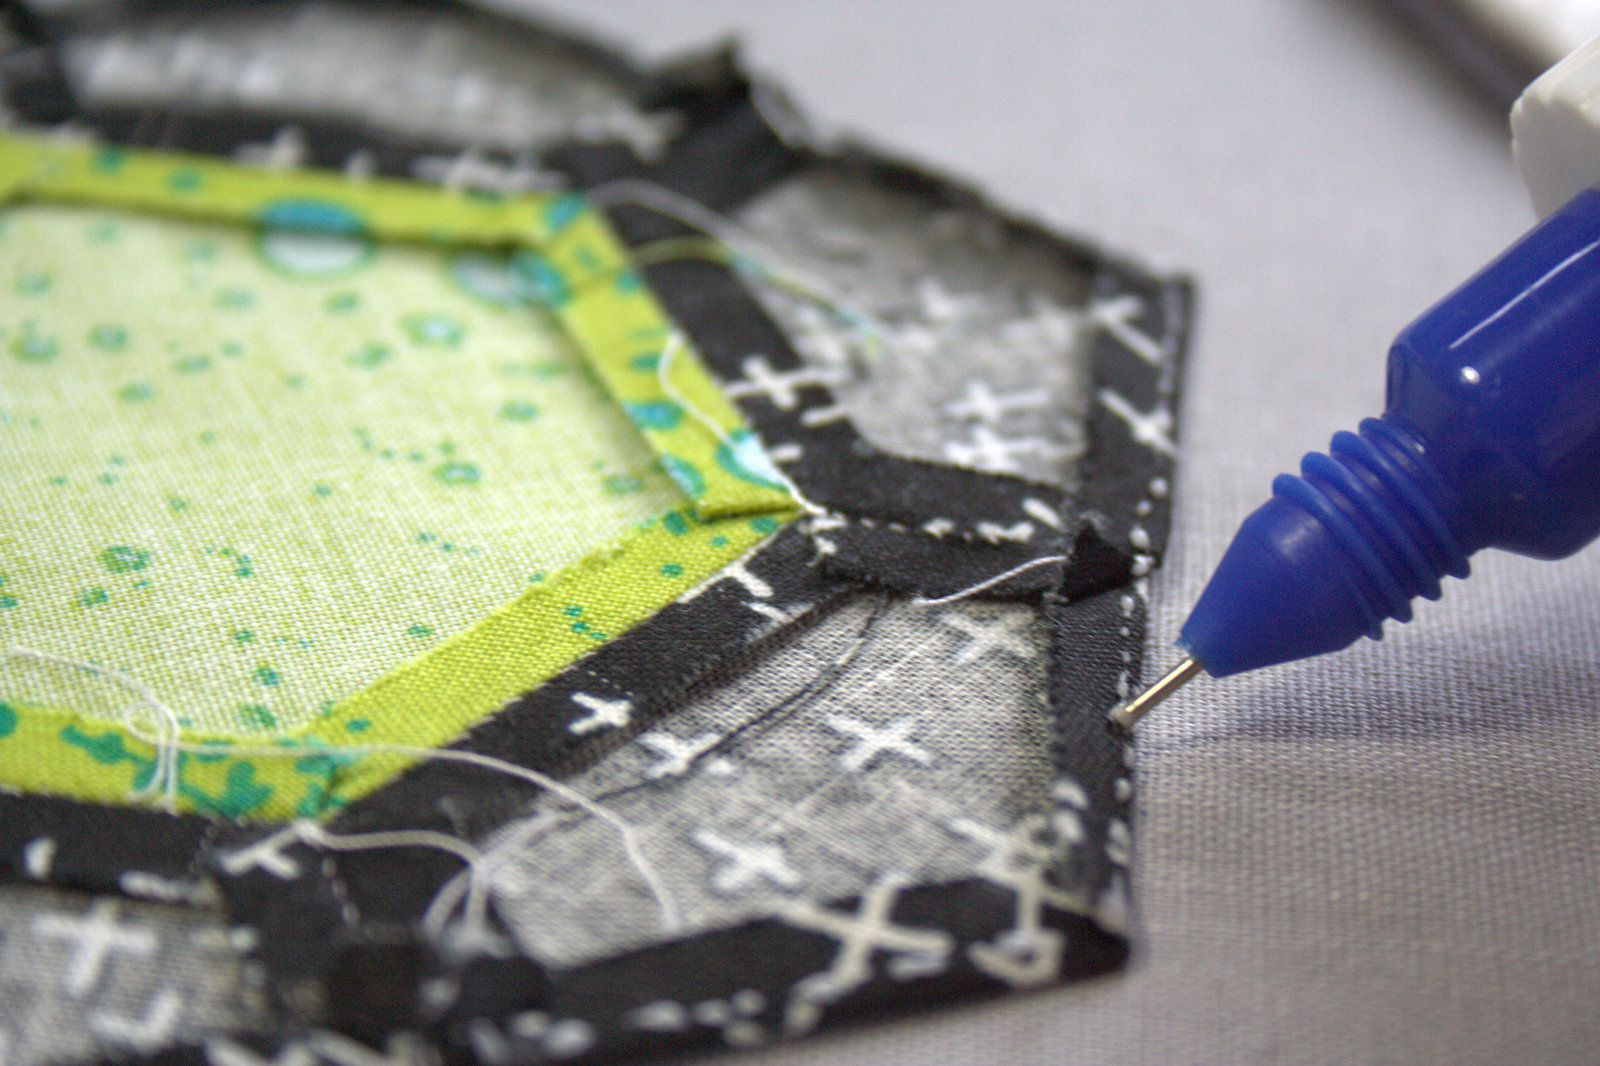
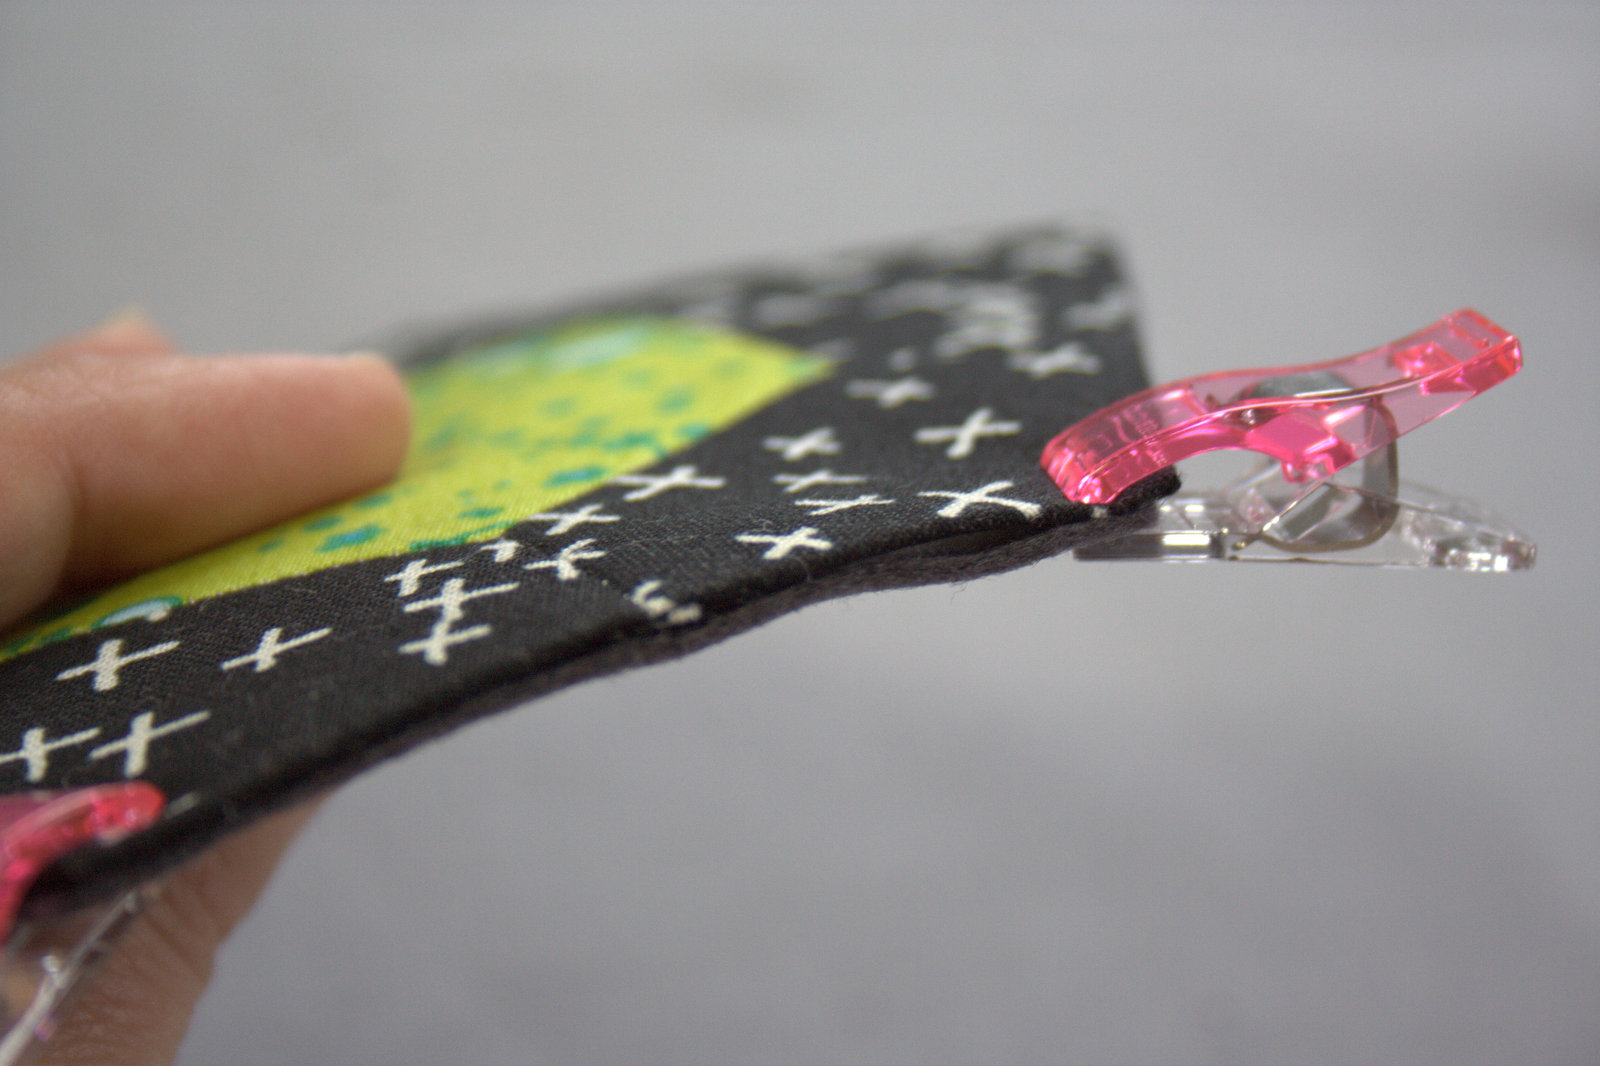
 Even having made multiple pillows, the insertion of a zipper still gives me the willies a bit before diving in. This time I used this fabulous tutorial by Suzy Quilts and am incredibly happy with my zipper! Mental note for next time, though: when creating a side zipper pillow, you need a zipper that is at least 2″ shorter than your pillow panels. I bought a bunch of 18″ zippers, one of which is shown in the progress photo, and none of which were used for this pillow because they were too long. I settled for a 14″ turquoise zipper, which coordinates enough to seem intentional (shhh).
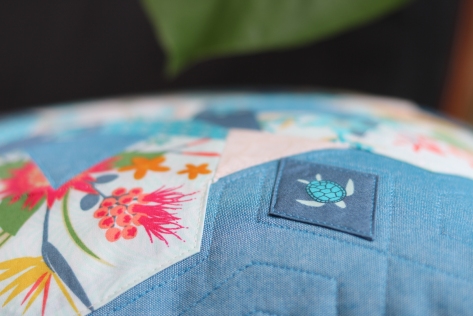 Those of you familiar with my Pollen Pillow pattern may have noticed that I included some extra diamonds on this pillow. The sea turtles just begged to be included more, so I borrowed the center diamonds after stitching the pillow center down, and made a few more sea turtles to swim outward around the edges. I love the effect!
 Here are just a couple more photos to round out this post. The first is of my daughter Maddie, who really wanted to be a pillow holding model (so helpful!). You can see the most pattern details in this photo, I think, so I’m glad she wanted to help!
 Finally, here is a photo of my original Pollen Pillow duking it out with this newbie for the prime spot. It’s so fun to see both of these pillows next to each other, since it’s a perfect example of how different fabric choices and color placement can result in very unique aesthetics with the Pollen Pillow pattern.
Thank you for swinging by to help celebrate this Friday finish, and be sure to check out the other stops on Mister Domestic’s Aura Blog Party. The projects are all stunning!
MISTER DOMESTIC’S AURA BLOG PARTY
- Monday February 11: Amanda Woodruff of A Crafty Fox
- Tuesday February 12: Kylie Gersekowski of Little Moo Designs
- Wednesday February 13: Sharon Holland of Sharon Holland Designs
- Thursday February 14: Kim Niedzwiecki of Go Go Kim
- Saturday February 16: Sarah Maxwell of Fearless with Fabric
- Sunday February 17: Natalie Santini of Hungry Hippie Sews
- Monday February 18: Carolina Moore of Always Expect Moore
- Tuesday February 19: Isabelle Selak of South Bay Bella Studio
- Wednesday February 20: Elizabeth Chappell of Quilters’ Candy
- February 21-24: Intermission
- Monday February 25: Tara Curtis of Wefty Needle
- Tuesday February 26: Monica Tetteh of That’s Sew Monica
- Wednesday February 27: Nicholas Ball of Quilts from the Attic
- Thursday February 28: Lucy Brennan of Charm About You
- Friday March 1: Robbin Flockhart of Sew Farm Quilter
- Saturday March 2: Evie Jespersen of EV Quilts
- Sunday March 3: Kelly Liddle of Jeliquilts
- Monday March 4: Maureen Cracknell of Maureen Cracknell Handmade
- Tuesday March 5: HollyAnne Knight of String and Story
- Wednesday March 6: Mimi Goodwin of Mimi G Style
- Thursday March 7: Angela Wolf of Fashion Sewing with Angela Wolf
- Friday March 8: Kitty Wilkin of Night Quilter <— YOU’RE HERE
- Saturday March 9: Sharon Burgess of Lilabelle Lane Creations
- Sunday March 10: Emily Dennis of Quilty Love
- Monday March 11: Sheri Cifaldi-Morrill of Whole Circle Studio
- Tuesday March 12: Elina Temmes of Elina Temmes
- Wednesday March 13: Jennifer Strauser of Dizzy Quilter
- Thursday March 14: Saija Kiiskinen of Saija Kiiskinen
- Friday March 15: Brittany Jones of Brittany J Jones
- Saturday March 16: Jodi Godfrey of Tales of Cloth
- Sunday March 17: Kim Niedzwiecki of Go Go Kim
- Monday March 18: Sharon McConnell of Color Girl Quilts

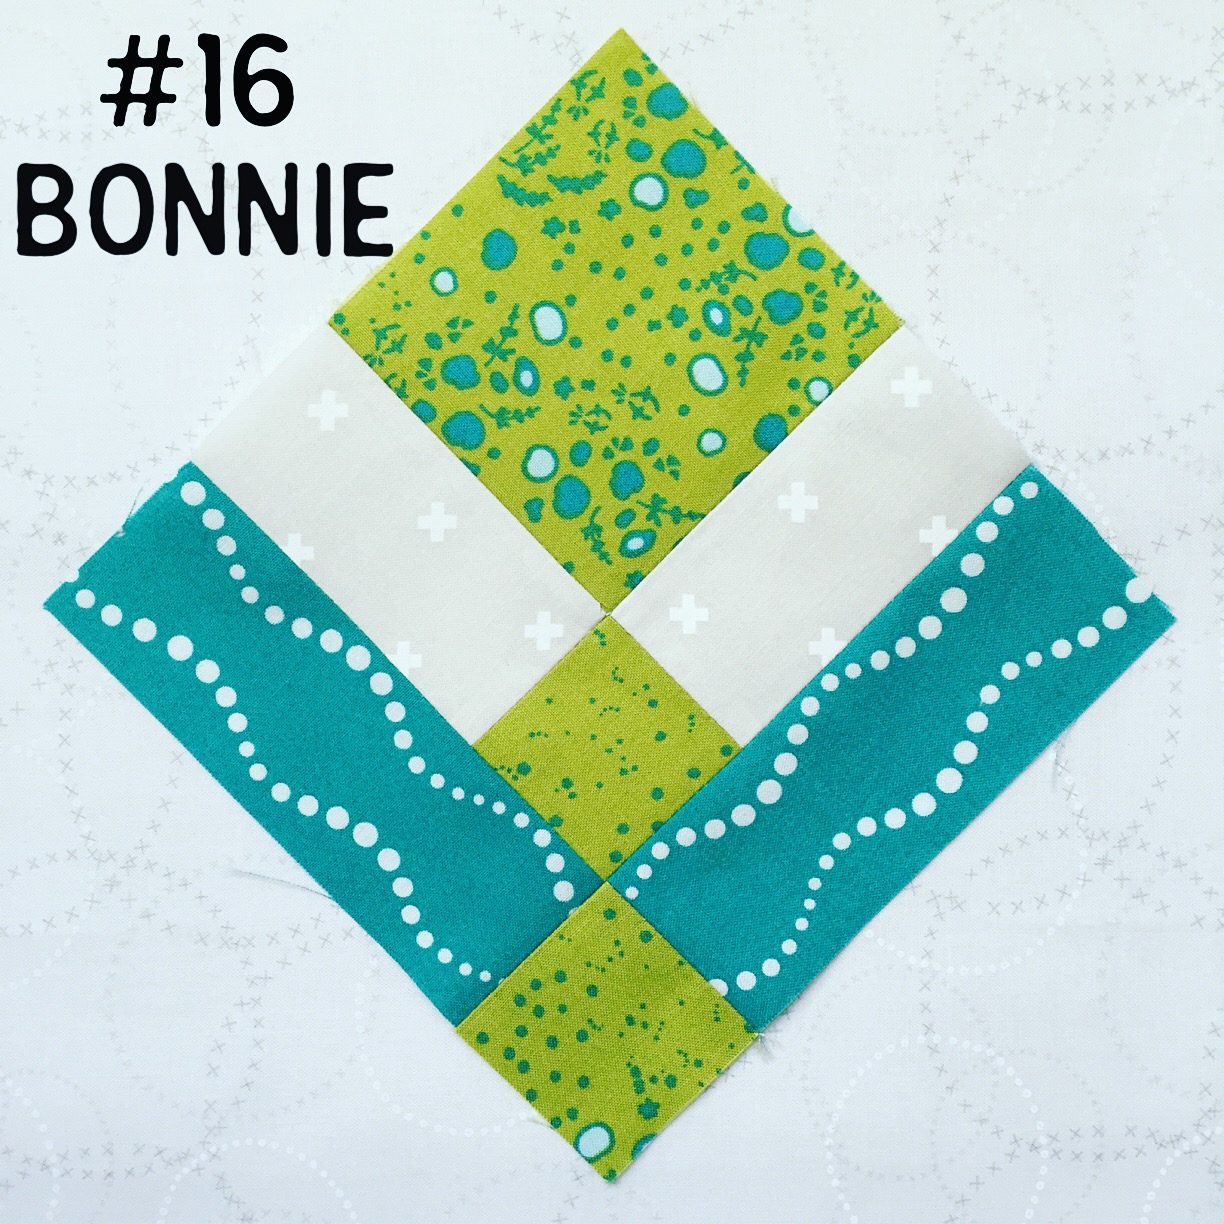
 Today I’m excited to reveal the block I designed for the
 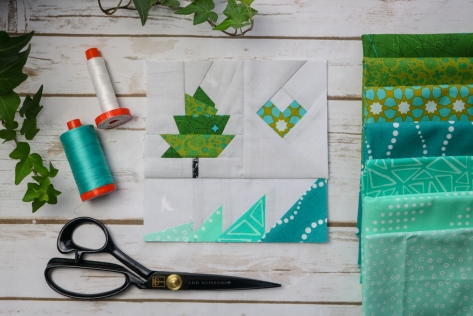 Today I am going to share 3 tips for using fussy cutting in foundation paper pieced blocks, using my Adventure Abounds block from the Splendid Sampler 2 book. If you’re new to foundation paper piecing (FPP), read my
  There are a few things you should remember before beginning FPP: First, the templates are a mirror image of the finished block, so when planning your fabric placement, visualize the right side of your fabric on the back of the template. Second, I highly recommend color coding your paper templates before starting so that you know exactly where each fabric should be. Third, don’t forget to use paper scissors to cut out and trim the templates! Your fabric scissors don’t want to go there!
 Once your fabrics are selected, your templates are cut out along the 1/4″ seam allowance line and color coded, you’re ready to dive in. Here are three tips for using fussy cutting in FPP:
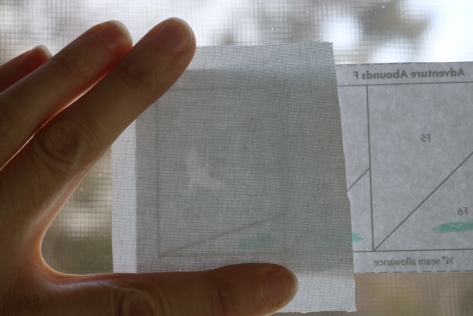 As an example of this for my Adventure Abounds block, I decided to position a subtle bird in the sky above the ocean, and held it up to a window to make sure it was positioned exactly how I wanted it. With a white on white background for my blocks, this example is subtle, but sometimes those subtle details are my favorite!
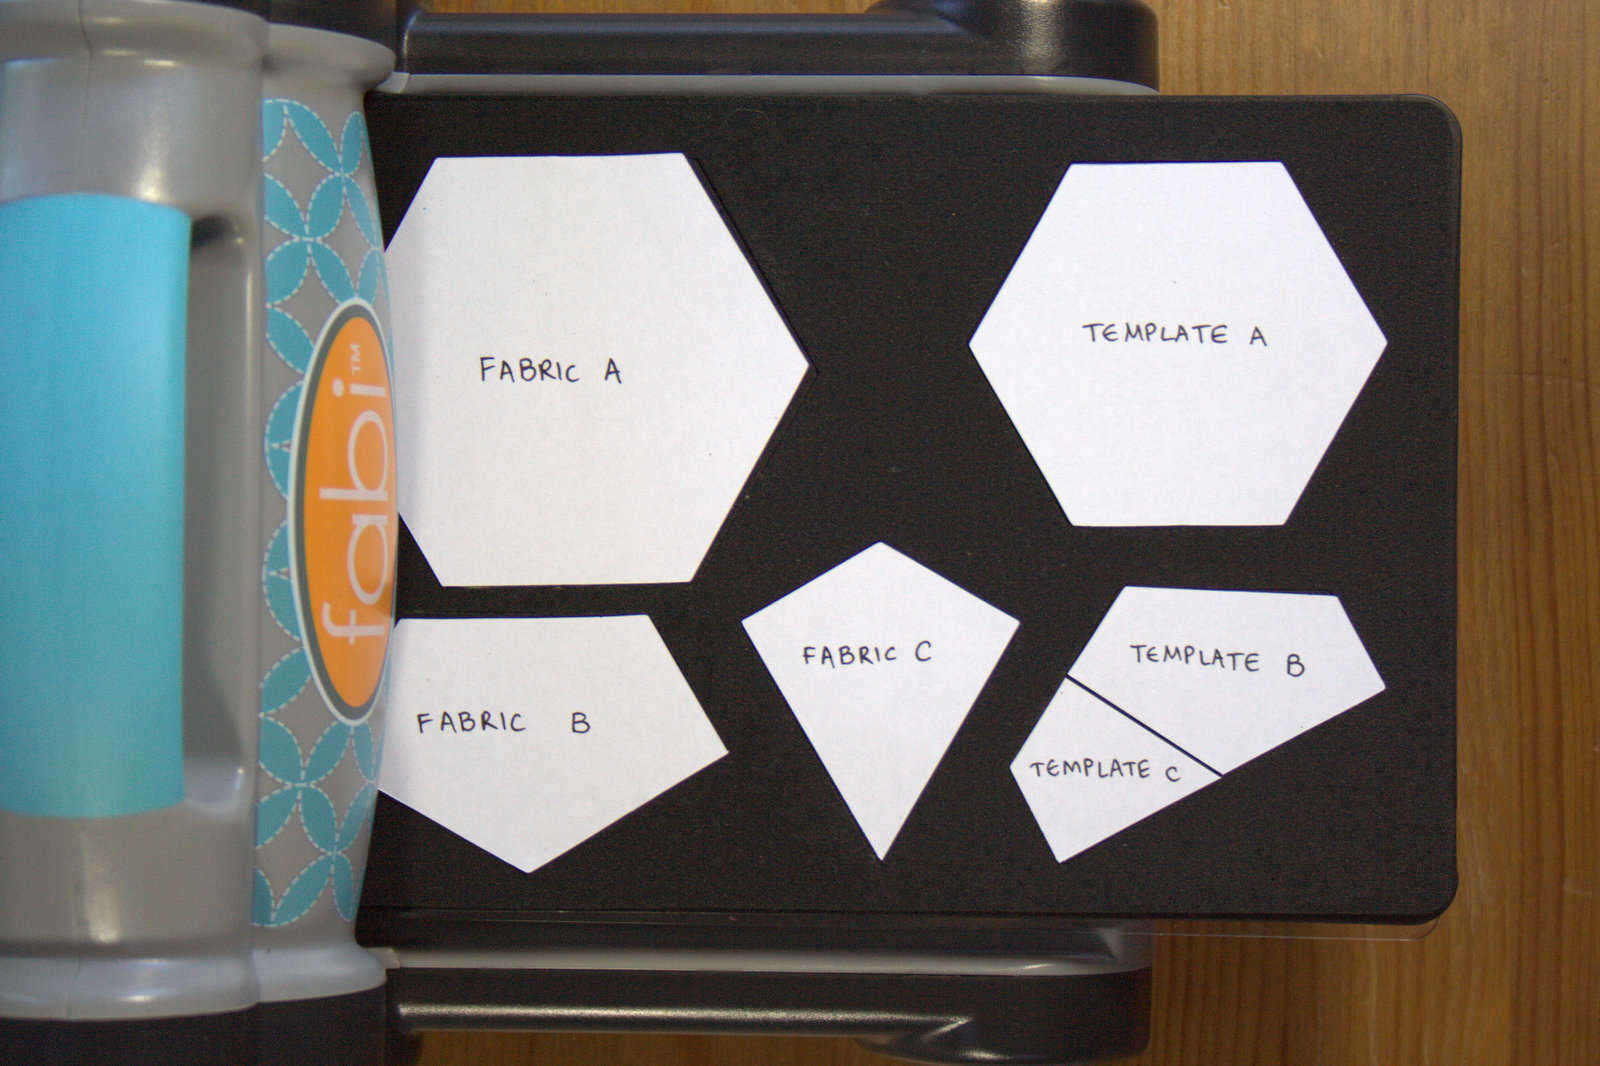
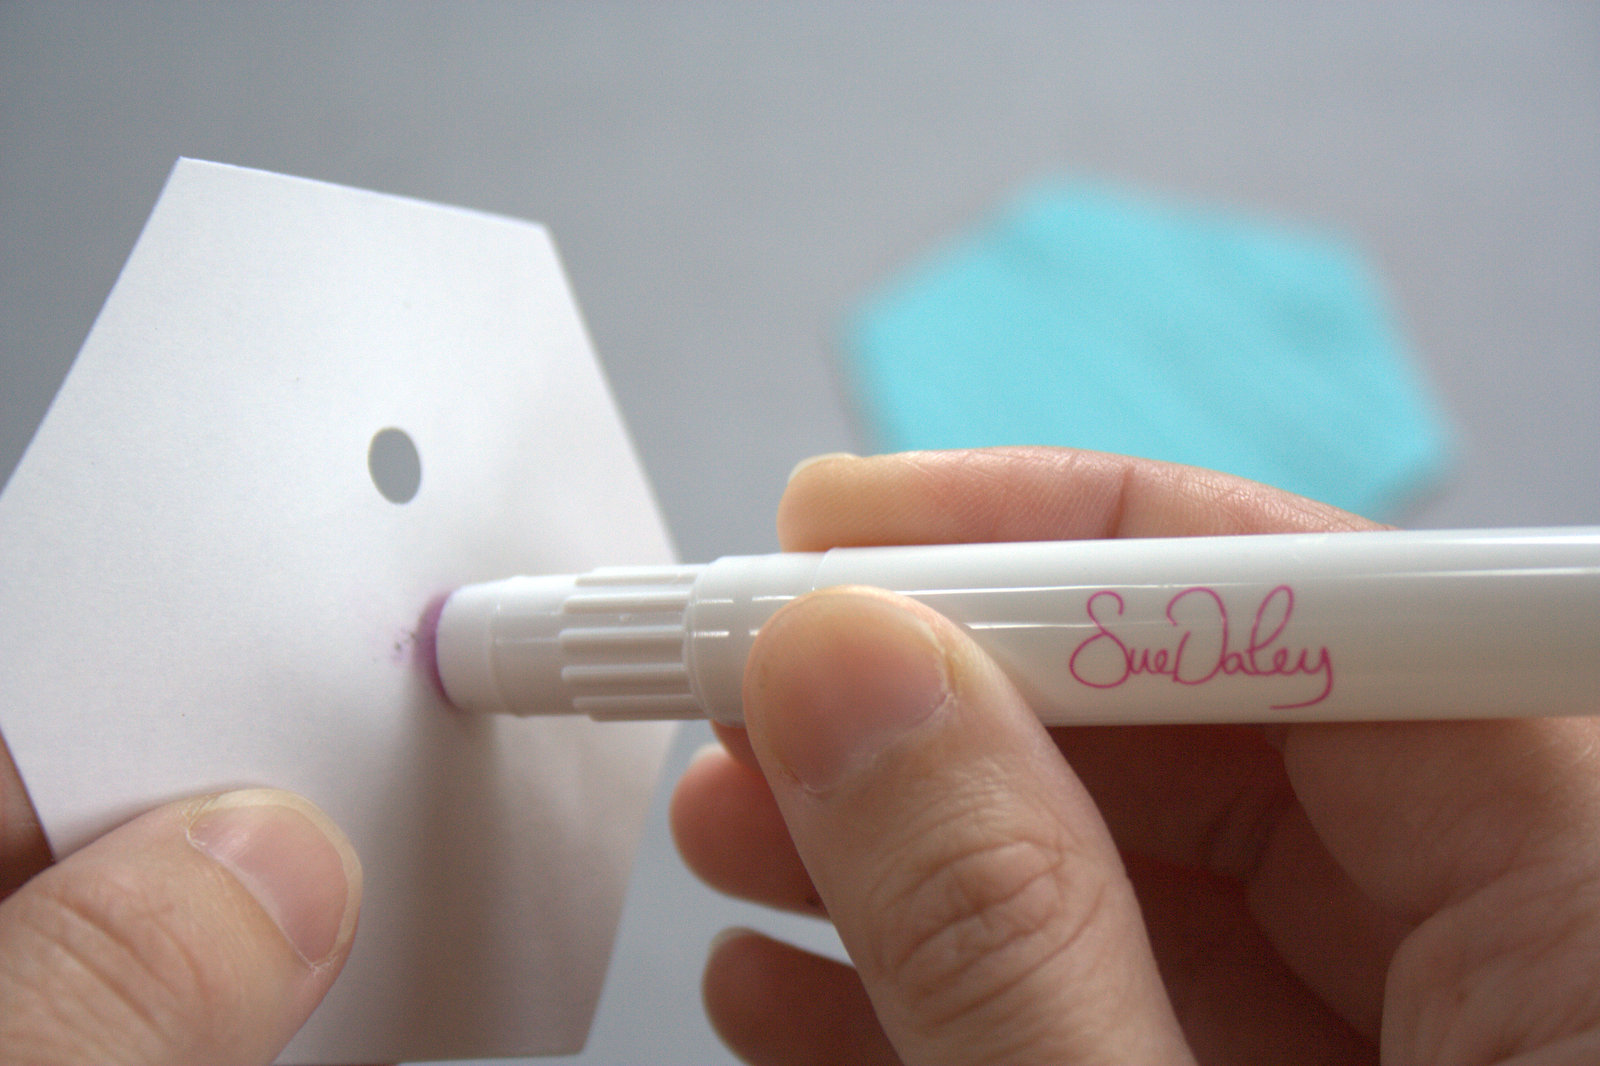
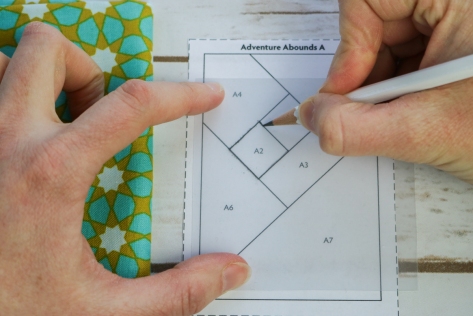 To create a template, first trace the shape from the paper foundation template onto the plastic. Be sure to label your piece, AND make note of directionality since the paper template is a mirror image.
 Once I trace the shape, I flip over the template plastic and write my notes on the opposite side, so that when I cut the fabric for that piece, I know that my notes should be legible on the right side of the fabric.
 Next, using a quilting ruler with 1/4″ measure, draw seam lines 1/4″ outside all the edges of your drawn lines.
 Cut out the template along that seam allowance line.
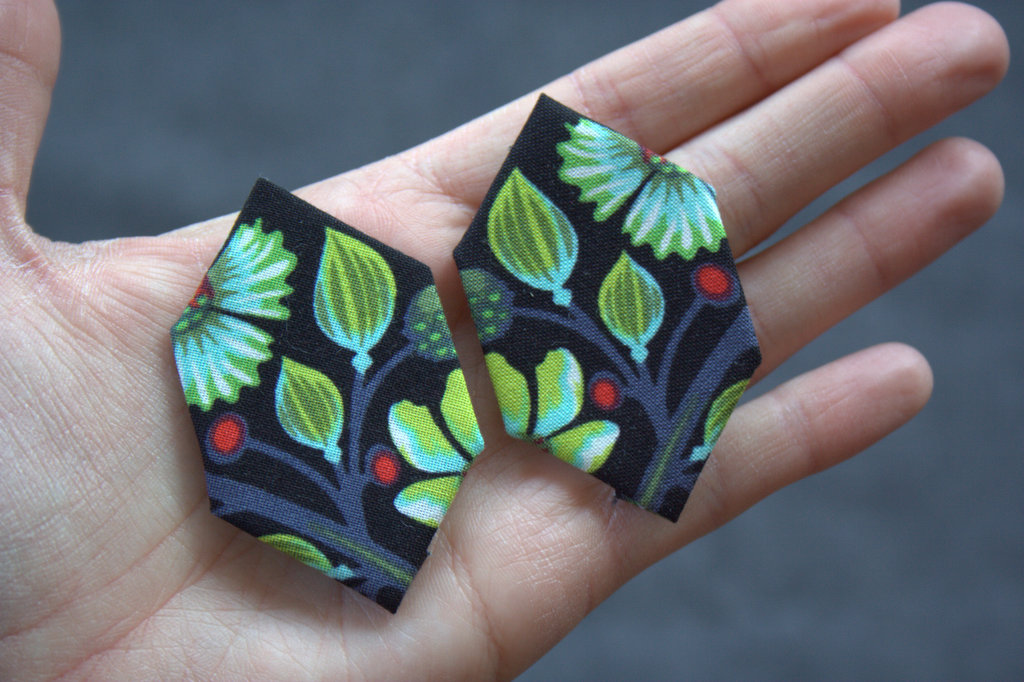
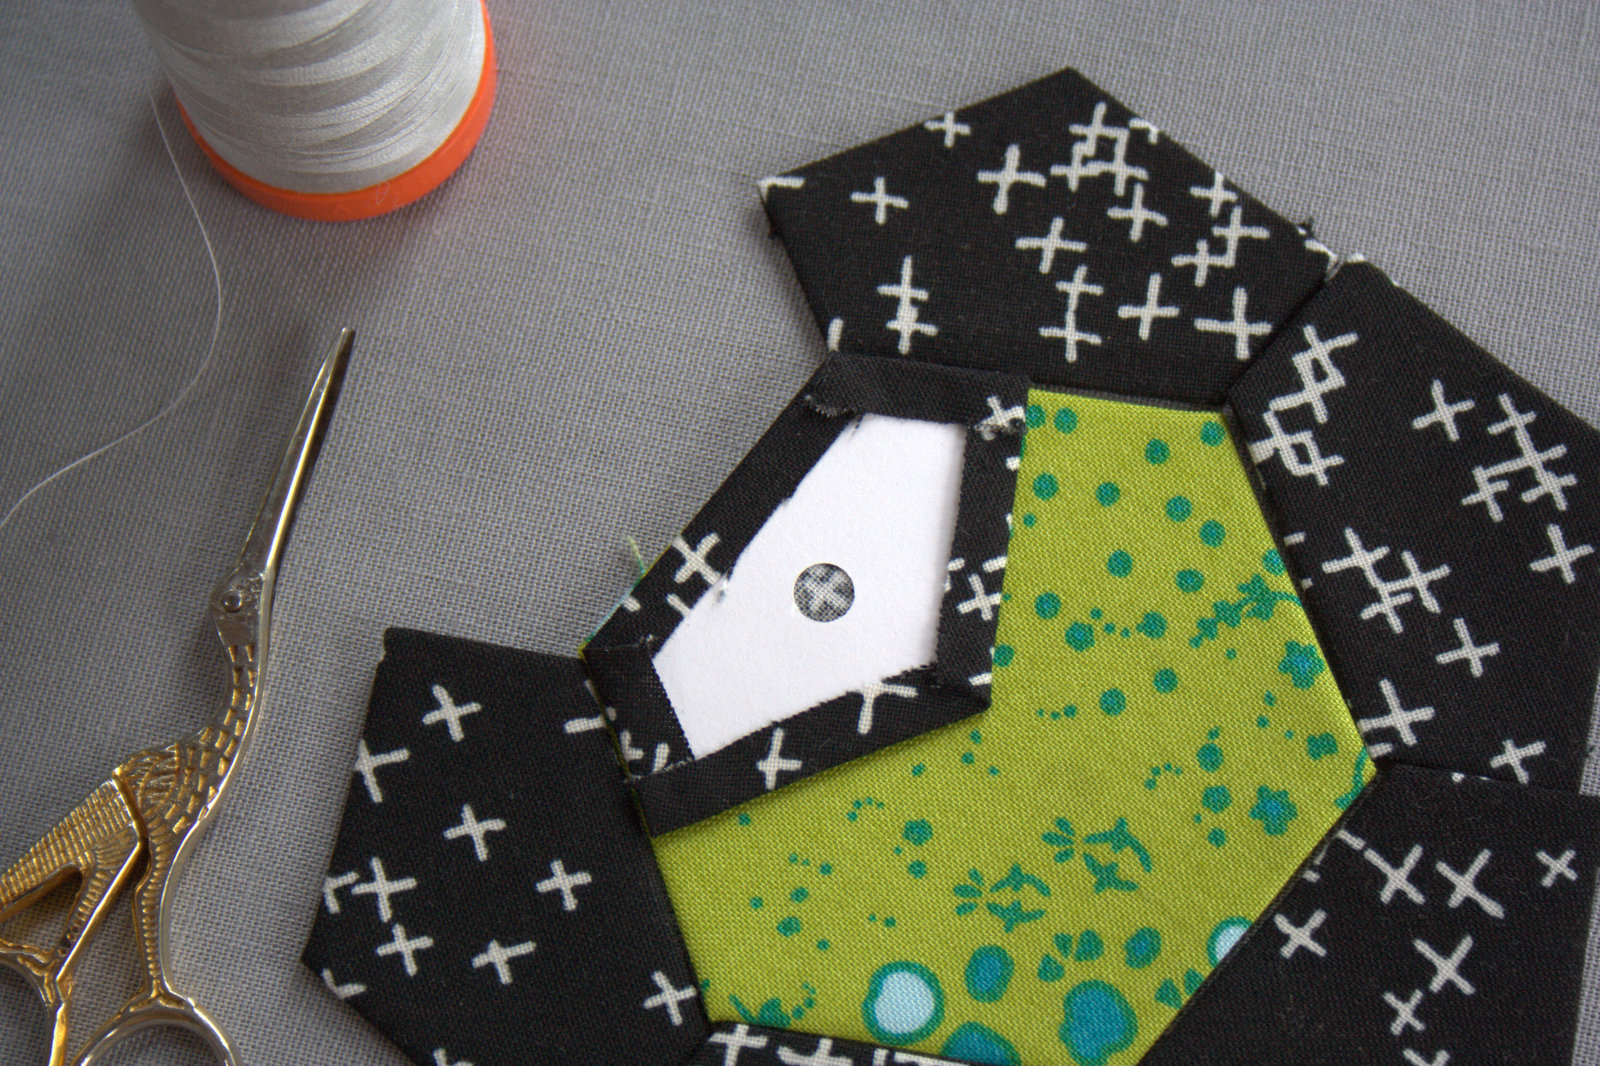
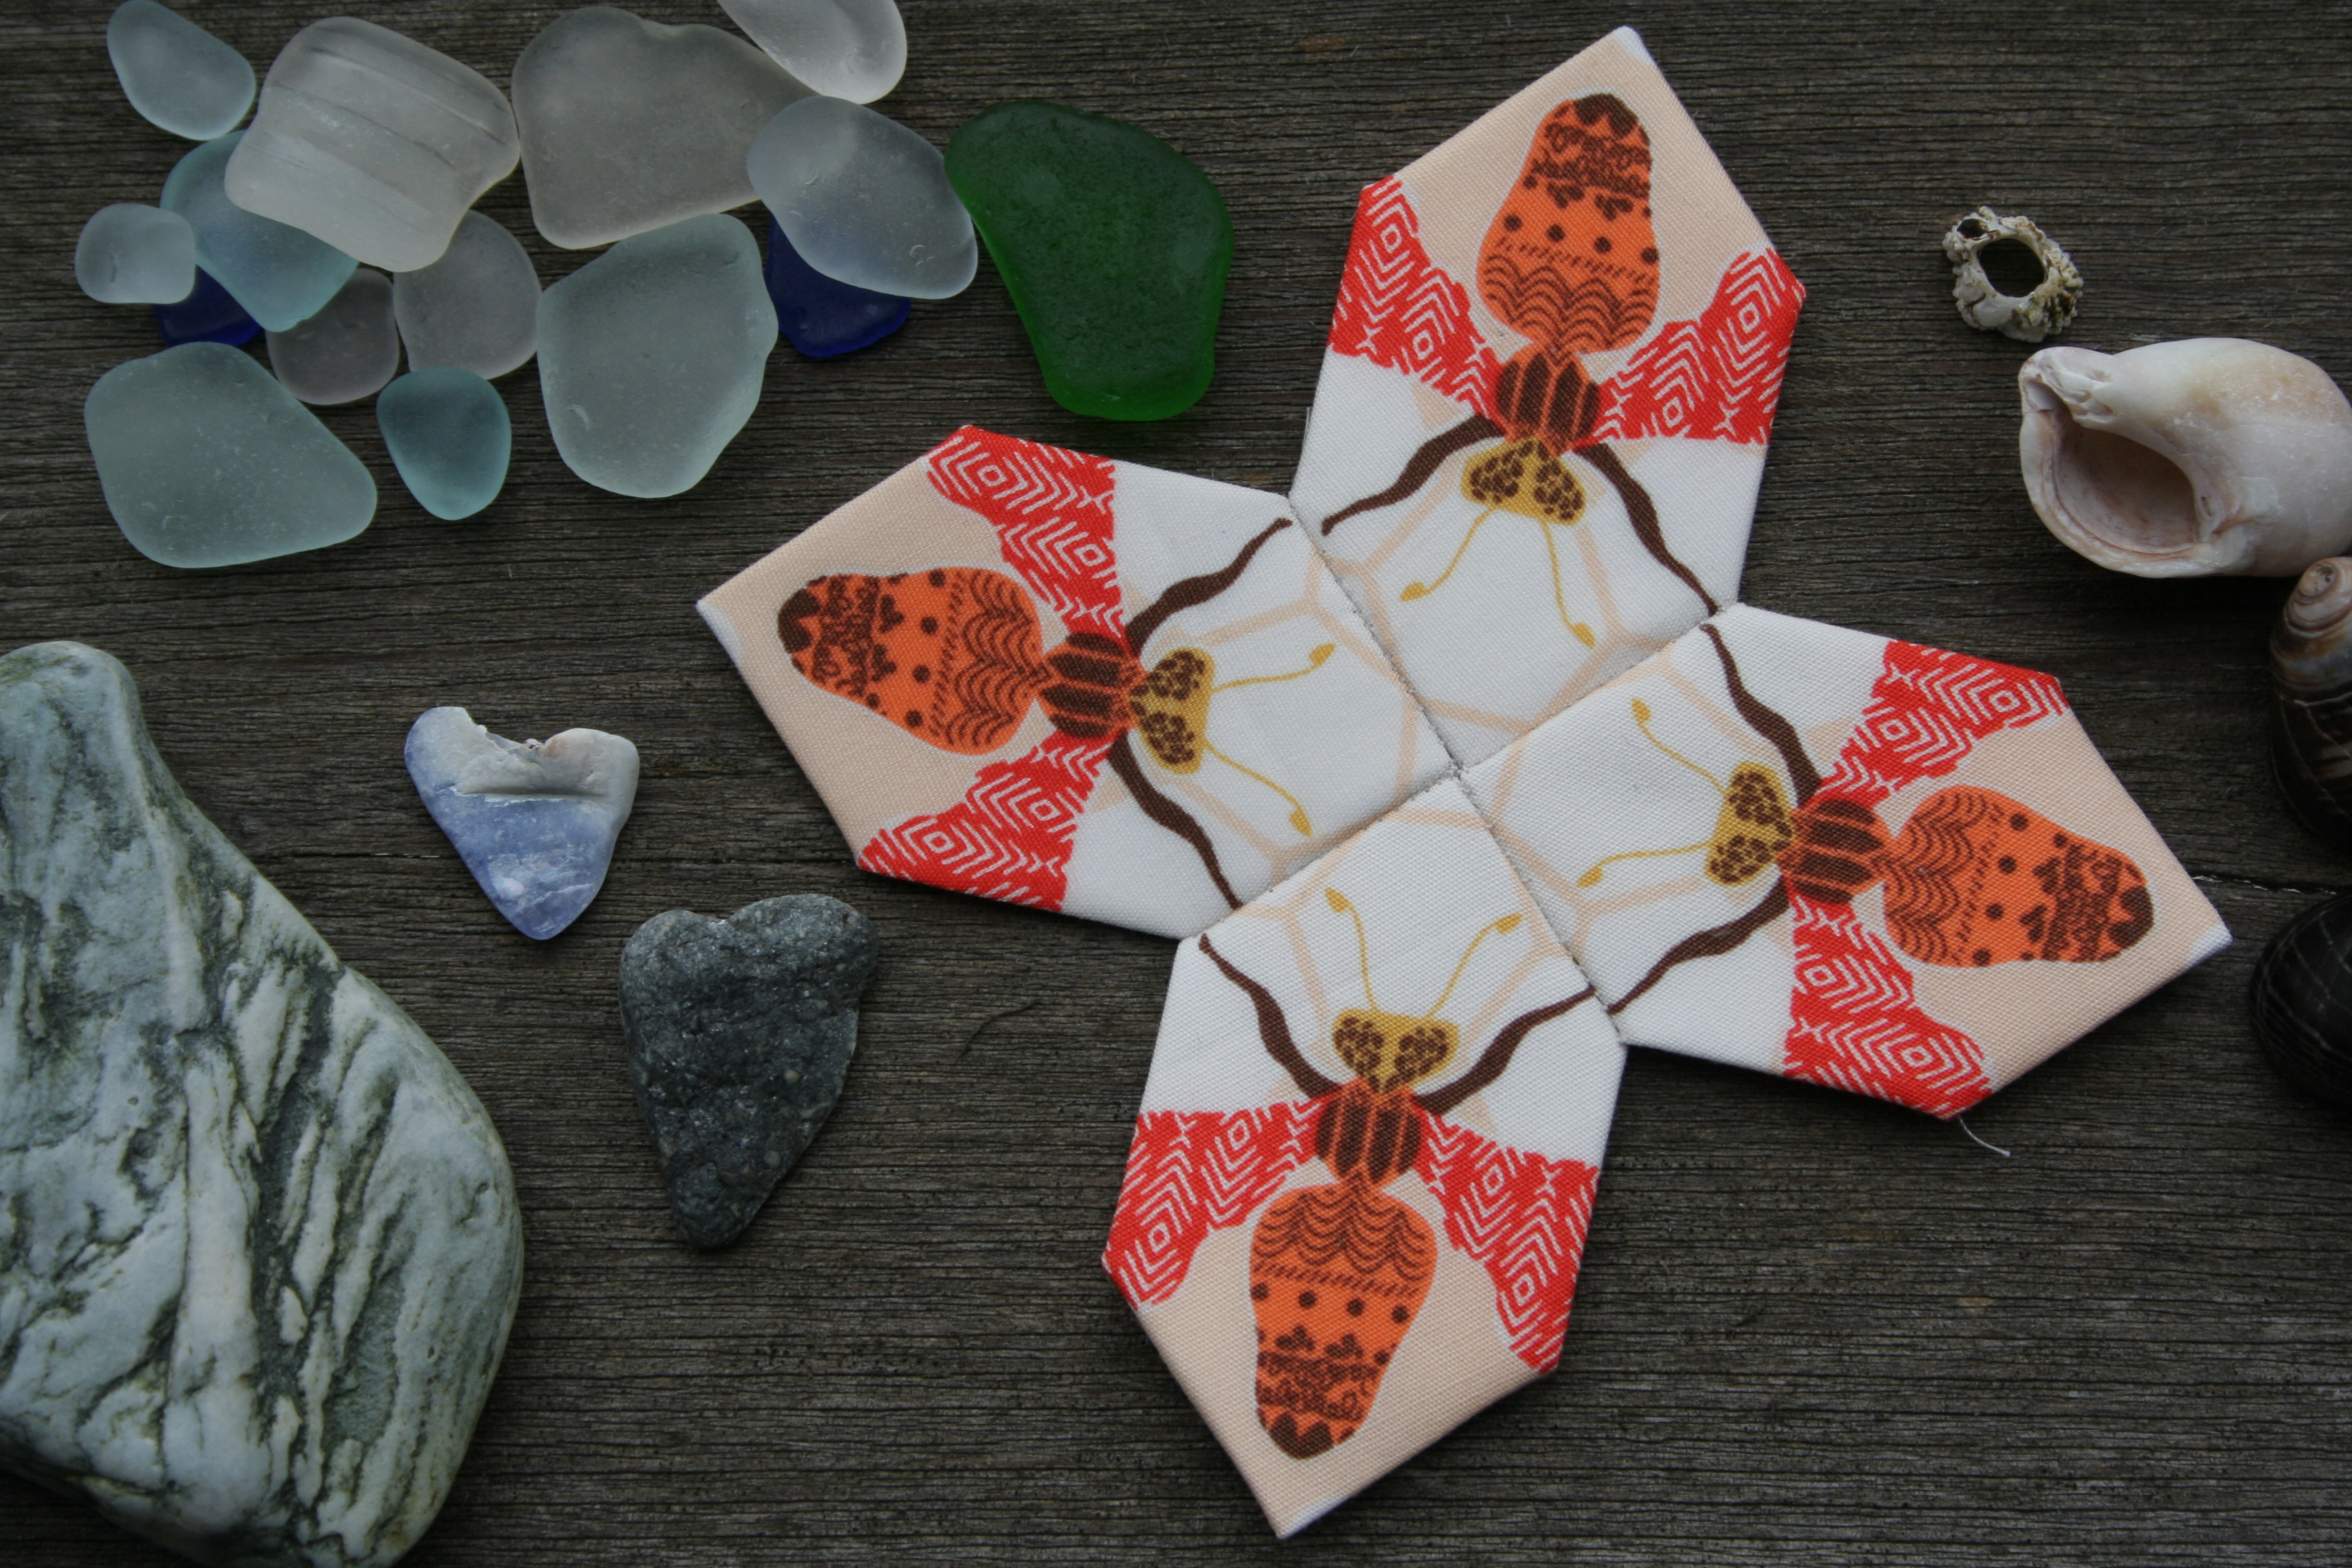
 For my block, I decided to fussy cut the heart so that the fabrics for the two pieces of the heart look continuous despite consisting of two fabric pieces. I decided to make a third reference template of the full heart and traced the pattern from the fabric onto the template, which I used as a reference when cutting out each individual part.
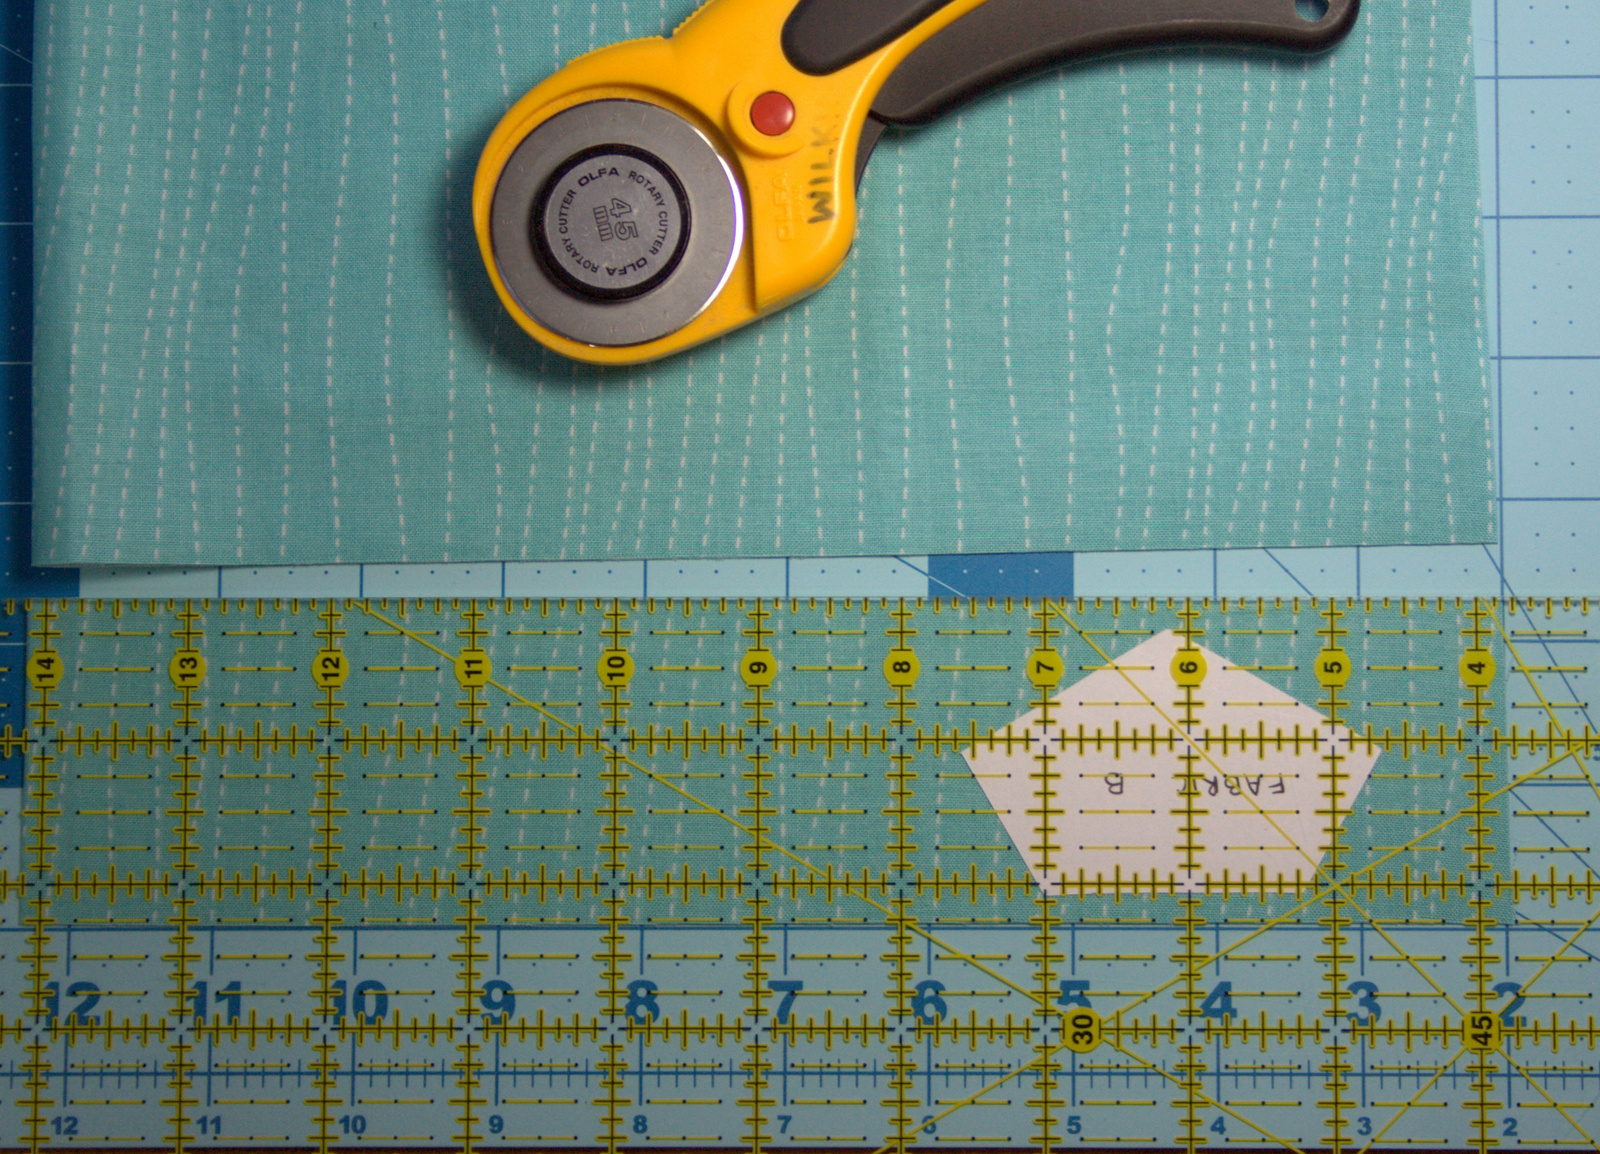
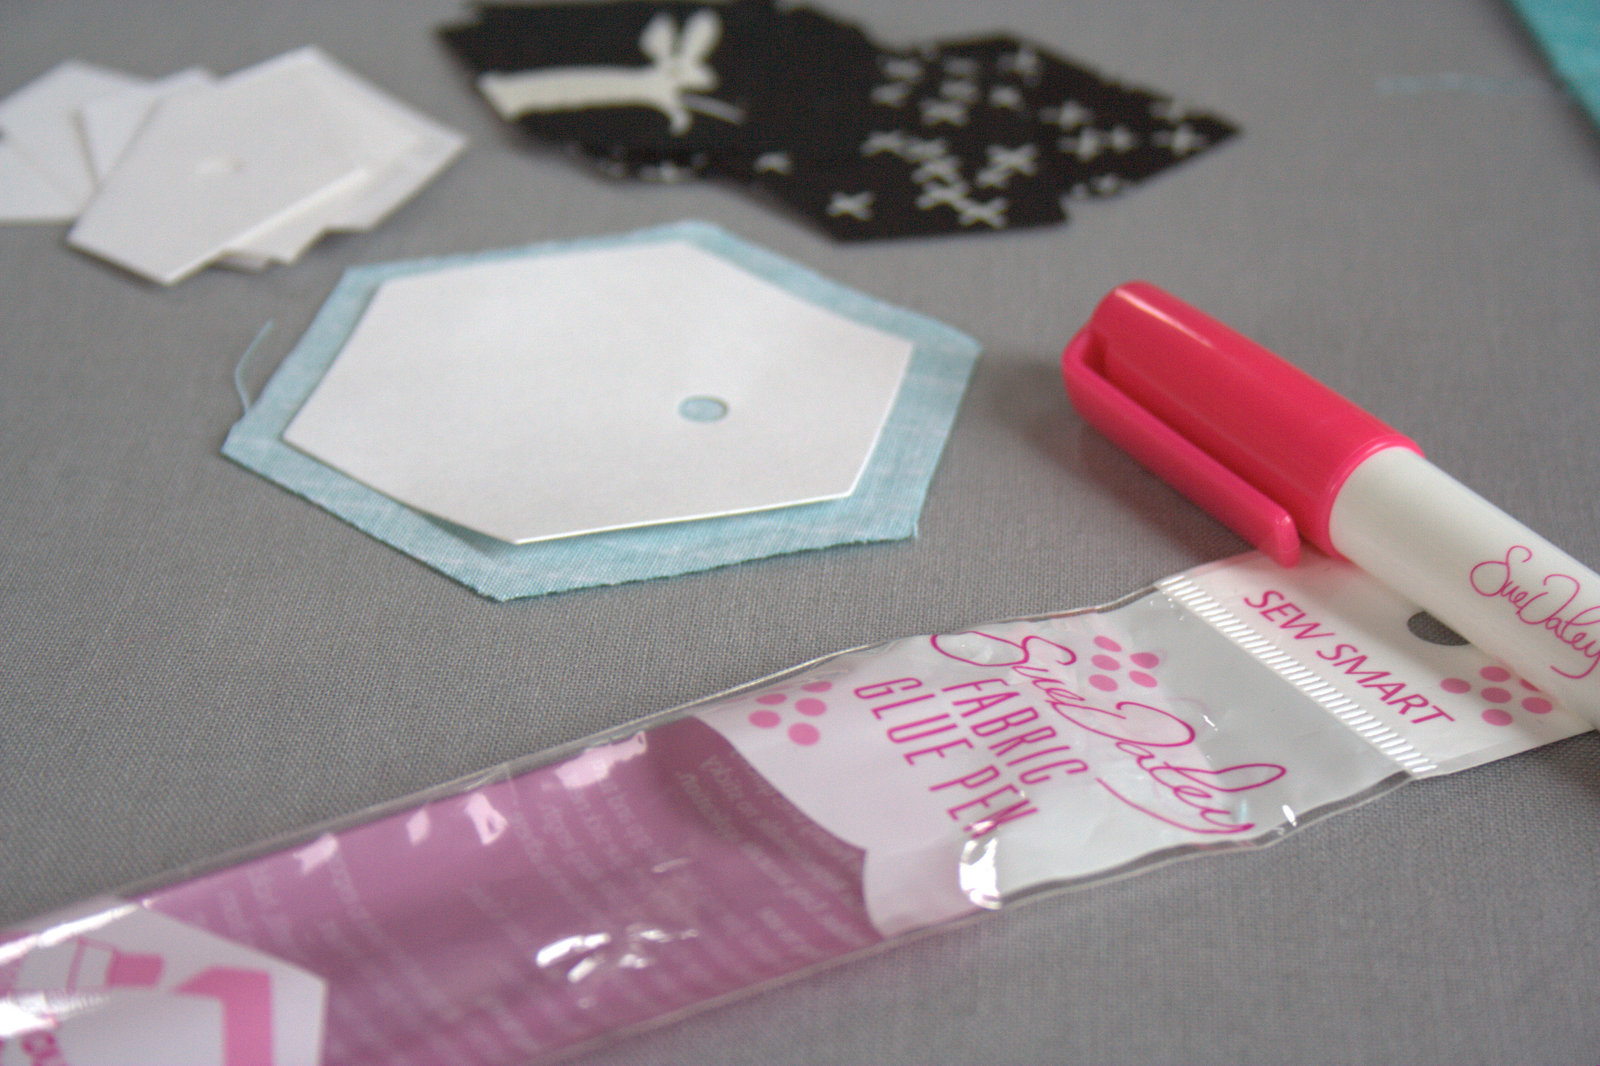
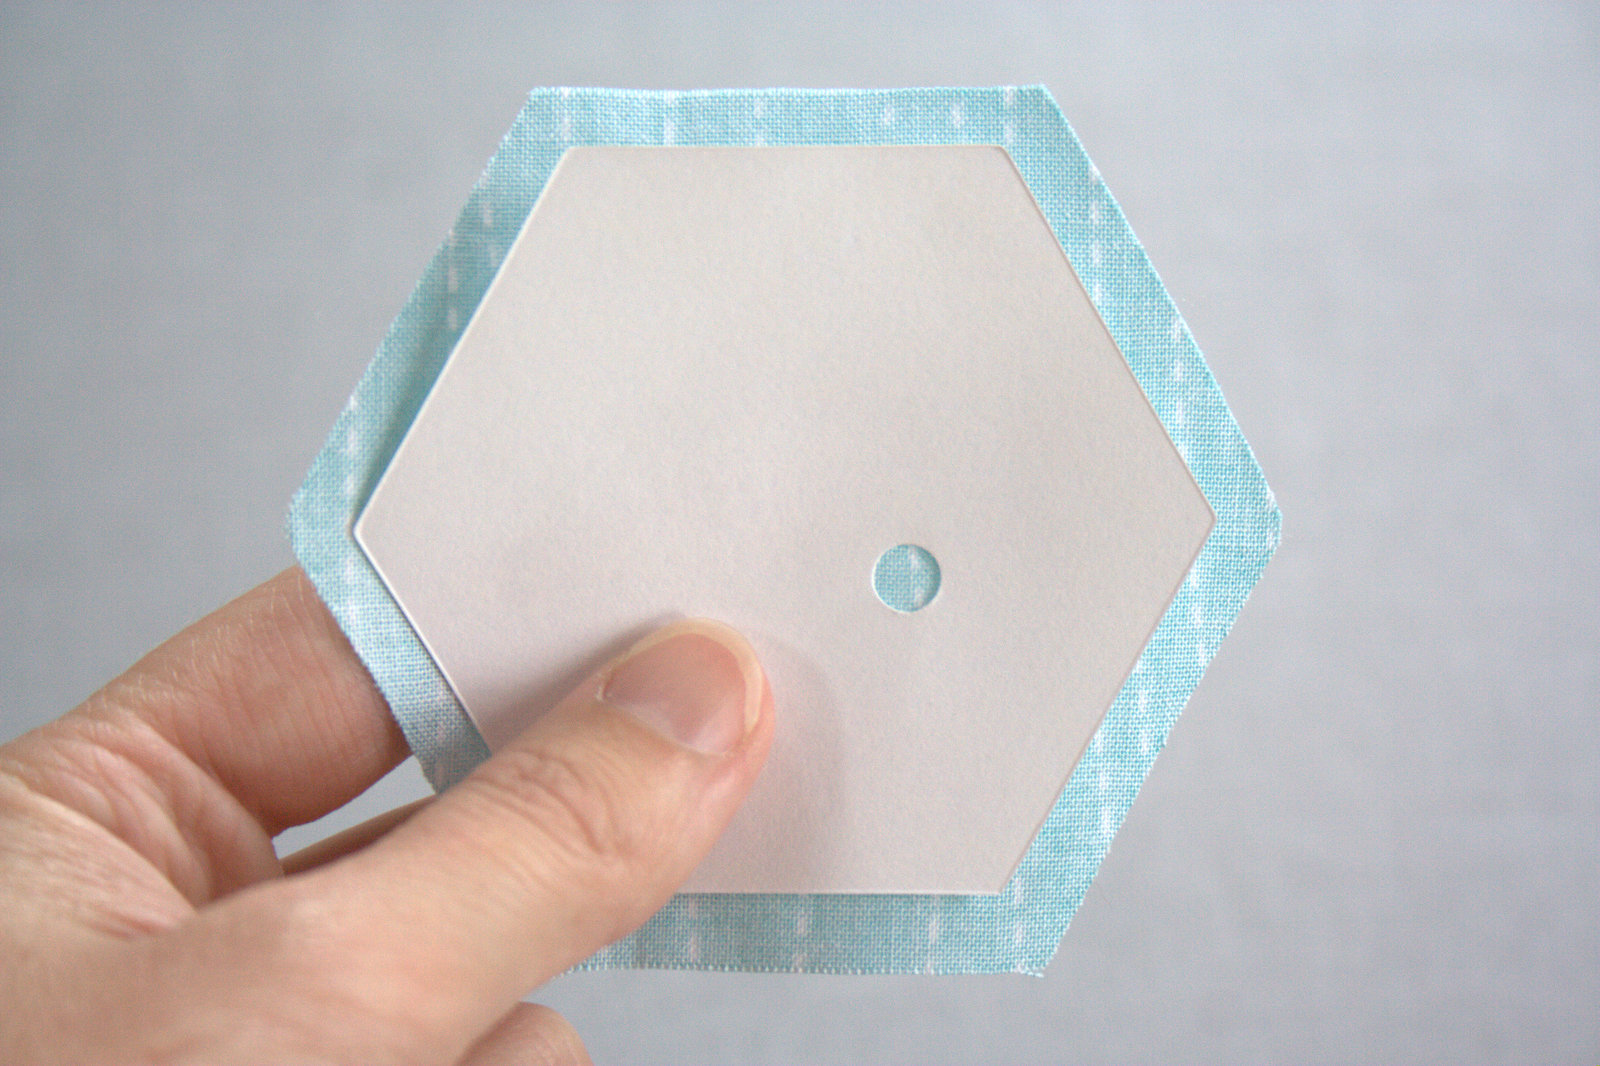
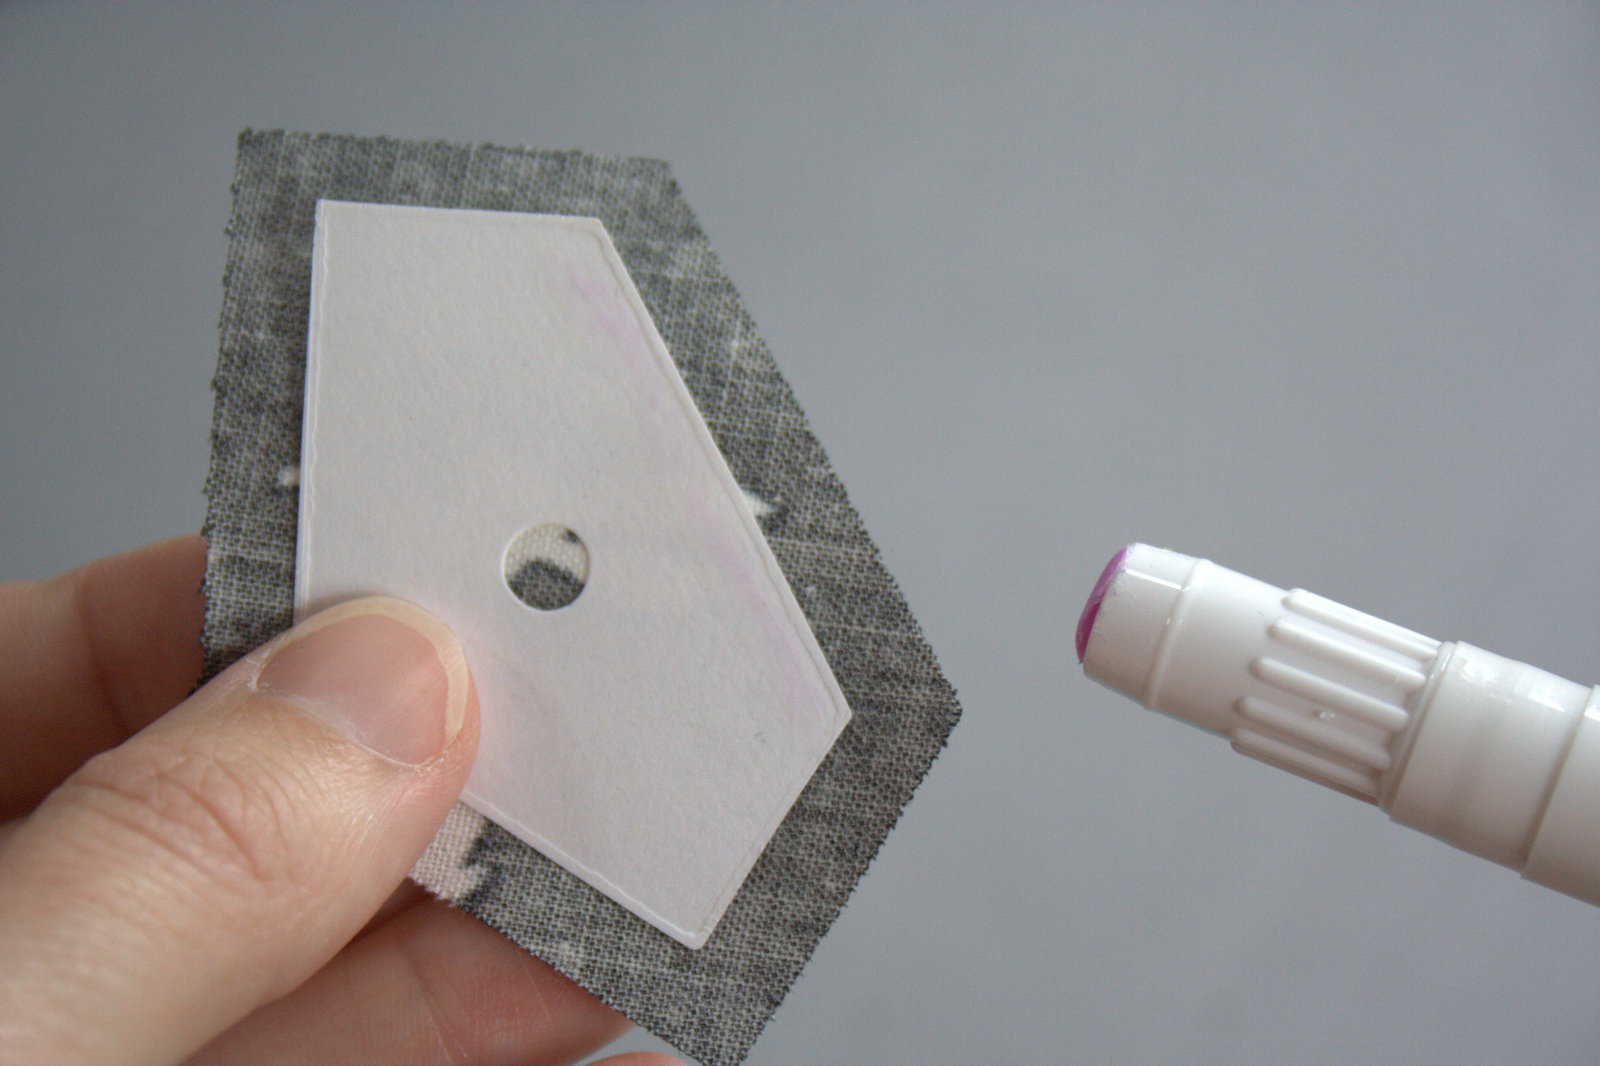
 Once you have your template positioned over the exact motif you want, carefully trace around the template with a fabric marking tool and cut out the fabric, or very carefully use a rotary cutter to cut around the template. Note that with planning templates made with template plastic or repurposed food lids, using your rotary cutter contains a good level of danger–so either purposefully live on the wild side, or use the trace and cut-with-scissors method!
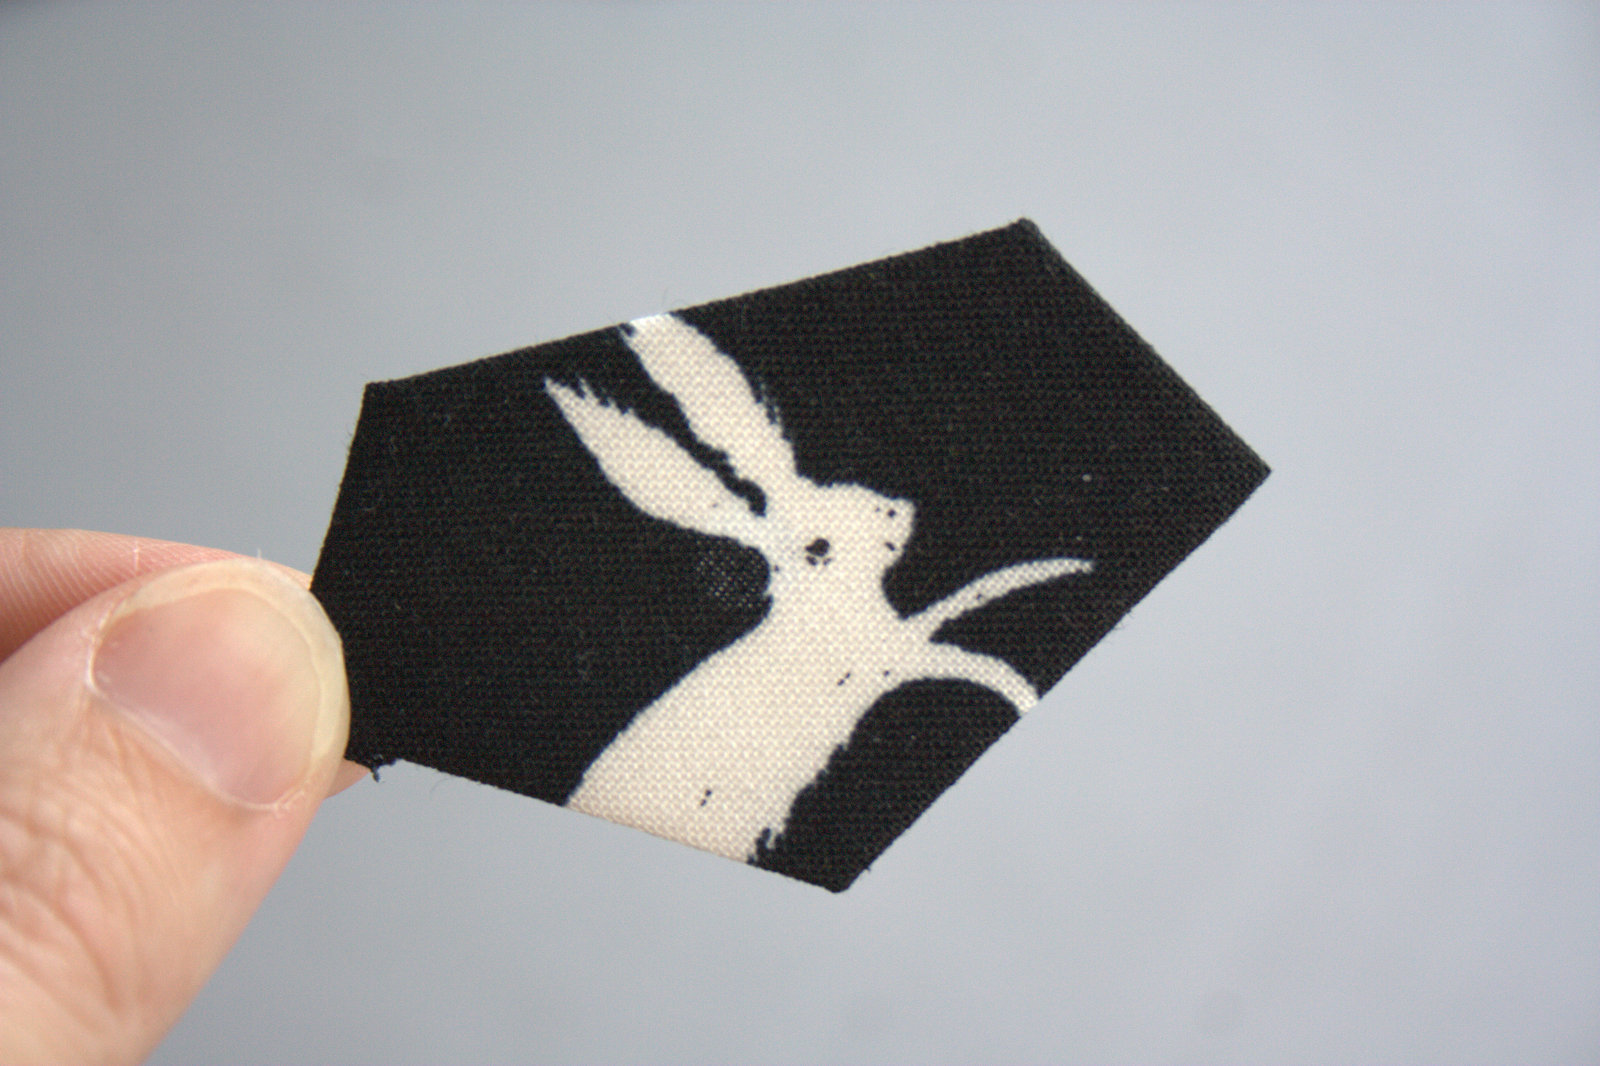
 Your perfectly planned fabric piece is ready to carefully stitch onto your growing foundation paper pieced section.
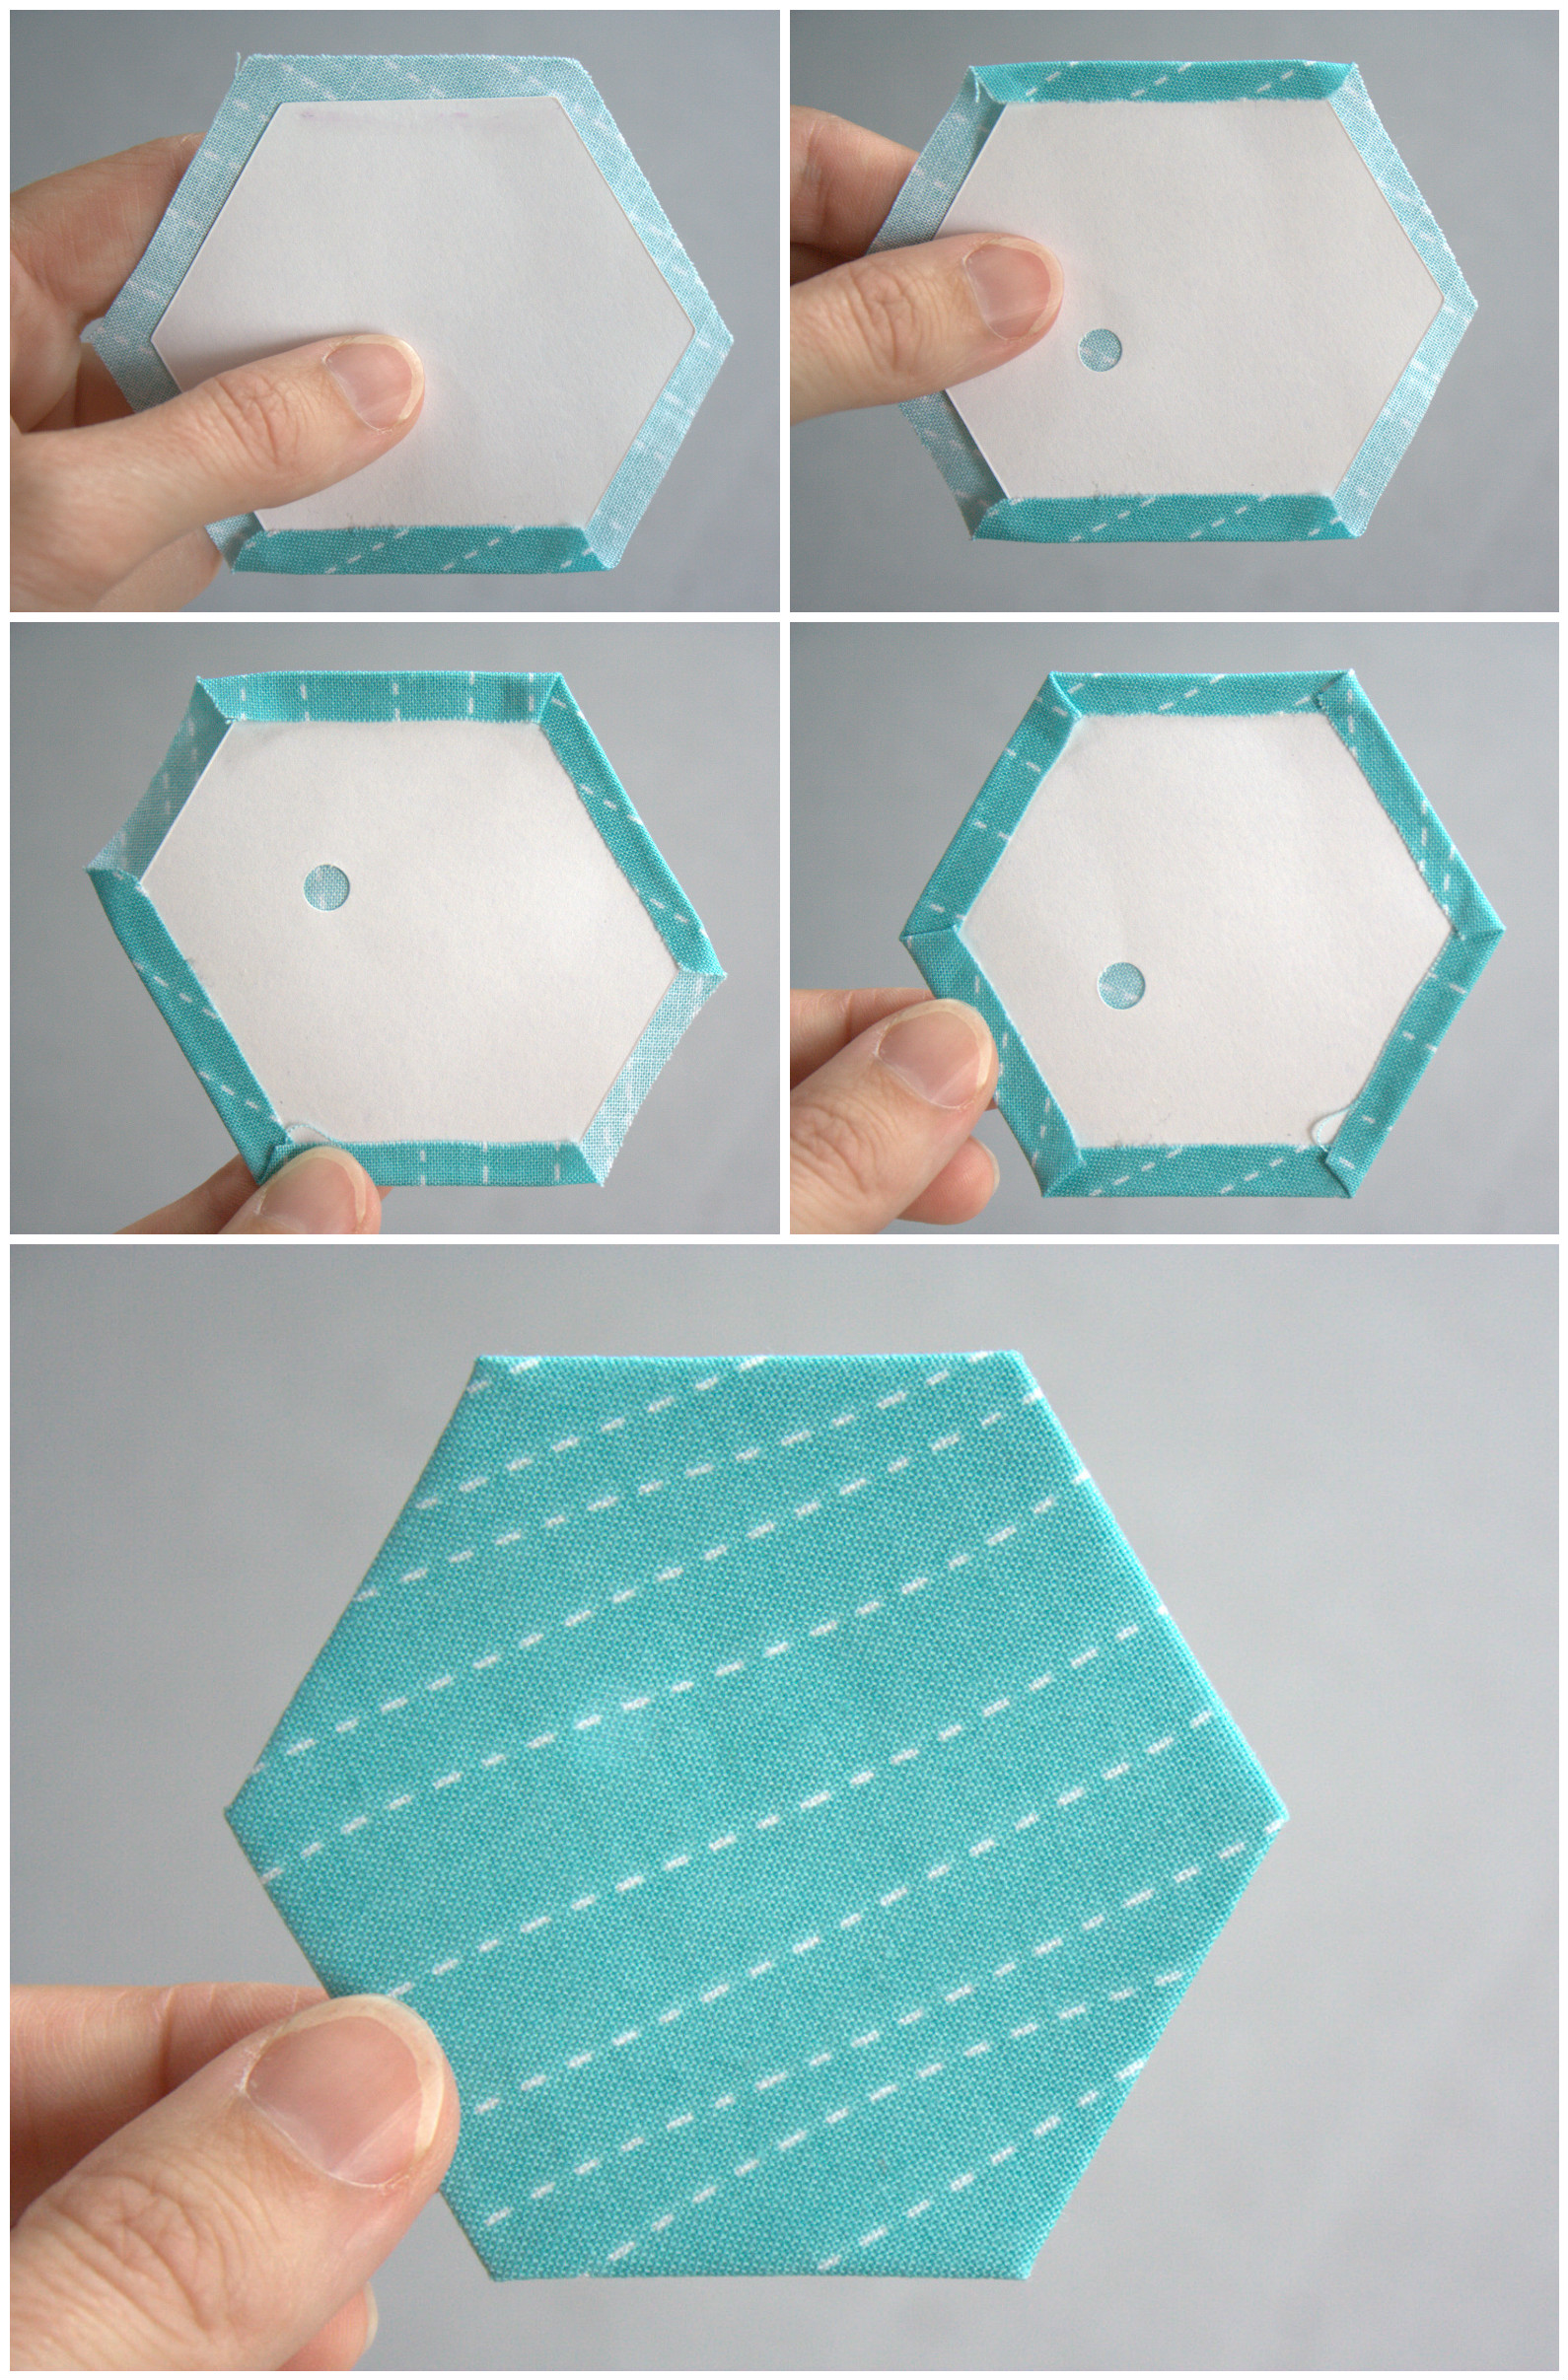
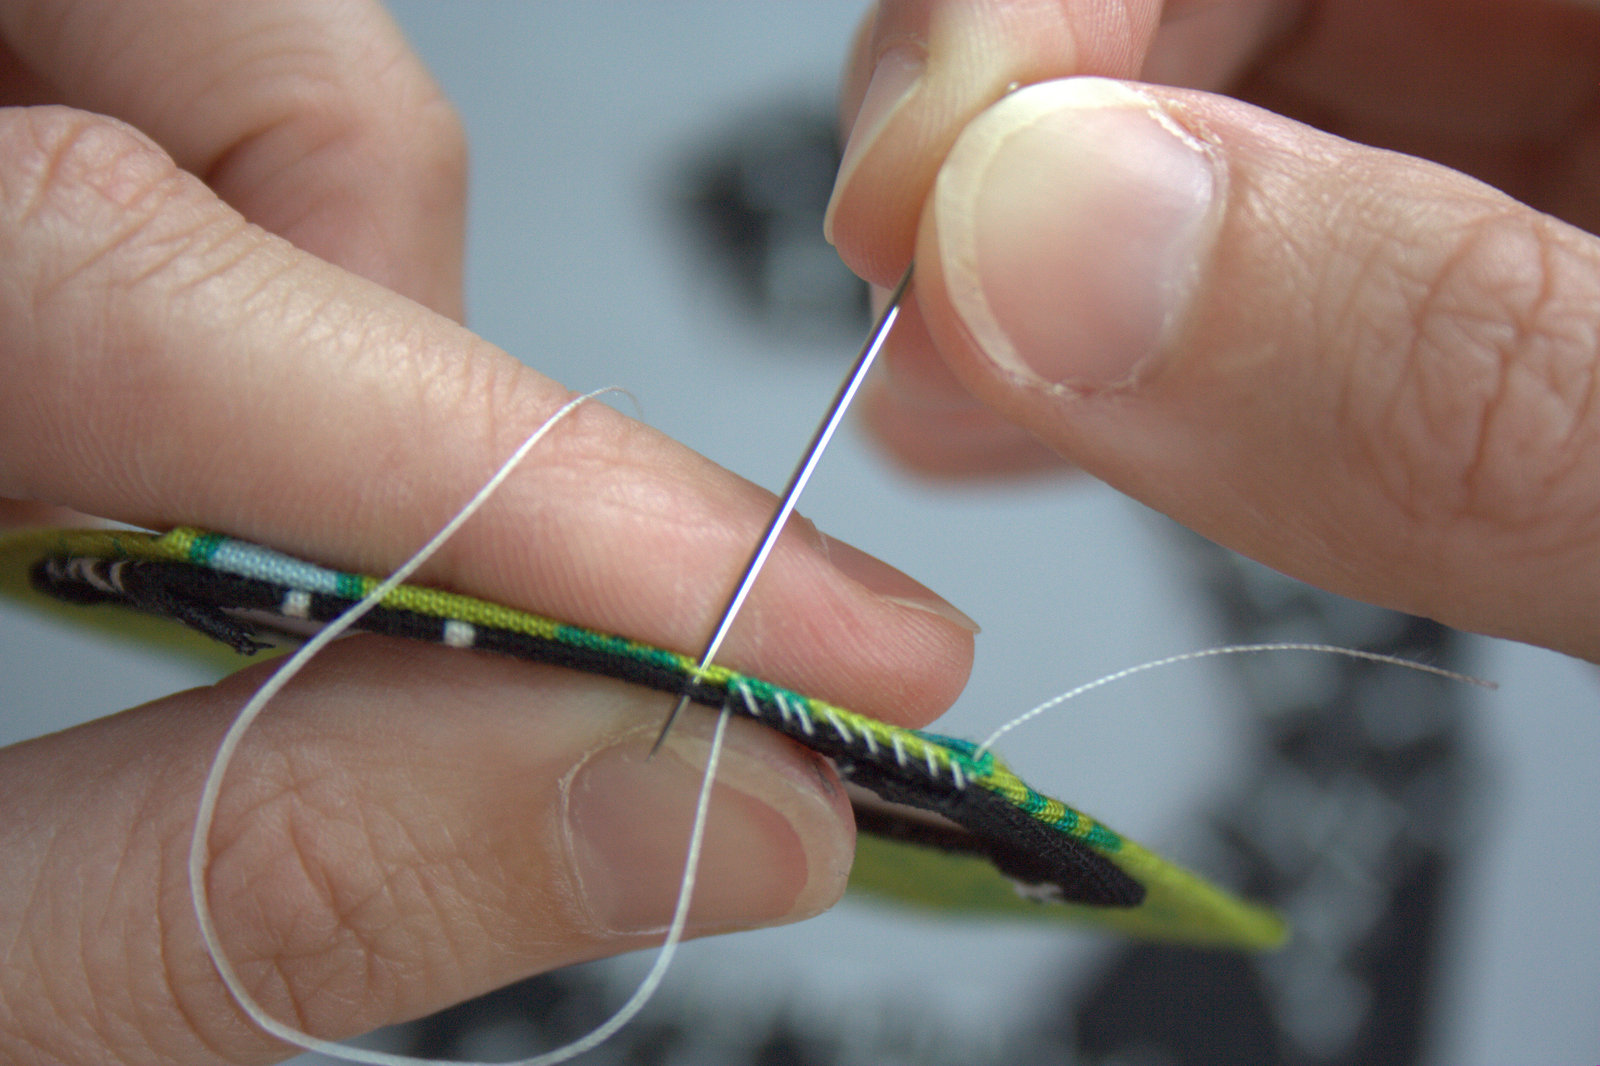
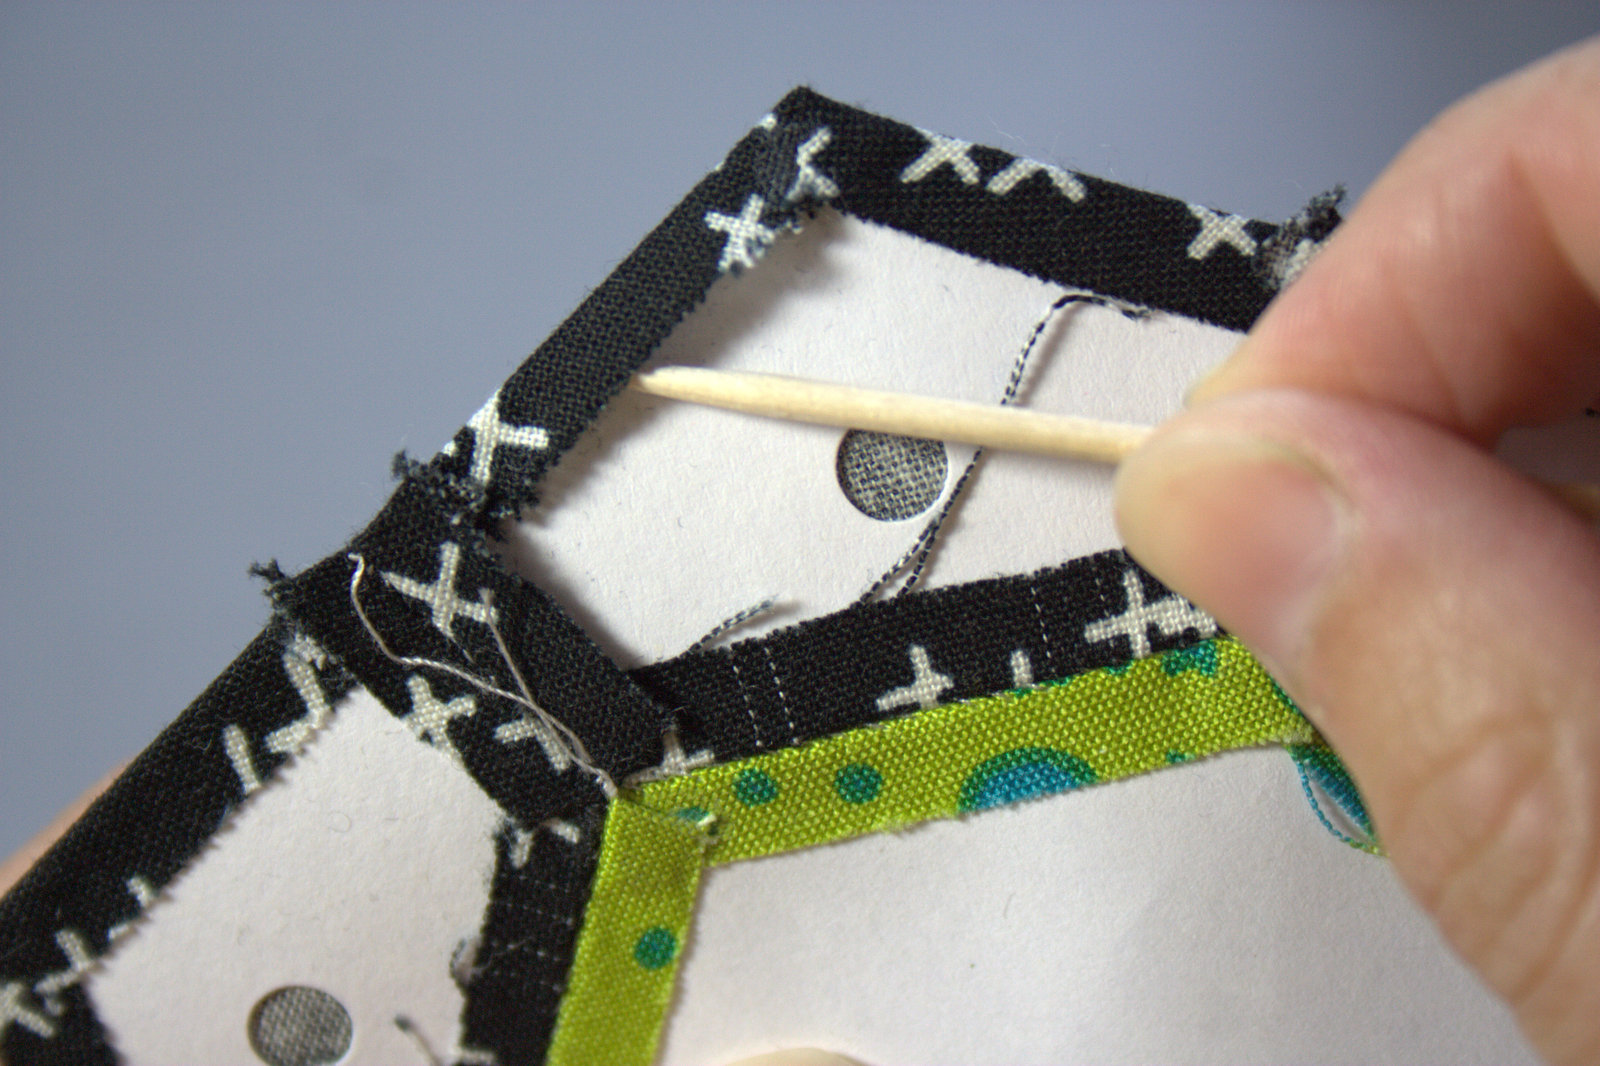
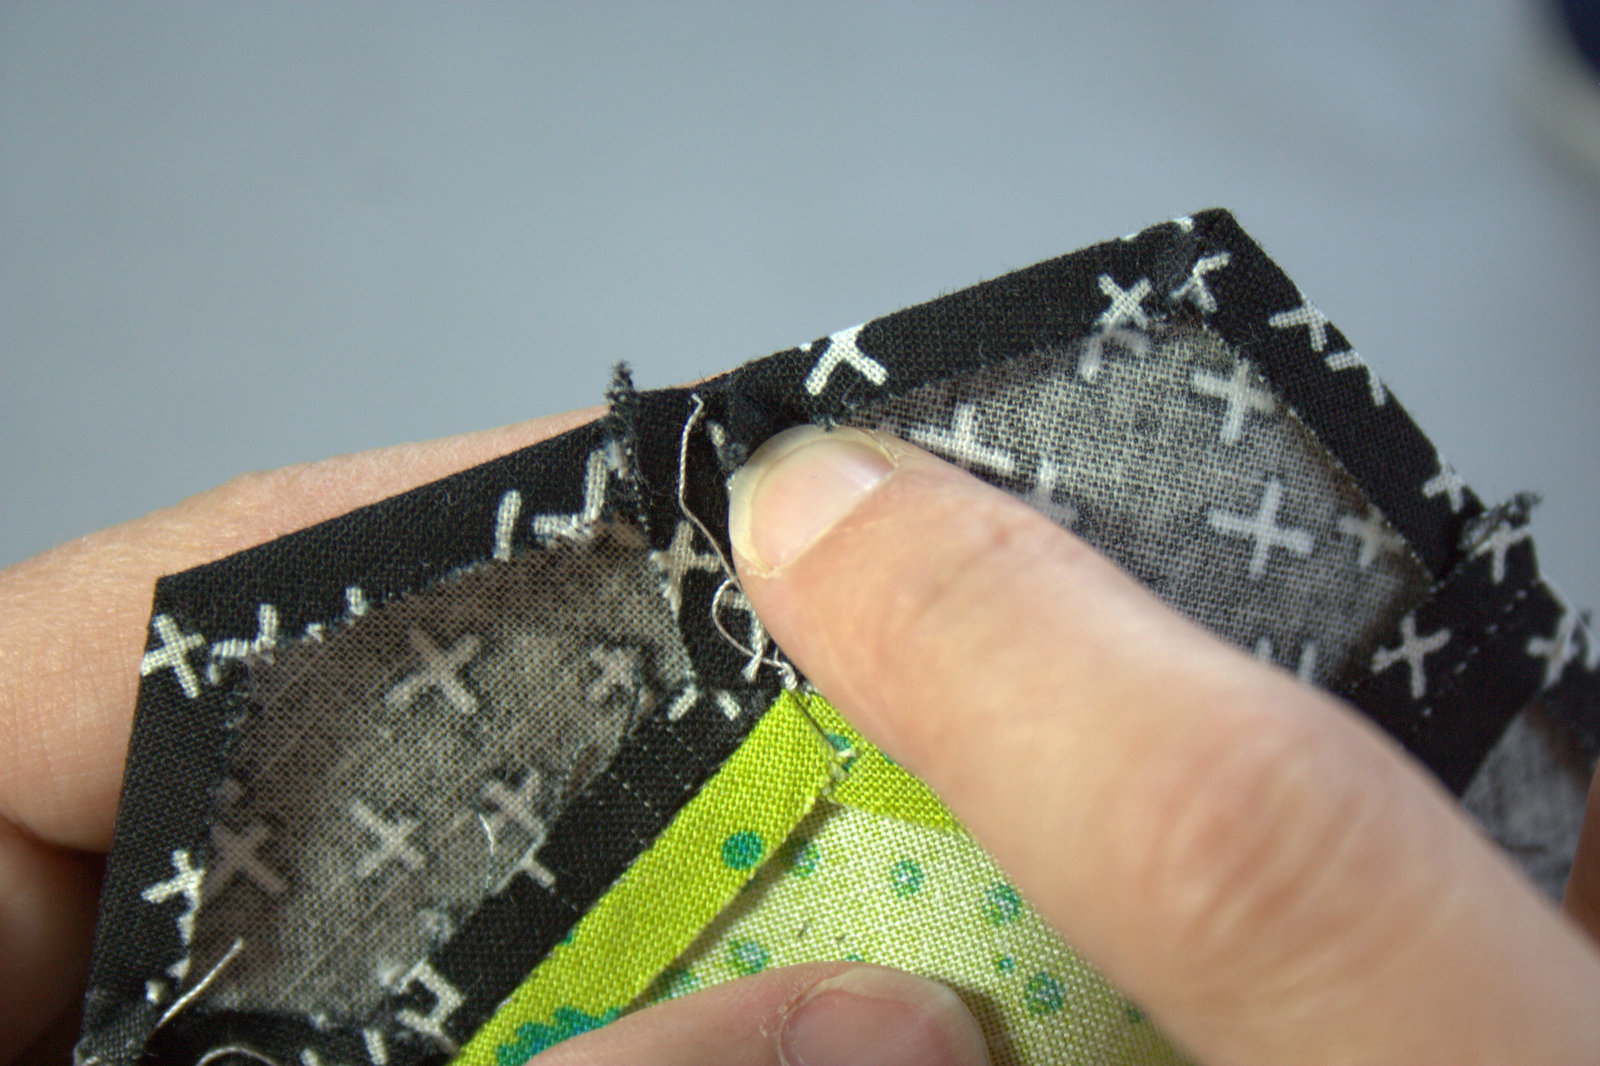
 Folding along the seam on which you are about to stitch and trimming the overhanging fabric to 1/4″ will help you line up the next piece accurately.
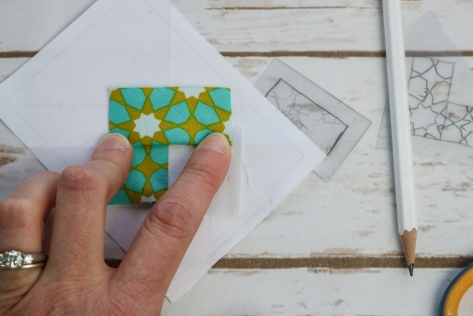 You can also fold over the piece you are about to stitch along the seam line to see how it looks before actually stitching.
 Once your fussy cut pieces are cut and stitched as desired, continue piecing your non-fussy cut pieces as you would any other FPP block.
 In the Adventure Abounds block I made for the original Splendid Sampler 2 quilt, I used this tip when piecing the text on the tree, specifically the word “love”, since the word “listen” was the first piece placed, and was therefore easy to simply glue in place and piece around. Knowing that I wanted the top of the word love to be juuust below that darker top piece, when I cut the square of fabric I carefully cut just a tad bit more than 1/4″ from that top edge of the word love. I left the rest of the rectangle of fabric a bit larger and less specific, since as long as that edge lined up properly, the rest didn’t matter.
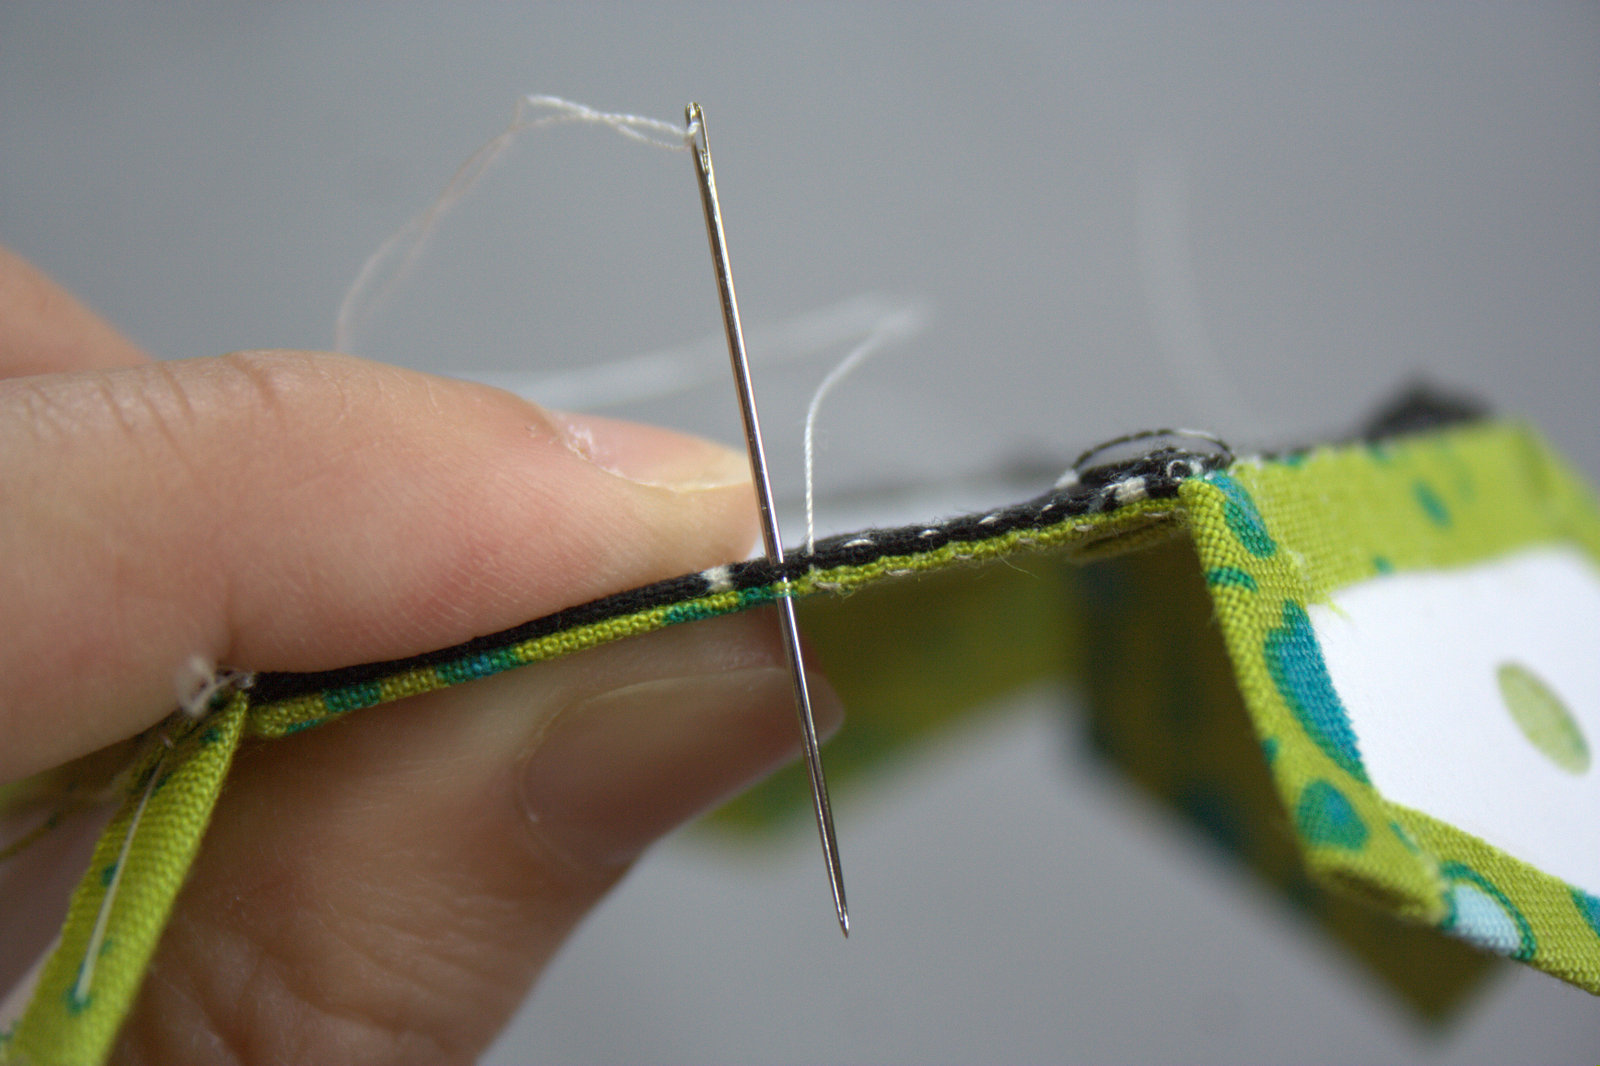
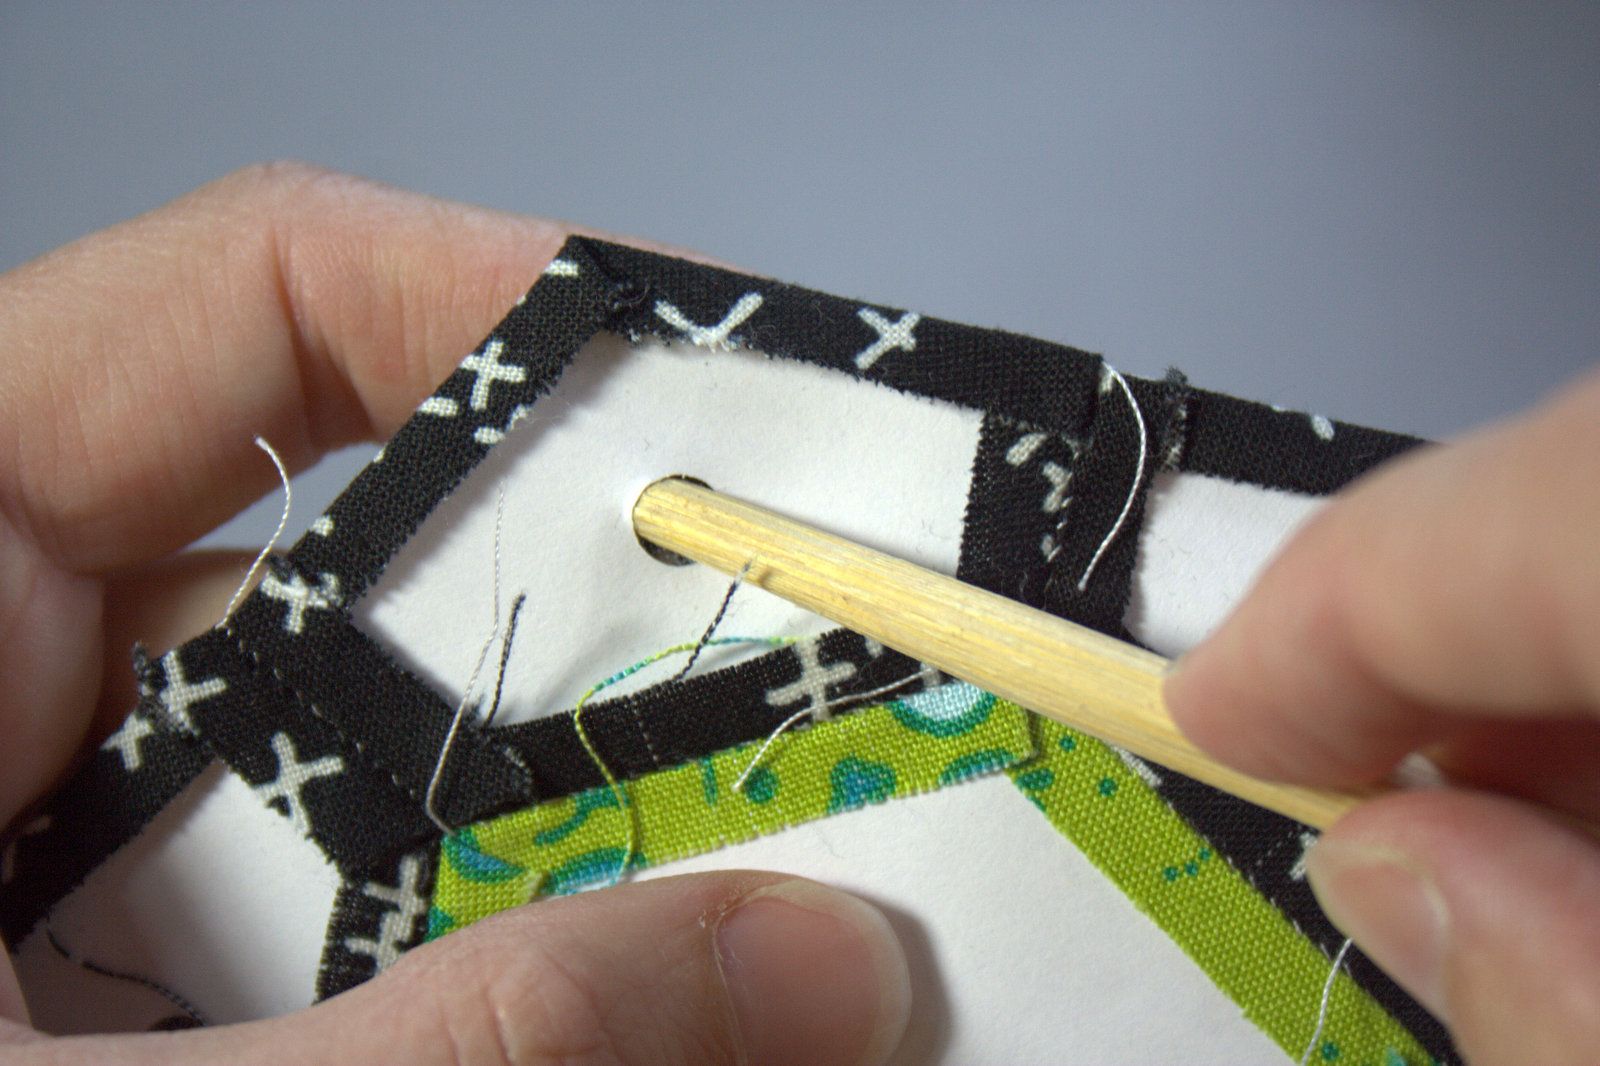
 Whenever employing any type of meticulous cutting in your FPP, it’s always a good idea to trim your 1/4″ seam allowance before positioning and stitching your fussy cut shape. To do this, simply fold back the foundation paper along the line you are about to sew on, and using a quilting ruler with 1/4″ measure, trim the fabric 1/4″ away from the fold. (Obviously use a cutting mat underneath! This photo shows without the mat for aesthetic consistency). Once your fabric is trimmed, you have a clean line with which to line up your next meticulously placed piece.
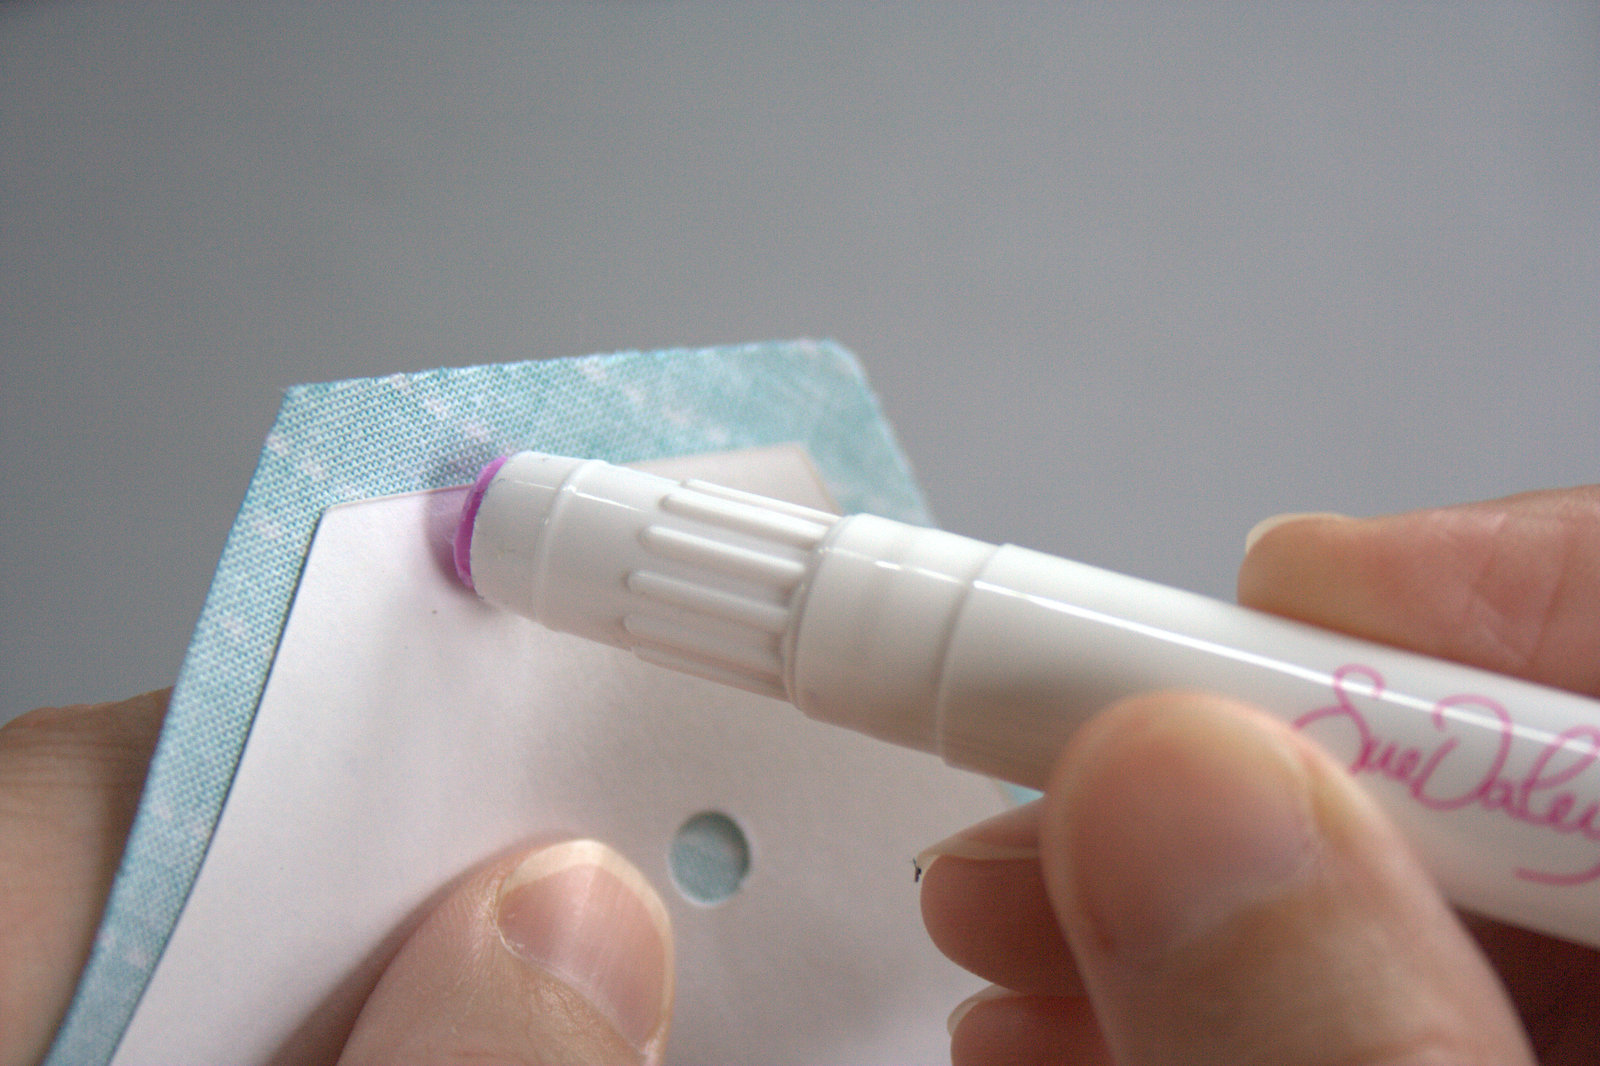
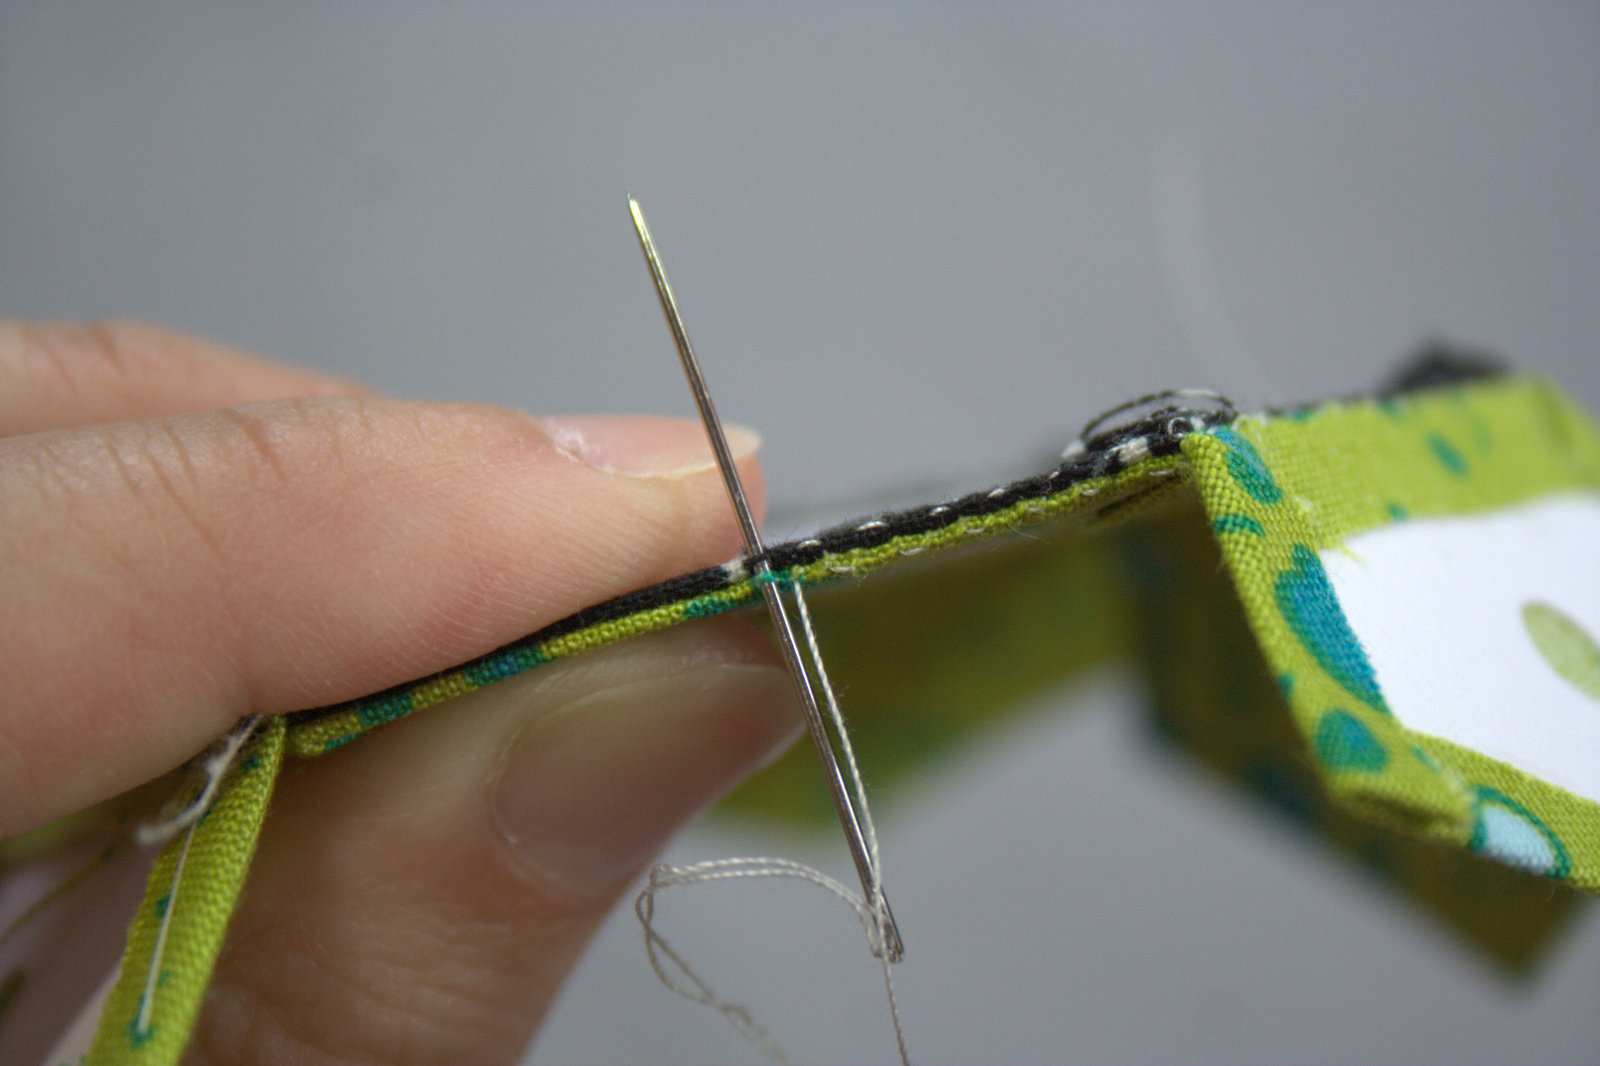
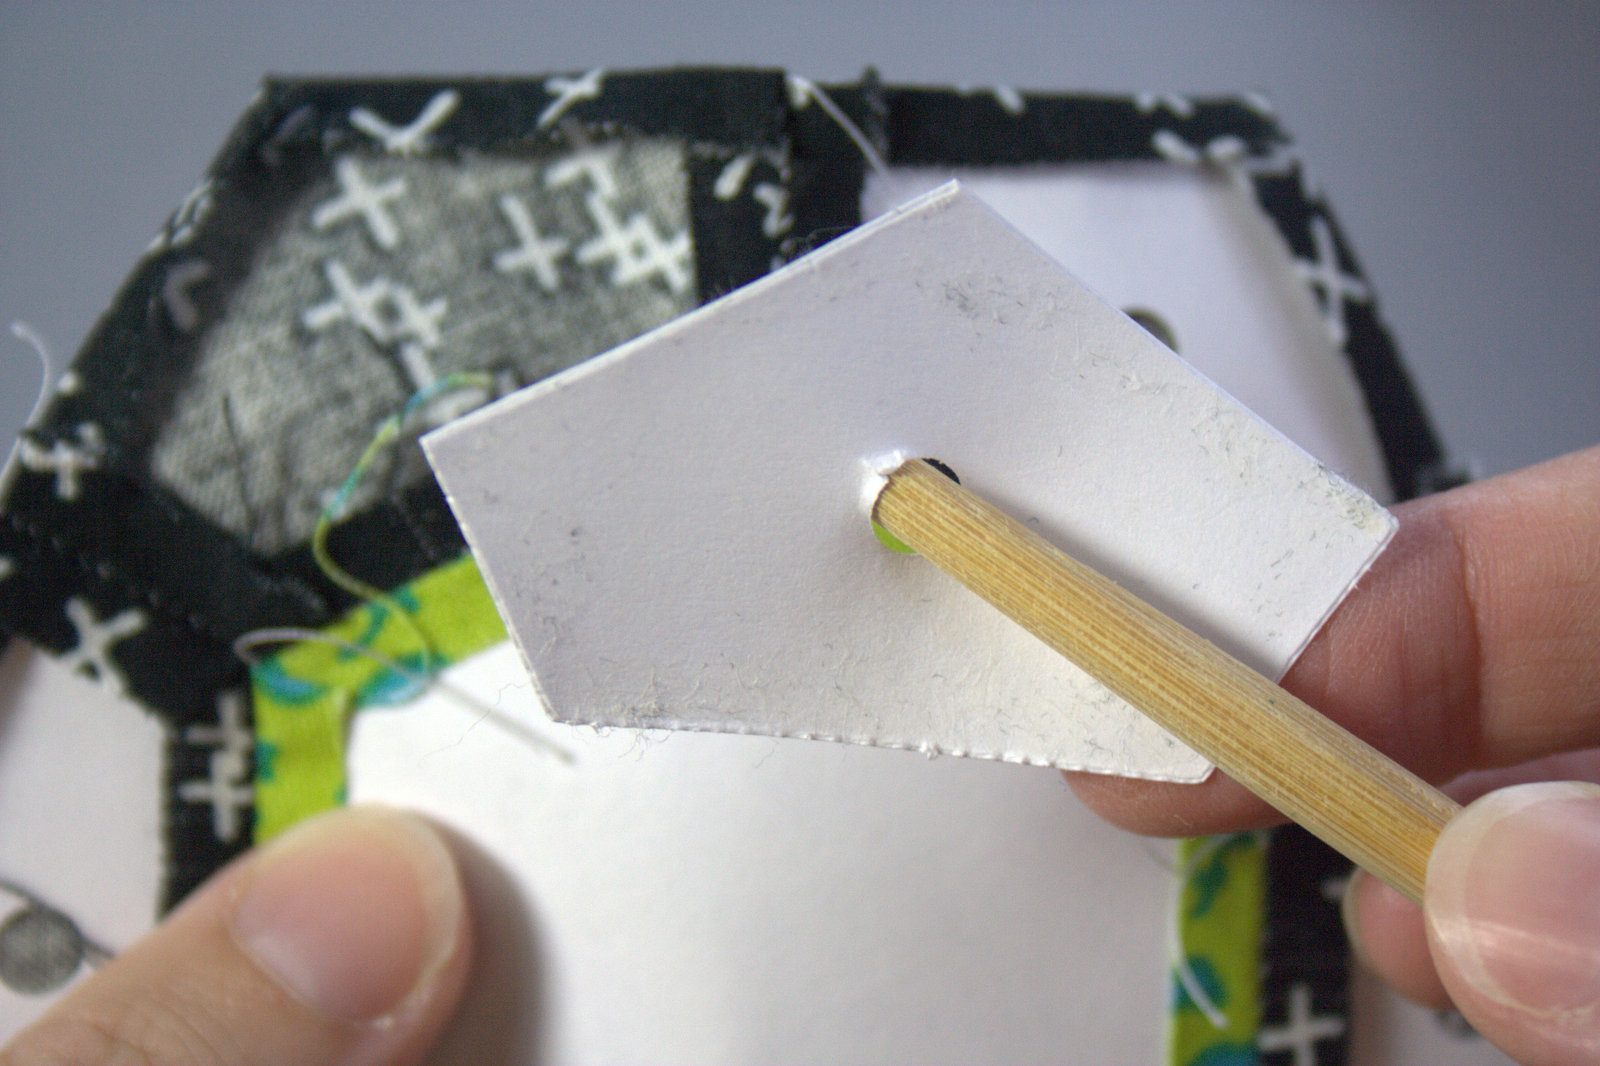
 When your paper is folded along the seam-to-be-sewn, you can place it on your next fabric (right side up) and the paper shape as folded will be exactly on top of the fabric that will end up in that space once you sew along the line. Be sure to visit
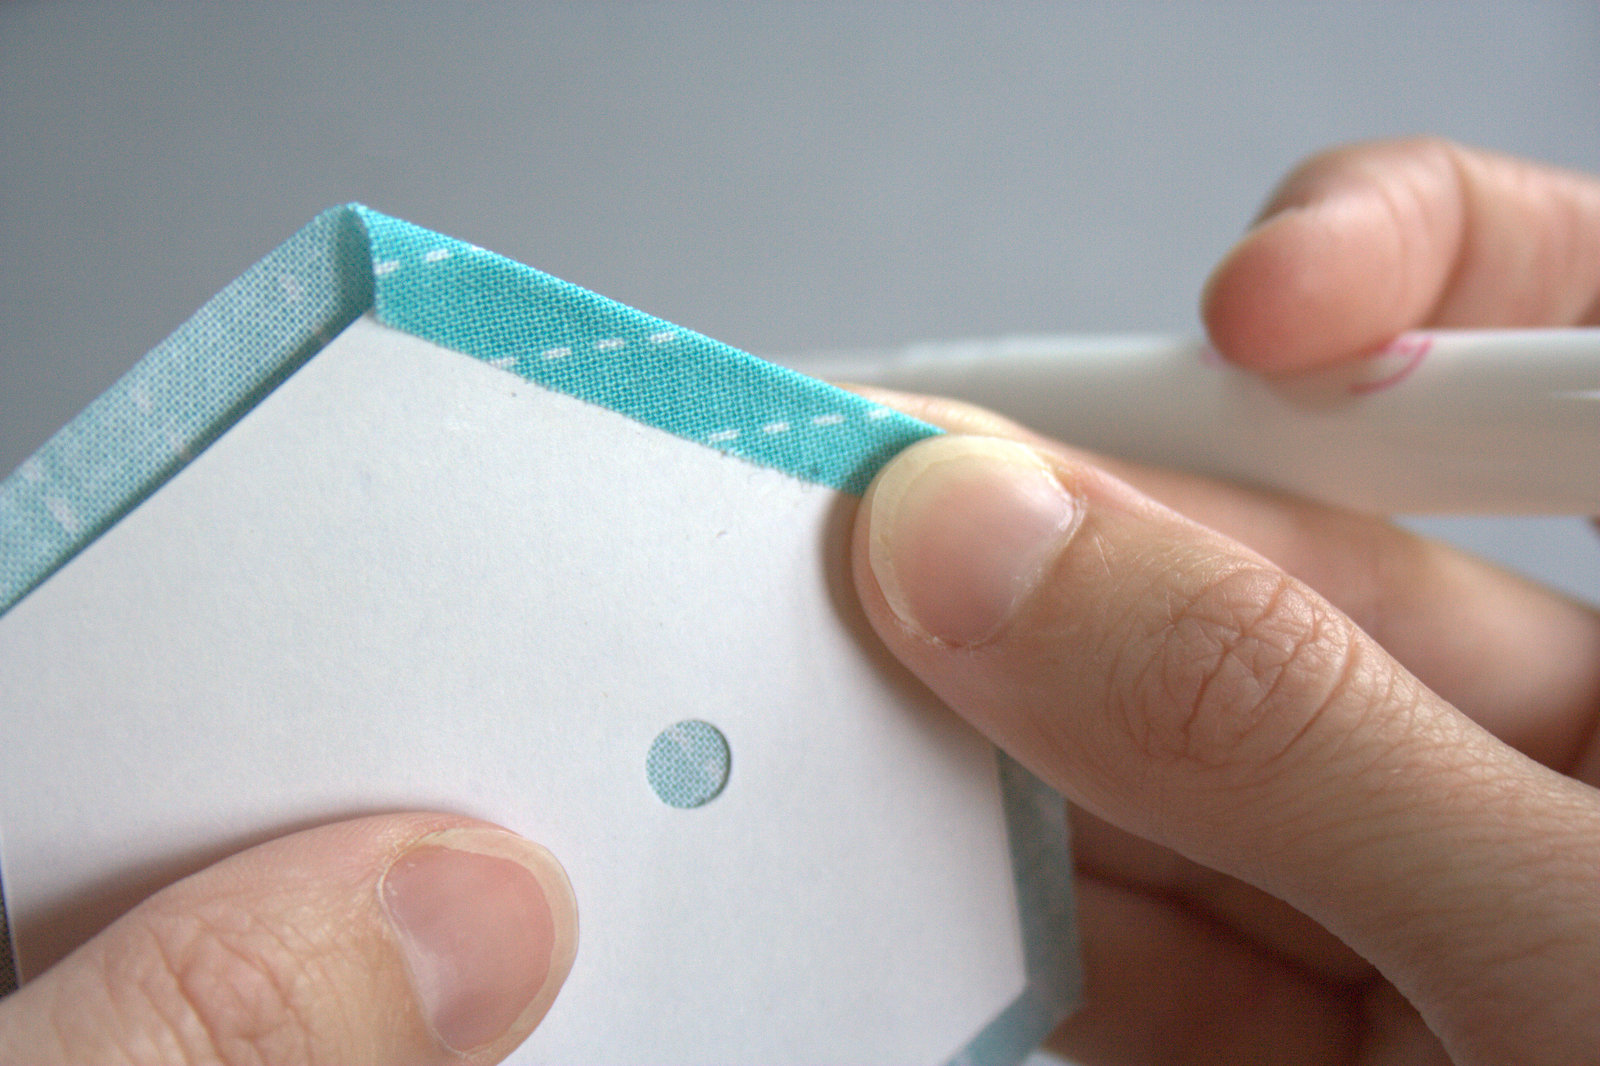
  What that means for us is that with that clear 1/4″ seam line showing us the direction we want our print to go, simply lining up the folded seam line with the directional print will ensure the pattern runs in exactly the direction we want. Fold up the edge a bit to peek under and make sure the pattern is positioned the way you want it, then without changing the position of the fabric, fold the paper back up and sew along the line.
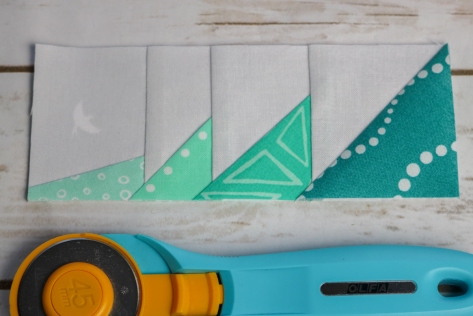 You will end up with your directional fabric meticulously positioned along the seam line, just how you wanted it. Paired with that fun bird flying over the ocean that we placed using Tip 1, these tips can help take your foundation paper piecing blocks to a whole new, intentional level.
 Okay, just one peek at my planned layout and a few of my blocks so far. A full look will come in its own blog post soon, so be sure to follow this space!
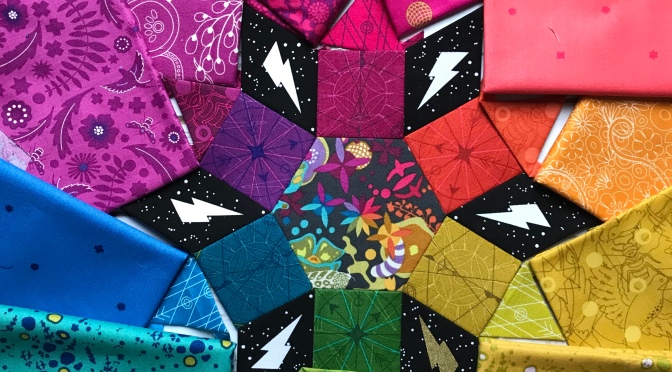
 I’m using *gasp*
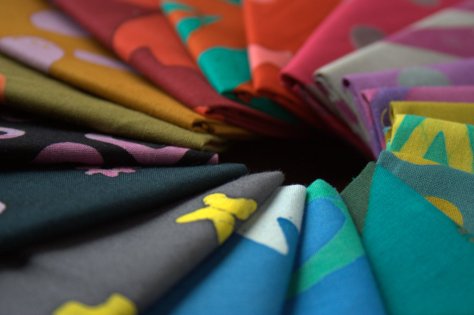
  I have a highly technical approach to selecting fabrics when it comes to a project like this. I place my center on the floor, surround it with all of the Alison Glass fabrics I can find, and then play.
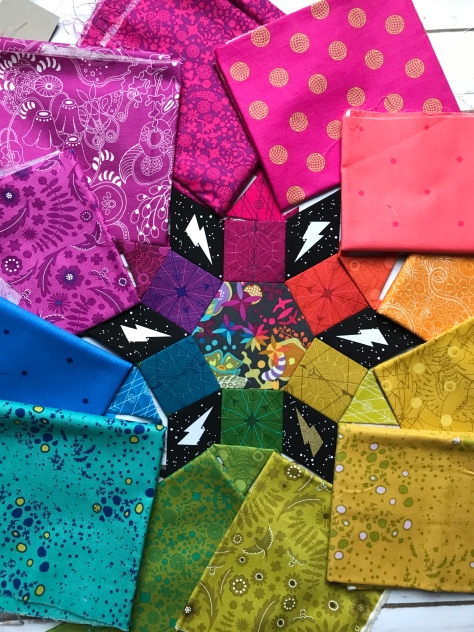 I audition fabrics not only in person, but also through the screen of my phone’s camera, since oddly, some fabric arrangements look different from afar. Alison makes it pretty easy since her fabrics are such a vibrant spectrum of tone on tone color that already transition so well through the rainbow. It’s still fun to decide where to put each bright little bit, and mixing fabrics from new and old fabric lines.
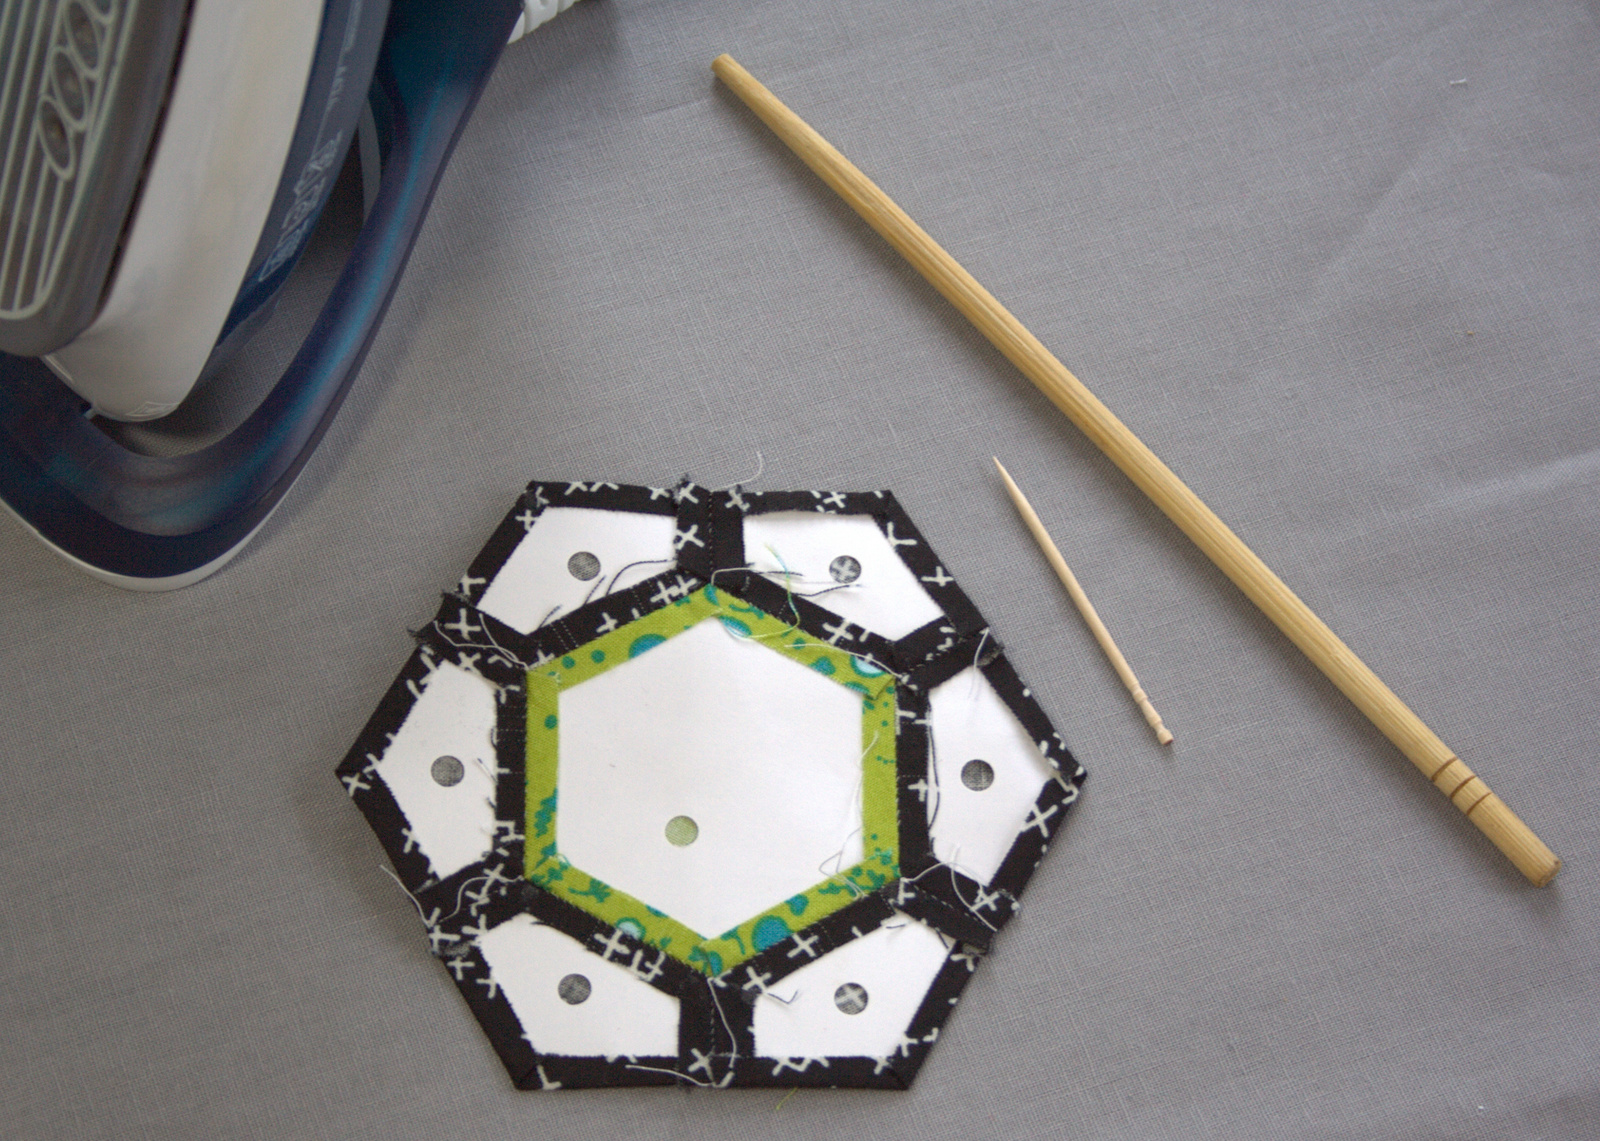
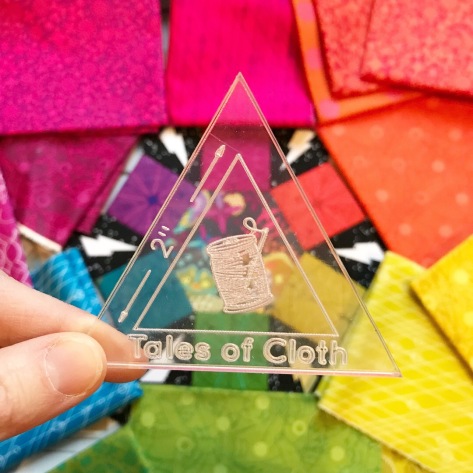 I love English Paper Pieced patterns that have acrylic templates, since I’m a big fan of meticulous cutting (aka
 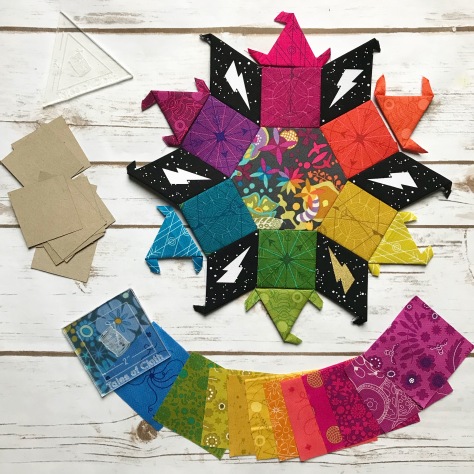 Even with a project focused on the color flow and not so much the individual pieces, I still fit meticulous cutting in where I can. You *might* notice that the squares around the center are all meticulously cut from Compass from Sun Print 2018, alternating designs since I only had fat eighths of the fabric, which didn’t include a full repeat of the design. The triangles are also meticulously cut, alternating between Latitude from Diving Board and Link from Sun Print 2017.
 I’ve been using
 Today I’m excited to be the first quilting stop on Patty’s Flit and Bloom Blog Tour, where I get to show you what I’ve been working on these past couple of months using her newest fabric line for
  I began with one of my favorite EPP patterns,
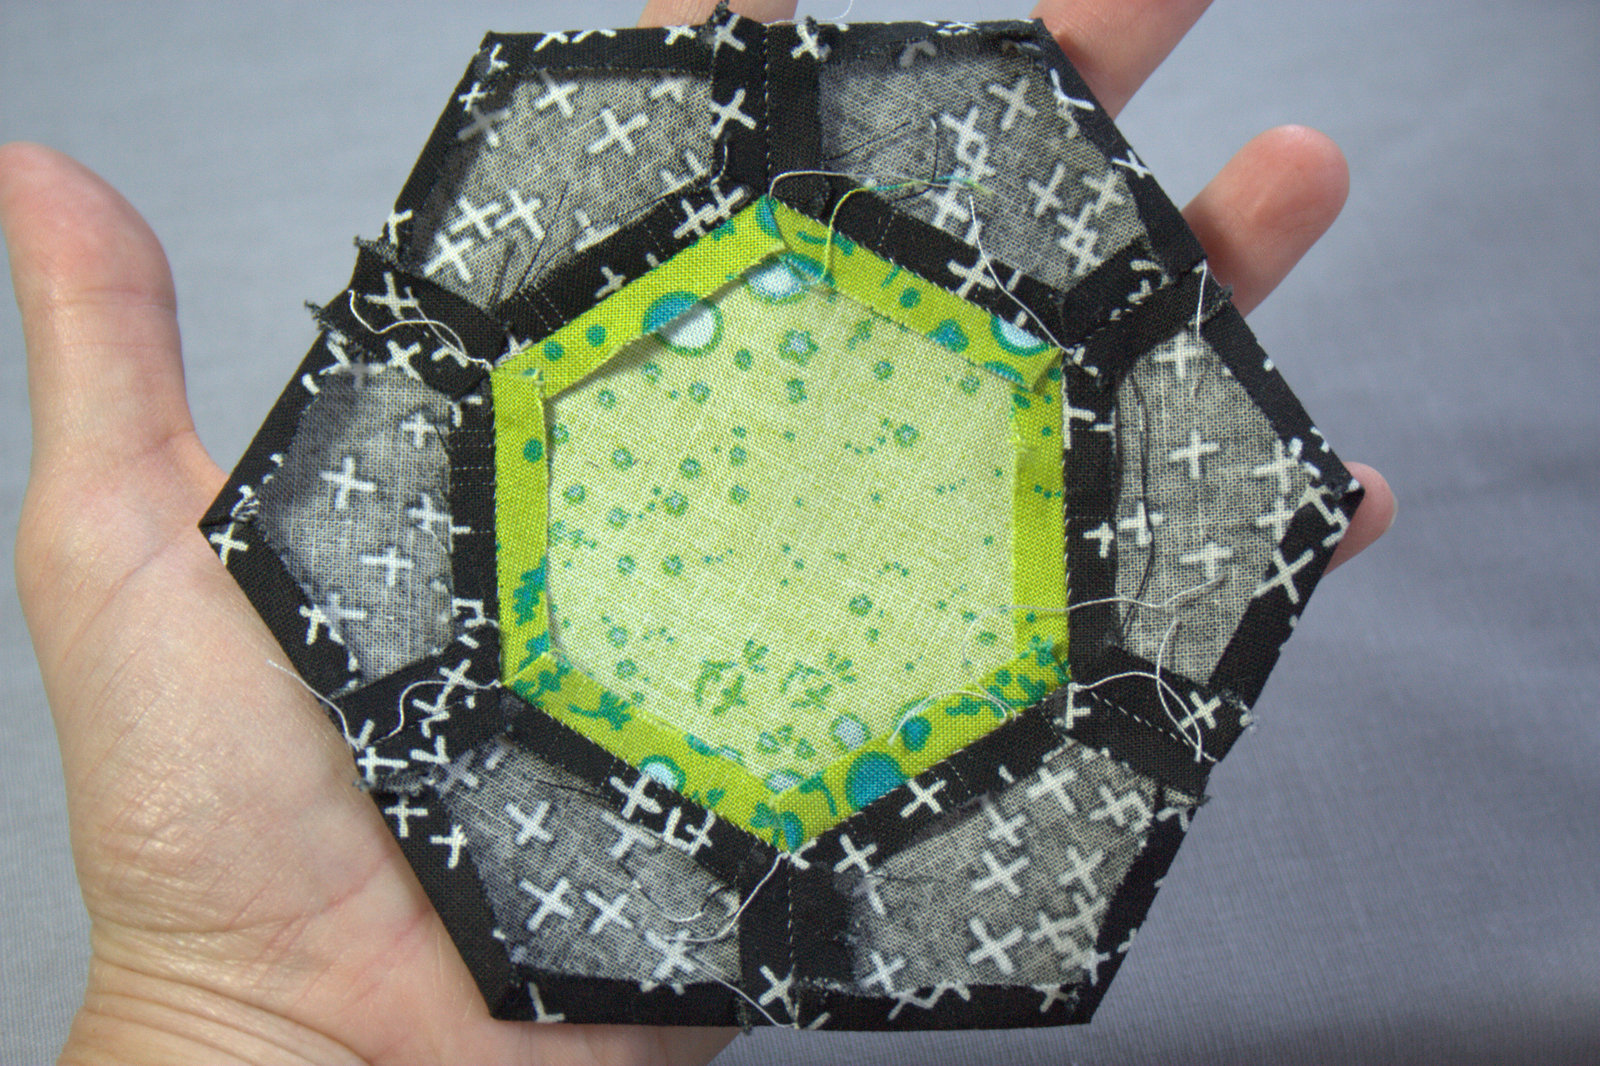
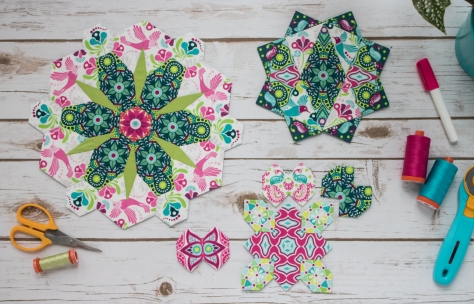
  Aren’t these peacocks fun as they dance in pairs around the block?
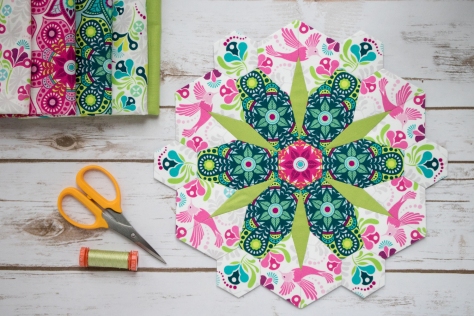 While I was stitching my Moonstone block, Mathew (aka
  I knew I wanted to incorporate the hummingbirds into this flower block, since hummingbirds and flowers go together like rock and roll, but couldn’t fit them onto any of the individual shapes. Then I realized that I could split the hummingbirds across two background fabrics and decided to go headfirst into meticulous cutting at its best.
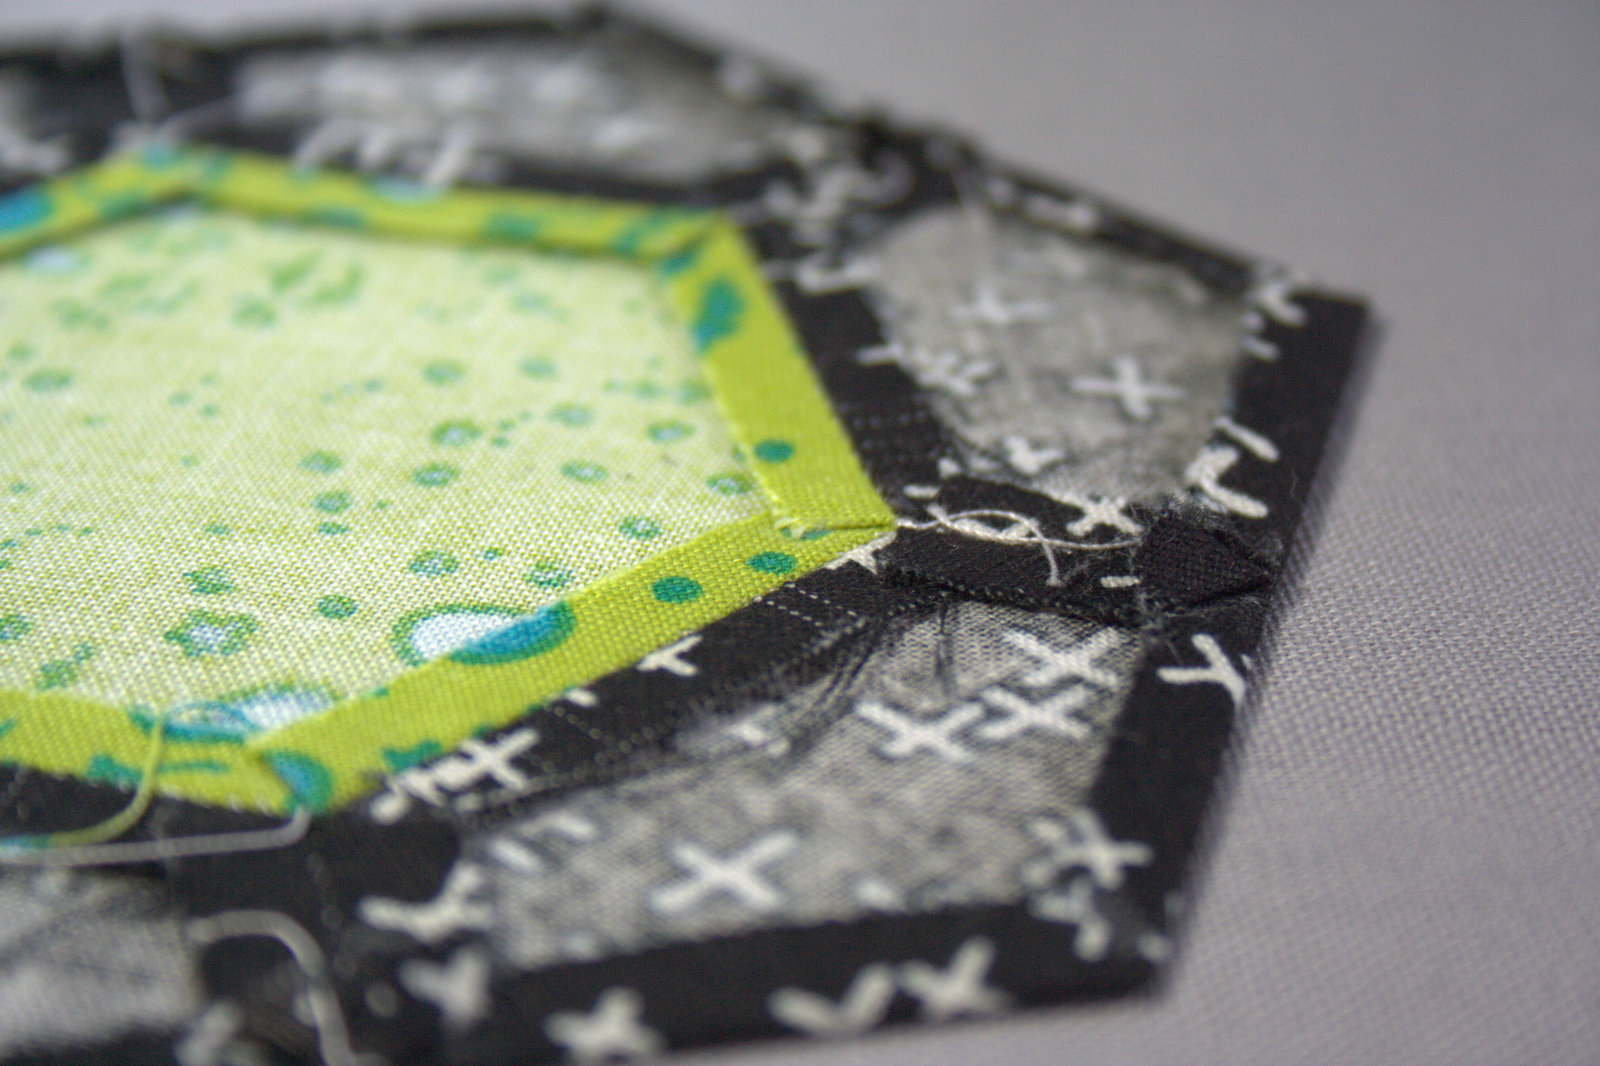
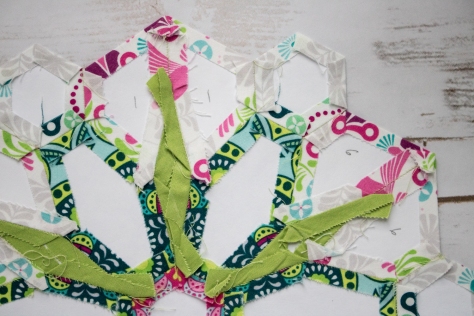 I labeled the humming bird front-back pairs since the Flowermania block is pieced in such a way that they are only joined right at the end as the segments are stitched together. This fussy cutting feat was no easy task, I might add. From the careful cutting to make sure the hummingbird halves would seamlessly meet when stitched together, to basting the pieces *just* so, to then stitching it all together and having it meet perfectly around the green diamonds, this was a challenge. They are not all perfectly matched up, and I learned a few tricks along the way that I’ll keep in mind next time, but overall I’m happy with the outcome.
 Some hummingbirds match perfectly, but even the imperfect ones are perfect in their own way. Hummingbirds are happily flitting around this Fowermania bloom, and it seems to me that it’s the perfect poster-child block for Flit and Bloom fabrics. Right!?
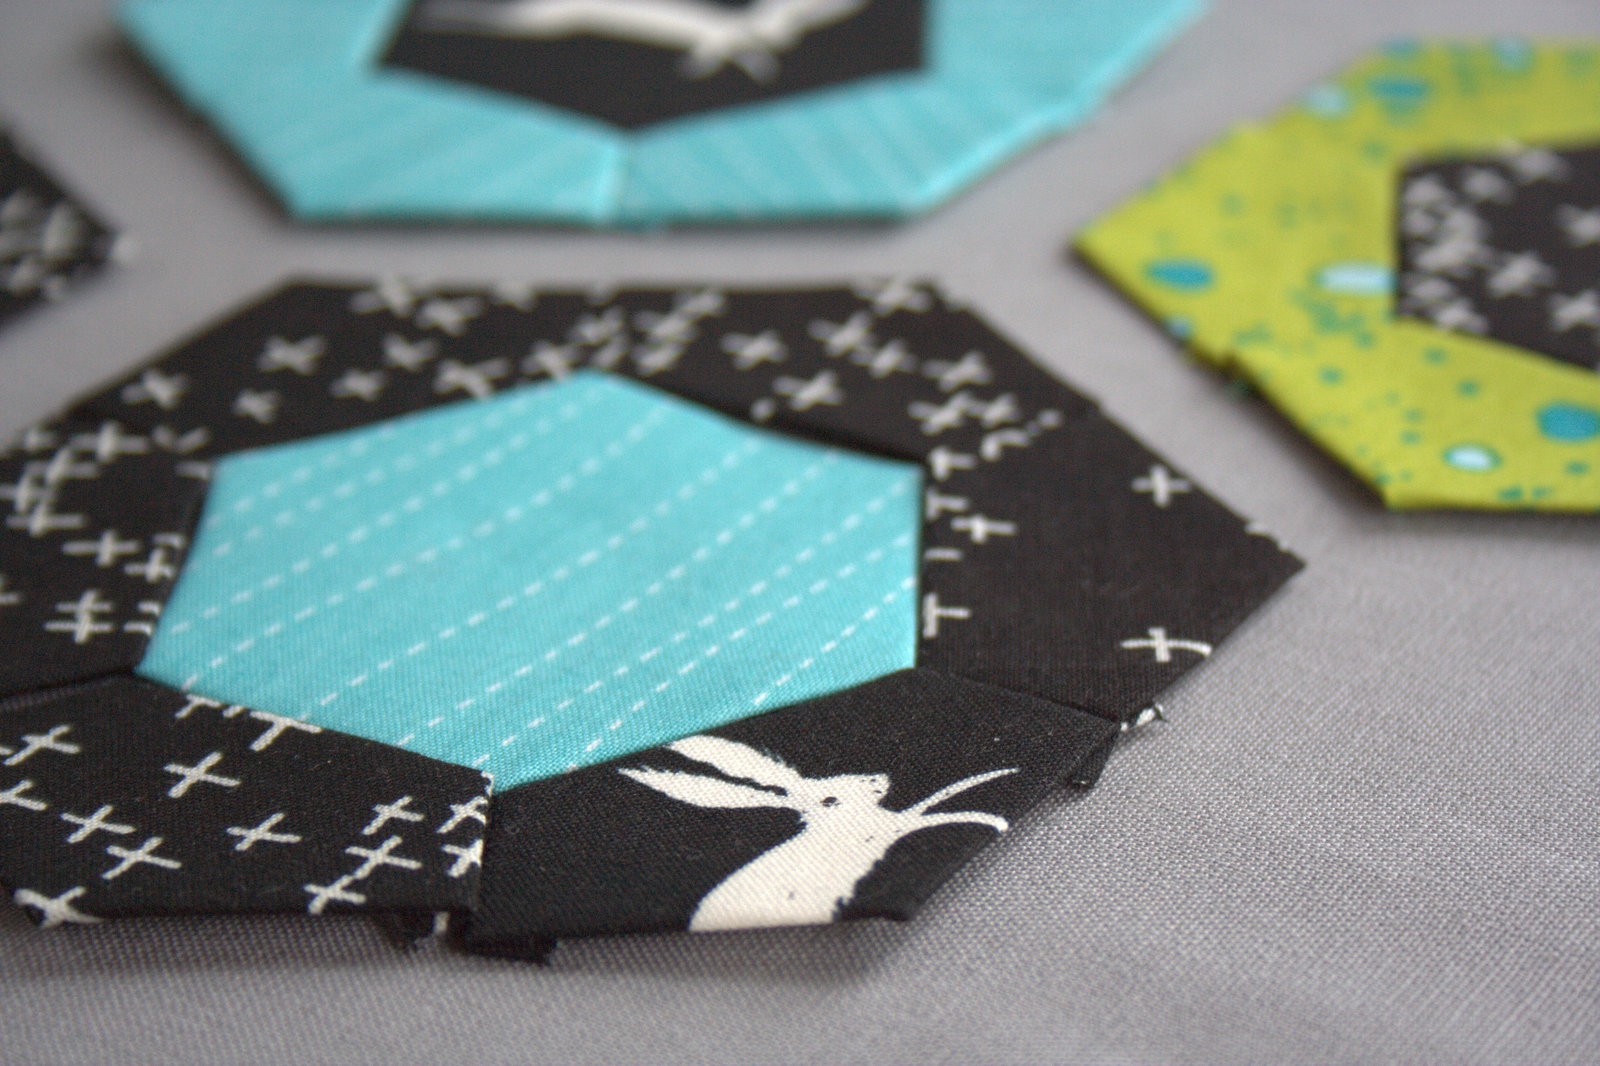
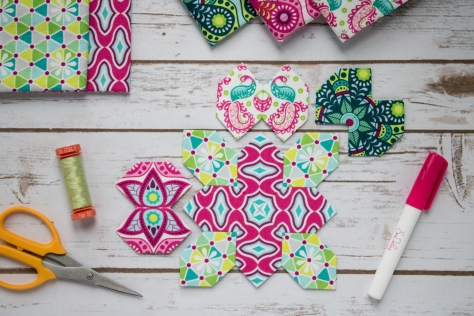 Finally, I started to dive into a Lucy Boston Patchwork of the Crosses block, since what is EPP without Lucy Boston? I love how rotating the fabrics creates even more meticulously cut geometric fun, and I look forward to seeing how this block shapes up.
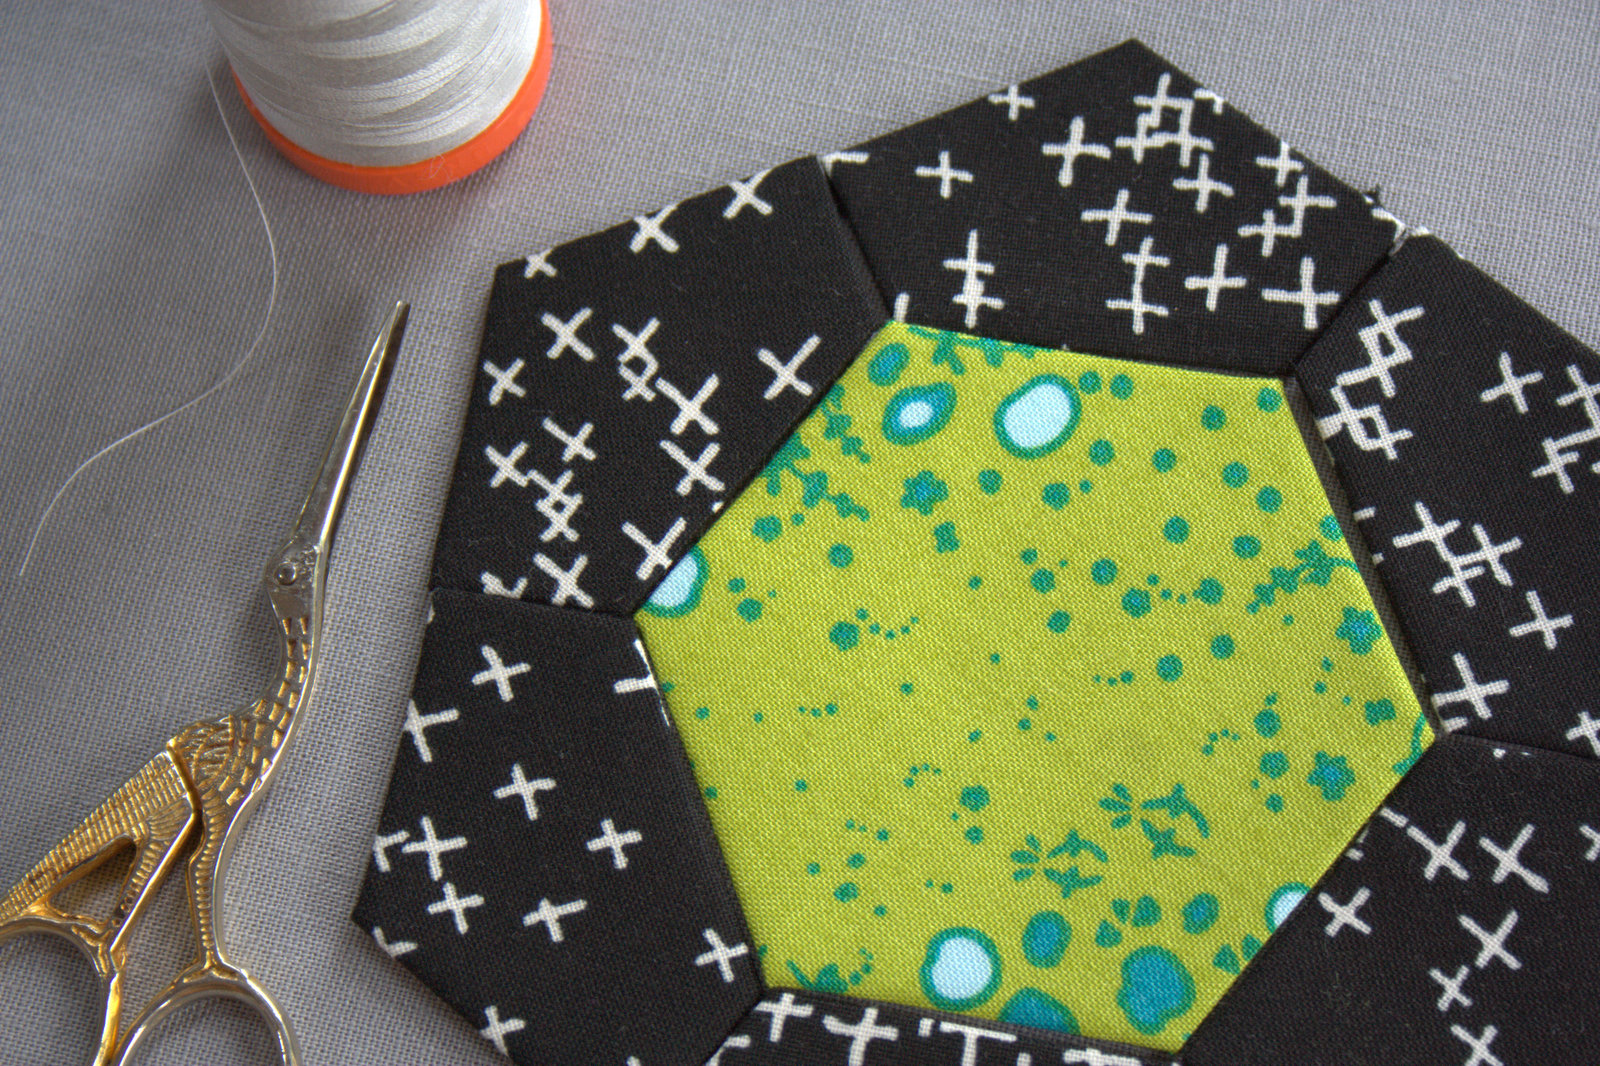
 One of my favorite parts of planning with Lucy Boston blocks is in the outer pairs. I like to make a few “test pairs” with different fabrics and arrangements to see which ones I visually like best.
 I love that Flit and Bloom has plenty of opportunity for mirror image fussy cutting, since those are my favorites–can you see why?
 Which arrangement is your favorite?
 I used
 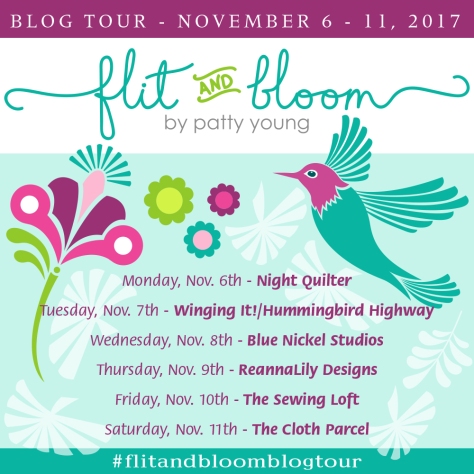 Be sure to visit the rest of the stops on the Flit and Bloom Blog tour to see what everyone has made with this fun fabric:
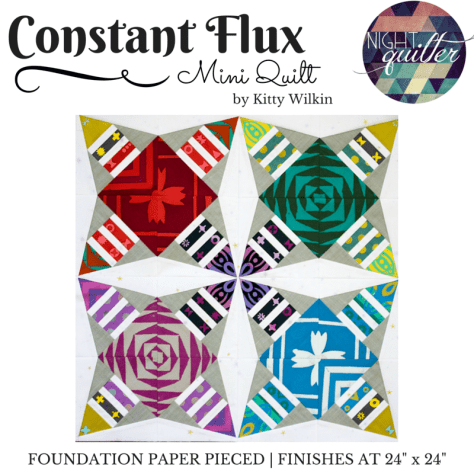
 I created my version of Constant Flux inspired by
 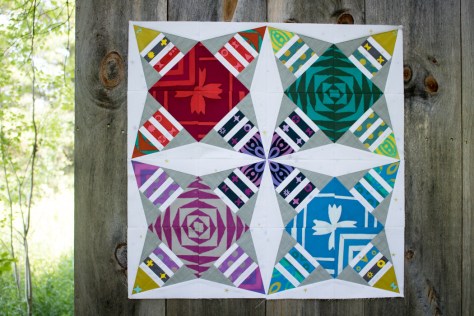 Constant Flux is available in my
 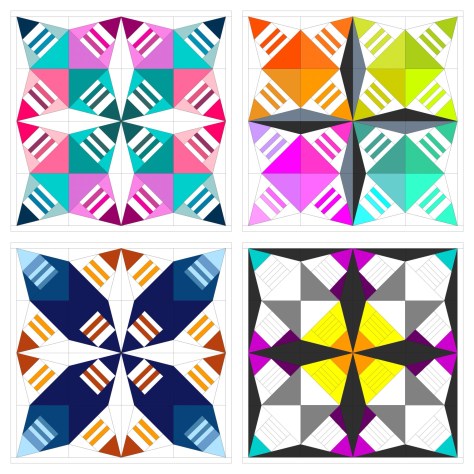 For now, I haven’t quilted my first one and I already want to make Constant Flux in a different colorway. Look at all of the options I came up with in just a short moment of color arrangement play! The pattern comes with a full page coloring sheet so that you can explore your options before diving in. That bottom right version is calling to me–which one would you make first?!