

Right before the mad-dash to get packed for our trek to QuiltCon, I finished a mini quilt and excitedly mailed it to a hotel in Savannah, where it patiently waited for Giuseppe to arrive. Here’s a closer look at my mini quilt that hung in the Andover Fabrics booth at QuiltCon.
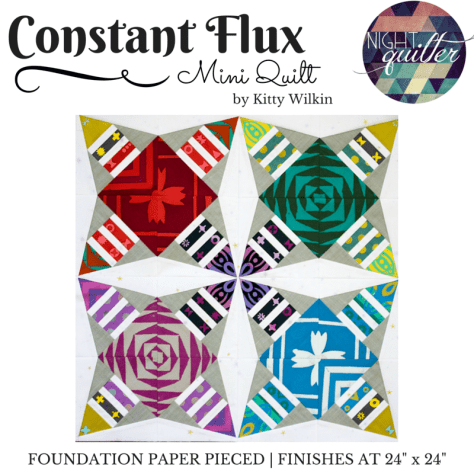
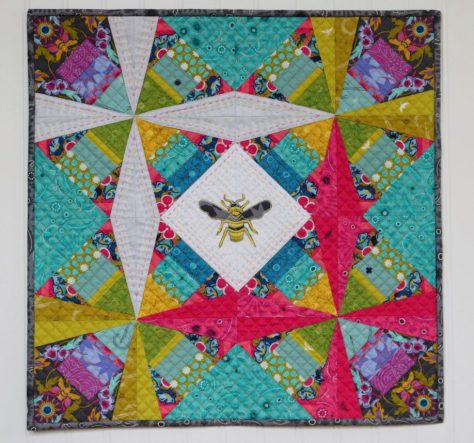 This quilt got its name after it was nearly completed, as I sat hand stitching the binding to the back. A mini quilt made at the request of Andover Fabrics, out of entirely Alison Glass fabrics, to be displayed in the Andover booth at QuiltCon–can you imagine how thrilled I was to make it? I had selected my pattern Constant Flux since I have been wanting to play with different arrangements and color schemes for it, and simply rearranged the blocks to create a central focal square (I rotated each block 180 degrees).
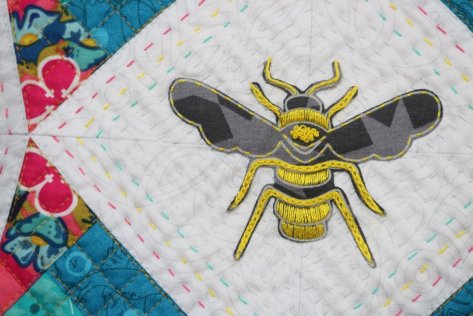 With freestyle embroidery fresh on my mind and Nichole Vogelsinger’s book Boho Embroidery freshly on my bookshelf, I was inspired to add an embroidered, appliquéd bee from Alison’s Seventy-Six line in the center.

So when a local friend of mine sent a message connecting me with a textile designer friend of hers who needed product photography, and calling me “the bee’s knees”, the name just felt right. I think the entire world pretty much knows that I think nearly all of Alison Glass’s fabrics are the bee’s knees, so it felt like the perfect name: The Bee’s Knees (aka all of my favorite things–Alison Glass fabrics, plus meticulous cutting, plus embroidered applique, plus detailed machine and hand quilting) in Constant Flux (the pattern name). More figuratively, it’s a nod to the fact that the fabrics and styles that we consider the bee’s knees are constantly changing.
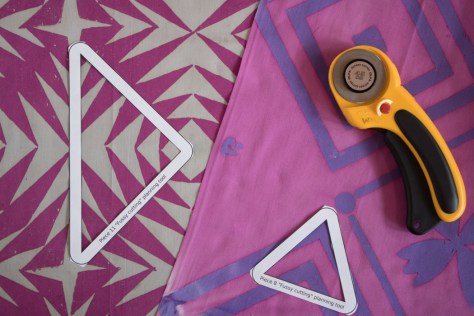
 I had a lot of fun with the meticulously cut (yeah, yeah, fussy cut) sections, including bees and flowers as framing for the color flow. I love pairing meticulous cutting with foundation paper piecing. The fussy cutting templates I include in my pattern came in handy, too.
 I knew I wanted to incorporate both hand and machine quilting, and I knew that I wanted the machine quilting to be dense. It took me a while to decide between using 50wt Aurifil 2600-Dove or 5015-Gold Yellow for the quilting, and finally I opted for the Gold Yellow to pull out the gold of the centrally stitched bee. I quilted a diagonal grid approx 1/2″ apart on all of the colored sections of the quilt and I love the texture it created. I wanted the white star and central diamond to pop, so I let them be, patiently awaiting hand quilting.
 I used a rainbow of 12wt Aurifil thread to help pull the rainbow from the gorgeous fabrics into the white sections, and I love the outcome! I decided to switch to 12wt 2600-Dove for the center so that the bee would stand out.
 The back shows that my hand quilting still has plenty of room for improvement (especially when trying to maneuver around the bee), but it’s still fun to see the back, too!
 I used Seventy Six fabrics Rising in Graphite and Numbered in Duck Egg for the back, with an Insignia in Chartreuse label.
 Labeling is one of my favorite parts–maybe because it helps me know that my name is on my work, or maybe because it means I’m finished with a project!!
 This quilt is currently in Andover headquarters in NYC for photography and other fun fabric adventuring before it returns to me, but it was super fun to see it hanging in the booth at QuiltCon (see it, top right??). You can see a photo of me proudly standing next to it in my QuiltCon post here.
I’m linking up with Crazy Mom Quilts Finish it up Friday, since this finished mini hopped right into the mail upon its completion and hasn’t been shared in detail here yet. Finishes do feel good, don’t they!?

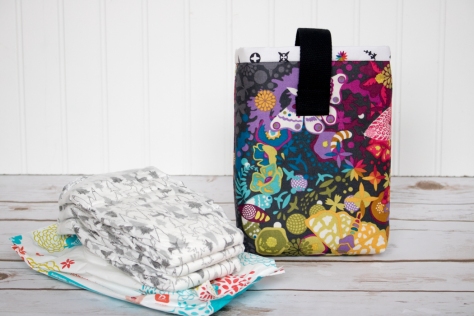 I made this
 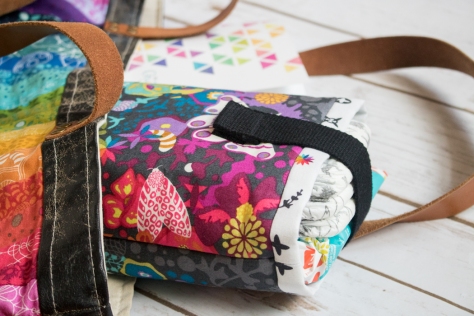 I used my all time favorite
  Of course I had to plan it so that the rainbow star from Artifact was visible right on the top. I should have given myself a tiny bit more space in that seam, but I’m not losing sleep over it. It’s gorgeous anyway!
 Now instead of having a purse filled with diapers and wipes floating every which way, I can have a beautiful and function space to store them compactly, not only making the inside of my purse a bit more organized, but also making it easy for me to visually check that I have a diaper for my little one before I head out!
 Since pens are another item I’m often digging for in the chaos within my gorgeous bag, I decided to store two of my favorite micron pens tucked in the corner of the diaper pouch, so that they are easily found when I think of something to add to my
  This pouch also perfectly coordinates with the amazing Alison Glass fabric bag my husband bought me for my birthday last year, made by the ever talented
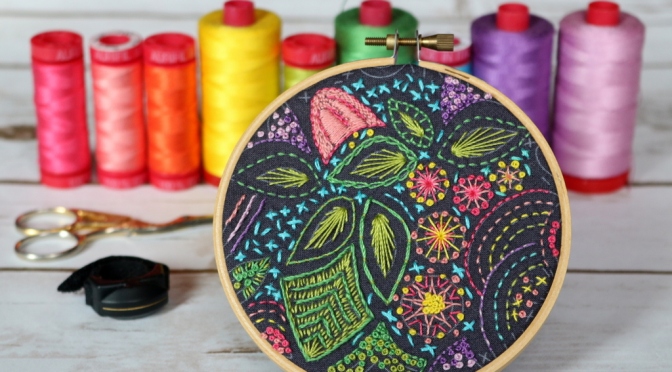
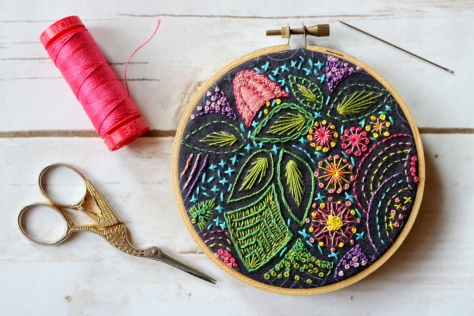 I’m so happy I obliged, because I just love this little hoop!
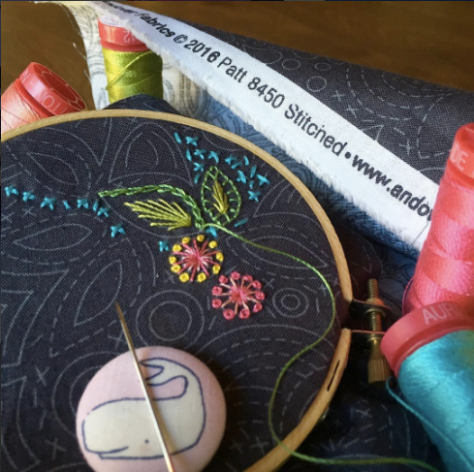
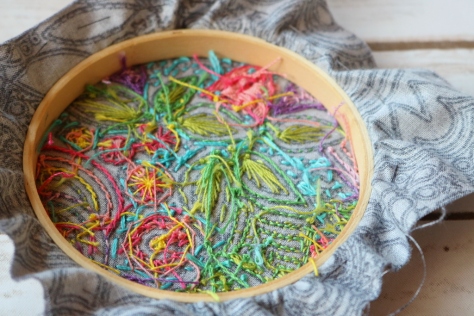
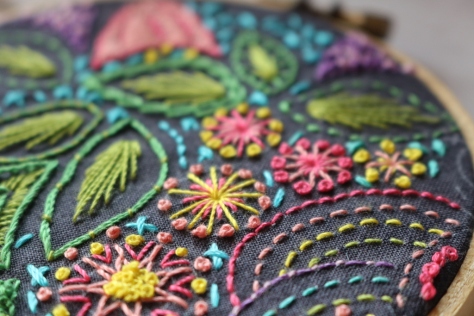 I stitched whatever I wanted, wherever I wanted, and tried many different stitches.
 I used Aurifil 12wt thread from my stash, in colors (left to right from photo above): 2530-Blossom Pink, 2435-Peachy Pink, mystery orange–the only Aurifil tag that has ever fallen off a spool!, 2120-Canary, 1147-Light Leaf Green, 2884-Green Yellow, 5005-Medium Turquoise, 2540-Medium Lavender, and 2515-Light Orchid. I used a single strand for all except the turquoise x’s, for which I use two strands. If I were to do it again, I would probably stick with a single strand since I love the crisp aesthetic that results.
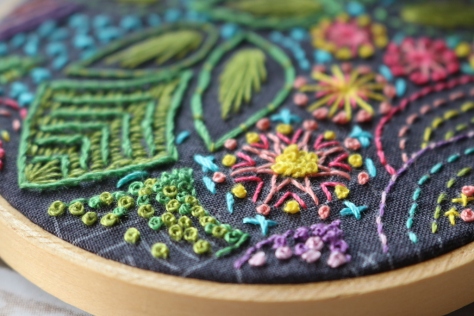 Toward the end, I went a little crazy with french knots, but I do love them so and they make a great “filler” around the edges.
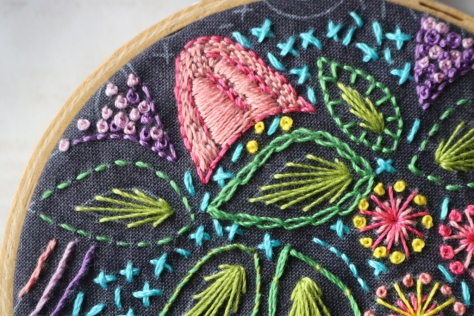 Since the pattern is printed on the fabric, there was no actual end, so it was up to me to decide how close to the edges to stitch. At first I thought I’d leave a bit open, but I just couldn’t stop stitching. As it is, most stitches extend to the absolute edge of the hoop. I kind of love it.
 I finished it using the methods (minus the plan-ahead phase, since I didn’t plan ahead lol) shared in
 It is such a great feeling to be creating for one of my children again (
 We are in the second week of sewing for the sew along, so hopefully I will have the quilt top completely sewn together by Monday. Time will tell if I actually meet that goal with all of the kids home and lots of family Thanksgiving time on the docket, but I’m hoping to at least be close!
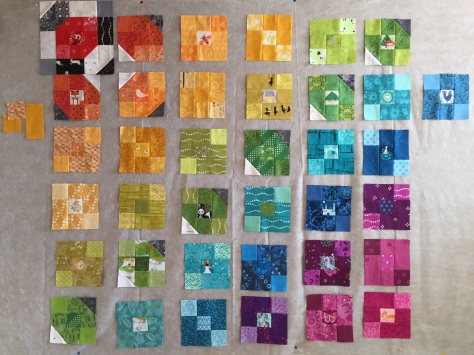
 I put a few contingencies in place to ensure that I love this quilt even though scrappy quilts are not typically my style, and I think they are proving to be quite successful. First, I used a very large ratio of
 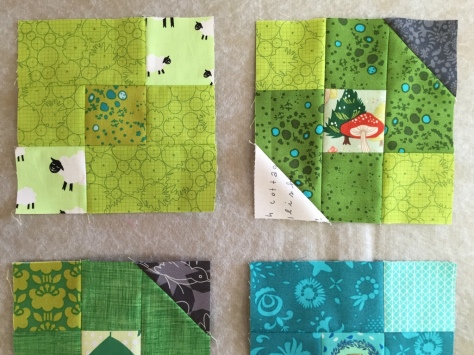 I love seeing my favorite designers’ fabrics together, too. The top right block in the photo above combines my favorite Carolyn Friedlander fabric from her first line Architextures (
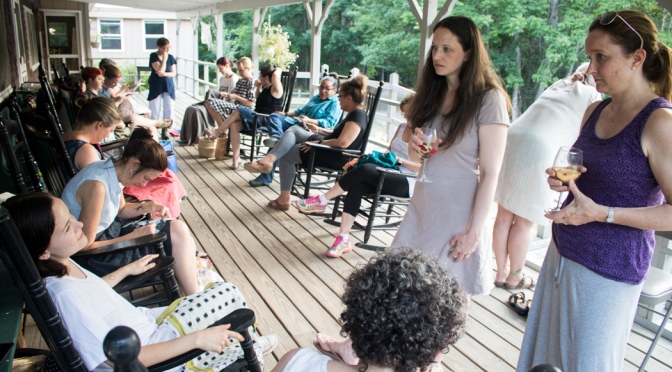
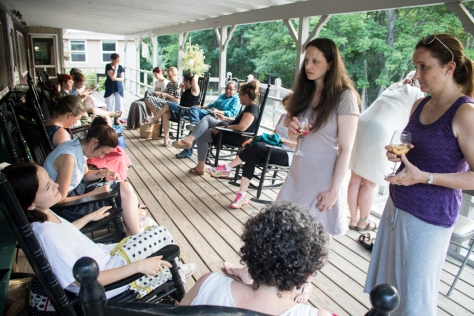 While I had every intention of taking lots of photos, I also made a conscious effort to distance myself from social media and technology as much as I could, so that I could aim to slow down body, mind, and spirit. Lo, I took hardly any photos at all. But I can tell you this: the retreat was everything I imagined and more and I would jump back there in a heartbeat. I’ve already begun saving pennies for next year. There was a whole lot of relaxing, chatting, stitching, laughing, learning, making new friends, swimming, yoga, relaxing some more, stitching some more, eating, drinking, and so much more.
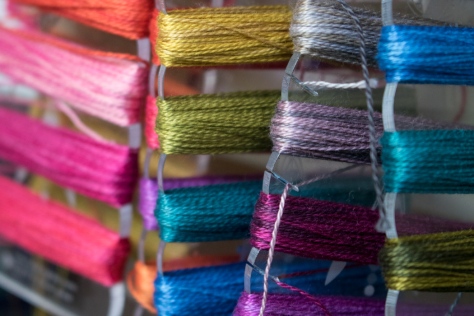 And of course color. Lots and lots of color. This is just a tiny peek at the
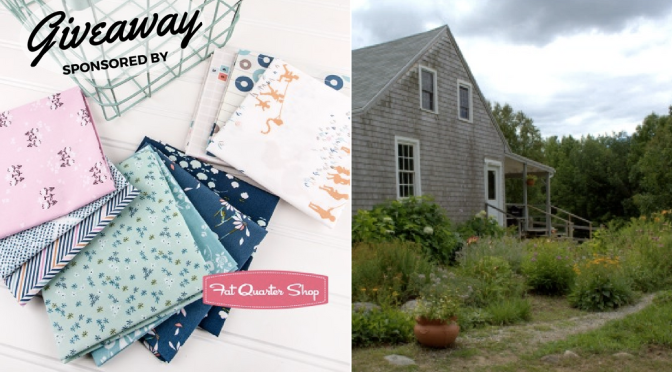
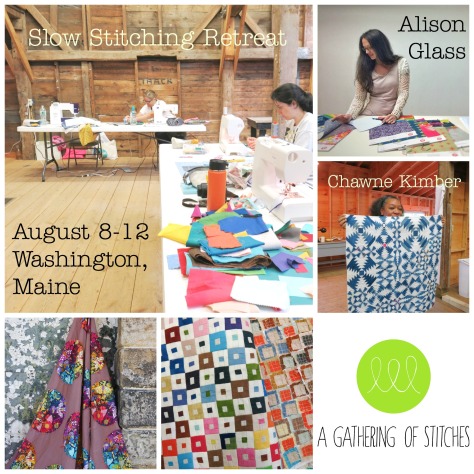
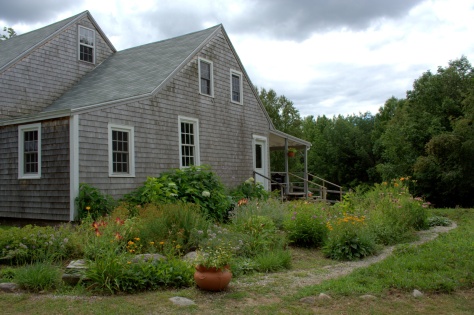 I originally aimed to schedule some blog posts for while I was away, but life has been very full these days, so this week will be quiet. I will be stitching away in this big, beautiful building and its neighboring barn, and will join you upon my return. Keep your eye on
 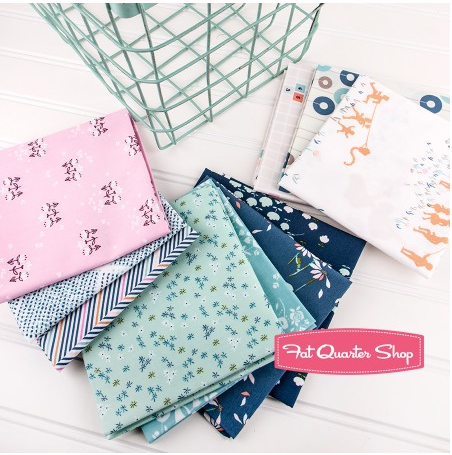 To hold you over for the week, I do have a fun giveaway sponsored by the


 If you haven’t yet added Constant Flux to your pattern library, it’s still on sale for a few more days in my
 I created my version of Constant Flux inspired by
 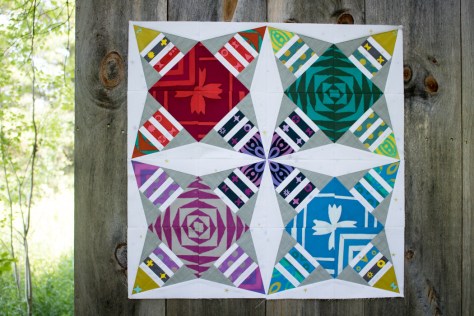 Constant Flux is available in my
 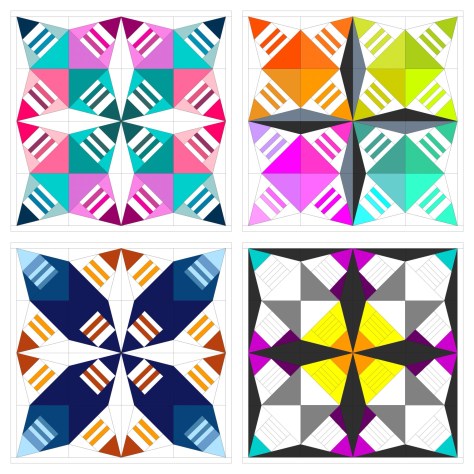 For now, I haven’t quilted my first one and I already want to make Constant Flux in a different colorway. Look at all of the options I came up with in just a short moment of color arrangement play! The pattern comes with a full page coloring sheet so that you can explore your options before diving in. That bottom right version is calling to me–which one would you make first?!
 First up is my ongoing epic
 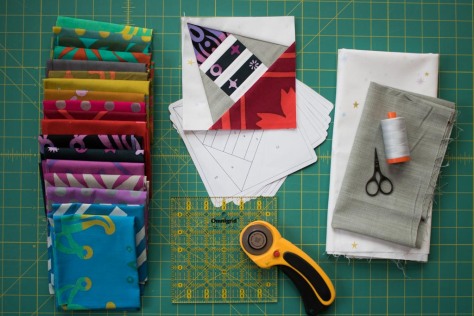 Another project I’m plugging away on is a fun one for Andover Fabrics. They were awesome enough to send some Alison Glass Handcrafted Patchwork to me, as well as some yardage of Constellation by Lizzy House from her Whisper Palette collection. I picked up some Andover textured solid from my LQS
  I’ve also been out on three different quilt photography adventures with my amazingly gifted quilt holding assistant, aka my husband. We have been having a blast photographing the quilts for this year’s
 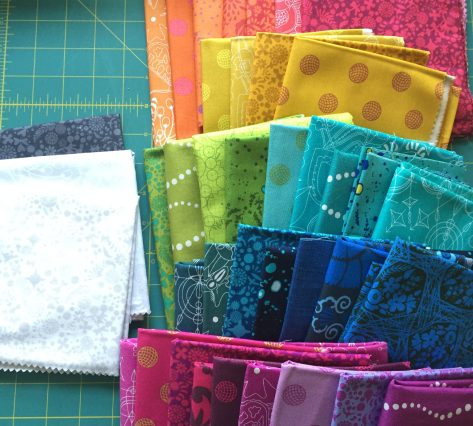 There are many other fun projects waiting patiently on the decks, including a Terrazzo Quilt (pattern by
 I really love clear video tutorials since I am very much a visual learner. Seeing each step helps make the process smooth and easy to complete without hang up or confusion. That, to me, is a big win!
 I decided to make my pin cushion with a range of warm Alison Glass Sun Prints 2015 and 2016, and once it was finished, it begged to be photographed out in the garden with the peonies. Such vibrant colors need to be in colorful company.
 I used a Tula Pink ribbon I won in a giveaway from
  I backed the pin cushion in Ex Libris Bookplate in Charcoal by Alison Glass (Andover Fabrics), and really would be tempted to use the pin cushion upside down every so often, it’s so pretty. This pin cushion is not for me, though, so the recipient can do with it as she pleases!
 This is the first pin cushion I’ve stuffed entirely with crushed walnut shell, at Sherri’s suggestion, and I really like the sturdiness and ease with which pins go into it. I bought the crushed walnut shell from a quasi-local, fabulous quilt shop,
  Check out the video below and make your own pin cushion if you want! There’s no such thing as too many pin cushions, right?